Category: Dinner

Easy, tasty dinner ideas for busy nights. Simple recipes, quick prep, and family-friendly meals you’ll make again and again.

  • Crockpot Meatloaf – Cozy, Irresistibly Easy Dinner

    Crockpot Meatloaf – Cozy, Irresistibly Easy Dinner

    Crockpot Meatloaf saved my Tuesday. I tossed everything into the slow cooker while my kids turned the kitchen into a Lego obstacle course, and this Crockpot Meatloaf quietly transformed into a tender, juicy loaf that tasted like home. At one point, I was whisking ketchup with one hand and rescuing a rolling onion with the other—classic Darleen Vance chaos—but dinner still came out perfectly. If you crave comfort food without hovering over the oven, this one’s your new weeknight hero.
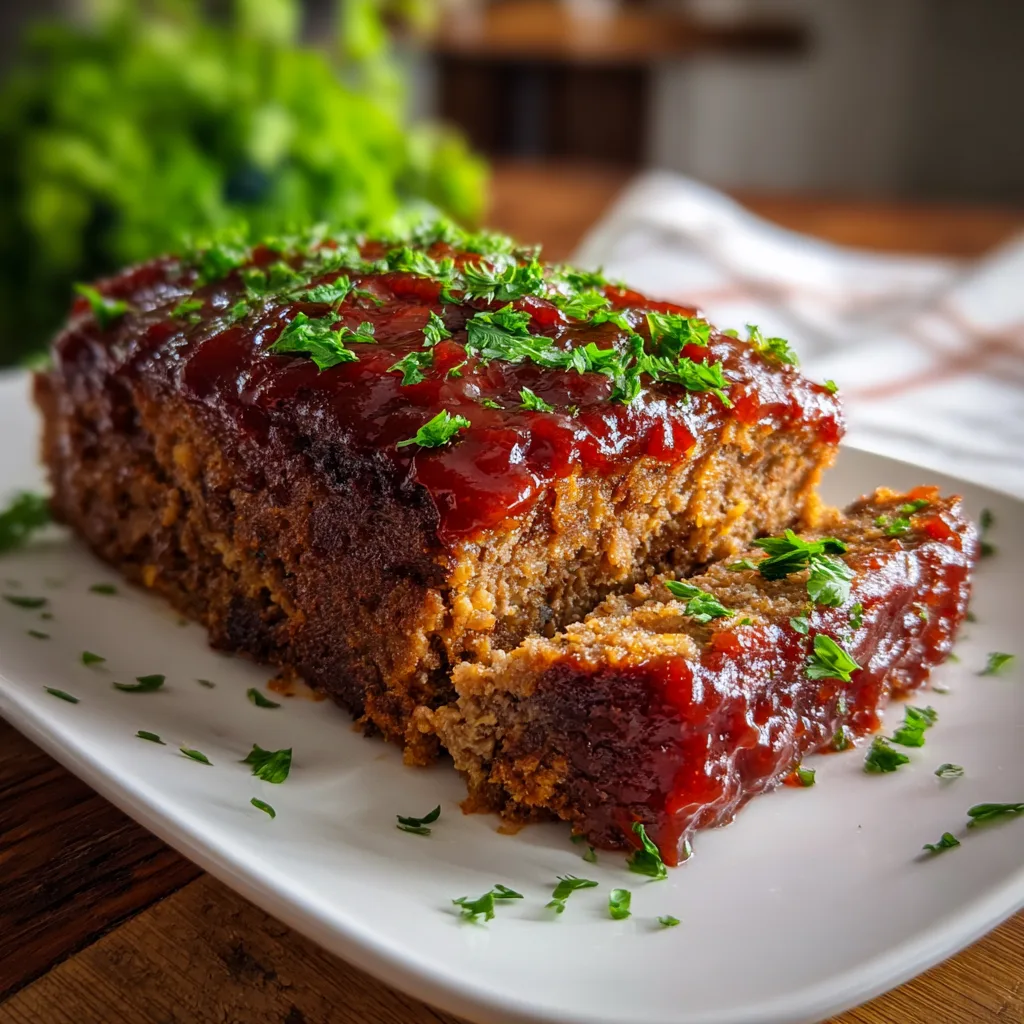
    Crockpot Meatloaf saved my Tuesday.

    Recipe

    Why You’ll Love This Crockpot Meatloaf

    What Makes This Crockpot Meatloaf So Irresistible

    I learned early that my family’s patience lasts exactly as long as the cartoons do. That’s when Crockpot Meatloaf became my secret weapon. With Crockpot Meatloaf, I can prep in minutes, set it to slow-cook, and come home to a cozy dinner that tastes like a hug. The slow cooker keeps the meat tender, the glaze turns glossy, and the kitchen smells like Sunday supper—even on a Wednesday. When I first served this Crockpot Meatloaf, my son asked if it could be his birthday dinner. That’s how you know it’s a keeper.

    • Simple prep: Mix, shape, and let the slow cooker do the work—an easy dinner with minimal hands-on time.
    • Ultra tender: Low-and-slow heat prevents drying, so you get juicy, homemade results.
    • Pantry-friendly: Everyday ingredients create classic comfort food flavor.
    • Family favorite: Kid-approved and weeknight-friendly; Crockpot Meatloaf is always welcome at the table.
    • Foolproof finish: A tangy glaze that caramelizes beautifully right in the crock.

    If you love set-and-forget comfort, you’ll also adore my Slow Cooker Mac and Cheese and this cozy Creamy Tortellini Soup. Ready to get cooking? Let’s dive into the recipe card below.

    Across social feeds, Crockpot Meatloaf is trending because it hits that sweet spot of easy prep and big flavor. With meal planning on the rise, this homemade classic delivers a one-pan meal that’s warm, reliable, and beautifully sliceable. It’s the weeknight win that feels like a weekend treat—the kind of Crockpot Meatloaf you’ll make once and crave forever.

    Tips, Tricks & Expert Secrets for Crockpot Meatloaf

    Chef Tips for Perfect Crockpot Meatloaf Every Time

    The first time I taught a friend to make Crockpot Meatloaf, she packed the meat like a snowball—cute, but dense. We laughed, then fixed it with a few pro moves. Now, every Crockpot Meatloaf she makes slices like a dream and tastes like a diner classic. Try these easy recipe upgrades:

    • Hydrate your crumbs: Soak breadcrumbs in milk first for a tender, homemade texture.
    • Mix gently: Overmixing compresses the loaf. Use a fork or loose fingers for an airy result.
    • Use a foil sling: Elevates the Crockpot Meatloaf so it doesn’t stew in juices, keeping edges pleasantly set.
    • Thermometer check: Pull at 160°F to avoid overcooking; it’s the ultimate cooking tip for perfect doneness.

    Smart Ingredient Swaps & Practical Cooking Advice

    • Gluten-free quick fix: Swap breadcrumbs for certified GF oats or almond flour.
    • Lighter option: Use 93% lean turkey, add 1 tablespoon olive oil, and increase milk by 1–2 tablespoons for moisture.
    • What not to do: Don’t pack the loaf or skip the rest time—both can cause a dense, crumbly Crockpot Meatloaf.
    • Homemade version of the glaze: Ketchup + brown sugar + a splash of cider vinegar creates that diner-style finish.

    With these practical swaps and quick fixes, your Crockpot Meatloaf turns out consistently delicious—an easy recipe you’ll love on repeat.

    Serving Ideas & Creative Variations

    How to Serve Crockpot Meatloaf for Maximum Enjoyment

    The first time I plated this Meatloaf for guests, I drizzled extra glaze, stacked buttery mashed potatoes, and added a bright green bean almondine. Everyone asked for seconds—and a photo. For effortless plating suggestions, try these serving ideas:

    • Classic comfort: Serve with mashed potatoes and roasted green beans; add extra glaze for shine.
    • Homestyle sandwich: Pile warm slices on toasted sourdough with sharp cheddar and pickles.
    • Weeknight bowl: Slice Crockpot Meatloaf over garlic rice with a side salad and vinaigrette.

    For pairing, try iced tea, a light red like Pinot Noir, or sparkling apple cider. If you’re sharing on social, slice thick, fan out on a platter, and brush with a fresh glaze for that glossy, pin-worthy finish.

    Flavor Twists and Seasonal Variations

    • BBQ Bacon: Swap ketchup for smoky BBQ sauce and tuck in a few chopped, crisped bacon slices.
    • Italian-Style: Add grated Parmesan, swap Italian seasoning for basil and oregano, and finish with marinara.
    • Autumn Harvest: Mix in finely diced mushrooms and a pinch of thyme; serve with sautéed apples.

    For more set-and-forget comfort ideas, peek at my crowd-pleasing Slow Cooker Chili Mac or party-friendly Hawaiian Crockpot Meatballs. However you plate it, your Crockpot Meatloaf will be the cozy star.

    Storage & Troubleshooting Guide

    How to Store and Reheat Crockpot Meatloaf

    I always make a double batch of Meatloaf for easy lunches. The trick is storing it right so it stays juicy and sliceable. Here’s how to keep it fresh:

    • Room temperature: Keep cooked meatloaf out for no more than 2 hours.
    • Refrigerator: Store slices in airtight containers up to 4 days; add a spoon of glaze to keep moist.
    • Freezer: Wrap slices individually, then place in a freezer bag for up to 3 months.

    Reheating methods:

    • Oven: 325°F for 12–15 minutes, covered with foil, until warmed through.
    • Skillet: Medium-low with a splash of broth; cover for 5–7 minutes.
    • Air fryer: 320°F for 5–7 minutes for a lightly crisp edge.

    Troubleshooting Common Crockpot Meatloaf Issues

    • Too dry: Add more milk next time or mix in grated zucchini; check temp earlier.
    • Watery: Elevate Crockpot Meatloaf on a foil sling to avoid stewing; drain excess liquid before slicing.
    • Crumbly: Don’t overcook; use enough binder (breadcrumbs + eggs) and rest 10 minutes before slicing.
    • Bland: Boost salt slightly, add extra Worcestershire, or sprinkle smoked paprika on top.

    With these storage tips and quick fixes, your Crockpot Meatloaf will stay tender, taste great, and reheat like a dream—promise.

    FAQs

    Can I make Crockpot Meatloaf without pork?

    Yes. Use all beef or substitute ground turkey. If using turkey, add 1–2 tablespoons olive oil and a splash more milk to keep it juicy.

    How do I know when Meatloaf is done?

    Use an instant-read thermometer. The center should reach 160°F. Start checking at 5.5 hours on Low or 3 hours on High.

    What can I use instead of breadcrumbs?

    Try panko, crushed saltine crackers, rolled oats, or almond flour (GF). Hydrate with milk for best texture.

    Can I prep Crockpot Meatloaf ahead?

    Yes. Mix, shape, and refrigerate up to 24 hours. Place in the slow cooker and cook as directed; add 15–20 minutes if very cold.

    Conclusion

    When you want comfort food that practically cooks itself, Crockpot Meatloaf is the answer. The slow cooker guarantees tender slices, the glaze brings sweet-tangy swagger, and the prep is blissfully simple. From easy dinner nights to Sunday-style suppers, this homemade classic delivers that warm, cozy payoff we all crave. Serve Crockpot Meatloaf with buttery mash, tuck leftovers into sandwiches, or freeze slices for future you—either way, it never disappoints. If you love slow cooker wins, don’t miss my Crockpot Fiesta Chicken for a zesty twist next time. Try it at home and tag me—I can’t wait to see your Crockpot Meatloaf shine!

  • 3-Ingredient Orange Chicken (Crockpot) – Deliciously Easy

    3-Ingredient Orange Chicken (Crockpot) – Deliciously Easy

    3-Ingredient Orange Chicken (Crockpot) is my go-to rescue plan when weekdays spiral into snack-dinner territory. Last Tuesday, my kid declared the science fair volcano needed “just a little more lava” as I was seasoning the chicken—boom, sticky fingers everywhere. Thankfully, 3-Ingredient Orange Chicken (Crockpot) doesn’t mind a little chaos. I tossed the chicken in, swiped the counter, and by homework time the kitchen smelled like a cozy takeout dream. Sweet, tangy, and no-fuss—exactly how Tuesday night is supposed to feel.

    3-Ingredient Orange Chicken

    Recipe

    WHY YOU’LL LOVE THIS RECIPE

    What Makes This 3-Ingredient Orange Chicken (Crockpot) So Irresistible

    On the nights when my brain is a browser with 27 open tabs, 3-Ingredient Orange Chicken (Crockpot) is the tab I actually click. The set-and-forget rhythm means I can answer emails, referee sibling debates, and still land a homemade, easy dinner without a sink full of dishes. The flavor is bold yet family-friendly, the sauce is glossy and comforting, and the method is so forgiving you’ll feel like a weeknight superstar. 3-Ingredient Orange Chicken (Crockpot) brings cozy takeout vibes with three pantry staples—no wok, no splatter, just sweet-tangy comfort food done right.

    • Quick prep: just stir, toss, and press start—five minutes to a homemade dinner.
    • Big flavor: orange marmalade meets smoky barbecue for a balanced sweet-tangy sauce.
    • Family-friendly: tender chicken that even picky eaters devour.
    • Budget-smart: three simple ingredients you probably already have.
    • Low-lift cleanup: one-pot, slow cooker ease for busy schedules.

    If you love simple, comforting, homemade slow-cooker meals, add this to your rotation. Then come straight to the recipe card—your new favorite weeknight saver is waiting.

    Between “fakeout takeout” trends and back-to-school chaos, 3-Ingredient Orange Chicken (Crockpot) fits the moment: effortless, cozy, and craveable. It’s the easy recipe people share because it delivers crowd-pleasing results with almost no effort—perfect for real life. Looking for more slow-cooker winners? Try my Crockpot Fiesta Chicken or the ultra-creamy Slow Cooker Mac & Cheese Classic next.

    TIPS, TRICKS & EXPERT SECRETS

    Chef Tips for Perfect 3-Ingredient Orange Chicken (Crockpot) Every Time

    I once taught a mini crockpot class at my neighbor’s block party and learned two things: everyone loves a good cooking tip, and nobody wants complicated. This 3-Ingredient Orange Chicken (Crockpot) proves both. Here’s how to make it consistently great:

    • Cut evenly: keep chicken pieces about 1½ inches so they cook at the same pace and stay juicy.
    • Layer wisely: stir the marmalade and barbecue sauce first, then add chicken and coat well for a glossy, even sauce.
    • Low and slow: LOW for 3 hours yields the most tender texture; use HIGH only if you truly need a quick fix.
    • Finish uncovered: remove the lid for 20–30 minutes at the end to reduce the sauce into a sticky, homemade version of takeout glaze.

    Smart Ingredient Swaps & Practical Cooking Advice

    • Chicken swap: chicken breasts work too—just check for doneness early to avoid dryness.
    • Gluten-friendly: choose a gluten-free barbecue sauce to keep this easy dinner GF.
    • Lighter vibe: use a no-sugar-added marmalade or a lighter barbecue sauce to reduce overall sweetness.
    • What not to do: don’t overcook; slow cookers vary, so start checking at the 2½-hour mark on LOW to protect that tender texture.

    With these easy, homemade tweaks, 3-Ingredient Orange Chicken (Crockpot) turns into the reliable, quick recipe you’ll lean on every week.

    SERVING IDEAS & CREATIVE VARIATIONS

    How to Serve 3-Ingredient Orange Chicken (Crockpot) for Maximum Enjoyment

    When I serve this to guests, I pull out my wide, shallow bowl and let the glossy orange sauce do the styling. A quick sprinkle of green onions makes it pop. Here are some easy serving ideas that make 3-Ingredient Orange Chicken (Crockpot) feel restaurant-ready:

    • Over fluffy jasmine rice with a squeeze of fresh orange for brightness.
    • Tossed with lo mein noodles and steamed broccoli for a one-bowl comfort meal.
    • Paired with crisp snap peas or roasted green beans to balance the sweet-tangy sauce.

    For more slow-cooker party favorites, my Hawaiian Crockpot Meatballs make a fun sweet-savory duo beside this orange chicken.

    3-Ingredient Orange Chicken
    How to Serve 3-Ingredient Orange Chicken (Crockpot)

    Flavor Twists and Seasonal Variations

    • Spicy orange: add a pinch of red pepper flakes or a drizzle of hot sauce at the end for heat.
    • Ginger-kissed: stir in a teaspoon of grated ginger (optional) to brighten the sauce.
    • Cran-Orange Holiday: swap half the marmalade for cranberry sauce in winter for a seasonal twist and gorgeous color.

    Plating suggestion: pile chicken high in a white bowl, spoon extra sauce over the top, and finish with sesame seeds and scallions. Snap a photo in natural window light—your followers will taste the cozy through the screen.

    STORAGE & TROUBLESHOOTING GUIDE

    How to Store and Reheat 3-Ingredient Orange Chicken (Crockpot)

    Leftovers of 3-Ingredient Orange Chicken (Crockpot) are my favorite “I already cooked” flex. Here’s how to keep it fresh and saucy:

    • Room temperature: keep out no more than 2 hours.
    • Fridge: store in airtight containers up to 4 days; choose shallow containers so the sauce doesn’t separate.
    • Freezer: freeze up to 3 months; thaw overnight in the refrigerator for best texture.
    • Reheat: simmer gently in a covered skillet over low heat, add a splash of water if needed; or microwave in short bursts, stirring between. Air fryer tip: spread chicken on foil in the basket, 350°F for 3–4 minutes to re-glaze.

    Troubleshooting Common 3-Ingredient Orange Chicken (Crockpot) Issues

    • Too watery: uncover and cook 20–30 minutes to reduce; if needed, simmer the sauce in a saucepan for a quick fix.
    • Too sweet: add a squeeze of fresh lemon or a dash of vinegar to balance the sauce.
    • Too thick or sticky: stir in 1–2 tablespoons of water while reheating to loosen.
    • Dry chicken: switch to thighs next time or shorten cook time; check doneness at 2½ hours on LOW.

    With these storage tips, reheat methods, and texture fixes, your 3-Ingredient Orange Chicken (Crockpot) will stay tender, bright, and delicious—ready for lunch boxes or cozy second-night dinners. For more slow-cooker comfort, try my Slow Cooker Chili Mac next.

    FAQs

    Can I use chicken breasts instead of thighs?

    Yes. Check doneness early (around 1 hour 45 minutes on HIGH or 2½ hours on LOW) to keep the chicken tender.

    How do I make the sauce thicker without adding extra ingredients?

    Uncover the slow cooker for the last 20–30 minutes to reduce the sauce, or broil the cooked chicken briefly to caramelize and concentrate flavors.

    Is this 3-Ingredient Orange Chicken (Crockpot) gluten-free?

    Use a certified gluten-free barbecue sauce and you’re set. The rest is naturally gluten-free.

    What sides go best with this recipe?

    Rice, lo mein, roasted green beans, or a simple sesame-snap pea salad pair beautifully with the sweet-tangy sauce.

    Conclusion

    Simple, bold, and comfort-packed, 3-Ingredient Orange Chicken (Crockpot) turns pantry staples into a glossy, homemade takeout favorite. This easy dinner delivers cozy, family-friendly flavor with almost zero effort—just stir, toss, and walk away. It’s the kind of homemade recipe that rescues busy weeknights, keeps cleanup minimal, and guarantees empty plates. Try it at home and tag me so I can see your sweet-tangy masterpieces—then keep the slow-cooker love going with a batch of my fan-favorite recipes on Recipes Darleen. 3-Ingredient Orange Chicken (Crockpot) is your new weeknight win.

  • Creamy Tortellini Soup (Crockpot) – Cozy, Ultimate Comfort

    Creamy Tortellini Soup (Crockpot) – Cozy, Ultimate Comfort

    Creamy Tortellini Soup (Crockpot) is my answer to weeknights that start with good intentions and end with a soccer cleat in the stew pot. The last time I made Creamy Tortellini Soup (Crockpot), I realized halfway through carpool that I hadn’t chopped the onions—so I tossed in a pre-chopped bag and called it a win. The kitchen smelled like an Italian grandma moved in, and my kids hovered with bowls in hand. This slow cooker comfort food is rich, homemade, and wildly easy—even on chaotic days.

    Creamy Tortellini Soup (Crockpot)

    Recipe

    Why You’ll Love This Creamy Tortellini Soup (Crockpot)

    What Makes This Creamy Tortellini Soup (Crockpot) So Irresistible

    I once told my family dinner would be “in 20 minutes,” then remembered the laundry was still in the car. The beauty of Creamy Tortellini Soup (Crockpot) is that it forgives the chaos. Toss in simple, homemade ingredients, set the slow cooker, and enjoy easy dinner smells that feel like a hug. Creamy Tortellini Soup (Crockpot) delivers comfort food flavor with minimal effort, and the slow simmer builds rich, silky texture without babysitting a pot.

    • Cozy, creamy base that tastes like it simmered all day—without any fuss.
    • Simple ingredients you likely have on hand; truly an easy recipe for busy nights.
    • Family-friendly: cheesy tortellini, mild Italian seasoning, and a crowd-pleasing homemade vibe.
    • Flexible: swap sausage for chicken, use veggie broth, or lighten with half-and-half.
    • One-pot convenience in your slow cooker; minimal cleanup for a one-pan meal feel.

    Grab your ladle and meet your new favorite weeknight hero—let’s dive into the recipe card!

    This slow cooker classic is having a moment because it nails the trifecta: easy dinner prep, homemade comfort, and scroll-stopping creaminess. The rich broth, tender tortellini, and fresh spinach make it feel wholesome yet indulgent. It’s the kind of comfort food you’ll share on social because everyone needs a bowl of this cozy goodness.

    Tips, Tricks & Expert Secrets for Slow Cooker Tortellini Soup

    Chef Tips for Perfect Creamy Tortellini Soup (Crockpot) Every Time

    True story: I once learned the hard way that tortellini added too early turns into dumpling clouds. Since then, I’ve kept a few cooking tips front and center for this homemade version of Creamy Tortellini Soup (Crockpot):

    • Brown for depth: Sear sausage until deeply caramelized; those browned bits equal big, savory flavor.
    • Layer seasoning: Salt lightly at the start and finish with Parmesan and a final pinch of salt to wake up the cream.
    • Add tortellini late: Stir in refrigerated tortellini during the last 20–30 minutes to keep it perfectly tender.
    • Finish silky: Temper cream by warming it slightly, then stir in off the heat for the creamiest texture.

    Smart Ingredient Swaps & Practical Cooking Advice

    • Lighter option: Use 3/4 cup half-and-half instead of heavy cream; add an extra 1–2 tablespoons Parmesan for body.
    • Vegetarian-friendly: Swap sausage for sautéed mushrooms, skip Parmesan or use a rennet-free brand, and choose vegetable broth.
    • Gluten-free quick fix: Use gluten-free tortellini and confirm your sausage and broth are certified GF.
    • What not to do: Don’t add tortellini at the start—overcooking leads to swollen, mushy pasta and watery soup.

    These practical cooking tips make your easy recipe shine while keeping that cozy, homemade comfort intact.

    Serving Ideas & Creative Variations

    How to Serve Creamy Tortellini Soup (Crockpot) for Maximum Enjoyment

    I set out bowls, a rain of Parmesan, and a little herb confetti, and suddenly my kids act like we’re at a bistro. For serving ideas, think contrast and crunch to elevate this comfort food:

    • Pair with a crisp green salad and garlicky croutons for a balanced plate.
    • Serve with warm, crusty bread or buttery garlic knots to soak up the creamy broth.
    • Beverage pairing: A light Pinot Grigio or sparkling water with lemon keeps things bright.
    How to Serve Creamy Tortellini Soup (Crockpot) for Maximum Enjoyment

    Flavor Twists and Seasonal Variations

    • Roasted Red Pepper Twist: Blend a roasted red pepper into the broth for sweet-smoky depth and gorgeous color.
    • Autumn Harvest: Add diced butternut squash in the first step and finish with a pinch of nutmeg for a fall-ready seasonal twist.
    • Tuscan Style: Stir in sun-dried tomatoes and basil; finish with a drizzle of good olive oil for an extra-lush flavor variation.

    Sharing on social? Style with a deep bowl, a swirl of cream, and a shower of Parmesan. Side-lighting and a torn bread hunk make your creamy tortellini soup look irresistibly spoonable.

    Storage & Troubleshooting Guide

    How to Store and Reheat Creamy Tortellini Soup (Crockpot)

    Leftovers rarely survive long here, but when they do, this is how I keep them fresh:

    • Room temperature: Keep out for no more than 2 hours for food safety.
    • Fridge: Store in airtight containers for 3–4 days. Tortellini continues to absorb broth, so keep extra stock on hand.
    • Freezer: Best practice is to freeze the base (broth + veggies + sausage) before adding tortellini and cream, up to 2 months. If freezing leftovers with tortellini, expect softer pasta; thaw overnight and reheat gently.
    • Reheat: Warm on the stovetop over medium-low, stirring often. Add a splash of broth or milk to restore a creamy, soup-like consistency. Microwave in 60–90 second bursts, stirring between intervals.

    Troubleshooting Common Creamy Tortellini Soup (Crockpot) Issues

    • Too thin/watery: Simmer uncovered for 5–10 minutes, then stir in extra Parmesan or a splash of heavy cream to thicken.
    • Too thick: Add warm broth in small splashes until it reaches your ideal spoonable texture.
    • Mushy tortellini: Add pasta only for the last 20–30 minutes on HIGH. Next time, set a timer to avoid overcooking.
    • Bland flavor: Finish with salt to taste and a squeeze of lemon; Parmesan boosts umami and brightens the creamy base.

    With a few smart storage and reheating moves, your soup will stay comforting, fresh-tasting, and ready for another cozy night.

    Love slow cooker comfort food? Try my Crack Chicken Noodle Soup (Crockpot), crowd-pleasing Lazy Ravioli Lasagna, and tangy-fun Dill Pickle Soup.

    FAQs

    Can I use frozen tortellini?

    Yes. Add frozen tortellini in the last 30–35 minutes on HIGH, and check for doneness at 25 minutes to avoid overcooking.

    How can I make it lighter?

    Use half-and-half instead of heavy cream and lean chicken instead of sausage. Add extra spinach or zucchini for volume.

    Will dairy curdle in the slow cooker?

    Stir in cream at the end on LOW or with the heat off. Temper by warming the cream slightly to help prevent curdling.

    Can I prep this as a freezer meal?

    Yes. Freeze everything except tortellini, spinach, and cream. Slow cook from thawed, then add tortellini/spinach near the end and finish with cream.

    Conclusion

    Creamy Tortellini Soup (Crockpot) is the kind of easy dinner that turns ordinary nights into something warm and memorable. With a homemade base, silky broth, and cheesy pasta, this comfort food tastes like love in a bowl. Use the cooking tips above, try a flavor variation, and keep the storage advice handy so every serving stays rich and cozy. Whether you’re feeding hungry teens or craving a quick slow cooker win, this creamy soup’s simple ingredients and one-pot ease deliver every time. Make Creamy Tortellini Soup (Crockpot) tonight, share your bowl, and tag me so I can cheer you on!

  • Slow Cooker Cabbage & Sausage – Cozy, Irresistibly Easy

    Slow Cooker Cabbage & Sausage – Cozy, Irresistibly Easy

    Slow Cooker Cabbage & Sausage is my kind of weeknight rescue. The first time I made Slow Cooker Cabbage & Sausage, I had a sock in the produce drawer (kid logic?) and exactly 12 minutes before soccer pickup. I chopped cabbage, sliced kielbasa, dumped everything in the crock, and hustled out the door. Hours later, we came home to a kitchen that smelled like a cozy diner and bowls of tender, savory comfort food. The slow cooker did the work, I took the credit, and no one asked where the sock went. That’s the magic of a set-it-and-forget-it, homemade one-pot dinner.

    slow cooker cabbage and sausage recip

    Recipe

    PART 1: WHY YOU’LL LOVE THIS RECIPE

    What Makes This Slow Cooker Cabbage & Sausage So Irresistible

    I learned early that Slow Cooker Cabbage & Sausage can turn chaos into calm. One rainy day, I tossed everything in the crock, shut the lid, and let the house fill with smoky, savory aromas while I wrangled homework and a dog who thinks carrots are toys. Slow Cooker Cabbage & Sausage rewards you with deep flavor and no stress. This homemade comfort food tastes like you hovered over the stove, but the slow cooker does the work. It’s the easy dinner you’ll reach for on chilly nights and busy days when you want a satisfying, one-pot meal without babysitting.

    • Hands-off ease: Quick prep, then the slow cooker makes dinner dreamy.
    • Comforting, homemade flavor: Tender cabbage, smoky sausage, and a cozy broth.
    • Simple, budget-friendly ingredients: Pantry staples meet weeknight magic.
    • Family-friendly: Mild, savory, and customizable for picky eaters.
    • Great for meal prep: Reheats beautifully and tastes even better the next day.

    Trending right now? Simple crockpot classics that taste amazing with minimal effort—exactly what Slow Cooker Cabbage & Sausage delivers. Ready to cook?

    People are craving cozy, uncomplicated comfort food, and Slow Cooker Cabbage & Sausage fits the moment. It’s a low-lift, high-reward easy dinner that’s perfect for busy families and anyone who loves a hearty, homemade one-pan meal. With smoky kielbasa and tender vegetables, this comfort food hero is making a quiet comeback—especially among meal-preppers who want flavor that holds up. If you’re in a slow cooker groove, you’ll also love my Slow Cooker Chili Mac and the reader-favorite Crockpot Cheesy Sausage and Rice.

    PART 2: TIPS, TRICKS & EXPERT SECRETS

    Chef Tips for Perfect Slow Cooker Cabbage & Sausage Every Time

    During a cooking demo, I once forgot to plug in the slow cooker. We all laughed, then ate very crunchy cabbage. Lesson learned—and now I’ve got the foolproof playbook for Slow Cooker Cabbage & Sausage that works every time. This easy recipe thrives on small moves that bring big flavor.

    • Brown the sausage: A quick sear builds deep, smoky flavor for Slow Cooker Cabbage & Sausage.
    • Cut cabbage thick: Wider slices stay tender-crisp, not mushy, after hours in the crock.
    • Layer smart: Cabbage and dense veg go on the bottom; sausage on top to keep texture.
    • Balance the broth: A splash of Dijon and vinegar brightens the whole pot—don’t skip it.

    Smart Ingredient Swaps & Practical Cooking Advice

    • Gluten-free: Use certified GF sausage and Dijon for a homemade version that fits your needs.
    • Vegan option: Swap sausage for smoked tempeh or plant-based sausage and use vegetable broth; add 1 tsp liquid smoke for depth.
    • Low-fat tweak: Use turkey kielbasa and skip the butter—still cozy, still delicious.
    • Don’t overdo the liquid: Cabbage releases moisture; too much broth can make the pot watery.

    One more cooking tip for Slow Cooker Cabbage & Sausage: resist constant stirring. Lift the lid only when needed to keep heat steady and texture consistent. For more slow cooker comfort, peek at my wildly cozy Dill Pickle Soup—it’s an easy recipe with big personality.

    PART 3: SERVING IDEAS & CREATIVE VARIATIONS

    How to Serve Slow Cooker Cabbage & Sausage for Maximum Enjoyment

    When friends pop in, I ladle Slow Cooker Cabbage & Sausage into warm bowls and call it a night. Simple plating, happy faces. For guests, I’ll add a sprinkle of parsley and a drizzle of good olive oil for shine—easy, homemade presentation that looks special without extra work.

    • Serve with crusty bread or buttered noodles to soak up the savory broth.
    • Add a dollop of whole-grain mustard or sour cream at the table for tangy contrast.
    • Pair with a crisp lager, light red wine, or sparkling apple cider.
    How to Serve Slow Cooker Cabbage & Sausage for Maximum Enjoyment
    How to Serve Slow Cooker Cabbage & Sausage for Maximum Enjoyment

    Flavor Twists and Seasonal Variations

    • Smoky & Spicy: Add 1/2 teaspoon red pepper flakes and extra smoked paprika for a bold kick.
    • Fall Harvest: Stir in diced apples and a pinch of caraway for a sweet-savory seasonal twist.
    • Tuscan Touch: Swap Dijon for 2 tablespoons tomato paste, add rosemary, and finish with a grating of Parmesan.

    For content creators: plate in shallow bowls, pile sausage on top for height, and photograph near a window with a neutral backdrop. A little steam looks dreamy with Slow Cooker Cabbage & Sausage. And if you love slow cooker sides for a full spread, try my Slow Cooker Green Bean Casserole alongside this comfort classic.

    PART 4: STORAGE & TROUBLESHOOTING GUIDE

    How to Store and Reheat Slow Cooker Cabbage & Sausage

    Leftover Slow Cooker Cabbage & Sausage might be my favorite breakfast—one skillet, one egg on top, done. To keep it fresh, a few storage basics go a long way.

    • Room temperature: Keep out no longer than 2 hours for food safety.
    • Fridge: Store in shallow, airtight containers for 3–4 days to preserve texture and flavor.
    • Freezer: Freeze up to 2 months; thaw overnight in the fridge. Cabbage will soften slightly but stays tasty.
    • Reheat: Warm gently on the stovetop with a splash of broth; or use the microwave in 60–90 second bursts, stirring between. Skillet reheating keeps the sausage edges a bit crisp.

    Troubleshooting Common Slow Cooker Cabbage & Sausage Issues

    • Too watery: Ladle off excess liquid or simmer uncovered in a pot for 5–10 minutes to reduce.
    • Too dry: Stir in 1/2–1 cup warm broth; the cabbage will rehydrate quickly.
    • Uneven texture: Cut cabbage in thicker wedges and place dense veg on the bottom for even cooking.
    • Overcooked cabbage: Next time, cook on LOW and check at the 4-hour mark.
    • Flat flavor: Add a pinch of salt, a splash of cider vinegar, or a little Dijon to wake it up.

    With these storage tips and quick fixes, your Slow Cooker Cabbage & Sausage will keep tasting homemade and hearty—no stress, all comfort.

    FAQs

    Can I make Slow Cooker Cabbage & Sausage without browning the sausage?

    Yes. Browning adds depth, but you can skip it to save time. The slow cooker will still infuse the cabbage with smoky, savory flavor from the sausage.

    What sausage works best for Slow Cooker Cabbage & Sausage?

    Smoked pork or beef kielbasa is classic, but turkey kielbasa or fully cooked chicken sausage also works. Choose a sausage you enjoy eating on its own.

    Can I add rice or noodles to Slow Cooker Cabbage & Sausage?

    Cook grains or noodles separately to avoid overcooking. Spoon the stew over buttered egg noodles or serve with crusty bread to soak up the broth.

    Is Slow Cooker Cabbage & Sausage gluten-free?

    It can be. Use gluten-free sausage and Dijon, and verify broth labels. The base recipe is naturally grain-free and easy to adapt.

    Conclusion

    When life gets busy, Slow Cooker Cabbage & Sausage brings calm to the kitchen. It’s the easy dinner that tastes like an all-day simmer—homemade comfort food with smoky sausage, tender cabbage, and a broth that just begs for bread. Whether you’re feeding a crowd or meal prepping for the week, Slow Cooker Cabbage & Sausage delivers reliable flavor, simple ingredients, and a one-pot cleanup dream. Want a full cozy lineup? Check out my recipe collection for more slow cooker favorites. Try this at home and tag me so I can cheer you on—your bowl of comfort is waiting!

  • Crockpot Fiesta Chicken – Creamy and Irresistible

    Crockpot Fiesta Chicken – Creamy and Irresistible

    Crockpot Fiesta Chicken has saved more dinnertime chaos in my house than I can count. Last week, I accidentally doubled the corn and forgot to plug in the slow cooker—yep, classic Darleen Vance. I flipped the switch, laughed at myself, and we still had Crockpot Fiesta Chicken that tasted like a creamy, cozy hug with a fiesta kick. It’s the kind of easy dinner I lean on when the day gets wild, and everyone wants homemade comfort fast. If you love set-it-and-forget-it meals that bring big flavor with minimal effort, this one’s about to become your weeknight favorite.

    Crockpot Fiesta Chicken

    Recipe

    WHY YOU’LL LOVE THIS RECIPE

    What Makes This Crockpot Fiesta Chicken So Irresistible

    I once tried to impress my neighbor with a “fancy” roast, only to realize the oven never preheated. Crockpot Fiesta Chicken came to the rescue—creamy, bold, and absolutely reliable. Crockpot Fiesta Chicken brings that easy dinner magic: it’s homemade, hands-off, and turns into comfort food without breaking a sweat. The slow cooker handles the heavy lifting, infusing juicy chicken with Tex-Mex flavor so you can focus on everything else life throws at you. This cozy one-pot meal tastes like a celebration and stores like a champ for lunches and leftover dinners.

    • Set-it-and-forget-it prep: 10 minutes of effort for a full-flavor, homemade slow cooker dinner.
    • Creamy, crowd-pleasing texture that’s perfect over rice, in bowls, or tucked into tortillas.
    • Panty-friendly ingredients—beans, salsa, corn—that keep it budget-smart and family-friendly.
    • Flexible heat: use mild or medium salsa, and add jalapeños if you love a little fire.
    • Leftover gold for meal prep, easy lunches, or midnight snacks.

    It’s the weeknight hero: an easy, one-pot slow cooker recipe that’s equally at home on a busy Monday or a relaxed Sunday. The creamy salsa base tastes restaurant-level but feels wonderfully homemade. Crockpot Fiesta Chicken has gone viral because it’s a quick fix for flavor lovers who want cozy protein-packed bowls without hovering over the stove. For more cozy slow cooker inspo, try my High-Protein Crockpot Mac and Cheese or family-favorite Slow Cooker Chili Mac. Ready to cook? Let’s dive in.

    TIPS, TRICKS & EXPERT SECRETS

    Chef Tips for Perfect Crockpot Fiesta Chicken Every Time

    I learned this the delicious way: one day I tossed everything in at once—cream cheese included—and ended up whisking like a madwoman. Now I know the little secrets that make Crockpot Fiesta Chicken velvety and foolproof.

    • Season smart: Rub taco seasoning directly onto the chicken before adding salsa so the spices bloom in the slow cooker.
    • Stagger the dairy: Add cream cheese at the end and whisk to melt for the smoothest, creamy sauce.
    • Texture control: If you prefer chunkier chicken, cube it before cooking. For classic shreds, cook whole and pull with forks.
    • Finish with brightness: Lime juice and fresh cilantro at the end wake up every rich, savory note.

    Smart Ingredient Swaps & Practical Cooking Advice

    • Dairy-light: Swap half the cream cheese for plain Greek yogurt after cooking for a lighter creamy finish.
    • Gluten-free: Use gluten-free taco seasoning and verify your broth; Crockpot Fiesta Chicken is naturally wheat-free.
    • Dairy-free: Skip cream cheese and stir in a splash of canned coconut milk plus 1 tbsp nutritional yeast for body.
    • What not to do: Don’t overcook on High—boneless breasts can dry out. If using High, check at 2 hours.

    This friendly cooking tip roster turns an already easy recipe into a repeat winner. Whether you want a homemade version with extra veggies or a quick fix with pantry staples, Crockpot Fiesta Chicken delivers every time.

    SERVING IDEAS & CREATIVE VARIATIONS

    How to Serve Crockpot Fiesta Chicken for Maximum Enjoyment

    When friends drop by, I pull out colorful bowls and set up a DIY bar—Crockpot Fiesta Chicken at the center, toppings all around. It instantly looks party-ready without extra work.

    • Rice bowls: Spoon over cilantro-lime rice with avocado, jalapeños, and a squeeze of lime.
    • Tortilla night: Stuff into warm tortillas with shredded lettuce, pico, and a sprinkle of cheddar.
    • Low-carb bowls: Serve over cauliflower rice with extra cilantro and a dollop of Greek yogurt.

    Flavor Twists and Seasonal Variations

    • Smoky chipotle: Stir in 1–2 tsp minced chipotle in adobo before cooking for deeper heat.
    • Roasted poblano: Fold in chopped roasted poblano peppers for a mellow, earthy kick.
    • Summer corn salsa: Use fresh grilled corn in season for extra sweetness and char.

    Plating suggestion: contrast creamy chicken with crisp toppings—radishes, pickled onions, or crunchy tortilla strips—for texture and gorgeous color. Photograph in natural light with a lime wedge and herb sprinkle for instant scroll-stopping style. If you love cozy slow cooker comfort, bookmark my Crockpot Garlic Parmesan Chicken Pasta for another family-pleasing easy dinner.

    How to Serve Crockpot Fiesta Chicken for Maximum Enjoyment

    STORAGE & TROUBLESHOOTING GUIDE

    How to Store and Reheat Crockpot Fiesta Chicken

    Leftovers are my favorite part—Crockpot Fiesta Chicken does next-day lunches like a champ. I portion bowls for my crew, label them, and they vanish by Wednesday.

    • Room temp: Keep out no longer than 2 hours.
    • Fridge: Store in airtight containers up to 4 days. For best texture, keep toppings separate.
    • Freezer: Freeze up to 3 months in zip-top bags laid flat. Thaw overnight in the fridge.
    • Reheat: Warm gently on the stovetop over low heat or in the microwave at 50–70% power, stirring often. Add a splash of broth or milk to keep it creamy. In a skillet, low and slow works best.

    Troubleshooting Common Crockpot Fiesta Chicken Issues

    • Too watery: Remove lid and simmer 10–15 minutes, or stir in 2–3 tbsp cream cheese to thicken.
    • Too thick: Add broth or milk a tablespoon at a time until silky.
    • Dry chicken: Mix in 1/4 cup salsa and 2 tbsp broth; warm on Low. Next time, shorten cook time.
    • Flat flavor: Add lime juice, extra cilantro, and a pinch of salt. A dash of hot sauce wakes it up.

    Follow this storage advice and your Crockpot Fiesta Chicken will keep fresh and tasty all week. If a texture hiccup happens, these quick fixes bring it right back to creamy, cozy perfection.

    FAQs

    Can I use frozen chicken?

    For food safety and even cooking, thaw chicken first. If you must start frozen, extend cook time and ensure the internal temperature reaches 165°F.

    Can I make Crockpot Fiesta Chicken with thighs?

    Yes. Boneless, skinless thighs stay ultra-juicy. Cook on Low 4–5 hours or High 2–3 hours, then shred.

    How do I make it spicier?

    Use medium or hot salsa, add diced jalapeños, or stir in 1–2 teaspoons chipotle in adobo.

    Is Crockpot Fiesta Chicken gluten-free?

    It can be. Use gluten-free taco seasoning and check your broth and salsa labels. Serve with corn tortillas, rice, or cauliflower rice.

    Conclusion

    Creamy, comforting, and weeknight-easy, Crockpot Fiesta Chicken is the kind of slow cooker recipe that turns ordinary ingredients into cozy comfort food. Whether you scoop it over rice, tuck it into warm tortillas, or pile it high in bowls with crunchy toppings, Crockpot Fiesta Chicken brings homemade charm with minimal effort. Keep this easy dinner in your rotation for busy nights, meal prep, and family gatherings. Try it at home and tag me—I can’t wait to see your bowls, burritos, and party platters. And when you want more slow cooker comfort, explore the delicious line-up on RecipesDarleen

  • Overnight French Toast Casserole – Comforting, Irresistible

    Overnight French Toast Casserole – Comforting, Irresistible

    Overnight French Toast Casserole saved my Saturday brunch when my mixer went missing and my dog ran off with the spatula. I tossed cubes of day-old brioche into a pan, whisked a quick custard, and let the magic happen in the fridge. By morning, Overnight French Toast Casserole was puffed, golden, and cinnamon-kissed—no flipping, no fuss. I poured coffee, we dusted with powdered sugar, and nobody noticed the spatula. This is my kind of kitchen chaos ending: cozy, simple, and delicious.

    Overnight French Toast Casserole

    Recipe

    Why You’ll Love This Overnight French Toast Casserole

    What Makes This Overnight French Toast Casserole So Irresistible

    I learned the beauty of Overnight French Toast Casserole the morning I accidentally double-booked brunch and soccer carpool. I whisked a custard, soaked the bread, and went to bed—then woke up to a puffed, golden tray of comfort food that made me look like I planned it all along.

    Overnight French Toast Casserole delivers bakery-level flavor with barely any morning effort. It’s the kind of homemade, one-pan meal that wraps the whole house in cinnamon warmth. And yes, the first slice always disappears before I can grab the camera. If you crave an easy dinner-for-breakfast or an unfussy crowd-pleaser, this cozy bake is the answer. The Overnight French Toast Casserole method gives you time back, flavor forward, and stress down.

    • Make-ahead magic: Minimal morning work; just bake and serve.
    • Comforting taste: Custardy center with a buttery, cinnamon-sugar crumble.
    • Simple ingredients: Pantry staples and day-old bread—budget-friendly and homemade.
    • Family-friendly: A one-pan breakfast that doubles as brunch dessert.
    • Reliable results: The soak ensures even texture and rich flavor every time.

    Between holiday brunch boards and make-ahead hosting, Overnight French Toast Casserole keeps trending because it’s an easy recipe with show-stopping payoff. It tastes like a bakery treat, eats like a hug, and bakes while you brew coffee. Whether you’re serving an easy dinner breakfast night or planning a festive brunch spread, this comfort food classic scales up, plates beautifully, and never fails to gather compliments. Ready to get baking? Let’s head to the recipe card and make the homemade version that keeps guests lingering for seconds.

    Tips, Tricks & Expert Secrets for Overnight French Toast Casserole

    Chef Tips for Perfect Overnight French Toast Casserole Every Time

    During a cooking class, I once whisked the custard so furiously I made bubbles big enough to float a toy boat. Lesson learned: gentler is better for Overnight French Toast Casserole. Here’s how I guarantee dreamy texture and deep flavor in this easy recipe:

    • Bread matters: Use day-old brioche or challah. The slight dryness soaks up custard for a plush, not soggy, homemade version.
    • Soak smart: Aim for 8–24 hours. The longer rest equals deeper flavor and even bake.
    • Temp and time: Bake at 350°F until the center reaches 165–175°F. A quick cooking tip that prevents underbaked middles.
    • Rest before slicing: 10 minutes lets the custard set and the steam settle for clean squares.

    Smart Ingredient Swaps & Practical Cooking Advice

    • Dairy-light: Swap half-and-half for cream, or use all whole milk for a lighter custard.
    • Gluten-free: Use your favorite sturdy gluten-free brioche-style loaf; everything else remains the same.
    • Vegan twist: Use a plant brioche, whisk 1 3/4 cups oat milk with 1/4 cup canned coconut milk, and replace eggs with 3 tablespoons ground flax mixed with 1/2 cup water; add 1 tablespoon cornstarch to help set.
    • Flavor boosters: A teaspoon of orange zest or a splash of bourbon warms the profile without overpowering.

    What not to do: Don’t overmix the custard or shred the bread. Overmixing adds air and can cause a dry top with a hollow center; tearing bread too small leads to a dense, uneven texture. Keep your Overnight French Toast Casserole simple for maximum reward and quickest fix.

    Serving Ideas & Creative Variations

    How to Serve Overnight French Toast Casserole for Maximum Enjoyment

    I once served Overnight French Toast Casserole on a cutting board like a pastry slab and my guests thought I’d hidden a patisserie in the pantry. A few plating suggestions turn a cozy bake into a moment. Try these pairing and serving ideas:

    • Top with a dollop of whipped mascarpone, a drizzle of warm maple syrup, and a snowfall of powdered sugar.
    • Serve alongside salty breakfast sausage or crisp bacon to balance the sweetness.
    • Pour a steaming mug of Mulled Apple Cider (Crockpot) for a festive, fragrant pairing.

    Flavor Twists and Seasonal Variations

    • Berry Cheesecake: Swirl 4 ounces softened cream cheese with 2 tablespoons sugar; dot over the bread before baking and add 1 1/2 cups mixed berries.
    • Apple Crumble: Fold in 2 cups diced sautéed apples with a pinch of cardamom; add extra cinnamon to the topping for a fall seasonal twist.
    • Chocolate Hazelnut: Dollop 1/3 cup chocolate-hazelnut spread between layers, sprinkle with chopped hazelnuts, and serve with espresso.

    For content creators, shoot it warm by a window for soft, steamy highlights; a side angle shows off the custardy layers. Building a brunch menu? Pair this with a savory slow-cooker classic like Crockpot Garlic Parmesan Chicken Pasta or a holiday-friendly side such as Slow Cooker Sweet Potato Casserole. Your table, your rules—just don’t forget the second pan of Overnight French Toast Casserole.

    Storage & Troubleshooting Guide

    How to Store and Reheat Overnight French Toast Casserole

    My family believes leftovers are a lifestyle, so I tested every way to keep Overnight French Toast Casserole fresh. Here’s how to store, reheat, and keep that tender center intact:

    • Room temperature: Keep at room temp up to 2 hours for serving.
    • Refrigerator: Store tightly covered 3–4 days. Use glass or a lidded container to prevent drying and odors.
    • Freezer: Wrap individual squares in parchment, then foil, and place in a zip-top bag up to 2 months. Thaw overnight in the fridge.
    • Reheating: Oven at 325°F for 10–15 minutes (best texture). Air fryer 300°F for 5–7 minutes for crisp edges. Skillet on low with a splash of milk and a lid for a quick fix.

    Troubleshooting Common Overnight French Toast Casserole Issues

    • Too dry: Add an extra 1/4 cup milk next time or bake 5–8 minutes less. Cover loosely with foil for the last 15 minutes if top browns too fast.
    • Watery middle: Bread may be too fresh. Use day-old bread and extend the soak to 12+ hours; bake until the center is just set.
    • Uneven texture: Cubes should be evenly sized (about 1 inch). Press lightly after pouring custard to help absorption.
    • Overcooked edges: Reduce oven to 325°F, increase bake time slightly, or use a metal pan for more even heat distribution.

    With these storage tips and texture fixes, your Overnight French Toast Casserole will keep fresh, reheat beautifully, and remain company-ready. You’ve got this—one cozy slice at a time.

    FAQs

    Can I assemble Overnight French Toast Casserole two days ahead?

    Yes—assemble it up to 24 hours ahead for best texture. If you need 36 hours, add 1 extra cup of bread to avoid over-soaking.

    What bread works best?

    Day-old brioche or challah is ideal. French bread also works; avoid very soft sandwich loaves that can become mushy.

    How do I know it’s done baking?

    The top should be golden, the edges set, and the center jiggle slightly. A thermometer in the middle should read 165–175°F.

    Can I make Overnight French Toast Casserole without nuts?

    Absolutely. Omit the pecans in the topping or replace with rolled oats for crunch.

    Conclusion

    Overnight French Toast Casserole is the make-ahead star that turns ordinary mornings into relaxed, memorable brunches. With simple, homemade ingredients and a one-pan method, you get bakery-style comfort food that’s as easy as it is impressive. Whether you lean classic with cinnamon and vanilla or try a seasonal twist, this Overnight French Toast Casserole delivers custardy layers, crisp edges, and irresistible aroma every time.

    Brew coffee, set the table, and let the oven do the heavy lifting. Try it at home, share your flavor variations, and tag me so I can cheer you on! If you’re building a full menu, add a cozy sip like my spiced cider and a savory slow-cooker main—then enjoy every warm, cozy bite of Overnight French Toast Casserole.

  • High-Protein Crockpot Mac & Cheese – Creamy, Cozy Comfort

    High-Protein Crockpot Mac & Cheese – Creamy, Cozy Comfort

    High-Protein Crockpot Mac & Cheese is my weeknight safety net. Last Tuesday, the dog stole the shredded cheese, the timer sang before I even boiled water, and my kids staged a “taste test” with every spoon in the house. Still, High-Protein Crockpot Mac & Cheese came out creamy, cozy, and ridiculously satisfying. I tossed everything into the slow cooker, blended cottage cheese and Greek yogurt for extra protein, and let the crock do the heavy lifting. Chaos calmed, bowls were filled, and peace was restored—at least until someone asked for seconds.

    High-Protein Crockpot Mac & Cheese

    Recipe

    WHY YOU’LL LOVE THIS RECIPE

    What Makes This High-Protein Crockpot Mac & Cheese So Irresistible

    I developed this High-Protein Crockpot Mac & Cheese after one of those classic Darleen moments: I promised dinner to neighbors, my kids invited extra friends, and I had just one burner working. High-Protein Crockpot Mac & Cheese saved the night. The slow cooker quietly melted a velvety, protein-packed sauce while I put out napkins and tried to find matching bowls. This homemade comfort food feels like a hug, yet it’s an easy dinner that frees you to multitask. With a creamy cottage cheese and Greek yogurt base, it’s a one-pan meal that tastes indulgent but delivers serious staying power.

    • Extra protein without sacrificing flavor—Greek yogurt and cottage cheese make it luxuriously creamy.
    • Hands-off cooking—your slow cooker does the work while you tackle life.
    • Family-friendly comfort food that reheats like a dream.
    • Simple, affordable ingredients you can find anywhere.
    • Flexible base—add veggies or lean protein for an easy dinner upgrade.

    If you’re craving cozy comfort food with better macros, this High-Protein Crockpot Mac & Cheese is ready to slide right into your weeknight rotation. Let’s get to the recipe card!

    Protein-rich pasta dishes are all over social feeds, and High-Protein Crockpot Mac & Cheese stands out because it’s truly creamy, genuinely easy, and delightfully homemade. No gritty powders here—just real-food ingredients that create a silky, classic sauce in your slow cooker. It’s the smart weeknight win for busy cooks chasing flavor, comfort, and a quick fix.

    TIPS, TRICKS & EXPERT SECRETS

    Chef Tips for Perfect High-Protein Crockpot Mac & Cheese Every Time

    During a pop-up class, I learned the hard way that not all dairy melts the same—my first batch of High-Protein Crockpot Mac & Cheese was tasty but a touch grainy. The fix was simple: blend the cottage cheese and yogurt until silky, then let gentle heat do the rest. Here’s the friendly, expert playbook to nail this easy recipe every time.

    • Blend the sauce base: Cottage cheese + Greek yogurt + evaporated milk creates a smooth, homemade version that resists curdling.
    • Shred your own cheese: Pre-shredded often contains anti-caking starches that can affect texture.
    • Low and slow: Keep the slow cooker on Low. Gentle heat is the secret to creamy High-Protein Crockpot Mac & Cheese.
    • Par-cook pasta: Boil 3 minutes shy of al dente so it finishes perfectly tender in the crock.

    Smart Ingredient Swaps & Practical Cooking Advice

    • Gluten-free: Use a sturdy chickpea or brown rice elbow; check earlier for doneness to avoid mush.
    • Lighter: Swap 2% cheeses and use skim evaporated milk; keep the Greek yogurt for creaminess.
    • Veg boost: Fold in steamed broccoli or peas during the final 10 minutes for a one-pan meal.
    • What not to do: Don’t cook on High—excess heat can split dairy and dry the pasta in this High-Protein Crockpot Mac & Cheese.

    Craving more slow cooker classics after this easy dinner? Try my Lazy Ravioli Lasagna (Crockpot) or the crowd-favorite Crockpot Garlic Parmesan Chicken Pasta for equally cozy, homemade comfort food.

    SERVING IDEAS & CREATIVE VARIATIONS

    How to Serve High-Protein Crockpot Mac & Cheese for Maximum Enjoyment

    When I plated High-Protein Crockpot Mac & Cheese for a small dinner party, I ladled it into warm bowls, added a sprinkle of chives, and placed a simple green salad in the middle. It looked like a bistro special with zero stress. For plating suggestions and serving ideas, keep the focus on creamy comfort and bright, crunchy contrasts.

    • Pair with a crisp arugula salad and lemony vinaigrette to cut the richness.
    • Serve with roasted broccoli or garlicky green beans for a complete, easy dinner.
    • Offer hot sauce or chili crisp on the side for heat-lovers.

    Flavor Twists and Seasonal Variations

    • Smoky BBQ: Stir in pulled chicken and a drizzle of BBQ sauce; top with scallions.
    • Autumn Harvest: Fold in roasted butternut cubes and a pinch of nutmeg for a seasonal twist.
    • Jalapeño Popper: Add diced roasted jalapeños, crumbled turkey bacon, and extra mozzarella for a playful flavor variation.

    Sharing your High-Protein Crockpot Mac & Cheese on social? Plate in shallow bowls, add a high-contrast herb, and shoot near a window. For cozy vibes, style with linen napkins and a steaming mug—then link your spread with a sipper like my Mulled Apple Cider (Crockpot).

    High-Protein Crockpot Mac & Cheese

    STORAGE & TROUBLESHOOTING GUIDE

    How to Store and Reheat High-Protein Crockpot Mac & Cheese

    Leftover High-Protein Crockpot Mac & Cheese is a gift for busy days. I stash single servings for easy lunches, and my future self always thanks me.

    • Room temperature: Keep out no longer than 2 hours.
    • Refrigerator: Store in airtight containers for 3–4 days. Press a piece of parchment onto the surface to keep it extra creamy.
    • Freezer: Freeze up to 2 months. Thaw overnight in the fridge for best texture.
    • Reheat: Add a splash of milk and warm gently on the stove over low heat, in the microwave at 50% power in short bursts, or in a covered oven-safe dish at 300°F until creamy. Stir occasionally to keep it smooth.

    Troubleshooting Common High-Protein Crockpot Mac & Cheese Issues

    • Too dry: Stir in warm milk a few tablespoons at a time. The sauce will loosen and turn glossy.
    • Watery: Simmer uncovered on Low for a few minutes or fold in a little extra cheddar to tighten.
    • Grainy: Blend the dairy base thoroughly next time and keep heat on Low. Freshly shredded cheese melts smoother.
    • Overcooked pasta: Par-cook less next round; check early once it’s in the crock.

    With these storage tips, reheating methods, and texture fixes, your High-Protein Crockpot Mac & Cheese will keep fresh, reheat beautifully, and deliver comfort on repeat. You’ve got this—dinner bliss awaits!

    FAQs

    Can I cook the pasta entirely in the slow cooker?

    For the best texture in High-Protein Crockpot Mac & Cheese, par-cook the pasta 3 minutes shy of al dente, then finish it in the crock so it stays tender, not mushy.

    How do I prevent a curdled or grainy sauce?

    Blend cottage cheese and Greek yogurt until smooth, use freshly shredded cheeses, and keep the slow cooker on Low. Gentle heat keeps the sauce silky.

    Can I make this gluten-free?

    Yes. Use a sturdy gluten-free elbow like chickpea or brown rice pasta. Check doneness early once it’s in the slow cooker.

    What protein can I add to make it even heartier?

    Fold in cooked shredded chicken, turkey sausage, or tender white beans during the final 10 minutes of cooking for more protein without drying the sauce.

    Conclusion

    High-Protein Crockpot Mac & Cheese is cozy, homemade comfort food with a better-for-you twist. Silky from blended cottage cheese and Greek yogurt, this easy dinner lives happily in your slow cooker and delivers weeknight joy. From game days to potlucks, High-Protein Crockpot Mac & Cheese holds its creamy texture, reheats well, and pairs with simple sides for a complete, one-pan meal. If you love slow cooker wins, bookmark my Healthy Slow Cooker Zuppa Toscana Soup too. Make this High-Protein Crockpot Mac & Cheese at home, share your bowl, and tag me—I can’t wait to see your delicious results!

  • Slow Cooker Chili Mac – Comforting and Irresistible

    Slow Cooker Chili Mac – Comforting and Irresistible

    Slow Cooker Chili Mac saved my Tuesday when the school pickup ran late and the dog discovered the flour bin. I tossed everything into the crock before the chaos began, and by dinner time, Slow Cooker Chili Mac was bubbling away like a warm hug. My husband set out bowls while I scraped flour off the cabinets, and we all met around the table to spoon up cheesy, beefy comfort. This is the weeknight win that tastes like you tried way harder than you did.

    Slow Cooker Chili Mac

    Recipe

    WHY YOU’LL LOVE THIS RECIPE

    What Makes This Slow Cooker Chili Mac So Irresistible

    Confession time: the first time I made Slow Cooker Chili Mac, I forgot to plug in the crock. Now I triple-check, because Slow Cooker Chili Mac is my favorite easy dinner on those wild, real-life days. It’s homemade comfort food that’s hearty, cheesy, and blissfully hands-off—a one-pot meal that makes your kitchen smell amazing and your people happy.

    • Set-it-and-forget-it ease: minimal prep, maximum flavor in your trusty crockpot.
    • Comfort food joy: rich chili base, tender pasta, and melty cheddar in every bite.
    • Family-friendly and budget-wise: pantry staples turn into a weeknight hero.
    • One-pot, low mess: fewer dishes, more couch time.
    • Customizable heat and toppings: make it mild, bold, or extra cheesy.

    Trending as an easy dinner and one-pan meal, this cozy bowl brings big, bold chili flavor with the twirlable fun of mac. If you love slow cooker classics like my Lazy Ravioli Lasagna or crave the comfort of a hearty, homemade crockpot dinner, you’ll be smitten. Grab a spoon—we’re headed to the recipe card next.

    Between soccer practice and a laundry mountain, people want cozy food without fuss. Slow Cooker Chili Mac is trending because it tastes like an all-day simmer yet fits real-life schedules. It’s the ultimate comfort food, a homemade, easy recipe that doubles as meal prep for tomorrow’s lunch. Plus, it’s social-share friendly—bubbly cheese always wins the internet.

    TIPS, TRICKS & EXPERT SECRETS

    Chef Tips for Perfect Slow Cooker Chili Mac Every Time

    During a cooking class, I learned the simplest upgrade: bloom your spices. The first time I did that for Slow Cooker Chili Mac, the flavor popped like a cozy chili cook-off. Here’s how to make your easy recipe sing:

    • Brown, then bloom: brown the beef, then sauté onion, pepper, and garlic with chili powder and cumin for 30 seconds to wake up the spices.
    • Timing the pasta: add macaroni near the end. Cook on High for 20–25 minutes so it turns tender, not mushy.
    • Broth control: keep extra broth on standby. If your slow cooker runs hot or pasta drinks more liquid, splash in 1/2 cup to maintain a saucy texture.
    • Cheese at the finish: stir in cheddar off heat or at the very end to keep it creamy instead of greasy.

    Smart Ingredient Swaps & Practical Cooking Advice

    • Vegan swap: replace beef with 12 oz plant-based crumbles or extra beans, use vegetable broth, and sub dairy-free cheddar. You’ll still get a hearty, homemade version of Slow Cooker Chili Mac.
    • Gluten-free fix: use gluten-free elbows and cook them separately; stir into the chili base right before serving to protect texture.
    • Lighter option: swap 93% turkey for beef and reduce cheese to 3/4 cup for a leaner, quick fix without losing comfort.
    • What not to do: don’t add the pasta at the start—overcooked noodles will soak up too much liquid and get gummy.

    These cooking tips keep your Slow Cooker Chili Mac rich, balanced, and weeknight-ready—exactly the easy dinner you’ll make on repeat.

    SERVING IDEAS & CREATIVE VARIATIONS

    How to Serve Slow Cooker Chili Mac for Maximum Enjoyment

    When friends stop by, I park the slow cooker on warm and let everyone build their bowls of Slow Cooker Chili Mac. It feels festive without any stress—and the table looks gorgeous with colorful toppings. For pairing, try:

    • Bright sides: simple green salad with lime vinaigrette or roasted corn for a crisp, fresh contrast.
    • Sips: a cold lager, sparkling water with lime, or a cozy mug of Mulled Apple Cider.
    • Bread: warm cornbread or buttered garlic toast for dunking into all that saucy goodness.
    How to Serve Slow Cooker Chili Mac for Maximum Enjoyment
    How to Serve Slow Cooker Chili Mac for Maximum Enjoyment

    Flavor Twists and Seasonal Variations

    • Smoky chipotle: add 1–2 tsp chipotle in adobo and a handful of fire-roasted corn.
    • Autumn harvest: stir in 1 cup diced butternut squash during the first cook for a subtle sweet note.
    • Pinterest-favorite cheesy top: transfer finished Slow Cooker Chili Mac to a casserole, top with extra cheddar, and broil just until bubbly and golden.

    For creators: plate in shallow bowls with a tight swirl of pasta, a sprinkle of scallions, and a dollop of sour cream. Shoot overhead in natural light—those molten cheese ribbons and chili flecks make a scroll-stopping post. If you like a full slow cooker spread, pair it with my Slow Cooker Green Bean Casserole for a crowd-pleasing meal.

    STORAGE & TROUBLESHOOTING GUIDE

    How to Store and Reheat Slow Cooker Chili Mac

    Leftover Slow Cooker Chili Mac might be my favorite midnight snack. Here’s how to keep it fresh:

    • Room temperature: keep out no longer than 2 hours.
    • Fridge: store in airtight containers 3–4 days. Divide into single portions for easy reheat.
    • Freezer: freeze in freezer-safe bags or containers up to 2 months. For best pasta texture, freeze the chili base without pasta and add freshly cooked noodles when reheating.
    • Reheat: stovetop over medium with a splash of broth or water; microwave in 60–90 second bursts, stirring between; oven at 325°F covered, 15–20 minutes.

    Troubleshooting Common Slow Cooker Chili Mac Issues

    • Too thick: add 1/2–1 cup broth or water and simmer to loosen.
    • Too watery: simmer uncovered on High for 10–15 minutes or stir in 1–2 tbsp tomato paste.
    • Pasta overcooked: next time, add pasta later or cook it separately and stir in before serving.
    • Flat flavor: add 1/2 tsp salt, a squeeze of lime, or a dash of hot sauce; blooming spices earlier also helps.
    • Greasy top: drain beef well and fold cheese in at the end off heat.

    With these storage tips and quick fixes, your Slow Cooker Chili Mac will keep its cozy, homemade magic from day one to leftovers. For more crock comfort, try my creamy Crockpot Garlic Parmesan Chicken Pasta next.

    FAQs

    Can I cook the pasta separately?

    Yes. Cook the pasta al dente on the stovetop, then stir into the chili base just before serving. It’s a great way to control texture in Slow Cooker Chili Mac.

    Can I make Slow Cooker Chili Mac ahead?

    Absolutely. Cook the chili base, chill, and reheat. Stir in freshly cooked pasta and cheese right before serving for best results.

    How can I make it gluten-free?

    Use gluten-free elbows and cook them separately. Stir into the finished chili and add more broth as needed to keep it saucy.

    What protein swaps work well?

    Ground turkey, chicken, or plant-based crumbles all work. Keep spices the same and adjust salt to taste.

    Conclusion

    There’s a reason Slow Cooker Chili Mac is the first thing I make when the weather turns or life gets busy. It’s an easy dinner with big, homemade flavor, a one-pot comfort food that brings everyone to the table. From weeknight meal prep to game-day gatherings, Slow Cooker Chili Mac delivers cozy satisfaction with minimal effort. Try it, share a photo, and tag me—let’s see those cheesy swirls and happy bowls. If this recipe becomes your family favorite, don’t miss my other slow cooker stars linked above. Your crockpot is about to be the MVP of dinner.