Category: Dinner

Easy, tasty dinner ideas for busy nights. Simple recipes, quick prep, and family-friendly meals you’ll make again and again.

  • Christmas Jam Recipe – Cozy and Irresistible

    Christmas Jam Recipe – Cozy and Irresistible

    Christmas Jam Recipe is my official kickoff to holiday kitchen chaos. Last year, the mixer was whirring, the carols were too loud, and I mistook the cinnamon for cloves—twice. The Christmas Jam Recipe still came out bright, spiced, and giftable, and my sister declared it “December in a jar.” I’ve learned that a good stir, a squeeze of orange, and a bit of cranberry tartness make magic. If you’re baking bread like this Festive Christmas Bread, this jam is the cozy topping you’ll want on every slice.

    Christmas Jam Recipe

    Recipe

    Why You’ll Love This Recipe

    What Makes This Christmas Jam Recipe So Irresistible

    Confession: the first time I tested this Christmas Jam Recipe, I forgot to pull the pot off the heat before answering a doorbell carol. Cue the frantic stir! Still, this Christmas Jam Recipe delivered a beautiful balance of tart cranberries, sweet strawberries, and a cuddly hug of cinnamon and cloves. It’s a homemade, one-pot comfort food moment that spreads like holiday cheer. The best part? It tastes like festive nostalgia and looks like a ruby jewel in every jar—absolutely giftable.

    • Simple and reliable: one pot, easy recipe steps, and a quick fix if foam appears.
    • Cozy, bright flavor: cranberry tang + strawberry sweetness + orange sparkle.
    • Gifts made easy: this homemade version is perfect for teacher gifts and neighbor drop-offs.
    • Flexible: fridge jam or water-bath canning—your choice.
    • Family-friendly: not too spicy, just enough holiday warmth.

    When you’re ready for that first taste, you’ll understand why the Christmas Jam Recipe becomes a tradition. Let’s grab a spoon and head to the recipe card.

    On social feeds, this Christmas Jam Recipe is trending because it checks every seasonal box: quick prep, homemade charm, and a cozy aroma that makes the whole house smell like December. It’s the comfort food spread that turns toast, pancakes, and cheese boards into holiday moments. And yes—your kitchen will feel like a tiny jam factory (in the best way). Pin it, save it, and share a jar; you’ll be everyone’s favorite elf.

    Tips, Tricks & Expert Secrets

    Chef Tips for Perfect Christmas Jam Recipe Every Time

    During a cooking demo, I learned the most valuable jam lesson: trust the rolling boil. It’s louder than a choir rehearsal and just as enthusiastic. With this Christmas Jam Recipe, these quick cooking tips will guarantee success every time.

    • Prep smart: Whisk pectin with a bit of sugar before adding—no clumps, smooth set.
    • Heat right: Hit a full rolling boil that doesn’t stop when stirred before adding all the sugar.
    • Texture target: Use a potato masher for rustic jam or an immersion blender for smoother results.
    • Set test: Chill a saucer in the freezer. Drop a spoonful of jam—if it wrinkles when nudged, it’s done.

    Smart Ingredient Swaps & Practical Cooking Advice

    • Vegan/Refined sugar alternative: Use organic cane sugar or a 1:1 jam sugar formulated for pectin. Avoid liquid sweeteners—they can affect set.
    • Spice swap: Try cardamom or allspice in place of cloves for a different homemade version twist.
    • Citrus boost: Add lemon zest if your orange is mild—brightens flavor in this easy recipe.
    • What not to do: Don’t reduce the sugar drastically in a pectin-set jam. It’s a chemistry thing—too little sugar can prevent a proper gel and leave your Christmas Jam Recipe runny.

    With a few thoughtful cooking tips and a steady stir, you’ll have a foolproof, quick fix holiday spread.

    Serving Ideas & Creative Variations

    How to Serve Christmas Jam Recipe for Maximum Enjoyment

    When I set out the brunch spread, someone always asks, “What’s that ruby jar?” It’s the Christmas Jam Recipe, and it steals the spotlight every time. For a festive morning, slather it on warm toast or pair it with this Festive Christmas Bread (https://recipesdarleen.com/festive-christmas-bread/). On a dessert board, spoon it next to shortbread and a wedge of brie. And if you’re building a snack tray while candy cools, try it with Classic Christmas Toffee for that sweet-salty duo.

    • Breakfast hero: Swirl into yogurt parfaits or drizzle over pancakes instead of syrup.
    • Cheese board essential: Pair with brie, goat cheese, or aged cheddar; add almonds and rosemary sprigs.
    • Hostess gift: Tie a ribbon around a jar with a little card of serving ideas—instant holiday joy.
    How to Serve Christmas Jam Recipe for Maximum Enjoyment
    How to Serve Christmas Jam Recipe for Maximum Enjoyment

    Flavor Twists and Seasonal Variations

    • Ginger Sparkle: Add 1 tablespoon finely grated fresh ginger for a lively kick.
    • Pomegranate Pop: Fold in 1/2 cup pomegranate arils after cooking for bursts of color and texture.
    • Spiced Mulled Jam: Simmer with a strip of orange peel and a cinnamon stick; remove before canning for a cozy, mulled flavor variation.

    For content creators, a white plate, natural light, and a small spoon trail across the jam make a pin-worthy plating suggestion. Tag your holiday jars—I can’t wait to see your seasonal twist.

    Storage & Troubleshooting Guide

    How to Store and Reheat Christmas Jam Recipe

    My pantry has a whole shelf dedicated to this Christmas Jam Recipe, but the fridge jars disappear fastest. Here’s how to keep every jar tasting fresh and bright.

    • Room temperature: Only for sealed, properly canned jars—store in a cool, dark place up to 1 year.
    • Refrigerator: Refrigerate unsealed jars up to 3 weeks. Always use clean utensils to keep fresh.
    • Freezer: Freeze refrigerator jam up to 6 months in freezer-safe containers (leave headspace for expansion).
    • Containers: Use glass canning jars with tight lids or freezer-safe plastic containers to preserve texture and flavor.
    • Reheating: Jam doesn’t need reheating, but to loosen a cold jar, warm the sealed jar in a bowl of hot tap water for a few minutes. Stir to restore silky spreadability.

    Troubleshooting Common Christmas Jam Recipe Issues

    • Too runny: Chill a jar overnight; many jams set as they cool. If still loose, re-cook with a bit more pectin and bring to a full rolling boil for 1 minute.
    • Too thick: Stir in hot water or orange juice 1 teaspoon at a time, then re-warm gently to fix texture.
    • Overly sweet: Balance with a squeeze of lemon juice at serving.
    • Foam on top: Skim at the end of cooking or add a tiny pat of butter while boiling to reduce foam (optional).
    • Scorched bottom: Don’t scrape the pot’s bottom into jars; transfer only the jam above the scorch to preserve flavor.

    However your batch turns out, you’ve got this. The Christmas Jam Recipe is forgiving, festive, and absolutely worth a second stir.

    FAQs

    Can I make this Christmas Jam Recipe without pectin?

    Yes. Simmer longer to reduce and thicken naturally, but expect a softer set. Use a frozen-plate test to check doneness.

    Can I use frozen strawberries?

    Absolutely. Thaw and drain excess liquid first so you can control texture and avoid a watery finish.

    How can I lower the sugar?

    Use a low- or no-sugar pectin and follow that product’s ratios. Standard pectin needs sugar to gel properly.

    What altitude adjustments do I need for canning?

    For 1,001–3,000 ft add 5 minutes; 3,001–6,000 ft add 10 minutes; above 6,000 ft add 15 minutes to the water-bath process.

    Conclusion

    This sparkling, spiced Christmas Jam Recipe brings cranberry brightness, strawberry sweetness, and cozy cinnamon to every bite. It’s an easy homemade spread that turns breakfasts, desserts, and cheese boards into instant holiday moments. Whether you’re gifting jars, topping warm biscuits, or pairing with a dessert like my Moist Pumpkin Chocolate Chip Bread hacks, the Christmas Jam Recipe keeps spirits merry and kitchens fragrant. Make a batch, stash a few in the pantry, and share the love. Try it at home and tag me—I can’t wait to see your festive jars lined up like twinkling lights.
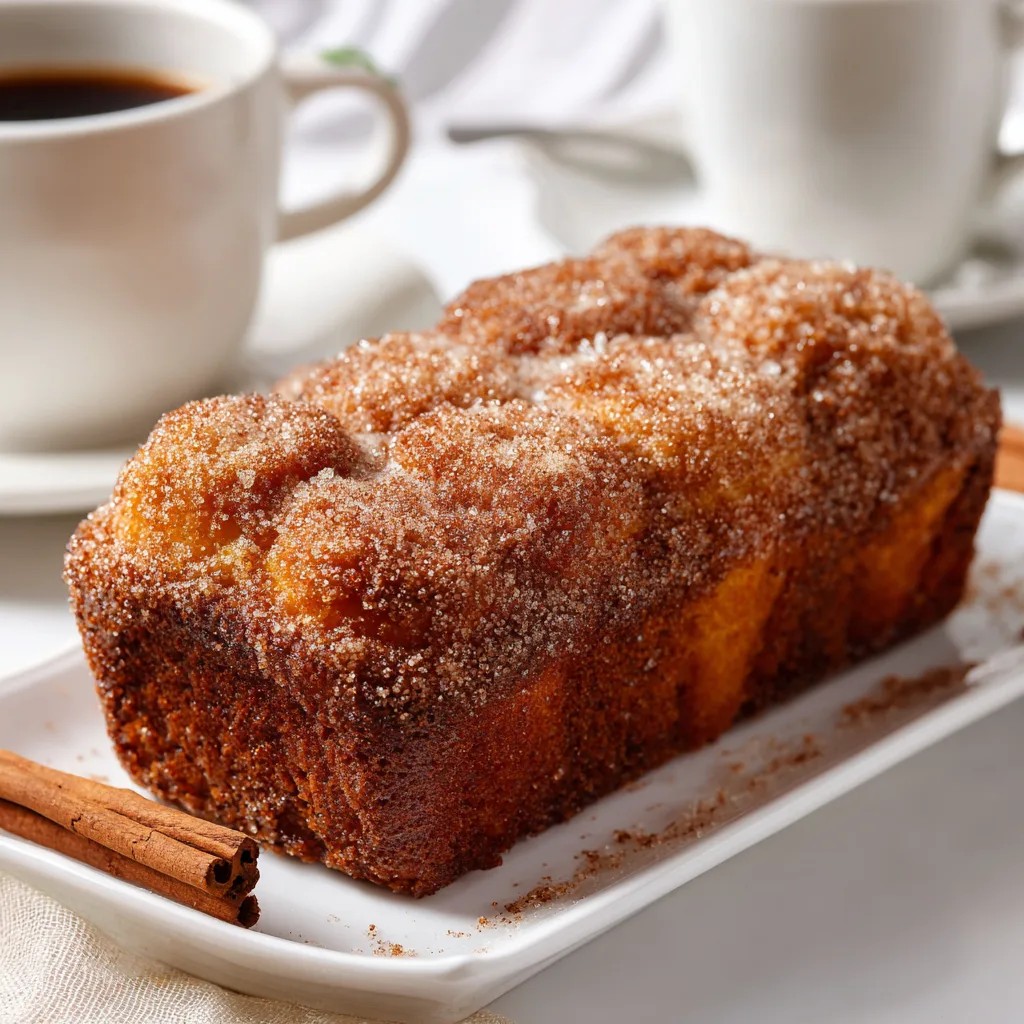
  • Spiced Apple Cider Donut Loaf – Cozy, Irresistibly Tender

    Spiced Apple Cider Donut Loaf – Cozy, Irresistibly Tender

    Spiced Apple Cider Donut Loaf is the cure for an impatient sweet tooth. Last fall, I, Darleen Vance, boiled apple cider while my mixer pirouetted off the counter thanks to a curious cat. Spiced Apple Cider Donut Loaf still came out bakery-soft, drenched in cinnamon sugar, and my kitchen smelled like a cozy orchard. My kids snuck slices before dinner, and I pretended not to notice because this loaf was worth every crumb. If you love easy, homemade comfort food that tastes like a trip to the cider mill, settle in—this one is for you.

    Spiced Apple Cider Donut Loaf

    Recipe

    Why You’ll Love This Spiced Apple Cider Donut Loaf

    What Makes This Spiced Apple Cider Donut Loaf So Irresistible

    I first tested this Spiced Apple Cider Donut Loaf after a marathon day of school pickups and a pantry raid that turned up exactly one apple and a half bottle of cider. The Spiced Apple Cider Donut Loaf perfumed the whole house like a cider mill, and by the time it cooled, we were hovering with butter knives in hand. This homemade quick bread eats like a tender donut—the cinnamon-sugar crust shatters softly, and the crumb is plush, cozy, and deeply flavorful. It’s the kind of comfort food you’ll crave on repeat, an easy recipe that looks bakery-fancy but comes together with simple, everyday ingredients.

    • Cozy flavor: Reduced cider and warm spices make every slice taste like a fresh donut.
    • One-bowl ease: A homemade batter with minimal dishes for a quick fix on busy days.
    • Family-friendly: Not too sweet, but just indulgent enough for breakfast, snack, or dessert.
    • Simple ingredients: Pantry staples plus apple cider—nothing fussy, all flavor.
    • Versatile finish: Cinnamon-sugar topping or a light cider glaze—both irresistible.

    If you love nostalgic bakes and want a Spiced Apple Cider Donut Loaf that feels special without stress, this is your sign to preheat the oven and grab that mug of cider. Let’s bake.

    Beyond the cozy vibes, Spiced Apple Cider Donut Loaf travels well, slices clean, and stays tender for days. It’s a homemade version of a bakery favorite that doubles as a brunch showpiece—especially alongside Overnight French Toast Casserole or a steaming pot of Mulled Apple Cider. The cinnamon sugar sparkle makes this easy dinner-party dessert look like you fussed—without actually fussing. People are sharing it because it’s simple, satisfying, and undeniably photogenic.

    Tips, Tricks & Expert Secrets for Spiced Apple Cider Donut Loaf

    Chef Tips for Perfect Spiced Apple Cider Donut Loaf Every Time

    In a cooking class, I once tried to save time by skipping the cider reduction. Never again. That tiny step is the flavor secret for any Spiced Apple Cider Donut Loaf—consider it your pro move for maximum fragrance and a plush, donut-style crumb.

    • Reduce the cider: Simmer to at least half its volume. It concentrates flavor and prevents a watery loaf.
    • Don’t overmix: Fold until the flour disappears. Overmixing toughens quick breads.
    • Check early: Start testing at 50 minutes; ovens vary. Look for moist crumbs on the tester.
    • Coat while warm: Brush with butter and cinnamon sugar as soon as the loaf is warm for the best adhesion.
    Chef Tips for Perfect Spiced Apple Cider Donut Loaf Every Time
    Spiced Apple Cider Donut Loaf

    Smart Ingredient Swaps & Practical Cooking Advice

    • Gluten-free: Use a quality 1:1 gluten-free all-purpose flour. Add 1 tablespoon milk if batter seems thick.
    • Dairy-free/vegan: Swap oil for butter; use plant milk in the glaze. For vegan, use two flax eggs (2 tablespoons ground flax + 5 tablespoons warm water) instead of eggs.
    • Oil vs. butter: Oil yields ultra-moist texture; melted butter adds rich flavor. Choose your adventure.
    • What not to do: Don’t bake in a too-small pan; overflow and underbaked centers can happen. Stick to a 9×5-inch loaf pan for this easy recipe.

    Follow these cooking tips and your Spiced Apple Cider Donut Loaf will be golden, fragrant, and tender—an easy, homemade version you’ll keep on rotation.

    Serving Ideas & Creative Variations

    How to Serve Spiced Apple Cider Donut Loaf for Maximum Enjoyment

    When I set the Spiced Apple Cider Donut Loaf on the table, my family circles like it’s the main event. Slice thick, pass napkins, and let the cinnamon sugar sparkle. It’s comfort food made for cozy gatherings and content creators alike—snap that crumb shot under a window and you’re Pinterest-ready.

    • Warm with butter: Reheat a slice and add a pat of salted butter to melt into the cinnamon sugar.
    • Brunch plate: Pair with soft-scrambled eggs and fresh berries, or serve after a bowl of Creamy Tortellini Soup for a perfect cozy-day menu.
    • Coffeehouse vibe: Serve with latte foam art and a drizzle of the optional cider glaze.

    Flavor Twists and Seasonal Variations

    • Brown butter boost: Swap melted butter for browned butter in the batter for a nutty, bakery-style twist.
    • Maple sugar crust: Replace cinnamon sugar with maple sugar for a toasty, seasonal twist.
    • Cran-apple swirl: Fold 1/2 cup chopped cranberries into the batter for tart pops of color.

    Plating suggestion: Slice on a wooden board, dust lightly with extra cinnamon sugar, and drizzle the glaze in a crosshatch. The Spiced Apple Cider Donut Loaf looks gorgeous with a few thin apple slices fanned alongside for styling.

    Storage & Troubleshooting Guide

    How to Store and Reheat Spiced Apple Cider Donut Loaf

    Leftovers of Spiced Apple Cider Donut Loaf rarely last long at my house, but when they do, I stash slices for late-night snacks. To keep your loaf soft and the cinnamon sugar fresh, store smart and reheat gently.

    • Room temperature: Keeps 2–3 days in an airtight container with a paper towel to absorb moisture.
    • Refrigerator: Up to 5 days, tightly wrapped; bring to room temp or warm before serving.
    • Freezer: Freeze slices for up to 2 months in a double-wrapped, freezer-safe bag. Thaw at room temp.
    • Reheat: Oven or toaster oven at 300°F for 8–10 minutes, or air fryer at 300°F for 4–6 minutes. Avoid microwaving too long—it can toughen the crumb.

    Troubleshooting Common Spiced Apple Cider Donut Loaf Issues

    • Too dry: Loaf may be overbaked. Next time, reduce bake time by 3–5 minutes and ensure you measured flour correctly (spoon and level).
    • Wet center: Needs more bake time or your pan is smaller than 9×5. Tent with foil and continue baking until a tester comes out clean.
    • Bland flavor: Cider likely wasn’t reduced enough. Reduce to at least half for concentrated flavor.
    • Sugar topping falls off: Brush butter while the loaf is still warm, then add the cinnamon sugar so it adheres.

    With these storage tips and quick fixes, your Spiced Apple Cider Donut Loaf will stay tender, fragrant, and bakery-beautiful. You’ve got this!

    FAQs

    Can I skip reducing the cider?

    You can, but the flavor will be less intense and the batter may be looser. Reducing cider is the secret to a deeply spiced, donut-like loaf.

    Which pan works best for Spiced Apple Cider Donut Loaf?

    A standard 9×5-inch loaf pan yields the right height and bake time. Smaller pans can cause overflow or underbaked centers.

    Can I make Spiced Apple Cider Donut Loaf ahead?

    Yes. Bake, cool, and wrap airtight. Add the cinnamon-sugar topping right before serving for the freshest texture.

    How do I make it gluten-free?

    Use a 1:1 gluten-free flour blend and monitor batter thickness. Add a splash of milk if needed. Bake time may vary by a few minutes.

    Conclusion

    When you’re craving cozy, homemade comfort food that feels special, Spiced Apple Cider Donut Loaf delivers every time. The reduced cider, warm spices, and cinnamon-sugar finish create an easy recipe with bakery-level flavor. This quick bread is perfect for brunch, dessert, or your afternoon coffee break—and it’s as photogenic as it is delicious. Try this Spiced Apple Cider Donut Loaf at home and tag me so I can see your crumb shots. If you’re planning a fall menu, pair it with Mulled Apple Cider or prep-ahead brunch like Overnight French Toast Casserole. Fresh-baked happiness, guaranteed.

  • Slow Cooker Stuffed Shells – Cozy and Irresistible

    Slow Cooker Stuffed Shells – Cozy and Irresistible

    Slow Cooker Stuffed Shells saved dinner on the night my son turned the kitchen timer into a toy spaceship and launched it behind the fridge. I needed comfort fast, so I stuffed shells during nap time, dropped them into the crock, and let the slow cooker do the magic. By dinnertime, the house smelled like a cozy trattoria. Slow Cooker Stuffed Shells is the kind of easy dinner that forgives the chaos and rewards you with creamy, cheesy, homemade comfort food.

    Slow Cooker Stuffed Shells saved dinner on the night my son turned the kitchen timer into a toy spaceship and launched it behind the fridge.

    Recipe

    Why You’ll Love Slow Cooker Stuffed Shells

    What Makes This Slow Cooker Stuffed Shells So Irresistible

    I learned quickly that Slow Cooker Stuffed Shells is my weeknight superhero. One rainy Tuesday, I had ricotta, a jar of marinara, and exactly 17 minutes before a Zoom call. I stuffed, I layered, and I let the pot hum. Slow Cooker Stuffed Shells took over, and dinner turned into creamy comfort food with zero stress. This homemade, easy dinner feels like a hug in a bowl and works even when life is messy.

    • Set it and forget it: A truly easy dinner where the slow cooker does the work.
    • Comfort food classic: Creamy ricotta filling and gooey mozzarella in rich marinara.
    • Family-friendly: Everyone cheers for stuffed shells; it’s a guaranteed crowd-pleaser.
    • Make-ahead magic: Assemble earlier, then cook when you need it.
    • Flexible: Keep it vegetarian or add meat for a heartier homemade version.

    Because Slow Cooker Stuffed Shells cooks low and slow, the pasta absorbs flavor without falling apart, delivering that one-pan meal vibe without babysitting the stove. It’s the cozy, easy dinner you’ll crave on weeknights and lazy Sundays alike. Ready to make it? The full recipe card is just below.

    Slow Cooker Stuffed Shells are trending because they’re practical, hands-off, and delicious. You get genuine comfort food with restaurant-level flavor and a homemade, weeknight-friendly process. On social media, cooks love how the shells hold their shape, the cheese stays lush, and the marinara becomes silky in the crock. Plus, Slow Cooker Stuffed Shells fit into meal planning: stuff shells in advance, pop them in the pot, and dinner practically makes itself. If you love low-fuss favorites like my Slow Cooker Mac & Cheese or crave layered pasta comforts like Lazy Ravioli Lasagna, Slow Cooker Stuffed Shells will be your new go-to easy dinner.

    Tips, Tricks & Expert Secrets for Slow Cooker Stuffed Shells

    Chef Tips for Perfect Slow Cooker Stuffed Shells Every Time

    My first batch of Slow Cooker Stuffed Shells taught me a humble lesson: don’t skip parboiling. I tried raw shells once and they cooked unevenly—classic kitchen mishap. After a few tests (and one overenthusiastic cheese spill), I landed on these reliable cooking tips for an easy recipe that’s consistently creamy and tender.

    • Parboil just shy of al dente: Boil shells 5 minutes less than package directions to prevent mush and ensure even texture.
    • Thin the sauce slightly: Mix marinara with a splash of water or broth; Slow Cooker Stuffed Shells need steam to finish cooking.
    • Layer smart: Sauce on the bottom, stuffed shells in a snug single layer, then more sauce so every bite stays saucy.
    • Finish with a melt: Add the last bit of mozzarella at the end, cover 10–15 minutes, then rest so everything sets beautifully.

    Smart Ingredient Swaps & Practical Cooking Advice

    • Vegan option: Use dairy-free ricotta and mozzarella and a vegan-friendly pasta. Slow Cooker Stuffed Shells can be a comforting plant-based win.
    • Gluten-free fix: Choose gluten-free jumbo shells and check your marinara label. The homemade version is just as cozy.
    • Lighter twist: Part-skim ricotta and reduced-fat mozzarella cut calories while keeping the creamy vibe.
    • What not to do: Don’t cook on High for too long—overcooked Slow Cooker Stuffed Shells can turn soggy. If in doubt, start on Low and check early.

    Keep this cooking tip in your back pocket: if sauce looks too thick, add a quick fix splash of broth. Slow Cooker Stuffed Shells should be nestled in moisture to steam gently into comfort food perfection.

    Serving Ideas & Creative Variations for Slow Cooker Stuffed Shells

    How to Serve Slow Cooker Stuffed Shells for Maximum Enjoyment

    When friends drop by, I lean on Slow Cooker Stuffed Shells and a little presentation magic. I spoon shells into shallow bowls, add extra sauce from the crock, and shower with basil. It looks restaurant-ready with hardly any effort—ideal for an easy dinner party or a cozy weeknight plate.

    • Pairing ideas: Garlic bread or a crunchy green salad with lemon vinaigrette to balance the creamy pasta.
    • Sauce boost: Warm a little extra marinara on the side for saucy fans.
    • Beverage pairing: A medium-bodied red (Sangiovese) or sparkling water with citrus keeps flavors bright.
    Serve Slow Cooker Stuffed Shells for Maximum Enjoyment
    Serve Slow Cooker Stuffed Shells for Maximum Enjoyment

    Flavor Twists and Seasonal Variations

    • Three-cheese herb: Mix ricotta with lemon zest and chopped parsley for a zippy flavor variation.
    • Autumn cozy: Stir in roasted butternut squash cubes for a seasonal twist on Slow Cooker Stuffed Shells.
    • Spicy arrabbiata: Use a spicy marinara and a pinch of red pepper flakes for bold, cozy heat.

    For content creators: drizzle a little olive oil, add a basil sprig, and shoot near a window for soft light—plating suggestion gold for Instagram-worthy Slow Cooker Stuffed Shells. If you like warming bowls, you’ll also love my Creamy Tortellini Soup—same comfort food energy, just spoonable.

    Storage & Troubleshooting Guide

    How to Store and Reheat Slow Cooker Stuffed Shells

    Leftover Slow Cooker Stuffed Shells might be the best breakfast—ask me how I know. Here’s how to keep them fresh and reheat without losing that creamy, homemade texture.

    • Room temperature: Keep out no more than 2 hours for food safety.
    • Fridge: Store in an airtight container 3–4 days. Add a spoon of sauce on top to keep moisture.
    • Freezer: Freeze in a freezer-safe, sauce-topped container up to 3 months. Label for easy dinner planning.
    • Reheat: Oven at 350°F (175°C), covered, 15–20 minutes; or microwave in short bursts with a splash of water. Air fryer works for quick melts—cover with foil to prevent drying.

    Troubleshooting Common Slow Cooker Stuffed Shells Issues

    • Too dry: Add more sauce or a splash of broth before cooking. Slow Cooker Stuffed Shells need moisture to steam.
    • Watery: Your spinach may have held water. Next time, squeeze dry and reduce added liquid slightly.
    • Uneven texture: Parboil shells shorter and arrange in a single layer so heat circulates evenly.
    • Overcooked: Check early at 3 hours on Low. Every slow cooker runs a little differently.

    With these storage advice tips and quick fixes, your Slow Cooker Stuffed Shells will reheat like a dream. And if you’re stocking the freezer, add another cozy classic like Slow Cooker Chili Mac to your lineup for stress-free nights.

    FAQs

    Do I have to boil the shells first?

    Yes, parboil 5 minutes less than package directions. It helps Slow Cooker Stuffed Shells cook evenly without turning mushy.

    Can I assemble Slow Cooker Stuffed Shells ahead?

    Absolutely. Stuff and refrigerate up to 24 hours. Add 15–30 minutes to the cook time if starting cold.

    How do I keep the shells from sticking?

    Spread sauce on the bottom first and keep shells in a snug single layer. Sauce on top prevents sticking and keeps them tender.

    Can I add meat?

    Yes. Fold in browned ground beef or turkey for a heartier version. It’s a great homemade variation that stays family-friendly.

    Conclusion

    Stuffed Shells delivers everything we crave in an easy dinner: velvety ricotta, melty mozzarella, and a marinara hug made hands-off. As comfort food goes, Slow Cooker Stuffed Shells is reliable, family-friendly, and perfect for make-ahead planning. Use the expert cooking tips, storage advice, and flavor variation ideas to tailor this homemade classic to your table—whether you keep it vegetarian or add a savory twist. Ready to tuck into something cozy? Try it at home and tag me so I can see your delicious bowls!

  • Slow Cooker Broccoli Cheddar Soup – Creamy, Cozy

    Slow Cooker Broccoli Cheddar Soup – Creamy, Cozy

    Slow Cooker Broccoli Cheddar Soup saved dinner on a night my kids decided the kitchen was a trampoline park. I tossed everything in the crock and prayed to the comfort food gods. An hour later, the house smelled like Slow Cooker Broccoli Cheddar Soup heaven, and no one remembered we’d started with chaos. I stirred in sharp cheddar, grabbed some crusty bread, and we called it a win. When life gets loud, this creamy, cozy classic whispers, “I’ve got you.”

    Slow Cooker Broccoli Cheddar Soup

    Recipe

    Why You’ll Love This Slow Cooker Broccoli Cheddar Soup

    What Makes This Slow Cooker Broccoli Cheddar Soup So Irresistible

    I first made Slow Cooker Broccoli Cheddar Soup on a day when my timer went missing (later found in the toy bin). Slow Cooker Broccoli Cheddar Soup doesn’t care if you measure with your heart—it’s forgiving, creamy, and brings pure comfort food vibes. This homemade, easy dinner simmers low and slow so the broccoli becomes tender and the cheddar melts like a dream. Here’s why this cozy one-pot meal keeps showing up in my kitchen:

    • Hands-off ease: Toss in simple ingredients, walk away, and return to creamy Slow Cooker Broccoli Cheddar Soup perfection.
    • Restaurant flavor at home: Sharp cheddar, a hint of Dijon, and smoked paprika create a rich homemade soup with depth.
    • Family-friendly: Kid-approved bowl of comfort that pairs with grilled cheese or crusty bread.
    • Flexible texture: Blend silky smooth or keep it chunky—your Slow Cooker Broccoli Cheddar Soup, your way.
    • Great for meal prep: Heats beautifully for quick lunches and easy weeknight dinners.

    Short prep, big payoff. On busy nights, this easy recipe is a quick fix that still tastes slow-simmered. The slow cooker coaxes out savory broccoli sweetness, while cheddar and cream wrap everything in cozy comfort. It’s a homemade version of your favorite café bowl, perfect for chilly nights, football Sundays, or whenever you crave nostalgic comfort food. If you love all-in-one slow cooker ideas, peek at my creamy tortellini soup and ultra-comforting slow cooker mac and cheese. Ready to cook? Let’s slide into the recipe card and get this pot going.

    Tips, Tricks & Expert Secrets for Slow Cooker Broccoli Cheddar Soup

    Chef Tips for Perfect Slow Cooker Broccoli Cheddar Soup Every Time

    My “aha” moment with Slow Cooker Broccoli Cheddar Soup came when I shredded the cheese fresh instead of grabbing the bag—instant silky upgrade. Then I learned one tiny cooking tip: add cheese off heat. Magic. For consistent, creamy results in this easy recipe, try these:

    • Shred your own cheddar: Pre-shredded cheese has anti-caking agents that can make homemade soup grainy.
    • Season in layers: Salt the veggie base, then taste again after adding dairy—cheddar is salty too.
    • Partial blend: Pulse with an immersion blender to keep texture. Full blend = café-smooth; partial blend = hearty comfort food.
    • Cheese last, heat off: Stir cheese in small handfuls with the cooker off to prevent splitting.

    Smart Ingredient Swaps & Practical Cooking Advice

    • Gluten-free: Use cornstarch slurry (as written). If you prefer a roux, swap in 3 tbsp butter + 3 tbsp gluten-free flour on the stove, whisk with 1 cup milk, then stir into the cooker at the end.
    • Lighter: Use half-and-half or evaporated milk instead of heavy cream; add extra broccoli for body.
    • Vegetarian to the core: This recipe uses vegetable broth; if you only have chicken broth, you’ll lose the vegetarian diet tag but keep that savory punch.
    • What not to do: Don’t add cheese while the slow cooker is boiling—high heat can make Slow Cooker Broccoli Cheddar Soup oily or curdled.

    These quick fixes keep your Slow Cooker Broccoli Cheddar Soup creamy, stable, and ultra-satisfying—just the kind of homemade version you’ll repeat all season.

    Serving Ideas & Creative Variations

    How to Serve Slow Cooker Broccoli Cheddar Soup for Maximum Enjoyment

    When friends pop by, I ladle Slow Cooker Broccoli Cheddar Soup into warm bowls and float a garlicky crouton on top—instant bistro moment. For a simple weeknight, I plate it with a grilled cheese “soldier” for dipping. Here are favorite serving ideas that make this homemade comfort food shine:

    • Pairings: Sourdough toast, warm pretzel rolls, or a crispy side salad with lemony vinaigrette.
    • Finishing touches: Extra sharp cheddar, chives, a swirl of cream, or a sprinkle of crushed red pepper.
    • Beverages: Apple cider, light pilsner, or a bright Sauvignon Blanc to cut through the richness.

    Flavor Twists and Seasonal Variations

    • Roasted Garlic Edition: Roast a whole head of garlic, squeeze into the pot before blending for mellow depth.
    • Broccoli Cheddar “Loaded Baked Potato” Soup: Stir in diced cooked potatoes and a dollop of Greek yogurt, then top with green onions.
    • Autumn Harvest: Add a cup of diced butternut squash for a sweet, seasonal twist and extra color.

    Content creators: capture the steam swirl and a cheese pull for irresistible scrolling appeal. A wide, shallow bowl with a chunky bread stack makes Slow Cooker Broccoli Cheddar Soup look as cozy as it tastes. Craving more slow-cooker comfort? Try my popular crack chicken noodle soup next.

    Storage & Troubleshooting Guide

    How to Store and Reheat Slow Cooker Broccoli Cheddar Soup

    Leftovers make my next-day lunch feel like a hug. To keep Slow Cooker Broccoli Cheddar Soup creamy and fresh, store and reheat with care:

    • Room temperature: Up to 2 hours only.
    • Refrigerator: 3–4 days in airtight containers; I love glass jars or snap-lid meal prep containers to keep aromas contained.
    • Freezer: Up to 2 months. Dairy-based soups can separate slightly when thawed, but whisking while reheating brings it back together.
    • Reheat: Warm gently on the stove over low heat, stirring often. Add a splash of milk or broth to loosen. Avoid boiling to protect the cheese.
    Store and Reheat Slow Cooker Broccoli Cheddar Soup
    Store and Reheat Slow Cooker Broccoli Cheddar Soup

    Troubleshooting Common Slow Cooker Broccoli Cheddar Soup Issues

    • Too thin: Simmer a few minutes uncovered or add another teaspoon of cornstarch mixed with cold water. Whisk well.
    • Too thick: Stir in warm broth or milk, a little at a time, until it’s perfect.
    • Grainy cheese: Heat was too high. Take the pot off heat and whisk in a splash of cream; blend briefly for a smoother finish.
    • Under-seasoned: Add salt gradually, plus a dash of Dijon or lemon juice to brighten flavors.
    • Watery texture from frozen broccoli: Use fresh broccoli or thaw and drain well before adding to Slow Cooker Broccoli Cheddar Soup.

    Don’t stress—most texture issues have an easy fix. With a gentle reheat and a quick whisk, your Slow Cooker Broccoli Cheddar Soup will be cozy, creamy, and ready for seconds.

    FAQs

    Can I make Slow Cooker Broccoli Cheddar Soup without heavy cream?

    Yes. Use half-and-half, evaporated milk, or whole milk. For extra body, blend more broccoli or add a touch more cornstarch slurry.

    Do I have to use fresh broccoli for Slow Cooker Broccoli Cheddar Soup?

    Fresh is best for texture. If using frozen, thaw and drain well to avoid thinning the soup. Chop any large pieces.

    Why did my Slow Cooker Broccoli Cheddar Soup turn grainy?

    Cheese can seize if added over high heat or if it’s pre-shredded. Turn off heat and add freshly shredded cheddar in small handfuls, stirring until smooth.

    Can I add protein to Slow Cooker Broccoli Cheddar Soup?

    Absolutely. Stir in cooked shredded chicken or white beans at the end. Warm through gently so the dairy stays silky.

    Conclusion

    Slow Cooker Broccoli Cheddar Soup is the creamy, cozy comfort food that calms a busy day. This easy dinner delivers homemade flavor with minimal effort, and the slow cooker does the heavy lifting while you live your life. With tender broccoli, melty cheddar, and just-right seasoning, it tastes like a café classic made in your own kitchen.

    Keep this Slow Cooker Broccoli Cheddar Soup on repeat for weeknights, game days, and meal prep. When you make it, try a topping bar with chives and extra cheddar for fun. Then tell me how it went—try it at home and tag me! And if you’re on a slow-cooker streak, you’ll love my hearty slow cooker chili mac next.

  • Festive Christmas Bread – Cozy and Irresistibly Easy

    Festive Christmas Bread – Cozy and Irresistibly Easy

    Festive Christmas Bread is my holiday life-saver when the kitchen turns into a merry circus. Last year, I dropped a sack of flour while humming carols, and a puff of white snowed over the counter and my bangs. Festive Christmas Bread doesn’t mind the chaos—it thrives on it. I, Darleen Vance, whisked, kneaded, and laughed while the dough rose like a miracle on a frosty window sill. Two loaves later, my family stopped “quality testing” long enough to set the table. Cozy spice, orange zest, and cranberries do the rest—proof that holiday baking is more about the memories than perfection.

    Pour a mug of something warm (like my Mulled Apple Cider Crockpot) and let’s bake!

    Festive Christmas Bread – Cozy and Irresistibly Easy

    Recipe

    Why You’ll Love Festive Christmas Bread

    What Makes This Festive Christmas Bread So Irresistible

    I once told my sister that Festive Christmas Bread is basically a hug you can slice. She rolled her eyes—until she smelled the butter melting into a warm, orange-scented crumb. Festive Christmas Bread has the cozy flavor of the holidays with the simplicity of a reliable, homemade bake. The dough is forgiving, the mix-ins are flexible, and the glaze makes it look like you tried much harder than you did. And that’s my kind of easy recipe and comfort food.

    • Comforting flavor: cinnamon, cardamom, and orange zest make every slice taste like holiday magic.
    • Homemade ease: a straightforward, homemade method that’s beginner-friendly.
    • Flexible mix-ins: swap cranberries for cherries or pistachios for almonds—your homemade version, your rules.
    • Family-friendly: sturdy enough for toasting, tender enough to eat warm with butter.
    • Great for gifting: Festive Christmas Bread wraps beautifully and stays moist for days.

    Whether you’re planning an easy holiday brunch or want a reliable comfort bake, Festive Christmas Bread delivers that soft crumb and golden crust every time. Ready to bake the loaf everyone will ask for again?

    Festive Christmas Bread is riding the wave of cozy, homemade holiday baking because it looks bakery-level without the fuss. On social feeds, you’ll see glossy orange glaze, vibrant cranberries, and a tender crumb that pulls apart like a dream. People love an easy recipe that feels special, and Festive Christmas Bread hits that sweet spot—quick to prep, gorgeous on a platter, and absolutely delightful with morning coffee. It’s a comfort food classic, but with a bright, modern twist.

    Tips, Tricks & Expert Secrets

    Chef Tips for Perfect Festive Christmas Bread Every Time

    When I taught a holiday baking class, I learned that the best cooking tip is to trust your dough’s feel more than the clock. During one demo, my timer failed, but the dough told me when it was ready—smooth, springy, and slightly tacky. Let that guide you with Festive Christmas Bread and you’ll never go wrong in your homemade version.

    • Warm but not hot liquid: Aim for 105–110°F milk so your yeast stays happy.
    • Windowpane test: After kneading Festive Christmas Bread dough, stretch a small piece thin; if it doesn’t tear, you’ve got a great gluten structure.
    • Proof by size, not minutes: Wait for a true double in volume; room temp and humidity vary.
    • Shiny glaze finish: Whisk orange juice into powdered sugar until it ribbons off the spoon; drizzle over a cooled loaf for that bakery shine.

    Smart Ingredient Swaps & Practical Cooking Advice

    • Vegan: Use plant milk, 1:1 vegan butter, and replace each egg with 3 tablespoons aquafaba. Festive Christmas Bread stays fluffy with this quick fix.
    • Gluten-free: Substitute a high-quality 1:1 gluten-free flour blend and add 1 teaspoon psyllium husk. Expect a slightly denser but delicious easy recipe.
    • Sugar options: Coconut sugar works for a deeper flavor; honey adds moisture—reduce milk by 1 tablespoon if using honey.
    • What not to do: Don’t overmix after adding dried fruit—overmixing can tear the dough and make Festive Christmas Bread dense.

    From prep to bake, keep things simple and gentle. You’ll end up with Festive Christmas Bread that’s tender, aromatic, and crowd-pleasing—no culinary degree required.

    Serving Ideas & Creative Variations for Festive Christmas Bread

    How to Serve Festive Christmas Bread for Maximum Enjoyment

    I once plated Festive Christmas Bread on a wood board with cranberries and sprigs of rosemary, and my guests asked which bakery it came from. Presentation is half the fun—especially with a shiny glaze and jeweled fruit. For effortless serving ideas, lean into the holiday charm.

    • Breakfast tray: Toast slices, add salted butter and orange marmalade, and serve with hot coffee or mulled apple cider.
    • Dessert plate: Warm slices with vanilla ice cream and a dusting of cinnamon sugar.
    • Brunch board: Pair with a soft cheese, honey, and roasted nuts for a cozy spread.

    Flavor Twists and Seasonal Variations

    • Cranberry-Orange Almond: The classic Festive Christmas Bread with zest, cranberries, and sliced almonds.
    • Chocolate-Cherry: Swap cranberries for dried cherries and fold in dark chocolate chunks for a rich flavor variation.
    • Pistachio-Cardamom: Use pistachios and a touch more cardamom for a fragrant seasonal twist.

    Plating suggestion: Slice thick, fan on a platter, and drizzle extra glaze just before serving for glossy photos. If you love sharing bakes online, shoot near a window and add a little powdered sugar “snow.” Leftovers make a gorgeous base for my Overnight French Toast Casserole—a smart second-day treat.

    Storage & Troubleshooting Guide for Festive Christmas Bread

    How to Store and Reheat Festive Christmas Bread

    I’m notorious for baking two loaves of Festive Christmas Bread and hiding one for later. To keep it fresh, storage matters as much as the bake.

    • Room temperature: Keep Festive Christmas Bread in an airtight container or wrapped tightly for up to 3 days.
    • Refrigerator: Wrap well to prevent drying; keeps 5–6 days. Bring to room temp before serving.
    • Freezer: Wrap slices in parchment, then foil or a freezer bag; freeze up to 2 months.
    • Reheat: Oven at 325°F for 8–10 minutes or toast slices lightly. An air fryer works at 300°F for 2–3 minutes.

    Troubleshooting Common Festive Christmas Bread Issues

    • Too dry: You may have overbaked. Next time, pull Festive Christmas Bread when it reaches 195°F internal temperature and tent with foil if browning too fast.
    • Dense crumb: Dough might be under-kneaded or under-proofed. Knead until smooth and elastic and proof until doubled—trust the volume.
    • Gummy center: Oven too hot or loaf too large for the pan. Use a 9×5-inch pan or shape as a round and bake to temp, not just time.
    • Fallen loaf: Over-proofed. Shorten the second rise and bake as soon as it looks puffy and springs back slowly when poked.

    With a few tweaks, your Festive Christmas Bread will stay moist, slice beautifully, and taste like the holidays. Serve alongside a cozy main like my Slow Cooker Sweet Potato Casserole for a festive table that feels generous and warm.

    FAQs

    Can I make Festive Christmas Bread ahead of time?

    Yes. Bake, cool, and wrap tightly for up to 3 days at room temp, or freeze for up to 2 months. Glaze just before serving.

    Can I bake Festive Christmas Bread without a loaf pan?

    Absolutely. Shape into a round, place on a parchment-lined sheet, and bake. Start checking for doneness at 28 minutes.

    How do I keep the fruit from sinking in Festive Christmas Bread?

    Toss dried fruit with 1 teaspoon flour before folding into the dough. It helps suspend mix-ins evenly.

    Can I reduce the sugar in Festive Christmas Bread?

    Yes, cut sugar by up to 25%. Flavor will be less sweet, but the bread will still rise and bake well.

    Conclusion

    Festive Christmas Bread brings everything we love about holiday baking—warm spice, bright citrus, and that irresistible homemade aroma. Whether you slice it warm with butter or turn leftovers into French toast, this easy recipe is comfort food at its finest. The homemade version is simple, adaptable, and perfect for sharing. If you try Festive Christmas Bread, tag me so I can cheer you on and reshare your gorgeous loaf. Ready to bake joy into your kitchen? Pull out the mixing bowl, cue the carols, and let the aroma of Festive Christmas Bread make your home feel like a cozy bakery.

  • Sugar Cookie Cheesecake – Stephanie’s Sweet Treats Cozy, Rich

    Sugar Cookie Cheesecake – Stephanie’s Sweet Treats Cozy, Rich

    Sugar Cookie Cheesecake – Stephanie’s Sweet Treats is my happy-place bake. Last weekend, the mixer cord lassoed the vanilla, my toddler declared the sprinkles “confetti,” and somehow we still pulled off dessert. Sugar Cookie Cheesecake – Stephanie’s Sweet Treats saves the day because it’s creamy, cozy, and surprisingly simple. The sugar cookie crust feels nostalgic, and the velvety filling is pure comfort food. Consider this your new party-ready, homemade showstopper.

    Sugar Cookie Cheesecake

    Recipe

    Why You’ll Love Sugar Cookie Cheesecake – Stephanie’s Sweet Treats

    The first time I served Sugar Cookie Cheesecake – Stephanie’s Sweet Treats to friends, I was still in slippers, hair dusted with flour, laughing at my lopsided parchment. It didn’t matter—one slice in and everyone was quiet in that “oh my goodness” way. This Sugar Cookie Cheesecake – Stephanie’s Sweet Treats blends a buttery sugar cookie crust with a plush, creamy cheesecake center. It’s a homemade dream that tastes like holidays and weekend comfort in every bite.

    • Cozy sugar cookie crust plus silky filling makes a comforting, bakery-style dessert.
    • Simple ingredients you already love—cream cheese, sugar, vanilla—keep it approachable and homemade.
    • Easy recipe steps with reliable baking tips for consistently smooth texture.
    • Make-ahead friendly: bake the day before and chill for stress-free entertaining.
    • Family-friendly, party-ready, and perfect for birthdays, potlucks, or a cozy night in.

    It’s the mashup magic. Sugar Cookie Cheesecake – Stephanie’s Sweet Treats merges a nostalgic cookie with a rich, creamy cheesecake, delivering comfort food vibes with polished presentation. The flavor is classic yet playful; the method is doable even on a busy afternoon. If you love easy, homemade desserts that look impressive without complicated steps, this is the one. Grab your springform pan—dessert bliss is just a bake away.

    Tips, Tricks & Expert Secrets for Sugar Cookie Cheesecake – Stephanie’s Sweet Treats

    I learned this the messy way: I once rushed a cheesecake into the oven with cold cream cheese—lumpy city! Since then, I treat Sugar Cookie Cheesecake – Stephanie’s Sweet Treats the way I treat weekend coffee—unhurried and blissful. Here are the baking tips that never fail me.

    • Room-temperature dairy is nonnegotiable. Softened cream cheese and room-temp eggs create a velvety, lump-free batter.
    • Low and slow mixing. Blend on low speed to avoid adding excess air; this helps prevent cracks.
    • Use a water bath or steam method. Place a pan of hot water on a lower rack to keep the oven humid and the cheesecake ultra creamy.
    • Don’t overbake. Center should jiggle like set Jell-O; it will finish setting as it cools.

    Smart Ingredient Swaps & Practical Cooking Advice

    • Gluten-free swap: Use certified gluten-free sugar cookie dough for the crust.
    • Lighter option: Replace sour cream with Greek yogurt for a tangy, slightly lighter homemade version.
    • Flavor boost: Add a touch of almond extract to the batter for a bakery-style nuance.
    • What not to do: Don’t overmix once eggs are added—overmixing can cause cracks and a tough texture.

    For a quick fix if you do see cracks, top the chilled cheesecake with whipped cream, cookie crumbles, or a simple white chocolate drizzle. With these cooking tips, Sugar Cookie Cheesecake – Stephanie’s Sweet Treats stays creamy and gorgeous every time.

    Serving Ideas & Creative Variations for Sugar Cookie Cheesecake – Stephanie’s Sweet Treats

    I love unveiling Sugar Cookie Cheesecake – Stephanie’s Sweet Treats at the table with a little swirl of whipped cream and a rain of rainbow sprinkles—cue the oohs and aahs. For cozy gatherings, slice generous wedges and offer a few plating suggestions so everyone can customize.

    • Serve with warm berry compote or fresh strawberries for a bright, tangy balance.
    • Pair with coffee, black tea, or a vanilla chai latte to complement the creamy filling.
    • Holiday-ready pairing: sip alongside Mulled Apple Cider (Crockpot) for a seasonal twist.

    Flavor Twists and Seasonal Variations

    • Birthday Cake Cheesecake: Fold in rainbow sprinkles and a hint of almond extract; finish with confetti on top.
    • Strawberry Shortcake Style: Swirl strawberry jam into the batter and top with macerated berries.
    • Holiday Peppermint: Add crushed peppermint candies to the crust and a white chocolate drizzle on top.

    For content creators, think clean slices, overhead shots, and a few cookie crumbles for texture. Bright natural light and a simple white plate make Sugar Cookie Cheesecake – Stephanie’s Sweet Treats pop on Pinterest and Instagram. Looking for a brunch pairing? Try my crowd-favorite Overnight French Toast Casserole—it’s a make-ahead win. For a cozy dinner before dessert, set and forget Slow Cooker Mac & Cheese and finish the night with cheesecake bliss.

    Storage & Troubleshooting Guide for Sugar Cookie Cheesecake – Stephanie’s Sweet Treats

    Leftovers of Sugar Cookie Cheesecake – Stephanie’s Sweet Treats rarely last, but when they do, here’s how I keep them dreamy. Once the cheesecake is fully cooled and chilled, remove the springform ring and store slices neatly.

    • Room temperature: Keep out no longer than 2 hours.
    • Refrigerator: Store covered in an airtight container for 4–5 days to keep fresh.
    • Freezer: Wrap slices in plastic, then foil, and freeze up to 2 months. Thaw overnight in the fridge.
    • Reheating: Cheesecake is best served cold or lightly cool. If you prefer softer texture, let a slice sit at room temp for 15–20 minutes—no oven needed.
    • Cracks on top: Usually from overbaking or rapid cooling. Fix by chilling fully, then covering with whipped cream or a cookie crumble topper.
    • Watery crust: The crust wasn’t set or got wet. Par-bake the crust and wrap the pan tightly with foil if using a water bath.
    • Dense texture: Overmixed eggs introduce air and toughen the crumb. Mix on low and stop once combined.
    • Too soft: Not chilled long enough. Sugar Cookie Cheesecake – Stephanie’s Sweet Treats needs at least 4 hours (preferably overnight) to set.

    With a few smart storage tips and gentle fixes, Sugar Cookie Cheesecake – Stephanie’s Sweet Treats stays smooth, creamy, and party-perfect. You’ve got this!

    FAQs

    Do I need a water bath for Sugar Cookie Cheesecake – Stephanie’s Sweet Treats?

    No, but a steam method (a pan of hot water on a lower rack) helps prevent cracks and keeps the cheesecake extra creamy.

    Can I use store-bought sugar cookie dough for the crust?

    Yes, store-bought dough works beautifully. Press it evenly, par-bake, and cool slightly before adding the batter.

    How long should Sugar Cookie Cheesecake – Stephanie’s Sweet Treats chill?

    At least 4 hours, though overnight produces the cleanest slices and best texture.

    Can I make it gluten-free?

    Use certified gluten-free sugar cookie dough for the crust and verify all other ingredients are gluten-free.

    Conclusion

    Sugar Cookie Cheesecake – Stephanie’s Sweet Treats is the cozy, rich dessert that turns simple ingredients into bakery-style magic. With a buttery sugar cookie crust, creamy filling, and make-ahead flexibility, it’s a homemade comfort food classic you’ll crave all year. Use the baking tips, storage advice, and creative serving ideas above to keep every slice smooth and crowd-pleasing. Whether you’re hosting a holiday, planning a birthday, or treating yourself after dinner, this easy recipe delivers. Try it at home and tag me—I can’t wait to see your Sugar Cookie Cheesecake – Stephanie’s Sweet Treats shining on your table.

  • Classic Christmas Toffee – Cozy, Irresistible and Easy

    Classic Christmas Toffee – Cozy, Irresistible and Easy

    Classic Christmas Toffee is the candy I make when the tree lights are twinkling and the kitchen timer is playing backup singer. Last year, I, Darleen Vance, dropped a spatula mid-stir and my dog tried to claim it like a holiday trophy. Classic Christmas Toffee still turned out glossy, crisp, and chocolate-kissed, proving chaos cannot defeat caramel magic. If I can pull it off with carols blaring and cocoa on the stove, so can you.

    Classic Christmas Toffee

    Recipe

    WHY YOU’LL LOVE THIS RECIPE

    What Makes This Classic Christmas Toffee So Irresistible

    I first learned to trust Classic Christmas Toffee on a snow day when my mixer quit and my patience followed. Classic Christmas Toffee doesn’t need fancy gear—just a sturdy pot, a candy thermometer, and a little attention. The buttery snap, the glossy melt of chocolate, and the sprinkle of toasty nuts make this homemade favorite pure holiday comfort food. And yes, it’s an easy recipe you can master even if your kitchen sometimes feels like a sleigh ride on ice.

    • Buttery crunch meets silky chocolate—classic, cozy, and totally homemade.
    • Simple ingredients you likely have: butter, sugar, chocolate, and nuts.
    • Quick prep and a fast stovetop cook—then it cools while you sip cocoa.
    • Perfect for gifting; packs beautifully in tins and cookie boxes.
    • Family-friendly to make and share; a holiday candy that disappears fast.

    With Classic Christmas Toffee, you get big flavor, quick prep, and festive charm in every shard. Ready to stir up a batch? Let’s slide straight into the recipe card after a few smart pointers.

    Holiday bakers love a homemade treat that looks boutique but takes minimal effort. Classic Christmas Toffee checks all the boxes: a glossy chocolate cap, a crisp, golden base, and that satisfying snap that says you nailed it. Pinterest boards adore its giftable style, and your crew will rave about the buttery aroma filling the house. The internet agrees—this is the nostalgic, easy candy that returns to center stage every December.

    TIPS, TRICKS & EXPERT SECRETS

    Chef Tips for Perfect Classic Christmas Toffee Every Time

    During my first candy class, I tried to multitask—bad idea. I learned fast that Classic Christmas Toffee rewards focus and a few expert habits. Consider these cooking tips your quick fix to success with this easy recipe and homemade version.

    • Use a heavy-bottomed saucepan: Even heat prevents scorching and graininess.
    • Stir gently at the start, then minimally: Once the sugar dissolves, over-stirring can invite crystallization.
    • Clip on a candy thermometer: Pull the toffee at 300°F (hard crack) for that signature crisp snap.
    • Warm the pan or baking sheet: A slightly warmed tray helps the toffee spread smoothly.
    • Let chocolate sit a minute: Sprinkle chips on hot toffee, wait 2 minutes, then spread for a shiny, even layer.

    Smart Ingredient Swaps & Practical Cooking Advice

    • Dairy-free/vegan: Use a quality plant-based butter with at least 80% fat and dairy-free chocolate. Texture stays close to classic.
    • Nut-free: Skip nuts and finish with crushed pretzels or pumpkin seeds. Still festive, still crunchy.
    • Salt balance: Fine sea salt in the base plus a pinch of flaky salt on top keeps the sweetness in check.
    • What not to do: Don’t walk away once the mixture hits a vigorous boil—Classic Christmas Toffee can jump from perfect to burned in seconds.

    Keep it simple, stay present at the stove, and your Classic Christmas Toffee will set beautifully, taste rich, and look spectacular.

    SERVING IDEAS & CREATIVE VARIATIONS

    How to Serve Classic Christmas Toffee for Maximum Enjoyment

    When guests pop in, I pile Classic Christmas Toffee on a cake stand, tuck in a few sprigs of rosemary, and watch eyes light up. Presentation is as easy as layering shards in a glass jar with parchment. For pairing, try a warm beverage and a cozy corner—your holiday hosting, simplified.

    • Pairings: Serve with coffee, hot cocoa, or a mug of Mulled Apple Cider (Crockpot) for a fragrant, festive spread.
    • Gift it: Layer toffee between parchment in tins and add a bow. Include a hand-written label with ingredients.
    • Brunch board: Offer Classic Christmas Toffee alongside fruit, cheeses, and Overnight French Toast Casserole for a sweet-salty holiday table.
    Serve Classic Christmas Toffee

    Flavor Twists and Seasonal Variations

    • Dark Chocolate Sea Salt: Use 70% dark chocolate, finish with flaky salt for a bold, modern bite.
    • Peppermint Bark Toffee: Swap half the nuts for crushed candy canes and white chocolate drizzle for a seasonal twist.
    • Espresso Almond: Stir 1 teaspoon instant espresso into the chocolate before spreading; top with toasted almonds.
    • Pecan Pie Spice: Add 1/2 teaspoon cinnamon and a pinch of nutmeg to the base; finish with toasted pecans.

    Styling tip: Photograph shards on crinkled parchment with a dusting of powdered sugar and warm bokeh lights behind. Tag your shareable plate and link your method for friends—this is the kind of homemade joy that trends quickly. For more cozy inspo, browse Recipes Darleen for holiday-friendly comfort dishes.

    STORAGE & TROUBLESHOOTING GUIDE

    How to Store and Reheat Classic Christmas Toffee

    One year I hid my stash on the top shelf, but my family heard the telltale snap of Classic Christmas Toffee from two rooms away. Here’s how to keep yours fresh and ready.

    • Room temperature: Store Classic Christmas Toffee up to 2 weeks in an airtight tin with parchment between layers.
    • Refrigerator: Keeps 3 weeks, good for warm climates. Let sit 10 minutes before serving to soften the chocolate’s chill.
    • Freezer: Up to 2–3 months. Wrap tightly in parchment and place in a freezer bag. Thaw in the fridge, then room temp 10 minutes.
    • Reheat? Not needed. If chocolate dulls, quickly chill 5 minutes to re-set the sheen. Toffee itself should stay crisp without reheating.

    Troubleshooting Common Classic Christmas Toffee Issues

    • Grainy or cloudy: Sugar likely crystallized. Next time, avoid over-stirring after the sugar dissolves and use a clean pan and spoon.
    • Separated butter: Heat was too high or stirring was too vigorous. Add a tablespoon of hot water and whisk off the heat to bring it back together, then continue cooking.
    • Too soft or sticky: Mixture didn’t reach hard crack. Cook to 300°F and verify your thermometer’s accuracy.
    • Burnt notes: Heat was too high near the end. Reduce heat slightly as you approach 290°F and watch closely.
    • Chocolate won’t melt: Wait 1–2 minutes after sprinkling chips on hot toffee. If needed, tent loosely with foil to trap warmth.

    With these storage tips and quick fixes, your Classic Christmas Toffee will keep its snap, shine, and holiday magic. You’ve got this—and I’m cheering you on.

    FAQs

    Do I need a candy thermometer?

    It’s the easiest path to repeatable results. For Classic Christmas Toffee, hit 300°F for that perfect snap.

    Can I make Classic Christmas Toffee without nuts?

    Yes. Skip nuts or use seeds, pretzels, or crushed cookies. It’s still crisp, buttery, and delicious.

    Why did my Classic Christmas Toffee separate?

    Usually heat that’s too high or over-stirring. Whisk in a tablespoon of hot water off heat to re-emulsify, then continue.

    How far ahead can I make Classic Christmas Toffee?

    Make it 1–2 weeks in advance and store airtight. For longer, freeze up to 3 months.

    Conclusion

    Classic Christmas Toffee is that rare homemade treat that looks boutique but feels like a warm hug. With simple ingredients, a few smart cooking tips, and a steady 300°F, you’ll get buttery crunch, glossy chocolate, and holiday sparkle in every bite. Whether you’re gifting tins, building cookie boxes, or sneaking a shard with coffee, Classic Christmas Toffee brings classic comfort and reliable results. Ready to stir up some cheer? Try it at home and tag me—your shiny, snappy toffee deserves a spotlight!

  • Cowboy Stew (Slow Cooker) – Cozy and Irresistible

    Cowboy Stew (Slow Cooker) – Cozy and Irresistible

    Cowboy Stew (Slow Cooker) is my weeknight hero and weekend crowd-pleaser all in one. Last Tuesday, the dog chased a potato across the kitchen, my timer was beeping, and I still managed to get Cowboy Stew (Slow Cooker) simmering by 9 a.m. While the house smelled like a campfire supper, I tackled the chaos. By dinner, it was hearty, bold, and exactly the kind of comfort food that makes everyone linger at the table. Darleen Vance, kitchen ringmaster, signing off—apron slightly splattered and happy about it.

    Cowboy Stew (Slow Cooker)

    Recipe

    WHY YOU’LL LOVE THIS RECIPE

    What Makes This Cowboy Stew (Slow Cooker) So Irresistible

    I first made Cowboy Stew (Slow Cooker) on a day when my to-do list was longer than my patience. I tossed everything into the crock, forgot about it, and came back to a homemade dinner that tasted like I hovered over a stove all day. Cowboy Stew (Slow Cooker) is the set-it-and-savor kind of comfort food that hugs you back, and my family now expects it on chilly nights, game days, and whenever a cozy, easy dinner is needed.

    • Quick prep, big payoff: a few minutes of browning for deep, bold flavor.
    • Comfort food classic: rich broth, hearty potatoes, beans, and smoky sausage.
    • Simple pantry staples: everything is easy to find and budget-friendly.
    • Family-friendly and crowd-ready: perfect for potlucks and game-day spreads.
    • One-pot ease: minimal dishes and maximum flavor for a true one-pan meal feel.

    When you crave a reliable, homemade, easy dinner with real-deal flavor, this Cowboy Stew (Slow Cooker) will be your new go-to. Ready to cook?

    Across social media and cozy weeknight kitchens, the buzz is all about big flavor with minimal effort. This Cowboy Stew (Slow Cooker) nails that promise. It tastes like an all-day simmer, thanks to a slow, gentle cook that lets spices bloom and the meat turn ultra-tender. It’s the comfort food you want with the ease you need, especially when time is tight and bellies are hungry.

    If you love crockpot classics, try my Slow Cooker Cabbage & Sausage next, or warm up with a bowl of Creamy Tortellini Soup. For a game-night mash-up, don’t miss Slow Cooker Chili Mac.

    TIPS, TRICKS & EXPERT SECRETS

    Chef Tips for Perfect Cowboy Stew (Slow Cooker) Every Time

    True story: I once skipped browning the meat for Cowboy Stew (Slow Cooker) to save five minutes. The stew was fine—but not fireworks. That tiny bit of browning is a cooking tip that transforms this easy recipe into a restaurant-worthy, homemade version.

    • Brown the meats well: caramelized bits equal deep, savory flavor.
    • Layer your aromatics: sauté onion, pepper, and garlic to build a richer base.
    • Mind the liquid: potatoes and beans thicken as they cook; add broth as needed for your ideal texture.
    • Finish with acidity: a splash of Worcestershire or a squeeze of lemon at the end brightens everything.

    Smart Ingredient Swaps & Practical Cooking Advice

    • Diet-friendly tweaks: use turkey sausage and extra-lean beef for a lighter bowl; for gluten-free, choose certified GF broth and Worcestershire.
    • Vegan idea: swap meats for plant-based crumbles and smoked paprika; use veggie broth and add mushrooms for umami.
    • Thickness control: for thicker stew, uncover during the last 30 minutes or mash a few potato chunks. For looser stew, stir in warm broth.
    • What not to do: don’t add uncooked rice or pasta directly—this can soak up liquid unpredictably and turn mushy.

    These quick fixes and cooking tips keep Cowboy Stew (Slow Cooker) consistent every time, without fuss.

    SERVING IDEAS & CREATIVE VARIATIONS

    How to Serve Cowboy Stew (Slow Cooker) for Maximum Enjoyment

    When friends pop in, I ladle Cowboy Stew (Slow Cooker) into warm bowls, set out toppings, and it feels like a cozy chuckwagon buffet. For easy serving ideas, I love:

    • Buttery cornbread or warm biscuits for dunking.
    • A crisp green salad with tangy vinaigrette to balance the richness.
    • Cold lager, sweet tea, or a smoky bourbon cocktail to complement the bold flavors.

    Plating suggestion: serve in shallow bowls so the colors of corn, beans, and tomatoes shine. For social media, add a swirl of sour cream, sprinkle with scallions, and shoot near a window for soft light—Cowboy Stew (Slow Cooker) photographs beautifully with a rustic napkin or wood board.

    Flavor Twists and Seasonal Variations

    • Southwest Kick: add chipotle in adobo and a handful of black beans; finish with cilantro and lime.
    • Autumn Harvest: fold in diced sweet potatoes and carrots; garnish with sage for a seasonal twist.
    • Cheeseburger Cowboy: stir in shredded cheddar and a spoon of mustard at the end for a playful, Pinterest-inspired variation.

    For more comfort-forward slow cooker inspiration that pairs well with these serving ideas, peek at my 3-Ingredient Orange Chicken and crowd-pleasing Hawaiian Meatballs.

    STORAGE & TROUBLESHOOTING GUIDE

    How to Store and Reheat Cowboy Stew (Slow Cooker)

    Leftovers of Cowboy Stew (Slow Cooker) are my future-self’s love letter. I portion it out right after dinner so lunches are grab-and-go.

    • Room temperature: keep out no longer than 2 hours.
    • Fridge: store in airtight containers up to 4 days; the flavors get even better.
    • Freezer: ladle into freezer-safe containers or bags (leave headspace). Freeze up to 3 months.
    • Reheat: warm gently on the stove over medium-low, stirring with a splash of broth or water. Microwave in 60–90 second bursts, stirring between intervals. Slow cooker on Warm works for gatherings.

    Troubleshooting Common Cowboy Stew (Slow Cooker) Issues

    • Too thick: loosen with warm beef broth, a little at a time, until the texture is just right.
    • Too thin or watery: uncover for the last 30 minutes, mash a few potatoes, or stir in 1–2 teaspoons of cornstarch slurry; simmer to thicken.
    • Under-seasoned: add a pinch of salt, a dash of Worcestershire, and a squeeze of lemon for brightness.
    • Too salty: balance with additional unsalted broth and a small spoon of tomato paste; simmer 10 minutes.
    • Greasy top: skim with a spoon or lay a paper towel briefly on the surface to absorb excess fat.

    With these storage tips and quick fixes, your Cowboy Stew (Slow Cooker) will keep fresh, reheat beautifully, and stay comfortingly consistent. You’ve got this—Darleen-approved.

    FAQs

    Can I make Cowboy Stew (Slow Cooker) the night before?

    Yes. Brown the meats, chop the veggies, and combine everything (except potatoes) in the insert. Refrigerate up to 24 hours. Add potatoes right before cooking for best texture.

    Can I skip browning the meat?

    You can, but browning adds deep, savory flavor. If you’re in a hurry, at least brown the sausage for smoky notes that define Cowboy Stew (Slow Cooker).

    How do I make it spicier?

    Use hot Rotel, add diced jalapeños, or stir in chipotle in adobo. Taste at the end and finish with your favorite hot sauce.

    What potatoes work best?

    Russets give a velvety body as they soften, while Yukon Golds hold their shape. Either works for Cowboy Stew (Slow Cooker); choose based on your preferred texture.

    Conclusion

    Cowboy Stew (Slow Cooker) brings big, homemade comfort with minimal effort—hearty meat, tender potatoes, and bold spices that meld into a satisfying, easy dinner. This one-pot, slow cooker classic proves that comfort food can be weeknight-friendly and party-ready. Keep this recipe in your rotation when you want a family-friendly, freezer-friendly bowl that tastes like a day on the ranch without the work. Try Cowboy Stew (Slow Cooker) at home, share your flavor variation, and tag me so I can cheer on your cozy creation. I can’t wait to see your bowls of comfort!