Category: Dinner

Easy, tasty dinner ideas for busy nights. Simple recipes, quick prep, and family-friendly meals you’ll make again and again.

  • Lemon Herb Chicken and Rice – Easy and Irresistibly Cozy

    Lemon Herb Chicken and Rice – Easy and Irresistibly Cozy

    Lemon Herb Chicken and Rice is my weeknight hero, and it has saved more chaotic dinners than I can count. One Tuesday, my timer competed with a ringing doorbell, a wobbly stack of lunchboxes, and my toddler’s “help” measuring pepper. Lemon Herb Chicken and Rice still turned out bright, cozy, and completely devoured. I’m Darleen Vance, and this one-pan meal keeps my kitchen sane when the day goes sideways. It’s the kind of homemade, easy dinner that tastes like a hug in a bowl and feels restaurant-worthy without the fuss.

    Lemon Herb Chicken and Rice

    Recipe

    WHY YOU’LL LOVE THIS RECIPE

    What Makes This Lemon Herb Chicken and Rice So Irresistible

    Lemon Herb Chicken and Rice has a loyal spot in my rotation because it’s a one-pan meal that tastes like you’ve been fussing all afternoon. The first time I served Lemon Herb Chicken and Rice to my picky eaters, I watched the lemony steam billow up like a cozy cloud and they actually paused their show to ask, “Is dinner ready now?” That’s the magic. You get homemade comfort food, easy dinner energy, and bright, balanced flavor in every bite. And because Lemon Herb Chicken and Rice builds flavor right in the pan, your kitchen smells like a little bistro—without the sink full of dishes.

    • Quick prep: Pantry-friendly ingredients and simple steps for a true weeknight win.
    • One-pan ease: Sear, simmer, and steam in the same skillet for minimal cleanup.
    • Comforting yet fresh: Cozy rice meets sunny lemon and fragrant herbs.
    • Family-friendly: Mild, balanced flavors that please kids and grown-ups.
    • Reliable results: Fluffy rice and juicy chicken when you follow the timing.

    Between social feeds and busy schedules, everyone wants an easy dinner that still feels special. Lemon Herb Chicken and Rice checks every box: homemade, quick fix, and full-on comfort food flavor. It’s the kind of dish you can plate casually for the family or style for a pretty photo. I love that this easy recipe lets the lemon and herbs do the heavy lifting, so the chicken stays juicy, the rice is fluffy, and the vibe is restaurant quality. When a craving hits for something bright and cozy, Lemon Herb Chicken and Rice is your weeknight MVP. Ready to cook? Let’s get to the recipe card next.

    TIPS, TRICKS & EXPERT SECRETS

    Chef Tips for Perfect Lemon Herb Chicken and Rice Every Time

    During a cooking class, I once rushed the rice and learned the hard way that patience equals perfection. With Lemon Herb Chicken and Rice, the steam time makes the grains tender and the chicken extra juicy. Keep these cooking tips close for an easy recipe that never fails.

    • Toast the rice: A quick toast in oil with herbs adds a nutty note and better texture to Lemon Herb Chicken and Rice.
    • Use the right pan: A heavy skillet or Dutch oven distributes heat evenly, preventing hotspots and undercooked pockets.
    • Simmer gently: Once covered, keep the heat low so the rice in Lemon Herb Chicken and Rice stays fluffy and doesn’t scorch.
    • Rest covered: After cooking, let Lemon Herb Chicken and Rice sit 5–10 minutes to finish steaming—this is your fluff-and-juicy insurance.

    Smart Ingredient Swaps & Practical Cooking Advice

    • Chicken choice: Thighs are forgiving and stay moist. If using breasts, don’t overcook during the sear.
    • Rice swap: For brown rice, add 1/2 cup extra broth and cook 35–40 minutes; keep it gently simmering.
    • Dietary tweaks: Use dairy-free butter or skip it for a lighter homemade version. Ensure broth is gluten-free for a GF-friendly Lemon Herb Chicken and Rice.
    • Flavor bump: Finish with extra lemon zest and a drizzle of olive oil for a fresh, glossy look.
    • What not to do: Don’t lift the lid too early. Opening the pan vents steam and can leave Lemon Herb Chicken and Rice unevenly cooked.

    These cooking tips keep your Lemon Herb Chicken and Rice consistent, flavorful, and camera-ready every single time.

    SERVING IDEAS & CREATIVE VARIATIONS

    How to Serve Lemon Herb Chicken and Rice for Maximum Enjoyment

    When I serve Lemon Herb Chicken and Rice to friends, I pile it in a wide bowl, add lemon slices, and rain down fresh herbs. It looks like a bistro plate with none of the stress. For easy serving ideas and plating suggestions, lean into color and contrast.

    • Side pairings: Add a crisp green salad or roasted asparagus to balance the cozy rice.
    • Saucy upgrade: Spoon a quick yogurt-garlic sauce over Lemon Herb Chicken and Rice for cool, creamy contrast.
    • Beverage match: A light white wine or sparkling water with citrus slices keeps the flavors bright.

    Planning a comfort-forward spread? Pair it with a warm bowl of White Lasagna Soup (Crockpot) or the cozy classic Slow Cooker Broccoli Cheddar Soup. For dessert, the golden crunch of Baked Apple Fritters is pure joy with the lemony finish.

    Flavor Twists and Seasonal Variations

    • Spring twist: Stir in peas, tender spinach, and extra lemon zest into Lemon Herb Chicken and Rice for a fresh, green pop.
    • Summer garden: Add cherry tomatoes and basil; finish with a drizzle of good olive oil.
    • Fall comfort: Use thyme and rosemary, and finish with a pat of butter for deeper, cozy notes.
    • Spicy kick: Sprinkle red pepper flakes or drizzle chili oil to wake up the lemon.

    These flavor variations keep Lemon Herb Chicken and Rice exciting, seasonal, and share-worthy—perfect for social media or a pretty weeknight plate.

    Lemon Herb Chicken and Rice
    Lemon Herb Chicken and Rice

    STORAGE & TROUBLESHOOTING GUIDE

    How to Store and Reheat Lemon Herb Chicken and Rice

    Leftover Lemon Herb Chicken and Rice is a gift to your future self. I pack it in lunch-ready containers right after dinner—because if I don’t, someone raids the pan for a midnight snack. To keep it fresh, follow this storage advice:

    • Room temperature: Don’t leave Lemon Herb Chicken and Rice out for more than 2 hours.
    • Fridge: Store airtight up to 4 days. Press plastic wrap onto the rice surface to keep moisture in.
    • Freezer: Freeze up to 2 months in freezer-safe containers. Thaw overnight in the fridge.
    • Reheat: Add a splash of broth or water. Warm in a covered skillet over medium-low, or microwave covered in short bursts, stirring once. Oven method: 300°F, 10–12 minutes, covered, until hot.

    Troubleshooting Common Lemon Herb Chicken and Rice Issues

    • Too dry: Stir in a few tablespoons of warm broth and cover briefly to steam. Finish with a little butter or olive oil.
    • Watery rice: Simmer gently, covered, a few more minutes; then rest off heat so the grains set.
    • Undercooked rice: Add 1/4 cup hot broth, cover, and cook a few more minutes on low.
    • Overcooked chicken: Slice and fold it into the rice with a squeeze of lemon to restore juiciness.
    • Bland flavor: Boost with extra lemon zest, a pinch of salt, and fresh parsley to brighten.

    With these quick fixes, your Lemon Herb Chicken and Rice will keep its texture, stay flavorful, and feel like fresh comfort food even on day two.

    FAQs

    Can I use brown rice?

    Yes. Add 1/2 cup extra broth and cook 35–40 minutes on low. Rest covered 10 minutes for fluffy grains.

    Can I make Lemon Herb Chicken and Rice in the oven?

    Absolutely. After searing and adding liquid, cover and bake at 375°F for about 22 minutes, then rest 5–10 minutes.

    Thighs or breasts—what’s best?

    Thighs are juicier and more forgiving. Breasts work too—just avoid overcooking during the sear.

    Is this recipe gluten-free?

    It can be. Use certified gluten-free chicken broth and check spices. Skip butter or use dairy-free for a lighter finish.

    Conclusion

    Lemon Herb Chicken and Rice is the kind of easy dinner that anchors a busy week—bright lemon, tender herbs, juicy chicken, and fluffy rice in one pan. When you want homemade comfort food with a fresh twist, Lemon Herb Chicken and Rice delivers a cozy, satisfying bowl that tastes like you planned ahead. Whether you’re feeding picky eaters or plating for guests, Lemon Herb Chicken and Rice is reliable, flavorful, and endlessly adaptable with seasonal swaps. Keep this one-pan meal in your rotation, trust the timing, and let the lemon do the heavy lifting. I’m cheering you on from my slightly messy kitchen—try it at home and tag me so I can celebrate your delicious win!

  • Salted Caramel Apple Bars – Irresistibly Cozy & Easy

    Salted Caramel Apple Bars – Irresistibly Cozy & Easy

    Salted Caramel Apple Bars are my official “fall has arrived” signal. Last week, I pulled these Salted Caramel Apple Bars from the oven just as my timer went off…and so did my smoke alarm because I set the parchment on the stovetop. Classic Darleen move. My kids came running, my dog barked, and we all ended up laughing around the counter with warm bars and melty caramel. This recipe is forgiving, wildly delicious, and perfect when you want homemade comfort without fussy steps. If you love cozy desserts, bookmark this and also peek at my Baked Apple Fritters or the autumn favorite Spiced Apple Cider Donut Loaf.

    Salted Caramel Apple Bars are my official “fall has arrived” signal. Last week, I pulled these Salted Caramel Apple Bar

    Recipe

    Why You’ll Love These Salted Caramel Apple Bars

    What Makes This Salted Caramel Apple Bars So Irresistible

    I made these Salted Caramel Apple Bars on a Tuesday when the laundry was still in baskets and dinner was a “we’ll figure it out later” situation. That’s the magic of Salted Caramel Apple Bars: they reward the real-life chaos with gooey comfort food and homemade goodness. The buttery shortbread base, tender cinnamon apples, and golden oat crumble meet a rich, salted caramel drizzle that tastes like a warm hug. Salted Caramel Apple Bars are the kind of easy recipe you bake once and then crave every weekend. And yes, they’re basically a one-pan dessert that makes your whole home smell like fall.

    • Comfort-first flavor: buttery crust, juicy apples, and lush caramel in every bite.
    • Simple, homemade steps: no mixer needed; this easy recipe comes together fast.
    • Family-friendly treat: Salted Caramel Apple Bars slice cleanly and travel well for school or potlucks.
    • Flexible and forgiving: works with a mix of tart and sweet apples; store-bought caramel is a quick fix.
    • One-pan payoff: bake in a 9×13 and slice into bars for effortless serving.

    If your heart loves cozy desserts, Salted Caramel Apple Bars are your new signature bake. Let’s jump into the recipe details so you can get these in the oven.

    Salted Caramel Apple Bars are trending because they’re the perfect bridge between weeknight ease and bakery-level flavor. Home bakers love that this homemade version tastes luxurious without complicated steps. The salted caramel brings a bold, modern twist to classic apple bars, and the oat crumb adds a crispy, nostalgic finish. In short, Salted Caramel Apple Bars deliver cozy comfort, an easy dessert bar format, and serious fall flair—no special equipment required.

    Tips, Tricks & Expert Secrets for Salted Caramel Apple Bars

    Chef Tips for Perfect Salted Caramel Apple Bars Every Time

    During a baking class, I once overcooked caramel while answering a question about pie crust. Lesson learned: with caramel, attention is the ingredient. These cooking tips keep Salted Caramel Apple Bars foolproof, bakery-beautiful, and reliably delicious.

    • Dice apples evenly: 1/2-inch cubes soften at the same rate, keeping texture uniform in your Salted Caramel Apple Bars.
    • Parbake the crust: 10 minutes gives a sturdy base so the bars don’t turn soggy under the filling.
    • Warm the cream: for homemade caramel, warm cream prevents seizing and promotes a silky finish.
    • Crumble clumps = texture: squeeze the oat topping in your palm to form big, crunchy bits that bake up beautifully.

    Smart Ingredient Swaps & Practical Cooking Advice

    • Gluten-free: use a 1:1 gluten-free flour blend for both crust and topping; choose certified gluten-free oats.
    • Vegan: swap butter for refined coconut oil in crust/topping; make caramel with coconut cream and vegan butter.
    • Shortcut caramel: stir sea salt into thick store-bought caramel for a quick homemade version vibe.
    • What not to do: don’t overmix the crust—stop once it’s evenly moistened. Overworking leads to a tough base.
    • Pan wisdom: a metal 9×13 conducts heat best. Glass runs hotter; watch the last 5 minutes of bake time.

    With these easy recipe pointers and a reliable cooking tip or two, your Salted Caramel Apple Bars will emerge golden, gooey, and picture-perfect—every time. For more cozy inspiration, nibble your way through my Gingerbread Cheesecake Cookies.

    Serving Ideas & Creative Variations

    How to Serve Salted Caramel Apple Bars for Maximum Enjoyment

    When I plated Salted Caramel Apple Bars for friends last weekend, I did the drizzle-at-the-table trick. Heads turned, forks paused, and everyone leaned in. That glossy ribbon of salted caramel makes these bars feel like a bakery dessert at home. If you’re sharing online or styling for photos, keep a little jar of caramel nearby—clean drops on the plate and a sprinkle of flaky salt read beautifully in pictures.

    • Serve warm with vanilla ice cream and an extra caramel drizzle for classic comfort food bliss.
    • Pair with hot apple cider or a cinnamon latte to echo the cozy spice notes.
    • For a party platter, cut Salted Caramel Apple Bars into bite-size squares and dust lightly with powdered sugar.
    How to Serve Salted Caramel Apple Bars for Maximum Enjoyment
    How to Serve Salted Caramel Apple Bars for Maximum Enjoyment

    Flavor Twists and Seasonal Variations

    • Maple-Pecan: stir 1/2 cup chopped pecans into the crumble and add 1 tablespoon maple syrup to the filling.
    • Bourbon Caramel: add 1–2 teaspoons bourbon to the caramel off heat for a grown-up, flavor-packed variation.
    • Harvest Cran-Apple: fold 1/2 cup fresh cranberries into the apples for a tart, jewel-toned seasonal twist.

    Plating suggestion: slice with a hot knife for super-clean edges. Stack two bars, offset slightly, and drizzle in a zig-zag for a cafe-style finish. If you love seasonal bakes, you might also enjoy my festive Frosted Christmas Brownies—they pair wonderfully on a dessert board with these Salted Caramel Apple Bars.

    Storage & Troubleshooting Guide

    How to Store and Reheat Salted Caramel Apple Bars

    Confession: I make two pans and stash one. Future Darleen is always grateful. Here’s how to store Salted Caramel Apple Bars so they stay fresh and fabulous, plus how to reheat without losing that tender crumb.

    • Room temperature: keep covered for up to 2 days. For best texture, place parchment between stacked bars.
    • Fridge: store in an airtight container 4–5 days to keep the apples crisp-tender and the caramel set.
    • Freezer: wrap individual bars tightly, then place in a freezer bag for up to 2–3 months. Thaw overnight in the fridge.
    • Reheat: warm in a 300°F (150°C) oven for 8–10 minutes, or in an air fryer at 300°F for 3–4 minutes. Avoid the microwave for longer than 10–15 seconds—it can make the crumble soggy.

    Troubleshooting Common Salted Caramel Apple Bars Issues

    • Too watery: add another teaspoon of flour to the apple mixture next time; ensure apples are patted dry after peeling.
    • Soggy base: parbake the crust for the full 10 minutes and cool just briefly before topping.
    • Overbrowned top: tent loosely with foil in the last 10 minutes to protect the crumble from overcooking.
    • Crystallized caramel: add a tablespoon of water and gently reheat to dissolve crystals; avoid stirring before sugar melts.
    • Dry texture: pull bars when you see bubbling at the edges—the apple juices and caramel should be lively, not dull.

    With these storage tips and quick fixes, your Salted Caramel Apple Bars will keep their bakery-fresh magic. You’ve got this—and your kitchen will smell amazing.

    FAQs

    Can I make Salted Caramel Apple Bars ahead?

    Yes. Bake, cool, and refrigerate up to 24 hours. Drizzle with caramel just before serving for the freshest look.

    What apples are best for Salted Caramel Apple Bars?

    A mix of Granny Smith (tart) and Honeycrisp (sweet) balances flavor and keeps texture from turning mushy.

    Can I use store-bought caramel?

    Absolutely. Choose a thick sauce, warm slightly, and stir in 1/2 teaspoon sea salt for that signature salted finish.

    How do I get clean slices?

    Chill the pan for 30 minutes, then cut with a hot, dry knife, wiping the blade between cuts.

    Conclusion

    Warm, buttery, and wonderfully shareable, these Salted Caramel Apple Bars are comfort food in dessert-bar form. The homemade base bakes crisp, the cinnamon apples turn tender, and the caramel brings that irresistible, cozy finish. If you love easy dessert bars that taste bakery-fresh, this homemade recipe will be your new fall favorite. Try Salted Caramel Apple Bars at home and tag me so I can cheer on your bake! And if you’re building an autumn dessert board, add my Baked Apple Fritters or Spiced Apple Cider Donut Loaf for extra cozy vibes.

  • One Bowl Peppermint Brownies – Irresistible and Festive

    One Bowl Peppermint Brownies – Irresistible and Festive

    One Bowl Peppermint Brownies are my winter sanity saver. Last December, I was filming while the dog chased a candy cane under the oven and my timer sang backup vocals. I needed something fast, forgiving, and delicious—so One Bowl Peppermint Brownies to the rescue. With one bowl, a whisk, and a sprinkle of crushed candy canes, the kitchen chaos turned cozy. These brownies are fudgy, mint-kissed, and guaranteed crowd-pleasers, even if you’re baking between wrapping gifts and reheating soup. Pour, bake, breathe—then share.

    One Bowl Peppermint Brownies

    Recipe

    Why You’ll Love One Bowl Peppermint Brownies

    What Makes This One Bowl Peppermint Brownies So Irresistible

    I first baked One Bowl Peppermint Brownies after a holiday party ran over and my mixer went missing—borrowed by a neighbor, naturally. One Bowl Peppermint Brownies saved dessert, and the laughter followed the crackle of those candy cane crumbs. The charm is how this homemade recipe turns simple pantry staples into a bold, cozy comfort food that feels bakery-special without fuss. It’s my favorite quick fix when I need an easy recipe that tastes like a grand finale to a winter dinner.

    • Minimal cleanup: true one-bowl method—no mixer, no mess, all reward.
    • Fudgy texture: glossy tops, melty chocolate, and that signature minty snap.
    • Dependable timing: bakes fast and evenly for weeknights or last-minute guests.
    • Simple ingredients: classic, affordable, and easy to keep on hand.
    • Family-friendly: strong chocolate flavor with just-right peppermint.

    With One Bowl Peppermint Brownies, you get an easy homemade version that’s tailor-made for busy seasons, dinner parties, and cozy nights. Ready to bake the best one-bowl dessert? Let’s get you to the recipe card.

    Trending Reason People Are Talking About One Bowl Peppermint Brownies

    Aside from the comforting chocolate-mint combo, One Bowl Peppermint Brownies are trending because they’re incredibly shareable. They look festive, plate beautifully, and stand out on cookie trays. If you love holiday classics like Frosted Christmas Brownies or pretty swirls like my Peppermint Swirl Cookies, these brownies bring that same viral-worthy energy with a faster, one-pan-style cleanup. One Bowl Peppermint Brownies are your shortcut to a polished, homemade dessert that screams celebration.

    Tips, Tricks & Expert Secrets for One Bowl Peppermint Brownies

    Chef Tips for Perfect One Bowl Peppermint Brownies Every Time

    The best cooking tip I ever got came while I was teaching a teen baking class: “Set a timer for cool-down, not just bake time.” It changed my One Bowl Peppermint Brownies forever—no more rushing the slice. The homemade version thrives on patience and small details. Here’s how to lock in that fudgy, glossy finish with this easy recipe:

    • Whisk while warm: Stir sugar into warm melted butter to create a shiny base that helps that iconic crackly top.
    • Beat eggs briefly: 30–45 seconds of whisking adds structure without making the brownies cakey.
    • Fold, don’t stir: Overmixing toughens; stop when the flour streaks disappear.
    • Pull on moist crumbs: For One Bowl Peppermint Brownies, a toothpick with damp crumbs (not wet batter) means fudgy perfection.

    Smart Ingredient Swaps & Practical Cooking Advice

    • Gluten-free swap: Use a 1:1 gluten-free all-purpose blend; keep everything else the same for this homemade quick fix.
    • Dairy-free swap: Replace butter with 1/2 cup neutral oil and choose dairy-free chocolate chips.
    • Mint intensity: Prefer a lighter mint? Drop peppermint extract to 1/4 teaspoon and add more vanilla.
    • What not to do: Don’t bake in a glass pan at the same time/temp; it can overcook the edges. Use metal or reduce heat by 25°F.

    With these practical tips, your One Bowl Peppermint Brownies will be bakery-level and party-ready. For savory comfort food to pair with dessert, warm up a bowl of White Lasagna Soup before you slice into minty bliss.

    Serving Ideas & Creative Variations for One Bowl Peppermint Brownies

    How to Serve One Bowl Peppermint Brownies for Maximum Enjoyment

    I once served One Bowl Peppermint Brownies on a platter lined with crushed ice and eucalyptus for a wintery vibe—and everyone assumed I ordered dessert. Presentation matters. For effortless plating suggestion wins, try these serving ideas:

    • Warm with vanilla bean ice cream and hot fudge for a classic comfort dessert pairing.
    • Dust with cocoa and top with whipped cream for a café-style finish.
    • Holiday tray: Mix with Chocolate Thumbprint Cookies for a festive, shareable sweets board.
    How to Serve One Bowl Peppermint Brownies for Maximum Enjoyment
    How to Serve One Bowl Peppermint Brownies for Maximum Enjoyment

    Flavor Twists and Seasonal Variations

    • Mocha Mint: Add 1 teaspoon instant espresso to the dry ingredients for a coffee-forward flavor variation.
    • White Chocolate Peppermint: Swap semisweet chips for white chips and drizzle with white chocolate for a snowy seasonal twist.
    • Double Peppermint Crunch: Stir in chopped peppermint bark instead of chips for extra texture and bold mint.

    Food photographers: slice with a hot, clean knife for sharp edges; style One Bowl Peppermint Brownies on matte plates to make the glossy tops pop. These serving ideas help One Bowl Peppermint Brownies shine at dinner parties, bake sales, and cozy nights alike.

    Storage & Troubleshooting Guide for One Bowl Peppermint Brownies

    How to Store and Reheat One Bowl Peppermint Brownies

    Leftover One Bowl Peppermint Brownies rarely happen here, but when they do, I stash a secret row in the freezer. To keep One Bowl Peppermint Brownies bakery-fresh, follow this storage advice:

    • Room temperature: Keep in an airtight container up to 3 days. Place parchment between layers to protect the crackly tops.
    • Fridge: Store up to 6 days, well covered; let sit 10–15 minutes before serving to soften.
    • Freezer: Wrap individual squares in plastic, then place in a freezer bag up to 3 months. Thaw at room temp or in the fridge.
    • Reheat: Warm in a 300°F oven for 5–8 minutes or use an air fryer at 300°F for 2–4 minutes to revive fudginess.

    Troubleshooting Common One Bowl Peppermint Brownies Issues

    • Too dry: You likely overbaked. Next time, pull on moist crumbs and reduce bake time by 2–3 minutes.
    • Too gooey/wet: Add 2 minutes to bake time, or let the brownies cool fully to set the crumb.
    • Uneven texture: Overmixing can toughen the edges. Fold gently and stop as soon as dry streaks vanish.
    • No crackly top: Ensure sugar is whisked into warm butter and that eggs are beaten 30–45 seconds.
    • Mint overpowering: Reduce peppermint extract to 1/4 teaspoon and finish with a light candy cane sprinkle instead.

    With these quick fixes, your One Bowl Peppermint Brownies will keep their fudgy texture and festive charm, even days later. You’ve got this—bake, store, reheat, repeat.

    FAQs

    Can I double the recipe for a 9×13 pan?

    Yes. Double all ingredients, bake in a 9×13 metal pan at 350°F for 24–30 minutes, and test for moist crumbs.

    Do I have to use candy canes?

    No. Skip them or swap with peppermint bark, Andes mints, or extra chocolate chips for pure fudgy brownies.

    How minty are these One Bowl Peppermint Brownies?

    Moderately minty. For lighter mint, use 1/4 teaspoon peppermint extract. For bolder mint, go up to 3/4 teaspoon.

    Can I make One Bowl Peppermint Brownies ahead?

    Absolutely. Bake a day early and store covered at room temp. The flavors meld and the tops stay glossy.

    Conclusion

    From busy weeknights to sparkling holiday parties, One Bowl Peppermint Brownies deliver reliable joy with minimal effort. This easy, homemade, comfort dessert has that fudgy chew, a cooling mint finish, and the kind of crackly top that makes cameras click. Whether you’re packing gift boxes, building a cookie board, or rewarding yourself after dinner, One Bowl Peppermint Brownies bring festive flavor without the fuss. Try it at home and tag me—your photos make my day, and your twists inspire the next cozy bake.

  • Best Pecan Pie Cookies – Cozy, Irresistibly Rich

    Best Pecan Pie Cookies – Cozy, Irresistibly Rich

    Best pecan pie cookies came to life on a night my mixer decided to moonwalk across the counter and my kids used the measuring cups as drumsticks. I wanted the best pecan pie cookies flavor without making a whole pie, so I mashed up my favorite brown sugar cookie with a gooey pecan filling. Ten minutes later, my kitchen smelled like a bakery and my family was snacking before I could grab a photo. I’m Darleen Vance, and this is the messy, joyful, homemade magic I love to share.

    Best pecan pie cookies

    Recipe

    WHY YOU’LL LOVE THIS RECIPE

    What Makes This best pecan pie cookies So Irresistible

    I was testing these on a Tuesday when my timer failed, the dog barked, and I opened the oven in dramatic slow motion. Somehow, best pecan pie cookies still emerged with buttery edges and a gooey, maple-kissed center. That’s the magic of this easy, homemade cookie: the flavor of pecan pie in a handheld bite.

    If you crave comfort food that’s quick to prep, best pecan pie cookies are your new go-to. The dough is simple, the filling tastes like brown-sugar caramel, and the whole batch disappears faster than I can say “cooling rack.” It’s the kind of cozy, crowd-pleasing dessert that feels special on weeknights and holidays alike, and it’s the best pecan pie cookies trick to win a cookie swap without stress.

    • Fast and simple: one bowl for dough, one bowl for filling—easy recipe, minimal cleanup.
    • Buttery, chewy edges with a gooey pecan center—like miniature pecan pies.
    • Pantry-friendly, homemade version: flour, butter, brown sugar, pecans, maple or corn syrup.
    • Perfect for potlucks, Thanksgiving dessert tables, and cookie exchanges.
    • Make-ahead friendly: chill dough, then bake fresh for bakery-style aroma.

    When you’re ready, let’s bake these best pecan pie cookies together—straight to the recipe card below!

    What Makes This best pecan pie cookies So Irresistible
    What Makes This best pecan pie cookies So Irresistible

    Across social feeds, best pecan pie cookies are trending because they’re comfort-first, time-smart, and beautifully nostalgic. They capture the homemade pecan pie vibe with less effort and more consistency. The soft, chewy cookie supports a caramelized pecan filling that sets glossy and golden. It’s a quick fix when you want big flavor without rolling a crust. And yes, best pecan pie cookies are shareable—try them on your Thanksgiving dessert platter with a few festive treats like my gingerbread cheesecake cookies or these ultra-giftable Christmas jam jars.

    TIPS, TRICKS & EXPERT SECRETS

    Chef Tips for Perfect best pecan pie cookies Every Time

    I learned this from a bakery friend after I overmixed a batch so thoroughly it bounced like a rubber ball: for best pecan pie cookies, mix gently and toast the nuts. These small steps amplify flavor and give that tender, chewy texture you expect from the best pecan pie cookies recipe.

    • Toast the pecans: 6–8 minutes at 350°F until fragrant. It deepens the homemade flavor and keeps best pecan pie cookies from tasting flat.
    • Cream butter and sugars 2–3 minutes for airy, soft cookies. Overmixing after adding flour makes them tough.
    • Create a deep thumbprint well so the gooey filling stays put and doesn’t overflow.
    • Underbake slightly: pull when edges are set and centers look soft. The carryover heat finishes them.

    Smart Ingredient Swaps & Practical Cooking Advice

    • Maple-forward twist: swap light corn syrup for pure maple syrup for a warm, cozy note in best pecan pie cookies.
    • Gluten-free: Use a 1:1 gluten-free baking flour with xanthan gum; chill dough 20 minutes for easier shaping.
    • Dairy-free: Replace butter with a good-quality vegan baking stick; choose maple syrup for the filling.
    • What not to do: don’t overfill the wells—too much filling leads to spillover and uneven texture.

    For an easy recipe flow, pre-measure ingredients, line trays, and keep a small spoon for filling. This homemade version is forgiving, but respecting the bake time and pan size will keep your best pecan pie cookies tender, not dry.

    SERVING IDEAS & CREATIVE VARIATIONS

    How to Serve best pecan pie cookies for Maximum Enjoyment

    When I brought a platter of best pecan pie cookies to a neighborhood potluck, I stacked them on a wooden board with a small bowl of maple glaze and a sprinkle of flaky salt. Everyone went straight for them. For effortless serving ideas, think cozy and simple: warm cookies, cold milk, and maybe a holiday soundtrack humming in the background. The best pecan pie cookies look gorgeous with a glossy finish and a little crunch.

    • Pair with vanilla bean ice cream and warm cider for nostalgic comfort food vibes.
    • Serve on a tiered stand with powdered sugar-dusted Christmas Gooey Butter Cookies and festive Peppermint Swirl Cookies for a holiday cookie bar.
    • Add a finishing touch: a drizzle of maple glaze and a pinch of flaky sea salt right before serving.
    How to Serve best pecan pie cookies for Maximum Enjoyment

    Flavor Twists and Seasonal Variations

    • Bourbon-Pecan: Add 1–2 teaspoons bourbon to the filling for a bold, aromatic twist on best pecan pie cookies.
    • Chocolate-Dipped: Once cooled, dip half the cookie in melted dark chocolate; set on parchment.
    • Spiced Harvest: Stir 1/4 teaspoon cinnamon and a whisper of nutmeg into the dough for a fall-forward flavor variation.

    Plating suggestion: arrange cookies in a loose circle, spoon extra chopped pecans in the center, and dust the board with a light snow of powdered sugar. If you photograph your best pecan pie cookies, shoot near a window, backlight the cookies to make the glossy filling shine, and use a neutral linen for balance.

    STORAGE & TROUBLESHOOTING GUIDE

    How to Store and Reheat best pecan pie cookies

    My family rarely leaves leftovers, but when they do, I stash best pecan pie cookies for late-night tea. To keep them fresh, follow this storage advice so the edges stay crisp and the centers stay tender.

    • Room temperature: Keep best pecan pie cookies in an airtight container for 3–4 days with parchment between layers.
    • Fridge: Store up to 1 week; let them come to room temperature before serving to soften the filling.
    • Freezer: Freeze baked cookies up to 2 months; thaw at room temperature. Freeze unbaked dough balls (unfilled) up to 2 months, then thaw, indent, fill, and bake.
    • Reheat: For warm, fresh-from-oven vibes, warm in a 300°F oven for 4–6 minutes or pop into an air fryer at 300°F for 2–3 minutes.

    Troubleshooting Common best pecan pie cookies Issues

    • Too dry: Slightly underbake next time. Also ensure you measure flour correctly (fluff, spoon, and level).
    • Watery filling: Use packed brown sugar and simmer the mixture a minute on the stovetop to thicken before filling.
    • Spreading: Chill dough 15–20 minutes before baking and use heavy, light-colored sheet pans.
    • Overcooked bottoms: Bake in the upper third of the oven and use parchment—not dark nonstick pans.

    You’ve got this. With a few tweaks, your best pecan pie cookies will bake up bakery-beautiful, and your kitchen will smell like a holiday hug.

    FAQs

    Can I make the dough ahead?

    Yes. Chill the dough up to 48 hours. Scoop, indent, fill, and bake. Add 1–2 minutes to the bake time if the dough is very cold.

    Do I have to use corn syrup?

    No. Pure maple syrup works beautifully and gives a warm, cozy flavor. The filling sets slightly softer, which is delicious.

    How do I keep the filling from bubbling over?

    Make a deep thumbprint, don’t overfill, and bake on the middle rack. If it spreads, use a spoon to nudge filling back while hot.

    Can I add chocolate?

    Absolutely. Fold 1/2 cup mini chocolate chips into the dough or dip finished cookies in melted dark chocolate.

    Conclusion

    Cozy, quick, and wildly delicious, the best pecan pie cookies bring gooey pecan pie richness to an easy dessert you can bake any night. With buttery edges, glossy centers, and that homemade brown sugar aroma, these best pecan pie cookies deliver comfort food satisfaction with minimal effort. Try a maple swirl or a chocolate dip for a flavor variation, serve warm with ice cream, and don’t forget to share your batch. I’m cheering you on—bake the best pecan pie cookies at home and tag me so I can see your gorgeous trays! If you’re stocking your holiday menu, you’ll also love my creamy slow cooker broccoli cheddar soup alongside the cookie plate.

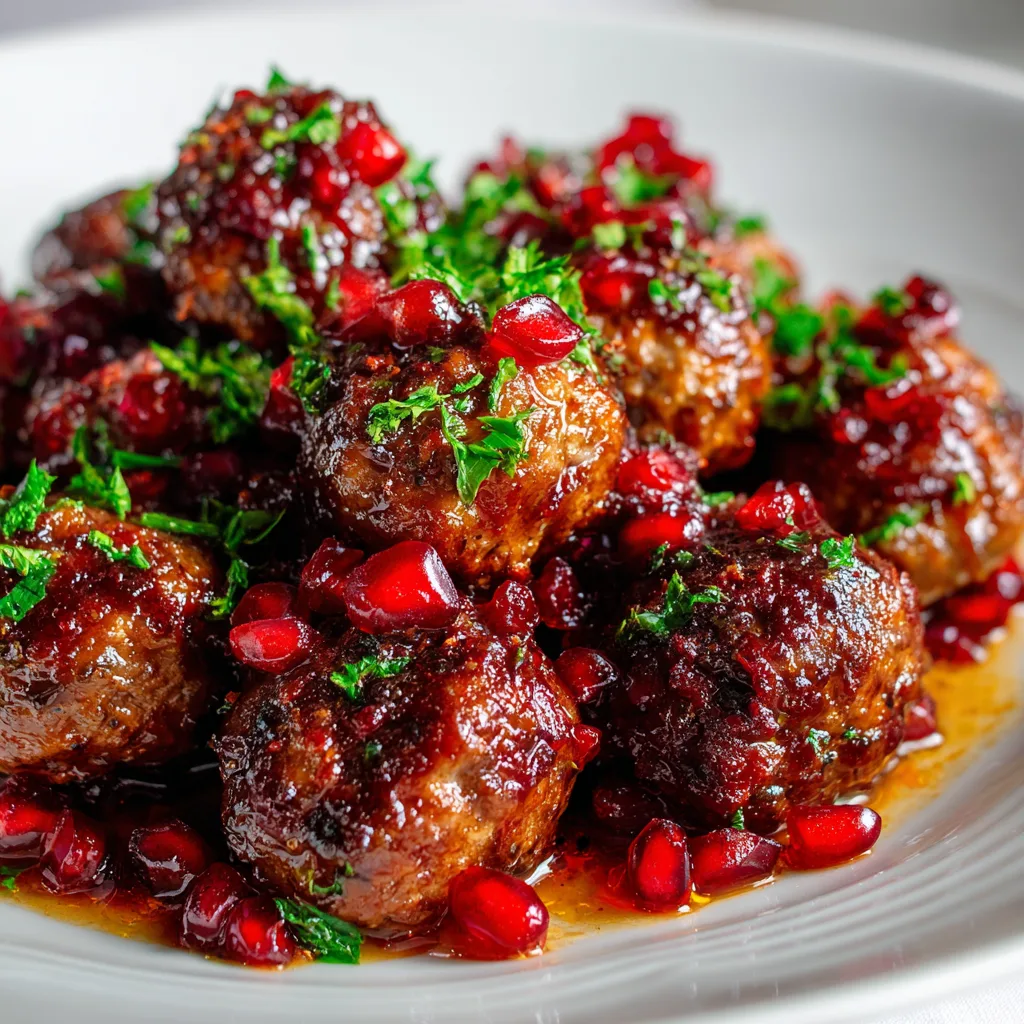
  • Crockpot Cranberry Meatballs – Irresistibly Easy and Cozy

    Crockpot Cranberry Meatballs – Irresistibly Easy and Cozy

    Crockpot Cranberry Meatballs are what I make when the week walks in wearing muddy boots. Last Sunday, I spilled cranberry sauce on my slippers, the dog stole a meatball, and somehow dinner still tasted like a holiday hug. Crockpot Cranberry Meatballs save me on busy nights and party days alike—hands-off, comforting, and always devoured. I learned years ago that the slow cooker is my secret to stress-free hosting, and these sweet-tangy bites prove it every time.

    Crockpot Cranberry Meatballs

    Recipe

    Why You’ll Love Crockpot Cranberry Meatballs

    What Makes This Crockpot Cranberry Meatballs So Irresistible

    I first made Crockpot Cranberry Meatballs for a neighborhood potluck when my timer failed, my toddler hid the ladle, and somehow everyone still asked for seconds. Crockpot Cranberry Meatballs feel like holiday magic in a bowl—comfort food without the juggling act. The sweet-tangy glaze, the tender bite, the hands-off slow cooker ease: it’s the weeknight-meets-party trick we all need. With this easy dinner, you get homemade comfort without hovering over the stove, and clean-up is blissfully simple for a one-pot slow cooker meal.

    • Quick prep: dump, stir, set, and forget—perfect for a busy day.
    • Comforting taste: sweet-tangy cranberry sauce balanced with a savory kick.
    • Flexible: use frozen meatballs or a homemade version and still win dinner.
    • Family- and crowd-friendly: kids love the glaze, adults love the depth of flavor.
    • One-pot convenience: minimal dishes, maximum payoff.

    Whether you serve Crockpot Cranberry Meatballs as an appetizer or spooned over rice for an easy dinner, the slow cooker does the heavy lifting. And if you love slow-cooker comfort like these Crockpot Cranberry Meatballs, you’ll also adore Crockpot Garlic Parm Chicken Pasta and the savory-sweet vibes of Slow Cooker Korean BBQ Beef. Cozy up, grab your crock, and let this recipe lead the way to the full card below.

    Every season, Crockpot Cranberry Meatballs blow up on social because they’re that perfect blend of nostalgic and new. It’s a “set-it-and-still-look-impressive” kind of dish that makes hosting simple and weeknights calm. They photograph beautifully, taste like a holiday hug, and the prep is so breezy you can make them while answering emails. Crockpot Cranberry Meatballs are going viral for being an easy recipe with homemade flavor, a quick fix for potlucks, and pure comfort food when you need it most.

    Tips, Tricks & Expert Secrets

    Chef Tips for Perfect Crockpot Cranberry Meatballs Every Time

    During a cooking class, I learned the tiniest tweak—adding vinegar—makes Crockpot Cranberry Meatballs pop with balanced brightness. After my own “whoops” moment of overmixing meat, I also learned tenderness starts before the slow cooker ever turns on. Here’s how to nail Crockpot Cranberry Meatballs without stress.

    • Balance the glaze: a splash of apple cider vinegar or orange zest keeps the sauce from tasting flat.
    • Heat gently: Low for 3–4 hours keeps the texture plump; High works in a pinch, but stir once to prevent hotspots.
    • If making homemade: mix lightly and use a cookie scoop for even, tender meatballs—overmixing = dense.
    • Glossy finish: uncover for the last 10–15 minutes if you want a thicker, clingier glaze.

    Smart Ingredient Swaps & Practical Cooking Advice

    • Gluten-free: choose certified GF meatballs and GF breadcrumbs; most chili sauces are naturally GF, but check labels.
    • Vegan: use plant-based meatballs and swap in a vegan chili sauce; the cranberry glaze works beautifully.
    • Low-fat: use turkey meatballs; the sauce still shines without extra richness.
    • What not to do: don’t add extra liquid (like water); it dilutes flavor and makes the glaze runny.

    These cooking tips turn Crockpot Cranberry Meatballs into an easy recipe with steady, homemade results. If you’re all-in on slow-cooker comfort, bookmark my Crockpot Loaded Baked Potato Soup too—another quick fix you’ll crave on repeat.

    Serving Ideas & Creative Variations

    How to Serve Crockpot Cranberry Meatballs for Maximum Enjoyment

    When friends show up, I pop the lid and let the aroma do the talking. I’ve hauled Crockpot Cranberry Meatballs to game day, Friendsgiving, and Wednesday nights when I want an easy dinner that still feels special. For effortless plating, keep the slow cooker on Warm and set out toothpicks, or spoon into a shallow bowl so the glaze shines.

    • Party bites: serve straight from the crock on Warm with skewers and a sprinkle of parsley.
    • Weeknight dinner: pile over buttered egg noodles, steamed rice, or mashed potatoes for comfort food bliss.
    • Buffet plate: add roasted green beans and a bright slaw to balance the sweet-tangy sauce.
    How to Serve Crockpot Cranberry Meatballs for Maximum Enjoyment
    How to Serve Crockpot Cranberry Meatballs for Maximum Enjoyment

    Flavor Twists and Seasonal Variations

    • Orange-Ginger Holiday: add 1 tablespoon grated fresh ginger and more orange zest for a citrusy, festive twist.
    • Smoky Chipotle: swirl in 1–2 teaspoons adobo sauce for deep smoky heat—perfect for game day.
    • Maple-Mustard: swap brown sugar for 2 tablespoons pure maple syrup; double the Dijon for a cozy, cabin vibe.

    For content creators, photograph Crockpot Cranberry Meatballs in a matte white bowl with a spoon glossed in sauce and a pinch of zest on top—it emphasizes texture and color. These plating suggestions and flavor variation ideas make Crockpot Cranberry Meatballs worthy of your next share, save, and repeat.

    Storage & Troubleshooting Guide

    How to Store and Reheat Crockpot Cranberry Meatballs

    My fridge is a second act waiting to happen, and Crockpot Cranberry Meatballs never let me down on day two. Store them right and they’re just as tender and glossy tomorrow.

    • Room temp: keep out for up to 2 hours on a buffet; then refrigerate.
    • Fridge: store Crockpot Cranberry Meatballs in an airtight container up to 4 days. Separate any excess sauce for best texture.
    • Freezer: freeze in heavy freezer bags or containers up to 3 months; lay flat for faster thawing.
    • Reheat: stovetop on low, stirring occasionally; or microwave in short bursts. For party sheen, warm in the crockpot on Low until bubbly. Air fryer works if you re-sauce after warming.

    Troubleshooting Common Crockpot Cranberry Meatballs Issues

    • Too watery: crack the lid for the last 15–20 minutes to reduce, or stir in 1–2 tablespoons of cranberry sauce.
    • Too thick: add 1–2 tablespoons chili sauce to loosen without losing flavor.
    • Too sweet: balance with 1 teaspoon more cider vinegar or extra Dijon.
    • Dry texture: switch to Low heat, stir to coat evenly, and don’t overcook; if homemade, avoid overmixing the meat.

    With this storage advice, your Crockpot Cranberry Meatballs will keep fresh and reliable. And if anything goes sideways, these quick fixes make it right. You’ve got this—dinner is back on your side.

    FAQs

    Can I make Crockpot Cranberry Meatballs ahead?

    Yes. Cook, cool, and refrigerate up to 4 days or freeze up to 3 months. Reheat gently on Low or stovetop until hot and glossy.

    Do I have to use frozen meatballs?

    No. A homemade version works great—just bake or pan-brown first to set the shape, then add to the slow cooker with the sauce.

    How do I keep them warm for parties?

    Set the cooker to Warm, stir occasionally, and keep the lid on between servings to prevent drying.

    Are Crockpot Cranberry Meatballs gluten-free?

    They can be if you use certified gluten-free meatballs and confirm your chili sauce is GF. Always check labels.

    Conclusion

    Crockpot Cranberry Meatballs deliver that perfect sweet-tangy comfort with zero kitchen stress. This easy dinner doubles as a party-ready appetizer, a homemade-tasting slow cooker staple that fits holidays, game day, and busy weeknights. With simple ingredients, one-pot convenience, and reliable flavor, Crockpot Cranberry Meatballs prove you don’t need a lot of time to serve something craveable. Try it at home, make it your own with a seasonal twist, and tag me so I can cheer you on. When your crockpot is doing the work, dinner feels cozy again.

  • Baked Apple Fritters – Cozy, Crispy, and Irresistible

    Baked Apple Fritters – Cozy, Crispy, and Irresistible

    Baked Apple Fritters saved my morning when my timer went off and I realized I’d forgotten to heat the oil—so I baked them instead. In true Darleen Vance fashion, the cat walked through flour, the kids asked for seconds, and the house smelled like a fall festival. These Baked Apple Fritters come out golden, cozy, and just-sweet-enough without the splatter drama. Welcome to my new favorite kitchen chaos win.

    Baked Apple Fritters

    Recipe

    WHY YOU’LL LOVE THIS RECIPE

    What Makes This Baked Apple Fritters So Irresistible

    I first made Baked Apple Fritters on a rainy Tuesday when I’d promised dessert but couldn’t face a pot of hot oil. One bowl, one pan, and in they went. The house smelled like cinnamon fairgrounds, and my youngest announced these Baked Apple Fritters were “apple doughnuts with manners.” This homemade comfort food is all the cozy you crave, minus the fryer fuss, and every bite tastes like a tiny fall festival.

    • Easy recipe and quick prep: one bowl, no deep-frying, weeknight-friendly.
    • Comfort food flavor: tender apples, warm cinnamon, and a light cider glaze.
    • Homemade and family-friendly: simple pantry ingredients you already have.
    • Lower mess, less oil: baked not fried, but still golden and crispy at the edges.
    • Versatile: perfect dessert, sweet brunch, or cozy snack with coffee.

    If you love simple, homemade baking wins, these Baked Apple Fritters will be your new go-to. Let’s bake!

    We’re all chasing easy, satisfying desserts that taste like a bakery treat—without babysitting hot oil. These Baked Apple Fritters deliver that crisp-chewy edge, tender apple middle, and glossy glaze, all from a standard oven. The homemade version also plays well with dietary tweaks and seasonal twists. If you’re in a comfort food mood, try them alongside my Festive Christmas Bread or bake ahead for a sweet ending after Slow Cooker Pot Roast. And yes, they’re dreamy with warm cider.

    TIPS, TRICKS & EXPERT SECRETS

    Chef Tips for Perfect Baked Apple Fritters Every Time

    During a quick cooking lesson with my niece, I learned the most important fritter rule by accident: don’t overmix. The batter went from tender to tough in two extra stirs. Consider this your friendly Darleen warning for Baked Apple Fritters that stay fluffy and moist.

    • Use tart-sweet apples: Granny Smith or Honeycrisp keep shape and balance sweetness.
    • Pat-dry extra juicy apples: a quick blot prevents soggy bottoms and keeps texture even.
    • Shape matters: flatten scoops slightly so fritters bake up with that classic, craggy look.
    • High heat, short bake: 400°F encourages a golden, crispy edge without drying.

    Smart Ingredient Swaps & Practical Cooking Advice

    • Gluten-free: use a measure-for-measure GF flour blend and add 1 extra tablespoon milk if batter seems thick.
    • Vegan: swap eggs for 2 flax eggs (2 tbsp ground flax + 5 tbsp water) and use dairy-free milk and coconut oil.
    • Lower sugar: reduce granulated sugar by 1–2 tablespoons; the glaze still brings sweetness.
    • What not to do: don’t overmix—stop when the flour streaks disappear. Overmixing makes dense fritters and can dull that homemade, bakery-style crumb.

    Keep these cooking tips handy for a quick fix anytime. This easy recipe proves that Baked Apple Fritters can be crisp, tender, and bakery-good—no fryer needed.

    SERVING IDEAS & CREATIVE VARIATIONS

    How to Serve Baked Apple Fritters for Maximum Enjoyment

    When I served Baked Apple Fritters at a weekend brunch, I plated them on a wire rack over a marble slab so the glaze dripped photogenically (blogger move, I know). Our guests hovered, then sprinted for seconds. For simple plating suggestions and cozy serving ideas, try these:

    • Pairing: warm fritters with vanilla bean ice cream and a drizzle of caramel sauce.
    • Brunch board: serve with sharp cheddar, spiced nuts, and fresh berries for sweet-salty balance.
    • Beverages: hot coffee, chai latte, or mulled apple cider to echo the cinnamon notes.

    Content creators: dust a second glaze pass for extra shine and photograph near a window—backlighting makes the glaze glow.

    Flavor Twists and Seasonal Variations

    • Chai Spice Fritters: swap cinnamon/nutmeg for 1 1/2 tsp chai spice blend.
    • Maple Pecan: use maple in the glaze and fold in toasted pecans for buttery crunch.
    • Cran-Apple Holiday: add 1/2 cup chopped cranberries and a whisper of orange zest—perfect next to Classic Christmas Toffee.

    These variations make Baked Apple Fritters endlessly customizable, from cozy fall baking to snowy holiday spreads. Pin your favorite flavor variation and share your seasonal twist!

    STORAGE & TROUBLESHOOTING GUIDE

    How to Store and Reheat Baked Apple Fritters

    Leftover Baked Apple Fritters? I stash a few for “future Darleen” and thank myself later. Here’s how to keep them fresh and irresistible.

    • Room temperature: 1 day in an airtight container lined with a paper towel to absorb moisture.
    • Refrigerator: up to 4 days, well-sealed to keep aroma and texture intact.
    • Freezer: up to 2 months; wrap each fritter, then store in a freezer-safe bag. Thaw overnight in the fridge.
    • Reheat: oven at 350°F for 6–8 minutes; air fryer at 320°F for 3–4 minutes; or skillet with a pat of butter 2–3 minutes per side for a crisp edge.

    Troubleshooting Common Baked Apple Fritters Issues

    • Too dry: you may have added too much flour. Next time, fluff flour before measuring and don’t overbake; add 1–2 tsp extra milk for a looser batter.
    • Watery or spreading: apples were extra juicy. Pat them dry and add 1–2 tbsp flour to the batter.
    • Pale tops: bake on an upper-middle rack and brush with melted butter for color; a final 1–2 minutes helps brown.
    • Soggy bottoms: cool on a wire rack, not on the baking sheet; steam softens texture.

    With these storage tips and quick fixes, your Baked Apple Fritters will stay bakery-fresh. Keep this storage advice handy and bake on!

    FAQs

    Can I make Baked Apple Fritters ahead?

    Yes. Bake, cool, and freeze on a sheet pan, then bag. Reheat at 350°F for 6–8 minutes and glaze just before serving.

    What apples work best for Baked Apple Fritters?

    Granny Smith or Honeycrisp. They hold shape and keep the homemade fritters balanced, not overly sweet.

    Can I make Baked Apple Fritters gluten-free?

    Use a 1:1 gluten-free flour blend and add a splash more milk if the batter is too thick. Bake time remains similar.

    Do I need a special pan?

    No. A parchment-lined baking sheet works. A muffin-top pan gives extra crispy edges but isn’t required.

    Conclusion

    When you want comfort food without the fryer, Baked Apple Fritters bring cozy flavor, crispy edges, and tender apple bites in an easy recipe anyone can master. The homemade batter mixes in one bowl, bakes fast, and takes beautifully to seasonal twists. Serve them warm for dessert or brunch, drizzle with cider glaze, and savor that cinnamon apple aroma that makes a kitchen feel like home.

    If you’re building a fall baking list, pair these Baked Apple Fritters with my reader-favorite Pumpkin Chocolate Chip Bread for a seasonal spread. Try it at home and tag me—I can’t wait to see your fritters!

  • White Lasagna Soup (Crockpot) – Creamy, Irresistible Comfort

    White Lasagna Soup (Crockpot) – Creamy, Irresistible Comfort

    White Lasagna Soup (Crockpot) saved me on a night my timer failed, the dog stole my ricotta, and the kids were “starving” at 4 p.m. I tossed everything into the slow cooker, broke the noodles at the end, and stirred in a silky swirl of cream and cheese. The kitchen went quiet—always the sign of victory. White Lasagna Soup (Crockpot) became our midweek hero: creamy, comforting, and ridiculously easy. I even hid a second batch behind the yogurt for tomorrow’s lunch. Don’t tell.

    Explore more cozy slow cooker favorites like Crockpot Loaded Baked Potato Soup and my velvety Slow Cooker Broccoli Cheddar Soup. If you love dump-and-go dinners, check this roundup: Dump-and-Go Crockpot Soups.

    White Lasagna Soup (Crockpot)

    Recipe


    WHY YOU’LL LOVE THIS RECIPE

    What Makes This White Lasagna Soup (Crockpot) So Irresistible

    I was halfway through laundry when the craving hit: White Lasagna Soup (Crockpot). I tossed ingredients in the pot, set the dial, and let the house fill with the aroma of garlic and herbs. White Lasagna Soup (Crockpot) has that comforting magic—like lasagna’s creamy heart in soup form—without hovering over the stove. When the noodles go in at the end and that cheese swirl happens, it’s a mic-drop moment. If you love an easy dinner that tastes homemade and hugs your soul, this is it. White Lasagna Soup (Crockpot) does the heavy lifting, so you don’t have to.

    • Set-it-and-forget-it ease: craveable comfort food with almost zero babysitting.
    • Weeknight-friendly prep: pantry staples, simple steps, and a smooth finish.
    • Creamy, cheesy finish: ricotta, mozzarella, and Parmesan—hello, lasagna vibes.
    • Family-approved: kid-friendly flavors with a grown-up depth of herbs and garlic.
    • Flexible: easily make a gluten-free or lighter homemade version.

    Ready to ladle up the good stuff? Let’s get to the recipe card and start your pot of White Lasagna Soup (Crockpot).

    The internet loves cozy one-pot meals, and White Lasagna Soup (Crockpot) checks every box: creamy texture, classic flavors, and a hands-off cook. Food creators adore its camera-ready ribbons of noodles, melty cheese, and bright green spinach. Busy cooks love the reliable, easy recipe and the homemade taste. It’s the kind of comfort food that makes comments explode with “saving for later” and “making this tonight.” White Lasagna Soup (Crockpot) is a crowd-pleaser for a reason—it’s simple, soulful, and sensational.


    TIPS, TRICKS & EXPERT SECRETS

    Chef Tips for Perfect White Lasagna Soup (Crockpot) Every Time

    I once whisked cold cream cheese straight into a bubbling pot—cue little white floaties. Lesson learned. Now my White Lasagna Soup (Crockpot) is velvety every time with these quick fixes and cooking tips.

    • Warm the dairy: Heat heavy cream with cream cheese until smooth, then stir in for a silky finish to your White Lasagna Soup (Crockpot).
    • Season in layers: Salt the broth first, then adjust after cheese melts to keep flavors balanced.
    • Stir noodles once or twice: Broken lasagna can nestle together; a quick stir prevents clumps in this easy recipe.
    • Finish with lemon zest: The citrus brightens the homemade version and cuts through richness.

    Smart Ingredient Swaps & Practical Cooking Advice

    • Gluten-free: Use gluten-free lasagna noodles and check broth labels.
    • Lighter: Swap half-and-half for heavy cream, and reduce mozzarella by 1/4 cup.
    • Protein swap: Try rotisserie chicken stirred in at the end for a fast, quick fix.
    • What not to do: Don’t add dry noodles too early—overcooked pasta turns mushy and throws off the texture of White Lasagna Soup (Crockpot).

    Follow these practical, friendly steps and your White Lasagna Soup (Crockpot) will consistently deliver restaurant-level comfort with weeknight effort.


    SERVING IDEAS & CREATIVE VARIATIONS

    How to Serve White Lasagna Soup (Crockpot) for Maximum Enjoyment

    The first time I served White Lasagna Soup (Crockpot) to guests, I piled bowls with ricotta clouds and a sparkle of parsley. Silence, then spoon-scraping. For plating suggestions and serving ideas, think contrast and crunch—your cozy bowl, their instant second helping.

    • Pair with warm, crusty garlic bread or focaccia to scoop up every creamy drop.
    • Serve a crisp side salad with lemony vinaigrette to complement the rich, homemade flavor.
    • Pour a chilled Pinot Grigio or a sparkling lemonade to refresh the palate.

    Flavor Twists and Seasonal Variations

    • Herb garden twist: Finish White Lasagna Soup (Crockpot) with fresh basil and thyme for a fragrant upgrade.
    • Fall favorite: Add sautéed mushrooms and a pinch of nutmeg for an autumnal seasonal twist.
    • Pinterest-popular: Stir in pesto at the end for a bold, emerald swirl and eye-catching flavor variation.

    Content creators: top bowls with a ricotta quenelle, lemon zest, and a sprinkle of black pepper for scroll-stopping photos. White Lasagna Soup (Crockpot) is a stunner on Instagram and a winner at the table.


    STORAGE & TROUBLESHOOTING GUIDE

    How to Store and Reheat White Lasagna Soup (Crockpot)

    Leftovers are a gift. I store White Lasagna Soup (Crockpot) in a mason jar for quick lunches, and it reheats like a dream with a splash of broth.

    • Room temperature: Keep no more than 2 hours for food safety.
    • Fridge: Store in airtight containers up to 4 days. To keep noodles from softening, you can refrigerate them separately if you plan ahead.
    • Freezer: Freeze up to 2 months—best if you freeze without the noodles and dairy; add those fresh after reheating.
    • Reheat: Warm gently on the stovetop over low heat, adding a splash of broth or milk to loosen. Microwave in short bursts, stirring between intervals.

    Troubleshooting Common White Lasagna Soup (Crockpot) Issues

    • Too thick: Whisk in warm broth or milk until you reach a creamy, sippable consistency.
    • Too thin: Simmer uncovered for a few minutes or add a bit more cream cheese to enrich.
    • Watery flavor: Increase salt gradually and finish with extra Parmesan for depth.
    • Noodles too soft: Add them later next time and check at 15–20 minutes on High.
    • Grainy dairy: Always temper cream and cream cheese, then stir in off direct boil.

    With these storage tips and fixes, your White Lasagna Soup (Crockpot) will keep fresh, reheat beautifully, and taste just as cozy the next day. You’ve got this!


    FAQs

    Can I use rotisserie chicken?

    Yes. Stir in shredded rotisserie chicken during the last 10 minutes, just long enough to warm through before adding dairy.

    Do I have to cook noodles separately?

    No. Add broken lasagna noodles directly to the slow cooker for the final 20–30 minutes on High and stir once or twice.

    How can I make it gluten-free?

    Use gluten-free lasagna noodles and verify your broth and cheese labels are gluten-free.

    Can I lighten the soup?

    Use half-and-half instead of heavy cream and reduce mozzarella by 1/4 cup. It stays creamy and satisfying.


    Conclusion

    White Lasagna Soup (Crockpot) is the best kind of weeknight comfort food—simple, homemade, and deeply satisfying. The slow cooker does the heavy lifting while you get a silky, cheesy bowl of joy that tastes like your favorite white lasagna. This easy dinner brings cozy, family-friendly flavor to your table with minimal effort, and the leftovers reheat like a dream. Make White Lasagna Soup (Crockpot) once, and you’ll keep it on repeat for busy nights, game days, and casual company. Try it at home and tag me—can’t wait to see your steaming bowls and creative toppings!


  • Slow Cooker Korean BBQ Beef – Deliciously Cozy and Bold

    Slow Cooker Korean BBQ Beef – Deliciously Cozy and Bold

    Slow Cooker Korean BBQ Beef turned a chaotic Tuesday into a cozy win in my kitchen. I’d just realized the soccer cleats were still in the dryer and my phone was buzzing nonstop, but tossing everything into the slow cooker and walking away felt like a miracle. Slow Cooker Korean BBQ Beef rewards you with tender, sweet-savory beef and zero stress by dinnertime. The hardest part? Not sneaking bites while shredding.

    Slow Cooker Korean BBQ Beef

    Recipe

    WHY YOU’LL LOVE THIS RECIPE

    What Makes This Slow Cooker Korean BBQ Beef So Irresistible

    I first made Slow Cooker Korean BBQ Beef on a night when the smoke alarm had already yelled at my toast. Slow Cooker Korean BBQ Beef saved dinner, sanity, and a few grumpy appetites. There’s something magical about letting a slow cooker turn chuck roast into buttery shreds that soak up a bold, homemade gochujang glaze. It’s the easy dinner you crave when life looks busy but you still want comfort food with personality.

    • Hands-off ease: Quick prep and the slow cooker does the rest—a true set-it-and-forget-it homemade win.
    • Unreal flavor: Soy, garlic, ginger, and gochujang create that sweet-heat Korean BBQ profile.
    • Family-friendly: Kid-approved sweetness with customizable spice.
    • Meal-prep gold: Great for bowls, tacos, sliders, or a cozy one-pot meal vibe over rice.
    • Reliable results: Tender, juicy shreds every time.

    If you’re into cozy slow cooker comfort food, peek at my Slow Cooker Broccoli Cheddar Soup or classic Pot Roast Slow Cooker Recipe for more easy dinner inspiration. Ready to cook? Let’s get this recipe card rolling.

    Beyond flavor, Slow Cooker Korean BBQ Beef nails that internet-friendly, weeknight-friendly sweet spot: minimal effort, glossy finish, and Instagram-worthy shreds. The homemade sauce feels upscale, but the method is entirely practical. Busy families and meal-prep lovers rave because this easy recipe holds up for days, reheats like a dream, and flexes from rice bowls to sliders. It’s comfort food with a modern twist—rich, bold, cozy—and yes, it photographs beautifully without trying too hard.

    TIPS, TRICKS & EXPERT SECRETS

    Chef Tips for Perfect Slow Cooker Korean BBQ Beef Every Time

    During a cooking class, I once measured gochujang with my heart—and my taste buds needed a timeout. Lesson learned! For Slow Cooker Korean BBQ Beef, balance is everything. Here are my favorite cooking tips to keep your easy recipe foolproof, flavorful, and melt-in-your-mouth tender.

    • Choose the right cut: Chuck roast is king for Slow Cooker Korean BBQ Beef—marbled, forgiving, and ideal for shredding.
    • Sear optional, flavor mandatory: If time allows, a quick sear adds depth. If not, don’t stress—the homemade version is still fantastic.
    • Grate a pear or apple: A classic Korean BBQ cooking tip for natural sweetness and tenderizing power.
    • Low and slow wins: Cook on low for the juiciest texture; high works in a pinch, but low delivers the silkiest shreds.

    Smart Ingredient Swaps & Practical Cooking Advice

    • Gluten-free quick fix: Use tamari or coconut aminos in place of soy sauce.
    • Milder heat: Swap some gochujang for ketchup to keep that sweet glaze without the spice jump.
    • Lean cut adjustment: If using sirloin or round, shorten cook time slightly and add 1 tablespoon neutral oil to keep moisture.
    • Don’t drown the beef: Avoid adding too much liquid—the roast releases juice; otherwise you’ll end up with watery sauce.

    What not to do: Don’t shred before the roast is truly tender. If it resists, cook longer and check seasoning at the end. With these easy recipe tips, your Slow Cooker Korean BBQ Beef will be glossy, balanced, and unforgettable.

    SERVING IDEAS & CREATIVE VARIATIONS

    How to Serve Slow Cooker Korean BBQ Beef for Maximum Enjoyment

    The first time I served Slow Cooker Korean BBQ Beef to guests, I went full buffet—rice, pickles, kimchi, and tiny slider buns. Everyone built their own bowls and sandwiches, and my dinner table suddenly felt like a cozy food truck. For plating suggestions, pile the beef high, spoon on extra glaze, and finish with green onions and sesame seeds for that restaurant-style shine.

    • Classic bowl: Steamed rice, quick cucumber pickles, kimchi, and a drizzle of sauce.
    • Slider party: Toasted brioche or Hawaiian rolls, plus crunchy slaw.
    • Lettuce wraps: Butter lettuce cups with carrot matchsticks for a lighter, fresh take.
    How to Serve Slow Cooker Korean BBQ Beef for Maximum Enjoyment
    How to Serve Slow Cooker Korean BBQ Beef for Maximum Enjoyment

    Pairing picks: Try a crisp lager or sparkling water with lime. For a cozy spread, set this alongside my crowd-pleasing Slow Cooker Stuffed Shells for a multi-dish slow cooker night.

    Flavor Twists and Seasonal Variations

    • Sticky orange glaze: Add 1 tablespoon orange zest and 2 tablespoons orange juice for a citrus-kissed seasonal twist.
    • Extra smoky: Stir in 1 teaspoon smoked paprika and a splash of liquid smoke.
    • Veg-forward bowls: Add steamed broccoli or roasted carrots in the last 15 minutes for a hearty, colorful serving idea.

    Content creators: Take a spoonful of glossy sauce and brush it over the shredded meat for photos; top with sesame and scallions for texture contrast. This flavor variation-friendly recipe plays beautifully on Pinterest and Instagram.

    STORAGE & TROUBLESHOOTING GUIDE

    How to Store and Reheat Slow Cooker Korean BBQ Beef

    Leftovers of Slow Cooker Korean BBQ Beef are a gift. I portion it into containers for meal prep bowls, then I have cozy lunches waiting all week.

    • Room temperature: Keep out no longer than 2 hours.
    • Refrigerator: Store in airtight containers up to 4 days; add extra sauce to keep it juicy.
    • Freezer: Freeze up to 3 months in freezer bags, laid flat for quick thawing.
    • Reheat: Warm gently in a skillet with a splash of water or broth; microwave in 45-second bursts, stirring. Oven at 300°F covered until steamy works great, too.

    Troubleshooting Common Slow Cooker Korean BBQ Beef Issues

    • Too watery: Remove the beef, simmer sauce on high with the lid off, and whisk in a cornstarch slurry to thicken.
    • Too dry: Stir in a splash of broth and a teaspoon of sesame oil; warm gently.
    • Not shredding: Cook longer on low; tough spots usually just need time.
    • Too salty: Add a bit more brown sugar, rice vinegar, or a squeeze of orange juice to balance.
    • Too spicy: Reduce gochujang and add ketchup or a little honey for a smoother finish.

    With these storage advice notes and quick fixes, your Slow Cooker Korean BBQ Beef will keep fresh, reheat beautifully, and stay glossy and tender. You’ve got this—and dinner’s about to be delicious.

    FAQs

    Can I make Slow Cooker Korean BBQ Beef without gochujang?

    Yes. Use a mix of ketchup and a pinch of chili flakes. It won’t be identical, but you’ll keep that sweet-savory balance.

    What cut of beef works best?

    Chuck roast is ideal for shredding. Brisket or boneless short ribs also work but may need a little extra time.

    Can I prep this the night before?

    Absolutely. Combine sauce ingredients, slice onions, and refrigerate. In the morning, add everything to the slow cooker and start.

    How do I thicken the sauce?

    Simmer the cooking liquid and whisk in a cornstarch slurry until glossy. Toss the beef back in to coat.

    Conclusion

    Slow Cooker Korean BBQ Beef is that rare mix of easy dinner and restaurant-level flavor. The homemade sauce hugs every tender shred, turning a busy evening into true comfort food. From rice bowls to sliders, this Slow Cooker Korean BBQ Beef adapts to your table, your mood, and your meal prep plans. If you love cozy slow cooker victories, bookmark this and explore my soup lineup like Crockpot Loaded Baked Potato Soup for another ultra-comforting classic. Try it at home and tag me—I can’t wait to see your bold, glossy plates of Slow Cooker Korean BBQ Beef.