Category: Dinner

Easy, tasty dinner ideas for busy nights. Simple recipes, quick prep, and family-friendly meals you’ll make again and again.

  • Cheesy Baja Chicken Bell Pepper Skillet | Irresistibly Delicious!

    Cheesy Baja Chicken Bell Pepper Skillet | Irresistibly Delicious!

    Cheesy Baja Chicken Bell Pepper Skillet | Irresistibly Delicious!

    The Cheesy Baja Chicken Bell Pepper Skillet has become my absolute go-to dinner when I need something colorful, flavorful, and ready in under 30 minutes. The first time I made this dish, the aroma of those toasting spices filled my kitchen, and I knew I had stumbled onto something special. There’s something magical about the way the bell peppers soften while still maintaining that perfect bite, all while soaking up the zesty Baja-inspired seasonings. This one-pan wonder combines tender chicken, vibrant peppers, and a blanket of melty cheese that creates the most satisfying weeknight meal you’ll ever taste. Let me show you how to bring this southwestern delight to your table tonight.

    Recipe

    Why You’ll Love This Cheesy Baja Chicken Bell Pepper Skillet

    Quick & Easy One-Pan Wonder

    If you’re anything like me, the words “one-pan” are music to your ears after a long day. This Cheesy Baja Chicken Bell Pepper Skillet comes together in just 25 minutes from start to finish, making it perfect for busy weeknights when you’re tempted to order takeout. The beauty lies in its simplicity—just slice, season, sauté, and sprinkle with cheese. I love how the chicken and peppers cook together, allowing the flavors to meld while saving you from washing multiple pots and pans. The active cooking time is minimal, giving you space to help with homework or simply take a breath after a hectic day.

    Flavor Explosion in Every Bite

    The combination of smoky cumin, chili powder, and garlic creates a depth of flavor that transports me straight to a beachside café in Baja. Last month, when my sister was visiting, she couldn’t believe the complex taste came from such simple ingredients. The bell peppers add a natural sweetness that balances the savory chicken and spices perfectly. When the cheese melts into all the nooks and crannies, it creates these little pockets of creamy goodness that make each forkful an adventure. The lime juice added at the end brightens everything with a zesty punch that makes all the flavors pop.

    Essential Tips & Tricks

    Perfecting Your Peppers

    The secret to this dish is getting your bell peppers just right—tender-crisp is the texture we’re aiming for. I learned this the hard way after overcooking them into mush during my first attempt! Slice them into uniform strips about ¼-inch thick so they cook evenly. I prefer using a mix of red, yellow, and orange peppers for both flavor and visual appeal. Green peppers work too, but they’re slightly less sweet. Make sure your skillet is hot before adding the peppers—that initial sizzle is crucial for developing those lovely caramelized edges while maintaining their structure. Similar to my Mexican Rajas Poblanas, the peppers should still have a slight bite.

    Mastering the Chicken Technique

    For the juiciest chicken, start with uniform-sized pieces cut against the grain. I typically slice boneless, skinless chicken breasts into strips about ½-inch thick, which ensures they cook quickly and evenly. Season the chicken before it hits the pan—this builds a foundation of flavor that permeates throughout cooking. The biggest mistake I see is overcrowding the pan, which causes the chicken to steam rather than sauté. If needed, cook in batches to get that beautiful golden exterior. Let the chicken develop a light crust before stirring—about 2-3 minutes per side. This creates texture contrast and locks in moisture for perfectly tender results.

    Serving Ideas & Creative Variations

    Perfect Pairings

    This Cheesy Baja Chicken Bell Pepper Skillet is delicious on its own, but I love serving it with warm corn tortillas for an interactive meal. My family goes crazy for it when I set out small bowls of toppings—fresh cilantro, diced avocado, sour cream, and lime wedges—letting everyone customize their plate. For a lighter option, serve it over cauliflower rice or alongside a simple green salad dressed with lime vinaigrette. When I’m craving something more substantial, I’ll pair it with cilantro-lime rice or black beans. For a fun weekend twist, try serving it with my Sweet Chili Chicken Bowl components for a fusion fiesta.

    Creative Twists on the Classic

    Don’t be afraid to make this recipe your own! Swap the chicken for ground turkey or beef for a different texture, or use shrimp for a seafood spin (just add them during the last few minutes of cooking). Vegetarians can substitute firm tofu or simply double up on the peppers and add black beans. For a spicier version, add diced jalapeños or a dash of cayenne. I’ve experimented with cheese variations too—pepper jack adds a nice kick, while a Mexican blend creates stretchy cheese pulls that are totally Instagram-worthy. One rainy Sunday, I added a can of fire-roasted tomatoes and some corn kernels, which created a saucier, more stew-like version that was perfect for dipping crusty bread.

    Storage & Troubleshooting Guide

    Proper Storage for Leftovers

    This skillet dish reheats beautifully, making it perfect for meal prep lunches. Store leftovers in an airtight container in the refrigerator for up to 3 days. The flavors actually deepen overnight, making day-two lunches something to look forward to! If you’re planning to freeze portions, do so before adding the cheese—dairy can separate and become grainy when frozen and reheated. When you’re ready to enjoy, thaw overnight in the refrigerator, then reheat in a skillet with a splash of chicken broth to maintain moisture. Add fresh cheese during the last minute of reheating for that gooey texture we all love.

    Troubleshooting Common Issues

    If your peppers are turning out too soft, they’re likely being cooked too long or at too high a temperature. The fix is simple: add them later in the cooking process or use higher heat for a shorter time. For chicken that seems dry, it’s usually overcooked—next time, remove it from the heat when it reaches 165°F internally. If your cheese isn’t melting properly, cover the skillet with a lid for 1-2 minutes to trap the heat. Sauce too watery?

    Let it simmer uncovered for a few extra minutes before adding the cheese. And if the flavors seem flat, a squeeze of lime juice, a sprinkle of salt, or a dash of hot sauce can work wonders to brighten everything up.

    Frequently Asked Questions

    Can I make Cheesy Baja Chicken Bell Pepper Skillet ahead of time?

    Yes! Prepare everything except the cheese up to 2 days ahead. Store in the refrigerator, then reheat in a skillet and add fresh cheese just before serving for the best texture and flavor.

    What’s the best cheese to use for this recipe?

    I recommend a combination of sharp cheddar and Monterey Jack for the perfect melt and flavor. Pepper Jack works beautifully if you prefer a spicier kick.

    Can I use frozen bell peppers?

    While fresh peppers provide the best texture, frozen peppers will work in a pinch. Thaw and drain them thoroughly first, and expect a slightly softer final result.

    Is this Cheesy Baja Chicken Bell Pepper Skillet gluten-free?

    Yes, this dish is naturally gluten-free, making it perfect for those with gluten sensitivities. Just double-check your spice blends for hidden gluten additives.

    How can I make a vegetarian version?

    Replace chicken with black beans, pinto beans, or firm tofu. Add extra vegetables like zucchini or corn for more substance and flavor variety.

    Final Thoughts

    This Cheesy Baja Chicken Bell Pepper Skillet has saved dinner at my house more times than I can count. There’s something deeply satisfying about creating such bold flavors with minimal effort and cleanup. The colorful peppers, tender chicken, and blanket of melted cheese create a dish that feels both comforting and special. I hope this recipe finds its way into your regular rotation, perhaps becoming the meal your family requests on busy weeknights or the dish friends ask about after gatherings. Don’t forget to check out more quick dinner ideas on Pinterest for inspiration!
  • Anti Inflammatory Turmeric Chicken Soup: Heal & Boost Immunity Fast!

    Anti Inflammatory Turmeric Chicken Soup: Heal & Boost Immunity Fast!

    Anti Inflammatory Turmeric Chicken Soup: Heal & Boost Immunity Fast!

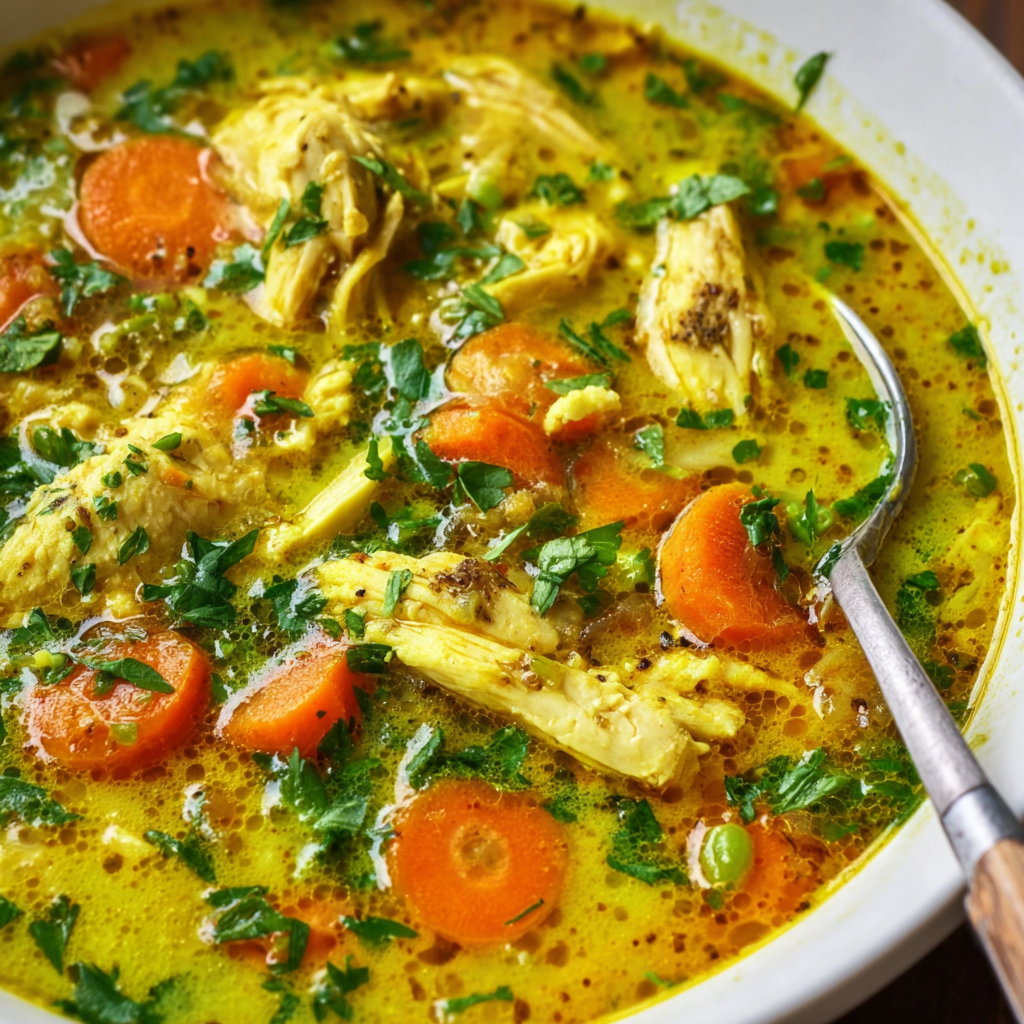
    Anti Inflammatory Turmeric Chicken Soup is my ultimate comfort-in-a-bowl remedy whenever my body needs some serious TLC. The golden broth, fragrant with warming spices and vibrant turmeric, has become my go-to solution during those dreary winter days when my joints ache and my immune system needs a boost. I discovered this healing elixir last year when battling a stubborn cold, and it’s since earned a permanent spot in my recipe collection at Recipes Darleen. The magic lies in how the anti-inflammatory properties of turmeric combine with protein-rich chicken and nourishing vegetables to create something that’s both medicinal and utterly delicious.

    Recipe

    Why You’ll Love This Anti Inflammatory Turmeric Chicken Soup

    A Powerhouse of Healing Ingredients

    This soup isn’t just delicious—it’s practically medicinal. The star ingredient, turmeric, contains curcumin, a compound with powerful anti-inflammatory effects that may help reduce joint pain and boost immunity. I’ve paired it with fresh ginger and garlic, creating a trifecta of healing ingredients that work synergistically. Black pepper isn’t just for flavor—it enhances turmeric absorption by up to 2000%! The bone broth base provides collagen and minerals, while protein-rich chicken helps repair tissues. When I’m feeling particularly run-down, this golden elixir feels like it’s healing me from the inside out.

    Quick Comfort Without Sacrificing Flavor

    On those days when my energy is low but I need something nourishing, this soup comes to the rescue. It takes just 30 minutes of active preparation, then simmers to perfection while I rest. The aroma that fills my kitchen—earthy turmeric, fragrant thyme, and sweet onions—provides comfort before I even take the first spoonful. What I love most is how the flavors deepen overnight, making leftovers even more delicious. Unlike many “healthy” recipes that sacrifice taste, this soup delivers rich, complex flavors that satisfy my comfort food cravings while supporting my wellness goals.

    Essential Tips & Tricks

    Mastering the Perfect Turmeric Balance

    Finding the right turmeric amount is crucial—too little won’t provide the anti-inflammatory benefits, while too much creates bitterness. I recommend starting with 1½ tablespoons for a full pot, then adjusting to your taste. Always use fresh turmeric root when possible; it has a brighter, more complex flavor than the powder. Grate it directly into the pot using a microplane for the most even distribution. If using powder, bloom it in oil with your other spices to release its full potential. This technique, similar to what I use in my Cauliflower Chickpea Curry, enhances the turmeric’s flavor profile dramatically.

    Creating the Ultimate Healing Broth

    The broth quality makes or breaks this soup. I prefer homemade bone broth for maximum nutrition and flavor, but a good-quality store-bought version works in a pinch. For an extra immune boost, simmer the broth with chicken bones for 20 minutes before adding vegetables. Don’t rush the sautéing process—allowing onions to caramelize slightly adds remarkable depth. For silky texture, finish with a splash of full-fat coconut milk or a drizzle of olive oil just before serving. This creates a luxurious mouthfeel and helps your body absorb the fat-soluble compounds in turmeric, maximizing the anti-inflammatory benefits.

    Serving Ideas & Creative Variations

    Complementary Sides for a Complete Meal

    This Anti Inflammatory Turmeric Chicken Soup pairs beautifully with crusty sourdough or gluten-free crackers for dipping. For a heartier meal, I sometimes serve it alongside a simple arugula salad dressed with lemon and olive oil—the brightness cuts through the rich soup perfectly. When serving to guests, I love to set up a toppings bar with fresh herbs, lemon wedges, chili flakes, and toasted pumpkin seeds for everyone to customize their bowls. For something different, try it with my Italian Chicken Gnocchi Soup for an impressive soup-tasting dinner that always wows friends.

    Seasonal Adaptations Worth Trying

    I’ve created seasonal variations that keep this recipe exciting year-round. In summer, I lighten it up with zucchini, fresh corn, and lots of herbs like basil and cilantro. Fall calls for hearty root vegetables—sweet potatoes, parsnips, and butternut squash add natural sweetness and extra nutrition. Winter versions get a protein boost from white beans or chickpeas, while spring inspires me to add asparagus, peas, and tender greens. For a vegetarian version, replace chicken with firm tofu or tempeh and use vegetable broth. Each adaptation maintains the core anti-inflammatory benefits while keeping the flavors fresh and aligned with what’s available seasonally.

    Storage & Troubleshooting Guide

    Proper Storage for Maximum Benefits

    This soup stores beautifully, actually improving in flavor after a day in the refrigerator as the spices meld. Refrigerate in airtight glass containers for up to 4 days—I prefer glass as turmeric can stain plastic. For freezing, slightly undercook the vegetables and cool completely before portioning into freezer-safe containers, leaving room for expansion. Frozen soup maintains quality for 3 months. When reheating, do so gently on the stovetop rather than microwaving to preserve the delicate flavors and nutrients. Add fresh herbs just before serving to brighten the reheated soup.

    Fixing Common Soup Issues

    If your soup tastes too bitter, the turmeric might be overpowering. Balance it with a teaspoon of honey or coconut sugar and a splash of lime juice. For thin broth, simmer uncovered to reduce, or blend a cup of the vegetables and return to the pot for natural thickening. If the flavors seem flat, a splash of apple cider vinegar often works wonders to brighten everything. Too spicy? Add coconut milk to temper the heat. Remember that turmeric’s color intensifies over time—what looks perfect today may appear more vibrant tomorrow, but this doesn’t affect the taste or benefits.

    Frequently Asked Questions

    Can I make this Anti Inflammatory Turmeric Chicken Soup in a slow cooker?

    Absolutely! Add all ingredients except fresh herbs to your slow cooker, cook on low for 6-8 hours or high for 3-4 hours, then stir in fresh herbs before serving. The slow cooking intensifies the anti-inflammatory properties.

    Is fresh turmeric necessary or can I use powdered?

    While fresh turmeric provides optimal flavor and benefits, powdered works well too. Use 1 teaspoon of powder for each tablespoon of fresh called for in the recipe.

    Can I make this soup vegetarian?

    Yes! Replace chicken with chickpeas or tofu, and use vegetable broth instead of chicken broth. Add a tablespoon of nutritional yeast for umami depth.

    How can I increase the protein content?

    Add an extra cup of shredded chicken, stir in rinsed canned beans during the last 10 minutes, or top each serving with a soft-boiled egg.

    Will this soup help with my joint inflammation?

    While many people find relief from joint discomfort with regular consumption of turmeric-rich foods, this soup should complement, not replace, medical treatment for inflammatory conditions.

    Final Thoughts

    This Anti Inflammatory Turmeric Chicken Soup has become more than just a recipe in my kitchen—it’s a ritual of self-care I turn to whenever my body needs gentle healing. The golden elixir combines centuries-old wisdom about turmeric’s medicinal properties with modern understanding of nutrition, all wrapped in a package that’s deeply satisfying to both body and soul. Whether you’re fighting off a cold, managing inflammation, or simply craving something nourishing, I hope this soup brings you the same comfort it’s brought me. For more healing recipes, visit my Pinterest collection where I’m always adding new wellness-focused dishes.

  • Dal Makhani Recipe: Irresistibly Creamy & Bursting with Flavor!

    Dal Makhani Recipe: Irresistibly Creamy & Bursting with Flavor!

    Dal Makhani Recipe: Irresistibly Creamy & Bursting with Flavor!

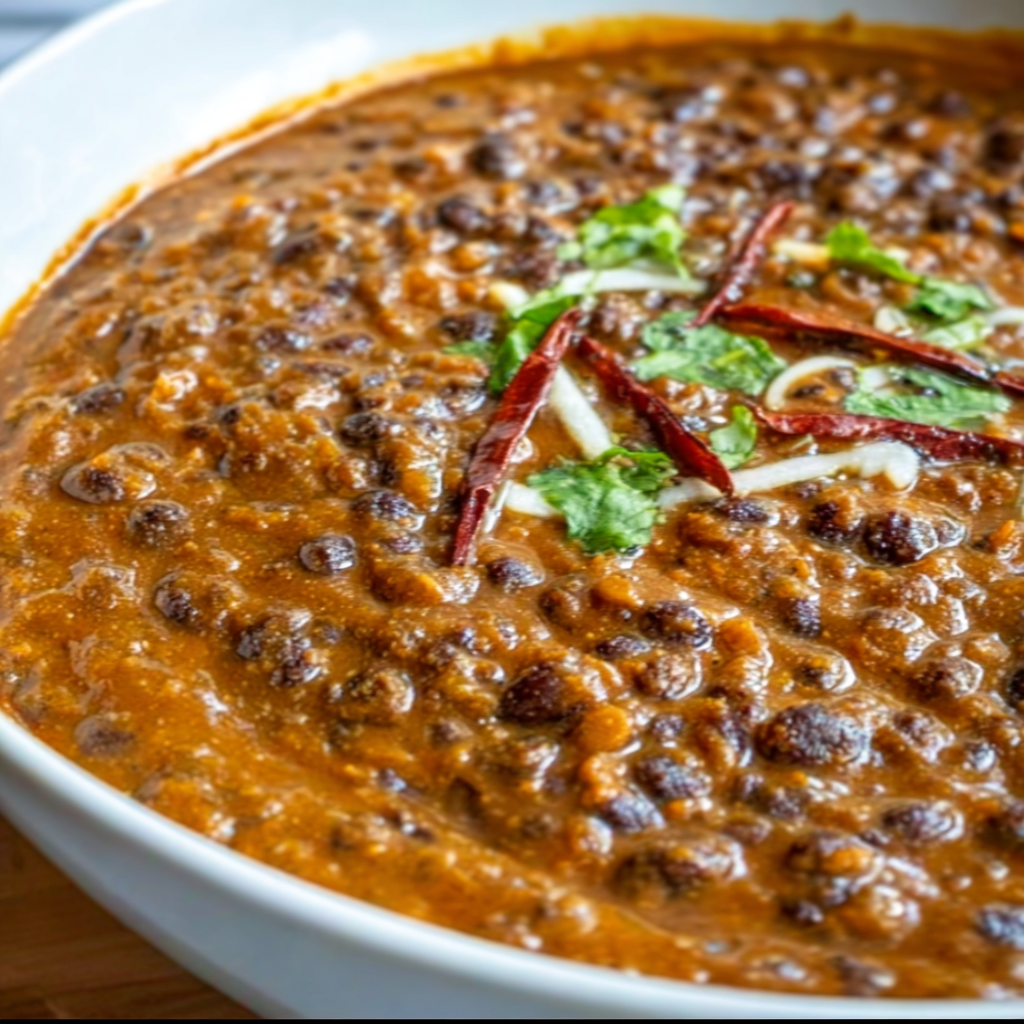
    Dal Makhani has completely transformed my weeknight dinner game, bringing the rich, creamy flavors of North Indian cuisine right into my humble kitchen. The first time I simmered these black lentils with butter and cream, my entire apartment filled with an aroma so intoxicating that my neighbor actually knocked on my door asking what I was cooking! This velvety dal creates pure magic in your mouth—each spoonful delivers a perfect balance of smokiness, creaminess, and subtle spice that will transport you straight to the streets of Delhi. If you’ve been searching for an authentic Dal Makhani recipe, your journey ends here.

    Recipe

    Why You’ll Love This Dal Makhani

    A Perfect Balance of Flavors

    This Dal Makhani delivers complex layers of flavor that develop beautifully over time. The earthy black lentils provide a hearty base while the aromatic spices—cumin, coriander, and garam masala—create depth without overwhelming heat. I love how the slow cooking process transforms simple ingredients into something truly extraordinary. The butter and cream melt into the lentils, creating that signature silky texture that coats your spoon and warms your soul. Trust me, even my spice-cautious friends request this dish repeatedly!

    Versatile and Nutritious Comfort Food

    Beyond its incredible taste, Dal Makhani offers remarkable nutritional benefits. These black lentils pack a serious protein punch while providing fiber that keeps you satisfied for hours. I often make a large batch on Sunday for easy weekday lunches that actually keep me energized through afternoon meetings. It’s equally perfect for casual family dinners or impressive enough for guests. The best part? It actually tastes even better the next day, making it ideal for meal prep and busy households who need delicious food without daily cooking.

    Essential Tips & Tricks

    Perfecting the Texture

    The secret to restaurant-quality Dal Makhani lies in achieving that perfect creamy consistency. Start by soaking your black lentils (urad dal) and kidney beans (rajma) overnight—this isn’t optional! This crucial step ensures they cook evenly and develop that luxurious texture. When simmering, maintain a gentle bubble rather than a rolling boil, and stir occasionally to prevent sticking. The traditional method calls for slow cooking for hours, but I’ve found that 45 minutes in a pressure cooker followed by 20 minutes of simmering with cream creates nearly identical results for those busy weeknights.

    Building Flavor Foundations

    The tempering process (tadka) transforms this dish from good to extraordinary. Heat ghee or butter until shimmering, then add whole spices like cumin seeds and bay leaves, allowing them to release their essential oils before adding onions. Let those onions caramelize to a deep golden brown—don’t rush this step! The natural sweetness balances the earthiness of the lentils. For authentic flavor, finish with a splash of cream and a dollop of butter just before serving. This final touch creates that signature velvety mouthfeel that makes restaurant-style Dal Makhani so irresistible.

    Serving Ideas & Creative Variations

    Perfect Pairings

    Dal Makhani deserves worthy companions on your table. Serve with fluffy basmati rice or freshly made naan bread for soaking up every last drop of that luxurious sauce. I love adding a side of quick-pickled onions for brightness and textural contrast. For a complete Indian feast, pair with Cauliflower Chickpea Curry and a simple cucumber raita. The cooling yogurt balances the richness perfectly. For special occasions, try serving in individual copper bowls with a swirl of cream and fresh cilantro—the presentation elevates the experience and always impresses guests!

    Modern Twists on Tradition

    While I respect tradition, I’ve discovered some delightful creative variations that breathe new life into this classic dish. For a lighter version, substitute half the cream with coconut milk for subtle sweetness. Vegetable additions like wilted spinach or roasted butternut squash fold in beautifully during the final cooking stage. My personal favorite twist is adding a tablespoon of smoked paprika for enhanced smokiness—it mimics the traditional clay pot cooking method. For heat lovers, stir in a spoonful of chili garlic paste just before serving for a fiery kick that complements the creamy base.

    Storage & Troubleshooting Guide

    Keeping It Fresh

    Dal Makhani actually improves with time as flavors meld together, making it perfect for batch cooking. Store in airtight containers in the refrigerator for up to 5 days—the flavors will continue developing beautifully. For longer storage, freeze portions in freezer-safe containers for up to 3 months. When reheating, add a splash of water or cream as the dal tends to thicken considerably. I often make double batches specifically to freeze; nothing beats having homemade Dal Makhani ready within minutes on hectic days when cooking feels impossible.

    Fixing Common Issues

    Even experienced cooks occasionally encounter challenges with Dal Makhani. If your dal is too thick or grainy, the lentils likely needed more soaking time or longer cooking. Simply add warm water or stock (¼ cup at a time) and simmer until the desired consistency is reached. For dal that’s too thin, continue simmering uncovered to reduce, or add a teaspoon of cornstarch slurried with cold water. If your dal lacks depth, try adding a touch more garam masala and a squeeze of lemon juice—acid brightens all the flavors. Remember that patience is key—this dish rewards those who give it time to develop.

    Frequently Asked Questions

    Can I make Dal Makhani without cream for a dairy-free version?

    Absolutely! Substitute full-fat coconut milk or cashew cream for traditional dairy. The coconut adds subtle sweetness while cashew cream maintains the neutral creamy profile closer to the original.

    How can I make authentic Dal Makhani if I don’t have time for overnight soaking?

    Use the quick-soak method: boil lentils and beans for 2 minutes, then let sit covered for 1 hour. While not ideal, it’s a workable solution when time is limited.

    My Dal Makhani never tastes as rich as restaurant versions. What’s the secret?

    Restaurants often use significantly more butter and cream than home recipes suggest. Don’t skimp on these ingredients if you want true restaurant flavor in your Dal Makhani.

    Can I make this in a slow cooker instead?

    Yes! Cook on low for 8 hours after sautéing the aromatics. Add cream and butter during the final 30 minutes of cooking time.

    What’s the difference between Dal Makhani and regular dal?

    Dal Makhani specifically uses whole black lentils and kidney beans simmered with butter and cream, while regular dal can be made with various split lentils and typically has a thinner consistency.

    Final Thoughts

    Dal Makhani represents everything I love about cooking—simple ingredients transformed through time and technique into something truly extraordinary. There’s something deeply satisfying about watching these humble lentils slowly absorb the flavors and become this luxurious, velvety dish that brings people together. Whether you’re new to Indian cooking or a seasoned pro, this recipe deserves a permanent spot in your repertoire. For more delicious recipes like this one, follow me on Pinterest where I share my latest culinary adventures!

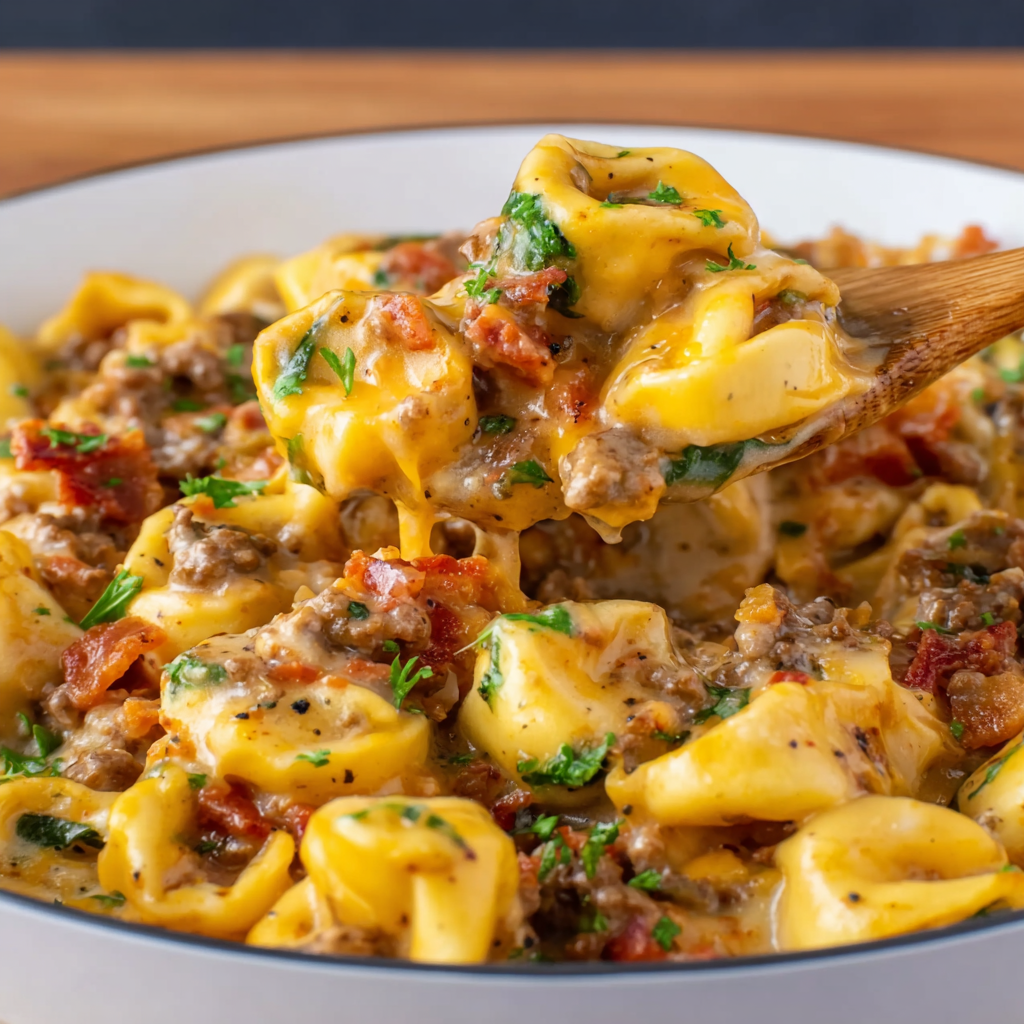
  • Bacon Cheeseburger Tortellini: Irresistibly Delicious Comfort Food!

    Bacon Cheeseburger Tortellini: Irresistibly Delicious Comfort Food!

    Bacon Cheeseburger Tortellini: Irresistibly Delicious Comfort Food!

    Bacon Cheeseburger Tortellini has completely transformed my weeknight dinner game, and I’m absolutely thrilled to share this cozy comfort dish with you! The first time I made this, my kitchen filled with the irresistible aroma of sizzling bacon and seasoned ground beef that had my family hovering around the stove asking “how much longer?” This delicious pasta creation combines all the flavors of your favorite burger – savory beef, crispy bacon, melty cheese – with pillowy cheese-filled tortellini for a meal that feels like a warm hug. It’s become my go-to when I need something hearty that makes everyone at my table smile. Check out more family favorites at Recipes Darleen.

    Recipe

    Why You’ll Love This Bacon Cheeseburger Tortellini

    Perfect Comfort Food Combination

    There’s something magical about combining two beloved classics into one extraordinary dish. The rich, savory ground beef perfectly complements the cheese-filled tortellini, creating layers of flavor in every bite. I still remember the first time I served this to my sister – her eyes widened with that first forkful! The bacon adds a smoky crunch that elevates the entire dish, while the cheese sauce brings everything together in creamy perfection. This dish strikes that perfect balance between familiar comfort and exciting flavor that makes dinnertime something to look forward to.

    Quick and Straightforward Preparation

    On busy weeknights when I’m juggling work emails and helping with homework, this recipe is my saving grace. You’ll have this on the table in under 30 minutes, making it perfect for those evenings when you want something delicious without spending hours in the kitchen. The ingredients are straightforward pantry staples, and the cooking process flows naturally – brown the meat, cook the pasta, combine with the sauce. No complicated techniques or specialized equipment needed! Even when I’m exhausted, I can make this dish on autopilot and still have everyone asking for seconds.

    Essential Tips & Tricks

    Perfecting the Flavor Base

    The secret to making this dish absolutely irresistible lies in building those foundational flavors. Start by cooking your bacon until it’s perfectly crispy, then use that flavorful bacon fat to brown your ground beef – this simple step infuses everything with that smoky, savory essence. Don’t rush the onion and garlic sautéing process; letting them become translucent and aromatic creates depth in your sauce. I always add a splash of Worcestershire sauce for that authentic burger flavor that makes everyone ask, “What’s in this?” Remember to season each layer as you go, rather than just at the end.

    Pasta and Sauce Techniques

    Achieving that perfect creamy texture makes all the difference between a good dish and a great one. Cook your tortellini just until al dente – they’ll continue cooking slightly in the sauce. For the creamiest result, I’ve found that gradually adding cheese to the sauce while it’s off the heat prevents graininess. If your sauce seems too thick, add a splash of pasta water – the starch helps everything come together beautifully. For a variation with an Italian twist, check out my Italian Chicken Gnocchi Soup which uses similar techniques for creating a velvety base.

    Serving Ideas & Creative Variations

    Perfect Pairings and Sides

    Serve this hearty dish with something fresh and crisp to balance the richness. A simple green salad with a tangy vinaigrette cuts through the creaminess beautifully – I like arugula with lemon dressing for the perfect contrast. Garlic bread makes an excellent companion for soaking up every last bit of that delicious sauce. For a complete meal that will impress dinner guests, consider adding my Mediterranean Chicken Quinoa Bowl as a lighter side option. For casual family dinners, I serve this in wide, shallow bowls to keep everything at the perfect temperature.

    Exciting Flavor Twists

    Don’t be afraid to make this recipe your own with creative flavor variations! For a spicy kick, add diced jalapeños or a dash of hot sauce to the sauce. My husband loves when I add mushrooms for an earthy element, while my kids go crazy for the version with diced pickles mixed in at the end for that authentic burger experience. Try using half ground beef and half Italian sausage for extra depth, or swap the cheddar for pepper jack if you enjoy heat. For a lighter option, ground turkey works beautifully – just add a bit more seasoning since it’s naturally less flavorful than beef.

    Storage & Troubleshooting Guide

    Proper Storage and Reheating

    This dish makes fantastic leftovers that might taste even better the next day! Store any remaining pasta in an airtight container in the refrigerator for up to 3 days. When reheating, add a splash of milk or cream to revive the sauce, as it tends to thicken when chilled. Warm it gently on the stovetop over medium-low heat, stirring occasionally to prevent sticking. I don’t recommend freezing this dish, as the cream sauce can separate and the tortellini texture suffers. For meal prep, you can prepare the meat sauce ahead of time and refrigerate, then cook the pasta fresh when you’re ready to serve.

    Common Issues and Solutions

    If your sauce breaks or looks curdled, don’t panic! Lower the heat immediately and whisk in a tablespoon of cold cream. The most common mistake is overheating the cheese sauce – always add cheese off the heat. If your dish seems bland, brighten it with a squeeze of fresh lemon juice or a dash of hot sauce. Too thick? Add pasta water a tablespoon at a time. Too thin? Let it simmer uncovered for a few minutes. Remember that tortellini absorbs sauce quickly, so if you’re not serving immediately, make your sauce slightly thinner than you think you need.

    Frequently Asked Questions

    Can I use frozen tortellini for Bacon Cheeseburger Tortellini?

    Absolutely! No need to thaw – just add 1-2 minutes to the cooking time. Check for doneness by tasting a piece; it should be tender but still have a slight bite.

    What cheese works best in this recipe?

    Sharp cheddar provides classic burger flavor, but a mix of cheddar and mozzarella creates the best melt. Experiment with American cheese for an authentic fast-food burger taste.

    Can I make this dish ahead of time?

    Prepare the meat sauce up to 2 days ahead, but cook the tortellini fresh when ready to serve. Combine everything just before serving for best texture.

    Is there a way to make this lighter?

    Use lean ground beef or turkey, reduced-fat cheese, and light cream instead of heavy cream. Add extra vegetables like bell peppers or spinach for nutrition.

    What’s the best way to reheat leftovers?

    Gently warm on the stovetop with a splash of milk to revive the sauce. Microwave on 70% power, stirring halfway through, to prevent the pasta from becoming tough.

    Final Thoughts

    This Bacon Cheeseburger Tortellini has become more than just a recipe in my household – it’s a guaranteed mood-lifter after long days and the dish most requested for special family dinners. The way it combines familiar comfort with surprising depth keeps everyone coming back for more. I’d love to see your versions of this dish – share them with me on Pinterest! Remember that cooking is about making memories as much as meals, and this Bacon Cheeseburger Tortellini creates plenty of both around my table.

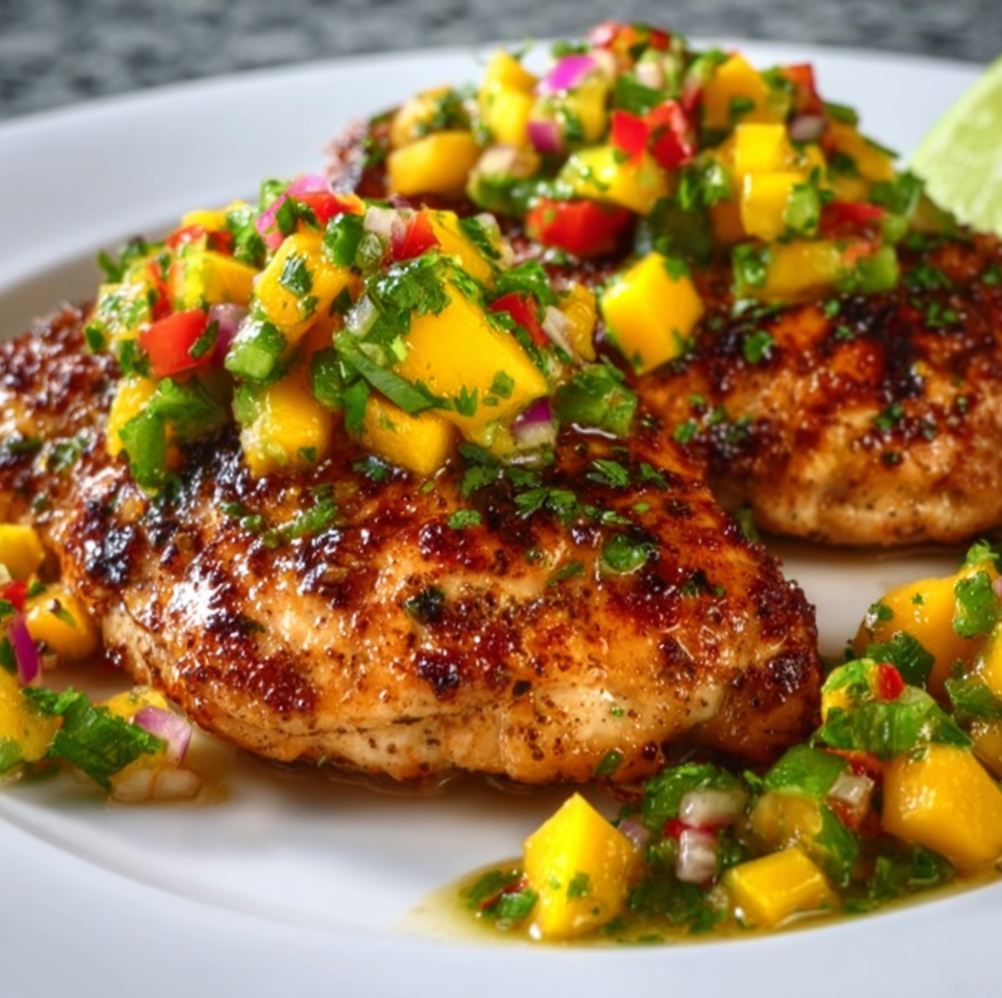
  • Honey Lime Chicken with Fresh Mango Salsa: Irresistibly Zesty & Sweet!

    Honey Lime Chicken with Fresh Mango Salsa: Irresistibly Zesty & Sweet!

    Honey Lime Chicken with Fresh Mango Salsa: Irresistibly Zesty & Sweet!

    There’s something magical about the way honey lime chicken with fresh mango salsa dances across your taste buds on a warm evening. The tangy lime juice mingling with sweet honey creates this irresistible glaze that caramelizes perfectly on the grill. I discovered this recipe during a beach vacation when a local chef shared his secret for the most flavorful chicken I’d ever tasted. The tropical brightness of the mango salsa paired with the sticky-sweet chicken instantly transports me back to that oceanside dinner. This dish has become my go-to when I want to impress guests or simply treat myself to something special from Recipes Darleen.

    Recipe

    Why You’ll Love This Honey Lime Chicken with Fresh Mango Salsa

    Perfect Balance of Flavors

    The magic of this dish lies in its perfect harmony of flavors. The honey provides a natural sweetness that caramelizes beautifully when grilled, while the lime juice cuts through with bright acidity that keeps everything balanced. I love how the chicken soaks up all these flavors, becoming incredibly juicy and tender. The marinade requires just a handful of ingredients you probably already have in your pantry: honey, lime juice, garlic, and a touch of chili powder for subtle heat. When these ingredients come together, they create a mouthwatering aroma that will have your family gathering in the kitchen before dinner is even ready!

    Quick and Versatile Preparation

    One thing I absolutely adore about this honey lime chicken is how versatile the preparation can be. You can marinate the chicken for as little as 30 minutes when you’re short on time, or let it soak overnight for maximum flavor penetration. The cooking method is flexible too! Grill it for those beautiful char marks and smoky flavor, bake it for hands-off convenience, or even pan-sear it when the weather doesn’t cooperate. I’ve made this recipe on busy weeknights and for special weekend gatherings. The fresh mango salsa comes together in minutes while the chicken cooks, making this an efficient yet impressive meal that never feels rushed.

    Essential Tips & Tricks

    Perfecting the Marinade

    The key to exceptional honey lime chicken starts with the marinade. I’ve found that using fresh lime juice (never bottled) makes a remarkable difference in brightness. For the best flavor infusion, score your chicken breasts with shallow cuts before marinating—this allows the sweet-tangy mixture to penetrate deeper. Another game-changer is adding a tablespoon of olive oil to your marinade, which helps the chicken retain moisture during cooking. Don’t skip the 10 minutes of resting time after cooking! This allows the juices to redistribute throughout the meat, resulting in chicken that’s moist and tender rather than dry. Your patience will be rewarded with perfectly juicy results.

    Creating Perfect Mango Salsa

    The fresh mango salsa deserves as much attention as the chicken itself. Select mangoes that yield slightly to pressure—they should feel soft but not mushy. I’ve learned that the best texture comes from dicing all ingredients to a similar size, about ¼-inch pieces. For a balanced flavor profile, don’t skip the red onion and jalapeño; they provide essential contrast to the sweet mango. A pro tip I discovered after many attempts: make the salsa at least 30 minutes before serving and store it in the refrigerator. This allows the flavors to meld together beautifully, similar to how I prepare the Mexican Street Corn Pasta Salad that pairs wonderfully with this dish.

    Serving Ideas & Creative Variations

    Complementary Side Dishes

    This honey lime chicken with fresh mango salsa shines as the star of various meal presentations. For a complete dinner, I love serving it over coconut rice, which soaks up all those delicious juices. A simple side of black beans seasoned with cumin and lime provides protein and complements the tropical flavors perfectly. For a lighter option, pair with a crisp jicama slaw dressed with lime and cilantro. When entertaining, I arrange the sliced chicken over a bed of mixed greens with avocado slices and drizzle with extra lime juice. The vibrant colors make for a stunning presentation that’s as beautiful as it is delicious!

    Exciting Flavor Variations

    While the classic recipe is divine, I’ve enjoyed experimenting with variations that maintain the essence of the dish while introducing new flavor dimensions. Try adding a tablespoon of tequila to the marinade for a subtle complexity that evokes margarita vibes. For a Thai-inspired twist, incorporate lemongrass and a splash of coconut milk into the marinade. The mango salsa is equally adaptable—add diced pineapple or peach for additional sweetness, or substitute watermelon for a refreshing summer variation. For heat lovers, incorporate habanero instead of jalapeño in the salsa, similar to my approach with Grilled Shrimp Bowl with Avocado Corn Salsa.

    Storage & Troubleshooting Guide

    Proper Storage Solutions

    Storing leftover honey lime chicken properly ensures you can enjoy this delicious meal for days to come. Allow the chicken to cool completely before refrigerating in an airtight container—it will maintain its quality for up to 3 days. Store the mango salsa separately in its own container to preserve its fresh texture and prevent it from becoming soggy. When reheating the chicken, add a splash of water or chicken broth to maintain moisture, then cover and warm gently in the microwave or in a skillet over medium-low heat. For meal prep, you can freeze the marinated raw chicken for up to 2 months—just thaw overnight in the refrigerator when ready to cook.

    Common Issues and Solutions

    Even experienced cooks encounter challenges with this recipe. If your chicken is turning out dry, you’re likely overcooking it—invest in a meat thermometer and remove the chicken from heat when it reaches 165°F (74°C). For chicken that’s not absorbing enough flavor, try pounding it to an even thickness before marinating to help it cook evenly and absorb more marinade. If your mango salsa is too watery, make sure to remove excess juice from the mango before mixing, and add a touch more lime juice and salt to brighten the flavors. When the salsa lacks punch, a pinch of cayenne pepper or a drizzle of honey can quickly remedy the situation.

    Frequently Asked Questions

    Can I make honey lime chicken with fresh mango salsa ahead of time?

    Yes! Marinate the chicken up to 24 hours in advance and prepare the mango salsa up to 4 hours before serving. Store separately in the refrigerator and combine just before serving for the freshest flavor and texture.

    What’s the best type of mango to use for the salsa?

    Ataulfo (also called champagne or honey) mangoes work beautifully with their sweet, creamy flesh and minimal fibers. Tommy Atkins mangoes are more widely available and also work well when fully ripe.

    Can I use frozen mango for the salsa?

    While fresh is preferred for optimal texture, thawed frozen mango will work in a pinch. Drain excess liquid after thawing and pat dry with paper towels before dicing and mixing with other ingredients.

    How can I make this recipe spicier?

    Add cayenne pepper or red pepper flakes to the chicken marinade, and increase the amount of jalapeño (keeping the seeds) in the mango salsa. A dash of hot sauce just before serving also works wonderfully.

    Is this recipe gluten-free?

    Yes, this honey lime chicken with fresh mango salsa is naturally gluten-free. Just ensure any pre-packaged spices you use don’t contain anti-caking agents with gluten.

    Final Thoughts

    This honey lime chicken with fresh mango salsa has become more than just a recipe in my kitchen—it’s a reminder that simple ingredients can create extraordinary meals. The bright, tropical flavors bring sunshine to the table regardless of season, while the balance of sweet, tangy, and spicy elements makes every bite interesting. I hope this dish brings as much joy to your table as it has to mine! For more delicious inspiration, check out my other recipes on Pinterest where I’m always sharing new flavor adventures.

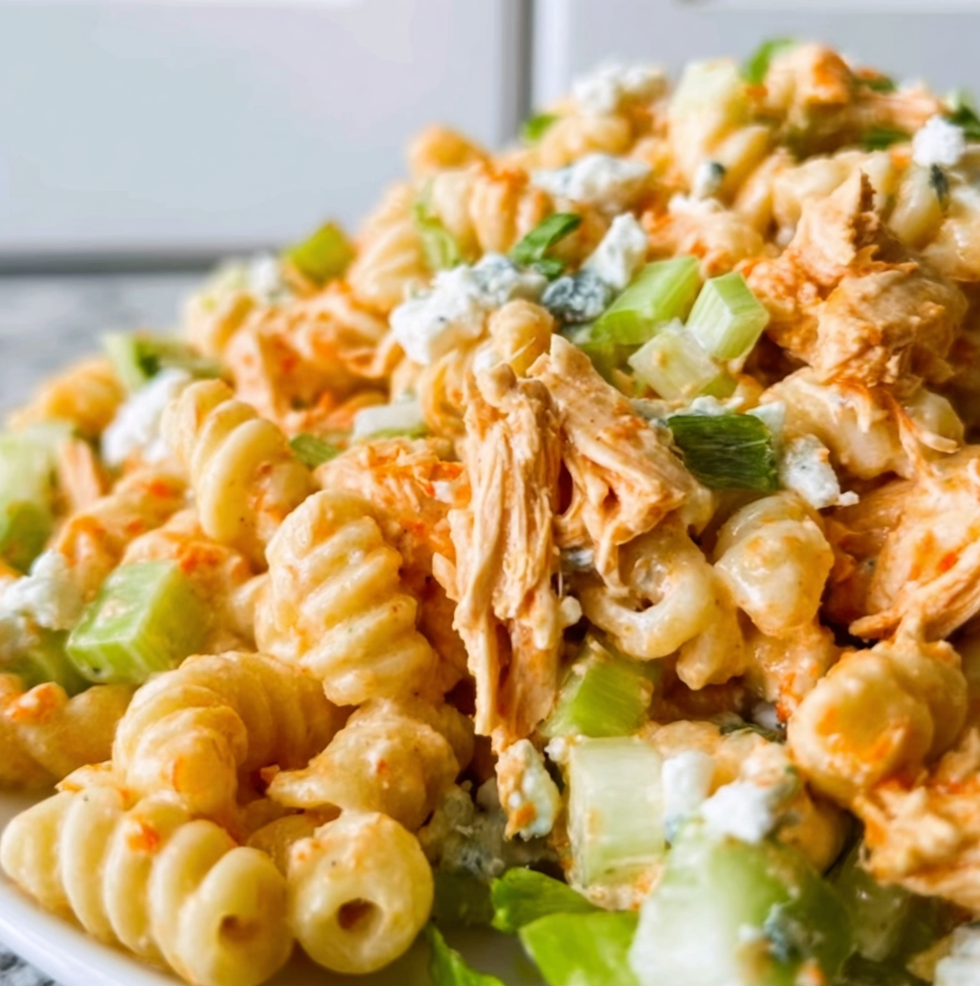
  • Buffalo Chicken Pasta Salad That’s Irresistibly Creamy & Spicy!

    Buffalo Chicken Pasta Salad That’s Irresistibly Creamy & Spicy!

    Buffalo Chicken Pasta Salad That’s Irresistibly Creamy & Spicy!

    Buffalo Chicken Pasta Salad combines two comfort food favorites into one irresistible dish that’s perfect for summer gatherings, meal prep, or a satisfying weeknight dinner. The spicy kick of buffalo sauce mingles with creamy dressing and tender pasta, creating a flavor explosion in every bite. I first made this for my sister’s backyard barbecue, and it disappeared faster than any other dish! The tangy heat balanced with cool, creamy elements makes this pasta salad absolutely crave-worthy and something you’ll want to make again and again. Let me show you how to create this perfect balance of flavors at Recipes Darleen.

    Recipe

    Why You’ll Love This Buffalo Chicken Pasta Salad

    Perfect Balance of Flavors and Textures

    The magic of this Buffalo Chicken Pasta Salad lies in its contrasting elements working in perfect harmony. The spicy buffalo sauce coats tender chunks of chicken, while the cool, creamy dressing soothes the heat just enough. I love how the al dente pasta provides the perfect backdrop for these bold flavors. The crunch from diced celery and red onion adds textural contrast that keeps each bite interesting. When I serve this at gatherings, even my heat-averse friends can’t resist coming back for seconds—it’s that perfect balance of spicy and creamy that makes everyone’s taste buds dance!

    Make-Ahead Convenience

    One thing I absolutely adore about this recipe is its meal prep potential. I often make a big batch on Sunday, and the flavors actually improve overnight as they mingle in the refrigerator. The pasta absorbs more of the buffalo essence, and everything melds into creamy, spicy perfection. It’s saved me on countless busy weeknights when I need something substantial but don’t have time to cook. Plus, it travels beautifully for potlucks and picnics. I’ve brought this to office lunches and beach days alike, and it holds up wonderfully, making it truly versatile for any occasion.

    Essential Tips & Tricks

    Choosing and Cooking Your Pasta

    The foundation of any great pasta salad is properly cooked pasta, and this Buffalo Chicken Pasta Salad is no exception. I recommend using medium-sized pasta shapes with ridges or cavities that trap the delicious sauce—rotini, farfalle, or penne work beautifully. The key is cooking the pasta just until al dente, then immediately rinsing under cold water to stop the cooking process. This prevents the pasta from becoming mushy as it sits in the dressing. For an extra flavor boost, try cooking your pasta in chicken broth instead of water! This simple swap adds a subtle depth that elevates the entire dish, similar to how I enhance my Grilled Chicken Orzo Salad with Avocado.

    Perfecting the Buffalo Sauce Balance

    Finding the right spice level is crucial for this salad. I recommend starting with less buffalo sauce than you think you’ll need—you can always add more, but you can’t take it away! My perfect ratio is about 1/3 cup buffalo sauce to 3/4 cup creamy dressing for a family-friendly heat level. For extra creaminess that helps tame the heat, I sometimes add a dollop of blue cheese or ranch dressing. If you’re serving guests with varying spice preferences, consider keeping extra buffalo sauce on the side so everyone can customize their heat level. The goal is that perfect balance where the buffalo flavor shines without overwhelming the other ingredients.

    Serving Ideas & Creative Variations

    Complementary Side Dishes

    This Buffalo Chicken Pasta Salad shines as a main dish, but pairing it with the right sides creates a complete meal experience. I love serving it with cooling elements like sliced cucumbers or a simple green salad with a light vinaigrette to balance the richness. For a heartier spread, add some crusty garlic bread or homemade cornbread to soak up any extra dressing. When I’m entertaining, I sometimes create a pasta salad bar with this buffalo version as the star, alongside my Mexican Street Corn Pasta Salad for variety. The contrast between the spicy buffalo and sweet corn flavors gives guests delightful options that complement each other beautifully.

    Creative Twist Options

    Don’t be afraid to put your own spin on this versatile recipe! One of my favorite variations is adding avocado chunks just before serving for creamy, cooling bites that balance the heat. For a Mediterranean twist, try incorporating crumbled feta instead of blue cheese and adding chopped Kalamata olives. Vegetarian guests? Substitute the chicken with roasted cauliflower tossed in buffalo sauce—the florets catch the sauce beautifully. For a lower-carb option, use zucchini noodles for half the pasta. When I’m feeling extra indulgent, I sometimes add crispy bacon bits or even crushed ranch-flavored chips on top for unexpected texture and flavor that makes everyone ask for my secret ingredient!

    Storage & Troubleshooting Guide

    Proper Storage Techniques

    To maintain the best quality of your Buffalo Chicken Pasta Salad, proper storage is essential. Store it in an airtight container in the refrigerator for up to 4 days. I find that glass containers work best as they don’t absorb the buffalo flavor like plastic sometimes can. If you’re making this ahead for a party, consider keeping the dressing separate until about an hour before serving. This prevents the pasta from absorbing all the moisture and becoming soggy. For meal prep, I portion individual servings into separate containers for grab-and-go lunches. If the salad seems dry after refrigeration, simply drizzle a little extra dressing or a splash of buttermilk to refresh it before serving.

    Quick Fixes for Common Issues

    Even the most experienced cooks encounter challenges, but I’ve got solutions! If your pasta salad becomes too spicy, add more of the creamy element—try folding in additional ranch dressing, sour cream, or even cream cheese to tame the heat. Too dry after sitting overnight? A splash of milk or a dollop of mayo works wonders to bring back the creaminess. If the pasta has absorbed too much liquid and become mushy, add fresh, crisp elements like diced bell peppers or celery to reintroduce texture. And if the buffalo flavor isn’t pronounced enough, don’t just add more sauce—a sprinkle of cayenne or a dash of hot sauce will amp up the heat without making the salad too wet.

    Frequently Asked Questions

    Can I use leftover rotisserie chicken for Buffalo Chicken Pasta Salad?

    Absolutely! Rotisserie chicken is perfect for this recipe—it saves time and adds flavor. Simply shred or dice the meat and toss with buffalo sauce before adding to your pasta salad.

    How can I make this pasta salad healthier?

    Use whole wheat pasta, Greek yogurt instead of mayo in the dressing, and increase the vegetables. Try adding shredded carrots, diced bell peppers, or broccoli florets for extra nutrition.

    Is this recipe gluten-free?

    Not as written, but you can easily substitute gluten-free pasta. Just ensure your buffalo sauce is gluten-free as well, as some brands contain wheat-based ingredients.

    Can I freeze Buffalo Chicken Pasta Salad?

    I don’t recommend freezing this salad as the creamy dressing will separate and the pasta texture will change significantly upon thawing.

    How spicy is this Buffalo Chicken Pasta Salad?

    The spice level is customizable! Start with less buffalo sauce if you prefer mild heat, or add cayenne pepper or hot sauce for extra kick if you love spicy foods.

    Final Thoughts

    This Buffalo Chicken Pasta Salad has become my go-to recipe when I want to impress without spending hours in the kitchen. The bold flavors, make-ahead convenience, and endless adaptability make it perfect for everything from quiet family dinners to lively potlucks. I love seeing people’s surprised expressions when they taste how the creamy, spicy elements come together so perfectly. For more delicious recipes like this one, follow me on Pinterest where I share new inspiration daily!

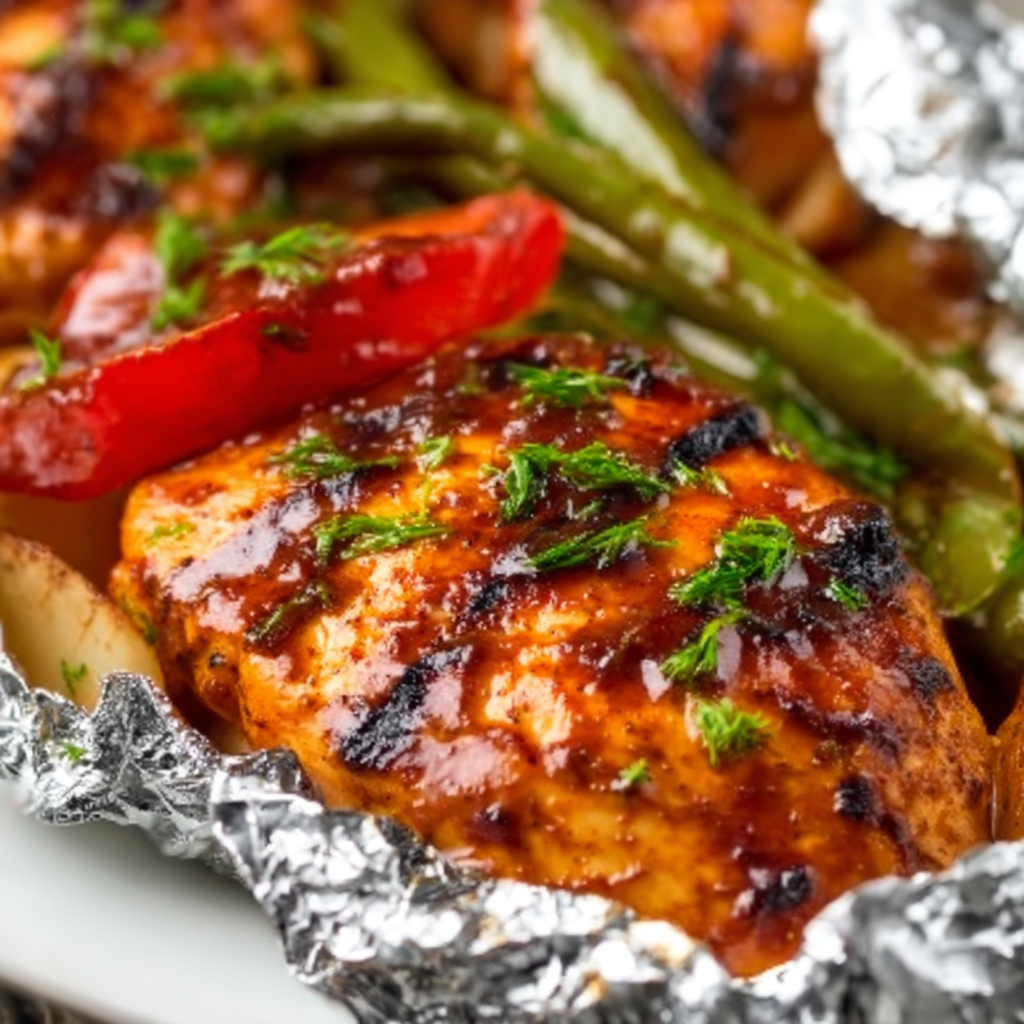
  • Grilled BBQ Chicken Foil Dinner That Will Wow Your Taste Buds!

    Grilled BBQ Chicken Foil Dinner That Will Wow Your Taste Buds!

    Grilled BBQ Chicken Foil Dinner That Will Wow Your Taste Buds!

    There’s something magical about the way a Grilled BBQ Chicken Foil Dinner transforms an ordinary weeknight into a special occasion. The tantalizing aroma of smoky barbecue sauce mingling with tender chicken and colorful vegetables never fails to bring my family running to the table. I discovered this foolproof method during a chaotic summer when I needed dinner solutions that wouldn’t heat up my kitchen. Now it’s become our go-to meal for both busy weeknights and casual entertaining. The beauty lies in its simplicity—everything cooks together in a tidy foil packet, infusing the ingredients with incredible flavor while keeping cleanup to an absolute minimum.

    Recipe

    Why You’ll Love This Grilled BBQ Chicken Foil Dinner

    Perfect for Busy Families

    As a mom who juggles work deadlines and family commitments, I’m always looking for time-saving meals that don’t sacrifice flavor. These foil packets are my secret weapon! Simply toss your chicken, veggies, and seasonings together, wrap them up, and let the grill work its magic. The entire meal cooks in about 20 minutes, giving you precious time to help with homework or simply catch your breath. I love that I can prep these packets in the morning, refrigerate them, and then quickly grill them when evening chaos hits. The best part? Everyone gets their own personalized dinner packet, eliminating those “I don’t like peppers” complaints!

    Flavor That Can’t Be Beat

    The enclosed cooking environment of foil packets creates a flavor intensity that’s hard to achieve with other methods. As the chicken cooks, it releases its juices, which mingle with the barbecue sauce and seasonings to create an incredible natural sauce. The vegetables steam in this flavorful mixture, absorbing all those delicious flavors while maintaining their nutritional value. I’ve found that adding a small pat of butter to each packet creates an irresistible richness that takes this dish to restaurant-quality levels. My husband always comments that the chicken stays remarkably juicy and tender—a welcome change from dried-out grilled chicken breasts!

    Essential Tips & Tricks

    Foil Packet Perfection

    Creating the perfect foil packet requires a bit of technique, but it’s easy once you know the tricks. Start with heavy-duty aluminum foil or double up regular foil to prevent tearing. Cut pieces approximately 12×18 inches to give yourself plenty of working room. Place ingredients in the center, then bring the long sides together above the food. Fold the edges down in several small, tight folds until the foil is snug against the food. Crimp the short ends similarly, but leave a small pocket of air inside to allow for steam circulation. This proper sealing technique prevents juices from escaping while allowing enough space for everything to cook evenly.

    Temperature Management

    The secret to perfectly cooked chicken packets lies in temperature control. I’ve learned through plenty of trial and error that medium heat (around 375°F) works best for foil packets. Too hot, and you’ll burn the outside while leaving the inside raw; too cool, and everything will steam rather than develop those desirable caramelized flavors. I recommend using a two-zone fire on your grill—hot on one side, cooler on the other. Start packets on the cooler side for about 15 minutes, then move to the hot side for 5 minutes to develop some char. Always check that your chicken reaches 165°F before serving. Visit Recipes Darleen for more grilled chicken inspiration!

    Serving Ideas & Creative Variations

    Perfect Pairings

    While these foil packets contain a complete meal, I sometimes add a few complementary sides to round things out. A simple green salad with a light vinaigrette provides a fresh contrast to the rich, smoky flavors of the packets. For heartier appetites, I’ll serve warm crusty bread for sopping up the incredible sauce that develops inside each packet—trust me, you won’t want to waste a drop! On special occasions, I’ll add a sweet ending like lemon curd cookies that cleanse the palate after the savory barbecue flavors. For outdoor gatherings, consider setting up a “topping station” with fresh herbs, crumbled cheese, and additional barbecue sauce.

    Mix It Up

    The beauty of this cooking method is its versatility—once you master the basic technique, the variations are endless! Swap chicken thighs for breasts for even juicier results. Try different vegetable combinations based on what’s in season: summer squash and cherry tomatoes in summer, sweet potatoes and Brussels sprouts in fall. For a tropical twist, add pineapple chunks and switch to a teriyaki-based sauce. Feeling adventurous? Create a Mexican-inspired version with lime juice, chili powder, and corn. For a Mediterranean flair, use olive oil, lemon, oregano, and olives instead of barbecue sauce. My family has fun voting on their favorite variations, making dinner both delicious and interactive!

    Storage & Troubleshooting Guide

    Leftovers & Make-Ahead Tips

    These foil packet meals are perfect for meal prepping! You can assemble them up to 24 hours in advance—just keep them refrigerated until you’re ready to grill. If you have leftovers, transfer the contents to an airtight container (discard the used foil) and refrigerate for up to 3 days. While reheating in the microwave works in a pinch, I prefer reheating in a 350°F oven for about 15 minutes to maintain some of the original texture. For a time-saving hack, prepare a double batch and freeze the uncooked packets for up to 1 month. Thaw completely in the refrigerator before grilling. The flavors actually intensify as they marinate, making next-day leftovers particularly delicious!

    Troubleshooting Common Issues

    Even the most foolproof recipes can encounter hiccups! If your packets are leaking precious juices, you likely need to improve your sealing technique. Make sure your foil pieces are large enough and that you’re creating tight, multiple folds. If vegetables are coming out undercooked while the chicken is done, try cutting them into smaller, more uniform pieces. For those finding the chicken too dry, add a tablespoon of chicken broth or extra barbecue sauce to each packet before sealing. If you’re struggling with sticking, lightly spray the foil with cooking spray before adding ingredients. Remember that cooking times may vary based on your grill’s temperature and the size of your chicken pieces—always use a meat thermometer for perfect results.

    Frequently Asked Questions

    Can I make Grilled BBQ Chicken Foil Dinners in the oven instead?

    Absolutely! Bake at 425°F for 25-30 minutes until chicken reaches 165°F. You’ll miss some smoky flavor but still get delicious results. Open carefully as steam will escape when unwrapping.

    What vegetables work best in these foil packets?

    Choose vegetables with similar cooking times like bell peppers, zucchini, corn, and onions. For harder vegetables like carrots or potatoes, slice them thinner so they cook at the same rate as the chicken.

    How do I prevent my foil packets from sticking?

    Spray the foil lightly with cooking spray before adding ingredients, or place a piece of parchment paper between the food and foil for easy release and serving.

    Can I make these packets vegetarian?

    Definitely! Substitute the chicken with firm tofu, portobello mushrooms, or chickpeas. Add extra seasonings and a splash more sauce since these alternatives won’t release as much natural flavor as chicken.

    How do I know when my Grilled BBQ Chicken Foil Dinner is done?

    Carefully open one packet and check that chicken has reached 165°F with a meat thermometer. The chicken should be opaque throughout with no pink remaining, and vegetables should be tender.

    Final Thoughts

    The Grilled BBQ Chicken Foil Dinner has become a cornerstone in my recipe collection because it delivers on so many levels—flavor, convenience, and versatility. There’s something deeply satisfying about unwrapping these little foil presents at the dinner table, releasing a cloud of fragrant steam that promises deliciousness inside. Whether you’re cooking for picky eaters, entertaining guests, or simply trying to get a nutritious dinner on the table with minimal fuss, these customizable packets rise to every occasion. Don’t forget to check out more delicious ideas on our Pinterest board for inspiration!

  • BBQ Pulled Beef Sandwiches That Will Blow Your Taste Buds Away!

    BBQ Pulled Beef Sandwiches That Will Blow Your Taste Buds Away!

    BBQ Pulled Beef Sandwiches That Will Blow Your Taste Buds Away!

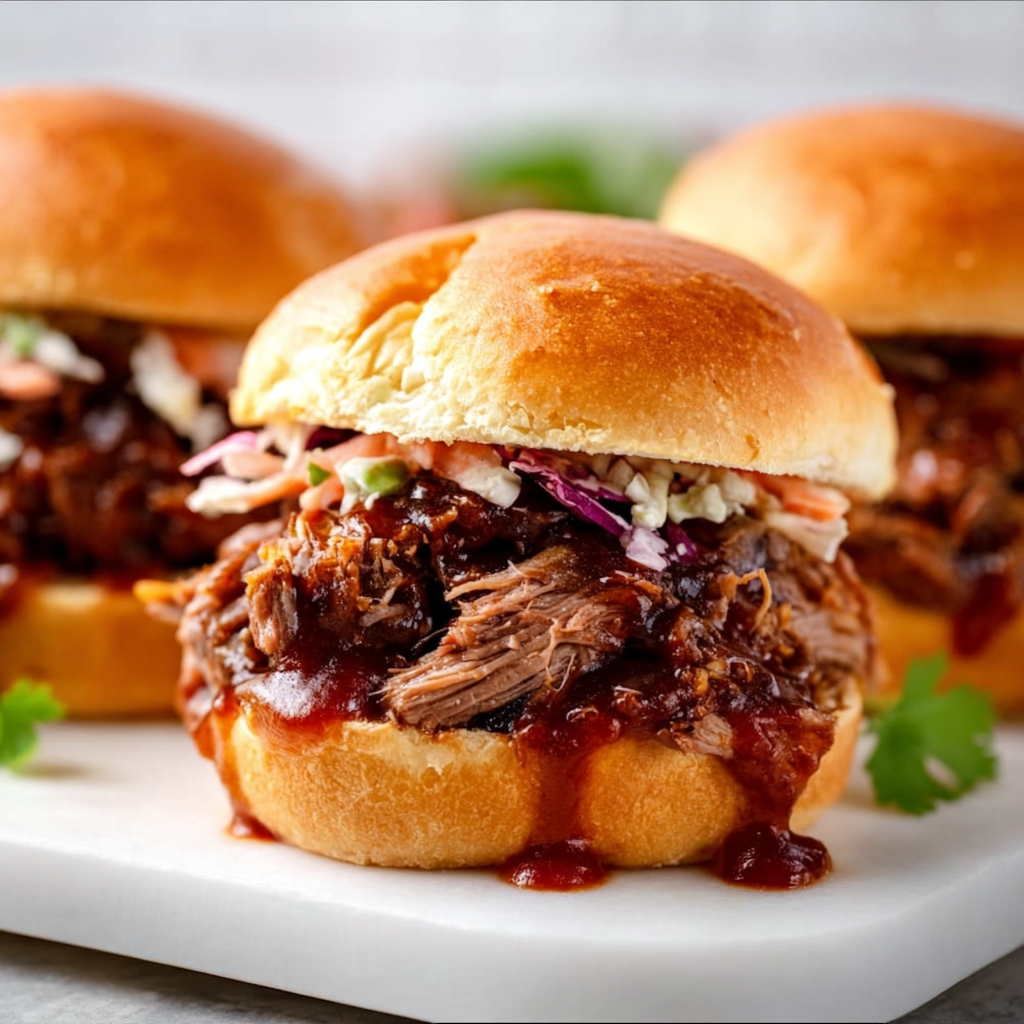
    These BBQ Pulled Beef Sandwiches have completely transformed my weeknight dinner game! There’s something magical about the way tender, slow-cooked beef absorbs all those smoky-sweet barbecue flavors, creating the most incredible sandwich filling imaginable. I first made these after a particularly exhausting Monday, when I needed comfort food that wouldn’t require hours of active cooking time. The rich aroma filled my kitchen as the beef simmered away, and that first bite—with the meat piled high on a toasted bun—was pure bliss. If you’re craving restaurant-quality pulled beef without the fuss, this recipe deserves a spot in your regular rotation. Check out my other comfort food classics for more inspiration!

    Recipe

    Why You’ll Love These BBQ Pulled Beef Sandwiches

    Perfect Balance of Flavors and Textures

    The magic of these sandwiches lies in their incredible depth of flavor. The beef becomes melt-in-your-mouth tender after slow cooking, absorbing the perfect balance of tangy, sweet, and smoky notes from the barbecue sauce. I love how the meat develops those caramelized edges while remaining juicy throughout. The contrast between the soft, pillowy buns and the hearty pulled beef creates a textural experience that’s absolutely irresistible. Add a bit of crunch from coleslaw, and you’ve got a sandwich that hits every sensory note perfectly. It’s comfort food that feels special enough for guests yet simple enough for weeknights.

    Make-Ahead Convenience

    These BBQ pulled beef sandwiches are the ultimate time-saver for busy households. The beef actually tastes better when made a day ahead, allowing those flavors to deepen and meld overnight in the refrigerator. I often prep a large batch on Sunday, then enjoy stress-free meals throughout the week. The recipe scales beautifully for crowds or can be portioned for smaller households. You can freeze portions in airtight containers for up to 3 months, making this a perfect emergency meal solution. I’ve served these at everything from casual family dinners to neighborhood gatherings with rave reviews every time.

    Essential Tips & Tricks

    Choosing and Preparing the Beef

    Selecting the right cut makes all the difference in this recipe. Chuck roast is my go-to choice for its perfect marbling and flavor, but brisket or round roast work beautifully too. Before cooking, I always pat the meat dry and season generously with salt and pepper, then sear until deeply browned on all sides. This crucial step creates that rich foundation of flavor that elevates the entire dish. Don’t rush this part! Take your time creating that beautiful crust before transferring to the slow cooker. The caramelization that happens during searing contributes incredible depth to the final product that you simply can’t achieve otherwise.

    Perfecting Your Sauce Strategy

    The barbecue sauce is where you can really make this recipe your own. I typically start with a combination of store-bought sauce enhanced with additional ingredients like apple cider vinegar, brown sugar, Worcestershire sauce, and a touch of liquid smoke. Add the majority of your sauce during the cooking process, but always reserve about a cup to mix with the shredded beef after cooking. This two-stage approach ensures maximum flavor penetration while keeping the meat moist. Taste and adjust seasonings just before serving—sometimes a splash of vinegar or hot sauce is exactly what’s needed to brighten everything up.

    Serving Ideas & Creative Variations

    Beyond Basic Buns

    While classic hamburger buns are delicious, don’t be afraid to experiment with different bread options. Brioche buns add richness, pretzel rolls bring a wonderful chewiness, and Hawaiian sweet rolls offer a delightful contrast to the savory beef. For a lower-carb option, try butter lettuce wraps or serve the meat over a baked sweet potato. One of my favorite variations is to pile the pulled beef onto thick-cut Texas toast with melted cheddar cheese for an indulgent open-faced sandwich. The possibilities are endless! Consider setting up a build-your-own sandwich bar when entertaining, with various breads, cheeses, and toppings.

    Complementary Sides and Toppings

    The perfect accompaniments can elevate your BBQ pulled beef sandwiches from good to unforgettable. Classic coleslaw adds refreshing crunch and creaminess—I prefer mine with a vinegar base to cut through the richness of the meat. Pickled red onions, jalapeños, or banana peppers bring brightness and acidity. For sides, honey butter skillet corn pairs beautifully, as do crispy sweet potato fries or a simple green salad. Don’t forget a selection of sauces for customization: extra BBQ sauce, Alabama white sauce, or even a spicy aioli lets everyone personalize their sandwich experience.

    Storage & Troubleshooting Guide

    Proper Storage for Maximum Flavor

    Store leftover pulled beef in airtight containers in the refrigerator for up to 4 days. The flavors actually continue to develop, making day-two sandwiches sometimes even better than the first round! For longer storage, freeze portions in heavy-duty freezer bags with as much air removed as possible. I like to freeze in meal-sized portions for easy thawing. When reheating, add a splash of beef broth or extra barbecue sauce to maintain moisture. The microwave works for quick reheating, but for best results, warm gently on the stovetop in a covered pan, stirring occasionally to distribute heat evenly.

    Fixing Common Issues

    If your pulled beef turns out too dry, there are several easy fixes. First, try adding more sauce and gently warming everything together. A splash of beef broth or even a bit of cola can help restore moisture without diluting flavor. For beef that’s too fatty, refrigerate overnight and skim the solidified fat from the top before reheating. If your sauce is too thin, simmer it separately until reduced to your desired consistency, then recombine with the meat. For too-sweet sauce, balance with a splash of apple cider vinegar or a squeeze of lemon juice. Too spicy? Add a dollop of sour cream to individual servings.

    Frequently Asked Questions

    What’s the best cut of beef for BBQ pulled beef sandwiches?

    Chuck roast is ideal due to its marbling and connective tissue that breaks down during slow cooking. Brisket and round roast are excellent alternatives, though cooking times may vary slightly based on the cut.

    Can I make this recipe in an Instant Pot instead?

    Absolutely! Cook on high pressure for 60-70 minutes, then natural release for 15 minutes. You’ll still want to sear the meat first for maximum flavor development.

    How do I prevent my BBQ pulled beef from becoming too soupy?

    Reduce extra liquid by removing the lid during the final 30 minutes of cooking, or transfer the sauce to a saucepan and reduce separately before recombining with the shredded beef.

    What’s the secret to really tender pulled beef?

    Patience is key—don’t rush the cooking process. Cook until the meat easily shreds with a fork, which typically takes 8-10 hours on low in a slow cooker.

    Can I prepare BBQ pulled beef sandwiches for a large crowd?

    Yes! The recipe scales beautifully. Calculate about ⅓ pound of raw beef per person, and consider setting up a sandwich bar so guests can customize their own.

    Final Thoughts

    These BBQ pulled beef sandwiches have become my go-to recipe whenever I need a foolproof meal that satisfies everyone at the table. There’s something magical about transforming a humble cut of beef into something so flavorful and versatile. Whether you’re feeding a crowd or meal prepping for your week ahead, this recipe delivers incredible results with minimal active cooking time. Don’t forget to check out more delicious recipes on Pinterest for creative serving ideas and variations. Once you master these sandwiches, they’ll become a staple in your cooking repertoire!