Category: Dinner

Easy, tasty dinner ideas for busy nights. Simple recipes, quick prep, and family-friendly meals you’ll make again and again.

  • Mediterranean Beef Pita Pockets: Irresistibly Delicious & Easy!

    Mediterranean Beef Pita Pockets: Irresistibly Delicious & Easy!

    I didn’t expect these Mediterranean Beef Pita Pockets to become my family’s new obsession, but the first time I served them, they vanished so fast I barely got a second bite! There’s something truly special about the spiced beef mingling with fresh, vibrant toppings, all tucked into a warm, fluffy pita. It's that kind of meal that makes you close your eyes and savor every single flavor, instantly transporting you to sun-drenched shores. Trust me, you'll crave this again.

    Why You'll Love This Mediterranean Beef Pita Pockets

    An Irresistible Flavor Journey

    These pita pockets are a symphony of textures and tastes, making them an instant hit for anyone craving something beyond the ordinary. The perfectly seasoned ground beef, infused with aromatic Mediterranean spices like cumin, oregano, and paprika, creates a deeply savory foundation. When combined with crisp vegetables, tangy feta, and a drizzle of creamy tzatziki, each bite is bursting with freshness. It’s a complete meal that feels gourmet yet comes together with surprising ease. This is seriously addictive.

    Quick, Easy, and Famously Delicious

    Life gets busy, but delicious meals shouldn't be a compromise. This recipe for Mediterranean Beef Pita Pockets is incredibly straightforward, perfect for a weeknight dinner when you need something satisfying without a fuss. From browning the beef to assembling the pockets, it’s a process that’s both engaging and rewarding. Plus, the vibrant colors and enticing aromas make it a showstopper, even if it took you less than 30 minutes to prepare. Everyone will ask you for this recipe!

    Essential Tips & Tricks

    Perfecting Your Spiced Beef Filling

    The key to truly crave-worthy Mediterranean Beef Pita Pockets lies in the beef seasoning. Don't be shy with the spices! Toasting your cumin and coriander seeds lightly before grinding them can unlock even more intense flavor, if you have whole spices on hand. Ensure your ground beef is fully browned and crumbled finely for optimal texture. A little trick: drain any excess fat after browning to prevent soggy pita, ensuring that delicious, savory richness remains concentrated in the meat.

    Choosing and Preparing Your Pita Bread

    Not all pita bread is created equal, and the right choice makes all the difference for these Mediterranean Beef Pita Pockets. Look for soft, thick pita pockets that are easy to open without tearing. Warming them gently in a dry skillet or microwave for a few seconds before filling makes them more pliable and enhances their texture. This also helps them absorb the delicious beef juices without becoming overly saturated. A perfectly warmed pita is the ideal vessel for this flavorful feast.

    Serving Ideas & Variations

    Creative Topping Combos

    While the classic cucumber, tomato, and feta combination for Mediterranean Beef Pita Pockets is always a winner, don't hesitate to get creative with your toppings! Consider adding pickled red onions for a tangy crunch, Kalamata olives for briny depth, or a sprinkle of fresh mint or dill for an aromatic lift. A dollop of hummus or a spicy harissa drizzle can also elevate the experience. For an extra layer of flavor, try a squeeze of fresh lemon juice over the finished pockets.

    Sides That Complete the Meal

    To make your Mediterranean Beef Pita Pockets a truly unforgettable meal, pair them with complementary sides. A simple crisp green salad with a lemon vinaigrette is always a fresh choice, or you could opt for a vibrant https://recipesdarleen.com/mediterranean-lentil-salad/. If you're feeling adventurous, some fluffy couscous or a side of crispy roasted potatoes would be absolutely divine. Don't forget a generous bowl of extra tzatziki for dipping – it's practically mandatory!

    Storage & Troubleshooting

    Keeping Leftovers Fresh

    If you happen to have any leftover Mediterranean Beef Pita Pockets – a rare occurrence in my house! – it's best to store the components separately. Keep the spiced beef in an airtight container in the refrigerator for up to 3-4 days. Store the fresh toppings like chopped cucumber and tomato separately to maintain their crispness. The pita bread can be kept at room temperature or refrigerated. This way, you can assemble fresh, delicious pockets whenever a craving strikes, maintaining optimal taste and texture.

    Preventing Soggy Pitas

    The biggest challenge with any stuffed pita is preventing it from becoming soggy. The best way to avoid this with your Mediterranean Beef Pita Pockets is to ensure your beef filling isn't overly wet. After cooking, make sure to drain any excess liquid or fat from the ground beef. Additionally, assemble the pockets right before serving. If you're prepping ahead, keep the beef warm and the toppings chilled, then stuff the warmed pita just before eating. This guarantees a perfectly textured bite every time.

    Frequently Asked Questions

    Can I use a different type of meat?

    Absolutely! Ground lamb or a mix of beef and lamb would be fantastic for these pockets, offering a slightly richer, more authentic Mediterranean flavor. You could also use ground chicken or turkey.

    What if I don't have all the spices?

    Don't worry! While the full spice blend is best, you can still make delicious Mediterranean Beef Pita Pockets. Focus on cumin and oregano if you're short, and consider a dash of garlic powder for depth.

    Can these be made ahead of time?

    You can prepare the spiced beef filling and chop all the vegetables a day or two in advance. Store them separately in airtight containers. Assemble the Mediterranean Beef Pita Pockets just before serving for the best experience.

    Is there a dairy-free option for the sauce?

    Yes! For a dairy-free alternative to tzatziki, you can blend silken tofu with cucumber, garlic, lemon juice, and fresh dill. It provides a similar creamy, tangy profile.

    What kind of pita bread is best?

    Opt for thicker, softer pita breads that are easy to open into a pocket. Whole wheat pitas also work well and add a nutty flavor. Avoid thin, crispy varieties that might tear.

    Final Thoughts

    Making these Mediterranean Beef Pita Pockets is more than just cooking; it's an invitation to a vibrant culinary experience that’s both comforting and exciting. The blend of savory, spiced beef with crisp, fresh vegetables and creamy tzatziki is simply unmatched. It’s a meal that brings joy to the table, perfect for sharing with loved ones or savoring on a cozy night in. I love how effortlessly this dish combines wholesome ingredients into something truly spectacular. For more delicious inspiration, make sure to check out my collection of recipes at Recipes Darleen. This recipe truly captures the essence of fresh, flavorful home cooking. You'll be making these again and again.
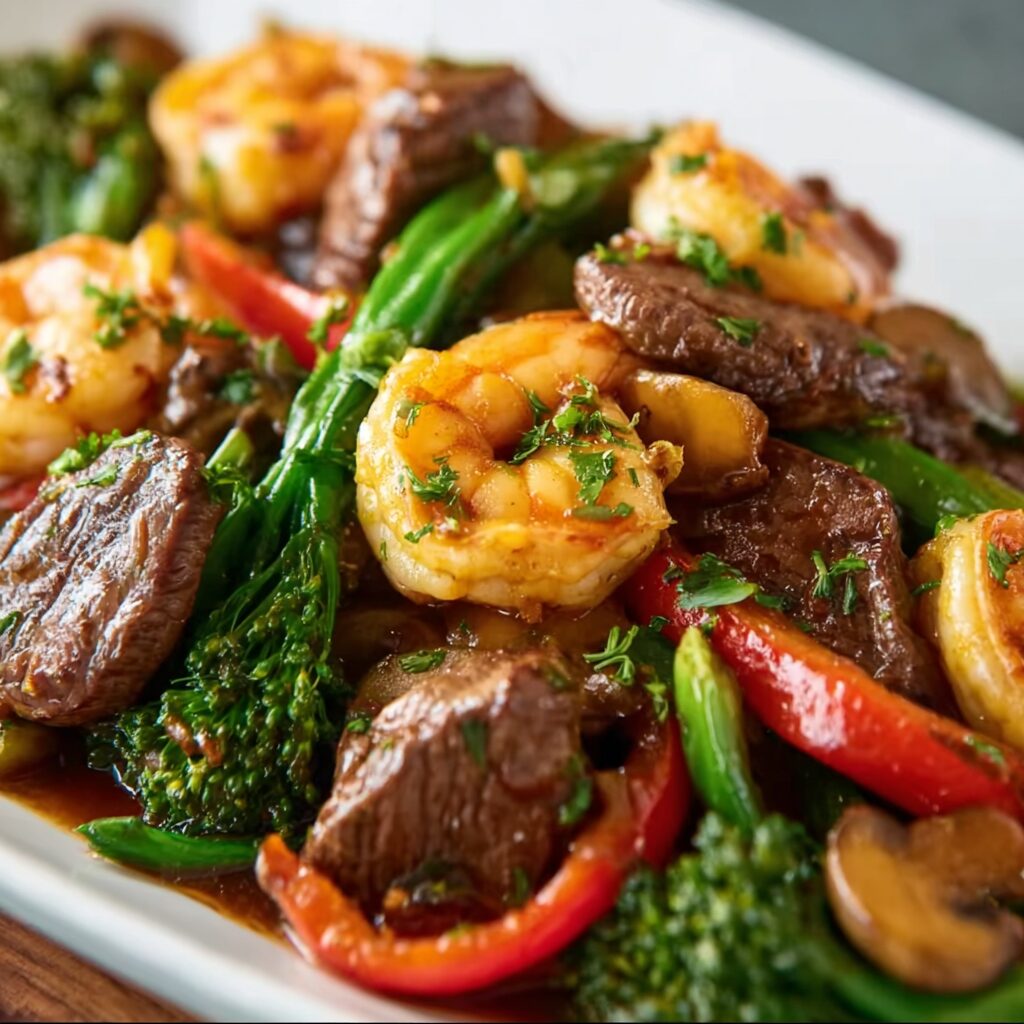

  • Protein-Rich Steak & Shrimp Stir-Fry: Irresistibly Healthy Feast!

    Protein-Rich Steak & Shrimp Stir-Fry: Irresistibly Healthy Feast!

    The first time I whipped up this Protein-Rich Steak and Shrimp Stir-Fry, I honestly didn't expect the reaction. My husband, who usually takes his time, practically inhaled his plate, and then immediately asked if there was more. It was gone before I could even sit down properly! This dish isn't just a meal; it’s a vibrant explosion of flavors and textures, making it an absolute weeknight hero that you'll crave again and again. It truly brings that takeout experience right to your kitchen, but even better.

    Why You'll Love This Protein-Rich Steak and Shrimp Stir-Fry

    A Flavor Explosion That Satisfies Every Craving

    This isn't just any stir-fry; it's a symphony of savory, sweet, and umami notes that dance on your palate. Imagine tender, seared steak strips mingling with succulent, juicy shrimp, all coated in a rich, glossy sauce. The crisp-tender vegetables add a delightful crunch, creating a textural masterpiece that is truly irresistible. It’s the kind of comforting, hearty meal that makes you feel nourished and completely satisfied, dispelling any thought of bland, boring healthy eating.

    Effortless Elegance for Busy Weeknights

    Life gets hectic, but that doesn't mean your meals have to suffer. This Protein-Rich Steak and Shrimp Stir-Fry comes together in a flash, making it perfect for those evenings when you need something quick, yet impressive. With minimal prep and a single wok or large skillet, you can achieve restaurant-quality results in under 30 minutes. It’s a fantastic way to get a balanced, protein-packed dinner on the table without sacrificing precious time. This is dangerously addictive.

    Essential Tips & Tricks

    Mastering the Sear for Perfect Protein

    Achieving that beautiful, caramelized crust on your steak and shrimp is key to unlocking maximum flavor. Ensure your wok or skillet is smoking hot before adding your protein. Cook the steak in batches to avoid overcrowding the pan, allowing each piece to develop a deep brown sear. For the shrimp, cook them quickly until they just turn pink; overcooking will make them rubbery. A little patience here pays off immensely, transforming good ingredients into extraordinary bites.

    The Secret to a Silky Stir-Fry Sauce

    The sauce is the heart of any great stir-fry, and ours is no exception. Whisk all your sauce ingredients together thoroughly before you start cooking, ensuring there are no lumps. Add it to the pan only after your proteins and vegetables are cooked, allowing it to thicken and coat everything beautifully. The cornstarch in the sauce is your secret weapon for that desirable glossy finish and perfect consistency. Trust me, you'll want to lick the pan clean.

    Serving Ideas & Variations

    Classic Pairings and Creative Twists

    While this Protein-Rich Steak and Shrimp Stir-Fry is fantastic on its own, pairing it with a simple side of fluffy white or brown rice is a classic choice that soaks up all that incredible sauce. For a lighter option, consider serving it over cauliflower rice or even a bed of fresh mixed greens. If you're feeling adventurous, try adding some toasted sesame seeds, chopped peanuts, or a drizzle of sriracha for an extra kick. This dish is incredibly versatile, adapting to your mood!

    Elevate Your Stir-Fry with Exciting Add-Ins

    Don't be afraid to get creative with your vegetables and other additions. Broccoli florets, snap peas, bell peppers, and carrots are traditional, but consider experimenting with bok choy, mushrooms, or even some water chestnuts for added crunch. For an extra layer of richness, a sprinkle of crispy fried shallots or a dollop of chili garlic paste can truly elevate the experience. You could even swap out the steak for ground turkey for a different spin, perhaps inspired by our ground turkey rice bowls.

    Storage & Troubleshooting

    Keeping Leftovers Fresh and Flavorful

    Storing your leftover Protein-Rich Steak and Shrimp Stir-Fry properly ensures you can enjoy it for days. Allow the stir-fry to cool completely before transferring it to an airtight container. It will keep beautifully in the refrigerator for up to 3-4 days. When reheating, I prefer to use a skillet over medium heat to help maintain the texture of the steak and shrimp, rather than microwaving which can sometimes make the protein tough.

    Common Stir-Fry Snafus and How to Fix Them

    Did your stir-fry turn out watery? This often happens if the pan isn't hot enough or if you've overcrowded it, causing the vegetables to steam instead of sear. To fix it, remove the protein and vegetables, then reduce the sauce over high heat until it thickens. If your sauce is too thick, simply whisk in a tablespoon of water or broth at a time until it reaches your desired consistency. Don't worry, every chef has had a stir-fry hiccup!

    Frequently Asked Questions

    Can I prepare the ingredients ahead of time?

    Absolutely! Chop all your vegetables and whisk together the sauce ingredients a day in advance. Store them separately in airtight containers in the refrigerator. This makes assembly a breeze on a busy weeknight.

    What kind of steak is best for stir-fry?

    Flank steak, sirloin, or skirt steak are excellent choices. They are lean, flavorful, and tenderize beautifully when sliced thinly against the grain. Look for well-marbled cuts for the best taste.

    Can I use frozen shrimp?

    Yes, you can! Just make sure to thaw the shrimp completely and pat them very dry before cooking. Excess moisture will prevent them from searing properly and can make your stir-fry watery.

    Is this Protein-Rich Steak and Shrimp Stir-Fry gluten-free?

    To make it gluten-free, simply ensure your soy sauce is gluten-free (tamari is a great substitute) and double-check any other sauce ingredients for hidden gluten. Most other components are naturally gluten-free.

    How do I make the stir-fry spicier?

    For a spicier kick, add a pinch of red pepper flakes to your sauce, or finish the dish with a drizzle of sriracha or chili oil. You can also add sliced fresh chilies with your vegetables.

    Final Thoughts

    This Protein-Rich Steak and Shrimp Stir-Fry has quickly become a cornerstone in my kitchen, a dish I turn to when I want something incredibly satisfying, flavorful, and quick. It’s more than just a meal; it’s an experience that brings joy and warmth to the dinner table. The vibrant colors, the incredible aroma, and the perfectly balanced flavors make every bite a delight. I genuinely hope you give this recipe a try and discover its magic for yourself. It’s a testament to how delicious and exciting healthy eating can be. You'll thank me later!

  • Cheesy Chicken Crescent Bake: Irresistibly Gooey Comfort Food!

    Cheesy Chicken Crescent Bake: Irresistibly Gooey Comfort Food!

    Cheesy Chicken Crescent Bake: Irresistibly Gooey Comfort Food!

    The first time I made this Cheesy Chicken Crescent Bake, I genuinely didn’t expect it to become the most requested dish at our weekly family dinner. My husband took one bite and declared it insanely good, practically inhaling his portion before I even finished plating mine. It’s that kind of comforting, golden-brown perfection that instantly makes you feel all warm and fuzzy inside. This recipe is a true weeknight hero, promising a delicious, hearty meal with minimal effort and maximum flavor. Get ready for a new family favorite that will have everyone asking for seconds!

    Recipe

    Why You’ll Love This Cheesy Chicken Crescent Bake

    Unbeatable Comfort and Flavor

    There’s something truly magical about tender chicken enveloped in a rich, creamy, and dangerously addictive cheesy sauce, all baked inside flaky, buttery crescent rolls. This Cheesy Chicken Crescent Bake hits all the right notes for a satisfying meal. It’s the kind of dish that brings a smile to your face after a long day, wrapping you in a warm hug of savory goodness. The layers of texture, from the soft chicken to the crisp crescent, make every bite an experience.

    It’s perfect for those evenings when you crave something hearty but don’t want to spend hours in the kitchen. The blend of seasoned chicken with gooey melted cheese creates an irresistible combination that will have your family asking for it again and again. Trust me, this won’t last long on the table!

    Effortless Prep for Busy Lives

    One of the biggest reasons I adore this Cheesy Chicken Crescent Bake is how incredibly simple it is to throw together, even on the busiest weeknights. We’re talking minimal chopping and maximum flavor impact. You can have this bubbling, golden masterpiece ready for the oven in under 15 minutes, making it a lifesaver when dinner needs to be on the table fast. It’s an ideal recipe for beginner cooks or anyone looking for a stress-free meal solution.

    The simple ingredient list means less grocery shopping hassle, too. It’s a fantastic way to use up leftover cooked chicken, transforming it into something extraordinary without much fuss. This dish proves that delicious, homemade meals don’t have to be complicated.

    Essential Tips & Tricks

    Perfecting Your Chicken Filling

    For the most succulent Cheesy Chicken Crescent Bake, ensure your chicken is cooked and shredded or diced evenly. This allows it to mix seamlessly with the creamy cheese sauce, guaranteeing a flavorful bite in every single crescent roll. Don’t be shy with seasoning the chicken; a good pinch of garlic powder, onion powder, and a dash of paprika will elevate the taste significantly. An expert tip: using rotisserie chicken saves immense time and adds incredible flavor depth, making your prep even quicker.

    Make sure your cream cheese is softened to room temperature before mixing. This prevents lumps and ensures a smooth, luscious filling that spreads easily.

    Achieving Golden Crescent Perfection

    The key to a truly irresistible Cheesy Chicken Crescent Bake lies in the golden-brown, flaky crust of the crescent rolls. Before baking, gently brush the tops of the crescent rolls with a little melted butter or an egg wash. This simple step creates that beautiful sheen and helps them crisp up to perfection. Keep an eye on them during the last few minutes of baking; ovens can vary, and you want them perfectly golden, not burnt.

    If you notice the crescents browning too quickly, you can loosely tent the dish with aluminum foil. This protects the crust while allowing the filling to heat through completely.

    Serving Ideas & Variations

    Delightful Side Pairings

    This Cheesy Chicken Crescent Bake is hearty enough to be a meal on its own, but pairing it with a fresh side can really elevate the experience. A vibrant green salad, like this refreshing chopped salad, offers a nice contrast to the richness of the bake. Steamed broccoli or green beans tossed with a little garlic butter also make excellent, easy additions. For something a bit more substantial, a light rice pilaf or roasted potatoes would complement the flavors beautifully.

    Don’t forget a sprinkle of fresh parsley or chives over the top right before serving for a pop of color and herbaceous freshness. It’s the little touches that make it feel extra special!

    Creative Flavor Twists

    Feeling adventurous with your Cheesy Chicken Crescent Bake? The beauty of this recipe is its versatility. Consider adding a can of drained, diced green chiles to the chicken mixture for a subtle kick, or a spoonful of your favorite salsa for a Tex-Mex twist. For a touch of smoky flavor, crumbled bacon bits are always a welcome addition. You could even swap out the cheddar for a spicier Monterey Jack or a smoky gouda.

    Don’t be afraid to experiment with different herbs too; a pinch of dried dill or a touch of thyme can completely transform the profile. This is seriously addictive, so get creative!

    Storage & Troubleshooting

    Keeping Leftovers Delicious

    Should you miraculously have any leftovers of this Cheesy Chicken Crescent Bake (a rare occurrence in my house!), storing them properly ensures they remain just as delicious. Allow the bake to cool completely before transferring it to an airtight container. It will keep well in the refrigerator for up to 3-4 days. For reheating, a quick stint in the microwave works, but for best results, warm it in a preheated oven at 350°F (175°C) for about 10-15 minutes.

    This method helps the crescent rolls regain some of their original crispiness, preventing them from becoming soggy. You can also freeze individual portions for convenient future meals.

    Common Hiccups and Fixes

    Even the simplest recipes can sometimes present small challenges, but don’t worry, I’ve got you covered. If your crescent rolls aren’t browning evenly, try rotating your baking dish halfway through the cooking time. If the filling seems a bit too runny, you might have added too much liquid or your cream cheese wasn’t fully softened. A quick fix is to add a tablespoon of flour or cornstarch to the chicken mixture next time.

    If your chicken filling is a bit dry, a splash of chicken broth or milk can easily remedy that. Remember, practice makes perfect, and every bake is a learning experience!

    Frequently Asked Questions

    Can I make this Cheesy Chicken Crescent Bake ahead of time?

    Absolutely! You can assemble the entire bake, cover it tightly, and refrigerate it for up to 24 hours before baking. Just add about 5-10 minutes to the baking time if baking from cold.

    What kind of chicken works best?

    Cooked and shredded or diced chicken is ideal. Rotisserie chicken is a fantastic shortcut, but leftover baked or boiled chicken works perfectly too.

    Can I use other types of cheese?

    Yes, feel free to experiment! While cheddar is classic, Monterey Jack, Colby, or a Mexican blend would also be delicious and melt beautifully in this recipe.

    Is it possible to freeze this bake?

    Yes, you can freeze the assembled, unbaked casserole for up to a month. Thaw in the refrigerator overnight and then bake as directed, adding extra time.

    How do I prevent soggy crescent rolls?

    Ensure your filling isn’t overly wet. Also, baking on a rack placed over a baking sheet can help air circulate and keep the bottom of the Cheesy Chicken Crescent Bake crispier.

    Final Thoughts

    This Cheesy Chicken Crescent Bake isn’t just a recipe; it’s a promise of effortless joy and delicious comfort. It’s the kind of meal that brings everyone to the table, eager for that first bite of golden, flaky crust and creamy, cheesy chicken filling. I remember one evening, after a particularly hectic day, just how much this simple dish provided a moment of pure bliss and togetherness. It quickly became a staple, proving that the best food doesn’t need to be complicated. So go ahead, whip this up tonight and watch it disappear. You deserve this kind of easy, comforting deliciousness!

  • Crispy Garlic Parmesan Ranch Smash Chicken That’ll Wow Your Tastebuds!

    Crispy Garlic Parmesan Ranch Smash Chicken That’ll Wow Your Tastebuds!

    Crispy Garlic Parmesan Ranch Smash Chicken That’ll Wow Your Tastebuds!

    I didn’t think chicken could surprise me anymore, until I made this Crispy Garlic Parmesan Ranch Smash Chicken. The first time, my family actually fell silent at the dinner table, completely engrossed in the incredible crunch and savory flavor. It was that good, an unexpected explosion of taste and texture that instantly became our new obsession. This recipe isn’t just dinner; it’s a moment of pure, unadulterated joy that you’ll crave constantly.

    Recipe

    Why You’ll Love This Crispy Garlic Parmesan Ranch Smash Chicken

    Irresistible Flavor Fusion

    This isn’t just chicken; it’s a symphony of flavors designed to make your taste buds sing. The Crispy Garlic Parmesan Ranch Smash Chicken brings together the savory depth of garlic, the salty tang of Parmesan, and the creamy, herby goodness of ranch. Each bite delivers an explosion of umami that’s utterly captivating. The unique smashing technique ensures maximum surface area for that golden, crispy crust, making every morsel incredibly satisfying. It’s a flavor profile that’s bold, comforting, and undeniably addictive.

    Weeknight Wonder

    Forget complicated recipes; this smash chicken is your new weeknight hero. It’s incredibly simple to prepare, requiring minimal ingredients and fuss, yet it delivers restaurant-quality results. From pantry to plate, you’re looking at a meal that comes together quickly, perfect for those busy evenings when you crave something extraordinary without the extra effort. My kids literally cheer when they know this is on the menu, making dinner a breeze. Trust me, this won’t last long once it hits the table!

    Essential Tips & Tricks

    Achieving the Perfect Smash

    The secret to truly crispy garlic parmesan ranch smash chicken lies in the “smash.” Start with boneless, skinless chicken breasts and place them between two pieces of parchment paper. Use a heavy pan or meat mallet to firmly flatten them to about 1/4-inch thickness. This not only tenderizes the chicken but creates a larger surface area, allowing for that incredible, shatteringly crisp crust. Don’t be shy with the smash; a uniform thinness is key for even cooking and maximum crispiness.

    Flavor Layering Secrets

    To elevate your chicken, don’t just sprinkle; press the seasonings! After smashing, generously coat both sides of the chicken with a mix of garlic powder, dried ranch seasoning, and freshly grated Parmesan. Press these spices firmly into the meat to ensure they adhere and create a rich, flavorful crust as it cooks. A little extra olive oil in the hot skillet helps to bloom the garlic and ranch, intensifying their aromas and flavors for a truly sensational finish.

    Serving Ideas & Variations

    Delicious Pairings

    This crispy chicken is incredibly versatile, making it perfect for various meal combinations. Serve your Crispy Garlic Parmesan Ranch Smash Chicken alongside a fresh green salad for a lighter meal, or with creamy mashed potatoes and roasted asparagus for a hearty dinner. It’s also fantastic with a side of my honey butter skillet corn recipe or even tucked into warm buns for a gourmet sandwich experience. The flavors are robust enough to stand alone but complement many sides beautifully.

    Creative Twists

    Want to mix things up? Try adding a pinch of smoked paprika to your seasoning blend for a subtle smoky kick. For a spicier version, a dash of cayenne pepper can really awaken the palate. You could also experiment with different cheeses, like sharp cheddar or a spicy Monterey Jack, to change the flavor profile. These variations keep the dish exciting and allow you to tailor it to your personal cravings. This is dangerously addictive, so get ready to experiment!

    Storage & Troubleshooting

    Keeping it Fresh

    Leftover Crispy Garlic Parmesan Ranch Smash Chicken can be stored in an airtight container in the refrigerator for up to 3 days. To reheat and retain some of that glorious crispiness, avoid the microwave. Instead, warm it gently in a dry skillet over medium-low heat or pop it into a preheated oven or air fryer at 350°F (175°C) for 5-7 minutes, or until heated through. This method helps reactivate the crispy texture, making leftovers almost as good as fresh.

    Common Fixes

    If your chicken isn’t as crispy as you’d hoped, ensure your skillet is hot enough before adding the chicken and don’t overcrowd the pan. Cooking in batches allows for better browning. If it’s drying out, you might be overcooking it; remember, thin chicken cooks quickly! A meat thermometer should read 165°F (74°C). If the flavor isn’t popping, try adding a squeeze of fresh lemon juice or a sprinkle of fresh herbs like parsley or chives right before serving.

    Frequently Asked Questions

    Can I use chicken thighs instead of breasts?

    Absolutely! Boneless, skinless chicken thighs work wonderfully. They tend to be more forgiving and retain moisture well, though they might require a slightly longer cooking time to achieve the desired crispiness.

    What if I don’t have ranch seasoning?

    No problem! You can make your own with a blend of dried dill, parsley, chives, garlic powder, onion powder, salt, and pepper. Adjust to your taste preferences for a similar flavor profile.

    How do I prevent the Parmesan from burning?

    Ensure your heat isn’t too high. Medium-high heat is ideal. Also, press the Parmesan firmly into the chicken so it adheres well and cooks with the chicken, rather than burning separately in the pan.

    Can I bake this chicken instead of pan-frying?

    Yes, you can! Bake the Crispy Garlic Parmesan Ranch Smash Chicken on a parchment-lined baking sheet at 400°F (200°C) for 15-20 minutes, flipping halfway, until cooked through and golden brown.

    Is this recipe gluten-free?

    Yes, as long as your ranch seasoning and any other ingredients used are certified gluten-free, this recipe is naturally gluten-free. Always check labels to be sure!

    Final Thoughts

    This Crispy Garlic Parmesan Ranch Smash Chicken truly delivers on its promise of incredible flavor and satisfying crunch. It’s the kind of meal that disappears from plates almost as fast as you can cook it, leaving everyone asking for the recipe. I love how it transforms simple chicken breasts into something truly special with minimal effort. Whether it’s a busy Tuesday night or a casual weekend dinner, this dish brings comfort and excitement to your table. Don’t forget to share your culinary creations with me over on Pinterest! Get ready for a new family favorite that you’ll crave again and again.

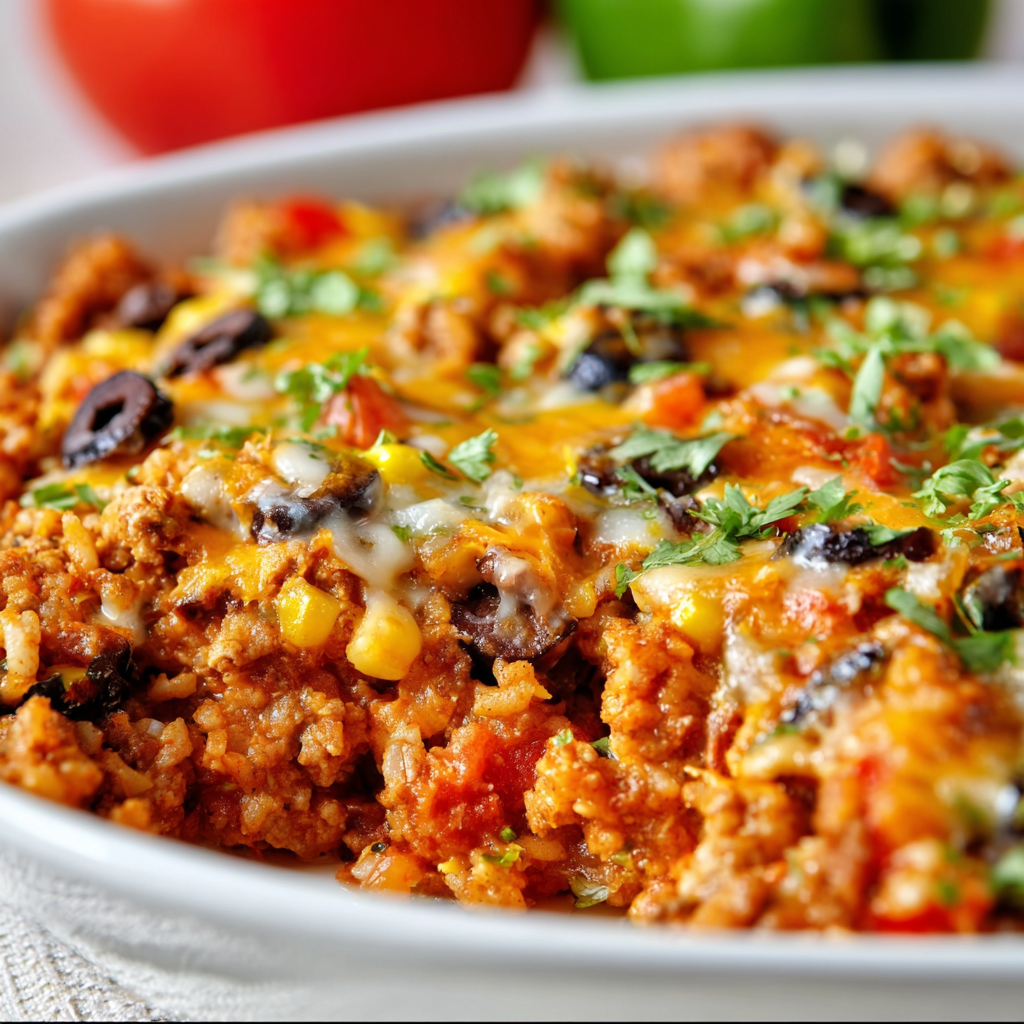
  • Southwestern Ground Turkey Casserole: Irresistibly Easy & Delicious!

    Southwestern Ground Turkey Casserole: Irresistibly Easy & Delicious!

    Southwestern Ground Turkey Casserole: Irresistibly Easy & Delicious!

    The first time I made this Southwestern Ground Turkey Casserole, I honestly didn’t expect it to vanish before I even finished clearing the dinner table. My husband, usually a slow eater, went back for seconds so fast I barely registered his first plate was empty! It’s become a go-to for busy weeknights, offering a burst of vibrant flavor and comforting warmth that makes everyone instantly happy. Get ready for a seriously crave-worthy dish.

    Recipe

    Why You’ll Love This Southwestern Ground Turkey Casserole

    Unbeatable Comfort in Every Bite

    This casserole is the ultimate hug in a dish, perfect for those evenings when you just need something hearty and satisfying. Imagine layers of seasoned ground turkey, tender rice, black beans, and sweet corn, all nestled under a blanket of gooey, melted cheese. It’s the kind of meal that instantly makes you feel cozy and nourished from the inside out. The spices are warm and inviting, providing a comforting experience that’s ideal for family dinners or a casual gathering with friends.

    A Flavor Explosion That Keeps You Coming Back

    Prepare your taste buds for an incredible journey! The Southwestern Ground Turkey Casserole is packed with bold, zesty flavors that truly pop. From the smoky chili powder and cumin to the bright kick of Rotel tomatoes, every spoonful delivers a harmonious blend of savory and slightly spicy notes. The lean ground turkey absorbs all these delicious seasonings, creating a rich, deeply satisfying base that pairs perfectly with the creamy textures of the cheese and corn. This is dangerously addictive.

    Essential Tips & Tricks

    Perfecting the Turkey Base

    The key to an outstanding Southwestern Ground Turkey Casserole starts with perfectly browned and seasoned turkey. Always cook your ground turkey until it’s no longer pink, breaking it up into fine crumbles as it cooks. Drain any excess fat to prevent a greasy casserole. Don’t be shy with the seasonings; let the chili powder, cumin, and garlic powder really bloom in the hot pan with the turkey. This step builds the foundational flavor, ensuring every bite is rich and savory. A well-seasoned base makes all the difference.

    Smart Layering for Casserole Success

    Achieving that beautiful, cohesive casserole texture is all about thoughtful layering. Start with your rice mixture, creating an even base that will absorb all the delicious flavors. Next, spread the ground turkey mixture evenly, ensuring every serving gets a good portion of meat and beans. Finish with a generous layer of cheese—I love a mix of cheddar and Monterey Jack for optimal meltiness. Pressing down lightly on each layer helps everything meld together as it bakes. Trust me, this won’t last long!

    Serving Ideas & Variations

    Beyond the Casserole Dish

    While this Southwestern Ground Turkey Casserole is fantastic straight from the oven, don’t stop there! Serve it with a dollop of sour cream or Greek yogurt, a sprinkle of fresh cilantro, and a squeeze of lime for an extra burst of freshness. It’s also incredible scooped into warm tortillas for impromptu tacos, or even over a bed of crisp lettuce for a hearty salad. For an even more indulgent meal, consider pairing it with a vibrant side like a quick Mexican Street Corn Pasta Salad.

    Customizing Your Southwestern Creation

    The beauty of this casserole lies in its versatility. Feel free to swap out ground turkey for lean ground beef or even shredded chicken if you prefer. Want more veggies? Dice up some bell peppers or zucchini and sauté them with the turkey. For an extra kick, add a can of diced green chilies or a pinch of cayenne pepper. You can also experiment with different cheese blends or add a layer of crushed tortilla chips on top during the last few minutes of baking for a delightful crunch. Everyone will ask for this recipe!

    Storage & Troubleshooting

    Make-Ahead and Leftover Brilliance

    This Southwestern Ground Turkey Casserole is a fantastic make-ahead meal. You can assemble the entire casserole (without baking) and refrigerate it for up to 24 hours. Just add an extra 10-15 minutes to the baking time. Leftovers store beautifully in an airtight container in the refrigerator for up to 3-4 days. It reheats wonderfully in the microwave or oven, making it perfect for meal prepping. For longer storage, freeze individual portions for quick, comforting meals whenever you need them.

    Solving Common Casserole Conundrums

    If your casserole seems a bit dry, ensure you haven’t overbaked it and that your turkey wasn’t too lean without enough moisture from the sauce. A splash of chicken broth mixed into the turkey layer can prevent this. If it’s too soupy, you might have added too much liquid or didn’t drain the turkey properly. A quick fix is to bake it uncovered for an extra 5-10 minutes to allow some moisture to evaporate. For extra cheesy goodness, add more cheese during the last 10 minutes of baking.

    Frequently Asked Questions

    Can I use brown rice instead of white rice?

    Yes, absolutely! Brown rice will work, but it may require a slightly longer cooking time or a bit more liquid to ensure it becomes tender within the casserole. Adjust accordingly.

    Is this casserole spicy?

    The heat level is mild to medium, depending on the type of Rotel you use. For more spice, choose “hot” Rotel or add a pinch of cayenne pepper. For less, use “mild” Rotel.

    Can I prepare this casserole ahead of time?

    You can assemble the Southwestern Ground Turkey Casserole up to 24 hours in advance. Cover tightly and refrigerate. Add about 10-15 minutes to the baking time when ready.

    How do I store leftovers?

    Store any leftover Southwestern Ground Turkey Casserole in an airtight container in the refrigerator for up to 3-4 days. Reheat in the microwave or oven until warmed through.

    Can I freeze this casserole?

    Yes, this casserole freezes well! Bake completely, let it cool, then wrap tightly in plastic wrap and foil. Freeze for up to 2-3 months. Thaw overnight in the fridge before reheating.

    Final Thoughts

    This Southwestern Ground Turkey Casserole truly embodies everything I love about a great meal: it’s flavorful, comforting, and incredibly satisfying. It’s a dish that brings people together, fills hungry tummies, and leaves everyone feeling happy and content. Whether you’re feeding a family or simply craving a hearty meal, this recipe delivers on all fronts. I promise, once you try this vibrant, cheesy, and utterly delicious casserole, it will quickly become a cherished favorite in your recipe rotation. Enjoy every single amazing bite!

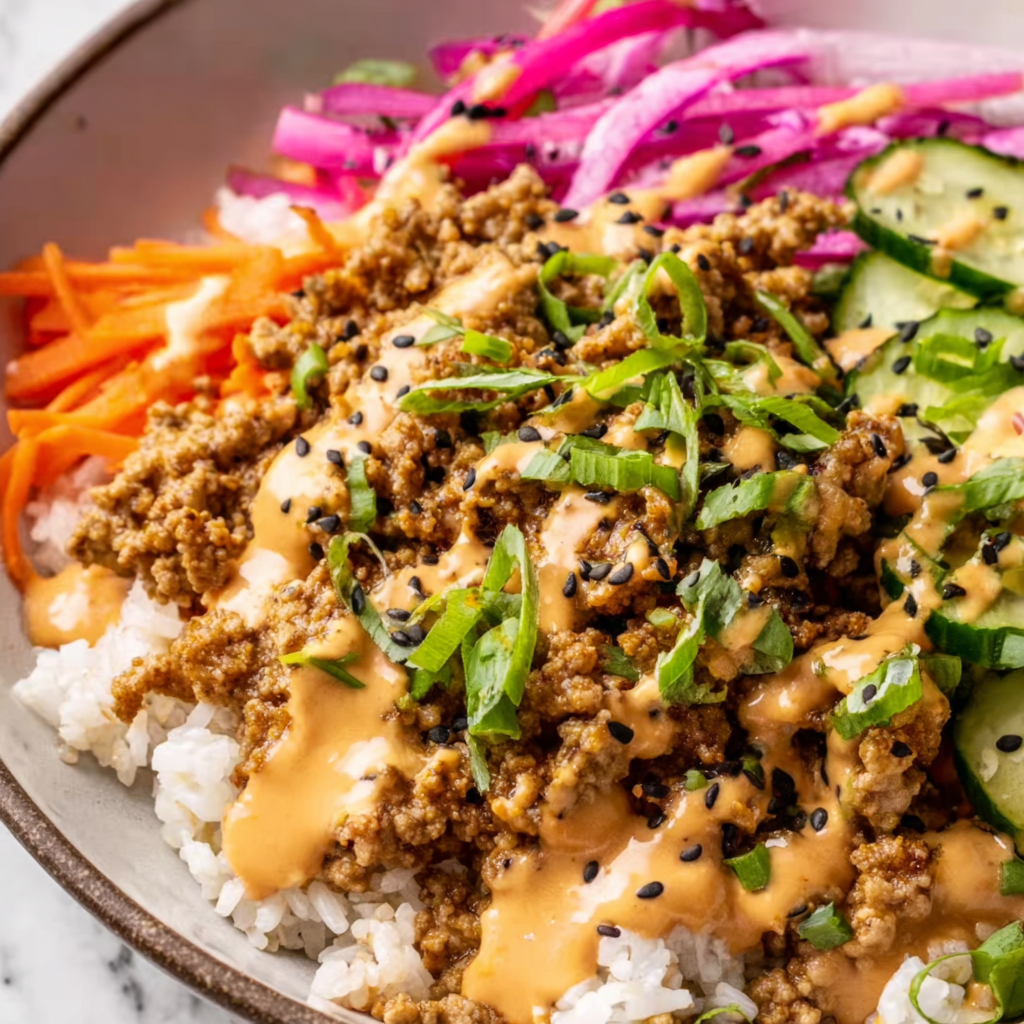
  • Ground Turkey Rice Bowls with Bang Bang Sauce: Irresistibly Delicious!

    Ground Turkey Rice Bowls with Bang Bang Sauce: Irresistibly Delicious!

    Ground Turkey Rice Bowls with Bang Bang Sauce: Irresistibly Delicious!

    Ground Turkey Rice Bowls with Bang Bang Sauce are about to become your new weeknight obsession. I discovered this recipe during a particularly chaotic Tuesday when I needed something quick but refused to compromise on flavor. The moment that creamy, spicy bang bang sauce hit the savory ground turkey, I knew I’d found a keeper. These bowls strike that perfect balance between wholesome and indulgent—protein-packed turkey, fluffy rice, crisp veggies, and that irresistible sauce that ties everything together. Think of it as your favorite takeout bowl, but healthier, cheaper, and ready in under 30 minutes. Trust me, your dinner routine needs this recipe in the rotation.

    Recipe

    Why You’ll Love This Ground Turkey Rice Bowls with Bang Bang Sauce

    Perfect Balance of Flavor and Nutrition

    These Ground Turkey Rice Bowls with Bang Bang Sauce deliver serious flavor without the guilt. The lean ground turkey provides ample protein while keeping the fat content reasonable, and you can load up on as many colorful veggies as your heart desires. I love how the spicy-sweet bang bang sauce transforms these simple ingredients into something that feels restaurant-worthy. The best part? You can adjust the heat level to your preference, making it family-friendly or spice-lover approved. My husband, who typically reaches for seconds of anything covered in cheese, went back for more of this instead!

    Quick and Customizable Weeknight Solution

    On those evenings when cooking feels like a chore, this 30-minute meal is your saving grace. The components come together simultaneously—rice simmering in one pot, turkey browning in a pan, and sauce whisked in a bowl. It’s the definition of efficient cooking. Plus, these bowls are endlessly customizable. Swap brown rice for quinoa, add different vegetables based on what’s in your fridge, or double the sauce if you’re like me and believe more is always better. I’ve made this on hectic Mondays and lazy Sundays, and it delivers every single time.

    Essential Tips & Tricks

    Mastering the Perfect Bang Bang Sauce

    The heart of these bowls is undoubtedly the bang bang sauce—that creamy, spicy, slightly sweet concoction that makes everything it touches taste better. For the creamiest texture, use full-fat mayonnaise and make sure your sweet chili sauce is fresh (old bottles tend to crystallize). The key to balanced flavor is adding the sriracha gradually, tasting as you go. I learned this the hard way after once making it too spicy even for my heat-loving palate! For extra tang, add a squeeze of fresh lime juice right before serving. This sauce keeps well in the fridge for up to a week, so consider making a double batch.

    Elevating Your Ground Turkey Game

    Let’s be honest—ground turkey can sometimes be bland, but not with these flavor-boosting techniques. Start by browning your turkey in a hot pan with a touch of oil to develop those delicious caramelized bits. Season generously with garlic powder, onion powder, and a splash of soy sauce while cooking. For an umami boost that will remind you of our Mediterranean Chicken Quinoa Bowl, add a tablespoon of hoisin sauce during the last minute of cooking. And never, ever overcook your turkey—it should just lose its pink color before you remove it from heat.

    Serving Ideas & Creative Variations

    Build-Your-Own Bowl Bar

    Transform dinner into an interactive experience with a DIY bowl bar. Set out the cooked turkey, rice, bang bang sauce, and an array of toppings in separate dishes. Include options like diced avocado, shredded carrots, sliced cucumber, chopped cilantro, lime wedges, and crunchy wonton strips. This approach is perfect for families with varying preferences or when entertaining casual dinner guests. My nieces and nephews absolutely love this approach—they feel like they’re eating at their favorite fast-casual restaurant! The bonus? Everyone gets exactly what they want, and the conversation flows as you build your bowls together.

    Global Flavor Variations

    While the classic bang bang sauce has Asian-inspired flavors, don’t be afraid to experiment with global twists. For a Mediterranean version, season the turkey with oregano and cumin, swap the rice for couscous, and replace the bang bang sauce with tzatziki. Craving Mexican? Try taco seasoning on the turkey, cilantro-lime rice as your base, and top with avocado and salsa. For something similar to my Sweet Chili Chicken Bowl, use a teriyaki glaze instead of bang bang sauce and add pineapple chunks for sweetness. The possibilities are endless, making this recipe a true chameleon in your meal rotation.

    Storage & Troubleshooting Guide

    Meal Prep and Storage Solutions

    These Ground Turkey Rice Bowls with Bang Bang Sauce are meal prep champions. Prepare all components separately and store in airtight containers in the refrigerator for up to 4 days. Keep the sauce separate until ready to serve to maintain optimal texture. When reheating, add a splash of water to the rice before microwaving to restore moisture, and heat the turkey just until warmed through. For freezing, portion the turkey and rice into freezer-safe containers without the sauce or fresh toppings. Thaw overnight in the refrigerator before reheating. I often make a double batch on Sundays, ensuring I have at least two stress-free lunches waiting for me during the workweek.

    Troubleshooting Common Issues

    Even the simplest recipes can hit snags, but these quick fixes will save your dinner. If your turkey turns out dry, stir in a tablespoon of chicken broth or even a little bang bang sauce while reheating. Rice clumping together? Rinse it under cold water before cooking, and fluff with a fork immediately after it’s done. Bang bang sauce too spicy? Add more mayo and a touch of honey to tame the heat. Sauce too thick? Thin with a little water or lime juice. Missing an ingredient? Remember that cooking is flexible—swap green onions for cilantro, frozen vegetables for fresh, or even ground chicken for turkey. The essence of this dish remains delicious regardless of small substitutions.

    Frequently Asked Questions

    Can I make Ground Turkey Rice Bowls with Bang Bang Sauce ahead of time?

    Absolutely! Prepare the components separately and store in the refrigerator for up to 4 days. Keep the sauce separate until serving to maintain texture and freshness. Reheat the turkey and rice gently before assembling your bowls.

    Is there a vegetarian alternative to this recipe?

    Yes! Substitute the ground turkey with crumbled extra-firm tofu or tempeh. Season it the same way and cook until browned for a protein-packed vegetarian version that works beautifully with the bang bang sauce.

    How spicy is the bang bang sauce?

    The spice level is completely customizable. Start with less sriracha (1 teaspoon) for a mild version, or increase to 1-2 tablespoons for serious heat. You control the fire!

    What’s the best rice to use for these bowls?

    Jasmine rice works beautifully for its fragrance and fluffiness, but any rice variety works. Brown rice adds nutritional value, while cauliflower rice creates a lower-carb option.

    Can I use store-bought bang bang sauce instead?

    While store-bought sauce works in a pinch, homemade delivers superior flavor with just 4 ingredients: mayonnaise, sweet chili sauce, sriracha, and honey. It takes just 2 minutes to whisk together!

    Final Thoughts

    These Ground Turkey Rice Bowls with Bang Bang Sauce have become my reliable solution for those nights when I want something satisfying without spending hours in the kitchen. There’s something magical about how a few simple ingredients transform into a meal that feels special enough for company yet easy enough for everyday. I hope this recipe brings the same joy to your kitchen that it has to mine. Don’t forget to check out more bowl inspiration on our Pinterest page where we’re constantly adding new variations to keep your meals exciting!

  • Lemon Pepper Turkey Breast Strips That Will Blow Your Mind!

    Lemon Pepper Turkey Breast Strips That Will Blow Your Mind!

    Lemon Pepper Turkey Breast Strips That Will Blow Your Mind!

    These zesty lemon pepper turkey breast strips have become my absolute weeknight savior! Tender, juicy, and bursting with bright citrus and peppery notes, they’re the perfect protein that goes from fridge to table in under 20 minutes. I discovered this recipe during a particularly hectic work week when I needed something nutritious yet quick. The aroma of lemon zest and cracked pepper filled my kitchen, and I’ve been making these flavor-packed strips regularly ever since. Whether you’re meal prepping or need a fast dinner solution, these turkey strips deliver maximum flavor with minimal effort.

    Recipe

    Why You’ll Love This Lemon Pepper Turkey Breast Strips

    Perfect Balance of Flavors

    The magic of these strips lies in the perfect harmony between bright lemon and bold pepper. The citrus cuts through the richness of the turkey while the pepper adds that delightful bite that keeps you coming back for more. I’ve found that using fresh lemon zest rather than just juice makes all the difference – it infuses the meat with intense citrus oils that bottled alternatives just can’t match. The pepper creates a beautiful crust when seared, locking in moisture and creating texture contrast that elevates this simple protein to something truly craveable.

    Quick and Nutritious Solution

    On those evenings when cooking feels like a monumental task, these protein-packed strips are my salvation. Turkey breast is naturally lean, making it an excellent choice for health-conscious meals without sacrificing flavor. Each serving delivers approximately 25g of protein with minimal fat, keeping you satisfied for hours. The preparation is wonderfully straightforward – just slice, season, and sear! I often prep the seasoning mix on weekends, which makes weeknight cooking even faster. The entire dish comes together in about 15 minutes, perfect for those nights when hunger and exhaustion are competing for attention.

    Essential Tips & Tricks

    Preparation Secrets

    The key to truly exceptional lemon pepper turkey strips starts with proper turkey preparation. I always slice my turkey breast against the grain into even strips about ½-inch thick – this ensures they cook evenly and remain tender. Pat the meat dry with paper towels before seasoning; this step is crucial for developing that beautiful golden sear. For the most vibrant flavor, use a microplane to zest your lemons directly onto the turkey, allowing the aromatic oils to penetrate the meat. This simple technique transforms an ordinary protein into something that will make your taste buds dance with joy, just like my Mediterranean Chicken Quinoa Bowl.

    Perfect Cooking Technique

    Achieving that ideal golden exterior while maintaining juicy tenderness inside requires careful heat management. I start with a hot pan (cast iron is my favorite) with just a touch of olive oil, then reduce to medium heat once the strips hit the surface. This creates an immediate sear that locks in moisture. The most common mistake is overcooking – turkey breast cooks quickly! Just 2-3 minutes per side is usually sufficient. Look for a temperature of 165°F on an instant-read thermometer. For extra juiciness, I sometimes add a splash of chicken broth and cover the pan for the final minute, creating a gentle steam bath that keeps everything succulent.

    Serving Ideas & Creative Variations

    Versatile Meal Pairings

    These flavor-packed strips are incredibly versatile and pair beautifully with countless sides. My personal favorite is serving them over a bed of lemony orzo with roasted asparagus – the pasta absorbs any juices from the turkey, creating a light sauce that ties everything together. For a lower-carb option, try them atop a crisp Greek salad with cucumber, tomato, and feta. They’re also perfect for meal prep – I’ll often make a double batch on Sunday and use them throughout the week in wraps, grain bowls, or chopped into Italian Chicken Gnocchi Soup for an easy twist. The bright flavors hold up beautifully for 3-4 days in the refrigerator.

    Exciting Flavor Twists

    While the classic lemon-pepper combination is divine, don’t be afraid to experiment with variations. Adding a tablespoon of honey to the seasoning creates a sweet-savory glaze that caramelizes beautifully when cooked. For Mediterranean flair, mix in dried oregano, minced garlic, and a pinch of red pepper flakes. My summer favorite is adding fresh herbs – chopped dill, basil, or thyme folded in just before serving brightens everything. For a more complex profile, try incorporating a teaspoon of Dijon mustard into the seasoning mix. The slight tang complements the lemon perfectly while adding depth that makes these strips feel even more special.

    Storage & Troubleshooting Guide

    Proper Storage Methods

    To maintain the optimal texture and flavor of your lemon pepper turkey strips, proper storage is essential. Allow leftovers to cool completely before transferring to an airtight container lined with a paper towel to absorb excess moisture. Refrigerate for up to 4 days. For longer storage, freeze the strips in a single layer on a parchment-lined baking sheet until solid, then transfer to freezer bags with the air pressed out. This method prevents freezer burn and allows you to grab just what you need. When reheating, avoid the microwave if possible – a quick 2-minute sear in a hot skillet revives the exterior crispness without drying out the meat.

    Common Issues and Solutions

    If your turkey strips turn out dry, you’ve likely overcooked the meat. Turkey breast is lean and cooks quickly – next time, reduce your cooking time by 1-2 minutes per side. For extra insurance against dryness, try brining the strips in a simple salt-water solution for 30 minutes before cooking. If your seasoning isn’t adhering well, ensure you’ve thoroughly patted the meat dry and consider adding a teaspoon of olive oil to help the lemon zest and pepper stick. For strips that lack flavor intensity, remember that fresh ingredients make all the difference – pre-ground pepper and bottled lemon juice simply can’t compete with freshly cracked pepper and just-zested lemon.

    Frequently Asked Questions

    Can I use turkey tenderloins instead of breast for these lemon pepper turkey strips?

    Absolutely! Turkey tenderloins work beautifully and often cook even faster than breast meat. They’re naturally more tender but follow the same cooking guidelines, watching carefully as they may need 1-2 minutes less cooking time.

    How do I prevent the lemon pepper seasoning from burning in the pan?

    Monitor your heat level carefully. Start with medium-high heat for the initial sear, then reduce to medium. Adding a tiny bit of honey to your seasoning mix can also help prevent burning while adding delicious caramelization.

    Can I make this recipe with chicken instead?

    Yes! Chicken breast works perfectly as a substitute. The cooking method remains the same, though thicker chicken breasts might need an additional minute per side to reach 165°F internal temperature.

    How can I make these strips spicier?

    Add cayenne pepper or red pepper flakes to your seasoning mix. Start with ¼ teaspoon and adjust to your preference. For complex heat, try adding a pinch of smoked paprika as well.

    What’s the best way to meal prep these lemon pepper turkey strips for the week?

    Cook a double batch, cool completely, then refrigerate in airtight containers. They maintain their flavor and texture for up to 4 days, making them perfect for quick salads, wraps, or protein-packed snacks.

    Final Thoughts

    These lemon pepper turkey breast strips have become a staple in my kitchen for good reason – they’re the perfect balance of convenience, nutrition, and incredible flavor. The bright citrus notes paired with the bold pepper create a protein option that never feels boring or repetitive. I find myself reaching for this recipe whenever I need a reliable, delicious meal that doesn’t demand hours in the kitchen. Whether you’re cooking for one or feeding a family, these versatile strips adapt to countless meal scenarios. For more inspiration, check out my Pinterest for creative serving ideas!

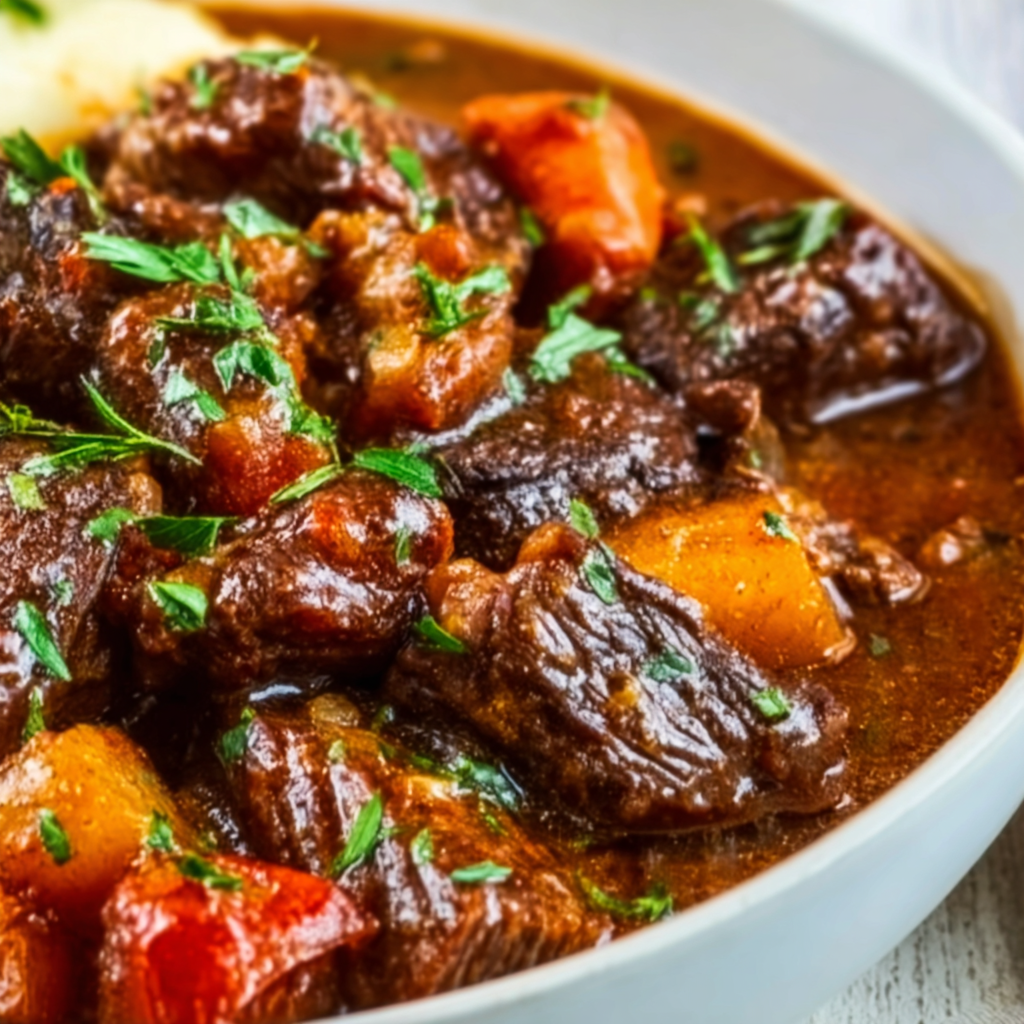
  • Italian Beef Stew Recipe: Cozy, Hearty Comfort in Every Bite!

    Italian Beef Stew Recipe: Cozy, Hearty Comfort in Every Bite!

    Italian Beef Stew Recipe: Cozy, Hearty Comfort in Every Bite!

    There’s nothing quite like the rich aroma of Italian Beef Stew simmering away on a cold afternoon. This hearty, soul-warming dish has been my go-to comfort food since my grandmother first taught me to make it on rainy Sundays in her tiny kitchen. The tender chunks of beef, aromatic herbs, and robust tomato base create a perfect harmony of flavors that transport you straight to the Italian countryside. Unlike many stews that can feel heavy, this recipe balances richness with bright notes from fresh herbs and a splash of red wine that elevates every spoonful. Let me show you how to create this unforgettable dish that’s become a cornerstone in my family’s recipe collection.

    Recipe

    Why You’ll Love This Italian Beef Stew

    Perfect One-Pot Comfort Food

    This Italian Beef Stew is the ultimate one-pot wonder that delivers maximum flavor with minimal effort. The beauty lies in its simplicity—just brown the meat, add your vegetables, pour in the liquids, and let everything mingle and develop into something truly magical. I love how the kitchen fills with that unmistakable aroma of herbs and simmering tomatoes about halfway through cooking. The stew develops layers of flavor as it cooks, with the beef becoming fork-tender and absorbing all those wonderful Italian seasonings. Plus, cleanup is a breeze with just one pot to wash, making this perfect for busy weeknights or lazy weekend cooking.

    Versatile and Forgiving

    What I adore about this Italian Beef Stew is how incredibly versatile it is. Don’t have fresh rosemary? Dried works beautifully. Only have ground beef instead of chuck? It’ll still be delicious. The recipe welcomes substitutions and additions based on what you have on hand. I’ve made this with different vegetables depending on the season—summer squash in August, extra mushrooms in fall—and it’s always turned out wonderfully. The forgiving nature of this stew makes it perfect for beginning cooks or those nights when you’re working with pantry staples. And if you accidentally let it simmer a bit too long? No worries—it often tastes even better!

    Essential Tips & Tricks

    Selecting and Preparing the Beef

    Choosing the right cut is crucial for an exceptional Italian Beef Stew. I recommend chuck roast for its perfect balance of meat and fat, which breaks down beautifully during the slow cooking process. Cut the beef into uniform 1½-inch cubes to ensure even cooking. Before adding to your pot, make sure to thoroughly pat the meat dry with paper towels—this is non-negotiable! Damp meat will steam rather than sear, and you’ll miss out on that gorgeous brown crust that adds incredible depth of flavor. Work in batches when browning to avoid overcrowding the pot, which is another common mistake that prevents proper caramelization.

    The Secret to Rich Flavor

    The foundation of exceptional Italian Beef Stew lies in building flavor at every stage. Start by properly deglazing your pot after browning the meat—those browned bits (fond) contain concentrated flavor gold! Use a good-quality dry red wine like Chianti or Sangiovese that you’d actually drink (never cooking wine). Let it reduce slightly before adding other liquids. Another game-changer is adding a parmesan rind during simmering—it melts slowly, infusing the stew with incredible umami depth. For an authentic Italian touch like my Italian Chicken Gnocchi Soup, finish with fresh herbs in the last 10 minutes of cooking, rather than at the beginning.

    Serving Ideas & Creative Variations

    Perfect Pairings

    Italian Beef Stew shines brightest when served with the right accompaniments. My absolute favorite pairing is a crusty loaf of ciabatta bread for sopping up every last drop of that rich gravy—there’s something deeply satisfying about using bread as your utensil! For a complete meal, I love serving it over creamy polenta or alongside roasted garlic mashed potatoes. If you’re looking for a lighter option, a simple arugula salad with lemon vinaigrette provides the perfect peppery contrast to the stew’s richness. For special occasions, I’ll sometimes prepare my High Protein Creamy Beef Pasta as a starter before bringing out this showstopping stew.

    Regional Italian Twists

    While this recipe captures the essence of traditional Italian Beef Stew, each region in Italy has its own delightful variation. For a Tuscan-inspired version, add cannellini beans and kale during the last 30 minutes of cooking. The Northern Italian approach includes more root vegetables like parsnips and turnips, plus a touch of cream for richness. My personal favorite twist is the Sicilian variation with olives, capers, and a hint of orange zest that brightens the entire dish. Sometimes I’ll add pancetta at the beginning for a deeper flavor profile, or incorporate porcini mushrooms for an earthy dimension that complements the beef beautifully.

    Storage & Troubleshooting Guide

    Proper Storage and Reheating

    Like most stews, Italian Beef Stew actually improves with time as the flavors continue to meld. Store leftovers in airtight containers in the refrigerator for up to 4 days, or freeze for up to 3 months. When freezing, leave about an inch of space at the top of your container to allow for expansion. For the best reheating results, thaw frozen stew overnight in the refrigerator, then warm slowly over medium-low heat on the stovetop, adding a splash of beef broth if it seems too thick. Avoid microwaving if possible, as it can make the meat tough. I often make a double batch specifically to freeze individual portions for quick weeknight dinners.

    Fixing Common Issues

    Even experienced cooks occasionally encounter challenges with stew. If your Italian Beef Stew turns out too thin, create a slurry with 1 tablespoon cornstarch mixed with 2 tablespoons cold water, then stir it in during the last 15 minutes of cooking. For stew that’s too thick, simply add more beef broth until you reach your desired consistency. If the meat seems tough, it likely needs more time—contrary to what you might think, tough stew meat usually indicates undercooking, not overcooking. And if your stew tastes flat, try adding a splash of balsamic vinegar or a squeeze of lemon juice just before serving to brighten all the flavors.

    Frequently Asked Questions

    What cut of beef is best for Italian Beef Stew?

    Chuck roast is ideal as it becomes tender and flavorful when slow-cooked. Beef shoulder or bottom round also work well. Look for meat with good marbling for the most succulent results.

    Can I make Italian Beef Stew in a slow cooker?

    Absolutely! Brown the meat and sauté the vegetables first, then transfer everything to your slow cooker. Cook on low for 7-8 hours or high for 4-5 hours until the beef is fork-tender.

    What’s the best wine to use in this recipe?

    Use a dry red wine you’d enjoy drinking like Chianti, Sangiovese, or Montepulciano. The wine’s flavors concentrate during cooking, so quality matters. Avoid “cooking wine” which contains salt and additives.

    Can I make this stew ahead of time?

    Yes! Italian Beef Stew tastes even better the next day as flavors continue to develop. Make it up to 2 days ahead and refrigerate in an airtight container, then gently reheat before serving.

    How can I thicken my stew if it’s too watery?

    Create a cornstarch slurry with 1 tablespoon cornstarch mixed with 2 tablespoons cold water. Stir into simmering stew during the last 15 minutes of cooking until it reaches your desired thickness.

    Final Thoughts

    This Italian Beef Stew has been my culinary companion through countless family gatherings, chilly evenings, and times when I needed the comfort only a truly satisfying meal can provide. There’s something almost magical about how a handful of simple ingredients can transform into something so profoundly nourishing and delicious. I hope this recipe brings the same warmth and joy to your table that it has to mine. The beauty of Italian cooking lies in its respect for quality ingredients and unhurried preparation—values that this stew embodies perfectly. Don’t forget to share your creations on Pinterest and let me know how you made this Italian Beef Stew your own!