Category: Dinner

Easy, tasty dinner ideas for busy nights. Simple recipes, quick prep, and family-friendly meals you’ll make again and again.

  • Creamy Salmon Spinach Pasta Recipe That Will Blow Your Mind!

    Creamy Salmon Spinach Pasta Recipe That Will Blow Your Mind!

    Creamy Salmon Spinach Pasta Recipe That Will Blow Your Mind!

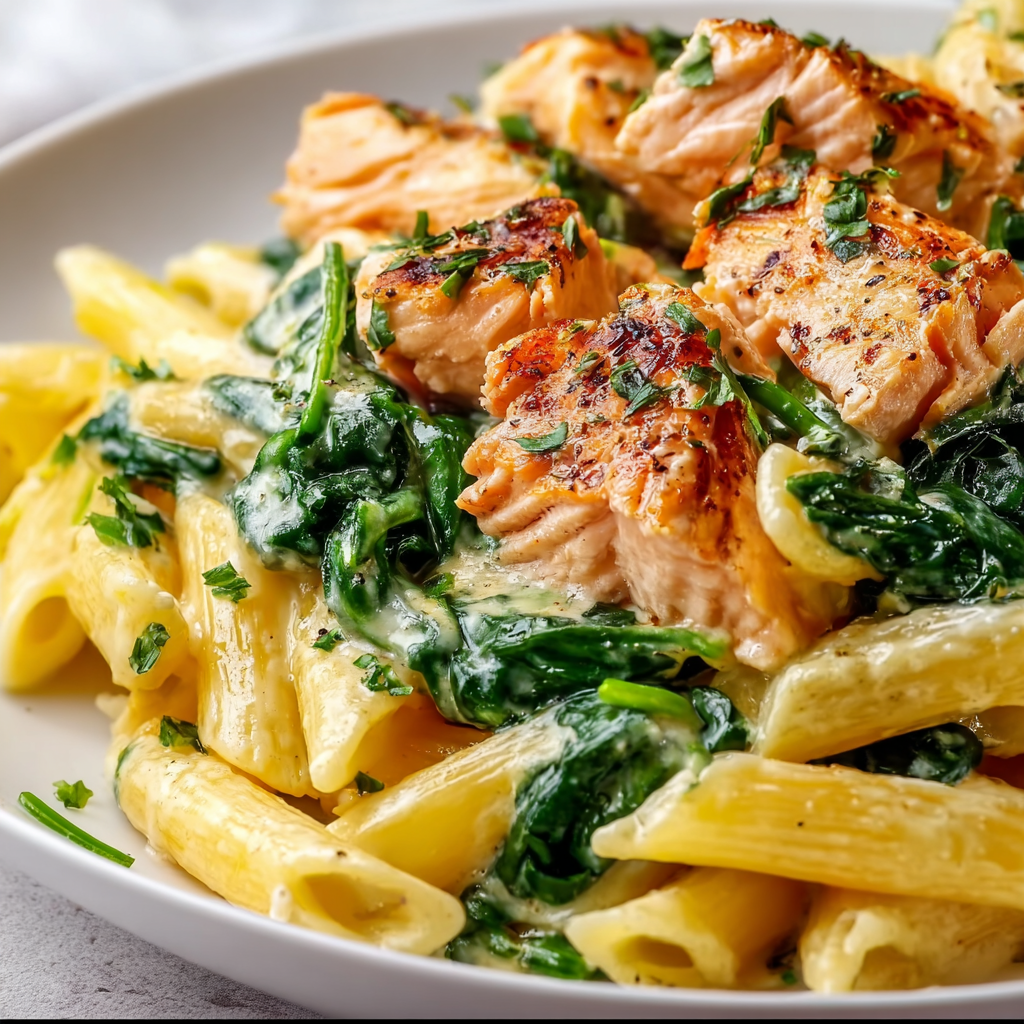
    Creamy Salmon Spinach Pasta has become my absolute go-to for those evenings when I crave something that feels indulgent yet comes together in minutes. There’s something magical about how the silky sauce clings to each strand of pasta, carrying flakes of tender salmon and wilted spinach in each twirl of your fork. I first created this recipe during a rainy Sunday when comfort food was calling my name but I wanted something a bit more sophisticated than my usual mac and cheese. The combination of rich cream, bright lemon, and savory salmon creates a dish that’s both elegant and cozy.

    Recipe

    Why You’ll Love This Creamy Salmon Spinach Pasta

    Perfect Balance of Flavors and Textures

    This pasta dish strikes that elusive balance between rich and refreshing. The cream sauce is velvety without being heavy, brightened with lemon zest and a hint of garlic that cuts through the richness. The salmon flakes into tender morsels that practically melt in your mouth, while the spinach adds a slight earthiness and beautiful color contrast. I love how the pasta absorbs just enough sauce to be coated without drowning. Each bite offers a different experience – sometimes more salmon, sometimes a perfect forkful of pasta wrapped in silky sauce with peppery notes from the fresh cracked black pepper.

    Quick Weeknight Luxury

    What I adore most about this Creamy Salmon Spinach Pasta is how it transforms ordinary ingredients into something that feels special enough for company. Yet it’s ready in under 30 minutes! Last Tuesday, after a particularly exhausting workday, I almost ordered takeout before remembering I had salmon in the fridge. Twenty minutes later, I was twirling this pasta around my fork, wondering why I’d ever consider spending money on restaurant food. The cleanup is minimal too – just one pot for the pasta and one pan for the sauce. Perfect for those evenings when you want something that tastes like you spent hours in the kitchen but requires minimal effort.

    Essential Tips & Tricks

    Selecting and Preparing Your Salmon

    The quality of salmon makes a tremendous difference in this dish. I prefer wild-caught salmon for its richer flavor and firmer texture, but good-quality farmed salmon works beautifully too. Remove the skin before cooking (or after, if that’s easier) and check carefully for pin bones. For the most foolproof results, cook the salmon separately first – either gently poached in the cream or quickly pan-seared and then flaked into the sauce. This prevents overcooking and ensures those perfect, tender morsels throughout your pasta. Remember that salmon continues cooking from residual heat, so it’s better to slightly undercook it initially.

    Perfecting Your Cream Sauce

    The secret to a silky-smooth sauce is patience and temperature control. Start with a cold pan when adding your cream to prevent it from splitting. I learned this the hard way during a dinner party when I rushed and ended up with a slightly curdled sauce! Now I always heat my cream slowly and never let it boil aggressively. If you’re concerned about calories, you can substitute half the cream with the starchy pasta water, which adds body without the extra richness. For extra flavor dimension, try infusing your cream with a sprig of fresh dill or tarragon before adding it to the pasta sauce.

    Serving Ideas & Creative Variations

    Complementary Side Dishes

    This Creamy Salmon Spinach Pasta pairs beautifully with light, acidic sides that balance the richness of the cream sauce. My favorite combination is a simple arugula salad dressed with lemon juice and olive oil – the peppery greens cut through the creaminess perfectly. For something more substantial, try roasted asparagus with a sprinkle of lemon zest, or a side of garlic bread for sopping up extra sauce. If you’re serving this for a dinner party, start with a light appetizer like cucumber rounds topped with whipped feta and fresh herbs to set the stage without filling everyone up before the main event.

    Exciting Flavor Twists

    While the classic version is divine, this pasta welcomes creative adaptations. Sometimes I swap the spinach for tender asparagus tips or sweet peas for a spring variation. Adding capers or chopped sun-dried tomatoes brings a welcome punch of acidity and umami. For a luxurious upgrade, fold in some mascarpone cheese at the end or top with a spoonful of salmon roe for a beautiful pop of color and briny flavor. My husband loves when I add a splash of vodka to the sauce (cook it off, of course) for a subtle depth that complements the salmon beautifully. The versatility makes this recipe one you’ll return to again and again.

    Storage & Troubleshooting Guide

    Proper Storage and Reheating

    Cream-based pasta dishes can be tricky to store and reheat without separating, but I’ve found some reliable methods. Allow leftovers to cool completely before transferring to an airtight container and refrigerating for up to 2 days. When reheating, add a splash of milk or cream and warm gently over low heat, stirring frequently. Microwaving works in a pinch, but use 50% power and stir halfway through. The texture won’t be quite as silky as when freshly made, but it’s still delicious. I don’t recommend freezing this dish as the cream sauce tends to separate and the pasta becomes mushy.

    Fixing Common Issues

    If your sauce looks too thin or watery, a simple troubleshooting technique is to let it simmer uncovered for a few extra minutes. For an immediate fix, a teaspoon of cornstarch mixed with cold water creates a slurry that will thicken your sauce when stirred in and heated through. If your sauce breaks or curdles, try whisking in a tablespoon of cold cream off the heat. For salmon that turned out too dry, flake it very finely and fold it into the sauce where it can absorb moisture. And if you accidentally oversalted, a squeeze of fresh lemon juice can help balance the flavors.

    Frequently Asked Questions

    Can I use smoked salmon instead of fresh?

    Absolutely! Smoked salmon adds wonderful flavor, but add it at the very end since it’s already cooked. Just fold it in off the heat to warm through without toughening.

    What pasta shape works best for Creamy Salmon Spinach Pasta?

    Fettuccine and linguine are my favorites as they hold the creamy sauce beautifully. Penne and fusilli also work well as their shapes capture sauce in their crevices.

    Can I make this dish dairy-free?

    Yes! Substitute the cream with full-fat coconut milk and add a tablespoon of nutritional yeast for cheesy flavor. The coconut adds a subtle sweetness that complements the salmon.

    How do I prevent the spinach from becoming slimy?

    Add spinach at the very end and just let it wilt from the sauce’s heat without additional cooking. Fresh baby spinach works better than frozen for texture.

    What wine pairs best with this pasta?

    A crisp Sauvignon Blanc or unoaked Chardonnay complements the creamy salmon pasta beautifully. The acidity cuts through the richness while enhancing the lemon notes.

    Final Thoughts

    This Creamy Salmon Spinach Pasta has saved countless weeknight dinners at my house while still feeling special enough for celebrations. There’s something truly magical about transforming simple ingredients into something that feels like a restaurant-quality meal. I hope you’ll try this recipe and make it your own – perhaps it will become your go-to impressive-yet-easy dinner too! For more pasta inspiration, check out my other recipes on Pinterest where I’m constantly adding new ideas for quick, delicious meals that bring comfort and joy to your table.
  • Brown Sugar Pineapple Chicken Recipe That’ll WOW Your Taste Buds!

    Brown Sugar Pineapple Chicken Recipe That’ll WOW Your Taste Buds!

    Brown Sugar Pineapple Chicken Recipe That’ll WOW Your Taste Buds!

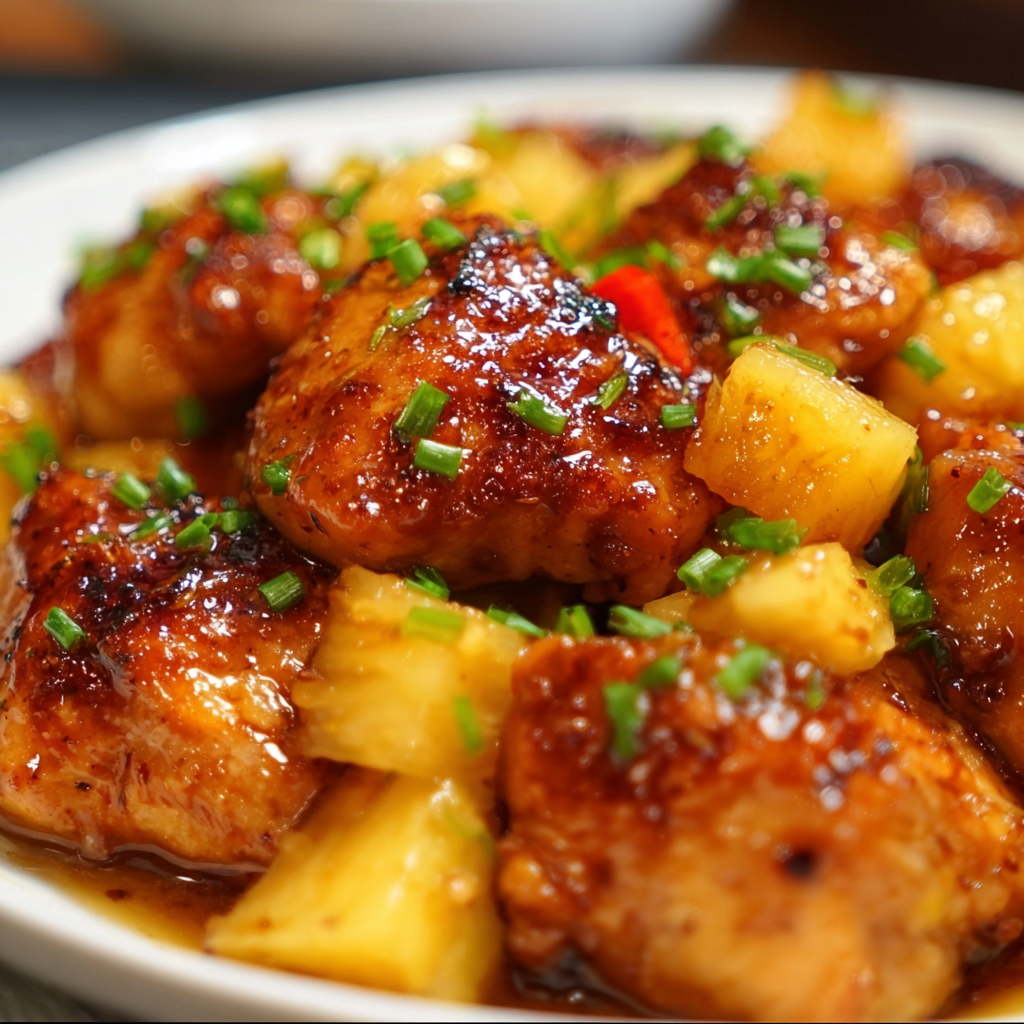
    This Brown Sugar Pineapple Chicken Recipe transforms ordinary chicken into a caramelized tropical delight that’s both sweet and savory. I discovered this gem during a rainy Sunday when I craved something that would brighten our dinner table. The magic happens when the brown sugar caramelizes with the pineapple juice, creating a glossy sauce that coats each piece of chicken perfectly. It’s become my go-to when I need a quick dinner that feels special without hours in the kitchen. If you enjoy sweet-savory combinations like in my Sweet Chili Chicken Bowl, you’ll absolutely love this!

    Recipe

    Why You’ll Love This Brown Sugar Pineapple Chicken Recipe

    Perfect Balance of Flavors

    The caramelized brown sugar creates a depth that perfectly complements the bright acidity of pineapple. What makes this dish special is how the sauce thickens as it cooks, coating each piece of chicken with sticky-sweet goodness. I love watching my family’s faces light up when they taste that first bite—the way the sweetness hits first, followed by a subtle tanginess from the pineapple. The chicken stays incredibly tender while developing those beautiful caramelized edges that make you want to scrape every last bit from the pan.

    Quick and Simple Preparation

    This recipe requires just 10 minutes of prep and basic pantry ingredients you likely already have. The first time I made it, I was running late from work and needed something impressive without the fuss. Simply brown the chicken, mix the sauce ingredients, combine, and let it simmer until done. The hands-off cooking time gives you space to prepare a side dish or simply relax with a glass of wine. Even on my busiest weeknights, I can manage this recipe without feeling overwhelmed.

    Essential Tips & Tricks

    Getting the Perfect Caramelization

    The secret to amazing flavor lies in proper caramelization. Don’t rush the initial browning of the chicken—those golden edges are flavor foundations. I learned this the hard way when I once hurried the process and missed out on that deep caramel flavor. Make sure your pan is hot before adding the chicken, then resist the urge to stir constantly. Let the sugar in the sauce bubble and thicken naturally. If your sauce seems too thin, a cornstarch slurry (1 teaspoon cornstarch mixed with 1 tablespoon water) will help it reach that perfect sticky consistency.

    Choosing the Right Ingredients

    Use fresh pineapple whenever possible for the brightest flavor, though canned works wonderfully in a pinch. I prefer dark brown sugar for its deeper molasses notes, but light brown sugar creates a milder sweetness that some prefer. Chicken thighs retain moisture better than breasts, but both work beautifully in this recipe. For an extra flavor dimension, try adding a splash of soy sauce or a hint of ginger. My Grilled Chicken Orzo Salad uses similar flavor-building techniques!

    Serving Ideas & Creative Variations

    Perfect Pairings

    Serve this sticky-sweet chicken over fluffy jasmine rice that soaks up every drop of sauce. I love adding a bright side of steamed broccoli or a crisp cucumber salad for contrast. For a dinner party last month, I served it with coconut rice and roasted vegetables, and my guests couldn’t stop raving. A sprinkle of sesame seeds and sliced green onions adds both visual appeal and texture. For a complete meal experience, consider starting with a light soup or ending with a simple fruit-based dessert.

    Exciting Variations

    Transform this dish by adding spicy elements like red pepper flakes or sriracha to balance the sweetness. One summer evening, I added diced bell peppers and onions during the last few minutes of cooking, creating a complete one-pan meal. For a tropical twist, mix in some mango chunks alongside the pineapple. You can also try it with pork tenderloin instead of chicken for a delicious alternative. The sauce works beautifully in a slow cooker too—perfect for those busy days when you want dinner waiting for you, similar to my Crockpot Chicken and Stuffing Recipe.

    Storage & Troubleshooting Guide

    Proper Storage Methods

    Store leftovers in an airtight container in the refrigerator for up to 3 days. The flavors actually deepen overnight, making this dish even better the next day! I often make a double batch specifically for planned leftovers. For freezing, cool the chicken completely before transferring to freezer-safe containers, where it will keep for up to 2 months. Thaw overnight in the refrigerator before reheating. When reheating, add a splash of water or pineapple juice to revitalize the sauce if it’s thickened too much.

    Common Problems and Solutions

    If your sauce becomes too thick or burns easily, lower the heat and add a splash of chicken broth or pineapple juice. I once accidentally let mine reduce too much and saved it with this simple fix. For sauce that’s too thin, simmer uncovered for a few extra minutes or add that cornstarch slurry mentioned earlier. If the chicken seems dry, it’s likely overcooked—next time, check for doneness earlier. Remember that dark meat is more forgiving than white meat when it comes to cooking time.

    Frequently Asked Questions

    Can I use canned pineapple for Brown Sugar Pineapple Chicken?

    Absolutely! Canned pineapple works perfectly—just be sure to reserve the juice for the sauce. I recommend chunks in 100% juice rather than syrup for better flavor balance.

    How can I make this recipe healthier?

    Use chicken breasts instead of thighs, reduce the brown sugar by half, and increase the amount of fresh pineapple. Adding more vegetables like bell peppers and snap peas also boosts nutrition.

    Can this be made in a slow cooker?

    Yes! Brown the chicken first, then combine all ingredients in your slow cooker. Cook on low for 4-5 hours or high for 2-3 hours until the chicken reaches 165°F.

    Is this recipe gluten-free?

    The basic recipe is naturally gluten-free, but always check your soy sauce if using, as many brands contain wheat. Tamari makes a great gluten-free alternative.

    How spicy is Brown Sugar Pineapple Chicken?

    The standard recipe isn’t spicy at all—it’s sweet with tangy notes. Add red pepper flakes, sriracha, or diced jalapeños if you prefer some heat!

    Final Thoughts

    This Brown Sugar Pineapple Chicken recipe has become a treasured part of my cooking repertoire for good reason. The interplay of sweet, tangy, and savory flavors creates something truly special that elevates an ordinary weeknight. I’ve shared it with countless friends who now make it regularly for their own families. For more delicious recipe inspiration, follow me on Pinterest where I’m always adding new ideas. Whether you’re cooking for picky eaters or gourmet food lovers, this dish bridges the gap beautifully.

  • Italian Sausage and Peppers in Tomato Sauce – Irresistibly Delicious!

    Italian Sausage and Peppers in Tomato Sauce – Irresistibly Delicious!

    Italian Sausage and Peppers in Tomato Sauce – Irresistibly Delicious!

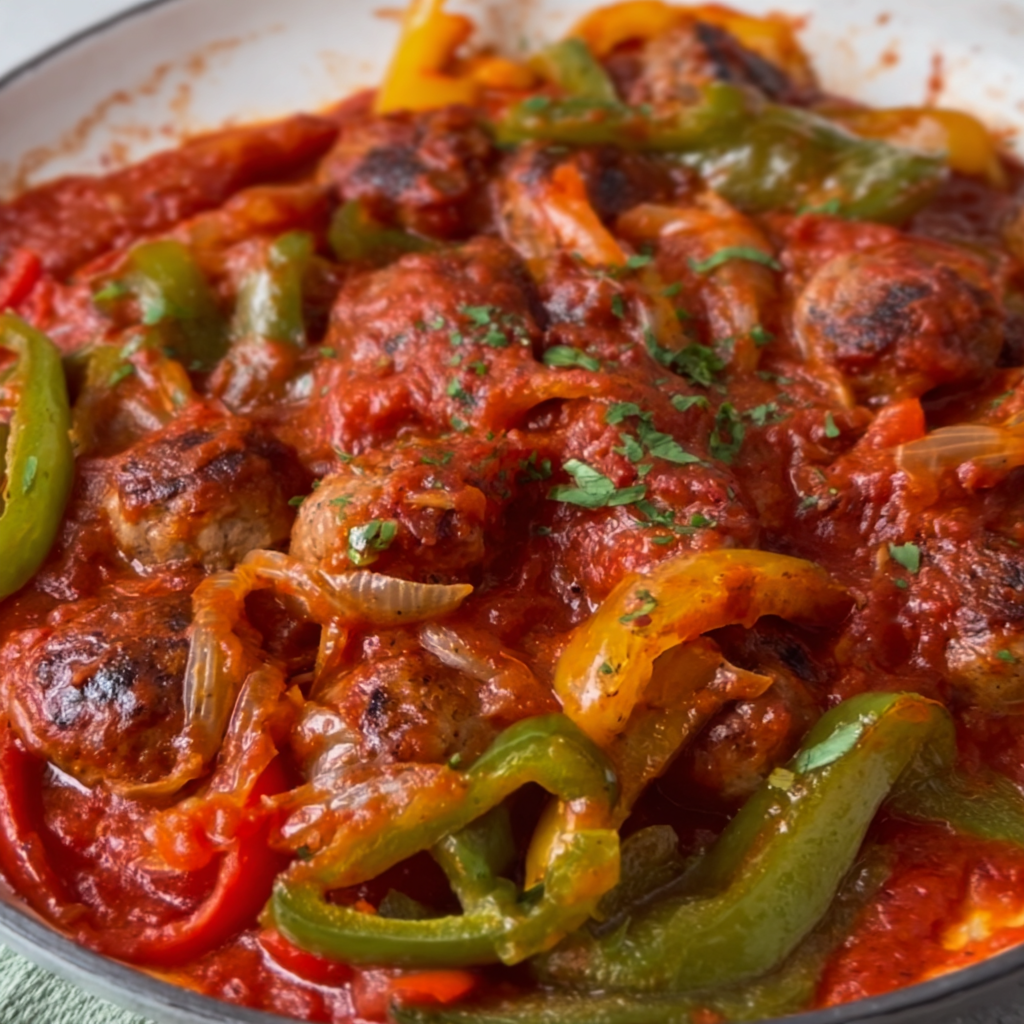
    The aroma of Italian sausage and peppers with tomato sauce simmering on the stove takes me right back to my grandmother’s kitchen. There’s something magical about the way those sweet bell peppers soften alongside spicy Italian sausages, creating a harmony of flavors that feels like a warm hug. I’ve spent years perfecting this classic comfort dish, and today I’m thrilled to share my go-to recipe that balances authentic Italian flavors with everyday simplicity. This one-pot wonder has saved countless weeknight dinners in my home and never fails to bring smiles around the table.

    Recipe

    Why You’ll Love This Italian Sausage and Peppers with Tomato Sauce

    A Perfect Balance of Flavors and Textures

    The beauty of Italian sausage and peppers with tomato sauce lies in its perfect balance of flavors. The sweet bell peppers caramelize slightly as they cook, creating a natural sweetness that complements the savory, slightly spicy Italian sausage. I love how the tomato sauce brings everything together, simmering into a silky consistency that clings to each bite. The textures work in harmony too – tender peppers, juicy sausage, and that rich sauce create a dish that’s incredibly satisfying without being heavy. It’s the kind of meal that feels special enough for Sunday dinner but simple enough for Wednesday night.

    Simple Ingredients, Maximum Flavor

    What I adore about this dish is how it transforms simple ingredients into something extraordinary. You’ll need just Italian sausages (sweet, hot, or a mix), bell peppers in various colors, onions, garlic, canned tomatoes, and a handful of herbs. That’s it! The magic happens as these humble ingredients slowly cook together, releasing their flavors and creating something greater than the sum of their parts. I’ve made this on busy weeknights and for dinner parties alike – it never disappoints and always tastes like I spent hours in the kitchen, even when it took just minutes of active cooking time.

    Essential Tips & Tricks

    Selecting and Preparing the Perfect Sausages

    Choosing the right sausages makes all the difference in this dish. Look for high-quality Italian sausages with visible herbs and spices in the meat. I prefer a mix of sweet and hot for balanced flavor, but adjust based on your spice preference. Before cooking, I always pierce the sausages lightly with a fork – this prevents them from bursting while allowing some of their flavorful juices to escape into the sauce. For deeper flavor, brown the sausages first before adding other ingredients. This creates those delicious caramelized bits (fond) that will enrich your entire dish when deglazed with a splash of wine or broth.

    The Secret to Perfect Peppers

    The key to perfect peppers is in the cutting and cooking technique. Slice your bell peppers into uniform strips about ½-inch wide – this ensures they’ll cook evenly alongside the sausage. I’ve found that a mix of red, yellow, and green peppers not only looks beautiful but adds complexity to the flavor profile. Don’t rush the cooking process; allowing the peppers to slowly soften and slightly caramelize brings out their natural sweetness. If you’re short on time, check out my Instant Pot Alfredo recipe for another quick weeknight option that follows similar principles of layering flavors.

    Serving Ideas & Creative Variations

    Traditional and Modern Serving Suggestions

    This versatile dish shines in so many settings! Traditionally, Italian sausage and peppers with tomato sauce is served over creamy polenta or alongside crusty Italian bread to soak up all that delicious sauce. For a lighter option, I love it over zucchini noodles or cauliflower rice. It also makes an incredible sandwich filling – stuff it into a crusty roll with some provolone cheese for an authentic Italian street food experience. For a complete meal, pair it with a simple side salad dressed with olive oil and lemon, similar to my Italian Chicken Gnocchi Soup that balances rich flavors with lighter elements.

    Creative Twists on the Classic Recipe

    While the classic recipe is perfection, I love experimenting with variations. Try adding fennel bulb sliced thin alongside the peppers for a subtle anise flavor that complements the sausage beautifully. For a spicier version, incorporate some calabrian chilies or red pepper flakes. Make it heartier by adding mushrooms, which absorb all the amazing flavors of the sauce. You can even transform it into a pasta sauce – just chop the sausage and peppers into smaller pieces and toss with rigatoni or penne. For a one-pot meal, add small cubed potatoes to cook alongside everything else, creating an even more substantial dish.

    Storage & Troubleshooting Guide

    Making Ahead and Proper Storage

    One of the best things about Italian sausage and peppers with tomato sauce is that it tastes even better the next day! To store properly, cool the dish completely before transferring to airtight containers. It will keep beautifully in the refrigerator for up to 4 days, with the flavors melding and deepening over time. This dish also freezes exceptionally well – portion it into freezer-safe containers and freeze for up to 3 months. When reheating, I prefer to do it slowly on the stovetop with a splash of water or broth to maintain the perfect consistency, though microwave works in a pinch.

    Fixing Common Issues

    If your sauce becomes too watery, simply simmer uncovered for 5-10 minutes to reduce and thicken. Conversely, if it’s too thick, add a splash of chicken broth or water. For sausages that aren’t cooking through evenly, try the poaching method: simmer them in water for 5 minutes before browning and continuing with the recipe. If your peppers are cooking too quickly while the sausage isn’t done, remove them temporarily with a slotted spoon and return them to the pan in the final minutes of cooking. And remember – if your sauce lacks depth, a teaspoon of balsamic vinegar or a pinch of sugar can work wonders to balance flavors.

    Frequently Asked Questions

    Can I make Italian sausage and peppers with tomato sauce in a slow cooker?

    Absolutely! Brown the sausages first, then combine all ingredients in your slow cooker. Cook on low for 6-7 hours or high for 3-4 hours until sausages are cooked through and peppers are tender.

    What’s the best type of tomatoes to use for the sauce?

    San Marzano tomatoes are ideal for their sweet flavor and low acidity. If unavailable, any good-quality canned whole or crushed tomatoes will work beautifully.

    Can I use turkey or chicken sausage instead of pork?

    Yes! Poultry-based Italian sausages work wonderfully in this recipe. They’re leaner, so be careful not to overcook them as they can dry out more quickly than pork sausages.

    How can I make this dish spicier?

    Add red pepper flakes, diced fresh hot peppers like jalapeños, or use more hot Italian sausage in your mix. You can also incorporate a spicy Italian condiment like bomba sauce.

    What’s the best way to serve leftover Italian sausage and peppers with tomato sauce?

    Leftover sausage and peppers make incredible sandwiches on crusty rolls, delicious pizza toppings, or can be chopped and mixed with eggs for a spectacular breakfast hash.

    Final Thoughts

    Italian sausage and peppers with tomato sauce remains one of those timeless dishes that never goes out of style. Its beautiful simplicity and incredible depth of flavor remind us that good cooking doesn’t have to be complicated. I hope you’ll try this recipe and make it your own, perhaps starting a tradition in your family just as my grandmother did in ours. For more delicious Italian-inspired recipes, check out my collection on Pinterest. The combination of sweet peppers, savory sausage, and rich tomato sauce creates a meal that nourishes both body and soul.

  • Cottage Cheese Ground Beef Sweet Potato Casserole That Will Wow!

    Cottage Cheese Ground Beef Sweet Potato Casserole That Will Wow!

    Cottage Cheese Ground Beef Sweet Potato Casserole That Will Wow!

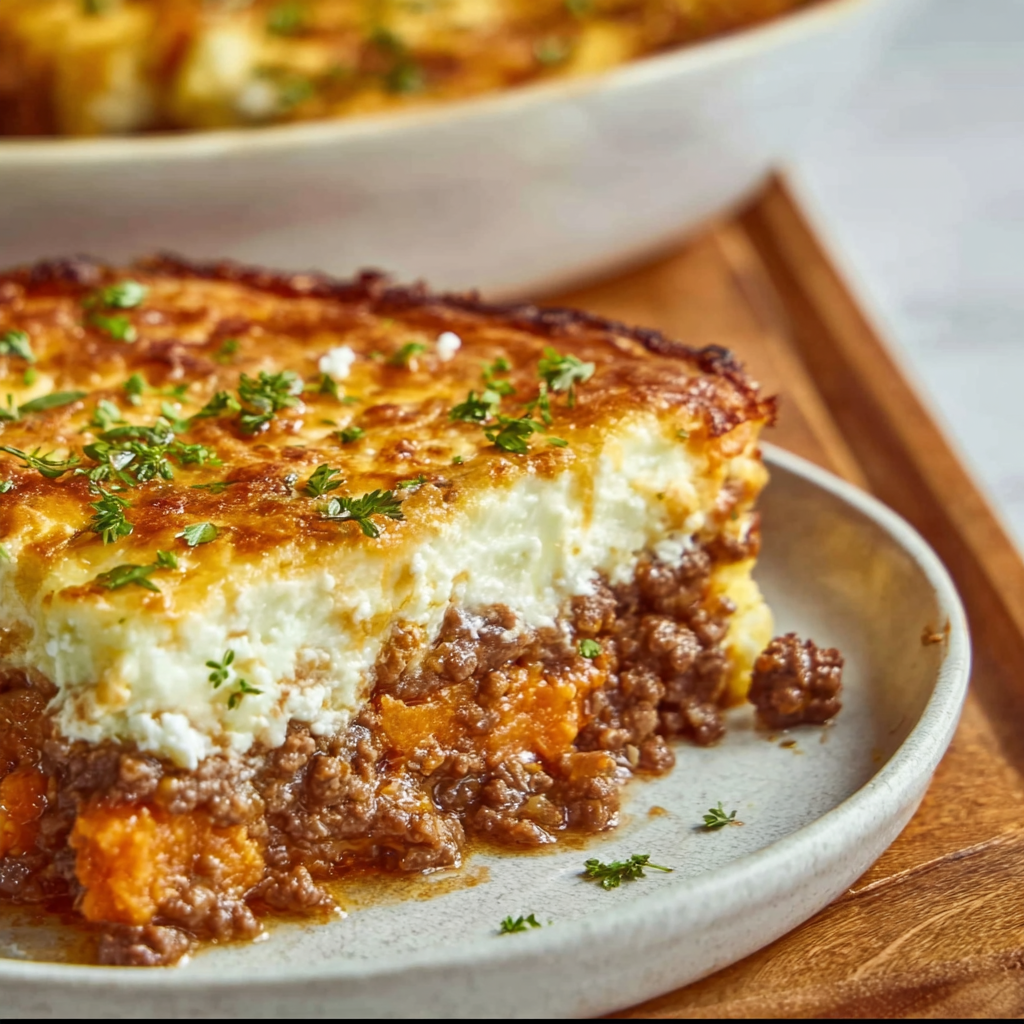
    This Cottage Cheese, Ground Beef and Sweet Potato Casserole has become my ultimate comfort food revelation! The creamy tang of cottage cheese perfectly balances the hearty ground beef, while sweet potatoes add a velvety sweetness that makes this dish absolutely crave-worthy. I discovered this combination during a rainy Sunday when I needed something nourishing but didn’t want the usual pasta casserole. The first bite had me wondering why I hadn’t been making this protein-packed, nutrient-dense meal all along! If you’re looking for a family-friendly dinner that’s both satisfying and wholesome, this recipe is about to become your new favorite.

    Recipe

    Why You’ll Love This Cottage Cheese, Ground Beef and Sweet Potato Casserole

    Perfect Balance of Flavors and Textures

    The magic of this casserole lies in its textural contrasts. The creamy cottage cheese creates pockets of tangy goodness against the savory ground beef, while the sweet potatoes add a natural sweetness and velvety texture. I love how the top gets slightly crispy in the oven, giving you that satisfying crunch with each bite. The subtle sweetness from the potatoes balances the umami richness of the beef, creating a dish that feels simultaneously indulgent and nourishing. My husband, who typically reaches for seconds of my Italian Chicken Gnocchi Soup, now requests this casserole just as often!

    Nutritional Powerhouse in One Dish

    This casserole is a nutrient-dense meal that doesn’t sacrifice flavor for health benefits. The cottage cheese provides excellent protein while keeping the dish creamy without heavy cream. Sweet potatoes deliver fiber, vitamins A and C, and complex carbohydrates that keep you feeling satisfied longer. Ground beef adds iron and B vitamins, making this a well-rounded dinner option. I’ve found it’s perfect for meal prep too – the flavors actually deepen overnight, making leftovers even more delicious. When I’m trying to incorporate more protein into my family’s diet without complaints, this dish is my secret weapon!

    Essential Tips & Tricks

    Perfecting Your Cottage Cheese Layer

    The key to the best texture is draining excess moisture from your cottage cheese before assembling. I place mine in a fine-mesh strainer for about 15 minutes while preparing other ingredients. This prevents your casserole from becoming watery during baking. For extra creaminess, I recommend using full-fat cottage cheese – the flavor and texture simply can’t be matched by lower-fat versions. If you’re feeling adventurous, try mixing in a tablespoon of fresh herbs like thyme or rosemary into the cottage cheese layer. This simple step elevates the flavor profile tremendously, similar to how herbs transform my High Protein Cottage Cheese Pancakes.

    Sweet Potato Preparation Methods

    How you prepare your sweet potatoes significantly impacts the final texture of your casserole. For a faster cooking time, I recommend pre-roasting cubed sweet potatoes for 15 minutes before adding them to the casserole. This gives them a slight caramelization that enhances their natural sweetness. Alternatively, you can shred the sweet potatoes for a more integrated texture throughout the dish. Whatever method you choose, make sure your sweet potato pieces are uniform in size for even cooking. I’ve found that a light drizzle of maple syrup on the sweet potatoes adds a subtle depth that pairs beautifully with the savory elements.

    Serving Ideas & Creative Variations

    Complementary Side Dishes

    This hearty casserole pairs beautifully with lighter sides that balance its richness. I love serving it with a simple arugula salad dressed with lemon and olive oil, which cuts through the creaminess perfectly. Roasted Brussels sprouts or steamed green beans also complement the flavors wonderfully. For a complete meal that still feels light, try my Mediterranean Lentil Salad on the side – the bright, fresh flavors create a perfect contrast. When serving for guests, I place the casserole in the center of the table with small bowls of toasted pumpkin seeds and fresh herbs for everyone to garnish their own portions.

    Flavor Variations to Try

    Don’t be afraid to make this recipe your own with creative adaptations! For a Mexican-inspired version, add a layer of black beans, corn, and taco seasoning, then top with pepper jack cheese. For an Italian twist, mix marinara sauce with the ground beef and add a sprinkle of Italian herbs to the cottage cheese. My family loves when I add a layer of sautéed mushrooms and spinach between the beef and sweet potatoes for extra vegetables. You can also swap the ground beef for ground turkey or even lentils for a lighter option that still delivers on protein and satisfaction.

    Storage & Troubleshooting Guide

    Proper Storage for Maximum Freshness

    This casserole stores beautifully, making it perfect for meal prep Sundays. Once completely cooled, cover tightly with foil or transfer portions to airtight containers. It will keep in the refrigerator for up to 4 days. For longer storage, freeze individual portions for up to 3 months. I recommend using glass containers with secure lids to prevent freezer burn. When reheating, sprinkle a few drops of water over the top before covering – this prevents the casserole from drying out. For best results, thaw frozen portions in the refrigerator overnight before reheating in a 325°F oven until heated through.

    Common Issues and Solutions

    If your casserole turns out watery, the most likely culprit is excess moisture in the ingredients. Next time, make sure to drain the cottage cheese thoroughly and consider patting the sweet potatoes dry after washing. If the top isn’t browning nicely, try placing it under the broiler for the final 2-3 minutes of cooking (watch carefully to prevent burning!). For uneven cooking, ensure your casserole dish distributes heat well and that sweet potato pieces are uniform in size. If your casserole seems bland, don’t be shy with seasonings – this dish can handle robust flavors like smoked paprika, garlic powder, or even a dash of cinnamon.

    Frequently Asked Questions

    Can I use regular potatoes instead of sweet potatoes?

    Yes, you can substitute regular potatoes, but you’ll lose the subtle sweetness that balances the dish. If using regular potatoes, consider adding a tablespoon of maple syrup or honey to maintain that sweet-savory balance.

    Is there a substitute for cottage cheese in this recipe?

    Ricotta makes an excellent substitute with a similar texture. For a dairy-free version, try silken tofu blended with a tablespoon of nutritional yeast and a squeeze of lemon juice.

    How can I make this Cottage Cheese, Ground Beef and Sweet Potato Casserole ahead of time?

    Assemble the casserole up to 24 hours in advance, cover and refrigerate. Add an extra 10-15 minutes to the baking time when cooking from cold, and let it stand at room temperature for 30 minutes before baking.

    Can I add vegetables to this casserole?

    Absolutely! Spinach, kale, bell peppers, or zucchini work wonderfully. Sauté them briefly before adding to reduce excess moisture and enhance flavor.

    What’s the best cheese to use for topping?

    Sharp cheddar provides the best flavor contrast, but monterey jack, gruyère, or a Mexican blend all work beautifully depending on your flavor preference.

    Final Thoughts

    This Cottage Cheese, Ground Beef and Sweet Potato Casserole has become a staple in my kitchen for good reason – it’s the perfect marriage of comfort and nutrition. The combination of protein-rich cottage cheese and ground beef with nutrient-dense sweet potatoes creates a satisfying meal that feels like a hug in food form. I love recipes that bring together unexpected ingredients to create something greater than the sum of their parts, and this casserole absolutely delivers on that promise. Don’t forget to check out more of my cozy comfort food recipes on Pinterest for more inspiration!

  • Cookies and Cream Cookie Recipe That Will Blow Your Mind!

    Cookies and Cream Cookie Recipe That Will Blow Your Mind!

    Cookies and Cream Cookie Recipe That Will Blow Your Mind!

    This Cookies and Cream Cookie Recipe combines two beloved treats into one irresistible dessert that’s impossible to resist. I discovered this recipe during a rainy weekend when my niece was visiting, and we needed something special to brighten our day. The moment these cookies came out of the oven, with their crisp edges and soft centers studded with crushed Oreos, I knew we had created something magical. The familiar vanilla-chocolate flavor profile gets an upgrade with chunks of cookies folded into the dough, creating pockets of creamy sweetness in every bite. If you love classic cookies but crave something with a bit more personality, this recipe will quickly become your new favorite.

    Recipe

    Perfect Texture Combination

    There’s something absolutely magical about the textural contrast in these cookies. The base cookie dough bakes up with those perfectly crisp edges while maintaining a soft, slightly chewy center that melts in your mouth. Then you get the surprising crunch from the cookie pieces, followed by that creamy filling that creates little pockets of sweetness throughout. I’ve tested countless cookie recipes over the years, but this texture combination is what makes these truly special. It’s like getting the best parts of two desserts in every single bite—the satisfying chew of a homemade cookie with the nostalgic crunch of your favorite sandwich cookie.

    Crowd-Pleasing Flavor

    These cookies consistently earn rave reviews whenever I bring them to gatherings. The familiar vanilla-chocolate combo speaks to everyone’s inner child while still feeling sophisticated enough for grown-up palates. What I love most is watching people take their first bite—there’s always that moment of surprise when they discover the cookies and cream pieces scattered throughout. The base cookie has a rich buttery vanilla flavor that perfectly complements the chocolate cookie pieces and sweet cream filling. Even my friend who claims not to have a sweet tooth ended up reaching for seconds (and thirds!) when I brought these to our last book club meeting.

    Essential Tips & Tricks

    Ingredient Selection Matters

    When making this cookies and cream cookie recipe, quality ingredients make a noticeable difference. I recommend using European-style butter with higher fat content for a richer flavor and better texture. For the cookies and cream element, classic Oreos work beautifully, but I’ve had great results with other sandwich cookies too. The key is to vary how finely you crush them—some pieces should be chunky while others more fine, creating textural interest throughout. Don’t skip the touch of sea salt in the recipe; it balances the sweetness and enhances the vanilla notes in a way that makes these cookies truly special, just like my 3-Ingredient Biscoff Cookies.

    Perfect Your Technique

    The mixing method significantly impacts your final results with these cookies. Cream the butter and sugars until truly light and fluffy—this takes about 3-4 minutes with an electric mixer, not the 30 seconds many people do. This incorporates air into the dough, creating that perfect texture. When adding the crushed cookies, fold them in gently with a spatula rather than your mixer to prevent overmixing and breaking them down too much. For bakery-worthy cookies, chill the dough for at least 30 minutes before baking—this prevents excessive spreading and intensifies the flavors as the ingredients have time to meld together.

    Serving Ideas & Creative Variations

    Elevated Serving Suggestions

    These cookies shine on their own, but there are ways to make them even more special. Try serving them slightly warm with a small scoop of vanilla ice cream sandwiched between two cookies for an elevated dessert. For dinner parties, I’ve created cookie platters with these as the centerpiece, surrounded by fresh berries and mint leaves for a pop of color. They pair beautifully with a glass of cold milk, of course, but also with coffee or hot chocolate for a cozy treat. For an extra touch, dust them with a little powdered sugar just before serving or drizzle with a simple vanilla glaze when you want them to look extra special, similar to my No-Bake Pumpkin Cheesecake Balls.

    Exciting Flavor Twists

    While the classic recipe is perfect, I love experimenting with variations. Try adding white chocolate chips for extra sweetness and creaminess that complements the cookies and cream flavor perfectly. For chocolate lovers, use a chocolate cookie base instead of vanilla—just substitute ¼ cup of flour with cocoa powder. Mint chocolate sandwich cookies create a refreshing twist on the original, especially during holiday seasons. I’ve also had success adding a tablespoon of instant espresso powder to the dough for a sophisticated mocha flavor that adults particularly appreciate. During fall, try adding warming spices like cinnamon or a touch of nutmeg to the base dough.

    Storage & Troubleshooting Guide

    Proper Storage Methods

    To maintain the perfect texture of your cookies and cream cookies, proper storage is essential. Once completely cooled, store them in an airtight container at room temperature for up to 5 days. The key is including a slice of bread in the container—it helps maintain moisture without making the cookies soggy. For longer storage, these cookies freeze beautifully for up to 3 months. I recommend placing them in a single layer on a baking sheet to freeze individually before transferring to a freezer bag. This prevents them from sticking together and allows you to thaw just what you need. When ready to enjoy, let them come to room temperature naturally for the best texture.

    Fixing Common Issues

    Even experienced bakers occasionally encounter problems, but most cookie issues have simple solutions. If your cookies spread too much, your butter was likely too warm—next time, ensure it’s cool room temperature, not melty. For cookies that don’t spread enough, you might have used too much flour; I recommend weighing flour rather than using cup measurements for precision. If your cookies brown too quickly on the bottom before the centers are done, try using light-colored baking sheets or lining them with parchment paper. And if your cookie pieces become soggy after storage, try folding in the crushed cookies right before baking rather than mixing them into the dough in advance.

    Frequently Asked Questions

    Can I use different types of sandwich cookies for this recipe?

    Absolutely! While classic Oreos create the traditional cookies and cream flavor, try chocolate mint, golden vanilla, or even peanut butter sandwich cookies for delicious variations.

    How do I know when these cookies are perfectly baked?

    Look for golden edges with centers that appear slightly underdone—they’ll continue cooking on the hot baking sheet after removal from the oven.

    Yes! The dough can be refrigerated for up to 3 days or frozen for 3 months. If frozen, thaw overnight in the refrigerator before baking.

    Why did my cookies turn out flat?

    This typically happens when butter is too warm or there’s insufficient flour. Chill your dough for at least 30 minutes before baking to prevent spreading.

    How finely should I crush the sandwich cookies?

    Aim for a mix of textures—some pieces about ¼ inch, others more finely crushed—to create interesting texture throughout your cookies and cream cookies.

    Final Thoughts

    This cookies and cream cookie recipe has become one of my signature desserts, requested at every family gathering and neighborhood potluck. There’s something deeply satisfying about creating something so simple yet so beloved. I find myself returning to this recipe whenever I need a foolproof treat that bridges generations—children love the familiar flavors while adults appreciate the nostalgic twist. Don’t forget to check out more delicious cookie recipes on Pinterest for additional inspiration. Whatever the occasion, these cookies bring joy with every bite—and isn’t that what home baking is all about?

  • Hibachi Chicken with Fried Rice: Irresistibly Delicious & Easy!

    Hibachi Chicken with Fried Rice: Irresistibly Delicious & Easy!

    Hibachi Chicken with Fried Rice: Irresistibly Delicious & Easy!

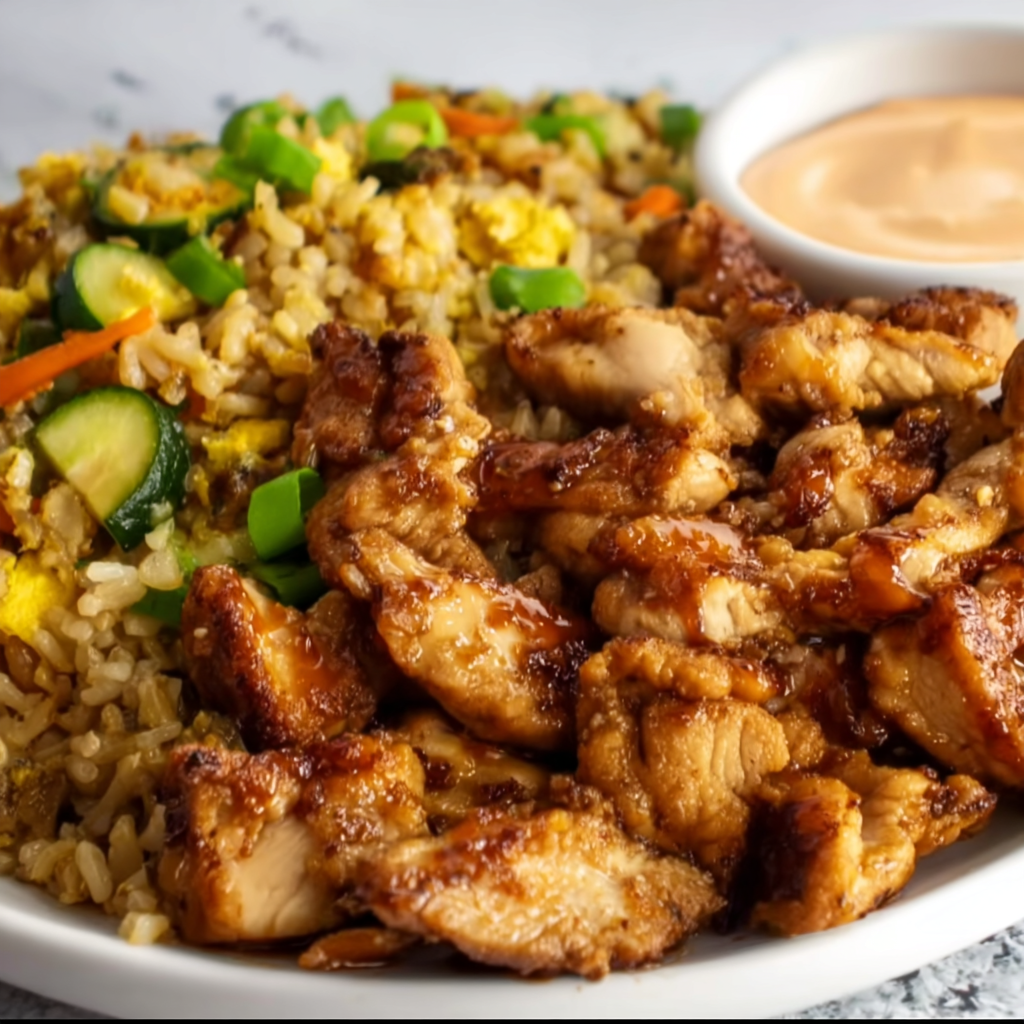
    There’s something magical about sizzling Hibachi Chicken with Fried Rice that transforms an ordinary dinner into a special occasion. The savory aromas, the perfectly caramelized edges, and that unmistakable umami flavor transport me straight to my favorite Japanese steakhouse—minus the flying shrimp and onion volcanoes! I’ve spent years perfecting this recipe at home, and I’m thrilled to share my secrets for creating restaurant-quality hibachi in your own kitchen. This dish combines tender chicken, fluffy rice, and fresh vegetables in a harmony of flavors that will have your family requesting it weekly. Let’s bring the hibachi experience home!

    Recipe

    Why You’ll Love This Hibachi Chicken with Fried Rice

    Perfect Balance of Flavors and Textures

    The magic of hibachi lies in its perfect balance—savory, slightly sweet, with that irresistible umami depth. The chicken gets beautifully caramelized on the outside while staying juicy inside, creating that signature hibachi texture contrast. I love how the rice absorbs all those incredible flavors while maintaining distinct grains that have just the right chew. The vegetables add freshness and crunch, making every bite interesting. My husband always says the mark of great hibachi is when you keep going back for “just one more bite” until suddenly your plate is empty—and this recipe definitely has that quality!

    Quick and Impressive Dinner Solution

    This weeknight wonder comes together faster than delivery and feels infinitely more special. I’ve made this on hectic Thursdays when I barely had energy to cook and for impromptu dinner guests when I wanted to impress. The ingredients are simple pantry and refrigerator staples, but the results feel restaurant-worthy. The entire meal takes about 30 minutes from start to finish, making it perfect for busy evenings. My favorite part? Everyone gathers around as I cook, drawn by the irresistible aromas filling the kitchen, creating that communal hibachi experience right at home.

    Essential Tips & Tricks

    The Secret to Perfect Hibachi Fried Rice

    The key to authentic hibachi rice is starting with cold, day-old rice. This might sound strange, but freshly cooked rice contains too much moisture and will turn mushy. I make extra rice the night before and refrigerate it—this allows the grains to dry slightly and firm up. Another game-changer is using a large, flat cooking surface that gets screaming hot. I use my cast iron skillet, but any heavy-bottomed pan works well. Keep the heat high and the ingredients moving constantly, just like hibachi chefs do. This creates those delicious crispy bits that make hibachi rice so addictive!

    Mastering Hibachi-Style Chicken

    For perfectly tender chicken, cut your pieces uniformly—about 1-inch cubes ensure even cooking. The hibachi magic happens when you let the chicken develop a golden crust before stirring. I resisted this at first (I’m a chronic food-flipper!), but giving each piece time to sear creates that authentic caramelization. The sauce should be simple—a blend of soy sauce, butter, and garlic forms the foundation of hibachi flavor. Don’t overcomplicate it! For extra tenderness, try a quick 15-minute marinade in a mixture of soy sauce and grated ginger before cooking, similar to how I prepare chicken for my Sweet Chili Chicken Bowl.

    Serving Ideas & Creative Variations

    Complete Your Hibachi Feast

    Create an authentic hibachi experience by serving your chicken and fried rice with classic accompaniments. I always make a quick batch of yum yum sauce (mayo, ketchup, rice vinegar, sugar, paprika, and garlic powder) for drizzling. Ginger sauce makes another wonderful addition—just blend fresh ginger, soy sauce, vinegar, and a touch of sugar. Serve everything with a simple side of steamed edamame sprinkled with sea salt. For a full restaurant experience, try adding Honey Butter Skillet Corn as a side dish—the sweet buttery flavors complement the savory hibachi perfectly!

    Exciting Flavor Variations

    The beauty of hibachi at home is that you can customize it endlessly! For teriyaki hibachi chicken, brush the chicken with teriyaki sauce during the last minute of cooking. Spicy hibachi fans can add sriracha to the cooking sauce or mix it into yum yum sauce for a fiery kick. Vegetable variations are endless—try adding mushrooms, broccoli, or snap peas to the mix. For a low-carb option, substitute cauliflower rice for traditional rice. My personal favorite variation is adding a sprinkle of furikake (Japanese seaweed seasoning) over the finished dish for an extra umami boost.

    Storage & Troubleshooting Guide

    Proper Storage for Leftovers

    Hibachi leftovers maintain their deliciousness when stored properly. Allow everything to cool completely before transferring to airtight containers—I separate the chicken and rice to maintain their distinct textures. Refrigerate for up to 3 days. When reheating, add a small splash of water to the rice to restore moisture, then heat in a skillet rather than microwave when possible. This revives the texture instead of making it rubbery. For meal prep, I sometimes make double batches of the chicken and portion it with rice for quick lunches throughout the week.

    Fixing Common Hibachi Mistakes

    The most common hibachi pitfall is soggy rice. If this happens, spread your rice on a baking sheet and place in a 350°F oven for 5 minutes to dry out before continuing. For chicken that’s browning too quickly, lower your heat slightly and continue cooking until done. If your flavors seem flat, a splash of rice vinegar or squeeze of fresh lemon juice will brighten everything up. And if your vegetables are turning mushy, you’re likely overcrowding the pan—cook in smaller batches with high heat for the perfect tender-crisp texture that makes restaurant hibachi so special.

    Frequently Asked Questions

    What makes hibachi chicken different from regular stir-fry?

    Hibachi chicken uses high heat, simple seasonings (primarily soy sauce, butter, and garlic), and a specific cooking technique that creates caramelization. The focus is on the natural flavors of the ingredients rather than complex sauces.

    Can I make Hibachi Chicken with Fried Rice ahead of time?

    Yes! Cook the chicken and vegetables, then refrigerate separately from the rice. When ready to serve, reheat everything in a hot skillet, adding a splash of soy sauce to refresh the flavors.

    What’s the best rice to use for hibachi fried rice?

    Medium-grain rice works best for authentic hibachi. Jasmine or Calrose rice provides the perfect texture—fluffy yet slightly sticky to hold flavors well.

    How can I make this recipe gluten-free?

    Simply substitute tamari or coconut aminos for soy sauce. All other ingredients in traditional hibachi chicken and fried rice are naturally gluten-free.

    What vegetables work best in hibachi fried rice?

    Classic hibachi vegetables include onions, zucchini, mushrooms, and carrots. However, you can customize with any quick-cooking vegetables you enjoy or have on hand.

    Final Thoughts

    This Hibachi Chicken with Fried Rice recipe brings the excitement and flavors of your favorite Japanese steakhouse right to your dining table. There’s something deeply satisfying about creating these beloved restaurant flavors at home—not just for the money saved, but for the pride in mastering a new cooking style. I hope you’ll try this recipe the next time you’re craving hibachi but don’t want to leave home. The sizzle of the pan, the aromatic steam rising, and that first perfect bite make this dish pure cooking magic. Don’t forget to check out more of my Asian-inspired recipes on Pinterest!

  • Caesar Salad Chicken Rice Bowl: Irresistible Flavor Explosion!

    Caesar Salad Chicken Rice Bowl: Irresistible Flavor Explosion!

    Caesar Salad Chicken Rice Bowl: Irresistible Flavor Explosion!

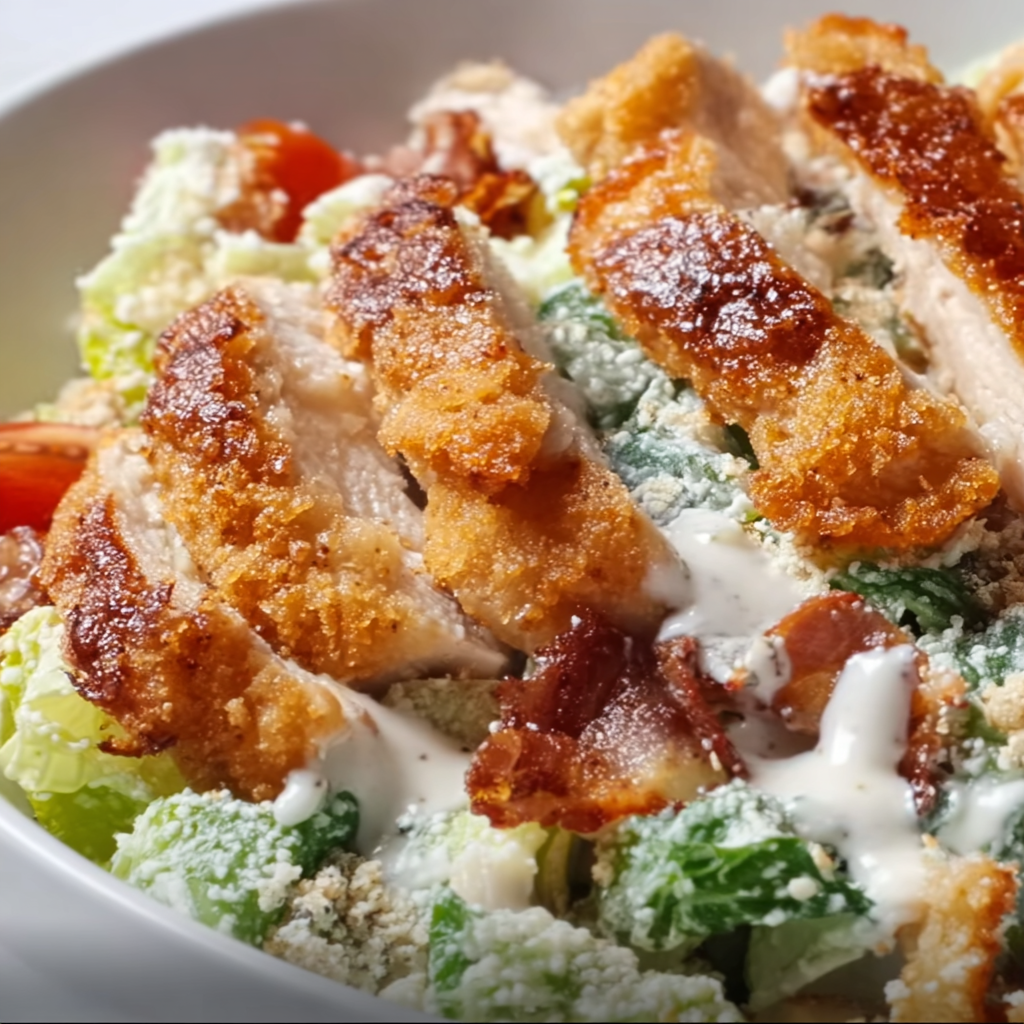
    There’s something utterly satisfying about a Caesar Salad Chicken Rice Bowl that speaks to my soul. That perfect balance of crisp romaine, savory chicken, and hearty rice all drizzled with creamy dressing makes my taste buds dance with joy! I discovered this delightful combination last summer when I was craving something substantial yet fresh. The way the warm rice contrasts with the cool, crunchy lettuce creates a texture paradise that’s become my go-to lunch when I need a boost. Ready in just 20 minutes, this bowl brings restaurant-quality flavor right to your kitchen table without the fuss or expense of dining out.

    Recipe

    Why You’ll Love This Caesar Salad Chicken Rice Bowl

    Perfect Balance of Flavors and Textures

    The magic of this Caesar Salad Chicken Rice Bowl lies in its harmonious contrasts. The nutty warmth of freshly cooked rice creates the perfect foundation for juicy, seasoned chicken breast that’s been kissed by herbs and spices. Then comes the cool crunch of romaine lettuce, the sharp bite of Parmesan, and those irresistible croutons that add the perfect textural pop. When the creamy, garlicky Caesar dressing ties everything together, you get that satisfying mouthfeel that makes you close your eyes with each bite. It’s comfort food that doesn’t weigh you down!

    Quick and Customizable Meal Solution

    On those evenings when the clock is ticking and hunger is mounting, this bowl comes to the rescue in just 20 minutes! I love that I can prep components ahead—cook rice and chicken on Sunday, then assemble fresh bowls throughout the week. The versatility is unmatched; swap brown rice for quinoa, add avocado for creaminess, or throw in roasted veggies for extra nutrition. My husband prefers his with extra croutons, while I add a sprinkle of red pepper flakes for heat. It’s like having a custom restaurant experience right in your kitchen, adapting to everyone’s preferences with minimal effort.

    Essential Tips & Tricks

    Perfecting Your Chicken

    The star of any Caesar Salad Chicken Rice Bowl is undoubtedly the chicken, and getting it right makes all the difference. I’ve found that marinating boneless chicken breasts in a simple mixture of lemon juice, garlic, and olive oil for even just 15 minutes infuses incredible flavor. For the juiciest results, cook chicken to exactly 165°F (74°C) using an instant-read thermometer—no guesswork! Allow it to rest for 5 minutes before slicing against the grain. This creates tender, bite-sized pieces that distribute perfectly throughout your bowl rather than tough chunks that overwhelm the other ingredients.

    Creating the Perfect Rice Base

    The foundation of your bowl deserves special attention! I’ve learned that rinsing rice until the water runs clear removes excess starch and prevents gumminess. For extra flavor, try cooking your rice in low-sodium chicken broth instead of water, adding a bay leaf or sprig of thyme for aromatic depth. Once cooked, fluff with a fork and let it cool slightly before assembling your bowl—this prevents the lettuce from wilting on contact. For meal prep convenience, cook a large batch of rice and portion it into containers, ready to form the base of various bowls throughout the week, like my Mediterranean Chicken Quinoa Bowl with Broccoli and Tomato.

    Serving Ideas & Creative Variations

    Family-Style Assembly Stations

    Transform dinner into an interactive experience by creating a build-your-own bowl station! I arrange each component—warm rice, sliced chicken, chopped romaine, shaved Parmesan, croutons, and dressing—in separate serving dishes down the center of our table. Everyone gets to customize their perfect Caesar Salad Chicken Rice Bowl with exactly what they love. This approach is brilliant for picky eaters and creates such wonderful dinner conversation as we compare our creations. Plus, it’s a fantastic way to entertain guests casually without the pressure of plating perfect meals. The joy on people’s faces as they craft their ideal bowl is priceless!

    Seasonal Adaptations Worth Trying

    The beauty of this versatile bowl is how easily it embraces seasonal produce! In summer, I add sweet cherry tomatoes and grilled corn kernels for bursts of juicy sweetness. Fall calls for roasted butternut squash cubes and dried cranberries. Winter? Try roasted brussels sprouts and pomegranate seeds for festive color. Spring welcomes tender asparagus tips and fresh peas. You can also transform the entire flavor profile by swapping traditional Caesar for honey mustard chicken or adding a Mediterranean twist with olives, cucumbers, and feta. The possibilities are endless while keeping that perfect balance of protein, grains, and greens.

    Storage & Troubleshooting Guide

    Meal Prep and Storage Solutions

    Mastering the art of component storage ensures your Caesar Salad Chicken Rice Bowl stays fresh and delicious all week. Store cooked rice and chicken separately in airtight containers for up to 4 days in the refrigerator. Keep romaine lettuce crisp by washing, thoroughly drying, and storing wrapped in paper towels inside a partially open plastic bag. Croutons should remain at room temperature in a sealed container to maintain their crunch. Store dressing separately in a small jar or container. When ready to eat, simply warm the rice and chicken before assembling with the cold components. This method prevents soggy lettuce and ensures each ingredient maintains its ideal texture.

    Fixing Common Bowl Mishaps

    Even the most experienced cooks encounter challenges! If your rice turns out too mushy, try spreading it on a baking sheet to dry slightly in a 300°F oven for 5-10 minutes. Dry chicken? Slice it thinly and toss with a bit of olive oil and lemon juice before adding to your bowl. Wilted lettuce can be revived by soaking in ice water for 10 minutes, then thoroughly drying. If your Caesar dressing breaks or separates, whisk in a teaspoon of warm water until it re-emulsifies. And if you’ve accidentally oversalted any component, balance it with acid (lemon juice) or something creamy (extra Parmesan or a dollop of Greek yogurt).

    Frequently Asked Questions

    Can I make Caesar Salad Chicken Rice Bowls ahead of time?

    Yes! Prep components separately (cooked rice, chicken, washed lettuce, dressing) and store in the refrigerator. Assemble just before eating to maintain optimal textures and prevent soggy lettuce.

    What’s the best rice to use for these bowls?

    Medium-grain white rice works wonderfully, but brown rice, jasmine, or even cauliflower rice are excellent alternatives depending on your preference and dietary needs.

    How can I make this recipe vegetarian?

    Replace chicken with roasted chickpeas, grilled halloumi cheese, or marinated tofu. Ensure your Caesar dressing is vegetarian (without anchovies) or use a plant-based alternative.

    Can I use store-bought Caesar dressing?

    Absolutely! While homemade dressing offers superior flavor, a quality store-bought Caesar works perfectly for quick weeknight meals when time is limited.

    Is the Caesar Salad Chicken Rice Bowl suitable for meal prep?

    Definitely! Store components separately and assemble fresh bowls throughout the week. This approach maintains texture integrity while providing quick, ready-to-assemble meals.

    Final Thoughts

    The Caesar Salad Chicken Rice Bowl has become my reliable mealtime hero—bringing together comfort, nutrition, and convenience in one beautiful dish. What I adore most is watching friends and family customize their bowls with such delight, creating personal masterpieces that reflect their tastes. Whether you’re meal prepping for busy weekdays or serving a casual dinner gathering, these bowls adapt to your needs while delivering that perfect balance of flavors and textures. I hope you’ll explore this versatile meal concept and make it your own! For more inspiration, check out my collection at Pinterest.

  • Mediterranean Marinated Cauliflower Salad | Irresistibly Fresh & Flavorful!

    Mediterranean Marinated Cauliflower Salad | Irresistibly Fresh & Flavorful!

    Mediterranean Marinated Cauliflower Salad | Irresistibly Fresh & Flavorful!

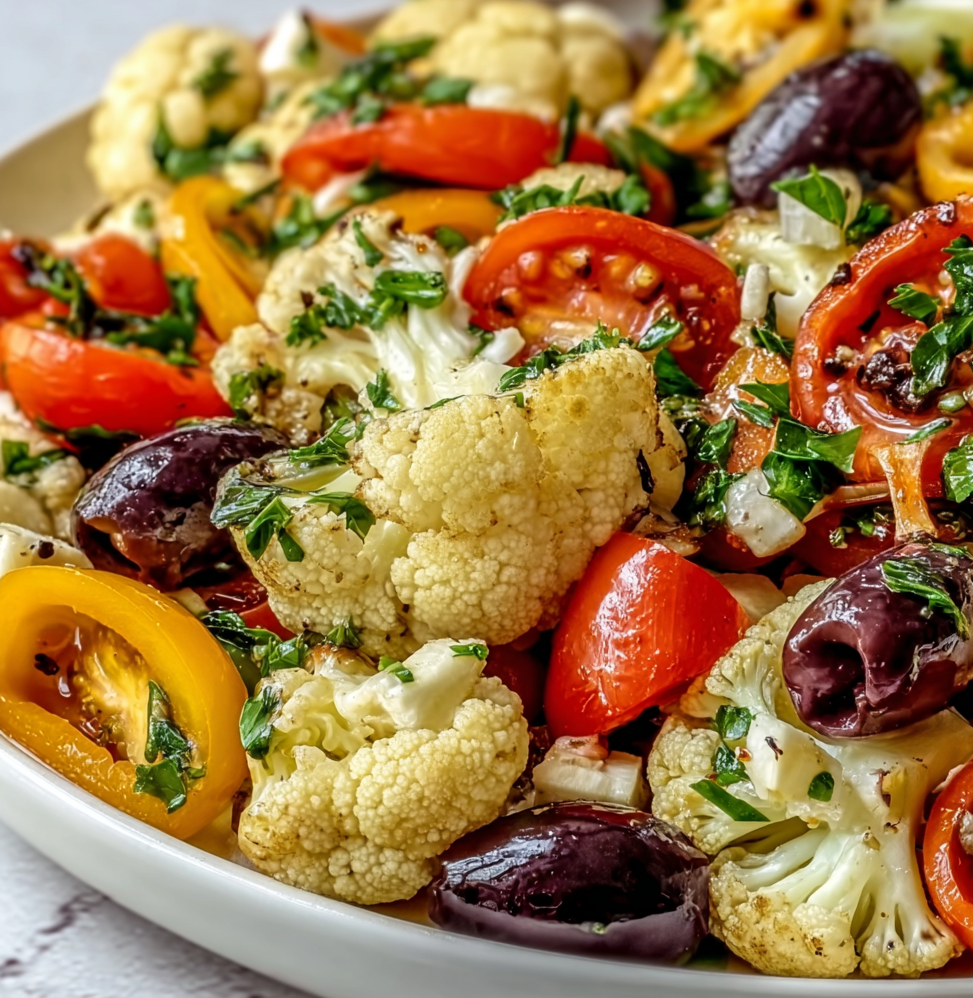
    This Mediterranean Marinated Cauliflower Salad changed my entire perspective on raw cauliflower. The first time I made it for a summer potluck, I watched skeptical friends transform into believers with each bite. There’s something magical about how the tangy marinade softens those crisp florets just enough while preserving their satisfying crunch. Packed with vibrant Mediterranean flavors, this make-ahead wonder gets even better overnight as the cauliflower soaks up all those herbaceous, zesty notes. Perfect for meal prep or entertaining guests, this no-cook salad might just become your new summer staple.

    Recipe

    Why You’ll Love This Mediterranean Marinated Cauliflower Salad

    A Perfect Make-Ahead Marvel

    Let’s be honest—we all need more recipes that taste better the next day. This Mediterranean Marinated Cauliflower Salad is exactly that kind of kitchen hero. The longer those cauliflower florets bathe in the herby vinaigrette, the more flavor they absorb. I often make this on Sunday afternoons while my kids do homework, and it’s ready for effortless lunches all week. The marinade works its magic overnight, transforming raw cauliflower into tender, flavor-packed bites without losing that satisfying crunch. Plus, not having to cook anything during summer’s hottest days? That’s a win I’ll take every time.

    Nutritional Powerhouse in Disguise

    Don’t let the incredible flavor fool you—this salad is seriously good for you. Cauliflower delivers impressive amounts of vitamin C, fiber, and antioxidants, while the olive oil provides heart-healthy fats. I started making this when trying to incorporate more vegetables into my family’s diet without complaints. The Mediterranean marinade is so vibrant that even my veggie-suspicious husband asks for seconds. Each bite delivers a perfect balance of briny olives, punchy garlic, and fresh herbs that make you forget you’re eating something so nutritious. It’s become my secret weapon for sneaking more plant-based goodness onto our table.

    Essential Tips & Tricks

    Perfecting Your Cauliflower Prep

    The foundation of an exceptional Mediterranean Marinated Cauliflower Salad lies in how you prepare the star ingredient. Cut your florets into bite-sized pieces that are consistent in size—this ensures they marinate evenly and deliver the perfect texture in every forkful. I learned the hard way that massive chunks won’t absorb the flavors properly! For the freshest taste, select a cauliflower head that feels heavy for its size with tight, cream-colored florets. If you’re short on time, pre-cut florets work too, but give them a quick rinse and pat dry before marinating. This simple attention to detail makes all the difference in the final result.

    Mastering the Mediterranean Marinade

    The marinade is where the magic happens in this salad. Use the highest quality olive oil you can afford—its flavor will shine through in this raw preparation. I once made this with an old bottle of olive oil hiding in my pantry, and the difference was noticeable! Balance is key: the acid from lemon juice and vinegar, the richness from olive oil, and the aromatics from herbs need to complement each other. Let the marinade sit for 5-10 minutes before pouring over the cauliflower to allow the flavors to meld. For the most vibrant flavor profile, crush dried herbs between your fingers before adding them to release their essential oils.

    Serving Ideas & Creative Variations

    Perfect Pairings for Any Occasion

    This Mediterranean Marinated Cauliflower Salad works beautifully as both a side dish and a main attraction. Serve it alongside grilled proteins like chicken or fish for a complete meal that feels both light and satisfying. I’ve brought this to countless summer gatherings, and it pairs wonderfully with everything from burgers to grilled shrimp bowls. For a casual lunch, scoop it onto toasted pita with a dollop of hummus. The salad holds up well at room temperature, making it perfect for picnics or buffet-style meals. The bright flavors complement heavier dishes, creating balance on your plate and making it a versatile addition to any menu.

    Seasonal Twists and Adaptations

    Don’t be afraid to make this recipe your own with seasonal additions. In summer, fold in garden-fresh tomatoes and cucumber for extra juiciness. During fall, try adding roasted sweet potato cubes for a heartier version. I’ve experimented with different herbs depending on what’s growing in my garden—dill adds brightness, while rosemary lends an earthy depth. For a protein boost, add chickpeas or white beans. Cheese lovers can crumble feta or goat cheese over the top just before serving. My family enjoys a spicy version with a pinch of red pepper flakes. These simple variations keep the salad exciting year-round while maintaining its Mediterranean soul.

    Storage & Troubleshooting Guide

    Maximizing Freshness and Flavor

    This Mediterranean Marinated Cauliflower Salad actually improves with time, but proper storage is key to maintaining its vibrant qualities. Store it in an airtight container in the refrigerator for up to 5 days. I recommend giving it a gentle toss each day to redistribute the marinade. If you’re planning to add delicate ingredients like fresh herbs or cheese, reserve them until just before serving. The cauliflower will soften slightly as it marinates but should maintain a pleasant crunch. If you notice the olive oil solidifying when chilled, simply let the salad sit at room temperature for 15 minutes before serving to restore its perfect texture.

    Rescuing Common Cauliflower Conundrums

    Even the most experienced cooks encounter challenges! If your salad tastes too acidic, drizzle in a bit more olive oil and a pinch of honey to balance the flavors. For cauliflower that’s too crunchy after marinating, try cutting the florets smaller next time, or massage the marinade into the florets with your hands before refrigerating. If the flavor seems flat, brighten it with an extra squeeze of lemon juice and a sprinkle of flaky sea salt just before serving. Discolored cauliflower with brown spots? Simply trim those away—the rest is perfectly fine to use. These quick fixes ensure your Mediterranean Marinated Cauliflower Salad will always be a success.

    Frequently Asked Questions

    Can I make Mediterranean Marinated Cauliflower Salad ahead of time?

    Absolutely! This salad actually improves with time. Make it up to 3 days ahead, storing it in the refrigerator. The cauliflower softens slightly while maintaining a pleasant crunch as it marinates.

    Is this recipe vegan and gluten-free?

    Yes! The traditional Mediterranean Marinated Cauliflower Salad contains no animal products or gluten. Just verify that your vinegar is gluten-free if you have severe sensitivities.

    Can I use frozen cauliflower instead of fresh?

    I don’t recommend it. Frozen cauliflower becomes too soft when thawed and won’t maintain the crucial crisp-tender texture that makes this salad special.

    What can I substitute for red wine vinegar?

    White wine vinegar, champagne vinegar, or even lemon juice work well. Each will bring a slightly different flavor profile, but all complement the Mediterranean ingredients beautifully.

    How long will the Mediterranean Marinated Cauliflower Salad last in the refrigerator?

    When stored in an airtight container, this salad stays fresh for up to 5 days. The flavors deepen over time, making leftovers something to look forward to!

    Final Thoughts

    This Mediterranean Marinated Cauliflower Salad has become my reliable kitchen companion through busy weeknights, weekend gatherings, and everything in between. There’s something deeply satisfying about creating a dish that actually improves with time, making your future self thankful for your past efforts. The vibrant flavors transport me to sun-drenched Mediterranean coastlines even on the dreariest days. Whether you’re a cauliflower enthusiast or still need convincing, this marinated salad deserves a place in your recipe collection. Find more Mediterranean-inspired recipes on Pinterest and keep the flavors flowing!