Category: Dinner

Easy, tasty dinner ideas for busy nights. Simple recipes, quick prep, and family-friendly meals you’ll make again and again.

  • Heavenly Pistachio Raspberry Cake: Irresistibly Delicious & Dreamy!

    Heavenly Pistachio Raspberry Cake: Irresistibly Delicious & Dreamy!

    Heavenly Pistachio Raspberry Cake: Irresistibly Delicious & Dreamy!

    This heavenly pistachio raspberry cake has become my absolute obsession lately! The moment I pulled it from the oven, my kitchen filled with the most intoxicating aroma of toasted pistachios and sweet raspberry essence. The vibrant green crumb studded with ruby-red berries creates a visual masterpiece that’s almost too pretty to eat. Almost. I’ve served this at three gatherings now, and each time, people practically beg for the recipe before they’ve finished their first bite. If you loved my pink coconut snowball cake bars, this pistachio-raspberry creation takes that delightful texture to new heights with more complex, sophisticated flavors.

    Recipe

    Why You’ll Love This Heavenly Pistachio Raspberry Cake

    Perfect Balance of Flavors and Textures

    The nutty depth of pistachios pairs magically with bright, tangy raspberries—it’s a flavor combination straight from dessert heaven. Each bite delivers that perfect balance between rich, buttery cake and juicy berry bursts. I’ve added a touch of almond extract alongside vanilla to enhance the pistachio flavor profile, creating layers of complexity that make this cake truly special. The texture is what dreams are made of: moist and tender crumb with a slight crunch from the crushed pistachios folded throughout. When those raspberries bake, they create these perfect pockets of jammy goodness.

    Stunning Visual Appeal Without Fuss

    This cake is what I call an effortless showstopper. The natural colors—that lovely pistachio green and the ruby-red raspberry swirls—create a gorgeous presentation without any artificial coloring. The simple dusting of powdered sugar and a crown of fresh raspberries and chopped pistachios makes it Instagram-worthy without requiring professional decorating skills. I served this at my sister’s birthday, and before I even set it down, everyone had their phones out for photos! The contrast between the pale green cake and vibrant berries creates a natural beauty that makes people think you spent hours in the kitchen.

    Essential Tips & Tricks

    Perfecting Your Pistachio Prep

    Getting the pistachio texture just right is crucial for this cake’s signature flavor and appearance. I recommend using unsalted pistachios and toasting them lightly (about 5 minutes at 350°F) before grinding. This simple step intensifies their flavor dramatically. Pulse them in your food processor until they resemble coarse sand—not so long that they turn into butter! Leave some small chunks for texture. For the garnish, chop some by hand for a more rustic look. If you’re short on time, some specialty stores sell pistachio flour, but the flavor is never quite as vibrant as freshly ground nuts.

    Mastering the Raspberry Integration

    The way you handle the raspberries makes all the difference in this cake. For the batter, I fold in frozen raspberries (don’t thaw them!) tossed lightly in flour—this prevents them from sinking and bleeding too much color throughout. For the freshest flavor, I also make a quick raspberry coulis by simmering fresh berries with a touch of sugar and lemon juice, then straining out the seeds. This creates beautiful swirls throughout the cake when you marble it into the batter before baking. Like my raspberry sugar cookies, the key is balancing the fruit’s moisture without making the cake soggy.

    Serving Ideas & Creative Variations

    Elegant Accompaniments

    Elevate this heavenly pistachio raspberry cake with thoughtful accompaniments that complement its sophisticated flavor profile. A dollop of lightly sweetened mascarpone cream adds a luxurious touch that balances the cake’s sweetness perfectly. For dinner parties, I serve thin slices alongside a small glass of Moscato d’Asti—the wine’s subtle sweetness and effervescence create a magical pairing. For afternoon tea, try it with a pistachio-infused whipped cream. The cake also pairs beautifully with a scoop of vanilla bean ice cream for more casual gatherings, where the contrast between warm cake and cold ice cream creates pure bliss.

    Seasonal and Dietary Adaptations

    This versatile cake welcomes creative substitutions while maintaining its charm. In summer, swap raspberries for blackberries or a mix of summer berries. During fall, pears poached in honey make an elegant alternative to the raspberries. For dietary needs, this cake adapts beautifully—use a high-quality cup-for-cup gluten-free flour blend with 1/4 teaspoon xanthan gum added. For dairy-free versions, substitute coconut oil for butter and coconut cream in the frosting. The condensed milk baked rice pudding fans will appreciate how this cake has that same comforting quality while being more sophisticated.

    Storage & Troubleshooting Guide

    Keeping Your Cake Fresh

    Proper storage techniques ensure this cake stays delicious for days. At room temperature, cover it with a cake dome or inverted bowl and consume within 2 days for optimal freshness. In the refrigerator, wrap individual slices in parchment paper, then plastic wrap, extending enjoyment to 5 days—just bring to room temperature before serving to revive the texture and flavors. This cake also freezes beautifully for up to 3 months: wrap slices tightly in plastic wrap, then foil, and thaw overnight in the refrigerator. I’ve found that the pistachio flavor actually deepens after a day, making this a perfect make-ahead dessert for busy hosts.

    Solving Common Baking Challenges

    Even experienced bakers encounter common issues with specialty cakes. If your pistachios turn the batter too green, reduce the amount slightly or mix them with a small portion of almond flour. For sunken raspberries, make sure they’re completely dry and well-coated in flour before folding in. If your cake seems too dense, check your leavening agents’ freshness—baking powder loses potency after 6 months. For a cake that’s browning too quickly, loosely tent with foil halfway through baking. Remember that oven temperatures vary, so start checking for doneness about 5 minutes before the recipe suggests.

    Frequently Asked Questions

    Can I use pistachio pudding mix instead of real pistachios?

    While convenient, pudding mixes contain artificial flavors. For the authentic heavenly pistachio raspberry cake experience, real pistachios provide superior flavor, natural color, and wonderful texture that no mix can replicate.

    How do I prevent my raspberries from sinking to the bottom?

    Toss frozen raspberries in 1-2 tablespoons of flour before folding them gently into the batter. This coating helps them stay suspended during baking rather than sinking.

    Can I make this cake ahead for a special occasion?

    Absolutely! The flavors actually develop beautifully overnight. Bake it a day ahead, store at room temperature under a cake dome, and add any fresh garnishes just before serving.

    What’s the best way to grind pistachios for this recipe?

    Use a food processor and pulse in short bursts until they reach a sandy texture with small chunks remaining. Avoid over-processing, which releases oils and creates pistachio butter.

    Is this cake suitable for beginners?

    Yes! The technique is straightforward—just fold ingredients gently and don’t overmix. The natural beauty of the pistachios and raspberries makes even imperfect attempts look impressive.

    Final Thoughts

    This heavenly pistachio raspberry cake has become my signature dessert for good reason—it strikes that perfect balance between sophisticated and comforting. The contrasting flavors and textures create a memorable experience that keeps friends and family requesting it time and again. What I love most is how the humble pistachio transforms into something truly extraordinary when paired with bright raspberries. Whether for a special celebration or just because it’s Tuesday, this cake brings a moment of pure joy to any table. Find more inspiration for your baking adventures on Pinterest.

  • Chicken Tzatziki Rice Recipe: Creamy, Flavor-Packed Easy Dinner!

    Chicken Tzatziki Rice Recipe: Creamy, Flavor-Packed Easy Dinner!

    Chicken Tzatziki Rice Recipe: Creamy, Flavor-Packed Easy Dinner!

    Chicken Tzatziki Rice combines the refreshing tang of Greek yogurt with tender chicken and fluffy rice for a Mediterranean-inspired meal that’s both comforting and bright. As I stirred the final touches into this dish last night, the aroma of lemon, dill, and garlic filled my kitchen, instantly transporting me to the sunny shores of Santorini. There’s something magical about how these simple ingredients transform into something so incredibly satisfying. This one-pot wonder has become my go-to for busy weeknights when I crave something nourishing yet exciting. If you’ve been stuck in a dinner rut, this Chicken Tzatziki Rice might just be your new favorite rescue meal.

    Recipe

    Why You’ll Love This Chicken Tzatziki Rice

    Perfect Balance of Flavors and Textures

    The magic of this Chicken Tzatziki Rice lies in its perfect harmony of flavors and textures. The creamy tzatziki sauce coats each grain of rice with cooling cucumber and tangy yogurt, while tender chicken pieces provide satisfying protein. I love how the bright lemon zest cuts through the richness, and fresh dill adds that distinctive Mediterranean flair. What makes this dish truly special is the contrast between the fluffy rice, juicy chicken, and the refreshing crunch of cucumber. It’s like having your favorite Greek restaurant flavors in a comforting one-bowl meal that satisfies all your cravings at once.

    Quick and Versatile Weeknight Solution

    When Thursday evening rolls around and my fridge is looking sparse, this Chicken Tzatziki Rice has saved dinner more times than I can count. It’s a 30-minute meal that delivers restaurant-quality flavor with minimal effort. The beauty lies in its adaptability—use leftover rotisserie chicken to make it even faster, or swap in chickpeas for a vegetarian version. I’ve made this with brown rice when I’m feeling virtuous and orzo when I want something more indulgent. The tzatziki component works with whatever herbs you have on hand—I’ve used mint when dill was nowhere to be found, and it was still delicious!

    Essential Tips & Tricks

    Perfecting Your Rice Texture

    Getting the perfect rice texture is crucial for this dish—you want fluffy, separate grains that will hold up to the tzatziki sauce without becoming mushy. I always rinse my rice thoroughly until the water runs clear, which removes excess starch and prevents clumping. For long-grain rice, maintain a 1:1.5 ratio of rice to water, and resist the urge to peek while it’s cooking! Let it rest covered for 5-10 minutes after cooking before fluffing with a fork. If you’re using brown rice, adjust your cooking time accordingly and expect to add about 20 minutes to the process. The extra time is worth it for the nutty flavor and extra fiber it brings to the dish.

    Mastering Homemade Tzatziki

    The soul of this dish is the authentic tzatziki, and making it from scratch elevates the entire meal. The secret to perfect tzatziki is removing excess moisture from your cucumbers—I grate them, then squeeze them in a clean kitchen towel until they’re nearly dry. This prevents watery sauce that would dilute your flavors. Use full-fat Greek yogurt for the creamiest results, and let your garlic infuse for at least 10 minutes before mixing everything together. I like to prepare the tzatziki while the rice cooks, allowing the flavors to marry as everything comes together. The cooling effect against the warm rice creates a delightful temperature contrast that makes each bite exciting.

    Serving Ideas & Creative Variations

    Mediterranean-Inspired Side Pairings

    This Chicken Tzatziki Rice shines as a complete meal, but thoughtful sides can transform it into a Mediterranean feast. I love serving it with a simple Greek salad—just tomatoes, cucumbers, red onion, and feta with olive oil and oregano. Warm pita triangles drizzled with olive oil and za’atar make perfect scoops for any extra tzatziki. For a more substantial spread, add roasted vegetables like bell peppers, zucchini, or eggplant. A small dish of marinated olives and some hummus completes the experience. These sides complement without competing, letting the bright, tangy flavors of the main dish take center stage.

    Exciting Flavor Twists

    While the classic version is divine, this dish welcomes creative variations that keep it exciting meal after meal. Try a lemon-herb upgrade by adding preserved lemon and fresh oregano for intense citrus notes. For a spicy kick, stir in harissa paste or Aleppo pepper flakes to contrast with the cooling tzatziki. I’ve made a gorgeous “sunset” version using turmeric and smoked paprika in the rice, which turns it a beautiful golden color. For a heartier twist, add roasted chickpeas or toasted pine nuts for extra texture. My personal favorite variation includes crumbled feta folded in at the last minute, creating pockets of salty creaminess throughout the dish.

    Storage & Troubleshooting Guide

    Proper Storage for Maximum Freshness

    To maintain the vibrant flavors of your Chicken Tzatziki Rice, proper storage is essential. Store the tzatziki sauce separately from the rice and chicken mixture—this prevents the rice from becoming soggy. In airtight containers, the chicken and rice will keep for 3-4 days in the refrigerator, while the tzatziki stays fresh for about 2 days before the cucumbers release too much water. I prefer glass containers as they don’t absorb flavors or stain from the yogurt. For meal prep, portion individual servings of rice and chicken, with tzatziki in separate small containers. When ready to eat, allow the rice mixture to come to room temperature before adding the cold tzatziki for the best texture contrast.

    Solving Common Recipe Challenges

    Even experienced cooks occasionally encounter challenges with this dish. If your rice turns out too sticky, it’s likely due to insufficient rinsing or improper water ratio. Next time, rinse thoroughly and try reducing your liquid slightly. For watery tzatziki, the culprit is almost always the cucumber—double down on squeezing out moisture or try salting the cucumber first to draw out water. If your chicken seems bland, marinate it in lemon juice, olive oil, and herbs for 30 minutes before cooking. And if the entire dish needs brightening, a fresh squeeze of lemon juice and a sprinkle of flaky sea salt just before serving works wonders to wake up all the flavors.

    Frequently Asked Questions

    Can I make Chicken Tzatziki Rice ahead of time?

    Yes! Prepare the rice and chicken up to 2 days ahead, but store the tzatziki separately. Combine just before serving for the best texture and flavor contrast. Reheat the rice mixture gently with a splash of water to restore moisture.

    Is Chicken Tzatziki Rice gluten-free?

    This dish is naturally gluten-free as long as you verify your specific yogurt brand doesn’t contain additives with gluten. Always check labels, especially on seasonings or pre-marinated chicken if you’re using those.

    Can I use brown rice instead of white rice?

    Absolutely! Brown rice adds wonderful nutty flavor and extra nutrition. Increase cooking time by about 20 minutes and add approximately ¼ cup more liquid to accommodate the longer cooking process.

    What’s the best way to prevent watery tzatziki?

    The secret is thoroughly draining your grated cucumber. Salt it, let it sit for 10 minutes, then squeeze out moisture using a clean kitchen towel or fine-mesh strainer before adding to the yogurt.

    How can I make a vegetarian version of this dish?

    Replace chicken with roasted chickpeas, grilled halloumi cheese, or marinated tofu. The tzatziki and rice components remain the same, creating an equally satisfying meatless meal.

    Final Thoughts

    This Chicken Tzatziki Rice has become more than just a recipe in my kitchen—it’s a reminder that comfort food can be bright, fresh, and exciting. The way the creamy tzatziki melts into warm, fluffy rice creates something greater than the sum of its parts. I love how it brings Mediterranean sunshine to my table even on the dreariest days. Whether you’re cooking for yourself or sharing with loved ones, this dish offers that rare combination of simplicity and sophistication that makes everyday dining special. Don’t forget to check out more Mediterranean-inspired recipes on Pinterest for your next culinary adventure!

  • High-Protein Veggie Bake That’s Bursting with Flavor & Energy!

    High-Protein Veggie Bake That’s Bursting with Flavor & Energy!

    High-Protein Veggie Bake That’s Bursting with Flavor & Energy!

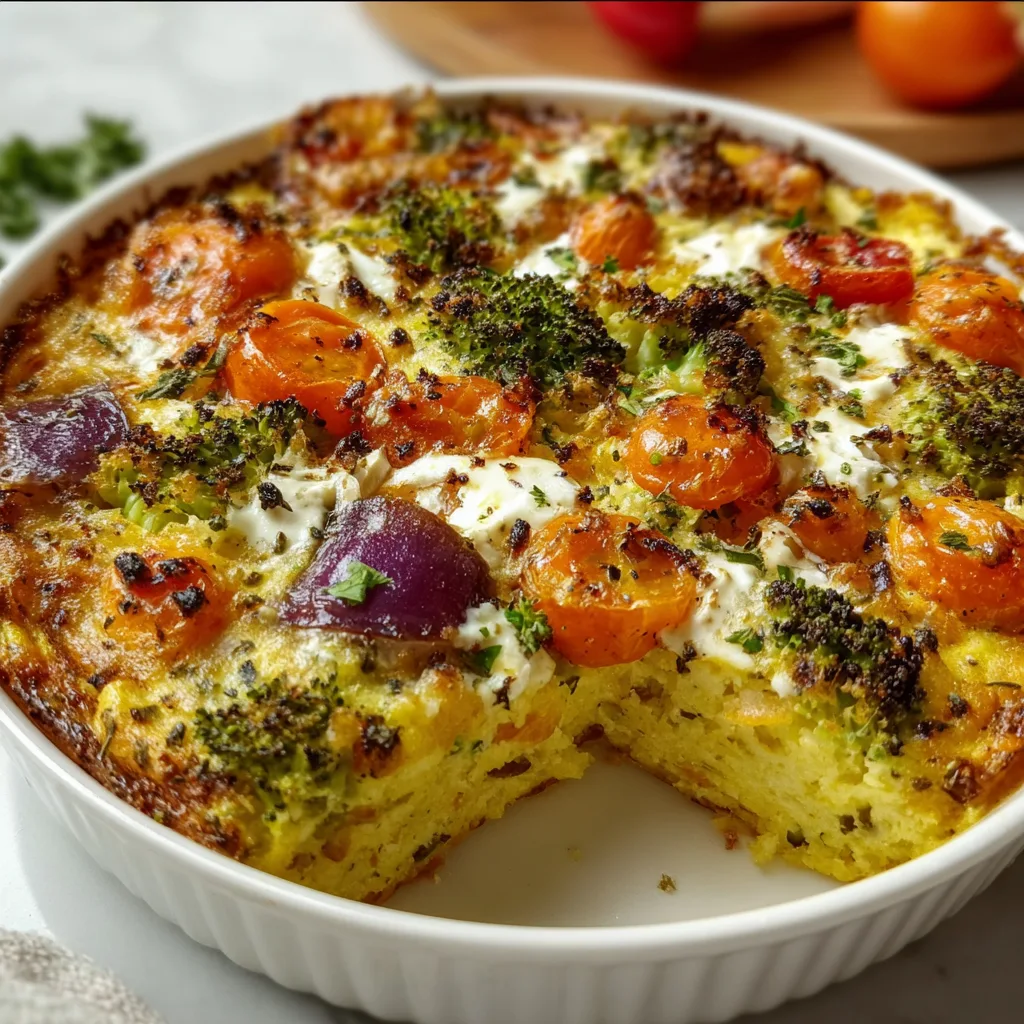
    This high-protein veggie bake changed my entire meal prep game! I stumbled upon this recipe during a busy week when I needed something nutritious that wouldn’t leave me hungry an hour later. The combination of colorful vegetables, protein-rich beans, and melty cheese creates a hearty casserole that satisfies even the most demanding appetites. What I love most is how the edges get slightly crispy while the center remains tender and flavorful. Trust me, this dish will have everyone at the table reaching for seconds—even the dedicated meat-lovers in my family can’t resist!

    Recipe

    Why You’ll Love This High-Protein Veggie Bake

    Perfect Balance of Nutrition and Flavor

    This isn’t just another bland healthy dish—it’s a flavor powerhouse! Each bite delivers a perfect balance of protein, fiber, and complex carbohydrates that keep you satisfied for hours. The secret lies in layering complementary vegetables with protein-rich ingredients like chickpeas, black beans, and quinoa. I’ve found that adding a touch of smoked paprika creates depth that transforms ordinary veggies into something extraordinary. Plus, the protein content (about 25g per serving) makes this an excellent option for active lifestyles or anyone looking to reduce meat consumption without sacrificing satiety.

    Versatile Make-Ahead Meal Solution

    As someone who values both convenience and nutrition, I appreciate how this bake fits seamlessly into busy schedules. You can prep all components in advance and simply assemble when ready to bake. The flexibility is unmatched—prepare it on Sunday, portion it out, and enjoy stress-free meals throughout the week. I’ve even frozen individual portions that reheat beautifully for those evenings when cooking feels impossible. Unlike many meal-prep options that become tiresome, this veggie bake maintains its appeal with each serving, especially when the cheese gets all bubbly and golden on top!

    Essential Tips & Tricks

    Maximizing Protein Content

    To truly elevate this dish to protein powerhouse status, strategic ingredient selection makes all the difference. I recommend using a combination of legumes (chickpeas, lentils, black beans) alongside quinoa for complementary amino acids. Don’t overlook less obvious protein sources like nutritional yeast (8g protein per 1/4 cup), which adds a cheesy flavor while boosting nutrition. For an extra protein bump, consider folding in some hemp seeds or chopped tempeh before baking. The key is creating layers of protein throughout the dish rather than relying on just one source—similar to how I approach my power-packed cheesy chicken potatoes.

    Perfecting Texture and Moisture Balance

    The difference between a mediocre veggie bake and an exceptional one often comes down to moisture management. I learned this lesson the hard way after creating several soggy disappointments! Pre-roast water-heavy vegetables like zucchini, eggplant, and mushrooms before adding them to your bake. This concentrates their flavor while eliminating excess moisture. For the perfect consistency, include a binding element such as a mixture of Greek yogurt and eggs or silken tofu blended with nutritional yeast. This creates a creamy texture that holds everything together without becoming watery or dry when baked.

    Serving Ideas & Creative Variations

    Complementary Side Dishes

    While this high-protein veggie bake stands beautifully on its own, pairing it with the right sides elevates the entire meal experience. I love serving it with a crisp arugula salad dressed simply with lemon juice and olive oil—the peppery notes and acidity perfectly balance the richness of the bake. For a more substantial meal, consider a side of crusty whole grain bread or garlic knots to soak up any delicious sauces. When entertaining, I arrange the bake alongside roasted asparagus and a fresh Mediterranean spinach-feta dip for an impressive spread that never fails to delight guests.

    Seasonal and Dietary Adaptations

    One of the reasons I return to this recipe throughout the year is its adaptability to seasonal produce and dietary needs. In summer, I load it with zucchini, bell peppers, and fresh herbs from my garden. Come fall, I switch to heartier options like butternut squash, Brussels sprouts, and sage. For those following specific diets, this bake transforms easily: swap in gluten-free grains, use dairy-free cheese alternatives, or add nutrient-dense greens like kale and spinach for extra vitamins. The foundation remains the same, but these thoughtful substitutions keep the dish exciting and aligned with your nutritional goals.

    Storage & Troubleshooting Guide

    Proper Storage for Maximum Freshness

    To maintain the optimal texture and flavor of your high-protein veggie bake, proper storage is essential. After cooling completely, portion leftovers into airtight containers and refrigerate for up to 4 days. For longer storage, wrap individual portions tightly in parchment paper, then foil, before freezing for up to 3 months. I’ve found that adding a small splash of vegetable broth when reheating prevents the dish from drying out. For best results, thaw frozen portions overnight in the refrigerator before reheating at 350°F until the center reaches 165°F—this preserves the moisture without overcooking the vegetables.

    Fixing Common Veggie Bake Problems

    Even experienced cooks occasionally encounter challenges with veggie bakes. If your dish turns out too watery, next time try roasting vegetables separately before assembling or adding 1-2 tablespoons of cornstarch to absorb excess moisture. For a bake that’s too dry, incorporate more binding ingredients like Greek yogurt or ricotta cheese. If you’re finding the flavor lacks depth, don’t underestimate the power of umami-rich additions like sun-dried tomatoes, nutritional yeast, or a splash of soy sauce. I once rescued an underwhelming bake by simply adding a layer of pesto before the final cheese topping—it transformed the entire dish!

    Frequently Asked Questions

    How can I make this high-protein veggie bake vegan?

    Replace dairy cheese with nutritional yeast or plant-based cheese alternatives. Use silken tofu blended with nutritional yeast and a bit of lemon juice as a binding agent instead of eggs. Add extra beans or tempeh for additional protein.

    Can I prepare this dish in advance?

    Absolutely! Assemble the entire bake up to 24 hours ahead and refrigerate covered. Add an extra 10-15 minutes to the baking time if cooking directly from the refrigerator.

    Which vegetables work best in this recipe?

    Focus on vegetables with complementary textures—combine sturdy options like cauliflower and sweet potatoes with softer vegetables like spinach and mushrooms. Avoid very watery vegetables unless pre-roasted.

    How do I prevent the bottom from getting soggy?

    Pre-roast water-heavy vegetables, use a thin layer of breadcrumbs on the bottom of the dish to absorb moisture, and let the bake rest for 10-15 minutes before serving.

    What’s the best way to reheat leftovers?

    For best texture, reheat in a 350°F oven for 15-20 minutes. Microwave reheating works in a pinch—cover with a damp paper towel and heat in 1-minute intervals.

    Final Thoughts

    This high-protein veggie bake has become more than just a recipe in my kitchen—it’s a reliable solution for nourishing meals that never compromise on flavor. The beauty lies in its adaptability and how it welcomes your personal touch. Whether you’re feeding a family, meal prepping for the week, or looking to incorporate more plant-based options, this dish delivers on all fronts. I’d love to see your creations on Pinterest! Remember, the best recipes evolve with each making, so don’t be afraid to experiment and make this veggie bake truly your own.

  • Sour Cream Chicken Bake: Creamy Comfort Food You’ll Crave!

    Sour Cream Chicken Bake: Creamy Comfort Food You’ll Crave!

    Sour Cream Chicken Bake: Creamy Comfort Food You’ll Crave!

    This sour cream chicken bake is the definition of comfort food perfection – tender chicken breasts nestled in a creamy, tangy sauce that transforms into a bubbling masterpiece in your oven. I discovered this recipe during a particularly chilly autumn evening when I needed something that would warm both the kitchen and our spirits. The way the sour cream creates this velvety blanket over the seasoned chicken had my family scraping their plates clean! It’s become our go-to dinner for those nights when we crave something hearty and satisfying without hours of prep work. If you love dishes that combine simplicity with incredible flavor, this chicken bake is about to become your new favorite too.

    Recipe

    Why You’ll Love This Sour Cream Chicken Bake

    Simple Ingredients, Extraordinary Flavor

    This recipe proves that culinary magic happens with just a handful of everyday ingredients. The star of the show is obviously the sour cream, which creates this incredible velvety texture while adding a subtle tanginess that balances the richness perfectly. I love how it transforms in the oven, creating those slightly caramelized edges that we all fight over at the dinner table! The seasoning blend – a mix of garlic powder, paprika, and herbs – infuses the chicken with flavor that penetrates deep into every bite. What makes this truly special is how these simple ingredients work together to create something that tastes like you spent hours in the kitchen.

    Weeknight-Friendly Preparation

    As someone who juggles work, family, and everything in between, I cherish recipes that deliver maximum flavor with minimum effort. This sour cream chicken bake is the epitome of weeknight efficiency – just season the chicken, blend the creamy topping, and let your oven do the heavy lifting. The hands-on time is under 15 minutes, which means I can help with homework or tackle a quick chore while dinner practically makes itself. I’ve prepared this on my busiest days and still managed to serve a meal that makes everyone think I’ve been cooking all afternoon. The beauty is in its simplicity – no complicated techniques or hard-to-find ingredients required!

    Essential Tips & Tricks

    Getting the Perfect Texture

    The key to this dish’s success lies in achieving that golden, slightly crispy topping while keeping the chicken perfectly moist underneath. I’ve found that patting the chicken dry before seasoning makes a world of difference – it helps the seasonings adhere better and prevents excess moisture from thinning out your sour cream mixture. Another game-changer is bringing the sour cream to room temperature before mixing it with the other ingredients. This creates a smoother, more even coating that bakes beautifully. For that irresistible golden finish, I switch to the broiler for the final 2-3 minutes, watching carefully to catch that perfect moment when the top transforms into a delicious crust.

    Flavor Boosting Techniques

    While the basic recipe is delicious on its own, I’ve discovered some flavor-enhancing tweaks that elevate it even further. Adding a tablespoon of Dijon mustard to the sour cream mixture introduces a subtle tangy depth that complements the creaminess beautifully. For a flavor explosion, try marinating the chicken for 30 minutes in a mixture of olive oil, lemon juice, and minced garlic before proceeding with the recipe. I’ve also found that sprinkling fresh herbs like dill or chives over the finished dish brightens everything up wonderfully. These simple additions transform an already delicious sour cream noodle bake into something truly restaurant-worthy without adding much extra work.

    Serving Ideas & Creative Variations

    Perfect Pairings

    This sour cream chicken bake pairs beautifully with so many sides, making it incredibly versatile for meal planning. My family’s favorite combination includes fluffy rice pilaf that soaks up all that creamy sauce – absolute heaven on a plate! For a lighter option, roasted asparagus or a simple green salad with vinaigrette provides the perfect fresh contrast to the rich chicken. When I’m feeling particularly indulgent, I serve it with buttery mashed potatoes and some crusty bread for sauce-mopping purposes. The dish also works wonderfully with wild rice or quinoa if you’re looking for something with more texture and nutritional value. Whatever you choose, make sure there’s something to capture that incredible sauce!

    Exciting Flavor Variations

    One thing I adore about this recipe is how easily it adapts to different flavor profiles. For a Mediterranean twist, mix in some sun-dried tomatoes and crumbled feta cheese to the sour cream before baking. When I’m craving something with a kick, I add a few tablespoons of buffalo sauce and top with blue cheese crumbles during the last five minutes of baking. My husband’s favorite variation includes adding a layer of sautéed mushrooms and onions beneath the chicken before topping with the sour cream mixture. For a heartier meal that still maintains that creamy goodness, try this meatball and mashed potato bake that uses similar techniques but with a completely different flavor profile.

    Storage & Troubleshooting Guide

    Proper Storage Solutions

    This sour cream chicken bake is meal-prep friendly and stores beautifully for those busy weeks when cooking every night isn’t feasible. Once completely cooled, transfer leftovers to an airtight container and refrigerate for up to 3 days. The flavor actually deepens overnight as the seasonings continue to meld! For longer storage, you can freeze individual portions in freezer-safe containers for up to 2 months. I recommend thawing overnight in the refrigerator before reheating. When it’s time to enjoy your leftovers, reheat gently in a 325°F oven covered with foil until warmed through – this preserves the creamy texture much better than microwaving, which can cause the sauce to separate.

    Common Issues & Easy Fixes

    The most common issue with this dish is a watery sauce, usually caused by excess moisture in the chicken. To prevent this, always thoroughly pat dry your chicken before cooking and avoid overcrowding the baking dish, which can create steam instead of allowing proper browning. If your topping isn’t browning nicely, your oven temperature might be too low – try positioning the dish in the upper third of the oven or finishing with a brief broil. For those concerned about calories, you can substitute Greek yogurt for up to half of the sour cream without sacrificing too much creaminess.

    If your sauce curdles during baking, it’s likely due to high heat – next time, try reducing the temperature slightly and extending the cooking time.

    Frequently Asked Questions

    Can I use chicken thighs instead of breasts for this sour cream chicken bake?

    Absolutely! Chicken thighs work beautifully and often result in a more tender, flavorful dish. Just adjust cooking time accordingly – thighs typically need 5-7 minutes longer than breasts.

    Is there a lighter alternative to sour cream I can use?

    Yes! Greek yogurt makes an excellent substitute for part or all of the sour cream. It maintains the tanginess while reducing fat and calories and adding protein.

    Can I prepare this dish ahead of time?

    Definitely. Assemble everything up to 24 hours ahead, cover and refrigerate. Add 5-10 minutes to the baking time when cooking from cold.

    What herbs work best in this recipe?

    Dill, thyme, and chives complement the creamy sauce perfectly. Fresh herbs added after baking provide the brightest flavor and beautiful presentation.

    Why did my sauce separate during baking?

    This usually happens when baked at too high a temperature or when dairy products aren’t at room temperature before mixing. Try lowering the heat by 25°F next time.

    Final Thoughts

    This sour cream chicken bake has earned its place as a staple in my dinner rotation for good reason – it strikes that perfect balance between effortless preparation and impressive results. There’s something magical about pulling a bubbling, golden dish from the oven that fills your kitchen with irresistible aromas. I love how versatile it is, adapting to whatever ingredients I have on hand while maintaining that comforting, creamy essence that makes it so beloved. Whether you’re cooking for a family weeknight dinner or hosting friends for a casual gathering, this dish delivers satisfaction in every bite. Find more delicious recipes on Pinterest!

  • Maple Mustard Beef Tenderloin: Irresistible Flavor Explosion!

    Maple Mustard Beef Tenderloin: Irresistible Flavor Explosion!

    Maple Mustard Beef Tenderloin: Irresistible Flavor Explosion!

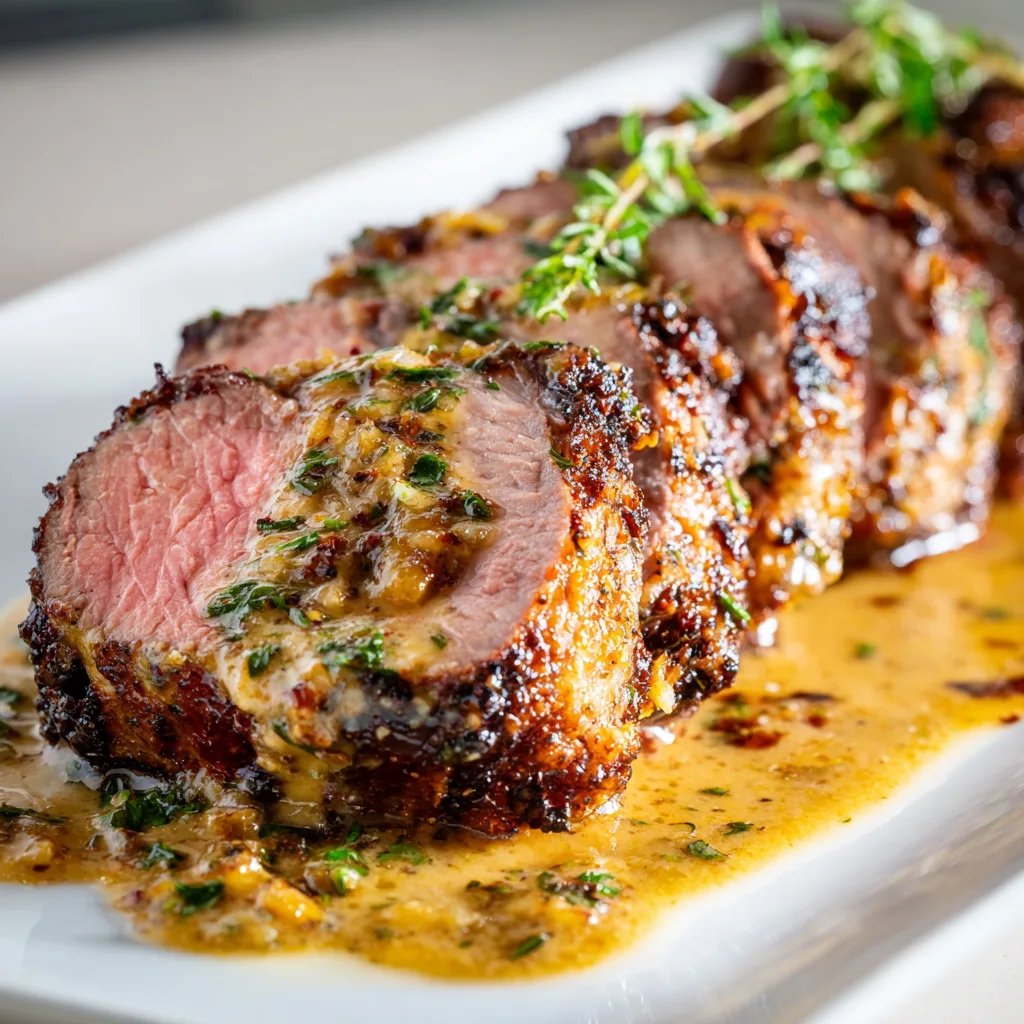
    Maple mustard beef tenderloin transforms an ordinary dinner into something extraordinary. The first time I made this dish, my kitchen filled with the most intoxicating aroma—sweet maple mingling with tangy mustard and rich beef. It was one of those moments where I couldn’t stop peeking into the oven! The outside develops this gorgeous caramelized crust while the inside stays perfectly tender and juicy. If you’ve been searching for that perfect special occasion dish, this maple mustard beef tenderloin delivers impressive results without complicated techniques.

    Recipe

    Why You’ll Love This Maple Mustard Beef Tenderloin

    Perfect Balance of Flavors

    The magic of this recipe lies in the perfect harmony between sweet maple syrup and zesty mustard. These contrasting flavors create a glaze that caramelizes beautifully on the beef, forming a crust that’s simultaneously sweet, tangy, and slightly peppery. I love how the maple’s natural sweetness mellows the mustard’s sharpness while enhancing the beef’s rich flavor. The first time my sister tried it, she immediately asked for the recipe—that’s when I knew this combination was truly special! Each bite delivers a complex flavor profile that feels sophisticated yet comforting.

    Impressive Yet Simple Preparation

    Don’t let the elegant appearance fool you—this maple mustard beef tenderloin is surprisingly straightforward to prepare. The active prep time is minimal, making it perfect for both special occasions and elevated weeknight dinners when you want something special. I remember frantically preparing for a last-minute dinner party and turning to this recipe because it’s reliably impressive without requiring constant attention. The marinade does most of the flavor work for you, and the roasting process is largely hands-off, giving you time to prepare sides or simply enjoy a glass of wine while your kitchen fills with mouthwatering aromas.

    Essential Tips & Tricks

    Selecting and Preparing Your Tenderloin

    Choosing the right cut is crucial for this recipe. Look for a center-cut tenderloin with consistent thickness and good marbling. I prefer asking my butcher to trim and tie it, saving precious preparation time. Before applying the maple-mustard mixture, pat the meat thoroughly dry with paper towels—this ensures proper searing and helps the glaze adhere better. Allow the tenderloin to come to room temperature for about 30 minutes before cooking; this simple step promotes even cooking from edge to center. The difference in texture between a properly prepared tenderloin and one cooked straight from the refrigerator is remarkable!

    Perfecting the Maple Mustard Glaze

    The glaze is where this recipe truly shines. Use pure maple syrup—not pancake syrup—for authentic flavor and better caramelization. Combine with both Dijon and whole grain mustards for complexity. When I’m feeling adventurous, I add a splash of bourbon or a pinch of smoked paprika for depth. Garlic herb chicken has a similar approach to building layers of flavor. Reserve about 2 tablespoons of glaze for basting during cooking, which creates that irresistible caramelized exterior. Apply the initial coating at least 2 hours before cooking (overnight is even better) to allow the flavors to penetrate the meat.

    Serving Ideas & Creative Variations

    Complementary Side Dishes

    This maple mustard beef tenderloin pairs beautifully with sides that complement its sweet-savory profile. Roasted root vegetables like carrots, parsnips, and sweet potatoes echo the maple’s sweetness while adding earthy contrast. For a special occasion, I serve it with creamy mashed potatoes or a wild mushroom risotto to soak up the delicious juices. A simple arugula salad with lemon vinaigrette provides a bright, peppery counterpoint to the rich meat. Last Christmas, I served this tenderloin with crispy hot honey feta chicken as part of a surf-and-turf menu, and my guests were fighting over the last pieces of both!

    Seasonal Adaptations

    One thing I love about this recipe is how easily it adapts to different seasons. In autumn and winter, enhance the glaze with warming spices like cinnamon, cloves, or rosemary for a holiday-worthy centerpiece. For spring gatherings, lighten things up by adding fresh herbs like thyme or tarragon to the glaze and serving with spring vegetables. Summer barbecues? Take this tenderloin to the grill! The maple-mustard mixture caramelizes beautifully over charcoal, creating an irresistible smoky-sweet crust. Just be careful with the direct heat—the sugars in maple syrup can burn quickly, so indirect grilling works best.

    Storage & Troubleshooting Guide

    Proper Storage and Reheating

    Leftover maple mustard beef tenderloin (if you’re lucky enough to have any!) requires proper storage to maintain its quality. Refrigerate promptly in an airtight container for up to 3 days. For reheating, avoid the microwave which can toughen the meat. Instead, slice the tenderloin thinly, wrap loosely in foil with a splash of beef broth, and warm in a 275°F oven just until heated through. This gentle reheating preserves the tenderness. My favorite way to enjoy leftovers is actually cold or at room temperature on a sandwich with arugula and horseradish cream—the flavors meld beautifully overnight!

    Common Mistakes to Avoid

    The most frequent issue when preparing this dish is overcooking. Beef tenderloin is lean and cooks quickly, so using a meat thermometer is essential. Aim for 125°F for rare, 135°F for medium-rare, or 145°F for medium, remembering that temperature will rise 5-10 degrees during resting. Another common mistake is slicing too soon—always rest your tenderloin for at least 10 minutes (I prefer 15) under loose foil to allow juices to redistribute. If your glaze starts to burn during cooking, simply tent with foil to prevent further browning while allowing the meat to finish cooking properly.

    Frequently Asked Questions

    What’s the best internal temperature for maple mustard beef tenderloin?

    For optimal tenderness and flavor, cook to 130-135°F for medium-rare. The temperature will rise another 5-10 degrees while resting. Always use a reliable meat thermometer inserted into the thickest part.

    Can I prepare this recipe in advance?

    Yes! Apply the maple mustard marinade up to 24 hours in advance and refrigerate. Remove from refrigerator 30-45 minutes before cooking to allow the meat to come to room temperature.

    What mustards work best for maple mustard beef tenderloin?

    A combination of Dijon (for tang) and whole grain mustard (for texture) creates the perfect balance. Stone-ground or spicy brown mustard can be substituted based on preference.

    Can I use this same glaze on other meats?

    Absolutely! This versatile maple-mustard glaze works beautifully on pork tenderloin, chicken thighs, or even salmon. Adjust cooking times accordingly for different proteins.

    How do I ensure my tenderloin cooks evenly?

    Tie the tenderloin with kitchen twine at 1-inch intervals to create a uniform shape. This promotes even cooking and helps maintain the meat’s juiciness throughout.

    Final Thoughts

    This maple mustard beef tenderloin has become my go-to recipe when I want to create something truly memorable without spending hours in the kitchen. The contrast between the caramelized exterior and tender, juicy center creates a dining experience that feels special every time. What I love most is watching guests take that first bite—there’s always a moment of quiet appreciation before the compliments begin. Whether for a holiday gathering or date night at home, this dish strikes the perfect balance between impressive and accessible. Give it a try, and I’d love to see your results on Pinterest!

  • Creamy Miso Butter Beans That Will Melt Your Heart Instantly

    Creamy Miso Butter Beans That Will Melt Your Heart Instantly

    Creamy Miso Butter Beans That Will Melt Your Heart Instantly

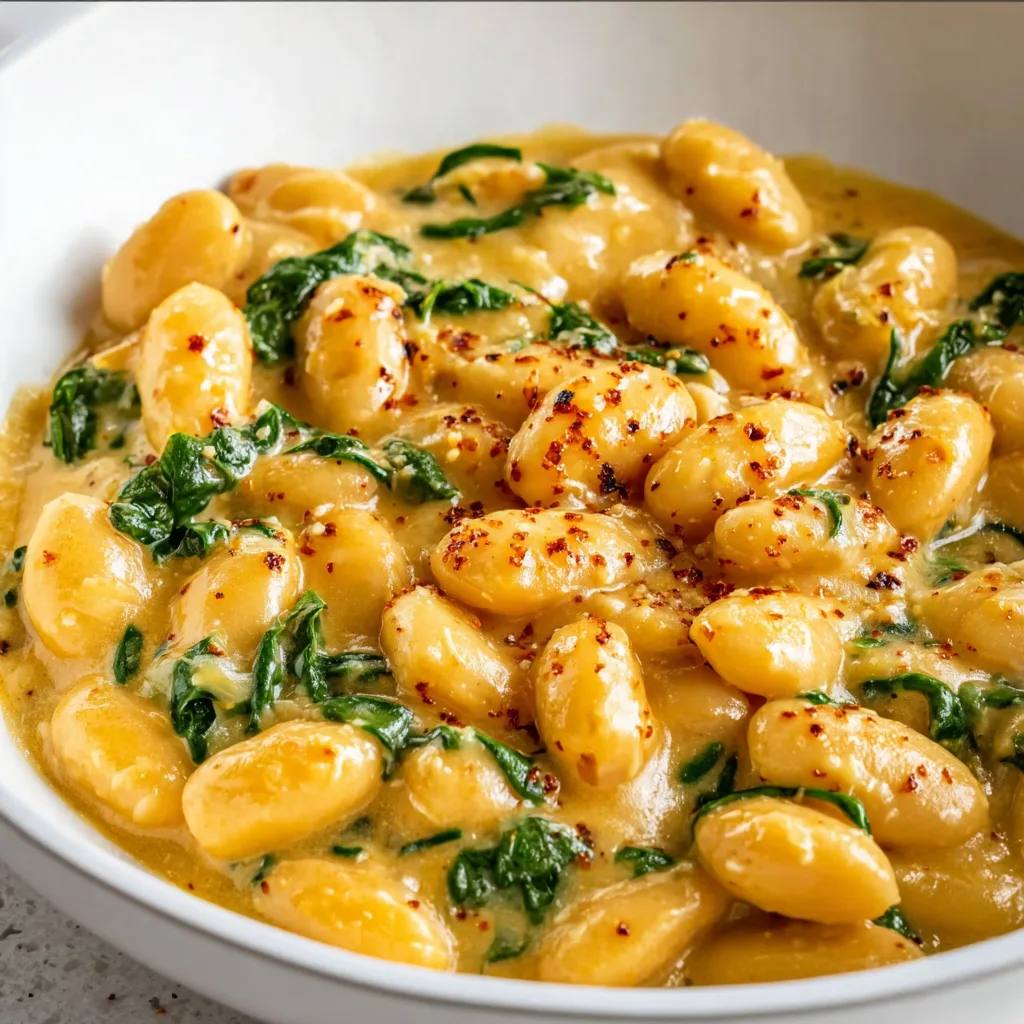
    Creamy Miso Butter Beans have become my absolute obsession this winter. There’s something magical about the way white miso paste transforms ordinary butter beans into a velvety, umami-rich dish that feels both comforting and sophisticated. I discovered this recipe during a rainy weekend when I was craving something cozy but didn’t want to make another batch of my usual garlic herb chicken. The first spoonful had me closing my eyes in pure bliss – creamy, savory, with that perfect hint of miso complexity.

    Recipe

    Why You’ll Love This Creamy Miso Butter Beans

    Perfect Balance of Flavors and Textures

    These creamy miso butter beans deliver an incredible depth of flavor that might seem complex but comes together with minimal effort. The butteriness of the beans creates the perfect canvas for the savory, slightly sweet notes of white miso paste. I love how the beans maintain just enough texture while swimming in that silky sauce. The gentle heat from a pinch of red pepper flakes wakes up your palate without overwhelming, while fresh herbs add brightness that cuts through the richness. It’s comfort food with a sophisticated twist.

    Quick and Nourishing Weeknight Solution

    When life gets hectic, this dish is my secret weapon. It takes just 20 minutes from pantry to plate but tastes like something that simmered all day. Packed with plant-based protein and fiber, it’s substantially nourishing without weighing you down. I’ve made this on countless Monday nights when I needed something restorative after a long day. The best part? The ingredients keep well in your pantry, making this an excellent “I have nothing planned” dinner solution that still feels intentional and nurturing.

    Essential Tips & Tricks

    Selecting and Preparing Your Beans

    The foundation of exceptional creamy miso butter beans starts with choosing the right beans. While canned butter beans offer convenience (and I use them often!), dried beans provide superior texture if you have time to soak them overnight. Regardless of which you choose, don’t skip rinsing them thoroughly to remove excess starch and any metallic taste from canned varieties. For extra creaminess, gently mash about 25% of your beans against the side of the pan while cooking. This releases their natural starches, creating that luxurious texture without adding heavy cream.

    Miso Mastery for Perfect Results

    White miso paste is the star ingredient here, providing that complex umami foundation that makes these beans irresistible. Store it in an airtight container in the refrigerator, where it will keep for months. When incorporating miso into the dish, always dissolve it first in a small amount of warm (not boiling) liquid before adding to the pan. High heat destroys miso’s delicate enzymes and flavor compounds. For a deeper flavor profile, try mixing in a tiny amount of darker miso with the white, similar to the technique I use in my roasted red pepper hummus for depth.

    Serving Ideas & Creative Variations

    Elevate Your Meal with Perfect Pairings

    These creamy miso butter beans shine as both a main dish or a sophisticated side. For a complete meal, serve them over steamed jasmine rice or crusty sourdough toast drizzled with olive oil. They also make an unexpectedly perfect side for grilled fish or roasted chicken thighs. I love adding a bright, acidic element on the side – perhaps a simple arugula salad with lemon vinaigrette or quick-pickled red onions. The contrast between the creamy beans and something fresh and zippy creates a perfectly balanced plate that feels restaurant-worthy.

    Seasonal Adaptations Worth Trying

    The beauty of this recipe lies in its adaptability throughout the year. In spring, fold in tender peas and asparagus tips during the last few minutes of cooking. Summer calls for cherry tomatoes that burst in the heat, releasing their sweet juices into the sauce. Fall is perfect for adding roasted butternut squash cubes and crispy sage leaves. Winter versions shine with wilted kale and a sprinkle of toasted walnuts, similar to my meatball and mashed potato bake that transforms with the seasons. Each variation maintains the creamy miso foundation while celebrating what’s fresh.

    Storage & Troubleshooting Guide

    Keeping Leftovers Fresh and Delicious

    These creamy miso butter beans actually improve overnight as the flavors meld together in the refrigerator. Store cooled leftovers in an airtight container for up to 4 days. When reheating, add a splash of water or vegetable broth to loosen the sauce, as it will thicken considerably when chilled. Gentle heat is key – microwave on medium power with occasional stirring, or warm slowly on the stovetop. I don’t recommend freezing this dish, as the texture of the beans can become mealy, and the delicate miso flavor diminishes after thawing.

    Troubleshooting Common Challenges

    If your sauce seems too thin, don’t reach for flour or cornstarch. Instead, gently mash more beans against the side of the pan to release their natural starches. For sauce that’s too thick, gradually add warm vegetable broth until you reach your desired consistency. If the miso flavor seems too subtle, don’t simply add more paste – this can make the dish overly salty. Instead, enhance the umami with a small splash of tamari or a teaspoon of nutritional yeast. For beans that remain firm despite cooking, they may be older; simply extend the simmering time.

    Frequently Asked Questions

    Can I use other types of beans for this recipe?

    Absolutely! Cannellini, navy, or even chickpeas work beautifully. Each variety brings a different texture, with butter beans offering the creamiest result and chickpeas providing more bite.

    What’s the difference between white and red miso for creamy miso butter beans?

    White miso is milder and sweeter, perfect for this creamy dish. Red miso is more intensely flavored and saltier – use just a small amount (¼ of what the recipe calls for) if substituting.

    Is this recipe vegan?

    Yes! Despite the rich, buttery texture, this dish is completely plant-based when using plant butter and vegetable broth, making it perfect for everyone at your table.

    How can I make this dish more substantial?

    Add sautéed mushrooms, wilted greens like spinach or kale, or top with a soft-boiled egg. For meat-eaters, crispy bacon bits or shredded rotisserie chicken work wonderfully.

    Can I prepare creamy miso butter beans in advance for a dinner party?

    Definitely! Make them up to two days ahead, storing in the refrigerator. The flavors actually improve, just thin with a bit of broth when reheating gently before serving.

    Final Thoughts

    These creamy miso butter beans have become a staple in my kitchen for good reason – they perfectly balance simplicity with sophisticated flavor. There’s something deeply satisfying about transforming humble pantry ingredients into something that feels special enough for guests yet simple enough for Tuesday night dinner. I hope you’ll give these beans a permanent spot in your recipe collection and explore all the seasonal variations that make them endlessly adaptable. Don’t forget to share your creations on Pinterest – I’d love to see how you make this dish your own!

  • Mediterranean Chicken Orzo: Flavor-Packed Comfort in Every Bite

    Mediterranean Chicken Orzo: Flavor-Packed Comfort in Every Bite

    Mediterranean Chicken Orzo: Flavor-Packed Comfort in Every Bite

    Mediterranean Chicken Orzo is a dish that speaks to my soul on those evenings when I crave something both comforting and bright. The first time I made this, the aroma of lemon and herbs filled my kitchen, transporting me straight to a seaside taverna. There’s something magical about how the tender chicken, plump orzo, and vibrant Mediterranean flavors come together in one skillet. This recipe balances bold flavors with simple preparation—exactly what I need when I want a dinner that feels special without hours of work. Ready to bring a taste of the Mediterranean to your table? Let’s dive in!

    Recipe

    Why You’ll Love This Mediterranean Chicken Orzo

    Perfect Balance of Flavors and Textures

    The beauty of Mediterranean Chicken Orzo lies in its harmonious blend of ingredients. The tender chicken thighs absorb all those gorgeous flavors of lemon, oregano, and garlic, while the orzo pasta soaks up the savory broth as it cooks. What I adore most is how the bright acidity from lemon juice and briny olives cuts through the richness. Each forkful delivers that perfect balance—creamy pasta, juicy chicken, and the occasional burst of sweetness from sun-dried tomatoes. It’s a textural playground that keeps every bite interesting.

    One-Pot Wonder for Busy Weeknights

    Let’s be honest—who has time for complicated meals on a Tuesday? This Mediterranean Chicken Orzo is my go-to when I want something that tastes like I spent hours in the kitchen but actually comes together in about 30 minutes. Everything cooks in one skillet, meaning fewer dishes and more flavor as the ingredients mingle together. I’ve made this countless times when friends drop by unexpectedly, and it never fails to impress. The best part? You probably have most ingredients already waiting in your pantry.

    Essential Tips & Tricks

    Perfecting Your Chicken

    For truly exceptional Mediterranean Chicken Orzo, start by properly searing your chicken thighs. I always pat them completely dry with paper towels before seasoning—this is non-negotiable if you want that beautiful golden crust! Allow them to cook undisturbed for at least 4-5 minutes per side. The fond (those delicious browned bits) that forms on the pan becomes the flavor foundation for the entire dish. If you’re short on time, you could substitute pre-cooked rotisserie chicken, but you’ll miss out on developing those complex flavors in the pan.

    Orzo Cooking Secrets

    The trickiest part of this dish is getting the orzo cooked perfectly—neither mushy nor undercooked. My foolproof method is to toast the dry orzo in a bit of olive oil before adding liquid, which gives it a nutty depth and helps it maintain its texture. Watch your liquid-to-orzo ratio carefully; I use 2½ cups of broth for every cup of orzo. Keep the heat at a gentle simmer rather than a rolling boil, and stir occasionally to prevent sticking. For an extra layer of flavor, try chicken bone broth instead of regular chicken stock.

    Serving Ideas & Creative Variations

    Mediterranean-Inspired Sides

    Elevate your Mediterranean Chicken Orzo with thoughtfully chosen sides that complement its flavors. I love serving it with a simple Greek salad featuring crisp cucumbers, juicy tomatoes, and crumbled feta. A side of warm pita bread brushed with olive oil and sprinkled with za’atar is perfect for scooping up any remaining sauce. For a lighter option, roasted lemon asparagus makes an elegant pairing. When hosting, I arrange everything on a large wooden board for a casual, abundant presentation that always gets compliments.

    Seasonal and Dietary Adaptations

    One reason I return to this recipe again and again is its incredible versatility. In summer, I fold in handfuls of fresh herbs and cherry tomatoes right at the end. During cooler months, I might add hearty greens like kale or substitute butternut squash for some of the vegetables. For a vegetarian version, replace the chicken with meaty portobello mushrooms and use vegetable broth. To make it dairy-free, simply skip the feta garnish or use a plant-based alternative. The core Mediterranean flavors remain delicious through all these variations.

    Storage & Troubleshooting Guide

    Proper Storage and Reheating

    Mediterranean Chicken Orzo actually improves overnight as the flavors meld together, making it perfect for meal prep. Store leftovers in airtight containers in the refrigerator for up to 3-4 days. When reheating, add a splash of chicken broth or water to revive the orzo’s texture, as it tends to absorb liquid while sitting. For the best results, reheat gently on the stovetop rather than the microwave. If freezing, I recommend slightly undercooking the orzo initially, then cooling completely before transferring to freezer-safe containers where it will keep for up to 2 months.

    Fixing Common Issues

    Even experienced cooks encounter challenges with this dish occasionally. If your orzo is still hard after cooking, cover the pan and add an extra ¼ cup of hot broth, continuing to simmer until tender. For too-soupy results, simply remove the lid and increase the heat slightly to reduce excess liquid. If your chicken turns out dry, it was likely overcooked—next time, remove it earlier and return to the pan just to warm through before serving. And if the flavors seem flat, a final squeeze of fresh lemon juice and a sprinkle of flaky sea salt works wonders.

    Frequently Asked Questions

    Can I use chicken breasts instead of thighs in Mediterranean Chicken Orzo?

    Yes! Chicken breasts work well but cook faster than thighs. Reduce cooking time by 2-3 minutes per side and be careful not to overcook them to maintain juiciness.

    Is there a substitute for orzo if I can’t find it?

    Small pasta shapes like ditalini or small shells work beautifully. You could also use pearl couscous (Israeli couscous), though cooking times may vary slightly.

    How can I make this Mediterranean Chicken Orzo more budget-friendly?

    Use bone-in chicken thighs (they’re cheaper), reduce the amount of feta, and incorporate seasonal vegetables. Frozen spinach works well in place of fresh herbs when needed.

    Can I make this dish ahead for a dinner party?

    Absolutely! Prepare it up to a day ahead, slightly undercooking the orzo. Refrigerate, then reheat gently with a splash of broth, adding fresh herbs just before serving.

    What wine pairs best with Mediterranean Chicken Orzo?

    A crisp, acidic white wine like a Greek Assyrtiko or a light Pinot Grigio complements the lemony, herbal notes in this dish perfectly.

    Final Thoughts

    Mediterranean Chicken Orzo has become my culinary passport to sunnier shores, even on the dreariest days. There’s something deeply satisfying about creating a dish that balances simplicity with such vibrant, complex flavors. Whether you’re cooking for a quiet night in or hosting friends for dinner, this recipe adapts to the occasion beautifully. I hope it brings as much joy to your table as it has to mine. For more Mediterranean-inspired recipes, check out my Pinterest board where I’m always adding new favorites!

  • Ruths Chris-Style Potatoes Au Gratin: Irresistibly Cheesy Delight!

    Ruths Chris-Style Potatoes Au Gratin: Irresistibly Cheesy Delight!

    Ruths Chris-Style Potatoes Au Gratin: Irresistibly Cheesy Delight!

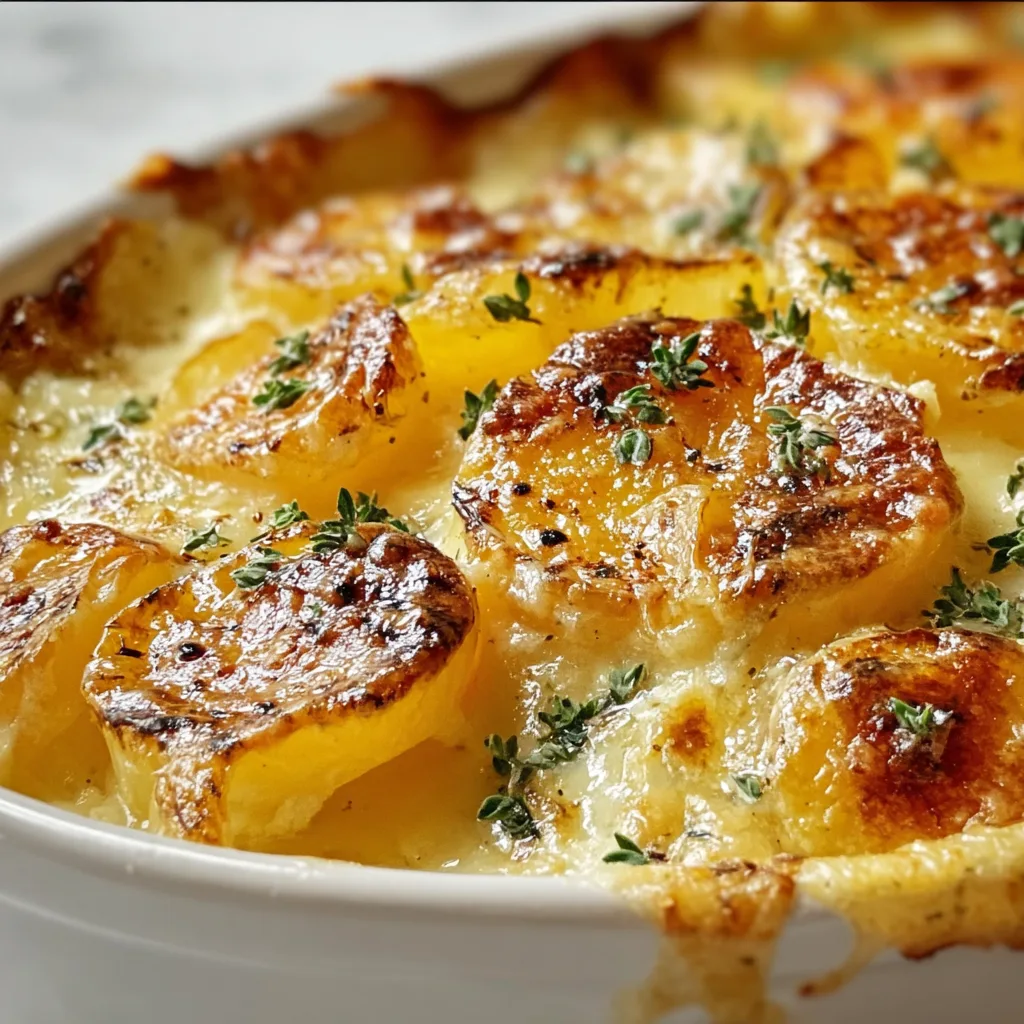
    Ruths Chris-Style Potatoes Au Gratin transforms ordinary spuds into a decadent masterpiece that rivals the famous steakhouse version. The first time I made these for Sunday dinner, my kitchen filled with the intoxicating aroma of bubbling cheese and garlic that had everyone hovering near the oven. There’s something magical about that moment when the golden crust forms on top, revealing the creamy, tender layers of potato beneath. This recipe captures the essence of comfort food luxury—rich, velvety, and utterly irresistible. If you’re looking to elevate your potato game, this recipe delivers steakhouse quality right at your dinner table.

    Recipe

    Why You’ll Love This Ruths Chris-Style Potatoes Au Gratin

    Restaurant-Quality Flavor at Home

    The beauty of these Ruths Chris-Style Potatoes Au Gratin lies in their perfect balance of textures and flavors. The sharp cheddar and gruyère create a complex cheese profile that commercial versions simply can’t match. I still remember my husband’s face when he took his first bite—that wide-eyed “restaurant quality” look of surprise. The heavy cream creates a silky sauce that coats each potato slice, while the garlic infuses everything with aromatic depth. Unlike basic potato casseroles, this version develops those crispy edges and corners that everyone fights over, while maintaining a luscious, creamy center.

    Simple Ingredients, Extraordinary Results

    What I adore about this recipe is how it transforms everyday ingredients into something spectacular. You don’t need exotic components—just quality basics like fresh potatoes, real cream, and good cheese. The magic happens in the layering technique and slow baking process. Last Christmas, I was short on time but refused to compromise on sides. These potatoes saved me! They looked impressive enough for our holiday table but required minimal active preparation. The ingredients work harmoniously to create that signature Ruths Chris richness that makes potato au gratin more than just a side dish—it’s often the star of the meal.

    Essential Tips & Tricks

    Mastering the Perfect Slice

    Getting your potato thickness just right is crucial for Ruths Chris-Style Potatoes Au Gratin success. I learned the hard way that uniform slices (about 1/8-inch thick) cook evenly and create the ideal texture. Hand-slicing works, but my mandoline slicer was a game-changer! Another non-negotiable: soaking your sliced potatoes in cold water for 15 minutes, then patting them completely dry. This removes excess starch and prevents that gluey texture that can ruin an otherwise perfect dish. Choose starchy potatoes like Russets for their ability to absorb cream while maintaining structure—I once tried waxy potatoes and ended up with a soupy mess.

    The Secret to That Signature Crust

    The hallmark of authentic Ruths Chris-Style Potatoes Au Gratin is that irresistible golden top that forms during baking. To achieve this, reserve about 1/4 cup of your sharpest cheese for the final 15 minutes of baking. I also brush the top with a mixture of melted butter and a pinch of paprika before the final bake—a trick I learned from my favorite garlic herb chicken recipe. For extra decadence, switch your oven to broil for the final 2-3 minutes, watching carefully to get that perfect caramelization without burning. The contrast between the crispy top and creamy interior is what makes this dish unforgettable.

    Serving Ideas & Creative Variations

    Perfect Pairings for Your Potatoes

    Ruths Chris-Style Potatoes Au Gratin deserves to be showcased alongside worthy companions. They shine brilliantly next to a perfectly seared steak or roasted beef tenderloin, recreating that steakhouse experience. For a lighter option, pair with a simple roasted chicken and crisp green salad. I once served these at a dinner party with slow cooker pepper steak and still receive compliments years later! The rich, creamy texture also balances beautifully with anything acidic or bright—think roasted asparagus with lemon or a vinaigrette-dressed salad. These potatoes are substantial enough that they can transform even a simple protein into a special meal.

    Exciting Flavor Twists

    While the classic version is divine, don’t be afraid to make this recipe your own with thoughtful additions. Incorporating caramelized onions between layers adds sweet depth, while crispy bacon bits bring smokiness and texture. My personal favorite variation includes a layer of sautéed mushrooms and fresh thyme—it adds an earthy dimension that’s absolutely mouthwatering. For heat lovers, add thinly sliced jalapeños or a dash of cayenne to the cream mixture. You can also experiment with cheese combinations—smoked gouda adds complexity, while a touch of blue cheese creates bold pockets of flavor without overwhelming the dish.

    Storage & Troubleshooting Guide

    Keeping Leftovers Perfect

    Properly stored Ruths Chris-Style Potatoes Au Gratin maintain their deliciousness for days. Allow leftovers to cool completely before transferring to an airtight container—this prevents condensation that can make the top soggy. Refrigerated potatoes stay good for 3-4 days, though the texture is best within the first 48 hours. To reheat, cover with foil and warm in a 325°F oven for 15-20 minutes until heated through, then remove the foil for the last few minutes to re-crisp the top. Avoid microwaving if possible—it creates hot spots and ruins the texture. I’ve found individual portions reheat better than large sections.

    Fixing Common Pitfalls

    Even experienced cooks occasionally encounter issues with potato au gratin. If your sauce appears curdled, it’s likely from overheating or using pre-shredded cheese with anti-caking agents. Always grate fresh and add cheese to slightly cooled cream for smooth results. Undercooked, firm potatoes usually mean they were sliced too thick or the dish wasn’t baked long enough—cover with foil and continue baking until tender. For watery gratin, remember to thoroughly dry potatoes after soaking and don’t overfill your baking dish. If the top browns too quickly before potatoes are done, simply cover with foil to prevent burning while the center continues cooking.

    Frequently Asked Questions

    Can I make Ruths Chris-Style Potatoes Au Gratin ahead of time?

    Yes! Assemble up to 24 hours ahead, cover tightly with plastic wrap, and refrigerate. Remove from refrigerator 30 minutes before baking, and add 10-15 minutes to the cooking time. This makes them perfect for holiday meal prep.

    What’s the best cheese for authentic Ruths Chris-Style Potatoes Au Gratin?

    A combination of sharp cheddar and gruyère delivers the most authentic flavor profile. For extra richness, add a few tablespoons of parmesan to the top layer before the final browning.

    Can I freeze these potatoes?

    Yes, but freeze before baking for best results. Wrap tightly in plastic wrap, then foil, and freeze for up to 3 months. Thaw completely in refrigerator before baking as directed.

    How do I prevent my potatoes from turning gray?

    Soak sliced potatoes in cold water with a splash of lemon juice or vinegar for 15 minutes, then dry thoroughly. This prevents oxidation while removing excess starch for better texture.

    What’s the difference between potatoes au gratin and scalloped potatoes?

    Traditional au gratin contains cheese (like this Ruths Chris-Style Potatoes Au Gratin), while scalloped potatoes feature a cream sauce without cheese. Au gratin also typically has a breadcrumb or cheese crust on top.

    Final Thoughts

    Creating Ruths Chris-Style Potatoes Au Gratin at home brings a taste of luxury to your everyday table. The combination of perfectly sliced potatoes, rich cream, and golden cheese creates a side dish that often steals the spotlight from the main course. I’ve found that mastering this recipe has given me a reliable showstopper for everything from holiday feasts to Sunday family dinners. There’s something deeply satisfying about recreating restaurant magic in your own kitchen. Don’t forget to check out more delicious potato creations on Pinterest for endless inspiration!