Category: Dinner

Easy, tasty dinner ideas for busy nights. Simple recipes, quick prep, and family-friendly meals you’ll make again and again.

  • Irish Potato Bread Recipe That Will Melt Your Heart Instantly

    Irish Potato Bread Recipe That Will Melt Your Heart Instantly

    Irish Potato Bread Recipe That Will Melt Your Heart Instantly

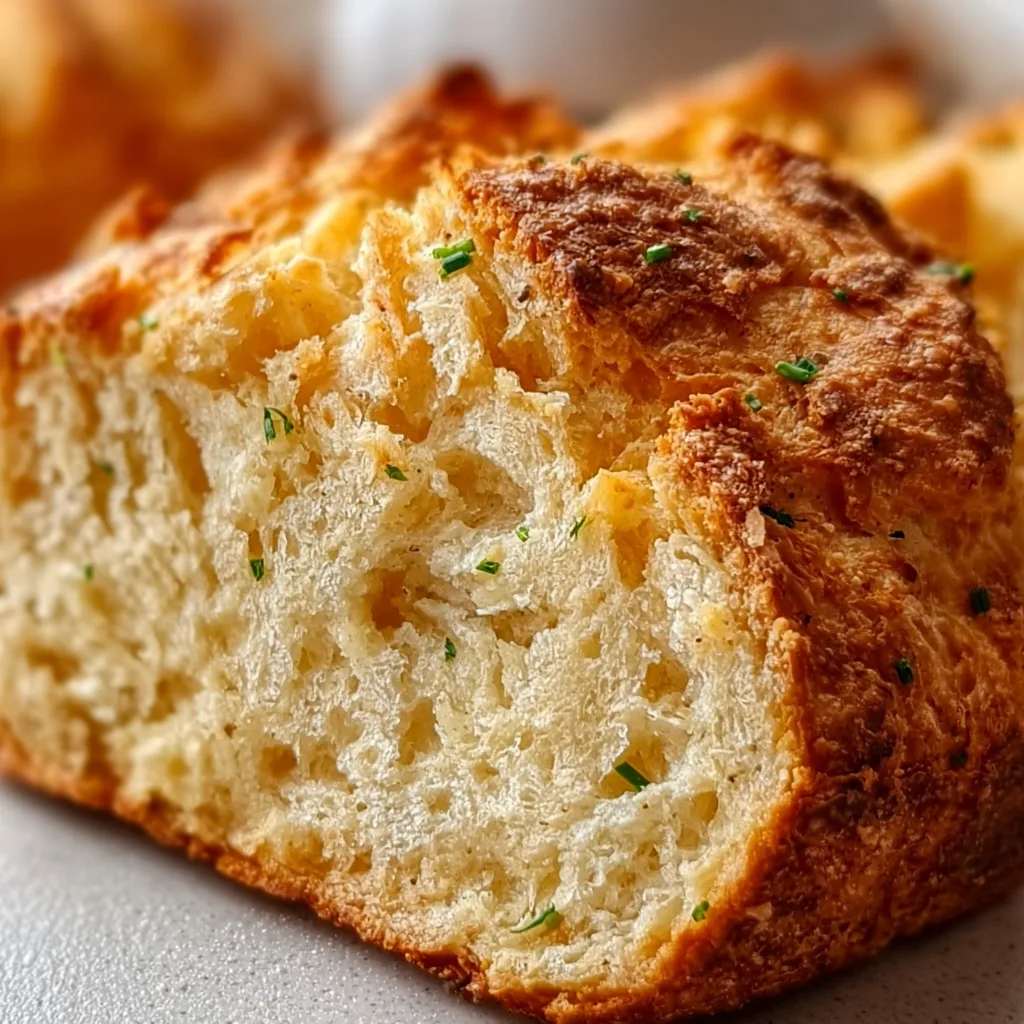
    Irish Potato Bread has been my comfort food salvation on countless rainy afternoons. There’s something magical about the way these golden, slightly crisp rounds transform simple pantry staples into a soul-warming treat. My grandmother first taught me this recipe on a visit to County Cork, and I’ve been perfecting it ever since. The pillowy interior contrasts beautifully with the crisp exterior, creating that perfect bite that pairs with everything from soups to Sunday roasts. If you’re craving a taste of Irish tradition that doesn’t require fancy ingredients, this recipe deserves a permanent spot in your collection.

    Recipe

    Why You’ll Love This Irish Potato Bread

    Perfect Texture & Flavor Balance

    The magical texture of Irish Potato Bread comes from the perfect balance of mashed potatoes and flour. Unlike other potato breads that can be dense, this version stays light and tender with a subtle crisp edge that makes each bite absolutely irresistible. I’ve found the key is using floury potatoes like Russets that create that perfect starchy base. The mild potato flavor carries hints of butter and a touch of salt that makes it versatile enough to pair with both sweet and savory toppings. My family fights over the last piece every single time!

    Simple Ingredients, Big Impact

    What I adore about this traditional recipe is how it transforms humble ingredients into something extraordinary. You’ll need just potatoes, flour, butter, salt, and a splash of milk – that’s it! No fancy equipment or specialty items required. This bread was born from necessity in Irish kitchens where making the most of simple ingredients was essential. I’ve made this recipe countless times when my pantry was nearly bare, yet guests always rave about it like it’s the fanciest thing I’ve ever served. Sometimes the simplest foods truly are the most satisfying.

    Essential Tips & Tricks

    Mastering the Potato Preparation

    Getting your potatoes just right is the foundation of exceptional Irish Potato Bread. I’ve learned to boil them with the skins on until fork-tender, then peel while still warm. This method preserves more potato flavor and prevents them from becoming waterlogged. Allow the potatoes to cool slightly before mashing – you want them warm but not hot enough to cook the flour when mixed. Avoid using a food processor, which can make them gluey. Instead, use a potato masher or ricer for that perfect fluffy texture that will give your bread its characteristic lightness.

    The Perfect Dough Consistency

    Finding the ideal dough consistency is where many first-timers struggle with Irish Potato Bread. The dough should feel soft and pliable but not sticky enough to cling to your fingers. Start with slightly less flour than the recipe calls for, then add more gradually as you work the dough. The exact amount will vary depending on how moist your potatoes are. When I’m making my Creamy Miso Butter Beans, I use this same approach of adjusting ingredients by feel rather than strict measurements. Trust your hands – they’ll tell you when the texture is just right.

    Serving Ideas & Creative Variations

    Classic Irish Pairings

    Irish Potato Bread shines brightest alongside traditional accompaniments that highlight its versatility. Serve it warm with a generous smear of salted Irish butter that melts into all the nooks and crannies – this simple pairing is absolute heaven! For breakfast, nothing beats potato bread fried in a bit of bacon fat until golden, then served alongside eggs and rashers. It’s also the perfect companion to hearty Irish stews, sopping up those rich, savory juices. I’ve even served it with smoked salmon and a dollop of crème fraîche for an elegant appetizer that never fails to impress.

    Modern Twists & Add-Ins

    While I cherish the traditional version, experimenting with creative additions has led to some delightful discoveries! Fold in chopped green onions and sharp cheddar for a savory twist that pairs beautifully with soup. For herb lovers, add fresh rosemary and thyme to the dough for an aromatic variation. Similar to my Roasted Red Pepper Hummus, adding roasted garlic to the potato mixture creates incredible depth of flavor. For a breakfast version, try adding a touch of honey to the dough and serving with cinnamon butter – it’s unexpectedly wonderful!

    Storage & Troubleshooting Guide

    Keeping It Fresh

    Irish Potato Bread is best enjoyed fresh from the pan, but proper storage can maintain its quality for several days. Allow any leftover bread to cool completely before storing in an airtight container lined with paper towels to absorb excess moisture. At room temperature, it stays good for up to 2 days. For longer storage, refrigerate for up to 5 days, though the texture will become more dense. To revive refrigerated bread, warm it in a skillet with a touch of butter until crisp and heated through. The bread also freezes beautifully for up to 3 months when wrapped tightly.

    Fixing Common Issues

    Even experienced bakers encounter challenges with Irish Potato Bread. If your bread turns out too dense, you likely overworked the dough or added too much flour. Remember to handle the dough gently and mix just until ingredients are combined. For bread that’s too wet or doesn’t hold its shape, your potatoes probably contained excess moisture. Next time, let the mashed potatoes cool longer or add a tablespoon more flour. If the outside burns before the inside cooks, your heat is too high – try a medium-low setting and use a heavy-bottomed pan for more even cooking.

    Frequently Asked Questions

    What type of potatoes work best for Irish Potato Bread?

    Starchy potatoes like Russets or Idaho are ideal because they create a fluffy texture. Waxy potatoes like red or new potatoes contain too much moisture and won’t give you the right consistency.

    Can I make Irish Potato Bread gluten-free?

    Yes! Substitute the all-purpose flour with a 1:1 gluten-free flour blend. The potatoes already provide structure, so the bread adapts well to gluten-free modifications.

    How thick should I roll the Irish Potato Bread?

    Aim for about ½-inch thickness for traditional farls. Thinner bread cooks faster but may become too crisp, while thicker pieces need lower heat to cook through properly.

    Can I make the dough ahead of time?

    You can prepare the dough up to 24 hours ahead and refrigerate it. Bring it to room temperature for 30 minutes before shaping and cooking for best results.

    What’s the difference between Irish Potato Bread and boxty?

    Irish Potato Bread (or farls) uses cooked, mashed potatoes mixed with flour, while traditional boxty combines raw grated potatoes with mashed potatoes for a different texture.

    Final Thoughts

    There’s something profoundly satisfying about mastering a recipe as timeless as Irish Potato Bread. This humble yet versatile bread connects us to generations of home cooks who created nourishing food from simple ingredients. I hope you’ll try this recipe and experience the joy of pulling golden, fragrant farls from your skillet. Whether you stick to tradition or experiment with your own variations, the heart of this Irish classic remains the same – comfort and satisfaction in every bite. For more inspiration, check out my Pinterest boards where I share my favorite ways to enjoy this beloved bread.
  • High-Protein Philly Cheesesteak Mac: Epic Flavor, Guilt-Free Indulgence!

    High-Protein Philly Cheesesteak Mac: Epic Flavor, Guilt-Free Indulgence!

    High-Protein Philly Cheesesteak Mac: Epic Flavor, Guilt-Free Indulgence!

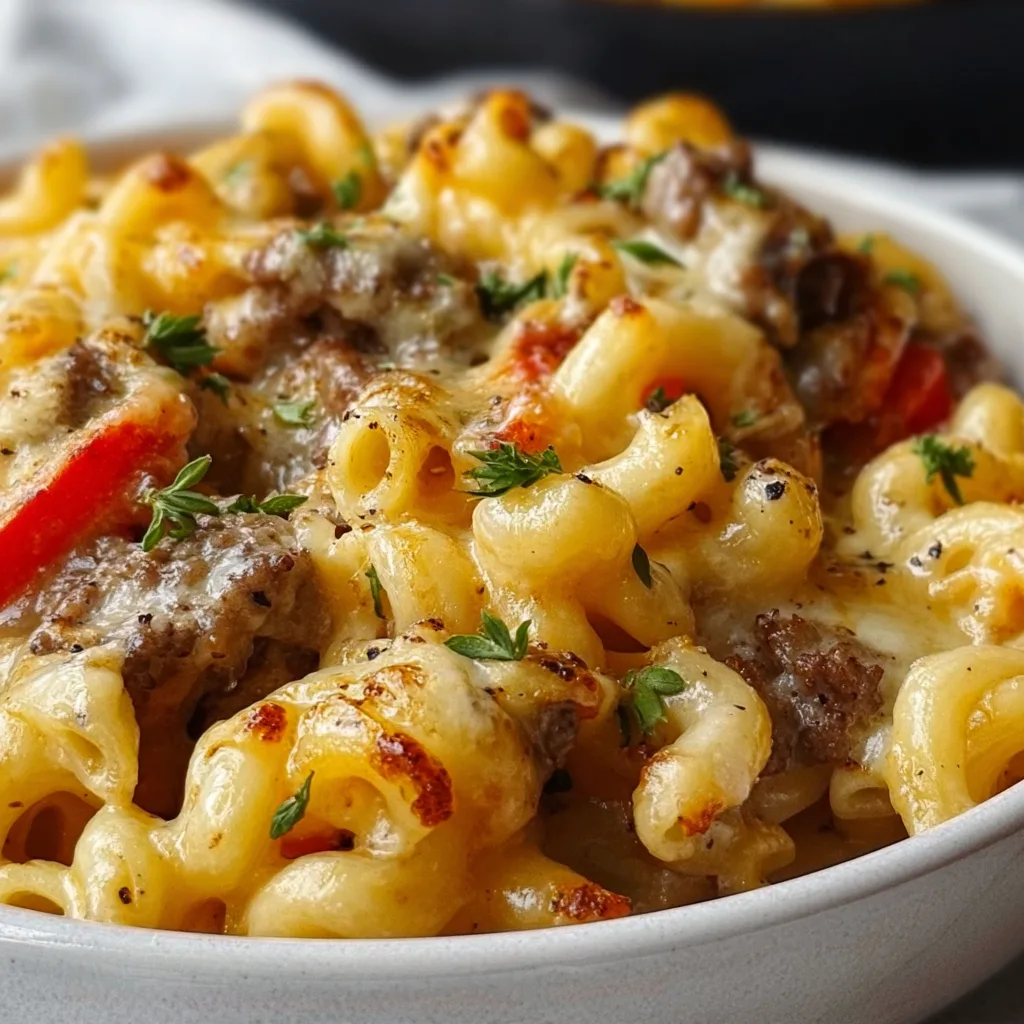
    High-Protein Philly Cheesesteak Mac combines two comfort food classics into one irresistible dish that will satisfy even the heartiest appetites. I created this recipe on a chilly Sunday when my family was craving something substantial yet comforting. The familiar flavors of a Philly cheesesteak sandwich transformed into a protein-packed mac and cheese had everyone scraping their plates clean! With tender steak strips, sautéed peppers and onions, and a velvety cheese sauce coating every pasta bite, this dish delivers bold flavors and impressive nutrition. Perfect for meal prep or a crowd-pleasing dinner, similar to my Creamy Tuscan Marry Me Butter Beans, this dish will become your new go-to comfort food.

    Recipe

    Why You’ll Love This High-Protein Philly Cheesesteak Mac

    Perfect Protein Balance

    This dish isn’t just delicious—it’s a protein powerhouse! Each serving packs approximately 30g of protein from the combination of lean steak, protein-enriched pasta, and cheese. I love how this satisfies my family’s hunger for hours, unlike regular mac and cheese that leaves us snacking an hour later. The protein-to-carb ratio makes this ideal for active families or anyone looking to boost their protein intake without sacrificing flavor. The tender steak pieces distribute perfectly throughout, ensuring every forkful delivers that savory, satisfying bite that makes Philly cheesesteaks so craveable.

    Weeknight-Friendly Comfort Food

    What I adore about this High-Protein Philly Cheesesteak Mac is how it transforms a restaurant favorite into an achievable weeknight dinner. The entire dish comes together in about 30 minutes—perfect for those evenings when you’re craving comfort food but don’t have hours to spend in the kitchen. I’ve streamlined the cooking process so you can prepare the components simultaneously: pasta boiling while you sauté the vegetables and steak. This efficiency doesn’t compromise flavor—the caramelized onions, tender peppers, and seasoned steak create layers of flavor that taste like they’ve been simmering all day.

    Essential Tips & Tricks

    Perfecting Your Protein Components

    The secret to exceptional High-Protein Philly Cheesesteak Mac lies in how you handle the steak. I recommend using ribeye or sirloin for the perfect balance of flavor and tenderness. Slice the meat against the grain into thin strips while it’s still slightly frozen—this makes cutting much easier! Season generously with salt, pepper, and a touch of garlic powder before quickly searing over high heat. Cook the steak to medium-rare initially since it will continue cooking when combined with the hot pasta and sauce. This technique ensures your steak stays tender rather than becoming tough and chewy.

    Creating the Ultimate Cheese Sauce

    The cheese sauce makes or breaks this dish, so don’t rush this step! Start with a roux base (equal parts butter and flour) before gradually whisking in warm milk for a silky-smooth texture. For authentic Philly flavor, I use a combination of provolone and white American cheese, with a small amount of cream cheese to enhance creaminess. Add cheese in small batches, allowing each addition to melt completely before adding more. For extra protein and creaminess, try stirring in 1/4 cup of Greek yogurt once the sauce is off the heat. This creates a tangy depth that complements the savory steak perfectly.

    Serving Ideas & Creative Variations

    Family-Style Presentation Options

    Serve this High-Protein Philly Cheesesteak Mac straight from the skillet for a rustic presentation that keeps the dish hot longer. For special occasions, transfer to a broiler-safe dish, top with extra cheese and breadcrumbs, then broil until golden and bubbly. I love garnishing with fresh parsley or chives for a pop of color and freshness against the rich, creamy background. For a fun twist, serve in individual ramekins with a side salad—this creates restaurant-quality presentation that makes weeknight dinners feel special. The portion control also helps if you’re serving guests with varying appetites.

    Creative Twist Suggestions

    Don’t be afraid to make this recipe your own! For a spicy kick, add jalapeños or red pepper flakes to the vegetable mix. Mushroom lovers can add sautéed cremini or portobello mushrooms for an earthy flavor dimension and extra texture. For a lighter version, substitute half the pasta with roasted cauliflower florets—you’ll still get that satisfying texture with fewer carbs. I’ve even made a breakfast version with leftover High-Protein Philly Cheesesteak Mac formed into patties and topped with a fried egg—absolutely divine for weekend brunch!

    Storage & Troubleshooting Guide

    Meal Prep & Storage Solutions

    This High-Protein Philly Cheesesteak Mac is meal-prep friendly and actually tastes even better the next day as the flavors meld together. Store leftovers in airtight containers in the refrigerator for up to 3 days. When reheating, add a splash of milk and stir frequently to revive the creamy texture—microwaving on 70% power helps prevent the sauce from separating. For longer storage, freeze individual portions for up to 2 months. I like using silicone muffin cups for perfect single-serving portions that defrost quickly for lunch emergencies!

    Fixing Common Issues

    If your sauce breaks or becomes grainy, don’t panic! Lower the heat immediately and whisk in 1-2 tablespoons of warm milk until smoothness returns. For too-thick sauce, gradually add milk until you reach desired consistency. If too thin, simmer gently while stirring constantly. Pasta overcooked? Next time, cook it 1-2 minutes less than package directions since it continues cooking when mixed with hot sauce. Remember that quality ingredients matter—pre-shredded cheese contains anti-caking agents that can make your sauce grainy, so always opt for block cheese that you grate yourself.

    Frequently Asked Questions

    Can I make High-Protein Philly Cheesesteak Mac with chicken instead?

    Absolutely! Substitute thinly sliced chicken breast, using the same seasonings and cooking method. Chicken will cook slightly faster than beef, so adjust your timing accordingly.

    What’s the best pasta shape for this recipe?

    Medium shells, cavatappi, or elbow macaroni work best as they capture the cheese sauce in their ridges and hollows. Protein-enriched varieties add an extra nutrition boost.

    Can this be made vegetarian?

    Yes! Replace steak with portobello mushrooms sliced into strips and sautéed until caramelized. Add a teaspoon of soy sauce for umami flavor.

    How can I increase the protein content even more?

    Mix in 1/2 cup of cottage cheese to the sauce, add white beans, or incorporate unflavored protein powder into the cheese sauce after it’s off the heat.

    Is High-Protein Philly Cheesesteak Mac suitable for meal prep?

    Definitely! It reheats beautifully and flavors develop overnight. Portion into containers and refrigerate up to 3 days or freeze for longer storage.

    Final Thoughts

    This High-Protein Philly Cheesesteak Mac represents comfort food at its finest—familiar flavors transformed into something special that nourishes both body and soul. What I love most is how versatile it is, working equally well for casual family dinners or impressive entertaining. The protein boost makes it satisfying in a way traditional mac and cheese simply isn’t. Don’t forget to share your creations on Pinterest and tag me when you make this dish your own! Your kitchen will be filled with irresistible aromas and happy eaters asking for seconds.

  • Buffalo Chicken Bowls That’ll Blow Your Mind with Flavor!

    Buffalo Chicken Bowls That’ll Blow Your Mind with Flavor!

    Buffalo Chicken Bowls That’ll Blow Your Mind with Flavor!

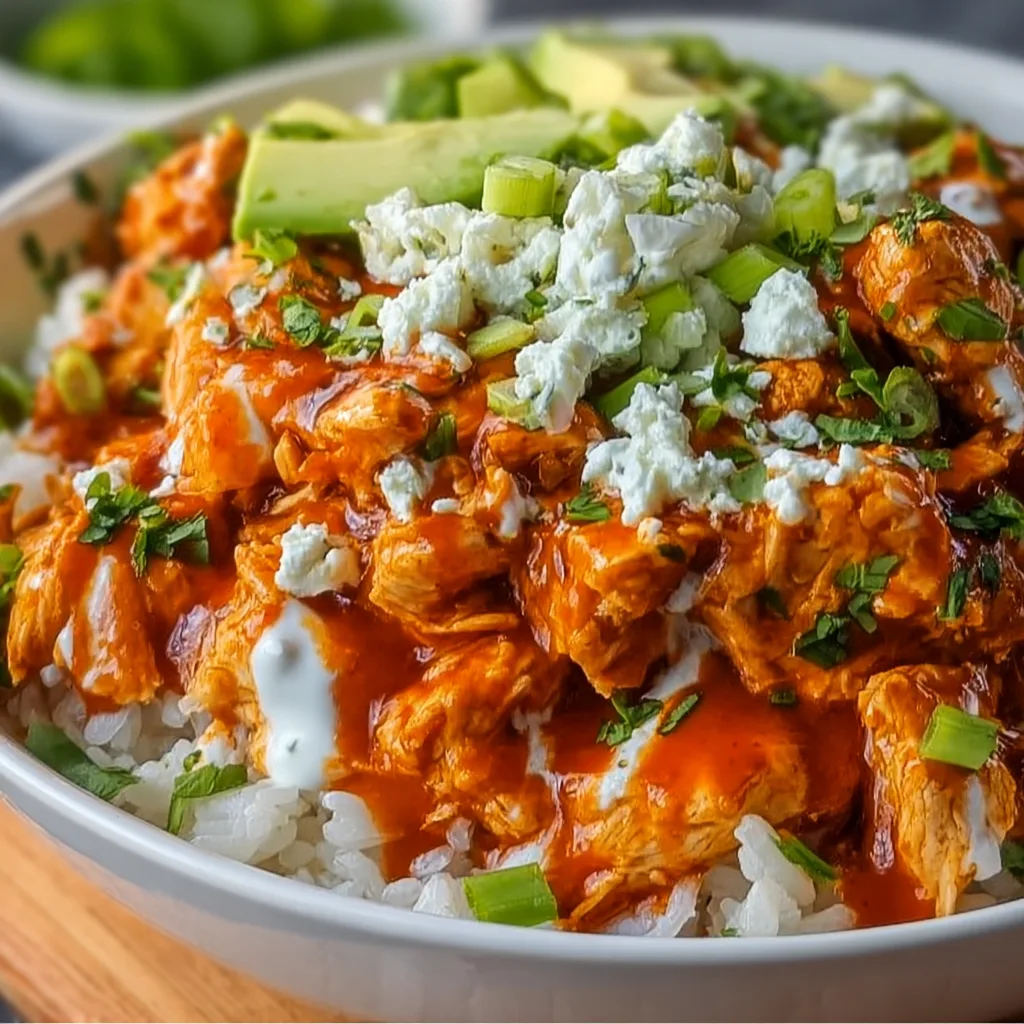
    These Buffalo Chicken Bowls have completely revolutionized my weeknight dinner game! Imagine tender, spicy buffalo chicken nestled on a bed of fluffy rice, topped with creamy blue cheese dressing, crunchy celery, and all your favorite fixings. It’s like enjoying the best buffalo wings experience but in a satisfying, complete meal that comes together in just 30 minutes. I first created these bowls during a particularly hectic week when I needed something that delivered big flavor without a big time commitment. Now they’ve become a regular request in my household, and I bet they’ll become a staple in yours too!

    Recipe

    Why You’ll Love These Buffalo Chicken Bowls

    Perfect Balance of Flavors and Textures

    There’s something magical about that first bite where you get a little bit of everything – the spicy kick from the buffalo sauce-coated chicken, the cooling creaminess of the blue cheese dressing, and the fresh crunch of diced celery and carrots. I love how each component plays its part in creating a bowl that hits all the right notes. The tender chicken soaks up the tangy buffalo sauce beautifully, while the rice provides the perfect neutral base to soak up all those incredible flavors. It’s comfort food that manages to feel indulgent yet surprisingly balanced.

    Quick and Customizable for Any Occasion

    What makes these bowls truly special is how adaptable they are for any situation. Having friends over for game day? Set up a buffalo chicken bowl bar where everyone can build their own creation. Need a quick lunch? Prep the components ahead and assemble in minutes. I’ve made these for casual family dinners and for friends who dropped by unexpectedly, and they’re always a hit. You can easily dial the spice level up or down, swap in quinoa or cauliflower rice for a different base, or even use rotisserie chicken when you’re super pressed for time.

    Essential Tips & Tricks

    Perfecting Your Buffalo Sauce

    The heart and soul of these bowls is the buffalo sauce, and getting it right makes all the difference. I recommend using a high-quality hot sauce (Frank’s RedHot is my go-to) mixed with melted butter for that authentic flavor. For the perfect consistency, whisk together 2 parts hot sauce to 1 part melted butter, then add a tiny splash of honey to balance the heat. Let your chicken simmer in the sauce for at least 2-3 minutes to really absorb the flavors. If you’re feeling adventurous, try making your own buffalo sauce by adding garlic powder and a touch of white vinegar.

    Protein Preparation Methods

    You have several options for preparing your chicken, and each creates a slightly different experience. For maximum flavor, I prefer to dice boneless chicken breasts, season them with salt and pepper, then sear until golden before tossing in buffalo sauce. For a quicker option, shredded rotisserie chicken works beautifully – just warm it through with the sauce. If you’re looking for a healthier approach, try air fryer chicken wings for amazing texture without excess oil. Remember to let your chicken rest for a few minutes before slicing to keep it juicy.

    Serving Ideas & Creative Variations

    Complementary Toppings and Sides

    The beauty of these bowls is in the finishing touches – they’re what elevates this from a simple meal to something special. Beyond the classic blue cheese and celery, I love adding diced avocado for creaminess, pickled red onions for tang, and a sprinkle of green onions for freshness. For an extra layer of texture, try adding crispy tortilla strips or crushed pita chips on top. If you’re serving these for a gathering, consider offering roasted red pepper hummus as an additional topping – the smoky flavor pairs beautifully with the buffalo chicken.

    Exciting Buffalo Bowl Variations

    Once you master the basic buffalo chicken bowl, the possibilities are endless! My family loves a buffalo cauliflower version for meatless Monday – just roast cauliflower florets and toss in the same buffalo sauce. For a low-carb option, serve over a bed of sautéed cabbage or zucchini noodles instead of rice. You can also transform this into a buffalo chicken wrap by rolling all the ingredients in a large tortilla. My personal favorite variation is a breakfast bowl with buffalo chicken, scrambled eggs, and avocado – it’s unexpectedly delicious and perfect for using up leftover chicken.

    Storage & Troubleshooting Guide

    Proper Storage for Maximum Freshness

    For meal prep enthusiasts, these bowls are a game-changer when stored correctly. Keep components separate until ready to eat – store the buffalo chicken in an airtight container for up to 3 days, rice for up to 5 days, and prepared toppings for 2-3 days. I recommend waiting to add the blue cheese dressing until just before serving to maintain the best texture. When reheating the chicken, add a splash of water or extra buffalo sauce to prevent it from drying out. For the freshest experience, store crisp elements like diced celery or tortilla strips separately from the wet ingredients.

    Solving Common Buffalo Bowl Challenges

    Even the best recipes can face hiccups, but these are easily fixed! If your buffalo sauce separates or looks oily, simply whisk it vigorously or blend it briefly to re-emulsify. Too spicy? Add a dollop of ranch dressing or sour cream to cool things down. If your chicken turns out dry, try simmering it in a bit more sauce with a splash of chicken broth. For meal prep, rice can sometimes dry out – I solve this by adding a tablespoon of water before reheating and covering with a damp paper towel. Remember that buffalo sauce will intensify in flavor over time, so you might want to go milder if preparing these bowls in advance.

    Frequently Asked Questions

    Can I make Buffalo Chicken Bowls ahead of time?

    Absolutely! Prepare the chicken and rice up to 3 days ahead. Store components separately and assemble just before serving for the freshest experience. Reheat the chicken with a splash of extra sauce to keep it moist.

    What’s the best substitute for blue cheese if I don’t like it?

    Ranch dressing makes an excellent substitute! You can also try a creamy avocado dressing or a tangy yogurt-based sauce if you prefer something milder but still creamy.

    How can I make these bowls lower in carbs?

    Swap the rice for cauliflower rice, zucchini noodles, or a bed of mixed greens. You’ll still get all the delicious buffalo chicken flavors with significantly fewer carbs.

    Can I use a different protein instead of chicken?

    Definitely! Try buffalo shrimp for a quick-cooking option, or use firm tofu for a vegetarian version. Both absorb the buffalo sauce beautifully and provide different but delicious textures.

    What’s the key to keeping Buffalo Chicken Bowls from getting too messy?

    Layer strategically! Start with rice, then chicken, followed by drier toppings. Add sauces and dressings just before eating, and consider serving wet components like buffalo sauce in a small side container.

    Final Thoughts

    These Buffalo Chicken Bowls represent everything I love about modern comfort food – bold flavors, endless customization options, and the perfect balance of indulgence and wholesome ingredients. They’ve saved countless busy weeknights in my home while never sacrificing on taste or satisfaction. Whether you’re meal prepping for the week ahead or feeding a hungry crowd watching the big game, these bowls deliver that crave-worthy buffalo chicken experience in a complete, nourishing meal. Don’t forget to check out more delicious recipes on Pinterest for more inspiration!

  • Baked Italian Grinder Sandwiches That Will Blow Your Taste Buds Away!

    Baked Italian Grinder Sandwiches That Will Blow Your Taste Buds Away!

    Baked Italian Grinder Sandwiches That Will Blow Your Taste Buds Away!

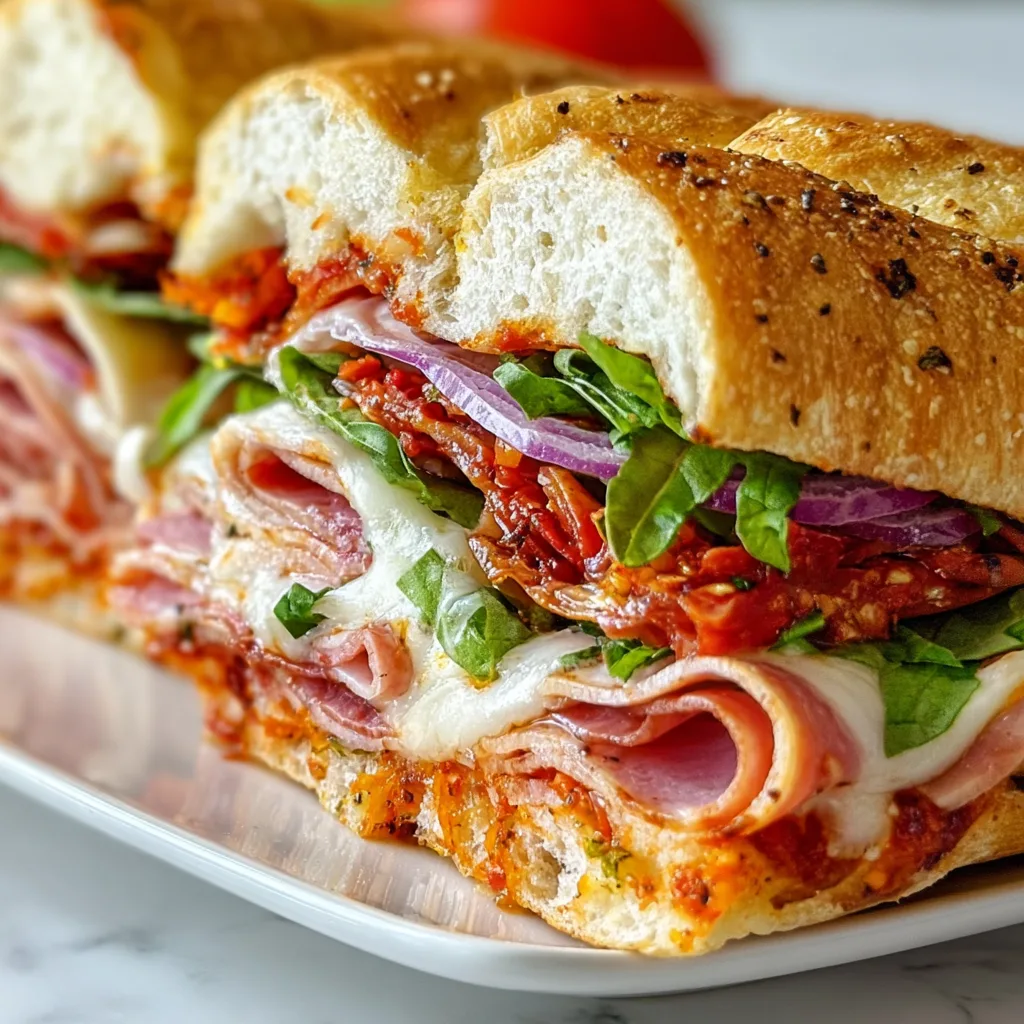
    These Baked Italian Grinder Sandwiches have completely transformed my weeknight dinner routine! Imagine layers of savory Italian meats, melty provolone, and tangy pepperoncini all nestled into crusty bread and baked until golden perfection. The first time I made these for my family, the kitchen filled with an aroma that had everyone hovering around the oven like hungry little bees. There’s something magical about how the flavors meld together when baked – it’s like a pizza and sandwich had a delicious baby, and I’m here for it!

    Recipe

    Why You’ll Love These Baked Italian Grinder Sandwiches

    A Time-Saving Crowd Pleaser

    These sandwiches are my go-to when I need to feed a hungry crowd without spending hours in the kitchen. The assembly-line approach makes preparation a breeze – just layer, wrap, and bake! I’ve served these at everything from game day gatherings to casual Friday night dinners, and they disappear faster than I can say “seconds, please!” The beauty lies in their versatility; you can prepare them ahead of time and simply pop them in the oven when guests arrive. The heavenly aroma that fills your home is just an added bonus!

    Perfect Balance of Flavors and Textures

    What makes these Baked Italian Grinder Sandwiches truly special is the perfect harmony of flavors and textures. The contrast between the crispy exterior and soft, warm interior creates a sensory experience that’s utterly satisfying. Each bite delivers a medley of savory meats, creamy cheese, and that signature tanginess from the Italian dressing and pepperoncini. I love how the heat from the oven transforms ordinary cold cuts into something extraordinary – the edges get slightly crisp while the center remains tender and juicy.

    Essential Tips & Tricks

    Bread Selection Matters

    Choosing the right bread is crucial for creating the perfect foundation for your Baked Italian Grinder Sandwiches. I learned this the hard way after using a too-soft variety that turned soggy! Opt for crusty Italian bread, ciabatta, or even a sturdy French baguette that can withstand the moisture from the fillings and dressing. For an extra touch of flavor, brush the inside with olive oil and toast it lightly before adding your ingredients. This creates a protective barrier that helps maintain that delightful textural contrast between crispy exterior and soft interior.

    Layer Like a Pro

    The secret to exceptional Baked Italian Grinder Sandwiches lies in the strategic layering of ingredients. Start with a base layer of provolone, which acts as a moisture barrier for the bread. Then alternate your meats – I typically use a combination of salami, ham, and pepperoni for authentic Italian flavor profiles. Add a second cheese layer before topping with pepperoncini, roasted red peppers, and a drizzle of Italian dressing. This method ensures that every bite contains the perfect balance of ingredients and prevents any single flavor from overwhelming the others.

    Serving Ideas & Creative Variations

    Perfect Pairings

    Elevate your Baked Italian Grinder Sandwiches with thoughtfully chosen side dishes that complement their robust flavors. I love serving these sandwiches with a crisp antipasto salad – the vinegary brightness cuts through the richness perfectly. For a heartier meal, pair with roasted vegetables or a simple tomato soup. Don’t forget the beverage pairing! A light Italian red wine like Chianti or a crisp lager beer makes for an incredible flavor combination that enhances the sandwich’s Mediterranean profile.

    Exciting Flavor Twists

    While the classic version is amazing, these sandwiches are incredibly adaptable to different flavor profiles. Create a Mediterranean twist by swapping the Italian meats for grilled chicken, adding feta cheese, olives, and a drizzle of tzatziki. For a spicy variation, incorporate calabrian chili paste into your dressing and add pickled jalapeños. My family’s current obsession is the breakfast grinder – with scrambled eggs, crispy bacon, and melted cheddar. The possibilities are endless, and each variation brings its own unique charm to the table!

    Storage & Troubleshooting Guide

    Make-Ahead and Leftovers

    These Baked Italian Grinder Sandwiches are perfect for meal prepping and storing for later enjoyment. Assemble them completely, then wrap individually in aluminum foil and refrigerate for up to 24 hours before baking. For leftovers, store in an airtight container for up to 2 days. The best reheating method is in a 300°F oven for about 10 minutes – this restores that wonderful crispy exterior. Avoid microwaving if possible, as it tends to make the bread soggy and ruins that perfect texture contrast we work so hard to achieve!

    Preventing Common Pitfalls

    The most common issue with Baked Italian Grinder Sandwiches is the dreaded soggy bottom! To prevent this, create a protective barrier by spreading a thin layer of butter or mayo on the inside of the bread before adding other ingredients. Another tip is to place moisture-rich ingredients like tomatoes in the center rather than directly against the bread. If your sandwiches are browning too quickly in the oven, simply tent them with foil for the first half of baking, then remove to allow for that perfect golden finish during the final minutes.

    Frequently Asked Questions

    Can I make Baked Italian Grinder Sandwiches vegetarian?

    Absolutely! Replace meats with grilled vegetables, portobello mushrooms, or plant-based Italian sausage. Add extra cheese varieties like fontina or mozzarella for richness, and don’t skimp on the pepperoncini for that signature tang.

    What’s the best temperature for baking Italian Grinder Sandwiches?

    Bake at 375°F for 12-15 minutes. This temperature allows the cheese to melt perfectly while giving the bread a golden exterior without burning. For extra crispiness, finish with 2 minutes under the broiler.

    Can I freeze these sandwiches before baking?

    Yes! Assemble the sandwiches, wrap individually in plastic wrap, then foil, and freeze for up to 1 month. Thaw in the refrigerator overnight before baking, adding 5-7 extra minutes to the baking time.

    How do I keep the bread from getting soggy?

    Toast the bread lightly before assembly and create a fat barrier with mayo, butter, or a layer of cheese directly against the bread. Drain wet ingredients like pepperoncini thoroughly before adding.

    What makes a sandwich officially a “grinder”?

    A grinder is traditionally a hot submarine sandwich originating from New England. Baked Italian Grinder Sandwiches feature Italian meats and cheeses on crusty bread that’s baked until hot and crispy, distinguishing them from cold subs.

    Final Thoughts

    These Baked Italian Grinder Sandwiches have earned their place in my regular recipe rotation for good reason – they’re the perfect blend of convenience and incredible flavor. There’s something magical about pulling that foil-wrapped package from the oven, unwrapping it to release a cloud of fragrant steam, and biting into those perfectly melded layers. I encourage you to make these your own by experimenting with different ingredients while keeping the essential technique intact. Don’t forget to share your creations on Pinterest – I’d love to see your personal spin on this family favorite!

  • Soft Baked Cheesy Pretzel Dogs: Irresistibly Gooey Snack Craze

    Soft Baked Cheesy Pretzel Dogs: Irresistibly Gooey Snack Craze

    Soft Baked Cheesy Pretzel Dogs: Irresistibly Gooey Snack Craze

    Soft Baked Cheesy Pretzel Dogs have completely transformed my game day snack rotation. There’s something magical about biting into that pillowy pretzel dough wrapped around a juicy hot dog, with melted cheese oozing from the center. I first made these for my nephew’s birthday party, and they disappeared faster than I could set them on the table! The combination of soft, chewy pretzel exterior with savory filling creates the ultimate comfort food that’s both nostalgic and utterly satisfying. Whether you’re hosting a movie night or need a crowd-pleaser for your next gathering, these cheesy pretzel dogs are guaranteed to impress.

    Recipe

    Why You’ll Love These Soft Baked Cheesy Pretzel Dogs

    Perfect Combination of Textures and Flavors

    The contrast of textures in these pretzel dogs is what makes them truly special. The exterior has that distinctive pretzel chew with a gorgeous amber sheen, while the inside remains pillow-soft. I love how the cheese melts into the hot dog, creating pockets of gooey goodness in every bite. The subtle tang from the baking soda bath gives these that authentic pretzel flavor that pairs perfectly with the savory hot dog. Plus, that sprinkling of coarse salt on top creates little bursts of flavor that elevate the entire experience. Trust me, the flavor combination is absolutely addictive!

    Simple Ingredients with Maximum Impact

    What I adore about these Soft Baked Cheesy Pretzel Dogs is how they transform basic pantry staples into something extraordinary. You’ll need just flour, yeast, water, butter, sugar, and salt for the dough, plus hot dogs and your favorite cheese for stuffing. I typically use cheddar, but pepper jack adds a lovely kick if you’re feeling adventurous! The magic happens in the baking soda bath, which gives the pretzel its distinctive flavor and beautiful brown crust. These humble ingredients work together to create something far greater than the sum of their parts—a truly impressive snack that looks like it came from a specialty bakery!

    Essential Tips & Tricks

    Mastering the Perfect Pretzel Dough

    The key to exceptional Soft Baked Cheesy Pretzel Dogs lies in the dough consistency. You want it slightly tacky but not sticky—it should feel smooth and elastic when properly kneaded. I’ve found that letting the dough rise until it’s doubled in size (about 45-60 minutes) creates the perfect texture. Don’t rush this step! If your kitchen is cold, place the dough in a turned-off oven with just the light on. The gentle warmth helps the yeast work its magic. When rolling out the dough strips, aim for even thickness to ensure consistent cooking. This attention to detail makes all the difference in achieving that perfect pretzel texture.

    The Secret to the Perfect Baking Soda Bath

    The baking soda bath is what transforms ordinary bread dough into true pretzel dough, giving it that distinctive flavor and beautiful brown exterior. Use a large, wide pot so you can easily maneuver the stuffed dogs. The water should be at a gentle simmer, not a rolling boil, which could damage your carefully wrapped dogs. Dip each pretzel dog for just 20-30 seconds—any longer and they’ll become too alkaline. After the bath, immediately place them on a parchment-lined baking sheet and add your toppings while the surface is still wet so they’ll stick. This quick dip is what gives you that authentic pretzel shop quality!

    Serving Ideas & Creative Variations

    Dipping Sauces That Elevate the Experience

    Nothing complements Soft Baked Cheesy Pretzel Dogs like an array of flavorful dips. My go-to combination includes honey mustard for tanginess, beer cheese for richness, and spicy ketchup for a kick. For something different, try a jalapeño ranch or buffalo sauce if you enjoy heat. I recently served these at a family gathering with a warm queso dip that had everyone asking for the recipe! The contrast between the warm, soft pretzel and cool, creamy dips creates a delightful sensory experience. You could even create a dipping station with small bowls of various sauces for guests to mix and match—it’s always a hit at parties.

    Creative Filling Variations to Try

    While the classic cheese-stuffed hot dog is delicious, don’t be afraid to experiment with fillings! Try wrapping the pretzel dough around bratwurst with sauerkraut for a German-inspired twist, or use chicken sausage with mozzarella and sun-dried tomatoes for an Italian flair. Vegetarian guests will love plant-based sausages stuffed with dairy-free cheese. For breakfast versions, wrap the dough around cooked breakfast sausage links with scrambled eggs and cheese. My personal favorite variation uses pepper jack cheese and sliced jalapeños for a spicy kick that’s absolutely irresistible. The possibilities are endless!

    Storage & Troubleshooting Guide

    Keeping Them Fresh and Reheating Properly

    To maintain the perfect texture, store any leftover Soft Baked Cheesy Pretzel Dogs in an airtight container in the refrigerator for up to 3 days. Avoid plastic wrap directly on the pretzels as it can make them soggy. When reheating, the oven is your best friend—preheat to 350°F and warm them for about 5-7 minutes until heated through. This restores that lovely contrast between the crusty exterior and soft interior. For a quick option, 20-30 seconds in the microwave works, though you’ll lose some crispness. I like to spritz them with a tiny bit of water before reheating to help restore moisture without making them soggy.

    Troubleshooting Common Issues

    If your pretzel dogs aren’t browning properly, the likely culprit is an ineffective baking soda bath. Make sure your solution is concentrated enough (⅓ cup baking soda to 5 cups water) and that the water is simmering. Pale pretzels might also result from insufficient egg wash—brush generously before baking. If the dough is cracking when you wrap the hot dogs, it’s likely too dry; add a sprinkle of water and knead briefly to incorporate. For dogs that unravel during baking, ensure you’re pinching the seams firmly and placing them seam-side down on the baking sheet. With these simple fixes, your pretzel dogs will come out perfectly every time!

    Frequently Asked Questions

    Can I make Soft Baked Cheesy Pretzel Dogs ahead of time?

    Yes! Prepare them up to the shaping stage, then refrigerate overnight. Bring to room temperature for 30 minutes, give them the baking soda bath, and bake fresh when needed. They’ll taste just as delicious!

    What’s the best cheese for stuffing pretzel dogs?

    Cheddar and American melt beautifully, while pepper jack adds spice. For best results, use block cheese cut into thin strips rather than pre-shredded, which contains anti-caking agents that affect melting.

    Can I freeze these pretzel dogs?

    Absolutely! Cool completely, wrap individually in plastic wrap, then foil, and freeze for up to 2 months. Thaw in the refrigerator overnight and reheat in a 350°F oven for 10-15 minutes.

    Why did my pretzel dogs split open during baking?

    This usually happens when the seam isn’t sealed properly. Make sure to pinch the edges firmly and place seam-side down on the baking sheet. Also, don’t overstuff with cheese.

    What if I don’t have a stand mixer for the dough?

    No problem! You can mix and knead the dough by hand. It takes about 8-10 minutes of kneading to develop the gluten properly for that perfect chewy pretzel texture.

    Final Thoughts

    These Soft Baked Cheesy Pretzel Dogs have become my signature party food for good reason—they consistently delight guests of all ages and disappear within minutes. The combination of soft pretzel exterior, juicy hot dog, and melty cheese creates a truly irresistible bite that’s both nostalgic and sophisticated. Whether you’re making them for game day, movie night, or just because it’s Tuesday, I promise they’ll bring smiles all around. Don’t forget to check out more crowd-pleasing recipes on Pinterest for your next gathering!

  • Spinach Artichoke Tomato Casserole: Creamy, Comforting & Irresistible!

    Spinach Artichoke Tomato Casserole: Creamy, Comforting & Irresistible!

    Spinach Artichoke Tomato Casserole: Creamy, Comforting & Irresistible!

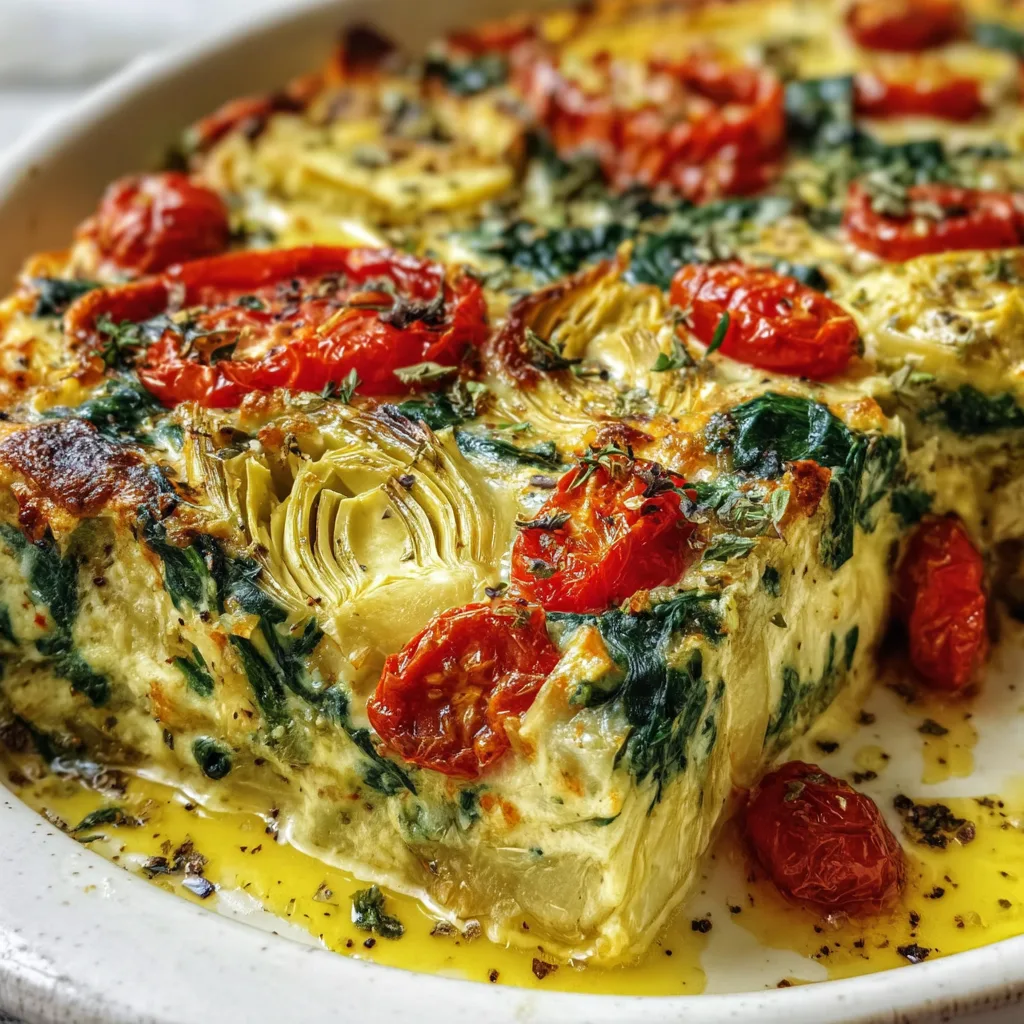
    Spinach Artichoke Tomato Casserole combines all my favorite ingredients into one bubbling, cheese-topped dish that never fails to bring smiles around my dinner table. The first time I made this for my family, my daughter declared it “the best thing that’s ever come out of our oven” – and honestly, I couldn’t disagree! There’s something magical about how the tangy artichokes, vibrant spinach, and sweet tomatoes meld together under a blanket of melted cheese. It’s comfort food that somehow feels indulgent and wholesome at the same time, perfect for those evenings when you need a warm hug in food form.

    Recipe

    Why You’ll Love This Spinach Artichoke Tomato Casserole

    A Perfect Balance of Flavors and Textures

    This Spinach Artichoke Tomato Casserole is a flavor powerhouse that hits all the right notes. The earthy spinach provides a nutritious base, while artichoke hearts add a subtle tanginess that perfectly complements the sweet, juicy tomatoes. I love how the garlic and herbs infuse throughout, creating aromatic depth in every bite. The textural contrast is equally impressive – from the tender vegetables to the creamy cheese sauce and that irresistible golden-brown crust on top. When you break through that cheesy layer with your fork, the steam that rises carries the most mouthwatering scent you can imagine.

    Make-Ahead Convenience for Busy Days

    One of my favorite things about this casserole is its incredible versatility as a meal prep champion. I often assemble it on Sunday afternoons, refrigerate it, and then bake it fresh on Monday evening when I’m too tired to cook from scratch. The flavors actually develop and deepen overnight, making it even more delicious! You can also freeze it unbaked for up to three months – perfect for those chaotic weeks when cooking feels impossible. Just thaw overnight in the refrigerator and add about 10 minutes to the baking time. My family never guesses it wasn’t made from scratch that day!

    Essential Tips & Tricks

    Ingredient Selection for Maximum Flavor

    Choosing the right ingredients makes all the difference in your Spinach Artichoke Tomato Casserole. Always use fresh spinach when possible – it provides better texture and flavor than frozen (though frozen works in a pinch if you thoroughly drain it). For artichokes, marinated varieties add an extra flavor dimension, but water-packed ones let the other flavors shine. When it comes to tomatoes, I’ve found that Roma or San Marzano varieties offer the perfect balance of sweetness and acidity without making the casserole watery. For cheese, a combination of mozzarella, Parmesan, and a touch of creamy goat cheese creates the most luxurious texture.

    Perfecting Your Casserole Technique

    The secret to an exceptional Spinach Artichoke Tomato Casserole lies in the layering technique. Start by thoroughly drying your spinach after washing – excess moisture is the enemy of a perfect casserole. When assembling, create distinct layers rather than mixing everything together; this creates beautiful sections when you serve it. Another game-changing tip: let your casserole rest for 10-15 minutes after baking. This allows the cheese to set slightly and makes serving neater. For that picture-perfect golden top, switch to broil for the final 2-3 minutes, but watch carefully to prevent burning!

    Serving Ideas & Creative Variations

    Perfect Pairings for a Complete Meal

    This Spinach Artichoke Tomato Casserole shines as both a main dish and a show-stopping side. For a complete dinner, I love serving it alongside a simple grilled chicken breast or a piece of baked salmon. A light, lemony arugula salad provides the perfect fresh contrast to the rich casserole. When entertaining, I place the bubbling casserole in the center of the table with crusty garlic bread for dipping into that cheesy goodness. The vibrant colors make for a beautiful presentation that always impresses guests before they even take their first delicious bite.

    Customization Ideas for Every Diet

    One of the best things about this versatile casserole is how easily it adapts to different dietary needs. For a protein boost, add shredded rotisserie chicken, Italian sausage, or white beans. Make it vegan by substituting the cheese with cashew cream and nutritional yeast – it’s surprisingly delicious! For a low-carb version, mix in riced cauliflower and skip any breadcrumb topping. My gluten-free friends appreciate that this dish is naturally wheat-free. You can also add Mediterranean flair with olives, capers, and feta, or give it a Mexican twist with black beans, corn, and pepper jack cheese.

    Storage & Troubleshooting Guide

    Keeping Leftovers Fresh and Delicious

    Properly storing your Spinach Artichoke Tomato Casserole ensures you’ll enjoy it just as much the second time around. Once cooled, cover leftovers tightly with plastic wrap or transfer to airtight containers and refrigerate for up to 4 days. The flavors actually continue to develop, making day-two casserole sometimes even better! To reheat, cover with foil and warm in a 325°F oven for 15-20 minutes until heated through. For individual portions, the microwave works well – just cover with a damp paper towel to prevent drying. Freezing portions in single-serving containers makes for easy future lunches.

    Solving Common Casserole Problems

    Even experienced cooks occasionally encounter issues with casseroles. If your Spinach Artichoke Tomato Casserole turns out watery, the culprit is usually excess moisture from the vegetables. Next time, thoroughly drain the artichokes and squeeze dry the spinach before assembling. If your casserole seems too dry, try adding a splash of cream or an extra dollop of sour cream to the mixture. Cheese not melting properly? Make sure you’re using freshly grated cheese rather than pre-shredded (which contains anti-caking agents). And if your top isn’t browning nicely, a quick finish under the broiler works wonders.

    Frequently Asked Questions

    Can I use frozen spinach in my Spinach Artichoke Tomato Casserole?

    Yes! Thaw completely and squeeze out all excess moisture using a clean kitchen towel. One 10-oz package of frozen spinach equals about 1½ pounds of fresh spinach.

    How do I prevent my casserole from becoming watery?

    Thoroughly drain all vegetables, especially artichokes. Pat tomato slices dry with paper towels before adding, and don’t skip squeezing excess moisture from spinach.

    Can I make this casserole ahead of time?

    Absolutely! Assemble up to 24 hours ahead and refrigerate. Add 5-10 minutes to baking time when cooking from cold.

    What cheeses work best in this recipe?

    A combination of mozzarella for stretch, Parmesan for flavor, and cream cheese or goat cheese for creaminess creates the perfect balance.

    Is Spinach Artichoke Tomato Casserole freezer-friendly?

    Yes! Freeze unbaked for up to 3 months. Thaw overnight in refrigerator before baking, adding 10-15 minutes to the cooking time.

    Final Thoughts

    This Spinach Artichoke Tomato Casserole has become my go-to dish for everything from family dinners to potluck contributions. There’s something deeply satisfying about creating a dish that’s both nutritious and crave-worthy. The way the flavors meld together creates something far greater than the sum of its parts. I hope you’ll give this recipe a try and experience the joy of watching loved ones go back for seconds! Don’t forget to check out more of my favorite casserole recipes on Pinterest for endless inspiration.

  • Hot Honey Chicken Cutlets That Will Blow Your Mind!

    Hot Honey Chicken Cutlets That Will Blow Your Mind!

    Hot Honey Chicken Cutlets That Will Blow Your Mind!

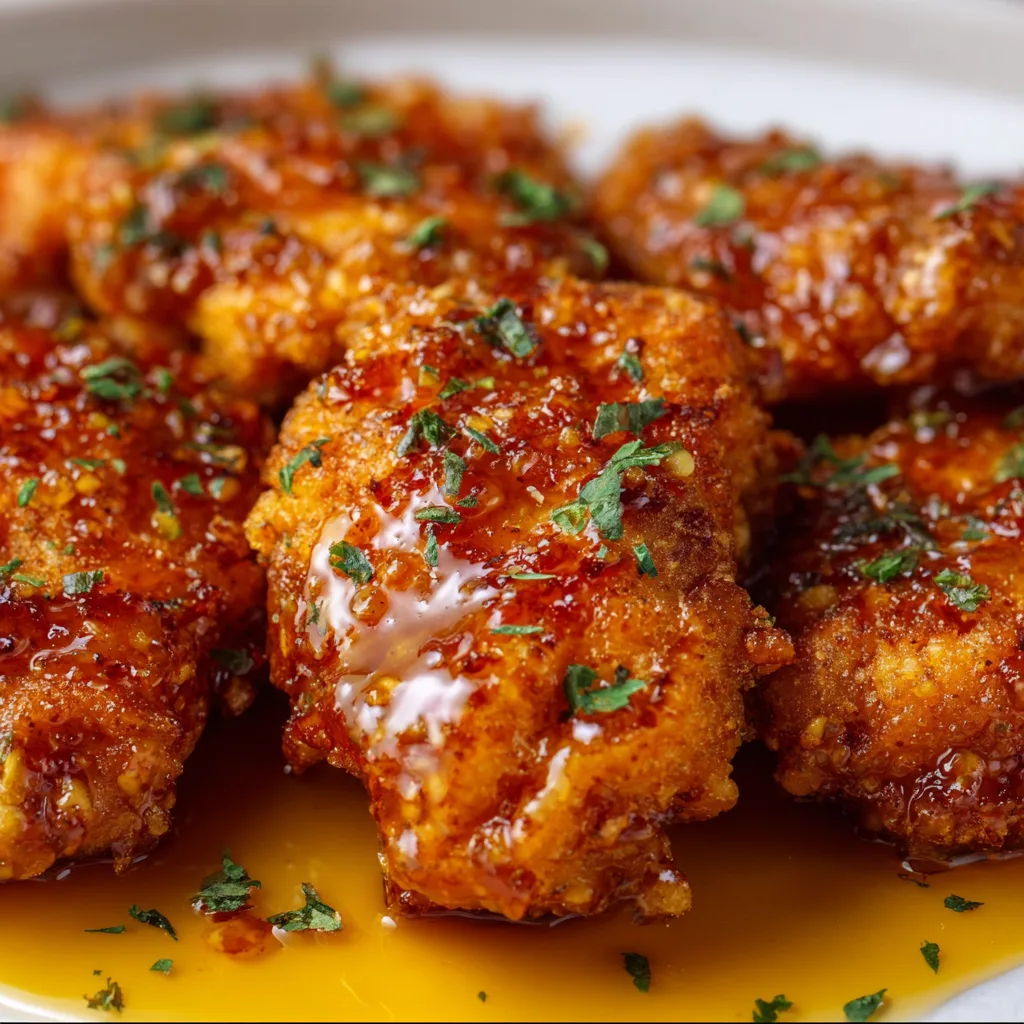
    Hot honey chicken cutlets have become my absolute obsession lately. That perfect balance of crispy exterior giving way to juicy, tender meat, all glazed with sweet-spicy honey that creates the most addictive sticky finish. I’ve been perfecting this recipe for months, and I’m thrilled to finally share it with you! The combination of golden, crunchy coating and that rich honey drizzle creates a flavor explosion that’s both comforting and exciting. Trust me, once you try these crispy hot honey feta chicken cutlets, you’ll be making them on repeat.

    Recipe

    Why You’ll Love These Hot Honey Chicken Cutlets

    Perfect Balance of Sweet & Heat

    There’s something magical about the sweet-heat combination that makes these cutlets irresistible. The honey creates this gorgeous glossy coating that caramelizes slightly when it hits the hot chicken. I love watching my family’s faces light up with that first bite—the initial sweetness followed by a gentle kick of heat that builds perfectly. The beauty is you can adjust the spice level to your preference. Last weekend, I made these for my sister who can’t handle much heat, and even she was reaching for seconds!

    Weeknight-Friendly Preparation

    These hot honey chicken cutlets have become my go-to when I need a quick impressive dinner. The entire process takes under 30 minutes, making it perfect for busy evenings when you still want something special. I’ve streamlined the breading process to minimize mess (a three-bowl setup is your friend here!). The cutlets cook quickly since they’re thin, and the honey sauce comes together in seconds. I’ve lost count of how many Monday night dinners these cutlets have rescued when I’m tired but still craving something delicious.

    Essential Tips & Tricks

    Perfecting the Crispy Coating

    The secret to perfectly crispy hot honey chicken cutlets lies in the double-dredge technique. Start with thin, evenly pounded cutlets—this ensures even cooking and maximum crispiness. Pat them completely dry before dredging to help the coating stick. For extra crunch, I mix panko with regular breadcrumbs and add a touch of cornstarch to my flour mixture. Another game-changer? Let the breaded cutlets rest for 5 minutes before frying. This gives the coating time to adhere properly and results in that satisfying crunch that pairs so beautifully with the sticky honey sauce.

    Mastering the Hot Honey Drizzle

    The honey-to-heat ratio is crucial for balancing these cutlets perfectly. I prefer using good-quality local honey for its complex flavor notes. For the heat element, I’ve found that a combination of red pepper flakes and a touch of cayenne gives the most balanced result. The secret is infusing the honey—warm it gently with your spices and a splash of apple cider vinegar for brightness. Let it steep while you cook the chicken. This method creates a more complex flavor than simply mixing cold honey with hot sauce. For a delicious variation, check out my air fryer parmesan crusted chicken wings for another crispy chicken option.

    Serving Ideas & Creative Variations

    Perfect Pairings for a Complete Meal

    These hot honey chicken cutlets shine when paired with bright, fresh sides that complement their sweet-spicy profile. My family’s favorite combination is serving them over a crisp arugula salad dressed with lemon vinaigrette—the peppery greens and acidic dressing cut through the richness perfectly. For a heartier option, they’re amazing with creamy mashed potatoes or buttery rice that soaks up the extra honey drizzle. On summer evenings, I love serving them alongside charred corn on the cob and a simple cucumber salad. The contrasting temperatures and textures create a truly satisfying meal experience.

    Exciting Flavor Twists

    Don’t be afraid to play with the flavor profile of your hot honey chicken cutlets! My latest obsession is adding a tablespoon of bourbon to the honey mixture for a subtle smoky sweetness. For an Asian-inspired version, incorporate ginger, garlic, and a splash of soy sauce into your honey drizzle. Herb lovers should try adding fresh thyme or rosemary to the breadcrumb mixture. For a Mediterranean twist, top the finished cutlets with crumbled feta, fresh mint, and a squeeze of lemon. Looking for more creative chicken ideas? Try my Mediterranean chicken orzo for another flavorful option.

    Storage & Troubleshooting Guide

    Keeping Leftovers Fresh & Crispy

    While these hot honey chicken cutlets are best enjoyed fresh, proper storage can help maintain their delicious texture. If you have leftovers, let them cool completely before refrigerating. Store them in a single layer in an airtight container with paper towels between layers to absorb moisture. When reheating, avoid the microwave which will make them soggy. Instead, place them on a wire rack over a baking sheet and warm in a 350°F oven for 7-10 minutes. For maximum crispiness, give them a quick spritz of oil before reheating. I often make extra cutlets specifically for lunch the next day!

    Solving Common Cooking Challenges

    The most common issue with hot honey chicken cutlets is coating that falls off during cooking. To prevent this, ensure your oil is hot enough before adding the chicken (around 350°F is perfect). Another trick is to avoid overcrowding the pan, which lowers the oil temperature and creates steam. If your honey sauce is too thick, add a teaspoon of warm water to thin it. Too thin? Simmer it for an extra minute to reduce. For cutlets that brown too quickly on the outside before cooking through, lower your heat slightly and finish them in a 350°F oven for 5 minutes.

    Frequently Asked Questions

    Can I make hot honey chicken cutlets in an air fryer?

    Absolutely! Spray the breaded cutlets with cooking oil and air fry at 375°F for 7-8 minutes per side. The coating won’t be quite as golden, but they’ll still be delicious with the honey drizzle.

    How spicy are these chicken cutlets?

    The heat level is customizable. As written, they have a medium kick that builds gradually. Reduce the red pepper flakes by half for milder cutlets, or double them for a fiery version.

    Can I use chicken thighs instead of breasts?

    Yes! Pound boneless, skinless thighs to an even thickness. They’ll be even juicier than breasts but may need an extra minute or two of cooking time.

    What’s the best oil for frying these cutlets?

    Vegetable, canola, or peanut oil work best due to their high smoke points. Avoid olive oil, which can impart a strong flavor and smokes at lower temperatures.

    Can I make the hot honey sauce ahead of time?

    Definitely! The hot honey sauce keeps well in the refrigerator for up to two weeks. Just warm it gently before drizzling over your freshly cooked chicken cutlets.

    Final Thoughts

    These hot honey chicken cutlets have earned their place as a staple in my recipe collection. They strike that perfect balance between everyday accessible and special enough for company. The contrast of crispy exterior, juicy chicken, and that sweet-spicy honey glaze creates a memorable dish that’s both comforting and exciting. I hope you’ll give them a try and experience the magic for yourself! Don’t forget to check out more delicious recipes on Pinterest for endless culinary inspiration.

  • Mango Chicken Curry Recipe: Irresistibly Sweet & Spicy Delight!

    Mango Chicken Curry Recipe: Irresistibly Sweet & Spicy Delight!

    Mango Chicken Curry Recipe: Irresistibly Sweet & Spicy Delight!

    Mango Chicken Curry combines the sweet tanginess of ripe mangoes with aromatic spices and tender chicken for a dish that’s both comforting and exotic. The first time I made this curry, my kitchen filled with the most intoxicating scent—cardamom, ginger, and sweet mango melding together in perfect harmony. I’ve been tweaking this recipe for years, and I’m thrilled to finally share my perfected version with you! This vibrant curry strikes the perfect balance between creamy, spicy, and sweet, making it an absolute showstopper for both weeknight dinners and special occasions.

    Recipe

    Why You’ll Love This Mango Chicken Curry

    A Symphony of Flavors and Textures

    The magic of this Mango Chicken Curry lies in its incredible depth of flavor. The natural sweetness from ripe mangoes perfectly balances the warming spices, while the coconut milk adds a velvety richness that makes each bite utterly satisfying. I love how the chicken becomes incredibly tender as it simmers in the sauce, absorbing all those gorgeous flavors. The contrast between the soft chicken, juicy mango chunks, and the silky curry sauce creates a textural experience that keeps you coming back for more. It’s comfort food with a tropical twist!

    Quick and Impressive Dinner Solution

    Despite its complex flavors, this curry comes together in under 40 minutes, making it perfect for busy weeknights when you want something special without spending hours in the kitchen. I’ve served this to dinner guests who assumed I’d been cooking all day! The vibrant golden-orange color makes for a stunning presentation that looks as good as it tastes. Plus, it’s naturally gluten-free and can be easily adapted for various dietary needs. This has become my go-to recipe when I need to impress without stress.

    Essential Tips & Tricks

    Selecting and Preparing the Perfect Mangoes

    For the best Mango Chicken Curry, choosing the right mangoes is crucial. Look for mangoes that yield slightly to gentle pressure—they should feel soft but not mushy. I prefer using Alphonso or Ataulfo varieties for their sweet flavor and minimal fiber, but any ripe mango will work. When prepping, slice along both sides of the flat pit, score the flesh in a grid pattern, then invert and cut the cubes away from the skin. For a smoother curry, puree half the mango and leave the rest in chunks for delightful texture contrast, similar to how I prepare fruit for my Cheesecake Fruit Salad with Caramel.

    Balancing Spices for Perfect Heat

    The spice balance makes or breaks a curry. I recommend starting with a base blend of ground cumin, coriander, turmeric, and garam masala. Add these to the oil after sautéing your onions for maximum flavor release. For heat, adjust the cayenne pepper or fresh chilies to your preference—remember you can always add more, but you can’t take it away! A pinch of cinnamon adds wonderful depth that complements the mango beautifully. Taste as you go and remember that the flavors will develop further as the curry simmers, becoming more harmonious and complex.

    Serving Ideas & Creative Variations

    Perfect Pairings for a Complete Meal

    Mango Chicken Curry deserves worthy companions! I love serving it over fluffy basmati rice that soaks up all that glorious sauce. For a lighter option, cauliflower rice works beautifully too. On the side, warm naan bread is perfect for scooping up every last drop. For a complete spread, add a simple cucumber raita to cool the palate, or try my Roasted Red Pepper Hummus with pita for an unexpected but delicious fusion approach. Fresh herbs like cilantro or mint scattered on top add brightness and color that elevates the entire presentation.

    Exciting Twists on the Classic Recipe

    Don’t be afraid to make this Mango Chicken Curry your own! For a seafood variation, substitute the chicken with shrimp or firm white fish for a quicker cooking time and lighter finish. Vegetarians can use chickpeas and roasted cauliflower instead of chicken—the sauce is so flavorful, you won’t miss the meat. For a creamier curry, add a dollop of Greek yogurt just before serving. If you love extra texture, sprinkle toasted cashews or coconut flakes on top. My personal favorite twist is adding a splash of lime juice and zest at the end for a citrusy brightness.

    Storage & Troubleshooting Guide

    Keeping It Fresh and Flavorful

    This Mango Chicken Curry actually tastes even better the next day as the flavors have time to meld together! Store leftovers in an airtight container in the refrigerator for up to 3 days. When reheating, add a splash of water or coconut milk if the curry has thickened too much. For longer storage, this curry freezes beautifully for up to 3 months—just leave out any fresh herbs until serving time. I like to portion it into individual containers for quick grab-and-heat lunches that brighten up my workday with tropical flavors.

    Solving Common Curry Challenges

    If your curry sauce is too thin, simmer it uncovered for a few extra minutes to reduce and concentrate the flavors. Conversely, if it’s too thick, add coconut milk or chicken broth a tablespoon at a time until you reach your desired consistency. If the mango flavor isn’t pronounced enough, try adding a tablespoon of mango chutney. For a curry that’s too spicy, additional coconut milk or a dollop of yogurt will help tame the heat. Remember that curry is forgiving—taste as you go and adjust the seasonings until it’s perfectly balanced to your preference.

    Frequently Asked Questions

    Can I use canned mango instead of fresh?

    Yes! While fresh mango provides the best flavor, canned mango chunks (drained) work well in a pinch. Choose varieties packed in juice rather than syrup for a more authentic taste.

    Is Mango Chicken Curry spicy?

    The spice level is entirely customizable. As written, this recipe has a medium heat that balances the sweet mango. Adjust the chili powder or fresh chilies to make it milder or spicier to suit your preference.

    Can I make this curry in advance for a party?

    Absolutely! Mango Chicken Curry actually improves with time as the flavors develop. Make it up to 2 days ahead, refrigerate, and gently reheat before serving.

    What protein substitutes work well in this recipe?

    Try firm tofu, chickpeas, or paneer for vegetarian options. For seafood lovers, shrimp or firm white fish make excellent substitutes that cook even faster than chicken.

    How can I thicken my Mango Chicken Curry if it’s too watery?

    For a thicker Mango Chicken Curry, simmer uncovered for 5-10 minutes longer or add 1-2 teaspoons of cornstarch mixed with water. Both methods will help concentrate flavors while thickening.

    Final Thoughts

    This Mango Chicken Curry has become one of my signature dishes for good reason. It transforms simple ingredients into something truly magical—a testament to how food can transport us to faraway places through flavor. The balance of sweet mango, aromatic spices, and tender chicken creates a meal that nourishes both body and soul. I hope this curry brings as much joy to your table as it has to mine! For more delicious recipes like this one, follow me on Pinterest where I’m always sharing new culinary inspirations.