Category: Dinner

Easy, tasty dinner ideas for busy nights. Simple recipes, quick prep, and family-friendly meals you’ll make again and again.

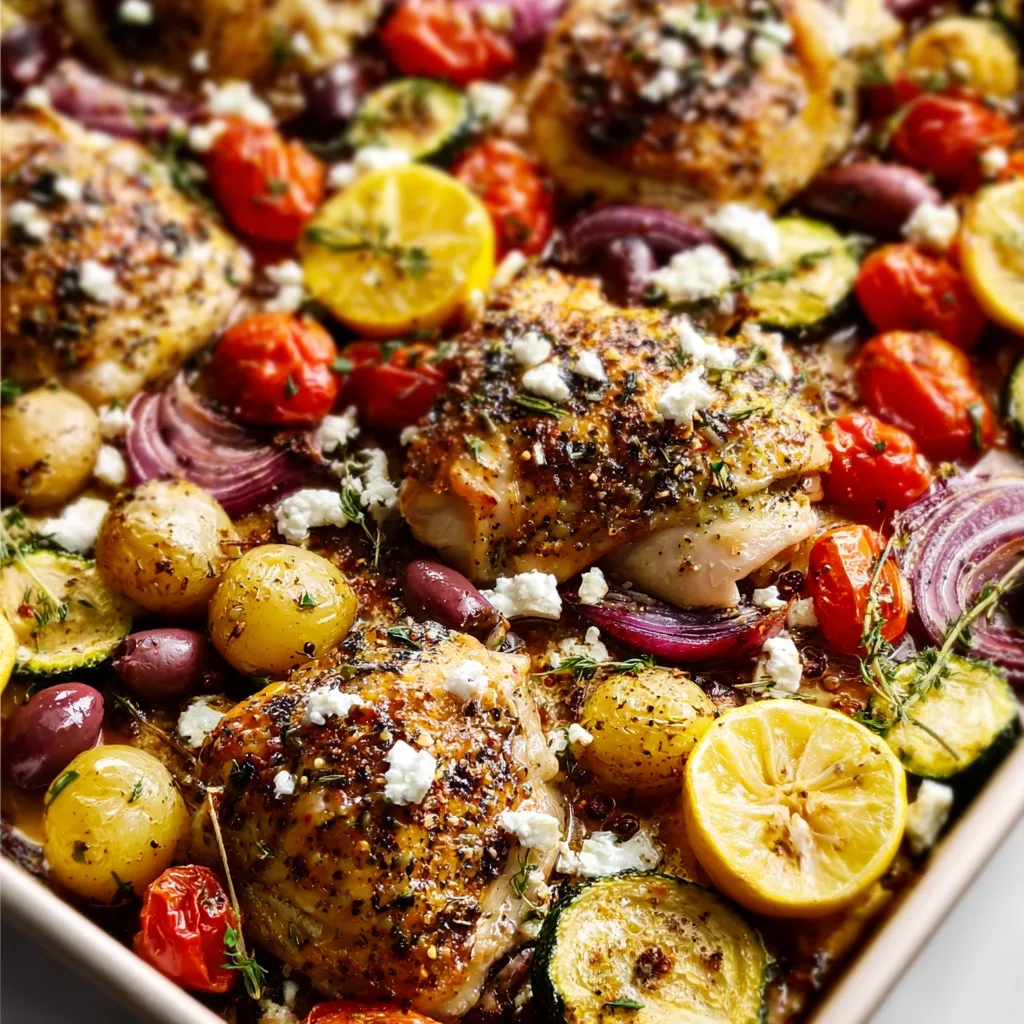
  • Greek Sheet Pan Chicken Recipe That Will Wow Your Taste Buds!

    Greek Sheet Pan Chicken Recipe That Will Wow Your Taste Buds!

    Greek Sheet Pan Chicken Recipe That Will Wow Your Taste Buds!

    Greek Sheet Pan Chicken is one of those magical dinners that transforms your kitchen with Mediterranean aromas while requiring minimal effort from you. I discovered this recipe during a particularly chaotic week when my sister was visiting with her twins. The ability to toss everything onto one pan and have dinner ready in under an hour felt like finding hidden treasure! The combination of lemon-kissed chicken, colorful vegetables, and briny olives creates a meal that’s both nourishing and incredibly satisfying. Trust me, this sheet pan wonder might just become your new weeknight hero, especially when life gets a little too busy for complicated cooking. Let me show you why this Mediterranean-inspired dish deserves a permanent spot in your recipe collection.

    Recipe

    Why You’ll Love This Greek Sheet Pan Chicken

    A Flavor Explosion with Minimal Effort

    The beauty of Greek Sheet Pan Chicken lies in its perfect balance of bold flavors and simple preparation. The marinade—a heavenly blend of olive oil, lemon juice, garlic, and oregano—infuses the chicken with that distinctive Mediterranean taste we all crave. What I adore most is how the chicken releases its juices while roasting, creating a natural sauce that coats the vegetables. The red onions caramelize slightly, potatoes develop crispy edges, and cherry tomatoes burst, releasing their sweet-tart essence. All this flavor magic happens while you’re free to help with homework, catch up on emails, or simply enjoy a moment of peace with your favorite beverage.

    A Complete Nutritional Powerhouse

    This dish isn’t just delicious—it’s a nutritional goldmine. The protein-rich chicken pairs beautifully with fiber-packed vegetables and heart-healthy olive oil. I love that every bite delivers something beneficial for your body. The colorful medley of vegetables provides a spectrum of vitamins and antioxidants, while the herbs add both flavor and anti-inflammatory benefits. My husband, who typically eyes “healthy meals” with suspicion, requests this dish regularly—proof that nutritious food can absolutely satisfy even the pickiest eaters. The best part? Everything cooks together, preserving nutrients that might otherwise be lost in more complicated cooking methods.

    Essential Tips & Tricks

    Perfecting Your Chicken Texture

    The secret to truly exceptional Greek Sheet Pan Chicken lies in the chicken preparation. I’ve learned through many trials that marinating the chicken for at least 30 minutes makes a remarkable difference in tenderness and flavor depth. For weeknight dinners, I often prepare the marinade in the morning before work. Another game-changing tip: pat the chicken dry before marinating—this helps the flavors adhere better and promotes that gorgeous golden-brown exterior we’re after. For even cooking, try to select chicken pieces of similar size, or if using breasts, consider butterflying thicker portions to match the cooking time of thinner pieces.

    Vegetable Arrangement Matters

    The way you arrange vegetables on your sheet pan significantly impacts the final result. Always place denser vegetables (like potatoes) around the outer edges of the pan where heat circulation is strongest. Keep more delicate items like tomatoes and zucchini toward the center, protected by the chicken pieces. This strategic arrangement ensures everything finishes cooking at the same time. I learned this the hard way after several attempts with undercooked potatoes and overcooked bell peppers! For extra insurance against uneven cooking, consider preheating your sheet pan while the oven warms up—this gives those potatoes a head start and creates a beautiful initial sear on everything.

    Serving Ideas & Creative Variations

    Mediterranean Accompaniments

    Elevate your Greek Sheet Pan Chicken with thoughtfully chosen side dishes that complement its Mediterranean character. A simple Greek salad with cucumber, feta, and kalamata olives creates a refreshing contrast to the warm, roasted components. I often serve this dish with warm pita bread for scooping up those delicious pan juices—my children’s favorite part! A dollop of tzatziki sauce adds a cooling element that balances the dish perfectly. For special occasions, consider adding a side of lemony rice pilaf or roasted garlic hummus for a more substantial meal that will impress even your foodie friends.

    Seasonal Adaptations & Substitutions

    One of the most beautiful aspects of this recipe is its flexibility across seasons. In summer, I incorporate eggplant, zucchini, and extra tomatoes when they’re at their peak. Fall brings opportunities for sweet potato, butternut squash, and Brussels sprouts additions. For a protein variation, substitute chicken with firm white fish (reducing cooking time) or hearty chickpeas for a vegetarian version. The herb profile can evolve too—swap oregano for rosemary in winter or add fresh dill and mint in spring. My family particularly loves when I add preserved lemon in place of fresh for a deeper, more complex citrus note.

    Storage & Troubleshooting Guide

    Maximizing Leftovers

    Greek Sheet Pan Chicken transforms beautifully into next-day meals, often tasting even better after flavors have had time to meld. Store leftovers in airtight containers in the refrigerator for up to 3 days. For reheating, avoid the microwave if possible—it tends to render the chicken rubbery. Instead, place everything in a covered skillet with a splash of chicken broth or water and warm over medium-low heat. My favorite leftover hack: shred the chicken and vegetables, then stuff into pita pockets with fresh greens and a drizzle of yogurt sauce for a quick lunch that doesn’t feel like leftovers at all!

    Solving Common Cooking Challenges

    The most frequent issue with sheet pan dinners is uneven cooking. If you find your vegetables aren’t cooking at the same rate as your chicken, don’t hesitate to remove items that finish early. For particularly stubborn potatoes, consider microwaving them for 2-3 minutes before adding to the sheet pan. If your chicken skin isn’t crisping properly, a quick 2-minute broil at the end works wonders—just watch carefully to prevent burning! And for those times when your vegetables release too much moisture, try increasing your oven temperature by 25 degrees and using a larger pan to allow more evaporation. These simple adjustments have rescued many of my meals from mediocrity!

    Frequently Asked Questions

    Can I make Greek Sheet Pan Chicken ahead of time?

    Absolutely! Marinate the chicken up to 24 hours in advance. You can also prep all vegetables the day before and store them in airtight containers. Assemble everything on the sheet pan just before baking for the freshest results.

    What’s the best chicken cut to use for Greek Sheet Pan Chicken?

    Bone-in, skin-on chicken thighs provide the most flavor and moisture. However, chicken breasts work well too—just reduce cooking time by about 5-7 minutes and consider adding a little extra olive oil to prevent dryness.

    Can I make this recipe vegetarian?

    Yes! Replace chicken with 2 cans of drained chickpeas or cubed extra-firm tofu. Reduce cooking time to about 25-30 minutes, tossing halfway through for even browning.

    How do I prevent vegetables from becoming soggy?

    Ensure your vegetables are completely dry before roasting, cut them into uniform pieces, and don’t overcrowd the pan. Using two sheet pans if necessary allows proper air circulation for crispy edges.

    What herbs can I substitute if I don’t have oregano?

    Rosemary, thyme, or Italian seasoning blend work beautifully. Fresh herbs like dill or parsley can be added after cooking for brightness. The Mediterranean flavor profile is quite forgiving!

    Final Thoughts

    Greek Sheet Pan Chicken represents everything I love about home cooking—simplicity, nutrition, and incredible flavor that brings everyone to the table with smiles. The magic happens not just in the Mediterranean ingredients but in how they transform together in the oven, creating something greater than the sum of their parts. I find myself returning to this recipe again and again, especially during busy weeks when cooking feels overwhelming but we still crave something wholesome and delicious. Whether you’re cooking for a family or meal-prepping for one, this versatile dish adapts to your needs while delivering that warm, Mediterranean embrace we all need sometimes. Check out my Pinterest for more sheet pan inspiration!


  • Easy Honey Sesame Chicken Recipe That’ll Wow Your Taste Buds!

    Easy Honey Sesame Chicken Recipe That’ll Wow Your Taste Buds!

    Easy Honey Sesame Chicken Recipe That’ll Wow Your Taste Buds!

    Easy Honey Sesame Chicken has completely transformed my weeknight dinner rotation, and I’m betting it will do the same for yours! This irresistible dish combines tender chicken pieces coated in a sticky-sweet glaze that’s punctuated with toasty sesame seeds and a gentle hint of garlic. The first time I made this, my kitchen filled with that unmistakable aroma of honey caramelizing in the pan, and my family appeared at the table faster than I could say “dinner’s ready!” Perfect for busy evenings when you need something delicious without the fuss, this 30-minute wonder delivers restaurant-quality flavor right at home. Let me show you how to make this crowd-pleasing favorite.

    Recipe

    Why You’ll Love This Easy Honey Sesame Chicken

    A Perfect Balance of Flavors

    The magic of this Easy Honey Sesame Chicken lies in its perfect balance of sweet, savory, and nutty elements. The honey provides a natural sweetness that caramelizes beautifully, while soy sauce adds that umami depth that makes you go back for seconds. I’ve tweaked this recipe countless times until finding the ideal sauce consistency – thick enough to cling to every piece of chicken but not overpowering. The toasted sesame oil and seeds add a distinctive nuttiness that elevates this dish beyond ordinary takeout versions, giving you that authentic Asian-inspired flavor profile that feels both comforting and special.

    Quick and Accessible Ingredients

    One thing I absolutely adore about this recipe is how it transforms simple pantry staples into something extraordinary. Most of the ingredients are likely already sitting in your kitchen right now! The chicken thighs (or breasts, if you prefer) provide a tender base, while common Asian condiments create that signature sauce. No hunting down obscure ingredients at specialty stores – just straightforward, accessible components that come together in under 30 minutes. This accessibility makes Easy Honey Sesame Chicken perfect for spontaneous cooking when you’re craving something delicious but don’t want to make a special shopping trip.

    Essential Tips & Tricks

    Perfecting the Chicken Texture

    The secret to restaurant-quality chicken lies in how you prepare it before it even touches the sauce. I’ve learned through many trials that velveting the chicken makes all the difference. This simple technique involves coating your chicken pieces in a mixture of cornstarch and egg white before cooking. This creates a protective barrier that keeps the meat incredibly tender while developing a light crust that the sauce clings to beautifully. Another game-changer: don’t overcrowd your pan! Cook in batches if necessary, giving each piece room to sear rather than steam for that perfect golden exterior.

    Sauce Consistency Secrets

    Getting that perfect glaze consistency can make or break your Easy Honey Sesame Chicken. The key is patience during the reduction process. Start with a slightly thinner sauce than you ultimately want, as it will continue to thicken as it cools. My foolproof method: after adding your sauce ingredients to the pan, let it bubble gently for 2-3 minutes until it coats the back of a spoon. If it’s still too thin, a slurry of 1 teaspoon cornstarch mixed with 2 teaspoons water will thicken things up nicely. Remember that honey caramelizes quickly, so keep the heat medium-low to prevent burning.

    Serving Ideas & Creative Variations

    Perfect Pairings

    This Easy Honey Sesame Chicken shines brightest when paired with the right accompaniments. My family’s favorite combination is fluffy jasmine rice that soaks up all that delicious sauce, alongside simply steamed broccoli for color and nutrition. For a lower-carb option, cauliflower rice works beautifully, or try serving over a bed of crisp lettuce cups for a refreshing twist. Want to take it up a notch? Add a side of quick-pickled cucumbers – the tangy crunch perfectly balances the sweet chicken. For a complete feast, consider starting with roasted red pepper hummus as an appetizer to set the stage for your main course.

    Global Fusion Inspirations

    Don’t be afraid to put your own spin on this versatile dish! One of my favorite variations adds a spicy kick with a tablespoon of gochujang or sriracha stirred into the sauce. For a tropical twist, substitute pineapple juice for some of the honey and toss in some fresh pineapple chunks at the end. Love citrus? Add orange zest and a splash of juice for a bright, citrusy version. You can also play with the protein – shrimp works wonderfully with the same sauce and cooks even faster than chicken. For a vegetarian option, extra-firm tofu or cauliflower florets make excellent substitutes that soak up all that delicious flavor.

    Storage & Troubleshooting Guide

    Keeping It Fresh

    Your Easy Honey Sesame Chicken stores beautifully for quick meals throughout the week. Once cooled completely, transfer leftovers to airtight containers and refrigerate for up to 4 days. The flavor actually deepens overnight as the chicken continues to absorb the sauce! For reheating, a quick zap in the microwave works, but for best results, gently warm it in a skillet with a tablespoon of water to rejuvenate the sauce. If you’re meal prepping, consider keeping the chicken and sauce separate from your rice until serving time – this prevents the rice from becoming soggy and gives you that fresh-made experience even days later.

    Fixing Common Issues

    Even experienced cooks sometimes encounter challenges, but most are easily fixed! If your sauce is too thin, simmer it a bit longer or add that cornstarch slurry I mentioned earlier. Too thick? A splash of chicken broth or water will loosen it right up. If you find your chicken turning out tough, it’s likely being overcooked – remember that it will continue cooking slightly in the hot sauce. For sauce that’s too sweet, balance it with a bit more soy sauce or a splash of rice vinegar. And if the sesame flavor isn’t pronounced enough, try toasting your sesame seeds in a dry pan before adding them – this simple step intensifies their nutty flavor dramatically.

    Frequently Asked Questions

    Can I make Easy Honey Sesame Chicken ahead of time?

    Yes! Prepare it up to 2 days ahead and store in the refrigerator. The flavors actually deepen overnight, making it even more delicious when reheated gently on the stovetop or microwave.

    What’s the best cut of chicken to use?

    Boneless, skinless thighs provide the juiciest results, but breast meat works well too. Just be careful not to overcook breast meat as it can dry out more quickly than thighs.

    Can I make this recipe gluten-free?

    Absolutely! Simply substitute regular soy sauce with tamari or coconut aminos, and verify your other condiments are certified gluten-free.

    How do I get the sauce to thicken properly?

    Simmer the sauce until it coats the back of a spoon. If needed, add a cornstarch slurry (1 tsp cornstarch mixed with 2 tsp cold water) and cook for another minute.

    Is Easy Honey Sesame Chicken spicy?

    Not traditionally, but you can easily add heat with red pepper flakes, sriracha, or a dash of your favorite hot sauce to customize the spice level.

    Final Thoughts

    This Easy Honey Sesame Chicken has become my ultimate solution for those evenings when I want something impressive without the effort. There’s something magical about creating a dish that tastes like it came from your favorite restaurant but required just minutes in your own kitchen. The combination of tender chicken pieces and that irresistible sticky-sweet sauce creates a meal that satisfies cravings while still feeling wholesome. I hope this recipe brings as much joy to your table as it has to mine! For more delicious inspiration, check out my Pinterest boards where I’m always sharing new favorites.

  • 3-Ingredient Cottage Cheese Pizza Crust That Will Blow Your Mind!

    3-Ingredient Cottage Cheese Pizza Crust That Will Blow Your Mind!

    3-Ingredient Cottage Cheese Pizza Crust That Will Blow Your Mind!

    3-Ingredient Cottage Cheese Pizza Crust might just be my new kitchen obsession! As someone who craves pizza but doesn’t always want the carb overload, this protein-packed alternative has become my go-to weeknight solution. The first time I pulled this crust from the oven, golden and crispy at the edges yet tender in the middle, I knew I’d found something special. It’s ridiculously simple—just cottage cheese, eggs, and flour—but delivers a satisfyingly sturdy base that holds up to all your favorite toppings. If you’re looking for a lighter pizza option that doesn’t sacrifice on texture, this recipe deserves a spot in your regular rotation, just like my Deep Dish Meat Lovers Pizza Pie.

    Recipe

    Why You’ll Love This 3-Ingredient Cottage Cheese Pizza Crust

    Nutrition Powerhouse

    This isn’t just any pizza crust—it’s a protein powerhouse that transforms your favorite comfort food into something you can feel good about eating regularly. The cottage cheese delivers an impressive protein boost while keeping the texture wonderfully tender. I’ve served this to friends who couldn’t believe it wasn’t a traditional crust! The eggs add structure and additional protein, while the minimal flour keeps the carb count reasonable. My teenage son, who typically turns his nose up at “healthy alternatives,” devoured two slices before I even mentioned the secret ingredient.

    Quick & Fuss-Free Preparation

    What I adore most about this 3-Ingredient Cottage Cheese Pizza Crust is how ridiculously simple it is to throw together. On busy weeknights when I’m tempted to order delivery, I remember I can have this crust ready for toppings in under 10 minutes of active time. No waiting for dough to rise or complicated kneading techniques required! Just blend the ingredients until smooth, spread onto your baking sheet, and pre-bake for a few minutes. The time-saving simplicity makes this a practical option even when you’re exhausted after a long day.

    Essential Tips & Tricks

    Perfecting Your Crust Texture

    The key to a perfectly textured 3-Ingredient Cottage Cheese Pizza Crust lies in how you blend the ingredients. Use a food processor or blender to ensure the cottage cheese curds are completely smooth—this creates a uniform batter that bakes evenly. I learned the hard way that hand-mixing leaves lumps that affect the final texture! For a crispier edge, try spreading the batter slightly thinner around the perimeter. And don’t skip the pre-bake step before adding toppings; those 8-10 minutes alone in the oven give the crust the structural integrity it needs to support your favorite Pepperoni Pizza Fries toppings.

    Choosing the Right Cottage Cheese

    Not all cottage cheese performs equally in this recipe. For best results, use a full-fat variety which creates a richer flavor and better texture in the finished crust. I’ve found that small or medium curd works better than large curd, as it blends more smoothly. If you’re watching sodium, look for a low-sodium option—the difference in taste is negligible in the finished product. Another pro tip: drain excess liquid from your cottage cheese by placing it in a fine-mesh strainer for 10 minutes before measuring. This prevents a soggy crust and helps achieve that coveted crispy exterior.

    Serving Ideas & Creative Variations

    Family-Friendly Topping Combinations

    Transform your 3-Ingredient Cottage Cheese Pizza Crust into a crowd-pleasing meal with the right toppings. For my picky eaters, a classic combination of low-moisture mozzarella, a thin layer of marinara, and turkey pepperoni is always a hit. For adults, I love topping it with pesto, cherry tomatoes, fresh mozzarella, and a drizzle of balsamic glaze after baking. The neutral flavor of the crust makes it incredibly versatile! Create a breakfast pizza with scrambled eggs, spinach, and feta, or try a Hawaiian BBQ Pizza variation with pineapple, ham, and a sweet-tangy sauce.

    Flavor Boosters for the Base

    Take your 3-Ingredient Cottage Cheese Pizza Crust from good to extraordinary by incorporating flavor enhancers directly into the base. My favorite addition is 1-2 teaspoons of Italian seasoning and a clove of minced garlic blended right into the mixture. For a cheesy boost, add 2 tablespoons of grated Parmesan to the batter. Dried herbs like oregano, basil, or even a pinch of red pepper flakes can be mixed in for a flavor-infused crust that complements your toppings. I’ve also had great success adding a tablespoon of nutritional yeast for a subtle umami undertone that enhances the cheese flavor.

    Storage & Troubleshooting Guide

    Make-Ahead and Freezing Options

    This 3-Ingredient Cottage Cheese Pizza Crust is perfect for meal prep enthusiasts. You can prepare and pre-bake several crusts on the weekend, then cool completely and store them in the refrigerator for up to 3 days. When ready to use, simply add your toppings and bake until heated through. For longer storage, freeze the pre-baked crusts with parchment paper between layers in an airtight container. They’ll keep for up to a month! I often make a double batch on Sundays, which gives me a head start on at least two weeknight dinners.

    Fixing Common Crust Issues

    If your 3-Ingredient Cottage Cheese Pizza Crust turns out too soft in the middle, the most likely culprit is excess moisture. Make sure to drain your cottage cheese well, and consider extending the pre-bake time by 2-3 minutes. For a crust that’s sticking to the pan, parchment paper is your best friend—I never skip this step! If the edges are browning too quickly while the center remains underdone, cover just the perimeter with small strips of aluminum foil. And remember that even baking requires spreading the batter to a uniform thickness across your pan.

    Frequently Asked Questions

    Can I make this 3-Ingredient Cottage Cheese Pizza Crust gluten-free?

    Absolutely! Simply substitute the regular flour with a 1:1 gluten-free flour blend. I’ve had great success with Bob’s Red Mill and King Arthur versions, though you may need to add an extra tablespoon to achieve the right consistency.

    How does the taste compare to regular pizza crust?

    While it doesn’t have the exact chew of a yeast-based dough, this crust has a pleasant, neutral flavor that lets your toppings shine. The texture is similar to a thicker flatbread with a slightly eggy quality.

    Can I use low-fat cottage cheese instead?

    Yes, though full-fat produces the best texture and flavor. If using low-fat, you might need to reduce the pre-bake time by 1-2 minutes to prevent the crust from becoming too dry.

    Is this crust sturdy enough to pick up with my hands?

    When properly pre-baked and not overloaded with wet toppings, this crust holds up surprisingly well! For best results, let it cool for 2-3 minutes after final baking before slicing.

    Can I double the recipe for a larger pizza or multiple crusts?

    Definitely! The 3-Ingredient Cottage Cheese Pizza Crust recipe doubles beautifully. Just make sure to adjust your baking sheets accordingly and maintain the same thickness for even cooking.

    Final Thoughts

    The 3-Ingredient Cottage Cheese Pizza Crust has revolutionized pizza night in my home, bringing together convenience, nutrition, and flavor in one simple package. What I love most is how it transforms an occasional indulgence into a regular meal option that supports my health goals without sacrificing satisfaction. Give this crust a try, experiment with your favorite toppings, and share your creations on Pinterest! I’m confident this protein-packed alternative will find a permanent place in your meal rotation.

  • Brazilian Coconut Chicken with Lime | Irresistibly Zesty & Creamy!

    Brazilian Coconut Chicken with Lime | Irresistibly Zesty & Creamy!

    Brazilian Coconut Chicken with Lime | Irresistibly Zesty & Creamy!

    Brazilian Coconut Chicken with Lime is a vibrant dish that transports me straight to the sun-soaked beaches of Brazil with every aromatic bite. The first time I made this, the kitchen filled with the intoxicating scent of lime zest and coconut milk, making my husband wander in from the garden asking what magical thing was happening. The tender chicken bathed in creamy coconut sauce with bright pops of lime creates a perfect balance of flavors that’s both comforting and exotic. If you’re looking to break out of your dinner rut, this recipe might just become your new weeknight hero, much like my Crispy Hot Honey Feta Chicken did last summer.

    Recipe

    Why You’ll Love This Brazilian Coconut Chicken with Lime

    A Symphony of Tropical Flavors

    The magic of this dish lies in its flavor harmony – creamy coconut milk creates a velvety base that carries the bright, citrusy notes of fresh lime juice and zest. Each bite offers a perfect balance of richness and acidity that dances on your tongue. I love how the gentle heat from red pepper flakes builds slowly, never overwhelming but adding that perfect warmth. The first time my sister tried it, she closed her eyes and said it tasted like vacation in a bowl – and honestly, that’s the perfect description for this sunshine-filled dish that brightens even the dreariest weeknight.

    Quick and Impressive Results

    What makes this Brazilian Coconut Chicken with Lime truly special is how it transforms simple ingredients into something that tastes like it took hours to prepare. The entire dish comes together in about 30 minutes, making it perfect for busy weeknights when you want something that feels special. I’ve served this to last-minute dinner guests who were convinced I’d been cooking all day! The sauce develops such depth as it simmers, creating layers of flavor that belie its quick preparation time. It’s become my secret weapon recipe when I need to impress without stress.

    Essential Tips & Tricks

    Perfecting Your Coconut Sauce

    The velvety texture of the coconut sauce makes this dish extraordinary, but it requires a bit of finesse. Always use full-fat coconut milk for the richest results – the light versions simply don’t create the same luxurious mouthfeel. When adding lime juice, pour it in gradually while stirring to prevent curdling. My game-changing tip: let the sauce simmer uncovered for the final 5 minutes to reduce slightly, concentrating the flavors. This creates that restaurant-quality finish that makes everyone think you’ve been taking cooking classes.

    Chicken Preparation Secrets

    The tender, juicy chicken is the foundation of this dish, so don’t rush this step. I recommend using boneless, skinless thighs for their inherent moisture and flavor, but breasts work beautifully too when prepared correctly. The key is allowing the chicken to develop a light golden crust before adding the liquid ingredients. This initial sear locks in moisture and creates flavor compounds that infuse the entire sauce. Pat the chicken completely dry with paper towels before seasoning, and don’t crowd the pan – work in batches if needed for that perfect golden exterior.

    Serving Ideas & Creative Variations

    Perfect Pairings and Sides

    This Brazilian Coconut Chicken with Lime begs to be served over a bed of fluffy jasmine rice that soaks up every drop of the luscious sauce. For a complete meal, I love adding a simple side of black beans with a hint of cumin and fresh cilantro. When I’m feeling fancy, I’ll make a quick mango-avocado salsa to spoon over the top – the sweet-tart fruit complements the coconut lime sauce beautifully. For a lower-carb option, try cauliflower rice or serve alongside roasted sweet potatoes like my Cajun Roasted Sweet Potatoes for a colorful plate that’s as beautiful as it is delicious.

    Exciting Flavor Twists

    Don’t be afraid to make this recipe your own with creative flavor variations. For a more traditional Brazilian twist, add diced tomatoes and bell peppers to create a heartier stew-like consistency. Seafood lovers can substitute shrimp for chicken, reducing the cooking time accordingly. My personal favorite variation is adding a tablespoon of smooth peanut butter to the sauce, creating a subtle nutty undertone that complements the coconut beautifully. For special occasions, a splash of white rum added with the coconut milk creates a sophisticated depth that always impresses dinner guests.

    Storage & Troubleshooting Guide

    Proper Storage Solutions

    This Brazilian Coconut Chicken with Lime actually tastes even better the next day as the flavors continue to meld in the refrigerator. Store leftovers in an airtight container for up to 3 days. When reheating, add a small splash of coconut milk or water to revitalize the sauce if it’s thickened too much. For meal prep, you can freeze portions in individual containers for up to 2 months – just thaw overnight in the refrigerator before gently reheating. I often make a double batch specifically to freeze half for those nights when cooking feels impossible.

    Fixing Common Issues

    If your sauce seems too thin or watery, don’t panic! Simply remove the chicken pieces temporarily and continue simmering the sauce uncovered until it reduces to your desired consistency. For sauce that’s too thick, gradually whisk in additional coconut milk or chicken broth. If the lime flavor is too subtle, add fresh zest rather than more juice to brighten without making it too acidic. And if you accidentally oversalted, a squeeze of fresh lime juice and a teaspoon of brown sugar can help balance the flavors beautifully.

    Frequently Asked Questions

    Can I use lime juice from a bottle instead of fresh limes?

    Fresh is best for this Brazilian Coconut Chicken with Lime, as bottled juice lacks the bright oils from the zest. If necessary, use bottled juice but add extra zest from a fresh lime to compensate for the missing aromatic qualities.

    Is this dish spicy?

    The heat level is customizable! Red pepper flakes provide gentle warmth, but you can increase or omit them based on your preference. For authentic Brazilian flavor, try using malagueta peppers if you can find them.

    Can I make this dish dairy-free?

    Good news! This dish is naturally dairy-free, as it relies on coconut milk for creaminess. Just ensure any additional ingredients you add maintain its dairy-free status if that’s important to you.

    What’s the best way to serve leftovers?

    Reheat gently on the stovetop with a splash of coconut milk to refresh the sauce. Leftovers also make amazing filling for wraps or topping for grain bowls the next day.

    How can I make this more authentic?

    For truly authentic Brazilian Coconut Chicken with Lime, add dendê oil (palm oil) if available, incorporate fresh cilantro, and serve with farofa (toasted cassava flour) on the side.

    Final Thoughts

    Brazilian Coconut Chicken with Lime has become my go-to recipe when I want to bring sunshine to our dinner table, regardless of the weather outside. There’s something magical about how a few simple ingredients transform into such a vibrant, flavorful meal that feels like a mini-vacation in every bite. I love watching people’s faces light up with that first creamy, tangy spoonful – it’s pure kitchen joy. Don’t forget to check out my other tropical-inspired recipes on Pinterest for more culinary adventures that bring global flavors to your home kitchen.

  • Chili Cheese Potato Skillet: Irresistibly Cheesy & Perfectly Spicy!

    Chili Cheese Potato Skillet: Irresistibly Cheesy & Perfectly Spicy!

    Chili Cheese Potato Skillet: Irresistibly Cheesy & Perfectly Spicy!

    This Chili Cheese Potato Skillet is the ultimate comfort food mashup that’ll have you scraping the pan for every last morsel. There’s something magical about watching cheese melt into spicy chili as it bubbles around crispy potatoes. I discovered this recipe during a particularly brutal winter when my heating went out, and let me tell you, a steaming skillet of this hearty goodness warmed me from the inside out. The beauty lies in its simplicity – just a few ingredients transform into a soul-satisfying meal that works for breakfast, dinner, or those moments when you’re craving something hearty and homey. It reminds me of those loaded cajun seafood stuffed potatoes but with a comforting chili twist.

    Recipe

    Why You’ll Love This Chili Cheese Potato Skillet

    Perfect Texture Combination

    The contrasting textures in this Chili Cheese Potato Skillet create an irresistible eating experience that keeps you coming back for more. The crispy potato edges develop a golden crust that gives way to tender centers, while the chili provides a rich, saucy component that seeps into every bite. When topped with melty cheese that forms those delicious cheese pulls with every forkful, it creates the perfect harmony of textures. I love watching my family’s faces light up when they hear the sizzle of the skillet hitting the table – that sound alone promises something extraordinary is about to happen.

    One-Pan Wonder

    There’s something deeply satisfying about a meal that comes together in a single pan, and this Chili Cheese Potato Skillet delivers that convenience beautifully. The cleanup is minimal, which means more time enjoying your evening and less time scrubbing dishes. I particularly appreciate how the flavors build and intensify as everything cooks together in the skillet – the potatoes absorb the savory chili seasonings, creating layers of flavor impossible to achieve otherwise. On busy weeknights when cooking feels overwhelming, this recipe has saved my sanity more times than I can count.

    Essential Tips & Tricks

    Potato Perfection

    Achieving the ideal potato texture in your Chili Cheese Potato Skillet requires a few insider techniques that make all the difference. I recommend par-cooking your potatoes first, either by microwaving for 4-5 minutes or boiling until just fork-tender, before adding them to the skillet. This ensures they’ll cook evenly and develop that gorgeous crispy exterior without burning. Choose starchy varieties like russets for the crispiest results, or waxy potatoes like Yukon golds if you prefer a creamier bite. Cutting them into uniform sizes – about 1/2-inch cubes – helps them cook at the same rate.

    Chili Enhancement Strategies

    The chili component of your Chili Cheese Potato Skillet can be elevated with a few simple techniques that develop complex flavors. Whether using homemade or canned chili, try blooming your spices in the hot oil before adding the chili – just 30 seconds of toasting cumin, chili powder, and garlic powder awakens their essential oils. For depth, a splash of coffee or dark beer works wonders, while a spoonful of brown sugar balances acidity. I learned this trick from making deep dish meat lovers pizza pie, where the same principle applies – developing layers of flavor transforms simple ingredients into something extraordinary.

    Serving Ideas & Creative Variations

    Topping Bar Extravaganza

    Transform your Chili Cheese Potato Skillet into an interactive dining experience by setting up a topping station that lets everyone customize their portion. Fresh additions like diced avocado, sliced jalapeños, chopped cilantro, and lime wedges bring brightness to the rich base. Cooling elements such as sour cream, Greek yogurt, or Mexican crema balance the heat, while crunchy toppings like tortilla strips or corn chips add textural contrast. I discovered the joy of topping bars when hosting a game day gathering – guests loved personalizing their servings, and it turned a simple meal into a memorable experience.

    Global Flavor Twists

    This versatile Chili Cheese Potato Skillet can travel the world through creative ingredient swaps that completely transform its character. For a Mediterranean version, use lamb-based chili with feta cheese, olives, and a dollop of tzatziki. An Asian-inspired variation might incorporate gochujang, kimchi, and scallions with a fried egg on top, similar to my potsticker stir fry approach. For Italian flair, use bolognese instead of chili, top with mozzarella and basil, and finish with balsamic glaze. I love experimenting with these variations when I’m craving something familiar yet new – it’s like getting multiple recipes from one foundational dish.

    Storage & Troubleshooting Guide

    Proper Storage Methods

    Extending the life of your Chili Cheese Potato Skillet requires proper storage techniques to maintain both flavor and texture. Allow leftovers to cool completely before transferring to airtight containers, which helps prevent sogginess and bacterial growth. Refrigerated portions stay fresh for 3-4 days, while freezing works surprisingly well for up to 2 months – just be sure to thaw overnight in the refrigerator before reheating. For best results when reheating, use a skillet rather than a microwave to restore some of the original crispiness, adding a sprinkle of fresh cheese during the final minutes.

    Common Issues & Solutions

    Even experienced cooks occasionally encounter challenges when making a Chili Cheese Potato Skillet, but simple adjustments can save the day. If your potatoes stick to the pan, the likely culprit is insufficient preheating or not enough oil – make sure your skillet is properly heated and well-oiled before adding potatoes. For potatoes that won’t crisp, try patting them completely dry before cooking and avoid overcrowding the pan. If your dish turns out too watery, simmer uncovered for a few extra minutes to reduce excess liquid, or add a cornstarch slurry to thicken the chili component.

    Frequently Asked Questions

    Can I make Chili Cheese Potato Skillet ahead of time?

    Yes! Prepare the components separately – cook the potatoes and chili up to 2 days ahead. Store refrigerated, then assemble and add cheese just before serving. This saves time while maintaining optimal texture.

    What’s the best cheese for a Chili Cheese Potato Skillet?

    Sharp cheddar provides the perfect tang and meltability. For variety, try Monterey Jack, pepper jack for heat, or a Mexican cheese blend. Freshly grated cheese melts more smoothly than pre-shredded varieties.

    Can I make this vegetarian?

    Absolutely! Substitute bean-based chili or use plant-based meat alternatives. Black bean and sweet potato chili works beautifully, and plant-based cheese alternatives melt well if you’re going fully vegan.

    How do I prevent my potatoes from getting soggy?

    Ensure potatoes are thoroughly dried after washing and par-cooking. Use a hot skillet and enough oil, cook in batches if needed to avoid overcrowding, and add the chili only after potatoes have developed a crispy exterior.

    What sides pair well with Chili Cheese Potato Skillet?

    A simple green salad with vinaigrette provides refreshing contrast. Cornbread, garlic bread, or tortillas work well for sopping up extra sauce. For a lighter meal, roasted vegetables balance the richness.

    Final Thoughts

    The Chili Cheese Potato Skillet has become my go-to recipe when I need comfort food that delivers big flavors without demanding hours in the kitchen. There’s something deeply satisfying about watching cheese bubble over spicy chili and crispy potatoes, knowing that simple ingredients have transformed into something extraordinary. I encourage you to make this recipe your own – adjust the spice level, experiment with toppings, and create your perfect version. Share your creations on Pinterest and tag me – I’d love to see how your Chili Cheese Potato Skillet turns out!

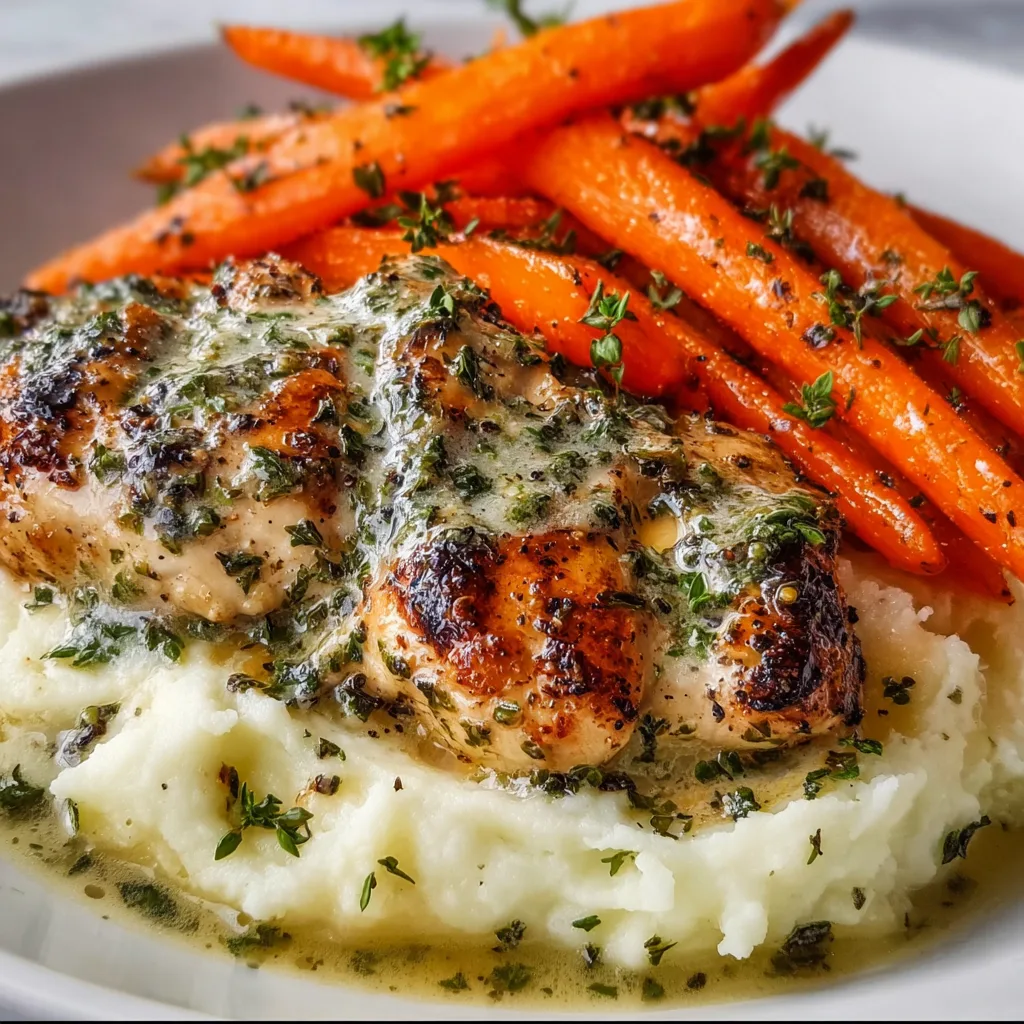
  • Garlic Herb Chicken with Creamy Mash & Roasted Carrots: Irresistible Comfort Meal

    Garlic Herb Chicken with Creamy Mash & Roasted Carrots: Irresistible Comfort Meal

    Garlic Herb Chicken with Creamy Mash & Roasted Carrots: Irresistible Comfort Meal

    There’s something magical about a perfectly roasted Garlic Herb Chicken with Creamy Mash & Roasted Carrots that makes any dinner feel special. The aroma that fills your kitchen as the chicken roasts—fragrant herbs mingling with sweet roasted garlic—is enough to make your mouth water before you even take your first bite. I discovered this recipe during a particularly stressful week when I needed comfort food that didn’t require hours in the kitchen. Now it’s my go-to when I want to impress without the stress. This complete meal delivers everything you crave: tender chicken, velvety potatoes, and caramelized carrots that’ll have everyone asking for seconds.

    Recipe

    Why You’ll Love This Garlic Herb Chicken with Creamy Mash & Roasted Carrots

    Perfect Balance of Flavors and Textures

    The beauty of this Garlic Herb Chicken with Creamy Mash & Roasted Carrots lies in its perfect harmony of flavors. The chicken skin crisps up beautifully while the meat stays incredibly juicy, infused with aromatic herbs and punchy garlic. Meanwhile, the carrots develop a gorgeous caramelization that brings out their natural sweetness. The creamy mashed potatoes act as the perfect canvas for soaking up all those wonderful pan juices. It’s a symphony of textures—crispy, tender, creamy, and soft—that makes every bite satisfying in a different way.

    Impressive Yet Approachable

    Don’t let the elegant appearance fool you—this Garlic Herb Chicken dish is surprisingly simple to prepare. Even on busy weeknights, you can have this on the table in about an hour with minimal hands-on time. The one-pan approach for the chicken and carrots means less cleanup, while the potatoes simmer away without much attention. I’ve served this at everything from casual family dinners to small dinner parties, and it never fails to impress. The presentation looks like you spent hours in the kitchen, but only you’ll know how effortless it really was!

    Essential Tips & Tricks

    Perfecting Your Chicken

    For truly exceptional Garlic Herb Chicken, don’t skip patting the chicken dry before seasoning—this is the secret to crispy skin. Allow your chicken to come to room temperature for about 20 minutes before roasting; this ensures even cooking from surface to center. When making the herb butter, really work it under the skin for maximum flavor infusion. I like to use a combination of rosemary, thyme, and parsley, but feel free to customize based on what you have. And remember, a meat thermometer is your best friend—chicken thighs should reach 175°F while breasts are perfect at 165°F.

    Mastering Mash & Carrots

    The creamiest mashed potatoes start with the right potatoes—Yukon Golds are my go-to for their naturally buttery texture. For an extra luxurious touch, warm your milk and butter before adding them to your potatoes. As for those gorgeous carrots, the key is not overcrowding your roasting pan. Each carrot needs space to caramelize properly rather than steam. A drizzle of honey in the last 10 minutes of roasting adds a beautiful glaze that pairs perfectly with the savory chicken. For more veggie inspiration, check out these crispy garlic air fryer broccoli florets as another side option.

    Serving Ideas & Creative Variations

    Seasonal Adaptations

    This Garlic Herb Chicken with Creamy Mash & Roasted Carrots welcomes seasonal tweaks that keep it fresh year-round. In spring, try adding fresh peas or asparagus to the roasting pan in the last 10 minutes. Summer calls for zucchini or cherry tomatoes alongside the carrots. Fall begs for butternut squash and sage in your herb butter, while winter is perfect for adding parsnips and rosemary. The mashed potatoes can transform too—fold in roasted garlic in winter, fresh chives in spring, or even swap them entirely for a cauliflower mash when you’re craving something lighter.

    Elegant Entertaining Options

    When serving this dish for guests, consider a few special touches that elevate without complicating. A quick pan sauce made from the drippings takes just minutes but adds restaurant-quality flavor. Simply deglaze with white wine, add a splash of cream, and reduce. For a beautiful presentation, serve family-style on a large platter with fresh herb garnishes. This pairs wonderfully with a simple green salad dressed with lemon vinaigrette. For a complete dinner party menu, start with crispy crab cake bites that complement the main course perfectly.

    Storage & Troubleshooting Guide

    Proper Storage & Reheating

    Leftover Garlic Herb Chicken and sides keep beautifully when stored properly. Refrigerate components separately in airtight containers within two hours of cooking for maximum freshness and food safety. They’ll keep well for 3-4 days. When reheating the chicken, cover it loosely with foil and warm in a 300°F oven to prevent drying out. The mashed potatoes benefit from a splash of milk or cream before gentle reheating on the stovetop or microwave. Carrots can be enjoyed cold in salads or warmed in the oven alongside the chicken for about 10 minutes.

    Common Issues & Solutions

    If your chicken skin isn’t crisping properly, try positioning it higher in the oven or finishing with a quick broil—just watch carefully to prevent burning! For mashed potatoes that turned out gluey, you likely overworked them; next time, be gentler and use a ricer or food mill instead of a mixer. If your carrots are cooking unevenly, cut them to more uniform sizes and make sure they’re not overcrowded. And if your herb butter is sliding off the chicken rather than flavoring it, make sure you’re really working it under the skin and creating a pocket between the skin and meat.

    Frequently Asked Questions

    Can I use boneless chicken for this Garlic Herb Chicken recipe?

    Yes! Boneless chicken works great but cooks faster. Reduce cooking time by about 10-15 minutes and use a meat thermometer to ensure it reaches 165°F without overcooking.

    What herbs work best with this dish?

    Rosemary, thyme, and parsley create a classic flavor profile. Sage is wonderful in fall, while tarragon and chives add brightness in spring.

    Can I make components of this meal ahead of time?

    Absolutely! Prepare the herb butter and prep the vegetables up to 24 hours ahead. The mashed potatoes can be made 2 hours ahead and kept warm in a slow cooker.

    How can I make this recipe dairy-free?

    Replace butter with olive oil in the herb mixture and use your favorite plant-based milk and vegan butter for the mashed potatoes. The flavor profile remains delicious!

    What wine pairs well with Garlic Herb Chicken with Creamy Mash & Roasted Carrots?

    A medium-bodied white like Chardonnay or Viognier complements the creamy elements, while a light Pinot Noir works beautifully with the herb-roasted chicken.

    Final Thoughts

    This Garlic Herb Chicken with Creamy Mash & Roasted Carrots has become my definition of perfect comfort food—impressive enough for company yet simple enough for weeknights. There’s something deeply satisfying about creating a complete meal where each component shines while complementing the others. The combination of crispy-skinned, herb-infused chicken alongside creamy potatoes and sweet roasted carrots creates a plate that nourishes both body and soul. I hope this recipe brings as much joy to your table as it has to mine! For more delicious inspiration, visit our Pinterest page where we share new comfort food ideas weekly.

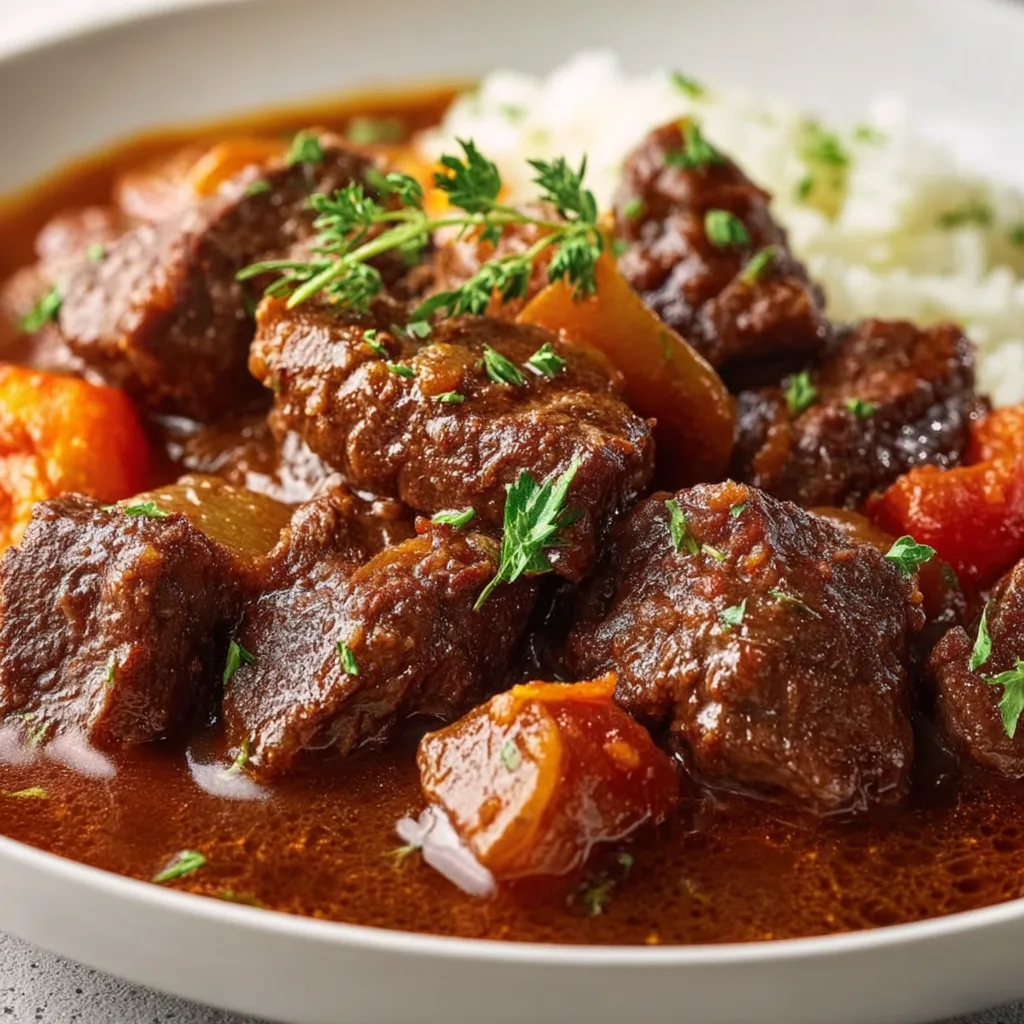
  • Slow Cooker Pepper Steak Recipe That Will Blow Your Mind!

    Slow Cooker Pepper Steak Recipe That Will Blow Your Mind!

    Slow Cooker Pepper Steak Recipe That Will Blow Your Mind!

    Slow Cooker Pepper Steak is one of those magical comfort meals that practically makes itself. The tender strips of beef, vibrant bell peppers, and rich savory sauce come together in a symphony of flavors while your trusty slow cooker does all the work. I first discovered this recipe during a particularly hectic week when my kitchen renovation left me with just a slow cooker and a dream. The aroma that filled my home as this dish simmered all day was nothing short of heavenly. If you’re craving something that delivers maximum flavor with minimum effort, this hearty dish from my collection is exactly what you need.

    Recipe

    Why You’ll Love This Slow Cooker Pepper Steak

    Perfect for Busy Days

    This slow cooker pepper steak is a lifesaver on those days when you’re juggling a million things. Just 15 minutes of morning prep, and you’ll return home to a restaurant-quality meal. The beef becomes incredibly tender as it cooks low and slow, absorbing all those savory flavors from the soy sauce, ginger, and garlic. I love how the bell peppers maintain just enough texture to provide a satisfying contrast to the melt-in-your-mouth beef. My neighbor actually knocked on my door last time I made this, drawn in by the irresistible aroma wafting from my kitchen!

    Budget-Friendly Gourmet

    One of the greatest advantages of slow cooker recipes like this pepper steak is their ability to transform economical cuts of beef into something extraordinary. Chuck roast or flank steak work beautifully here, sliced against the grain for maximum tenderness. The slow cooking process breaks down the tougher fibers, resulting in meat that rivals expensive steakhouse offerings. Plus, bell peppers are often on sale, making this an affordable way to feed a family. I’ve calculated this meal at less than $3 per serving when made with sale ingredients – a fraction of takeout prices!

    Essential Tips & Tricks

    Perfecting the Meat Texture

    For the most tender pepper steak results, slice your beef thinly against the grain before adding it to the slow cooker. This cuts through the muscle fibers and results in meat that practically melts in your mouth. I also recommend browning the meat first in a hot skillet with a touch of oil – this extra step takes just 5 minutes but creates those delicious caramelized flavors that make the dish extraordinary. For maximum convenience, you can even prep and slice everything the night before, storing the components separately in the refrigerator until morning.

    Managing Moisture and Flavor

    The secret to a perfectly balanced slow cooker pepper steak lies in managing the moisture. Too much liquid creates a soupy mess, while too little risks burning. I’ve found that 3/4 cup of beef broth provides the ideal base. Add your bell peppers during the last hour of cooking to keep them vibrant and prevent them from turning to mush. For an extra flavor boost, try adding a tablespoon of oyster sauce alongside the soy sauce – it adds an incredible umami depth that takes this dish to new heights!

    Serving Ideas & Creative Variations

    Perfect Pairings

    This pepper steak creates a beautiful pool of savory sauce that begs to be spooned over something absorbent. Fluffy white rice is the classic choice, but don’t stop there! Try serving it over cauliflower rice for a lower-carb option, or spoon it onto wide egg noodles for a fusion twist. I particularly love it with a side of steamed broccoli that catches all those delicious juices. For a complete meal that will impress dinner guests, pair it with a simple cucumber salad dressed with rice vinegar and sesame oil – the cool crunch perfectly complements the rich, tender beef.

    Exciting Flavor Twists

    While traditional pepper steak is magnificent on its own, don’t be afraid to make it your own! Add a handful of snow peas or sliced mushrooms during the final hour for extra texture and nutrition. For a spicier version, include a teaspoon of sriracha or a sprinkle of red pepper flakes. My personal favorite variation includes a tablespoon of hoisin sauce and a splash of orange juice for a sweet-savory twist that reminds me of my favorite Chinese restaurant. You can even swap the beef for chicken thighs or pork shoulder with delicious results!

    Storage & Troubleshooting Guide

    Storing and Reheating

    This slow cooker pepper steak actually improves overnight as the flavors continue to meld, making it perfect for meal prep. Store leftovers in airtight containers in the refrigerator for up to 4 days, or freeze portions for up to 3 months. When reheating, add a splash of beef broth to restore moisture, and warm gently on the stovetop or microwave until just heated through. I like to prepare a double batch specifically to freeze individual portions for those nights when cooking feels impossible – future you will be incredibly grateful for this delicious homemade freezer meal!

    Common Problems and Solutions

    If your pepper steak sauce is too thin, try this simple fix: mix 1 tablespoon of cornstarch with 2 tablespoons of cold water, then stir this slurry into the slow cooker during the last 30 minutes of cooking with the lid off. For beef that isn’t as tender as you’d like, your cooking time might need extending – tough cuts sometimes need an extra hour or two to reach that perfect texture. If your dish tastes bland, brighten it with a splash of rice vinegar or a squeeze of fresh lime juice just before serving. These acidic notes will wake up all the flavors!

    Frequently Asked Questions

    Can I make Slow Cooker Pepper Steak with frozen meat?

    For safety reasons, I don’t recommend using frozen meat directly in the slow cooker. Always thaw your beef completely in the refrigerator before slicing and cooking to ensure even cooking and proper food safety.

    What’s the best cut of beef for Slow Cooker Pepper Steak?

    Flank steak, chuck roast, or round steak work beautifully. These economical cuts become incredibly tender during the slow cooking process, absorbing all the delicious flavors of the sauce.

    Can I add vegetables other than bell peppers?

    Absolutely! Snow peas, mushrooms, onions, and water chestnuts are excellent additions. Add firmer vegetables earlier in the cooking process and more delicate ones in the last hour.

    How do I prevent my bell peppers from getting mushy?

    Add your bell peppers during the final hour of cooking time. This allows them to soften while still maintaining some texture and their vibrant color.

    Can I make this recipe in an Instant Pot instead?

    Yes! Use the sauté function to brown the meat, then pressure cook on high for 20 minutes with a natural release. Add peppers, then pressure cook for an additional 2 minutes.

    Final Thoughts

    This Slow Cooker Pepper Steak has become one of my most requested recipes for good reason. It transforms simple ingredients into a crave-worthy meal with minimal effort, making it perfect for both weeknight dinners and special occasions. The combination of tender beef, colorful peppers, and that rich, savory sauce creates pure comfort in a bowl. I hope this recipe brings as much joy to your table as it has to mine! For more delicious slow cooker inspiration, be sure to check out my Pinterest collection of comfort food favorites.

  • Crispy Hot Honey Feta Chicken That Will Blow Your Mind!

    Crispy Hot Honey Feta Chicken That Will Blow Your Mind!

    Crispy Hot Honey Feta Chicken That Will Blow Your Mind!

    Crispy Hot Honey Feta Chicken combines everything I love about comfort food – golden, crunchy chicken cutlets drizzled with spicy-sweet honey and topped with crumbled feta that gets slightly melty against the hot surface. The first time I made this for my family, my kitchen filled with that irresistible aroma of seasoned breadcrumbs hitting hot oil. My husband walked in, took one deep breath, and said, “Whatever that is, I want it now!” The perfect balance of heat, sweetness, and tangy cheese makes this dish an absolute showstopper that’s surprisingly simple to prepare. If you love the combination of sweet and spicy, check out my Sausage Ricotta Honey Hot Pizza too!

    Recipe

    Why You’ll Love This Crispy Hot Honey Feta Chicken

    A Symphony of Textures and Flavors

    The magic of this Crispy Hot Honey Feta Chicken lies in its contrasting elements that somehow work in perfect harmony. The exterior crunch gives way to juicy, tender chicken inside, while the hot honey creates a glossy, sticky coating that clings to every bite. I love watching the feta slowly soften against the warm chicken without fully melting. The tangy, salty cheese cuts through the sweetness of the honey, creating that perfect bite that makes you close your eyes and savor the moment. It’s comfort food elevated to something special enough for guests.

    Quick Enough for Weeknights, Impressive Enough for Company

    What I adore about this Crispy Hot Honey Feta Chicken is how it transforms a basic chicken dinner into something that feels restaurant-worthy in under 30 minutes. The ingredients are pantry staples, but the combination feels fresh and exciting. The visual appeal alone – that golden crust, the amber honey drizzle, and the snow-white feta crumbles – makes this dish Instagram-worthy without any fussy techniques. I’ve served this on busy Tuesdays and for Saturday dinner parties with equal success.

    Essential Tips & Tricks

    Perfecting the Crispy Coating

    For truly Crispy Hot Honey Feta Chicken, don’t skip pounding the chicken to even thickness – this ensures perfect cooking and maximum crunch. My secret weapon is a double dredge – flour, then egg, then a mixture of panko and regular breadcrumbs for varied texture. Make sure your oil is hot enough before adding chicken (test with a breadcrumb – it should sizzle immediately). Don’t crowd the pan! Work in batches to maintain that golden crust. The sound of the sizzle as the chicken hits the oil is your reassurance that crispiness is on its way.

    Balancing the Hot Honey Drizzle

    The hot honey component of Crispy Hot Honey Feta Chicken requires a delicate balance. I recommend starting with good-quality honey and infusing it with your preferred heat source – crushed red pepper flakes, cayenne, or even a dash of hot sauce. Warm it gently; don’t boil it. The honey should be loose enough to drizzle but not so hot that it loses its viscosity. For a milder version that’s still flavorful, try my Sticky Honey Garlic Steak and Rotini approach to sweet heat balance.

    Serving Ideas & Creative Variations

    Perfect Pairings for a Complete Meal

    Crispy Hot Honey Feta Chicken pairs beautifully with sides that complement its flavor profile. I love serving it with a crisp arugula salad dressed simply with lemon and olive oil – the peppery greens cut through the richness perfectly. For heartier appetites, roasted lemon potatoes or a simple orzo with herbs make excellent accompaniments. The chicken also works wonderfully sliced over pasta tossed with a light garlic oil. For an impressive spread, add my Crispy Garlic Air Fryer Broccoli on the side.

    Exciting Twists on the Classic

    While the traditional Crispy Hot Honey Feta Chicken is divine, don’t be afraid to experiment! Try using different cheeses – goat cheese adds tangy creaminess, while blue cheese brings bold flavor. The hot honey can be customized with garlic, herbs, or even a splash of bourbon for depth. For a fun presentation, slice the chicken and serve it in warm pitas with cucumber, tomatoes, and a drizzle of tzatziki. You can also transform this into sliders by serving on mini buns with a slice of pickle for a crowd-pleasing appetizer.

    Storage & Troubleshooting Guide

    Keeping It Crispy for Leftovers

    Storing Crispy Hot Honey Feta Chicken properly ensures you can enjoy that delicious crunch even the next day. Allow the chicken to cool completely before refrigerating in an airtight container, separating layers with parchment paper. For reheating, skip the microwave – it’ll make your beautiful crust soggy! Instead, place in a 350°F oven for 10-15 minutes until heated through. I recommend adding the feta and hot honey fresh after reheating for the best texture and flavor profile. Properly stored, the chicken will maintain quality for up to 3 days.

    Solving Common Cooking Challenges

    If your Crispy Hot Honey Feta Chicken coating is falling off, your pan likely wasn’t hot enough when you added the chicken. The immediate sear is crucial for adhering the breading. Another tip: let the breaded chicken rest for 5-10 minutes before frying to help the coating set. If your honey sauce is too spicy, temper it with a touch more honey or a small pat of butter. For chicken that’s browning too quickly on the outside but remains undercooked inside, lower the heat and finish cooking with a lid to trap heat.

    Frequently Asked Questions

    Can I make Crispy Hot Honey Feta Chicken in an air fryer?

    Absolutely! Spray the breaded chicken with cooking oil and air fry at 380°F for about 12 minutes, flipping halfway. You’ll get a similar crunch with less oil.

    What’s the best chicken cut to use?

    Boneless, skinless chicken breasts work best when pounded thin. Thighs are a juicier alternative but may need slightly longer cooking time.

    How spicy is the hot honey?

    The heat level is customizable. Start with 1 teaspoon of red pepper flakes per ½ cup honey and adjust to your preference.

    Can I prepare components ahead of time?

    You can bread the chicken up to 4 hours ahead and refrigerate. The hot honey can be made 2 weeks in advance and stored in a jar.

    What can I substitute for feta in Crispy Hot Honey Feta Chicken?

    Goat cheese, ricotta salata, or even crumbled queso fresco work well. For a dairy-free version, try a sprinkle of nutritional yeast.

    Final Thoughts

    Crispy Hot Honey Feta Chicken represents what I love most about cooking – simple ingredients transformed into something memorable through technique and creativity. The combination of textures and flavors creates a dish that feels special without being complicated. Every time I serve it, I’m reminded that good food doesn’t need to be fussy to be impressive. I hope this recipe brings the same joy to your table that it has to mine! For more delicious inspiration, follow me on Pinterest where I share all my favorite comfort food creations.