Category: Dinner

Easy, tasty dinner ideas for busy nights. Simple recipes, quick prep, and family-friendly meals you’ll make again and again.

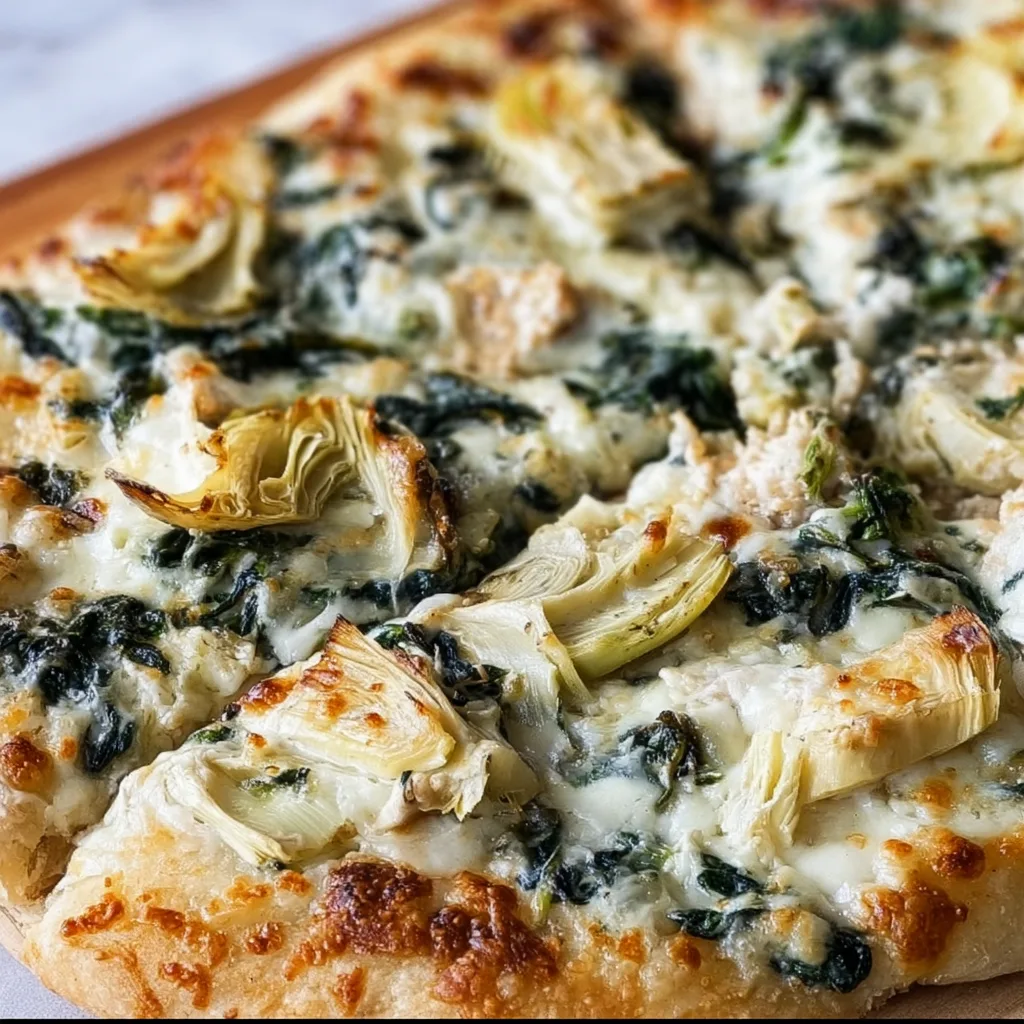
  • Spinach Artichoke Pizza: Irresistibly Creamy & Delicious!

    Spinach Artichoke Pizza: Irresistibly Creamy & Delicious!

    Spinach Artichoke Pizza: Irresistibly Creamy & Delicious!

    This Spinach Artichoke Pizza transforms everyone’s favorite creamy dip into an irresistible pizza that’ll have you reaching for seconds before you’ve finished your first slice! The combination of gooey cheese, tender spinach, and tangy artichoke hearts creates a symphony of flavors that dance across your taste buds with each bite. I first created this recipe during a rainy Sunday when I was craving both comfort food and something a bit more sophisticated than my usual pepperoni standby. The moment that first slice hit my plate, with cheese stretching in perfect strings, I knew I’d stumbled onto something magical that I just had to share with you all.

    Recipe

    Why You’ll Love This Spinach Artichoke Pizza

    A Perfect Balance of Flavors and Textures

    There’s something almost magical about the way the creamy white sauce creates the perfect canvas for the slightly bitter spinach and briny artichoke hearts. Each bite delivers a beautiful contrast between the crispy crust and the velvety toppings. I love how the garlic infuses the entire pizza with its aromatic essence, while the combination of mozzarella and parmesan creates that perfect cheese pull we all secretly judge a good pizza by. The first time my neighbor tried this, she declared it “restaurant quality” – which might be the highest compliment a home cook can receive!

    Quick Weeknight Dinner Solution

    This spinach artichoke pizza comes together in just about 30 minutes, making it perfect for those evenings when you want something homemade but hassle-free. Most of the ingredients are pantry and freezer staples in my house – I always keep frozen spinach and a jar of artichoke hearts on hand specifically for this recipe. The dough can be store-bought to save time or made ahead on the weekend. I’ve served this on busy Thursdays after work and for impromptu gatherings when friends drop by unexpectedly, and it’s always met with delight and requests for the recipe.

    Essential Tips & Tricks

    Perfecting Your Pizza Dough

    The foundation of any great pizza is its crust, and this spinach artichoke version deserves the best base possible. For a crispy bottom with a chewy interior, preheat your pizza stone or sheet pan in the oven before adding the dough. I learned this trick from my Italian neighbor, and it makes all the difference! Make sure to thoroughly drain and squeeze dry your spinach – excess moisture is the enemy of crispy pizza. If you’re using fresh spinach instead of frozen, sauté it briefly with a touch of olive oil and garlic before adding it to your pizza for the best flavor development.

    Creating the Ideal Creamy Base

    The white sauce for this spinach artichoke pizza needs to be thick enough to stay put but still spreadable. I recommend making it slightly thicker than you might think necessary, as it will thin out slightly during baking. For the richest flavor, use a combination of cream cheese and sour cream as your base, then enhance it with freshly grated parmesan – never the pre-grated stuff! Adding a pinch of red pepper flakes creates a subtle heat that balances the richness perfectly. For an extra layer of flavor, try roasting your garlic before adding it to the sauce.

    Serving Ideas & Creative Variations

    Perfect Pairings for Your Pizza Night

    This spinach artichoke pizza pairs beautifully with a simple arugula salad dressed with lemon and olive oil – the peppery greens and bright acidity cut through the richness perfectly. For drinks, a crisp Pinot Grigio or a light lager complements without overwhelming the delicate flavors. If you’re hosting a pizza night, consider setting up a DIY pizza station with this as the star, alongside a simpler option like a classic margherita. I love to finish the meal with something light and fruity, like a sorbet or fresh berries, to cleanse the palate after all that delicious creaminess.

    Exciting Twists on the Classic Recipe

    Don’t be afraid to make this recipe your own! Try adding caramelized onions for sweetness, sun-dried tomatoes for tanginess, or even some crumbled bacon for a smoky element. For a seafood twist, top with some cooked shrimp or crabmeat just before serving – it’s reminiscent of my popular crab rangoon pizza but with a different flavor profile. You can also play with different cheeses – smoked gouda adds depth, while a sprinkle of feta brings a salty punch. For a vegan version, use plant-based cream cheese and mozzarella – you’ll be surprised how delicious it still is!

    Storage & Troubleshooting Guide

    Keeping Your Pizza Fresh

    Like most pizzas, spinach artichoke pizza is best enjoyed fresh from the oven when the cheese is perfectly melty and bubbly. However, leftovers can be stored in an airtight container in the refrigerator for up to 3 days. To reheat, avoid the microwave which will make the crust soggy. Instead, place slices on a baking sheet in a 350°F oven for 5-7 minutes, or use a skillet over medium-low heat with a lid to create steam that will remelt the cheese while keeping the crust crispy. If you want to prep ahead, you can make the white sauce up to 2 days in advance.

    Solving Common Pizza Problems

    If your crust turns out soggy, the most likely culprit is excess moisture from the spinach or artichokes. Make sure to thoroughly drain both before adding them to your pizza. Another tip is to par-bake your crust for 3-4 minutes before adding toppings. If your cheese is browning too quickly before the crust is done, try positioning your rack lower in the oven or covering the top loosely with foil for part of the baking time. For those who find their crust too pale, brush the edges with olive oil mixed with a touch of honey for that perfect golden-brown color.

    Frequently Asked Questions

    Can I use fresh spinach instead of frozen for spinach artichoke pizza?

    Absolutely! Just sauté about 6 cups of fresh spinach until wilted, then drain well and chop. Fresh spinach adds a vibrant color and slightly different texture that many people prefer.

    How do I prevent my pizza from getting soggy?

    Ensure all toppings are well-drained and pat dry with paper towels. Pre-baking the crust for 3-4 minutes before adding toppings also creates a barrier against moisture.

    What cheese works best for this recipe?

    A combination of mozzarella for stretch, parmesan for flavor, and cream cheese in the base creates the perfect balance. For extra indulgence, add a sprinkle of fontina or gruyère.

    Can I make this pizza ahead of time?

    Yes! Prepare the components separately and assemble just before baking. Alternatively, par-bake the crust, add toppings, refrigerate, and finish baking when ready to serve.

    Is there a gluten-free option for spinach artichoke pizza?

    Definitely! Use your favorite gluten-free pizza crust or try a cauliflower crust for a lower-carb option. The toppings work beautifully with alternative crusts.

    Final Thoughts

    This spinach artichoke pizza has become my go-to recipe when I want to impress without spending hours in the kitchen. The combination of creamy sauce, tender vegetables, and melty cheese creates something far greater than the sum of its parts. I love seeing friends’ faces light up with that first bite – it’s the ultimate satisfaction for any home cook. Don’t forget to check out more of my pizza creations on Pinterest for endless inspiration. Whether you’re cooking for a crowd or treating yourself to a special dinner, this spinach artichoke pizza delivers comfort and elegance in every slice.
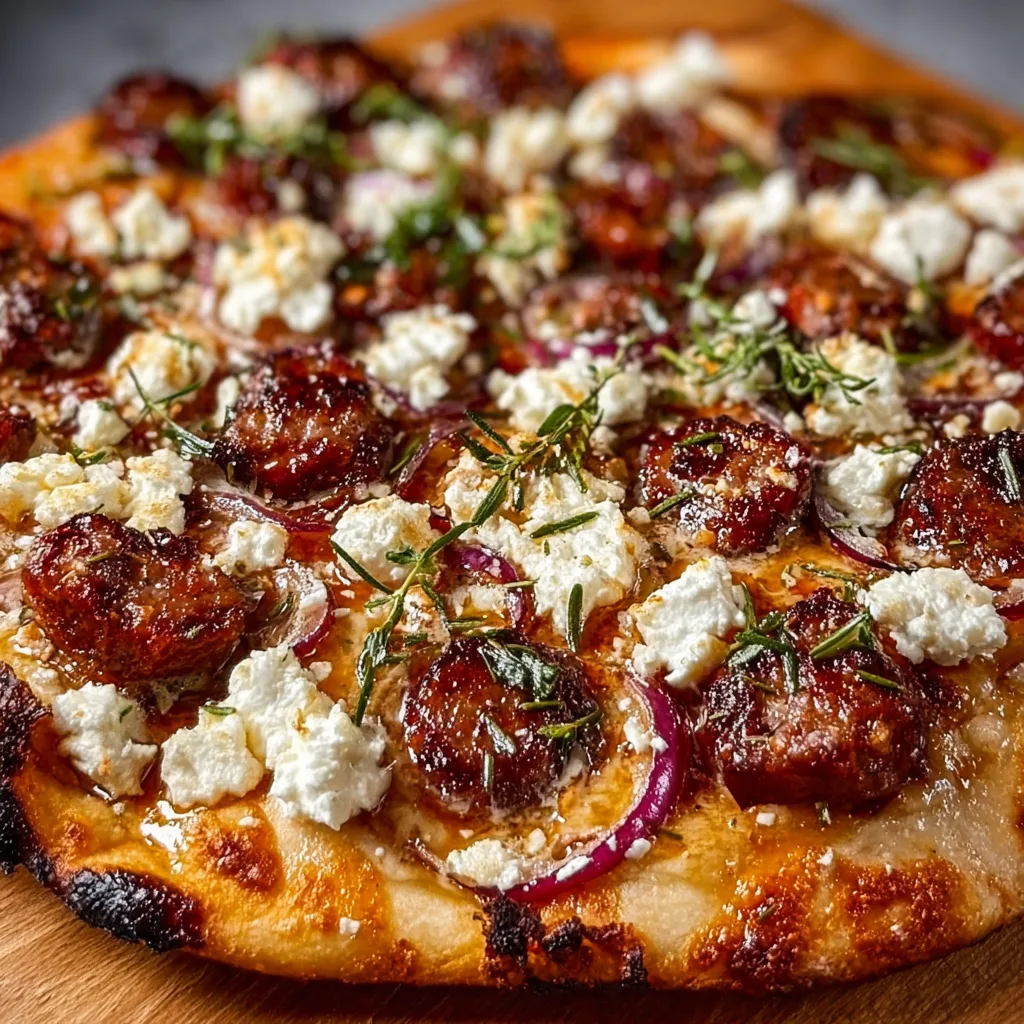
  • Hot Sausage Feta Honey Pizza: Irresistibly Bold Flavor Explosion!

    Hot Sausage Feta Honey Pizza: Irresistibly Bold Flavor Explosion!

    Hot Sausage Feta Honey Pizza: Irresistibly Bold Flavor Explosion!

    Hot Sausage Feta Honey Pizza combines all my favorite flavor dimensions in one irresistible bite—spicy Italian sausage, creamy feta, and that drizzle of honey that transforms everything it touches. The first time I made this for my Friday night gathering, my friend Mia actually gasped when she took her first bite. “Sweet, spicy, salty—how is this so perfect?” she whispered. That’s the magic of this pizza! The contrast between the heat of the sausage and the sweet honey creates an experience that’s both comforting and exciting. If you’re looking to elevate your homemade pizza game, this recipe is about to become your new obsession.

    Recipe

    Why You’ll Love This Hot Sausage Feta Honey Pizza

    A Symphony of Contrasting Flavors

    The beauty of this Hot Sausage Feta Honey Pizza lies in its perfect balance of opposing flavors. The spicy kick from the hot Italian sausage wakes up your taste buds while the creamy, tangy feta cools things down just enough. Then comes that golden drizzle of honey—transforming each bite into something magical. I love watching people’s expressions when they taste these flavors together for the first time. It’s like witnessing someone discover a new favorite song! The subtle sweetness cuts through the richness, creating a pizza experience that feels both familiar and entirely new at the same time.

    Quick and Impressive for Any Occasion

    This pizza might taste like it came from a fancy wood-fired restaurant, but it’s surprisingly simple to pull together. The prep time is minimal, especially if you use store-bought dough (I keep some in my freezer for pizza emergencies). You can have this ready in about 30 minutes, making it perfect for impromptu gatherings or those nights when you want something special without the fuss. I’ve made this for casual movie nights and more formal dinner parties alike—it always earns rave reviews. The combination looks stunning with minimal effort, which is my favorite kind of recipe!

    Essential Tips & Tricks

    Perfecting Your Pizza Dough

    Getting your dough right makes all the difference with this Hot Sausage Feta Honey Pizza. I recommend letting store-bought dough come to room temperature for at least 30 minutes before stretching—cold dough fights back! For the best texture, pre-bake your crust for 3-4 minutes before adding toppings. This prevents the dreaded soggy middle that can happen with juicy toppings like sausage. If you’re feeling adventurous, try a garlic-infused crust by brushing the edges with olive oil and minced garlic before baking. That extra step creates an aromatic experience that elevates the entire pizza.

    Balancing Your Toppings

    The key to this pizza’s success is restraint—resist the urge to pile on too many toppings! A light touch works best, especially with strong flavors like hot sausage and feta. I pre-cook my sausage until it’s just done, draining excess fat to prevent a greasy pizza. Crumble the feta rather than using thick chunks for better distribution of flavor. For the honey drizzle, wait until the pizza comes out of the oven—drizzling before baking will just burn the honey. I keep a special hot honey infused with chili flakes for this recipe, adding another dimension to the flavor profile.

    Serving Ideas & Creative Variations

    Perfect Pairings for Your Pizza Night

    This Hot Sausage Feta Honey Pizza deserves accompaniments that complement without overwhelming its complex flavors. A simple arugula salad with lemon vinaigrette makes the perfect counterpoint—the peppery greens and bright acidity balance the richness of the pizza. For drinks, try a crisp Pinot Grigio or a light IPA that won’t compete with the spice. I love serving this pizza as part of a casual spread with Mediterranean Spinach Feta Crisps for a themed night. For dessert, something light and refreshing works best—think berry sorbet or a simple affogato to cleanse the palate.

    Exciting Twists on the Classic Recipe

    Don’t be afraid to play with this versatile recipe! Swap the hot Italian sausage for nduja (spreadable spicy pork) for an even more intense flavor experience. For a Mediterranean twist, add thinly sliced preserved lemons and a sprinkle of za’atar after baking. Vegetarians can substitute spicy roasted mushrooms or plant-based sausage—the honey and feta still create that magical flavor combination. My friend with a fig tree inspired my favorite variation: adding thinly sliced fresh figs alongside the feta for a seasonal treat that elevates the honey notes. The beauty of this pizza is its adaptability while maintaining that sweet-spicy-salty balance.

    Storage & Troubleshooting Guide

    Keeping Your Pizza Fresh

    While this Hot Sausage Feta Honey Pizza is best enjoyed fresh from the oven, leftovers can still be delicious with proper storage. Allow pizza to cool completely before refrigerating to prevent condensation that leads to sogginess. Store slices in an airtight container with parchment paper between layers for up to 3 days. For reheating, skip the microwave! Instead, use a skillet over medium-low heat with a lid until the cheese melts, or a 350°F oven for 5-7 minutes. The crust crisps back up beautifully this way. If you’re meal prepping, consider baking the crust and storing toppings separately, then assembling just before serving.

    Solving Common Pizza Problems

    Even experienced home cooks encounter pizza challenges! If your crust is sticking to the pan, try a generous dusting of cornmeal or semolina flour before placing the dough. For overly soggy pizza, pre-cooking wet ingredients like sausage is crucial. If your edges are burning while the center remains undercooked, create a foil shield for the perimeter during the final minutes of baking. Finding your honey burning? Add it after baking, while the pizza is still hot but out of the oven. And if your feta isn’t melting as expected—that’s actually normal! Feta retains its shape when heated, which provides that delightful textural contrast against the melty mozzarella base.

    Frequently Asked Questions

    Can I make Hot Sausage Feta Honey Pizza ahead of time?

    Yes! Pre-bake the crust for 5 minutes, cool completely, then add toppings except honey. Refrigerate for up to 24 hours, then bake and add honey just before serving.

    What’s the best cheese combination for this pizza?

    I recommend a base of low-moisture mozzarella for meltability, topped with crumbled feta. The mozzarella provides stretch while feta adds tangy flavor contrast.

    Can I freeze leftover pizza?

    Absolutely! Wrap individual slices in plastic wrap, then foil, and freeze for up to 2 months. Reheat from frozen in a 375°F oven until hot.

    Is there a vegetarian alternative for the sausage?

    Try spicy roasted chickpeas or plant-based Italian sausage. The key is maintaining that spicy element to balance the sweet honey.

    How do I prevent my Hot Sausage Feta Honey Pizza from getting soggy?

    Pre-cook and drain the sausage thoroughly, use low-moisture mozzarella, and consider pre-baking your crust for 3-4 minutes before adding toppings.

    Final Thoughts

    This Hot Sausage Feta Honey Pizza has become my go-to recipe whenever I want to impress without spending hours in the kitchen. There’s something magical about the combination of spicy sausage, tangy feta, and sweet honey that keeps everyone coming back for another slice. I’ve watched this pizza turn skeptics into believers with just one bite—that moment when the flavors all come together is pure culinary joy. Whether you’re cooking for a crowd or treating yourself to something special, this pizza delivers an experience that feels both indulgent and accessible. Find more inspiration for your next cooking adventure on Pinterest!

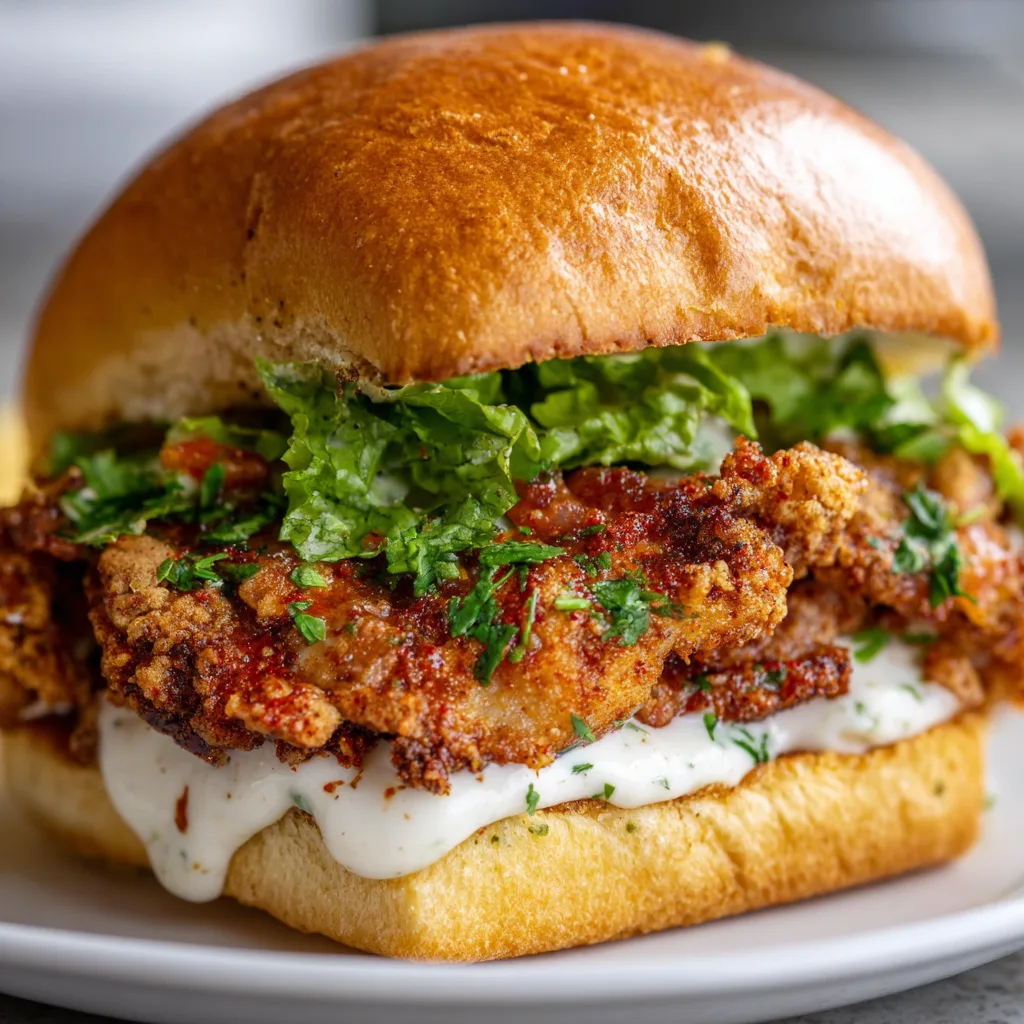
  • Cajun Crispy Chicken Sandwich with Garlic Aioli – Irresistibly Crispy!

    Cajun Crispy Chicken Sandwich with Garlic Aioli – Irresistibly Crispy!

    Cajun Crispy Chicken Sandwich with Garlic Aioli – Irresistibly Crispy!

    There’s something magical about that first bite into a Cajun Crispy Chicken Sandwich with Garlic Aioli – the perfect crunch, the warm kick of spices, and that creamy garlic spread that ties everything together. I still remember making these for my sister’s backyard gathering last summer; the sandwiches disappeared faster than I could snap a picture! This Southern-inspired sandwich brings together bold Cajun spices with a cooling aioli that creates a flavor explosion worthy of your favorite restaurant, but made right in your kitchen. Trust me, once you master this recipe, it’ll become your new go-to for impressing friends or treating yourself after a long day.

    Recipe

    Why You’ll Love This Cajun Crispy Chicken Sandwich with Garlic Aioli

    Perfect Balance of Flavors and Textures

    The magic of this sandwich lies in its perfect harmony of contrasts. The chicken breast is marinated in a zesty Cajun blend that infuses every bite with warmth without overwhelming heat. I love how the crispy, craggy exterior gives way to juicy, tender meat inside – it’s that textural contrast that makes you close your eyes with each bite. The buttery brioche bun adds a touch of sweetness while the cool, creamy garlic aioli cuts through the spice with its rich, velvety texture. Add some crisp lettuce and juicy tomato, and you’ve got a sandwich that hits every note on your palate.

    Quick Enough for Weeknights, Special Enough for Gatherings

    What I adore about this sandwich is its versatility. Despite its impressive flavor profile, it comes together in under 30 minutes, making it weeknight-friendly yet special enough for gatherings. The chicken can be prepped ahead and the aioli made in advance, so assembly is a breeze when hunger strikes. I’ve made these for casual Friday dinners and for impromptu get-togethers, and they never fail to impress. There’s something about serving a perfectly golden, crispy chicken sandwich that makes everyone feel like they’re getting restaurant-quality food without the wait or the price tag.

    Essential Tips & Tricks

    Mastering the Cajun Coating

    The key to that perfect crispy coating starts with proper preparation. I always pat my chicken breasts completely dry before dredging – moisture is the enemy of crispiness! For the ultimate crunch, I use a double-dredging technique: flour mixture, then buttermilk, then back into the flour mixture. Press the coating firmly onto the chicken to create those delicious craggy bits that get extra crispy. For authentic Cajun flavor, toast your spices in a dry pan for 30 seconds before mixing them into your flour – this simple step awakens the essential oils in the spices and makes a noticeable difference in the final flavor profile.

    Perfecting the Garlic Aioli

    The garlic aioli isn’t just a condiment – it’s the crowning glory of this sandwich! For the most flavorful aioli, roast whole garlic cloves until they’re soft and caramelized instead of using raw garlic. This mellows the sharpness while intensifying the savory notes. Let your mayo come to room temperature before mixing for the smoothest texture. A splash of lemon juice brightens everything up, while a pinch of cayenne creates a subtle warmth that complements the Cajun chicken beautifully. If you love garlic-forward flavors, try my Garlic Parmesan Cheeseburger Bombs for another crowd-pleasing option.

    Serving Ideas & Creative Variations

    Perfect Pairings for Your Sandwich

    This Cajun Crispy Chicken Sandwich deserves equally exciting sides! My go-to pairing is sweet potato fries tossed with a pinch of the same Cajun seasoning – the sweetness balances the sandwich’s spice beautifully. For a lighter option, a crisp coleslaw with apple cider vinegar dressing cuts through the richness. On hot summer days, nothing beats serving these with watermelon slices sprinkled with tajin for a sweet-spicy contrast. For drinks, a cold sweet tea or a citrusy lemonade complements the flavors perfectly. These sandwiches also pair wonderfully with my Cajun Chicken Alfredo for a full Southern-inspired feast.

    Exciting Twists on the Classic

    Don’t be afraid to make this sandwich your own! For a Nashville-inspired version, add honey and extra cayenne to your Cajun mix for a sweet-heat combo. Seafood lovers can substitute the chicken with firm white fish or shrimp for an incredible po’boy variation. Vegetarians aren’t left out – cauliflower steaks work beautifully with the same coating and cooking method. For an extra layer of flavor, add smoked gouda or pepper jack cheese. My personal favorite twist is adding pickled jalapeños and a thin layer of blackberry jam – the sweet-spicy-tangy combination is absolutely mind-blowing!

    Storage & Troubleshooting Guide

    Keeping Components Fresh

    For make-ahead convenience, store your components separately. The garlic aioli keeps beautifully in an airtight container in the refrigerator for up to 5 days, developing even deeper flavor overnight. If you have leftover fried chicken, store it uncovered in the refrigerator for up to 2 days – covering it creates condensation that softens the coating. To reheat, avoid the microwave! Instead, place the chicken in a 325°F oven for 10-15 minutes until heated through, which helps restore some crispiness. Store assembled sandwiches wrapped in parchment rather than plastic to prevent sogginess.

    Solving Common Challenges

    If your chicken coating isn’t crisping properly, your oil likely isn’t hot enough. Maintain a steady temperature between 350-375°F – use a thermometer for precision. If the outside browns too quickly while the inside remains undercooked, your heat is too high. For thick chicken breasts, butterfly or pound them to even thickness before cooking. If your aioli breaks or becomes too thin, whisk in an additional egg yolk at room temperature. For a coating that won’t stick, ensure you’re pressing it firmly onto the chicken and letting it rest for 5 minutes before frying to help the coating adhere.

    Frequently Asked Questions

    Can I make this Cajun Crispy Chicken Sandwich with Garlic Aioli ahead of time?

    Yes! Prepare the garlic aioli up to 5 days ahead and store refrigerated. You can also bread the chicken and keep it uncovered in the refrigerator for up to 4 hours before frying for maximum crispiness.

    What’s the best oil for frying the chicken?

    Vegetable, canola, or peanut oil work best due to their high smoke points. I prefer peanut oil for its subtle flavor that complements the Cajun spices without overpowering them.

    Can I bake or air-fry the chicken instead?

    Absolutely! Spray the breaded chicken with cooking oil and bake at 425°F for 20-25 minutes or air-fry at 390°F for 12-15 minutes, flipping halfway through either method.

    How spicy is this sandwich?

    The heat level is customizable. As written, it has a medium kick that most people enjoy. Reduce the cayenne for milder flavor or add extra hot sauce to the aioli for more heat.

    What can I substitute for buttermilk?

    Mix 1 cup milk with 1 tablespoon lemon juice or vinegar and let stand for 5 minutes. Greek yogurt thinned with a little milk also works beautifully as a buttermilk alternative.

    Final Thoughts

    This Cajun Crispy Chicken Sandwich with Garlic Aioli has become my signature dish for good reason – it strikes that perfect balance between comfort food and culinary adventure. There’s something deeply satisfying about creating a sandwich that rivals any restaurant version, with layers of flavor and texture that keep you coming back for another bite. Whether you’re cooking for family, friends, or just treating yourself, this recipe delivers that special something that turns an ordinary meal into a memorable experience. For more delicious recipes and inspiration, follow me on Pinterest where I’m always sharing new favorites!

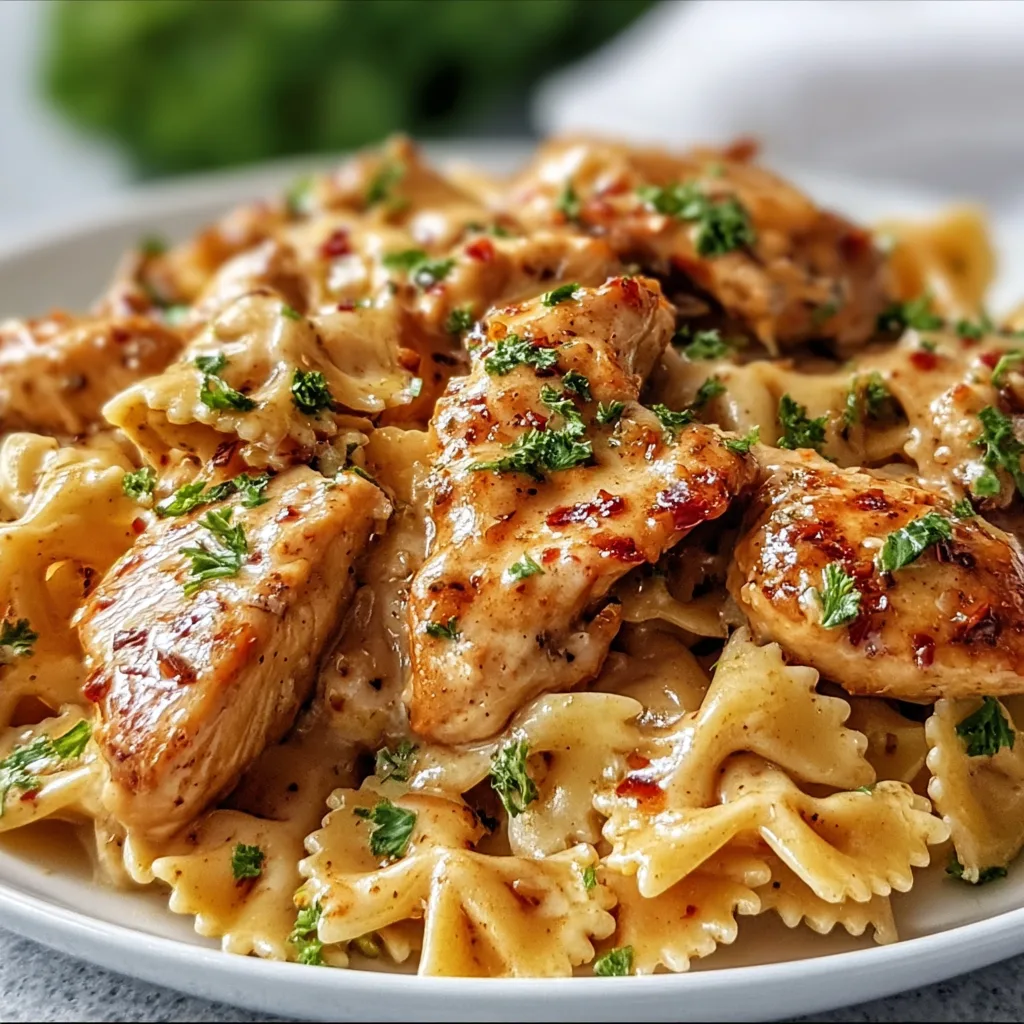
  • Creamy Cowboy Butter Chicken Pasta That Melts Hearts Instantly

    Creamy Cowboy Butter Chicken Pasta That Melts Hearts Instantly

    Creamy Cowboy Butter Chicken Pasta That Melts Hearts Instantly

    Creamy Cowboy Butter Chicken Pasta combines all the comforting flavors I crave when the evening turns chilly. The first time I made this dish, my kitchen filled with the aroma of garlic-infused butter and herbs that made my mouth water before I even took a bite. There’s something magical about the way the velvety sauce coats each pasta strand, creating the perfect vehicle for tender chicken pieces seasoned with that signature cowboy butter blend. If you’re looking for a crowd-pleasing dinner that feels both indulgent and homey, this recipe from Recipes Darleen needs to be your next kitchen adventure.

    Recipe

    Why You’ll Love This Creamy Cowboy Butter Chicken Pasta

    A Symphony of Rich Flavors

    The beauty of this Creamy Cowboy Butter Chicken Pasta lies in its perfect balance of flavors. The signature cowboy butter—a heavenly blend of garlic, herbs, and a hint of heat—transforms ordinary chicken into something extraordinary. I still remember the first time my fork twirled through those sauce-coated noodles, delivering that first bite where cream meets butter meets herbs. The slight kick from red pepper flakes cuts through the richness, while fresh herbs add brightness that keeps you coming back for more. It’s comfort food elevated to something special.

    One-Pot Wonder for Busy Nights

    On those evenings when cooking feels like a mountain to climb, this pasta dish becomes my saving grace. Everything comes together in just one pot, meaning fewer dishes and more time to savor each bite. The pasta cooks right in the sauce, absorbing all those wonderful flavors while creating a naturally thickened creamy texture without extra steps. I’ve made this on frantic weeknights when time was tight, and still managed to feel like I’d created something special. The simplicity-to-flavor ratio here is truly unbeatable.

    Essential Tips & Tricks

    Mastering the Cowboy Butter Base

    The heart of this dish is undoubtedly the cowboy butter, so don’t rush this foundation. I learned the hard way that low and slow is the secret here—let that butter melt gently while infusing with garlic and herbs. Browning the butter slightly adds a nutty dimension that elevates the entire dish. Make sure your herbs are fresh for the brightest flavor; I like to rub them between my palms before adding to release their essential oils. This aromatic base creates the flavor platform that makes this pasta irresistible.

    Perfect Pasta Technique

    The difference between good pasta and amazing pasta often comes down to timing and technique. For this creamy cowboy butter chicken pasta, cook your pasta just shy of al dente before it meets the sauce—it will continue cooking as it mingles with the creamy elements. Reserve about 1/2 cup of that starchy pasta water before draining; it’s liquid gold that helps bind the sauce to the pasta. This technique reminds me of how my grandmother would always save pasta water, a trick I initially dismissed but now swear by for creating silky sauces like in my Creamy Parmesan Baked Caesar Chicken.

    Serving Ideas & Creative Variations

    Perfect Pairings for a Complete Meal

    This creamy pasta begs for simple, complementary sides that won’t compete with its rich flavors. I serve it with a bright arugula salad dressed with just lemon and olive oil to cut through the richness. Garlic bread is another no-fail option—I’ve watched guests use it to soak up every last drop of that cowboy butter sauce. For a more substantial meal, roasted asparagus or broccolini adds color and nutrition. My family’s favorite combination includes a side of my Sauteed Bok Choy which offers a crisp, green contrast to the creamy pasta.

    Exciting Flavor Twists

    Don’t be afraid to make this recipe your own! I’ve experimented with adding sundried tomatoes and spinach for a pop of color and extra nutrients. Swapping chicken for shrimp creates an elegant variation perfect for date night. For a smokier profile, add crispy bacon bits or smoked paprika to the cowboy butter base. My personal favorite twist is incorporating caramelized onions for sweet depth against the savory notes. When corn is in season, fresh kernels add delightful sweetness and texture that complements the creamy sauce beautifully.

    Storage & Troubleshooting Guide

    Keeping Leftovers at Their Best

    This pasta reheats beautifully, making it perfect for meal prep or next-day lunches. Store leftovers in an airtight container in the refrigerator for up to three days. The sauce tends to thicken when chilled, so when reheating, add a splash of milk or chicken broth to restore its creamy consistency. I find the microwave works well for quick lunches—just cover with a damp paper towel and heat in 30-second intervals, stirring between. For best results though, gentle reheating in a skillet allows you to carefully bring back that silky texture without overheating.

    Fixing Common Sauce Issues

    Even experienced cooks occasionally face sauce emergencies! If your sauce breaks or looks curdled, lower the heat immediately and whisk in a tablespoon of cold cream. For sauce that’s too thin, a cornstarch slurry (one teaspoon cornstarch mixed with a tablespoon of cold water) will thicken things up nicely. Too thick? Simply add pasta water or chicken broth a tablespoon at a time. If your sauce lacks flavor depth, a teaspoon of Dijon mustard or splash of white wine can work wonders. I once rescued an underseasoned batch with a sprinkle of ranch seasoning—surprisingly delicious!

    Frequently Asked Questions

    Can I make Creamy Cowboy Butter Chicken Pasta ahead of time?

    Yes! Prepare it up to a day ahead, but undercook the pasta slightly. Store separately from the sauce if possible, and combine when reheating with a splash of cream to refresh the texture.

    What’s the best pasta shape for this recipe?

    Fettuccine and pappardelle work beautifully as their wide surfaces capture the creamy sauce. Medium shells and rotini are excellent alternatives as they trap pockets of the delicious cowboy butter sauce.

    Can I make this dish vegetarian?

    Absolutely! Substitute the chicken with mushrooms, roasted cauliflower, or plant-based chicken alternatives. The cowboy butter sauce works wonderfully with these options too.

    How spicy is this dish?

    The heat level is mild to medium depending on your red pepper flake amount. For a kid-friendly version, reduce or omit the pepper flakes and add them individually at the table.

    What’s the secret to preventing the cream from curdling?

    Lower the heat before adding cream and avoid boiling once it’s added. Room temperature cream also incorporates more smoothly than cold cream straight from the refrigerator.

    Final Thoughts

    This Creamy Cowboy Butter Chicken Pasta has become my go-to recipe when I want to impress without stress. There’s something magical about watching someone take that first bite and seeing their eyes light up with pleasure. The combination of tender chicken, al dente pasta, and that velvety cowboy butter sauce creates a memorable meal that feels special enough for company yet simple enough for weeknights. I hope this dish brings as much joy to your table as it has to mine. For more comforting pasta inspirations, visit our Pinterest board where I share even more cowboy butter creations!

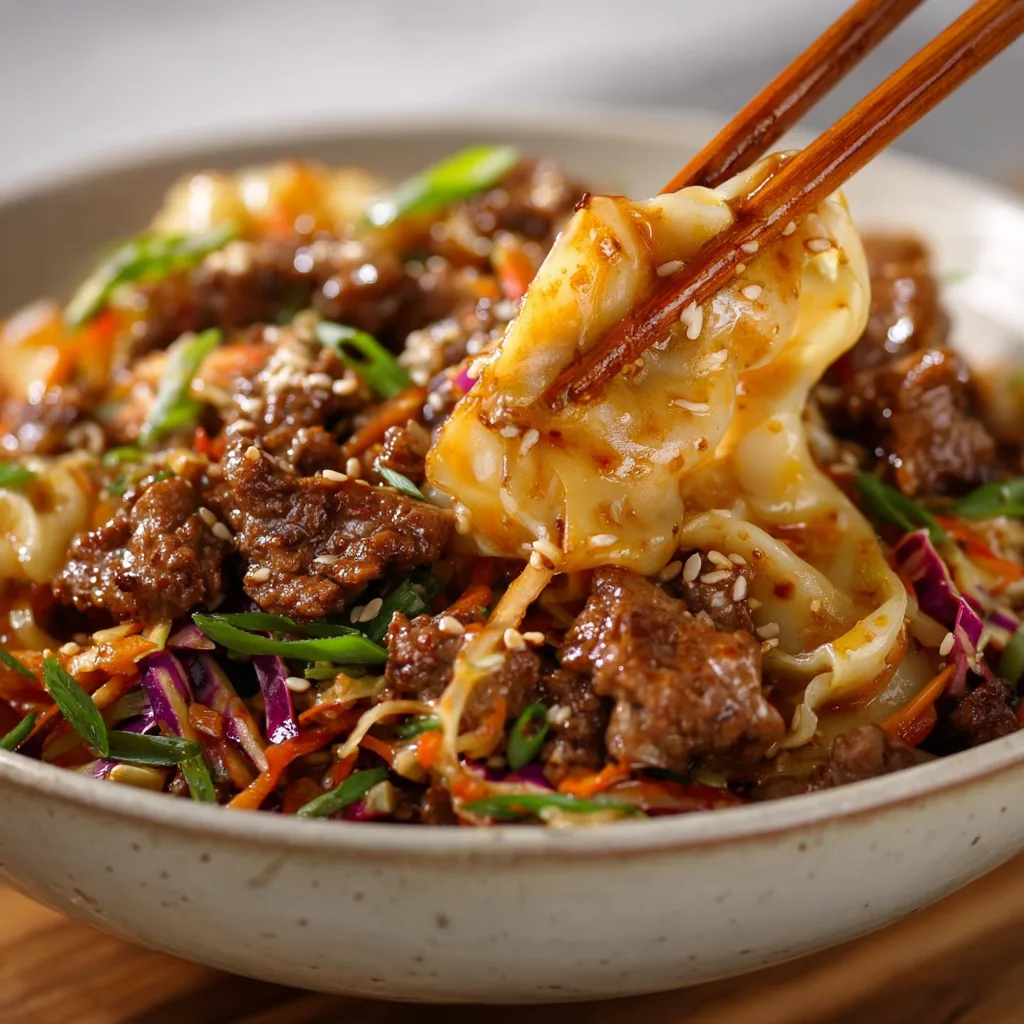
  • Potsticker Noodle Bowl with Beef & Cabbage Slaw You’ll Crave!

    Potsticker Noodle Bowl with Beef & Cabbage Slaw You’ll Crave!

    Potsticker Noodle Bowl with Beef & Cabbage Slaw You’ll Crave!

    This Potsticker Noodle Bowl with Beef & Cabbage Slaw combines everything I love about takeout into one cozy, homemade bowl of goodness. The first time I made this, my kitchen filled with that irresistible aroma of sesame oil and ginger that instantly transports me back to my favorite little dumpling shop downtown. There’s something magical about the tender beef, slippery noodles, and the fresh crunch of cabbage slaw that makes this dish both comforting and exciting. It’s become my go-to when I’m craving something that feels special but doesn’t require hours in the kitchen—perfect for those nights when you want something delicious but your energy tank is running low.

    Recipe

    Why You’ll Love This Potsticker Noodle Bowl with Beef & Cabbage Slaw

    A Complete Meal in One Bowl

    This potsticker noodle bowl truly delivers on flavor and satisfaction without the fuss of multiple dishes. The umami-rich beef mimics those delicious potsticker fillings we all crave, while the noodles soak up all that savory sauce. I love how the textures play together—tender meat, silky noodles, and that fresh cabbage crunch. Last week, I served this to friends who stopped by unexpectedly, and they couldn’t believe it wasn’t takeout! The beauty is that everything cooks in stages but in the same pan, so cleanup is minimal. Perfect for busy weeknights when you want something that feels special.

    Budget-Friendly Takeout Alternative

    Let’s be honest—takeout adds up quickly! This potsticker noodle bowl gives you all those restaurant flavors at a fraction of the cost. Ground beef is economical yet flavorful, especially when seasoned with ginger, garlic, and soy sauce. The cabbage slaw stretches the meal while adding freshness and crunch. I calculated that making this at home costs about a third of what I’d pay for similar takeout for my family. Plus, you can adjust ingredients based on what’s on sale or already in your pantry. When I’m feeling particularly budget-conscious, I’ll even swap half the beef for mushrooms—it maintains that meaty texture while stretching your dollar even further.

    Essential Tips & Tricks

    Perfecting the Beef Mixture

    The secret to restaurant-quality flavor in your potsticker noodle bowl is all in how you handle the beef. Start by browning it properly—don’t overcrowd the pan and resist the urge to stir constantly. Let it develop those crispy edges that mimic the bottoms of pan-fried dumplings. I learned this the hard way after making mushy meat for years! Add your aromatics (ginger, garlic, green onions) only after the beef has browned to prevent burning. A splash of water helps the seasonings distribute evenly throughout the meat. For extra flavor, a tablespoon of toasted sesame oil at the end makes all the difference—it’s that distinctive potsticker flavor that brings everything together.

    Creating the Perfect Cabbage Slaw

    The cabbage slaw isn’t just a garnish—it’s an essential component that brings freshness and texture to your potsticker noodle bowl. For the best results, slice your cabbage ultra-thin using a sharp knife or mandoline. I like to prepare the slaw while the beef cooks and let it sit with a pinch of salt to soften slightly. A simple dressing of rice vinegar, a touch of sugar, and sesame oil gives it that perfect tangy-sweet balance that complements the savory beef. For added color and nutrition, toss in shredded carrots, thinly sliced bell peppers, or even some edamame. This colorful slaw is similar to what I use in my BBQ Chicken Coleslaw Wraps but with an Asian-inspired twist.

    Serving Ideas & Creative Variations

    Family-Style Presentation

    Transform your potsticker noodle bowl into an interactive dining experience by serving it family-style. Place the hot noodles and beef in a large serving bowl, with the fresh cabbage slaw and various toppings in separate dishes around it. Let everyone build their own perfect bowl! I started doing this after noticing how my kids were more likely to try everything when they had control over their portions. Set out small bowls of chopped peanuts, sesame seeds, extra sliced green onions, lime wedges, and sriracha or chili oil. This approach is perfect for gatherings where you want something casual yet impressive, like when I hosted an impromptu movie night and needed something easy but crowd-pleasing.

    Seasonal Adaptations

    One of the things I love most about this potsticker noodle bowl is how easily it adapts to whatever season we’re in. In summer, I add fresh herbs like mint, basil, or cilantro to brighten everything up. During fall and winter, I might toss in some roasted butternut squash cubes or swap the cabbage slaw for quick-pickled root vegetables. Spring calls for tender asparagus tips or sugar snap peas added in the last minute of cooking. You could even take inspiration from my Honey Glazed Salmon Bowl and add a protein switch-up—shrimp or tofu work beautifully in place of beef, each bringing their own character to the dish while maintaining that potsticker-inspired flavor profile.

    Storage & Troubleshooting Guide

    Proper Storage for Leftovers

    To maintain the quality of your potsticker noodle bowl leftovers, proper storage is key. I recommend storing the components separately when possible—keep the noodles and beef mixture in one container and the fresh cabbage slaw in another. This prevents the cabbage from wilting and the noodles from absorbing all the liquid and becoming soggy. Refrigerate promptly and consume within 3 days for best quality. When reheating, add a splash of water or broth to the noodle-beef mixture before microwaving to restore moisture. I’ve found that a quick 30-second refresh in a hot skillet can revive the textures beautifully, making day-two potsticker bowls almost as good as fresh.

    Fixing Common Issues

    Even experienced cooks encounter challenges! If your potsticker noodle bowl sauce seems too thin, try a cornstarch slurry (1 teaspoon cornstarch mixed with 1 tablespoon cold water) added to the simmering sauce. For sauce that’s too thick, a splash of chicken or vegetable broth loosens things up perfectly. If your noodles clump together, rinse them under cold water immediately after cooking, then toss with a teaspoon of oil before adding to the dish. Bland flavor? Don’t be shy with the soy sauce and consider adding a spoonful of hoisin or oyster sauce for depth. Remember that the cabbage slaw adds brightness, so if your dish feels heavy, a little extra slaw on top can balance everything beautifully.

    Frequently Asked Questions

    What type of noodles work best for a Potsticker Noodle Bowl with Beef & Cabbage Slaw?

    Rice noodles, ramen, or egg noodles all work wonderfully. I prefer medium-width rice noodles as they hold up well to the sauce and beef while maintaining that authentic Asian noodle bowl feel. Cook them just until al dente to prevent mushiness.

    Can I make this dish vegetarian?

    Absolutely! Substitute the beef with crumbled tofu, chopped mushrooms, or plant-based ground meat alternatives. Add an extra tablespoon of soy sauce and a teaspoon of miso paste to enhance the umami flavor profile that meat typically provides.

    How spicy is this dish?

    The basic recipe is mild, making it family-friendly. You can easily adjust the heat level by adding sriracha, chili oil, or sliced fresh chilies to taste. I like to serve hot sauce on the side so everyone can customize their own bowl.

    Can I prep components of this dish ahead of time?

    Yes! The cabbage slaw can be made up to 24 hours ahead and stored in the refrigerator. You can also cook the beef mixture a day in advance. Cook the noodles fresh when you’re ready to serve for the best texture.

    How do I prevent my Potsticker Noodle Bowl from becoming soggy?

    Avoid overcooking the noodles and drain them well. If not serving immediately, toss with a little oil to prevent sticking. Add the cabbage slaw just before serving to maintain its crunch and keep the fresh elements separate from the hot components.

    Final Thoughts

    This Potsticker Noodle Bowl with Beef & Cabbage Slaw has become my go-to recipe when I want something comforting yet fresh that doesn’t keep me in the kitchen all night. There’s something magical about how it transforms simple ingredients into a dish that feels special enough for guests but easy enough for weeknights. I love how customizable it is—perfect for using up whatever vegetables are looking lonely in your crisper drawer. Whether you’re cooking for one or feeding a crowd, this bowl delivers big on flavor while keeping things deliciously simple. Don’t forget to check out more Asian-inspired recipes on our Pinterest for your next culinary adventure!

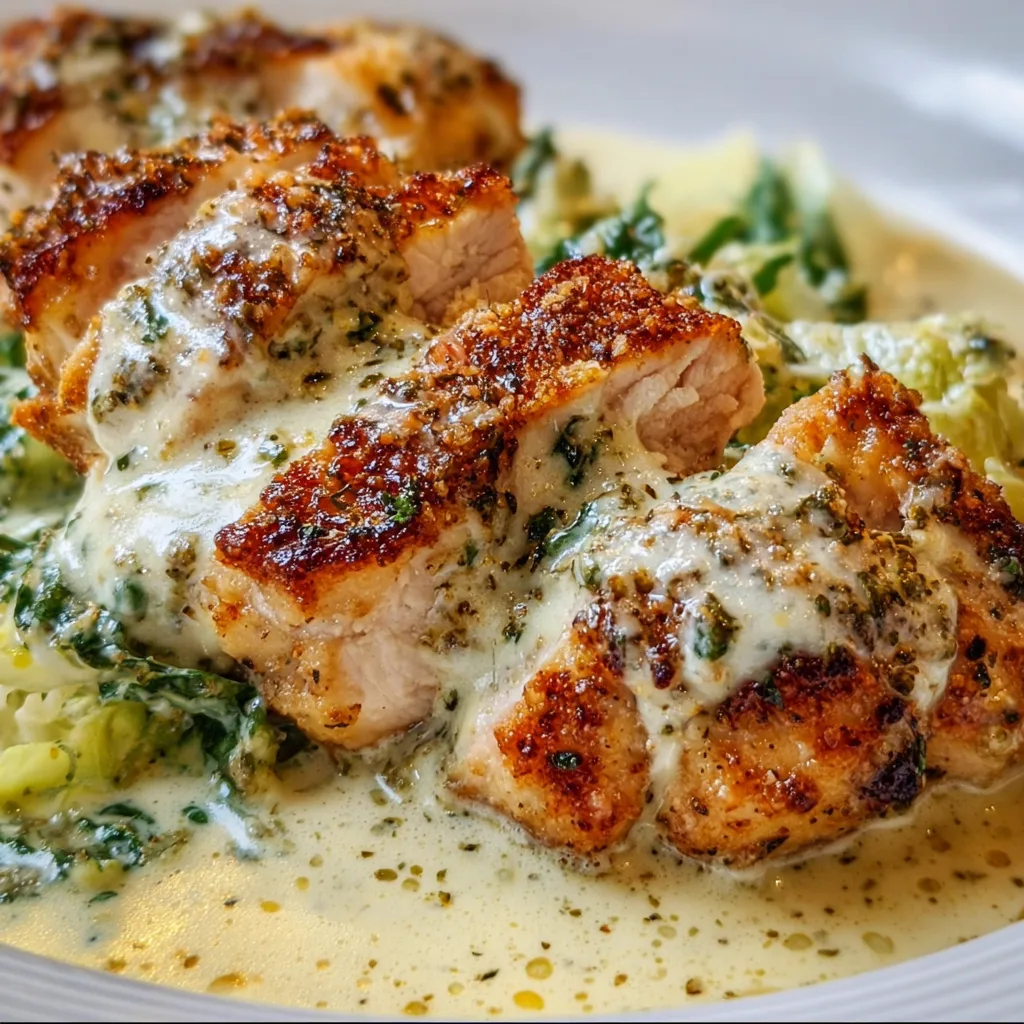
  • Creamy Parmesan Baked Caesar Chicken That Will Wow Your Taste Buds!

    Creamy Parmesan Baked Caesar Chicken That Will Wow Your Taste Buds!

    Creamy Parmesan Baked Caesar Chicken That Will Wow Your Taste Buds!

    Creamy Parmesan Baked Caesar Chicken transforms ordinary chicken breasts into a restaurant-worthy dinner that’s surprisingly simple to make at home. The first time I made this dish, my kitchen filled with the most intoxicating aroma of garlic, herbs, and melting cheese. There’s something magical about how the tangy Caesar dressing mingles with the nutty Parmesan, creating a velvety blanket over perfectly tender chicken. This easy weeknight recipe has become my go-to when I want to impress without stress – perfect for both casual family dinners and entertaining guests who’ll be begging for your culinary secrets.

    Recipe

    Why You’ll Love This Creamy Parmesan Baked Caesar Chicken

    A Time-Saving Flavor Explosion

    This dish delivers maximum flavor with minimal effort. The beauty lies in how the Caesar dressing does double duty – tenderizing the chicken while infusing it with garlicky, lemony notes. I remember rushing to prepare dinner for unexpected guests and reaching for this recipe in panic mode. Twenty-five minutes later, they were convinced I’d spent hours in the kitchen! The creamy texture develops naturally as it bakes, creating a luscious sauce that’s perfect for spooning over the chicken. No complicated techniques or fancy equipment needed – just honest ingredients coming together beautifully.

    Perfect for Meal Prep Magic

    The versatility of Creamy Parmesan Baked Caesar Chicken makes it a meal prep champion. I often make a double batch on Sundays, enjoying it fresh that evening, then repurposing leftovers throughout the week. Slice it over salads, stuff it into wraps, or pair with different sides for entirely new meals. The flavors actually deepen overnight, making day-two chicken even more delicious. Unlike many chicken recipes that dry out when reheated, the creamy Parmesan sauce keeps everything moist and tender, even after a quick zap in the microwave.

    Essential Tips & Tricks

    Selecting & Preparing Your Chicken

    Start with uniform-sized chicken breasts to ensure even cooking. If your chicken breasts are particularly thick, consider butterflying them or using a meat mallet to pound them to an even thickness of about ¾-inch. This small step makes a huge difference! Pat the chicken completely dry before adding seasonings – this helps the Caesar dressing adhere properly and prevents watery sauce. I learned this the hard way after making a soupy version when I skipped this step! For an extra flavor boost, try marinating the chicken in a tablespoon of the Caesar dressing for 30 minutes before assembling the dish, similar to my Hot Honey Chicken Cutlets.

    Perfecting the Parmesan Sauce

    The quality of ingredients truly matters in this simple recipe. Opt for freshly grated Parmesan rather than pre-packaged – it melts beautifully and delivers superior flavor. When selecting Caesar dressing, choose a thick, refrigerated version rather than shelf-stable varieties for the creamiest results. My secret ingredient? A tablespoon of sour cream stirred into the Caesar dressing adds an extra dimension of tanginess and helps the sauce cling to the chicken. Don’t rush the final broil – those 2-3 minutes create the irresistible golden crust that makes this dish truly special.

    Serving Ideas & Creative Variations

    Complementary Side Dishes

    This creamy chicken pairs beautifully with bright, acidic sides that balance its richness. My go-to combination is a simple arugula salad dressed with lemon juice and olive oil. The peppery greens cut through the creamy sauce perfectly. For heartier meals, roasted garlic mashed potatoes make an excellent base to catch every drop of sauce. Asparagus, green beans, or Sauteed Bok Choy also work beautifully. When entertaining, I serve this on a large platter surrounded by colorful vegetables and crusty bread for sopping up sauce – the presentation always impresses without requiring elaborate plating skills.

    Exciting Flavor Twists

    Don’t be afraid to put your own spin on this versatile recipe! For a Mediterranean twist, add sun-dried tomatoes, artichoke hearts, and a sprinkle of feta cheese before baking. Craving something spicy? Mix red pepper flakes or a tablespoon of hot honey into your Caesar mixture. My family’s favorite variation includes a layer of sautéed mushrooms and spinach between the chicken and sauce, adding earthy depth and sneaking in extra vegetables. For a lighter version, substitute Greek yogurt for half the Caesar dressing while maintaining that creamy texture we all crave.

    Storage & Troubleshooting Guide

    Proper Storage Methods

    Store leftover Creamy Parmesan Baked Caesar Chicken in an airtight container in the refrigerator for up to 3 days. The flavors actually improve overnight as the chicken continues to absorb the savory sauce. For freezing, I recommend portioning individual servings in freezer-safe containers – they’ll keep well for up to 2 months. The key to successful reheating is low and slow: cover with foil and warm in a 300°F oven until heated through, or microwave at 50% power with a damp paper towel covering the dish. This prevents the sauce from separating and keeps the chicken tender.

    Troubleshooting Common Issues

    If your sauce turns out too thin, there’s an easy fix! Remove the chicken to a plate, then simmer the sauce in a small saucepan with a teaspoon of cornstarch mixed with cold water until it reaches your desired consistency. Sauce curdled? This typically happens when exposed to high heat too quickly. Next time, let your Caesar dressing come to room temperature before mixing with other ingredients. For chicken that seems dry despite the sauce, you likely overcooked it. Use an instant-read thermometer to cook chicken to exactly 165°F – this precision tool has revolutionized my chicken dishes!

    Frequently Asked Questions

    Can I use chicken thighs instead of breasts for Creamy Parmesan Baked Caesar Chicken?

    Absolutely! Boneless, skinless chicken thighs work beautifully and often yield more tender results. Adjust cooking time to about 25-30 minutes, as thighs typically take slightly longer than breasts.

    Is homemade Caesar dressing better than store-bought for this recipe?

    While homemade dressing adds incredible flavor, quality store-bought works perfectly for weeknight convenience. Look for refrigerated varieties rather than shelf-stable options for the creamiest texture.

    Can this recipe be made dairy-free?

    Yes! Use dairy-free Caesar dressing and substitute nutritional yeast or dairy-free Parmesan alternatives. The texture will differ slightly but still delivers delicious flavor.

    How can I make this dish lower in calories?

    Use light Caesar dressing, reduce the Parmesan by half, and incorporate more herbs for flavor. Greek yogurt can replace some of the dressing while maintaining creaminess.

    What’s the best way to prevent the chicken from drying out?

    Don’t overcook! Remove the Creamy Parmesan Baked Caesar Chicken from the oven once it reaches 165°F internally. Covering with foil for the first portion of baking helps retain moisture.

    Final Thoughts

    Creamy Parmesan Baked Caesar Chicken deserves a spot in your regular dinner rotation. It strikes that perfect balance between comfort food indulgence and weeknight practicality that we’re all searching for. I love how this dish transforms humble chicken breasts into something that feels special enough for company yet simple enough for Monday night. The combination of tangy Caesar dressing and nutty Parmesan creates layers of flavor that belie the recipe’s simplicity. For more delicious recipe inspiration, follow me on Pinterest where I’m always sharing new favorites!

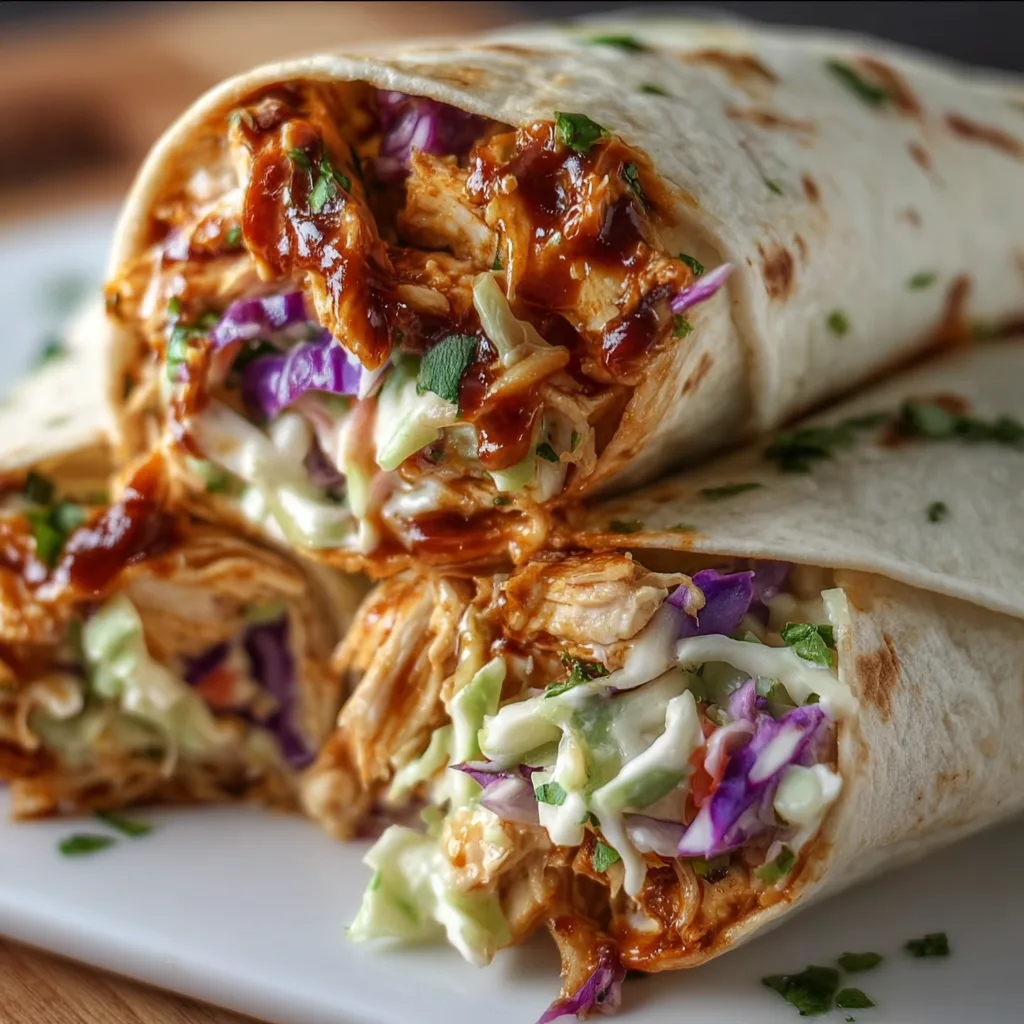
  • BBQ Chicken Coleslaw Wraps: Irresistibly Fresh & Flavor-Packed!

    BBQ Chicken Coleslaw Wraps: Irresistibly Fresh & Flavor-Packed!

    BBQ Chicken Coleslaw Wraps: Irresistibly Fresh & Flavor-Packed!

    These BBQ Chicken Coleslaw Wraps have become my absolute summer obsession! There’s something magical about the way tender, smoky BBQ chicken mingles with crisp, cool coleslaw, all wrapped in a soft tortilla. I first created these after a backyard barbecue left me with leftover grilled chicken that was too delicious to waste. The combination of flavors—sweet, tangy, creamy, and smoky—creates a perfect harmony that’s refreshing yet satisfying. These wraps have saved countless lunch hours at my house and have become a regular in my meal prep rotation. They’re portable, customizable, and guaranteed to make your taste buds dance!

    Recipe

    Why You’ll Love These BBQ Chicken Coleslaw Wraps

    Perfect Balance of Flavors and Textures

    The magic of these BBQ Chicken Coleslaw Wraps lies in their incredible texture contrast. Each bite delivers the tender, succulent BBQ chicken against the cool crunch of fresh coleslaw. The sweet-smoky notes of the barbecue sauce dance with the creamy tanginess of the slaw dressing, creating a flavor symphony that’s utterly irresistible. I love how the soft tortilla wraps everything up, adding that final textural element that makes each bite complete. My husband claims these wraps “fixed” his Wednesday lunch slump—high praise from someone who typically reaches for the same turkey sandwich every day!

    Quick and Convenient Meal Solution

    These wraps are my secret weapon for hectic weeknights and rushed lunches. With just 15 minutes of prep time, they come together faster than a food delivery order! The make-ahead potential is a game-changer—I often prepare the components on Sunday, storing them separately to assemble fresh wraps throughout the week. They’re perfectly portable for work lunches, picnics, or even road trips. Last summer, I packed these for a beach day, and even after sitting in the cooler for hours, they maintained their perfect texture and flavor—no soggy wraps here! They’re truly the ultimate grab-and-go meal.

    Essential Tips & Tricks

    Mastering the BBQ Chicken

    The foundation of an exceptional BBQ Chicken Coleslaw Wrap is perfectly cooked, flavorful chicken. I recommend using boneless thighs for their natural moisture and rich flavor, though breasts work beautifully too. For maximum flavor infusion, marinate your chicken in your favorite BBQ sauce for at least 30 minutes before cooking. My secret? Adding a tablespoon of honey and a dash of smoked paprika to store-bought sauce creates depth without extra work. Cook your chicken just until it reaches 165°F, then let it rest before shredding or dicing. This prevents the dreaded dry chicken syndrome that can ruin even the best wrap concepts.

    Crafting the Perfect Coleslaw

    The coleslaw in these wraps isn’t just a supporting player—it’s a star in its own right! For the best texture contrast, I mix pre-shredded cabbage with freshly julienned carrots and thinly sliced red onion. The dressing should complement the BBQ flavor without overwhelming it—my go-to combines mayonnaise, a splash of apple cider vinegar, a teaspoon of Dijon mustard, and a touch of honey. Let your slaw rest for at least 15 minutes before assembling your wraps; this allows the flavors to meld while maintaining that essential crunch. For extra nutrition and color, try adding julienned bell peppers or broccoli slaw like I do in my Coconut Curry Salmon recipe!

    Serving Ideas & Creative Variations

    Perfect Pairings and Sides

    These BBQ Chicken Coleslaw Wraps stand beautifully on their own, but the right sides can elevate your meal to restaurant quality. I love serving them with sweet potato fries dusted with smoked paprika—the sweet-smoky echo of the wrap’s flavors creates a cohesive meal experience. For something lighter, a simple side salad with a vinaigrette dressing provides a refreshing contrast. When entertaining, I cut the wraps into pinwheels and serve them alongside a bowl of crunchy kettle chips and pickle spears. For a complete summer spread, pair these wraps with my Crispy Air Fryer Blooming Onion for an irresistible combo that always disappears first!

    Exciting Flavor Variations

    While the classic BBQ Chicken Coleslaw Wrap is perfection, I can’t help but experiment with variations that keep this recipe fresh and exciting. For a southwestern twist, add black beans, corn, and a sprinkle of taco seasoning to your chicken, then swap the regular slaw for a cilantro-lime version. Craving something with Asian flair? Try using hoisin or teriyaki sauce instead of BBQ, then add matchstick cucumbers and a ginger-sesame slaw. For a lighter option, use Greek yogurt instead of mayonnaise in your slaw and add fresh herbs like dill or parsley. My family’s current favorite is the “Buffalo” version with hot sauce-spiked chicken and a blue cheese slaw!

    Storage & Troubleshooting Guide

    Keeping Components Fresh

    The key to enjoying these wraps all week long is proper storage technique. I always store the components separately—cooked BBQ chicken in an airtight container, coleslaw in its own container without dressing, and tortillas sealed in their original packaging. The chicken stays fresh for 3-4 days refrigerated, while undressed slaw maintains its crunch for about 2 days. Keep your dressing in a small jar and combine with the slaw just before assembly. If you’re meal prepping, consider freezing portion-sized bags of the BBQ chicken—it thaws quickly and maintains its flavor beautifully. I learned this trick after a particularly busy month when I needed grab-and-go options that didn’t sacrifice flavor.

    Solving Common Wrap Issues

    Even the most experienced wrap-makers encounter occasional challenges! To prevent the dreaded soggy wrap syndrome, pat your coleslaw dry with paper towels before assembly and avoid over-saucing your chicken. If your wraps are falling apart during rolling, try warming your tortillas for 10-15 seconds in the microwave—this makes them more pliable and less likely to tear. For wraps that stay together during transport, secure them with parchment paper and kitchen twine or wrap tightly in foil. If your chicken seems dry after reheating, add a small splash of BBQ sauce and a teaspoon of water before warming it to restore moisture and flavor.

    Frequently Asked Questions

    Can I make BBQ Chicken Coleslaw Wraps ahead of time?

    Yes! Prepare the BBQ chicken and coleslaw up to 3 days ahead, storing them separately. Assemble wraps the morning of or right before serving for optimal freshness and to prevent sogginess.

    What’s the best tortilla to use for these wraps?

    I prefer large (10-12 inch) flour tortillas for their flexibility and neutral flavor. For a healthier option, whole wheat, spinach, or low-carb tortillas work beautifully too.

    How can I make these wraps gluten-free?

    Simply substitute gluten-free tortillas and ensure your BBQ sauce is gluten-free (many commercial brands contain wheat). The chicken and homemade coleslaw are naturally gluten-free.

    Can I use rotisserie chicken for my BBQ Chicken Coleslaw Wraps?

    Absolutely! Shred a store-bought rotisserie chicken and toss with warm BBQ sauce for an even quicker preparation. This is my favorite weeknight shortcut!

    What’s the best way to pack these for lunch?

    Wrap tightly in parchment paper or foil, then slice in half just before serving. For meal prep, pack components separately and assemble at lunchtime to maintain perfect texture.

    Final Thoughts

    These BBQ Chicken Coleslaw Wraps have become my go-to solution for everything from quick lunches to casual entertaining. There’s something deeply satisfying about creating something so flavorful with such simple ingredients. The beauty of these wraps lies in their versatility—they can be as basic or as elaborate as you like, depending on your time and ingredients. I hope you’ll make these BBQ Chicken Coleslaw Wraps part of your regular rotation too! For more delicious wrap inspirations, follow me on Pinterest where I’m always sharing new flavor combinations and serving ideas.

  • Banana Bread Cinnamon Rolls: Irresistibly Soft, Sweet & Viral!

    Banana Bread Cinnamon Rolls: Irresistibly Soft, Sweet & Viral!

    Banana Bread Cinnamon Rolls: Irresistibly Soft, Sweet & Viral!

    Banana Bread Cinnamon Rolls combine two beloved comfort classics into one irresistible breakfast treat. The moment these swirls of cinnamon-spiced banana dough hit the oven, my kitchen transforms into a cozy haven of sweet aromas that instantly transport me back to Sunday mornings at my grandmother’s. There’s something magical about the way the ripe bananas caramelize with brown sugar and cinnamon, creating pockets of gooey goodness in each bite. If you’re looking for a show-stopping breakfast that’ll have everyone asking for seconds, these rolls are your answer.

    Recipe

    Why You’ll Love These Banana Bread Cinnamon Rolls

    The Perfect Flavor Marriage

    The natural sweetness of ripe bananas creates a depth of flavor that regular cinnamon rolls simply can’t match. I discovered this combination by accident when I had overripe bananas and a craving for something warm and spiced. The banana-infused dough stays incredibly tender while developing those crispy edges that make you fight for the center piece. What makes these truly special is how the banana flavor intensifies during baking, creating complex caramel notes that pair perfectly with the cinnamon-sugar swirl. It’s like enjoying banana bread and cinnamon rolls in every single bite!

    Make-Ahead Convenience

    These rolls are perfect for busy mornings or special occasions because you can prep them the night before. I’ve found this particularly handy when hosting weekend guests—nothing impresses like freshly baked rolls without the early wake-up call! Simply prepare the rolls through the first rise, shape them, place in your baking pan, then refrigerate overnight. The slow, cold fermentation actually enhances the banana flavor while developing the gluten structure. In the morning, just let them come to room temperature for about 30 minutes before baking. The heavenly aroma will wake everyone up better than any alarm clock!

    Essential Tips & Tricks

    Banana Selection Matters

    Using perfectly overripe bananas is non-negotiable for these rolls. Look for bananas with plenty of brown spots—even completely black bananas work beautifully here! These super-ripe fruits deliver maximum sweetness and that intense banana flavor we’re after. I once tried making these with yellow bananas and the difference was striking—much less flavor and sweetness. Mash your bananas completely for even distribution throughout the dough, but don’t puree them. The tiny bits of fruit create delightful pockets of moisture and flavor that make these rolls uniquely different from standard cinnamon rolls.

    Perfect Rising Environment

    Creating the ideal rising conditions transforms good rolls into great ones. I’ve found that preheating your oven to its lowest setting (usually around 170°F), then turning it off and placing the covered dough inside creates the perfect warm environment. The slight residual heat speeds up the rising process without killing the yeast. If your kitchen is particularly cold, place a shallow pan of hot water on the rack below your dough to create humidity. This prevents the surface from drying out and creates a pillowy texture that melts in your mouth.

    Serving Ideas & Creative Variations

    Beyond Basic Frosting

    While cream cheese frosting is divine, these banana bread cinnamon rolls shine with unexpected toppings. My personal favorite is a maple-bourbon glaze that complements the banana flavor beautifully—just whisk together powdered sugar, a splash of real maple syrup, and a teaspoon of bourbon. For a tropical twist, try a coconut cream glaze with toasted coconut flakes sprinkled on top. You could even go decadent with a chocolate ganache drizzle that transforms these into dessert-worthy treats. The key is balancing sweetness with the already sweet banana dough.

    Delicious Add-Ins

    Customize your rolls with mix-ins that complement the banana-cinnamon flavor profile. Chopped toasted walnuts or pecans add wonderful texture and nutty depth when sprinkled over the filling before rolling. Dark chocolate chips create pockets of melty goodness that make these rolls utterly irresistible. For a fruit-forward approach, try adding dried cranberries or blueberries to the filling. My family’s favorite version includes a layer of thinly sliced fresh strawberries that caramelize during baking—the combination of banana and strawberry is absolutely magical!

    Storage & Troubleshooting Guide

    Keeping Rolls Fresh

    These banana bread cinnamon rolls stay remarkably moist longer than traditional cinnamon rolls thanks to the banana in the dough. Store completely cooled rolls in an airtight container at room temperature for up to 3 days. For longer storage, refrigerate for up to a week, though the texture is best within the first 4 days. To reheat, microwave individual rolls for 15-20 seconds or place several in a 300°F oven covered with foil for 10 minutes. For the freshest experience, I recommend freezing unfrosted rolls, then thawing and warming before adding fresh frosting.

    Fixing Common Issues

    Even experienced bakers encounter dough dilemmas occasionally. If your dough seems too sticky after adding the banana, resist adding too much extra flour—just enough to handle it. Overly dry dough makes tough rolls. For filling that leaks out during baking, try chilling the shaped rolls for 20 minutes before baking. If your rolls rise unevenly, it’s likely due to uneven thickness when rolling—use a ruler as a guide for consistent thickness. And remember, if your rolls brown too quickly before cooking through, simply tent with aluminum foil halfway through baking.

    Frequently Asked Questions

    Can I make Banana Bread Cinnamon Rolls without yeast?

    While traditional cinnamon rolls require yeast, you can make a quick version using self-rising flour and Greek yogurt for the dough. They won’t have the same texture but will satisfy the craving in about half the time.

    How ripe should my bananas be?

    Very ripe! Look for bananas with significant brown spotting or even completely black peels. These provide the strongest flavor and natural sweetness your rolls need.

    Can I freeze the unbaked rolls?

    Absolutely! Freeze them after shaping but before the second rise. Thaw overnight in the refrigerator, then allow to rise at room temperature before baking.

    What’s the best substitute for cream cheese frosting?

    A simple maple glaze works beautifully—mix powdered sugar with maple syrup and a splash of milk until pourable. The maple complements the banana flavor wonderfully.

    Why did my Banana Bread Cinnamon Rolls turn out dense?

    Overmixing the dough or using too much flour can create dense rolls. Mix just until ingredients are combined and use the minimum flour needed to handle the dough.

    Final Thoughts

    These Banana Bread Cinnamon Rolls represent the best of both worlds—the comforting familiarity of banana bread with the indulgent swirls of a perfect cinnamon roll. They’ve become my signature breakfast for special occasions, earning rave reviews and recipe requests every time. The beauty lies in their versatility; you can dress them up for holidays or keep them simple for weekend family breakfasts. Whatever the occasion, these rolls create moments of joy around the table. For more delicious breakfast inspiration, visit Pinterest and discover your next favorite morning treat!