Category: Dinner

Easy, tasty dinner ideas for busy nights. Simple recipes, quick prep, and family-friendly meals you’ll make again and again.

  • Pink Sauce Pasta with Ground Turkey: Creamy Comfort You’ll Crave!

    Pink Sauce Pasta with Ground Turkey: Creamy Comfort You’ll Crave!

    Pink Sauce Pasta with Ground Turkey: Creamy Comfort You’ll Crave!

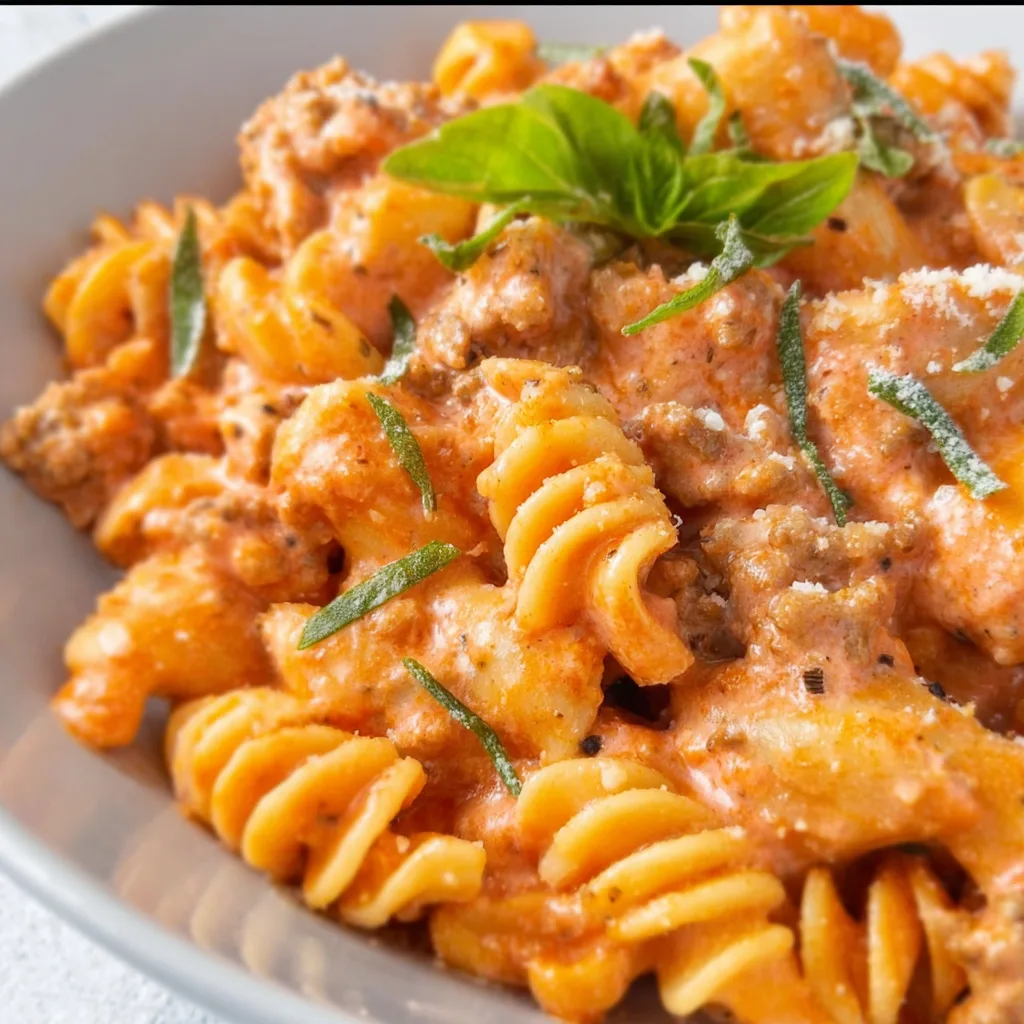
    Pink Sauce Pasta with Ground Turkey has become my ultimate weeknight hero dish – creamy, comforting, and ready in under 30 minutes. I first created this recipe during a particularly chaotic Tuesday when my pantry was nearly empty, but I desperately needed something cozy and satisfying. The silky pink sauce (a magical marriage of marinara and cream) transforms humble ground turkey into something that feels special enough for company. When my sister tried it last month, she immediately requested the recipe for her dinner rotation. You’ll find it’s the perfect balance of richness and brightness that works beautifully with pasta of any shape.

    Recipe

    Why You’ll Love This Pink Sauce Pasta with Ground Turkey

    Perfect Weeknight Solution

    This dish has saved me countless times when I’m short on time but craving something homemade and comforting. The ground turkey cooks in minutes, and the pink sauce comes together while your pasta boils – meaning dinner is ready in about 25 minutes flat. I love that it uses ingredients I typically have on hand, and the leftovers (if there are any!) reheat beautifully for lunch the next day. The protein-packed turkey makes it filling without feeling heavy, and my kids devour it without complaints about “seeing vegetables” in their pasta.

    Versatile and Adaptable

    What makes this pink sauce pasta truly special is how endlessly customizable it is. Don’t have ground turkey? Swap in chicken, beef, or even chickpeas for a vegetarian option. The pink sauce itself is a canvas for whatever flavors you’re craving – add red pepper flakes for heat, stir in spinach for extra greens, or throw in some sun-dried tomatoes for a flavor punch. I’ve made this with everything from bow-ties to rigatoni, and it works beautifully with any pasta shape. When herbs are abundant in my garden, I’ll add fresh basil or oregano right before serving.

    Essential Tips & Tricks

    Perfect Pink Sauce Technique

    The key to an irresistible pink sauce is achieving that perfect velvety texture without breaking or curdling. My foolproof method: reduce the heat to low before adding the cream, and never let it boil after the cream goes in. For maximum flavor development, let the turkey brown properly before adding garlic – those caramelized bits are flavor gold! I always use room temperature cream (I measure it out when I start cooking) to prevent temperature shock when it hits the hot tomato sauce. A pinch of nutmeg might sound strange, but it adds an incredible depth that makes people wonder what your secret ingredient is.

    Ingredient Quality Matters

    I’ve learned through many pasta nights that using quality ingredients makes a dramatic difference in this simple dish. San Marzano tomatoes create a sauce with natural sweetness and less acidity. For the cream component, heavy cream produces the richest result, but half-and-half works beautifully if you’re watching calories. When seasoning the turkey, don’t skimp on salt – ground poultry needs proper seasoning to shine. I prefer freshly grated Parmesan rather than pre-shredded, as it melts more smoothly into the sauce and provides that authentic flavor that makes the dish feel special.

    Serving Ideas & Creative Variations

    Perfect Pairings

    This pink sauce pasta deserves thoughtful accompaniments that complement its creamy richness. My favorite pairing is a simple arugula salad with lemon vinaigrette – the peppery greens and bright acidity cut through the sauce beautifully. For bread, try garlic knots or a crusty baguette to soak up every last bit of sauce. When serving for company, I’ll start with bruschetta or antipasto to set the Italian mood. For beverages, a crisp Pinot Grigio or Sauvignon Blanc complements the creamy sauce perfectly, while sparkling water with lemon works wonderfully for a non-alcoholic option.

    Seasonal Adaptations

    I love changing this recipe with the seasons, keeping it fresh year-round. In summer, I fold in cherry tomatoes and fresh corn right at the end, letting them warm through without fully cooking. Fall calls for diced butternut squash roasted separately and stirred in, plus a sprinkle of sage. Winter versions get heartier with mushrooms sautéed alongside the turkey and a dash of truffle oil for special occasions. Spring brings asparagus tips and fresh peas, making the dish feel light and vibrant. The versatility means we never tire of our pink sauce pasta, even when I make it twice in one week.

    Storage & Troubleshooting Guide

    Proper Storage Methods

    For maximum freshness, store leftover pink sauce pasta in airtight containers in the refrigerator for up to 3 days. I recommend keeping pasta and sauce separate when possible – this prevents the pasta from absorbing all the sauce and becoming mushy. When reheating, add a splash of cream or milk to revitalize the sauce, as it tends to thicken when chilled. For freezing, I focus on the sauce only (pasta doesn’t freeze well) in portion-sized containers for up to 2 months. Thaw overnight in the refrigerator, then gently reheat on the stovetop, whisking occasionally to recombine any separated ingredients.

    Common Fixes for Pink Sauce Issues

    The most common issue with pink sauce is separation or curdling, which happens when cream is added to hot tomato sauce too quickly. If this occurs, lower the heat immediately and whisk vigorously – often you can rescue it! If your sauce is too thick, thin it with pasta water (I always reserve some before draining). Too thin? Simmer gently until reduced, or add a teaspoon of cornstarch mixed with cold water. If your sauce lacks depth, try adding a splash of balsamic vinegar or a parmesan rind while simmering. For grainy texture issues, next time use room temperature cream and ensure your tomato sauce isn’t boiling when you combine them.

    Frequently Asked Questions

    Can I make Pink Sauce Pasta with Ground Turkey ahead of time?

    Yes! Prepare the sauce up to 2 days ahead and refrigerate. Cook fresh pasta when ready to serve, then reheat the sauce gently on low heat, adding a splash of cream if needed to restore creaminess.

    What pasta shapes work best with pink sauce?

    Shapes that trap sauce work wonderfully – penne, rigatoni, farfalle, and shells are my favorites. For a lighter version, try it with zucchini noodles or spaghetti squash.

    Is there a dairy-free alternative for the cream?

    Absolutely! Full-fat coconut milk creates a delicious dairy-free pink sauce. Cashew cream also works beautifully – blend 1 cup soaked cashews with 3/4 cup water until smooth.

    Can I use jarred marinara instead of making sauce from scratch?

    Yes! Use 2 cups of your favorite jarred marinara to save time. Just make sure it’s a brand you enjoy, as it will significantly impact the final flavor.

    How can I make this pink sauce pasta spicier?

    Add red pepper flakes while sautéing the garlic, or stir in calabrian chili paste for complex heat. For milder warmth, add a few grinds of black pepper just before serving.

    Final Thoughts

    Pink Sauce Pasta with Ground Turkey has earned its place as a staple in my kitchen because it bridges the gap between everyday cooking and something that feels special. There’s something magical about how a few simple ingredients transform into a silky, flavorful sauce that clings perfectly to each pasta strand. Whether you’re cooking for picky eaters, hosting friends, or simply treating yourself after a long day, this recipe delivers comfort and satisfaction without hours of effort. I hope it becomes a beloved recipe in your home too! Find more pasta inspiration on Pinterest.
  • Blackened Chicken Recipe: Irresistibly Spicy & Juicy Delight!

    Blackened Chicken Recipe: Irresistibly Spicy & Juicy Delight!

    Blackened Chicken Recipe: Irresistibly Spicy & Juicy Delight!

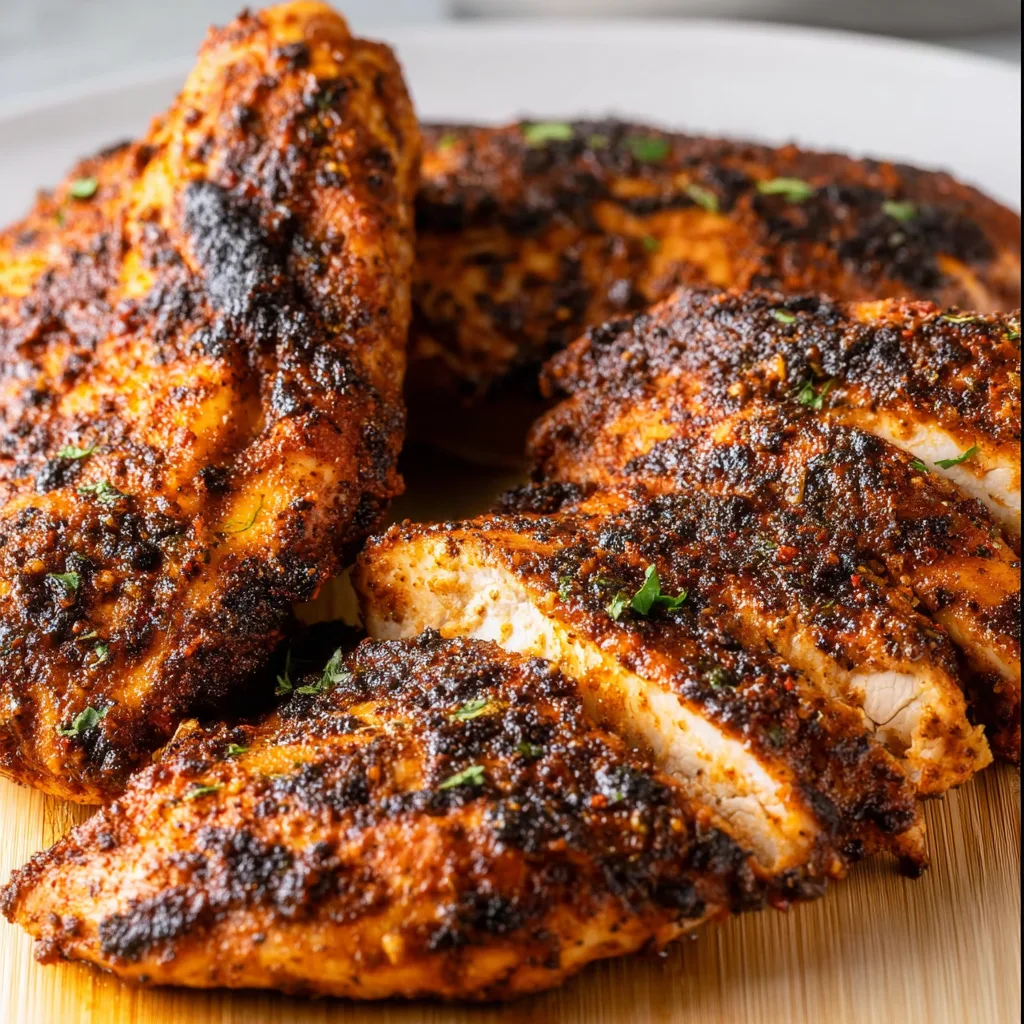
    Blackened Chicken is a culinary revelation that’s become my go-to for weeknight dinners that feel special without the fuss. The first time I made this smoky, spice-crusted delight, my kitchen filled with an aroma that transported me straight to New Orleans. There’s something magical about that perfect crust—charred and fragrant on the outside while keeping the chicken incredibly juicy within. I’ve spent years perfecting this recipe, and I’m thrilled to share my secrets for achieving that ideal balance of heat and flavor that makes blackened chicken truly unforgettable.

    Recipe

    Why You’ll Love This Blackened Chicken

    Perfect Balance of Spices and Heat

    The magic of blackened chicken lies in its bold spice blend. I’ve tweaked mine over dozens of attempts to find that sweet spot where cayenne, paprika, and thyme create depth without overwhelming your palate. The first bite delivers that signature smoky char, followed by layers of flavor that unfold as you continue eating. What I love most is how the spices form a protective crust that seals in moisture. Even on hectic weeknights when I’m rushing, this technique ensures juicy chicken every time—a true kitchen miracle that’s converted even my spice-skeptical friends.

    Quick Yet Impressive Results

    I still remember serving blackened chicken at my first dinner party, nervously watching as guests took their initial bites. Their expressions of delight confirmed what I already knew—this dish punches above its weight. The beauty is in its deceptive simplicity. While it looks and tastes like something that required hours of preparation, it comes together in under 30 minutes. The dramatic searing process creates restaurant-quality results that have friends begging for the recipe. It’s become my secret weapon for those nights when I want to impress without spending the entire evening in the kitchen.

    Essential Tips & Tricks

    Mastering the Blackening Technique

    The key to perfect blackened chicken starts with a screaming hot cast iron skillet. I learned this lesson the hard way after numerous underwhelming attempts. Your pan should be so hot it’s just shy of smoking—this creates that characteristic char without burning the spices. Pat your chicken completely dry before seasoning; moisture is the enemy of a good crust. I like to press the spices firmly into the meat rather than just sprinkling them. This ensures they adhere properly during the high-heat cooking process, giving you that beautiful blackened crust that defines this dish.

    Choosing and Preparing Your Chicken

    Not all chicken cuts are created equal for blackening. I’ve found that uniform thickness is crucial for even cooking. Butterflied chicken breasts or thighs pounded to even thickness work beautifully. For the juiciest results, bring your chicken to room temperature before cooking—about 20 minutes on the counter does the trick. This prevents the exterior from burning while waiting for the cold center to cook through. If you’re using chicken with skin, score it lightly to help the spices penetrate and to render the fat properly. This simple step elevates the texture dramatically and creates pockets for the spices to nestle into.

    Serving Ideas & Creative Variations

    Perfect Pairings for Blackened Chicken

    The robust flavor profile of blackened chicken pairs beautifully with cooling elements that balance its heat. My family’s favorite combination includes a zesty lime crema that cuts through the spices perfectly. For a complete meal, I serve it alongside creamy mashed potatoes or buttery corn—the sweetness complements the savory spice crust wonderfully. When I’m feeling more adventurous, I’ll slice the chicken over a crisp salad with avocado and mango for a tropical twist. The bright, fresh ingredients create a stunning contrast to the deep, smoky flavors of the blackened seasoning.

    Exciting Flavor Variations

    While traditional blackened seasoning is incredible, I love experimenting with regional adaptations. My Caribbean-inspired version incorporates allspice and a touch of brown sugar, creating a slightly sweet heat that’s irresistible. For a Mediterranean twist, I’ll add oregano and lemon zest to the spice blend, then serve the chicken with a cooling tzatziki. When I’m craving something with depth, a coffee-infused blackening rub adds remarkable complexity. The slight bitterness of the coffee grounds creates a fascinating counterpoint to the chicken’s natural sweetness and makes for a conversation-starting dinner party dish.

    Storage & Troubleshooting Guide

    Storing and Reheating for Best Results

    Blackened chicken maintains its flavor profile beautifully when stored properly. I store leftovers in an airtight container in the refrigerator for up to three days. The key to reheating without drying out the meat is adding moisture. I place a damp paper towel over the chicken when microwaving, or add a splash of chicken broth when reheating in a skillet. For meal prep, I often slice the cooled chicken and store it separately from any sauces. This prevents the beautiful crust from getting soggy and preserves that wonderful texture contrast that makes blackened chicken so special.

    Fixing Common Blackening Mistakes

    The most common issue I encounter is spice burning rather than blackening. The difference is subtle but important—blackened spices are dark and flavorful, while burnt spices taste acrid. If your spices are burning, your heat is likely too high or your pan isn’t heavy enough to distribute heat evenly. A quality cast iron skillet makes all the difference. Another frequent problem is chicken sticking to the pan. The solution is counterintuitive: don’t move the chicken once placed in the hot pan. Let it form a crust first, which naturally releases from the surface when ready. Patience here rewards you with that perfect blackened exterior.

    Frequently Asked Questions

    What makes chicken “blackened” versus just seasoned?

    Blackening involves coating chicken with spices and cooking in a very hot cast iron skillet until the spices form a dark, flavorful crust. The technique originated in Cajun cooking and relies on the spices charring without burning the meat.

    Can I blacken chicken in the oven instead of a skillet?

    Yes, though you’ll miss some of the characteristic crust. Preheat a cast iron skillet in a 450°F oven, add your seasoned chicken, and roast until cooked through. The results are good, though less authentic than stovetop blackening.

    How spicy is blackened chicken typically?

    Traditional blackened chicken has moderate heat from cayenne pepper. You can easily adjust the spice level by reducing cayenne for milder flavor or increasing it for more heat while maintaining the signature blackened flavor profile.

    Can I make blackened chicken ahead for a party?

    Absolutely! Blackened chicken holds up well when made a few hours ahead. Keep it loosely covered at room temperature for up to two hours, or refrigerate and gently reheat with a splash of chicken broth to maintain moisture.

    What’s the best way to tell when blackened chicken is done?

    Use an instant-read thermometer to check for 165°F at the thickest part. Visual cues can be misleading with blackened chicken since the spice crust darkens before the chicken is fully cooked.

    Final Thoughts

    Blackened chicken represents everything I love about cooking—simple ingredients transformed through technique into something extraordinary. The contrast between the spicy, textured exterior and juicy interior creates a sensory experience that feels indulgent yet fits into everyday cooking. I hope my tips help you achieve that perfect blackened crust that will have everyone at your table asking for seconds. This dish proves that sometimes the most memorable meals come from embracing high heat and bold flavors rather than complicated processes. Find more delicious recipes on Pinterest and keep experimenting with your blackened chicken creations!

  • Copycat Cheesecake Factory Chicken Madeira Recipe – Irresistibly Delicious!

    Copycat Cheesecake Factory Chicken Madeira Recipe – Irresistibly Delicious!

    Copycat Cheesecake Factory Chicken Madeira Recipe – Irresistibly Delicious!

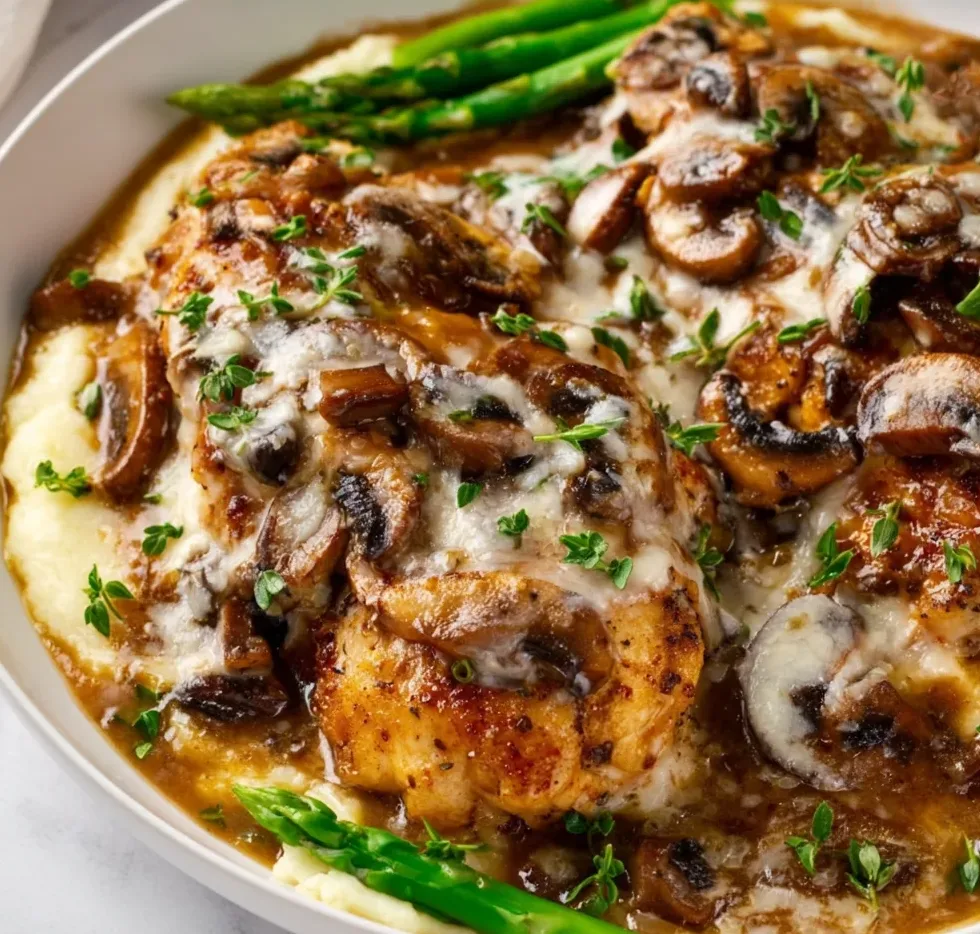
    Copycat Cheesecake Factory Chicken Madeira has been my secret weapon for dinner parties for years. There’s something magical about that rich, wine-infused sauce cascading over perfectly seared chicken breasts and melty mozzarella that makes everyone think I’m a culinary genius. I still remember the first time I recreated this dish at home—my kitchen filled with the earthy aroma of mushrooms and Madeira wine, and my husband declaring it better than the restaurant version! This recipe captures all the signature flavors of the beloved Cheesecake Factory classic while letting you enjoy it in your cozy home setting.

    Recipe

    Why You’ll Love This Copycat Cheesecake Factory Chicken Madeira

    Restaurant-Quality Results at Home

    This copycat recipe delivers that authentic restaurant experience without the hefty price tag or wait times. The combination of tender chicken breasts, savory mushrooms, and that signature Madeira wine sauce creates layers of flavor that rival the original. I’ve spent years perfecting this recipe, adjusting proportions and techniques until it tastes just like what you’d order at The Cheesecake Factory. The best part? You can make it in your pajamas while sipping a glass of the same Madeira wine you’re cooking with—something you definitely can’t do at the restaurant!

    Simple Yet Impressive

    Don’t let the elegant results fool you—this dish is surprisingly approachable. With just a handful of quality ingredients and some basic techniques, you’ll create something truly spectacular. The chicken breasts are simply seasoned before being seared to golden perfection. The mushrooms need nothing more than a good caramelization to release their earthy goodness. And that signature sauce? It’s mostly hands-off simmering. The entire dish comes together in about 45 minutes, making it perfect for both special occasions and elevated weeknight dinners when you want to treat yourself.

    Essential Tips & Tricks

    Mastering the Madeira Sauce

    The soul of this dish is undoubtedly the rich Madeira sauce. For authentic flavor, use actual Madeira wine—not cooking wine from the grocery store. The alcohol cooks off, leaving behind a complex sweetness that defines this dish. Let the sauce reduce properly; patience here pays off in flavor concentration. A properly reduced sauce should coat the back of a spoon with a silky sheen. If you’re making this for a family dinner, try pairing it with my Mediterranean Spinach Feta Crisps as an appetizer for a complete restaurant experience.

    Perfect Chicken Technique

    For restaurant-quality results, pound your chicken breasts to an even 1/2-inch thickness before cooking. This ensures they cook evenly and remain tender throughout. Season generously with salt and pepper, and don’t rush the searing process—a proper golden crust adds tremendous flavor. Once you’ve added the mozzarella, cover the pan briefly to help it melt perfectly without overcooking the chicken. Remember that the chicken will continue cooking slightly as it rests, so remove it from the heat when it reaches 160°F, as it will climb to the safe 165°F while resting.

    Serving Ideas & Creative Variations

    Classic Pairings

    Serve your Copycat Cheesecake Factory Chicken Madeira with creamy mashed potatoes to soak up every drop of that magnificent sauce. The restaurant typically includes sautéed asparagus, which provides a perfect fresh counterpoint to the richness of the dish. For a complete experience, warm some crusty bread for sauce-dipping purposes—I promise no one will judge you for wiping your plate clean! For more delicious chicken recipes that impress dinner guests, check out my Marry Me Chicken Creamy Parmesan which has a similar “wow” factor.

    Exciting Twists

    While the classic recipe is perfect, don’t be afraid to make it your own. Try using portobello mushrooms for a meatier texture, or add a handful of sun-dried tomatoes for a tangy twist. For a lighter version, substitute chicken thighs with turkey cutlets and serve over cauliflower mash instead of potatoes. You can even transform this into a pasta dish by slicing the chicken and mushrooms, tossing with the sauce, and serving over fettuccine. The versatility of these flavors means you can reinvent this dish multiple ways without losing its essence.

    Storage & Troubleshooting Guide

    Proper Storage Solutions

    This Chicken Madeira stores beautifully, making it perfect for meal prep or leftovers. Refrigerate in an airtight container for up to 3 days. The flavors actually develop overnight, making day-two Madeira sometimes even better than day one! To reheat, use a covered skillet over medium-low heat with a splash of chicken broth to revive the sauce. Avoid microwaving if possible, as it can toughen the chicken. If you want to freeze portions, do so before adding the cheese, then add fresh mozzarella when reheating for best texture.

    Common Issues & Fixes

    If your sauce is too thin, don’t panic—simply simmer it longer to reduce, or whisk in a cornstarch slurry (1 teaspoon cornstarch mixed with 1 tablespoon cold water). If your sauce broke or separated, lower the heat and whisk in a pat of cold butter to re-emulsify. Overcooked chicken is a common pitfall—invest in a meat thermometer and remove the chicken at 160°F for perfect doneness. If your mushrooms released too much liquid and didn’t brown properly, next time use a hotter pan and avoid overcrowding, cooking them in batches if necessary.

    Frequently Asked Questions

    What exactly is Madeira wine and can I substitute it?

    Madeira is a fortified Portuguese wine with a unique sweet-yet-tangy profile. While you can substitute marsala or dry sherry, the authentic Cheesecake Factory flavor comes from real Madeira. The alcohol cooks off, leaving only the complex flavor.

    How do I ensure my Copycat Cheesecake Factory Chicken Madeira has tender chicken?

    Pound chicken to even thickness, don’t overcook (use a thermometer), and let it rest after cooking. The gentle simmer in the sauce also helps maintain moisture in the meat.

    Can I make this recipe ahead of time?

    Yes! Prepare everything except adding the cheese up to 24 hours ahead. Reheat gently on the stovetop, then add cheese and broil briefly before serving.

    What mushrooms work best in this recipe?

    Button or cremini mushrooms are traditional, but a mix including shiitake adds wonderful depth. Slice them evenly (not too thin) so they don’t disappear during cooking.

    Is this recipe gluten-free?

    The original Copycat Cheesecake Factory Chicken Madeira is naturally gluten-free as long as you verify your chicken broth is gluten-free. No flour is needed for thickening the signature sauce.

    Final Thoughts

    This Copycat Cheesecake Factory Chicken Madeira recipe brings restaurant luxury to your dinner table with surprisingly little effort. I love how the rich, velvety sauce transforms simple ingredients into something that feels special enough for celebrations yet accessible enough for a random Tuesday. The way the mushrooms absorb all those wonderful flavors while the chicken stays tender and juicy is nothing short of culinary magic. Don’t forget to share your creations on Pinterest – I’d love to see your version of this beloved classic!

  • Creamy Blackened Chicken Alfredo Pasta | Irresistibly Delicious!

    Creamy Blackened Chicken Alfredo Pasta | Irresistibly Delicious!

    Creamy Blackened Chicken Alfredo Pasta | Irresistibly Delicious!

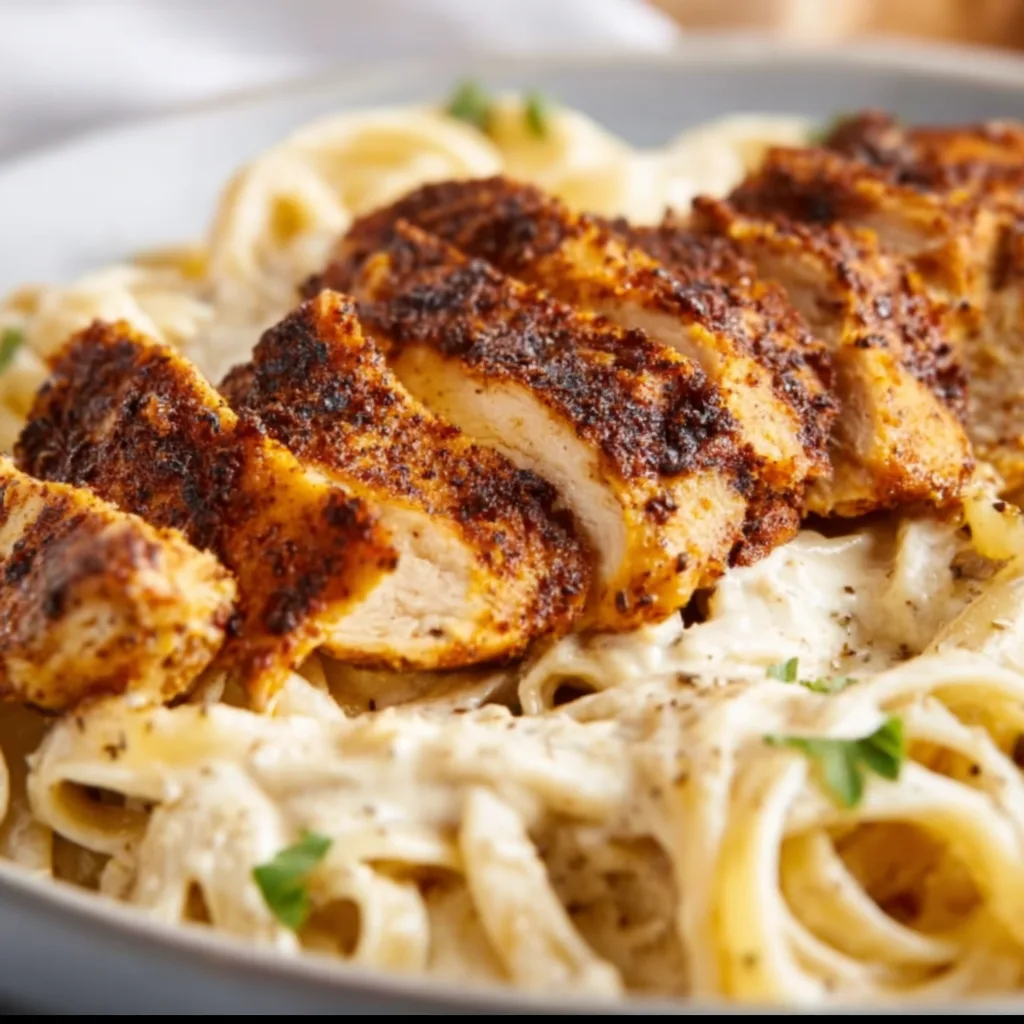
    Creamy Blackened Chicken Alfredo Pasta is the ultimate comfort food that brings restaurant-quality elegance to your dinner table with minimal effort. The first time I made this dish, my kitchen filled with the intoxicating aroma of blackened spices and rich garlic butter that had my family hovering nearby, asking when dinner would be ready. The contrast between the spicy, charred chicken and the silky, indulgent alfredo sauce creates a flavor explosion that’s impossible to resist. This dish has become my go-to when I want to impress without spending hours in the kitchen, just like my Creamy Cowboy Butter Chicken Pasta.

    Recipe

    Why You’ll Love This Creamy Blackened Chicken Alfredo Pasta

    Perfect Balance of Flavors and Textures

    There’s something magical about the way the blackening spices create a spicy, smoky crust on tender chicken breast while the creamy alfredo sauce cools everything down with its velvety richness. I love how each bite delivers contrasting sensations – the slight char of the blackened exterior giving way to juicy chicken, all coated in that silky sauce that clings perfectly to al dente pasta. The addition of freshly grated Parmesan adds a salty, nutty dimension that ties everything together, creating a dish that feels indulgent yet perfectly balanced.

    Quick Weeknight Luxury

    Despite its impressive appearance, this dish comes together in about 30 minutes, making it perfect for those evenings when you crave something special but simple. The multitasking approach – blackening chicken while your pasta cooks and the sauce simmers – means dinner arrives at the table efficiently. I’ve made this on busy weeknights and for impromptu dinner guests with equal success. The look of delight when people take their first bite makes the minimal effort completely worthwhile. It’s become my secret weapon for turning an ordinary Monday into something memorable.

    Essential Tips & Tricks

    Mastering the Blackening Technique

    The key to perfect blackened chicken lies in two critical elements: a properly heated pan and the right spice blend. I learned through trial and error that a cast-iron skillet works best, heated until it’s just beginning to smoke. Pat your chicken completely dry before coating with spices – any moisture will steam rather than blacken. For the spice mix, balance is everything: paprika, cayenne, oregano, thyme, garlic powder, onion powder, salt, and pepper create that authentic flavor. Don’t flip the chicken too early; let it develop that beautiful crust before turning.

    Creating Silky Alfredo Sauce

    The secret to a restaurant-quality alfredo sauce is starting with a quality heavy cream and real butter – this is not the place for substitutions! Begin by gently sautéing minced garlic in butter until fragrant but not brown, then slowly whisk in the cream. The key mistake many make is rushing the process or cranking the heat too high. Keep your sauce at a gentle simmer, never a boil, which causes separation. Add the Parmesan cheese in batches, allowing each addition to fully melt before adding more for the smoothest texture.

    Serving Ideas & Creative Variations

    Perfect Pairings

    This rich pasta dish pairs beautifully with bright, acidic sides that cut through the creaminess. I love serving it with a simple arugula salad dressed with lemon vinaigrette or roasted asparagus with a squeeze of fresh lemon. For a complete meal that won’t overwhelm, warm garlic bread with a crispy crust provides the perfect vehicle for sopping up extra sauce. If you’re entertaining, start with something light like my Roasted Red Pepper Hummus with fresh vegetables to balance the richness of the main course.

    Exciting Flavor Twists

    While the classic version is divine, this dish welcomes creative adaptations. For a seafood variation, substitute blackened shrimp or add them alongside the chicken for a surf and turf approach. Sundried tomatoes and spinach folded in at the last minute add color, nutrition, and a pleasant tanginess. For heat lovers, stir in a spoonful of cajun seasoning to the alfredo sauce or add red pepper flakes. My personal favorite twist is adding caramelized onions and mushrooms sautéed with a splash of white wine for an earthy dimension that complements the creamy sauce beautifully.

    Storage & Troubleshooting Guide

    Proper Storage Methods

    To maintain the quality of leftover Creamy Blackened Chicken Alfredo Pasta, cool completely before transferring to airtight containers. The pasta will absorb sauce as it sits, so I recommend storing them separately when possible. Refrigerate for up to 3 days for optimal flavor and texture. When reheating, add a splash of milk or cream to restore the sauce’s silkiness. For longer storage, this dish can be frozen for up to 1 month, though the texture of the sauce may change slightly. Always thaw overnight in the refrigerator rather than using the microwave defrost function.

    Fixing Common Issues

    If your alfredo sauce breaks or becomes grainy, don’t panic! Lower the heat immediately and whisk in 1-2 tablespoons of cold heavy cream to re-emulsify the sauce. For sauce that’s too thick, gradually add warm milk until you reach your desired consistency. If too thin, a slurry of cornstarch and cold water can help thicken it without affecting flavor. Blackened chicken turning out too charred? Your pan was likely too hot – next time, reduce the heat slightly and watch carefully. Remember that pasta continues cooking in hot sauce, so always aim for slightly firmer than al dente when boiling.

    Frequently Asked Questions

    Can I use pre-cooked chicken for this Creamy Blackened Chicken Alfredo Pasta?

    Yes, though you’ll sacrifice some flavor. Toss pre-cooked chicken with blackening seasoning and quickly sear in a hot pan just to develop the crust before adding to your finished alfredo sauce.

    What’s the best pasta shape for alfredo sauce?

    Fettuccine is traditional, but any pasta with ridges or texture works well. Penne, rigatoni, or linguine all hold the creamy sauce beautifully and pair wonderfully with the chicken pieces.

    Can I make this dish lighter?

    You can substitute half-and-half for heavy cream and reduce butter slightly, though the sauce won’t be as rich. Adding extra garlic and herbs helps maintain flavor complexity when reducing fat.

    Is this recipe spicy?

    The blackening seasoning provides moderate heat that’s balanced by the creamy sauce. Adjust cayenne pepper in your blackening mix to control spiciness according to your preference.

    How do I prevent my alfredo sauce from separating?

    Keep heat low and never let the sauce boil. Add cheese gradually off the heat, and if reheating, do so gently with a splash of cream while whisking constantly.

    Final Thoughts

    This Creamy Blackened Chicken Alfredo Pasta represents comfort food at its finest – sophisticated enough for special occasions yet simple enough for weeknight dinners. I find myself returning to this recipe whenever I need a foolproof dish that delivers both impressive presentation and incredible flavor. The contrast between spicy blackened chicken and velvety alfredo sauce creates a memorable meal that feels like a restaurant experience at your own table. For more delicious pasta inspirations, follow me on Pinterest where I’m always sharing new comfort food creations!

  • Fluffy Twice Baked Potatoes Recipe That Will Blow Your Mind!

    Fluffy Twice Baked Potatoes Recipe That Will Blow Your Mind!

    Fluffy Twice Baked Potatoes Recipe That Will Blow Your Mind!

    Fluffy Twice Baked Potatoes are the ultimate comfort food that combines crispy potato skins with a cloud-like, creamy interior that melts in your mouth. I discovered these little gems during a snowy weekend at my grandmother’s farmhouse, where she taught me that the secret lies in whipping the potato filling until it’s as light as air. The contrast between the crispy exterior and the pillowy center creates a texture that’s simply irresistible. Whether you’re hosting a dinner party or craving a cozy side dish for a weeknight meal, these twice baked potatoes will elevate any dining experience with minimal effort.

    Recipe

    Why You’ll Love This Fluffy Twice Baked Potatoes

    Perfect Texture Combination

    The magic of fluffy twice baked potatoes lies in their contrasting textures. The outer shell maintains that satisfying crispness that gives way to an incredibly light, whipped interior. I’ve found that using russet potatoes works best because of their high starch content, which creates that perfect fluffiness. The first bake ensures the skin gets nice and crispy, while the second bake melds all the flavors together. When you take that first bite, you’ll experience the delightful crunch followed by the most cloud-like potato filling that practically dissolves on your tongue. It’s a textural paradise!

    Endless Customization Options

    What I absolutely adore about fluffy twice baked potatoes is their versatility. The basic recipe is delicious on its own, but it also serves as the perfect canvas for creativity. You can fold in roasted garlic for a mellow, aromatic flavor or add crispy bacon bits for a smoky punch. Experiment with different cheese combinations—sharp cheddar, tangy goat cheese, or nutty gruyère. For an herbal note, try chives, rosemary, or thyme. My family goes wild when I add caramelized onions and blue cheese! The possibilities are truly endless, making this recipe one you’ll never tire of making or eating.

    Essential Tips & Tricks

    Achieving Maximum Fluffiness

    The key to creating the fluffiest potatoes possible is in the technique. After the first bake, let the potatoes cool just enough to handle, then scoop out the flesh leaving a ¼-inch border to maintain structural integrity. For cloud-like texture, use a ricer or food processor instead of a masher—this removes all lumps. Warm your dairy ingredients (butter, sour cream, milk) before adding them; cold ingredients can make the potatoes gummy. Whip the mixture with an electric mixer for 1-2 minutes until light and airy. This extra step makes all the difference between good and extraordinary twice baked potatoes!

    Perfecting the Twice Baked Process

    Timing is everything when creating fluffy twice baked potatoes. For the initial bake, preheat your oven to 400°F and cook potatoes for 45-60 minutes until fork-tender. After filling the shells, the second bake should be at 375°F for just 15-20 minutes—enough to melt the cheese and heat through without drying out. For that beautiful golden top, switch to broil for the final 2-3 minutes, but watch carefully! They can go from perfectly browned to burnt in seconds. If preparing ahead, complete all steps except the final bake, refrigerate, then add 10 minutes to the second bake time when ready to serve.

    Serving Ideas & Creative Variations

    Perfect Pairings for Any Occasion

    Fluffy twice baked potatoes work beautifully as both elegant sides and hearty mains. For dinner parties, serve them alongside a perfectly seared steak or roasted chicken—their creamy texture complements proteins wonderfully. For casual gatherings, pair with a simple green salad dressed with vinaigrette for a refreshing contrast. They’re substantial enough to be a vegetarian main course when topped with broccoli and extra cheese. I love serving them at brunch with poached eggs and hollandaise! The versatility of these potatoes means they’re appropriate for everything from holiday feasts to Tuesday night dinners with easy honey sesame chicken.

    Innovative Flavor Combinations

    Take your fluffy twice baked potatoes to the next level with unexpected ingredients. Try a Mediterranean version with sun-dried tomatoes, feta, and olives folded into the filling. For a southwestern twist, add corn, black beans, jalapeños, and top with avocado after baking. My personal favorite is a loaded baked potato version with sharp cheddar, crispy bacon, chives, and a dollop of sour cream. For something truly special, try a truffle-infused filling with wild mushrooms and gruyère cheese. The humble potato becomes extraordinary when you think outside the traditional flavor profiles!

    Storage & Troubleshooting Guide

    Proper Storage and Reheating Methods

    Fluffy twice baked potatoes are perfect for meal prep because they store and reheat beautifully. After cooling completely, wrap individual potatoes in plastic wrap and refrigerate for up to 3 days. For longer storage, freeze them on a baking sheet until solid, then transfer to freezer bags for up to 2 months. When reheating from refrigerated, bake at 350°F for 15-20 minutes. From frozen, don’t thaw first—bake at 350°F for 30-35 minutes until heated through. For the best texture when reheating, sprinkle with a little extra cheese on top to prevent drying out.

    Solving Common Potato Problems

    Even experienced cooks encounter issues with twice baked potatoes. If your potatoes are too dense, you likely overworked the filling or used cold dairy. Next time, warm your milk and sour cream and mix gently. For potatoes that won’t crisp up, try brushing the skins with olive oil and salt before the first bake. If the filling is too runny, fold in a tablespoon of instant potato flakes to absorb excess moisture. For potatoes that collapse, you’ve likely scooped too much flesh out—always leave that ¼-inch border. Remember that different potato varieties have different moisture levels, so adjust your recipe accordingly.

    Frequently Asked Questions

    What makes twice baked potatoes so fluffy?

    The secret to fluffy twice baked potatoes is using a ricer or food processor instead of a masher, warming dairy ingredients before adding them, and whipping the mixture with an electric mixer for 1-2 minutes until light and airy.

    Can I make fluffy twice baked potatoes ahead of time?

    Absolutely! Prepare everything except the final bake, refrigerate for up to 3 days, then bake for 25-30 minutes at 375°F when ready to serve. They can also be frozen for up to 2 months.

    What’s the best potato variety to use?

    Russet potatoes are ideal because their high starch content creates the fluffiest interior. Their sturdy skins also hold up well to twice baking.

    How can I make these potatoes healthier?

    Use Greek yogurt instead of sour cream, reduce cheese, add steamed broccoli or spinach to the filling, and top with herbs instead of bacon for a lighter version that’s still delicious.

    Can I make mini fluffy twice baked potatoes as appetizers?

    Yes! Use small potatoes like fingerlings or baby reds, reduce baking times accordingly, and serve as elegant bite-sized appetizers at your next gathering.

    Final Thoughts

    Fluffy twice baked potatoes have become my go-to recipe when I want to impress without spending hours in the kitchen. There’s something magical about that moment when your fork breaks through the crispy top into the cloud-like interior—it’s comfort food perfection. I encourage you to make this recipe your own by experimenting with different fillings and toppings. The techniques you’ll learn creating these fluffy twice baked potatoes will elevate your potato game forever. For more delicious recipes and inspiration, follow me on Pinterest where I’m always sharing new comfort food ideas.

  • Gyudon Recipe That Will Melt Your Heart in Every Bite!

    Gyudon Recipe That Will Melt Your Heart in Every Bite!

    Gyudon Recipe That Will Melt Your Heart in Every Bite!

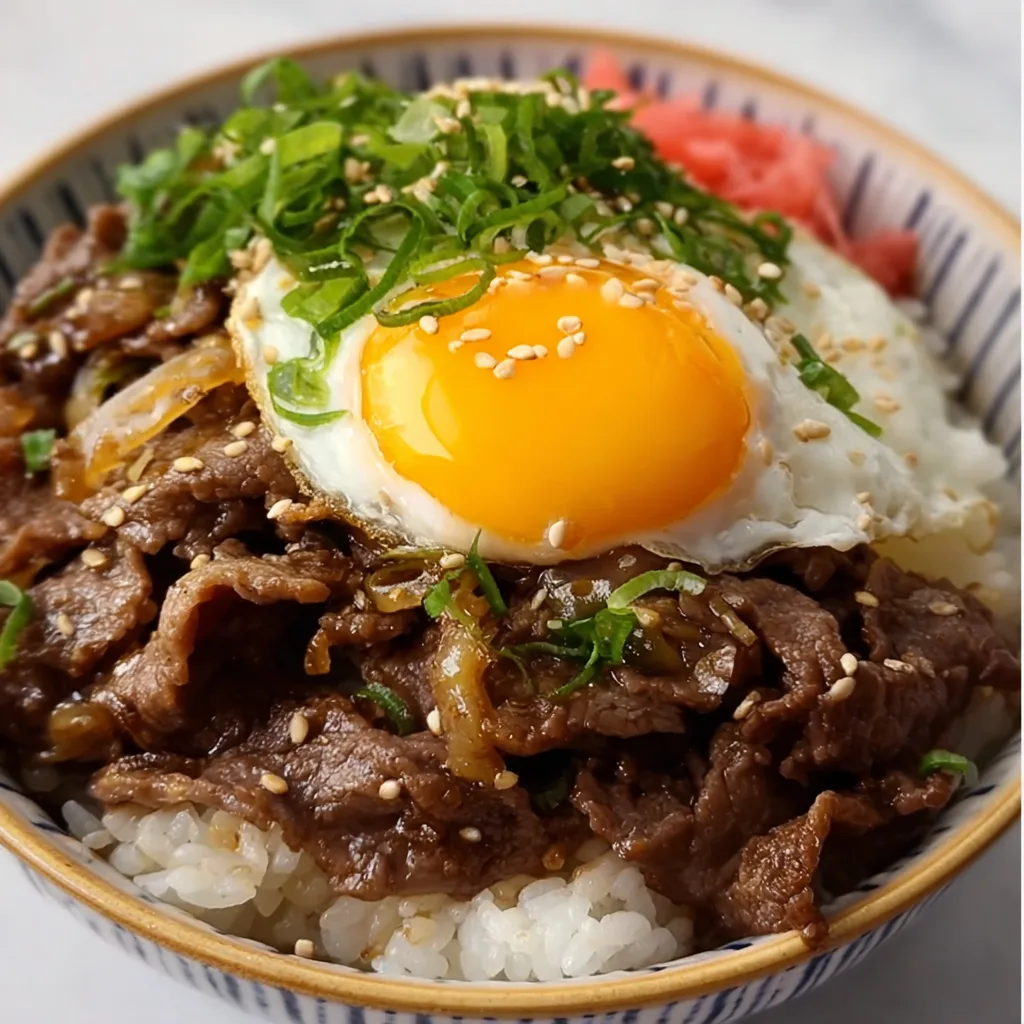
    Gyudon (Japanese Beef Rice Bowl) transports me to the bustling streets of Tokyo with just one aromatic bite. There’s something magical about thinly sliced beef and onions simmered in a sweet-savory sauce, all served over a steaming bowl of fluffy rice. The first time I made this comfort dish during a rainy Sunday afternoon, the rich umami aroma filled my tiny apartment, and I was instantly hooked. This traditional Japanese favorite strikes the perfect balance between convenience and flavor, making it an ideal weeknight dinner that feels like a warm hug in bowl form.

    Recipe

    Why You’ll Love This Gyudon (Japanese Beef Rice Bowl)

    Quick Comfort Food with Authentic Flavor

    Gyudon is the ultimate 30-minute meal that doesn’t sacrifice flavor for speed. The tender beef absorbs the sweet-savory sauce, creating a perfect harmony that feels both indulgent and nourishing. I love how the thinly sliced onions practically melt into the sauce, adding natural sweetness. The combination of soy sauce, mirin, and a touch of sugar creates that distinctive Japanese flavor profile that makes you close your eyes with each bite. My husband now requests this dish weekly, claiming it’s better than our local Japanese restaurant!

    Simple Ingredients, Maximum Impact

    What makes gyudon truly special is how it transforms basic ingredients into something extraordinary. You’ll need just thinly sliced beef (ribeye or chuck works beautifully), onions, soy sauce, mirin, sake (or a substitute), sugar, and dashi powder. That’s it! The magic happens when these humble components simmer together, creating a glossy sauce that coats each piece of meat perfectly. I keep these pantry staples on hand specifically for those evenings when I crave something comforting but don’t have the energy for an elaborate meal.

    Essential Tips & Tricks

    Mastering the Perfect Beef Slice

    The secret to authentic gyudon lies in the paper-thin beef slices. Ask your butcher to slice ribeye or chuck extremely thin (almost shaved), or partially freeze your meat at home for about 30 minutes before slicing it yourself with a sharp knife. This technique ensures the beef cooks quickly and remains tender. I learned this trick from my Japanese neighbor who watched me struggling with thick-cut beef one afternoon and kindly showed me how a quick freeze makes all the difference in achieving that melt-in-your-mouth texture that makes gyudon so irresistible.

    Balancing the Signature Sauce

    Creating the perfect gyudon sauce requires a delicate balance of flavors. The ideal ratio is 3 parts soy sauce, 3 parts mirin, 1 part sake, and 1 part sugar, plus a teaspoon of dashi powder for depth. If your sauce tastes too sweet, add a splash more soy sauce. Too salty? A drizzle of mirin or a pinch more sugar will balance it out. Don’t rush the simmering process—allow the sauce to reduce slightly until it coats the back of a spoon. This creates that glossy finish that makes restaurant-quality gyudon so special.

    Serving Ideas & Creative Variations

    Traditional and Modern Accompaniments

    Serve your gyudon with classic Japanese pickles (tsukemono) for a bright, acidic contrast to the rich beef. A soft-poached egg on top creates a luxurious sauce when the yolk breaks into the meat. For a complete meal, add a side of miso soup and steamed vegetables. My personal touch is adding a sprinkle of togarashi (Japanese chili pepper) and thinly sliced scallions for color and freshness. These simple additions transform a humble bowl into something that feels like it came from a cozy Japanese izakaya.

    Regional and Dietary Adaptations

    Gyudon welcomes creative adaptations while maintaining its soul. For a Kansai-style version, add dashi-simmered thin slices of konnyaku (yam cake) for texture. Going low-carb? Serve over cauliflower rice or alongside steamed vegetables instead. Vegetarians can substitute thinly sliced portobello mushrooms or plant-based beef alternatives—the key is maintaining those thin slices to absorb the flavorful sauce. I’ve even made a spicy version by adding gochujang (Korean chili paste) that creates a delicious fusion variation my spice-loving friends request repeatedly.

    Storage & Troubleshooting Guide

    Proper Storage for Maximum Freshness

    Gyudon stores beautifully, making it perfect for meal prep. Store the beef mixture separately from rice in airtight containers in the refrigerator for up to 3 days. The flavors actually develop and improve overnight! For freezing, cool the beef mixture completely, then portion into freezer-safe containers for up to 2 months. Thaw overnight in the refrigerator before gently reheating on the stovetop with a splash of water to restore the sauce’s consistency. Always prepare fresh rice when serving leftovers for the best texture.

    Fixing Common Gyudon Challenges

    If your beef turns out tough, it’s likely either sliced too thick or overcooked. Remember that thin slices cook in just 1-2 minutes. For overly salty sauce, add a quartered potato during simmering (remove before serving) to absorb excess salt, or balance with a teaspoon of sugar. If your sauce is too thin, mix 1 teaspoon cornstarch with 1 tablespoon cold water and stir into the simmering mixture. Too thick? Add a splash of dashi or water. These simple fixes ensure your gyudon turns out perfectly every time.

    Frequently Asked Questions

    What cut of beef is best for gyudon?

    Ribeye or chuck work best for gyudon because they offer a good balance of fat and meat. Have your butcher slice it paper-thin, or partially freeze it at home before slicing for that authentic melt-in-your-mouth texture.

    Can I make gyudon without sake?

    Absolutely! Substitute sake with dry sherry, Chinese rice wine, or even a mixture of 3 parts water to 1 part rice vinegar. The flavor will be slightly different but still delicious.

    How do I achieve restaurant-quality gyudon at home?

    The secret lies in paper-thin beef slices and allowing your sauce to reduce properly. Don’t rush the simmering process, and finish with a sprinkle of togarashi and green onions for that authentic presentation.

    Is gyudon healthy?

    Gyudon can be part of a balanced diet. Use leaner beef cuts, reduce the sugar slightly, and serve with plenty of vegetables for a more nutritious meal that still delivers on flavor.

    Can I prepare components of gyudon in advance?

    Yes! Slice your beef and onions up to a day ahead, and mix your sauce ingredients in advance. This makes weeknight assembly incredibly quick while preserving the dish’s fresh-cooked quality.

    Final Thoughts

    Gyudon (Japanese Beef Rice Bowl) exemplifies how simple ingredients can create something truly extraordinary when treated with care. There’s a reason this dish has been beloved in Japan for generations—it offers comfort and satisfaction in every bite while being accessible enough for any home cook to master. I find myself returning to this recipe again and again, not just for its ease but for how it transforms an ordinary evening into something special. Find more inspiration for your kitchen adventures at Pinterest.

  • Cantonese Soy Sauce Chow Mein: Irresistibly Savory Noodle Bliss!

    Cantonese Soy Sauce Chow Mein: Irresistibly Savory Noodle Bliss!

    Cantonese Soy Sauce Chow Mein: Irresistibly Savory Noodle Bliss!

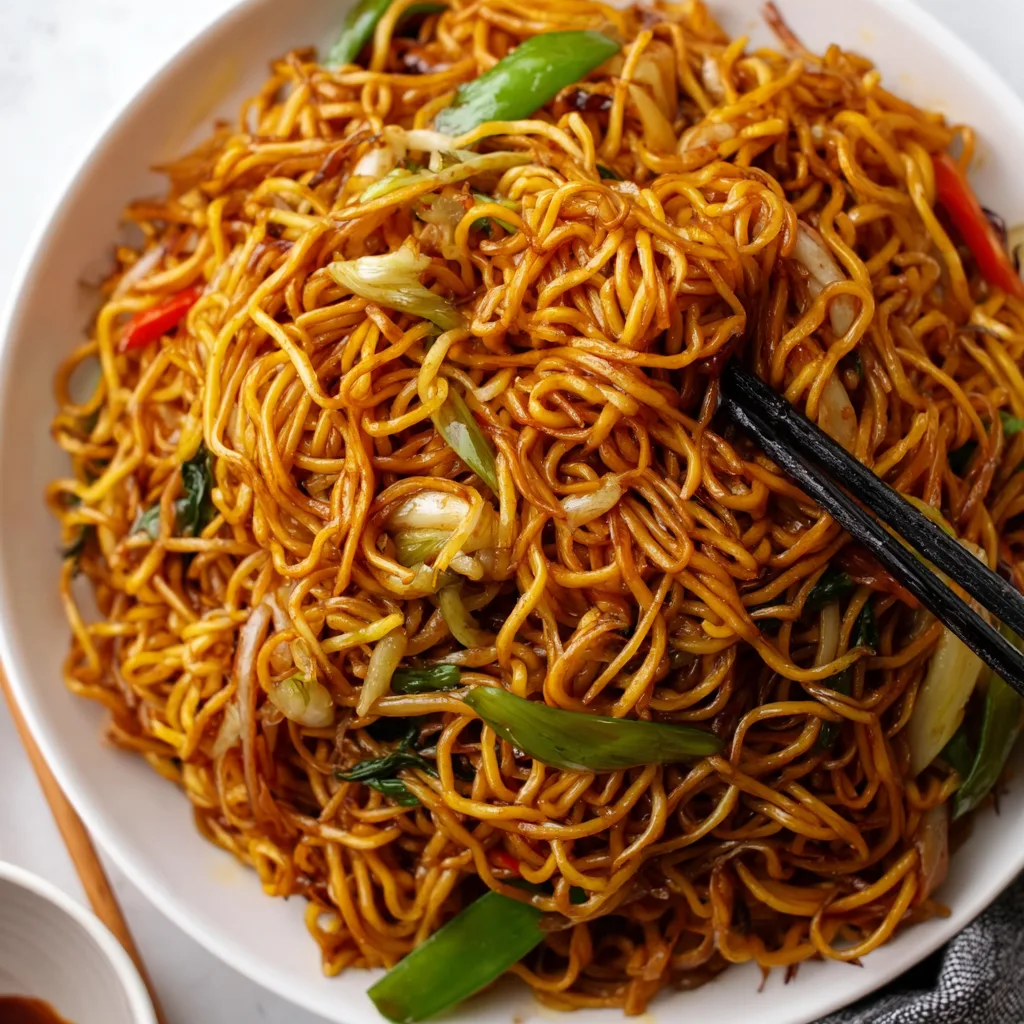
    Cantonese Soy Sauce Chow Mein has been my comfort food salvation on countless busy weeknights when takeout tempts but my wallet protests. There’s something magical about the way these noodles soak up that perfect balance of savory soy sauce, creating silky strands that glisten in the wok. The first time I mastered this recipe, my kitchen filled with that unmistakable aroma that transported me straight to my favorite Chinese restaurant. The beauty lies in its simplicity – just a handful of ingredients creating a symphony of textures and flavors that dance on your tongue with every twirl of your fork.

    Recipe

    Why You’ll Love This Cantonese Soy Sauce Chow Mein

    Perfect Balance of Flavors and Textures

    This Cantonese Soy Sauce Chow Mein delivers that restaurant-quality experience without the delivery fee. The noodles develop those coveted crispy edges while maintaining a tender bite at the center. I’m obsessed with how the soy sauce caramelizes slightly when it hits the hot wok, creating these little pockets of intense umami that burst with each mouthful. The subtle sweetness balances the saltiness perfectly, while a touch of sesame oil adds that aromatic finish that makes you close your eyes with each bite.

    Quick, Versatile, and Economical

    On nights when I’m staring blankly into my refrigerator, this chow mein recipe is my saving grace. It comes together in under 30 minutes and works with whatever protein you have on hand – leftover chicken, shrimp, tofu, or just a medley of vegetables. The ingredients are pantry staples that won’t break the bank, making this significantly more economical than takeout. I’ve made this on date nights and for hungry teenagers alike – it’s that rare recipe that pleases everyone while adapting to whatever your kitchen has to offer.

    Essential Tips & Tricks

    Noodle Selection and Preparation

    Choosing the right noodles makes all the difference in authentic Cantonese Soy Sauce Chow Mein. Look for fresh egg noodles labeled “Hong Kong-style” or “chow mein noodles” – they’re thinner than lo mein and develop that perfect crispy-yet-chewy texture. If using dried noodles, undercook them slightly as they’ll continue cooking in the wok. My game-changing tip: after boiling, rinse under cold water to stop the cooking process, then toss with a teaspoon of sesame oil to prevent sticking while you prep other ingredients.

    Wok Hei: The Breath of the Wok

    The secret to restaurant-quality chow mein is achieving wok hei – that smoky, charred essence that comes from cooking at high heat. Get your wok screaming hot before adding oil (it should be just smoking), then work quickly in batches to prevent overcrowding. When I first tried this technique, the difference was mind-blowing – the noodles developed those coveted crispy edges and caramelized flavor that simply can’t happen in a crowded, cool pan. For an added flavor boost, try adding a splash of Shaoxing wine in the final toss.

    Serving Ideas & Creative Variations

    Perfect Pairings and Garnishes

    Serve your Cantonese Soy Sauce Chow Mein as a complete meal or alongside other Chinese favorites. I love topping mine with thinly sliced scallions, a sprinkle of toasted sesame seeds, and crispy fried garlic chips for textural contrast. For a complete feast, pair with my Creamy Coconut Curry Prawn Spaghetti for an Asian fusion dinner that will impress guests. Don’t skip a final drizzle of chili oil if you enjoy heat – it adds a beautiful color contrast and pleasant warmth without overwhelming the delicate flavors.

    Regional and Dietary Adaptations

    Transform this classic into a Singapore-style version by adding a teaspoon of curry powder to the sauce mixture. For a Shanghai variation, incorporate dark soy sauce for deeper color and add julienned bamboo shoots. Making it gluten-free is simple – just substitute tamari for soy sauce and use rice noodles instead of wheat-based ones. For a low-carb option, spiralized zucchini or shirataki noodles work surprisingly well with the same sauce profile, though you’ll want to adjust cooking times to prevent sogginess.

    Storage & Troubleshooting Guide

    Proper Storage and Reheating Methods

    These noodles store beautifully for quick lunches throughout the week. Refrigerate in an airtight container for up to 3 days, separating portions with parchment paper to prevent sticking. When reheating, skip the microwave which makes noodles gummy. Instead, a quick toss in a hot skillet with a teaspoon of oil brings back that fresh-made texture. If the noodles seem dry, sprinkle a few drops of water around the edges of the pan and cover briefly – the steam will revive them without making them soggy.

    Common Issues and Easy Fixes

    Soggy noodles are the most common problem with homemade chow mein. The culprit is usually overcrowding the pan or not getting it hot enough. If your noodles aren’t crisping, try cooking in smaller batches and increasing the heat. Too salty? Add a squeeze of fresh lime juice and a drizzle of honey to balance the flavors. If your sauce is too thin and watery, mix 1/2 teaspoon cornstarch with 1 tablespoon cold water and stir it in during the final minute of cooking for that perfect silky coating.

    Frequently Asked Questions

    What makes Cantonese Soy Sauce Chow Mein different from other noodle dishes?

    Cantonese Soy Sauce Chow Mein focuses on the noodles themselves rather than heavy sauces or toppings. The hallmark is wok hei (breath of the wok) and the caramelization of soy sauce on the noodles, creating a drier, more intensely flavored dish than other stir-fried noodles.

    Can I make this dish ahead of time?

    Yes! Prepare all ingredients and parboil the noodles up to a day ahead. Store separately in the refrigerator, then stir-fry just before serving for the best texture and flavor.

    What vegetables work best in this recipe?

    Traditional options include bean sprouts, scallions, and julienned carrots. However, bok choy, snow peas, bell peppers, and mushrooms also work beautifully. Just ensure they’re cut uniformly for even cooking.

    Is this dish spicy?

    Traditional Cantonese Soy Sauce Chow Mein isn’t spicy, but you can easily add heat with fresh chili, chili oil, or chili garlic sauce to taste.

    Can I use spaghetti if I can’t find Chinese egg noodles?

    In a pinch, yes. Cook spaghetti until very al dente (about 2 minutes less than package directions), then rinse with cold water before stir-frying. The texture will be different but still delicious.

    Final Thoughts

    Mastering Cantonese Soy Sauce Chow Mein has become my secret weapon for impressing guests and satisfying cravings without reaching for the takeout menu. The magic is in those perfectly caramelized noodles with their balance of savory depth and subtle sweetness. What I love most is watching people’s faces light up with that first bite – the recognition that homemade can actually surpass restaurant versions. Don’t be surprised if this becomes your new go-to comfort food! For more Asian-inspired recipes, check out my Pinterest collection where I’m constantly adding new favorites.

  • Chicken Korma Recipe: Irresistible Flavor with Flatbread or Rice

    Chicken Korma Recipe: Irresistible Flavor with Flatbread or Rice

    Chicken Korma Recipe: Irresistible Flavor with Flatbread or Rice

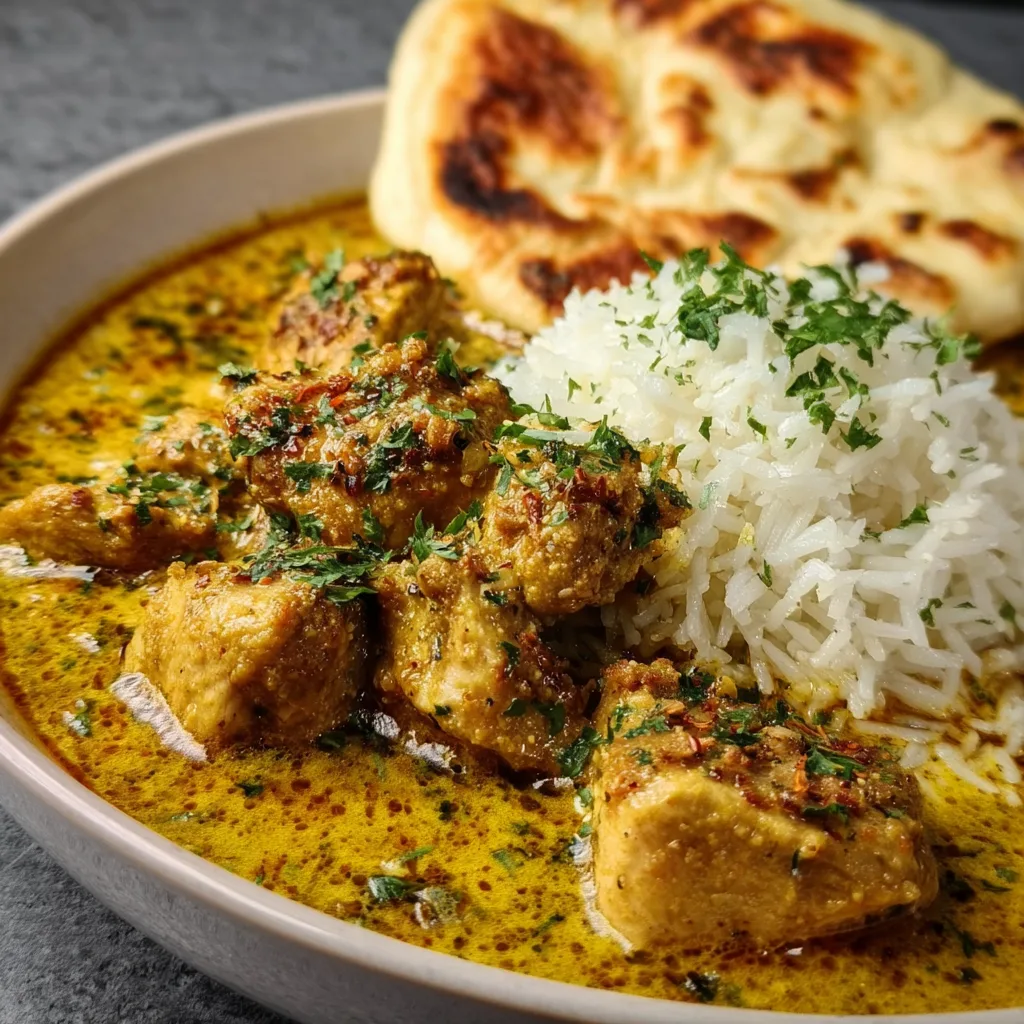
    Chicken Korma with Flatbread or Rice is that magical dish that transports you straight to the heart of Indian cuisine with its creamy, aromatic embrace. The first time I made this at home, the rich blend of spices filled my kitchen with a warmth that felt like a culinary hug. There’s something incredibly satisfying about creating those restaurant-quality flavors in your own kitchen. The tender chicken swimming in that velvety, golden sauce makes this dish perfect for both weeknight dinners and special occasions. If you love comfort food with a touch of exotic flair, this creamy cowboy butter chicken pasta might also become a favorite!

    Recipe

    Why You’ll Love This Chicken Korma with Flatbread or Rice

    A Perfect Balance of Flavors

    The beauty of Chicken Korma lies in its harmonious blend of spices that dance on your palate without overwhelming it. Unlike some curries that bring intense heat, korma offers a gentle warmth from garam masala, turmeric, and coriander. The creamy sauce, enriched with yogurt and a touch of coconut milk, creates a velvety texture that clings perfectly to each piece of chicken. I love how the sweetness from the caramelized onions balances the savory notes, creating that distinctive korma flavor that’s both complex and comforting at the same time.

    Quick Comfort Food with Impressive Results

    Despite its rich flavor profile, this Chicken Korma comes together surprisingly quickly. On those evenings when I’m craving something special but don’t have hours to spend in the kitchen, this dish never disappoints. The magic happens in about 30 minutes, making it perfect for busy weeknights. Yet the results are so impressive that guests always think I’ve spent hours cooking! The fragrant rice or warm flatbread soaking up that luscious sauce creates a meal that feels like a proper feast without the fuss. It’s comfort food that nourishes both body and soul.

    Essential Tips & Tricks

    Mastering the Korma Sauce

    The secret to an exceptional korma sauce lies in how you build those foundational flavors. Start by properly browning your onions until they’re golden and sweet—this creates the base note for the entire dish. Toast your spices briefly in the hot oil to release their aromatic oils before adding other ingredients. For that signature silky texture, temper your yogurt by stirring in a spoonful of the hot mixture before adding it to the pan. This prevents curdling and ensures that luxuriously smooth finish. I learned this technique after one disastrous attempt where my sauce separated into a grainy mess!

    Protein Preparation Perfection

    The difference between good and exceptional korma often comes down to how you prepare the chicken. Cut your chicken into uniform pieces (about 1-inch cubes) to ensure even cooking. For maximum flavor absorption, marinate the chicken in yogurt, garlic, and ginger for at least 30 minutes before cooking—though overnight is even better! This tenderizes the meat while infusing it with flavor. If you’re short on time, a quick 15-minute marinade with lemon juice will still improve the texture and flavor of your chicken considerably.

    Serving Ideas & Creative Variations

    Beyond Basic Rice

    While basmati rice is the traditional pairing for Chicken Korma, there are so many creative ways to serve this versatile dish. Try coconut rice for an extra layer of tropical flavor that complements the korma beautifully. For a lighter option, cauliflower rice works surprisingly well, soaking up the sauce while keeping things low-carb. My personal favorite is a combination of wild rice and basmati for contrasting textures. Don’t forget the garnishes—fresh cilantro, toasted almonds, and a sprinkle of garam masala elevate the presentation and add wonderful textural contrast to each bite.

    Global Fusion Inspirations

    One thing I love about korma is how adaptable it is to different culinary influences. For a Mediterranean twist, add roasted red peppers and finish with crumbled feta cheese. Feeling adventurous? Transform leftover korma into incredible stuffed bell peppers or use it as a filling for savory crepes. For a fusion breakfast idea, try korma shakshuka by making wells in the sauce and poaching eggs directly in it. The possibilities are endless, making this recipe a versatile staple in your cooking repertoire that never gets boring.

    Storage & Troubleshooting Guide

    Keeping Korma Fresh

    Chicken Korma actually improves with time as the flavors meld together, making it perfect for meal prep. Store leftovers in airtight containers in the refrigerator for up to 3 days. For freezing, cool the korma completely before transferring to freezer-safe containers, leaving a bit of space for expansion. It freezes beautifully for up to 3 months. When reheating, add a splash of water or coconut milk if the sauce has thickened too much. For best texture, reheat gently on the stovetop rather than microwave, stirring occasionally to prevent scorching and maintain that creamy consistency.

    Fixing Common Korma Challenges

    If your korma sauce has curdled, don’t panic! You can often rescue it by removing from heat and whisking in a tablespoon of warm water mixed with a teaspoon of cornstarch. For a sauce that’s too thin, simmer uncovered for a few extra minutes, or add a cornstarch slurry (1 teaspoon cornstarch mixed with 1 tablespoon cold water). If your korma lacks depth, a teaspoon of tomato paste or a splash of cream can work wonders. Too spicy? A dollop of yogurt or coconut cream will temper the heat while maintaining that luxurious texture that makes korma so special.

    Frequently Asked Questions

    What makes Chicken Korma different from other curry dishes?

    Chicken Korma features a milder, creamier sauce made with yogurt and sometimes nuts, without the intense heat of other curries. It originated in Mughal cuisine and traditionally uses braised meat with a yogurt-based sauce and warming spices rather than chili heat.

    Can I make Chicken Korma with Flatbread or Rice in advance?

    Absolutely! Korma actually tastes better the next day as flavors develop. Make it up to 2 days ahead, refrigerate in an airtight container, and gently reheat on the stove with a splash of liquid if needed.

    What’s the best rice to serve with Chicken Korma?

    Fragrant basmati rice is traditional and ideal, as its long grains and subtle aroma complement the korma sauce perfectly. Jasmine rice works well too, or try naan flatbread for dipping.

    Can I make this dish vegetarian?

    Yes! Replace chicken with chickpeas, paneer cheese, or mixed vegetables like cauliflower, peas, and carrots. Adjust cooking time accordingly as vegetables require less simmering than chicken.

    Is Chicken Korma spicy?

    No, authentic Chicken Korma is known for being mild and aromatic rather than spicy. It features warm spices like cardamom, cinnamon and garam masala that provide depth without heat.

    Final Thoughts

    This Chicken Korma with Flatbread or Rice brings the magic of Indian cuisine into your home kitchen with surprisingly little effort. The combination of tender chicken in that velvety, aromatic sauce creates a meal that feels like a warm embrace at the end of a long day. Whether you’re serving it with fluffy basmati rice, warm naan, or trying one of the creative variations, this dish is sure to become a regular in your cooking rotation. Don’t forget to check out more international inspirations on our Pinterest page for your next culinary adventure!