Category: Desserts

Sweet and easy dessert recipes for every craving. Simple treats, rich flavors, and quick ideas that make any moment feel special.

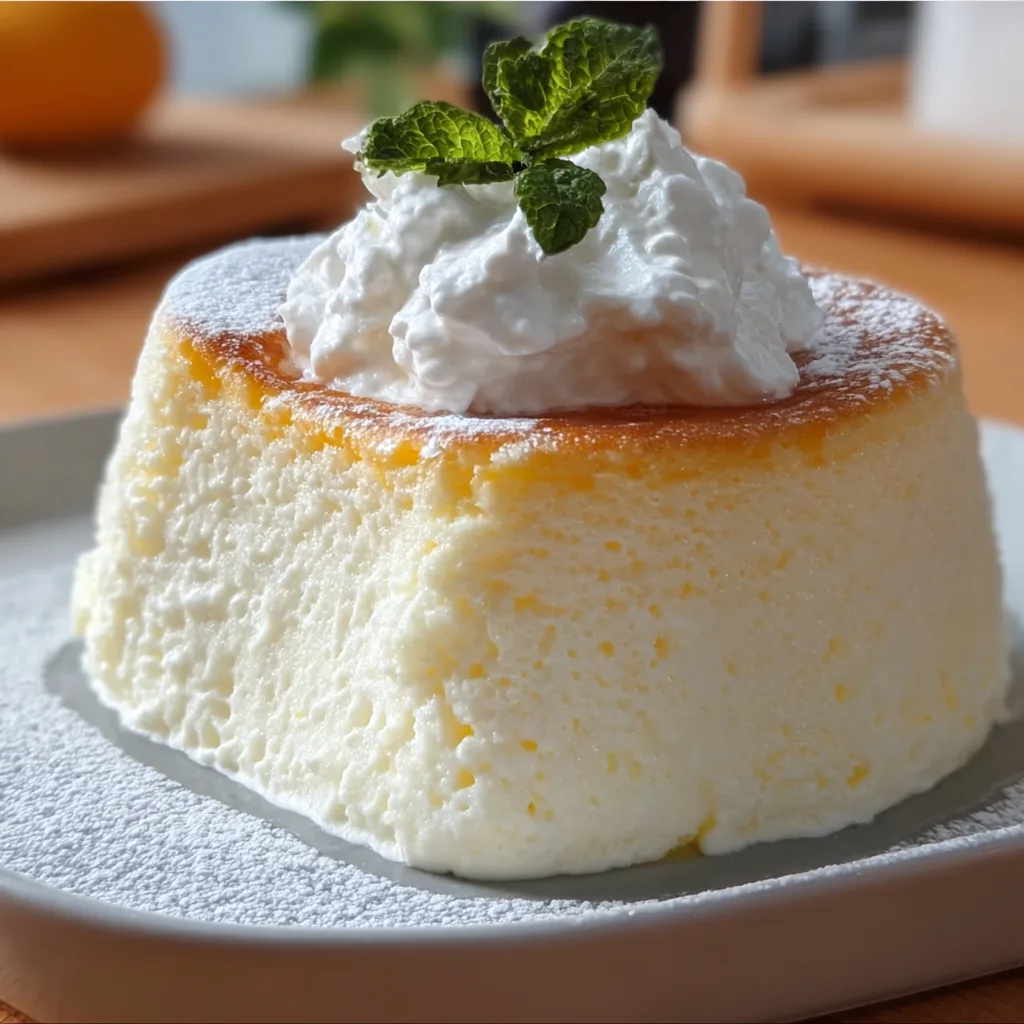
  • Fluffy Yogurt Cloud Dessert: Irresistibly Light & Heavenly Treat!

    Fluffy Yogurt Cloud Dessert: Irresistibly Light & Heavenly Treat!

    Fluffy Yogurt Cloud Dessert: Irresistibly Light & Heavenly Treat!

    This Fluffy Yogurt Cloud Dessert is what dreams are made of—light as air, delicately sweet, and impossibly creamy. I discovered this heavenly treat last summer when I needed something cool and refreshing that wouldn’t weigh me down after a backyard barbecue. The first spoonful transported me to dessert nirvana! The contrast between the billowy yogurt clouds and fresh berries creates a perfect balance that’s both satisfying and gentle on your sweet tooth. If you love no-bake treats, this ethereal dessert will become your new go-to for effortless entertaining.

    Recipe

    Why You’ll Love This Fluffy Yogurt Cloud Dessert

    Perfect Balance of Light & Decadent

    The magic of this Fluffy Yogurt Cloud Dessert lies in its contradictions—it’s somehow both substantial and weightless at the same time. The Greek yogurt base provides a velvety richness while whipped cream lightens everything to cloud-like perfection. I love how it satisfies my dessert cravings without that heavy feeling afterward. The tanginess from the yogurt balances the sweetness, creating a sophisticated flavor profile that even dessert snobs will appreciate. It’s become my secret weapon for dinner parties where I want to impress without spending hours in the kitchen.

    Make-Ahead Convenience

    One of the greatest joys of this Fluffy Yogurt Cloud Dessert is its make-ahead potential. I’ve prepared it up to 24 hours before serving with spectacular results—the flavors actually deepen and meld together beautifully. This has saved me countless times when hosting, allowing me to focus on other dishes or simply enjoying my guests. The texture holds remarkably well in the refrigerator, maintaining those beautiful, distinct layers without becoming watery or deflated. For busy weeknights or unexpected visitors, having this ready to go feels like giving yourself a gift.

    Essential Tips & Tricks

    Achieving the Perfect Texture

    The key to cloud-like perfection lies in how you handle the ingredients. Always use well-chilled cream and cold metal bowls for whipping—I even pop mine in the freezer for 15 minutes beforehand. Whip the cream just until firm peaks form; overwhipping creates a grainy texture that ruins the cloud-like effect. When folding the whipped cream into the yogurt, use a gentle hand with a silicone spatula, maintaining a light touch with figure-eight motions. This preserves the air bubbles that give this dessert its signature fluffiness and ensures each spoonful melts in your mouth.

    Flavor Customization Secrets

    The beauty of this Fluffy Yogurt Cloud Dessert lies in its versatility. Start with a foundation of high-quality Greek yogurt—I prefer full-fat for richness, but 2% works beautifully too. For natural sweeteners, try honey, maple syrup, or berry compote for distinct flavor profiles. Extract choices dramatically change the character—vanilla creates a classic foundation, while almond, lemon, or orange blossom transform it into something extraordinary. My personal favorite combination is honey with a touch of cardamom and vanilla, which creates an exotic yet comforting profile.

    Serving Ideas & Creative Variations

    Elegant Presentation Options

    Transform this humble dessert into a showstopper with thoughtful presentation. Layer in clear glass vessels—parfait glasses, champagne flutes, or mason jars all work beautifully—to showcase the cloud-like layers. For dinner parties, individual servings in vintage teacups create an unexpected elegant touch. Create a dramatic centerpiece by assembling in a trifle dish with alternating layers of fruit, granola, and crushed cookies. A dusting of cocoa powder, cinnamon, or finely grated chocolate adds professional flair. I once served this at a baby shower in miniature flower pots with edible flower garnishes—the guests still talk about it!

    Seasonal Adaptations

    This Fluffy Yogurt Cloud Dessert transforms effortlessly with the seasons. In summer, fold in fresh berries and lemon zest for brightness. Fall calls for warming spices—cinnamon, nutmeg, and cloves—with caramelized apples or pears. Winter versions shine with chocolate shavings, peppermint extract, and crushed candy canes. Spring begs for floral notes like lavender honey or rose water with pistachios. The holiday season is perfect for cranberry-orange variations with candied pecans. My family’s Thanksgiving tradition now includes a pumpkin spice version with maple-glazed pecans that pairs perfectly with our easy caramel toffee crunch cake.

    Storage & Troubleshooting Guide

    Proper Storage Methods

    To maintain the cloud-like texture of your dessert, proper storage is essential. Always keep it in an airtight container to prevent it from absorbing refrigerator odors or forming a skin on top. If preparing in advance, consider adding toppings like fresh fruit, nuts, or chocolate just before serving to maintain their texture. This dessert stays at peak quality for up to 3 days in the refrigerator, though the texture is most ethereal within the first 24-48 hours. Never freeze this dessert—the delicate structure will collapse upon thawing, resulting in a watery, separated mixture.

    Fixing Common Problems

    Even experienced cooks encounter issues with this delicate dessert. If your mixture becomes too runny, it’s likely due to overworked yogurt releasing whey. Fix this by straining the yogurt through cheesecloth for 30 minutes before proceeding. For a dessert that’s too firm, gently fold in 2-3 tablespoons of milk or cream. If the flavor lacks brightness, a pinch of salt and a squeeze of fresh lemon juice work wonders to enhance the taste without adding more sugar. For grainy texture issues, ensure you’re using room temperature sweeteners—cold honey or sugar can crystallize in cold yogurt.

    Frequently Asked Questions

    Can I make Fluffy Yogurt Cloud Dessert with non-dairy ingredients?

    Absolutely! Substitute coconut cream for heavy cream and use almond, coconut, or cashew yogurt alternatives. The texture may be slightly different but still delightfully cloud-like.

    Why did my Fluffy Yogurt Cloud Dessert become watery overnight?

    This typically happens when using regular yogurt instead of Greek. Always drain regular yogurt in cheesecloth for 2-3 hours before using, or stick with thick Greek yogurt.

    Can I use frozen fruits in this dessert?

    Yes, but thaw and drain them thoroughly first. Pat dry with paper towels to remove excess moisture that could make your dessert runny.

    Is this dessert suitable for diabetics?

    With modifications, yes. Use stevia or monk fruit sweetener instead of sugar and focus on low-glycemic berries like strawberries and blackberries for toppings.

    How can I make this dessert more protein-rich?

    Increase the protein content by using higher-protein Greek yogurt (2:1 ratio with whipped cream) and adding crushed nuts or a sprinkle of hemp seeds.

    Final Thoughts

    This Fluffy Yogurt Cloud Dessert has become my signature offering—the one friends request by name when they visit. There’s something magical about transforming simple ingredients into something that feels so special and ethereal. I love watching people’s expressions as they take their first bite, that moment of surprise when they discover how something so light can deliver such satisfaction. Whether you’re entertaining guests or simply treating yourself after a long day, these billowy clouds of yogurt goodness never disappoint. Create your own version today and watch it become a beloved part of your recipe collection.
  • S’mores Swiss Roll: Irresistibly Gooey Delight You Can’t Miss!

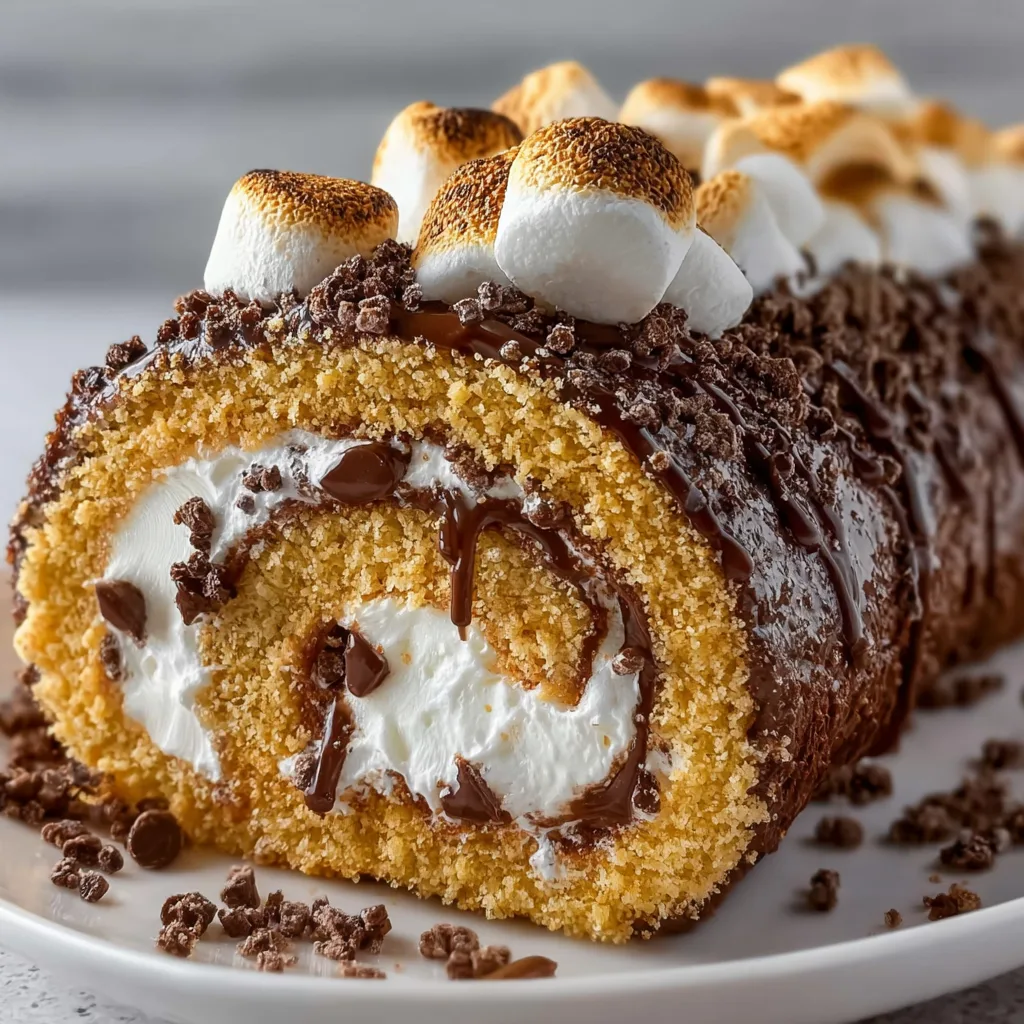
    S’mores Swiss Roll: Irresistibly Gooey Delight You Can’t Miss!

    S’mores Swiss Roll: Irresistibly Gooey Delight You Can’t Miss!

    This S’mores Swiss Roll combines everything magical about campfire s’mores with the elegant swirl of a classic Swiss roll cake. The pillowy chocolate sponge cradles a cloud of marshmallow fluff and graham cracker crumbles, all drizzled with rich chocolate ganache. I first created this showstopper for my niece’s birthday when she requested “something with s’mores but fancy,” and it’s been a family favorite ever since. The best part? You get all those nostalgic flavors without needing a campfire—though I won’t judge if you toast the top with a kitchen torch for that extra authentic touch!

    Recipe

    Why You’ll Love This S’mores Swiss Roll

    Perfect Balance of Textures and Flavors

    The magic of this S’mores Swiss Roll lies in its contrasting textures. The light, springy chocolate sponge provides the perfect backdrop for the gooey marshmallow filling that somehow stays put instead of oozing everywhere (kitchen victory!). I’ve added crushed graham crackers both inside the filling and sprinkled on top for that essential crunch that makes s’mores so satisfying. The chocolate ganache drizzle adds a final touch of richness that ties everything together. Every bite delivers that perfect balance of soft, crunchy, and melt-in-your-mouth delicious.

    Impressive Yet Achievable

    Don’t let the spiral pattern intimidate you—this S’mores Swiss Roll is actually quite forgiving to make! I used to panic about cake cracks until I realized they’re easily hidden under toppings or filling. The marshmallow fluff filling is particularly helpful here, as it’s sticky enough to hold everything together even if your cake isn’t rolled perfectly. Plus, the rustic nature of s’mores means that a few imperfections only add to its charm! When friends ask how I made something so fancy, I just smile knowing it took half the effort it appears to have required.

    Essential Tips & Tricks

    Mastering the Perfect Roll

    The key to a crack-free S’mores Swiss Roll is all in the timing and technique. Bake your chocolate sponge just until it springs back slightly when touched—overbaking leads to cracks. While still warm (not hot!), dust with a light coating of powdered sugar and roll it up in a clean kitchen towel. This “muscle memory” training helps the cake remember its shape. Let it cool completely rolled up before unrolling to add filling. I learned this the hard way after three failed attempts when I tried to rush the process! Take your time and you’ll be rewarded with that perfect spiral. Check out these no-bake desserts for more easy treats!

    Filling and Assembly Secrets

    The marshmallow filling can be a sticky challenge, but I’ve discovered a few game-changing tricks. Chill your mixing bowl before whipping the marshmallow fluff with a bit of cream cheese—this stabilizes it beautifully. Spread the filling evenly but leave a 1/2-inch border around the edges to prevent overflow. For the graham cracker element, crush some finely to mix into the filling and keep some chunkier for texture. When rolling, use the kitchen towel to guide the cake, applying gentle even pressure. If any cracks appear, don’t panic—they’ll be hidden by the ganache drizzle!

    Serving Ideas & Creative Variations

    Seasonal Adaptations

    This S’mores Swiss Roll welcomes seasonal twists that keep it exciting year-round. In summer, fold fresh raspberries into the filling for a fruity contrast, or add a splash of orange extract during fall for a subtle citrus note. Winter holidays call for a peppermint version—just swirl some crushed candy canes into the filling! My family went wild for the spring variation where I added a thin layer of strawberry cheesecake dip beneath the marshmallow fluff. Don’t be afraid to experiment with flavors that complement the chocolate-graham-marshmallow trinity!

    Presentation Upgrades

    Elevate your S’mores Swiss Roll with simple decorative touches that make it dinner-party worthy. A dusting of cocoa powder through a paper doily creates an elegant pattern, while chocolate curls add sophistication. For birthdays, I’ve pressed mini chocolate chips around the outside and topped with candles. My favorite presentation trick is serving slices on a pool of warm chocolate sauce with a tiny scoop of vanilla ice cream. For outdoor gatherings, I sometimes bring my kitchen torch to give each slice a freshly toasted marshmallow crown right before serving!

    Storage & Troubleshooting Guide

    Keeping It Fresh

    This S’mores Swiss Roll maintains its best texture when stored properly. Keep it in an airtight container in the refrigerator for up to 3 days—any longer and the graham crackers begin to soften too much. For the freshest experience, I recommend bringing slices to room temperature for about 15 minutes before serving. If you need to make it ahead for an event, consider freezing the unfilled roll, then thawing, filling, and finishing it the day before. The ganache topping actually helps seal in moisture, keeping your cake from drying out too quickly.

    Fixing Common Issues

    Even experienced bakers encounter challenges with Swiss rolls, but most problems have simple solutions. If your cake cracks during rolling, use extra filling as “glue” to hold it together—the marshmallow fluff is perfect for this repair job! For a roll that’s too dense, your batter might have been overmixed; next time, fold ingredients gently until just combined. If your filling squishes out the sides, chill the roll for 30 minutes before slicing with a warm, clean knife. I once salvaged a completely broken roll by turning it into a trifle with layers of the cake pieces, filling, and extra graham crackers!

    Frequently Asked Questions

    Can I make this S’mores Swiss Roll ahead of time?

    Yes! You can prepare it up to 2 days in advance. Store in the refrigerator in an airtight container, but bring to room temperature for 15-20 minutes before serving for the best texture and flavor.

    What if I don’t have marshmallow fluff?

    You can make your own by melting 2 cups of mini marshmallows with 2 tablespoons of corn syrup in the microwave, then beating until fluffy. Alternatively, use stabilized whipped cream folded with mini marshmallows.

    Can I freeze leftover slices?

    Absolutely! Wrap individual slices in plastic wrap, then foil, and freeze for up to 1 month. Thaw in the refrigerator overnight before enjoying.

    How do I prevent the cake from cracking?

    Don’t overbake the cake, roll it while still warm, and use a kitchen towel dusted with powdered sugar. The warmth makes the cake pliable and less likely to crack during rolling.

    What’s the best chocolate for the ganache topping?

    Semi-sweet chocolate chips work perfectly for the S’mores Swiss Roll ganache, but you can use milk chocolate for a sweeter result or dark chocolate (60-70% cacao) for a more intense flavor.

    Final Thoughts

    This S’mores Swiss Roll has become my go-to dessert when I want to impress without spending hours in the kitchen. There’s something magical about transforming a beloved campfire treat into an elegant swirled creation that makes everyone feel both nostalgic and fancy at the same time. The combination of chocolate sponge, marshmallow filling, and graham cracker crunch creates a dessert that’s greater than the sum of its parts. I hope this recipe brings as much joy to your table as it has to mine! For more delicious inspiration, follow me on Pinterest.

  • Fudgy Nutella Brownies Recipe: Irresistibly Gooey & Decadent Bliss

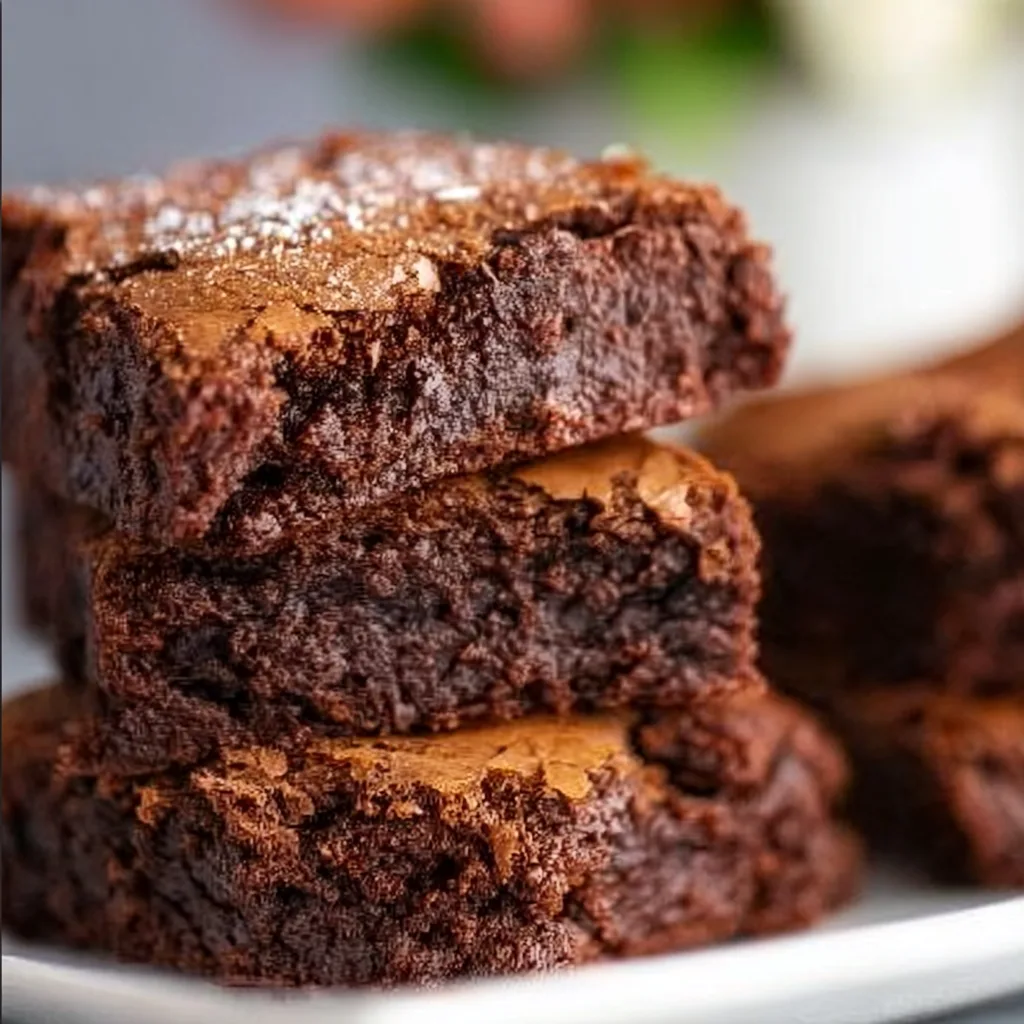
    Fudgy Nutella Brownies Recipe: Irresistibly Gooey & Decadent Bliss

    Fudgy Nutella Brownies Recipe: Irresistibly Gooey & Decadent Bliss

    Fudgy Nutella Brownies are what chocolate dreams are made of – rich, decadent squares of pure bliss that melt in your mouth with each heavenly bite. I still remember the first time I made these for my sister’s birthday gathering. The way everyone’s eyes widened at that first taste told me everything I needed to know. These aren’t just brownies; they’re an experience. The perfect balance of chocolatey intensity and hazelnut sweetness creates something truly special that’ll have everyone begging for the recipe. Trust me, these easy-to-make treats will become your new go-to dessert.

    Recipe

    Why You’ll Love These Fudgy Nutella Brownies

    Perfect Texture Every Time

    There’s something magical about the texture contrast in these brownies that keeps me coming back for more. The exterior develops this delicate, paper-thin crackly top that gives way to an incredibly fudgy center. It’s like biting through a chocolate cloud into pure velvet. I’ve tested this recipe countless times (my family wasn’t complaining!), and the secret is not overmixing once you add the flour. This keeps the brownies dense and fudgy rather than cakey. The Nutella adds this silky quality that regular brownies just don’t have – it’s what makes these truly special.

    Simple Ingredients, Extraordinary Results

    What I adore about these brownies is how they transform pantry staples into something extraordinary. You likely have most ingredients already: butter, sugar, eggs, vanilla, flour, cocoa powder, and of course, Nutella. No complicated techniques or fancy equipment needed – just a bowl, whisk, and spatula will do the trick. The Nutella isn’t just folded in; it’s strategically swirled throughout to create beautiful marbling and ensure every bite contains that distinctive hazelnut flavor. I’ve made these when unexpected guests arrived with just 45 minutes notice, and they were a massive hit!

    Essential Tips & Tricks

    Mastering the Nutella Swirl

    The signature swirl is what makes these brownies Instagram-worthy, but it takes a light touch. After pouring your batter into the pan, dollop spoonfuls of slightly warmed Nutella across the surface (15 seconds in the microwave makes it perfect). Then use a butter knife or toothpick to create elegant swirls by dragging through the dollops in a figure-eight pattern. Don’t overmix – you want distinct swirls, not a uniform blend. The first time I made these, I went overboard with the swirling and lost the beautiful pattern, so remember: less is more when it comes to creating those gorgeous marbled designs.

    The Secret to Fudgy Perfection

    The line between fudgy brownies and dry disappointment is thin, but I’ve cracked the code. The crucial moment is the baking time – even 2 minutes too long can rob you of that perfect fudgy center. Start checking at the minimum baking time by inserting a toothpick in the center. For fudgy brownies, you want moist crumbs clinging to the toothpick, not wet batter but definitely not a clean toothpick either. Also, using room temperature eggs creates a better emulsion with the butter, resulting in that dense, fudgy texture we’re after. I learned this the hard way after making a batch with cold eggs that turned out cakey!

    Serving Ideas & Creative Variations

    Elevate Your Brownie Experience

    Transform these already-amazing brownies into showstopping desserts with thoughtful presentation. Warm them slightly before serving and top with a scoop of vanilla ice cream that slowly melts into the crevices. Or try my personal favorite: dust with powdered sugar, add fresh raspberries, and drizzle with extra warmed Nutella. For dinner parties, I cut them into bite-sized squares and serve on a slate board with espresso shots on the side – the coffee amplifies the chocolate notes beautifully. These brownies also make a fantastic base for decadent dessert kabobs when cubed and skewered with strawberries and marshmallows.

    Exciting Flavor Twists

    While classic Nutella brownies are divine, I love experimenting with flavor variations that keep things interesting. Try adding a teaspoon of espresso powder to the batter to intensify the chocolate flavor without tasting like coffee. For a spicy kick, add ¼ teaspoon of cayenne pepper – the heat builds subtly and complements the sweetness perfectly. Orange zest and Nutella are surprisingly perfect partners, so fold in the zest of one orange for a refreshing twist. My holiday version includes a teaspoon of peppermint extract and crushed candy canes sprinkled on top before baking – it’s become our Christmas tradition!

    Storage & Troubleshooting Guide

    Keeping Brownies Fresh

    The beauty of these Nutella brownies is that they actually taste even better the next day as the flavors meld together. Store them in an airtight container at room temperature for up to 4 days, separating layers with parchment paper to prevent sticking. For longer storage, wrap individual brownies in plastic wrap, then foil, and freeze for up to 3 months. Thaw at room temperature for about an hour before serving, or microwave for 15-20 seconds for that just-baked warmth. I often make double batches specifically to freeze – there’s nothing better than discovering forgotten brownies in the freezer on a rough day!

    Fixing Common Brownie Problems

    Even experienced bakers encounter issues, but most brownie problems have simple solutions. If your brownies turn out too cakey, you likely overmixed the batter or added too much flour – next time, measure flour by spooning it into measuring cups rather than scooping. For brownies that sink in the middle, your oven temperature was probably too high – invest in an oven thermometer for accuracy. If the edges are overdone but the center is underbaked, try using a metal baking pan instead of glass, which conducts heat more evenly. My first batch ever had crispy edges until I discovered the magic of lining the pan with parchment paper with overhang for easy removal.

    Frequently Asked Questions

    Can I substitute the Nutella with another spread?

    Absolutely! Any chocolate-hazelnut spread works wonderfully. For a different flavor profile, try cookie butter or peanut butter, though the texture will be slightly different.

    Why did my brownies turn out cakey instead of fudgy?

    Overmixing the batter, too much flour, or overbaking are the usual culprits. For fudgy Nutella brownies, mix just until ingredients are combined and slightly underbake them.

    Can I make these brownies gluten-free?

    Yes! Replace the all-purpose flour with a 1:1 gluten-free flour blend. The Nutella adds moisture that helps maintain the fudgy texture even with gluten-free flour.

    How do I know when the brownies are done baking?

    Insert a toothpick into the center – it should come out with a few moist crumbs attached, not completely clean (which means they’re overbaked) nor with wet batter.

    Can I double this Fudgy Nutella Brownies recipe?

    Definitely! Double all ingredients and use a 9×13 inch pan instead. Increase baking time by about 5-7 minutes, but still check early.

    Final Thoughts

    These Fudgy Nutella Brownies have become my signature dessert for good reason – they strike that perfect balance between sophisticated flavor and comforting familiarity. There’s something almost magical about watching people take their first bite, eyes closing in pure appreciation. Whether you’re baking for a special occasion or simply craving something decadent on a Tuesday night, these brownies deliver that chocolate-hazelnut perfection every single time. Happy baking, and don’t forget to share your creations on Pinterest – I’d love to see your swirl technique!

  • Easy Banana Cream Pie Recipe That Will Melt Your Heart!

    Easy Banana Cream Pie Recipe That Will Melt Your Heart!

    Easy Banana Cream Pie Recipe That Will Melt Your Heart! 🍌❤️

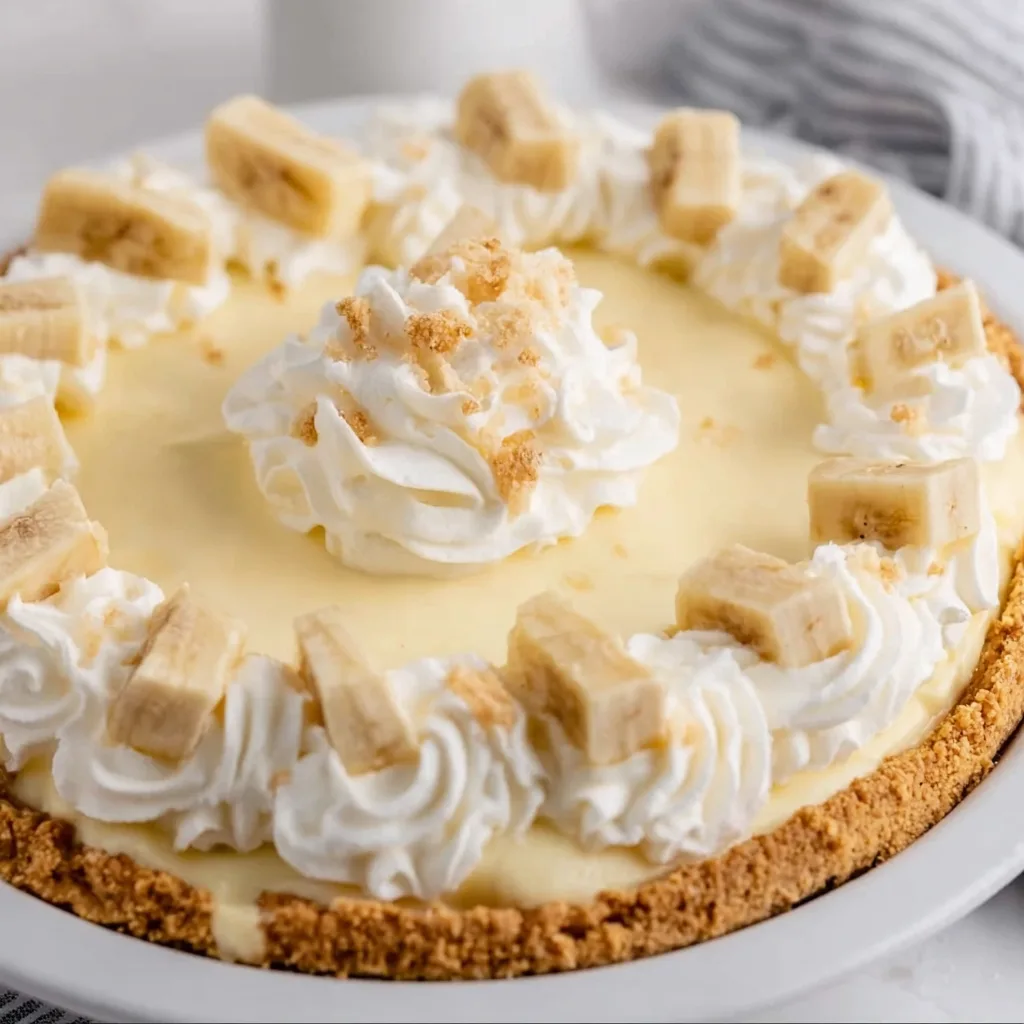
    This Easy Banana Cream Pie is the dessert your soul has been craving! Creamy, dreamy layers of vanilla pudding, fresh bananas, and billowy whipped cream nestled in a buttery graham cracker crust. I first made this pie for my sister’s birthday, and the way her eyes lit up at first bite told me everything. There’s something magical about the way those velvety layers melt together. The best part? You don’t need to be a pastry chef to create this show-stopping dessert that looks like it came from a fancy bakery. Let me show you how to make this no-fuss banana cream pie that will have everyone asking for seconds.

    Recipe

    Why You’ll Love This Easy Banana Cream Pie

    Perfect Balance of Flavors and Textures

    This pie hits all the right notes with its perfect harmony of textures and flavors. The crumbly graham cracker crust provides a satisfying contrast to the silky smooth pudding. Fresh banana slices add natural sweetness and that unmistakable tropical flavor that makes this dessert so special. I love how the cool, creamy filling melts in your mouth while the crust offers that delightful crunch. It’s this beautiful dance of textures that makes banana cream pie so universally loved—soft meets crisp, sweet meets buttery, and every bite is pure bliss.

    Make-Ahead Convenience

    One of the greatest joys of this Easy Banana Cream Pie is its make-ahead magic. You can prepare this dessert a day before your gathering, letting it chill and set up perfectly in the refrigerator overnight. This has saved me countless times when hosting dinner parties! The flavors actually develop and deepen as it chills, making it taste even better the next day. Just add the final whipped cream topping and any garnishes right before serving. Your future self will thank you when you’re calmly pulling a gorgeous, ready-to-serve dessert from the fridge instead of frantically baking.

    Essential Tips & Tricks

    Banana Selection and Preparation

    The secret to a perfect banana cream pie lies in choosing perfectly ripe bananas—yellow with just a few brown speckles. They should be firm but not hard, sweet but not mushy. I learned the hard way that green bananas lack flavor while overripe ones turn brown too quickly. To prevent browning, toss your banana slices in a little lemon juice before arranging them in the pie. For the prettiest presentation, save a few banana slices to decorate the top just before serving. This small step makes a huge difference in both the visual appeal and the fresh flavor of your Easy Banana Cream Pie.

    Pudding Perfection

    Achieving silky-smooth pudding is crucial for this pie’s luxurious texture. Whether using instant pudding or making it from scratch, whisk vigorously to eliminate any lumps. My favorite trick is to strain the pudding through a fine-mesh sieve for ultra-smoothness. Allow the pudding to cool slightly before folding in whipped cream—this creates that cloud-like texture that makes banana cream pie so heavenly. For extra richness, use whole milk or even substitute part of the milk with heavy cream. The pudding layer is the star of the show, so taking these extra steps ensures perfection every time.

    Serving Ideas & Creative Variations

    Elegant Toppings and Garnishes

    Transform your Easy Banana Cream Pie into a show-stopping centerpiece with thoughtful garnishes. Dust the top with cocoa powder or sprinkle with chocolate shavings for a sophisticated touch. I love arranging thin banana slices in a spiral pattern and drizzling with caramel sauce for special occasions. Toasted coconut flakes add wonderful texture and tropical flavor, while crushed vanilla wafers echo the crust’s sweetness. For a truly indulgent presentation, pipe whipped cream rosettes around the edge and place a chocolate-dipped strawberry between each one. These simple additions elevate this classic dessert to restaurant quality.

    Flavor Twists and Variations

    While traditional banana cream pie is perfection, don’t be afraid to experiment with delicious variations. Add a layer of chocolate ganache over the crust before the filling for a chocolate-banana combination that’s utterly irresistible. For a tropical twist, mix in some toasted coconut or a splash of rum to the pudding. Peanut butter lovers will swoon over a thin layer of peanut butter between the crust and bananas—it tastes like a deconstructed banana sandwich in pie form! During fall, try adding warm spices like cinnamon and nutmeg to the pudding for a cozy seasonal flavor profile that complements the bananas beautifully.

    Storage & Troubleshooting Guide

    Proper Storage for Maximum Freshness

    To keep your Easy Banana Cream Pie at its peak deliciousness, proper storage is essential. Always refrigerate the pie within two hours of making it, covered loosely with plastic wrap. For the best texture and flavor, consume within 2-3 days—though in my house, it rarely lasts that long! The bananas will gradually darken over time, which doesn’t affect taste but might impact appearance. If you need to make components ahead, prepare the crust and pudding separately, then assemble with fresh bananas the day you plan to serve. This strategy gives you convenience without sacrificing that fresh-made quality everyone loves.

    Fixing Common Problems

    Even experienced bakers encounter occasional pie predicaments, but they’re easily fixed! If your pudding layer seems too runny, refrigerate it longer or add an extra tablespoon of cornstarch next time. For a soggy crust, try brushing it with melted white chocolate to create a moisture barrier before adding fillings. If your whipped cream starts to weep or deflate, stabilize it with a teaspoon of unflavored gelatin or powdered sugar. Bananas turning brown too quickly? Brush them with a mixture of honey and water—it prevents oxidation and adds a subtle sweetness. Remember, even an imperfect banana cream pie is still delicious!

    Frequently Asked Questions

    Can I use a store-bought graham cracker crust for this Easy Banana Cream Pie?

    Absolutely! Store-bought crusts work perfectly and save time. For extra flavor, brush the crust with melted butter and bake for 5 minutes before filling.

    How do I prevent my bananas from turning brown?

    Toss banana slices in lemon juice or pineapple juice before adding to the pie. The citric acid prevents oxidation without affecting flavor significantly.

    Can I make this pie without pudding mix?

    Yes! Make homemade vanilla pudding with 2 cups milk, ½ cup sugar, ¼ cup cornstarch, 2 egg yolks, and 1 teaspoon vanilla. Cook until thickened, then cool before using.

    Is it possible to make this pie dairy-free?

    Definitely. Use coconut milk pudding and coconut whipped cream as substitutes. The tropical notes actually complement the banana flavor beautifully.

    How far in advance can I make banana cream pie?

    For best results, make the pie base up to 24 hours ahead, but add the final whipped cream topping and banana garnishes just 1-2 hours before serving.

    Final Thoughts

    This Easy Banana Cream Pie has become my go-to dessert for gatherings because it consistently delivers smiles and empty plates. There’s something wonderfully nostalgic about the combination of creamy pudding, fresh bananas, and billowy whipped cream that speaks to both kids and adults. The fact that it’s simple to make yet looks so impressive is just a bonus! I hope you’ll try this recipe and experience the joy of creating something so deliciously satisfying with minimal effort. Don’t forget to check out more delightful dessert ideas on Pinterest for your next sweet adventure!

  • Marshmallow Fruit Dip Recipe That Will Wow Your Taste Buds!

    Marshmallow Fruit Dip Recipe That Will Wow Your Taste Buds!

    Marshmallow Fruit Dip Recipe That Will Wow Your Taste Buds!

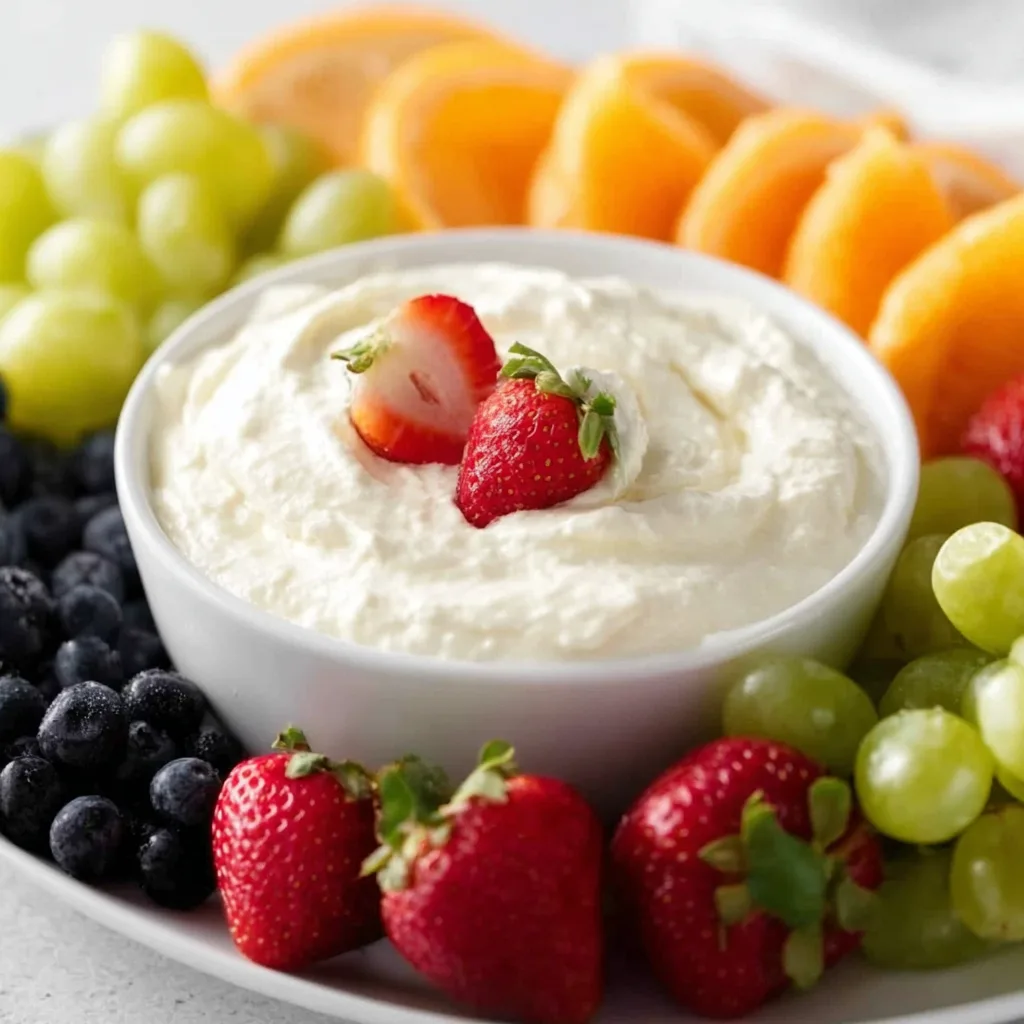
    Marshmallow Fruit Dip is one of those effortlessly impressive treats that makes everyone think you spent hours in the kitchen when it actually takes just minutes to prepare. The first time I made this creamy, cloud-like dip for a family gathering, my niece’s eyes widened with delight as she dipped her strawberry into the fluffy mixture. That moment of pure joy is exactly why I keep this recipe in my regular rotation. With just a handful of simple ingredients, you can create a crowd-pleasing dip that pairs perfectly with fresh fruit platters or graham crackers for a delightful dessert spread.

    Recipe

    Why You’ll Love This Marshmallow Fruit Dip

    Perfect Balance of Flavors and Textures

    This Marshmallow Fruit Dip delivers the ideal combination of sweet creaminess with a light, airy texture that melts in your mouth. The marshmallow fluff provides that nostalgic sweetness we all crave, while cream cheese adds a subtle tanginess that prevents the dip from being overwhelmingly sweet. I love how it clings perfectly to fresh strawberries and apple slices without dripping. The smooth consistency makes it incredibly dippable, and the vanilla extract adds a warm depth that elevates the simple ingredients into something truly special.

    Quick Prep for Maximum Impact

    One of the best things about this Marshmallow Fruit Dip is how ridiculously easy it is to make. When unexpected guests showed up last Sunday, I whipped this up in under 5 minutes while we chatted across my kitchen island. With just 3-4 basic ingredients that most of us already have on hand, it’s my go-to recipe for impromptu gatherings. No baking, no complicated techniques—just mix, serve, and accept the compliments! It’s perfect for busy hosts who want to impress without the stress, and it’s so simple that even kitchen novices can nail it on the first try.

    Essential Tips & Tricks

    Getting the Perfect Consistency

    For the dreamiest Marshmallow Fruit Dip, make sure your cream cheese is properly softened before mixing. Cold cream cheese will leave you battling lumps for ages! I place mine on the counter about 30 minutes before I plan to make the dip. Use an electric mixer for the smoothest results—trust me, your arms will thank you for not attempting this by hand. Beat the cream cheese first until completely smooth, then add your marshmallow fluff. This method prevents those pesky cream cheese lumps that can ruin the silky texture we’re aiming for.

    Flavor Boosting Secrets

    While the basic recipe is delicious, I’ve discovered a few flavor enhancers that take this dip to new heights. A tiny splash of fresh lemon juice brightens everything without making it taste lemony. For a more complex flavor profile, try adding a quarter teaspoon of almond extract alongside the vanilla—it adds a subtle sophistication that guests can’t quite put their finger on. If you’re serving adults, a tablespoon of Baileys Irish Cream creates a grown-up version that’s absolutely divine. Remember that extracts are potent, so start with less and add to taste.

    Serving Ideas & Creative Variations

    Beautiful Presentation Strategies

    Transform your Marshmallow Fruit Dip from simple to spectacular with thoughtful presentation. I love serving it in a hollowed-out pineapple for tropical-themed gatherings—the contrast between the white dip and yellow fruit creates an Instagram-worthy centerpiece. For elegant affairs, try piping small dollops onto individual serving spoons with a berry on top. My favorite everyday presentation is in a clear glass bowl surrounded by a rainbow of fresh fruits arranged in color order. Add edible flowers or mint leaves for a pop of color that makes the spread feel extra special.

    Seasonal Adaptations and Mix-ins

    This versatile dip transforms beautifully with seasonal mix-ins that keep it exciting year-round. In summer, fold in finely chopped fresh basil and lemon zest for a refreshing twist that pairs wonderfully with berries. Fall calls for cinnamon, nutmeg, and a drizzle of caramel sauce that turns it into a caramel apple dip. For winter holidays, crushed peppermint and mini chocolate chips create a festive treat. My spring favorite includes a tablespoon of orange zest and a splash of orange liqueur that brightens everything. Each variation maintains the dip’s creamy base while offering a new flavor experience.

    Storage & Troubleshooting Guide

    Proper Storage Methods

    To keep your Marshmallow Fruit Dip fresh and delicious, store it in an airtight container in the refrigerator for up to 3 days. The texture may firm up slightly when chilled, which is completely normal. Before serving again, let it sit at room temperature for about 15 minutes, then give it a quick stir to restore that perfectly fluffy consistency. If you’re planning a party in advance, you can prepare this dip the night before—just cover it with plastic wrap pressed directly onto the surface to prevent a skin from forming. This small detail makes a big difference in maintaining that dreamy texture everyone loves.

    Fixing Common Issues

    Even the simplest recipes can sometimes go awry, but most Marshmallow Fruit Dip issues have easy solutions. If your dip turns out too runny, pop it in the refrigerator for 30 minutes to firm up, or fold in additional marshmallow fluff. For a dip that’s too thick, a tablespoon of heavy cream or a splash of milk will loosen the consistency. If you notice small lumps, don’t panic! Transfer the mixture back to your mixing bowl and beat again with an electric mixer, focusing on those stubborn spots. For discoloration that may occur after storage, simply stir well before serving to revive that pristine white appearance.

    Frequently Asked Questions

    Can I make Marshmallow Fruit Dip ahead of time?

    Yes! Prepare it up to 24 hours in advance and store in the refrigerator in an airtight container. Let it sit at room temperature for 15 minutes before serving for the best consistency.

    What fruits pair best with Marshmallow Fruit Dip?

    Strawberries, apple slices, grapes, pineapple chunks, and banana coins are excellent choices. Firm fruits work best as they hold up well when dipping.

    Is there a way to make this Marshmallow Fruit Dip healthier?

    Use light cream cheese and add a tablespoon of Greek yogurt to boost protein. You can also reduce the marshmallow fluff slightly without sacrificing too much flavor.

    Can I freeze leftover dip?

    I don’t recommend freezing this dip as the texture becomes grainy when thawed. It’s best enjoyed fresh or refrigerated for up to 3 days.

    What can I substitute for marshmallow fluff?

    In a pinch, you can melt 2 cups of mini marshmallows with 1 tablespoon of corn syrup in the microwave, then cool slightly before incorporating into your dip.

    Final Thoughts

    This Marshmallow Fruit Dip has saved countless gatherings and earned a permanent spot in my recipe collection. There’s something magical about watching friends dip colorful fruits into this cloud-like creation, their eyes lighting up with the first taste. The beauty of this dip lies in its simplicity—a reminder that sometimes the most memorable treats don’t require complicated techniques or rare ingredients. Whether you’re hosting a formal party or just treating yourself on a quiet evening, this Marshmallow Fruit Dip brings a touch of sweetness that makes any moment feel special. Find more delightful treats on Pinterest.

  • Raspberry Cookies with Lemon Glaze – Irresistibly Tangy & Sweet Treat!

    Raspberry Cookies with Lemon Glaze – Irresistibly Tangy & Sweet Treat!

    Raspberry Cookies with Lemon Glaze – Irresistibly Tangy & Sweet Treat!

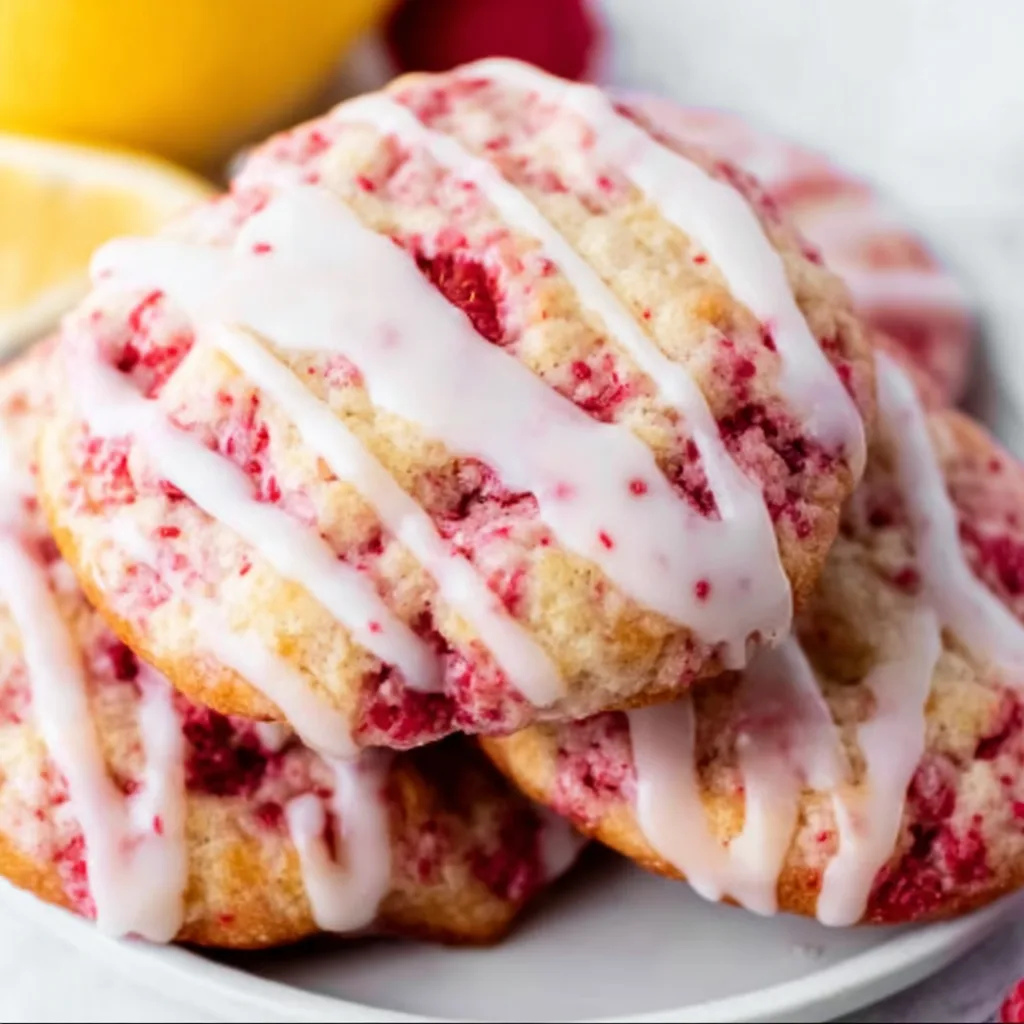
    These Raspberry Cookies with Lemon Glaze are the perfect balance of sweet, tart, and utterly irresistible. I’ve been baking these gems for years, and they never fail to brighten even the gloomiest afternoon. The tender, buttery cookies studded with fresh raspberries create the perfect canvas for that zingy lemon glaze that hardens just enough to give you that satisfying little crack when you bite in. They remind me of summer afternoons on my grandmother’s porch, where the tangy-sweet treats would disappear almost as quickly as she could plate them. If you love easy cinnamon swirl cookies, these will be your new favorite!

    Recipe

    Why You’ll Love These Raspberry Cookies with Lemon Glaze

    Perfect Balance of Flavors

    These cookies hit all the right notes with their sweet-tart balance that keeps you coming back for more. The buttery cookie base provides the perfect backdrop for the bright pops of fresh raspberry, which add little bursts of jammy goodness throughout. Then comes that lemon glaze—oh my goodness—it’s the crown jewel that ties everything together with its citrusy zing. I’ve watched people who claim they “don’t have a sweet tooth” reach for seconds and thirds of these beauties. The flavors dance together in perfect harmony without any single element overwhelming the others.

    Simple Yet Impressive

    Don’t let their elegant appearance fool you—these cookies are surprisingly beginner-friendly! The dough comes together in minutes with basic pantry ingredients, and the fresh raspberries fold in beautifully without any special technique. I’ve made these cookies with my niece who’s only eight, and she handled the process like a pro. The lemon glaze is equally straightforward—just powdered sugar and fresh lemon juice whisked to silky perfection. These cookies look like they came from a fancy bakery, but the process is simple enough for even novice bakers to master confidently.

    Essential Tips & Tricks

    Handling the Raspberry Dough

    The secret to perfect raspberry cookies is in how you handle the berries. Rather than mixing them directly into the dough (which can turn your cookies pink and soggy), gently fold them in at the very end using a silicone spatula. I learned this the hard way after a memorable baking disaster that resulted in sad pink puddles! Keep your raspberries cold until the last minute, and don’t worry if they break a little—those juicy pockets create delicious flavor bursts. For the best texture, chill the dough for at least 30 minutes before baking to prevent excessive spreading.

    Perfecting the Lemon Glaze

    The lemon glaze might seem simple, but a few tricks will take it from good to absolutely magnificent. Always use fresh lemon juice—the bottled stuff just doesn’t compare in flavor. Start with less liquid than you think you need and add more drop by drop until you reach that perfect consistency: thick enough to set properly but thin enough to drizzle. I like to add a tiny pinch of salt and a drop of vanilla to my glaze for depth. Let your cookies cool completely before glazing, or you’ll end up with a thin, runny mess instead of that beautiful bakery-style finish you’re aiming for.

    Serving Ideas & Creative Variations

    Perfect Pairings

    These raspberry cookies with lemon glaze shine brightest when served with the right accompaniments. I love offering them alongside a pot of Earl Grey tea, where the bergamot notes complement the lemon beautifully. For summer gatherings, serve them with sparkling lemonade or prosecco for an elegant touch. They make a stunning addition to brunch spreads or afternoon tea parties. For a truly decadent experience, sandwich a small scoop of vanilla bean ice cream between two cookies for an impromptu ice cream sandwich that will have everyone talking!

    Seasonal Adaptations

    While raspberries are the star of the original recipe, these cookies welcome seasonal variations. In late summer, substitute blackberries or blueberries for equally delicious results. During fall, try adding a pinch of cinnamon to the dough and a splash of maple syrup to the glaze. Winter holidays call for cranberries with orange zest in place of the lemon. For spring celebrations, I’ve even used chopped strawberries with a touch of rosewater in the glaze. The cookie base is wonderfully adaptable—just like my triple Reese’s peanut butter cookies that transform with different mix-ins.

    Storage & Troubleshooting Guide

    Keeping Them Fresh

    To maintain the perfect texture, store glazed cookies in a single layer in an airtight container at room temperature for up to 3 days. Place parchment paper between layers if you must stack them. The glaze will soften slightly over time but remains delicious. For longer storage, freeze unglazed cookies for up to 3 months, then thaw at room temperature and add fresh glaze before serving. I’ve found that storing them with a slice of bread helps keep them soft and prevents them from drying out—a trick my grandmother taught me that works wonders!

    Fixing Common Issues

    Even experienced bakers encounter challenges! If your cookies spread too much, your butter was likely too warm or you didn’t chill the dough long enough. Quick fix: refrigerate the remaining dough for an additional 30 minutes. If your raspberries are making the dough too wet, pat them dry with paper towels before folding in. For glaze that won’t set properly, it’s usually too thin—add more powdered sugar tablespoon by tablespoon. And if your cookies brown too quickly on the bottom, try using parchment paper and moving the rack up one position in your oven.

    Frequently Asked Questions

    Can I use frozen raspberries for these cookies?

    Yes, but thaw them first and pat thoroughly dry with paper towels to remove excess moisture. Frozen berries release more liquid, so you might need to add 1-2 extra tablespoons of flour to compensate.

    How do I know when my Raspberry Cookies with Lemon Glaze are done baking?

    Look for light golden edges while the centers still appear slightly soft. They’ll continue firming up as they cool. Overbaking will result in dry cookies that lose their tender texture.

    Can I make the dough ahead of time?

    Absolutely! The dough can be refrigerated for up to 2 days or frozen for 3 months. If frozen, thaw overnight in the refrigerator before baking.

    Why did my glaze soak into the cookies?

    The cookies were likely still warm when glazed. Always cool cookies completely on a wire rack before applying glaze to achieve that beautiful finish.

    Can I make these cookies gluten-free?

    Yes, substitute a 1:1 gluten-free flour blend. The texture may be slightly different, but they’ll still be delicious with all the raspberry and lemon flavors.

    Final Thoughts

    These Raspberry Cookies with Lemon Glaze have become my signature dessert for good reason—they’re the perfect balance of simplicity and sophistication. The bright raspberry flavor nestled in buttery cookies and topped with that zingy lemon finish creates something truly special. I’ve watched these cookies bring smiles at summer picnics and cozy winter gatherings alike. They’re the kind of treat that feels both nostalgic and fresh at the same time. Don’t be surprised when friends start requesting “those amazing raspberry cookies” at every gathering! Find more delicious inspiration on Pinterest.

  • Easter Bunny Bait: Irresistible Treats That Spark Joy & Fun!

    Easter Bunny Bait: Irresistible Treats That Spark Joy & Fun!

    Easter Bunny Bait: Irresistible Treats That Spark Joy & Fun!

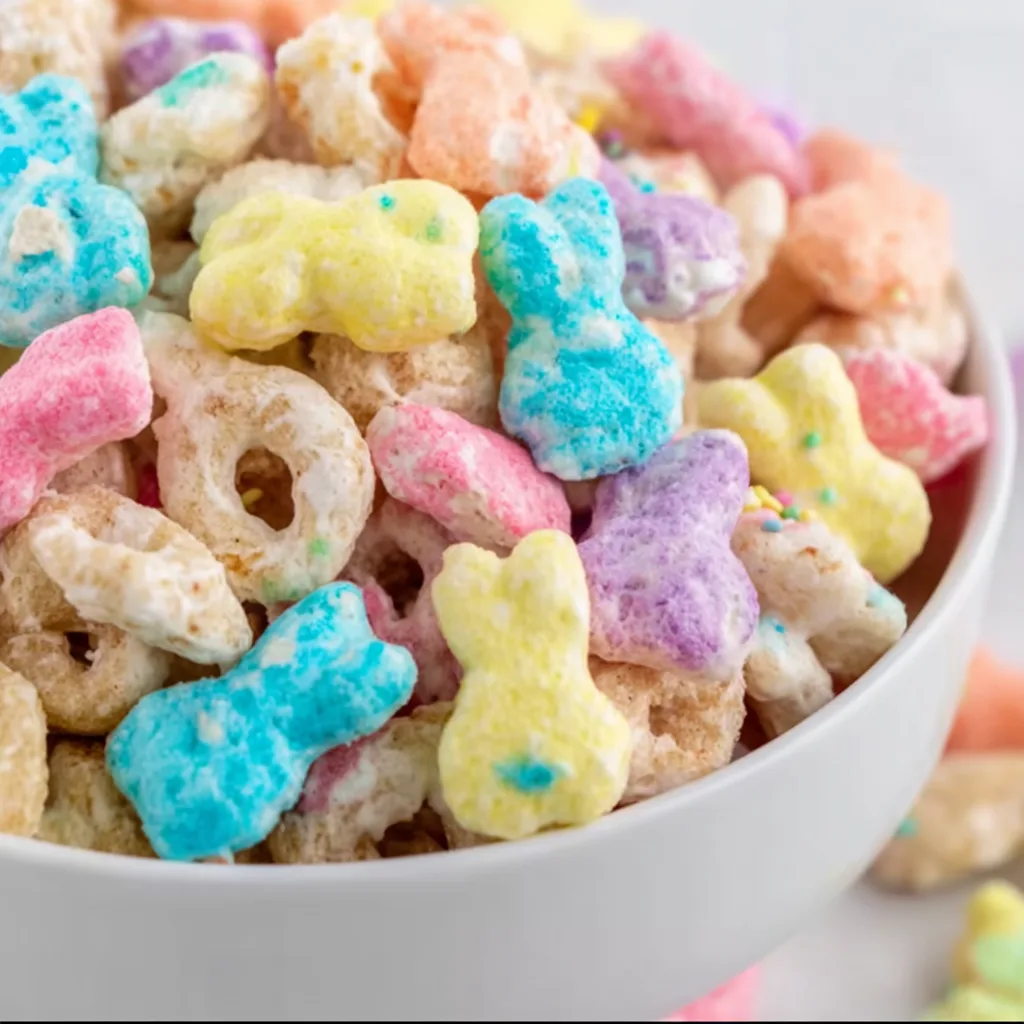
    Easter Bunny Bait is the ultimate springtime treat that captures all the magic of the season in one irresistible snack mix! This colorful, sweet-and-salty concoction combines crunchy cereal, pretzels, pastel candies, and a white chocolate drizzle that will have everyone reaching for more. I started making this festive treat years ago when my niece asked for something “special enough to attract the Easter Bunny,” and it’s been our family tradition ever since. The beauty of this recipe is how quickly it comes together while still looking absolutely spectacular on your holiday table.

    Recipe

    Why You’ll Love This Easter Bunny Bait

    Perfect Balance of Flavors

    This Easter Bunny Bait hits all the right notes with its sweet-salty combination that keeps everyone coming back for more. The buttery, salted pretzels create the perfect foundation, while the cereal adds a satisfying crunch. What makes this truly special is how the white chocolate coating brings everything together, creating little clusters of goodness that melt in your mouth. I’ve watched even the pickiest eaters at our family gatherings grab handful after handful of this addictive mix!

    Effortless Easter Entertaining

    When the holiday rush hits, this no-bake treat becomes your secret weapon. It takes just 15 minutes of active time, making it perfect for last-minute gatherings or when you’re juggling multiple dishes. The visual impact is enormous compared to the effort required—vibrant pastel colors create an instant festive atmosphere. My favorite part? You can make it a day ahead, which means one less thing to worry about when you’re preparing for Easter brunch or dinner.

    Essential Tips & Tricks

    Perfect Chocolate Coating Technique

    The key to exceptional Easter Bunny Bait lies in the chocolate melting process. Use a microwave-safe bowl and heat in 30-second intervals, stirring between each. This prevents scorching and ensures silky-smooth chocolate that coats everything evenly. When you’re ready to mix, work quickly but gently—fold rather than stir vigorously to keep your cereal pieces intact. I learned this the hard way after once ending up with more chocolate-covered dust than actual pieces!

    Customization Secrets

    Start with a solid base of cereal (Rice Chex works beautifully), but don’t be afraid to mix textures for interest. Adding 1-2 cups of mini pretzels creates delightful salty pockets. For a truly show-stopping mix, incorporate seasonal candies like pastel M&Ms, mini chocolate eggs, or even Easter Bunny Coconut Tails for an extra festive touch. The beauty of this recipe is its flexibility—you can easily adjust proportions based on your family’s preferences.

    Serving Ideas & Creative Variations

    Festive Packaging Options

    Transform your Easter Bunny Bait into adorable holiday gifts with minimal effort. Fill clear cellophane bags tied with pastel ribbons, or use small paper bags decorated with Easter stamps. Add custom labels like “Bunny Bait” or “Hoppy Easter” for a personal touch. Last Easter, I packaged individual portions in tiny flower pots lined with tissue paper—the kids thought they were magical, and the parents appreciated the portion control!

    Interactive Easter Activities

    Turn this recipe into a family tradition by making it an Easter weekend activity. Set up a mixing station where little ones can help measure and pour ingredients. For older kids, create a “design your own bunny bait” bar with various mix-ins. This pairs wonderfully with other Easter activities like decorating Easter egg cheesecake jars or setting up an indoor egg hunt when the weather doesn’t cooperate. These moments create lasting memories beyond just the treat itself.

    Storage & Troubleshooting Guide

    Maintaining Freshness

    To keep your Easter Bunny Bait perfectly crisp, store it in an airtight container at room temperature for up to one week. The chocolate coating creates a protective layer that helps maintain freshness. If you live in a particularly humid climate, add a silica gel packet (like those found in new shoes) to the storage container to absorb excess moisture. I’ve found that glass containers maintain crispness better than plastic ones, especially for longer storage.

    Fixing Common Issues

    If your chocolate seizes (becomes grainy or stiff), don’t panic! Add a teaspoon of neutral oil like vegetable or coconut and gently reheat. For mixtures that aren’t setting properly, spread them on the parchment more thinly and refrigerate for 10-15 minutes. If your colors are bleeding, try freezing the candy pieces for 15 minutes before adding them to the chocolate mixture. I once saved an entire batch by quickly refrigerating it when I noticed the colors starting to run!

    Frequently Asked Questions

    What makes a good Easter Bunny Bait mix?

    The perfect Easter Bunny Bait combines crunchy cereal, salty pretzels, sweet candies, and a binding white chocolate coating. The contrast of textures and flavors creates an addictive snack that appeals to all ages.

    Can I make Easter Bunny Bait ahead of time?

    Absolutely! Make it up to 5 days ahead and store in an airtight container at room temperature. The flavors actually meld nicely over time, though it rarely lasts that long in my house!

    What’s the best way to package Easter Bunny Bait as gifts?

    Clear cellophane bags tied with ribbon, decorated mason jars, or colorful paper bags all work beautifully. Add a cute tag and some Easter grass for extra festive charm.

    Can I use colored white chocolate instead of food coloring?

    Yes! Colored candy melts work perfectly and eliminate the need for food coloring. They come in various pastel shades that are perfect for Easter themes.

    How do I prevent the candies from melting in the Easter Bunny Bait?

    Let your white chocolate cool slightly before adding candies, and consider chilling candy-coated chocolates for 15 minutes before mixing them in to help them maintain their shape and prevent color bleeding.

    Final Thoughts

    Easter Bunny Bait brings together everything delightful about holiday treats—it’s colorful, customizable, and creates instant joy when shared. What I love most is how this simple recipe bridges generations, with grandparents enjoying it alongside the littlest family members. Whether you’re hosting an elaborate Easter celebration or just wanting to add a touch of springtime cheer to your week, this festive mix delivers big impact with minimal effort. Share your Easter Bunny Bait creations on Pinterest to spread the springtime joy!

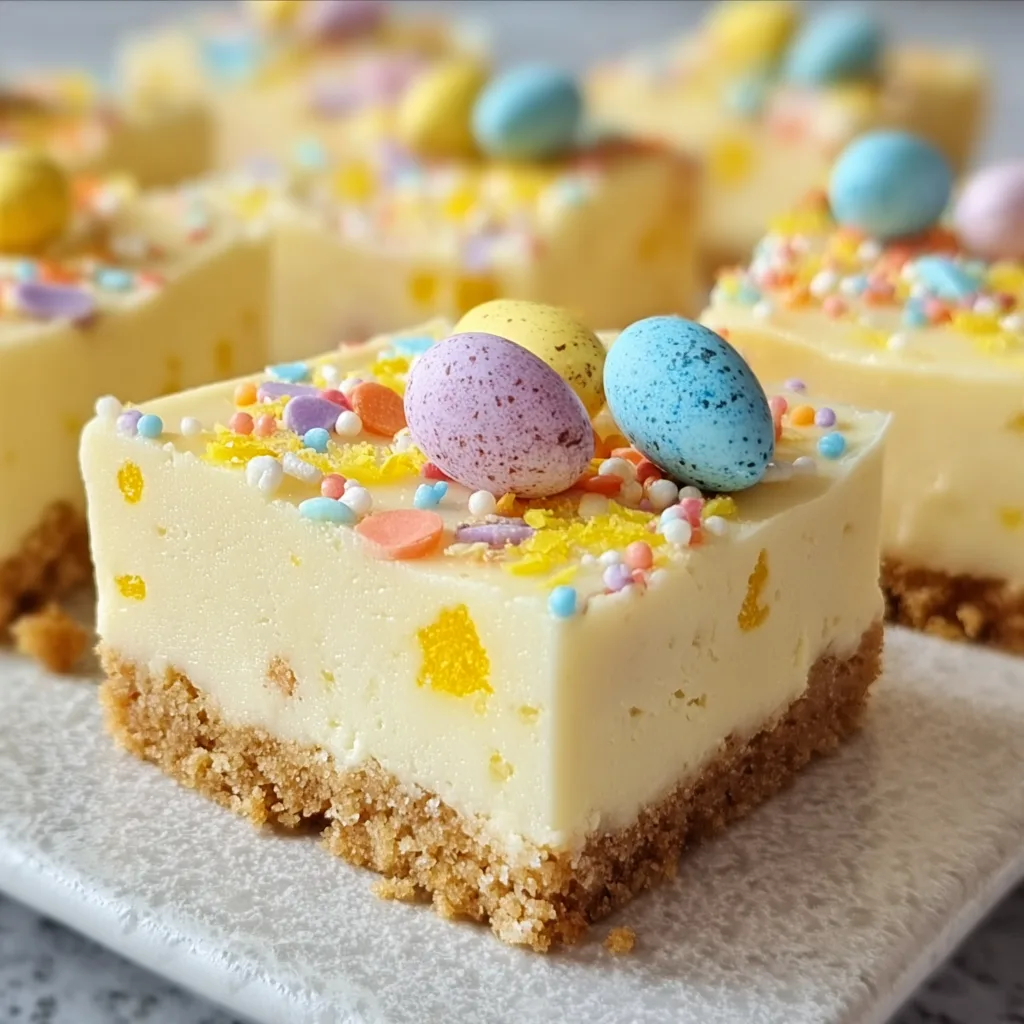
  • Creamy Easter Egg Lemon Cheesecake Bars That Wow Every Bite!

    Creamy Easter Egg Lemon Cheesecake Bars That Wow Every Bite!

    Creamy Easter Egg Lemon Cheesecake Bars That Wow Every Bite!

    These creamy Easter Egg Lemon Cheesecake Bars bring together the brightness of spring and the indulgence of Easter candy in one irresistible treat. I first made these for my family’s Easter brunch last year, and they disappeared faster than the kids could find their hidden eggs! The buttery graham cracker crust, velvety lemon cheesecake filling, and colorful Easter egg candies create the perfect balance of tangy, sweet, and creamy textures. Whether you’re hosting a holiday gathering or simply craving a seasonal dessert, these bars will become your new spring tradition. Let me show you how to create this showstopper that tastes like sunshine in every bite!

    Recipe

    Why You’ll Love These Creamy Easter Egg Lemon Cheesecake Bars

    Perfect Balance of Flavors

    The magic of these bars lies in their perfect flavor harmony. The zippy lemon zest cuts through the rich creaminess of the cheesecake layer, creating a refreshing bite that isn’t overpowering. I’ve tested countless ratios and found that 2 tablespoons of lemon zest gives just the right amount of brightness without overwhelming the palate. The crushed Easter egg candies add pops of chocolate and a satisfying crunch that makes each bite exciting. When my daughter took her first bite, her eyes widened and she whispered, “It tastes like Easter in my mouth!” I couldn’t have described it better myself.

    Make-Ahead Convenience

    One of my favorite things about these bars is how wonderfully they set up overnight in the refrigerator. The flavors meld together beautifully, and the texture becomes perfectly sliceable—ideal for busy holiday preparations! I always make mine the day before our Easter celebration, which means one less thing to worry about on the big day. The bars maintain their fresh flavor for up to 4 days in the refrigerator, though they rarely last that long in my house. This make-ahead quality makes them perfect for potlucks, family gatherings, or anytime you need a stress-free dessert option.

    Essential Tips & Tricks

    Getting the Perfect Texture

    The key to silky-smooth cheesecake bars is bringing your ingredients to room temperature before mixing. Cold cream cheese will leave lumps no matter how long you beat it! I learned this the hard way during my first attempt when I rushed the process. Set your cream cheese and eggs out for at least 30 minutes before starting. Another game-changer is using a water bath during baking—simply place your pan inside a larger one filled with about an inch of hot water. This gentle, humid heat prevents cracks and ensures that dreamy, velvety texture we all crave in a good cheesecake.

    Choosing the Right Easter Eggs

    Not all Easter candy works equally well in these bars! I’ve found that mini chocolate eggs with candy shells create the perfect texture contrast and colorful visual appeal. Avoid hollow chocolate eggs, as they’ll collapse when cut. For the topping, I like to use a mix of whole and chopped eggs – the whole ones create a beautiful presentation while the chopped pieces make it easier to get a perfect bite with every serving. If you’re using larger eggs like Cadbury eggs, chop them into smaller pieces to distribute the flavor more evenly throughout each bar.

    Serving Ideas & Creative Variations

    Seasonal Presentations

    Transform these bars into a true centerpiece by creating a spring garden display. I like to place the cut bars on a bed of edible green coconut “grass” and surround them with fresh berries and additional Easter candies. For individual servings, try cutting smaller squares and placing each on a decorative cupcake liner with a sprig of mint. Last Easter, I served these on my grandmother’s vintage cake stand, and the combination of pastel bars against the antique china created a photo-worthy moment that had everyone reaching for their phones before diving in!

    Flavor Twists

    While the classic lemon version is my family’s favorite, these bars are incredibly versatile. Try swapping the lemon for orange or lime zest for a different citrus kick. For chocolate lovers, add 1/4 cup of cocoa powder to the cheesecake mixture and use chocolate graham crackers for the crust. My personal favorite variation is adding 1/2 cup of white chocolate chips to the batter, which creates pockets of extra sweetness that balance the tangy lemon perfectly. You can also experiment with different Easter candies—malted milk eggs or even jelly beans can create fun flavor combinations.

    Storage & Troubleshooting Guide

    Proper Storage Methods

    To maintain that perfect creamy texture, store your bars in an airtight container in the refrigerator for up to 4 days. Place parchment paper between layers if you need to stack them. These bars also freeze beautifully for up to 2 months! I like to cut them into individual portions, wrap each in plastic wrap, and store in a freezer bag. This way, I can thaw just what I need for an impromptu dessert. Let frozen bars thaw overnight in the refrigerator or for about 2 hours at room temperature before serving for the best texture experience.

    Fixing Common Issues

    If your cheesecake develops cracks, don’t panic! This is purely cosmetic and won’t affect the delicious flavor. Simply top with additional whipped cream and Easter eggs to cover any imperfections. If your crust seems too crumbly when serving, it likely needed more butter or wasn’t pressed firmly enough before baking. Next time, use the bottom of a measuring cup to really compact the crust mixture. For bars that seem too soft, they likely needed more time in the refrigerator—a minimum of 4 hours chilling time is essential, but overnight is ideal for that perfect sliceable texture.

    Frequently Asked Questions

    Can I make creamy Easter Egg Lemon Cheesecake Bars without a water bath?

    Yes, though they may crack on top. The water bath ensures even baking and prevents cracks, but the bars will still taste delicious without it. If skipping, consider topping with whipped cream to hide any imperfections.

    How far in advance can I make these bars?

    You can prepare these bars up to 2 days before serving. Store them covered in the refrigerator for the best texture and flavor development. The crust may soften slightly but will still be delicious.

    Can I use reduced-fat cream cheese?

    Yes, though the texture won’t be quite as rich. I recommend using at least one block of full-fat cream cheese mixed with reduced-fat for the best compromise between creaminess and calories.

    What’s the best way to cut clean slices?

    Dip your knife in hot water and wipe clean between cuts. This creates clean edges without dragging the filling. Refrigerating the bars overnight also helps achieve cleaner slices.

    Are these suitable for freezing?

    Absolutely! Freeze cut bars in an airtight container with parchment between layers for up to 2 months. Thaw overnight in the refrigerator before serving.

    Final Thoughts

    These creamy Easter Egg Lemon Cheesecake Bars have become a cherished tradition in my home, bringing together the joy of the season in every bright, creamy bite. The combination of tangy lemon, rich cheesecake, and playful Easter candy creates a dessert that’s both sophisticated and fun. I love seeing the smiles when I bring these to the table—there’s something magical about a dessert that can transport us back to the excitement of childhood Easter mornings while still satisfying adult palates. For more seasonal inspiration, check out my Pinterest boards where I’m always sharing new creations!