Category: Desserts

Sweet and easy dessert recipes for every craving. Simple treats, rich flavors, and quick ideas that make any moment feel special.

  • Carrot Pistachio Spring Cake That Will Melt Your Heart!

    Carrot Pistachio Spring Cake That Will Melt Your Heart!

    Carrot Pistachio Spring Cake That Will Melt Your Heart!

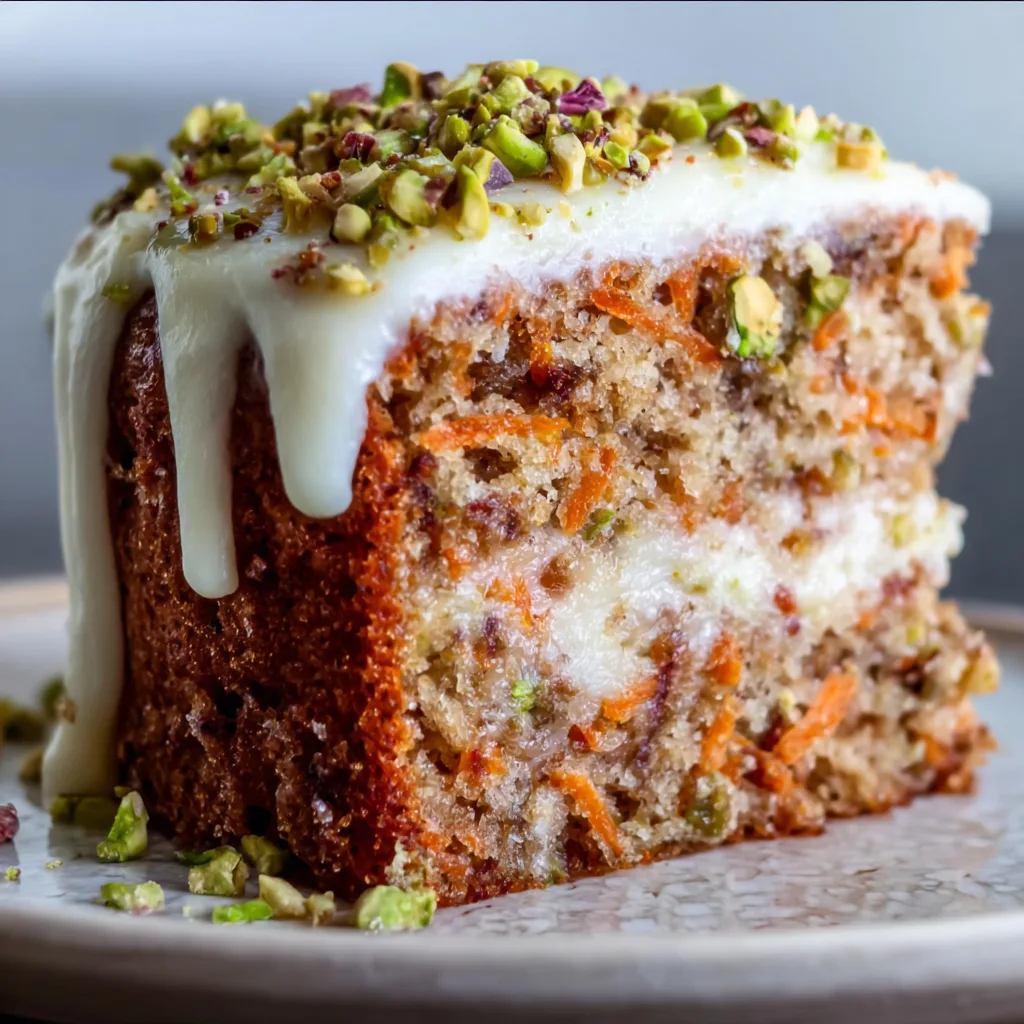
    There’s something magical about a carrot pistachio spring cake that captures the essence of the season. The vibrant orange flecks nestled within a moist, tender crumb, topped with velvety cream cheese frosting and crunchy pistachios – it’s pure bliss on a plate! I discovered this recipe during a particularly rainy April weekend when I craved something that would brighten our kitchen with springtime energy. The warm spices and nutty pistachios create a perfect harmony that’s become my family’s most requested dessert when the daffodils start blooming.

    Recipe

    Why You’ll Love This Carrot Pistachio Spring Cake

    A Perfect Balance of Flavors and Textures

    The beauty of this carrot pistachio spring cake lies in its exquisite balance. Sweet carrots meld with aromatic cinnamon and nutmeg, while pistachios add a delightful earthiness that elevates this beyond your standard carrot cake. Each bite delivers moisture from the carrots, warmth from the spices, and that distinctive crunch from the nuts. I love how the natural sweetness of the carrots means we can use less sugar without sacrificing flavor. The pistachios bring a subtle sophistication that makes this cake feel special enough for Easter brunch or Mother’s Day celebrations.

    Make-Ahead Convenience for Busy Schedules

    One of my favorite things about this cake is how the flavors actually improve overnight, making it the perfect make-ahead dessert. I often bake it the day before serving, which not only saves time but allows the spices to fully bloom and the moisture to distribute evenly throughout the cake. The cream cheese frosting sets beautifully in the refrigerator, creating clean slices when you’re ready to serve. This has saved me countless times when hosting spring gatherings – I can focus on other preparations while knowing my showstopping dessert is already perfected and waiting.

    Essential Tips & Tricks

    Properly Preparing Your Carrots and Pistachios

    The secret to the perfect texture starts with how you prepare the key ingredients. Always finely grate your carrots – I prefer using the small holes on a box grater for the perfect consistency. Too coarse, and they won’t cook properly; too fine (like in a food processor), and you’ll lose the lovely specks of color. For pistachios, toast them lightly before chopping to enhance their flavor, but let them cool completely before folding into the batter. Reserve some whole pistachios for garnishing the top – the vibrant green against the creamy frosting creates a stunning visual that hints at the flavors waiting inside.

    Achieving the Perfect Moisture Balance

    The trickiest part of any carrot cake is nailing the moisture level without ending up with a soggy bottom. I’ve found that squeezing excess moisture from the grated carrots with a clean kitchen towel works wonders. Don’t skip this step! Another game-changer is using brown sugar rather than all white sugar – it adds caramel notes while helping retain moisture. For the oil component, a neutral option like canola works well, but for special occasions, I’ll use half melted butter for richness. Check out my Gluten-Free Cinnamon Coffee Cake for more moisture-balancing techniques.

    Serving Ideas & Creative Variations

    Seasonal Pairings That Elevate Your Cake

    This carrot pistachio spring cake shines when paired with complementary flavors. Serve alongside a citrus-infused whipped cream or a scoop of honey ice cream to highlight the cake’s warm spices. For brunch settings, I love offering it with a pitcher of orange blossom iced tea or a sparkling elderflower drink. The cake’s earthy sweetness also pairs beautifully with spring fruits like strawberries or poached pears. When I’m feeling extra fancy, I’ll add a drizzle of honey and a sprinkle of orange zest just before serving to brighten the flavors and add visual appeal.

    Inventive Twists on the Classic Recipe

    While the classic recipe is divine, don’t be afraid to experiment! Try adding orange zest to the batter for a citrusy punch or swap half the pistachios for toasted walnuts for textural contrast. For a tropical twist, fold in some crushed pineapple (well-drained!) and top with coconut flakes. If you’re a chocolate lover like me, mini chocolate chips make a delicious addition – the slight bitterness balances the sweet carrots perfectly. For inspiration on creative dessert variations, check out my Sugar Cookie Truffles that use similar flavor-layering techniques.

    Storage & Troubleshooting Guide

    Keeping Your Cake Fresh for Days

    To maintain optimal freshness, store your frosted carrot pistachio spring cake in an airtight container in the refrigerator for up to 5 days. The cream cheese frosting requires refrigeration, but I recommend bringing slices to room temperature for about 20 minutes before serving to enhance the flavors and soften the texture. If you need to make it further ahead, the unfrosted cake freezes beautifully – wrap it tightly in plastic wrap and then foil, and it will keep for up to 3 months. Thaw overnight in the refrigerator and frost just before serving for that freshly-baked taste.

    Solving Common Baking Challenges

    If your cake sinks in the middle, your oven temperature might be too high – invest in an oven thermometer for accuracy. For a cake that’s too moist or gummy, you likely didn’t squeeze enough moisture from the carrots or your measurements were off. Use the spoon-and-level method for flour rather than scooping directly from the bag. If your pistachios sink to the bottom, try tossing them in a tablespoon of flour before folding into the batter. And for frosting that’s too soft, refrigerate it for 15-20 minutes before spreading, or add a bit more powdered sugar to achieve the perfect consistency.

    Frequently Asked Questions

    Can I make this carrot pistachio spring cake gluten-free?

    Absolutely! Substitute a 1:1 gluten-free flour blend with xanthan gum. The moisture from the carrots helps maintain tenderness, making this cake ideal for gluten-free adaptation.

    How do I prevent the cream cheese frosting from becoming runny?

    Use cold cream cheese straight from the refrigerator and softened (not melted) butter. Beat until just combined – overbeating incorporates air that can make the frosting too soft.

    Can I substitute walnuts for the pistachios?

    Yes! Walnuts work beautifully as a substitute. Toast them lightly first to enhance their flavor. You can also do a 50/50 mix of pistachios and walnuts.

    How far in advance can I make this cake?

    The unfrosted cake layers can be made 2 days ahead and kept at room temperature, well-wrapped. Once frosted, the cake keeps in the refrigerator for up to 5 days.

    Why did my carrots turn green in the cake?

    This happens when the carrots react with baking soda. Reduce the amount of baking soda slightly or add a teaspoon of lemon juice to the batter to prevent this reaction.

    Final Thoughts

    This carrot pistachio spring cake has become my signature springtime dessert, bringing together the earthy sweetness of carrots with the luxurious crunch of pistachios. What makes it truly special is how it bridges the gap between comfort food and elegant dessert – rustic enough for family gatherings yet sophisticated enough for special celebrations. The vibrant colors and flavors capture the essence of the season, making each slice a little celebration of spring. For more seasonal inspiration, visit our Pinterest board where we share our favorite springtime recipes!
  • Bomboloni – Irresistible Italian Doughnuts You Can’t Resist!

    Bomboloni – Irresistible Italian Doughnuts You Can’t Resist!

    Bomboloni - Irresistible Italian Doughnuts You Can’t Resist!

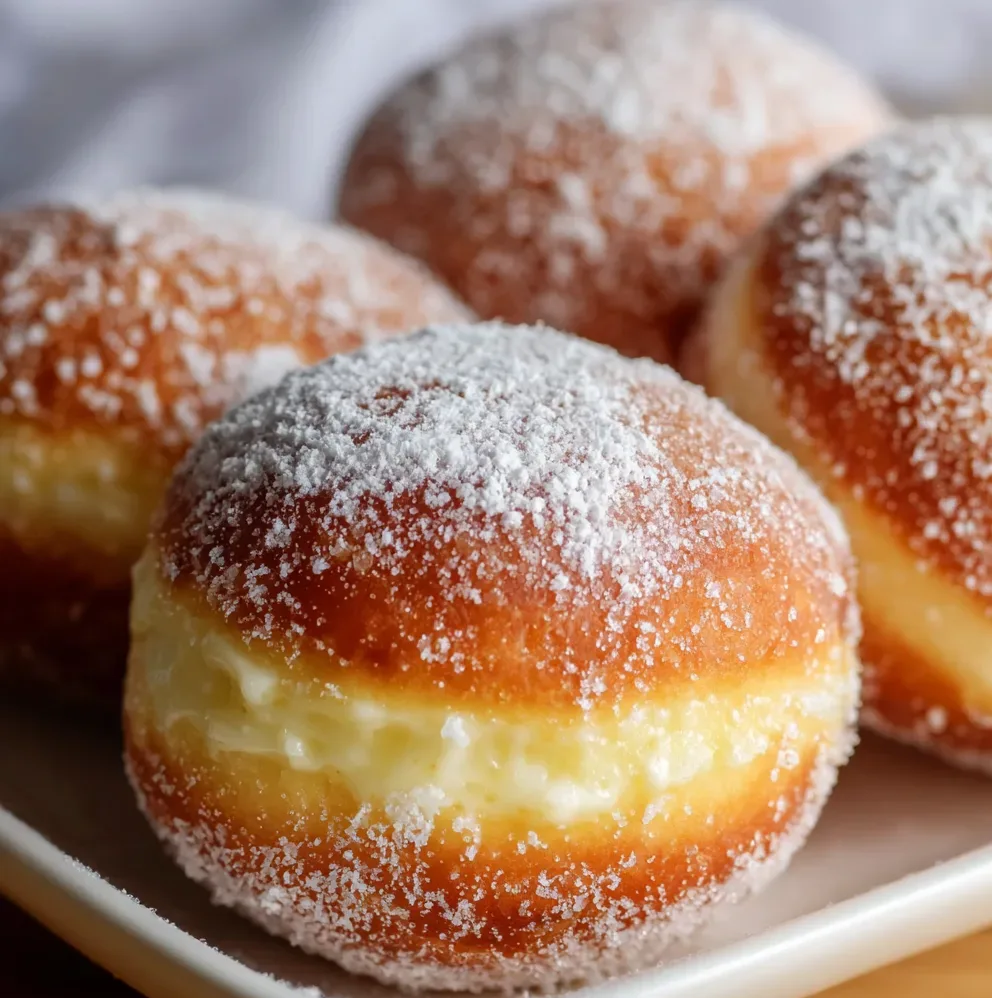
    Bomboloni – Italian Doughnuts are pure joy in pastry form, little pillows of fried dough that transport me straight to the streets of Florence with each bite. The first time I made these cloudlike treats, my kitchen filled with the intoxicating scent of vanilla and yeast, and I knew I’d found a recipe worth treasuring. There’s something magical about watching the dough puff up in hot oil, transforming into golden-brown perfection that’s just waiting to be filled with luscious custard or jam. If you’re craving a dessert that balances simplicity and indulgence, these Italian doughnuts are exactly what your weekend needs.

    Recipe

    Why You’ll Love This Bomboloni – Italian Doughnuts

    Texture & Flavor Perfection

    These Bomboloni deliver an irresistible combination of textures that make them utterly addictive. The exterior develops a delicate crispness while the interior remains impossibly fluffy and tender. What makes these Italian doughnuts special is their subtle sweetness—they’re not cloying like some American counterparts. The dough itself carries hints of vanilla and a gentle yeasty complexity that pairs beautifully with whatever filling you choose. I love how they’re substantial enough to satisfy but light enough that you’ll definitely reach for a second (or third!). The contrast between the warm dough and cool filling creates a sensory experience that’s simply divine.

    Versatility & Crowd-Pleasing Appeal

    One of my favorite things about Bomboloni is their incredible versatility. These Italian doughnuts work beautifully as a special breakfast treat, afternoon pick-me-up, or elegant dessert. They’re perfect for everything from casual weekend brunches to holiday celebrations. Everyone from kids to grandparents lights up when these appear on the table—there’s something universally appealing about a freshly made doughnut. You can customize the fillings based on what you love or what’s in season: classic custard, Nutella, fruit preserves, or even lemon curd. The possibilities are endless, making them perfect for pleasing a crowd with varying preferences.

    Essential Tips & Tricks

    Dough Development & Rising

    The secret to perfect Bomboloni lies in giving the dough enough time to develop properly. Don’t rush the rising process—this is what creates that ethereal, light texture that makes Italian doughnuts so special. I’ve found that letting the dough rise in a slightly warm spot (around 75°F) yields the best results. My favorite trick is to place the covered bowl near (not on) a preheating oven. Watch for visual cues rather than strict timing; the dough should double in size and feel pillowy when gently poked. If your kitchen is cool, it might take longer than recipes suggest, and that’s perfectly fine! Patience here translates directly to texture in the finished bomboloni.

    Frying Technique & Temperature Control

    Maintaining the right oil temperature is absolutely crucial for perfect Bomboloni. Too hot, and they’ll brown before cooking through; too cool, and they’ll absorb excess oil. Invest in a candy thermometer to keep your oil steady between 340-350°F—this sweet spot ensures golden exteriors and fully cooked centers. Work in small batches to prevent overcrowding, which drops the oil temperature dramatically. I learned this the hard way during my first attempt! Allow plenty of space for the doughnuts to float and expand. After frying, let them drain on paper towels before rolling in sugar, similar to how I prepare my Italian Easter Cookies for the perfect finish.

    Serving Ideas & Creative Variations

    Filling Options & Techniques

    The filling is where you can really make these Bomboloni your own personal masterpiece. Traditional pastry cream offers classic appeal, but don’t stop there! Nutella, lemon curd, raspberry jam, or even mascarpone whipped with a touch of honey all make spectacular fillings. For the neatest results, use a piping bag with a long narrow tip inserted from the side or bottom of the doughnut. My pro tip: chill your fillings slightly before piping—they’ll set up better inside the warm doughnuts. For a fun twist, try creating a sampler platter with different fillings, similar to my approach with Fluffy Yogurt Cloud Dessert where contrasting flavors create an exciting tasting experience.

    Seasonal & Special Occasion Adaptations

    Bomboloni can easily be adapted for different seasons and celebrations, making them a versatile addition to your baking repertoire. For summer, fill with fresh berry compote and dust with powdered sugar. Fall calls for apple butter or pumpkin spice pastry cream. During the holidays, try eggnog custard or gingerbread-spiced fillings. For an elegant dinner party finale, serve warm bomboloni alongside small bowls of different fillings and toppings, letting guests customize their own. I once served these at a New Year’s brunch with prosecco, and the combination was absolutely magical—the slight acidity of the bubbles perfectly balanced the sweet doughnuts.

    Storage & Troubleshooting Guide

    Keeping Bomboloni Fresh

    Bomboloni are at their absolute best when freshly made, but with proper storage, you can enjoy them for a day or two after baking. For unfilled bomboloni, store at room temperature in an airtight container for up to 24 hours. Once filled, refrigeration becomes necessary—store in a single layer to prevent squishing, and consume within 48 hours. If you need to refresh day-old bomboloni, a quick 5-10 seconds in the microwave works wonders to restore their softness. For longer storage, freeze unfilled bomboloni after they’ve completely cooled, then thaw at room temperature and warm slightly before filling and serving.

    Troubleshooting Common Issues

    If your Bomboloni aren’t turning out perfectly, a few simple adjustments can make all the difference. Dense doughnuts typically indicate under-proofing—next time, allow more rising time before frying. If they’re collapsing or deflating, you might be over-proofing or your oil temperature could be too low. Oil-soaked bomboloni usually mean your frying temperature is too cool—aim for that 340-350°F sweet spot. For filling problems, make sure your pastry cream or other fillings are thick enough to hold their shape but still pipeable. If your dough feels too sticky during handling, resist adding too much flour—instead, chill it briefly to make it more manageable.

    Frequently Asked Questions

    What makes Bomboloni different from regular doughnuts?

    Bomboloni are Italian doughnuts made with a richer, yeasted dough that’s typically filled rather than having a hole. They’re less sweet than American doughnuts and have a distinctively light, airy texture with a subtle yeasty flavor.

    Can I make the dough ahead of time?

    Absolutely! Prepare the dough and let it rise once, then refrigerate overnight. The slow, cold fermentation actually improves flavor. Bring to room temperature for 30-45 minutes before shaping and proceeding with the second rise.

    What’s the best oil for frying Bomboloni?

    Use a neutral oil with a high smoke point like vegetable, canola, or peanut oil. These won’t impart strong flavors and can withstand the temperatures needed for perfect frying.

    Can I bake Bomboloni instead of frying them?

    While traditional Bomboloni are fried, you can bake them at 375°F for 12-15 minutes. They’ll be less authentic with a different texture, but still delicious with less mess and oil.

    How do I know when the oil is at the right temperature without a thermometer?

    Drop a small piece of dough into the oil—it should sizzle gently and float to the surface within a few seconds. If it browns immediately, the oil is too hot; if it sits at the bottom, it’s too cool.

    Final Thoughts

    These Bomboloni – Italian Doughnuts have become one of my most treasured recipes, bringing a touch of Italian pastry magic into my home. There’s something deeply satisfying about creating these pillowy delights from scratch—watching the dough transform through rising, frying, and filling. The joy on people’s faces when they bite into a warm, freshly made bomboloni makes every step worthwhile. Whether you’re a seasoned baker or trying your hand at homemade doughnuts for the first time, I hope you’ll give these a try and discover why they’ve been beloved in Italy for generations. Don’t forget to check out more delicious inspiration on Pinterest!

  • Brown Butter Maple Donut Bars That’ll Blow Your Mind!

    Brown Butter Maple Donut Bars That’ll Blow Your Mind!

    Brown Butter Maple Donut Bars That’ll Blow Your Mind!

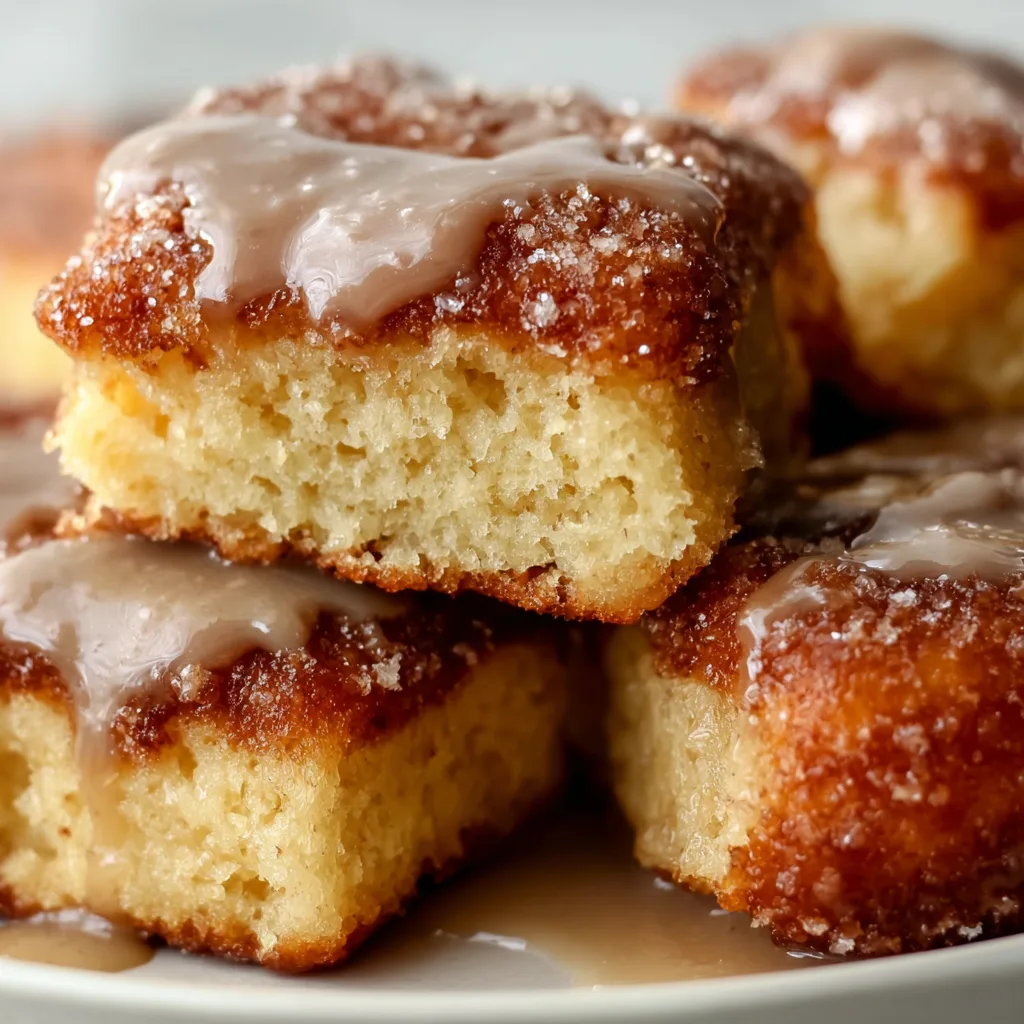
    Brown Butter Maple Donut Bars have completely transformed my weekend baking routine. The first time I made these, my kitchen filled with the most intoxicating aroma—nutty brown butter mingling with sweet maple—and I knew I’d stumbled upon something special. These bars capture everything you love about maple donuts but in an easy-to-make bar form that’s perfect for sharing (or not, I won’t judge!). With their tender crumb, caramelized edges, and glossy maple glaze, these treats strike the perfect balance between comforting and sophisticated.

    Recipe

    Why You’ll Love These Brown Butter Maple Donut Bars

    Perfect Balance of Flavors

    The magic of these Brown Butter Maple Donut Bars lies in their complex flavor profile. Brown butter creates a nutty, almost caramelized base that elevates these bars beyond ordinary treats. I discovered this recipe during a rainy Sunday when I craved maple donuts but didn’t want to leave the house. The maple flavor comes through in two ways—in the batter and in the glaze—creating depth that makes each bite more satisfying than the last. The subtle hints of vanilla and cinnamon round everything out, making these bars impossible to resist.

    Quick and Easy Preparation

    Unlike traditional donuts that require frying and special equipment, these Brown Butter Maple Donut Bars come together in about 15 minutes of active prep time. One bowl for the batter, one for the glaze—that’s it! I love that I can satisfy my donut cravings without dealing with hot oil or complicated techniques. The hardest part is waiting for them to cool before adding the glaze, but trust me, that patience pays off. Even my baking-averse partner can make these without breaking a sweat.

    Essential Tips & Tricks

    Perfecting the Brown Butter

    The foundation of these bars is perfectly browned butter, which requires a bit of attention but is worth every second. Use a light-colored pan so you can monitor the color change as the milk solids toast. I once walked away for just a minute and returned to nearly blackened butter—lesson learned! Swirl the pan frequently and watch for that moment when the butter turns amber and smells like toasted hazelnuts. Remove it from heat immediately, as it continues cooking in the hot pan.

    Achieving the Ideal Texture

    For the perfect tender-yet-sturdy texture in your Brown Butter Maple Donut Bars, don’t overmix the batter. Fold the ingredients just until combined—those few streaks of flour will disappear during baking. For bakery-quality bars, let the brown butter cool slightly before adding it to your sugar mixture. I’ve found that room temperature eggs make a noticeable difference in how evenly the batter comes together. Test for doneness with a toothpick; it should come out with a few moist crumbs, not wet batter.

    Serving Ideas & Creative Variations

    Perfect Pairings

    These Brown Butter Maple Donut Bars shine when served alongside the right beverages. A mug of strong coffee creates a delightful contrast to the sweet maple notes. Last fall, I served these at a brunch gathering with spiced apple cider, and guests couldn’t stop raving about the combination. For an indulgent weekend treat, try them slightly warmed with a scoop of vanilla ice cream. The bars’ firm texture holds up well, making them perfect for breakfast on the go or tucking into lunch boxes.

    Seasonal and Dietary Adaptations

    These versatile bars welcome creative adaptations to suit any occasion or dietary need. For autumn gatherings, add 1/2 teaspoon of pumpkin spice to the batter for a seasonal twist. I’ve successfully made these with gluten-free flour blends—just add 1/4 teaspoon xanthan gum if your blend doesn’t include it. For a dairy-free version, use coconut oil instead of butter (though you’ll miss the brown butter flavor). During maple sugaring season, splurge on grade B maple syrup for an intensified maple experience.

    Storage & Troubleshooting Guide

    Keeping Them Fresh

    Brown Butter Maple Donut Bars stay fresh for up to five days when stored properly. Keep them in an airtight container at room temperature, with parchment paper between layers to prevent sticking. I’ve found that placing a slice of bread in the container helps maintain moisture—a trick my grandmother taught me. These bars also freeze beautifully for up to three months; just thaw at room temperature when you’re ready to enjoy. The glaze may lose some shine after freezing, but the flavor remains delicious.

    Fixing Common Issues

    Even experienced bakers encounter challenges, but most Brown Butter Maple Donut Bar issues have simple solutions. If your bars seem too dense, you likely overmixed the batter—next time, use a gentle hand when combining ingredients. Bars that sink in the middle indicate underbaking or opening the oven door too early. For glaze that’s too runny, add more powdered sugar a tablespoon at a time. Too thick? A few drops of milk will thin it to the perfect consistency.

    Frequently Asked Questions

    Can I substitute the maple syrup with honey or another sweetener?

    Yes, but it will change the signature flavor. If substituting, use an equal amount of honey or agave, but reduce other liquids slightly as these alternatives are more moisture-rich than maple syrup.

    Why did my Brown Butter Maple Donut Bars turn out dry?

    Overbaking is usually the culprit. Check them 5 minutes before the recipe suggests and remember they continue cooking slightly after removal from the oven.

    Can I make these ahead for a special event?

    Absolutely! Bake them up to 2 days ahead and store unglazed. Add the fresh maple glaze 1-2 hours before serving for the best appearance and flavor.

    What’s the best way to achieve clean cuts?

    Use a sharp knife wiped clean between cuts. For professional-looking bars, chill them for 30 minutes after glazing before cutting.

    How can I intensify the maple flavor in my Brown Butter Maple Donut Bars?

    Use grade B or dark maple syrup and add 1/2 teaspoon of maple extract to both the batter and glaze for an extra maple punch.

    Final Thoughts

    Brown Butter Maple Donut Bars have become my signature bring-along for gatherings, earning requests from friends and family alike. There’s something magical about how the nutty brown butter amplifies the warm maple notes, creating a treat that’s both familiar and special. I hope these bars bring the same joy to your kitchen as they have to mine. Whether you’re a seasoned baker or just starting out, this recipe delivers reliable results with extraordinary flavor. Find more delicious inspiration on our Pinterest page!

  • St. Patrick’s Day Chocolate Chip Cookie Bars Everyone Craves!

    St. Patrick’s Day Chocolate Chip Cookie Bars Everyone Craves!

    St. Patrick’s Day Chocolate Chip Cookie Bars Everyone Craves!

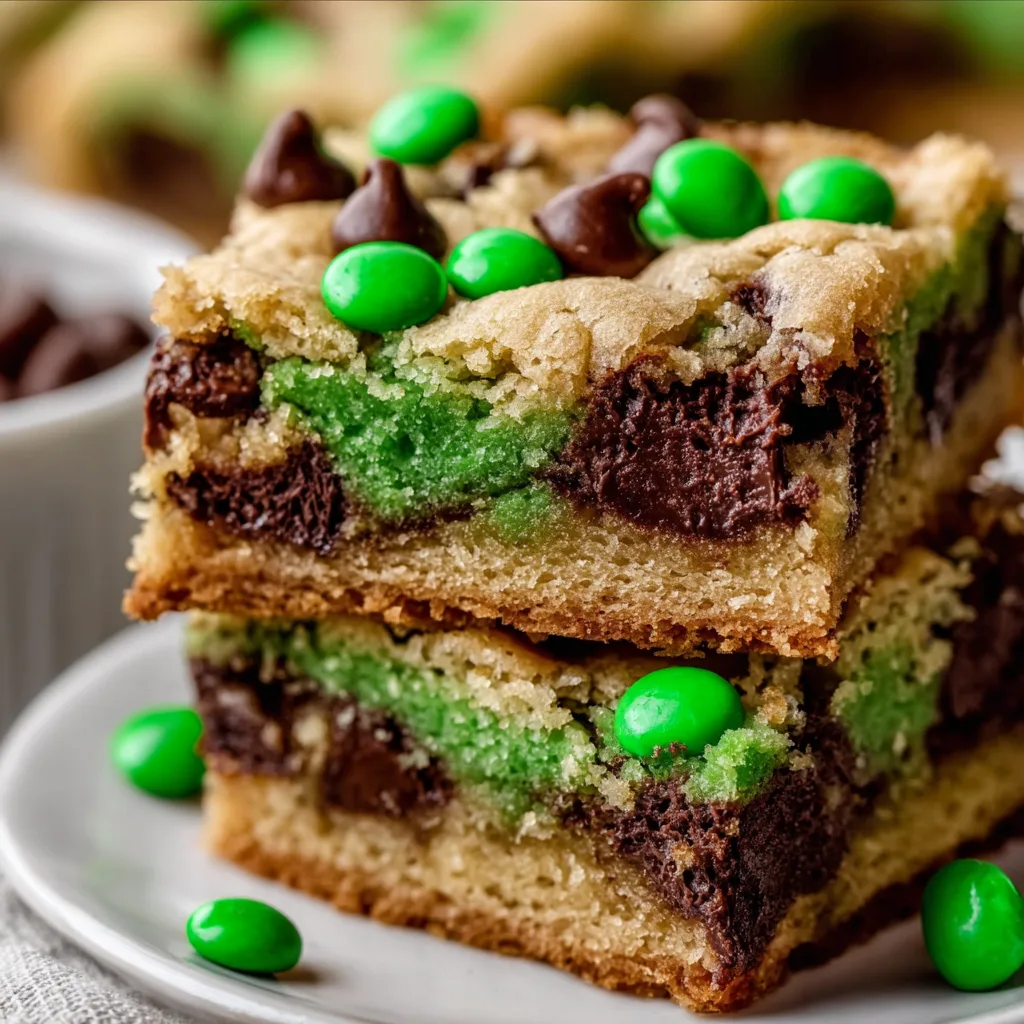
    St. Patrick’s Day Chocolate Chip Cookie Bars bring festive cheer to your March celebrations with their perfect balance of chewy, buttery goodness and holiday spirit. As someone who’s always looking for that special treat to mark the occasion, I’ve found these vibrant green-tinted bars to be an absolute crowd-pleaser. The familiar comfort of chocolate chip cookies transformed into an easy-to-serve bar format means less fuss and more time enjoying the festivities. Trust me, the rich vanilla aroma filling your kitchen as these bake will have everyone asking for the recipe before they even take their first bite. Let’s create some magical St. Patrick’s Day memories together!

    Recipe

    Perfect Balance of Festive Fun and Classic Flavor

    These cookie bars strike that magical balance between holiday novelty and classic comfort food. The vibrant green color catches the eye and sets a festive tone, while the familiar chocolate chip cookie flavor grounds the experience in something deliciously recognizable. I remember bringing these to my daughter’s school party last year—the way children’s eyes lit up at the sight of these emerald treats was priceless! Yet it was the parents who kept coming back for seconds, drawn by the nostalgic flavor of perfectly baked cookie bars with crisp edges and soft centers that simply melt in your mouth.

    Quick and Easy One-Bowl Wonder

    Let’s be honest—holiday baking shouldn’t mean spending hours in the kitchen! These bars come together in just one bowl with minimal measuring and fuss. The dough mixes up in about 10 minutes, spreads easily in the pan, and the hardest part is waiting for them to bake. Last St. Patrick’s Day, I was running late for a neighborhood potluck and still managed to whip these up while simultaneously helping my son with homework. The simplicity of bar cookies means no scooping individual portions or multiple baking batches—just spread, bake, cool, and cut into perfect squares that transport beautifully.

    Essential Tips & Tricks

    Getting That Perfect Green Hue

    The secret to these festive bars is achieving that perfect shade of green without affecting the flavor. I’ve found that gel food coloring works significantly better than liquid drops—you’ll need less product for more vibrant color, which means no artificial taste. Start with just a small amount on a toothpick and gradually add more until you reach your desired shade. Remember that the color will lighten slightly during baking. For a natural approach, try matcha powder which adds a subtle earthiness that pairs beautifully with the chocolate chips and creates a more sophisticated, muted green perfect for adult gatherings.

    Texture Secrets for Bakery-Quality Bars

    The difference between good and great cookie bars often comes down to texture. For that perfect chewy-yet-tender consistency, underbake slightly by removing from the oven when the center still looks slightly underdone but the edges are set and golden. The residual heat will continue cooking them to perfection. Another game-changer: chill your dough for 30 minutes before baking. This might seem like an unnecessary step when you’re in a hurry, but it allows the butter to firm up, preventing over-spreading and creating that desirable dense, fudgy texture that makes people reach for seconds.

    Serving Ideas & Creative Variations

    Festive Presentation Options

    Elevate your St. Patrick’s Day Chocolate Chip Cookie Bars with thoughtful presentation that enhances their holiday appeal. Try cutting them into shamrock shapes using cookie cutters for an extra festive touch—just be sure to do this while they’re still slightly warm for clean edges. For an elegant dessert table, dust with powdered sugar through a shamrock stencil or arrange on a platter with fresh mint leaves. Last year, I served these alongside vanilla ice cream with a drizzle of Bailey’s-infused caramel sauce for the adults, and it became the most talked-about dessert of our annual St. Patrick’s Day gathering!

    Mix-in Magic for Customized Creations

    While the classic recipe is delicious, customizing your cookie bars makes them truly special. Try swapping regular chocolate chips for mint chocolate chips for a refreshing twist that complements the holiday theme. White chocolate chips with dried cranberries add beautiful color contrast against the green background. For texture variety, incorporate 1/2 cup of chopped pistachios or walnuts. My personal favorite variation includes a layer of cream cheese filling: simply reserve 1 cup of dough, spread the remainder in the pan, top with sweetened cream cheese, then crumble the reserved dough over top before baking.

    Storage & Troubleshooting Guide

    Keeping Fresh and Freezing Options

    These cookie bars maintain their perfect texture for 3-4 days when stored properly in an airtight container at room temperature. Place parchment paper between layers to prevent sticking. For longer storage, these bars freeze beautifully for up to 3 months! I often make a double batch and freeze half for unexpected guests or late-night cravings. To freeze, cool completely, cut into squares, then wrap individually in plastic wrap before placing in a freezer bag. Thaw at room temperature for about an hour, or microwave for 15-20 seconds for that just-baked warmth and gooey chocolate experience.

    Fixing Common Baking Issues

    Even experienced bakers encounter occasional challenges. If your bars turn out too cakey, you likely used too much flour—remember to spoon flour into measuring cups rather than scooping directly from the bag. For bars that spread too much or seem greasy, the butter was probably too warm; next time, ensure it’s softened but still cool to the touch. If the green color fades during baking, try using more concentrated food coloring or adding a drop of blue to counteract the yellowing effect from the butter and vanilla. For crumbly bars that fall apart, they likely baked too long—watch closely during the final minutes!

    Frequently Asked Questions

    Absolutely! Prepare them up to 2 days in advance and store in an airtight container. For the freshest taste, slightly underbake them initially, then warm in a 300°F oven for 5 minutes before serving.

    Look for golden edges with a slightly soft center. A toothpick inserted in the middle should come out with a few moist crumbs but no wet batter. Remember, they’ll continue cooking slightly after removal.

    Can I use natural food coloring for these bars?

    Yes! Spirulina powder, matcha, or plant-based food coloring works well. Start with 1-2 teaspoons of powder or follow package directions for liquid alternatives. The color will be more subtle.

    Semi-sweet chocolate chips provide the perfect balance, but dark chocolate creates a sophisticated flavor profile. For extra festivity, mix in green-colored candy melts or mint chips.

    Can I make these gluten-free?

    Definitely! Substitute a 1:1 gluten-free flour blend. Add 1/4 teaspoon xanthan gum if your blend doesn’t include it, and consider adding an extra egg yolk for moisture.

    Final Thoughts

    These St. Patrick’s Day Chocolate Chip Cookie Bars have become my go-to March tradition, bringing a touch of whimsy and a whole lot of flavor to celebrations both large and intimate. There’s something magical about the way they transform a simple dessert into a memorable part of the holiday. Whether you’re baking with kids or preparing for an adult gathering, these versatile treats strike the perfect balance between festive appearance and comforting taste. Share your creations on Pinterest and join our community of holiday bakers spreading joy one green-tinted treat at a time!

  • Creamy Fruit Salad Rollups: Irresistibly Delicious & Easy Snack!

    Creamy Fruit Salad Rollups: Irresistibly Delicious & Easy Snack!

    Creamy Fruit Salad Rollups: Irresistibly Delicious & Easy Snack!

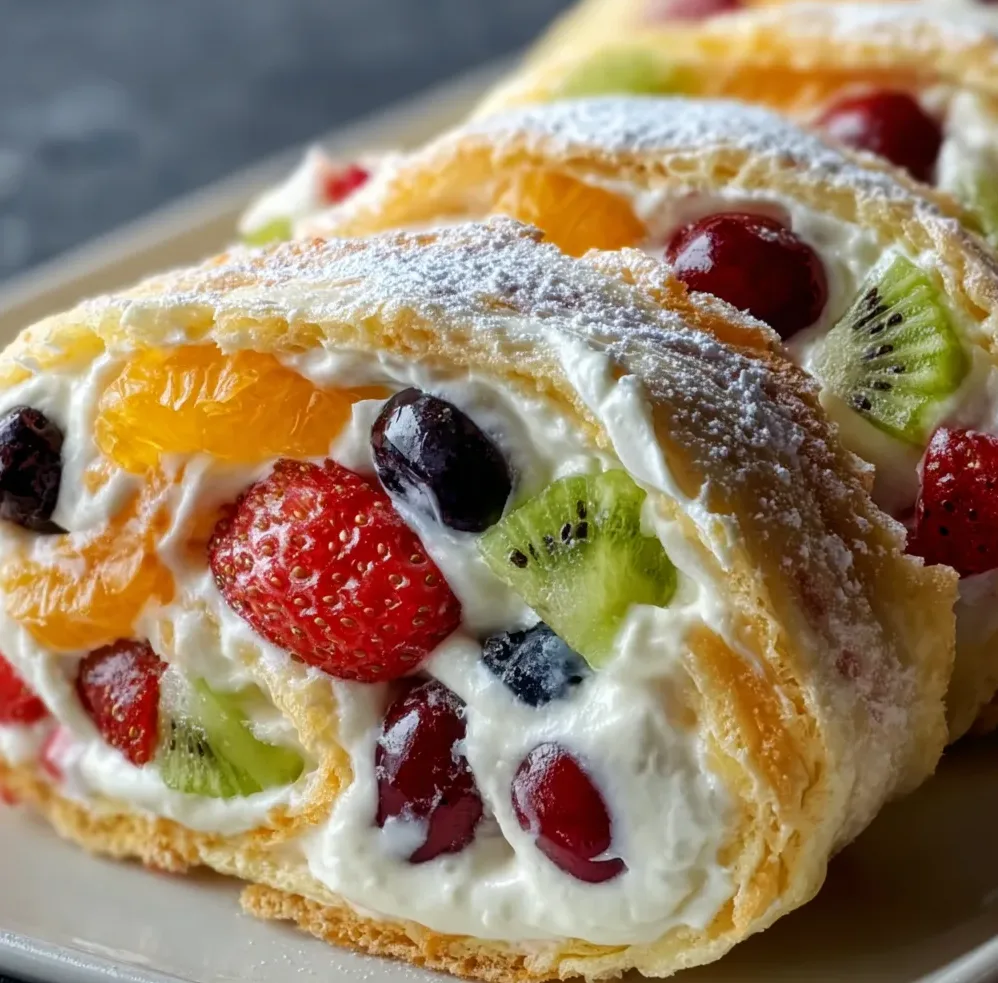
    Creamy Fruit Salad Rollups are my latest obsession, combining the refreshing sweetness of fresh fruits with velvety cream cheese in a portable, picnic-perfect package. I discovered this delightful treat during a summer gathering when my neighbor brought something similar, and I’ve been tweaking the recipe ever since. The tender tortillas wrap around a luscious filling that balances tangy cream cheese with honey-kissed fruits for a bite that’s both satisfying and light. Perfect for breakfast on-the-go or a sweet afternoon snack, these rollups have become a staple in my kitchen, especially when I’m craving something like my Easy Banana Cream Pie but want something more portable.

    Recipe

    Why You’ll Love These Creamy Fruit Salad Rollups

    Perfect Balance of Flavors and Textures

    There’s something magical about the way the creamy filling contrasts with the fresh fruit in these rollups. Each bite delivers a perfect harmony of smooth cream cheese, juicy berries, and tender tortilla. I love how the slight tanginess of the cream cheese balances the natural sweetness of ripe strawberries and blueberries. The honey drizzle adds just enough sweetness without overwhelming the fresh fruit flavors. And that moment when you bite through the soft tortilla into the cool, creamy center? Pure bliss! These rollups satisfy both sweet cravings and hunger in a way that feels indulgent yet light.

    Quick and Customizable for Any Occasion

    What I adore most about these Creamy Fruit Salad Rollups is their versatility and ease. You can whip these up in under 15 minutes when unexpected guests arrive or prep them the night before for a grab-and-go breakfast. Switch up the fruits based on what’s in season – peaches in summer, apples in fall, or citrus in winter. The filling can be adjusted to suit different dietary needs too. Need dairy-free? Use coconut cream cheese. Want extra protein? Add a sprinkle of chopped nuts. I’ve even made a savory version with herbs and cucumber that disappeared at a baby shower faster than my Creamy Cheese and Potato Pie.

    Essential Tips & Tricks

    Mastering the Perfect Filling Consistency

    The secret to success with these rollups lies in the cream cheese texture. I learned this the hard way after creating a too-runny filling that escaped from every end! Let your cream cheese come to room temperature before mixing, but don’t let it get too soft. Beat it just until smooth and spreadable – think frosting consistency. Pat your fruit dry with paper towels to remove excess moisture that could make your rollups soggy. For extra stability, I sometimes add a tablespoon of Greek yogurt which adds tanginess while helping the filling stay put. This creates that perfect creamy base that holds everything together.

    Rolling Technique for Picture-Perfect Results

    Trust me, there’s definitely a technique to creating beautiful rollups without filling squishing out everywhere. Start with room temperature tortillas – cold ones will crack! Spread the filling evenly, leaving a half-inch border around the edges. Don’t overfill; a thin, even layer works best. Place larger fruit pieces in a line about one-third from the bottom edge, then fold the bottom over the fruit and roll tightly. For clean slices, refrigerate the rolled tortillas for at least 30 minutes before cutting with a sharp knife. I sometimes use a bit of honey at the final edge as “glue” to keep everything sealed.

    Serving Ideas & Creative Variations

    Elegant Presentation for Gatherings

    Transform these simple rollups into party-worthy treats with minimal effort. For brunch gatherings, I arrange the colorful slices in a spiral on a white platter, sprinkle with mint leaves, and place a small bowl of honey or maple syrup in the center for dipping. For kids’ parties, I cut them into smaller “sushi” bites and provide colorful toothpicks. Create a stunning dessert board by pairing these rollups with my Marshmallow Fruit Dip and an assortment of fresh berries. The vibrant colors make for Instagram-worthy photos while the handheld format means less mess for guests.

    Sweet and Savory Flavor Combinations

    Don’t limit yourself to just sweet versions! The flavor possibilities are endless when you start experimenting. My tropical variation with mango, pineapple and coconut-infused cream cheese transports me to vacation mode instantly. For a fall twist, try apple-cinnamon with a sprinkle of granola for crunch. Chocolate lovers in my family go crazy for banana-Nutella rollups drizzled with peanut butter. On the savory side, cucumber-dill cream cheese with thin strawberry slices creates an unexpectedly refreshing appetizer. I’ve even created a “dessert taco” version by using cinnamon tortillas and a cheesecake-inspired filling that rivals my favorite Fluffy Yogurt Cloud Dessert.

    Storage & Troubleshooting Guide

    Keeping Rollups Fresh and Preventing Sogginess

    The biggest challenge with these Creamy Fruit Salad Rollups is maintaining that perfect texture over time. Store them in an airtight container lined with paper towels to absorb excess moisture. They’ll keep in the refrigerator for up to 2 days, though they’re best enjoyed within 24 hours. If making ahead for a party, consider wrapping the whole rolled tortillas in plastic wrap without slicing until serving time. For lunchboxes, wrap individual slices in parchment paper before placing in containers. If your rollups do get slightly soggy, a quick 10 seconds in the microwave can help revive the tortilla texture.

    Rescuing Common Rollup Mishaps

    Even I have rollup disasters sometimes! If your filling is too runny, fold in 1-2 tablespoons of whipped cream cheese to thicken it up. Tortilla cracked while rolling? Warm it for 10 seconds in the microwave to make it more pliable. If your rollups unravel when cutting, try chilling them longer or securing with toothpicks before slicing. Filling oozing out the sides? You likely overfilled – scrape some out and start again. For fruit that’s too juicy, toss it with a teaspoon of cornstarch before adding to the filling. Remember that even “ugly” rollups taste delicious, so don’t stress too much about appearance!

    Frequently Asked Questions

    Can I make Creamy Fruit Salad Rollups ahead of time?

    Yes! Prepare them up to 24 hours in advance. Store whole unsliced rolls wrapped in plastic wrap in the refrigerator, and slice just before serving for the freshest results.

    What’s the best tortilla to use for fruit rollups?

    Flour tortillas in the 8-inch size work best. Choose soft, fresh ones labeled “burrito style” for easier rolling. Flavored varieties like spinach or sun-dried tomato can add interesting flavor dimensions.

    Can I freeze these rollups?

    I don’t recommend freezing as the fruit will release moisture when thawed, making the tortillas soggy. These are best enjoyed fresh within 1-2 days of preparation.

    How do I prevent my Creamy Fruit Salad Rollups from getting soggy?

    Pat fruits dry thoroughly before adding them to the cream cheese mixture. Also, create a moisture barrier by spreading a thin layer of cream cheese on the tortilla before adding juicier fruits.

    What are good substitutes for cream cheese in this recipe?

    Mascarpone offers a richer, sweeter alternative. Greek yogurt cream cheese provides more protein. For dairy-free options, try almond-based or coconut-based cream cheese alternatives.

    Final Thoughts

    These Creamy Fruit Salad Rollups have become my go-to for everything from rushed weekday breakfasts to elegant brunches with friends. There’s something wonderfully satisfying about transforming simple ingredients into something that feels special yet requires minimal effort. The joy on people’s faces when they bite into these colorful spirals makes all the difference. Whether you stick to classic strawberry-banana or venture into exotic flavor territories, these rollups offer endless possibilities for customization. I hope these Creamy Fruit Salad Rollups bring as much happiness to your kitchen as they have to mine! Find more inspiration for fruity treats on my Pinterest board.

  • Peach Fluff Recipe That’s Irresistibly Light & Creamy!

    Peach Fluff Recipe That’s Irresistibly Light & Creamy!

    Peach Fluff Recipe That’s Irresistibly Light & Creamy!

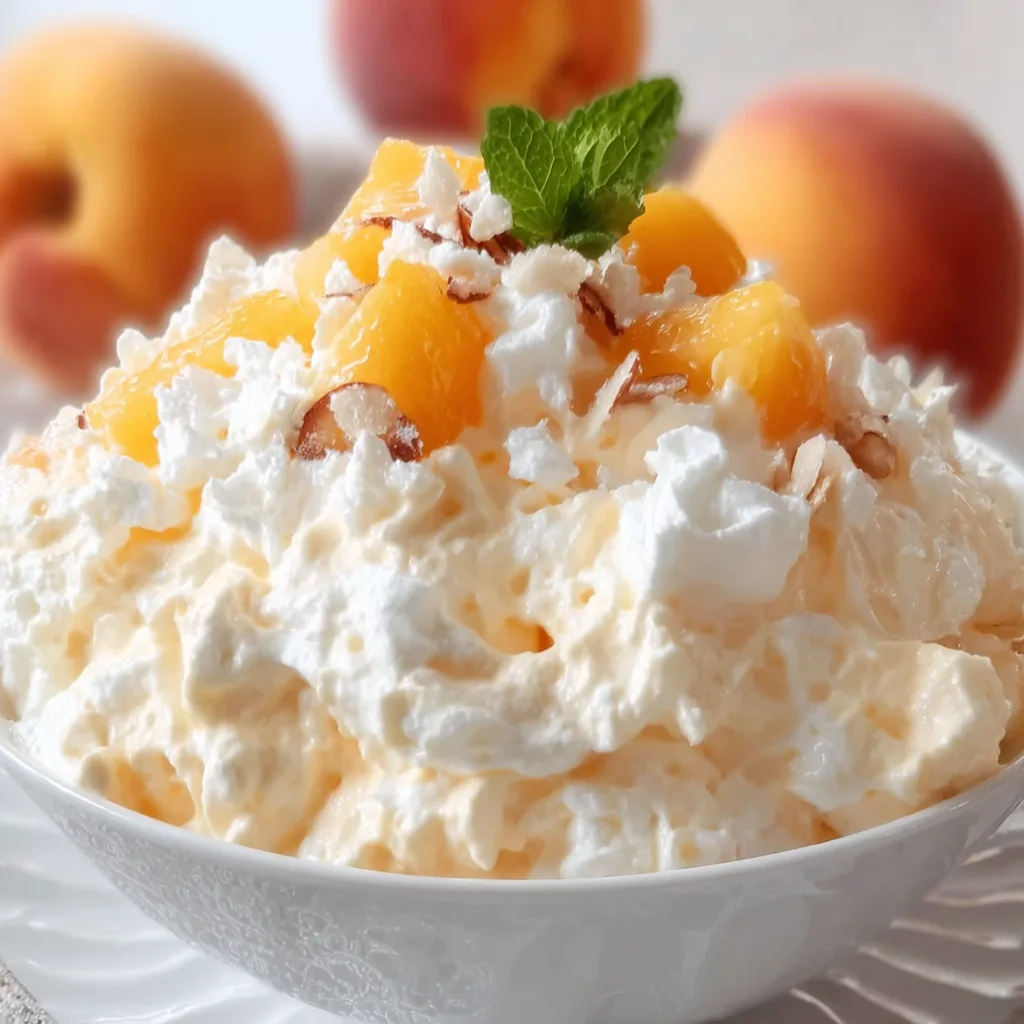
    Peach Fluff is summer’s dreamiest no-bake dessert that combines juicy peaches, fluffy whipped topping, and just the right amount of sweetness. Every spoonful feels like capturing sunshine in a bowl! I first made this for a backyard gathering when the temperature hit 95°F, and nobody wanted to turn on the oven. The creamy texture and bright peach flavor had everyone asking for the recipe before they’d even finished their first serving. This effortless treat takes just minutes to prepare but delivers the kind of satisfaction that makes people think you spent hours in the kitchen. Perfect for those days when you crave something sweet but don’t want to fuss with complicated techniques or hot ovens.

    Recipe

    Why You’ll Love This Peach Fluff

    Perfect Balance of Flavors and Textures

    There’s something magical about the way the tangy peaches mingle with the cloud-like whipped topping in this dessert. Each bite delivers a perfect balance of fruity brightness and creamy indulgence that dances on your tongue. The subtle vanilla notes complement the natural sweetness of the peaches without overwhelming them. I love how the tiny bursts of fruit pieces create textural interest against the pillowy fluff base. It’s like eating a peach-flavored cloud that somehow manages to be both substantial and light as air at the same time.

    Quick Preparation for Maximum Impact

    This Peach Fluff requires just 5 minutes of active preparation time, making it the ultimate last-minute dessert hero. On busy weeknights when the kids are demanding something sweet or when unexpected guests arrive, this recipe has saved me countless times. The simple folding technique requires no special skills or equipment beyond a mixing bowl and spoon. I love watching people’s expressions when they taste something so delicious and then learn how ridiculously easy it was to make. Sometimes the simplest recipes truly deliver the most satisfaction.

    Essential Tips & Tricks

    Choosing and Preparing Your Peaches

    The quality of your peaches makes all the difference in this dessert. During peak season (July through September), fresh ripe peaches will give you the most vibrant flavor. Look for fruits that yield slightly to gentle pressure and have a sweet fragrance. For the best texture, peel them before dicing—the easiest method is to score an X at the bottom, blanch for 30 seconds in boiling water, then transfer to an ice bath. The skins will slip right off! If fresh peaches aren’t available, well-drained canned peaches or thawed frozen peaches work beautifully as convenient alternatives.

    Achieving the Perfect Consistency

    The secret to irresistible Peach Fluff lies in its airy texture. Start with well-chilled ingredients—even your mixing bowl can be placed in the freezer for 10 minutes beforehand. When folding ingredients together, use a gentle hand with a spatula rather than aggressive stirring to maintain maximum fluffiness. If your mixture seems too thick, add a tablespoon of peach juice. Too thin? Fold in additional whipped topping or a few tablespoons of instant vanilla pudding mix. Allow the finished fluff to chill for at least one hour before serving to let the flavors meld perfectly.

    Serving Ideas & Creative Variations

    Elegant Presentation Options

    Transform this simple Peach Fluff into an impressive dessert worthy of special occasions by thinking beyond the basic serving bowl. Layer it in clear glass trifle dishes or stemmed glasses to showcase the beautiful peachy color. Add visual appeal with a sprinkle of crushed graham crackers, toasted coconut, or finely chopped pistachios on top. For individual servings that wow, pipe the fluff into dessert shells, hollowed strawberries, or mini phyllo cups. A fresh mint leaf or edible flower adds a professional finishing touch that elevates this humble dessert to restaurant quality.

    Flavor Twists and Add-ins

    While perfect in its classic form, Peach Fluff welcomes creative variations to suit your taste preferences. For a tropical twist, fold in diced mango or pineapple alongside the peaches. Craving something more decadent? Add white chocolate chips or crushed shortbread cookies for delightful pops of sweetness and texture. Spice lovers can incorporate a pinch of cardamom, ginger, or cinnamon. For a more substantial dessert, layer the fluff with angel food cake cubes or ladyfingers. My personal favorite variation includes a handful of fresh blueberries for a color contrast that’s as beautiful as it is delicious.

    Storage & Troubleshooting Guide

    Proper Storage for Maximum Freshness

    Keep your Peach Fluff at its best quality by storing it properly. Always use an airtight container to prevent it from absorbing refrigerator odors or forming a skin on top. The dessert will maintain optimal texture and flavor for up to 3 days when refrigerated. If you notice slight separation after storage, simply give it a gentle stir before serving. While technically safe to eat beyond three days, the texture begins to deteriorate as the whipped topping starts to deflate. For the freshest presentation at parties, prepare the base up to 24 hours ahead, then fold in the fruit just before serving.

    Fixing Common Issues

    Even the simplest recipes can sometimes present challenges, but most Peach Fluff problems have easy solutions. If your mixture turns out too runny, refrigerate for 30 minutes, then fold in 2-3 tablespoons of instant pudding mix. For a fluff that’s too firm, incorporate additional peach juice one tablespoon at a time. Discoloration from oxidizing peaches? Add a teaspoon of lemon juice to brighten both color and flavor. If the sweetness level isn’t right, adjust with a touch of honey (for more sweetness) or a pinch of salt (to tone down sweetness). Remember that the flavor develops after chilling, so taste again before making major adjustments.

    Frequently Asked Questions

    Can I make Peach Fluff with canned peaches?

    Absolutely! Drain canned peaches well and pat dry with paper towels to remove excess moisture. The convenient option works perfectly year-round when fresh peaches aren’t in season.

    How far in advance can I prepare Peach Fluff?

    For best results, prepare up to 24 hours ahead. The texture remains perfect, and the flavors actually improve after a few hours of chilling time.

    Is there a dairy-free option for making Peach Fluff?

    Yes! Substitute coconut cream whipped with a tablespoon of powdered sugar for the traditional whipped topping. The slight coconut flavor pairs beautifully with peaches.

    Can I freeze leftover Peach Fluff?

    I don’t recommend freezing this dessert as it will separate and become watery upon thawing. It’s best enjoyed fresh within 3 days.

    What makes Peach Fluff different from regular fruit salad?

    Peach Fluff has a creamy, mousse-like consistency thanks to the whipped topping base, while fruit salad typically features fresh fruit pieces in juice or light syrup.

    Final Thoughts

    This Peach Fluff has become my summer signature dessert—the one friends request by name when they know I’m bringing something sweet. There’s something deeply satisfying about creating something so delicious with so little effort. The bright, sunny flavor captures everything wonderful about peach season in a dessert that feels both nostalgic and fresh. Whether you’re serving it at a backyard barbecue or enjoying a quiet weeknight treat, this versatile recipe delivers pure joy in every spoonful. Find more delicious inspiration on Pinterest and discover why Peach Fluff deserves a permanent place in your dessert rotation.

  • Italian Easter Cookies: Irresistible Treats You’ll Crave This Spring!

    Italian Easter Cookies: Irresistible Treats You’ll Crave This Spring!

    Italian Easter Cookies: Irresistible Treats You’ll Crave This Spring!

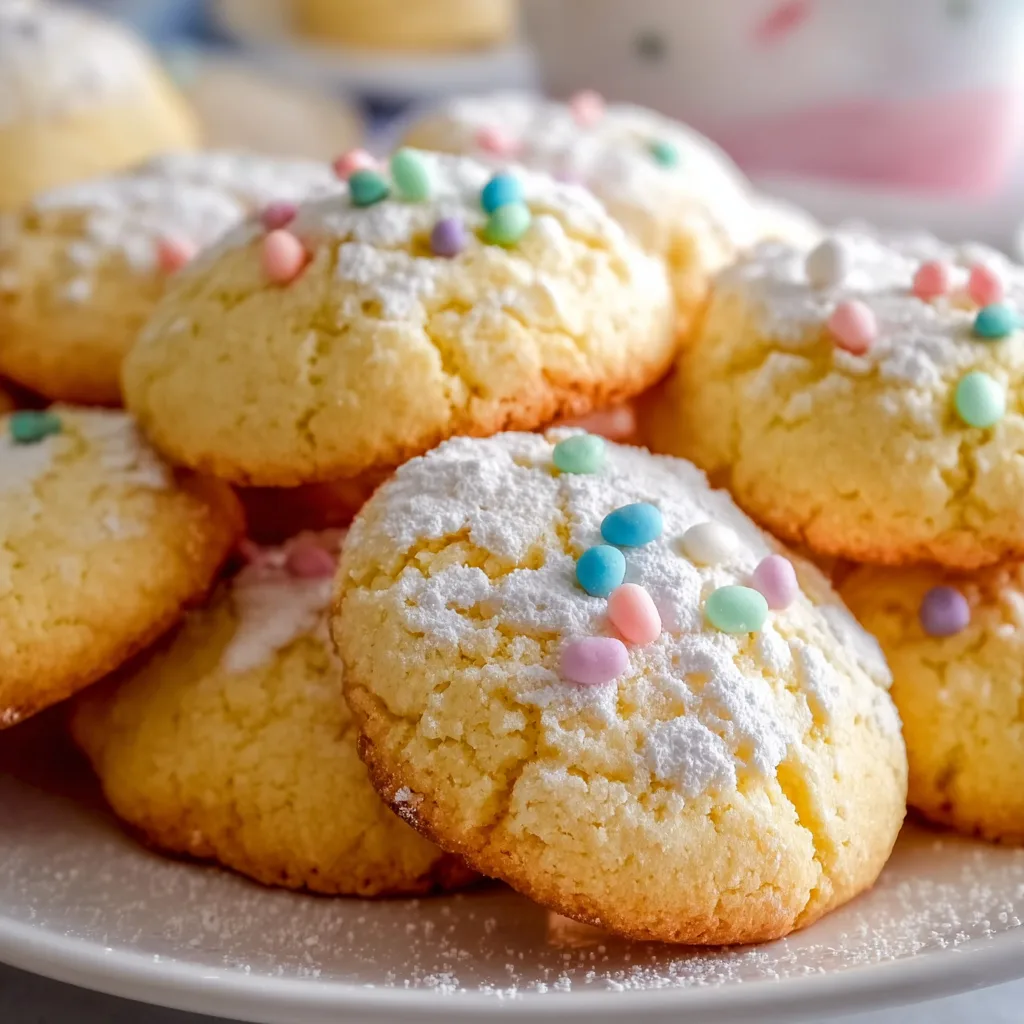
    Italian Easter Cookies bring the perfect blend of sweet tradition and springtime celebration to your holiday table. These delicate, anise-flavored treats dusted with colorful sprinkles have been part of my family’s Easter celebration for generations. I still remember standing on a kitchen stool beside my grandmother, eagerly waiting to add rainbow nonpareils to the freshly glazed cookies. The subtle sweetness paired with that distinctive licorice-like flavor creates a truly authentic Italian experience that signals spring has officially arrived. Let me show you how to create these beloved treats that will become your new Easter tradition.

    Recipe

    Why You’ll Love These Italian Easter Cookies

    Perfect Balance of Flavors and Texture

    These Italian Easter Cookies offer the most delightful combination of tender and cake-like texture with just the right amount of sweetness. The anise extract provides that distinctive flavor that’s both sophisticated and nostalgic. What I adore most is how these cookies strike the perfect balance—not too sweet, which makes them ideal for breakfast with coffee or as an afternoon treat. The thin glaze creates a slight crispness on the outside while maintaining that pillowy interior that practically melts in your mouth. Every bite delivers subtle complexity that store-bought cookies simply can’t match.

    Quick to Make with Pantry Staples

    One of the best things about these Italian Easter Cookies is that they require ingredients you likely already have in your pantry. No special shopping trip needed! The simple preparation means you can whip up a batch in under an hour, making them perfect for last-minute gatherings or when the cookie craving strikes. I’ve made these countless times when unexpected guests were on their way, and they always come together beautifully. The straightforward mixing method is also wonderfully forgiving, making this recipe accessible even to novice bakers who want to create something special for the holiday.

    Essential Tips & Tricks

    Mastering the Dough Consistency

    Getting the dough consistency right is crucial for perfect Italian Easter Cookies. It should feel soft and pliable but not sticky enough to cling to your hands. If your dough seems too wet, add flour one tablespoon at a time until it reaches that perfect texture. I’ve found that letting the dough rest for 10-15 minutes before shaping makes a world of difference in handling. Room temperature eggs and butter create the ideal base, so plan ahead by taking these ingredients out about an hour before you start baking. This small step results in a much more cohesive dough that’s a dream to work with.

    Perfecting the Glaze and Decoration

    The glaze is what transforms these cookies from good to spectacular! For best results, make sure your cookies are completely cool before glazing, otherwise it will run right off. I like to create a slightly thick consistency that coats the back of a spoon—this ensures the perfect coverage without becoming transparent. Work quickly to add sprinkles while the glaze is still wet, as this helps them adhere properly. For a fun Easter twist, try using pastel-colored nonpareils or even tiny sugar eggs. Check out these beautiful Easter egg cheesecake jars for more spring dessert inspiration!

    Serving Ideas & Creative Variations

    Elegant Easter Presentation Options

    Transform your Italian Easter Cookies into a stunning centerpiece by arranging them on a tiered cake stand with fresh spring flowers between the layers. The visual impact of these colorful cookies makes them perfect for holiday tables. I love creating small cellophane bags tied with pastel ribbons as take-home treats for guests. For brunch gatherings, try serving them alongside a selection of fresh berries and whipped mascarpone for an elegant touch. These cookies pair beautifully with coffee, tea, or even a glass of sweet dessert wine like Vin Santo for the adults at your celebration.

    Flavor Twists on the Traditional Recipe

    While anise is traditional, these versatile cookies welcome creative flavor adaptations. Try substituting almond or lemon extract for a bright, citrusy variation that’s especially refreshing for spring. Adding orange or lemon zest to the dough creates beautiful flecks of color and bursts of flavor. For chocolate lovers, fold mini chocolate chips into the dough or drizzle the glazed cookies with melted chocolate. I’ve even created a version with crushed pistachios and a touch of rosewater that was a huge hit at our family’s Easter celebration last year! For more Easter inspiration, check out these delicious Easter Bunny Coconut Tails.

    Storage & Troubleshooting Guide

    Keeping Cookies Fresh for Days

    These Italian Easter Cookies stay wonderfully fresh when stored properly. Place them in an airtight container with parchment paper between layers to prevent sticking and preserve that perfect texture. At room temperature, they’ll maintain their quality for up to 5 days, though they rarely last that long in my house! For longer storage, these cookies freeze beautifully for up to 3 months—just thaw them at room temperature for about an hour before serving. I recommend freezing them before adding the glaze and decorations for best results, then finishing them after thawing.

    Solving Common Baking Challenges

    If your cookies spread too much during baking, your dough may be too warm. Chilling the shaped cookies for 15 minutes before baking can help them maintain their form. For cookies that turn out too dry, you likely over-measured the flour—try using the spoon and level method rather than scooping directly with your measuring cup. If your glaze appears too runny, add powdered sugar a tablespoon at a time until it reaches the right consistency. Conversely, if it’s too thick, thin it with small amounts of milk or lemon juice until it’s just pourable but not watery.

    Frequently Asked Questions

    Can I make Italian Easter Cookies without anise flavor?

    Absolutely! Substitute vanilla, almond, or lemon extract in equal amounts. Each creates a different but equally delicious cookie that maintains the traditional texture while offering a flavor that might appeal to those who don’t enjoy anise.

    How far in advance can I make these cookies for Easter?

    You can make these cookies up to 5 days ahead when stored in an airtight container. Alternatively, freeze the unglazed cookies for up to 3 months, then thaw and decorate the day before serving.

    Why did my Italian Easter Cookies turn out dry?

    Over-measuring flour is typically the culprit. Use the spoon-and-level method for accurate measurements, and make sure not to overbake them—they should remain pale with just slight golden edges.

    Can I make these cookies with gluten-free flour?

    Yes! Use a 1:1 gluten-free flour blend with xanthan gum. The texture may be slightly different, but they’ll still be delicious. Add an extra egg yolk for moisture if the dough seems dry.

    How do I know when Italian Easter Cookies are done baking?

    Look for barely golden edges while the tops remain pale. They should feel set but still slightly soft when gently pressed. Overbaking will result in dry cookies, so err on the side of underbaking.

    Final Thoughts

    These Italian Easter Cookies represent the perfect marriage of tradition and celebration, bringing a touch of authentic Italian heritage to your holiday table. The joy of sharing these colorful, anise-scented treats with loved ones creates memories that last far beyond the Easter season. I find myself making these cookies throughout spring, as their light flavor and festive appearance brighten any gathering. Whether you’re honoring old family traditions or starting new ones, these cookies offer a delicious way to welcome the renewal that spring brings. Find more inspiration at Pinterest.

  • Brown Butter Honey Pistachio Bars: Irresistibly Nutty & Gooey!

    Brown Butter Honey Pistachio Bars: Irresistibly Nutty & Gooey!

    Brown Butter Honey Pistachio Bars: Irresistibly Nutty & Gooey!

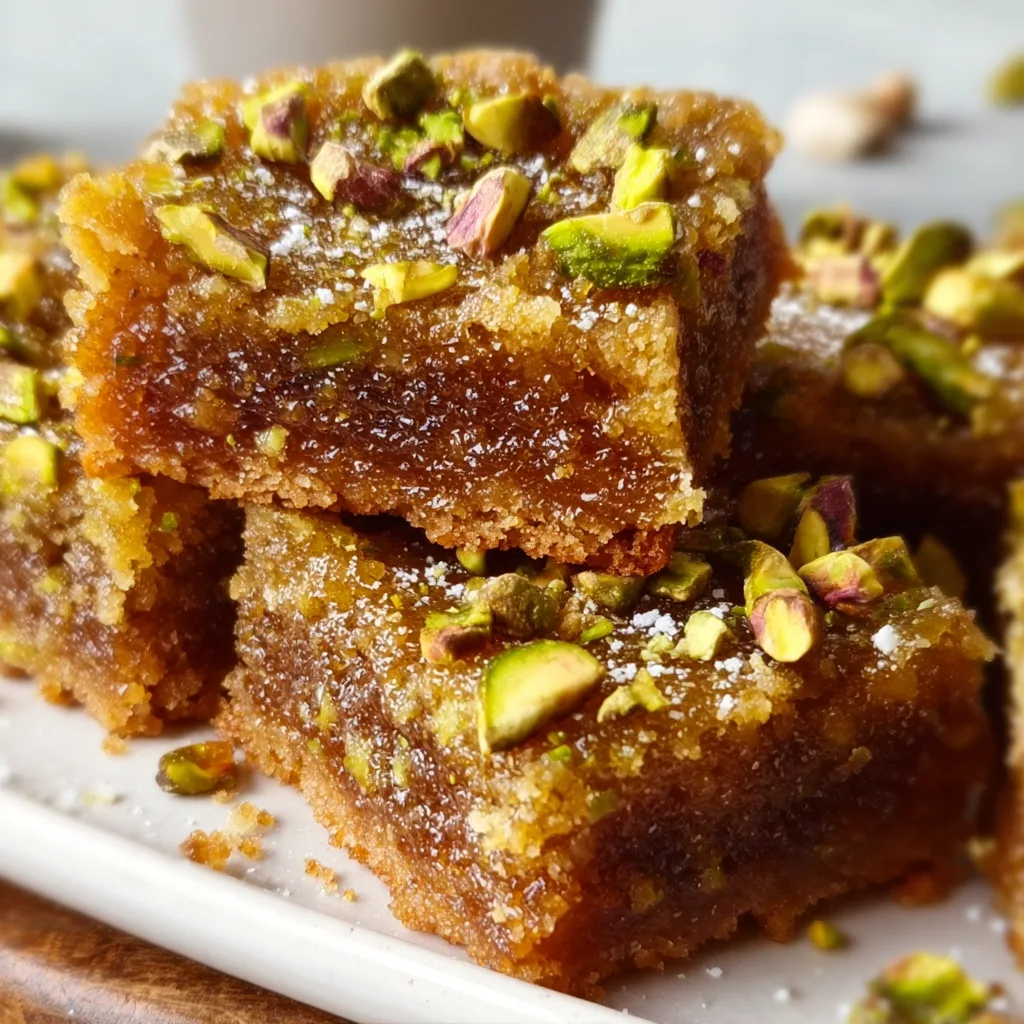
    Brown Butter Honey Pistachio Bars are what happens when buttery shortbread meets golden honey and toasty pistachios. The first time I made these for my sister’s birthday gathering, the pan was empty before I could even snap a photo! There’s something magical about the nutty aroma of brown butter that fills your kitchen as these bake. The combination of textures—crisp base, chewy center, and crunchy pistachios—creates an irresistible treat that’s sophisticated yet comforting. Perfect for holiday gatherings or simply paired with afternoon tea.

    Recipe

    Why You’ll Love These Brown Butter Honey Pistachio Bars

    A Symphony of Flavors

    The brown butter is the star of the show here, lending a complex, nutty flavor that elevates these bars from good to unforgettable. I still remember the first time I discovered brown butter—standing in my grandmother’s kitchen, watching the magical transformation as the butter sizzled and turned golden. The honey adds a floral sweetness that balances perfectly with the slight saltiness of the pistachios. Each bite delivers a perfect harmony of sweet, salty, nutty, and buttery notes that dance across your palate.

    Make-Ahead Convenience

    These bars are a busy host’s dream! You can prepare the shortbread base up to three days ahead and store it in the refrigerator. The honey-pistachio topping comes together in minutes when you’re ready to bake. I’ve even frozen the fully baked bars for up to a month with excellent results—just thaw overnight in the refrigerator. The flavors actually deepen after a day, making these perfect for advance preparation before gatherings. Your future self will thank you when you pull these out for unexpected guests!

    Essential Tips & Tricks

    Mastering the Brown Butter

    Browning butter requires patience and attention—but it’s worth every minute. Use a light-colored pan so you can monitor the color changes. The butter will foam, then the milk solids will sink and gradually turn golden brown. The nutty aroma is your cue it’s ready! Remove it immediately from heat to prevent burning. I once got distracted by a phone call and ended up with black butter—lesson learned! Let it cool slightly before adding to your mixture for the best texture and to avoid cooking your eggs.

    The Perfect Texture Balance

    For the ideal texture, underbake slightly rather than overbake. The center should be set but with a slight jiggle—it will continue cooking as it cools. Allow the bars to cool completely before cutting for clean edges. I recommend chilling them for at least two hours, then using a sharp knife dipped in hot water (and wiped dry) between cuts. This technique gives you those picture-perfect edges that make these bars look as professional as they taste.

    Serving Ideas & Creative Variations

    Elegant Presentation Options

    Transform these bars into a showstopping dessert by serving them slightly warm with a small scoop of vanilla bean ice cream or a dollop of lightly sweetened whipped cream. For dinner parties, I cut them into smaller diamonds instead of squares and dust with a whisper of powdered sugar. The contrast of the golden bars against a white serving plate makes for a beautiful presentation. Add a small sprig of fresh mint or a few additional chopped pistachios on top for a professional touch.

    Seasonal Adaptations

    These versatile bars welcome seasonal twists! In summer, add lemon zest to the shortbread base for brightness. For fall, incorporate a teaspoon of pumpkin spice and swap half the pistachios for pecans. Winter holidays call for a dash of cardamom and dried cranberries. Spring? Try adding dried apricots and a hint of orange blossom water. My personal favorite variation includes a thin layer of dark chocolate between the shortbread and honey-pistachio topping—the chocolate adds another dimension of flavor that pairs beautifully with the brown butter.

    Storage & Troubleshooting Guide

    Keeping Them Fresh

    Store your Brown Butter Honey Pistachio Bars in an airtight container at room temperature for up to 3 days or refrigerate for up to a week. Place parchment paper between layers to prevent sticking. For longer storage, wrap individual bars in plastic wrap, then aluminum foil, and freeze for up to 3 months. I’ve found that the flavor actually deepens after the first day as the honey has time to fully infuse the bars—making them ideal for make-ahead treats.

    Fixing Common Issues

    If your shortbread base crumbles when cutting, it likely needed more time to chill thoroughly before baking. Next time, refrigerate the dough for at least 30 minutes before baking. For a topping that’s too soft, an extra 5 minutes in the oven should help set it properly. If your brown butter has small dark specks, don’t worry! Those are caramelized milk solids and add wonderful flavor. However, if it smells burnt rather than nutty, it’s best to start over—the bitter taste will permeate your bars.

    Frequently Asked Questions

    Can I use salted butter for Brown Butter Honey Pistachio Bars?

    Yes, but reduce any additional salt in the recipe. The nutty flavor of brown butter works beautifully with a touch of salt, enhancing the contrast with the sweet honey.

    How do I know when my brown butter is ready?

    Watch for a golden amber color and a nutty, toasty aroma. The milk solids at the bottom should be light brown, not black.

    Can I substitute another nut for pistachios?

    Absolutely! Pecans, walnuts, or hazelnuts work wonderfully. Each brings its unique flavor profile while maintaining the delightful texture contrast.

    Are these bars gluten-free?

    Not as written, but you can substitute a 1:1 gluten-free flour blend in the shortbread base with good results.

    How do I achieve clean cuts on my Brown Butter Honey Pistachio Bars?

    Chill completely first, then use a sharp knife dipped in hot water and wiped dry between each cut for professional-looking edges.

    Final Thoughts

    These Brown Butter Honey Pistachio Bars have become my signature dessert for good reason. They strike that perfect balance between sophisticated and comforting, impressive yet approachable. The brown butter adds depth that elevates them beyond ordinary bar cookies, while the honey-pistachio combination creates a memorable flavor profile that guests always request again. Whether for holiday gatherings, potlucks, or simply as a special treat for yourself, these bars bring a moment of sweet indulgence to any occasion. Find more delicious recipes on Pinterest.