Category: Desserts

Sweet and easy dessert recipes for every craving. Simple treats, rich flavors, and quick ideas that make any moment feel special.

  • 3 Ingredient Biscoff Cookies: Easy, Irresistible & Viral Treat!

    3 Ingredient Biscoff Cookies: Easy, Irresistible & Viral Treat!

    3 Ingredient Biscoff Cookies: Easy, Irresistible & Viral Treat!

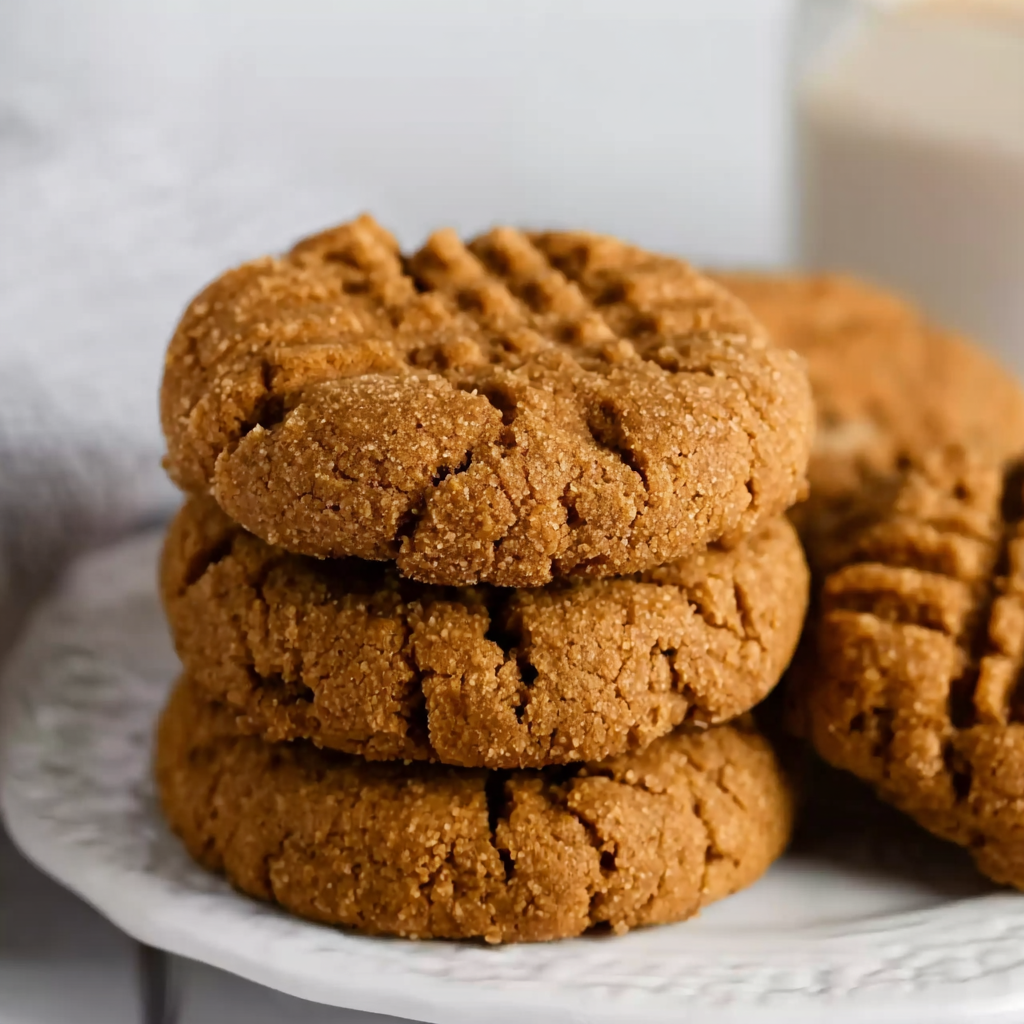
    I’ve been obsessed with creating 3 Ingredient Biscoff Cookies ever since discovering how ridiculously simple they are to make. There’s something magical about transforming that iconic spiced cookie butter into warm, fresh-from-the-oven treats with just two additional pantry staples. The rich caramelized flavor and subtle spice notes fill my kitchen with the most comforting aroma, instantly transporting me back to cozy winter afternoons at my grandmother’s house. If you’re craving something sweet but don’t want to spend hours in the kitchen, these cookies are about to become your new best friend. They’re perfect for last-minute gatherings or midnight cravings!

    Recipe

    Why You’ll Love This 3 Ingredient Biscoff Cookies

    Quick and Easy Preparation

    These cookies are a true lifesaver when you’re short on time but big on cookie cravings. I first made these during a particularly chaotic holiday season when I needed something impressive without the fuss. With just Biscoff spread, one egg, and all-purpose flour, you’ll have the dough ready in under 5 minutes. No mixer required—just a bowl and spoon! The simplicity means less cleanup and more time enjoying warm cookies. I love that there’s no need to chill the dough, making these perfect for those “I need cookies NOW” moments we all experience.

    Rich, Complex Flavor Profile

    Despite the minimal ingredients, these cookies deliver extraordinary flavor complexity. The distinctive taste of Biscoff spread—that perfect blend of caramelized sugar, cinnamon, and other warm spices—shines brilliantly in every bite. What amazes me most is how these cookies manage to capture both crisp edges and slightly chewy centers, creating the perfect textural contrast. The first time I served these at a gathering, friends refused to believe they were made with just three ingredients. They have that special bakery-quality taste that makes them seem far more sophisticated than their simple recipe suggests.

    Essential Tips & Tricks

    The key to nailing the texture lies in how you handle the dough. I’ve found that rolling the dough balls between your palms creates the perfect shape, but avoid overworking it—this keeps the centers tender. For chewier cookies, make the dough balls slightly larger and underbake by a minute. For crispier edges, flatten the balls slightly with your palm before baking. My personal preference is leaving them as balls for that perfect crisp-outside, soft-inside contrast. Watch them carefully during the last few minutes of baking—when the edges turn golden brown but the centers still look slightly underdone, that’s your sweet spot.

    Ingredient Quality Matters

    Since this recipe uses so few ingredients, quality makes a difference. I learned this the hard way after using a generic cookie butter once—the flavor just wasn’t the same. Authentic Lotus Biscoff spread gives these cookies their signature caramelized flavor that’s impossible to replicate. For the flour, all-purpose works perfectly, but I’ve found that using a kitchen scale to measure precisely (125g per cup) yields the most consistent results. The egg should be at room temperature to incorporate more easily. If your dough seems too sticky, don’t panic! Simply add an extra tablespoon of flour until it reaches a rollable consistency.

    Serving Ideas & Creative Variations

    Perfect Pairings

    These cookies shine when paired with the right complementary flavors. My absolute favorite way to enjoy them is still warm from the oven alongside a cup of cinnamon tea or coffee with a splash of cream. The warm spices in the cookies create a beautiful harmony with the beverages. For an elevated dessert experience, sandwich a small scoop of vanilla ice cream between two cookies while they’re still slightly warm—the contrast between warm cookie and cold ice cream is divine. They also make excellent companions to creamy desserts like puddings or custards, where their spiced notes cut through the richness.

    Easy Flavor Twists

    While perfect in their simplest form, these cookies welcome creative adaptations. My recent obsession is adding a quarter cup of mini chocolate chips to the dough—the combination of spiced cookie butter and chocolate is unexpectedly fantastic. White chocolate chips work beautifully too. For texture contrast, try folding in finely chopped nuts like pecans or hazelnuts. During holiday seasons, I love rolling the dough balls in cinnamon sugar before baking for a snickerdoodle-inspired variation. For a more sophisticated twist, press a small thumbprint into each cookie before baking and fill with a tiny dollop of raspberry jam.

    Storage & Troubleshooting Guide

    Keeping Cookies Fresh

    To maintain that perfect texture, store your cookies in an airtight container at room temperature for up to 5 days. I separate layers with parchment paper to prevent sticking. If you want to extend their life, these cookies freeze beautifully! Simply place cooled cookies in a freezer-safe container with parchment between layers and freeze for up to 3 months. When a craving hits, you can enjoy them straight from the freezer (they’re surprisingly delicious cold) or let them come to room temperature for about 20 minutes. For that fresh-baked experience, warm them in a 300°F oven for 3-4 minutes—they’ll taste like they just came out of the oven!

    Fixing Common Issues

    Even with such a simple recipe, occasional troubleshooting might be needed. If your cookies spread too much during baking, your dough was likely too warm or your oven temperature may be off. Try chilling the dough for 15 minutes before baking. For cookies that don’t spread enough, gently press down on the dough balls before baking. If the cookies seem too dry, you may have added too much flour—next time, measure more carefully or add a teaspoon of milk to the dough. For cookies that are too soft, simply bake them a minute or two longer until the edges firm up.

    Frequently Asked Questions

    Yes! While authentic Biscoff spread gives the classic flavor, you can experiment with any cookie butter. Speculoos or homemade versions work well, though the flavor profile will vary slightly.

    Are these cookies gluten-free?

    No, traditional Biscoff spread contains wheat, and the recipe calls for all-purpose flour. For a gluten-free version, you’d need gluten-free cookie butter and a 1:1 gluten-free flour substitute.

    Can I double the recipe?

    Absolutely! This recipe doubles beautifully with no adjustments needed beyond doubling each ingredient. Perfect for cookie exchanges or larger gatherings.

    How can I make these cookies vegan?

    Replace the egg with a flax egg (1 tablespoon ground flaxseed mixed with 3 tablespoons water, left to gel for 15 minutes). The texture will be slightly different but still delicious.

    Why did my cookies turn out dry?

    Too much flour is usually the culprit. Measure carefully or try reducing the flour by 1-2 tablespoons next time. Room temperature ingredients also help create a moister cookie.

    Final Thoughts

    These 3 Ingredient Biscoff Cookies have become my go-to recipe when I need something impressive with minimal effort. There’s something almost magical about transforming that distinctive spiced spread into warm, fragrant cookies that taste like they required hours of work. I’ve shared these cookies with neighbors, packed them for road trips, and served them at holiday gatherings—they never fail to impress. I hope you’ll discover the same joy I have in creating something so delicious with so little fuss. For more simple yet spectacular recipes, check out my other creations on Pinterest.
  • No-Bake Pumpkin Cheesecake Balls That Will Wow Your Taste Buds!

    No-Bake Pumpkin Cheesecake Balls That Will Wow Your Taste Buds!

    No-Bake Pumpkin Cheesecake Balls That Will Wow Your Taste Buds!

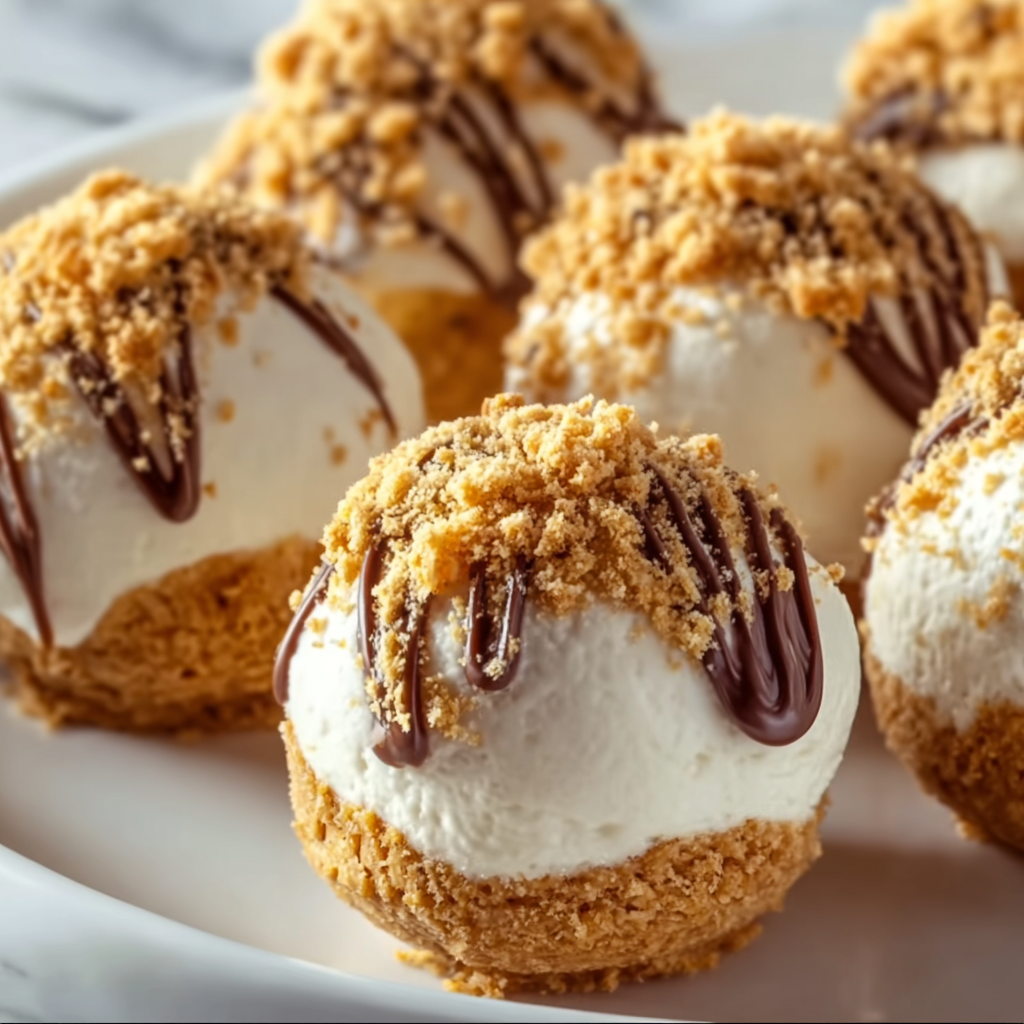
    No-Bake Pumpkin Cheesecake Balls are my absolute fall obsession! These bite-sized treats combine the velvety smoothness of cream cheese with warm pumpkin spice in a portable, poppable form that’s impossible to resist. I first made these for a chilly October game night, and they disappeared faster than I could say “autumn”! The best part? They require zero oven time but deliver maximum fall flavor. Perfect for holiday gatherings, afternoon snacks, or anytime you need a quick dessert fix that tastes like pumpkin pie and cheesecake had a delicious baby.

    Recipe

    Why You’ll Love This No-Bake Pumpkin Cheesecake Balls

    Perfect Balance of Flavors

    These little bites of heaven strike the perfect balance between tangy cream cheese and sweet pumpkin spice. The graham cracker coating adds a delightful textural contrast that makes each bite more satisfying than the last. I love how the warming spices—cinnamon, nutmeg, and cloves—bloom on your tongue with each bite. There’s something magical about that first taste when the creamy center meets the crunchy exterior. My neighbor actually gasped when she tried one, declaring them “better than pumpkin pie” (which I consider the highest compliment possible in autumn).

    Quick and Stress-Free Preparation

    The no-bake aspect makes these treats absolutely stress-free to prepare. On busy days when I’m juggling work deadlines and family obligations, I can still whip these up without breaking a sweat. Just mix, roll, chill, and you’re done! No watching the oven, no temperature worries, no baking fails. I made these with my niece last weekend while we caught up on life—the simplicity allowed us to chat and laugh without constantly checking timers. Perfect for beginners or anyone who wants impressive results without complicated techniques.

    Essential Tips & Tricks

    Ingredient Selection Matters

    Using full-fat cream cheese is non-negotiable for that perfect creamy texture—trust me, I tried the light version once and was disappointed. Let it soften completely at room temperature for easier mixing and a smoother result. For the pumpkin, always use pure pumpkin puree (not pumpkin pie filling) to control the sweetness and spice levels yourself. The quality of your graham crackers also makes a difference; I prefer honey graham crackers for their subtle sweetness that complements the pumpkin flavor perfectly.

    Rolling and Coating Techniques

    The rolling stage can get messy, but I’ve discovered a game-changing trick: chill the mixture for 30 minutes before rolling to firm it up. Use a small cookie scoop for uniform balls, and keep your hands slightly damp (not wet) to prevent sticking. When coating, place graham cracker crumbs in a shallow bowl and gently roll each ball until completely covered. For an extra-special touch, try adding a tiny sprinkle of cinnamon to your graham cracker coating—it creates beautiful flecks and enhances the fall flavor profile.

    Serving Ideas & Creative Variations

    Presentation Possibilities

    Transform these humble treats into showstoppers with thoughtful presentation. I love arranging them on a wooden board with fresh cinnamon sticks, small pumpkins, and maple leaves for a stunning fall dessert display. For parties, try placing each ball in a mini cupcake liner or skewering several on a decorative toothpick. They also look gorgeous stacked in a clear glass jar with layers of additional graham cracker crumbs between them. Last Thanksgiving, I served them on individual spoons with a tiny drizzle of caramel sauce, and my family still talks about the elegant presentation.

    Flavor Twists and Add-Ins

    The basic recipe is delicious, but customizing these treats makes them even more special. Try rolling them in crushed gingersnaps instead of graham crackers for a spicier kick. White chocolate chips folded into the mixture add sweet pockets of surprise. For a grown-up version, add 1-2 teaspoons of bourbon or rum to the mixture—the alcohol bakes off, leaving just the flavor. My personal favorite variation includes finely chopped crystallized ginger and a touch of orange zest, which brightens the whole flavor profile and adds a sophisticated twist.

    Storage & Troubleshooting Guide

    Proper Storage Methods

    These pumpkin cheesecake balls stay fresh when properly stored in the refrigerator for up to one week. Place them in an airtight container with parchment paper between layers to prevent sticking. They also freeze beautifully for up to three months—just thaw in the refrigerator overnight before serving. I often make a double batch and freeze half for unexpected guests or late-night cravings. The texture remains almost identical after freezing, though the graham cracker coating might soften slightly. For the best experience, let them sit at room temperature for 10 minutes before serving.

    Fixing Common Issues

    If your mixture is too soft to roll, it likely needs more time in the refrigerator—chill for an additional 30 minutes. Conversely, if it’s too firm, let it warm slightly at room temperature. For balls that won’t hold their shape, try adding more crushed graham crackers to the mixture, 1 tablespoon at a time. If the coating won’t stick, lightly dampen the exterior of each ball with a drop of water before rolling in crumbs. And if your balls taste too sweet, balance with a tiny pinch of salt or a squeeze of fresh lemon juice to brighten the flavors.

    Frequently Asked Questions

    Can I make No-Bake Pumpkin Cheesecake Balls ahead of time?

    Absolutely! These treats actually improve after 24 hours in the refrigerator as the flavors meld together. Make them up to 3 days in advance for parties or gatherings.

    What can I substitute for graham crackers?

    Gingersnaps, vanilla wafers, or digestive biscuits all work beautifully. For gluten-free options, try gluten-free graham crackers or crushed gluten-free cookies.

    Why is my mixture too sticky to roll?

    Your cream cheese might be too warm or your pumpkin puree too wet. Chill the mixture longer and consider adding more powdered sugar or graham cracker crumbs to absorb excess moisture.

    Can I use pumpkin pie filling instead of pumpkin puree?

    I don’t recommend it. Pumpkin pie filling contains added sugars and spices that will throw off the balance of flavors in your No-Bake Pumpkin Cheesecake Balls.

    How do I know when they’re ready to serve?

    After chilling for at least 2 hours, they should feel firm to the touch but yield slightly when bitten into—similar to a truffle consistency.

    Final Thoughts

    These No-Bake Pumpkin Cheesecake Balls have become my signature fall treat for good reason—they’re incredibly delicious yet wonderfully simple. There’s something magical about creating something so impressive with so little effort. The way the spices warm your senses and the creamy texture melts in your mouth creates an experience that’s greater than the sum of its parts. Whether you’re a pumpkin enthusiast or just looking for an easy seasonal dessert, these little bites of autumn joy deserve a spot in your recipe collection. Find more seasonal inspiration on Pinterest.

  • Southern-Style Honey Butter Cornbread Poppers That Melt Hearts!

    Southern-Style Honey Butter Cornbread Poppers That Melt Hearts!

    Southern-Style Honey Butter Cornbread Poppers That Melt Hearts!

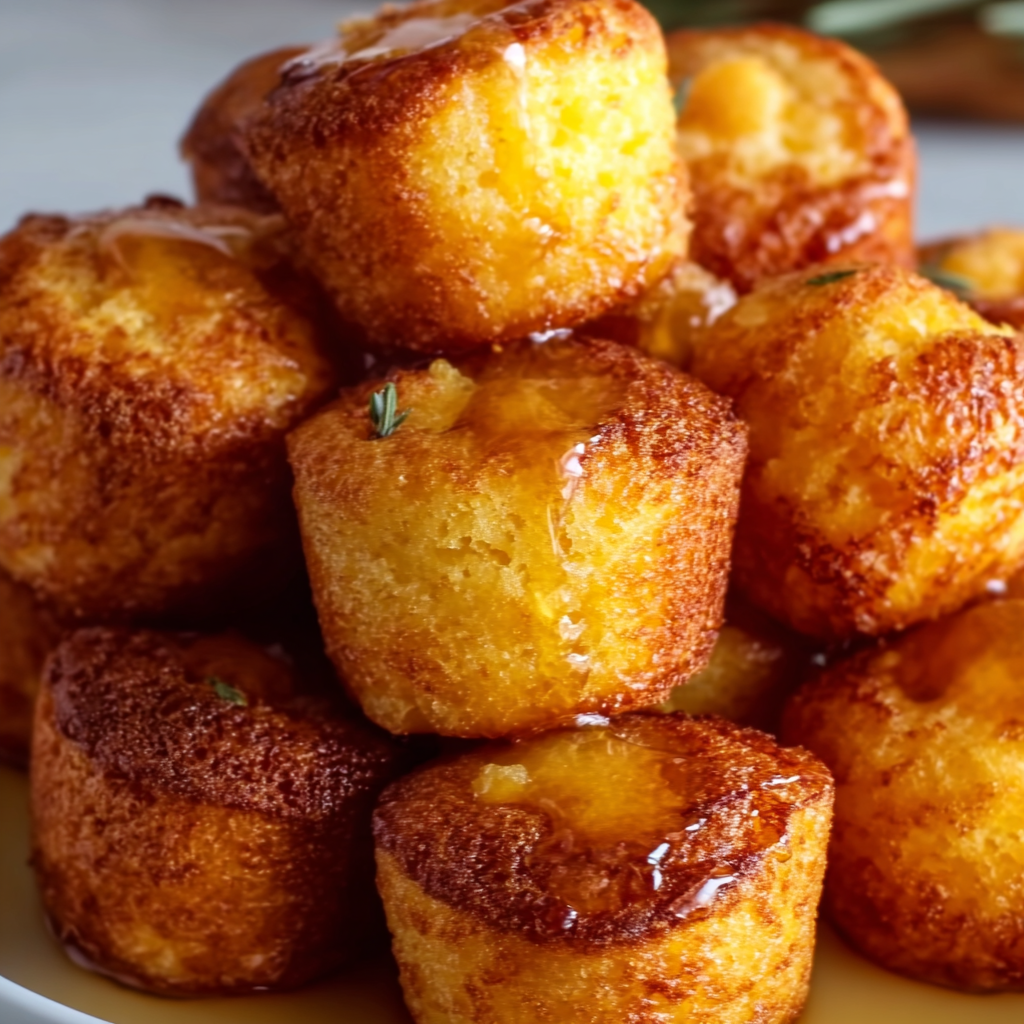
    Southern-Style Honey Butter Cornbread Poppers have completely transformed my approach to serving cornbread at family gatherings. The first time I made these golden, bite-sized morsels, my kitchen filled with that unmistakable sweet corn aroma that instantly transported me back to my grandmother’s Mississippi kitchen. There’s something magical about the way the crispy exterior gives way to a tender, honey-kissed center. These poppers strike the perfect balance between savory and sweet—making them irresistible for everything from holiday feasts to casual weeknight meals at Recipes Darleen.

    Recipe

    Why You’ll Love These Southern-Style Honey Butter Cornbread Poppers

    Perfect Texture Combination

    The secret to these poppers lies in their contrasting textures—crispy golden exterior with a pillowy interior that practically melts in your mouth. I’ll never forget serving these at last summer’s barbecue when my brother-in-law (who claims to hate cornbread) couldn’t stop reaching for more. The mini size creates the ideal ratio of crunchy edges to tender centers. Each bite delivers that satisfying crackle followed by soft, buttery goodness. Plus, their small size means they bake faster than traditional cornbread while developing those coveted caramelized edges that everyone fights over.

    Make-Ahead Convenience

    These Southern-Style Honey Butter Cornbread Poppers are a busy host’s dream. The batter comes together in just one bowl, and you can prepare it up to 24 hours ahead. I’ve learned this the hard way after scrambling to finish cooking while guests arrived! Simply refrigerate the batter overnight, then let it sit at room temperature for 15 minutes before baking. The poppers actually develop a deeper corn flavor with this rest time. For ultimate convenience, you can even freeze the baked poppers for up to 3 months and reheat them in minutes when needed.

    Essential Tips & Tricks

    Mastering the Batter

    The cornmeal quality makes all the difference in these poppers. I recommend stone-ground cornmeal for its authentic texture and flavor depth. One summer afternoon, I accidentally used regular cornmeal instead of stone-ground, and while still delicious, they lacked that distinctive Southern character. For the honey component, use a local variety if possible—wildflower honey adds beautiful floral notes. The batter should be thick but pourable, similar to pancake batter. If it’s too thick, add buttermilk one tablespoon at a time until you reach the right consistency for perfect popper texture.

    Temperature Matters

    Always start with room temperature ingredients when making Southern-Style Honey Butter Cornbread Poppers. Cold eggs or buttermilk can cause the melted butter to solidify, resulting in an uneven batter. I learned this lesson during a holiday rush when I tried to cut corners! Equally important is preheating your mini muffin tin until it’s sizzling hot before adding the batter. This creates that signature crispy exterior that defines these poppers. A cast iron mini muffin pan works best, but any heavy-duty muffin tin will do. Just remember to grease it generously with butter, not cooking spray.

    Serving Ideas & Creative Variations

    Perfect Pairings

    These poppers shine brightest alongside hearty Southern classics like chili, barbecue ribs, or slow-cooked short rib ragu. I still remember the looks of delight when I served these with my grandmother’s Brunswick stew recipe during a chilly fall gathering. For a show-stopping presentation, arrange them in a spiral on a wooden board with small bowls of flavored butters—cinnamon honey butter and jalapeño butter are crowd favorites. They’re also perfect for brunch alongside scrambled eggs and bacon, offering that sweet-savory contrast that makes brunches memorable.

    Flavor Twists

    The versatility of Southern-Style Honey Butter Cornbread Poppers makes them perfect for seasonal adaptations. In fall, fold in finely diced apples and cinnamon. Summer calls for fresh corn kernels and chopped jalapeños for a sweet-heat combo. My personal favorite variation came from a happy accident when I had leftover bacon from breakfast—crumbled bacon and sharp cheddar transformed these into an indulgent savory treat. For a dessert-like version, drizzle the finished poppers with additional honey and sprinkle with cinnamon sugar while still warm.

    Storage & Troubleshooting Guide

    Keeping Them Fresh

    To maintain that perfect crisp-tender texture, store completely cooled Southern-Style Honey Butter Cornbread Poppers in an airtight container at room temperature for up to 2 days. For longer storage, refrigerate for up to 5 days, though they’ll lose some of their crispness. The microwave works for quick reheating (15 seconds), but for best results, wrap them in foil and warm in a 300°F oven for 5-7 minutes. This restores their original texture beautifully. I often make double batches specifically to have leftovers—they’re that good with morning coffee!

    Fixing Common Issues

    If your poppers turn out too dense, you’ve likely overmixed the batter. I made this mistake at my first holiday hosting, frantically beating the mixture until smooth. Instead, stir just until the ingredients are combined—a few small lumps are perfectly fine! If they’re sticking to the pan despite greasing, try dusting the greased cavities with cornmeal before adding batter. For poppers that aren’t browning properly, your oven temperature might be too low. Consider using an oven thermometer to verify accuracy, as many home ovens run 25-50 degrees off their indicated temperature.

    Frequently Asked Questions

    Can I make Southern-Style Honey Butter Cornbread Poppers gluten-free?

    Absolutely! Substitute the all-purpose flour with a 1:1 gluten-free baking blend. Add ¼ teaspoon xanthan gum if your blend doesn’t include it for the best texture.

    How do I know when the poppers are done baking?

    They should be golden brown around the edges with a slight spring when touched. A toothpick inserted in the center should come out with a few moist crumbs, but no wet batter.

    Can I use regular muffin tins instead of mini ones?

    Yes, but increase baking time to 15-18 minutes and reduce the oven temperature to 375°F for regular-sized muffins.

    What’s the best way to incorporate corn kernels into the batter?

    Fold in ½ cup of fresh or thawed frozen corn kernels after mixing the batter. Pat them dry first to prevent excess moisture.

    How can I make these Southern-Style Honey Butter Cornbread Poppers more savory?

    Reduce honey to 2 tablespoons and add ½ cup shredded sharp cheddar and 2 tablespoons chopped chives or green onions.

    Final Thoughts

    These Southern-Style Honey Butter Cornbread Poppers have become my signature contribution to family gatherings and potlucks. There’s something special about watching people’s faces light up with that first bite—the moment the sweetness of honey meets the earthy cornmeal. I treasure how food connects us to memories and creates new ones. Whether you’re serving them alongside a hearty stew or enjoying them with a simple spread of butter, these poppers bring comfort and joy to any table. Find more delicious recipes on Pinterest!

  • Lemon Curd Cookies Recipe: Irresistibly Tangy & Soft Delight!

    Lemon Curd Cookies Recipe: Irresistibly Tangy & Soft Delight!

    Lemon Curd Cookies Recipe: Irresistibly Tangy & Soft Delight!

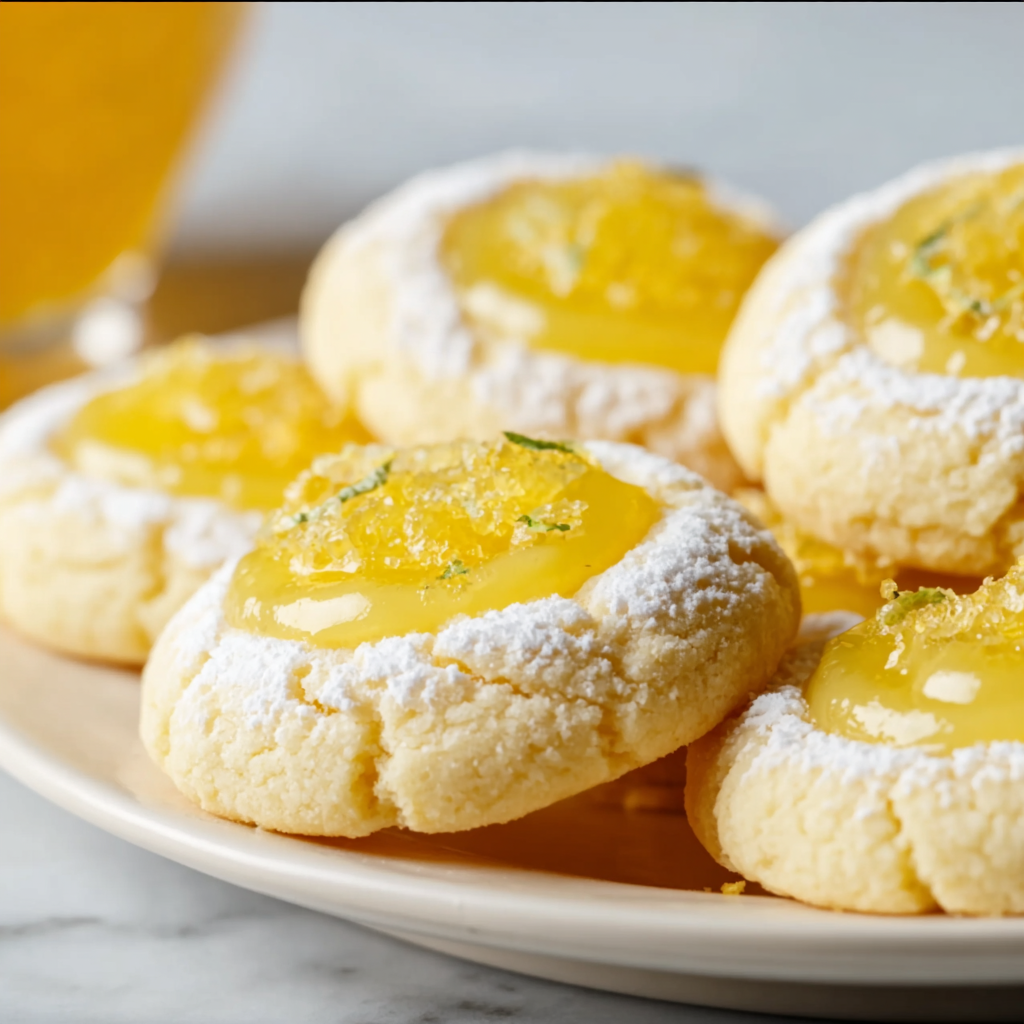
    This Lemon Curd Cookies Recipe transforms ordinary butter cookies into bright little bites of sunshine. The perfect balance of sweet cookie base and tangy lemon filling creates an irresistible treat that disappears from my cookie jar faster than I can say “citrus.” I discovered this recipe during a rainy spring afternoon when I needed something to brighten the day, and now it’s become my go-to for everything from afternoon tea to holiday cookie exchanges. The buttery shortbread-like base cradles the silky lemon curd in a way that makes each bite pure bliss.

    Recipe

    Why You’ll Love This Lemon Curd Cookies Recipe

    Perfect Balance of Sweet and Tangy

    There’s something magical about lemon desserts that keeps you coming back for “just one more.” These cookies nail that perfect balance where the buttery, melt-in-your-mouth cookie base meets the bright, zingy lemon curd center. I love watching guests take their first bite—their eyes always widen with that moment of surprise when the tanginess hits. The contrast between the tender cookie and the smooth, vibrant filling creates a sensory experience that’s utterly satisfying without being overwhelmingly sweet.

    Easy Make-Ahead Option

    These lemon curd cookies are a time-management dream for busy bakers. The dough can be prepared up to three days ahead and chilled, making them perfect for planning holiday baking or weekend treats. I often make a double batch of dough on Sunday, then bake half for immediate enjoyment and save the rest for midweek when I need a pick-me-up. The lemon curd can also be made in advance or (my little secret) purchased pre-made when time is tight. This flexibility makes them ideal for last-minute guests or cookie exchanges.

    Essential Tips & Tricks

    The key to these cookies is achieving that melt-in-your-mouth texture that perfectly complements the smooth lemon curd. Chill the dough for at least 30 minutes before shaping—this prevents spreading and maintains that tender crumb we’re after. When making the indentation for the lemon curd, use the back of a measuring teaspoon or your thumb, pressing gently but firmly. If the edges crack slightly, simply press them back together with your fingertips. For the ultimate texture, don’t overbake! The cookies should remain pale with just a hint of golden color around the edges.

    Mastering the Lemon Curd

    Whether you’re making homemade lemon curd or using store-bought, there are a few crucial handling tips to know. The curd should be thick enough to hold its shape but still spoonable. If your curd seems runny, refrigerate it for 30 minutes before filling the cookies. When filling, use a small spoon or piping bag to add just enough curd to fill the indentation without overflowing. Add the curd after baking, not before—this prevents the curd from bubbling, darkening, or drying out during the baking process.

    Serving Ideas & Creative Variations

    Elegant Presentation Options

    Transform these humble cookies into showstopping desserts with a few simple touches. For afternoon tea, arrange them on a tiered stand with fresh berries scattered between. When serving for special occasions, dust with powdered sugar just before presenting, or add a tiny sprig of fresh mint to each cookie. I love creating a dessert board with these cookies as the star, surrounded by dark chocolate squares, fresh berries, and mini caramel pecan cheesecakes for an impressive spread that looks like it took hours but comes together in minutes.

    Flavor Twists Worth Trying

    While classic lemon curd is divine, don’t be afraid to experiment with variations. Lime curd offers a slightly different citrus note that pairs beautifully with the buttery cookie base. For a tropical twist, fold a tablespoon of finely chopped mango into your lemon curd before filling. My personal favorite variation is adding a half teaspoon of lavender to the cookie dough—the floral notes complement the bright lemon perfectly. For holiday baking, try adding a touch of cranberry to the lemon curd for a festive red-flecked filling that’s as beautiful as it is delicious.

    Storage & Troubleshooting Guide

    Keeping Cookies Fresh

    These lemon curd cookies will stay perfectly fresh for up to 3 days when stored properly. Place them in a single layer in an airtight container with parchment paper between layers to prevent sticking. Keep them in the refrigerator due to the curd filling, but bring to room temperature for about 15 minutes before serving to allow the flavors to fully bloom. If you need longer storage, the unfilled baked cookies freeze beautifully for up to 3 months—just thaw and add fresh lemon curd before serving.

    Fixing Common Issues

    Even experienced bakers encounter challenges! If your cookies spread too much during baking, your butter was likely too warm or the dough wasn’t chilled enough. For the next batch, refrigerate the shaped cookies for 15 minutes before baking. If your lemon curd weeps or becomes too liquid after storing, gently blot with a paper towel and add a fresh dollop of curd before serving. For cookies that turned out too crisp rather than tender, reduce baking time by 1-2 minutes for your next batch—remember, they should be set but still pale.

    Frequently Asked Questions

    Can I make lemon curd cookies ahead of time for a party?

    Yes! Bake the cookies up to 3 days ahead and store unfilled in an airtight container. Add the lemon curd filling up to 24 hours before serving, then refrigerate until needed.

    How do I prevent my lemon curd cookies from becoming soggy?

    Fill cookies with curd no more than 24 hours before serving and store in the refrigerator. The thicker your curd, the less likely it will soak into the cookie.

    Can I freeze these lemon curd cookies?

    Freeze the baked unfilled cookies for up to 3 months. Thaw at room temperature and add fresh lemon curd before serving for best results.

    What’s the secret to a perfect lemon curd?

    Use fresh lemon juice and zest, cook over low heat while constantly stirring, and strain through a fine mesh sieve for silky-smooth, bright lemon curd.

    Can I use other citrus fruits in this lemon curd cookies recipe?

    Absolutely! Try lime, orange, or grapefruit curd for delicious variations. Each citrus brings its own unique flavor profile to these versatile cookies.

    Final Thoughts

    This lemon curd cookies recipe has become my signature contribution to gatherings, earning rave reviews and recipe requests every time. There’s something about the bright, sunny flavor that lifts spirits and brings smiles—exactly what a good cookie should do. The beauty of these cookies lies in their versatility and that perfect sweet-tart balance that makes them irresistible. Whether you’re an experienced baker or just starting out, these little bites of sunshine deserve a permanent spot in your recipe collection. Don’t forget to share your creations on Pinterest!

  • Crispy Egg Salad Recipe That Will Blow Your Mind!

    Crispy Egg Salad Recipe That Will Blow Your Mind!

    Crispy Egg Salad Recipe That Will Blow Your Mind!

    Crispy Egg Salad has completely transformed my lunch game, friends! There’s something magical about the contrast between crunchy textures and creamy dressing that makes this dish utterly irresistible. I discovered this recipe during a chaotic work-from-home day when my fridge was nearly empty – just eggs, some sad-looking celery, and condiments. What emerged was this delightful creation that’s now my go-to for quick lunches, potlucks, and even fancy brunch spreads. Let me show you how to make this egg-cellent dish that’ll have everyone asking for seconds!

    Recipe

    Why You’ll Love This Crispy Egg Salad

    Perfect Balance of Textures

    The magic of this Crispy Egg Salad lies in its contrasting textures. Perfectly hard-boiled eggs provide a velvety foundation, while crispy bacon bits and water chestnuts add unexpected crunch in every bite. I love the way the silky egg yolks blend with the mayo-based dressing, creating pockets of creaminess that complement the crisp elements. The first time I served this at a garden party, my friend Jen closed her eyes and sighed, “I never knew egg salad could be this exciting!” That’s exactly what makes this recipe special – it transforms the ordinary into something extraordinary.

    Quick and Versatile Meal Solution

    This Crispy Egg Salad comes together in just 20 minutes, making it perfect for those hectic weeknights when cooking feels impossible. The ingredients are pantry staples you likely already have on hand – eggs, mayo, celery, and your choice of crunchy add-ins. I’ve made this on busy Mondays and for impromptu weekend gatherings with equal success. It’s incredibly adaptable too – serve it on toast for breakfast, in lettuce cups for lunch, or as a protein-packed side with dinner. When time is tight but you still want something homemade and satisfying, this recipe consistently delivers.

    Essential Tips & Tricks

    Perfect Hard-Boiled Eggs Every Time

    The foundation of amazing Crispy Egg Salad is perfectly cooked eggs with firm whites and creamy yolks. My foolproof method: place eggs in cold water, bring to a boil, then cover and remove from heat for exactly 9 minutes. Transfer immediately to an ice bath to stop cooking and prevent that unappetizing gray ring around the yolk. For easier peeling, gently tap eggs all over and roll them on the counter before removing shells under a thin stream of cold water. This technique has saved me countless frustrated minutes picking tiny shell fragments from my eggs and ensures the perfect texture for your salad.

    Achieving the Perfect Crispy Elements

    The “crispy” in Crispy Egg Salad comes from strategic ingredient choices and proper preparation. For bacon, cook until extra crispy, then chop into small pieces that distribute evenly throughout the salad. Toast nuts like walnuts or almonds at 350°F for 8-10 minutes until fragrant before chopping. For vegetables, ensure they’re fresh and crunchy – limp celery ruins the experience! I like to soak celery in ice water for 30 minutes before chopping to revive its crispness. For an extra texture boost, try adding crispy rice elements or even crushed potato chips just before serving.

    Serving Ideas & Creative Variations

    Elegant Presentation Options

    Transform this humble Crispy Egg Salad into a showstopping dish with thoughtful presentation. For a beautiful brunch display, hollow out small dinner rolls and fill with the salad, garnishing with microgreens and paprika. Create an impressive appetizer by piping the mixture onto cucumber rounds using a star tip. For a stunning centerpiece, mound the salad into a bowl lined with butter lettuce leaves, creating a fresh, edible vessel. I served mine this way at my sister’s baby shower, arranging edible flowers around the edge, and guests were snapping photos before diving in! These simple touches elevate the everyday into something special.

    Flavor Variations to Try

    The basic Crispy Egg Salad recipe is wonderfully adaptable to different flavor profiles. For a Mediterranean twist, mix in chopped olives, feta cheese, and a squeeze of lemon juice. Craving something spicy? Add diced jalapeños, a dash of hot sauce, and swap regular mayo for a chipotle version. For an Asian-inspired variation, include a teaspoon of sesame oil, soy sauce, and top with crispy wonton strips. My personal favorite is adding curry powder, golden raisins, and toasted almonds for a sweet-savory combination that’s absolutely addictive. Don’t be afraid to experiment with herbs and spices to make this recipe uniquely yours.

    Storage & Troubleshooting Guide

    Proper Storage for Maximum Freshness

    To maintain the distinctive textures of your Crispy Egg Salad, proper storage is crucial. Store the base egg mixture in an airtight container in the refrigerator for up to 3 days. However, I recommend keeping crispy elements separate until serving time. Place bacon bits, toasted nuts, or croutons in small containers or zip-top bags alongside your egg mixture. This prevents them from absorbing moisture and becoming soggy. If you’re packing this for lunch, assemble it in the morning and keep it chilled with an ice pack. For best flavor, remove from the refrigerator 15 minutes before serving to take the chill off.

    Fixing Common Issues

    Even experienced cooks encounter challenges with egg salad. If your mixture is too dry and crumbly, add small amounts of mayo or Greek yogurt until you reach your desired consistency. Too wet? Mix in extra chopped vegetables or a hard-boiled egg to absorb excess moisture. If your crispy elements have softened, quickly refresh them – reheat bacon in a skillet for 30 seconds or toast nuts in a dry pan. Dealing with bland flavor? Add a pinch of salt, a squeeze of lemon juice, or a dash of hot sauce to brighten it up. Remember that egg salad flavors develop over time, so it may taste better after sitting for an hour.

    Frequently Asked Questions

    How long does Crispy Egg Salad stay fresh in the refrigerator?

    The egg base stays fresh for 3 days when properly refrigerated. For best results, store crispy elements separately and combine just before serving to maintain the contrasting textures.

    Can I make this recipe ahead for a party?

    Absolutely! Prepare the egg mixture up to 24 hours ahead, but add crispy ingredients like bacon, nuts, or croutons just before serving to preserve their crunch.

    What’s the best bread for Crispy Egg Salad sandwiches?

    I prefer sturdy breads like sourdough or ciabatta that can support the hearty texture. Toast the bread lightly for extra stability and a nice contrast to the creamy filling.

    Is there a mayo-free version of this recipe?

    Yes! Substitute Greek yogurt mixed with a teaspoon of Dijon mustard, or use mashed avocado for a completely different but equally delicious creamy base.

    How can I add more protein to my Crispy Egg Salad?

    Boost protein by incorporating diced chicken, crumbled turkey bacon, or chickpeas. For a seafood twist, add small shrimp or flaked tuna for a satisfying meal.

    Final Thoughts

    This Crispy Egg Salad has become my secret weapon for impressing guests without spending hours in the kitchen. The combination of creamy eggs with unexpected crunchy elements creates a texture experience that elevates this humble dish into something truly special. I love seeing the surprised expressions when people take their first bite, not expecting the delightful contrast of textures and flavors. Whether you’re making a quick lunch or catering a special event, this versatile recipe adapts to any occasion. Find more inspired recipes on Pinterest and start creating your own crispy, creamy masterpieces!

  • Mini Caramel Pecan Crème Brulee Cheesecakes – Irresistibly Delicious!

    Mini Caramel Pecan Crème Brulee Cheesecakes – Irresistibly Delicious!

    Mini Caramel Pecan Crème Brulee Cheesecakes – Irresistibly Delicious!

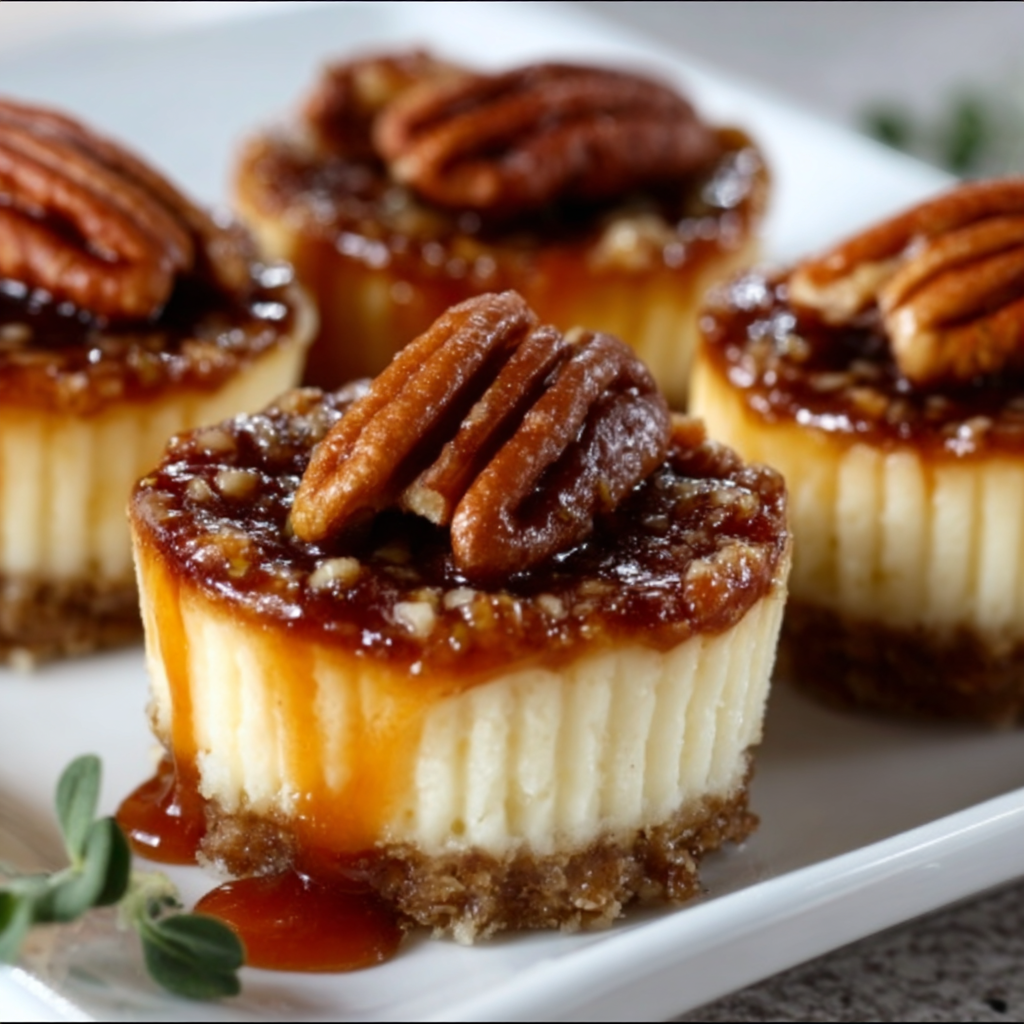
    Mini Caramel Pecan Creme Brulee Cheesecakes combine four incredible desserts into one showstopping treat that’s surprisingly simple to make. The first time I served these at a dinner party, my guests literally gasped when I brought them to the table. There’s something magical about the combination of creamy cheesecake, crunchy caramelized sugar topping, buttery pecans, and rich caramel that creates the perfect balance of textures and flavors. These mini desserts look impressive enough for special occasions but are manageable enough for weekend baking projects. Let me show you how to create these little bites of heaven.

    Recipe

    Why You’ll Love This Mini Caramel Pecan Creme Brulee Cheesecakes Recipe

    Perfect Make-Ahead Dessert

    These mini cheesecakes are a time-management dream. I often make them the day before a gathering, which allows the flavors to deepen overnight. The cheesecake base sets up beautifully in the refrigerator, creating that perfect dense-yet-creamy texture we all crave. You’ll appreciate how the caramel notes intensify and meld with the vanilla bean-flecked filling. Plus, you can add the brûlée topping just before serving, giving your guests that dramatic cracking moment that makes creme brulee so special.

    Impressive Without the Stress

    Despite their elegant appearance, these mini desserts are surprisingly forgiving to make. The individual portions eliminate many common cheesecake problems—no water bath needed, no worries about the center setting properly, and no stress about clean slices. The miniature format means faster baking and cooling times too. I’ve found that even baking novices can nail this recipe on the first try. When guests ask how you made something so beautiful, you can smile knowingly while keeping the simplicity your little secret.

    Essential Tips & Tricks

    Mastering the Perfect Texture

    The key to these cheesecakes is achieving that silky-smooth texture without cracks. Always start with room temperature cream cheese and eggs—I set mine out at least an hour before baking. Beat the cream cheese until completely lump-free before adding other ingredients, but avoid over-mixing once the eggs are incorporated. This prevents incorporating too much air, which can cause cracks. A gentle tap of your muffin tin against the counter before baking helps release any trapped air bubbles for that perfect, velvety finish.

    The Brulee Technique

    Creating that perfect caramelized sugar top might seem intimidating, but it’s actually quite simple. The secret lies in timing—sprinkle a thin, even layer of granulated sugar over completely chilled cheesecakes. Use a kitchen torch with a steady hand, moving constantly in circular motions about 2-3 inches from the surface. Watch for that moment when the sugar bubbles and turns amber—that’s your cue to move to the next spot. If you don’t have a torch, you can broil them briefly instead, but keep a vigilant eye to prevent burning!

    Serving Ideas & Creative Variations

    Seasonal Adaptations

    These mini desserts can be easily adapted for any season with simple swaps. In summer, I love adding fresh berries and mint for a refreshing contrast to the rich cheesecake. Fall calls for warming spices like cinnamon and nutmeg in the crust, while winter holidays shine with a splash of bourbon in the caramel sauce. Spring celebrations benefit from a light citrus zest folded into the filling. The versatility of this base recipe means you’ll never tire of making these little treasures, and they’ll always feel special and seasonally appropriate.

    Presentation Variations

    Elevate your Mini Caramel Pecan Creme Brulee Cheesecakes with thoughtful presentation. For casual gatherings, serve them in their cupcake liners on a rustic wooden board. For elegant affairs, carefully remove the liners and place each cheesecake on a small dessert plate with a drizzle of extra caramel sauce creating an artistic pattern. Add a tiny gold fork, a sprinkle of edible gold dust, or a personalized chocolate decoration for special occasions. The miniature format lends itself beautifully to dessert tables where guests can sample multiple treats.

    Storage & Troubleshooting Guide

    Proper Storage Methods

    These cheesecakes maintain their quality remarkably well when stored correctly. Without the brûléed topping, they’ll keep in an airtight container in the refrigerator for up to 4 days. For longer storage, freeze them individually on a baking sheet until solid, then transfer to a freezer container with parchment between layers. They’ll keep for up to 2 months frozen. Always thaw overnight in the refrigerator, never at room temperature, to maintain that perfect creamy texture. Add the caramelized sugar topping only after they’re completely thawed.

    Common Issues and Fixes

    If your cheesecakes develop small cracks, don’t worry—the caramel and pecan topping will hide them beautifully. For sunken centers, a strategic placement of whipped cream or extra caramel sauce works wonders. If your caramelized sugar layer isn’t hardening properly, your cheesecakes might be too warm—chill them thoroughly before attempting to brûlée. For a sugar top that burns rather than caramelizes, you’re likely holding the torch too close or in one spot too long. Practice makes perfect, and remember that even imperfect cheesecakes will taste divine!

    Frequently Asked Questions

    Can I make Mini Caramel Pecan Creme Brulee Cheesecakes without a kitchen torch?

    Yes! You can use your oven’s broiler instead. Place the sugar-topped cheesecakes on the highest rack, 3-4 inches from the heat source, and broil for 1-2 minutes while watching constantly to prevent burning.

    How far in advance can I make these cheesecakes?

    The cheesecake bases can be made up to 3 days ahead and stored in the refrigerator. Add the sugar topping and brûlée it just before serving for the best texture contrast.

    Can I substitute the pecans with another nut?

    Absolutely! Walnuts, macadamia nuts, or even pistachios work beautifully. Toast them lightly before using to enhance their flavor and maintain their crunch.

    Why did my caramel sauce crystallize?

    Crystallization usually happens when sugar crystals form during cooking. Avoid stirring the caramel once the sugar dissolves, and add a teaspoon of corn syrup to the recipe to prevent crystallization.

    What’s the best way to remove the cheesecakes from the liners?

    Freeze the cheesecakes for about 20 minutes, then carefully peel away the liners. The firmer texture from chilling makes this process much easier.

    Final Thoughts

    These Mini Caramel Pecan Creme Brulee Cheesecakes represent everything I love about dessert—they’re indulgent, beautiful, and bring people together around the table. The combination of smooth cheesecake, crunchy brûléed sugar, buttery pecans, and rich caramel creates a perfect harmony of flavors and textures that never fails to impress. Whether you’re celebrating a special occasion or simply treating yourself, these little treasures are worth every moment spent creating them. Find more delicious inspiration on Pinterest and enjoy the sweet moments these mini desserts will create!

  • Lemon Raspberry Cake Recipe That Will Blow Your Mind!

    Lemon Raspberry Cake Recipe That Will Blow Your Mind!

    Lemon Raspberry Cake Recipe That Will Blow Your Mind!

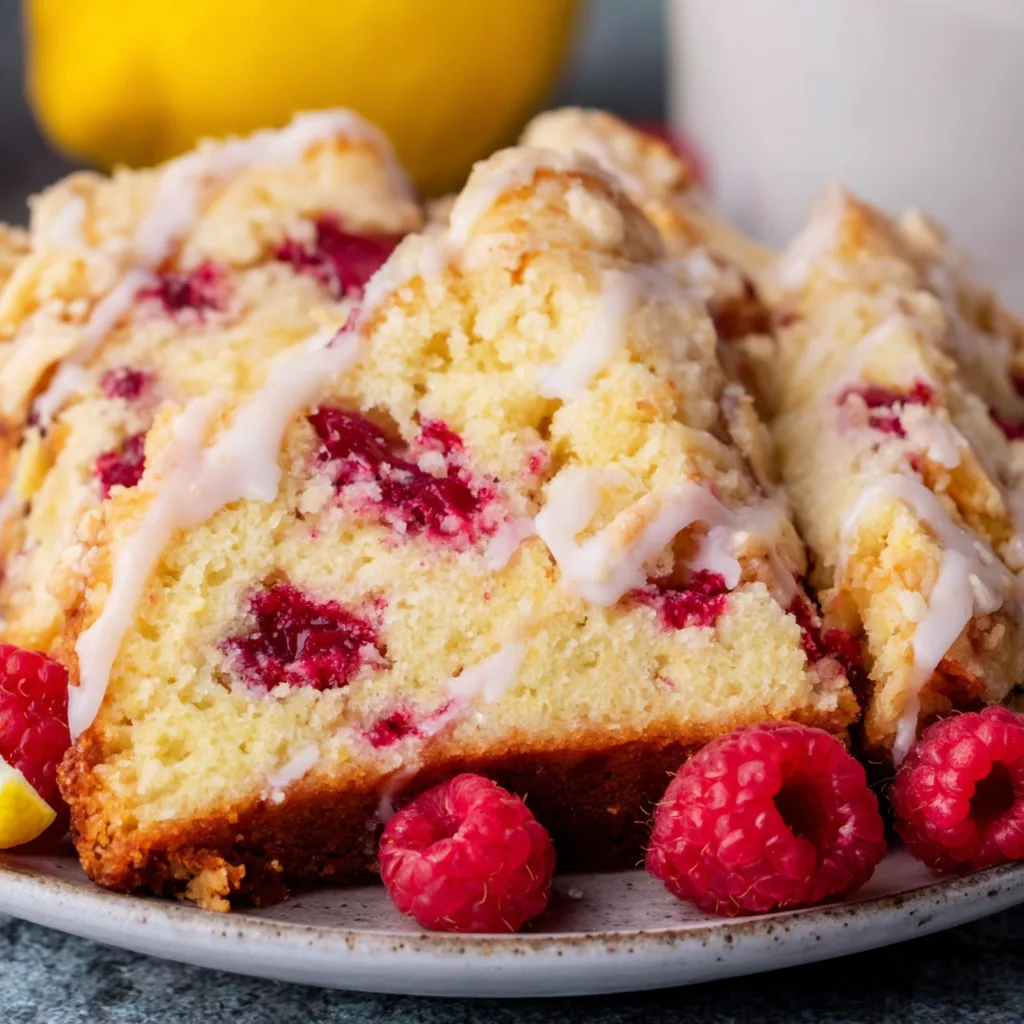
    This Lemon Raspberry Cake combines bright citrus zest with sweet-tart berries for a dessert that’s both elegant and comforting. The first time I made this cake, the kitchen filled with the most heavenly aroma of lemon and vanilla, instantly transporting me back to summer afternoons at my grandmother’s house. There’s something magical about the way these flavors play together—tart yet sweet, light yet satisfying. When life hands you lemons, don’t just make lemonade; make this gorgeous, crowd-pleasing cake that’s perfect for everything from casual gatherings to special celebrations. It’s become my go-to when I need something that feels both special and familiar, like my Crack Chicken Noodle Soup does on chilly evenings.

    Recipe

    Why You’ll Love This Lemon Raspberry Cake

    Perfect Balance of Flavors

    The magic of this cake lies in its perfect balance of bright lemon and sweet-tart raspberries. The lemon zest infuses every bite with citrusy sunshine, while fresh raspberries create pockets of juicy sweetness that burst with flavor. I love how the tanginess of the lemon cuts through the richness of the cake, creating something that’s neither too sweet nor too tart. The first time my neighbor tried it, she closed her eyes and sighed, “It tastes like summer on a plate!” That’s exactly what I aim for—desserts that evoke feelings and memories, not just satisfy a sweet tooth.

    Impressive Yet Approachable

    Don’t let its stunning appearance fool you—this cake is surprisingly simple to make! The batter comes together in just minutes, and the raspberry placement doesn’t require any fancy decorating skills. I remember being nervous the first time I served it at a dinner party, but the oohs and aahs as I brought it to the table instantly calmed my nerves. It’s that rare recipe that looks like it took hours but won’t leave you exhausted in the kitchen. The lemon glaze creates an effortlessly elegant finish that makes everyone think you’re a professional baker, even if you’re still mastering the basics.

    Essential Tips & Tricks

    Ingredient Selection Matters

    Using the freshest ingredients makes all the difference in this cake. Look for bright, unwaxed lemons for maximum zest yield and juice. When selecting raspberries, choose firm berries with vibrant color—they’ll hold their shape better during baking. Room temperature eggs and butter incorporate more air into the batter, creating that perfect tender crumb we’re after. I learned this the hard way when I once rushed and used cold ingredients—the texture just wasn’t the same. For an extra flavor boost, consider splurging on pure vanilla extract rather than imitation. Your taste buds will thank you!

    Technique Tips for Success

    The mixing method is crucial for achieving that perfect texture. Cream the butter and sugar until truly light and fluffy—this takes about 3-5 minutes, not just a quick mix! Fold in the raspberries gently with a spatula rather than your mixer to keep them intact. For the most even baking, rotate your pan halfway through the cooking time, especially if your oven has hot spots like mine does. If you’re looking for more baking techniques that never fail, check out my Sugar Cookie Truffles recipe where I share more of my favorite foolproof methods.

    Serving Ideas & Creative Variations

    Perfect Pairings

    This versatile cake shines in so many settings! For brunch, serve thin slices alongside a frothy cappuccino or mimosa. At dinner parties, pair with a small scoop of vanilla bean ice cream or a dollop of lightly sweetened whipped cream. The tanginess makes it a wonderful companion to afternoon tea, especially Earl Grey or chamomile. I once served this at a garden party with fresh mint-infused whipped cream, and guests were still talking about it months later. The bright flavors also pair beautifully with a glass of Prosecco or Champagne for celebrations.

    Seasonal Adaptations

    While raspberries are the star, this cake welcomes seasonal swaps! In late summer, try blackberries or blueberries for a different berry profile. Fall calls for thinly sliced apples with a touch of cinnamon. Winter? Add cranberries and orange zest for a holiday twist similar to my Cranberry Orange Bread Pudding. For spring, try strawberries and a hint of basil in the glaze. You can even transform this into cupcakes or a bundt cake—just adjust your baking time accordingly. The lemon base provides the perfect canvas for your creative seasonal inspirations.

    Storage & Troubleshooting Guide

    Keeping Your Cake Fresh

    To maintain maximum freshness, store your cake at room temperature under a cake dome or loosely covered with foil for up to three days. The moisture from the raspberries actually helps keep the cake from drying out! For longer storage, refrigerate for up to a week, but always bring to room temperature before serving to enhance the flavors. If you want to prepare ahead, the unfrosted cake freezes beautifully for up to three months—just wrap tightly in plastic wrap and then foil. I often make two at once, freezing one for those last-minute occasions when I need something special without the work.

    Troubleshooting Common Issues

    If your cake sinks in the middle, your oven temperature might be too high or you may have overmixed the batter. Gentle folding is key! For raspberries sinking to the bottom, try tossing them in a tablespoon of flour before folding into the batter—this helps them stay suspended. If your glaze is too thick, add lemon juice a teaspoon at a time; if too thin, add more powdered sugar. For a cake that’s browning too quickly, loosely tent with foil for the remaining bake time. Remember that even imperfect cakes are delicious—my family never complains about the “test batches” that didn’t turn out picture-perfect!

    Frequently Asked Questions

    Can I use frozen raspberries in my Lemon Raspberry Cake?

    Yes! Don’t thaw them first—fold frozen berries directly into the batter. This actually helps them maintain their shape during baking and prevents the juice from turning your batter pink.

    How do I know when the cake is perfectly done?

    Insert a toothpick into the center—it should come out with a few moist crumbs, not wet batter. The edges will be golden, and the cake will spring back lightly when touched.

    Can I make this cake gluten-free?

    Absolutely! Replace the all-purpose flour with a 1:1 gluten-free baking blend. I recommend adding 1/4 teaspoon xanthan gum if your blend doesn’t already include it for the best texture.

    Why did my raspberries sink to the bottom?

    Toss raspberries in 1 tablespoon of flour before folding them into the batter. Also, make sure your batter isn’t too thin—it should be able to support the weight of the berries.

    Can I prepare components of this cake in advance?

    Yes! Bake the cake up to 3 days ahead and store at room temperature. Make the glaze fresh before serving for the best appearance and texture.

    Final Thoughts

    This Lemon Raspberry Cake has become more than just a recipe in my collection—it’s a reliable friend for celebrations big and small. There’s something about the bright, sunny flavors that brings joy to any table and any season. I hope you’ll feel the same simple pleasure I do when you slice into this beauty and taste that perfect harmony of tart lemon and sweet raspberry. Don’t forget to share your creations on Pinterest or tag me in your photos—seeing your kitchen successes makes my day every time!

  • Hawaiian Cheesecake Salad Recipe That Will Wow Your Taste Buds!

    Hawaiian Cheesecake Salad Recipe That Will Wow Your Taste Buds!

    Hawaiian Cheesecake Salad Recipe That Will Wow Your Taste Buds!

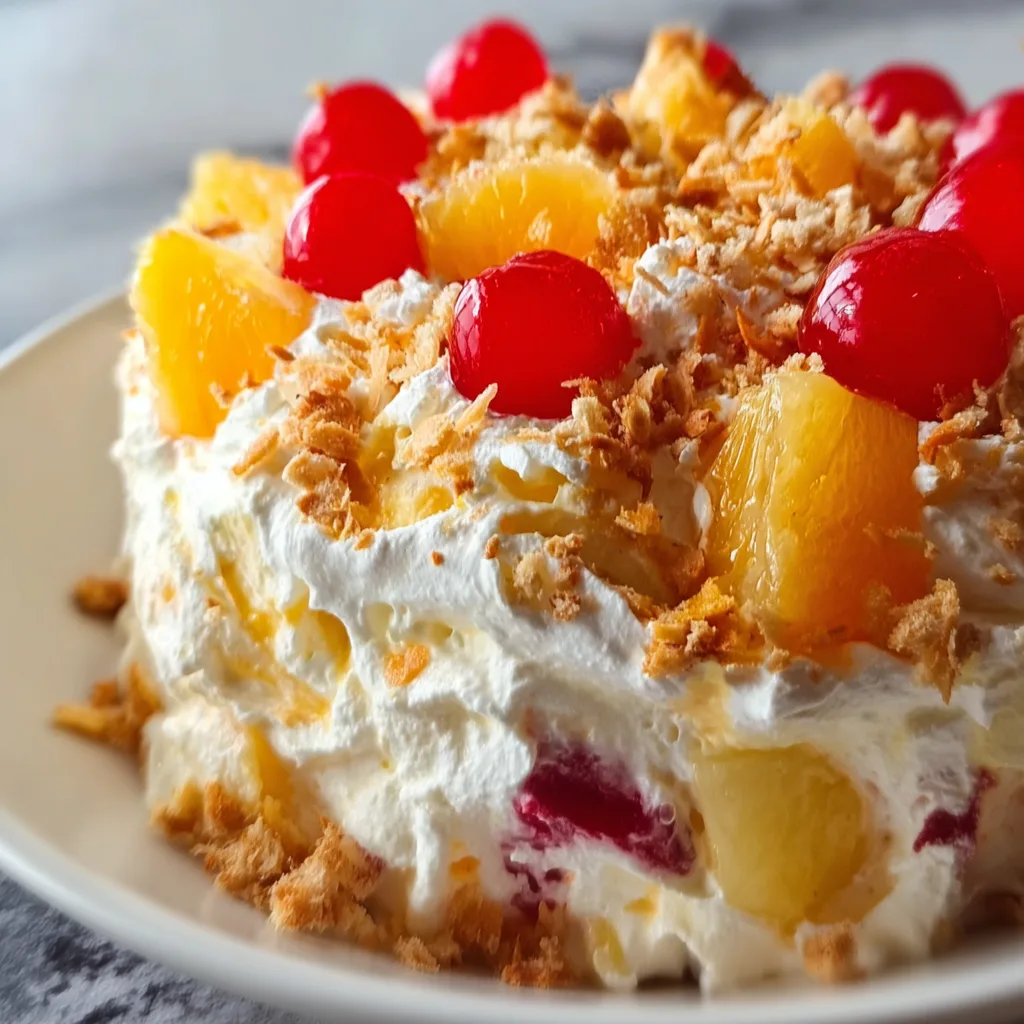
    Hawaiian Cheesecake Salad brings tropical paradise right to your kitchen table with its perfect blend of creamy, tangy, and sweet flavors. I discovered this delightful treat during a family gathering in Hawaii, and I’ve been obsessed ever since! The luscious cream cheese mixture gently coats chunks of juicy pineapple, sweet mandarin oranges, and ripe bananas, creating a dreamy texture that’s both refreshing and indulgent. It’s become my go-to for potlucks and summer barbecues, always disappearing within minutes. If you love dessert-style fruit salads that balance sweetness with tropical flair, this recipe will become your new favorite too!

    Recipe

    Why You’ll Love This Hawaiian Cheesecake Salad

    Perfect Balance of Flavors and Textures

    The magic of Hawaiian Cheesecake Salad lies in its incredible textural contrast. Each bite delivers a harmonious blend of velvety cream cheese mixture against juicy fruit chunks that burst with tropical sweetness. I adore how the tangy cream cheese base gets naturally sweetened by the fruit juices that release as everything mingles together. The subtle vanilla notes and hint of coconut transport me straight to a beachside luau. When you take your first spoonful, you’ll experience that perfect moment when creamy richness meets refreshing fruit—it’s absolutely heavenly!

    Quick and Stress-Free Preparation

    One of my favorite things about this Hawaiian Cheesecake Salad is how effortlessly it comes together. In just 15 minutes, you’ll have a show-stopping dish that looks like you spent hours in the kitchen. I often prepare the cream cheese mixture while my kids chop the fruit—it’s become our little tradition! The no-bake aspect makes it perfect for hot summer days when turning on the oven feels like torture. Plus, you can make it ahead and let those flavors develop in the refrigerator, which is a lifesaver when hosting gatherings like I did for my sister’s baby shower last month.

    Essential Tips & Tricks

    Selecting and Preparing the Perfect Fruits

    Choosing the right fruits makes all the difference in your Hawaiian Cheesecake Salad. Look for pineapples with fragrant bottoms and a slight give when pressed—this indicates peak ripeness. For bananas, select ones that are yellow with light brown speckles for the perfect sweetness. I always drain canned fruits thoroughly and pat them dry with paper towels to prevent excess liquid from thinning the creamy mixture. Cutting fruits into uniform, bite-sized pieces ensures every spoonful has the perfect balance of cream and fruit. My secret touch? Adding a splash of fresh lime juice to the bananas prevents browning and adds a subtle zing!

    Perfecting the Creamy Base

    The luscious base of Hawaiian Cheesecake Salad deserves special attention. Always use room temperature cream cheese to achieve that silky-smooth texture without lumps. I learned this the hard way after rushing through a batch for a neighborhood potluck! Whip it thoroughly with an electric mixer before adding other ingredients. For extra richness, fold in a cup of freshly whipped cream rather than using store-bought whipped topping. Adding a teaspoon of coconut extract alongside the vanilla creates an authentic tropical flavor that transports you straight to the islands. Remember to taste as you go—sometimes fruit sweetness varies, requiring slight adjustments.

    Serving Ideas & Creative Variations

    Presentation Techniques That Wow

    Elevate your Hawaiian Cheesecake Salad with thoughtful presentation touches. Serve it in a hollowed pineapple bowl for a stunning tropical centerpiece that always gets compliments at my summer gatherings. For individual servings, try clear parfait glasses with alternating layers of the creamy mixture and fruit for a beautiful visual effect. A sprinkle of toasted coconut flakes or crushed graham crackers adds delightful texture and appearance. For an extra special touch, garnish with edible flowers like pansies or violets—I did this for my daughter’s graduation party, and guests couldn’t stop taking photos! This beautiful salad pairs wonderfully with my Slow Cooker Mac & Cheese Classic for a complete meal.

    Creative Flavor Variations to Try

    While the classic Hawaiian Cheesecake Salad is divine, experimenting with variations keeps it exciting! Try adding fresh berries like strawberries and blueberries for a red-white-and-blue version perfect for summer holidays. For a tropical twist, incorporate diced mango, kiwi, and a sprinkle of crystallized ginger. My family goes crazy for the “Island Delight” version with added coconut cream in the base and topped with macadamia nuts and toasted coconut. For a lighter option, substitute Greek yogurt for half the cream cheese. During fall gatherings, I create an autumn version with apples, pears, and a hint of cinnamon that pairs beautifully with the creamy base.

    Storage & Troubleshooting Guide

    Proper Storage for Maximum Freshness

    Hawaiian Cheesecake Salad tastes best when the flavors have had time to meld, but proper storage is crucial. Keep it in an airtight container in the refrigerator for up to 24 hours for optimal taste and texture. I find that glass containers maintain freshness better than plastic ones. If you’re preparing components ahead, store the creamy base separately from cut fruits until about 2 hours before serving. Bananas and apples should always be added last to prevent browning. For potlucks, I keep my salad chilled with a clever trick—placing the serving bowl inside a larger bowl filled with ice, which maintains that perfect cool temperature even during outdoor summer gatherings.

    Solving Common Texture Issues

    Even experienced cooks occasionally encounter texture challenges with Hawaiian Cheesecake Salad. If your mixture becomes too thin, fold in additional cream cheese or a tablespoon of Greek yogurt to thicken it back up. For a runny salad caused by juicy fruits, drain the fruit thoroughly and pat dry before mixing, or add a tablespoon of instant pudding mix to stabilize the cream. If your salad develops a watery bottom after sitting, simply drain off excess liquid and gently fold everything together again. To revive day-old salad that’s lost its texture, whip a small amount of fresh cream cheese mixture and fold it through to refresh the entire dish.

    Frequently Asked Questions

    Can I make Hawaiian Cheesecake Salad ahead of time?

    Yes, but with some precautions! Prepare the cream cheese mixture up to 24 hours ahead and store separately. Add fruits 2-3 hours before serving, saving bananas for last to prevent browning. This maintains the perfect texture and freshness.

    What can I substitute for cream cheese?

    Greek yogurt works wonderfully as a lighter alternative. Use equal parts or a 50/50 blend with cream cheese. Mascarpone cheese creates a richer version, while dairy-free cream cheese offers a great vegan option.

    How do I prevent my Hawaiian Cheesecake Salad from becoming watery?

    Thoroughly drain all canned fruits and pat dry with paper towels. Add a tablespoon of instant vanilla pudding mix to stabilize the mixture. Always serve chilled and avoid letting it sit out for more than 2 hours.

    Can I freeze leftover Hawaiian Cheesecake Salad?

    I don’t recommend freezing this salad as the fruits will release water when thawed, creating a soggy texture. The cream cheese mixture also separates after freezing, significantly affecting the quality and appearance.

    What fruits work best in this recipe?

    Traditional Hawaiian Cheesecake Salad uses pineapple, mandarin oranges, and bananas. However, strawberries, grapes, kiwi, mango, and peaches also work beautifully. Avoid watery fruits like watermelon that dilute the creamy texture.

    Final Thoughts

    Hawaiian Cheesecake Salad has become my signature dish for good reason—it’s that perfect balance of simplicity and wow-factor that makes everyone feel special. There’s something magical about watching friends take their first bite and seeing their eyes light up with surprise and delight. Whether you’re serving it at a backyard barbecue or bringing tropical vibes to a winter potluck, this versatile treat bridges seasons and occasions with its creamy, fruit-filled goodness. I hope you’ll create your own special memories around this beloved recipe and share your Hawaiian Cheesecake Salad creations on Pinterest for others to enjoy!