Category: Desserts

Sweet and easy dessert recipes for every craving. Simple treats, rich flavors, and quick ideas that make any moment feel special.

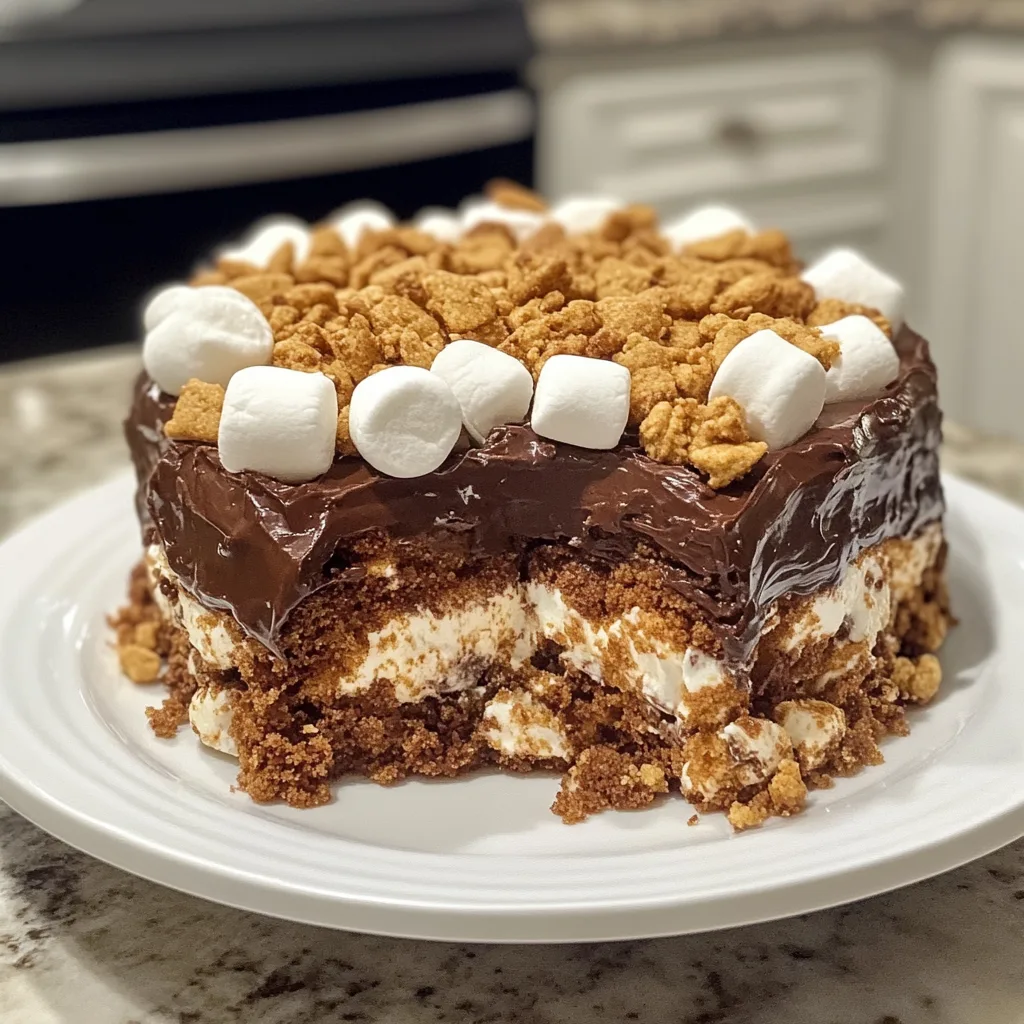
  • Crockpot S’mores Chocolate Cake: Gooey, Crispy & Irresistible!

    Crockpot S’mores Chocolate Cake: Gooey, Crispy & Irresistible!

    Crockpot S’mores Chocolate Cake: Gooey, Crispy & Irresistible!

    The aroma of Crockpot S’mores Chocolate Cake with Marshmallows and Graham Cracker Crumble wafting through my kitchen takes me right back to summer campfires – but without all the mosquito bites! This decadent dessert combines the nostalgic flavors of s’mores with the convenience of slow cooking, creating a gooey, chocolatey masterpiece that practically makes itself. I discovered this recipe during a rainy weekend when my camping plans were canceled, and it’s been a family favorite ever since. If you love the combination of melty chocolate, toasted marshmallows, and crunchy graham crackers, this slow cooker dessert will become your new obsession.

    Recipe

    Why You’ll Love This Crockpot S’mores Chocolate Cake with Marshmallows and Graham Cracker Crumble

    Effortless Preparation with Maximum Flavor

    There’s something magical about dumping a few ingredients into your slow cooker and returning hours later to a dessert that tastes like you spent all day in the kitchen. The deep chocolate flavor develops beautifully during the slow cooking process, creating rich, fudgy layers that meld perfectly with the marshmallows. I love how the graham crackers maintain just enough crunch to contrast with the gooey cake texture. Plus, the hands-off cooking method means you can prep this in the morning and have it ready exactly when your chocolate cravings hit hardest – usually around 8 PM for me!

    Perfect for Any Occasion

    This dessert has saved me countless times, from last-minute dinner guests to family movie nights. The warm, comforting aroma fills your home with that irresistible freshly-baked scent that makes everyone feel welcome. Children absolutely lose their minds over the marshmallow topping, while adults appreciate the sophisticated chocolate depth. I’ve served this at summer gatherings as a nod to camping traditions and during winter months when we’re all craving something cozy. The beauty is that it feels special enough for celebrations but simple enough for Tuesday night dessert.

    Essential Tips & Tricks

    Mastering the Perfect Texture

    The secret to this cake’s incredible texture lies in not overcooking it. Unlike oven baking, slow cookers retain moisture, giving you that perfect molten middle. Line your crockpot with parchment paper or use a slow cooker liner to prevent sticking and make cleanup a breeze. For the graham cracker crumble, crush the crackers to varying sizes – some fine powder and some chunky pieces – to create interesting texture throughout. I learned this the hard way after making a batch with too-fine crumbs that disappeared into the cake! Test for doneness by looking for set edges with a slightly jiggly center, similar to brownies.

    Ingredient Quality Makes a Difference

    When it comes to s’mores-inspired desserts, using high-quality chocolate elevates the entire experience. I prefer semi-sweet chocolate chips with at least 60% cacao for depth, though milk chocolate creates a sweeter, more traditional s’mores flavor. For the marshmallow topping, large marshmallows create dramatic melt pools, while mini marshmallows provide more even coverage. Fresh graham crackers make a noticeable difference in the crumble – stale ones lack that distinctive honey-wheat flavor. Don’t skimp on vanilla extract either; it bridges the chocolate and graham flavors beautifully, creating that authentic campfire s’mores experience.

    Serving Ideas & Creative Variations

    Elevate Your Presentation

    Transform this humble crockpot dessert into a showstopping finale with thoughtful serving techniques. Scoop warm portions into shallow bowls and add a quick torch to the marshmallow topping for that authentic campfire char (a kitchen torch works perfectly). A drizzle of chocolate sauce creates beautiful contrast against the white marshmallows. For dinner parties, I serve individual portions in mason jars layered with extra graham cracker crumbs between the cake and marshmallow – the clear glass showcases all those gorgeous layers. This approach works beautifully alongside other slow cooker desserts for an impressive dessert buffet.

    Exciting Flavor Twists

    While the classic s’mores flavor is unbeatable, small additions can create delightful variations. Add a teaspoon of espresso powder to the chocolate batter for mocha s’mores cake, or mix cinnamon into the graham cracker crumble for a Mexican hot chocolate spin. Peanut butter lovers can drop spoonfuls of creamy peanut butter between the batter and marshmallow layer. For adults, a tablespoon of bourbon or Kahlúa in the batter adds sophisticated depth. My personal favorite is adding orange zest to the chocolate batter – the bright citrus notes cut through the richness beautifully.

    Storage & Troubleshooting Guide

    Keeping It Fresh

    This dessert is at its absolute best when served warm from the crockpot, but leftovers can be stored and revived with a few tricks. Transfer cooled leftovers to an airtight container and refrigerate for up to 3 days. The texture will firm up considerably when cold, so reheat individual portions in the microwave for 20-30 seconds until just warm. The marshmallow topping won’t be quite as gooey after storage, but a fresh sprinkle of graham cracker crumbs adds back that textural contrast. For planned-ahead serving, prepare the batter and store separately from the toppings, assembling just before cooking.

    Fixing Common Issues

    Even experienced bakers encounter challenges with slow cooker desserts. If your cake turns out too gooey in the center, it likely needs more cook time – cover and continue cooking on low for 30-minute increments until the edges are set. Conversely, if it’s dry or overdone, serve with a scoop of vanilla ice cream or drizzle with chocolate sauce to add moisture. Marshmallows browning too quickly? Keep the lid on until the final 30 minutes of cooking. If graham crackers become soggy, add a fresh sprinkle just before serving for that essential crunch factor.

    Frequently Asked Questions

    Can I make Crockpot S’mores Chocolate Cake with Marshmallows and Graham Cracker Crumble ahead of time?

    Yes! Prepare the chocolate cake base up to a day ahead, then add the marshmallows and graham cracker topping during the final 30 minutes of heating before serving.

    What size slow cooker works best for this recipe?

    A 6-quart slow cooker is ideal. Smaller cookers may cause overflow, while larger ones might cook the cake too quickly and dry it out.

    Can I use a Dutch oven instead of a slow cooker?

    Absolutely! Bake at 325°F for approximately 35-45 minutes, adding the marshmallows during the final 10 minutes of baking.

    How do I know when the cake is done?

    The edges should be set while the center remains slightly jiggly. A toothpick inserted 1-inch from the edge should come out with moist crumbs.

    Can I make this recipe gluten-free?

    Yes, use gluten-free graham crackers and a 1:1 gluten-free flour blend in place of all-purpose flour for equally delicious results.

    Final Thoughts

    There’s something undeniably magical about the way this Crockpot S’mores Chocolate Cake with Marshmallows and Graham Cracker Crumble brings people together. The nostalgic flavors combined with modern convenience create a dessert experience that satisfies on every level. I love watching friends’ faces light up when they take that first bite – the way the warm chocolate mingles with gooey marshmallows and crunchy graham bits creates pure joy in dessert form. Whether you’re feeding a crowd or treating yourself, this slow cooker treasure delivers campfire comfort any day of the year. Find more inspiration for your sweet tooth on Pinterest!
  • Slow Cooker Berry Cobbler: Sweet, Juicy Bliss with Biscuit Topping!

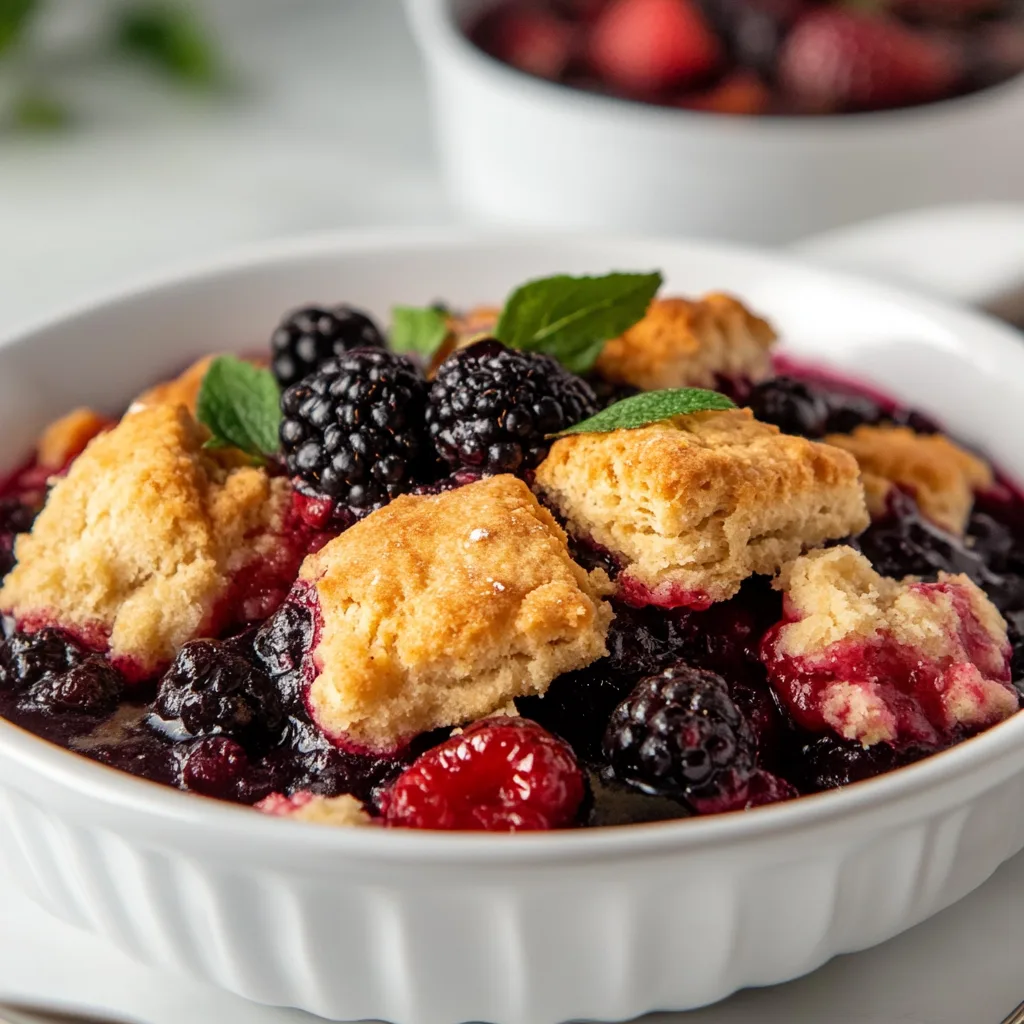
    Slow Cooker Berry Cobbler: Sweet, Juicy Bliss with Biscuit Topping!

    Slow Cooker Berry Cobbler: Sweet, Juicy Bliss with Biscuit Topping!

    The aroma of bubbling berries mingling with sweet vanilla and buttery biscuit topping is pure magic on a cozy evening. This Slow Cooker Berry Cobbler with Mixed Berries and Sweet Biscuit Topping transforms simple ingredients into a dessert that feels like a warm hug. I discovered this recipe during a rainy weekend at my grandmother’s lake house, where we gathered around her vintage Crock-Pot with eager spoons in hand. The slow cooker does all the heavy lifting, creating a perfectly tender cobbler while you relax. Let’s dive into this delightful dessert that combines the juicy sweetness of mixed berries with a pillowy biscuit crown.

    Recipe

    Why You’ll Love This Slow Cooker Berry Cobbler with Mixed Berries and Sweet Biscuit Topping

    Perfect for Any Occasion

    This cobbler has become my go-to dessert for everything from casual family dinners to special celebrations. The hands-off preparation means you can focus on your guests instead of hovering over the oven. I love setting this up before dinner and letting the slow cooker work its magic while we eat. The heavenly aroma that fills your home is an experience in itself! Plus, there’s something wonderfully nostalgic about serving a bubbling fruit dessert that reminds everyone of simpler times and family gatherings.

    Versatile and Foolproof

    One of the best things about this recipe is its incredible adaptability. You can use fresh berries in summer, frozen in winter, or a combination anytime. The slow cooker method ensures that even beginners can create a perfect cobbler every time. I’ve made this with blueberries, strawberries, blackberries, and raspberries—each version more delicious than the last. The gentle, consistent heat of the slow cooker allows the berries to release their juices gradually, creating a naturally thick and flavorful sauce beneath the tender biscuit topping.

    Essential Tips & Tricks

    Perfecting Your Berries

    The foundation of an exceptional cobbler is getting the berry mixture just right. Balance is key here—you want enough sweetness to complement the berries without overpowering their natural tartness. For frozen berries, there’s no need to thaw, but do add an extra tablespoon of cornstarch to account for the additional moisture. I like to add a splash of lemon juice to brighten the flavors and a touch of vanilla to create depth. For an extra special touch, try adding a tablespoon of balsamic vinegar to enhance the berry flavors.

    Creating the Perfect Topping

    The biscuit topping makes or breaks your cobbler, so don’t rush this part. Gentle handling is crucial—overmixing will result in tough biscuits. I keep my ingredients cold until the last minute, even chilling the flour for extra flakiness. Drop the biscuit dough in dollops rather than spreading it for that perfect rustic look. For a golden finish, brush the tops with a little melted butter before cooking. If you prefer a crispier topping, try removing the lid during the final 30 minutes of cooking time or place under the broiler for 2-3 minutes after cooking.

    Serving Ideas & Creative Variations

    Delicious Pairings

    This cobbler begs to be served with something creamy to contrast with the warm berries and tender biscuits. A scoop of vanilla bean ice cream creates the perfect hot-and-cold combination as it melts into the fruit. For a lighter option, try freshly whipped cream with a hint of cinnamon or a dollop of Greek yogurt drizzled with honey. I love setting up a little dessert bar with different toppings so everyone can customize their serving. This pairs beautifully with coffee or tea, making it perfect for brunch gatherings too.

    Seasonal Adaptations

    One of the joys of this recipe is how easily it transforms with the seasons. In summer, use fresh local berries at their peak sweetness. Fall calls for adding warming spices like cinnamon and nutmeg to the biscuit topping. Winter holidays? Try adding cranberries and orange zest for a festive twist. Spring is perfect for lighter variations with strawberries and rhubarb. You can even experiment with adding oats, nuts, or coconut to the topping for different textures. For a special adult version, try adding a splash of amaretto or bourbon to the berry mixture.

    Storage & Troubleshooting Guide

    Keeping It Fresh

    While this cobbler is best enjoyed warm from the slow cooker, leftovers can be stored and enjoyed later. Cool completely before transferring to an airtight container and refrigerating for up to 3 days. To reheat, microwave individual portions for about 30 seconds or warm in the oven at 350°F for 10 minutes. The topping may soften in storage, but the flavors actually develop beautifully overnight. For longer storage, freeze portions in freezer-safe containers for up to 3 months—just thaw overnight in the refrigerator before reheating.

    Solving Common Issues

    Even the best recipes can sometimes go awry, but most cobbler problems have easy fixes. If your cobbler turns out too soupy, try cooking with the lid off for the last 30 minutes to reduce moisture. For a topping that didn’t cook through, place the insert (if oven-safe) under the broiler for a few minutes. If your berries released too much juice, next time add an extra tablespoon of cornstarch or tapioca. Too sweet? Add a squeeze of lemon juice before serving to brighten the flavors and cut through the sweetness.

    Frequently Asked Questions

    Can I use frozen berries in my Slow Cooker Berry Cobbler with Mixed Berries and Sweet Biscuit Topping?

    Absolutely! No need to thaw—just add an extra tablespoon of cornstarch to account for the additional moisture. Frozen berries often work even better as they hold their shape during cooking.

    How do I know when my cobbler is done cooking?

    The topping should be firm and golden brown, and a knife inserted into the center of the biscuit should come out clean. The berry mixture will be bubbling around the edges.

    Can I make this recipe gluten-free?

    Yes! Simply substitute your favorite gluten-free flour blend for the all-purpose flour in the biscuit topping. Add 1/4 teaspoon xanthan gum if your blend doesn’t already include it.

    What size slow cooker works best for this recipe?

    A 6-quart slow cooker is ideal, but you can adjust quantities for different sizes. For smaller cookers, reduce ingredients by about a third.

    Can I prepare any parts of this cobbler ahead of time?

    You can mix the dry ingredients for the biscuit topping a day ahead and store in an airtight container. The berry mixture can also be prepared and refrigerated separately until ready to cook.

    Final Thoughts

    There’s something truly magical about the way a Slow Cooker Berry Cobbler with Mixed Berries and Sweet Biscuit Topping fills your home with warmth and anticipation. The contrast between the juicy, bubbling berries and the tender, golden topping creates a dessert that feels both comforting and special. Whether you’re serving it at a holiday gathering or simply treating yourself on a quiet evening, this recipe delivers pure comfort in every spoonful. Don’t forget to check out our Pinterest board for more delicious slow cooker inspirations that make life both easier and more delicious!

  • Crockpot Salted Caramel Hot Fudge Sundae Cake That’ll Blow Your Mind!

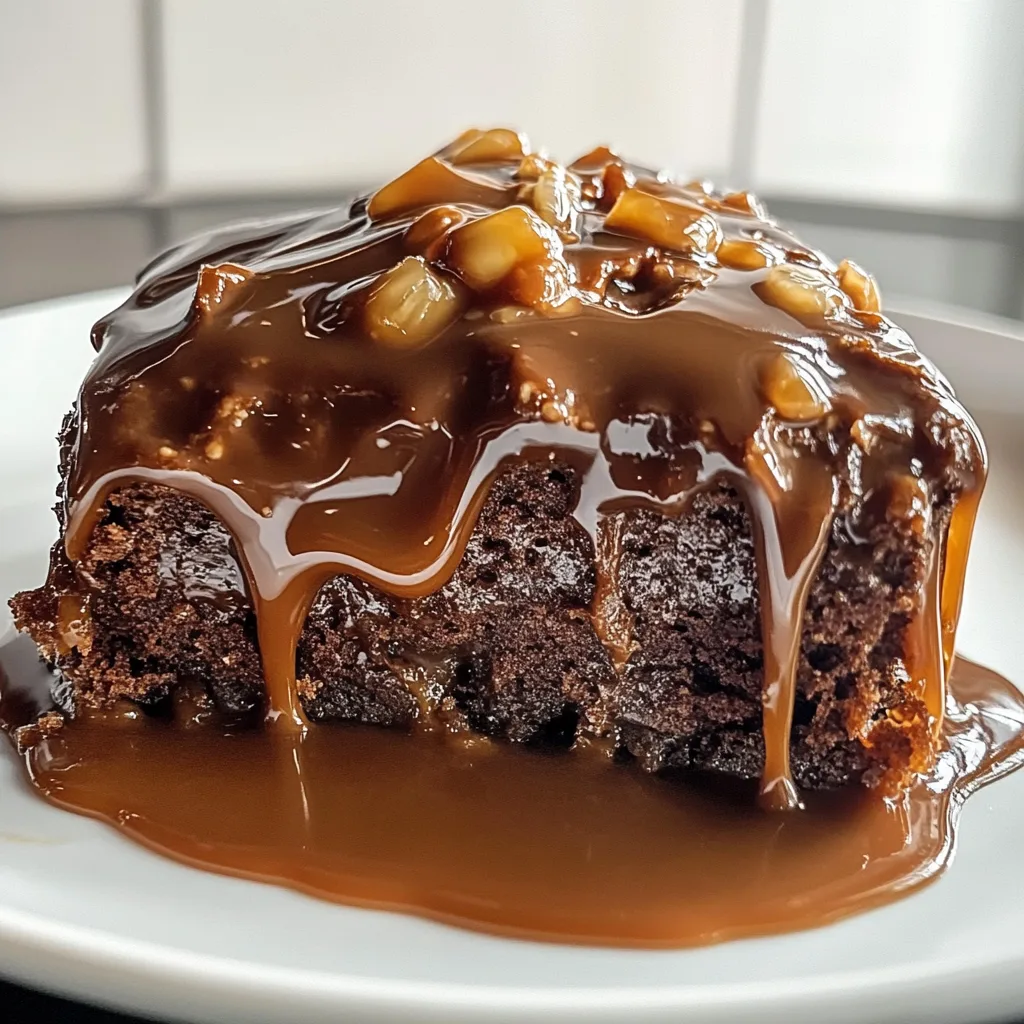
    Crockpot Salted Caramel Hot Fudge Sundae Cake That’ll Blow Your Mind!

    Crockpot Salted Caramel Hot Fudge Sundae Cake That’ll Blow Your Mind!

    Crockpot Salted Caramel Hot Fudge Sundae Cake has become my ultimate secret weapon for those nights when I need something decadently impressive with minimal effort. There’s something almost magical about the way the slow cooker transforms simple ingredients into layers of gooey chocolate cake, molten hot fudge, and ribbons of salted caramel. The first time I made this for my family game night, the kitchen filled with an aroma so intoxicating that everyone abandoned Monopoly mid-game! If you’ve been searching for a dessert that practically makes itself while filling your home with irresistible sweetness, this recipe is about to become your new favorite.

    Recipe

    Why You’ll Love This Crockpot Salted Caramel Hot Fudge Sundae Cake

    Perfect for Busy Dessert Lovers

    This dessert is a time-saving miracle for anyone who craves homemade sweets but lacks hours to spend in the kitchen. I love how I can toss everything together in about 10 minutes, then walk away while the slow cooker does its magic. The combination of rich chocolate cake batter with hot fudge and salted caramel creates distinct layers that would normally require multiple steps and pans. On my busiest weeknights, I’ve prepared this before dinner and returned to find a bakery-worthy dessert waiting. The contrast between the cake’s tender crumb and the molten sauce underneath creates a texture paradise that tastes like you spent hours in the kitchen.

    Impressive Without the Stress

    There’s something deeply satisfying about the “wow” factor this dessert delivers with so little effort. The first time I served it at a dinner party, guests couldn’t believe it came from a crockpot. The visual appeal of spooning into the cake to reveal the hidden fudge layer creates an instant dramatic moment at the table. I’ve found it’s perfect for last-minute gatherings since it requires basic pantry ingredients most baking enthusiasts already have on hand. The salted caramel element elevates it from simple to sophisticated, striking that perfect balance between homey comfort and special occasion indulgence that makes everyone feel pampered.

    Essential Tips & Tricks

    Getting the Perfect Texture

    Achieving the ideal cake-to-sauce ratio is all about timing and temperature. I’ve learned through multiple attempts that cooking on LOW for exactly 2.5 hours creates the perfect balance – any longer and you lose the molten center, any less and the cake remains too gooey. Using room temperature ingredients helps everything meld together beautifully. My game-changing discovery was placing a clean kitchen towel under the lid to catch condensation, preventing that dreaded soggy top layer. For the richest flavor, choose a high-quality cocoa powder and real vanilla extract. The difference in taste is remarkable, especially with the caramel notes complementing the deep chocolate.

    Preventing Common Mistakes

    The most crucial step is properly preparing your slow cooker before adding ingredients. I once skipped the thorough greasing and spent an hour scrubbing afterward! A generous coating of butter or cooking spray, especially up the sides, makes serving and cleanup dramatically easier. Similar to my Crockpot Triple Chocolate Brownie Pudding, resist the urge to lift the lid while cooking – each peek releases heat and extends cooking time by 15-20 minutes. When checking for doneness, look for set edges with a slightly jiggly center. Remember that carryover cooking continues even after you turn off the heat, so it’s better to slightly undercook than overcook.

    Serving Ideas & Creative Variations

    Elegant Presentation Options

    Transform this humble crockpot creation into a showstopping dessert with thoughtful presentation. I love serving it in individual ramekins topped with a quenelle of vanilla bean ice cream that slowly melts into the warm cake. For dinner parties, try pre-scooping into vintage teacups or martini glasses, then garnishing with chocolate shavings and a light dusting of sea salt flakes. The contrast of temperatures – warm cake against cold ice cream – creates a sensory delight that elevates the entire experience. For a dramatic tableside service, bring out the whole crockpot and scoop portions directly onto waiting plates, allowing guests to watch the molten layers reveal themselves.

    Flavor Customizations

    The basic recipe is a perfect canvas for endless flavor variations that keep this dessert exciting every time you make it. My family’s favorite twist is adding a teaspoon of espresso powder to the cake batter, which intensifies the chocolate flavor without tasting like coffee. For a seasonal twist similar to my Slow Cooker Banana Bread Pudding, try incorporating cinnamon and nutmeg into the batter during fall months. For fruit lovers, a layer of fresh raspberries or sliced bananas beneath the batter creates a delightful surprise when serving. You can also experiment with different extracts – almond, orange, or mint – to completely transform the flavor profile while keeping the same foolproof technique.

    Storage & Troubleshooting Guide

    Keeping Leftovers Fresh

    Properly storing leftovers ensures you can enjoy this decadent treat for days after making it. I’ve found that transferring portions to airtight containers while still slightly warm preserves the moisture balance perfectly. Refrigerate for up to 4 days, though the texture is best within the first 48 hours. When reheating, add a tablespoon of water before microwaving on 50% power to revive the sauce consistency. For a delicious transformation, try crumbling cold leftovers over vanilla ice cream for an instant sundae experience. If freezing portions for longer storage, wrap individual servings in plastic wrap then foil, and thaw overnight in the refrigerator before reheating.

    Rescuing Less-Than-Perfect Results

    Even experienced bakers occasionally encounter unexpected challenges with slow cooker desserts. If your cake turns out too dry, simply whisk together equal parts hot water and caramel sauce, then drizzle over portions before serving to instantly restore moisture. For an overly wet cake, transfer to an oven-safe dish and bake uncovered at 300°F for 10-15 minutes to evaporate excess liquid. If your caramel layer disappears into the cake, don’t worry – warm additional caramel sauce and drizzle over each serving for the same flavor impact. Remember that even imperfect results still taste delicious, especially when topped with whipped cream or ice cream to mask any texture issues.

    Frequently Asked Questions

    Can I make Crockpot Salted Caramel Hot Fudge Sundae Cake ahead of time?

    Yes! Prepare it up to 24 hours ahead and refrigerate uncooked. Allow the crockpot insert to come to room temperature before cooking, then add an extra 15 minutes to the cooking time for perfect results.

    What size slow cooker works best for this recipe?

    A 6-quart slow cooker is ideal. Smaller cookers may cause overflow, while larger ones might cook too quickly and result in a drier cake with less sauce formation.

    Can I use homemade caramel sauce instead of store-bought?

    Absolutely! Homemade caramel sauce adds wonderful depth of flavor. Just ensure it’s not too thin in consistency, or it might make the cake too wet during cooking.

    How do I know when the cake is done cooking?

    The edges should be set with a slight jiggle in the center. A toothpick inserted 1-inch from the edge should come out with moist crumbs, not wet batter.

    Can this recipe be made gluten-free?

    Yes, simply substitute your favorite cup-for-cup gluten-free flour blend. The slow, moist cooking environment actually helps gluten-free versions maintain excellent texture.

    Final Thoughts

    This Crockpot Salted Caramel Hot Fudge Sundae Cake has become my go-to dessert for everything from quiet family nights to impressive dinner parties. There’s something wonderfully satisfying about creating such a complex-tasting dessert with so little hands-on effort. I love watching guests’ eyes widen when they take that first warm, gooey bite – it’s a reminder that sometimes the simplest cooking methods yield the most magical results. Whether you’re a seasoned baker or just starting out, this forgiving recipe delivers consistent joy in every spoonful. Don’t forget to check out more delicious ideas on Pinterest for your next sweet adventure!

  • Crockpot Triple Chocolate Brownie Pudding – Irresistibly Gooey Delight!

    Crockpot Triple Chocolate Brownie Pudding – Irresistibly Gooey Delight!

    Crockpot Triple Chocolate Brownie Pudding – Irresistibly Gooey Delight!

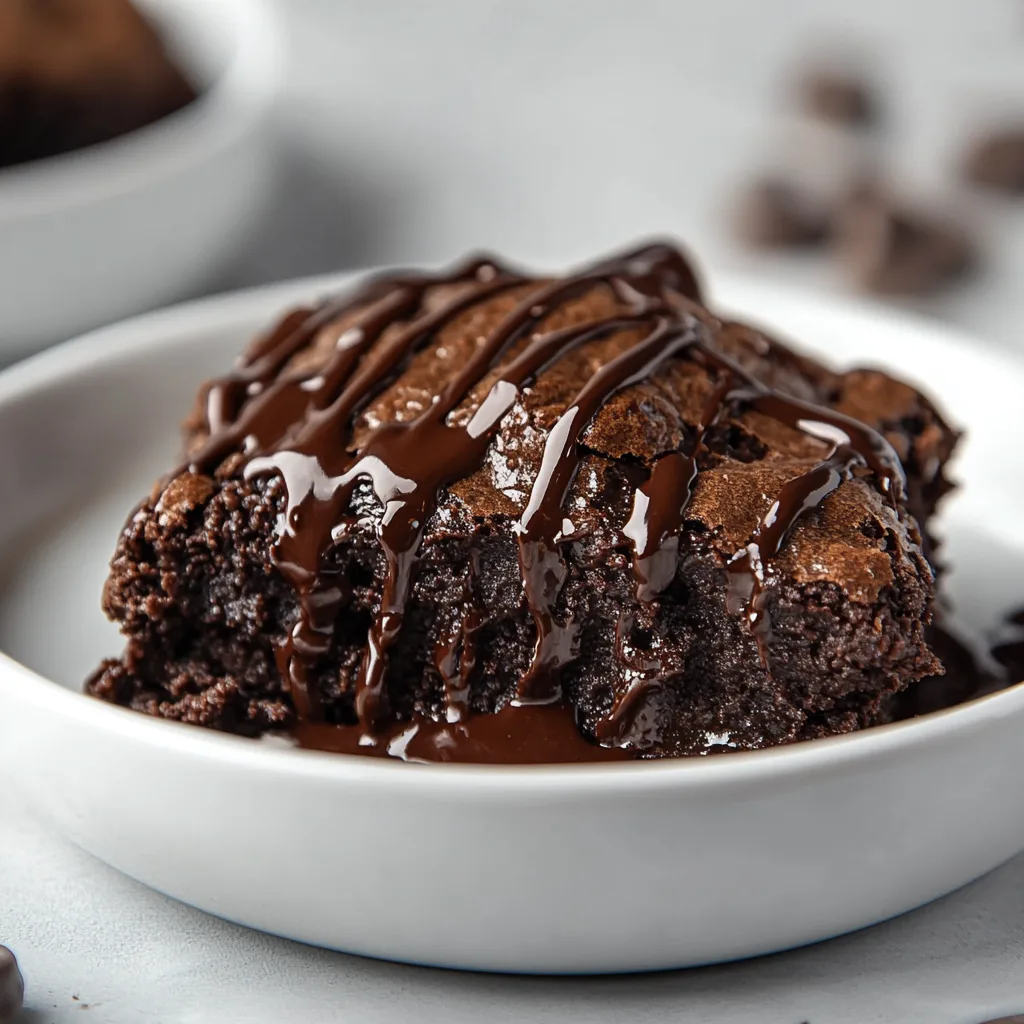
    Crockpot Triple Chocolate Brownie Pudding is the ultimate comfort dessert that practically makes itself while filling your home with an irresistible chocolate aroma. I discovered this magical recipe during a snowy weekend when I needed something warm and indulgent without much effort. The slow cooker transforms simple ingredients into a decadent dessert with three distinct layers: a fudgy brownie base, gooey pudding center, and a thin, crisp top. It’s like having three desserts in one – perfect for those nights when only chocolate will do.

    Recipe

    Why You’ll Love This Crockpot Triple Chocolate Brownie Pudding

    Effortless Indulgence with Maximum Flavor

    There’s something magical about desserts that create their own sauce while cooking. This brownie pudding does exactly that – the batter separates during cooking, creating distinct layers of fudgy brownie and silky chocolate pudding. I love that it requires minimal prep (just 10 minutes!) but delivers maximum chocolate impact with three different forms: cocoa powder, chocolate chips, and chocolate chunks. The slow, gentle heat of the crockpot allows the flavors to develop more deeply than oven baking, resulting in a richer chocolate experience.

    Perfect for Any Occasion

    This dessert has become my secret weapon for both casual family nights and impressive entertaining. When guests come over, I start it before dinner and by dessert time, the house smells like a chocolate paradise. The presentation is effortlessly elegant – scoop it warm into bowls with a dollop of vanilla ice cream melting into the pudding layers. I’ve served it for birthdays, holiday gatherings, and even as comfort food during movie nights. The best part? It stays warm in the crockpot, so everyone gets to enjoy it at the perfect temperature.

    Essential Tips & Tricks

    Mastering the Perfect Texture

    The key to achieving that magical three-layer effect lies in how you handle the batter and liquid components. Don’t stir after pouring the hot water over the top – this separation creates the pudding layer. Line your slow cooker with parchment paper or use a slow cooker liner for easy removal and cleanup. Cook on HIGH for precisely 2-2.5 hours with the lid slightly ajar (I prop mine open with a wooden spoon) to allow moisture to escape. This prevents the pudding from becoming too soupy while maintaining that perfect gooey center.

    Chocolate Selection Matters

    For truly spectacular results, quality matters when choosing your chocolate components. I use Dutch-processed cocoa powder for a deeper flavor profile, then mix semi-sweet and dark chocolate chips/chunks for complexity. The chocolate chips maintain their shape slightly, creating pockets of intense chocolate throughout. For an extra dimension, try adding espresso powder (just 1 teaspoon) to intensify the chocolate flavor without tasting like coffee. My family never guesses this secret ingredient, but always comments on how rich the chocolate tastes!

    Serving Ideas & Creative Variations

    Beyond Basic Toppings

    While vanilla ice cream is the classic pairing, don’t stop there! Create a dessert bar with multiple toppings: fresh raspberries, crushed peppermint, toasted coconut, or salted caramel sauce. My personal favorite is whipped mascarpone cream with a hint of orange zest – the slight tanginess balances the chocolate richness perfectly. For adults, try a splash of Kahlúa or Baileys drizzled over the top. The contrast of temperatures (warm pudding, cold toppings) creates a sensory experience that makes this dessert truly memorable.

    Seasonal and Dietary Adaptations

    This versatile recipe welcomes creative twists to match any season or dietary need. For a holiday version, add crushed candy canes and white chocolate chips to the batter. Summer calls for a s’mores variation with graham cracker pieces and marshmallows added during the final 15 minutes. For gluten-free guests, simply substitute a 1:1 gluten-free flour blend. I’ve even made a dairy-free version using coconut oil instead of butter and dairy-free chocolate chips that was equally delicious – proving this recipe’s incredible adaptability.

    Storage & Troubleshooting Guide

    Proper Storage for Leftovers

    Though it’s rare to have leftovers, this brownie pudding can be stored effectively for 3-4 days. Transfer to an airtight container and refrigerate – the texture will become more fudge-like as it cools. To reheat, microwave individual portions for 30-45 seconds or place in a 300°F oven for 10 minutes in an oven-safe dish. The pudding layer may be less distinct after storage, but the flavor remains divine. For a fun twist, try serving cold leftovers as a rich chocolate spread over warm toast or pancakes!

    Troubleshooting Common Issues

    If your brownie pudding didn’t develop distinct layers, a few factors might be at play. The most common issue is temperature control – cooking too long or with the lid fully sealed traps too much moisture. Next time, try reducing cooking time by 15-20 minutes and ensure the lid is cracked. If the mixture seems too dry, your slow cooker might run hot – add an extra ¼ cup of hot water next time. For an overly soupy result, extend cooking time by 15 minutes with the lid ajar to allow more evaporation.

    Frequently Asked Questions

    Can I make Crockpot Triple Chocolate Brownie Pudding ahead of time?

    Yes! Prepare the batter up to 24 hours ahead and refrigerate. Allow it to come to room temperature for 30 minutes before cooking. The finished dessert reheats beautifully, though the layers will be less distinct.

    What size slow cooker works best?

    A 4-6 quart oval slow cooker is ideal. If using a larger cooker, check for doneness earlier as the thinner layer will cook faster.

    Can I substitute different types of chocolate?

    Absolutely! Try white chocolate chips, butterscotch chips, or peanut butter chips for delicious variations. Just maintain the same total amount of chocolate.

    How do I know when it’s done cooking?

    The edges should be set with a slightly crusty top, while the center remains soft but not liquid. A toothpick inserted 1 inch from the edge should come out with moist crumbs.

    Can I double this Crockpot Triple Chocolate Brownie Pudding recipe?

    Yes, but use a larger slow cooker (7+ quarts) and increase cooking time by 30-45 minutes, checking frequently after the original cooking time.

    Final Thoughts

    This Crockpot Triple Chocolate Brownie Pudding has become a treasured recipe in my collection, earning its place through both simplicity and spectacular results. There’s something magical about the transformation that happens inside the slow cooker – ordinary ingredients becoming an extraordinary dessert with minimal effort. I hope you’ll experience the joy of pulling off the lid to reveal that perfect chocolate creation, filling your kitchen with an aroma that draws everyone to the table. Don’t forget to share your creations on Pinterest – I’d love to see your variations!

  • Slow Cooker Banana Bread Pudding with Caramel & Toasted Pecans

    Slow Cooker Banana Bread Pudding with Caramel & Toasted Pecans

    Slow Cooker Banana Bread Pudding with Caramel & Toasted Pecans

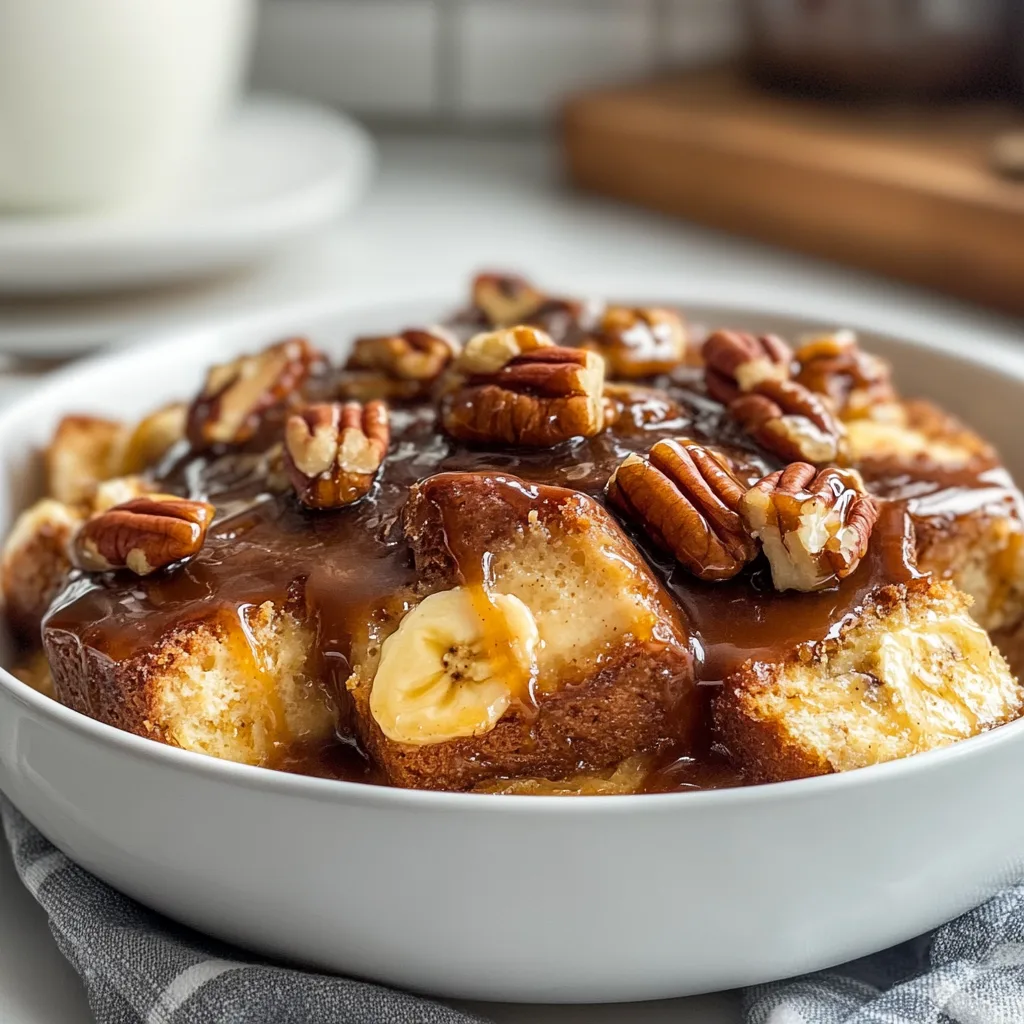
    There’s something utterly magical about the aroma of Slow Cooker Banana Bread Pudding with Caramel Drizzle and Pecans wafting through your home on a chilly evening. I discovered this recipe during a rainy weekend when my bananas had turned perfectly speckled brown—you know, that sweet spot between “still good” and “banana bread territory.” The slow cooker transforms humble ingredients into a dessert that’s simultaneously rustic and elegant. The caramel drizzle adds that perfect touch of indulgence while toasted pecans bring a satisfying crunch that elevates this comfort food classic to new heights. Let me show you how this hands-off wonder comes together.

    Recipe

    Why You’ll Love This Slow Cooker Banana Bread Pudding with Caramel Drizzle and Pecans

    Perfect Make-Ahead Dessert for Busy Lives

    This pudding is a lifesaver for those hectic days when you still want something special. I remember making this while preparing for overnight guests—I simply assembled everything in the morning, set the slow cooker, and by evening, we had a warm, soul-satisfying dessert waiting for us. The hands-off cooking method means you can focus on other tasks while your kitchen fills with the intoxicating scent of caramelized bananas and warm spices. Plus, it’s forgiving with timing, staying perfectly warm for up to an hour after cooking.

    Budget-Friendly Indulgence That Impresses

    Using overripe bananas transforms what might have been food waste into dessert gold. The humble ingredients—day-old bread, eggs, milk, and those spotty bananas—create something that tastes far more luxurious than its simple components suggest. I’ve served this at dinner parties where guests assumed it required hours of active preparation. The caramel drizzle feels fancy but takes just minutes to prepare, while toasted pecans add that perfect textural contrast that makes everyone think you spent all day in the kitchen.

    Essential Tips & Tricks

    Bread Selection Makes All the Difference

    The foundation of exceptional bread pudding is, unsurprisingly, the bread itself. I’ve found that brioche or challah creates the most luxurious texture, but any slightly stale bread works beautifully. The key is allowing the bread to dry out slightly—I’ve been known to cube fresh bread and leave it uncovered for a few hours before assembling. This helps it absorb the custard mixture without becoming soggy. For a twist, try cinnamon raisin bread or even banana bread for an extra layer of flavor that complements the fresh bananas perfectly.

    Perfecting Your Custard Mixture

    The custard is where you can really make this dessert shine with warm spices that complement the bananas. I always add a generous teaspoon of vanilla extract, a pinch of nutmeg, and cinnamon to my egg mixture. Whisk your eggs thoroughly before adding room temperature milk and cream to prevent scrambling. For extra richness, substitute some of the milk with coconut milk or add a splash of bourbon. The custard should completely soak the bread—I recommend gently pressing the bread down to ensure even absorption, similar to how I prepare my slow cooker peanut butter chocolate cookie bars.

    Serving Ideas & Creative Variations

    Elegant Presentation Techniques

    Transform this homey dessert into a showstopper with thoughtful presentation. I serve mine in pre-warmed bowls with the caramel drizzled in a pattern rather than simply poured on top. Try placing a scoop of vanilla bean ice cream in the center, allowing it to slowly melt into the warm pudding. Dust with powdered sugar using a small sieve for an elegant touch, and arrange additional banana slices and pecans artistically. For special occasions, I’ve even caramelized banana slices with a kitchen torch for a dramatic garnish that elevates the entire presentation.

    Seasonal Adaptations to Keep It Fresh

    This versatile recipe welcomes seasonal twists throughout the year. In summer, I fold in fresh berries or peaches before cooking. Fall calls for diced apples and extra cinnamon, while winter holidays are perfect for adding cranberries and orange zest. You can even incorporate chocolate chips or swap pecans for walnuts or almonds depending on your mood. The caramel sauce can be infused with different flavors too—try adding sea salt, bourbon, or even a touch of pumpkin spice during autumn months for a seasonal variation that keeps this recipe in rotation year-round.

    Storage & Troubleshooting Guide

    Extending the Life of Your Bread Pudding

    Proper storage ensures this dessert remains delicious for days. Once cooled, refrigerate leftovers in an airtight container for up to 4 days. I find the flavor actually deepens overnight as the spices meld together. To reheat, portion out what you need and microwave with a damp paper towel over the top to maintain moisture. For best results, drizzle with fresh caramel sauce after reheating. You can also freeze individual portions for up to 3 months—I wrap them in plastic, then foil, and label with the date for easy identification.

    Solving Common Texture Issues

    The most common challenge is achieving that perfect custardy texture—neither too dry nor too soggy. If your pudding seems dry, your slow cooker might run hot. Try reducing the cooking time by 30 minutes next batch or adding ¼ cup more liquid to the custard. For pudding that’s too wet, leave the lid slightly ajar during the last 30 minutes of cooking to allow excess moisture to escape. Remember that the pudding will continue to set as it cools, so it’s better to err on the side of slightly underdone than overdone.

    Frequently Asked Questions

    Can I make Slow Cooker Banana Bread Pudding with Caramel Drizzle and Pecans ahead of time?

    Absolutely! Prepare everything up to 24 hours in advance, refrigerate the assembled but uncooked pudding, and cook when ready. The caramel sauce can be made 3 days ahead and gently reheated before serving.

    What’s the best bread to use for this recipe?

    Brioche, challah, or French bread work beautifully. The slight sweetness of brioche complements the bananas perfectly, while challah creates a rich, tender texture that absorbs the custard wonderfully.

    Can I make this recipe dairy-free?

    Yes! Substitute the milk with almond, oat, or coconut milk and use coconut cream instead of heavy cream. For the caramel, use coconut cream and vegan butter for a dairy-free alternative that’s equally delicious.

    How do I know when the bread pudding is done?

    The pudding is ready when the center is set but still slightly jiggly, similar to a cheesecake. A knife inserted in the center should come out mostly clean with no liquid custard.

    Can I double this recipe for a larger crowd?

    Yes, but you’ll need a 6-quart or larger slow cooker. Increase cooking time by 30-45 minutes and check for doneness by ensuring the center reaches 160°F.

    Final Thoughts

    This Slow Cooker Banana Bread Pudding with Caramel Drizzle and Pecans has become my go-to dessert for both everyday comfort and special occasions. There’s something deeply satisfying about transforming simple ingredients into something so luxurious with minimal effort. The slow cooking process allows the flavors to develop and meld in a way that stovetop or oven methods simply can’t match. I hope this recipe brings the same warmth and joy to your kitchen that it has to mine. Don’t forget to check out more of my favorite slow cooker desserts on Pinterest for endless inspiration!

  • Pineapple Upside Down Cake with Maraschino Cherries – Irresistibly Delicious!

    Pineapple Upside Down Cake with Maraschino Cherries – Irresistibly Delicious!

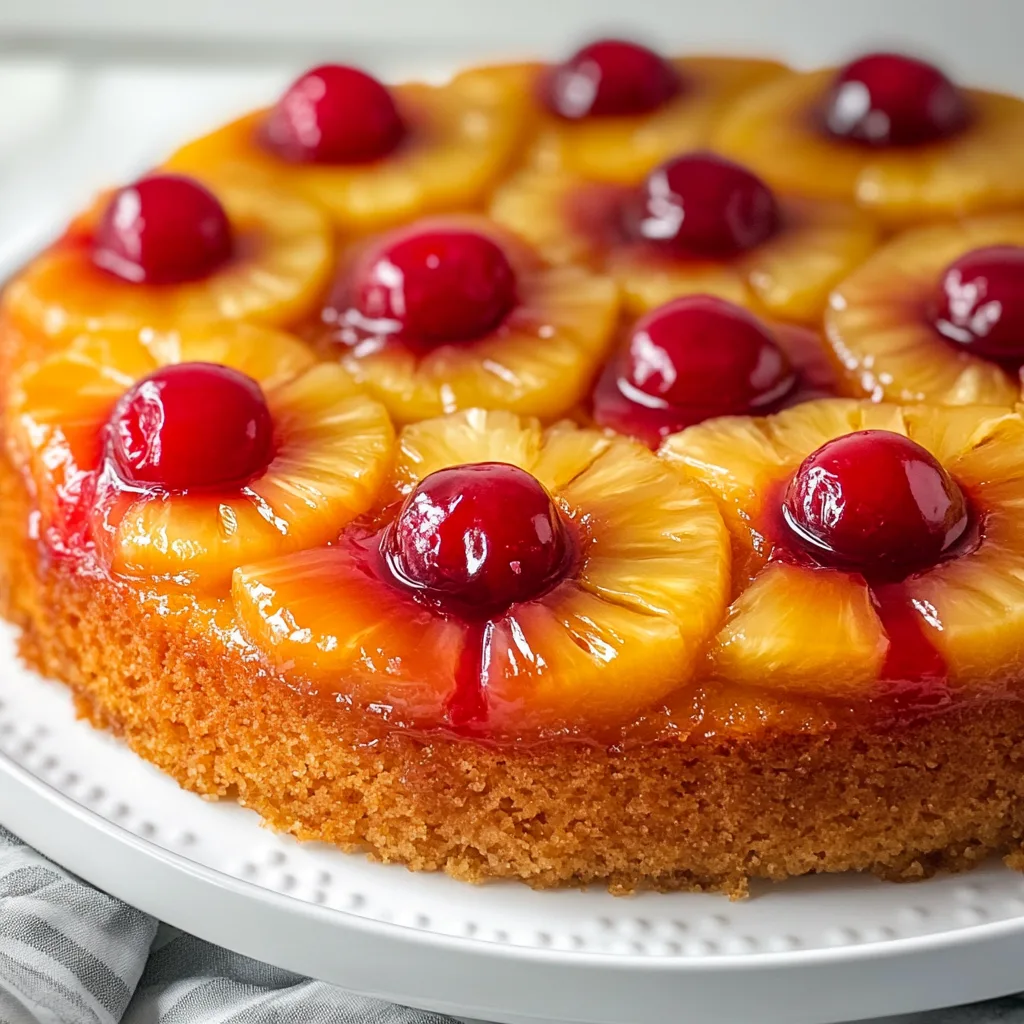
    There’s something undeniably magical about a perfectly caramelized Pineapple Upside Down Cake with Maraschino Cherries. The moment you flip that warm cake onto a serving plate and reveal those glistening pineapple rings with their ruby-red cherry centers nestled in golden caramel—it’s pure kitchen theater! I’ve been making this retro classic for Sunday family dinners since my grandmother first taught me, and that breathtaking reveal still makes my heart skip a beat every single time. If you’re craving a dessert that balances sweet-tart flavors with moist, buttery cake, you’re in for a treat with this timeless favorite from my collection.

    Pineapple Upside Down Cake with Maraschino Cherries – Irresistibly Delicious!

    Why You’ll Love This Pineapple Upside Down Cake with Maraschino Cherries

    A Perfect Balance of Flavors and Textures

    This cake is a symphony of contrasting elements that somehow create perfect harmony. The caramelized brown sugar creates a sticky-sweet top (which becomes the bottom when baked) that seeps slightly into the cake, while the pineapple adds bright tanginess. Those maraschino cherries aren’t just for looks—they provide bursts of sweetness that complement the slight acidity of the pineapple. Beneath it all, the cake itself is buttery and tender with a melt-in-your-mouth crumb that’s substantial enough to support all those toppings without becoming soggy.

    A Show-Stopping Dessert That’s Surprisingly Simple

    Don’t let its impressive appearance fool you—this Pineapple Upside Down Cake with Maraschino Cherries is remarkably beginner-friendly. The “hardest” part is arranging the pineapple and cherries in the pan, which is more fun than challenging! I remember feeling so accomplished the first time I made this for company; my mother-in-law actually gasped when I flipped it over. The beauty of this cake is that it’s designed to be rustic. That caramelization creates natural decoration, meaning you don’t need fancy piping skills or special equipment—just a regular cake pan and basic ingredients.

    Essential Tips & Tricks

    Perfecting the Caramel Base

    The foundation of an exceptional Pineapple Upside Down Cake starts with the caramel layer. For the richest flavor, use dark brown sugar rather than light—it has more molasses and creates that deep amber color we’re after. Melt the butter completely before sprinkling the sugar evenly across it. Resist the urge to stir! Let them mingle naturally in the pan. Pat your pineapple rings dry with paper towels before arranging them; excess moisture can make your caramel sauce too thin. For an extra-special touch, try adding a tablespoon of real maple syrup to the butter-sugar mixture.

    The Secret to a Perfectly Moist Cake

    The cake portion needs to be sturdy yet tender—a delicate balance! Use room temperature ingredients (especially eggs and butter) for the most even mixing. When measuring flour, spoon it into your measuring cup rather than scooping directly from the bag, which compacts it and can lead to a dense cake. I add a splash of the pineapple juice from the can to the batter—about 2 tablespoons—which infuses extra flavor and moisture. Mix just until ingredients are combined; overmixing develops gluten and toughens the cake. A toothpick inserted in the center should come out with a few moist crumbs, not completely clean.

    Serving Ideas & Creative Variations

    Elevating Your Presentation

    While this Pineapple Upside Down Cake with Maraschino Cherries is stunning on its own, a few simple additions can make it even more special. Serve slices slightly warm (not hot) to enhance the buttery mouthfeel. A dollop of lightly sweetened whipped cream on the side provides a cool contrast to the warm cake. For dinner parties, I place the whole cake on a vintage cake stand and surround it with fresh mint leaves. Individual servings look elegant on dessert plates with a light dusting of powdered sugar and a small sprig of mint. The vibrant colors make this cake perfect for holiday gatherings too!

    Exciting Flavor Twists on the Classic

    While the traditional recipe is beloved for good reason, there are delicious ways to make this cake your own. Try coconut rum in place of vanilla extract for a tropical twist, or add 1/2 teaspoon of ground cardamom to the batter for unexpected warmth. For a modern update, use fresh pineapple instead of canned (though you’ll need to make a simple syrup to replace the canned juice in the recipe). Feeling adventurous? Replace some of the maraschino cherries with fresh blackberries or add chopped macadamia nuts between the pineapple rings. Dark chocolate shavings sprinkled over the finished cake create an indulgent chocolate-covered-pineapple effect.

    Storage & Troubleshooting Guide

    Keeping Your Cake Fresh

    This Pineapple Upside Down Cake with Maraschino Cherries is at its absolute best the day it’s made, but proper storage can maintain its quality. Cover leftovers with a cake dome rather than plastic wrap, which can stick to the caramelized top. At room temperature, it stays fresh for up to 2 days. For longer storage, refrigerate for up to 5 days, but bring slices back to room temperature before serving to restore the cake’s tender texture. While you can technically freeze this cake, I don’t recommend it—the texture of the fruit changes upon thawing, and the caramel can become grainy.

    Solving Common Baking Challenges

    If your cake sticks when inverting, don’t panic! Run a thin knife around the edges and gently tap the bottom of the pan before attempting to flip it again. If some fruit stays in the pan, simply place it back on the cake—the warm caramel will help it adhere. For a cake that’s too pale on top, next time try placing the pan on the lower oven rack to encourage better caramelization. If your cake seems too wet in the center despite being fully baked, your pineapple likely had too much moisture; next time, pat the fruit very dry and consider reducing the liquid in your batter by a tablespoon.

    Frequently Asked Questions

    Can I make Pineapple Upside Down Cake with Maraschino Cherries without a cast iron skillet?

    Absolutely! While cast iron creates beautiful caramelization, a regular 9-inch cake pan works perfectly. Just make sure it’s at least 2 inches deep to prevent overflow during baking.

    How do I know when my cake is done baking?

    Insert a toothpick into the cake portion (not through the fruit). It should come out with a few moist crumbs but no wet batter. The edges will also pull slightly away from the pan.

    Can I make this recipe ahead of time for a party?

    Yes, but for best results, bake it the same day you’ll serve it. You can prepare the batter and arrange the fruit up to 2 hours before baking.

    What’s the best way to flip the cake without making a mess?

    Place your serving plate upside down over the cake pan. Holding them firmly together, quickly flip both over in one confident motion. Wait about 30 seconds before lifting the pan.

    Can I use fresh pineapple instead of canned?

    Yes! Cut fresh pineapple into 1/2-inch thick rings. You’ll need to make a simple syrup (equal parts sugar and water) to replace the canned juice in the recipe.

    Final Thoughts

    This Pineapple Upside Down Cake with Maraschino Cherries isn’t just a dessert—it’s a celebration of timeless flavors that continue to delight generation after generation. The moment when you reveal those perfect rings of caramelized pineapple and glossy cherries never gets old. I find myself making this whenever I need a reliable crowd-pleaser or just a dose of sweet nostalgia. Whether you’re a seasoned baker or trying this for the first time, I hope this cake brings as much joy to your table as it has to mine! For more delicious inspiration, follow me on Pinterest.

  • Slow Cooker Peanut Butter Chocolate Cookie Bars: Irresistibly Gooey!

    Slow Cooker Peanut Butter Chocolate Cookie Bars: Irresistibly Gooey!

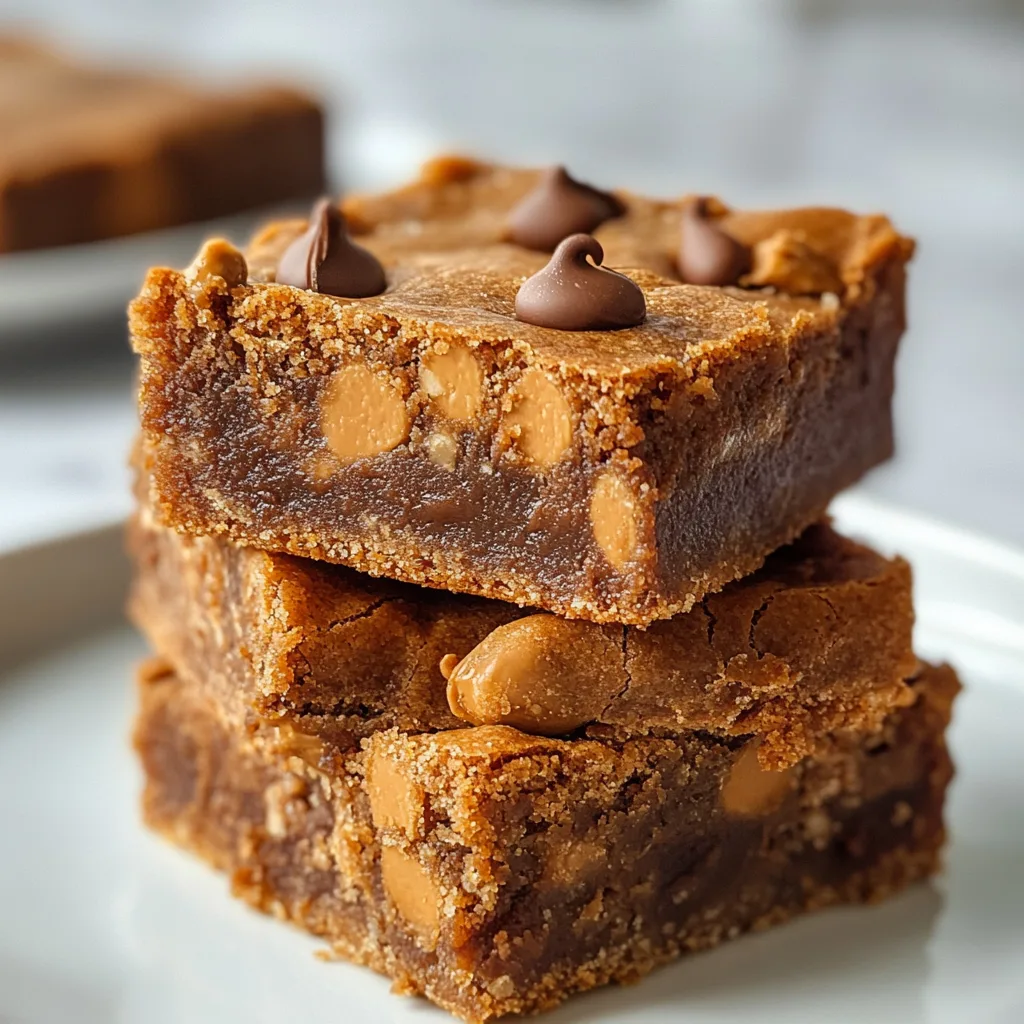
    Slow Cooker Peanut Butter Chocolate Cookie Bars are my absolute favorite indulgence when I want something decadently sweet without the fuss of traditional baking. The first time I made these, my kitchen filled with that irresistible aroma of melting chocolate and peanut butter that made even my teenager abandon his video game to investigate. There’s something magical about letting your slow cooker do all the work while you’re off handling life’s demands. These gooey, rich bars deliver all the comfort of homemade cookies with barely any effort—perfect for busy weeknights or weekend treats. Let me show you how to create this simple yet impressive dessert that’ll have everyone asking for seconds!

    Slow Cooker Peanut Butter Chocolate Cookie Bars: Irresistibly Gooey!

    Recipe

    Perfect for Busy Days

    These slow cooker peanut butter chocolate cookie bars have become my secret weapon for those chaotic days when I’m juggling work deadlines and family commitments. Unlike traditional baking that demands constant attention, these bars practically make themselves while you tackle your to-do list. The hands-off approach means you can simply layer the ingredients, set the timer, and walk away. I love how the slow, gentle heat creates that perfect chewy-yet-gooey texture that’s nearly impossible to achieve in a conventional oven. Plus, they’re ready exactly when you need them—whether for after-school snacks or last-minute guests.

    Foolproof Even for Beginners

    Don’t let baking intimidate you! These slow cooker peanut butter chocolate cookie bars are virtually impossible to mess up, which makes them perfect for novice bakers or cooking with kids. The forgiving nature of slow cooking means you don’t need precise measurements or perfect timing. I remember my first attempt—I was convinced I’d added too much peanut butter, but they turned out absolutely divine! The slow cooker’s consistent temperature eliminates common baking issues like burnt edges or undercooked centers. You’ll achieve that professional bakery-quality result without the stress, and the recipe’s flexibility means you can customize flavors while still getting perfect results every time.

    Essential Tips & Tricks

    Perfecting the Texture

    Getting the ideal consistency for your slow cooker peanut butter chocolate cookie bars depends on a few simple techniques. Line your slow cooker with parchment paper, leaving overhang on all sides—this prevents sticking and makes removal effortless. For chewier bars, cook on low for 2-3 hours; for more cake-like texture, add an extra egg. I’ve found that gently lifting the lid and checking the edges at the 2-hour mark gives me the perfect indicator—when they’re slightly pulling away from the sides, they’re nearly done. Remember that carryover cooking continues after you turn off the heat, so it’s better to undercook slightly than overdo it. Your bars will continue firming up as they cool.

    Ingredient Swaps & Substitutions

    Don’t worry if you’re missing an ingredient or catering to dietary restrictions—these slow cooker peanut butter chocolate cookie bars are incredibly adaptable. For gluten-free options, simply swap regular flour with a 1:1 gluten-free blend. No peanut butter? Almond or sunflower seed butter works beautifully. I once made these when I realized I was out of brown sugar—white sugar with a tablespoon of molasses saved the day! For a dairy-free version, use coconut oil instead of butter and dairy-free chocolate chips. You can even reduce the sugar by 1/4 cup and add mashed banana for natural sweetness. Just remember that liquid substitutions might require adjusting the cooking time slightly.

    Serving Ideas & Creative Variations

    Elevated Dessert Presentations

    Transform these humble slow cooker peanut butter chocolate cookie bars into showstopping desserts with minimal effort. For dinner parties, cut into neat squares and serve warm with a scoop of vanilla bean ice cream and a drizzle of warm caramel sauce. Create a dessert bar by offering toppings like crushed pretzels, toasted coconut, or chocolate ganache for guests to customize their portions. I love serving these at book club with coffee—I cut them into bite-sized pieces and arrange them on a tiered stand with fresh berries and mint leaves. For special occasions, stack alternating layers of bars and whipped cream in clear glasses for an impressive trifle-inspired dessert that looks like you spent hours in the kitchen.

    Seasonal & Holiday Adaptations

    These versatile slow cooker peanut butter chocolate cookie bars can be easily customized for any holiday or season. For Christmas, fold in crushed candy canes and white chocolate chips, then dust with powdered sugar “snow” before serving. Summer gatherings call for a s’mores version—add graham cracker pieces and mini marshmallows during the last 30 minutes of cooking. Halloween? Mix in orange-colored chocolate candies and top with spooky sprinkles. I made these for my daughter’s fall birthday by adding cinnamon, nutmeg, and chopped pecans—the warm spices perfectly complemented the chocolate and peanut butter. For Valentine’s Day, press heart-shaped candies into the top during the final cooking minutes for a festive touch.

    Storage & Troubleshooting Guide

    Keeping Them Fresh

    Preserving the perfect texture of your slow cooker peanut butter chocolate cookie bars is simple with proper storage. Once completely cooled, cut them into portions and store in an airtight container at room temperature for up to 3 days. Place parchment paper between layers to prevent sticking. For longer storage, refrigerate for up to a week—just bring to room temperature before serving to restore their gooey goodness. These bars also freeze beautifully for up to 3 months; wrap individual pieces in plastic wrap, then foil, and place in a freezer bag. I often make a double batch specifically to freeze, giving me instant dessert options for unexpected guests or late-night cravings.

    Fixing Common Issues

    Even the most experienced bakers encounter issues, but most problems with slow cooker peanut butter chocolate cookie bars have simple solutions. If your bars turn out too dry, you likely cooked them too long—next time, check earlier or add 2 tablespoons more butter to the recipe. Too gooey in the center? They need more time, or your slow cooker runs cool—continue cooking in 15-minute increments.

    Uneven cooking is common in older slow cookers; rotate the insert halfway through or invest in a newer model with better heat distribution. If the edges burn but the center is underdone, your cooker might run hot—use the LOW setting exclusively and consider adding a thin layer of water to the space between the insert and heating element.

    Frequently Asked Questions

    Yes, but use a 6-quart or larger slow cooker and increase cooking time by 30-45 minutes. Check frequently after the original cooking time as doubling can affect how evenly they cook.

    How do I know when they’re done cooking?

    Look for set edges that start pulling away from the sides while the center remains slightly soft. A toothpick inserted 1-inch from the edge should come out with a few moist crumbs.

    Can I make these dairy-free?

    Absolutely! Substitute the butter with coconut oil and use dairy-free chocolate chips. The peanut butter already adds richness, so you won’t miss the dairy.

    My slow cooker runs hot. Any suggestions?

    Use only the LOW setting and check 30 minutes earlier than the recipe suggests. Alternatively, place a kitchen towel between the lid and cooker to absorb excess moisture.

    How can I make these bars healthier?

    Reduce sugar by 25%, substitute half the flour with oat flour, use natural peanut butter, and add chopped nuts for protein. Dark chocolate chips contain less sugar than milk chocolate.

    Final Thoughts

    These Slow Cooker Peanut Butter Chocolate Cookie Bars have become my go-to recipe when I need something delicious with minimal effort. There’s something deeply satisfying about creating a dessert that feels special while being incredibly simple. I encourage you to make this recipe your own—experiment with mix-ins, try different nut butters, or adjust the sweetness to your preference. The slow cooker method truly transforms ordinary ingredients into an extraordinary treat that brings people together. Whether for family movie nights or elegant gatherings, these bars never disappoint. Find more inspiration for your next baking adventure on our Pinterest page!

  • Lemon and Blueberry Crumpet Doughnuts – Cozy, Irresistible

    Lemon and Blueberry Crumpet Doughnuts – Cozy, Irresistible

    Lemon and Blueberry Crumpet Doughnuts are the joyful kitchen shortcut I reach for when brunch needs magic, fast. The first time I made Lemon and Blueberry Crumpet Doughnuts, I was mid-chaos: the kettle screamed, my timer beeped, and my dog tried to steal a blueberry. Still, that warm lemon sugar and jammy blueberry swirl won the day. I squeezed the crumpets gently (key!) before air-frying, and they emerged puffy, golden, and gloriously doughnut-like. A quick lemon glaze drizzle, a messy counter, and a very happy table later—this recipe became a keeper.

    Lemon & Blueberry Crumpet Doughnuts

    Recipe

    WHY YOU’LL LOVE THIS RECIPE

    What Makes This Lemon and Blueberry Crumpet Doughnuts So Irresistible

    When I first served Lemon and Blueberry Crumpet Doughnuts to friends, one asked if I’d secretly opened a bakery. I laughed, because Lemon and Blueberry Crumpet Doughnuts are my shortcut to “fancy” without the fuss. They’re homemade yet forgiving, the kind of comfort food that turns any morning into a cozy memory. You get springy crumpet texture transformed into a doughnut dream, bright lemon glaze, and a blueberry compote that puddles in all the best places.

    • Quick prep: No yeast proofing—just soak, air-fry, and glaze for an easy recipe.
    • Simple ingredients: Pantry staples and store-bought crumpets make a reliable homemade version.
    • Comforting flavor: Tart lemon meets jammy blueberries for classic comfort food energy.
    • Family-friendly: Not too sweet, super soft, and perfect for brunch or dessert.
    • Flexible cooking: Air fryer, skillet, or oven—your choice for a quick fix.

    The secret is that crumpet crumb: those tiny holes drink up lemon custard without getting soggy. It’s like a built-in flavor sponge. This is the kind of easy dinner-adjacent brunch treat that slides into a weeknight dessert or lazy Sunday spread. Craving seconds? Me too. Let’s get to the recipe card so you can make a batch today.

    These Lemon and Blueberry Crumpet Doughnuts are having a moment because they’re fast, cozy, and wildly photogenic. On social feeds, the lemon glaze glints, the blueberry compote shines, and that “crumpet-to-doughnut” transformation feels like kitchen wizardry. If you love easy dinner side sweets or brunchy comfort food, this homemade star checks all the boxes with a one-pan meal vibe and minimal effort.

    TIPS, TRICKS & EXPERT SECRETS

    Chef Tips for Perfect Lemon and Blueberry Crumpet Doughnuts Every Time

    I learned a lot while testing these—like the day I forgot to preheat the air fryer and wondered why my Lemon and Blueberry Crumpet Doughnuts looked shy about browning. Lesson learned! A few pro moves make this easy recipe sing, whether you prefer an air fryer quick fix or skillet glow-up.

    • Preheat matters: A hot air fryer or skillet ensures fast color and that irresistible crisp edge on Lemon and Blueberry Crumpet Doughnuts.
    • Soak, then squeeze: Let each crumpet sit 20–30 seconds per side in the lemon custard, then gently squeeze to avoid sogginess.
    • Use lemon sugar warm: Coat doughnuts while hot so the lemon sugar clings perfectly.
    • Glaze viscosity: Whisk lemon juice into powdered sugar drop by drop. You want a ribbon-thick glaze that sets but still shines.

    Smart Ingredient Swaps & Practical Cooking Advice

    • Vegan swap: Use oat milk and 2 tbsp ground flax + 6 tbsp water (rest 10 minutes) instead of eggs; brush with melted vegan butter before coating.
    • Gluten-free: Choose gluten-free crumpets and verify cornstarch is certified GF.
    • Flavor boost: A pinch of cardamom or vanilla bean paste adds bakery-level depth to Lemon and Blueberry Crumpet Doughnuts.
    • What not to do: Don’t over-soak. If crumpets sit too long, they’ll collapse and cook up gummy.

    These cooking tips keep the homemade version consistent and crowd-pleasing. Whether you pan-fry or air-fry, you’ll get bright flavor, dreamy texture, and a result that looks as good as it tastes.

    SERVING IDEAS & CREATIVE VARIATIONS

    How to Serve Lemon and Blueberry Crumpet Doughnuts for Maximum Enjoyment

    Last weekend, I plated Lemon and Blueberry Crumpet Doughnuts on a big white platter with lemon zest confetti—it looked like a cafe window! For a brunch spread, add fresh berries and a warm pot of tea. If you love building a board, pair these with my Christmas Morning Charcuterie Breakfast Board for a shareable stunner.

    • Pairing: Hot coffee or Earl Grey highlights the citrus; a splash of cream softens the tang.
    • Sauce duo: Serve extra lemon glaze and a dish of warm blueberry compote for dipping.
    • Brunch set: Add a savory make-ahead like Make-Ahead Christmas Combo Casserole to balance the sweetness.

    Flavor Twists and Seasonal Variations

    • Spring glaze: Swap blueberry compote for strawberry-rhubarb; still keep that lemon sugar sparkle for Lemon and Blueberry Crumpet Doughnuts inspiration.
    • Fall spice: Add cinnamon and nutmeg to the lemon sugar; drizzle maple-lemon glaze over your crumpet doughnuts.
    • Holiday brunch: Serve alongside Panettone French Toast for a festive duo people will talk about.

    For content creators: shoot in natural window light, drizzle glaze right before the photo, and stack two Lemon and Blueberry Crumpet Doughnuts with compote cascading for that viral bite shot. These serving ideas, plating suggestions, and flavor variations make every batch ready for sharing.

    Lemon and Blueberry Crumpet Doughnuts – Cozy, Irresistible

    STORAGE & TROUBLESHOOTING GUIDE

    How to Store and Reheat Lemon and Blueberry Crumpet Doughnuts

    On the rare occasion we have leftovers, I stash Lemon and Blueberry Crumpet Doughnuts in a tin before anyone notices. To keep them fresh, store the compote and glaze separately.

    • Room temperature: Up to 6 hours in a loosely covered container (best texture day-of).
    • Refrigerator: 2–3 days in an airtight container; keep glaze and compote in separate jars.
    • Freezer: Freeze unglazed, uncoated crumpet doughnuts up to 1 month; thaw in the fridge.
    • Reheat: Air fryer at 325°F (160°C) for 3–4 minutes or oven at 325°F (160°C) for 6–8 minutes. Recoat with lemon sugar and glaze just before serving.

    Troubleshooting Common Lemon and Blueberry Crumpet Doughnuts Issues

    • Too soggy: You likely over-soaked. Next time, dip 20–30 seconds per side and gently squeeze.
    • Dry texture: Add a splash more milk to the custard or cook 1–2 minutes less; reheat with a brushing of melted butter.
    • Not browning: Preheat your air fryer or skillet and avoid crowding. A light oil spray boosts color.
    • Watery compote: Simmer 1–2 more minutes, or add a 1/2 tsp extra cornstarch slurry to fix texture.

    With this storage advice, you’ll keep Lemon and Blueberry Crumpet Doughnuts tender and bright. And if something goes sideways, a few quick fixes restore that homemade glow. You’ve got this—your next batch will be the best yet.

    FAQs

    Can I bake Lemon and Blueberry Crumpet Doughnuts instead of air-frying?

    Yes. Bake on a lined sheet at 400°F (200°C) for 12–15 minutes, flipping halfway. Coat in lemon sugar while warm and glaze after.

    What crumpets work best?

    Standard store-bought crumpets are perfect. If using gluten-free, handle gently and reduce soak time to avoid breakage.

    Can I make Lemon and Blueberry Crumpet Doughnuts ahead?

    Yes. Soak and cook, cool completely, then refrigerate. Reheat before coating in lemon sugar and add fresh glaze and compote to serve.

    How do I adjust sweetness?

    Reduce sugar in the soak to 1 tbsp, and thin the glaze with extra lemon juice. The blueberry compote’s sweetness is easily adjusted to taste.

    Conclusion

    Lemon and Blueberry Crumpet Doughnuts are a cozy, homemade treat with bold lemon zest, juicy blueberries, and that crumpet-to-doughnut magic. From quick prep to flexible cooking methods, this easy recipe delivers comfort food bliss every time. Dress them up for brunch, plate them with extra compote, and enjoy the bakery-style finish without leaving home. If you loved these, you might also enjoy my warming Slow Cooker Gingerbread Oatmeal for a seasonal twist. Make Lemon and Blueberry Crumpet Doughnuts today, share a photo, and tag me—your kitchen is about to smell incredible.