Category: Desserts

Sweet and easy dessert recipes for every craving. Simple treats, rich flavors, and quick ideas that make any moment feel special.

  • Burnt Honey Pie Recipe: Irresistible Sweet & Smoky Dessert Craze!

    Burnt Honey Pie Recipe: Irresistible Sweet & Smoky Dessert Craze!

    Burnt Honey Pie Recipe: Irresistible Sweet & Smoky Dessert Craze!

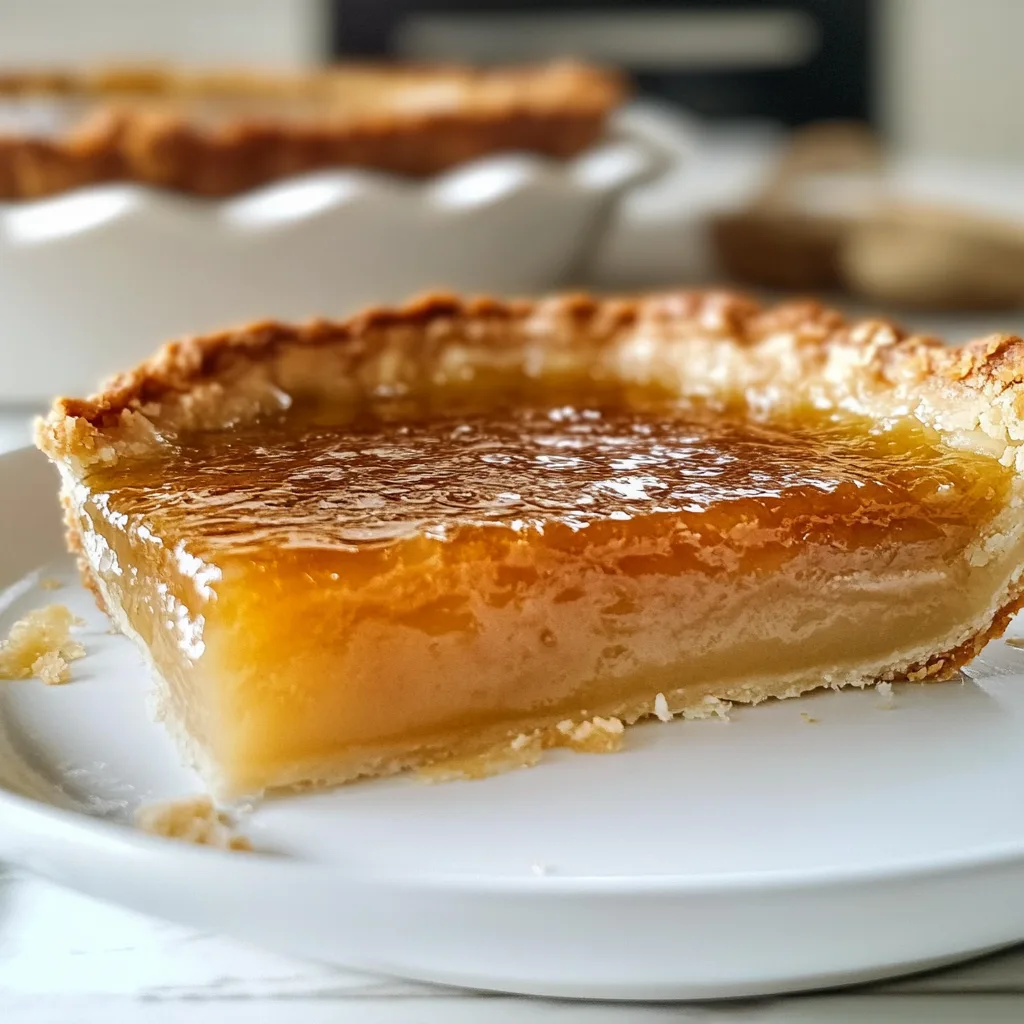
    Burnt Honey Pie has been my absolute obsession this season! There’s something magical about the way honey transforms when it’s carefully caramelized, creating deep amber notes that dance between sweet and almost savory. The first time I made this pie for my sister’s birthday gathering, the room fell silent as everyone took their first bites. The silky custard filling, perfumed with that distinctive burnt honey aroma, sits beautifully in a buttery crust that shatters just right with each forkful. If you’re looking for a dessert that feels both rustic and sophisticated, this is your new go-to recipe from Darleen’s kitchen.

    Recipe

    Why You’ll Love This Burnt Honey Pie

    A Symphony of Flavors and Textures

    This pie is a sensory experience unlike any other dessert. The process of burning (really, deeply caramelizing) the honey creates complex flavor notes that ordinary pies just don’t have—hints of caramel, toasted marshmallow, and even a whisper of smokiness. The contrast between the silky-smooth custard filling and the crisp, buttery crust creates that perfect textural balance we all crave. I love watching guests try to identify what makes it taste so unique! The subtle aroma that fills your kitchen as it bakes is reason enough to make this pie, even before that first heavenly bite.

    Make-Ahead Convenience

    One of my favorite things about this Burnt Honey Pie is how wonderfully it works with busy schedules. The pie actually benefits from being made a day in advance, allowing those complex flavors to develop and settle. The custard filling sets beautifully overnight in the refrigerator, making it perfect for holiday planning or dinner parties. I often make mine the evening before guests arrive, which means less stress and more time to enjoy company. Plus, serving slices straight from the refrigerator gives you that perfect cool, creamy texture that pairs beautifully with a hot cup of coffee.

    Essential Tips & Tricks

    Mastering the Burnt Honey

    The most crucial step is getting your honey to that perfect amber color without actually burning it. Use a heavy-bottomed saucepan and watch it carefully—it will bubble vigorously and then begin to darken. The difference between perfectly caramelized and bitter is just a matter of seconds! I keep a cup of hot water nearby to stop the cooking process immediately when it reaches that deep golden hue with a slight smoky aroma. Let your nose guide you; when it smells like toasted marshmallows with a hint of caramel, it’s perfect. Cool it slightly before adding to your custard mixture for the most intense flavor.

    Perfecting Your Crust

    A great Burnt Honey Pie deserves a flawless crust as its foundation. For best results, keep everything cold—your butter, your tools, even your hands if possible! I like to chill my flour in the freezer for 15 minutes before starting. When blind baking, use pie weights or dried beans to prevent shrinking, and brush the bottom with a thin layer of egg white once it’s partially baked. This creates a barrier that keeps the crust crisp even under the custard filling. For a beautiful golden edge, try brushing with egg wash before the final bake, just like I do with my Bourbon Maple Bacon Cinnamon Rolls.

    Serving Ideas & Creative Variations

    Perfect Pairings

    Burnt Honey Pie stands beautifully on its own, but a few thoughtful accompaniments can elevate it to restaurant quality. A dollop of lightly whipped cream with just a hint of vanilla makes the honey notes sing. For something more unexpected, try a small scoop of tangy crème fraîche to balance the sweetness. Fresh berries add a welcome burst of acidity—blackberries are my personal favorite with this pie. For special occasions, I’ve served thin slices alongside a small glass of bourbon or a cup of strong black tea. The contrast between the creamy pie and these bold flavors creates a memorable dessert experience.

    Seasonal Adaptations

    One thing I adore about this versatile pie is how easily it adapts to different seasons. In summer, I fold in fresh lavender or a splash of orange blossom water for a floral note. Fall calls for warming spices—try adding cinnamon and a pinch of cardamom to the custard. Winter holidays? A hint of rosemary infused into the cream creates an unexpected herbal note that pairs beautifully with the caramelized honey. For spring, I love adding lemon zest and a small amount of juice for brightness, similar to what I do in my Gluten-Free Lemon Pound Cake. The burnt honey provides a consistent base that welcomes these seasonal twists.

    Storage & Troubleshooting Guide

    Proper Storage Methods

    Burnt Honey Pie keeps beautifully when stored correctly. After it has completely cooled, cover loosely with foil rather than plastic wrap, which can make the crust soggy. The pie will keep in the refrigerator for up to four days, though the crust will soften slightly over time. If you need to store it longer, you can freeze individual slices—place them on a baking sheet until frozen solid, then wrap each piece tightly in plastic wrap and aluminum foil. Frozen slices can be thawed overnight in the refrigerator. I never recommend freezing the whole pie, as the texture of the filling may become grainy.

    Common Issues & Solutions

    If your filling isn’t setting properly, the most likely culprit is underbaking. The center should still have a slight wobble when you remove it from the oven—it will continue to set as it cools. If your honey darkens too quickly or tastes bitter, try lowering the heat next time and stirring more frequently. For a crust that shrinks during blind baking, make sure you’re chilling it adequately between steps and using enough pie weights. And if your filling cracks on top, you likely overcooked it or cooled it too quickly—next time, turn off the oven and let the pie cool gradually with the door slightly ajar.

    Frequently Asked Questions

    Can I use any type of honey for Burnt Honey Pie?

    You can use any honey, but varieties with distinct flavors like wildflower or orange blossom will give your pie more character. Avoid very dark honey like buckwheat, as it can become bitter when caramelized.

    How do I know when the honey is properly “burnt”?

    Watch for a deep amber color and a rich, caramel-like aroma. It should darken significantly but not smoke. This typically takes 3-5 minutes over medium heat.

    Can I make Burnt Honey Pie without dairy?

    Yes! Substitute coconut cream for heavy cream and use a plant-based butter in the crust. The burnt honey flavor still shines through beautifully.

    Why did my custard filling crack?

    Overbaking is usually the culprit. Remove the pie when the center still has a slight jiggle—it will continue setting as it cools.

    Can I prepare components of this pie in advance?

    Absolutely! The burnt honey can be made up to a week ahead and stored in an airtight container. The pie crust can be prepared and refrigerated for 2 days before baking.

    Final Thoughts

    This Burnt Honey Pie has become my signature dessert for good reason—it’s impressive yet approachable, with a flavor profile that keeps everyone coming back for more. There’s something deeply satisfying about transforming simple honey into something so complex and crave-worthy. The recipe rewards patience and attention to detail, but isn’t that true of all the best things in life? I hope you’ll try this Burnt Honey Pie and experience the magic for yourself. Don’t forget to share your creations on Pinterest so others can be inspired by your baking adventures!
  • Christmas Cheesecake with Cranberry Jam | Irresistibly Festive!

    Christmas Cheesecake with Cranberry Jam | Irresistibly Festive!

    Christmas Cheesecake with Cranberry Jam | Irresistibly Festive!

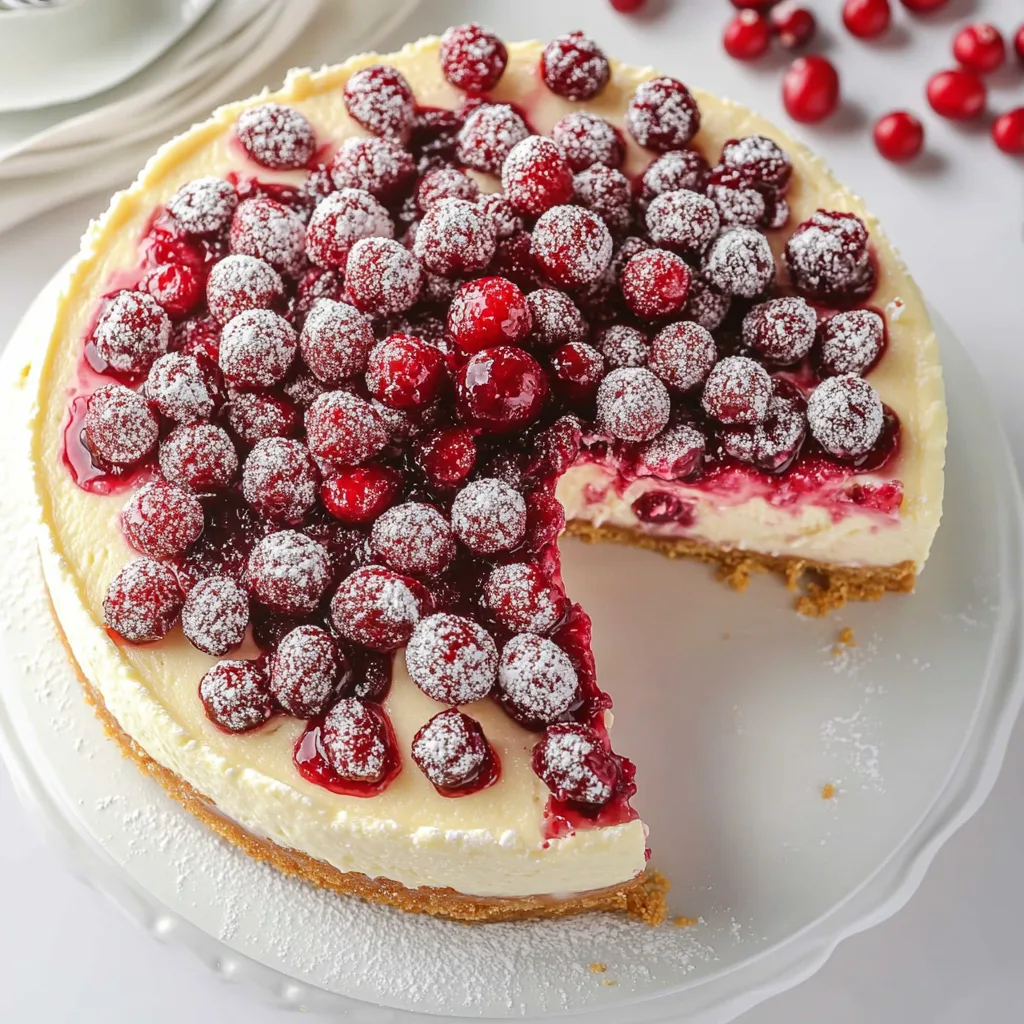
    The magic of Christmas Cheesecake with Cranberry Jam and Sugared Cranberries has been my holiday secret weapon for years. That first time I brought it to my in-laws’ gathering, the room fell silent as everyone took their first bite – then erupted into a chorus of “Oh my goodness!” There’s something about the creamy richness paired with tart cranberry that feels like Christmas itself on a plate. The festive red berries glisten like tiny jewels atop a velvet-smooth canvas, creating a showstopper that’s actually simpler than it looks. If you’re looking to add something special to your holiday dessert table, this is it!

    Recipe

    Why You’ll Love This Christmas Cheesecake with Cranberry Jam and Sugared Cranberries

    A Perfect Balance of Flavors

    The beauty of this Christmas Cheesecake lies in its perfect harmony of flavors. The velvety cheesecake provides a rich, creamy base that melts in your mouth with each bite. That subtle vanilla bean-speckled filling creates the perfect canvas for the star of the show – that vibrant cranberry jam layer. The tartness cuts through the richness in the most satisfying way! I love watching guests’ expressions as they discover how the sweet-tart cranberry complements the buttery graham cracker crust. It’s that magical balance that makes people reach for “just one more sliver” even after declaring they couldn’t eat another bite.

    A Make-Ahead Holiday Miracle

    As someone who’s hosted enough holiday gatherings to know the stress of last-minute preparations, this cheesecake has saved me countless times. You can make it up to three days ahead, which is absolute gold during the holiday rush. The cranberry jam can be prepared a week in advance, and those sugared cranberries? Make them two days before! I still remember frantically finishing other dishes last Christmas while this beauty waited patiently in the refrigerator. When dessert time arrived, I simply garnished with the sugared cranberries and fresh mint for a stress-free finale that looked like I’d spent hours on it that day.

    Essential Tips & Tricks

    Perfect Cheesecake Texture Every Time

    The secret to avoiding cracks and achieving that dreamy, silky texture starts with room temperature ingredients – especially the cream cheese. I learned this the hard way after battling lumpy batter for years! Beat the cream cheese alone first until completely smooth before adding other ingredients. The water bath is non-negotiable – it creates gentle, even heat around your precious creation. Last Christmas, I skipped the foil wrap and water leaked in (disaster!). Now I use a double layer of heavy-duty foil wrapped tightly around the pan. Cool your cheesecake gradually by turning off the oven, leaving the door ajar, and letting it rest for an hour before refrigerating.

    Cranberry Jam & Sugared Cranberry Success

    The cranberry jam needs just the right consistency – too runny and it won’t set properly; too thick and it won’t spread beautifully. The key is watching for that magical moment when the berries burst and the mixture coats the back of a spoon. For the sugared cranberries, patience is everything! After soaking them in simple syrup, let them dry completely on a rack before rolling in sugar. This creates that gorgeous crystallized effect that makes them look like they’ve been kissed by frost. I love making extra sugared cranberries – they’re irresistible snacks while cooking and make stunning garnishes for holiday cocktails or other desserts.

    Serving Ideas & Creative Variations

    Presentation That Wows

    Transform this already stunning Christmas Cheesecake into an absolute showstopper with thoughtful presentation. I arrange the sugared cranberries in a wreath pattern around the edge, then tuck small sprigs of fresh rosemary or mint between them for a pop of green. A light dusting of powdered sugar “snow” just before serving creates a magical winter wonderland effect. Serve on a cake stand lined with eucalyptus or pine branches for extra holiday charm. I’ve found that chilling the serving knife in ice water between slices gives you those clean, photo-worthy cuts that make everyone reach for their phones before taking a bite!

    Flavor Twists and Adaptations

    While the classic version is divine, this cheesecake welcomes creative variations. Try adding orange zest to the filling for a citrus twist that brightens the whole dessert. White chocolate chips folded into the batter create delightful pockets of sweetness. For an adults-only version, add a splash of Grand Marnier to the cranberry jam – it was the secret ingredient in last year’s Christmas Eve gathering! You can also swap the graham cracker crust for gingersnaps or chocolate cookie crumbs for a different flavor foundation. For mini versions, prepare in a muffin tin with liners and reduce baking time to about 20 minutes.

    Storage & Troubleshooting Guide

    Proper Storage for Maximum Freshness

    To maintain the Christmas Cheesecake’s perfect texture and flavor, proper storage is crucial. Once completely cooled, cover with plastic wrap (without touching the surface) or place in an airtight container before refrigerating. The cheesecake will stay fresh for up to 5 days in the refrigerator – though it rarely lasts that long in my house! For longer storage, you can freeze the plain cheesecake (without sugared cranberries) for up to a month. Wrap it tightly in plastic wrap, then aluminum foil, and thaw overnight in the refrigerator before garnishing. I like to slice before freezing, separating pieces with parchment paper for easy single servings.

    Fixing Common Cheesecake Problems

    Even experienced bakers encounter challenges with cheesecakes, but most issues have simple solutions. If your cheesecake cracks, don’t panic! The cranberry jam layer will cover minor imperfections, or use sugared cranberries strategically as beautiful camouflage. For a sunken center, your cheesecake likely needed more baking time – but a generous pile of sugared cranberries in the middle creates a deliberate decorative dip. If your crust gets soggy, try a quick prebake (10 minutes at 350°F) before adding filling. And if your sugared cranberries won’t crystallize properly, ensure they’re completely dry from the syrup soak before rolling in sugar – patience here makes all the difference!

    Frequently Asked Questions

    Can I make this Christmas Cheesecake with Cranberry Jam and Sugared Cranberries gluten-free?

    Absolutely! Simply substitute the graham crackers with gluten-free graham crackers or cookies. The rest of the ingredients are naturally gluten-free, making this an easy adaptation for those with sensitivities.

    How far in advance can I make the sugared cranberries?

    The sugared cranberries can be made up to 2 days in advance. Store them in a single layer at room temperature – not in the refrigerator, as moisture will dissolve the sugar coating.

    Can I use frozen cranberries instead of fresh?

    Yes! Frozen cranberries work perfectly for both the jam and sugared cranberries. Don’t thaw them before making the jam – use them directly from frozen for the best texture.

    What’s the secret to a crack-free cheesecake?

    Room temperature ingredients, not overmixing after adding eggs, using a water bath, and cooling gradually. These steps prevent the dramatic temperature changes that cause cracks.

    Can I substitute the cranberry jam with another flavor?

    Definitely! While cranberry creates that classic Christmas look and flavor, raspberry or cherry preserves make excellent alternatives that maintain the festive red color.

    Final Thoughts

    This Christmas Cheesecake with Cranberry Jam and Sugared Cranberries has become more than just a dessert in my home – it’s a cherished tradition that signals the holiday season has truly begun. The balance of creamy, sweet, and tart creates something truly magical that friends and family request year after year. The festive appearance makes it worthy of your holiday table’s centerpiece, while the make-ahead nature keeps your celebration stress-free. I’d love to see your creations – tag me on Pinterest when you make your own version of this holiday showstopper!

  • Chocolate Marshmallow Swirl Cookies: Irresistible Sweet Treats!

    Chocolate Marshmallow Swirl Cookies: Irresistible Sweet Treats!

    Chocolate Marshmallow Swirl Cookies: Irresistible Sweet Treats!

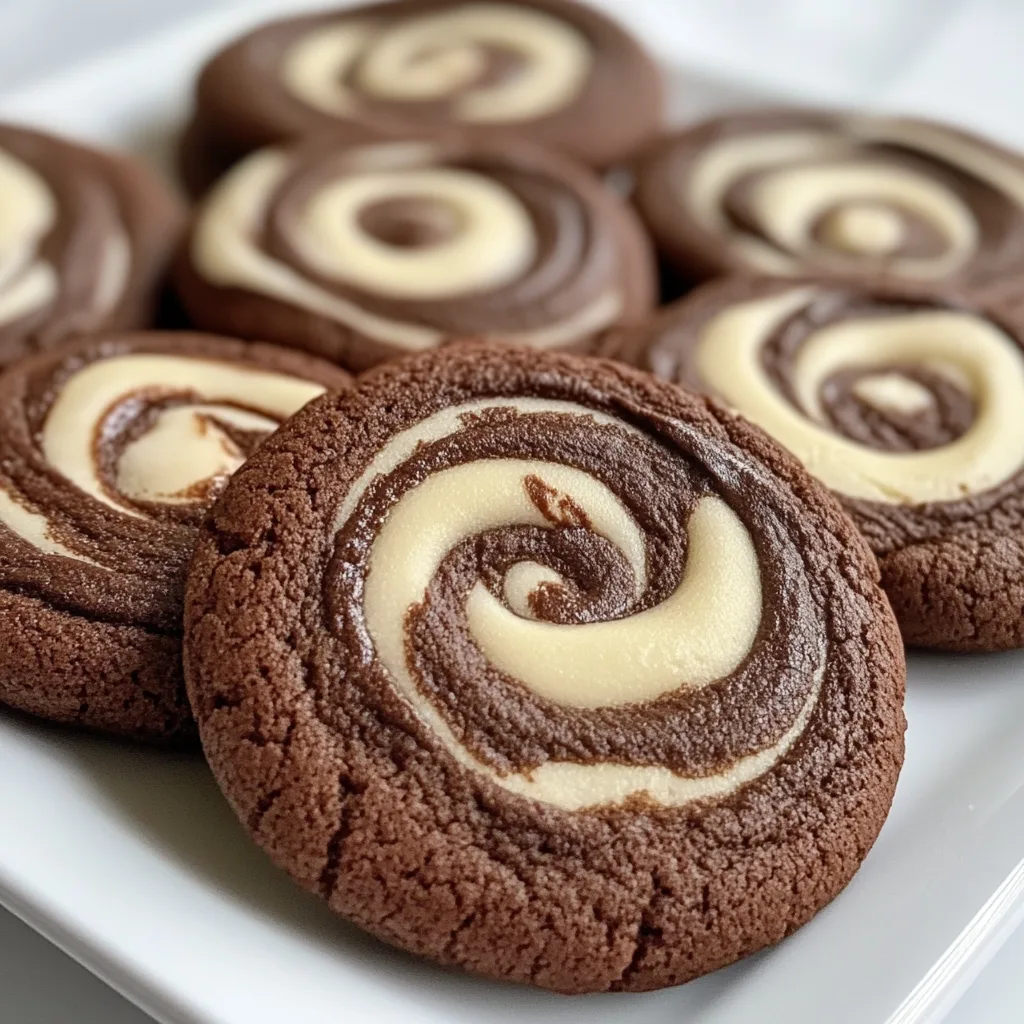
    Chocolate Marshmallow Swirl Cookies are the ultimate indulgence for those moments when you need a little extra comfort in your life. I first made these cookies during a particularly snowy weekend when the kids were bouncing off the walls with cabin fever. The rich chocolate base with swirls of gooey marshmallow created such magic that even my pickiest eater asked for seconds! These cookies strike the perfect balance between chewy edges and soft centers with pockets of melted marshmallow that create the most satisfying pull-apart texture. If you love these, you might also enjoy my Brown Butter Skillet Chocolate Chip Cookie for another cozy treat!

    Recipe

    Why You’ll Love These Chocolate Marshmallow Swirl Cookies

    Perfect Texture Combination

    There’s something almost magical about the textural contrast in these cookies. The cookie base has that ideal chewy-crisp edge that gradually gives way to a fudgy center. When you bite into a pocket of marshmallow, it creates this delightful stretchy pull that makes my heart happy every single time. I’ve tested these cookies at least seven times to get the ratio just right—enough marshmallow to create beautiful swirls and pockets of gooey goodness, but not so much that they become overly sweet or lose their shape during baking.

    Crowd-Pleasing Appeal

    These cookies have become my secret weapon for potlucks and school bake sales. Last month, I brought them to my daughter’s soccer team celebration, and they disappeared faster than any other dessert! The visual wow factor of the marshmallow swirls makes them instantly appealing, while the rich chocolate flavor satisfies even the most discerning chocolate lovers. They’re sophisticated enough for adults but playful enough for kids, making them the ultimate crowd-pleaser for any gathering.

    Essential Tips & Tricks

    Mastering the Marshmallow Swirl

    The key to perfect swirls is all in the timing and temperature. Always use room-temperature marshmallow cream (not marshmallows) for the smoothest incorporation. After folding it into your chocolate cookie dough, resist the urge to overmix! Three or four gentle folds with a rubber spatula creates those beautiful marbled streaks without fully incorporating the marshmallow. If you mix too much, you’ll lose the distinct swirl effect that makes these cookies so special and Instagram-worthy.

    Perfecting the Bake

    Finding the sweet spot for baking these cookies took me several attempts! The marshmallow components caramelize faster than the cookie base, so watch them carefully after the 8-minute mark. Look for slightly underbaked centers with set edges—they’ll continue cooking on the hot baking sheet after removal. For extra gooey centers like in my Gluten-Free Double Chocolate Cookies, let them cool on the sheet for exactly 5 minutes before transferring to a wire rack. This prevents overbaking while ensuring they set properly.

    Serving Ideas & Creative Variations

    Transform these cookies into an unforgettable dessert by serving them warm with a scoop of vanilla ice cream on top. The contrast between the warm, gooey cookie and cold ice cream creates a sensory delight that’s simply irresistible. For dinner parties, I like to stack three smaller cookies with layers of chocolate ganache between them, then add a light dusting of cocoa powder and a few fresh raspberries. The presentation looks fancy, but it takes just minutes to assemble!

    Seasonal Adaptations

    These versatile cookies welcome creative twists throughout the year. During winter holidays, I add a drop of peppermint extract and crushed candy canes on top for a festive touch. For summer gatherings, try incorporating graham cracker pieces for a s’mores-inspired variation that pairs beautifully with my Crockpot Smores Chocolate Cake. Fall calls for cinnamon and a touch of espresso powder to enhance the chocolate’s depth, while spring welcomes white chocolate chips and dried strawberry pieces for a fruity twist.

    Storage & Troubleshooting Guide

    Keeping Cookies Fresh

    These Chocolate Marshmallow Swirl Cookies maintain their best texture when stored in an airtight container at room temperature for up to 3 days. Place a slice of bread in the container to help maintain moisture—a trick my grandmother taught me that works wonders! For longer storage, these cookies freeze beautifully for up to 2 months. I recommend freezing them in a single layer until solid, then transferring to a freezer bag with parchment between layers to prevent sticking.

    Fixing Common Issues

    If your cookies spread too much during baking, your dough was likely too warm. Pop the shaped dough balls in the refrigerator for 20 minutes before baking to help them hold their shape. For cookies that turn out too dry, you may have overbaked them or used too much flour. Remember that visual cues trump timing—look for set edges with slightly soft centers rather than relying solely on the timer. If your marshmallow disappears completely, try using larger dollops and a gentler folding technique next time.

    Frequently Asked Questions

    Can I use regular marshmallows instead of marshmallow cream?

    Regular marshmallows won’t create the same swirl effect. If you must substitute, chop mini marshmallows and fold them in at the very end, but expect a more spotted appearance rather than beautiful swirls.

    How do I know when my Chocolate Marshmallow Swirl Cookies are done?

    Look for set edges with slightly underbaked centers—about 9-11 minutes at 350°F. They’ll continue firming up as they cool but maintain that perfect chewy texture.

    Can I make the dough ahead of time?

    Absolutely! The dough can be refrigerated for up to 3 days or frozen for 3 months. Just add 1-2 minutes to the bake time if cooking from cold.

    Why did my marshmallow disappear during baking?

    If your marshmallow cream disappeared, you likely mixed it too thoroughly into the dough. Use gentle folding and larger dollops for visible swirls.

    Are these cookies gluten-free?

    The standard recipe isn’t gluten-free, but you can substitute a 1:1 gluten-free flour blend with excellent results. Just add ¼ teaspoon xanthan gum if your blend doesn’t include it.

    Final Thoughts

    These Chocolate Marshmallow Swirl Cookies have become one of my family’s most requested treats, combining rich chocolate with gooey marshmallow in perfect harmony. There’s something deeply satisfying about watching someone take their first bite—that moment when their eyes widen at the unexpected marshmallow pull. Whether you’re baking them for a special occasion or simply because it’s Tuesday, these cookies deliver a little moment of joy with every bite. Find more inspiration for your baking adventures on Pinterest!

  • Gluten-Free Caramel Apple Tart That’ll Wow Your Taste Buds!

    Gluten-Free Caramel Apple Tart That’ll Wow Your Taste Buds!

    Gluten-Free Caramel Apple Tart That’ll Wow Your Taste Buds!

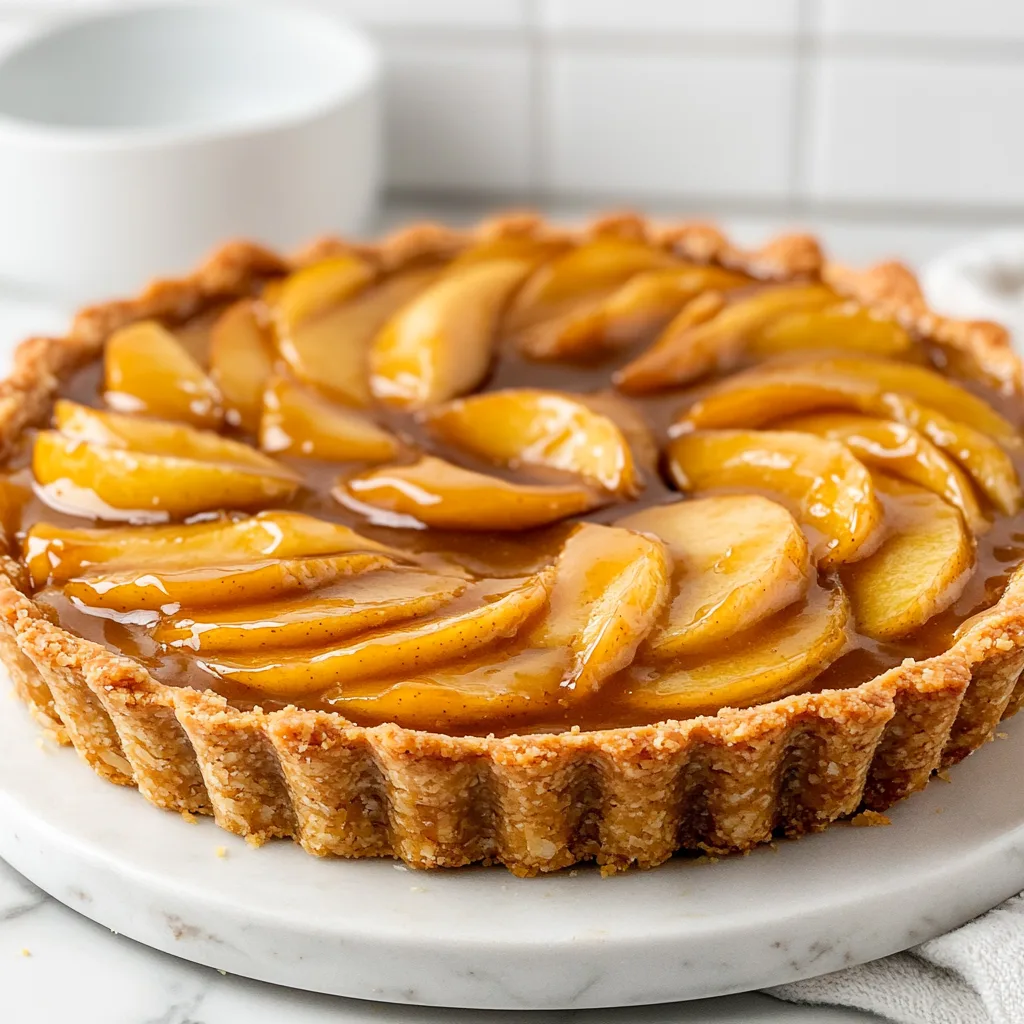
    The aroma of baked apples and warm caramel fills my kitchen as I pull this Gluten-Free Caramel Apple Tart with Almond Crust from the oven. There’s something magical about the way the tender apple slices nestle into that nutty, buttery crust—a perfect harmony of textures and flavors that makes my heart sing. I’ve always believed that gluten-free baking doesn’t mean compromising on indulgence, and this tart proves it beautifully. If you’re craving a dessert that balances sophisticated flavors with cozy comfort, this recipe will become your new autumn obsession.

    Recipe

    Why You’ll Love This Gluten-Free Caramel Apple Tart with Almond Crust

    Perfect Texture Combination

    The almond flour crust is the unsung hero of this dessert—crisp at the edges yet tender beneath the filling, with a subtle nuttiness that complements the apples perfectly. I discovered this crust technique during a rainy weekend experiment, and it’s become my secret weapon for impressive gluten-free desserts. The apples maintain just enough bite while becoming meltingly tender, creating that perfect contrast with the crust. And the homemade caramel? It transforms from a pourable sauce to a sticky, luscious coating that binds everything together in sweet harmony.

    Simple Yet Sophisticated

    Don’t let the elegant appearance fool you—this tart is surprisingly straightforward to make. The crust comes together in minutes with just a few ingredients, no complicated techniques required. I love how the caramel sauce can be made ahead of time (I often keep a jar in my fridge for emergency dessert situations!). The apple arrangement looks impressive but is actually quite forgiving—even my haphazard attempts turn out Instagram-worthy. This is the kind of dessert that makes guests think you spent hours in the kitchen, when really, it’s mostly hands-off baking time.

    Essential Tips & Tricks

    Perfecting the Almond Crust

    The key to a perfect crust is in the blind baking process—don’t skip this step! I learned this the hard way after one soggy-bottomed disaster. Pressing the dough firmly and evenly into your tart pan creates the sturdiest base. For extra insurance against sogginess, brush the pre-baked crust with a thin layer of beaten egg white while it’s still warm. This creates a moisture barrier that keeps everything crisp. Cold ingredients make for the flakiest texture, so I always chill my butter and work quickly with cool hands when mixing the dough.

    Apple Selection and Preparation

    Choose firm apples with a balance of sweetness and acidity—Honeycrisp, Pink Lady, or Granny Smith work beautifully here. I like to mix varieties for complexity, much like in my gluten-free blueberry muffins. Slice the apples to a consistent thickness (about ¼ inch) so they cook evenly. Tossing them with a bit of lemon juice prevents browning and adds brightness to balance the caramel’s sweetness. For the most beautiful arrangement, start from the outside and work your way in, slightly overlapping each slice for that professional look.

    Serving Ideas & Creative Variations

    Perfect Pairings

    This tart shines when served slightly warm with a scoop of vanilla bean ice cream melting into the caramel—the temperature contrast is absolutely heavenly. For special occasions, I drizzle additional warm caramel sauce over the top just before serving. A dollop of lightly whipped cream with a hint of cinnamon makes an elegant alternative. Coffee lovers will appreciate how a strong espresso cuts through the sweetness, creating a balanced dessert experience. For brunch, I’ve even served smaller slices alongside a cheese board for a sweet-savory moment.

    Seasonal Adaptations

    The beauty of this tart lies in its versatility. In summer, replace apples with fresh peaches or nectarines for a sunshine-bright variation. During the holidays, I add warming spices like cardamom and nutmeg to the filling, reminiscent of my gluten-free sticky toffee pudding. For a show-stopping autumn dessert, try mixing in cranberries with the apples and adding orange zest to the caramel. Pear and ginger make a sophisticated winter combination, while a mixed berry version celebrates spring beautifully. The almond crust provides the perfect canvas for your seasonal inspiration.

    Storage & Troubleshooting Guide

    Keeping It Fresh

    This tart maintains its texture best when stored at room temperature under a cake dome for the first day. After that, refrigerate any leftovers for up to three days. The crust may soften slightly in the refrigerator, but 10 minutes in a 300°F oven restores its crispness beautifully. For make-ahead convenience, prepare the components separately: the crust can be blind-baked and stored at room temperature for a day, the caramel keeps for two weeks refrigerated, and sliced apples (tossed with lemon juice) stay fresh for hours in the fridge.

    Fixing Common Issues

    If your caramel crystallizes, don’t panic! Add a tablespoon of hot water and gently rewarm it, stirring until smooth. For a crust that crumbles when slicing, your dough might have been too dry—next time, add an extra tablespoon of cold butter. If the bottom gets soggy despite blind baking, try placing the tart pan on a preheated baking sheet to give the bottom crust a heat boost. And if your apples release too much liquid during baking, toss them with a tablespoon of cornstarch before arranging them in the tart.

    Frequently Asked Questions

    Can I make this Gluten-Free Caramel Apple Tart with Almond Crust ahead of time?

    Yes! Bake the tart up to 24 hours ahead, store at room temperature, and warm slightly before serving. The caramel sauce can be made up to two weeks in advance and stored in the refrigerator.

    What’s the best substitute for almond flour?

    Hazelnut flour makes an excellent substitute with a different but complementary flavor profile. For nut allergies, try a gluten-free flour blend with 2 tablespoons of ground flaxseed for texture.

    Can I freeze this tart?

    Yes, though the texture is best fresh. Freeze fully baked and cooled tart for up to one month. Thaw overnight in the refrigerator and warm in a 300°F oven for 15 minutes before serving.

    How do I know when the caramel is ready?

    The caramel should reach a deep amber color and read 350°F on a candy thermometer. If you don’t have a thermometer, drop a small amount into cold water—it should form a soft, pliable ball.

    Can I use store-bought caramel sauce?

    Absolutely! While homemade offers better flavor, a good-quality store-bought caramel sauce saves time. Warm it slightly before drizzling over the apples for easier spreading.

    Final Thoughts

    This Gluten-Free Caramel Apple Tart with Almond Crust has become my signature fall dessert—the one friends request by name when they visit. There’s something deeply satisfying about creating something so beautiful and delicious that nobody would ever guess it’s gluten-free. The combination of buttery almond crust, tender spiced apples, and that rich caramel sauce creates a dessert that feels both nostalgic and special. Whether for a holiday gathering or a simple weekend treat, this tart brings a moment of sweetness that lingers long after the last bite. For more inspiration, visit our Pinterest board.

  • Gluten-Free Blueberry Muffins That Will Melt Your Heart!

    Gluten-Free Blueberry Muffins That Will Melt Your Heart!

    Gluten-Free Blueberry Muffins That Will Melt Your Heart!

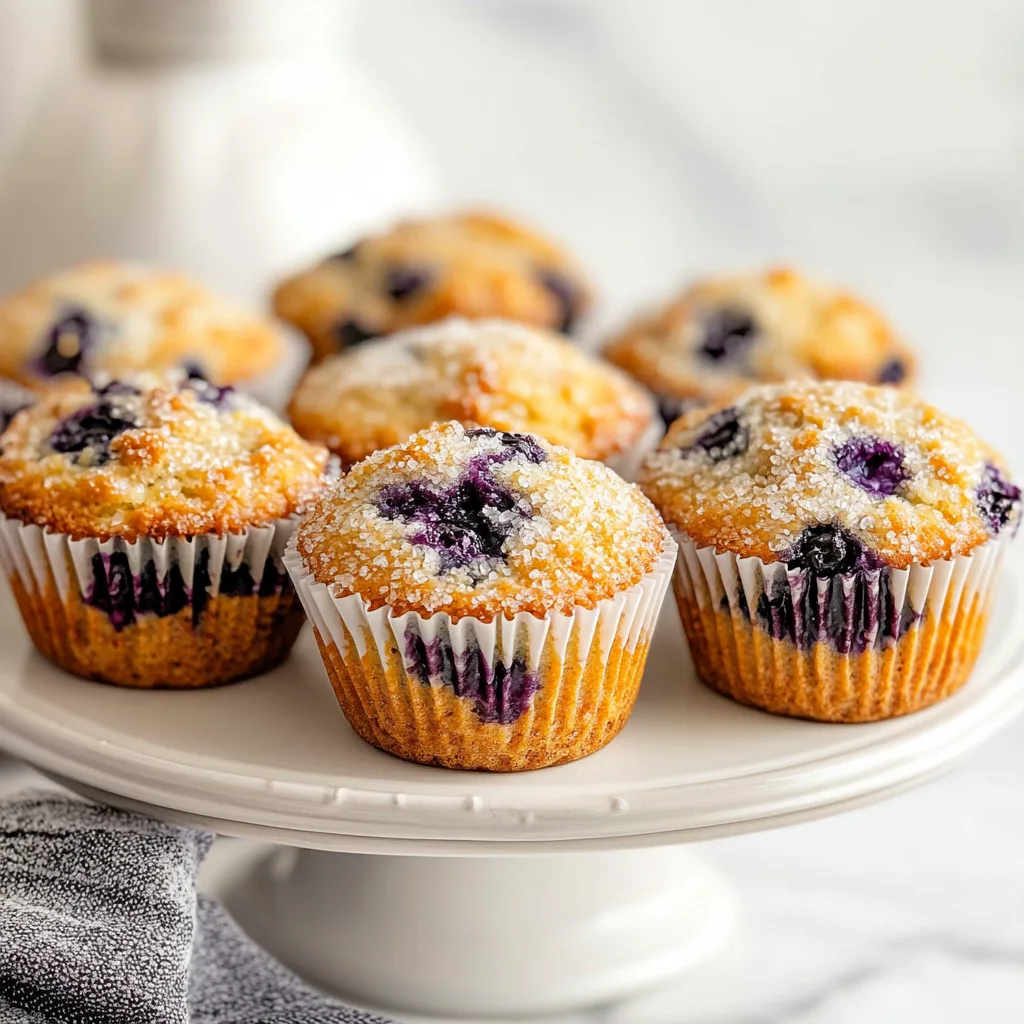
    Gluten-Free Blueberry Muffins have been my weekend baking obsession lately, and I’m thrilled to share this recipe that’s become a staple in my kitchen. There’s something magical about the aroma of fresh muffins filling your home on a lazy Sunday morning. These tender, bakery-style treats burst with juicy blueberries in every bite, and nobody will ever guess they’re gluten-free! Perfect for breakfast on-the-go or a sweet afternoon pick-me-up with tea, these muffins deliver all the comfort of traditional baking without the gluten. Let me show you how to make these irresistible treats that have converted even my gluten-loving friends.

    Recipe

    Why You’ll Love These Gluten-Free Blueberry Muffins

    Perfect Texture Every Time

    The biggest challenge with gluten-free baking is achieving that perfect, tender crumb that doesn’t fall apart or feel gritty. This recipe solves that problem beautifully! I’ve tested countless flour combinations and finally found the magic ratio that creates bakery-worthy texture. The secret lies in using a blend of rice flour, tapioca starch, and a touch of xanthan gum that mimics gluten’s structure. When you bite into these muffins, you’ll experience that delightful springiness that good muffins should have—not too dense, not too crumbly, just perfectly moist with a slightly crisp top.

    Bursting with Fresh Blueberry Flavor

    These aren’t those sad muffins with three lonely blueberries hiding inside! These beauties are absolutely loaded with berries in every bite. I prefer using fresh blueberries when they’re in season—there’s something about the way they burst during baking, creating little pockets of jammy goodness. But frozen works beautifully too (no need to thaw!). The natural sweetness of blueberries means we can use less sugar in the batter, letting that bright, fruity flavor shine through. I’ve added just a hint of lemon zest that brightens everything up and makes the blueberry flavor truly pop.

    Essential Tips & Tricks

    Mastering the Gluten-Free Batter

    The key to perfect gluten-free muffins is all in how you handle the batter. Unlike regular muffins where overmixing creates toughness, gluten-free batters need a bit more attention. Room temperature ingredients are absolutely crucial—cold eggs or milk will cause your coconut oil to solidify into little lumps. I learned this the hard way after a disappointing batch last winter! Mix your wet ingredients thoroughly, then gently fold in your dry ingredients just until combined. Let the batter rest for 15 minutes before baking; this allows the flours to hydrate properly and gives you a better rise and texture in the finished muffins.

    Preventing Berry Bleed and Sink

    Nobody wants that disappointing muffin where all the blueberries have sunk to the bottom or turned the batter an unappealing gray-blue color! Here’s my foolproof method: toss your fresh or frozen berries with a tablespoon of the dry flour mixture before folding them into the batter. This light coating creates a barrier that prevents the color from bleeding and helps suspend the berries throughout the muffin. Another game-changing tip is to fill your muffin cups halfway, add some berries, then top with more batter and a few additional berries. This ensures perfect distribution from top to bottom!

    Serving Ideas & Creative Variations

    Beyond Basic Breakfast

    These muffins shine as part of a complete breakfast spread! I love serving them slightly warm with a pat of salted butter that melts into all the nooks and crannies. For special brunches, create a muffin board with different spreads—honey butter, lemon curd, or whipped mascarpone all pair beautifully. These muffins also make the perfect sidekick to a savory breakfast casserole or frittata. My favorite weekend ritual is enjoying one with my morning coffee while the house is still quiet—those precious moments before the day gets busy feel like such a luxury!

    Seasonal Twists and Add-Ins

    While classic blueberry is timeless, this versatile base recipe welcomes creative variations! In fall, try adding diced apples and cinnamon for a cozy twist. Summer brings opportunities for mixed berry combinations—raspberries and blueberries create a gorgeous color contrast. For texture contrast, sprinkle the tops with gluten-free streusel or a simple lemon glaze that soaks into the warm muffins. Add-ins like toasted coconut, chopped nuts, or white chocolate chips can transform these into dessert-worthy treats. My daughter loves when I add a cream cheese filling—just a tablespoon of sweetened cream cheese pressed into the center before baking!

    Storage & Troubleshooting Guide

    Keeping Muffins Fresh

    Gluten-free baked goods have a reputation for drying out quickly, but with proper storage, these muffins stay delicious for days! Once completely cooled, store them in an airtight container lined with paper towels to absorb excess moisture. At room temperature, they’ll stay fresh for 2-3 days. For longer storage, refrigerate for up to a week—just warm them for 10-15 seconds in the microwave before eating to restore that fresh-baked texture. These muffins also freeze beautifully! Wrap individually in plastic wrap, then place in a freezer bag for up to three months. Perfect for those busy mornings when you need a homemade breakfast in minutes.

    Fixing Common Baking Issues

    Even experienced bakers encounter occasional challenges with gluten-free recipes. If your muffins turn out dense or gummy inside, your oven temperature was likely too high—invest in an oven thermometer for accuracy. Crumbly muffins usually mean there wasn’t enough binding agent; try adding an extra egg next time or increasing the xanthan gum slightly. If your muffins didn’t rise properly, check that your baking powder is fresh—it loses potency after about six months. And if the bottoms are too dark but the centers aren’t done, try lowering your oven rack position and placing a baking sheet underneath to diffuse the heat.

    Frequently Asked Questions

    Can I make these gluten-free blueberry muffins dairy-free too?

    Absolutely! Replace the milk with almond or oat milk and use coconut oil instead of butter. The texture remains tender and moist, with a subtle coconut undertone that pairs beautifully with blueberries.

    How do I know when the muffins are perfectly done?

    Insert a toothpick into the center—it should come out with a few moist crumbs but no wet batter. The tops should be golden brown and spring back slightly when gently touched.

    Can I use a pre-made gluten-free flour blend?

    Yes! Look for a cup-for-cup blend that contains xanthan gum. Bob’s Red Mill 1-to-1 and King Arthur Measure for Measure both work beautifully in this recipe.

    My blueberries always sink to the bottom. Help!

    Toss your berries in a tablespoon of the dry flour mixture before adding to the batter. This creates a light coating that helps them stay suspended during baking.

    Can I make mini muffins instead of standard size?

    Definitely! Fill mini muffin cups about 2/3 full and reduce baking time to 12-15 minutes. They make perfect two-bite treats for brunch gatherings!

    Final Thoughts

    These Gluten-Free Blueberry Muffins have become my signature recipe—the one friends always request when I offer to bring breakfast. There’s something deeply satisfying about creating a gluten-free version that actually tastes better than traditional muffins. The vibrant pops of blueberry, tender crumb, and golden tops make these impossible to resist. Whether you’re gluten-free by necessity or choice, these muffins prove that dietary restrictions never have to mean sacrificing flavor or texture. Happy baking, friends! Don’t forget to check out more of my gluten-free recipes on Pinterest.

  • Gluten-Free Double Chocolate Cookies That Will Melt Your Heart!

    Gluten-Free Double Chocolate Cookies That Will Melt Your Heart!

    Gluten-Free Double Chocolate Cookies That Will Melt Your Heart!

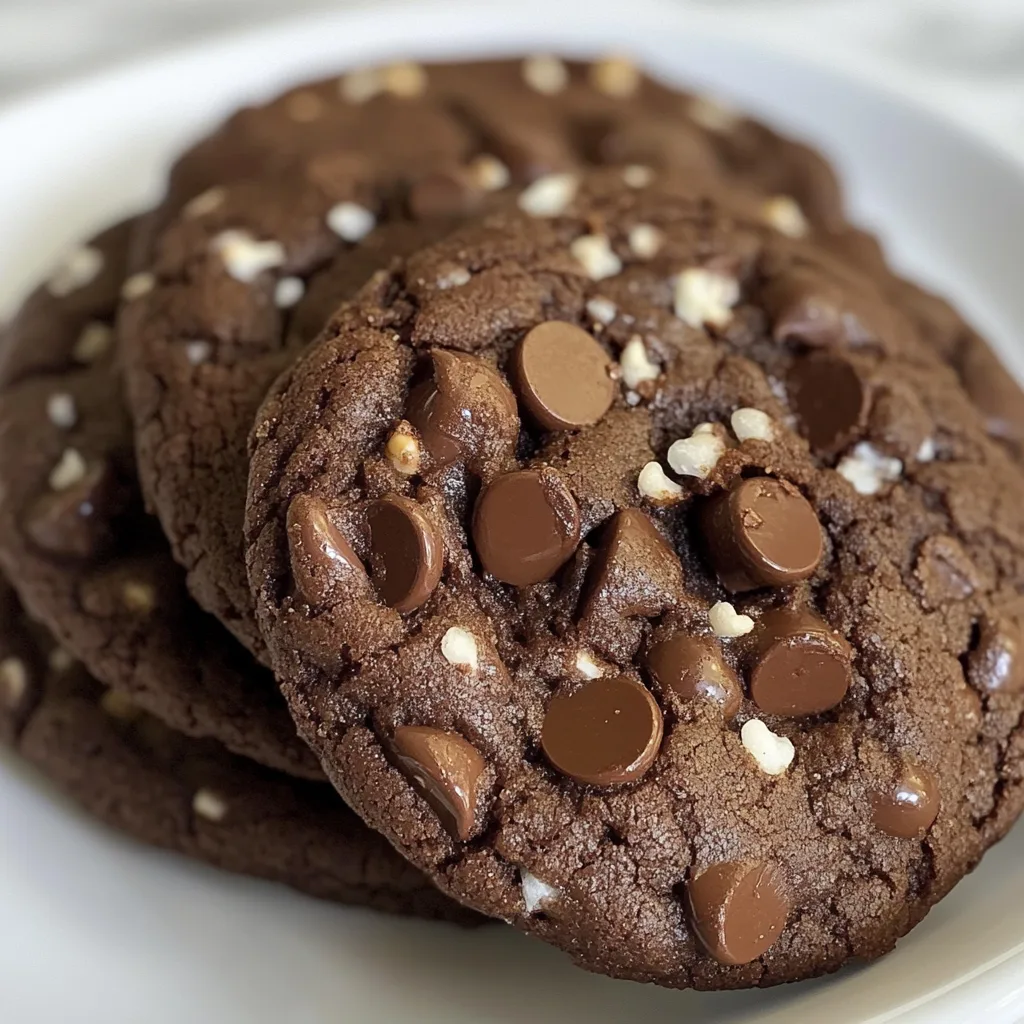
    These Gluten-Free Double Chocolate Cookies are what chocolate dreams are made of – rich, fudgy centers with a perfect crackly top that will make you forget they’re gluten-free! I discovered this recipe during a rainy weekend when my niece with celiac disease was visiting. The look on her face when she bit into these decadent treats was pure magic. With a double dose of chocolate from both cocoa powder and chunks, these cookies deliver an intensely satisfying experience similar to my Gluten-Free Brownies with Fudgy Centers but in perfect cookie form.

    Recipe

    Why You’ll Love These Gluten-Free Double Chocolate Cookies

    Perfect Texture Without the Gluten

    The secret to these cookies lies in the perfect blend of gluten-free flours that create that ideal chewy center and slightly crisp edge. I’ve tested countless combinations, and this one delivers cookies that don’t crumble or feel gritty like some gluten-free treats. The melted chocolate incorporated into the batter adds moisture that helps bind everything together, creating that fudgy brownie-like interior that stays soft for days. Even my husband, who typically turns his nose up at gluten-free baked goods, couldn’t tell the difference!

    Rich Chocolate Flavor That Satisfies

    These cookies pack a serious chocolate punch with two forms of chocolate. The cocoa powder provides that deep, rich base flavor, while the chocolate chunks create pockets of melty goodness in every bite. I recommend using high-quality dark chocolate (at least 60% cacao) for the chunks to balance the sweetness and add complexity. The slight bitterness from the dark chocolate enhances the overall flavor profile, making these cookies sophisticated enough for adults but still irresistible to kids. It’s chocolate nirvana in cookie form!

    Essential Tips & Tricks

    The key to magnificent gluten-free cookies is in the resting time. After mixing your dough, let it sit for at least 30 minutes before baking. This allows the gluten-free flours to hydrate properly and the flavors to develop. Another game-changer is using room temperature eggs – they incorporate much better than cold ones, creating a smoother dough. I learned this the hard way after numerous batches of cookies that spread too much. Don’t skip the xanthan gum if your flour blend doesn’t already include it; it’s essential for the structure these Gluten-Free Molasses Cookies need.

    Baking Techniques for Perfect Results

    Pay close attention to your baking time – these cookies go from perfect to overdone in a matter of minutes. The ideal cookie should look slightly underbaked in the center when you remove it from the oven. They’ll continue cooking on the hot baking sheet after you take them out. For that beautiful crackly top, don’t forget to bang the baking sheet on the counter halfway through baking and again right after they come out of the oven. This creates those lovely cracks while also helping the cookies settle into that perfect thickness.

    Serving Ideas & Creative Variations

    Elegant Serving Suggestions

    Transform these cookies into a show-stopping dessert by serving them warm with a scoop of vanilla ice cream on top. The contrast between the warm, gooey cookie and cold, creamy ice cream creates a sensory experience that’s absolutely divine. For a dinner party, try arranging them on a wooden board with fresh berries and mint sprigs for a pop of color. These cookies also make a lovely gift – stack them in a clear cellophane bag tied with ribbon, and you have a thoughtful homemade present that rivals anything from Brown Butter Skillet Chocolate Chip Cookie.

    Exciting Flavor Twists

    Get creative with these versatile cookies by adding different flavor elements. Stir in a teaspoon of espresso powder to intensify the chocolate flavor without adding coffee taste. For a holiday version, add a quarter teaspoon of peppermint extract and crushed candy canes on top. My personal favorite variation includes a tablespoon of orange zest and a splash of Grand Marnier for sophisticated chocolate-orange cookies. You can also experiment with different mix-ins like toasted nuts, dried cherries, or even caramel chunks for a new flavor experience each time.

    Storage & Troubleshooting Guide

    Keeping Your Cookies Fresh

    Store these gluten-free delights in an airtight container at room temperature for up to 5 days. The trick to maintaining their perfect texture is to place a small piece of bread in the container – it keeps the cookies from drying out without making them soggy. For longer storage, these cookies freeze beautifully for up to 3 months. I like to individually wrap them in plastic wrap before placing in a freezer bag. This way, I can grab just one or two whenever a chocolate craving strikes. Let them thaw at room temperature for about 30 minutes before enjoying.

    If your cookies spread too much, your dough might be too warm. Try chilling the dough for 30 minutes before baking. Conversely, if they don’t spread enough, gently flatten the dough balls before baking. For cookies that turn out too dry, you might have over-measured the flour – remember to spoon and level rather than scooping directly from the bag. And if your cookies lack that shiny, crackly top, make sure you’re not skimping on the sugar – it’s crucial for that characteristic brownie-like finish that makes these cookies so visually appealing.

    Frequently Asked Questions

    Can I make these Gluten-Free Double Chocolate Cookies ahead of time?

    Absolutely! The dough can be refrigerated for up to 3 days. Just bring it to room temperature for about 30 minutes before baking for best results.

    What’s the best gluten-free flour to use?

    I recommend a high-quality 1:1 gluten-free baking flour that contains xanthan gum. Bob’s Red Mill and King Arthur both make excellent versions that perform reliably in this recipe.

    Can I make these dairy-free as well?

    Yes! Substitute the butter with coconut oil or a plant-based butter, and use dairy-free chocolate chips. The texture will be slightly different but still delicious.

    Why did my cookies turn out flat?

    This usually happens when butter is too warm or there’s not enough flour. Make sure ingredients are properly measured and consider chilling the dough if your kitchen is warm.

    How can I tell when they’re perfectly baked?

    Look for set edges with a slightly soft center. They should have a crackly top but still look a bit underdone in the middle – they’ll firm up as they cool.

    Final Thoughts

    These Gluten-Free Double Chocolate Cookies have become my go-to recipe when I need something foolproof yet impressive. There’s something magical about watching someone’s face light up when they realize gluten-free can be this indulgent. Whether you’re baking for someone with dietary restrictions or simply craving an exceptional chocolate cookie experience, this recipe delivers every time. Don’t forget to check out more of my favorite recipes on Pinterest for more gluten-free inspiration!

  • Gluten-Free Strawberry Shortcake: Irresistibly Sweet & Easy!

    Gluten-Free Strawberry Shortcake: Irresistibly Sweet & Easy!

    Gluten-Free Strawberry Shortcake: Irresistibly Sweet & Easy!

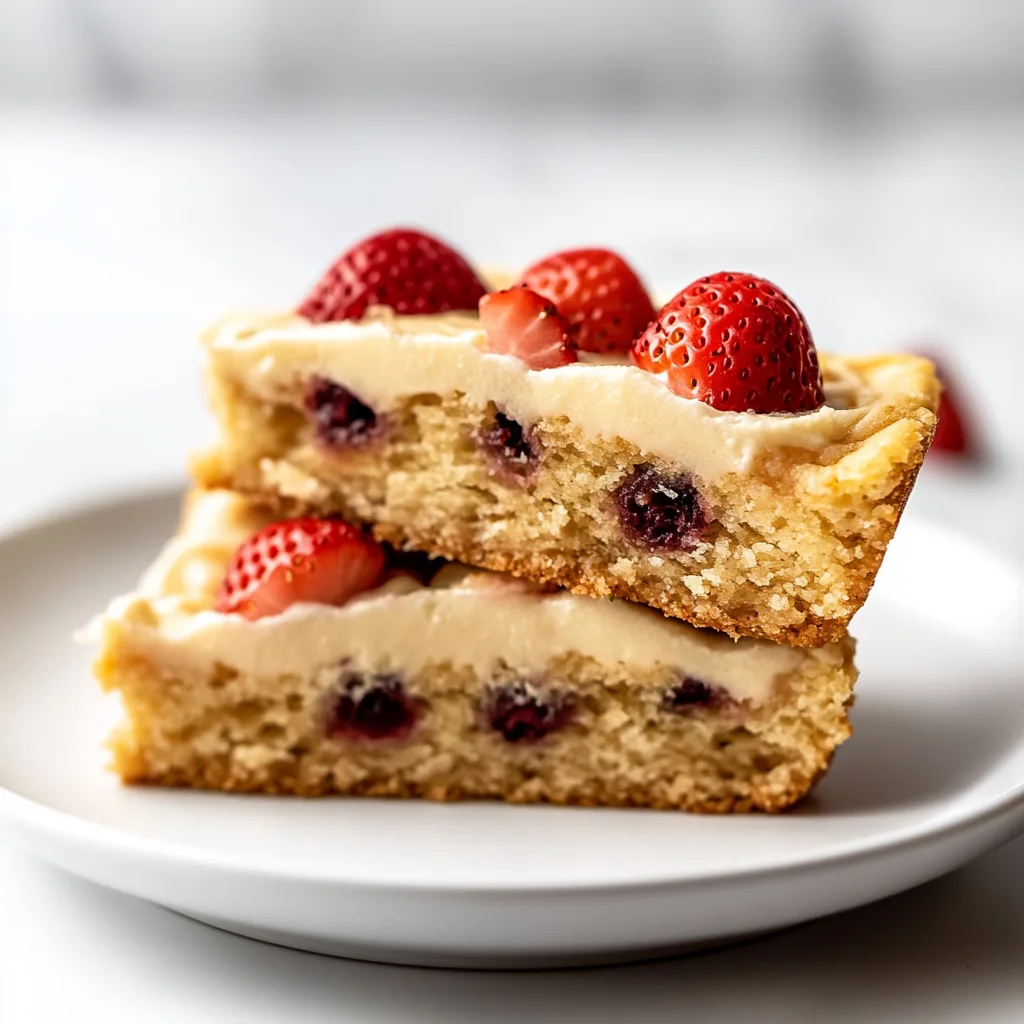
    Gluten-Free Strawberry Shortcake has completely transformed my summer dessert game! When those juicy strawberries hit the farmers’ market, I can’t resist creating this pillowy, tender shortcake that nobody would guess is gluten-free. The combination of buttery biscuits, sweet berries, and billowing clouds of whipped cream creates a dessert that’s both nostalgic and fresh. Last weekend, I served this at a backyard gathering, and the way everyone’s eyes lit up with that first bite told me everything I needed to know. If you’re craving a classic dessert that accommodates dietary needs without sacrificing an ounce of flavor, this recipe is about to become your new summer tradition, just like it’s become mine at Recipes Darleen.

    Recipe

    Why You’ll Love This Gluten-Free Strawberry Shortcake

    Perfect Texture Without the Gluten

    Creating gluten-free baked goods that don’t feel like a compromise used to feel impossible until I discovered the secrets to these shortcakes. The texture is divine – tender inside with a slight crispness on the outside that holds up beautifully to juicy strawberries. I use a blend of rice flour, tapioca starch, and a touch of xanthan gum to mimic traditional wheat flour’s structure. What makes these truly special is the cold butter technique – I grate frozen butter directly into the dry ingredients, creating those perfect little pockets that make the shortcakes rise beautifully and develop an irresistible buttery flavor.

    A Dessert for Everyone at the Table

    What I adore most about this gluten-free strawberry shortcake is how inclusive it feels when serving dessert. No more making separate options or watching someone skip the sweet finale! The beauty is that nobody can tell these are gluten-free – they’re just delicious shortcakes, period. I’ve served these at countless summer gatherings, and they’ve become my secret weapon for accommodating dietary needs without drawing attention to them. The look of surprise when I mention they’re gluten-free after everyone has cleaned their plates is always priceless. These shortcakes bring everyone together around the same delightful dessert.

    Essential Tips & Tricks

    Mastering the Berry Preparation

    The perfect maceration technique transforms ordinary strawberries into the star of this dessert. I slice most berries thinly, but leave some quartered for textural contrast, then toss with just enough sugar to draw out their natural juices without making them too sweet. My secret ingredient? A tiny splash of balsamic vinegar or a squeeze of lemon juice to brighten and intensify the strawberry flavor. Let them sit for at least 30 minutes – the transformation is magical as they develop that glossy, syrupy quality. For the most spectacular gluten-free dessert experience, prepare berries a few hours ahead and let them reach room temperature before serving.

    The Cold Ingredient Rule

    Temperature control is absolutely crucial for achieving that perfect rise and tender crumb in gluten-free shortcakes. Keep everything cold – the butter, the milk, even the mixing bowl if you can! I actually place my measured flour mixture in the freezer for 15 minutes before adding the butter. When incorporating wet ingredients, use a light touch and mix just until combined – overmixing is the enemy of tender shortcakes. Another game-changing tip: after shaping the biscuits, pop them in the freezer for 10 minutes before baking. This firms up the butter again, creating those beautiful layers when baked and preventing the dreaded spread that can happen with gluten-free doughs.

    Serving Ideas & Creative Variations

    Beyond Basic Strawberries

    While classic strawberries shine in this dessert, don’t be afraid to experiment with fruit combinations. I love creating seasonal variations throughout summer – adding blackberries and a hint of fresh mint in early summer, or peaches with a touch of honey in August. For a truly spectacular presentation, try a mixed berry medley with strawberries, blueberries, and raspberries, perhaps with a splash of Grand Marnier for adult gatherings. The gluten-free shortcake base is neutral enough to pair with virtually any fruit combination. I’ve even created a tropical version with mango and passion fruit that transported my guests straight to a beach vacation!

    Elevating Your Presentation

    Transform this humble dessert into a showstopping finale with thoughtful presentation. Instead of traditional assembly, try creating a shortcake bar where guests can build their own perfect ratio of cake, cream, and berries. For special occasions, I layer components in clear trifle glasses for a stunning visual effect. Another favorite approach is making miniature shortcakes using a small biscuit cutter – these two-bite versions are perfect for elegant dinner parties. Don’t forget the finishing touches: a light dusting of powdered sugar, a sprig of mint, or even edible flowers can elevate the entire experience from delicious to unforgettable.

    Storage & Troubleshooting Guide

    Keeping Components Fresh

    Proper storage ensures your gluten-free strawberry shortcake components maintain their optimal texture. Store baked shortcakes in an airtight container at room temperature for up to 2 days – any longer and they’ll begin to dry out. If needed, refresh them with 5-10 seconds in the microwave or a quick trip to a 300°F oven. The macerated berries will keep in the refrigerator for up to 24 hours, though they’ll continue to soften and release juice. Whipped cream is best made fresh, but if necessary, you can stabilize it with a teaspoon of powdered sugar and store it separately in the refrigerator for up to 4 hours.

    Solving Common Challenges

    Even experienced bakers encounter issues with gluten-free baking, but most problems have simple solutions. If your shortcakes spread too much during baking, your butter likely got too warm – next time, chill the shaped dough for 15 minutes before baking. For shortcakes that turned out dense rather than fluffy, you might have overworked the dough. Remember to use a light touch when mixing and folding. If they’re crumbly and falling apart, your mixture may have been too dry – gluten-free flours often absorb more liquid than wheat flour, so don’t be afraid to add an extra tablespoon of milk if the dough seems too dry.

    Frequently Asked Questions

    Can I make this gluten-free strawberry shortcake ahead of time?

    Yes! Bake the shortcakes up to 2 days ahead and store in an airtight container. Prepare berries up to 24 hours in advance. Assemble just before serving to maintain the perfect texture.

    What’s the best gluten-free flour blend for shortcakes?

    I recommend a blend with rice flour, tapioca starch, and potato starch. Commercial cup-for-cup blends containing xanthan gum also work well, providing structure that mimics gluten.

    Can I freeze the shortcakes?

    Absolutely! Cool completely, wrap individually in plastic, then foil, and freeze for up to 3 months. Thaw at room temperature and warm briefly before serving.

    How do I prevent my shortcakes from being dry?

    Use full-fat ingredients, don’t overmix the dough, and add a tablespoon of sour cream or yogurt to the wet ingredients for moisture that lasts.

    Can I use frozen strawberries instead of fresh?

    In a pinch, yes. Thaw completely, drain excess liquid, then macerate as directed. Fresh berries provide the best texture and flavor, but frozen work when strawberries aren’t in season.

    Final Thoughts

    This gluten-free strawberry shortcake has become more than just a recipe in my kitchen—it’s a celebration of inclusive baking that proves dietary restrictions never need to mean compromise. The joy of watching someone bite into these tender, buttery shortcakes topped with juicy berries and cream is pure kitchen magic. I hope you’ll make this recipe your own, experimenting with seasonal fruits and creating memories around your table. Don’t forget to share your creations on Pinterest – I’d love to see how you’ve made this gluten-free classic shine in your home!

  • Brown Butter Skillet Chocolate Chip Cookie That Melts Hearts Fast

    Brown Butter Skillet Chocolate Chip Cookie That Melts Hearts Fast

    Brown Butter Skillet Chocolate Chip Cookie That Melts Hearts Fast

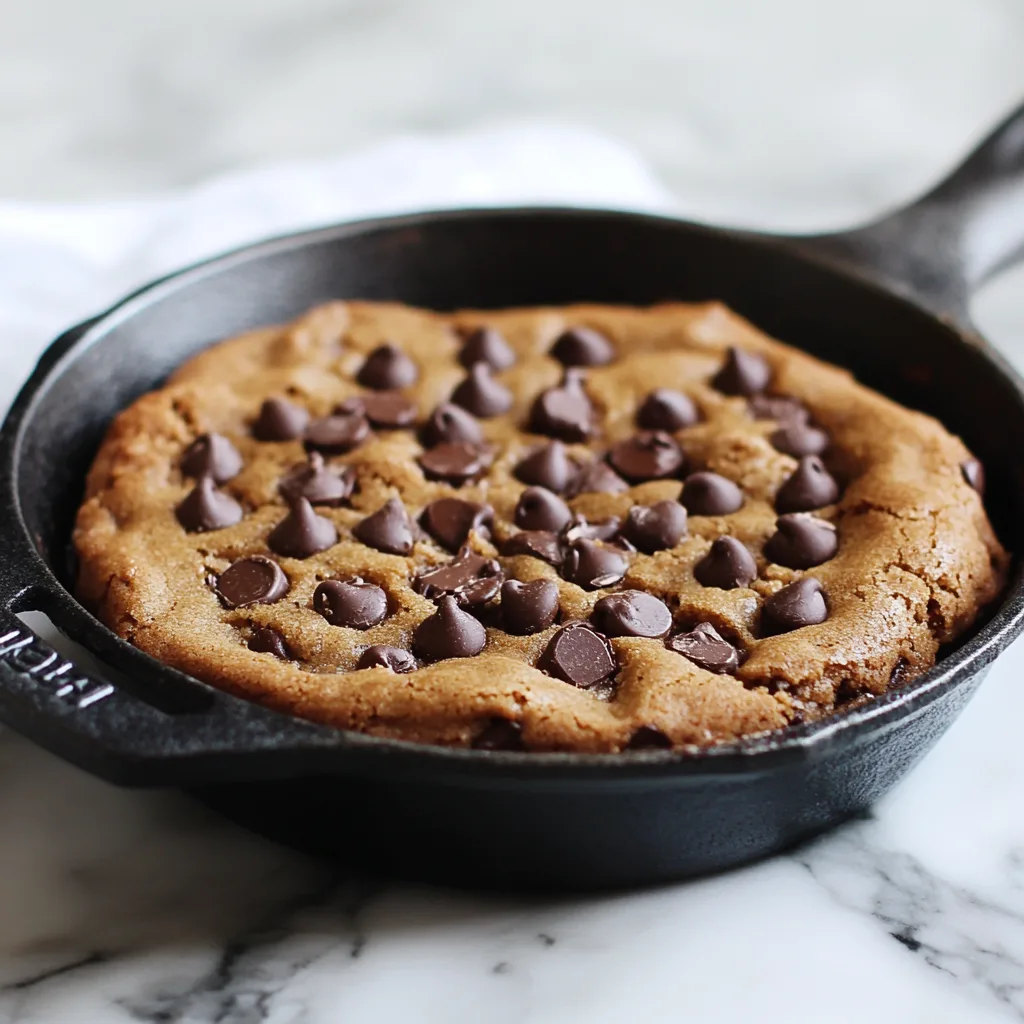
    The Brown Butter Skillet Chocolate Chip Cookie is my absolute favorite indulgence when I need something warm, gooey, and soul-satisfying. There’s something magical about that first crack through the crispy edge into the soft center that makes my heart skip a beat every time. I discovered this recipe during a rainy weekend at my grandmother’s cabin, and it’s been my go-to comfort dessert ever since. The nutty aroma of brown butter fills the kitchen with a warmth that signals something extraordinary is about to happen. If you love classic comfort desserts, this skillet cookie will become your new obsession.

    Recipe

    Perfect Texture Combination

    The beauty of a Brown Butter Skillet Chocolate Chip Cookie lies in its incredible texture contrast. The edges develop a delightful crispness while the center stays deliciously soft and gooey. I’ve found that cast iron creates the perfect heat distribution for achieving this texture nirvana. When my spoon breaks through that slightly crackly top into the molten center, it’s pure bliss! The brown butter adds complex caramel notes that regular chocolate chip cookies simply can’t match. Plus, the presentation is absolutely stunning – there’s nothing like bringing a sizzling skillet straight to the table.

    Simple Yet Impressive

    What I adore about this Brown Butter Skillet Chocolate Chip Cookie is how it transforms basic ingredients into something spectacular. Last month, I made this for unexpected dinner guests with pantry staples, and they couldn’t stop raving about it! The brown butter technique might sound fancy, but it’s actually quite straightforward – just watch the butter closely as it transforms from golden to nutty brown. This recipe requires fewer steps than individual cookies (no scooping or multiple batches), making it perfect for both weeknight treats and special occasions when you want to impress without spending hours in the kitchen.

    Essential Tips & Tricks

    Mastering the Brown Butter

    Perfecting your brown butter is the crucial first step to an exceptional skillet cookie. I’ve found that using a light-colored pan helps you monitor the color change from yellow to golden to that perfect nutty brown. Keep the heat medium-low and never walk away – butter can go from perfectly browned to burnt in seconds! You’ll know it’s ready when you smell that intoxicating nutty aroma and see tiny brown specks forming. Let it cool slightly before adding to your sugar mixture, or you might accidentally cook your eggs. This extra step adds a depth of flavor that transforms an ordinary cookie into something extraordinary.

    Choosing the Right Chocolate

    The chocolate you select makes a tremendous difference in your Brown Butter Skillet Chocolate Chip Cookie. I prefer using a combination of chocolates – chunks, chips, and even chopped bars with varying cocoa percentages. This creates pockets of different sweetness and texture throughout the cookie. For my last birthday, I splurged on high-quality chocolate with 70% cocoa content, and the difference was mind-blowing! Consider adding a touch of sea salt on top before baking to enhance the chocolate’s complexity. Remember to reserve some chocolate pieces for pressing into the top right before baking for that beautiful, bakery-worthy appearance.

    Serving Ideas & Creative Variations

    The Ultimate A La Mode Experience

    There’s nothing quite like serving a Brown Butter Skillet Chocolate Chip Cookie still warm from the oven with a scoop of vanilla bean ice cream melting into all the nooks and crannies. I love the dramatic sizzle when the cold ice cream hits the hot skillet! For extra decadence, drizzle with homemade caramel sauce or hot fudge. My family’s favorite weekend ritual involves gathering around the coffee table with spoons in hand, digging straight into the skillet while watching our favorite movie. For a dinner party upgrade, try adding individual ramekins for personal-sized cookies that never fail to impress guests.

    Seasonal Flavor Twists

    One of the joys of this Brown Butter Skillet Chocolate Chip Cookie is how adaptable it is to seasonal variations. During fall, I love adding warm spices like cinnamon and nutmeg with a handful of toasted pecans. For holiday gatherings, white chocolate chips with dried cranberries and orange zest create a festive twist. Summer brings opportunities for fresh berries pressed into the top before baking, creating jammy pockets of sweetness. My personal favorite variation happened by happy accident when I had leftover salted caramel sauce – swirling it through the batter created magical pockets of gooey goodness that had everyone fighting for the last bite.

    Storage & Troubleshooting Guide

    Keeping It Fresh

    While a Brown Butter Skillet Chocolate Chip Cookie is best enjoyed fresh from the oven, leftovers (if you’re lucky enough to have any!) can still be delicious. Cover the cooled skillet tightly with foil and store at room temperature for up to 3 days. To reheat, pop it in a 300°F oven for 5-7 minutes until warmed through. For longer storage, cut into portions and freeze in airtight containers for up to a month. My favorite midnight snack hack: microwave a frozen piece for 20-30 seconds for an almost-fresh-baked experience! Just remember that the texture is never quite the same as that first magical serving straight from the oven.

    Fixing Common Issues

    If your Brown Butter Skillet Chocolate Chip Cookie isn’t turning out perfectly, a few simple adjustments can help. For cookies that are too cakey or dry, reduce the flour by 2-3 tablespoons next time. If the center remains undercooked while the edges burn, your oven temperature may be too high – try reducing by 25°F. For cookies that spread too much, chill the dough for 30 minutes before baking. I once accidentally added too much butter and ended up with a delicious but very flat cookie! The fix was simple – I served it as a “cookie sundae base” with ice cream, and no one knew it wasn’t intentional.

    Frequently Asked Questions

    Yes! Prepare the dough up to 24 hours ahead and refrigerate in an airtight container. Let it sit at room temperature for 30 minutes before pressing into the skillet and baking for that fresh-baked experience.

    What size skillet works best?

    A 10-inch cast iron skillet is ideal for a perfect edge-to-center ratio. For thicker cookies, use a smaller 8-inch skillet. For thinner, crispier results, a 12-inch skillet works beautifully.

    Can I substitute the brown butter with regular butter?

    You can, but you’ll miss the nutty, caramel notes that make this cookie special. Brown butter adds complex flavor that transforms an ordinary chocolate chip cookie into something extraordinary.

    Is this recipe adaptable for dietary restrictions?

    Absolutely! Use gluten-free flour blend (with xanthan gum) for a gluten-free version. For dairy-free options, plant-based butter can be browned similarly, though watch it more carefully.

    Look for golden brown edges that are set, while the center remains slightly soft. A toothpick inserted 2 inches from the edge should come out mostly clean with a few moist crumbs.

    Final Thoughts

    This Brown Butter Skillet Chocolate Chip Cookie has become more than just a dessert in my home—it’s a tradition, a comfort, and sometimes even a celebration. The magic happens not just in the transformation of butter into its nutty, caramelized form, but in the moments shared around the warm skillet. Whether you’re serving it at a dinner party or enjoying it in your pajamas on a quiet evening, this skillet cookie brings a special kind of homemade happiness that’s hard to beat. I’d love to see your creations on Pinterest if you give this recipe a try!