Category: Desserts

Sweet and easy dessert recipes for every craving. Simple treats, rich flavors, and quick ideas that make any moment feel special.

  • Gingerbread Truffles – Cozy and Irresistible Treat

    Gingerbread Truffles – Cozy and Irresistible Treat

    Gingerbread Truffles are my holiday peace treaty with kitchen chaos. The first time I made Gingerbread Truffles, my mixer was MIA, the dog snagged a gingersnap, and my kids declared themselves official sprinkle testers. I mashed the crumbs with a rolling pin, laughed, and kept going—because the creamy spice and chocolate shell make every imperfect moment taste perfect. If you need a homemade, no-bake treat that feels like instant comfort food, this is it.
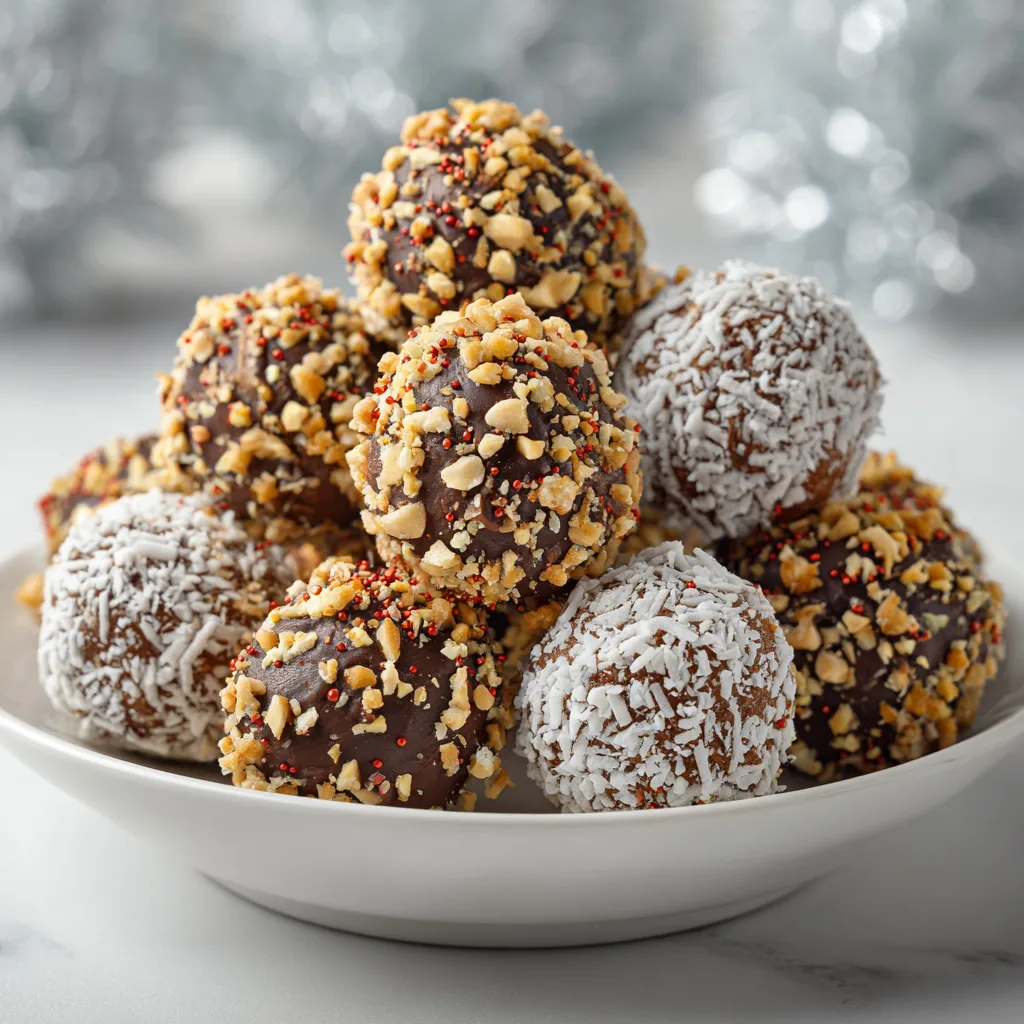
    Gingerbread Truffles – Cozy and Irresistible Treat

    Recipe

    PART 1: WHY YOU’LL LOVE THIS RECIPE

    What Makes This Gingerbread Truffles So Irresistible

    I created these Gingerbread Truffles after a December grocery run where I forgot butter, remembered molasses, and decided to wing it. Gingerbread Truffles deliver that classic cookie spice in a creamy, homemade truffle that tastes like holiday comfort food without turning on the oven. The chocolate shell gives a satisfying snap, and the inside is soft, gently sweet, and warmly spiced.

    • No-bake and fast: quick prep with simple ingredients you likely have on hand.
    • Silky inside, crisp shell: the best bite of the season in a homemade version.
    • Foolproof texture: easy recipe that sets up beautifully with a short chill.
    • Family-friendly fun: rolling, dipping, and sprinkling are perfect helper jobs.
    • Party-perfect: they look fancy with nearly zero effort, ideal for gifting and dessert trays.

    These Gingerbread Truffles bring the nostalgia of gingersnaps with modern ease. If you’re craving something cozy, festive, and shareable, this is your new holiday hero. Let’s make a batch and get to the recipe card!

    If your feed has been full of glossy holiday bites, Gingerbread Truffles are why. They’re an easy recipe to batch-make, photograph, and gift. Between the Pinterest-friendly drizzle and the short ingredient list, they’re the definition of quick fix dessert magic. Everyone can use a homemade comfort food moment—especially when it doubles as a crowd-pleasing treat and looks bakery-level without bakery-level effort.

    PART 2: TIPS, TRICKS & EXPERT SECRETS

    Chef Tips for Perfect Gingerbread Truffles Every Time

    I once taught a mini cooking class for neighbors and learned fast that melted chocolate behaves like a toddler—give it patience and it behaves, rush it and it gets dramatic. These cooking tip basics will keep your Gingerbread Truffles glossy and gorgeous.

    • Crumb texture matters: process gingersnaps to fine sand so the filling is smooth and holds its shape.
    • Work cool: chill the rolled centers 15–20 minutes so warm hands don’t melt the coating during dipping.
    • Melt gently: use 50% microwave power, stirring often, for a shiny, smooth chocolate shell.
    • Tap, don’t swirl: lift each truffle on a fork and tap the fork gently to release excess coating for a clean finish.

    Smart Ingredient Swaps & Practical Cooking Advice

    • Gluten-free: use gluten-free gingersnaps—the homemade version tastes just as great.
    • Vegan: swap dairy cream cheese for a vegan alternative and choose dairy-free melting wafers.
    • Less sweet: use bittersweet chocolate for coating and reduce molasses slightly for a spicier, less sugary bite.
    • Spice dial: love a bold kick? Add extra ground ginger or a pinch of black pepper for warmth.

    What not to do: don’t overheat chocolate. If it seizes, stir in 1 teaspoon neutral oil at a time as a quick fix. With these Gingerbread Truffles tips, you’ll get a flawless, homemade finish every time.

    PART 3: SERVING IDEAS & CREATIVE VARIATIONS

    How to Serve Gingerbread Truffles for Maximum Enjoyment

    When I set out a tray of Gingerbread Truffles at our cookie swap, they disappeared before the hot cocoa finished steaming. Presentation is half the fun: a simple platter, a dusting of crumbs, and a pretty drizzle make them look boutique-worthy. Try these serving ideas to make your Gingerbread Truffles the star:

    • Plate with contrast: mix white and dark chocolate coatings on the same tray for a striking spread.
    • Pair with sips: hot cocoa, espresso, or spiced chai highlight the molasses and ginger.
    • Sweet board: add dried cranberries, candied orange peel, and almond bark for a festive dessert board.

    Flavor Twists and Seasonal Variations

    • Maple-ginger: swap molasses for maple syrup and add a pinch of cardamom for a lighter, cozy twist.
    • Peppermint crunch: stir in crushed candy canes and use dark chocolate coating for a minty holiday variation.
    • Espresso drizzle: add 1 teaspoon instant espresso to the drizzle chocolate for a mocha vibe that amplifies spice.

    For creators, a simple plating suggestion: style truffles in odd-numbered groups and shoot near a window for soft, natural light. If you love festive truffles, you’ll also adore my Christmas Tree Cake Truffles and the ultra-giftable 5-Minute Christmas Crock Pot Candy. For a savory counterpoint on the party table, try Baked Cranberry Brie Bites.

    PART 4: STORAGE & TROUBLESHOOTING GUIDE

    How to Store and Reheat Gingerbread Truffles

    Leftover Gingerbread Truffles? Around here, that happens only when I hide a few. To keep fresh and protect the chocolate shell, store them correctly and they’ll taste bakery-new.

    • Room temperature: up to 2 days in a cool room, in a covered container, away from heat or sunlight.
    • Refrigerator: up to 7 days in an airtight container, layered with parchment to prevent sticking.
    • Freezer: up to 2 months. Freeze on a sheet pan, then bag in freezer-safe zip bags. Thaw overnight in the fridge to preserve texture.
    • Reheat: not needed for truffles. If they’re too firm from the fridge, let them stand 10–15 minutes at room temperature before serving.

    Troubleshooting Common Gingerbread Truffles Issues

    • Coating cracks: centers were too cold. Let rolled centers sit 5 minutes before dipping, or warm your coating slightly.
    • Soft or droopy truffles: mixture was too warm or wet. Chill longer, or add 2–3 tablespoons extra crumbs to fix texture.
    • Streaky/bloomed chocolate: heat swings can dull the finish. Keep batches small and melt at low power for a glossy shell.
    • Toppings sliding off: add toppings immediately after dipping while the coating is still wet.

    With this storage advice, your Gingerbread Truffles will keep their snap, spice, and creamy center. You’ve got this—these little bites are as forgiving as they are festive.

    FAQs

    Can I make Gingerbread Truffles ahead?

    Yes. Roll and freeze the centers up to 1 month. Dip the day you plan to serve for the freshest shell and best crunch.

    Do I need a food processor for Gingerbread Truffles?

    No. Place cookies in a zip-top bag and crush with a rolling pin until sandy. Fine crumbs help the centers hold together.

    Why did my chocolate seize while coating Gingerbread Truffles?

    Moisture or overheating is the culprit. Melt at 50% power and stir often. If it seizes, stir in 1–2 teaspoons neutral oil as a rescue.

    Can I use homemade gingersnaps for Gingerbread Truffles?

    Absolutely. Dry them slightly for crisp crumbs, or bake an extra minute for a sturdier, crushable cookie.

    Conclusion

    Gingerbread Truffles capture everything I love about holiday baking—cozy spice, creamy centers, and that chocolate snap—without the stress. This easy, homemade treat tastes like comfort food and looks party-ready with minimal effort. Use my expert tips to master the coating, keep a stash chilled for last-minute guests, and play with flavor variation like peppermint crunch or espresso drizzle. Gingerbread Truffles are the no-bake dessert you’ll return to every season. Try it at home and tag me so I can see your gorgeous trays!

  • Orange Chocolate Christmas Truffles – Irresistible & Cozy

    Orange Chocolate Christmas Truffles – Irresistible & Cozy

    Orange Chocolate Christmas Truffles are the holiday sweet I make when chaos hits and the doorbell rings early. Orange Chocolate Christmas Truffles saved me last year when I accidentally dropped powdered sugar on the dog and we turned him into a tiny, wagging snowdrift. I whisked a bright orange ganache, chilled it, and rolled truffles while the cocoa hid evidence of my “blizzard.” They’re rich, citrusy, melt-in-your-mouth bites that look fancy even if your kitchen looks like Santa’s workshop after a cinnamon explosion.

    Orange Chocolate Christmas Truffles – Irresistible & Cozy

    Recipe

    WHY YOU’LL LOVE THIS RECIPE

    What Makes This Orange Chocolate Christmas Truffles So Irresistible

    I created these Orange Chocolate Christmas Truffles on a day when my mixer quit right after the in-laws texted “We’re five minutes away.” Orange Chocolate Christmas Truffles require no baking, barely any equipment, and deliver pure, cozy comfort food vibes with a bright citrus pop. That contrast—the zesty orange against silky chocolate—tastes like a hug wrapped in twinkle lights. My homemade version is decadent but simple enough for a quick fix when you’re juggling gift wrap, carols, and a slightly-singed batch of something else on the counter.

    • Luxuriously creamy ganache center with real orange zest for bright, festive flavor.
    • Foolproof, easy recipe: melt, chill, roll—no oven required.
    • Simple, everyday ingredients you probably already have on hand.
    • Family-friendly to make and to eat; kids love rolling and decorating.
    • Beautiful gift-worthy treats that look bakery-made but are totally homemade.

    Orange Chocolate Christmas Truffles bring the sparkle to cookie trays and dessert boards without the stress. Ready to make a batch that disappears faster than the wrapping paper? Let’s jump into the recipe card below!

    Every holiday season, Orange Chocolate Christmas Truffles become the star of my dessert table because they’re a cozy, homemade indulgence that’s quick to assemble and impossible to stop eating. Friends rave about the smooth orange ganache and rich chocolate shell, and these truffles have become my most requested easy recipe to share. Between the vibrant citrus aroma, the meltaway texture, and the festive finish, it’s no wonder Orange Chocolate Christmas Truffles keep trending on my socials. They’re that perfectly balanced treat when you crave comfort food without the heavy lift.

    TIPS, TRICKS & EXPERT SECRETS

    Chef Tips for Perfect Orange Chocolate Christmas Truffles Every Time

    My favorite kitchen lesson came from a chocolatier who taught me that patience makes glossy, dreamy ganache. When I tested Orange Chocolate Christmas Truffles for a cookie swap, I learned three tiny changes that turned “good” into “wow.” Use these cooking tips for consistent success:

    • Chop chocolate finely and evenly so the hot cream melts it smoothly for a satin ganache.
    • Let the cream rest on the chocolate for 2 minutes before stirring—this prevents graininess.
    • Stir gently from the center out; avoid whisking air into the ganache for the silkiest texture.
    • Chill the mixture until scoopable, then work quickly with cold hands or food-safe gloves.

    Smart ingredient swaps make Orange Chocolate Christmas Truffles friendly for everyone:

    • Vegan: Use high-quality dairy-free chocolate and full-fat coconut cream instead of heavy cream; swap butter for vegan butter.
    • Gluten-free: The base recipe is naturally gluten-free—just confirm toppings like sprinkles are certified GF.

    What not to do: Don’t overheat the cream—it should steam, not boil. Scalding can cause splitting and a broken, greasy ganache. Keep this quick fix in mind: if ganache looks split, gently whisk in 1–2 teaspoons of warm cream to bring it back together. With these small, homemade adjustments, Orange Chocolate Christmas Truffles turn out glossy, truffle-shop worthy every time.

    Smart Ingredient Swaps & Practical Cooking Advice

    To fine-tune Orange Chocolate Christmas Truffles, choose chocolate around 60–70% cacao for balance, then dial in your orange flavor with zest and a splash of extract or liqueur. Measuring is key, but texture tells the truth: if the ganache feels too soft for rolling, chill longer; too firm, warm slightly at room temp. Keep your coating simple—cocoa powder for classic, or a crisp shell of tempered chocolate. This homemade version is an easy recipe to customize with pantry staples, and each small cooking tip above helps you glide through the steps like a pro.

    SERVING IDEAS & CREATIVE VARIATIONS

    How to Serve Orange Chocolate Christmas Truffles for Maximum Enjoyment

    Last December, I filled a vintage cookie tin with Orange Chocolate Christmas Truffles and passed it around the table between rounds of charades. The oohs and ahhs were instant—proof that a simple plating suggestion can elevate the moment. For a cozy dessert board, try a few serving ideas:

    • Pair with hot cocoa, espresso, or a citrusy tea to echo the orange aroma.
    • Arrange on a marble board with sliced clementines and candied orange peel for sparkle.
    • Drizzle with melted chocolate and a whisper of flaky salt just before serving.

    For more sweet gifting inspo, peek at my Christmas Tree Cake Truffles and my crowd-pleasing 5-Minute Christmas Crock-Pot Candy. They sit beautifully beside these truffles on any holiday tray.

    Orange Chocolate Christmas Truffles

    Flavor Twists and Seasonal Variations

    Orange Chocolate Christmas Truffles are endlessly adaptable, which makes them social-media-ready and fun to style. Try these flavor variation ideas for a seasonal twist:

    • Spiced Orange: Add a pinch of cinnamon and cardamom to the ganache; finish with cocoa and a dusting of powdered sugar for a wintry look.
    • Dark & Salty: Use 70% chocolate, bump the orange zest slightly, and finish with a crack of flaky sea salt.
    • Snowy Coconut: Roll in finely shredded coconut instead of cocoa for a white “snowball” finish.

    Photography tip: stack truffles in a pyramid and tuck in orange zest curls for dimension. A simple linen, scattered cranberries, and soft window light make Orange Chocolate Christmas Truffles look like they tumbled straight out of a holiday magazine spread.

    STORAGE & TROUBLESHOOTING GUIDE

    How to Store and Reheat Orange Chocolate Christmas Truffles

    There’s always a secret tin in my fridge labeled “leftovers,” which is code for: Orange Chocolate Christmas Truffles I’m not sharing yet. To keep them fresh, follow this storage advice:

    • Room Temperature: Up to 1–2 days if your kitchen stays cool (below 70°F/21°C); otherwise, refrigerate.
    • Refrigerator: Store in an airtight container for 10–14 days. Layer with parchment to prevent sticking.
    • Freezer: Freeze up to 2 months in a sealed container. Thaw overnight in the fridge, then let stand 10 minutes to soften.

    Reheating isn’t usually needed, but if you want a softer bite, rest truffles at room temp for 10–15 minutes. For an ultra-gentle warm-up, microwave a single truffle for 3–5 seconds—no more—or it may melt.

    Troubleshooting Common Orange Chocolate Christmas Truffles Issues

    • Too Soft to Roll: Chill longer or stir in a tablespoon of finely chopped chocolate; the cocoa butter will help firm the mixture.
    • Too Firm or Crumbly: Warm at room temperature for 5–10 minutes; fold in 1–2 teaspoons of warm cream to restore silkiness.
    • Grainy Ganache: The cream was too hot or stirred too vigorously. Fix by whisking in a splash of warm cream until smooth.
    • Cracked Coating: The centers were too cold when dipped. Let them sit a few minutes before coating.
    • Condensation Blooms: Avoid moving from freezer to a warm room. Thaw in the fridge to minimize moisture.

    With these simple, homemade fixes, your Orange Chocolate Christmas Truffles will keep their velvety texture, bright citrus flavor, and giftable shine. Need more festive sides for your party spread? Try my Christmas Cinnamon Butter on warm rolls next to your candy tray.

    FAQs

    Can I make Orange Chocolate Christmas Truffles without liqueur?

    Yes. Use 1 teaspoon orange extract instead of liqueur, and keep the zest for a fresh citrus pop.

    Do I have to temper the chocolate for dipping?

    No. You can dip in simply melted chocolate for ease, but tempered chocolate gives a snappier, shinier shell.

    Can I add nuts to Orange Chocolate Christmas Truffles?

    Absolutely. Fold in finely chopped toasted almonds, hazelnuts, or pistachios for texture before chilling.

    How do I keep my hands from getting messy while rolling?

    Wear food-safe gloves and dust your palms lightly with cocoa. Roll quickly, then chill again before coating.

    Conclusion

    When holiday to-do lists grow long, Orange Chocolate Christmas Truffles deliver comfort, sparkle, and a homemade touch with minimal effort. The creamy ganache, bright orange zest, and rich chocolate shell make a festive, giftable sweet that also satisfies those cozy comfort food cravings. Whether you roll them in cocoa or dip them for a glossy finish, this easy recipe adapts beautifully to flavor variation and seasonal twist ideas. Make a double batch, keep a few in the fridge for a quick fix, and share the rest with friends. I can’t wait to see your Orange Chocolate Christmas Truffles—try it at home and tag me so I can cheer on your holiday treat magic!

  • Christmas Tree Cake Truffles – Irresistibly Easy and Festive

    Christmas Tree Cake Truffles – Irresistibly Easy and Festive

    Christmas Tree Cake Truffles are the little bites I whip up when the holiday chaos hits DEFCON one. Christmas Tree Cake Truffles saved my sanity the year my mixer walked itself off the counter because I was “multitasking” ribbon curls and hot cocoa. I crumbled those nostalgic cakes, folded in creaminess, and dunked them in melty white chocolate while my twins redecorated the dog with sprinkles. The result? Sweet, soft, festive truffles that look bakery-fancy with almost zero effort. I’m Darleen Vance, and if your kitchen gets as delightfully messy as mine, you’re in the right place.

    Christmas Tree Cake Truffles are the little bites I whip up when the holiday chaos hits DEFCON one.

    Recipe

    Why You’ll Love This Christmas Tree Cake Truffles Recipe

    What Makes This Christmas Tree Cake Truffles So Irresistible

    I learned early on that when December gets loud, Christmas Tree Cake Truffles get quiet results. One year, I promised “just one more batch,” and my mixer decided it was done adulting for the evening. Cue me, a wooden spoon, and a bowl of Christmas Tree Cake Truffles dough—still the smoothest, creamiest homemade filling I’ve ever made without a single whirr. These no-bake bites turn nostalgic snack cakes into a party dessert that tastes like a fancy confection but behaves like an easy recipe you’ll actually make on a weeknight.

    • Quick prep: From crumbling to dipping, you’re party-ready in under an hour.
    • Comforting flavor: Vanilla cake, creamy filling, and white chocolate coating strike pure holiday comfort food vibes.
    • Simple ingredients: Snack cakes, cream cheese, and melts—no special equipment or candy thermometer.
    • Kid- and crowd-friendly: Bite-size, portable, and adorable—perfect for cookie swaps and buffets.
    • No-bake ease: A homemade treat without turning on the oven.

    Best of all, Christmas Tree Cake Truffles keep that soft, nostalgic center that reminds you of school parties and twinkle lights. If you’re in the mood for more festive treats, try my 5-Minute Christmas Crock Pot Candy or bring a savory balance with Cranberry Jalapeño Cream Cheese Dip. Ready to get rolling? Let’s make the magic happen below in the recipe card.

    These Christmas Tree Cake Truffles are holiday-famous because they’re a quick fix that looks bakery-made. Social feeds love a reliable, homemade version of a “wow” dessert, and this one delivers every time. Effort is minimal, payoff is big, and the flavor is a nostalgic hug. If there’s a viral dessert that actually performs under pressure, it’s this one.

    Tips, Tricks & Expert Secrets for Christmas Tree Cake Truffles

    Chef Tips for Perfect Christmas Tree Cake Truffles Every Time

    During a holiday demo, I once overheated the coating while chatting about sprinkles. My quick fix saved the batch and became my favorite cooking tip: when your coating gets thick, stir in a teaspoon of coconut oil to bring back that glossy dip. These Christmas Tree Cake Truffles love a gentle hand and a few small habits that make a big difference.

    • Chill first: Roll and chill truffles 20–25 minutes so they dip smoothly without crumbling.
    • Thin coating wisely: Add 1–2 teaspoons coconut oil or shortening to melted white chocolate for a silky, even shell.
    • Tap and trim: After dipping, tap the fork gently on the bowl’s edge; once set, trim “feet” with a paring knife for clean edges.
    • Work in batches: Keep half the tray chilling while you dip the rest so they stay firm.

    Smart Ingredient Swaps & Practical Cooking Advice

    • Gluten-free: Use gluten-free snack cakes or your favorite gluten-free vanilla cake scraps.
    • Vegan/dairy-free: Swap in dairy-free snack cakes and vegan cream cheese; coat with dairy-free white chips (add coconut oil for smoother melt).
    • Lighter option: Use light cream cheese; texture stays creamy with less richness.

    What not to do: Don’t overheat the coating. White chocolate scorches easily. Use short bursts, stir often, and stop when almost melted—residual heat finishes the job. This easy recipe shines when you keep it low and slow, just like a patient homemade version of old-fashioned candy making.

    Serving Ideas & Creative Variations for Christmas Tree Cake Truffles

    How to Serve Christmas Tree Cake Truffles for Maximum Enjoyment

    I once brought a tower of Christmas Tree Cake Truffles to a neighborhood ornament exchange, stacked on a cake stand with micro twinkle lights around the base. Everyone thought I special-ordered them. For effortless plating suggestion wins, go vertical and add sparkle.

    • Holiday board: Pair truffles with fresh berries, pretzels, and peppermint bark for a colorful dessert grazing board.
    • Cozy drink bar: Serve with hot cocoa, eggnog, or coffee for a sweet-and-sip moment guests love.
    • Giftable box: Tuck 6–8 truffles in parchment-lined tins for teacher gifts or neighborly cheer.

    Flavor Twists and Seasonal Variations

    • Peppermint crunch: Stir in 2 tablespoons crushed peppermint into the dough and top with candy cane dust.
    • Gingerbread glow: Add 1/2 teaspoon ground ginger and a pinch of cinnamon to the dough; dip in white chocolate and finish with gold sugar.
    • Red velvet drizzle: Use red candy melts for a striking festive drizzle over the white shell.

    For more party-ready bites, balance sweet with a savory star like Baked Cranberry Brie Bites. Content creators: shoot truffles on parchment with a few sprinkles scattered around; style in groups of three and use a shallow depth of field to make those sparkles pop. These serving ideas and flavor variation tips keep your Christmas Tree Cake Truffles camera-ready and holiday-iconic.

    Christmas Tree Cake Truffles
    Christmas Tree Cake Truffles

    Storage & Troubleshooting Guide for Christmas Tree Cake Truffles

    How to Store and Reheat Christmas Tree Cake Truffles

    My fridge turns into Santa’s workshop in December, so smart storage keeps things merry. Christmas Tree Cake Truffles are happiest in chill-mode and look as glossy on day five as day one when you package them right.

    • Room temperature: Up to 2 hours for serving. Because of cream cheese, return leftovers to the fridge promptly.
    • Refrigerator: Store in a single layer or separated with parchment in an airtight container for 5–7 days.
    • Freezer: Freeze up to 2 months. Thaw overnight in the fridge, then bring to room temp 10–15 minutes for best texture.
    • Best containers: Use hard-sided, shallow containers to protect the coating from dents and humidity.

    Reheating isn’t required, but to soften texture, let truffles rest at room temperature for 10–15 minutes. Avoid the microwave—it can crack the coating or melt the centers unevenly.

    Troubleshooting Common Christmas Tree Cake Truffles Issues

    • Too dry: Add 1–2 teaspoons cream cheese and knead in until the dough holds together smoothly.
    • Too soft: Chill longer, or mix in 1–2 tablespoons finely crushed vanilla wafers or graham crackers.
    • Thick or lumpy coating: You overheated it. Stir in 1 teaspoon coconut oil and microwave in short bursts, stirring often.
    • Cracked shells: Truffles were too cold or coating too hot. Let truffles sit 5 minutes before dipping and cool the coating slightly.
    • Pooling “feet”: Tap off more excess chocolate and scrape the bottom of the fork before setting down.

    With these storage tips and quick fixes, your Christmas Tree Cake Truffles will keep fresh, hold their shine, and wow every plate they land on. You’ve got this—holiday dessert bliss, handled.

    FAQs

    Can I make Christmas Tree Cake Truffles ahead?

    Yes. Roll the centers up to 2 days ahead and keep covered in the fridge. Dip and decorate the day you plan to serve for the glossiest finish.

    Do I have to use cream cheese?

    Cream cheese gives the best creamy texture, but you can use vanilla frosting (start with 3 tablespoons and add more as needed) or dairy-free cream cheese.

    Why is my coating streaky or dull?

    It was overheated or had moisture contact. Melt gently in short bursts, keep bowls dry, and stir in a teaspoon of coconut oil for shine.

    How long do Christmas Tree Cake Truffles last?

    Refrigerate in an airtight container for 5–7 days or freeze up to 2 months. For best flavor, bring to room temperature before serving.

    Conclusion

    Christmas Tree Cake Truffles are proof that a homemade holiday dessert can be easy, festive, and wildly delicious. The creamy center, nostalgic cake flavor, and crisp white chocolate shell make these no-bake truffles the party dessert everyone reaches for first. They’re a quick dessert win when time is tight, a comforting holiday treat for cozy nights in, and a giftable sweet that travels beautifully. If your December is buzzing, Christmas Tree Cake Truffles will keep the fun high and the stress low—my favorite kind of kitchen magic. Try it at home and tag me so I can see your sprinkle style! And when you want a savory counterpoint, bookmark my Roasted Asparagus and Carrot for a bright, simple side.

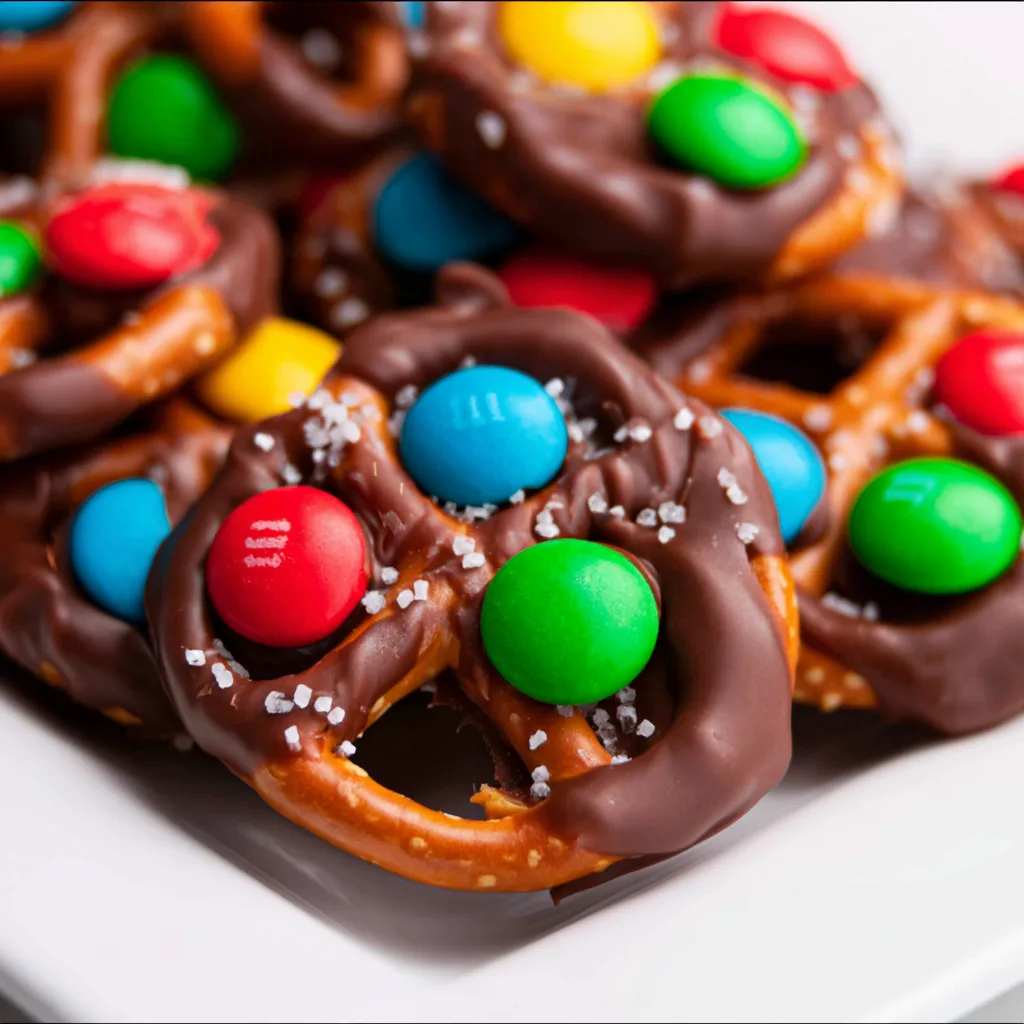
  • Rolo Pretzels with m&m candies – Irresistible, Cozy Treat

    Rolo Pretzels with m&m candies – Irresistible, Cozy Treat

    Rolo Pretzels with m&m candies had me at hello, but they sealed the deal the day my timer failed and I pulled a pan of half-melted chocolates from the oven while the dog chased a rogue pretzel across the floor. Somehow, those Rolo Pretzels with m&m candies still disappeared faster than I could say “cool completely.” This is the kind of quick, homemade, comfort-food snack that saves holidays, bake sales, and last-minute gift swaps. If kitchen chaos is your love language too, welcome home.

    Rolo Pretzels with m&m candies

    Recipe

    Why You’ll Love Rolo Pretzels with m&m candies

    What Makes This Rolo Pretzels with m&m candies So Irresistible

    I once told my kids we were only making a “few” Rolo Pretzels with m&m candies and somehow we were counting sticky fingers instead of servings. That’s the magic of this easy recipe: it’s a quick fix, a homemade treat that feels like comfort food yet uses simple pantry ingredients. Rolo Pretzels with m&m candies deliver that crispy-chewy bite with a pop of chocolate and caramel that tastes like a bakery snack without the fuss. The whole thing happens on one sheet pan, so the cleanup is a breeze and the smiles are instant. When you need a reliable, no-stress win, this is it.

    • Fast prep and bake: ready in minutes on a single sheet pan.
    • Simple ingredients: mini pretzels, Rolos, and m&m candies.
    • Kid-friendly and party-perfect: everyone can help press the candies.
    • Homemade look with store-bought ease — the ultimate easy recipe.
    • Make-ahead friendly and great for gifting or snack boards.

    These are going viral because they’re budget-friendly, nostalgic, and totally customizable for holidays. Rolo Pretzels with m&m candies fit into cookie boxes, hot cocoa bars, and movie-night spreads with zero stress. If you’re curating a sweet board with chocolate thumbprint cookies or adding them alongside sugar cookie truffles, the crunchy-salty bite balances all the creamy treats. Ready to bake a batch? Let’s head to the recipe card together.

    Tips, Tricks & Expert Secrets for Rolo Pretzels with m&m candies

    Chef Tips for Perfect Rolo Pretzels with m&m candies Every Time

    My lightbulb moment came the day I learned that Rolos don’t need to “melt,” they just need to soften. Once I stopped waiting for puddles, my Rolo Pretzels with m&m candies set glossy and gorgeous, every time.

    • Watch the gloss: pull from the oven as soon as the Rolos look shiny and soft; overbaking can cause blooming and dull chocolate.
    • Press gently: push the m&m just until the chocolate reaches the pretzel edge — you want a neat disk, not a spillover.
    • Use parchment, not foil or wax paper; parchment prevents sticking and ensures a clean release.
    • Quick set: chill 10–15 minutes to lock in that clean, bakery finish and keep the colors vibrant.

    Smart Ingredient Swaps & Practical Cooking Advice

    • Gluten-free: use certified GF mini pretzels for Rolo Pretzels with m&m candies that everyone can enjoy.
    • Dairy-free/vegan: swap Rolos for a dairy-free caramel square plus a dairy-free chocolate wafer; top with vegan candy-coated chocolates.
    • Flavor boosters: add a tiny pinch of flaky sea salt or a drizzle of melted dark chocolate after the candies set.
    • What not to do: don’t bake until the Rolos collapse. If they fully melt, the texture gets grainy and you’ll lose that clean look.

    These cooking tips keep your easy recipe consistent, whether you’re making one pan for the family or a homemade version for a bake sale. If you need savory crowd-pleasers, pair them with crockpot cranberry meatballs for a sweet-and-savory party menu.

    Serving Ideas & Creative Variations for Rolo Pretzels with m&m candies

    How to Serve Rolo Pretzels with m&m candies for Maximum Enjoyment

    The first time I plated Rolo Pretzels with m&m candies for guests, I tossed them into a vintage candy bowl and they vanished mid-sentence. Now I serve them on a long board with hot cocoa, espresso shots, and little bowls of extra m&m candies for color. They’re the cheerful burst every dessert spread needs.

    • Pairings: hot chocolate with whipped cream, strong coffee, or a cold glass of milk.
    • Plating suggestion: stack in neat rows on a parchment-lined board or tuck into cellophane treat bags with ribbon.
    • Ice-cream hack: crumble a few over vanilla ice cream for a sweet-salty sundae topper.

    Flavor Twists and Seasonal Variations

    • Holiday hues: red-and-green m&ms at Christmas, pastels for spring, and team colors for game day.
    • Pecan turtle style: press a toasted pecan half instead of an m&m, then drizzle with dark chocolate.
    • Peanut butter lovers: use peanut m&ms or add a peanut butter chip alongside the m&m.
    • Mint sparkle: crushed peppermint and white chocolate drizzle for a wintry look.

    For more festive baking, peek at my cozy lineup like Christmas gooey butter cookies — they look gorgeous next to a tray of Rolo Pretzels with m&m candies. Content creators: shoot overhead on parchment, group by color, and leave a few candies scattered for a natural, Pinterest-ready vibe. These serving ideas and flavor variations invite you to play.

    Storage & Troubleshooting Guide for Rolo Pretzels with m&m candies

    How to Store and Reheat Rolo Pretzels with m&m candies

    I stash a secret container of Rolo Pretzels with m&m candies in the pantry behind the flour — purely for research, of course. Here’s how to keep them fresh, crunchy, and photo-ready:

    • Room temperature: store up to 1 week in an airtight tin; layer with parchment to prevent sticking.
    • Refrigerator: keeps 2 weeks; great for warm kitchens or if you like a firmer bite.
    • Freezer: up to 2 months; thaw uncovered at room temp to avoid condensation.
    • Refresh: if the pretzels soften, pop on a sheet pan at 200°F (93°C) for 2–3 minutes, then cool completely.

    Troubleshooting Common Rolo Pretzels with m&m candies Issues

    • Chocolate looks dull or white: that’s bloom from overheating or temp swings. Bake less (watch for gloss) and cool at room temp before chilling.
    • Too hard to bite: overbaked caramel. Next time, pull earlier; for now, let them sit at room temp to soften slightly.
    • Sticky or weeping candies: humid storage. Add a silica gel packet to the tin (not touching food) and store in a cool, dry spot.
    • Candy colors smeared: press gently and set quickly in a cool room; don’t stack until fully set.

    With this storage advice, your Rolo Pretzels with m&m candies will keep their snap and shine. You’ve got this — and if a few go missing, I’ll never tell.

    FAQs

    Can I make Rolo Pretzels with m&m candies ahead of time?

    Yes. Make up to 5–7 days ahead and store airtight at room temperature, layered with parchment to keep the tops neat.

    Do I have to use mini pretzel twists?

    No. Square or waffle pretzels create a tidy base and help the chocolate spread evenly. Sticks are harder to press and stack.

    How do I keep the chocolate glossy?

    Pull as soon as the Rolos turn shiny and soft, then cool at room temp. Overbaking or rapid temp swings can cause bloom.

    Can I double the recipe?

    Absolutely. Use two sheet pans or bake in batches. Rotate pans halfway if your oven runs hot on one side.

    Conclusion

    When time is tight and you still want a homemade win, Rolo Pretzels with m&m candies deliver every single time. The salty crunch, melty caramel, and pop of chocolate make this easy recipe a comfort-food classic in snack form. Build a dessert board with these alongside cookies, cocoa, and fruit; they shine at parties and pack beautifully for gifts. With simple pantry ingredients and a quick bake on one sheet pan, you’ll get a glossy, crowd-pleasing treat without the stress. Try Rolo Pretzels with m&m candies at home and tag me so I can cheer you on — I can’t wait to see your colorful, cozy creations.

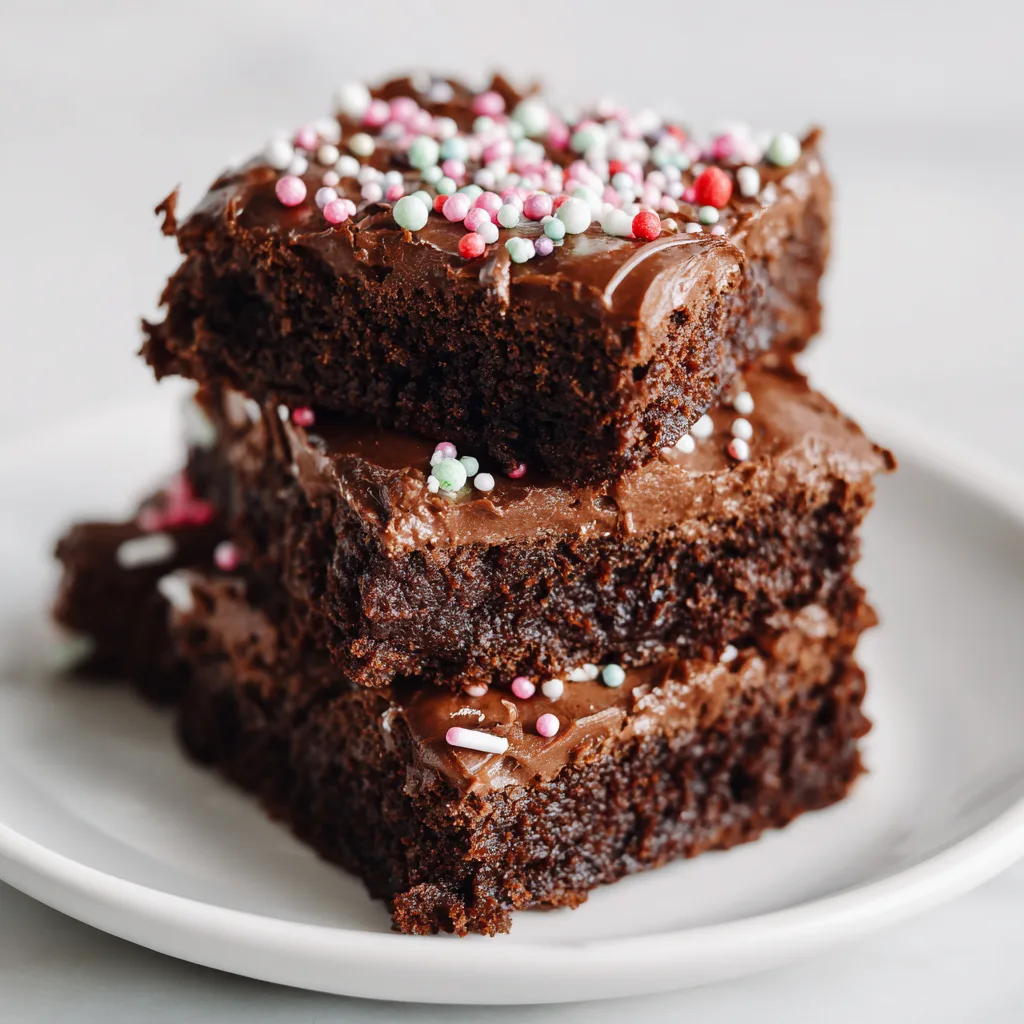
  • Frosted Christmas Brownies – Cozy and Irresistible

    Frosted Christmas Brownies – Cozy and Irresistible

    Frosted Christmas Brownies are the festive shortcut I reach for when December gets wild. Last year, my stand mixer was already busy with cookie dough, so I stirred these Frosted Christmas Brownies in one bowl while my twins decorated the tree and the dog stole an ornament. We ended up with twinkly lights, sticky fingers, and a pan of cooling brownies whisked under the garland to keep them safe. It was pure kitchen chaos with buttery cocoa in the air—and not a single complaint at dessert time. Cozy, fudgy, and crowned with silky frosting, these are the kind of holiday treats that make the merry feel manageable.

    Frosted Christmas Brownies

    Recipe

    WHY YOU’LL LOVE THIS RECIPE

    What Makes This Frosted Christmas Brownies So Irresistible

    I learned long ago that the fastest way to calm a noisy house is with a pan of Frosted Christmas Brownies. The first time I baked them, I pulled the frosting too soon and it slid like a chocolate sled right off the warm squares. We laughed, grabbed spoons, and called it “brownie fondue.” These Frosted Christmas Brownies are irresistible because they’re rich, fudgy, and unapologetically festive—comfort food in sparkly sprinkles. They come together like a true homemade, one-bowl recipe you can trust even on your busiest holiday nights.

    • Fudgy texture with a glossy top and soft crumb—classic bakery-style, but easier.
    • Silky cocoa frosting that spreads like a dream and sets with a soft bite.
    • One-bowl batter with simple pantry ingredients—no fancy steps, just easy baking.
    • Holiday-ready with peppermint, sprinkles, and candy cane crunch for instant cheer.
    • Family-friendly: kids can decorate, adults can savor; perfect for cookie swaps and potlucks.

    In short, this is the homemade holiday dessert that wins smiles fast. If you love giftable treats, peek at my Peppermint Swirl Cookies or the cozy Gingerbread Cheesecake Cookies for more festive baking inspiration. Ready to bake? Let’s head to the recipe card and bring a fresh pan of Frosted Christmas Brownies to life.

    Beyond nostalgia, the big buzz is all about convenience and flavor. These Frosted Christmas Brownies pack bakery-level richness with a quick, reliable method that makes holiday hosting less stressful. Content creators love sharing the shiny frosting swoops and sprinkle crowns on social media, and families love how a simple, homemade brownie can taste like a grand celebration. The result is an easy recipe with serious chocolate payoff—ideal for Instagram reels, classroom parties, or a cozy after-dinner dessert when you just want something warm, sweet, and familiar.

    TIPS, TRICKS & EXPERT SECRETS

    Chef Tips for Perfect Frosted Christmas Brownies Every Time

    When I taught a neighborhood baking class, I discovered a tiny trick that changed my brownies forever: whisk the sugar into warm butter until glossy before adding eggs. It gives that coveted crackly top. My Frosted Christmas Brownies lean on small, reliable moves like this to keep your batch fudgy and photogenic.

    • Use room-temperature eggs. They emulsify better, yielding a smoother, shinier batter and fudgier crumb.
    • Whisk butter and sugars until glossy. This “quick fix” helps create that thin, delicate crust we all love.
    • Fold, don’t beat. Overmixing develops gluten and can make brownies tough. Stop when the last streak of flour vanishes.
    • Pull them while slightly underbaked. A toothpick with a few moist crumbs (not wet batter) is your green light.
    • Cool completely before frosting. Frosting warm brownies equals slides and sadness. Patience pays off.
    Frosted Christmas Brownies deserve a neat, luscious crown, not a chocolate landslide. Keep it homemade, keep it simple, and you’ll nail this easy recipe every time.

    Smart Ingredient Swaps & Practical Cooking Advice

    • Gluten-free: Use a 1:1 gluten-free baking flour blend. Add 1 extra tablespoon milk to the frosting if needed for smoothness.
    • Vegan: Swap in vegan butter, use a flax egg (1 tablespoon flax meal + 3 tablespoons water per egg, gelled), and dairy-free milk and chocolate chips.
    • Less sweet: Reduce granulated sugar by 2–3 tablespoons and add 1 extra tablespoon cocoa for deeper chocolate flavor.
    • Flavor boost: Espresso powder magnifies the chocolate but stays undetectable—an expert-level cooking tip that’s easy to love.

    What not to do: Don’t bake in the wrong pan size without adjusting time. A smaller 8×8-inch pan needs a few extra minutes; a larger pan bakes faster. And never frost before the brownies are fully cool—Frosted Christmas Brownies deserve a neat, luscious crown, not a chocolate landslide. Keep it homemade, keep it simple, and you’ll nail this easy recipe every time.

    SERVING IDEAS & CREATIVE VARIATIONS

    How to Serve Frosted Christmas Brownies for Maximum Enjoyment

    When neighbors drop in, I slice Frosted Christmas Brownies into tidy squares, pile them on a cake stand, and dust the platter with candy-cane “confetti.” It’s presentation without pressure. For a café-style plate, add a small scoop of vanilla bean ice cream and a ribbon of chocolate sauce, then finish with a sprig of mint for that seasonal twist. These serving ideas are simple, photogenic, and perfect for sharing online.

    • Pairings: Hot cocoa with a whipped cream cap, peppermint mocha, or spiced chai offer cozy contrast.
    • Party platter: Alternate brownie squares with fruit (raspberries or clementine wedges) for color and balance.
    • Warm and melty: Microwave a slice for 10 seconds and top with a small scoop of ice cream for instant holiday comfort food.

    Flavor Twists and Seasonal Variations

    • Peppermint Bark Swirl: Drop spoonfuls of melted white chocolate over the frosted top; swirl and shower with crushed candy canes.
    • Gingerbread Spice Brownies: Add 1 teaspoon ground ginger and 1/4 teaspoon each cinnamon and cloves to the batter for a cozy flavor variation. Serve alongside my Christmas Jam for a sweet-spiced spread.
    • Orange-Cranberry Sparkle: Fold 1 tablespoon orange zest into the frosting and finish with finely chopped dried cranberries for a bright, seasonal twist.
    • Salted Caramel Drizzle: Add a thin zigzag of warm caramel over the frosting and a pinch of flaky salt—elegant yet easy.

    For more festive treats to round out your dessert table, try Sugar Cookie Truffles—they look darling next to Frosted Christmas Brownies and photograph like a dream for Pinterest boards. A few clean, overhead shots and a close-up of the frosting swoops will make your post pop.

    STORAGE & TROUBLESHOOTING GUIDE

    How to Store and Reheat Frosted Christmas Brownies

    Confession: I once hid Frosted Christmas Brownies behind the cranberries in the fridge—zero regrets. To keep your batch fresh and festive, use these storage tips.

    • Room temperature: Keep in an airtight container up to 2 days. Separate layers with parchment to protect the frosting.
    • Refrigerator: Store up to 5 days well covered. The chill helps the frosting stay neat and sliceable.
    • Freezer: Freeze individual squares on a sheet pan until firm, then wrap and bag for up to 2–3 months. Thaw overnight in the fridge or at room temp for 1–2 hours.
    • Reheat: Warm a square 10–15 seconds in the microwave or 5–7 minutes in a 300°F oven. If frosting softens, chill briefly to reset.

    Troubleshooting Common Frosted Christmas Brownies Issues

    • Too dry: You likely overbaked. Next time, pull at moist-crumb stage. For now, brush tops lightly with simple syrup or add a little extra frosting.
    • Gummy center: Underbaked. Chill, then slice and return cut pieces to a 300°F oven for 5–7 minutes to fix texture.
    • Crumbly edges: Batter may have been overmixed. Fold gently and use a scale for flour. A sharp knife or warm slicing knife helps cleaner cuts.
    • Frosting too thick: Beat in cream, 1 teaspoon at a time, until spreadable. Too thin? Add a tablespoon of powdered sugar and whip again.
    • Uneven rise: Check your oven temp with an oven thermometer and use the correct pan size for consistent results.

    With these storage advice tips and quick fixes, Frosted Christmas Brownies stay party-ready from first slice to last bite. You’ve got this—and your brownies will prove it.

    FAQs

    Can I make Frosted Christmas Brownies ahead?

    Yes. Bake, cool, and store the uncut slab tightly wrapped for up to 2 days at room temp or 5 days in the fridge. Frost the day you serve for the cleanest edges.

    Can I use a boxed brownie mix and add your frosting?

    Absolutely. Prepare the mix in a 9×9-inch pan for a thicker bite, then finish with the cocoa buttercream and sprinkles for a homemade upgrade.

    How do I get clean, sharp slices?

    Chill the frosted slab 20–30 minutes, use a long sharp knife, and wipe it clean between cuts. Lift with parchment overhang for easy handling.

    Can I skip the peppermint?

    Yes. Omit peppermint extract and candy canes for classic chocolate brownies, or swap in orange zest or espresso powder for a cozy twist.

    Conclusion

    Frosted Christmas Brownies are the kind of homemade holiday dessert that brings instant cheer: fudgy centers, glossy tops, and a silky cocoa frosting dressed in sprinkles. They check every comfort food box while staying wonderfully easy and reliable. Whether you’re baking for a party, gifting to neighbors, or pairing them with cocoa after a long day, these brownies deliver big flavor, simple technique, and plenty of festive charm. If you’re building a dessert tray, add bright bites like Peppermint Swirl Cookies for color and crunch. Bake these Frosted Christmas Brownies, share the joy, and tag me so I can cheer you on. Your kitchen is about to smell like the holidays.

  • Chocolate Thumbprint Cookies – Irresistible, Cozy Delight

    Chocolate Thumbprint Cookies – Irresistible, Cozy Delight

    Chocolate Thumbprint Cookies are my favorite “oops, guests are here in 30 minutes” dessert. Last winter, I tried to hide the cooling tray from my kids and our dog found them first—tail wagging, disaster looming. I saved most of the batch, and that creamy chocolate center still made us heroes with the neighbors. Chocolate Thumbprint Cookies are forgiving, impressive, and wildly delicious—even in a little kitchen chaos.

    Chocolate Thumbprint Cookies

    Recipe

    WHY YOU’LL LOVE THIS RECIPE

    What Makes This Chocolate Thumbprint Cookies So Irresistible

    I learned early that Chocolate Thumbprint Cookies can rescue any dessert emergency. One December night, the oven timer and my phone alarm chimed at the exact same moment and I pulled out the pan in a comedic panic—yet those homemade Chocolate Thumbprint Cookies still looked glossy and bakery-beautiful. That’s the magic: it’s an easy recipe that loves you back.

    • Quick prep and bake: simple steps, familiar pantry ingredients, and reliable results.
    • Rich, chocolate-forward dough with a silky ganache center for pure comfort food vibes.
    • Kid-friendly shaping—little thumbs make perfect indents for this homemade version.
    • Flexible for holidays, bake sales, or an after-dinner treat; they plate up like a fancy cookie.
    • Make-ahead friendly: dough and ganache both hold well.

    Chocolate Thumbprint Cookies deliver deep cocoa flavor without fuss. If you’re building a holiday cookie tray, try pairing them with my Gingerbread Cheesecake Cookies and adorable Sugar Cookie Truffles for a crowd-pleasing spread. Ready to bake? Let’s step into the recipe card together.

    Short, sweet, and photogenic. Chocolate Thumbprint Cookies are going viral because they’re homemade, cozy, and look like patisserie treats on Instagram. The contrast of tender chocolate cookie and creamy center is the feel-good content we all crave. Simple, bold, absolutely irresistible—these are the cookies friends ask for by name.

    TIPS, TRICKS & EXPERT SECRETS

    Chef Tips for Perfect Chocolate Thumbprint Cookies Every Time

    At a community bake-off, I taught a teen baker my favorite cooking tip: use the back of a 1/2 teaspoon measure to make even indents. We both laughed when our first tray looked like tiny chocolate crater fields—but the cookies still baked up beautiful. Here’s what I’ve learned for consistently perfect Chocolate Thumbprint Cookies:

    • Soften butter to cool-room temp: it should press with a gentle thumbprint, not oily or melty.
    • Cream well, then be gentle: beat butter and sugars until fluffy, then add dry ingredients on low to avoid overmixing.
    • Chill briefly if dough is sticky: 10–15 minutes firms it for cleaner shaping and crisper edges.
    • Re-dent right after baking: if centers puff, press them again while warm for a neat well.

    Smart Ingredient Swaps & Practical Cooking Advice

    • Vegan swap: use vegan butter and coconut cream for the ganache. Choose dairy-free chocolate chips.
    • Gluten-free option: replace all-purpose flour with a 1:1 gluten-free baking blend; add 1–2 teaspoons milk if dough feels dry.
    • Flavor boost: a pinch of espresso powder intensifies chocolate without tasting like coffee.
    • What not to do: don’t overbake. Dry, crumbly cookies happen fast; pull when set at edges and soft in the center.

    These quick fixes and easy recipe tweaks make a reliable, homemade version of Chocolate Thumbprint Cookies that bakes like a pro and tastes like a dream.

    SERVING IDEAS & CREATIVE VARIATIONS

    How to Serve Chocolate Thumbprint Cookies for Maximum Enjoyment

    When friends drop by, I pile Chocolate Thumbprint Cookies high on a cake stand and watch them disappear. Presentation turns this easy dessert into a showpiece without any stress. Try these serving ideas:

    • Pair with hot cocoa, spiced chai, or a shot of espresso for a cozy nightcap.
    • Drizzle warm cookies lightly with salted caramel for a sweet-salty finish.
    • Plate suggestion: stagger cookies in concentric circles and sprinkle a little powdered sugar on the platter for contrast.

    For holiday boards, tuck these alongside candied nuts, clementines, and a jar of my Christmas Jam for festive color and texture. Snap a few photos in natural window light; the glossy ganache photographs beautifully—ideal for Pinterest and Instagram.

    How to Serve Chocolate Thumbprint Cookies for Maximum Enjoyment
    How to Serve Chocolate Thumbprint Cookies for Maximum Enjoyment

    Flavor Twists and Seasonal Variations

    • Peppermint swirl: add 1/2 teaspoon peppermint extract to the dough and top ganache with crushed candy canes (think of it as the cookie cousin to my Peppermint Swirl Cookies).
    • Hazelnut delight: swap ganache for chocolate-hazelnut spread and finish with toasted chopped hazelnuts.
    • Mocha orange: add orange zest to the ganache and dust finished cookies with cocoa for a café-inspired twist.

    These flavor variations keep Chocolate Thumbprint Cookies fresh and fun—perfect for seasonal twists and creative plating suggestions at any gathering.

    STORAGE & TROUBLESHOOTING GUIDE

    How to Store and Reheat Chocolate Thumbprint Cookies

    Confession: I’ve hidden Chocolate Thumbprint Cookies in the breadbox to “save them for later.” Here’s how to keep them fresh without resorting to stealth storage.

    • Room temperature: store in an airtight container for 3 days. Layer with parchment to protect the ganache.
    • Refrigerator: keeps 5–6 days; remove 15 minutes before serving for the creamiest center.
    • Freezer: freeze cookies (filled or unfilled) up to 2 months in a zip-top bag, air squeezed out. Thaw at room temp. For unfilled, freeze dough balls and indent after a brief thaw.
    • Reheat: if you prefer a soft center, warm cookies on a baking sheet at 275°F for 4–6 minutes. Do not microwave; it can split the ganache.

    Troubleshooting Common Chocolate Thumbprint Cookies Issues

    • Too dry or crumbly: reduce bake time by 1–2 minutes; add 1–2 teaspoons milk to the dough next time.
    • Spreading too much: chill shaped dough 10–15 minutes before baking; ensure butter wasn’t too soft.
    • Wells collapse: re-dent immediately after baking while warm, then fill once cooled.
    • Ganache grainy: the cream was too hot or whisked too fast. Let cool slightly, then whisk in 1–2 teaspoons warm cream to smooth.

    With these storage advice tips, you’ll keep Chocolate Thumbprint Cookies tasting bakery-fresh. You’ve got this—sweet results are just a batch away.

    FAQs

    Can I make Chocolate Thumbprint Cookies ahead?

    Yes. Make the dough up to 48 hours ahead and refrigerate. Shape and bake straight from the fridge, adding 1 extra minute if needed. Baked cookies keep well for 3 days.

    Do I have to use ganache for the filling?

    No. Try chocolate-hazelnut spread, caramel, peanut butter, or a thick jam. Add the filling after cookies cool so it sets neatly.

    Why did my cookies crack around the edges?

    Minor cracks are normal. If cracks are large, the dough may be dry or overmixed. Add 1–2 teaspoons milk next time and press the indent gently to avoid splitting.

    Can I freeze Chocolate Thumbprint Cookies?

    Absolutely. Freeze unfilled or filled cookies up to 2 months. Thaw at room temperature. If unfilled, add ganache after thawing for the cleanest finish.

    Conclusion

    Chocolate Thumbprint Cookies are the reliable, homemade treat that turns simple ingredients into comfort food magic. With a tender, cocoa-rich cookie and a creamy center, these Chocolate Thumbprint Cookies fit every moment—holidays, weeknights, and everything in between. Use the serving ideas, flavor variation options, and storage tips above to bake with confidence, keep them fresh, and share them beautifully. If you love creative bakes, browse more at Recipes Darleen. Now it’s your turn: try this easy recipe at home and tag me so I can cheer on your delicious results!

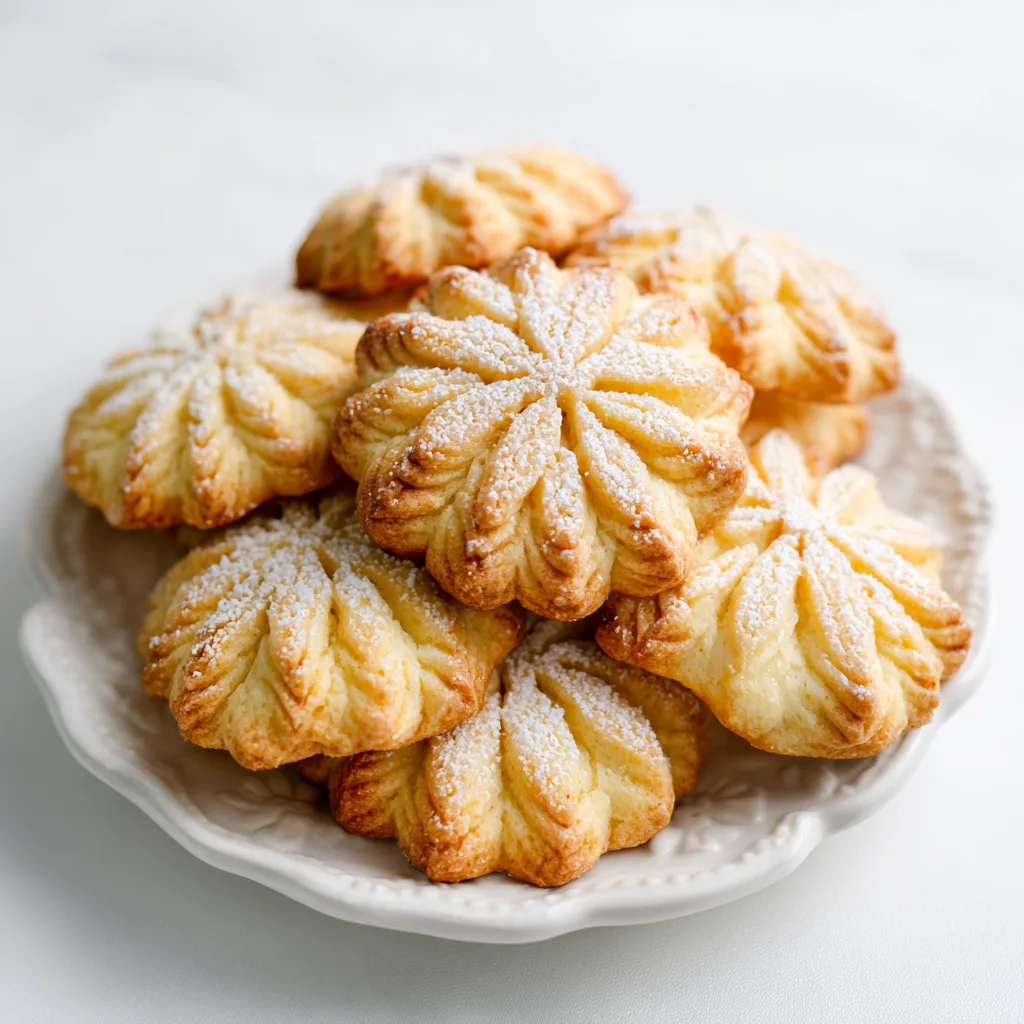
  • Traditional German Butter Cookies – Cozy and Irresistible

    Traditional German Butter Cookies – Cozy and Irresistible

    Traditional German Butter Cookies were the first cookies I learned to bake without supervision—and yes, my mixer shot a puff of flour all over the cat. Traditional German Butter Cookies are the reliable, buttery classic that turn kitchen chaos into cozy calm. I’m Darleen Vance, and I love how this dough comes together simply, rolls like a dream, and bakes into golden-edged, melt-in-your-mouth bites that taste like holidays, tea-time, and home. If you’ve ever wished for a cookie that’s crisp at the edges, tender at the center, and perfect for decorating or dipping, this is it.

    Traditional German Butter Cookies

    Recipe

    Why You’ll Love These Traditional German Butter Cookies

    What Makes This Traditional German Butter Cookies So Irresistible

    When I pull a tray of Traditional German Butter Cookies from the oven, my kitchen smells like a cozy bakery and my family comes running like it’s a bell. The first time I baked these, I tried cutting stars while answering a video call and somehow flour ended up on my bangs. Traditional German Butter Cookies forgive the chaos and deliver elegant, homemade results. Their buttery crumb, crisp edges, and tender center make them the comfort food of the cookie world. Whether you’re planning a holiday cookie tin, a weekend baking session, or a quick homemade gift, this easy recipe brings classic European charm to your table.

    • Buttery, melt-in-your-mouth texture with crisp-golden edges.
    • Simple, pantry-friendly ingredients—no fancy tools required.
    • Versatile for cut-outs, spritz, or slice-and-bake variations.
    • Perfect for decorating, gifting, or dipping in chocolate.
    • Reliable dough that rolls smoothly and bakes evenly.

    These Traditional German Butter Cookies trend every holiday season because they’re a homemade classic that bakes beautifully, tastes nostalgic, and looks stunning on a cookie board. With easy, one-bowl mixing and quick bake time, you’ll get that bakery-level finish without the stress. For more festive inspo, peek at my Gingerbread Cheesecake Cookies or these shareable Sugar Cookie Truffles. Ready to roll into the recipe card? Let’s bake.

    Tips, Tricks & Expert Secrets for Traditional German Butter Cookies

    Chef Tips for Perfect Traditional German Butter Cookies Every Time

    During a pastry lesson in Munich, I learned the quiet magic: don’t rush the butter. Traditional German Butter Cookies depend on gentle creaming and a short chill. Here’s how to nail this easy recipe and keep your homemade version crisp and tender.

    • Measure flour correctly: spoon and level to avoid a dry dough. For precision, use grams (300 g flour).
    • Cream butter and sugar until just fluffy—over-aerating can cause spreading.
    • Chill dough at least 1 hour; re-chill cut shapes 10 minutes before baking for sharp edges.
    • Bake until edges barely turn golden. Pull sooner rather than later to preserve tenderness.

    Smart Ingredient Swaps & Practical Cooking Advice

    • Gluten-free: Use a 1:1 baking blend and add 1 tablespoon milk if dough seems crumbly.
    • Vegan: Substitute plant butter (stick-style) and 2 tablespoons aquafaba for the yolks; chill well.
    • Flavor boosters: Swap half the vanilla for almond extract, or add lemon zest for a bright, traditional note.
    • What not to do: Don’t overmix once flour is added—overworking develops gluten and toughens the cookies.

    These cooking tips keep your Traditional German Butter Cookies consistent: quick fix adjustments, simple timing cues, and practical swaps that make the easy recipe work every time at home.

    Serving Ideas & Creative Variations

    How to Serve Traditional German Butter Cookies for Maximum Enjoyment

    I once plated Traditional German Butter Cookies on a vintage cake stand with a dusting of powdered sugar, and my guests thought I’d hired a caterer. Serve them warm with tea, coffee, or a cozy cocoa for instant charm. On dessert boards, pair them with tart jams or dark chocolate—those buttery notes love contrast. If you’re sharing on social media, stack a few cut-out stars, let crumbs scatter naturally, and shoot near a window for that soft glow. These serving ideas turn simple, homemade comfort food into a polished moment.

    • Pair with spiced tea, hot cocoa, or a latte—rich butter loves warm sips.
    • Dip halfway in melted chocolate and sprinkle with pistachios for color and crunch.
    • Sandwich two cookies with raspberry jam or apricot preserves for a classic German nod.
    How to Serve Traditional German Butter Cookies for Maximum Enjoyment
    How to Serve Traditional German Butter Cookies for Maximum Enjoyment

    Flavor Twists and Seasonal Variations

    • Holiday Citrus: Add orange zest and a whisper of cardamom; finish with powdered sugar snow.
    • Nutty Almond: Replace 1/2 cup flour with finely ground blanched almonds; glaze lightly with vanilla icing.
    • Cinnamon Sugar: Brush warm cookies with butter and toss in cinnamon-sugar for a churro-style hug.

    Planning a festive spread? Pair your Traditional German Butter Cookies with my gently spiced Christmas Jam for gifts that feel handmade and heartfelt. For cozy sips, you’ll love this Slow Cooker Broccoli Cheddar Soup on the side of your cookie-baking day—savory first, sweets second.

    Storage & Troubleshooting Guide for Traditional German Butter Cookies

    How to Store and Reheat Traditional German Butter Cookies

    I once hid a tin of Traditional German Butter Cookies from myself and still found it a week later—miraculously crisp. To keep that bakery-fresh bite, follow this storage advice:

    • Room temperature: Store baked cookies in an airtight tin at cool room temp for 7–10 days. Separate layers with parchment.
    • Freezer: Freeze baked cookies up to 2 months in a zip-top bag inside a rigid container. Thaw at room temperature, uncovered, to keep edges crisp.
    • Reheat: For just-baked aroma, warm in a 300°F (150°C) oven for 3–4 minutes. Avoid microwaving—softens the crisp.
    • Unbaked dough: Freeze dough disks up to 2 months; thaw overnight in the fridge, then roll and bake.

    Troubleshooting Common Traditional German Butter Cookies Issues

    • Too dry/crumbly: You likely overmeasured flour. Next time, weigh ingredients. As a quick fix, knead in 1–2 teaspoons milk.
    • Spreading: Dough was too warm or butter over-creamed. Chill cut-outs 10–15 minutes and bake on cool sheets.
    • Pale and soft: Extend bake by 1–2 minutes until edges just turn golden—watch closely to avoid overbaking.
    • Tough texture: Overmixed after adding flour. Mix on low speed and stop as soon as the dough clumps.

    With these quick fixes, your Traditional German Butter Cookies will stay crisp at the edges, tender in the center, and beautifully shaped. You’ve got this—and your cookie tin will prove it.

    FAQs

    Can I make Traditional German Butter Cookies without a mixer?

    Yes. Use a sturdy bowl and wooden spoon. Soften butter well, cream thoroughly by hand, and avoid overmixing after adding flour.

    Do I have to chill the dough?

    Chilling improves flavor, prevents spreading, and gives clean edges. One hour is ideal; even 30 minutes helps in a pinch.

    How thick should I roll the dough for Traditional German Butter Cookies?

    About 1/4 inch (6 mm). Thinner bakes crisper; thicker stays softer. Keep thickness even for consistent results.

    Can I decorate before or after baking?

    Both. Sprinkle sanding sugar before baking, or dip in chocolate and add nuts or sprinkles after the cookies cool.

    Conclusion

    Traditional German Butter Cookies are the kind of homemade comfort food that turns a simple afternoon into a memory. Buttery, crisp, and beautifully tender, they’re a reliable base for decorating, gifting, and seasonal flavor twists. With a few cooking tips—gentle creaming, proper chilling, and careful bake time—you’ll master this easy recipe and keep a cookie tin ready for guests. From tea-time to holiday trays, Traditional German Butter Cookies deliver golden charm and bakery-fresh aroma. Try it at home, tag me when you bake, and share your favorite shapes and finishes—your cookie board is about to shine.

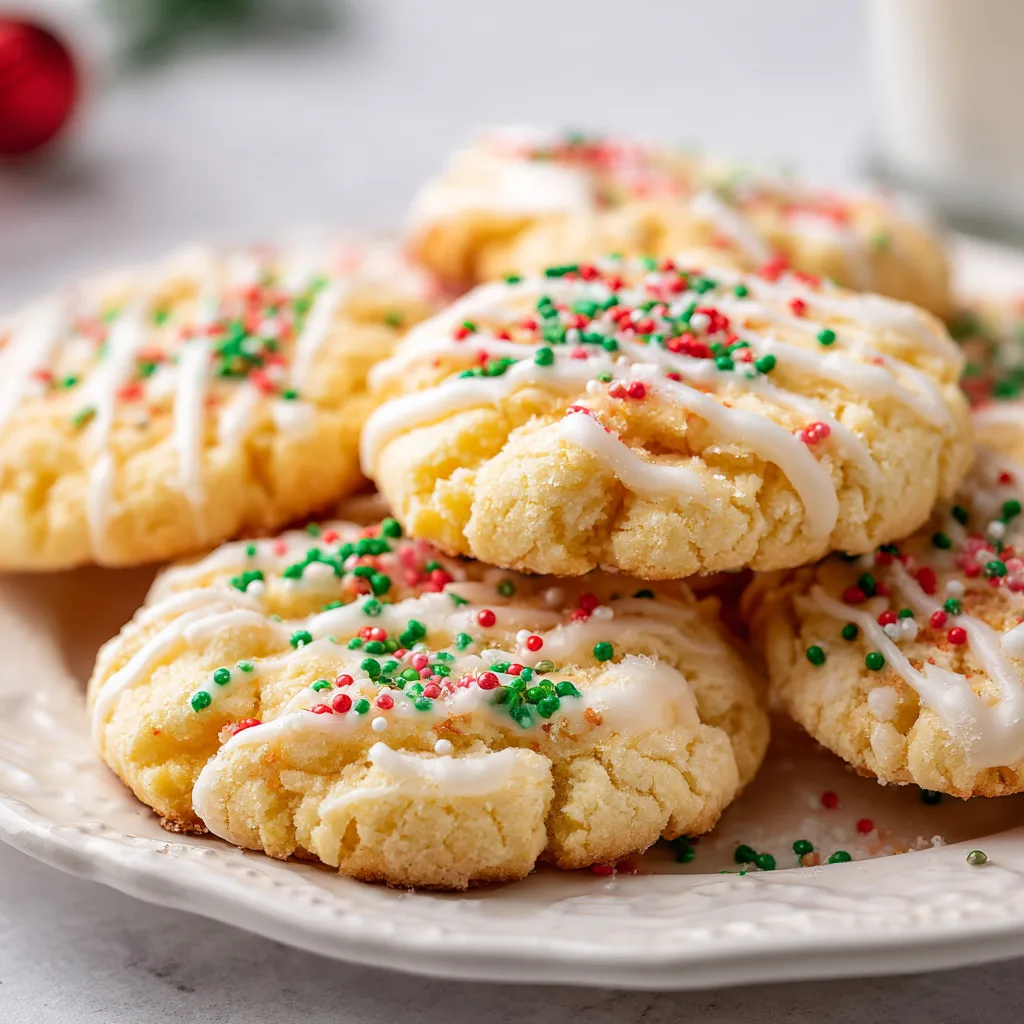
  • Christmas Gooey Butter Cookies – Cozy and Irresistible

    Christmas Gooey Butter Cookies – Cozy and Irresistible

    Christmas Gooey Butter Cookies are my shortcut to instant cheer. One December, my mixer quit halfway through, and I whisked the batter by hand while carols blasted and my kids dusted the dog with powdered sugar. These Christmas Gooey Butter Cookies still emerged soft, buttery, and festive—proof that holiday magic doesn’t need perfection, just laughter and a warm oven. I’m Darleen Vance, and this is the cozy, creamy cookie I bake when time is tight and spirits need lifting. If you love easy holiday baking, peek at my Peppermint Swirl Cookies and crowd-favorite Gingerbread Cheesecake Cookies next.

    Christmas Gooey Butter Cookies

    Recipe

    Why You’ll Love These Christmas Gooey Butter Cookies

    What Makes This Christmas Gooey Butter Cookies So Irresistible

    I learned quickly that Christmas Gooey Butter Cookies are the kind of homemade treat that turns a busy evening into a calm, cozy moment. The first time I baked them, the powdered sugar clouded the kitchen like fresh snow, and the batch vanished faster than I could plate them. These cookies are the very definition of comfort food and holiday baking happiness.

    • Buttery-soft centers with lightly crisp edges for that melt-in-your-mouth finish.
    • Quick prep and minimal fuss—this is an easy recipe with a quick fix for dessert cravings.
    • Uses simple, pantry-friendly ingredients; a true homemade holiday cookie.
    • Festive and kid-friendly—roll in sugar, add sprinkles, and bake.
    • Perfect for cookie exchanges, gifting, or a last-minute party dessert.

    Christmas Gooey Butter Cookies deliver simple joy with big flavor. If you’re planning a holiday menu, serve these alongside a mug of cocoa or set them out as a sweet bite after a cozy bowl of Slow Cooker Broccoli Cheddar Soup. Ready to bake a batch? Let’s get to the recipe card below.

    Every year, Christmas Gooey Butter Cookies trend because they taste like a bakery cookie without the bakery effort. They’re the definition of an easy holiday dessert—soft, gooey, and dusted in powdered sugar that looks like fresh snowfall. Food lovers adore the consistent results, the cozy texture, and how effortlessly these cookies fit into a homemade holiday cookie tray.

    Tips, Tricks & Expert Secrets for Christmas Gooey Butter Cookies

    Chef Tips for Perfect Christmas Gooey Butter Cookies Every Time

    I once taught a quick baking lesson to my niece, and she asked, “Is gooey the goal?” Yes! For Christmas Gooey Butter Cookies, gooey is greatness. Here’s how to nail it:

    • Soften ingredients fully: Room-temperature butter and cream cheese create a silky, cohesive batter for this easy recipe.
    • Chill the dough: A 30–45 minute chill keeps dough from spreading and locks in that gooey center.
    • Don’t overbake: Pull them when edges look set but centers are soft; carryover heat finishes them.
    • Generous sugar coat: Roll twice in powdered sugar—before and after a short rest—for a snowy finish.

    Smart Ingredient Swaps & Practical Cooking Advice

    • Flavor swap: Use white cake mix + 1 teaspoon almond extract for a bakery-style twist.
    • Gluten-free: Choose a gluten-free vanilla/yellow cake mix; results stay tender and gooey.
    • Vegan option: Vegan butter and plant-based cream cheese work; add an egg replacer and check doneness early.
    • What not to do: Don’t overmix once the cake mix goes in—overworking toughens cookies and reduces that signature gooey texture.

    These cooking tips make Christmas Gooey Butter Cookies a reliable, homemade version of a bakery favorite. Keep the batter chilled, follow the timing, and your holiday cookies will be soft and festive every time.

    Serving Ideas & Creative Variations for Christmas Gooey Butter Cookies

    How to Serve Christmas Gooey Butter Cookies for Maximum Enjoyment

    The first time I plated these for friends, I stacked Christmas Gooey Butter Cookies on a cake stand, sifted extra sugar over the top, and added a few cranberries for color. It looked like a winter snow globe. For maximum delight:

    • Pair with hot cocoa, eggnog, or spiced chai to highlight the buttery sweetness.
    • Serve with a spoonful of homemade Christmas Jam for a bright, fruity contrast.
    • Plate in a lined tin with parchment dividers—instant gift-ready presentation.
    How to Serve Christmas Gooey Butter Cookies for Maximum Enjoyment

    Flavor Twists and Seasonal Variations

    • Peppermint crunch: Fold in crushed candy canes and a hint of peppermint extract; perfect next to Sugar Cookie Truffles.
    • Citrus sparkle: Add orange zest and a touch of cardamom for a fragrant, festive lift.
    • Red velvet: Use red velvet cake mix + white chocolate chips for a holiday color pop.

    For food photos, style Christmas Gooey Butter Cookies with a light dusting of powdered sugar just before shooting, use natural window light, and add a ribbon-tied cookie stack for warmth. These serving ideas and flavor variations make every batch feel new while keeping that classic, homemade charm.

    Storage & Troubleshooting Guide for Christmas Gooey Butter Cookies

    How to Store and Reheat Christmas Gooey Butter Cookies

    My family believes Christmas Gooey Butter Cookies taste best on day two—still soft, a little denser, and extra cozy. Here’s how to keep them fresh:

    • Room temperature: Store up to 3 days in an airtight container with parchment between layers to protect the sugar coating.
    • Refrigerator: Keep up to 5–6 days; let cookies warm to room temp for ideal texture.
    • Freezer: Freeze up to 2 months. Freeze scooped dough balls or baked cookies. Thaw baked cookies at room temp; re-roll in powdered sugar if needed.
    • Reheat: Briefly warm in a 300°F oven for 3–4 minutes to revive the gooey center without drying out.

    Troubleshooting Common Christmas Gooey Butter Cookies Issues

    • Too flat: Dough wasn’t chilled or the oven was too hot. Chill longer and ensure a 350°F oven.
    • Too dry: Overbaked. Next time, remove when edges set and centers are soft; check 1–2 minutes earlier.
    • Powdered sugar melting: Roll in sugar right before baking and again lightly after cooling a few minutes.
    • Dough too sticky: Chill longer or lightly oil your hands before rolling.
    • Uneven texture: Don’t overmix after adding cake mix; mix just until combined for a tender crumb.

    With these storage tips and fixes, Christmas Gooey Butter Cookies will stay soft, gooey, and gorgeous from your first bite to the last. You’ve got this—and I’m cheering you on, one buttery cookie at a time.

    FAQs

    Can I make Christmas Gooey Butter Cookies ahead of time?

    Yes. Chill the dough up to 48 hours or freeze scooped dough balls. Bake straight from chilled or after a brief thaw for best shape.

    Why are my Christmas Gooey Butter Cookies spreading?

    Warm dough or a hot pan can cause spreading. Chill dough 30–45 minutes and bake on cool, lined sheets.

    Do I have to use yellow cake mix?

    No. White, vanilla, or red velvet cake mix also works. Adjust flavorings (vanilla, almond, or peppermint) to suit the mix.

    How do I keep the powdered sugar visible?

    Roll generously right before baking and dust again lightly after a short cool. Store between parchment to protect the coating.

    Conclusion

    Christmas Gooey Butter Cookies are the soft, buttery, homemade holiday cookies that disappear the moment they hit the plate. This easy dessert brings comfort food vibes with minimal effort, perfect for cookie exchanges, gifting, and last-minute celebrations. From family movie nights to festive potlucks, Christmas Gooey Butter Cookies taste like pure cheer—gooey centers, sugary snow, and cozy spice if you add a seasonal twist. Bake a batch, brew something warm, and enjoy the sweetest pause of the season. Try it at home and tag me so I can see your sugar-dusted masterpieces!