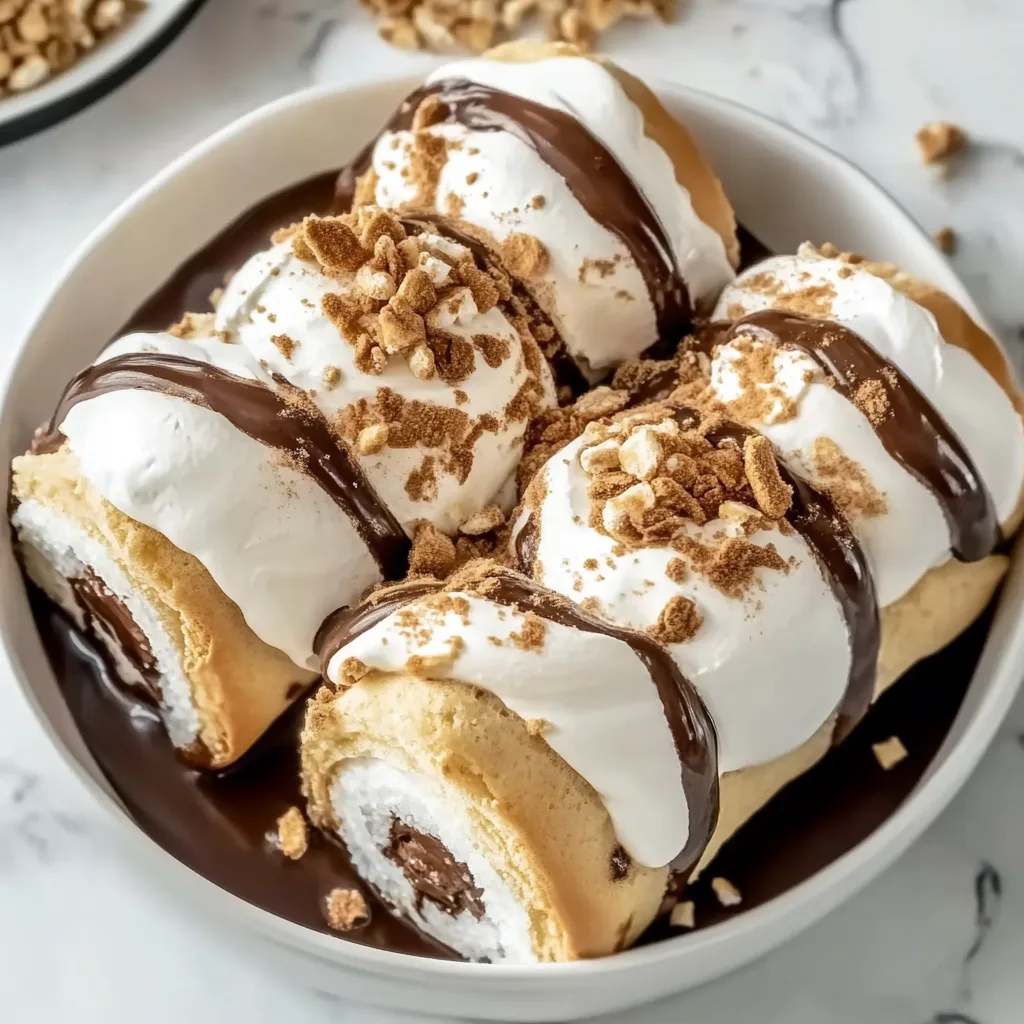
Category: Desserts

Sweet and easy dessert recipes for every craving. Simple treats, rich flavors, and quick ideas that make any moment feel special.

  • Lemon Crinkle Cookies: Irresistibly Zesty & Soft Delight!

    Lemon Crinkle Cookies: Irresistibly Zesty & Soft Delight!

    Lemon Crinkle Cookies: Irresistibly Zesty & Soft Delight!

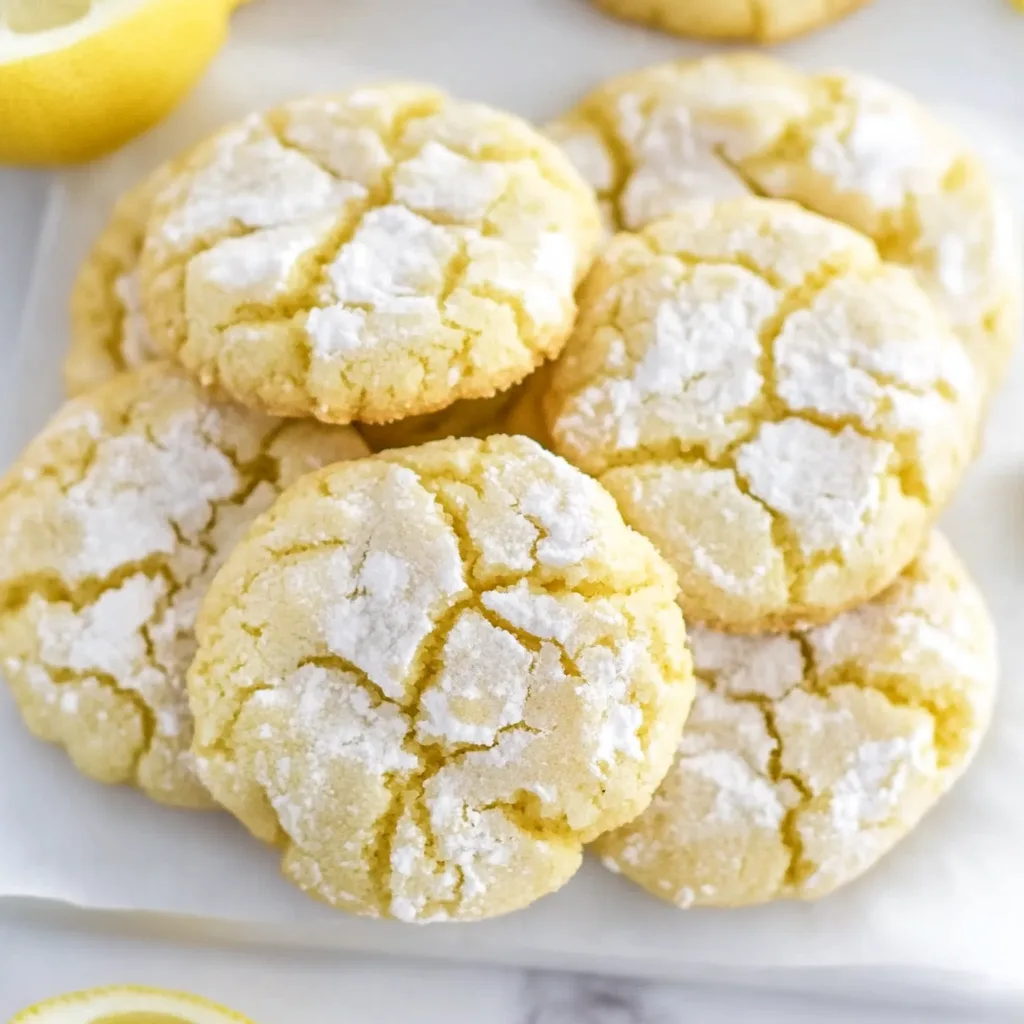
    Lemon Crinkle Cookies are a little piece of sunshine in cookie form. The first time I made these bright, zesty treats, the kitchen filled with the most incredible citrus aroma that instantly transported me to warm summer afternoons. There’s something magical about how these cookies crackle on top while staying soft and chewy inside. The perfect balance of sweetness and tanginess makes them utterly irresistible – just like those thick and creamy tomato soups we crave on chilly days. If you’re looking for a cookie that’s both refreshing and comforting, these lemon crinkle cookies will quickly become your new favorite.

    Recipe

    Why You’ll Love These Lemon Crinkle Cookies

    Perfect Texture Combination

    These lemon crinkle cookies offer the most delightful textural experience – crisp edges with soft, tender centers that practically melt in your mouth. The exterior develops those beautiful characteristic cracks during baking, creating a slight crunch that gives way to pillowy softness. I’m particularly fond of how the powdered sugar creates this sweet, delicate coating that contrasts beautifully with the bright lemon flavor. The dough comes together easily and holds its shape wonderfully while baking, ensuring each cookie maintains that perfect dome shape rather than spreading too thin.

    Bright, Vibrant Flavor

    The zesty punch of fresh lemon in these cookies is absolutely transformative. Using both lemon zest and juice creates layers of citrus flavor that brighten every bite. What makes these cookies special is how the tanginess cuts through the sweetness, creating a perfectly balanced treat that isn’t cloying. I remember bringing these to a summer potluck and watching faces light up with surprise at that first bite – there’s something unexpected and delightful about a cookie that tastes like sunshine. The vibrant yellow color also makes them visually appealing and perfect for spring gatherings.

    Essential Tips & Tricks

    Perfecting the Crinkle Effect

    The signature crackled top of lemon crinkle cookies requires a few key techniques. First, chill the dough thoroughly – at least one hour, but preferably two. This prevents spreading and helps maintain that beautiful domed shape. Before rolling in powdered sugar, I form the dough into perfect balls using a small cookie scoop for consistency. Then comes the crucial step: roll each ball generously in powdered sugar, ensuring complete coverage. For the most dramatic crinkles, don’t shake off excess sugar! This thick coating creates those beautiful creamy white contrasting cracks as the cookies expand in the oven.

    Getting the Lemon Flavor Just Right

    For truly exceptional lemon crinkle cookies, the quality and quantity of lemon ingredients matter tremendously. Always use fresh lemons rather than bottled juice – the difference is remarkable. When zesting, take only the yellow outer layer, avoiding the bitter white pith beneath. For maximum flavor, rub the zest into the sugar before mixing with other ingredients; this releases the essential oils and intensifies the citrus notes. If you prefer an even stronger lemon flavor, add a quarter teaspoon of lemon extract. Test one cookie first before baking the entire batch to ensure the lemon intensity suits your taste.

    Serving Ideas & Creative Variations

    Perfect Pairings

    Lemon crinkle cookies shine brightest when paired with complementary beverages and desserts. Serve alongside a cup of Earl Grey tea – the bergamot notes create a beautiful citrus harmony. For summer gatherings, these cookies make an unexpected but delightful companion to a scoop of vanilla bean ice cream or alongside fresh berries and whipped cream. I love setting these out during afternoon tea with friends, where they provide a refreshing counterpoint to richer treats like chocolate marshmallow swirl cookies. The bright lemon flavor also makes these cookies a welcome palate cleanser after a hearty meal.

    Delicious Twists on the Classic

    While traditional lemon crinkle cookies are perfect on their own, several variations can create exciting new flavor profiles. Try adding fresh blueberries to the dough for beautiful pops of color and juicy sweetness. White chocolate chips melt into pockets of creamy richness that balance the citrus tang beautifully. For a sophisticated twist, incorporate 1-2 teaspoons of culinary lavender into the sugar mixture before adding other ingredients. During holiday seasons, I sometimes add a teaspoon of rosemary for an unexpected herbaceous note that guests always comment on. Each variation maintains the essential character while offering a new experience.

    Storage & Troubleshooting Guide

    Keeping Cookies Fresh

    To maintain the perfect texture of your lemon crinkle cookies, proper storage is essential. Once completely cooled, store them in an airtight container at room temperature, where they’ll stay fresh for up to 5 days. For longer storage, separate layers with parchment paper to prevent sticking and preserve that beautiful powdered sugar coating. The cookies actually improve slightly after a day as the flavors meld together. If you notice them beginning to harden, add a slice of bread to the container – it will release moisture and keep your cookies soft. Avoid refrigeration, as it can make them tough and diminish the bright lemon flavor.

    Solving Common Baking Issues

    If your lemon crinkle cookies aren’t developing those signature cracks, a few adjustments can help. The most common issue is oven temperature – too low and the cookies spread before cracking; too high and they set too quickly. Invest in an oven thermometer for accuracy. If cookies spread too much, your dough was likely too warm or contained too little flour. Conversely, if they remain ball-shaped without cracking, try slightly flattening the dough balls before baking. For cookies that seem too dry, reduce baking time by 1-2 minutes. Remember that humidity affects flour absorption, so you may need slight adjustments to the recipe depending on your climate.

    Frequently Asked Questions

    Can I make lemon crinkle cookies without fresh lemons?

    While fresh is best, you can substitute 2 tablespoons bottled juice and 1 teaspoon lemon extract for the zest and juice. The flavor won’t be quite as vibrant, but they’ll still be delicious.

    Why didn’t my cookies develop cracks on top?

    Insufficient powdered sugar coating or dough that’s too warm are the most common culprits. Make sure to chill the dough thoroughly and coat generously with powdered sugar before baking.

    Absolutely! Roll the dough into balls, freeze on a baking sheet, then transfer to a freezer bag. When ready to bake, thaw slightly, roll in powdered sugar, and add 1-2 minutes to baking time.

    How do I know when my lemon crinkle cookies are done?

    Look for edges that are just set but centers that still appear slightly soft. They’ll firm up while cooling but remain chewy inside. Overbaking will result in crisp cookies.

    What makes lemon crinkle cookies crack on top?

    The contrast between the hot exterior that sets quickly and the cooler interior that continues to expand creates those beautiful cracks in lemon crinkle cookies.

    Final Thoughts

    These lemon crinkle cookies have become my go-to recipe whenever I need a bright, cheerful treat that never fails to impress. The way they balance sweetness and tanginess while offering that perfect textural contrast makes them truly special. I find myself returning to this recipe in every season – they’re as welcome at summer picnics as they are alongside hot cocoa in winter. Whether you’re an experienced baker or just starting out, these cookies offer a foolproof way to bring a little sunshine to your day. Find more delightful recipes on Pinterest and keep baking with joy!
  • Snickers Cheese Ball: Irresistible Sweet & Savory Party Treat!

    Snickers Cheese Ball: Irresistible Sweet & Savory Party Treat!

    Snickers Cheese Ball: Irresistible Sweet & Savory Party Treat!

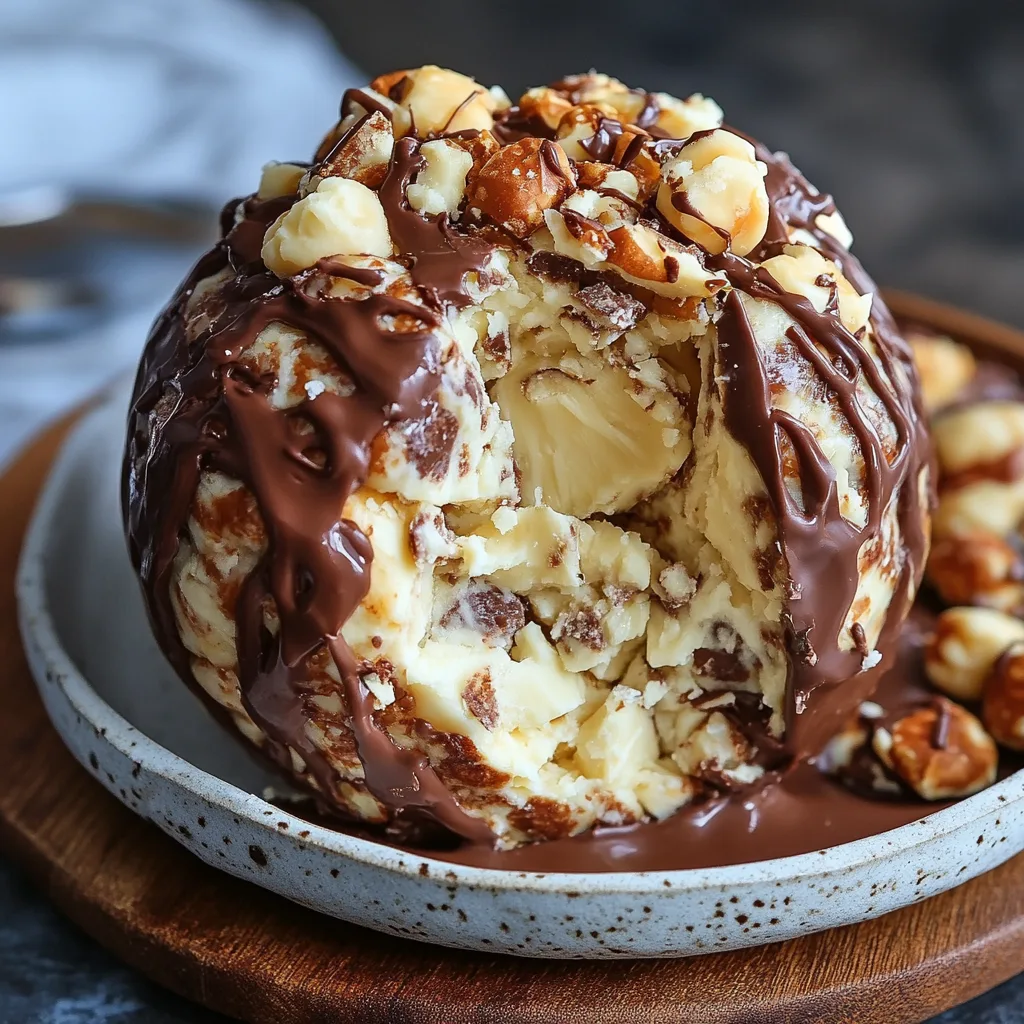
    This Snickers cheese ball is about to become your new favorite party showstopper! The first time I made this decadent treat for my sister’s holiday gathering, it disappeared faster than I could snap a photo. There’s something magical about the way the cream cheese base mingles with the chopped Snickers pieces, creating this irresistible sweet-savory masterpiece that keeps everyone coming back for “just one more” scoop. Perfect for holiday gatherings, game days, or anytime you need a crowd-pleasing dessert that looks impressive but requires minimal effort. Let’s dive into this no-bake wonder that combines my two greatest loves: chocolate and cheese!

    Recipe

    Why You’ll Love This Snickers Cheese Ball

    Perfect Balance of Flavors and Textures

    The beauty of this Snickers cheese ball lies in its captivating contrast of textures and flavors. The creamy, slightly tangy cream cheese base provides the perfect canvas for chunks of chewy Snickers bars with their nougat, caramel, and peanut goodness. I love how each bite delivers a different taste experience – sometimes you get more caramel, sometimes more chocolate. The exterior coating of crushed peanuts adds a satisfying crunch that contrasts beautifully with the smooth interior. When guests dip in graham crackers or apple slices, their eyes literally widen with that first perfect bite.

    Make-Ahead Convenience

    As someone who gets frazzled with last-minute party prep, I treasure recipes that can be made in advance. This Snickers cheese ball has saved me countless times! You can prepare it up to three days before your event, giving the flavors time to meld together beautifully in the refrigerator. I made two of these beauties for my daughter’s graduation party last spring, assembling them the night before while watching my favorite show. The next day, I simply transferred them to serving platters, surrounded them with dippers, and had a stunning dessert ready with zero day-of stress.

    Essential Tips & Tricks

    Temperature Matters

    The secret to the perfect Snickers cheese ball texture is all about temperature management. Always start with room temperature cream cheese – I leave mine out for at least 30 minutes before mixing. Cold cream cheese will leave you with lumps that no amount of mixing can fix (I learned this the hard way at my first attempt). When serving, take the cheese ball out about 15-20 minutes before guests arrive. This slight warming makes it perfectly spreadable without becoming too soft. The contrast between the slightly softened cheese and the still-firm Snickers pieces creates that magical mouthfeel that makes this treat so addictive.

    Chopping Technique

    The way you incorporate the Snickers bars makes a huge difference in the final texture of your cheese ball. I’ve found that freezing the candy bars for about 20 minutes before chopping prevents them from becoming a sticky mess. Use a sharp knife and aim for pieces about the size of small chocolate chips – not too fine (or they’ll disappear) and not too chunky (or they’ll make spreading difficult). I like to reserve some finely chopped pieces for mixing into the coating as well. This creates beautiful flecks of chocolate throughout and gives guests a visual hint of the deliciousness that awaits inside.

    Serving Ideas & Creative Variations

    Perfect Pairing Options

    Creating a beautiful spread around your Snickers cheese ball elevates the entire experience. My go-to dippers include butter cookies, graham crackers, and thinly sliced green apples (the slight tartness works wonders with the sweetness). For an extra-special presentation, I arrange everything on a wooden board with small clusters of fresh berries and mint leaves for color. Last Christmas, I added some salted caramel sauce on the side for drizzling, and my brother-in-law declared it the best dessert he’d ever tasted. The combination of salty, sweet, creamy, and crunchy elements creates a truly memorable tasting experience.

    Seasonal Adaptations

    One of the reasons I keep coming back to this Snickers cheese ball recipe is how easily it adapts to different occasions. For Halloween, roll the ball in orange and black sprinkles along with the peanuts. During Christmas, mix in crushed peppermint pieces and roll in red and green sprinkles. For a summer variation, try using Snickers ice cream bar pieces (kept frozen until the last minute) and serving with fresh strawberries. I’ve even made a “deconstructed” version for a fancy dinner party, serving small scoops in individual dessert cups topped with chocolate drizzle.

    Storage & Troubleshooting Guide

    Proper Storage Methods

    Storing your Snickers cheese ball properly ensures it maintains that perfect texture and flavor. Always wrap it tightly in plastic wrap before refrigerating – this prevents it from absorbing other flavors from your fridge and keeps the exterior from drying out. The cheese ball will keep beautifully for up to 5 days refrigerated. If you want to prepare further in advance, you can freeze the uncoated cheese ball for up to a month. Just thaw overnight in the refrigerator, then coat with the crushed peanuts and other toppings before serving. I label mine with the date using a piece of masking tape on the wrapper.

    Fixing Common Issues

    Even the most experienced cooks occasionally encounter challenges with this recipe. If your mixture seems too soft to form into a ball, the simplest fix is to refrigerate it for 30-45 minutes before shaping. If the mixture is too firm or crumbly, try adding a tablespoon of softened butter or a splash of heavy cream to improve spreadability. Once, when I realized I didn’t have enough Snickers, I substituted half with Milky Way bars and the result was equally delicious! For coating issues, slightly dampening your hands helps the toppings adhere more evenly to the surface.

    Frequently Asked Questions

    Can I make this Snickers cheese ball ahead of time?

    Absolutely! You can prepare it up to 3 days in advance. Just keep it wrapped tightly in plastic wrap in the refrigerator and add any final toppings just before serving.

    What can I use instead of graham crackers for dipping?

    Try vanilla wafers, butter cookies, pretzels, apple slices, strawberries, or even brownie bites for a truly decadent experience.

    How long can this sit out at a party?

    The Snickers cheese ball can safely remain at room temperature for up to 2 hours. After that, refrigerate any leftovers to maintain food safety.

    Can I use low-fat cream cheese?

    You can, but full-fat cream cheese provides the richest texture and flavor. If using low-fat, add 2 tablespoons of butter to improve consistency.

    What’s the best way to shape a perfect ball?

    Place the mixture on plastic wrap, gather the edges, and twist to form a tight ball. Refrigerate for 1-2 hours before unwrapping and coating.

    Final Thoughts

    This Snickers cheese ball has become my signature party contribution for good reason. It bridges the gap between cheese plate sophistication and nostalgic candy bar joy, making it universally beloved by guests of all ages. The way people’s faces light up when they realize what they’re eating makes every simple step worthwhile. Whether you’re hosting a holiday gathering, need a potluck stunner, or just want to treat yourself to something special, this recipe delivers maximum impact with minimal effort. Don’t forget to check out more delicious party ideas on Pinterest!

  • Easy Frosted Texas Brownies: Irresistibly Gooey & Delicious!

    Easy Frosted Texas Brownies: Irresistibly Gooey & Delicious!

    Easy Frosted Texas Brownies: Irresistibly Gooey & Delicious!

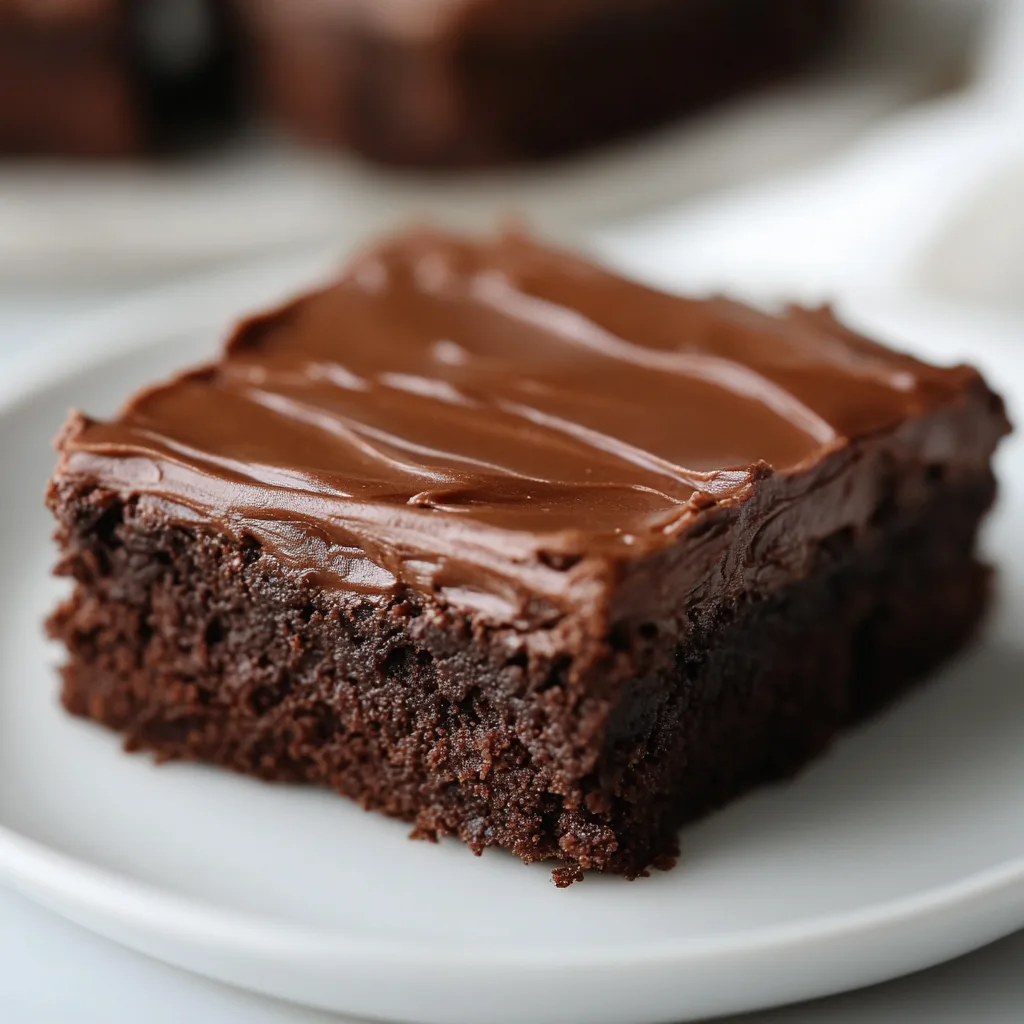
    These Easy Frosted Texas Brownies bring me back to my grandmother’s kitchen every single time I make them. There’s something magical about that glossy chocolate frosting poured over the warm, cake-like brownie base that makes everyone’s eyes light up. I discovered this recipe during a particularly rough week, and the simple joy of making these brownies turned everything around. The beauty of these Texas brownies is their simplicity – one pan, straightforward ingredients, and absolutely irresistible results that’ll have everyone asking for the recipe. If you’re looking for a foolproof dessert that delivers maximum comfort with minimal effort, these brownies are exactly what you need.

    Recipe

    Why You’ll Love These Easy Frosted Texas Brownies

    Perfect Texture Every Time

    Texas brownies have a unique texture that sets them apart from traditional fudgy brownies. They’re lighter, more cake-like, but still incredibly moist and tender. The secret lies in the quick boil of butter and water before mixing in the dry ingredients, creating that distinctive Texas brownie crumb. I love how they hold up perfectly when cut into squares – no crumbling or falling apart! The frosting creates this delicate crackly top that gives way to the soft brownie beneath. When you bite in, there’s this beautiful contrast between the silky frosting and the fluffy brownie that makes my taste buds dance every single time.

    Simple Ingredients, Extraordinary Results

    What I adore about these Easy Frosted Texas Brownies is that they use pantry staples you likely already have on hand. No special chocolate bars or fancy extracts needed! Just basic baking ingredients transformed into something spectacular. The frosting comes together with just cocoa powder, powdered sugar, butter, milk, and vanilla – but tastes like something from a high-end bakery. I’ve made these on busy weeknights when a chocolate craving hits, and they never disappoint. There’s something deeply satisfying about creating something so delicious from such humble ingredients. The simplicity means less shopping and more enjoying!

    Essential Tips & Tricks

    Mastering the Perfect Frosting

    The signature element of Easy Frosted Texas Brownies is that glossy, pourable chocolate frosting that sets into a perfect sheen. The key is timing – you want to pour it while the brownies are still warm (but not hot) and while the frosting is still fluid. I find that letting the brownies cool for about 10 minutes gives the perfect result. Another trick: sift your powdered sugar to avoid any lumps in the frosting. If your frosting starts to thicken too quickly, place it back over low heat for just a few seconds, or add a tiny splash of hot water. This creates that bakery-perfect finish that makes these brownies absolutely irresistible.

    Baking Pan Considerations

    The traditional sheet pan is what gives Texas brownies their characteristic thin, uniform shape. I recommend using a 15×10-inch jelly roll pan for authentic results, but a 9×13-inch pan works too (they’ll just be a bit thicker and need a few extra minutes in the oven). Whatever pan you choose, line it with parchment paper with overhang on the sides – this makes removing and cutting the brownies infinitely easier. Also, don’t overbake! These should remain moist, so when a toothpick inserted comes out with a few moist crumbs (not wet batter), they’re done. The residual heat will continue cooking them slightly as they cool.

    Serving Ideas & Creative Variations

    Elevated Serving Suggestions

    Transform these Easy Frosted Texas Brownies into a show-stopping dessert by serving them slightly warm with a scoop of vanilla ice cream. The contrast between the cool, creamy ice cream and the rich, chocolatey brownie is absolutely divine! For dinner parties, I cut them into smaller squares and arrange them on a tiered serving plate with fresh berries scattered between layers. A light dusting of powdered sugar adds an elegant touch. During the holidays, I add a tiny sprinkle of flaky sea salt on top – the salt enhances the chocolate flavor in the most magical way and gives them that gourmet touch that impresses guests every time.

    Exciting Flavor Twists

    While the classic Easy Frosted Texas Brownies are perfect as is, I love experimenting with seasonal variations. For fall, try adding 1/2 teaspoon of cinnamon to both the batter and frosting for a Mexican chocolate vibe. During the holidays, a few drops of peppermint extract in the frosting creates a festive treat. For coffee lovers, dissolve 1 tablespoon of espresso powder in the hot water for a mocha version. My personal favorite variation is adding 1/2 cup of toasted chopped pecans to the batter – the nutty crunch against the soft brownie is absolutely heavenly! These brownies are the perfect canvas for your creativity.

    Storage & Troubleshooting Guide

    Keeping Brownies Fresh

    These Easy Frosted Texas Brownies stay remarkably fresh when stored properly. Once completely cooled, store them in an airtight container at room temperature for up to 3 days. I like to place a piece of wax paper between layers to prevent sticking. For longer storage, refrigerate for up to a week – just let them come to room temperature before serving for the best texture and flavor. They also freeze beautifully! Wrap individual portions in plastic wrap, then foil, and freeze for up to 3 months. I often make a double batch specifically to freeze some for emergency chocolate cravings or last-minute guests.

    Solving Common Problems

    If your Easy Frosted Texas Brownies aren’t turning out perfectly, a few simple adjustments can help. Dry brownies usually mean they’ve been overbaked – remember, they continue cooking slightly after removal from the oven. For frosting that’s too thick to spread, add warm milk a teaspoon at a time until you reach the right consistency. If your frosting has small lumps, simply warm it gently while whisking continuously. For brownies that stick to the pan, remember that parchment paper is your best friend! And if your brownies sink slightly in the middle, it’s likely from opening the oven door too early in the baking process – try to resist peeking until they’re almost done.

    Frequently Asked Questions

    What makes Texas brownies different from regular brownies?

    Texas brownies are typically thinner, more cake-like in texture, and always include a poured frosting. They’re baked in a sheet pan rather than a square pan, creating their distinctive shape and texture.

    Can I make Easy Frosted Texas Brownies without cocoa powder?

    No, cocoa powder is essential for both the brownie and frosting. It provides the chocolate flavor and cannot be substituted without significantly changing the recipe.

    How do I know when my brownies are done baking?

    Insert a toothpick in the center – it should come out with a few moist crumbs, not wet batter. The edges will begin to pull away slightly from the sides of the pan.

    Can I add nuts to these brownies?

    Absolutely! Stir 1/2 to 1 cup of chopped pecans, walnuts, or even toasted hazelnuts into the batter before baking for a delicious nutty variation.

    Why did my Easy Frosted Texas Brownies turn out dry?

    Overbaking is usually the culprit. Check them early, and remember they continue cooking slightly after removal from the oven. Measuring flour incorrectly can also cause dryness.

    Final Thoughts

    These Easy Frosted Texas Brownies have become my go-to dessert for everything from casual family nights to impressive dinner parties. There’s something wonderfully nostalgic yet timeless about them – they remind me of childhood bake sales while still feeling special enough for any occasion. The simplicity of the recipe combined with the spectacular results makes them truly unbeatable. I hope these brownies bring as much joy to your kitchen as they have to mine! Don’t forget to check out more delicious recipes on Pinterest for more inspiration to satisfy your sweet tooth.

  • Gluten-Free Chocolate Chip Bread Pudding with Irresistible Caramel!

    Gluten-Free Chocolate Chip Bread Pudding with Irresistible Caramel!

    Gluten-Free Chocolate Chip Bread Pudding with Irresistible Caramel!

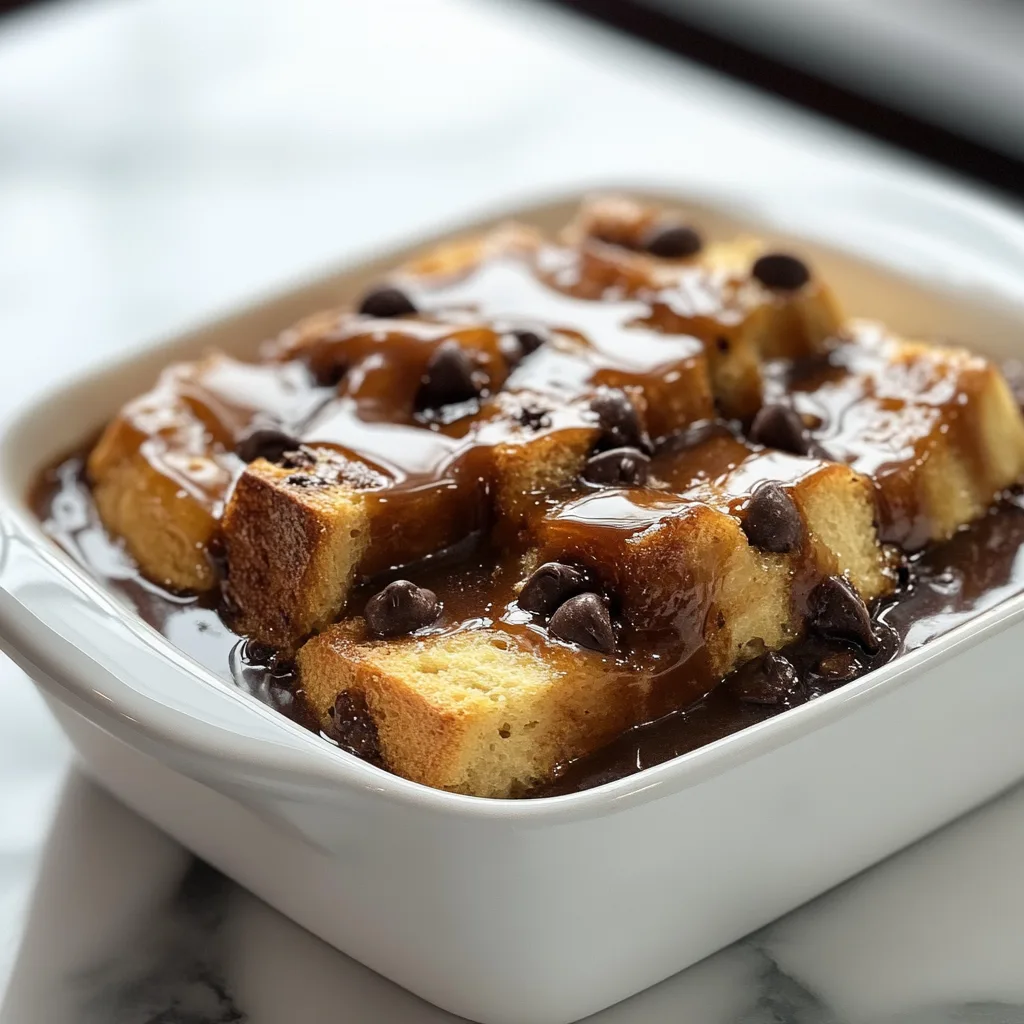
    Gluten-Free Chocolate Chip Bread Pudding with Caramel Sauce has become my weekend ritual whenever I need a little comfort that doesn’t upset my stomach. There’s something magical about the way those melty chocolate chips nestle between cubes of gluten-free bread, all bathed in a custard that’s somehow both rich and delicate. The first time I made this for my sister’s birthday brunch, everyone asked for seconds—nobody even realized it was gluten-free! When that warm caramel sauce cascades over the top, creating little rivers of sweetness… pure bliss. Let me show you how to create this cozy masterpiece that’s become a staple in my recipe collection.

    Why You’ll Love This Gluten-Free Chocolate Chip Bread Pudding with Caramel Sauce

    Perfect Texture Every Time

    The secret to this gluten-free bread pudding is all about balance. Using day-old gluten-free bread actually works better than regular bread because it absorbs the custard without becoming mushy. I’ve found that letting the bread soak for at least 30 minutes creates the perfect custardy texture while maintaining distinct bread pieces. The chocolate chips create these pockets of melty goodness that contrast beautifully with the tender bread. My neighbor Jane (who’s celiac) says this is the first bread pudding that actually reminds her of the ones her grandmother made—high praise indeed!

    Luxurious Homemade Caramel Sauce

    The caramel sauce isn’t just a topping—it’s what transforms this dessert from delicious to unforgettable. Made with just butter, brown sugar, cream, and a pinch of salt, this velvety sauce develops complex flavors as it simmers. I love adding a splash of vanilla at the end for warmth. The slight bitterness of the caramelized sugar perfectly balances the sweetness of the pudding. When I serve this at gatherings, people always dip their spoons back into the sauce bowl when they think no one’s looking!

    Essential Tips & Tricks

    Choosing the Right Bread

    Not all gluten-free breads are created equal for this recipe. Look for a hearty loaf with a good crumb structure—avoid the super soft sandwich varieties that can turn to mush. I’ve had amazing results with gluten-free sourdough or artisan-style loaves. Cut the bread into 1-inch cubes and let them dry out for a few hours (or overnight) before using. This extra step ensures they’ll soak up the custard without dissolving. When I’m in a hurry, I toast the bread cubes for 10 minutes at 300°F, which works beautifully too.

    Perfecting the Custard Mixture

    The custard is the soul of any bread pudding, and this one strikes the perfect balance between rich and light. Whisk together eggs, milk (I use full-fat for creaminess), sugar, vanilla, and a pinch of cinnamon until completely smooth. For an extra layer of flavor, try adding a tablespoon of bourbon or rum to the custard mixture. Make sure the custard fully saturates every bread cube by gently pressing the bread down as it soaks. I like to sprinkle extra chocolate chips on top just before baking for those irresistible melty pockets.

    Serving Ideas & Creative Variations

    Seasonal Adaptations

    This gluten-free chocolate chip bread pudding with caramel sauce welcomes seasonal twists that keep it fresh year-round. In fall, I add diced apples and a pinch of warming spices like nutmeg and allspice. Summer calls for fresh berries folded in just before baking—the way they burst creates beautiful pockets of tartness. During the holidays, I love adding orange zest and cranberries for a festive touch. The caramel sauce can be infused with different flavors too—try adding a cinnamon stick or star anise while it simmers for a subtle aromatic note.

    Elegant Presentation Options

    Transform this cozy dessert into a showstopper with thoughtful presentation. Serve individual portions in vintage teacups or small ramekins for an elegant brunch. For dinner parties, I create a beautiful dessert bar with the warm bread pudding as the centerpiece, surrounded by toppings like toasted nuts, whipped cream, and extra caramel sauce. For a truly spectacular finish, try flambéing a little rum over the top just before serving—the blue flames make for an unforgettable presentation that caramelizes the surface beautifully.

    Storage & Troubleshooting Guide

    Proper Storage Methods

    This gluten-free chocolate chip bread pudding stores surprisingly well, making it perfect for make-ahead entertaining. Refrigerate leftovers in an airtight container for up to 3 days—the flavors actually develop beautifully overnight. To reheat, cover with foil and warm in a 300°F oven for about 15 minutes, or microwave individual portions for 30-45 seconds. Store the caramel sauce separately in a jar in the refrigerator; it will solidify but returns to pourable perfection after 30 seconds in the microwave. For longer storage, freeze portions for up to 2 months in freezer-safe containers.

    Solving Common Issues

    Even experienced bakers encounter challenges, but these simple fixes ensure perfect results every time. If your pudding seems too dry, your bread might have been too dry initially—next time, reduce the bread’s drying time or add an extra ¼ cup of milk to the custard. For a pudding that’s too wet, extend the baking time by 5-10 minutes and check for a slight jiggle in the center. If your caramel sauce crystallizes, add a tablespoon of hot water and gently reheat, stirring constantly until smooth. Remember that gluten-free bread absorbs moisture differently than regular bread, so adjustments may be needed.

    Frequently Asked Questions

    Can I make this Gluten-Free Chocolate Chip Bread Pudding with Caramel Sauce ahead of time?

    Absolutely! Prepare it up to 24 hours ahead, cover and refrigerate unbaked. Let it come to room temperature for 30 minutes before baking. The caramel sauce can be made 3 days ahead and gently reheated before serving.

    What type of chocolate chips work best?

    Semi-sweet chocolate chips provide the perfect balance, but dark chocolate creates a more sophisticated flavor. For a sweeter version, try milk chocolate chips or a combination. Choose high-quality chips that melt smoothly.

    Can I make this dairy-free as well?

    Yes! Substitute the milk with coconut milk or almond milk, and use dairy-free butter and chocolate chips. The caramel sauce works beautifully with coconut cream instead of heavy cream for a slight tropical note.

    Why did my caramel sauce turn grainy?

    Crystallization happens when sugar crystals form. Prevent this by not stirring once the sugar begins to boil, adding a teaspoon of corn syrup to the mixture, or brushing the pan sides with water to dissolve sugar crystals.

    How do I know when the bread pudding is perfectly done?

    The pudding is done when the center is set but still slightly jiggly, similar to a cheesecake. A knife inserted comes out mostly clean with perhaps a bit of custard (but no raw egg). The top should be golden brown.

    Final Thoughts

    This Gluten-Free Chocolate Chip Bread Pudding with Caramel Sauce has become my go-to when I need something that feels both special and comforting. There’s something about the warm, custardy center studded with melty chocolate that makes any day better. I love how it brings people together—whether it’s family gathering around the table or friends stopping by for coffee. Don’t forget to check out more of my favorite gluten-free desserts on Pinterest for inspiration! The beauty of this recipe is that it’s both impressive and approachable, proving that gluten-free desserts can be the star of any table.

  • Rosca de Reyes: Celebrate Tradition with Sweet Joy & Surprise!

    Rosca de Reyes: Celebrate Tradition with Sweet Joy & Surprise!

    Rosca de Reyes: Celebrate Tradition with Sweet Joy & Surprise!

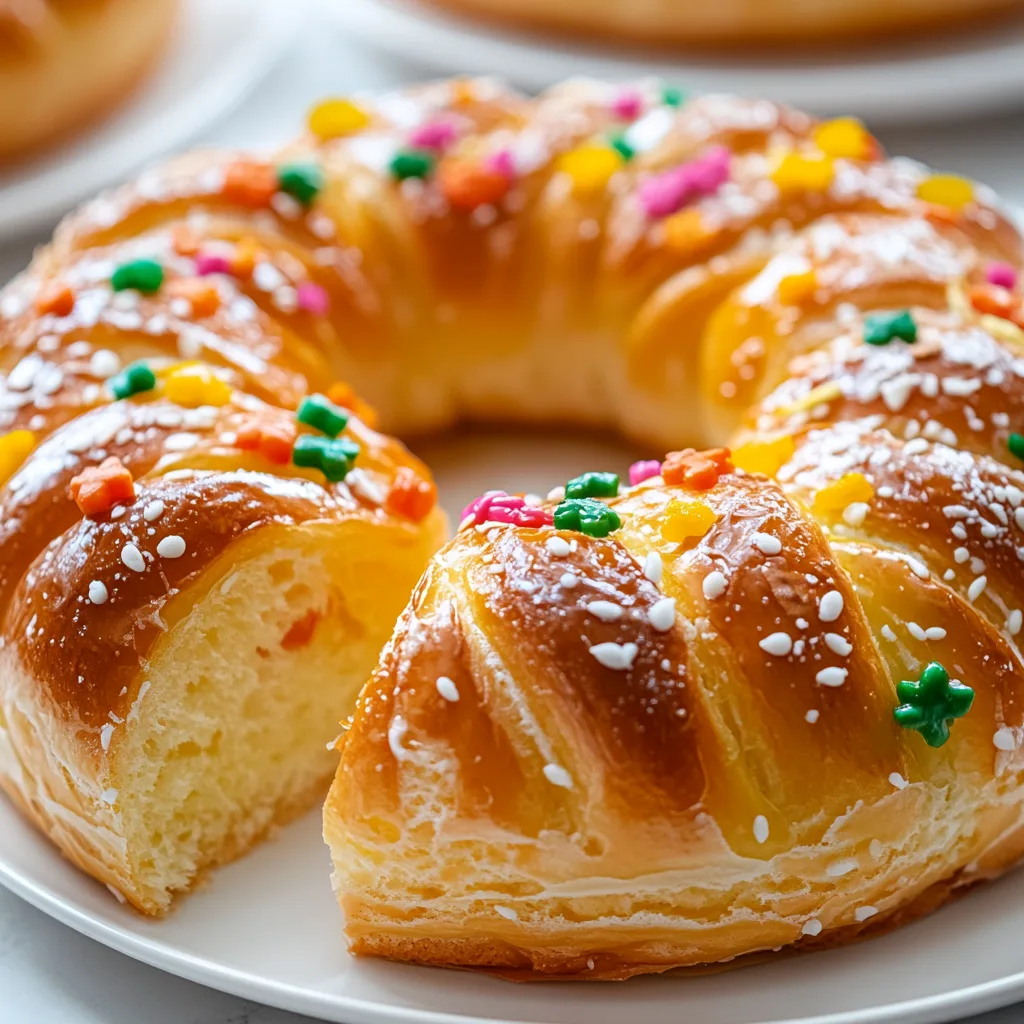
    Rosca de Reyes brings the magic of Epiphany to your kitchen with its crown-like shape and vibrant candied fruits that glitter like jewels across the top. This traditional sweet bread celebrates the arrival of the Three Kings and has been part of my family’s January 6th celebration for as long as I can remember. The moment that warm, aromatic bread comes out of the oven, my home fills with the scent of orange blossom and anise that instantly transports me back to childhood gatherings around my abuela’s table. If you’re looking for a meaningful holiday treat that’s as beautiful as it is delicious, this Rosca de Reyes recipe is your perfect winter baking project.

    Recipe

    Why You’ll Love This Rosca de Reyes

    A Bread Steeped in Tradition

    The Rosca de Reyes (Kings’ Ring) isn’t just delicious—it’s a cultural centerpiece with deep meaning. The oval shape represents a crown, while the colorful candied fruits symbolize the jewels adorning it. Hidden inside is a small baby figurine representing baby Jesus, and whoever finds it in their slice hosts the next gathering! I love how this bread connects generations through shared tradition. My grandmother would always let me help arrange the candied fruits when I was little, carefully placing each “jewel” just so. The bread’s subtle hints of orange and anise create an aroma that’s unmistakably festive.

    Perfect Balance of Flavors and Textures

    What makes Rosca de Reyes truly special is its perfect texture—soft and pillowy inside with a slightly crisp, golden exterior. The dough has a delicate sweetness enhanced by orange zest and a whisper of anise that doesn’t overwhelm. I’ve perfected this recipe through many January baking sessions, finding that balance between rich and light. The contrast between the tender bread and chewy candied fruits creates an irresistible bite every time. When you tear into a warm slice, the steam carries that intoxicating aroma that makes waiting until the bread cools completely nearly impossible!

    Essential Tips & Tricks

    Mastering the Dough

    The heart of a perfect Rosca de Reyes lies in its properly proofed dough. I’ve found that patience truly pays off here—allow at least 1-2 hours for the first rise in a warm spot until doubled in size. The texture should be soft and slightly tacky but not sticky. When kneading, look for that magical moment when the dough becomes smooth and elastic, pulling away from the bowl cleanly. I like to add the orange zest directly to the sugar before mixing, which releases the essential oils and infuses the entire dough with that bright citrus flavor that makes this holiday bread so special.

    Decorating for Maximum Impact

    The decoration is where your Rosca de Reyes truly becomes a showstopping centerpiece. Traditional toppings include strips of candied citrus, cherries, and figs, but I’ve found that dried apricots and cranberries work beautifully too. Arrange your fruits in a pattern before the second rise, gently pressing them into the dough. For that professional bakery shine, brush with egg wash twice—once before adding decorations and again just before baking. The sugar paste strips should be placed in a crisscross pattern between fruits. Don’t forget to insert the plastic baby figurine from the bottom after baking to avoid melting!

    Serving Ideas & Creative Variations

    Traditional Pairings

    Rosca de Reyes is traditionally enjoyed with hot chocolate, creating a perfect sweet-on-sweet pairing that warms you from the inside out. In my family, we make Mexican-style chocolate with cinnamon and a touch of chili for a gentle heat that complements the bread’s subtle spices. Serve slices while still slightly warm, allowing the butter to melt ever so slightly when spread on top. For a more substantial offering, I sometimes pair it with savory dishes like a simple egg frittata, creating a beautiful contrast of flavors that makes for a memorable Epiphany breakfast or brunch gathering.

    Modern Twists on Tradition

    While I respect tradition, I also love creating personal variations on classic Rosca de Reyes. Try filling the dough with cream cheese or chocolate-hazelnut spread before shaping for a delightful surprise inside. For a fragrant twist, add cardamom or star anise to the dough. I’ve experimented with a citrus glaze drizzled over the cooled bread, which adds a tangy brightness that balances the sweetness perfectly. Another favorite adaptation is adding orange blossom water to the dough for an intensified floral aroma. These small personalized touches honor the tradition while making it uniquely yours.

    Storage & Troubleshooting Guide

    Keeping Your Rosca Fresh

    To maintain your Rosca de Reyes at its best, proper storage is essential. When completely cooled, wrap it tightly in plastic wrap or store in an airtight container at room temperature for up to 3 days. The bread tends to dry out quickly, so if you won’t finish it within that time, slice and freeze portions in freezer bags for up to 3 months. To revive day-old bread, sprinkle with a few drops of water and warm in a 300°F oven for 5-10 minutes. This brings back that fresh-baked texture and reawakens the aromatic spices, making it almost as good as the first day.

    Common Issues and Solutions

    Even experienced bakers encounter challenges with Rosca de Reyes. If your dough isn’t rising properly, check that your yeast is fresh and your environment is warm enough. For a dense, heavy bread, you likely overworked the dough or added too much flour—remember that a slightly tacky dough produces the lightest texture. If your decorations fall off during baking, they weren’t pressed firmly enough into the dough before the second rise. For a bread that cracks during baking, you need deeper scoring before it goes in the oven. Don’t worry about small imperfections—they add character to your homemade creation!

    Frequently Asked Questions

    What is the significance of the baby figurine in Rosca de Reyes?

    The baby figurine represents baby Jesus in hiding from King Herod. Whoever finds it in their slice becomes the “godparent” who hosts the next celebration (Día de la Candelaria) on February 2nd with tamales and hot chocolate.

    Can I make Rosca de Reyes ahead of time?

    Yes! Prepare the dough through shaping, then refrigerate overnight for a slow rise. Bring to room temperature for 30 minutes before decorating and baking. The slow fermentation actually improves flavor.

    What if I don’t have candied fruit for my Rosca de Reyes?

    Substitute with dried fruits like apricots, cranberries, or figs. You can also use nuts, citrus zest strips, or even colorful sugar for decoration. The important element is creating a festive, crown-like appearance.

    How do I know when my Rosca is fully baked?

    A properly baked Rosca de Reyes should be golden brown with an internal temperature of 190°F. When tapped on the bottom, it should sound hollow. If browning too quickly, tent with foil.

    Can I make a gluten-free version?

    Absolutely! Use a high-quality gluten-free flour blend with xanthan gum. The texture will be slightly different, but adding an extra egg helps with binding and moisture retention.

    Final Thoughts

    Creating a Rosca de Reyes is more than baking—it’s participating in a centuries-old tradition that brings people together. The process of kneading, shaping, and decorating this special bread becomes a meditation on connection and celebration. Each time I bake one, I feel the presence of generations before me in the kitchen. Whether you’re making your first Rosca or your fifteenth, remember that the true magic happens when you share it with others. For more seasonal recipes that bring warmth to winter gatherings, visit our Pinterest collection of holiday favorites.

  • Snickerdoodle Cobbler Bliss: Irresistible Comfort in Every Bite!

    Snickerdoodle Cobbler Bliss: Irresistible Comfort in Every Bite!

    Snickerdoodle Cobbler Bliss: Irresistible Comfort in Every Bite!

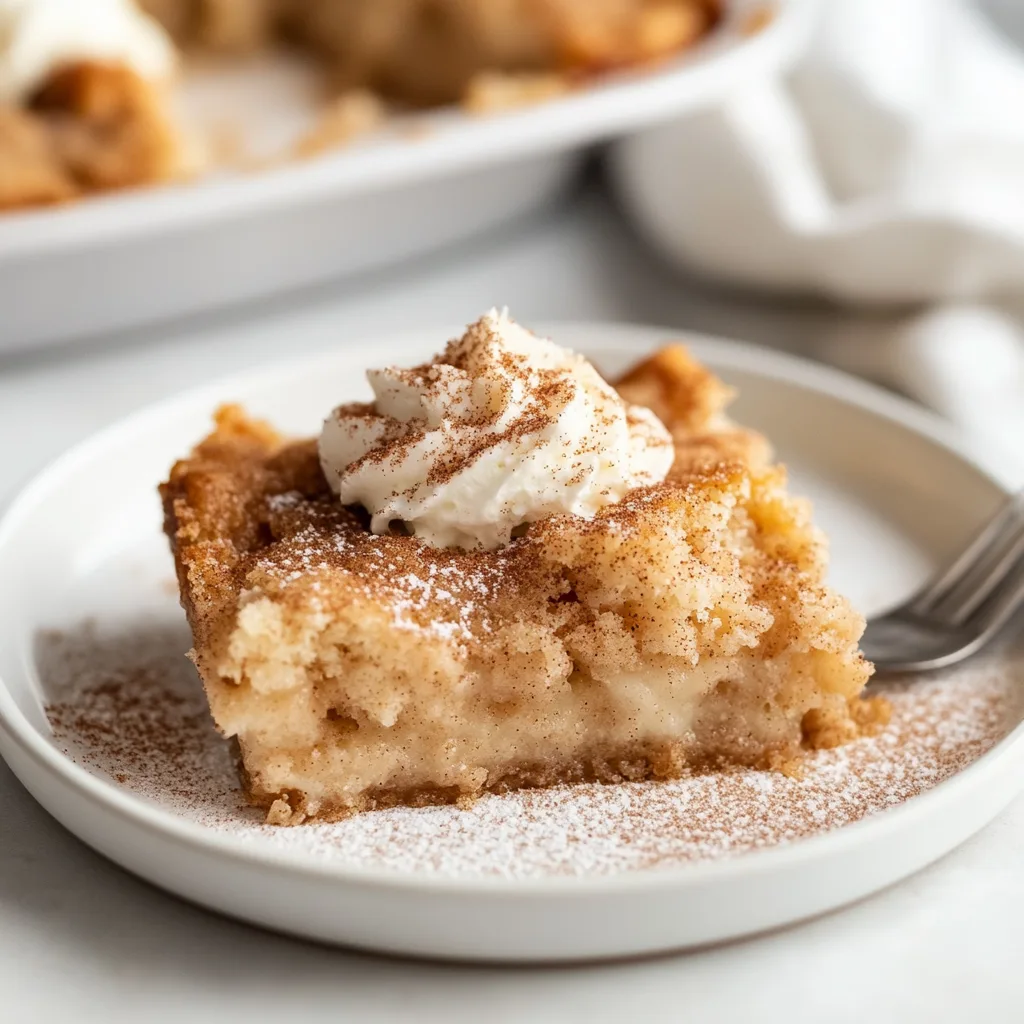
    Snickerdoodle Cobbler has become my absolute obsession this fall – imagine the perfect marriage between a buttery snickerdoodle cookie and a warm, gooey cobbler. The first time I made this for my family, we gathered around the kitchen island with spoons in hand, not even waiting for it to cool properly. That cinnamon-sugar crust that forms on top? Pure magic. It’s the dessert I turn to when I need something that feels like a warm hug, especially when paired with a scoop of vanilla ice cream that slowly melts into all those sweet crevices. If you love cinnamon sugar soft pretzels, this cobbler will absolutely steal your heart.

    Recipe

    Why You’ll Love This Snickerdoodle Cobbler

    The Perfect Balance of Textures

    There’s something utterly mesmerizing about the textural contrast in this snickerdoodle cobbler. The top layer develops this delightful crispness from the cinnamon-sugar coating that crackles under your spoon, while underneath awaits a soft, tender cake-like layer. And beneath that? Oh my goodness – a magical, warm custard that forms during baking. I still remember the first time I served this at a dinner party and watched everyone’s eyes widen with that first bite. The way the different layers create this symphony of textures is what makes this dessert so uniquely satisfying and impossible to resist.

    Simple Ingredients, Extraordinary Results

    What I adore most about this snickerdoodle cobbler is how it transforms basic pantry staples into something truly spectacular. You’ll need just flour, sugar, butter, milk, and a generous helping of cinnamon – ingredients I bet you already have on hand right now! There’s something so satisfying about creating dessert magic without a special trip to the store. Last weekend, when an unexpected snow day kept us homebound, this cobbler saved the day. The simplicity of the recipe belies the complexity of flavors that develop as it bakes, filling your home with the most intoxicating aroma of warm spices.

    Essential Tips & Tricks

    Mastering the Perfect Cinnamon-Sugar Ratio

    The heart and soul of any snickerdoodle cobbler lies in its cinnamon-sugar mixture. I’ve found that a 4:1 ratio of sugar to cinnamon creates that perfect balance – sweet with just enough spice to make your taste buds dance. Don’t skimp on quality cinnamon; it makes a noticeable difference! I once made this with some fancy Vietnamese cinnamon my sister gifted me, and the depth of flavor was absolutely incredible. For an extra dimension, try adding a tiny pinch of nutmeg or cardamom. Just remember to sprinkle the mixture evenly across the top before baking to ensure that signature snickerdoodle cobbler crust forms beautifully.

    The Pour-Over Method Secret

    The magic of this snickerdoodle cobbler happens during a step that might seem strange at first – the hot water pour-over. After assembling your batter and topping, you’ll pour hot water over the entire dish without stirring. This creates that signature gooey sauce that forms underneath while baking! I learned this technique from my grandmother, who used it for her peach cobbler. Trust the process, even if it looks soupy going into the oven. The water will transform into a luscious sauce while the top bakes into a perfect cookie-like crust. For extra richness, try using hot coffee or apple cider instead of water!

    Serving Ideas & Creative Variations

    Seasonal Pairings That Elevate Your Cobbler

    Snickerdoodle cobbler shines brightest when paired with complementary flavors that enhance its warm, cinnamon notes. In fall, I love serving it with a scoop of maple pecan ice cream or a drizzle of salted caramel sauce. During winter holidays, try adding a splash of bourbon to the batter or serving it alongside spiced apple cider. The cobbler also pairs beautifully with fresh berries in summer – the tartness creates a lovely contrast. For an extra special touch, whip up some cinnamon-infused whipped cream by adding a half teaspoon of cinnamon to your cream before whipping. It’s similar to how I finish my snickerdoodle cheesecake for that extra wow factor.

    Mix-In Ideas For Creative Twists

    While classic snickerdoodle cobbler is perfection on its own, adding mix-ins can create exciting variations. Try folding in diced apples tossed in cinnamon for an apple-snickerdoodle cobbler that tastes like fall in a dish. White chocolate chips add delightful pockets of sweetness, while chopped pecans or walnuts provide wonderful textural contrast. My personal favorite variation includes a layer of cream cheese filling in the middle – simply mix 8oz cream cheese with ¼ cup sugar and an egg, then pour it between batter layers. For a festive holiday version, add crushed candy canes on top during the last five minutes of baking for a peppermint-snickerdoodle mashup.

    Storage & Troubleshooting Guide

    Keeping Your Cobbler Fresh

    Snickerdoodle cobbler is at its absolute best when served warm from the oven, but leftovers can be stored and enjoyed for days. Cover any remaining cobbler with plastic wrap or transfer to an airtight container and refrigerate for up to 4 days. When ready to enjoy again, reheat individual portions in the microwave for 30-45 seconds until warm, or place the entire dish (if oven-safe) in a 300°F oven for about 15 minutes. The texture will change slightly – the top won’t be quite as crisp – but the flavors actually deepen overnight! For longer storage, you can freeze portions for up to 3 months in freezer-safe containers.

    Troubleshooting Common Issues

    If your snickerdoodle cobbler turned out too soupy, it likely needed more baking time. Every oven runs differently, and sometimes an extra 5-10 minutes makes all the difference. Look for a golden brown top that’s set in the center – if it jiggles too much, keep baking! Conversely, if your cobbler seems dry, you might have used too little liquid or overbaked it. Next time, try adding an extra tablespoon of butter or reducing the bake time slightly. For a cobbler that didn’t develop that signature crackly top, make sure your oven was fully preheated and consider placing the dish on a higher rack to encourage better browning.

    Frequently Asked Questions

    Can I make Snickerdoodle Cobbler ahead of time?

    Yes! You can prepare the batter up to 24 hours ahead and refrigerate it. Add the hot water pour-over just before baking. Alternatively, bake completely, refrigerate, and reheat at 300°F for 15-20 minutes before serving.

    What’s the difference between a cobbler and a crisp?

    Cobblers have a cake-like or biscuit topping, while crisps feature an oat-based streusel topping. Snickerdoodle cobbler specifically mimics the flavor profile of snickerdoodle cookies with its cinnamon-sugar crust.

    Can I make this recipe gluten-free?

    Absolutely! Simply substitute the all-purpose flour with a 1:1 gluten-free flour blend. I’ve tested this with Bob’s Red Mill Gluten-Free 1-to-1 Baking Flour with excellent results.

    Why did my cobbler separate into distinct layers?

    That’s actually perfect! Snickerdoodle cobbler naturally forms three distinct layers during baking: a cookie-like top, cake-like middle, and saucy bottom. This layering is what makes it special.

    How do I know when my Snickerdoodle Cobbler is done?

    Your cobbler is done when the top is golden brown and set (not wet or raw-looking), usually 35-40 minutes. A toothpick inserted into the cake layer should come out with moist crumbs, not wet batter.

    Final Thoughts

    This Snickerdoodle Cobbler has become my go-to dessert for everything from casual family dinners to holiday gatherings. There’s something about its warm, cinnamon embrace that makes everyone feel instantly at home. The way it fills your kitchen with that irresistible aroma as it bakes is almost as rewarding as the first delicious bite. I’d love to see your creations if you try this recipe – tag me on Pinterest so I can celebrate your baking success! Whether you stick with the classic version or try one of the variations, this snickerdoodle cobbler is bound to become a treasured recipe in your collection.

  • Snickerdoodle Cheesecake Recipe That’ll Melt Your Heart Instantly

    Snickerdoodle Cheesecake Recipe That’ll Melt Your Heart Instantly

    Snickerdoodle Cheesecake Recipe That’ll Melt Your Heart Instantly

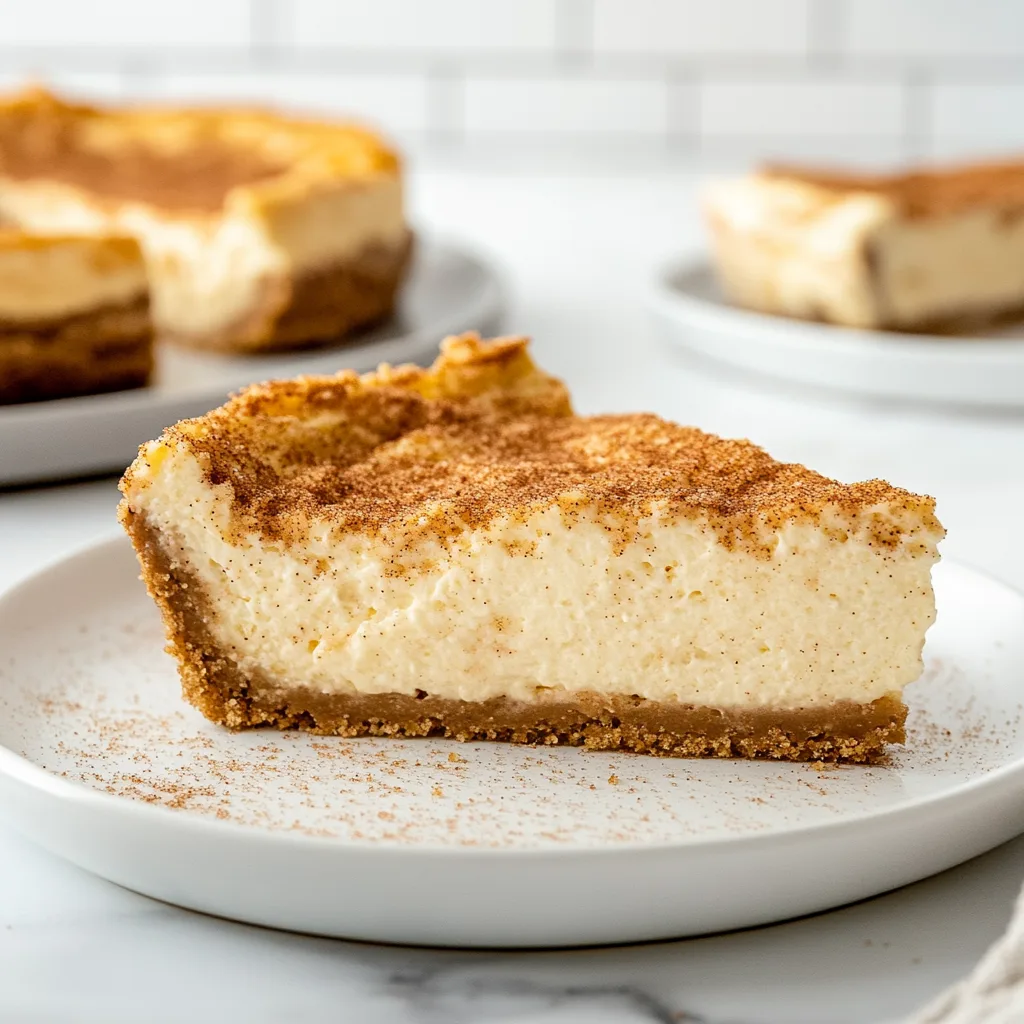
    Snickerdoodle Cheesecake combines two beloved classics into one irresistible dessert that’ll have everyone asking for seconds. The warm cinnamon-sugar embrace of snickerdoodle cookies transforms into a velvety cheesecake that’s simply magical. I discovered this recipe during a holiday baking marathon when I was craving something different from traditional Christmas treats. The moment that first forkful hit my taste buds, I knew this would become a year-round favorite in my home—and soon, yours too!

    Recipe

    Why You’ll Love This Snickerdoodle Cheesecake

    Perfect Balance of Flavors and Textures

    This cheesecake is a textural dream with its buttery cinnamon-sugar crust, creamy center, and slightly crisp topping. The tanginess of cream cheese perfectly balances the warm sweetness of cinnamon and sugar, creating that signature snickerdoodle flavor profile we all adore. I love how each bite delivers multiple sensations—first the crunch, then the silky-smooth filling that melts on your tongue, followed by that lingering warm spice. It’s like your favorite cookie and cheesecake had the most delicious baby imaginable!

    Make-Ahead Convenience

    One thing I absolutely cherish about this Snickerdoodle Cheesecake is its make-ahead magic. I can prepare it up to three days before a gathering, which is a lifesaver during busy holiday seasons or when hosting dinner parties. The flavors actually develop and deepen as it chills, making it even more delicious on day two or three. Last Christmas, I made this two days ahead, and it was the star dessert—everyone thought I’d spent hours in the kitchen that morning, but I was relaxed and enjoying my coffee instead!

    Essential Tips & Tricks

    Room Temperature Ingredients Matter

    Always use room temperature ingredients for your cheesecake batter—especially the cream cheese, eggs, and sour cream. Cold ingredients don’t blend properly and can leave lumps in your batter (nobody wants that!). I learned this lesson the hard way after rushing a cheesecake once and ending up with cream cheese chunks throughout. Now I set everything out at least an hour before I start mixing. This simple step ensures your Snickerdoodle Cheesecake will have that dreamy, velvety texture that makes cheesecakes so irresistible.

    The Water Bath Secret

    Don’t skip the water bath step! It might seem fussy, but it’s truly the difference between a cracked, dry cheesecake and a perfectly smooth, creamy one. The gentle, moist heat helps your Snickerdoodle Cheesecake bake evenly and prevents the surface from drying out too quickly. I wrap my springform pan in three layers of heavy-duty foil before placing it in the water bath—a tip I learned after a devastating leak ruined my first attempt. That extra protection keeps water from seeping in and creating a soggy crust.

    Serving Ideas & Creative Variations

    Seasonal Garnishes

    Transform your Snickerdoodle Cheesecake for any season with thoughtful garnishes. For fall and winter, I love adding a drizzle of salted caramel sauce and a sprinkle of toasted pecans. In spring, fresh berries add a gorgeous pop of color and tangy contrast. Summer calls for a scoop of vanilla bean ice cream alongside. The cinnamon-sugar base pairs beautifully with so many flavors—I’ve even served it with a coffee-infused whipped cream that reminded me of those cozy cinnamon sugar soft pretzels from the mall.

    Flavor Twists

    The basic Snickerdoodle Cheesecake recipe is a perfect canvas for creative variations. Try adding a teaspoon of espresso powder to the filling for a cinnamon-coffee delight. Around the holidays, I love incorporating a splash of bourbon and a pinch of nutmeg for a festive twist. For chocolate lovers, fold mini chocolate chips into the batter or add a layer of chocolate ganache on top. My personal favorite is adding a thin layer of apple butter between the crust and filling—it creates an apple-cinnamon moment that’s absolutely divine.

    Storage & Troubleshooting Guide

    Perfect Preservation

    Store your Snickerdoodle Cheesecake properly to maintain its amazing texture. Keep it refrigerated in an airtight container or tightly wrapped with plastic wrap for up to 5 days. For longer storage, you can freeze individual slices—wrap each piece in plastic wrap, then foil, and freeze for up to 3 months. I like to thaw frozen slices in the refrigerator overnight rather than at room temperature, as it helps maintain that perfect creamy consistency without becoming too soft or weepy around the edges.

    Fixing Common Issues

    Don’t panic if your cheesecake develops small surface cracks—it happens to the best of us! Simply cover them with a delicious topping like whipped cream, cinnamon whipped cream, or a dusting of cinnamon sugar. If your crust seems soggy, try baking it a few minutes longer next time before adding the filling. For a cheesecake that didn’t set properly, refrigerate it longer—sometimes it just needs more chill time. I once saved an undercooked center by turning it into “Snickerdoodle Cheesecake Parfaits” layered in glasses—no one knew it wasn’t intentional!

    Frequently Asked Questions

    Can I make Snickerdoodle Cheesecake without a springform pan?

    Yes! Use a regular cake pan lined with parchment paper with long overhanging edges. After chilling, lift the entire cheesecake out using the parchment handles. It won’t be as pretty but will taste just as delicious.

    How do I know when my cheesecake is done baking?

    The edges should be set but the center should still have a slight jiggle—like Jell-O. It will continue to set as it cools. Overbaking leads to cracks and a dry texture.

    Can I use low-fat cream cheese for this recipe?

    I don’t recommend it. Full-fat cream cheese provides the rich, creamy texture that makes Snickerdoodle Cheesecake special. Low-fat versions often contain stabilizers that affect both texture and flavor.

    My cinnamon swirl sank to the bottom. What happened?

    Your swirl mixture was likely too heavy. Next time, use less butter in the swirl mixture and make sure to just barely swirl it into the top layer of the batter.

    How far in advance can I make this cheesecake?

    You can make Snickerdoodle Cheesecake up to 3 days ahead and store it covered in the refrigerator. The flavors actually improve with a day or two of chilling!

    Final Thoughts

    This Snickerdoodle Cheesecake has become my signature dessert for good reason—it never fails to impress and always disappears quickly! The warm, comforting flavors of cinnamon and sugar wrapped in creamy cheesecake perfection create something truly magical. I hope you’ll give this recipe a try and experience the joy of sharing it with people you love. Be sure to check out more delicious dessert ideas on my Pinterest page for more inspiration. Happy baking!

  • S’mores Roll-Ups Recipe: Irresistibly Gooey & Easy Dessert Fun!

    S’mores Roll-Ups Recipe: Irresistibly Gooey & Easy Dessert Fun!

    S’mores Roll-Ups Recipe: Irresistibly Gooey & Easy Dessert Fun!

    S’mores Roll-Ups are the perfect solution when you’re craving that magical combination of graham crackers, chocolate, and marshmallows but don’t have a campfire in sight. I discovered this genius treat last summer when rain canceled our backyard bonfire, and my disappointed niece was on the verge of tears. The warm, gooey chocolate melting into pillowy marshmallows wrapped in a crispy tortilla brings all those beloved campfire flavors right to your kitchen. Trust me, the first bite will transport you straight to those cozy summer nights, minus the mosquitoes and smoky clothes!

    Recipe

    Why You’ll Love These S’mores Roll-Ups

    Quick & Easy for Any Occasion

    These S’mores Roll-Ups come together in just 10 minutes, making them perfect for impromptu dessert cravings or last-minute gatherings. Unlike traditional s’mores that require an open flame, these roll-ups need only a skillet and a few simple ingredients you probably already have in your pantry. I love that they’re incredibly versatile – equally perfect for a movie night snack, an after-school treat for hungry kids, or even dressed up on a dessert platter for guests. The familiar flavors in an unexpected package always bring smiles!

    All the Flavor Without the Fuss

    The magic combination of melty chocolate and gooey marshmallows delivers that authentic s’mores experience without having to build a campfire. The tortilla creates a crispy exterior that mimics the function of graham crackers but adds a delightful textural contrast. What I particularly adore is how the chocolate and marshmallow meld together into that perfect sweet harmony we all crave from s’mores. Plus, there’s no sticky fingers to clean up afterward! You get all the nostalgic flavor with none of the traditional mess.

    Essential Tips & Tricks

    Perfecting the Roll-Up Technique

    Getting the perfect roll is crucial for these S’mores Roll-Ups. Start by warming your tortillas slightly before filling – this makes them more pliable and less likely to crack. Spread a thin layer of chocolate hazelnut spread first (it acts as “glue”), then add your marshmallows and chocolate chips in a line slightly off-center. When rolling, fold in the sides first, then roll tightly from bottom to top. For an extra-secure seal, brush the edge with a tiny bit of water before completing the roll, similar to how I make those Cinnamon Sugar Soft Pretzels.

    Achieving the Ideal Melt

    The secret to perfection lies in the melting process. Use medium-low heat and be patient – rushing with high heat will burn the tortilla before the filling melts properly. I like to cover the pan for about 30 seconds to trap heat and help the marshmallows get extra gooey. Watch for that golden-brown exterior – it’s your signal that everything inside has reached melty perfection. For an extra touch, brush the outside with melted butter and a sprinkle of cinnamon-sugar before cooking for a more graham cracker-like flavor.

    Serving Ideas & Creative Variations

    Dress Them Up for Special Occasions

    Transform these simple S’mores Roll-Ups into showstopping desserts with a few elegant touches. Slice them diagonally and arrange on a platter with fresh berries and a dusting of powdered sugar for a beautiful presentation. For holiday gatherings, try drizzling with white chocolate and festive sprinkles. I’ve even served these at dinner parties with a scoop of vanilla ice cream and a drizzle of caramel sauce, similar to my Burnt Honey Pie – the contrast of warm roll-up and cold ice cream creates a sensational experience that guests always rave about.

    Fun Flavor Twists

    Don’t be afraid to get creative with your flavor combinations! Try using different spreads as your base – peanut butter creates a delicious Reese’s-inspired version. Add sliced strawberries or bananas for a fruity twist. White chocolate and crushed Oreos make a cookies-and-cream variation that my kids absolutely adore. For a grown-up version, try dark chocolate with a tiny sprinkle of sea salt or even a drop of orange extract for a sophisticated flavor profile. The possibilities are endless once you master the basic technique.

    Storage & Troubleshooting Guide

    Making Ahead and Storing

    While S’mores Roll-Ups are best enjoyed fresh, you can prepare them in advance for busy days. Assemble the roll-ups completely, then wrap individually in parchment paper and store in an airtight container in the refrigerator for up to 2 days. When ready to enjoy, simply reheat in a dry skillet for 1-2 minutes per side until warmed through. For a crowd, you can make a large batch and keep them warm in the oven at 200°F for up to 30 minutes. Just be careful not to stack them, as the warm filling can make them stick together.

    Fixing Common Problems

    The most common issue with S’mores Roll-Ups is filling leakage during cooking. To prevent this, don’t overfill your tortillas – about 1 tablespoon each of spread and marshmallows is perfect for a standard-sized tortilla. If you notice leaking while cooking, quickly use a spatula to press down on the seam. For tortillas that crack, try warming them slightly before rolling or switching to a more pliable brand. If your chocolate isn’t melting properly, try using smaller pieces or chocolate chips instead of larger chunks for more even distribution.

    Frequently Asked Questions

    Can I make S’mores Roll-Ups in the oven instead of a skillet?

    Yes! Arrange them seam-side down on a baking sheet and bake at 350°F for 5-7 minutes until golden and crisp. Brush with butter before baking for extra flavor and color.

    What’s the best type of tortilla to use for S’mores Roll-Ups?

    Medium-sized flour tortillas work best. Corn tortillas tend to crack, while extra-large tortillas make the roll-ups too doughy. Street taco-sized tortillas make perfect two-bite desserts.

    Can I make these S’mores Roll-Ups ahead for a party?

    Prepare them up to the rolling stage, then refrigerate for up to 24 hours. Cook just before serving for the best texture and melty filling.

    Are there any dairy-free options for S’mores Roll-Ups?

    Absolutely! Use dairy-free chocolate chips and check that your marshmallows are gelatin-free. Many chocolate hazelnut spreads now come in vegan versions too.

    How do I keep my S’mores Roll-Ups from getting soggy?

    Cook them until the tortilla is crisp and golden, then serve immediately. If making ahead, reheat in a dry skillet rather than the microwave to restore crispness.

    Final Thoughts

    These S’mores Roll-Ups have become my go-to solution for satisfying dessert cravings without a lot of fuss. There’s something magical about the way they transform simple ingredients into a treat that brings pure joy with every bite. Whether you’re making them for giggling kids or sophisticated adults, they never fail to impress. I hope you’ll give these S’mores Roll-Ups a try the next time you’re longing for those campfire flavors – and be sure to check out more creative dessert ideas on Pinterest for inspiration!