Category: Desserts

Sweet and easy dessert recipes for every craving. Simple treats, rich flavors, and quick ideas that make any moment feel special.

  • Delicious Vanilla Berry Cheesecake That Everyone’s Craving!

    Delicious Vanilla Berry Cheesecake That Everyone’s Craving!

    Delicious Vanilla Berry Cheesecake That Everyone’s Craving!

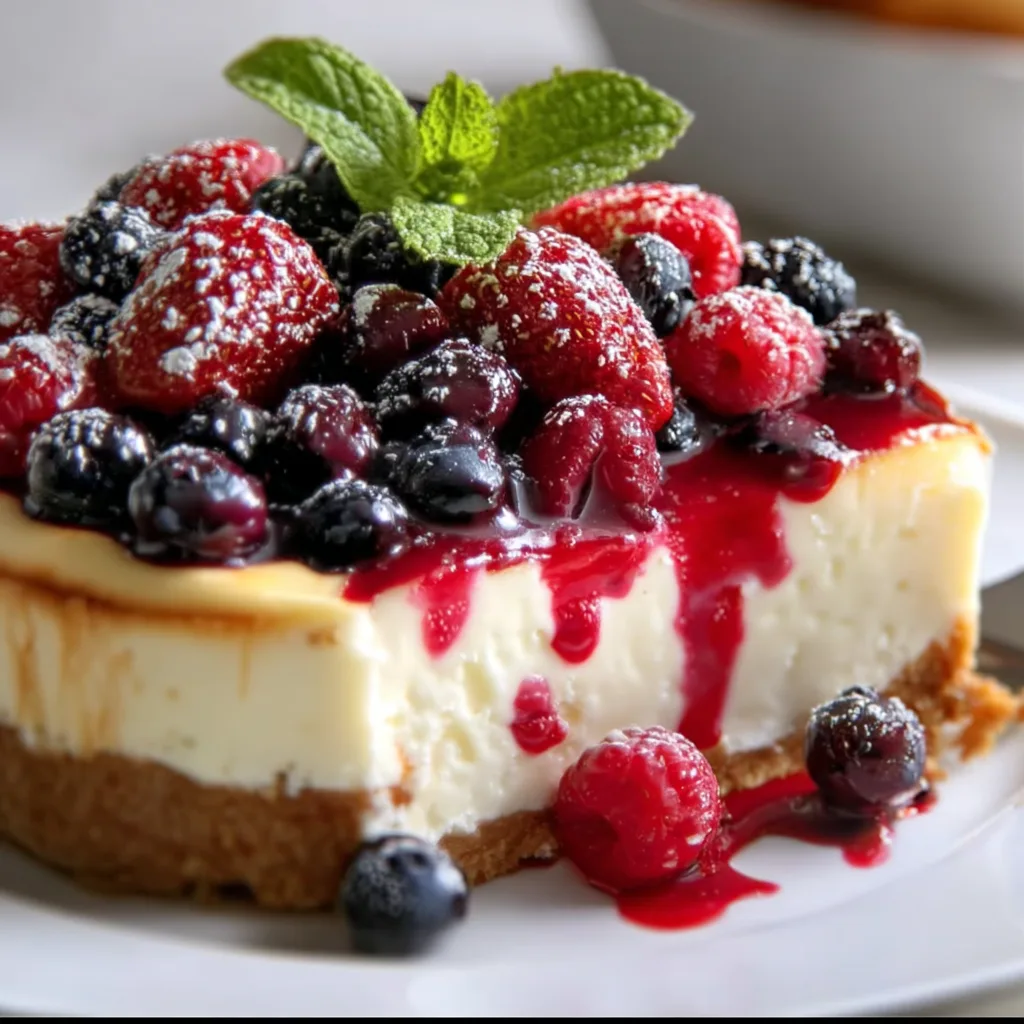
    This Delicious Vanilla Berry Cheesecake is my absolute pride and joy – a dessert that makes me weak in the knees every single time. The first bite takes me back to summer evenings on my grandmother’s porch, where dessert was always the main event. The contrast between the silky vanilla filling and the sweet-tart berry swirl creates a symphony of flavors that dance across your taste buds. I’ve perfected this recipe through countless iterations, and I’m thrilled to finally share my secret technique for achieving that perfect crack-free top and velvety texture that will have your guests begging for the recipe. Let’s dive in!

    Recipe

    Why You’ll Love This Delicious Vanilla Berry Cheesecake

    Perfect Balance of Flavors

    There’s something magical about the combination of creamy vanilla and bright berries that simply works on every level. The richness of the cheesecake base provides the perfect canvas for the fruity swirls to shine. I’ve carefully calibrated the sweetness so neither element overpowers the other. The graham cracker crust adds that necessary textural contrast with its subtle hint of cinnamon and honey notes. When my neighbor Jen first tried this, she closed her eyes and whispered, “I can taste summer in every bite.” That’s exactly the sensation I was aiming for!

    Impressive Yet Achievable

    Don’t let the stunning appearance fool you – this cheesecake is surprisingly approachable for bakers of all skill levels. The step-by-step method I’ve developed eliminates common pitfalls like cracking and sinking centers. The berry swirl looks intricate but requires just a simple technique with a toothpick or skewer. I remember my first attempt at a cheesecake years ago – a complete disaster with more cracks than the Grand Canyon! This recipe changed everything for me. The slow cooling method is truly foolproof, giving you professional-looking results every single time.

    Essential Tips & Tricks

    The Room Temperature Rule

    The single most important secret to cheesecake success is ensuring all your ingredients are at room temperature before you begin. Cold cream cheese will never fully incorporate, leaving you with those dreaded lumps that ruin the silky texture. I learned this lesson the hard way after rushing through preparation for a dinner party. Set your ingredients out at least two hours before baking. The patience pays off! For the berries, fresh is wonderful when in season, but high-quality frozen berries work beautifully too – just be sure to thaw and drain them thoroughly to prevent excess moisture from affecting your cheesecake’s texture.

    The Water Bath Method

    A water bath is non-negotiable for achieving that dreamy texture we all crave. The gentle, moist heat prevents the edges from cooking too quickly and helps maintain an even temperature throughout. Double-wrap your springform pan with heavy-duty aluminum foil to prevent any water from seeping in. I once skipped this step and ended up with a soggy crust that still haunts me! Place the wrapped pan in a larger roasting pan and add hot water halfway up the sides. This simple step makes all the difference between an ordinary cheesecake and one that melts in your mouth like velvet.

    Serving Ideas & Creative Variations

    Seasonal Adaptations

    The beauty of this Delicious Vanilla Berry Cheesecake lies in its versatility throughout the seasons. In summer, fresh strawberries, blueberries, and raspberries create a vibrant topping. Come fall, try incorporating spiced apple or pear compote with a drizzle of caramel. Winter holidays call for cranberry and orange with a hint of cinnamon. The base recipe remains your faithful canvas for creativity! I’ve even created a stunning Christmas version with a white chocolate drizzle and sugared cranberries that became our family’s holiday tradition – the red and white contrast is absolutely showstopping.

    Elegant Presentation Touches

    Elevate your cheesecake with simple but impactful garnishes that transform it from delicious to unforgettable. A light dusting of powdered sugar creates a snow-like effect that’s particularly beautiful over berries. Chocolate curls add sophistication and pair wonderfully with the vanilla base. For special occasions, I love adding edible flowers or gold leaf for a truly spectacular presentation. My daughter’s bridal shower featured mini versions of this cheesecake with candied violet petals – the guests still talk about them years later! Remember, we eat with our eyes first.

    Storage & Troubleshooting Guide

    Proper Chilling and Storage

    The hardest part of making this Delicious Vanilla Berry Cheesecake might be the waiting period. After baking, it needs at least 8 hours in the refrigerator to set properly – overnight is ideal. Store leftovers covered in the refrigerator for up to 5 days, though I’d be shocked if it lasts that long! For freezing, wrap individual slices tightly in plastic wrap, then foil, and freeze for up to 3 months. I always keep a few slices frozen for emergency dessert situations (we all have those, right?). Let frozen slices thaw overnight in the refrigerator for the best texture.

    Rescuing Common Issues

    Even experienced bakers encounter cheesecake challenges, but most are easily fixable. If your cheesecake cracks despite your best efforts, don’t panic! Simply top it with fresh berries or a berry compote – no one will ever know. If your crust seems too crumbly, a quick fix is pressing it more firmly before baking. For a filling that’s too soft, extend refrigeration time or pop it in the freezer for 30 minutes before serving. I once salvaged an undercooked center by transforming the entire dessert into parfaits – my guests thought it was intentional and loved the deconstructed approach!

    Frequently Asked Questions

    Can I make this Delicious Vanilla Berry Cheesecake without a springform pan?

    You can use a regular cake pan lined with parchment paper with long overhanging edges to help lift it out. The presentation won’t be as clean, but the flavor remains divine!

    How do I prevent my cheesecake from cracking?

    Avoid overmixing (which incorporates air), use a water bath, and never skip the slow cooling process. Turn off the oven when done and leave the door slightly ajar for an hour before removing.

    Can I substitute Greek yogurt for some of the cream cheese?

    Absolutely! Replace up to 1/3 of the cream cheese with full-fat Greek yogurt for a lighter texture and slight tanginess that complements the berries beautifully.

    Is this recipe suitable for making mini cheesecakes?

    Yes! Use a muffin tin with liners and reduce baking time to about 20-25 minutes. Perfect for portion control and gatherings.

    How far in advance can I make this cheesecake?

    You can make this cheesecake up to three days ahead. Store it covered in the refrigerator and add any fresh toppings just before serving.

    Final Thoughts

    This Delicious Vanilla Berry Cheesecake has become my signature dessert for good reason – it consistently delivers that perfect balance of impressive presentation and unforgettable flavor. The contrast between the velvety vanilla filling and vibrant berry swirls creates a dessert that’s both visually stunning and incredibly satisfying. I hope you’ll create your own memories around this recipe, perhaps starting a sweet tradition of your own. Don’t forget to share your creations on Pinterest – I’d love to see your personal spin on this beloved classic!
  • White Chocolate Cranberry Cookies: Irresistibly Sweet & Tangy Treats!

    White Chocolate Cranberry Cookies: Irresistibly Sweet & Tangy Treats!

    White Chocolate Cranberry Cookies: Irresistibly Sweet & Tangy Treats!

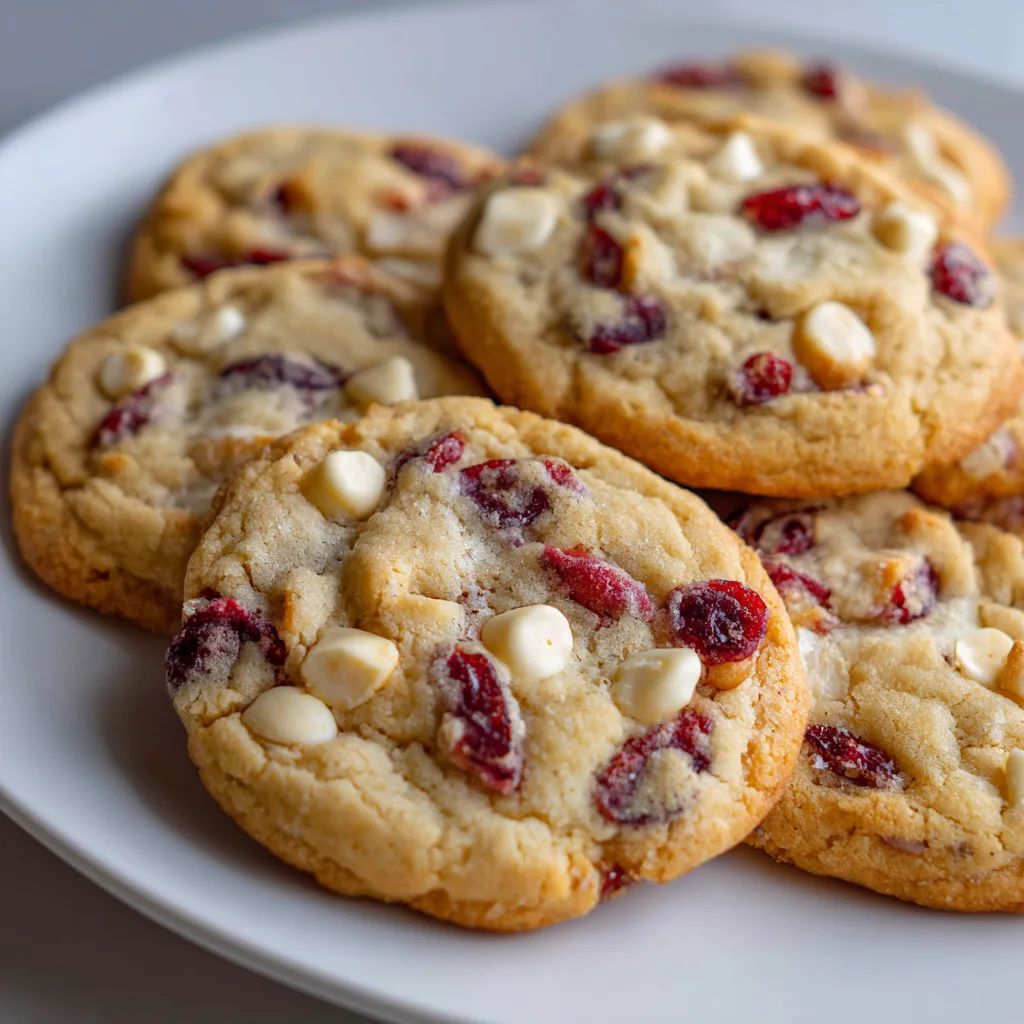
    White Chocolate Cranberry Cookies are the perfect holiday treat that brings together sweet, creamy white chocolate chunks and tart, chewy cranberries in every delightful bite. I discovered this recipe during my first Christmas away from family, when I was desperate for something that would fill my apartment with that warm, nostalgic aroma of home. The moment these cookies started baking, the buttery vanilla scent wafting through my tiny kitchen instantly transported me back to my grandmother’s holiday baking marathons. If you’re looking for a cookie that balances indulgence and comfort with a festive touch, you’ve found your new favorite recipe.

    Recipe

    Why You’ll Love These White Chocolate Cranberry Cookies

    Perfect Balance of Flavors and Textures

    These cookies are a sensory delight from the first bite to the last crumb. The rich buttery base creates a canvas for the star ingredients to shine. White chocolate doesn’t just melt—it creates pockets of creamy sweetness that contrast beautifully with the tart cranberries. I love how the edges develop a slight crispness while the centers remain soft and chewy. The cranberries plump slightly during baking, releasing their natural tanginess that cuts through the sweetness perfectly. It’s like having a little flavor party in each bite!

    Make-Ahead Friendly for Holiday Prep

    As someone who gets overwhelmed by last-minute holiday preparations, I adore how these cookies fit seamlessly into busy schedules. The dough can be made up to 3 days ahead and refrigerated until needed, making them perfect for holiday planning. You can even portion the dough into balls and freeze them for up to three months, baking just what you need when unexpected guests arrive. Nothing impresses like freshly baked cookies in minutes! Plus, they maintain their texture for days, making them ideal for cookie exchanges or gift boxes.

    Essential Tips & Tricks

    Ingredient Selection Matters

    Don’t skimp on quality when gathering ingredients for these special cookies. Use real butter (never margarine) for that rich, irreplaceable flavor foundation. For white chocolate, choose premium chips or chop a high-quality bar—they melt differently than the artificially flavored baking chips. For cranberries, I prefer using dried ones that still have a bit of moisture and chewiness rather than the super dry variety. If yours are too dry, soak them in warm water for 10 minutes, then pat dry before folding into your dough for a more tender texture in the finished cookie.

    Perfecting the Technique

    The secret to these cookies’ perfect texture lies in not overmixing the dough and properly chilling it before baking. Cream the butter and sugars just until light and fluffy—about 2-3 minutes maximum. Once you add the flour, mix just until combined. Overmixed dough leads to tough cookies! After folding in the white chocolate and cranberries, chill the dough for at least 30 minutes (overnight is even better). This prevents excessive spreading and allows the flavors to meld beautifully, similar to what happens with my Blueberry Swirl Sugar Cookies.

    Serving Ideas & Creative Variations

    Elegant Presentation Options

    Transform these already beautiful cookies into showstoppers with simple presentation tweaks. Press a few extra white chocolate chips and cranberries on top of each dough ball before baking for a bakery-worthy appearance. For holiday gatherings, arrange them on a wooden board with sprigs of rosemary and cinnamon sticks for a rustic, festive look. I love serving them slightly warm alongside mugs of hot chocolate or spiced cider. For an extra special touch, drizzle cooled cookies with melted white chocolate and a light dusting of orange zest to enhance the cranberry flavor.

    Delicious Flavor Twists

    While the classic recipe is perfection, I’ve experimented with several variations that are equally delightful. Add 1/2 teaspoon of orange zest to the dough for a citrus-infused version that brightens the cranberry flavor. For a nutty dimension, fold in 1/2 cup of chopped macadamia nuts or pistachios. During the holidays, I sometimes add 1/4 teaspoon of cinnamon or a pinch of cardamom for warm spice notes. For chocolate lovers, try using half white chocolate and half dark chocolate chips, creating a beautiful contrast similar to my Peanut Butter Chocolate Cupcakes.

    Storage & Troubleshooting Guide

    Keeping Cookies Fresh

    To maintain that perfect balance between chewy centers and crisp edges, proper storage is essential. Once completely cooled, store your cookies in an airtight container at room temperature with a slice of bread to maintain moisture. They’ll stay deliciously fresh for up to 5 days this way. For longer storage, freeze baked cookies in single layers separated by parchment paper for up to 3 months. To refresh slightly stale cookies, pop them in the microwave for 10 seconds before serving—they’ll taste nearly freshly baked with that warm, gooey white chocolate.

    If your cookies spread too much during baking, your dough likely wasn’t chilled enough or your butter was too warm. Next time, refrigerate the dough balls for at least 1 hour before baking. For cookies that don’t spread enough, try slightly flattening the dough balls before baking. If your cranberries are burning on the cookie surface, gently push any exposed fruits into the dough before baking. And remember, cookies continue to set as they cool—remove them from the oven when the edges are golden but the centers still look slightly underdone for that perfect chewy texture.

    Frequently Asked Questions

    Can I use fresh cranberries instead of dried in White Chocolate Cranberry Cookies?

    Fresh cranberries are too tart and wet for this recipe. Stick with dried cranberries, which provide concentrated flavor and won’t add excess moisture to your dough.

    How do I prevent the white chocolate from burning?

    Fold the chips completely into the dough rather than leaving them exposed on top. If adding decorative chips, press them in slightly and watch baking time carefully.

    Can I make these cookies gluten-free?

    Yes! Substitute a 1:1 gluten-free flour blend that contains xanthan gum. The texture will be slightly different but still delicious.

    Why did my cookies turn out too flat?

    Your butter was likely too warm or you didn’t chill the dough enough. Always start with cool room temperature butter and refrigerate the dough for at least 30 minutes.

    The dough can be refrigerated for up to 3 days or frozen for 3 months. If frozen, thaw overnight in the refrigerator before baking.

    Final Thoughts

    These White Chocolate Cranberry Cookies have become my signature holiday offering, requested by friends and family year after year. There’s something magical about the way the tart cranberries and sweet white chocolate play together against the buttery cookie canvas. I find myself making them well beyond the holiday season whenever I need a little comfort or have something to celebrate. They’re impressive enough for gifting but simple enough for everyday baking. Share your creations with me on Pinterest – I’d love to see how your White Chocolate Cranberry Cookies turn out!

  • Chocolate Poke Cake with Marshmallow That Will Steal Your Heart!

    Chocolate Poke Cake with Marshmallow That Will Steal Your Heart!

    Chocolate Poke Cake with Marshmallow That Will Steal Your Heart!

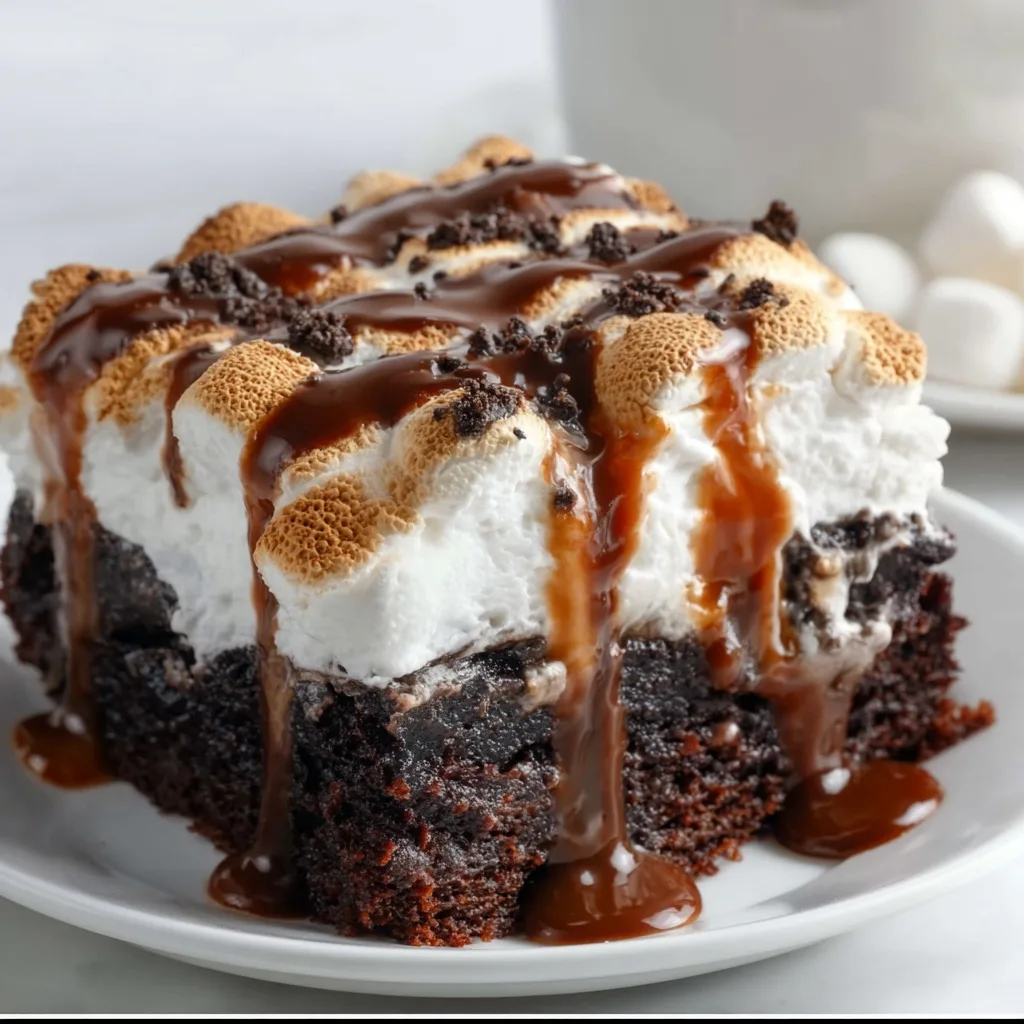
    This Chocolate Poke Cake with Marshmallow is the definition of dessert bliss! Imagine sinking your fork into moist chocolate cake riddled with tiny holes filled with gooey marshmallow cream that creates pockets of sweet surprise in every bite. I first made this for my niece’s birthday, and the way everyone’s eyes lit up told me everything. The marshmallow filling creates this magical contrast against the rich chocolate that makes this cake absolutely irresistible. If you love desserts that combine textures and flavors, this one will definitely earn a spot in your recipe collection from Recipes Darleen.

    Recipe

    Why You’ll Love This Chocolate Poke Cake with Marshmallow

    Perfect for Any Occasion

    This showstopper dessert works for literally everything—from casual Sunday dinners to milestone celebrations. What I adore about this poke cake is how it looks impressive but requires minimal effort. The marshmallow cream seeps into the cake, creating these luscious pockets of sweetness that make each bite incredibly moist. I’ve brought this to potlucks where people practically begged for the recipe! The combination of deep chocolate flavor with that pillowy marshmallow filling creates a nostalgic taste that reminds me of s’mores around a campfire.

    Make-Ahead Friendly

    One of the best features of this chocolate poke cake with marshmallow is that it actually improves with time! Make it a day ahead, and the flavors meld together beautifully as the marshmallow filling fully infuses the cake. This has saved me countless times when hosting dinner parties—I can prepare it the night before and focus on other dishes the day of the event. The cake stays incredibly moist for days, which means leftovers (if there are any!) taste just as delicious. I love desserts that don’t pressure me to serve them immediately.

    Essential Tips & Tricks

    Perfecting the Poke

    The secret to success lies in how you poke those holes! Use the handle end of a wooden spoon—it creates the perfect-sized openings that are wide enough to hold plenty of marshmallow filling but not so large that the cake falls apart. Poke while the cake is still warm (not hot!) from the oven, about 5-10 minutes after removing it. I learned the hard way that if you wait until it’s completely cool, the cake develops a crust that makes poking much harder. Make sure to distribute the holes evenly, about 1 inch apart, for consistent marshmallow pockets throughout.

    Marshmallow Magic

    For the creamiest filling, warm your marshmallow cream slightly before pouring it over the cake. This makes it flow more easily into those poke holes rather than sitting on top. I like to place the jar in warm water for a few minutes or microwave it for 10-15 seconds. Pour it slowly and use a spatula to guide it into the holes. For an extra-special touch, try mixing in a tablespoon of creamy peanut butter with the marshmallow cream—the flavor combination with chocolate is absolutely divine!

    Serving Ideas & Creative Variations

    Perfect Pairings

    Serve this indulgent dessert with a scoop of vanilla ice cream that slowly melts into the cake—pure heaven! For a more sophisticated presentation, add fresh raspberries or sliced strawberries alongside each slice to cut through the sweetness. Coffee lovers will appreciate how a shot of espresso or a cup of strong coffee complements the rich chocolate flavors. I once served this at a dinner party with a drizzle of salted caramel sauce, and guests were fighting over the last piece! The contrast of sweet and salty elevated the classic chocolate flavors to new heights.

    Flavor Twists

    The versatile base of this chocolate poke cake with marshmallow invites creative variations! Try replacing the marshmallow with dulce de leche for a caramel twist, or use peppermint-flavored marshmallow cream during the holidays. For a coffee-infused version, add 2 tablespoons of espresso powder to the cake batter. My family goes wild for the s’mores variation—top the marshmallow layer with crushed graham crackers and mini chocolate chips! For adult gatherings, consider adding 2 tablespoons of Baileys or Kahlúa to the marshmallow cream for a sophisticated flavor boost.

    Storage & Troubleshooting Guide

    Keeping It Fresh

    This cake stays perfectly moist for up to 5 days when stored properly. Cover it tightly with plastic wrap or store in an airtight container in the refrigerator. I recommend bringing it to room temperature for about 30 minutes before serving for the best texture and flavor. If you want to freeze portions, wrap individual slices in plastic wrap and then foil—they’ll keep for up to 3 months! Just thaw overnight in the refrigerator. I always make a full cake even for small gatherings because I know the leftovers will be appreciated for quick desserts throughout the week.

    Common Pitfalls

    The most frequent issue is marshmallow cream that doesn’t fully penetrate the cake. If this happens, your cake might have cooled too much before poking or the holes weren’t large enough. Another potential problem is a cake that’s too dry—this usually means it was overbaked. Check your cake 5 minutes before the recipe suggests, as ovens vary significantly. If your marshmallow layer becomes too firm after refrigeration, simply microwave individual slices for 10-15 seconds to restore that gooey texture we all love about this chocolate poke cake with marshmallow.

    Frequently Asked Questions

    Can I use marshmallows instead of marshmallow cream for this Chocolate Poke Cake with Marshmallow?

    Yes, but you’ll need to melt them first! Combine 2 cups of mini marshmallows with 3 tablespoons of milk in a microwave-safe bowl. Heat in 30-second intervals, stirring until smooth, then pour over the cake.

    Can I make this cake ahead of time?

    Absolutely! This cake actually improves after 24 hours as the flavors meld together. Store it covered in the refrigerator for up to 5 days.

    Is there a gluten-free version?

    Yes! Simply substitute your favorite gluten-free cake mix or flour blend. The marshmallow cream is typically gluten-free, but always check the label to be sure.

    Can I use a different flavor of cake mix?

    Definitely! White, yellow, or even red velvet cake mixes work beautifully with marshmallow cream. For a mint-chocolate version, try adding mint extract to a chocolate base.

    How do I know when the cake is done baking?

    Insert a toothpick into the center—it should come out with a few moist crumbs but no wet batter. Overbaking will result in a dry cake that won’t absorb the marshmallow well.

    Final Thoughts

    This Chocolate Poke Cake with Marshmallow has become my go-to dessert when I need something foolproof yet impressive. The contrast between the rich chocolate and sweet, gooey marshmallow creates a dessert experience that’s both nostalgic and indulgent. I love watching people’s faces light up with that first bite—it’s pure joy in cake form! For more delicious dessert ideas, check out our Pinterest page where we’re always sharing new creations. Happy baking, friends!

  • No-Bake German Chocolate Cheesecake That Will Wow Your Tastebuds!

    No-Bake German Chocolate Cheesecake That Will Wow Your Tastebuds!

    No-Bake German Chocolate Cheesecake That Will Wow Your Tastebuds!

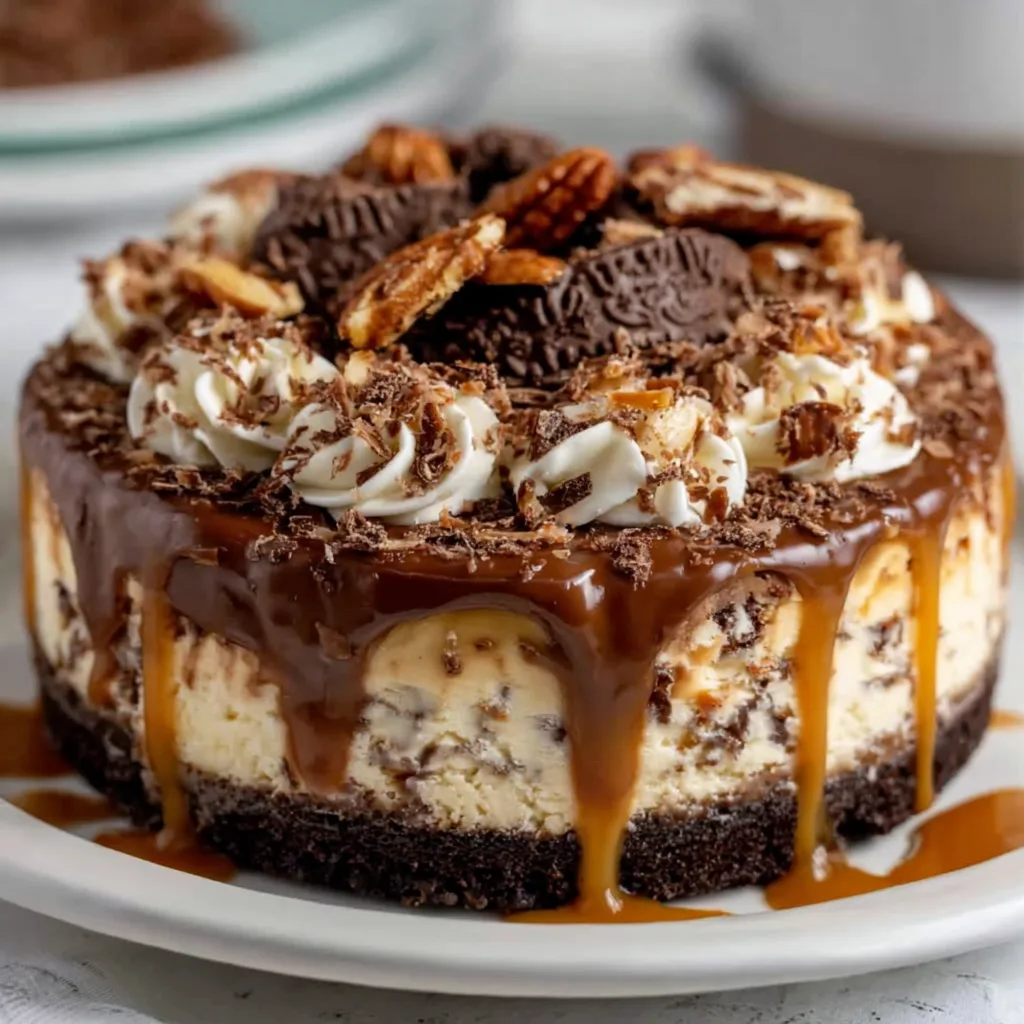
    No-Bake German Chocolate Cheesecake is the dessert that changed my summer entertaining game forever. The first time I made it for my sister’s birthday, I watched as everyone’s eyes widened with that first creamy, coconut-pecan bite. There’s something magical about the way the rich chocolate cheesecake layer meets that classic German chocolate topping – all without ever turning on your oven! This no-bake wonder combines the beloved flavors of German chocolate cake with the silky texture of cheesecake, creating a dessert that feels both nostalgic and impressive. Perfect for warm weather gatherings or any celebration that calls for something special.

    Recipe

    Why You’ll Love This No-Bake German Chocolate Cheesecake

    Perfect Make-Ahead Dessert Solution

    This cheesecake is my secret weapon for stress-free entertaining. I can make it a day or two before guests arrive, which means I’m not frantically finishing dessert while trying to host. The flavor actually improves overnight as the coconut-pecan topping melds with the chocolate cheesecake layer. The texture becomes even more velvety after chilling properly, creating that perfect slice that holds its shape when served. Plus, there’s something so satisfying about opening your refrigerator to find a gorgeous dessert already waiting – one less thing to worry about when company’s coming!

    No Oven Required – Summer Baking Savior

    During those sweltering summer months when turning on the oven feels like a personal attack, this no-bake cheesecake becomes my most treasured recipe. The heat-free preparation means your kitchen stays cool while you still get to create something spectacular. I remember making this during a particularly brutal heatwave last July – while neighbors complained about not being able to bake, I was serving up slices of this chocolate dream. The chocolate wafer crust sets perfectly in the refrigerator, and the creamy filling achieves that ideal cheesecake texture without any baking whatsoever.

    Essential Tips & Tricks

    Achieving the Perfect Texture

    The secret to silky-smooth cheesecake filling is all in the room temperature ingredients. Cold cream cheese will leave you battling lumps forever! I learned this the hard way when I once tried to rush the process. Set your cream cheese out at least two hours before starting. When beating the filling, scrape down the sides of the bowl frequently for even incorporation. For that signature German chocolate texture in the topping, toast your pecans lightly before chopping – it intensifies their flavor dramatically. And don’t rush the chilling time – a minimum of 6 hours is non-negotiable for proper setting.

    Troubleshooting Common Issues

    If your crust crumbles when slicing, you likely need more butter to bind it. The perfect crust should be moist enough to hold together but not so buttery that it becomes greasy. Press it firmly into your pan using the bottom of a measuring cup for even compaction. For the filling, if it seems too soft after the initial chill, pop it in the freezer for 20-30 minutes before serving. Sometimes my topping gets too thick to spread easily – if this happens to you, simply warm it slightly or add a tablespoon of milk to loosen the consistency. Remember that patience is key – rushing any step will affect your final results.

    Serving Ideas & Creative Variations

    Elegant Presentation Techniques

    Transform this already beautiful dessert into a showstopper with a few simple touches. I love creating a chocolate garnish by drizzling melted chocolate onto parchment paper, chilling until firm, then standing these delicate pieces upright on the cheesecake. For special occasions, I arrange fresh berries around the edge – the tartness complements the sweet coconut-pecan topping perfectly. Consider serving individual portions in glass jars for a modern presentation that guests always photograph. A light dusting of cocoa powder or a sprinkle of toasted coconut adds beautiful texture and visual appeal that makes everyone reach for their phones before their forks!

    Flavor Twists on the Classic

    While traditional German chocolate flavor is divine, don’t be afraid to experiment! Adding a tablespoon of espresso powder to the filling creates a mocha variation that coffee lovers adore. For a festive holiday twist, incorporate a teaspoon of peppermint extract and garnish with crushed candy canes. I once made a Mexican-inspired version with a hint of cinnamon and cayenne in the chocolate layer – the subtle heat was unexpectedly perfect. For those who love contrasting textures, try adding a layer of ganache between the crust and filling, or fold mini chocolate chips into the cheesecake mixture for little bursts of chocolate in every bite.

    Storage & Troubleshooting Guide

    Proper Storage for Maximum Freshness

    This cheesecake maintains its peak flavor for up to 5 days when properly stored in the refrigerator. Always cover it tightly with plastic wrap or store in an airtight container to prevent it from absorbing other flavors. I recommend slicing only what you’ll serve immediately and keeping the rest intact – this helps maintain moisture and prevents the edges from drying out. For longer storage, you can freeze individual slices wrapped in plastic and foil for up to 2 months. When ready to enjoy, thaw overnight in the refrigerator rather than at room temperature for the best texture restoration.

    Rescuing Less-Than-Perfect Results

    Even if your cheesecake doesn’t set properly, all is not lost! A too-soft filling can be transformed into delicious parfait cups – simply layer the components in glasses with some whipped cream and no one will know it wasn’t intentional. If your topping separates or looks oily, gently reheat it while whisking continuously, then cool before applying. Should your crust become soggy, you can crisp it up by pressing additional crushed cookies around the edges. Remember that taste matters more than appearance – I once dropped half my cheesecake back into the springform ring, quickly reshaped it, and my guests still raved about it!

    Frequently Asked Questions

    Can I make this No-Bake German Chocolate Cheesecake without coconut?

    Yes! Replace the coconut with an equal amount of finely chopped pecans or almonds in the topping. The flavor profile will change slightly but remain delicious with that classic German chocolate essence.

    How far in advance can I make this cheesecake?

    You can prepare this cheesecake up to 3 days before serving. The flavors actually develop and improve with time, making it an ideal make-ahead dessert for gatherings.

    Can I use a store-bought crust to save time?

    Absolutely! A pre-made chocolate cookie crust works perfectly. Just add your filling and topping as directed – no one will know the difference.

    My topping seems too runny. How can I fix it?

    If your topping is too thin, refrigerate it separately for 30 minutes to thicken before spreading on the cheesecake. You can also add 1-2 tablespoons more coconut to absorb excess moisture.

    Is there a dairy-free version of this recipe?

    Yes! Use dairy-free cream cheese, coconut cream instead of heavy cream, and dairy-free chocolate chips. The coconut-pecan topping works beautifully with coconut oil instead of butter.

    Final Thoughts

    This No-Bake German Chocolate Cheesecake has become my signature dessert for good reason – it combines nostalgic flavors with modern convenience in a way that never fails to impress. There’s something magical about creating something so decadent without even turning on the oven. Whether you’re beating the summer heat or just looking for an unforgettable dessert that can be prepared ahead of time, this recipe delivers on all fronts. I hope it becomes a treasured favorite in your recipe collection too! Don’t forget to check out more delicious dessert ideas on Pinterest.

  • Cranberry Pineapple Upside-Down Cake: Irresistibly Tangy & Sweet Delight!

    Cranberry Pineapple Upside-Down Cake: Irresistibly Tangy & Sweet Delight!

    Cranberry Pineapple Upside-Down Cake: Irresistibly Tangy & Sweet Delight!

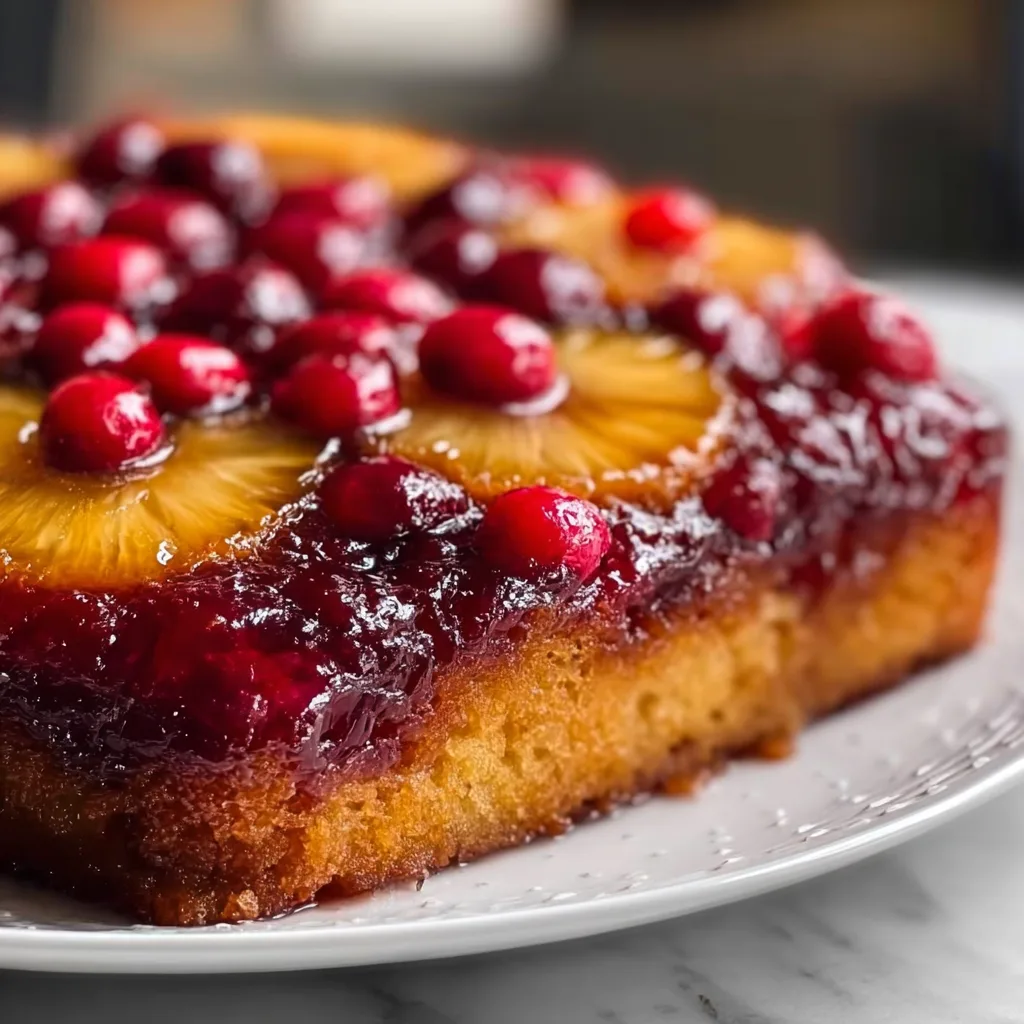
    Cranberry Pineapple Upside-Down Cake brings together the sweet tropical flavor of pineapple with the tart pop of cranberries in one showstopping dessert. The first time I made this for my family’s holiday gathering, the kitchen filled with the most heavenly aroma of caramelizing sugar and fruit. Everyone gathered around as I flipped the cake onto the serving platter, revealing that gorgeous jewel-toned topping. It’s become our signature winter dessert, perfect for bringing cozy comfort during the coldest months. If you love traditional pineapple upside-down cake but want something with a festive twist, this recipe is your answer.

    Recipe

    Why You’ll Love This Cranberry Pineapple Upside-Down Cake

    A Perfect Balance of Flavors

    The magic of this Cranberry Pineapple Upside-Down Cake lies in its perfect flavor balance. Sweet golden pineapple rings create sunny islands amid a sea of ruby cranberries, all nestled in a buttery brown sugar caramel. The tartness of the cranberries cuts through the sweetness, creating this incredible depth that ordinary upside-down cakes just don’t have. I love watching guests take their first bite—there’s always that moment of surprise when the cranberry tanginess hits. The tender vanilla cake underneath soaks up all those fruity juices, creating a moist texture that simply melts in your mouth.

    Stunning Visual Appeal

    This cake is a true showstopper that requires minimal decorating skills. The natural beauty of the fruit arrangement does all the work for you! The glistening cranberries nestle between pineapple rings, creating a ruby-studded mosaic that looks like stained glass when the caramel sets. I still remember my mother-in-law’s face when I brought this to Christmas dinner—she couldn’t stop taking pictures before we cut into it. The dramatic reveal moment when you flip the cake onto the serving plate never gets old. It’s the perfect dessert when you want to impress without spending hours on intricate frosting techniques.

    Essential Tips & Tricks

    Mastering the Caramel Base

    The caramel base is the crown jewel of this upside-down cake, so getting it right matters. I’ve learned to melt the butter directly in the pan over low heat, then sprinkle the brown sugar evenly before arranging the fruit. This creates that perfect sticky-sweet coating that candies the fruit as it bakes. Don’t rush this step! Let the sugar and butter melt together for about 3-4 minutes until it’s bubbling gently and smells like toffee. I once tried to speed this up and ended up with crystallized patches—lesson learned! Make sure your cranberries are patted dry to prevent excess moisture from thinning out your caramel.

    Preventing Sticking Disasters

    Nothing’s more heartbreaking than a cake that won’t release from the pan! I’ve had my share of cake catastrophes before discovering some foolproof methods. First, use a well-seasoned cast iron skillet or a heavy non-stick cake pan. Line the bottom with parchment paper for extra insurance if you’re nervous. When it’s time to flip, let the cake cool for exactly 10 minutes—not 5, not 15. This timing sweet spot allows the caramel to set slightly while still remaining pliable. Run a thin knife around the edges, place your serving plate on top, then flip with confidence like you’re turning a pancake!

    Serving Ideas & Creative Variations

    Seasonal Pairings

    This versatile cake shines with different accompaniments depending on the season. During winter holidays, I serve it slightly warm with a scoop of cinnamon ice cream that melts into the cranberry-caramel topping. For a lighter spring option, whipped mascarpone cream with orange zest complements the tartness beautifully. The cake pairs wonderfully with afternoon tea or coffee, especially when served with a small cheese board featuring sharp cheddar—trust me, the sweet-savory combination works! For brunch, I’ve been known to serve smaller portions alongside a mimosa flight, where the cranberry echoes the fruit in the drinks.

    Exciting Flavor Twists

    While the classic version is divine, I love experimenting with flavor variations. Try adding a tablespoon of orange zest to the batter for a citrus note that enhances the cranberries. For a cozy winter vibe, incorporate 1/2 teaspoon of cardamom or ginger into the dry ingredients. You can also swap half the cranberries for blueberries in summer for a red-white-blue effect that’s perfect for patriotic celebrations. For an adult version, try soaking the cranberries in Grand Marnier before adding them to the caramel base. The possibilities are endless, making this recipe a year-round favorite!

    Storage & Troubleshooting Guide

    Keeping It Fresh

    To maintain the perfect texture of your Cranberry Pineapple Upside-Down Cake, proper storage is key. At room temperature, cover the cake with a dome or invert a large bowl over it to protect the sticky topping, and it will stay fresh for 2 days. For longer storage, refrigerate for up to 5 days, but bring to room temperature before serving to revive that soft crumb. The caramel topping tends to absorb moisture in the fridge, so I like to warm individual slices for 15 seconds in the microwave to restore that glistening look. Freezing works too—wrap slices individually and thaw in the refrigerator overnight.

    Fixing Common Issues

    Even experienced bakers encounter challenges! If your cake comes out with a soggy middle, it likely needed more baking time. The cranberries release moisture, so you might need 5-7 minutes longer than you expect. For a cake that’s sticking stubbornly to the pan, place it over low heat for 30 seconds to warm and loosen the caramel. If your fruit topping looks pale, try a quick pass under the broiler for 1-2 minutes for that caramelized finish. And if cranberries are too tart for your taste, macerate them in 2 tablespoons of sugar for 15 minutes before adding to the caramel mixture.

    Frequently Asked Questions

    Can I use frozen cranberries for Cranberry Pineapple Upside-Down Cake?

    Yes! Don’t thaw them first—add them frozen directly to the caramel layer. They’ll release less juice during baking, which helps prevent a soggy topping.

    Can I make this cake ahead of time for a party?

    Absolutely! Make it up to 24 hours ahead. Store at room temperature under a cake dome, or refrigerate and bring to room temperature 1 hour before serving.

    What pan works best for upside-down cakes?

    A 9-inch cast iron skillet is ideal because it conducts heat evenly and creates perfect caramelization. A heavy cake pan with at least 2-inch sides works well too.

    Can I substitute canned pineapple with fresh?

    Yes, but pat fresh pineapple very dry first. Fresh pineapple contains more moisture and enzymes that can affect the texture if not properly prepared.

    Why did my caramel crystallize?

    Crystallization usually happens when sugar crystals form during cooking. Avoid stirring once the sugar begins to melt and make sure your pan is very clean before starting.

    Final Thoughts

    This Cranberry Pineapple Upside-Down Cake has become my signature holiday dessert, but it’s too delicious to save for special occasions only. The vibrant combination of sweet pineapple and tart cranberries creates a memorable flavor experience that guests will talk about long after the last crumb disappears. I love how it transforms simple ingredients into something truly spectacular. Whether you’re baking for a festive gathering or just treating yourself on a cozy weekend, this cake delivers both comfort and elegance. Find more delicious recipes on Pinterest and keep baking beautiful memories!

  • Candy Cane Pie Recipe: Irresistibly Sweet & Festive Delight!

    Candy Cane Pie Recipe: Irresistibly Sweet & Festive Delight!

    Candy Cane Pie Recipe: Irresistibly Sweet & Festive Delight!

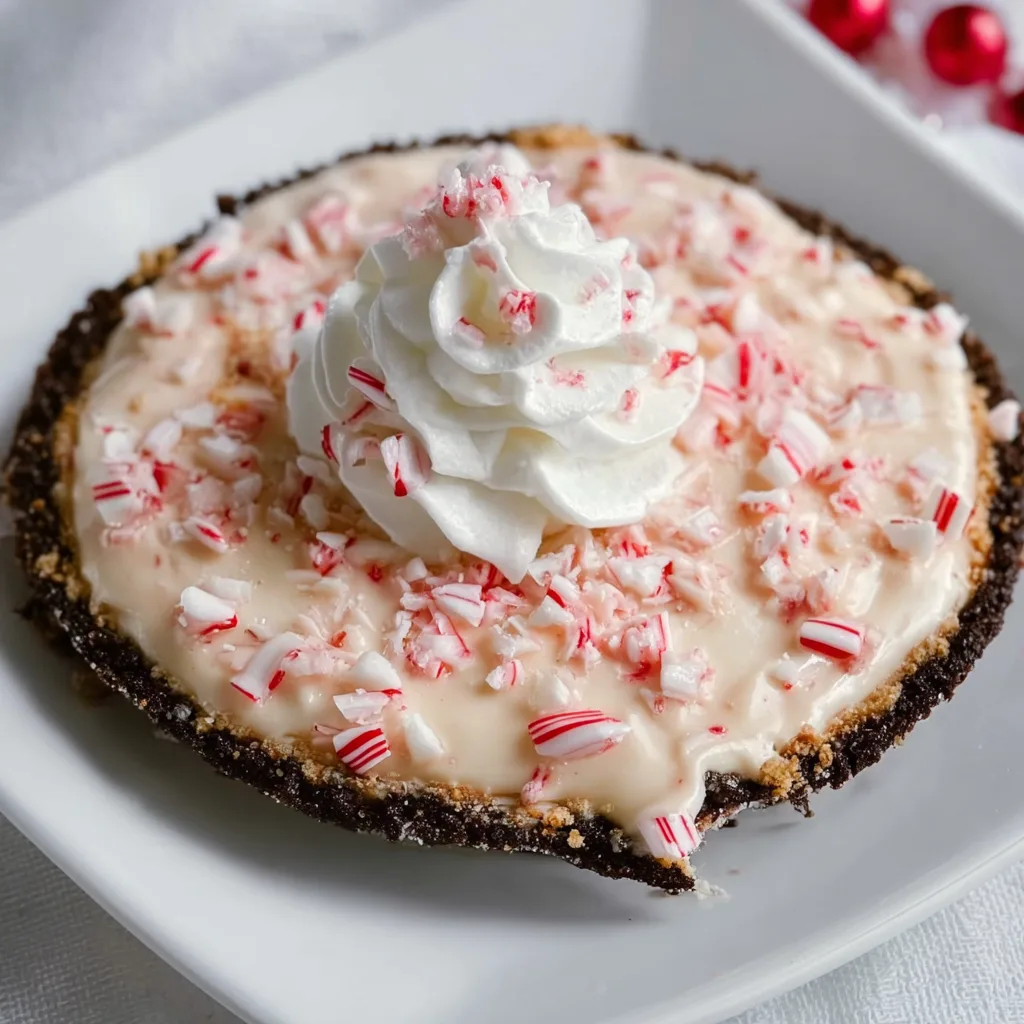
    This Candy Cane Pie captures everything magical about the holidays in each cool, creamy bite. The first time I made this festive dessert, my kitchen filled with the nostalgic aroma of crushed peppermint candies as I sprinkled them over the silky filling. There’s something about that classic red and white swirl that instantly transports me back to childhood Christmas mornings. With its buttery cookie crust, velvety cream cheese filling, and that perfect hint of peppermint, this show-stopping dessert creates those special memory-making moments that the holidays are all about. Ready to create your own holiday magic? Let’s dive in!

    Recipe

    Why You’ll Love This Candy Cane Pie

    Perfect Holiday Centerpiece

    This Candy Cane Pie isn’t just delicious—it’s a conversation starter. The striking red and white swirls create that wow factor when you bring it to the table. I served this at last year’s holiday gathering, and before anyone even tasted it, phones were out capturing its beauty! The balance of creamy filling with crunchy candy cane pieces offers the perfect textural contrast. Plus, the make-ahead friendly nature means you can focus on enjoying your guests rather than last-minute dessert prep. The holidays are hectic enough—this pie gives you one less thing to worry about.

    Crowd-Pleasing Flavor Profile

    The beauty of this Candy Cane Pie lies in its universal appeal. The peppermint flavor is present but not overwhelming, making it perfect for both mint enthusiasts and those who typically shy away from strongly flavored desserts. The cream cheese base provides a rich tanginess that balances the sweetness of the candy canes beautifully. I’ve found that even guests who claim not to love peppermint desserts end up requesting the recipe! The cool, refreshing finish makes it an ideal counterpoint to the often heavy holiday meals, cleansing the palate while still feeling indulgent.

    Essential Tips & Tricks

    Perfecting the Crust

    The foundation of any great pie is its crust, and this Candy Cane Pie is no exception. For the perfect texture, chill your cookie crust for at least 30 minutes before filling. This prevents it from becoming soggy and ensures that satisfying contrast with the creamy filling. I learned the hard way that rushing this step leads to disappointment! When pressing the crust into your pie plate, use the bottom of a measuring cup for even thickness throughout. For extra flavor depth, try using chocolate sandwich cookies in your crust—they pair wonderfully with the peppermint, similar to how they enhance these Churro Cheesecake Cookies.

    Creating Beautiful Swirls

    The signature candy cane swirls are easier to achieve than they look! The key is working with properly softened cream cheese—leave it out for at least an hour before mixing to avoid lumps. When adding your peppermint extract, start with less than you think you need; you can always add more, but you can’t take it away. For those perfect red swirls, use gel food coloring rather than liquid for more vibrant color without altering the texture. Apply gentle figure-eight motions with a knife or skewer, being careful not to overmix—you want distinct swirls, not a uniform pink filling.

    Serving Ideas & Creative Variations

    Festive Presentation Options

    Elevate your Candy Cane Pie with thoughtful presentation that makes it even more Instagram-worthy. Consider serving slices on vintage Christmas plates with a light dusting of powdered sugar “snow.” Add a candy cane garnish to each slice, or create a border of mini candy canes around the edge of the pie. For an extra special touch, serve alongside a small pitcher of warm chocolate sauce for drizzling—the combination of cool peppermint and warm chocolate creates a delightful temperature contrast. This approach works beautifully with desserts, much like the contrasting flavors in my Peanut Butter Chocolate Cupcakes.

    Seasonal Adaptations

    While traditional Candy Cane Pie is a Christmas classic, you can easily adapt this recipe throughout the year! For Valentine’s Day, swap candy canes for crushed heart-shaped peppermints and add a touch of pink coloring. During summer, create a refreshing variation with a hint of lemon zest and crushed lemon drop candies instead of peppermint. For a chocolate lover’s version, fold melted chocolate into half the filling before creating your swirls. The versatile base recipe works wonderfully with many flavor combinations—I’ve even created a maple version for fall gatherings that disappeared in minutes!

    Storage & Troubleshooting Guide

    Proper Storage Techniques

    To maintain the perfect texture of your Candy Cane Pie, proper storage is essential. Once completely set, cover loosely with plastic wrap, avoiding direct contact with the surface to prevent condensation from forming. The pie will keep in the refrigerator for up to 5 days, though the candy cane pieces may soften slightly over time. For longer storage, you can freeze the pie for up to 2 months—simply wrap tightly in plastic followed by foil. When ready to serve, thaw overnight in the refrigerator rather than at room temperature to prevent weeping or texture changes in the filling.

    Common Issues & Solutions

    Even experienced bakers encounter challenges! If your filling develops cracks, it likely chilled too quickly or was overmixed. Next time, ensure all ingredients are at room temperature and mix just until combined. For a crust that crumbles when slicing, try adding an extra tablespoon of melted butter to the mix and chilling thoroughly before filling. If candy cane pieces begin to “bleed” color into your filling, crush them just before serving rather than mixing them in advance. Remember that even imperfect pies taste delicious—I once dropped mine right before a party and served it as “Candy Cane Pie Parfait” in glasses!

    Frequently Asked Questions

    Can I make Candy Cane Pie ahead of time?

    Absolutely! This pie actually benefits from being made 1-2 days ahead. The flavors meld beautifully, and the texture sets perfectly when given time to chill thoroughly.

    What can I substitute for peppermint extract?

    Try crushed peppermint candies steeped in warm cream (then strained and cooled) or food-grade peppermint essential oil (use sparingly, just 1-2 drops).

    My cream cheese filling has lumps. What went wrong?

    Your cream cheese wasn’t soft enough. Next time, ensure it sits at room temperature for at least an hour, or microwave in 10-second bursts until perfectly softened.

    How do I prevent my Candy Cane Pie from becoming too sweet?

    Balance is key! Use unsweetened whipped cream in the topping and add a pinch of salt to the filling to enhance flavors without additional sweetness.

    Can I use store-bought crust for my Candy Cane Pie?

    Yes! While homemade crust has the best flavor, a ready-made graham cracker or chocolate cookie crust works well for a time-saving alternative.

    Final Thoughts

    This Candy Cane Pie has become my holiday tradition, bringing festive cheer to winter gatherings year after year. There’s something magical about the way its pepperminty sweetness captures the essence of the season in each bite. Whether you’re serving it as the grand finale to Christmas dinner or packaging slices as heartfelt homemade gifts, this dessert creates moments of pure joy that linger long after the last crumb is gone. From my kitchen to yours, I hope this Candy Cane Pie brings a touch of whimsy and wonder to your holiday celebrations! For more seasonal inspiration, visit our Pinterest page.

  • White Chocolate Peanut Butter Cheesecake That Will Melt Your Heart

    White Chocolate Peanut Butter Cheesecake That Will Melt Your Heart

    White Chocolate Peanut Butter Cheesecake That Will Melt Your Heart

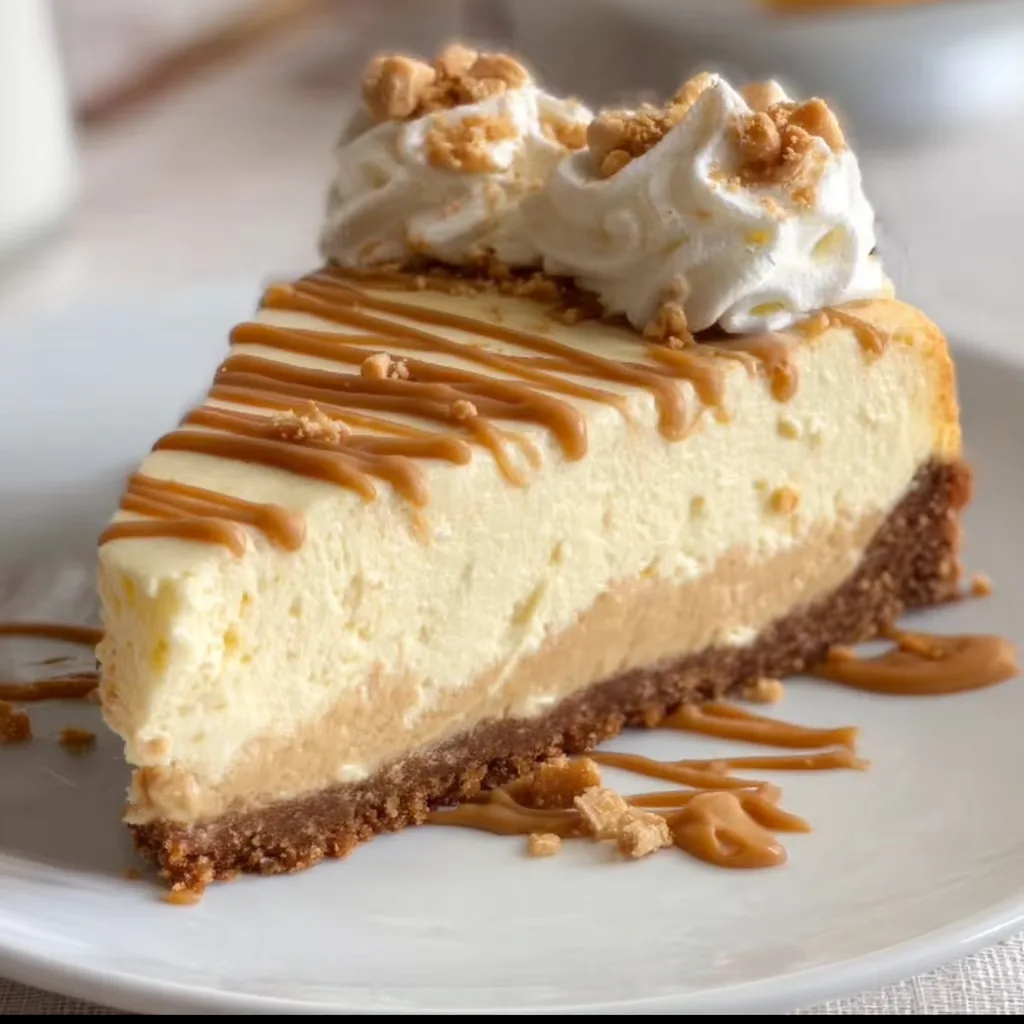
    This White Chocolate Peanut Butter Cheesecake is the dessert that dreams are made of—creamy, indulgent, and perfectly balanced between sweet white chocolate and nutty peanut butter. I stumbled upon this recipe during a rainy weekend when I was craving something special but didn’t want to venture outside. The first bite transported me to dessert heaven! The velvety texture melts in your mouth while the graham cracker crust provides that perfect contrasting crunch. If you’ve been searching for a show-stopping dessert that combines two beloved flavors, this is it. Trust me, your friends will be begging for the recipe after just one bite!

    Recipe

    Why You’ll Love This White Chocolate Peanut Butter Cheesecake

    Perfect Balance of Flavors

    The magic of this White Chocolate Peanut Butter Cheesecake lies in its harmonious flavor profile. The subtle sweetness of white chocolate beautifully complements the rich, nutty depth of peanut butter without either overwhelming the other. I’ve carefully calibrated the ratio so you get that dreamy, cloud-like texture with distinct notes of both star ingredients in every forkful. The graham cracker crust adds a toasty, buttery foundation that ties everything together. It’s like the dessert equivalent of a perfect symphony—each element plays its part at exactly the right moment.

    Impressive Yet Achievable

    Don’t let the elegant appearance fool you—this cheesecake is surprisingly approachable for bakers of all skill levels. The steps are straightforward, and I’ve eliminated unnecessary complications. You don’t need fancy equipment or obscure ingredients to create this masterpiece. The most challenging part might be waiting for it to chill completely! I remember making this for my sister’s birthday despite being nervous about tackling cheesecake. Her eyes lit up when she saw it, and that moment of pride was worth every minute spent in the kitchen.

    Essential Tips & Tricks

    Perfecting Your Ingredients

    Room temperature ingredients are absolutely crucial for achieving that silky-smooth texture we’re after. Cold cream cheese will leave lumps that no amount of mixing can salvage! Set your cream cheese, eggs, and sour cream on the counter at least 2 hours before starting. For the white chocolate, choose a high-quality brand that melts smoothly—this isn’t the place to skimp. And for peanut butter, I recommend using creamy rather than chunky for the best texture. Natural peanut butter works too, just make sure to stir it well if the oils have separated.

    Mastering the Water Bath

    Don’t skip the water bath—it’s the secret to a crack-free cheesecake! Wrap your springform pan in multiple layers of heavy-duty aluminum foil, making sure there are no tears where water could seep in. The gentle, moist heat from the water bath ensures even baking and prevents the dreaded crack down the middle. If you’re looking for another dessert that uses similar techniques, my Strawberry Cream Cheese Crumble Rolls are another crowd-pleaser that benefits from careful temperature control.

    Serving Ideas & Creative Variations

    Elegant Presentation Options

    Transform your White Chocolate Peanut Butter Cheesecake into a showstopper with thoughtful garnishes. A light dusting of cocoa powder creates beautiful contrast against the creamy surface. For special occasions, I love to pipe small rosettes of whipped cream around the edge and top each with a mini peanut butter cup or white chocolate shaving. Drizzling warm peanut butter and melted white chocolate in a crosshatch pattern not only adds visual interest but also reinforces the core flavors. Remember that chilled cheesecake cuts more cleanly—use a knife dipped in hot water for perfect slices.

    Exciting Flavor Twists

    While the classic version is divine, don’t be afraid to experiment with creative variations. Adding a layer of raspberry preserves between the crust and filling creates a delightful PB&J-inspired treat. For chocolate lovers, fold mini chocolate chips into the batter or replace the graham cracker crust with crushed Oreos. If you enjoy the combination of sweet and salty, try incorporating some Peanut Butter Chocolate Cupcakes elements by sprinkling sea salt flakes on top just before serving. The possibilities are endless!

    Storage & Troubleshooting Guide

    Proper Storage Methods

    Your White Chocolate Peanut Butter Cheesecake will stay fresh in the refrigerator for up to 5 days when stored properly. Always cover it tightly with plastic wrap or place it in an airtight container to prevent it from absorbing other flavors from your fridge. For longer storage, this cheesecake freezes beautifully for up to 2 months. I recommend slicing it first, then wrapping individual pieces in plastic wrap followed by foil. This way, you can thaw just what you need. Allow frozen slices to thaw overnight in the refrigerator for the best texture.

    Fixing Common Issues

    If your cheesecake develops cracks despite using a water bath, don’t panic! This is purely aesthetic and won’t affect the flavor. Simply cover the top with a layer of white chocolate ganache or peanut butter drizzle. If your crust seems soggy, it likely means water leaked into your foil wrap. Next time, use extra foil or place the wrapped springform inside a slightly larger cake pan before putting it in the water bath. For cheesecake that’s too dense, you probably overmixed the batter—mix just until ingredients are combined to maintain that perfect creamy texture.

    Frequently Asked Questions

    Can I use crunchy peanut butter instead of smooth?

    Yes, but expect a different texture. Crunchy peanut butter will add small bits throughout your cheesecake. If you love that extra texture contrast, go for it!

    Why did my White Chocolate Peanut Butter Cheesecake crack?

    Cracks usually happen from overmixing (incorporating too much air), baking at too high a temperature, or cooling too quickly. Use a water bath and cool gradually in the turned-off oven.

    Can I make this cheesecake without a springform pan?

    While springform pans are ideal, you can use a deep pie dish lined with parchment paper. The sides won’t be as clean, but the taste will be identical.

    How do I know when my cheesecake is perfectly baked?

    The edges should be set but the center should still have a slight jiggle—like firm Jell-O. It will continue setting as it cools.

    Can I substitute Greek yogurt for sour cream?

    Absolutely! Full-fat Greek yogurt makes an excellent 1:1 substitute for sour cream in this recipe, offering a similar tanginess with slightly more protein.

    Final Thoughts

    This White Chocolate Peanut Butter Cheesecake has become my go-to dessert when I want to create something truly memorable. The way the creamy white chocolate and nutty peanut butter flavors dance together creates a dessert experience that’s both comforting and sophisticated. I love seeing the look of pure delight on people’s faces when they take that first bite—it’s the ultimate reward for any home baker. Don’t forget to share your creations on Pinterest and tag me if you try this recipe. Happy baking!

  • Carrot Pound Cake Recipe That Will Melt Your Heart Instantly!

    Carrot Pound Cake Recipe That Will Melt Your Heart Instantly!

    Carrot Pound Cake Recipe That Will Melt Your Heart Instantly!

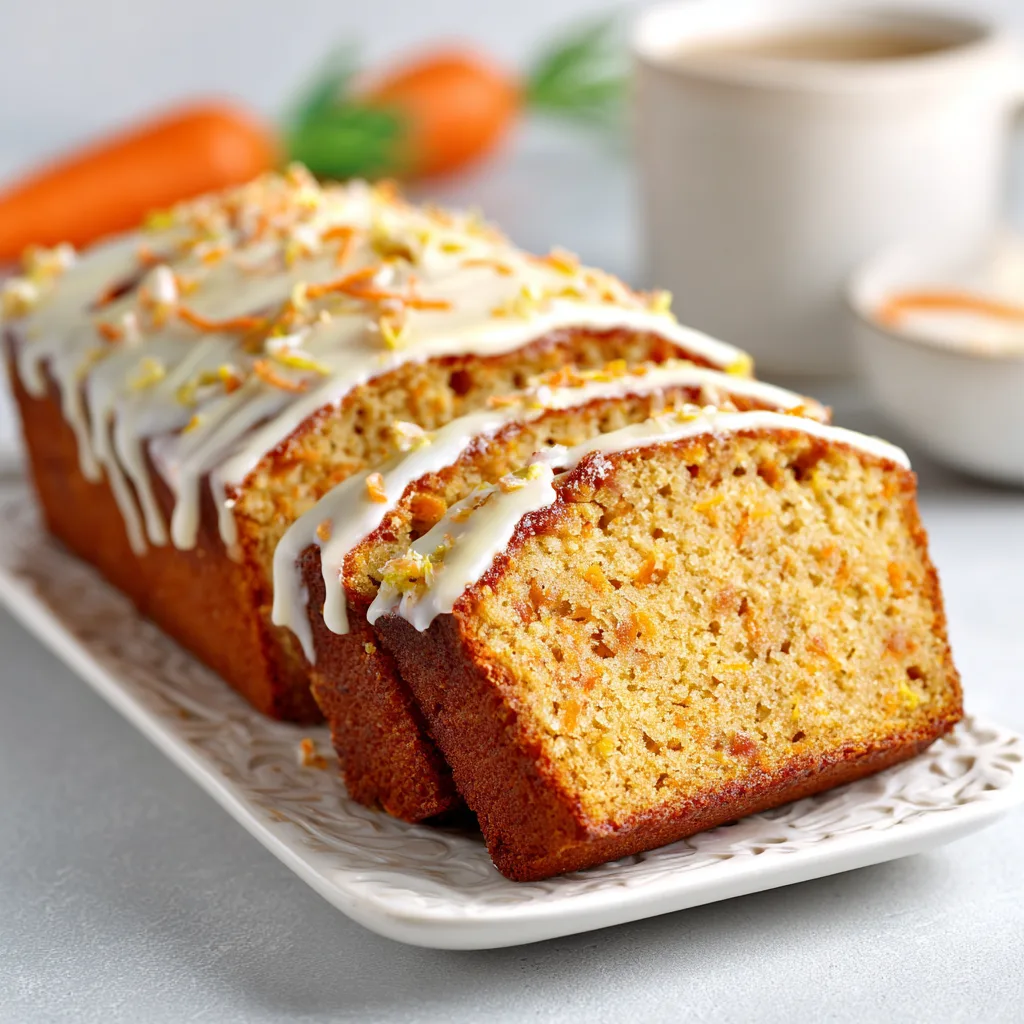
    Carrot pound cake is my absolute obsession when I need something that walks the line between everyday treat and special occasion dessert. The first time I made this, my kitchen filled with the warm aroma of cinnamon and nutmeg, and I knew I’d found my new go-to recipe. There’s something magical about how the carrots keep the cake incredibly moist for days while the cream cheese frosting adds that perfect tangy sweetness. If you’ve been searching for a dessert that impresses without complicated techniques, this carrot pound cake is your answer.

    Recipe

    Why You’ll Love This Carrot Pound Cake

    Perfect Balance of Flavors and Texture

    This carrot pound cake delivers the perfect balance between sweetness and spice. Unlike some carrot cakes that can be overpowering with too much cinnamon or cloves, this recipe lets the natural sweetness of carrots shine through. The texture is what truly sets it apart—dense enough to hold its shape when sliced but still incredibly tender. I love how each bite offers tiny flecks of orange carrot and the occasional crunch from chopped walnuts. It’s that magical combination of moist crumb and subtle spice that keeps everyone coming back for seconds.

    Make-Ahead Friendly and Crowd Pleasing

    One of my favorite things about this carrot pound cake is that it actually tastes better the day after baking. The flavors have time to develop and meld together, making it perfect for entertaining when you need to prepare dessert in advance. I’ve brought this to countless potlucks and family gatherings, and it’s always the first dessert to disappear. Even self-proclaimed “I don’t like carrot cake” people end up asking for the recipe! The cream cheese frosting seals the deal, making it irresistible to everyone from picky kids to discerning dessert connoisseurs.

    Essential Tips & Tricks

    Carrot Preparation Matters

    The way you prepare your carrots makes a huge difference in the final texture of your pound cake. I recommend using a fine grater rather than a food processor—hand-grated carrots release just the right amount of moisture without becoming too wet. After grating, gently pat the carrots with a paper towel to remove excess moisture. This prevents a soggy cake while still keeping that wonderful moistness we love. About two cups of finely grated carrots is the sweet spot for this recipe, giving you carrot flavor in every bite without weighing down the batter.

    Temperature Control for Perfect Results

    Room temperature ingredients are absolutely crucial for success when making carrot pound cake. Cold eggs, butter, or cream cheese can lead to a lumpy batter that doesn’t rise properly. I learned this the hard way when I rushed through making this cake for my sister’s birthday! Set your ingredients out at least an hour before mixing. For the baking itself, position your rack in the middle of the oven and consider using a light-colored loaf pan to prevent over-browning. Start checking for doneness about 10 minutes before the recipe suggests.

    Serving Ideas & Creative Variations

    Seasonal Serving Suggestions

    This carrot pound cake works beautifully across all seasons with just a few simple adjustments. In spring and summer, I love serving it with a side of fresh berries and a light dusting of powdered sugar instead of heavy frosting. For fall gatherings, try adding a sprinkle of toasted pecans and a drizzle of warm caramel sauce. Winter holidays call for a festive approach—add a touch of orange zest to the frosting and garnish with sugared cranberries for a pop of color. No matter the season, a dollop of lightly sweetened whipped cream is always welcome.

    Fun Flavor Twists

    Don’t be afraid to experiment with this versatile carrot pound cake base! My family goes wild when I add crushed pineapple (well-drained) to the batter for a tropical twist. For a sophisticated version, try adding 2 tablespoons of finely grated orange zest and a splash of Grand Marnier to the batter. Chocolate lovers can fold in 1/2 cup of mini chocolate chips for a surprising twist on the classic. For a honey-sweetened variation, replace half the sugar with honey and add an extra teaspoon of baking powder to maintain the perfect rise.

    Storage & Troubleshooting Guide

    Keeping It Fresh

    To maintain the perfect texture and flavor of your carrot pound cake, proper storage is essential. At room temperature, this cake stays beautifully moist for up to 3 days when stored in an airtight container. If you’ve added cream cheese frosting, refrigeration is necessary—just bring slices to room temperature before serving for the best flavor experience. This cake also freezes exceptionally well! I often make two loaves and freeze one (unfrosted) for up to 3 months. Wrap it tightly in plastic wrap, then aluminum foil, and place in a freezer bag to prevent freezer burn.

    Fixing Common Problems

    Even experienced bakers occasionally run into issues with pound cakes. If your carrot pound cake sinks in the middle, the likely culprit is underbaking or opening the oven door too early. Always test with a toothpick inserted in the center—it should come out with a few moist crumbs, not wet batter. For a cake that’s too dense, you might have overmixed the batter or used too much carrot. Remember to fold in dry ingredients gently just until combined, and measure your grated carrots carefully. If your cake cracks on top, don’t worry—that’s actually characteristic of pound cakes and makes the perfect place for frosting!

    Frequently Asked Questions

    Can I make carrot pound cake without nuts?

    Absolutely! Simply omit the nuts from the recipe without any other adjustments. For added texture, consider substituting with raisins, dried cranberries, or even unsweetened coconut flakes.

    How do I know when my carrot pound cake is done baking?

    Insert a toothpick into the center—it should come out with a few moist crumbs but no wet batter. The cake should also spring back slightly when gently pressed in the center.

    Can I use pre-shredded carrots from the store?

    I don’t recommend it. Pre-shredded carrots are typically dry and thick-cut. For the best texture and moisture in your carrot pound cake, freshly grate whole carrots using the fine side of a box grater.

    Is carrot pound cake healthier than regular pound cake?

    While it contains vegetables and can be made with whole wheat flour, carrot pound cake still contains sugar, fat, and calories similar to traditional pound cake. Enjoy it as a treat rather than a health food.

    Can I make this recipe as muffins instead of a loaf?

    Yes! Pour the batter into lined muffin tins, filling each about 2/3 full. Reduce baking time to 18-22 minutes, checking for doneness with a toothpick.

    Final Thoughts

    This carrot pound cake has become my signature dessert for good reason—it’s reliably delicious while being just unique enough to stand out from standard baked goods. There’s something deeply satisfying about creating a dessert that bridges the gap between homey comfort food and elegant treat. Whether you’re baking it for a special occasion or simply because you’re craving something sweet, this carrot pound cake delivers on all fronts. Don’t forget to check out more of my favorite recipes on Pinterest!