Category: Desserts

Sweet and easy dessert recipes for every craving. Simple treats, rich flavors, and quick ideas that make any moment feel special.

  • Red Velvet Oreo Cheesecake: Irresistibly Creamy Dessert Bliss!

    Red Velvet Oreo Cheesecake: Irresistibly Creamy Dessert Bliss!

    Red Velvet Oreo Cheesecake: Irresistibly Creamy Dessert Bliss!

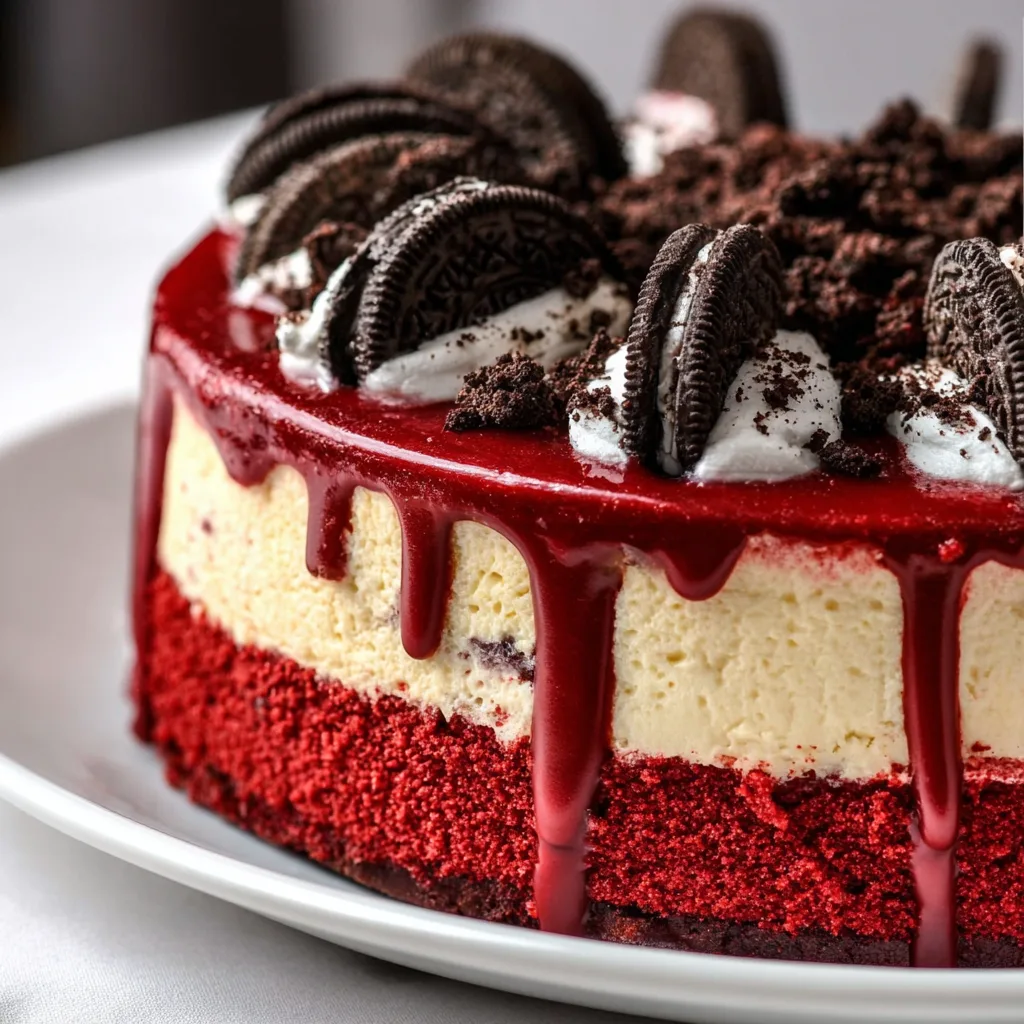
    Red Velvet Oreo Cheesecake combines two beloved desserts into one show-stopping treat that never fails to impress. The first time I made this luscious creation for my sister’s birthday gathering, the room fell silent as everyone took their first bite—then erupted into a chorus of “Oh my goodness!” The rich crimson layers paired with chunks of Oreo cookies create a dessert that’s both visually stunning and irresistibly delicious. The contrast between the tangy cream cheese, chocolate cookie crunch, and that distinctive cocoa-vanilla flavor of red velvet creates something truly magical that’ll have everyone requesting the recipe. If you love indulgent desserts like my fluffy Japanese cotton cheesecake, this one will surely become your new favorite.

    Recipe

    Why You’ll Love This Red Velvet Oreo Cheesecake

    A Perfect Balance of Flavors and Textures

    There’s something almost hypnotic about the way the flavors in this cheesecake play together. The subtle cocoa notes in the red velvet base provide the perfect foundation for the rich creaminess of the cheesecake layer. Then come those delightful Oreo chunks—little pockets of chocolate intensity that add both textural contrast and flavor depth. I love watching people’s expressions as they discover each component with every bite. The slight tanginess from the cream cheese balances the sweetness perfectly, ensuring this dessert never becomes cloying despite its decadence. It’s that rare dessert that feels both familiar and exciting at the same time.

    An Impressive Yet Achievable Showstopper

    Don’t let the stunning appearance fool you—this Red Velvet Oreo Cheesecake is completely doable for home bakers of all skill levels. The dramatic color contrast between the ruby-red cake layers and white cheesecake swirled with Oreo pieces creates a dessert that looks like it came from a high-end bakery. I still remember my neighbor asking which bakery I’d visited when I brought this to our block party! The beauty of this recipe is that while it looks elaborate, the techniques are straightforward. The “wow factor” comes from the natural beauty of the ingredients rather than complicated decorating techniques that require special skills.

    Essential Tips & Tricks

    Mastering the Perfect Cheesecake Consistency

    The secret to a silky-smooth cheesecake layer starts with room temperature ingredients—especially your cream cheese. I learned this the hard way after battling lumpy batter for years! Allow your cream cheese to sit out for at least 2 hours before mixing. When incorporating the eggs, mix just until combined; overmixing introduces air that can cause cracks. For that perfect Red Velvet Oreo Cheesecake texture, consider using a water bath during baking. Simply wrap your springform pan in foil and place it in a larger pan with an inch of hot water. This gentle, moist heat helps prevent cracks and ensures even baking throughout.

    The Art of the Perfect Oreo Integration

    Oreos deserve special attention in this recipe—they’re not just a topping but an essential flavor component. For the optimal cookie distribution, I recommend using three different Oreo textures: finely crushed for the crust, roughly chopped for the filling, and halved cookies for decoration. When folding Oreos into your cheesecake batter, use a gentle hand to maintain those beautiful chunks rather than pulverizing them into dust. For an extra-special touch, try drizzling some melted white chocolate over your crushed Oreos before incorporating them—it adds a subtle sweetness that complements the tanginess of the cheesecake beautifully.

    Serving Ideas & Creative Variations

    Complementary Pairings That Enhance Every Bite

    The rich complexity of Red Velvet Oreo Cheesecake pairs wonderfully with simple accompaniments that highlight rather than compete with its flavors. A dollop of lightly whipped cream adds a cloud-like softness that melts beautifully against the dense cheesecake. For a temperature contrast that elevates the experience, serve with a scoop of vanilla bean ice cream—the warmth of real vanilla against the chocolatey notes is divine. I love serving this with fresh berries; the bright acidity of raspberries or strawberries cuts through the richness perfectly. For beverage pairings, consider a strong coffee, dessert wine, or even a warming apple cider float for a cozy fall gathering.

    Seasonal and Dietary Adaptations

    This versatile dessert can be customized for any occasion or dietary need without sacrificing its wow factor. For a festive holiday version, incorporate crushed peppermint Oreos and garnish with candy cane pieces. Summer celebrations call for Golden Oreos with lemon zest in the cheesecake layer. For gluten-sensitive guests, gluten-free Oreo alternatives work beautifully—just ensure your red food coloring is gluten-free too. Reducing sugar is possible by choosing a less-sweet cream cheese base and dark chocolate Oreos. For smaller gatherings, transform this into individual mini cheesecakes using a muffin tin—they bake faster and create perfect individual portions that are ideal for socially distanced celebrations.

    Storage & Troubleshooting Guide

    Maintaining Freshness and Quality

    Proper storage ensures your Red Velvet Oreo Cheesecake stays perfectly delicious for days after baking. Always cool your cheesecake completely before refrigerating—I leave mine on the counter for an hour, then refrigerate uncovered for another hour before covering. This prevents condensation from making the top soggy. Once fully chilled, cover with plastic wrap or store in an airtight container for up to 5 days in the refrigerator. For longer storage, this cheesecake freezes beautifully! Slice it first, then wrap individual pieces in plastic wrap and foil. Frozen slices keep for up to 3 months and can be thawed in the refrigerator overnight for an instant dessert whenever cravings strike.

    Solving Common Cheesecake Challenges

    Even experienced bakers encounter occasional issues with cheesecakes, but most problems have simple solutions. If your cheesecake develops surface cracks, don’t panic—this is purely cosmetic and can be easily disguised with whipped cream, chocolate ganache, or additional Oreo crumbles. For a sunken center, your cheesecake likely needed more baking time; next time, look for a slight jiggle only in the center when you gently shake the pan. If your crust becomes soggy, try pre-baking it for 10 minutes before adding the filling. And remember that patience is crucial—rushing the cooling process often leads to texture issues, so allow your Red Velvet Oreo Cheesecake to cool gradually for that perfect silky consistency.

    Frequently Asked Questions

    Can I make Red Velvet Oreo Cheesecake without food coloring?

    Yes! Beetroot powder is an excellent natural alternative that provides the signature red color. Start with 2-3 tablespoons in your batter, adjusting until you achieve your desired shade of red. The taste is neutral when baked.

    How do I prevent my cheesecake from cracking?

    Avoid overmixing your batter, bake in a water bath, and cool gradually. Turn off the oven when done, open the door slightly, and let the cheesecake cool slowly for an hour before removing it completely.

    Can I make this Red Velvet Oreo Cheesecake ahead of time for an event?

    Absolutely! This cheesecake actually improves with 24-48 hours of refrigeration as the flavors meld together. Make it up to three days ahead, keeping it covered in the refrigerator until serving time.

    What’s the best way to cut clean slices?

    Dip a sharp knife in hot water, wipe dry, and cut. Repeat this process for each slice. The heat helps the knife glide through the cheesecake smoothly without dragging or creating messy edges.

    Can I use low-fat cream cheese?

    While possible, full-fat cream cheese provides the best texture and flavor. If using low-fat, add an extra egg yolk to maintain richness and consider reducing the sugar slightly to balance flavors.

    Final Thoughts

    This Red Velvet Oreo Cheesecake has become my signature dessert for good reason—it consistently delivers that perfect balance of impressive presentation and unforgettable flavor. The contrasting layers of velvety cream cheese and chocolate cookie crunch create a textural symphony that makes each bite an experience to savor. What I love most is how versatile it is for any celebration, from casual family gatherings to milestone celebrations. Don’t be surprised if this becomes your most requested recipe! For more delicious dessert inspirations, check out my collections on Pinterest where I’m always sharing new flavor combinations and presentation ideas.
  • Triple Lemon Meringue Cheesecake That Will Melt Your Heart!

    Triple Lemon Meringue Cheesecake That Will Melt Your Heart!

    Triple Lemon Meringue Cheesecake That Will Melt Your Heart!

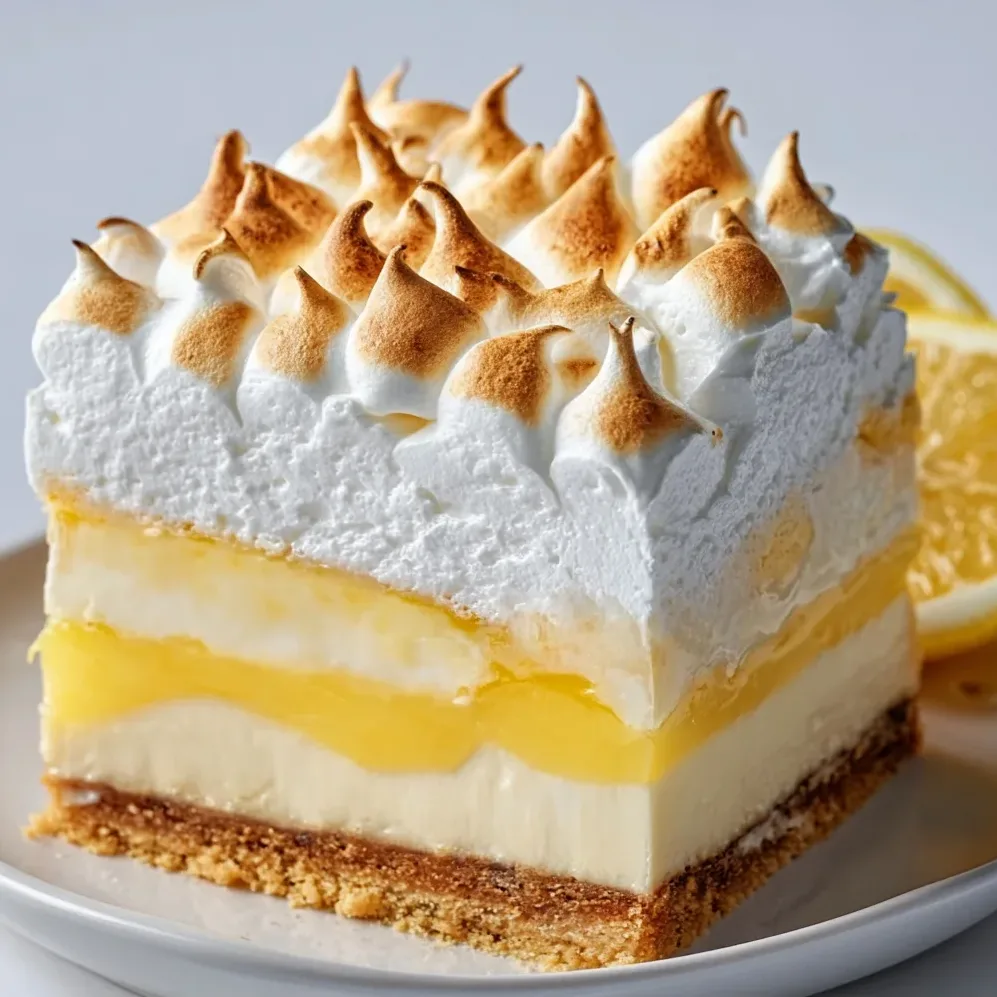
    Triple Lemon Meringue Cheesecake is what happens when three beloved desserts collide in perfect harmony. Every time I make this showstopper, my kitchen fills with the bright, zesty aroma of fresh lemons that instantly lifts my mood. The first time I served this at my sister’s birthday gathering, the table fell silent as everyone took their first bite – that moment of collective bliss is what I live for as a baker! The creamy cheesecake base, tangy lemon curd middle, and cloud-like meringue topping create a dessert that’s both impressive and irresistible. If you love fluffy Japanese cotton cheesecake, this triple-threat version will absolutely win your heart.

    Recipe

    Why You’ll Love This Triple Lemon Meringue Cheesecake

    Perfect Balance of Flavors and Textures

    The magic of this Triple Lemon Meringue Cheesecake lies in its perfect balance of sweet, tangy, and creamy elements. The buttery graham cracker crust provides that satisfying crunch against the velvety cheesecake layer. I’ve carefully calibrated the lemon flavor to shine through without overwhelming your taste buds – it’s bright and vibrant but never sour. The billowy meringue topping adds a delightful lightness that melts in your mouth, creating this beautiful textural journey from crisp to creamy to airy in a single bite. Trust me, it’s the kind of dessert that makes people close their eyes with that first forkful.

    Make-Ahead Convenience for Entertaining

    What I absolutely adore about this Triple Lemon Meringue Cheesecake is how perfect it is for entertaining. You can prepare the cheesecake base and lemon curd up to three days ahead, then simply add the meringue topping before serving. This has saved me countless times when hosting dinner parties! I remember making it for my best friend’s baby shower – being able to prep most of it two days before meant I could focus on decorations and games the day of the event. The dramatic presentation always elicits gasps when I bring it to the table, yet the actual hands-on time is surprisingly manageable when broken into stages.

    Essential Tips & Tricks

    Achieving the Perfect Cheesecake Texture

    The secret to a crack-free, silky-smooth cheesecake starts with room temperature ingredients. I learned this the hard way after one lumpy disaster! Make sure your cream cheese sits out for at least two hours before mixing. The water bath method is non-negotiable here – it creates a gentle, humid environment that prevents the dreaded crack down the middle. I always wrap my springform pan in three layers of heavy-duty foil to prevent water seepage. For the ultimate velvety texture, beat the cream cheese until completely smooth before adding other ingredients, but avoid overmixing once the eggs are incorporated. This prevents excess air from creating bubbles.

    Perfecting Your Meringue Topping

    Creating that gorgeous, fluffy meringue topping requires a few key techniques. Always start with a completely clean and dry mixing bowl – even a tiny drop of fat will prevent proper whipping. I separate my eggs when cold but let the whites come to room temperature for maximum volume. Adding the sugar gradually while beating is crucial – I count to five between each small addition. For that beautiful toasted finish, your broiler is your friend, but don’t walk away! I learned this watching my meringue go from golden to charred in 30 seconds flat. For extra stability, adding a pinch of cream of tartar helps maintain those beautiful peaks.

    Serving Ideas & Creative Variations

    Seasonal Fruit Pairings

    Elevate your Triple Lemon Meringue Cheesecake with seasonal fruit accompaniments that complement the citrus notes. In summer, I love adding fresh raspberries or blueberries around the base – the berry tartness plays beautifully against the lemon. For fall gatherings, try thin slices of poached pear fanned alongside each slice. Winter calls for blood orange segments that echo the citrus theme while adding dramatic color. The fruity additions aren’t just pretty – they add textural contrast and a fresh element that balances the richness. Last Christmas, I served this with sugared cranberries and mint sprigs for a festive touch that had everyone reaching for their phones to snap pictures.

    Flavor Twists and Adaptations

    Don’t be afraid to put your personal spin on this Triple Lemon Meringue Cheesecake! Swap the graham cracker crust for gingersnap cookies for a spicy-sweet foundation that works beautifully with the lemon. For a tropical twist, add a tablespoon of coconut extract to the cheesecake batter and sprinkle toasted coconut between layers. Feeling adventurous? Replace a portion of the lemon juice with lime or blood orange for a citrus medley version. My neighbor requested a chocolate-dipped version for her anniversary, so I drizzled the finished cake with dark chocolate ganache – the combination was unexpectedly magnificent. These small tweaks keep this recipe fresh and exciting each time you make it.

    Storage & Troubleshooting Guide

    Proper Storage for Maximum Freshness

    To maintain the perfect texture of your Triple Lemon Meringue Cheesecake, proper storage is essential. For the best results, refrigerate the cheesecake without the meringue topping, covered loosely with plastic wrap that doesn’t touch the surface. The meringue is ideally added just before serving, but if you need to store the fully assembled cake, use a tall cake container to avoid crushing those beautiful peaks. This dessert stays fresh in the refrigerator for up to four days, though the meringue will gradually soften. If you need longer storage, the cheesecake base and lemon curd (without meringue) can be frozen for up to a month – just wrap tightly in plastic and foil to prevent freezer burn.

    Troubleshooting Common Issues

    Even experienced bakers encounter challenges! If your cheesecake develops cracks, don’t panic – the lemon curd and meringue layers will hide imperfections beautifully. For a sunken center, your oven was likely too hot – next time, reduce the temperature by 25°F and use an oven thermometer to verify accuracy. If your lemon curd is too runny, it likely needed another minute of cooking – return it to the heat and simmer until it coats the back of a spoon. Weeping meringue usually means sugar wasn’t fully dissolved – be patient during the whipping process and feel the mixture between your fingers to check for graininess before declaring it done. Remember, even “imperfect” versions of this dessert are still absolutely delicious!

    Frequently Asked Questions

    Can I make Triple Lemon Meringue Cheesecake without a springform pan?

    You can use a deep pie dish or cake pan lined with parchment paper with long “handles” for lifting. The presentation won’t be as clean, but the flavor remains delicious. Just ensure you can still create a water bath.

    How do I prevent my lemon curd from curdling?

    Whisk constantly over medium-low heat and never let it boil. Strain the finished curd through a fine-mesh sieve to remove any small lumps. Using fresh lemon juice rather than bottled also helps.

    Can this Triple Lemon Meringue Cheesecake be made gluten-free?

    Absolutely! Simply substitute the graham cracker crust with gluten-free cookies or a nut-based crust. Ensure all other ingredients, particularly any extracts or flavorings, are certified gluten-free.

    Why did my meringue shrink after baking?

    Meringue shrinkage usually happens when it’s not sealed properly to the edges or when it’s undercooked. Make sure to spread the meringue all the way to touch the crust edges and bake until set.

    How far in advance can I make this dessert?

    The cheesecake base and lemon curd can be made 2-3 days ahead and stored separately. Add the meringue topping within a few hours of serving for the best texture and appearance.

    Final Thoughts

    This Triple Lemon Meringue Cheesecake has become my signature dessert for good reason – it combines familiar flavors in an extraordinary way that never fails to impress. The bright lemon zing, creamy cheesecake texture, and cloud-like meringue create a dessert symphony that’s greater than the sum of its parts. I hope you’ll try this recipe the next time you want to create a memorable ending to a special meal. The joy on your guests’ faces will be worth every step! For more dessert inspiration, check out my collection on Pinterest where I share even more indulgent creations.

  • German Chocolate Pecan Brownies That’ll Blow Your Mind!

    German Chocolate Pecan Brownies That’ll Blow Your Mind!

    German Chocolate Pecan Brownies That'll Blow Your Mind!

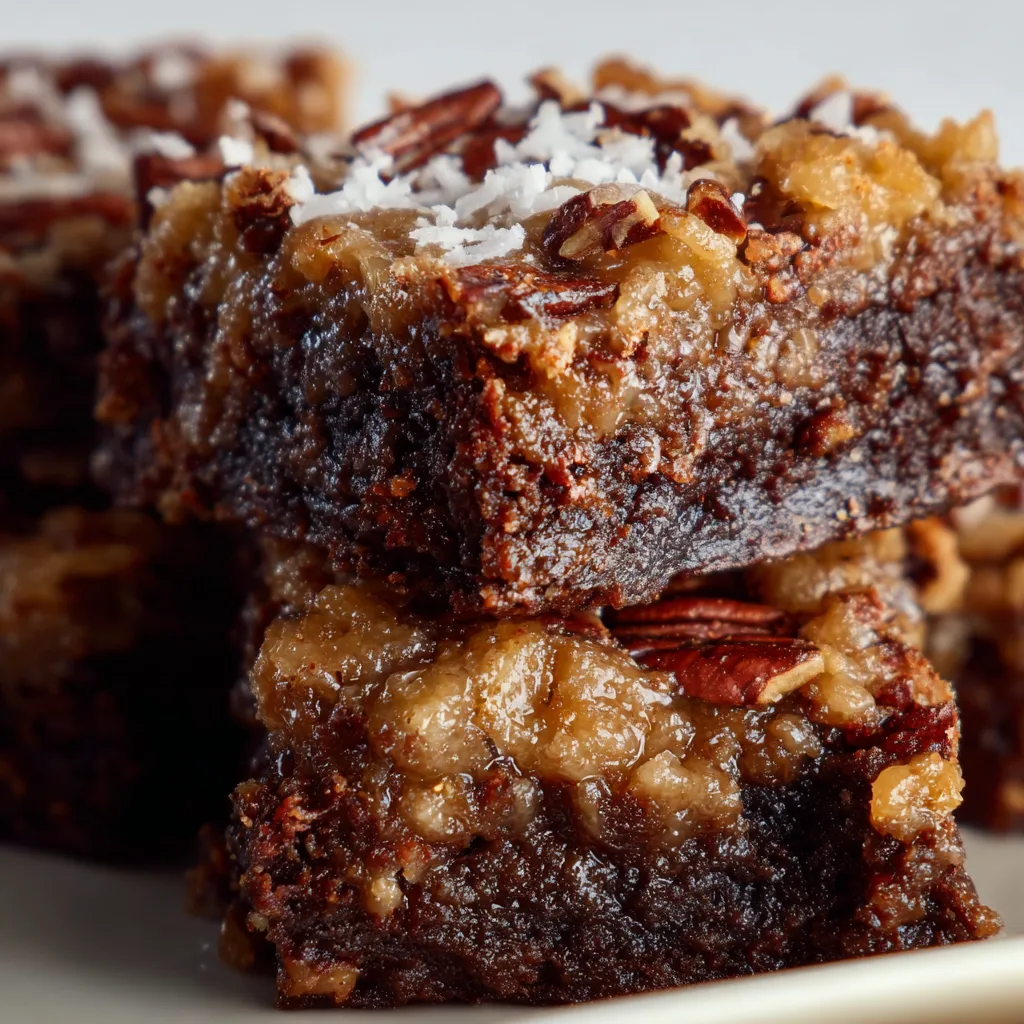
    German Chocolate Pecan Brownies are what happens when fudgy chocolate decadence meets the tropical sweetness of coconut and the buttery crunch of pecans. I discovered this recipe during a rainy weekend at my grandmother’s lake house, where we spent hours perfecting the balance between the dense brownie base and that irresistible coconut-pecan topping. The aroma that filled her tiny kitchen transported me straight to dessert heaven! These brownies strike that perfect balance between sophisticated flavor and comforting indulgence that’ll have everyone asking for the recipe. If you love the rich complexity of classic German chocolate cake, you’ll adore this handheld version even more.

    Recipe

    Why You’ll Love These German Chocolate Pecan Brownies

    The Perfect Texture Combination

    There’s something magical about the contrast between the fudgy brownie base and the gooey coconut-pecan topping. I’ve tweaked this recipe countless times to ensure the brownie layer stays perfectly moist without being undercooked. The key is not overmixing your batter and using high-quality cocoa powder for that intense chocolate flavor. When you bite through the caramelized coconut-pecan layer into the rich brownie beneath, you’ll experience a symphony of textures that makes these treats utterly irresistible. Trust me, texture perfection is what sets these brownies apart from ordinary desserts.

    Make-Ahead Convenience

    These German Chocolate Pecan Brownies are perfect for busy bakers! You can prepare the brownie base up to 3 days ahead and store it tightly wrapped at room temperature. The coconut-pecan topping can also be made a day in advance and refrigerated separately. This makes them ideal for entertaining or holiday gatherings when you want to impress without last-minute stress. I often make a double batch and freeze half for unexpected guests or chocolate emergencies (yes, that’s a real thing in my house!). The flavors actually deepen after a day, making these brownies taste even better the next day.

    Essential Tips & Tricks

    Perfecting the Brownie Base

    The foundation of spectacular German Chocolate Pecan Brownies is a properly executed brownie base. Always use room temperature eggs for better incorporation into your batter. When melting chocolate, use the double-boiler method rather than direct heat to prevent scorching. The most common mistake I see is overbaking – remove the brownies when a few moist crumbs still cling to your toothpick test. For an extra depth of flavor, add 1-2 tablespoons of espresso powder to intensify the chocolate notes without tasting like coffee. This simple trick elevates these brownies from good to unforgettable.

    Mastering the Coconut-Pecan Topping

    The iconic topping is what transforms these from regular brownies into German Chocolate Pecan Brownies. Always toast your pecans before adding them to enhance their nutty flavor and maintain their crunch. When cooking the coconut mixture, maintain medium-low heat and stir constantly to prevent the egg from scrambling. For the best texture, use sweetened coconut flakes rather than shredded coconut, which can sometimes be too stringy. I like to add a tiny pinch of flaky sea salt to the topping to balance the sweetness. For an extra touch of elegance, try drizzling melted chocolate across the finished brownies.

    Serving Ideas & Creative Variations

    Elegant Dessert Presentations

    Transform these German Chocolate Pecan Brownies from casual treats to elegant desserts with thoughtful presentation. Cut them into perfect squares using a warm knife wiped clean between cuts for restaurant-quality precision. For dinner parties, serve each brownie slightly warmed with a scoop of vanilla bean ice cream and a light dusting of cocoa powder. Create a dessert board by pairing brownie bites with fresh berries, whipped cream, and chocolate-dipped pecans. I once served these at a holiday gathering on individual vintage dessert plates with gold forks and received more compliments on the presentation than my carefully decorated Christmas cookies.

    Flavor Twist Variations

    While traditional German Chocolate Pecan Brownies are divine, don’t be afraid to experiment with flavor variations. Try adding 1/2 cup of bourbon-soaked cherries to the brownie batter for a sophisticated adult version. For coffee lovers, incorporate 2 tablespoons of coffee liqueur into the topping mixture. Spice enthusiasts might appreciate a pinch of cayenne pepper in the brownie base for a subtle heat that enhances the chocolate. My personal favorite variation includes a thin layer of salted caramel between the brownie and topping layers. The sweet-salty combination elevates these brownies to an entirely new level of indulgence.

    Storage & Troubleshooting Guide

    Keeping Brownies Fresh

    Proper storage is crucial for maintaining the perfect texture of German Chocolate Pecan Brownies. Store them in an airtight container at room temperature for up to 3 days, separating layers with parchment paper to prevent sticking. For longer storage, refrigerate for up to a week, but always bring them to room temperature before serving to restore their fudgy texture. If you need to freeze them, wrap individual brownies tightly in plastic wrap, then aluminum foil, and place in a freezer bag for up to 3 months. I’ve found that adding a slice of bread to the storage container helps maintain moisture levels and keeps the brownies from drying out.

    Fixing Common Problems

    Even experienced bakers encounter issues with German Chocolate Pecan Brownies. If your brownies turn out too cakey, you likely overmixed the batter or used too much flour – next time, measure flour by spooning into measuring cups rather than scooping. For sunken centers, your oven temperature was probably too high – invest in an oven thermometer for accuracy. If the topping separates or becomes grainy, you likely cooked it at too high a temperature – always maintain gentle heat and constant stirring. When the brownie edges get too crisp, try using a water bath during baking by placing your brownie pan inside a larger pan with about an inch of hot water.

    Frequently Asked Questions

    Can I make German Chocolate Pecan Brownies gluten-free?

    Yes! Substitute the all-purpose flour with a 1:1 gluten-free flour blend. Add 1/4 teaspoon xanthan gum if your blend doesn’t include it. The texture may be slightly different but still delicious.

    How do I know when the brownies are perfectly baked?

    Insert a toothpick into the center – it should come out with a few moist crumbs, not wet batter. The edges will appear set while the center remains slightly soft.

    Can I reduce the sugar in this recipe?

    You can reduce the brownie sugar by up to 1/4 cup without significantly affecting texture. However, the coconut-pecan topping needs its sugar content for proper caramelization.

    Why did my coconut-pecan topping turn grainy?

    The egg likely cooked too quickly. Use low heat, constant stirring, and remove from heat immediately once thickened to prevent overcooking.

    What’s the difference between regular brownies and German Chocolate Pecan Brownies?

    German Chocolate Pecan Brownies feature the distinctive coconut-pecan topping that gives them their signature flavor profile and textural contrast compared to traditional brownies.

    Final Thoughts

    German Chocolate Pecan Brownies represent the perfect marriage of rich chocolate, tropical coconut, and buttery pecans in one irresistible package. They’ve become my signature dessert for a reason – they’re impressive enough for special occasions yet comforting enough for everyday indulgence. The contrasting textures and complex flavors create a memorable dessert experience that keeps everyone coming back for more. Whether you follow the classic recipe or experiment with your own variations, these brownies are guaranteed to become a favorite in your baking repertoire. For more delicious dessert inspiration, check out my other recipes on Pinterest.

  • Peanut Butter Layered Delight: Irresistible, Creamy, Must-Try Dessert!

    Peanut Butter Layered Delight: Irresistible, Creamy, Must-Try Dessert!

    Peanut Butter Layered Delight: Irresistible, Creamy, Must-Try Dessert!

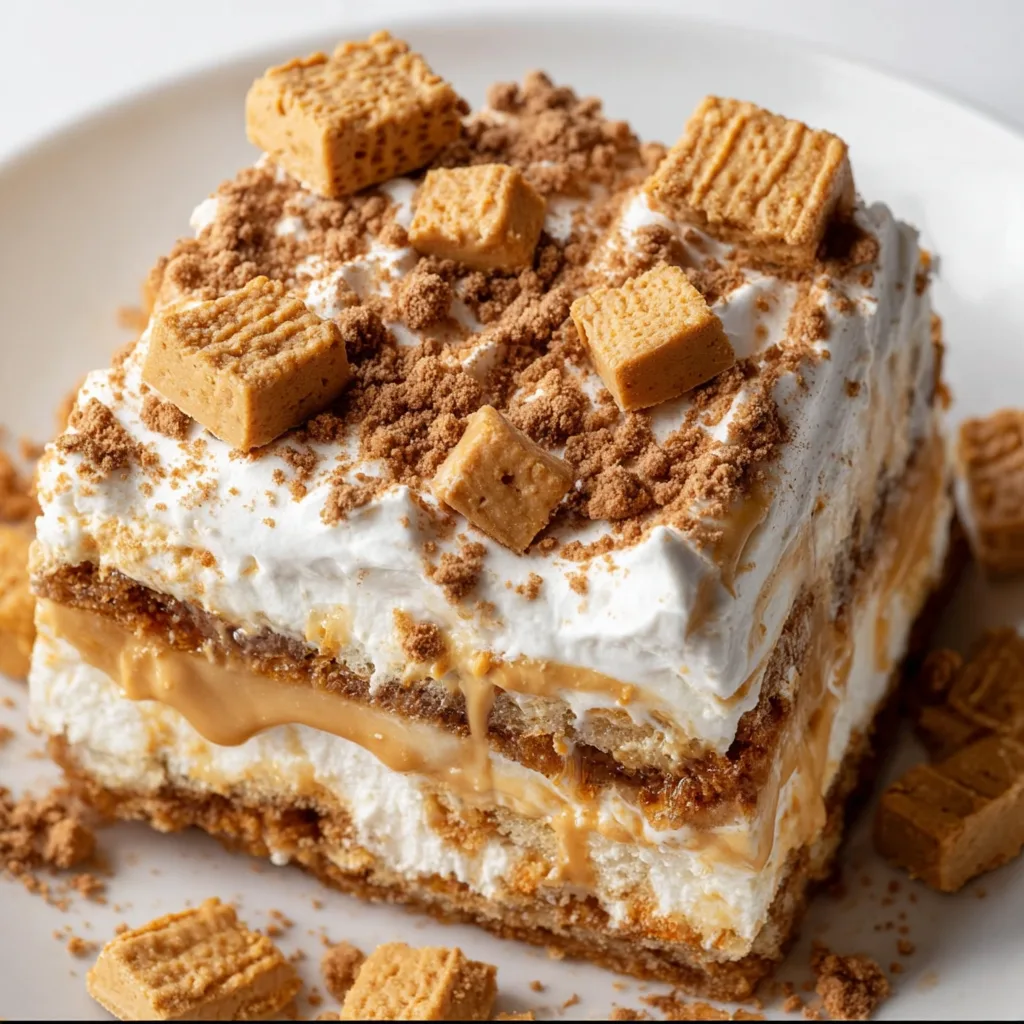
    Peanut Butter Layered Delight has been my saving grace for countless family gatherings and potlucks. There’s something magical about those creamy layers of peanut butter, cream cheese, and chocolate pudding that makes everyone’s eyes light up. The first time I made this for my sister’s birthday, the dish was scraped clean before I even had a chance to grab seconds! If you’re looking for a no-bake dessert that combines the perfect balance of sweet and salty with an irresistible texture, this dreamy layered creation is about to become your new signature dessert.

    Recipe

    Why You’ll Love This Peanut Butter Layered Delight

    A Perfect Make-Ahead Dessert

    There’s nothing quite like the feeling of having dessert completely prepared hours (or even a day) before your guests arrive. This Peanut Butter Layered Delight is my go-to when I need something impressive yet simple. The layers set beautifully in the refrigerator, and the flavors actually deepen and meld together as it chills. I’ve found that making it the night before not only saves me from last-minute kitchen chaos but results in a more flavorful dessert with perfectly defined layers that slice like a dream.

    Crowd-Pleasing Flavors Everyone Adores

    I’ve yet to meet someone who doesn’t swoon over the combination of peanut butter and chocolate. This dessert hits all the right notes with its buttery graham cracker crust, creamy peanut butter layer, silky chocolate pudding, and light whipped topping. The contrasting textures create such a satisfying bite that guests inevitably ask for the recipe. My nephew, who claims to “not like desserts,” somehow always manages to find room for a second helping of this treat. It’s that universally appealing!

    Essential Tips & Tricks

    Perfecting Your Layers

    The secret to those picture-perfect layers that make everyone reach for their phones? Patience and temperature. Make sure your cream cheese is properly softened—I leave mine out for at least an hour before mixing. When spreading each layer, work from the center outward with gentle, even pressure. I learned the hard way that rushing leads to muddy layers! Between each addition, pop the dish back in the refrigerator for 15-20 minutes to set. This extra step makes all the difference in creating those clean, distinct layers that make this Peanut Butter Layered Delight so visually stunning.

    Choosing Quality Ingredients

    Don’t underestimate the impact of using quality ingredients in a dessert with so few components. Opt for real cream cheese (not the spreadable kind) and natural peanut butter for the richest flavor. The difference between generic and name-brand chocolate pudding is surprisingly noticeable here—the better quality gives a deeper chocolate flavor that perfectly complements the peanut butter. For the whipped topping, I prefer making my own with heavy cream and a touch of powdered sugar, but a good quality store-bought version works beautifully if you’re short on time.

    Serving Ideas & Creative Variations

    Seasonal Adaptations

    The beauty of this Peanut Butter Layered Delight is how easily it can be dressed up for different occasions. For summer gatherings, I love adding a thin layer of sliced bananas between the peanut butter and pudding layers—it creates a nostalgic flavor reminiscent of childhood sandwiches. During the holidays, I sprinkle crushed peppermint candies on top or swap the regular Oreo crust for mint Oreos. Fall celebrations call for a drizzle of caramel sauce and a sprinkle of sea salt that elevates the entire dessert into something worthy of your Thanksgiving spread.

    Miniature Individual Servings

    Transform this classic dessert into elegant individual portions that eliminate the need for cutting and serving. Use clear plastic cups or small mason jars to create personal parfaits that showcase all those beautiful layers. This presentation is perfect for buffets or outdoor gatherings where guests can grab and go. I’ve found that making these individual portions allows for creative customization too—set up a small “toppings bar” with chopped peanuts, chocolate shavings, and fresh berries so everyone can personalize their dessert.

    Storage & Troubleshooting Guide

    Proper Storage for Maximum Freshness

    This Peanut Butter Layered Delight can be your best friend for busy weeks when properly stored. Keep it covered tightly with plastic wrap in the refrigerator, where it will maintain its peak freshness for up to 4 days. The graham cracker crust may soften slightly over time, but many of my friends actually prefer it this way! If you need to make it further in advance, you can freeze the entire dessert for up to a month—just thaw it overnight in the refrigerator before serving. I’ve found that slicing before freezing makes it easy to enjoy single portions whenever a craving strikes.

    Fixing Common Issues

    Even the most experienced bakers encounter challenges! If your peanut butter layer seems too stiff to spread, microwave it with the cream cheese for just 10-15 seconds to make it more workable without melting. For a pudding layer that’s too soft, add an extra tablespoon of cornstarch to help it set more firmly. If your whipped topping starts to weep or deflate after a day, simply refresh the dessert with a new layer before serving. Remember that slightly imperfect layers will still taste amazing—this dessert is wonderfully forgiving!

    Frequently Asked Questions

    Can I make Peanut Butter Layered Delight without dairy?

    Yes! Use dairy-free cream cheese, non-dairy whipped topping, and prepare the pudding with almond or oat milk. The texture might be slightly different, but the flavor remains delicious with these simple swaps.

    How far in advance can I prepare this dessert?

    You can make it up to 2 days ahead for optimal texture. The flavors actually improve overnight as they meld together, making this the perfect make-ahead dessert for busy hosts.

    Can I use crunchy peanut butter instead of creamy?

    Absolutely! Crunchy peanut butter adds wonderful texture contrast. You might need to add an extra tablespoon of powdered sugar to achieve the same smoothness in the peanut butter layer.

    Why did my chocolate pudding layer not set properly?

    Make sure you’re cooking the pudding according to package directions completely before adding it to your dessert. Cooling it slightly but not completely helps it spread evenly without mixing into other layers.

    Can I freeze individual portions of this dessert?

    Yes! Wrap individual slices tightly in plastic wrap then foil. Freeze for up to one month and thaw in the refrigerator for about 2 hours before serving.

    Final Thoughts

    This Peanut Butter Layered Delight has earned its place as my most-requested dessert for good reason. There’s something magical about the way these simple ingredients transform into something so much greater than the sum of their parts. I love watching people’s faces light up with their first bite—that moment of pure dessert bliss is why I bake in the first place. Whether you’re a seasoned baker or just starting out, this foolproof treat delivers impressive results every time. For more delicious inspiration, check out my Pinterest collection of no-bake favorites!

  • Delicious Cruffins with Cinnamon: Irresistibly Fluffy & Sweet!

    Delicious Cruffins with Cinnamon: Irresistibly Fluffy & Sweet!

    Delicious Cruffins with Cinnamon: Irresistibly Fluffy & Sweet!

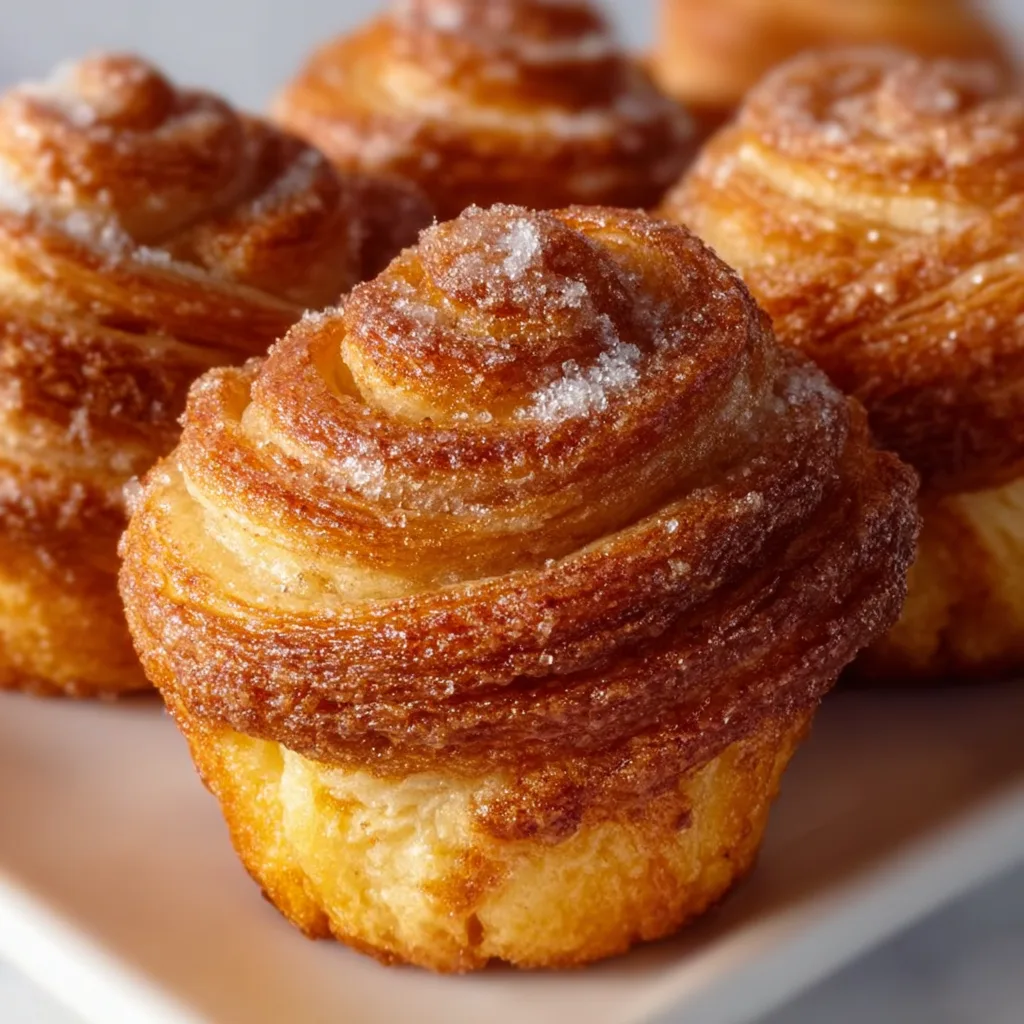
    Delicious Cruffins with Cinnamon have completely transformed my weekend baking routine! These heavenly hybrid pastries combine the buttery layers of a croissant with the shape and cinnamon-sugar coating of a muffin. The first time I pulled a batch from my oven, the aroma of warm cinnamon filled my kitchen and instantly transported me back to my grandmother’s bakery visits. There’s something magical about breaking into that first cruffin—hearing the delicate crackle of the flaky exterior while revealing the soft, swirled interior. If you’ve been enjoying my cinnamon roll cookies, these cruffins will absolutely steal your heart!

    Recipe

    Why You’ll Love These Delicious Cruffins with Cinnamon

    Perfect Balance of Textures

    The shatteringly crisp exterior gives way to pillowy-soft, buttery layers inside—it’s texture heaven in every bite! I still remember the first time I made these for my sister’s birthday brunch; everyone fell silent as they took their first bites, then erupted in delighted “mmms.” The laminated dough creates those distinct layers that pull apart so satisfyingly between your fingers. And when you add that warm cinnamon sugar coating that slightly caramelizes on the edges? Pure magic. The contrast between the crunchy, sugar-coated exterior and the tender interior is what makes these cruffins absolutely irresistible.

    Impressive Yet Achievable

    Don’t let their bakery-worthy appearance fool you—these cruffins are surprisingly doable at home! While they do require some patience during the folding and chilling process, the techniques are straightforward. I was intimidated the first time too, but breaking it down into manageable steps makes all the difference. The dough is forgiving, and even if your folds aren’t perfect, the result will still be delicious. Plus, the “wow factor” when you serve these beautiful spiral pastries makes any effort worthwhile. Your friends will think you’ve been taking professional pastry classes!

    Essential Tips & Tricks

    Mastering the Lamination Process

    The key to perfect cruffins lies in the cold butter and proper lamination technique. Keep everything chilled—I even put my rolling pin in the freezer for 15 minutes before starting! Work quickly when the dough is out of the refrigerator, and don’t skip the chilling time between folds. If the butter starts to soften or leak through the dough, immediately return it to the refrigerator. Those distinct layers happen when cold butter creates steam pockets during baking. For an extra-special touch, try infusing your butter with vanilla beans or cinnamon sugar before incorporating it into the dough.

    Perfecting the Cinnamon-Sugar Coating

    For that irresistible coating, timing is absolutely crucial. Brush the cruffins with melted butter immediately after they come out of the oven, then quickly roll in the cinnamon-sugar mixture while still hot. This ensures maximum adhesion and creates a slight caramelization that adds depth of flavor. I like to use a mixture of regular and turbinado sugar for added crunch and visual appeal. Don’t be shy with the cinnamon—I use a full tablespoon for that warm, aromatic flavor. For an extra dimension, add a pinch of cardamom or nutmeg to your cinnamon-sugar mix.

    Serving Ideas & Creative Variations

    Delectable Filling Options

    Transform your basic cruffins into extraordinary treats with unexpected fillings! My personal favorite is piping in a rich vanilla pastry cream after baking, but the possibilities are endless. Try lemon curd for a bright, tangy contrast to the cinnamon, or chocolate ganache for an indulgent twist. Apple butter creates a delightful fall variation, while maple cream cheese gives a nod to cinnamon roll cookies in cruffin form. For a sophisticated touch, try a coffee-infused pastry cream or dulce de leche. Just be sure to let the cruffins cool slightly before filling them.

    Perfect Pairings and Presentation

    Serve these delicious cruffins with cinnamon alongside a frothy cappuccino for the ultimate weekend indulgence. For special brunches, create a cruffin board with various fillings and toppings for guests to customize their own. A light dusting of powdered sugar just before serving adds an elegant touch. For dessert, try serving warm cruffins with a scoop of vanilla bean ice cream and a drizzle of caramel sauce. Stack them on a cake stand for an impressive centerpiece, or package individual cruffins in parchment paper tied with twine for delightful homemade gifts.

    Storage & Troubleshooting Guide

    Keeping Cruffins Fresh

    These pastries are at their absolute best when freshly baked, but proper storage can maintain their quality. Store unfilled cruffins at room temperature in an airtight container for up to 2 days. To refresh day-old cruffins, warm them in a 300°F oven for 5 minutes—this revives that wonderful crisp exterior! For longer storage, freeze completely cooled cruffins in a freezer bag for up to 1 month. Thaw at room temperature and then reheat as directed above. Filled cruffins should be refrigerated and consumed within 24 hours for optimal taste and texture.

    Troubleshooting Common Issues

    If your cruffins aren’t rising properly, the yeast might be old or the environment too cold—try creating a warm spot by turning your oven light on (not the oven itself). Butter leaking during baking usually means it got too warm during lamination—next time, be more vigilant about chilling between folds. Soggy bottoms can be prevented by using proper muffin tins and ensuring your oven is fully preheated. If your cruffins are browning too quickly, tent them with foil halfway through baking. Remember that even imperfect cruffins are delicious—embrace the homemade charm!

    Frequently Asked Questions

    Can I make the dough for these delicious cruffins with cinnamon ahead of time?

    Yes! Prepare the dough through the final folding, then wrap tightly and refrigerate overnight. Allow it to sit at room temperature for 15-20 minutes before shaping and proceeding with the recipe.

    Can I use store-bought puff pastry instead of making the dough from scratch?

    While it won’t have the exact same texture as traditional cruffins, you can use all-butter puff pastry in a pinch. Roll it out, sprinkle with cinnamon sugar, fold, cut, and twist into muffin tins.

    Why did my cruffins deflate after baking?

    This typically happens when the oven temperature fluctuates or when cruffins are removed too early. Ensure your oven is properly calibrated and that cruffins reach a golden brown color before removing.

    How do I know when my cruffins are properly proofed before baking?

    Properly proofed cruffins will have nearly doubled in size and feel light and puffy. When gently pressed with a fingertip, the dough should spring back slowly but not completely.

    Can I make mini cruffins instead of standard size?

    Absolutely! Use a mini muffin tin and reduce the baking time to 12-15 minutes. They make adorable bite-sized treats perfect for brunch gatherings or tea parties.

    Final Thoughts

    These Delicious Cruffins with Cinnamon have become my signature weekend baking project—the perfect balance of impressive yet achievable. There’s something truly magical about creating those beautiful swirled pastries in your own kitchen, filling the house with that intoxicating cinnamon aroma. Whether you’re baking them for a special brunch or simply treating yourself to something extraordinary, these cruffins deliver both visual drama and incredible flavor. I’d love to see your cruffin creations—tag me on Pinterest with your results!

  • Creamy Lemon Blueberry Cheesecake Bars That’ll Wow Your Taste Buds!

    Creamy Lemon Blueberry Cheesecake Bars That’ll Wow Your Taste Buds!

    Creamy Lemon Blueberry Cheesecake Bars That’ll Wow Your Taste Buds!

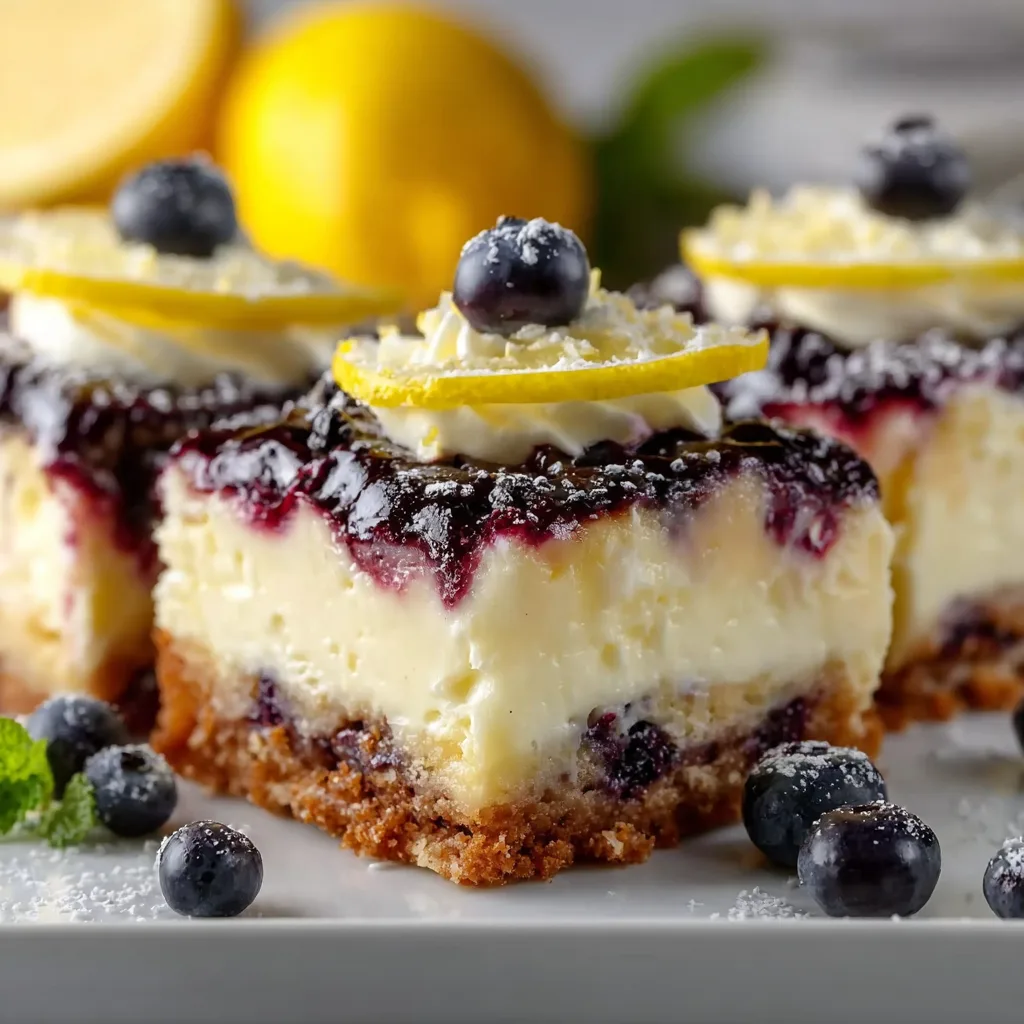
    Creamy Lemon Blueberry Cheesecake Bars are my absolute salvation during summer gatherings. The first time I made these, my sister’s eyes widened with that first bite—the perfect balance of tangy lemon and sweet blueberries against a buttery graham cracker crust had everyone reaching for seconds. There’s something magical about how the velvety cheesecake filling carries those bright citrus notes, while bursts of blueberries add pops of juicy sweetness. When life hands you lemons, don’t just make lemonade—transform them into these irresistible bars that’ll have your guests begging for the recipe, just like mine did at our backyard barbecue last July.

    Recipe

    Why You’ll Love This Creamy Lemon Blueberry Cheesecake Bars

    Perfect Balance of Flavors

    The vibrant tanginess of fresh lemon zest and juice cuts through the rich creaminess of the cheesecake filling, creating that perfect sweet-tart balance that makes your taste buds dance. I’m absolutely obsessed with how the blueberries add little bursts of sweetness that complement the lemon so beautifully. There’s something about this combination that feels like sunshine on a plate! The buttery graham cracker crust provides the perfect foundation—slightly sweet with a hint of cinnamon that grounds all those bright flavors. Every bite delivers multiple layers of flavor that work in perfect harmony.

    Make-Ahead Convenience

    One thing I adore about these bars is how incredibly convenient they are for entertaining. I can make them a day or two before my guests arrive, which means less stress and more time to enjoy the party! The flavors actually develop and intensify as they chill, making them even better the next day. Plus, they cut into perfect squares that look absolutely gorgeous on a serving platter. I’ve found they’re much less fussy than a traditional cheesecake—no water baths or worrying about cracks on the surface. Just mix, bake, chill, and slice!

    Essential Tips & Tricks

    Getting the Perfect Texture

    The secret to silky-smooth cheesecake bars is all in the temperature of your ingredients. I learned this the hard way after several lumpy batches! Always bring your cream cheese to room temperature before mixing—I give mine at least an hour on the counter. This ensures it blends perfectly with the other ingredients without forming those annoying little lumps. When adding the eggs, mix just until incorporated; overmixing introduces air that can cause cracks during baking. For the most vibrant lemon flavor, use both zest and juice—the oils in the zest contain incredible citrus essence that elevates these bars to bakery-quality status.

    Preventing Common Mistakes

    The number one mistake I see people make is overbaking these delicate bars. They should still have a slight jiggle in the center when you remove them from the oven—they’ll continue cooking from residual heat and then set perfectly as they cool. Another game-changer is letting them cool gradually; sudden temperature changes can cause cracking. I turn off the oven, prop the door open slightly, and let them cool for about 30 minutes before moving to room temperature. For clean cuts, chill completely (at least 4 hours, preferably overnight) and wipe your knife with warm water between slices.

    Serving Ideas & Creative Variations

    Beautiful Presentation Options

    Transform these bars into a showstopping dessert by serving them on a white platter scattered with fresh blueberries and thin lemon slices. For special occasions, I dust the tops with a light snowfall of powdered sugar just before serving—it looks absolutely magical against the purple-blue berries! Individual squares placed in cupcake liners make for easy grabbing at buffets. For an elegant touch, pipe small rosettes of whipped cream on each square and garnish with a tiny mint leaf. When I’m feeling extra fancy, I serve these alongside my Cinnamon Roll Cookies for a dessert spread that always impresses.

    Exciting Flavor Twists

    While the classic recipe is divine, I love experimenting with creative variations. Try swapping blueberries for raspberries or blackberries for a different berry experience. For a tropical twist, add a tablespoon of coconut extract to the filling and top with toasted coconut flakes. White chocolate lovers can fold 1/2 cup of white chocolate chips into the batter before baking. During fall, I sometimes replace the lemon with orange zest and juice, then add a teaspoon of pumpkin pie spice to the crust. For an adults-only version, add 2 tablespoons of limoncello to the filling—it adds incredible depth of flavor!

    Storage & Troubleshooting Guide

    Proper Storage Methods

    These cheesecake bars keep beautifully in the refrigerator for up to 5 days when stored properly. I place them in an airtight container with parchment paper between layers to prevent sticking. The flavor actually improves after the first day as the lemon notes mellow and blend with the creamy filling. For longer storage, these bars freeze exceptionally well! Wrap individual squares in plastic wrap, then aluminum foil, and freeze for up to 3 months. When a sudden craving hits, just thaw a square in the refrigerator for a few hours. I often make a double batch specifically to have emergency dessert ready for unexpected guests!

    Fixing Common Issues

    If your bars develop cracks, don’t panic! A simple blueberry compote drizzled over the top not only hides imperfections but adds an extra layer of flavor. For a too-soft filling, extend the refrigeration time—sometimes they just need a few more hours to set properly. If your crust turns out too crumbly, lightly mist it with water before rebaking for 5 minutes to help it bind. Discoloration around the blueberries is completely normal—the berries release juice during baking that creates beautiful purple swirls. If your bars are too tart, serve with a dollop of sweetened whipped cream to balance the flavors.

    Frequently Asked Questions

    Can I use frozen blueberries for Creamy Lemon Blueberry Cheesecake Bars?

    Yes! Don’t thaw them first—add them frozen directly to the batter. This prevents the juice from bleeding too much into the cheesecake filling and maintains those beautiful berry pockets throughout.

    How do I know when the cheesecake bars are fully baked?

    The edges should be set, but the center should still have a slight jiggle—like firm Jell-O. They’ll continue setting as they cool. Overbaking leads to dry, cracked bars.

    Can I make these bars without a food processor?

    Absolutely! Place graham crackers in a zip-top bag and crush with a rolling pin for the crust. For the filling, ensure your cream cheese is very soft and use a hand mixer instead.

    What’s the best way to cut clean squares?

    Chill completely (overnight is best), then use a sharp knife dipped in hot water and wiped clean between each cut. The heat helps slice through cleanly without dragging.

    Can I make these dairy-free?

    Yes, substitute dairy-free cream cheese and sour cream alternatives. The texture will be slightly different, but still delicious with all the lemon-blueberry flavor.

    Final Thoughts

    These Creamy Lemon Blueberry Cheesecake Bars have become my signature dessert for good reason—they strike that perfect balance between impressive and approachable. The contrast of tangy lemon, sweet blueberries, and rich cheesecake creates something truly magical that keeps everyone coming back for more. I love watching faces light up with that first bite, knowing I’ve created something special. Whether for casual backyard gatherings or elegant dinner parties, these bars never disappoint. Try them once, and I promise they’ll earn a permanent spot in your dessert rotation! Find more inspiration for your next baking adventure on Pinterest.

  • Tropical Mango Key Lime Cheesecake: Irresistible Summer Bliss!

    Tropical Mango Key Lime Cheesecake: Irresistible Summer Bliss!

    Tropical Mango Key Lime Cheesecake: Irresistible Summer Bliss!

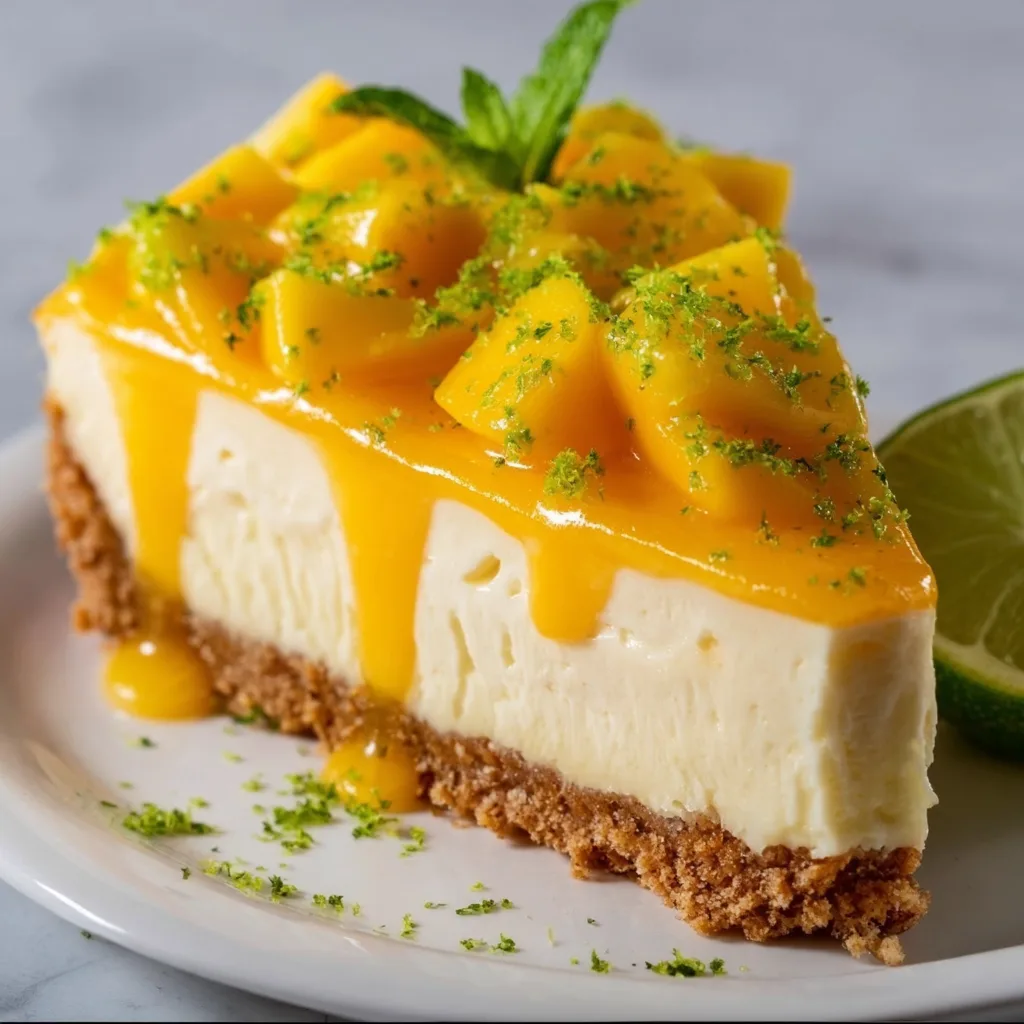
    This Tropical Mango Key Lime Cheesecake brings together two of my favorite flavors in one irresistible dessert. The tangy key lime filling nestled against sweet, juicy mango creates a vacation-worthy indulgence that transports me straight to a beachside cabana with every bite. I first created this recipe during a particularly dreary winter weekend when I needed something bright to lift my spirits. The vibrant colors and tropical flavors were exactly the mood-booster I needed! If you’re craving a taste of paradise, this creamy, dreamy cheesecake delivers all the sunshine vibes, no plane ticket required. It’s like summer in dessert form.

    Recipe

    Why You’ll Love This Tropical Mango Key Lime Cheesecake

    Perfect Balance of Flavors

    The magic of this Tropical Mango Key Lime Cheesecake lies in its perfect flavor harmony. The zippy key lime provides that mouth-puckering tang that cuts through the richness of the cream cheese, while the sweet mango adds tropical sweetness that balances everything beautifully. I’ve tested this recipe countless times to get that ideal sweet-tart ratio just right. The graham cracker crust adds a hint of honey-like sweetness and wonderful texture contrast against the silky filling. Every bite delivers that delicious tension between tangy and sweet that keeps your taste buds dancing.

    Make-Ahead Convenience

    One thing I absolutely adore about this Tropical Mango Key Lime Cheesecake is its make-ahead friendly nature. You can prepare it up to three days before your gathering, which is perfect when you’re hosting and want to minimize day-of stress. I often make mine the night before, letting those tropical flavors deepen and meld together overnight in the refrigerator. The cheesecake actually tastes better after it’s had time to chill completely, making it an ideal dessert for entertaining. Plus, the vibrant colors and tropical presentation never fail to impress guests!

    Essential Tips & Tricks

    Perfect Cheesecake Texture

    Achieving that silky-smooth texture is easier than you might think! Always start with room temperature ingredients—especially the cream cheese—to prevent lumps in your batter. I learned this the hard way after once trying to rush the process with cold cream cheese (never again!). Beat the cream cheese alone first until completely smooth before adding other ingredients. For the signature tropical mango key lime flavor, use fresh key lime juice if possible, though bottled works in a pinch. The gentle water bath method prevents cracks by maintaining even, gentle heat during baking. Just like with my No-Bake Peanut Butter Marshmallow Squares, patience is key to perfection.

    Mango Selection and Preparation

    The ripeness of your mangoes makes all the difference in this Tropical Mango Key Lime Cheesecake. Look for mangoes that yield slightly to gentle pressure and give off a sweet fragrance at the stem end. My favorite varieties for this recipe are Ataulfo (honey) or Kent mangoes for their smooth, fiber-free texture and intense sweetness. To prepare them, slice along either side of the flat pit, score the flesh in a grid pattern, then invert the skin to create perfect cubes. For the puree, blend until silky smooth and strain to remove any fibers. This extra step takes just minutes but ensures your cheesecake has that luxurious, velvety finish.

    Serving Ideas & Creative Variations

    Presentation Wow-Factors

    Transform your Tropical Mango Key Lime Cheesecake into a showstopping centerpiece with a few simple techniques. I love creating a decorative border of thinly sliced mango roses around the edge—they look complicated but only take minutes to arrange. A light dusting of lime zest adds beautiful color contrast against the yellow mango. For special occasions, I’ll add edible flowers like pansies or hibiscus for a tropical touch. Serve each slice with a small dollop of coconut whipped cream and a fresh mint sprig. The vibrant colors make this dessert perfect for summer gatherings, baby showers, or anytime you want to bring a taste of the tropics to your table.

    Flavor Twists

    Don’t be afraid to put your own spin on this Tropical Mango Key Lime Cheesecake with some creative variations. Try swapping the graham cracker crust for crushed coconut cookies or adding a tablespoon of finely minced crystallized ginger to the crust mixture for a warming zing. For a boozy adult version, fold 2 tablespoons of coconut rum into the filling or create a rum-spiked mango glaze. Passion fruit makes an incredible alternative to mango if you’re looking for even more tropical flair. I’ve even made a dairy-free version using coconut cream and vegan cream cheese that was surprisingly delicious. The tropical flavor profile is versatile enough to play with!

    Storage & Troubleshooting Guide

    Proper Storage Methods

    Keeping your Tropical Mango Key Lime Cheesecake fresh is all about proper refrigeration. Store it covered in the refrigerator for up to 5 days, though the crust may soften slightly after day 3. I recommend using a cake dome rather than plastic wrap, which can stick to the top and damage your beautiful presentation. If you need to freeze it, wrap individual slices tightly in plastic wrap, then aluminum foil, and freeze for up to 2 months. Thaw overnight in the refrigerator before serving. The mango topping is best added fresh after thawing if you’re freezing the base cheesecake, as the texture of frozen mango can become slightly watery upon thawing.

    Fixing Common Issues

    Even experienced bakers encounter challenges! If your cheesecake develops cracks on top, don’t worry—this is purely cosmetic and will be covered by your gorgeous mango topping anyway. To prevent this next time, ensure you’re using a proper water bath and cooling gradually. If your filling seems too runny, place it in the refrigerator for 15-20 minutes to firm up before pouring into the crust. For a weeping or watery mango topping, drain the puree through a fine-mesh sieve and cook it briefly with a teaspoon of cornstarch to thicken. Remember that cheesecake textures improve after proper chilling, so always plan for at least 6 hours of refrigeration.

    Frequently Asked Questions

    Can I use regular limes instead of key limes for my Tropical Mango Key Lime Cheesecake?

    Yes! Regular Persian limes work well, though they’re slightly less tart. Use the same amount of juice but reduce the zest by about 25% as Persian limes have a stronger zest flavor than key limes.

    How do I know when my cheesecake is properly baked?

    The edges should be set but the center should still have a slight jiggle—like firm Jell-O. It will continue to set as it cools. Overbaking causes cracks and a dry texture.

    Can this cheesecake be made without a springform pan?

    While a springform pan is ideal, you can use a deep pie dish lined with parchment. You won’t be able to remove it completely, but it will still taste delicious served directly from the dish.

    Is there a shortcut version of this recipe?

    For a quick version, make a no-bake cheesecake with cream cheese, condensed milk, and key lime juice, then top with store-bought mango puree or nectar mixed with gelatin.

    How far in advance can I make this for a party?

    This cheesecake is perfect for planning ahead! You can make it up to 3 days before your event. The flavors actually improve after 24 hours of chilling.

    Final Thoughts

    This Tropical Mango Key Lime Cheesecake has become my go-to dessert whenever I want to bring a little sunshine to the table. The bright citrus tang balanced with sweet, tropical mango creates a flavor vacation in every bite. I’ve shared this recipe at countless summer gatherings, and it never fails to transport everyone to a mental beach vacation. Don’t forget to check out more of my tropical-inspired desserts on Pinterest for additional ideas! Whether you’re celebrating something special or simply treating yourself, this cheesecake delivers a perfect slice of paradise.

  • Strawberry Crunch Cheesecake: Irresistible Delight You Must Try Today!

    Strawberry Crunch Cheesecake: Irresistible Delight You Must Try Today!

    Strawberry Crunch Cheesecake: Irresistible Delight You Must Try Today!

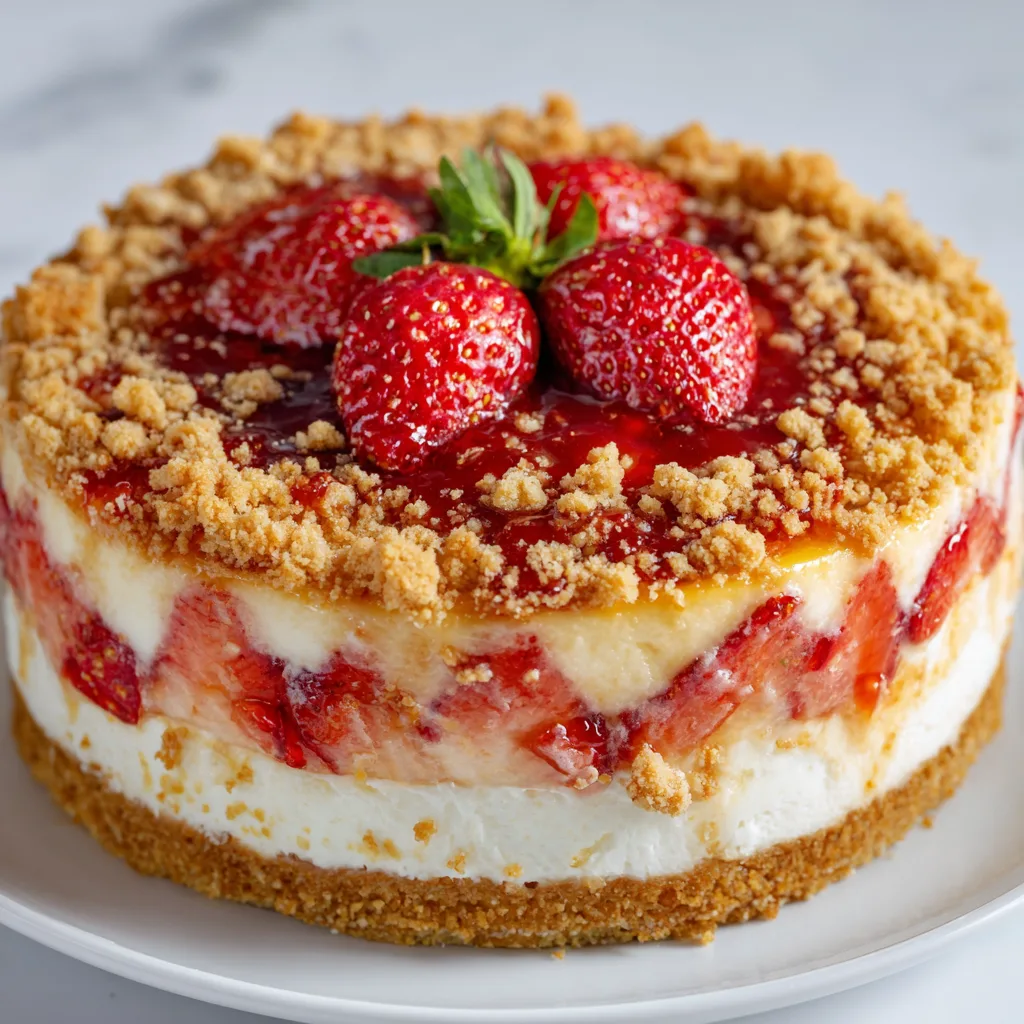
    Strawberry Crunch Cheesecake brings together the nostalgic flavors of those beloved Good Humor strawberry shortcake ice cream bars and transforms them into a decadent dessert masterpiece. The first time I made this for my family, the kitchen filled with that unmistakable sweet strawberry aroma, and I knew I had created something special. The contrast between the silky cream cheese filling and that iconic crunchy topping creates a texture symphony that’s simply irresistible. If you love the combination of creamy and crunchy like I do, you’ll also adore these Salted Caramel Pretzel Cheesecake Balls for a similar textural experience.

    Recipe

    Why You’ll Love This Strawberry Crunch Cheesecake

    Perfect Balance of Flavors and Textures

    There’s something magical about the way the tangy cream cheese filling complements the sweet strawberry elements in this cheesecake. Every bite delivers a perfect balance of rich creaminess against that signature crunchy topping that shatters delightfully with each forkful. I’ve found that letting the cheesecake chill overnight intensifies the strawberry flavor, allowing it to fully permeate the filling. The buttery graham cracker crust provides a sturdy foundation, while the strawberry shortcake crumbles on top create that nostalgic ice cream bar experience we all remember from childhood summers.

    Make-Ahead Convenience

    One of my favorite things about this Strawberry Crunch Cheesecake is how beautifully it fits into a busy schedule. You can prepare it up to three days in advance, making it perfect for entertaining without day-of stress. The flavors actually improve with time as they meld together in the refrigerator. I often make this on Friday afternoon for Sunday gatherings, which gives me one less thing to worry about on the day of the event. The stunning presentation belies how simple it is to prepare—your guests will think you spent hours in the kitchen when the refrigerator did most of the work!

    Essential Tips & Tricks

    Achieving the Perfect Cheesecake Texture

    The secret to a crack-free, velvety Strawberry Crunch Cheesecake lies in a few critical techniques. Always ensure your ingredients are at room temperature before mixing—cold cream cheese will create lumps that never fully incorporate. I learned this the hard way during my first attempt! Use a water bath to maintain gentle, even heat during baking; simply wrap your springform pan in foil and place it in a larger pan with hot water. Finally, resist the urge to open the oven door while baking, and always allow the cheesecake to cool gradually to prevent cracks and sinking.

    Creating That Signature Crunch Topping

    The iconic crunch topping is what transforms this from an ordinary cheesecake into a nostalgic dessert experience. To achieve that perfect strawberry shortcake texture, crush Golden Oreos or vanilla sandwich cookies until coarsely ground—not too fine! Mix with freeze-dried strawberries (never fresh, as they’ll make the topping soggy) and melted butter until just combined. The color should be a beautiful marbled pink and golden hue. Apply the topping only after the cheesecake has completely chilled, pressing gently to adhere without crushing the creamy surface. This ensures maximum crunch that stays crisp even after refrigeration.

    Serving Ideas & Creative Variations

    Presentation Techniques

    Elevate your Strawberry Crunch Cheesecake with thoughtful presentation touches that make it even more irresistible. Add a fresh strawberry fan to each slice just before serving—the juicy berries provide a beautiful color contrast and fresh flavor pop. For special occasions, I love piping small rosettes of whipped cream around the perimeter and dusting them with extra crunch topping. Serve on chilled plates to maintain the perfect texture, and consider a light drizzle of strawberry sauce in a decorative pattern on the plate. The vibrant red against the white cheesecake creates a stunning visual impact that guests can’t resist.

    Flavor Twists and Adaptations

    While the classic Strawberry Crunch Cheesecake is perfect as is, I’ve experimented with several delicious variations over the years. Try swirling strawberry preserves through the filling before baking for a marbled effect that’s both beautiful and flavorful. For chocolate lovers, add a thin layer of ganache between the crust and filling, reminiscent of those chocolate-dipped ice cream bars. You could also explore different fruit combinations—blueberry crunch or raspberry brownie variations work beautifully with the same technique. For a holiday twist, incorporate crushed peppermint candies into the topping during winter months.

    Storage & Troubleshooting Guide

    Proper Storage Methods

    To maintain the perfect texture contrast in your Strawberry Crunch Cheesecake, proper storage is essential. Always refrigerate the cheesecake uncovered until completely chilled (about 4 hours), then cover with plastic wrap or place in an airtight container. This prevents condensation from making the topping soggy. The cheesecake will stay fresh for up to 5 days in the refrigerator. For longer storage, you can freeze individual slices—wrap each piece tightly in plastic wrap, then foil, and freeze for up to 2 months. Allow frozen slices to thaw in the refrigerator overnight for the best texture restoration.

    Fixing Common Issues

    Even experienced bakers encounter challenges with cheesecakes, but most problems have simple solutions. If your cheesecake develops cracks, don’t panic! Simply cover with the strawberry crunch topping, which will hide imperfections beautifully. For a sunken center, which typically happens from overmixing or rapid temperature changes, create a slight well in the middle and fill with fresh strawberry compote. If your crust becomes soggy, try blind-baking it for 10 minutes at 350°F before adding the filling next time. And if your topping loses its crunch after storage, simply make a small batch of fresh crumble to sprinkle on just before serving.

    Frequently Asked Questions

    Can I use fresh strawberries in the crunch topping?

    No, fresh strawberries will make the topping soggy. Always use freeze-dried strawberries, which provide intense flavor and maintain that signature crunch even after refrigeration.

    How do I prevent my Strawberry Crunch Cheesecake from cracking?

    Bake in a water bath, avoid overmixing the filling, and allow the cheesecake to cool gradually in the turned-off oven with the door slightly ajar before refrigerating.

    Can I make this cheesecake without a springform pan?

    Yes, though a springform pan is ideal. Alternatively, line a regular cake pan with parchment paper with overhanging edges to help lift the chilled cheesecake out carefully.

    Is this recipe suitable for beginners?

    Absolutely! While cheesecakes have a reputation for being tricky, this Strawberry Crunch Cheesecake is forgiving, and the crumb topping hides any imperfections beautifully.

    Can I make a mini version of this recipe?

    Yes! Use a muffin tin lined with paper liners and reduce the baking time to about 20-25 minutes. The mini versions make adorable individual servings.

    Final Thoughts

    This Strawberry Crunch Cheesecake has become my signature dessert for good reason—it combines nostalgic flavors with elegant presentation in a way that makes everyone feel special. The contrast between the silky filling and that irresistible crunchy topping creates something truly magical that transcends a simple dessert. I hope you’ll try this recipe and create your own sweet memories around the table. For more dessert inspiration, be sure to follow us on Pinterest where we share new creations weekly!