Category: Desserts

Sweet and easy dessert recipes for every craving. Simple treats, rich flavors, and quick ideas that make any moment feel special.

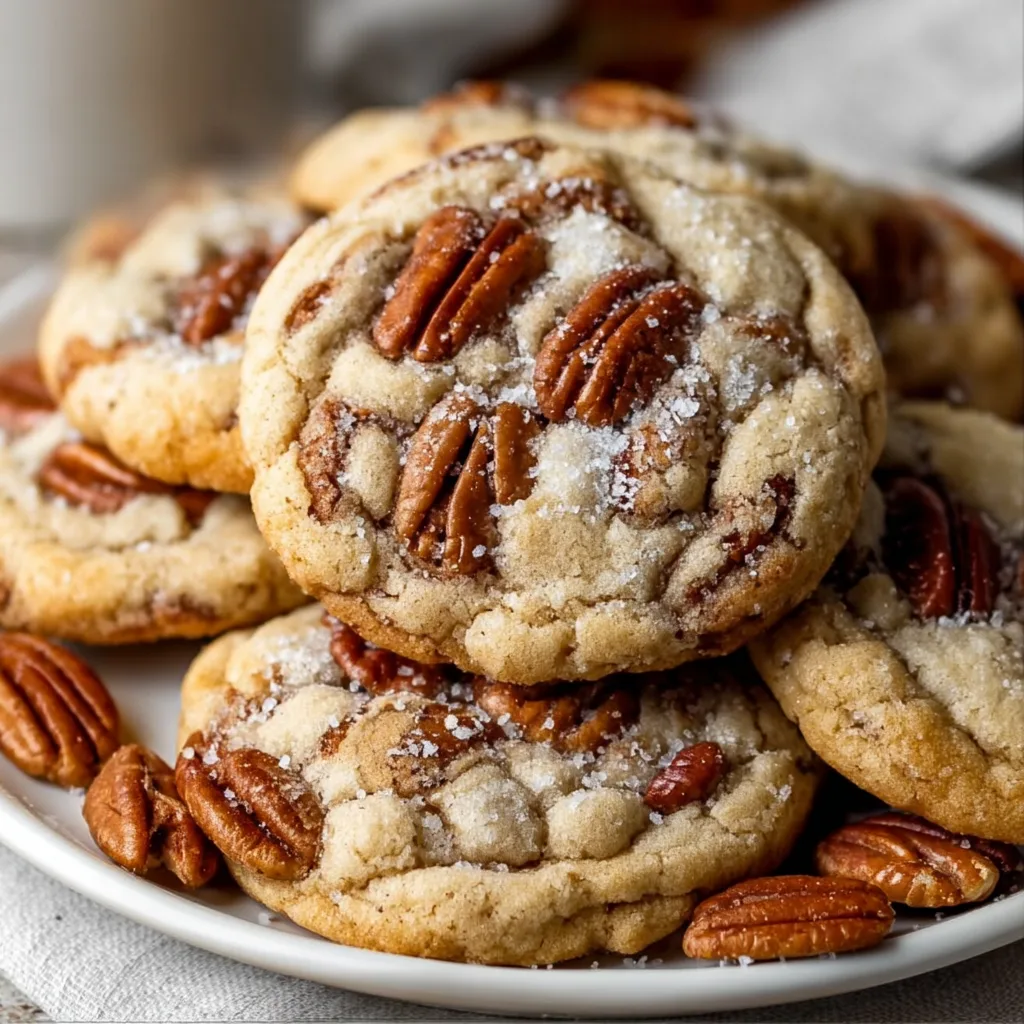
  • Butter Pecan Cookies: Irresistibly Crunchy, Melt-in-Your-Mouth Delight!

    Butter Pecan Cookies: Irresistibly Crunchy, Melt-in-Your-Mouth Delight!

    Butter Pecan Cookies: Irresistibly Crunchy, Melt-in-Your-Mouth Delight!

    Butter pecan cookies are the perfect balance of sweet, salty, and nutty—a trifecta of flavors that never disappoints. I discovered these gems during a holiday baking marathon with my sister, and they’ve been my go-to ever since. The rich, toasted pecans create little pockets of buttery crunch that make these cookies absolutely irresistible. There’s something magical about the aroma that fills your kitchen as they bake—warm butter, vanilla, and toasty nuts dancing together. If you’re looking for a cookie that feels like a warm hug, these butter pecan cookies are exactly what you need.

    Recipe

    Why You’ll Love These Butter Pecan Cookies

    Perfect Texture Combination

    These butter pecan cookies offer that dream-worthy texture that’s crisp around the edges yet tender in the center. The secret lies in browning the butter first, which adds a nutty depth that regular butter simply can’t match. I love how the toasted pecans provide little bursts of crunch throughout each bite. When you sink your teeth into one of these cookies, you’ll experience that perfect resistance before it gives way to a soft, buttery middle. The contrast between the caramelized exterior and the melt-in-your-mouth interior is what makes these cookies truly special.

    Make-Ahead Convenience

    One of the best features of these butter pecan cookies is their incredible versatility when it comes to preparation. The dough can be made up to 3 days ahead and stored in the refrigerator, ready whenever your cookie craving strikes. I often make a double batch and freeze half the dough in pre-portioned balls—instant cookies whenever unexpected guests arrive! The flavor actually deepens as the dough rests, allowing the vanilla and brown sugar notes to fully develop. This make-ahead quality has saved me countless times when I needed a quick dessert for last-minute gatherings.

    Essential Tips & Tricks

    Toasting Pecans Properly

    Properly toasted pecans make all the difference in these cookies. I learned this the hard way after burning a batch (the kitchen smelled like charcoal for days). For perfect results, spread your chopped pecans in a single layer on a baking sheet and toast at 350°F for 8-10 minutes, stirring halfway through. You’ll know they’re ready when they become fragrant and darken slightly. Let them cool completely before adding to your dough—hot nuts can melt your butter and affect the cookie texture. This simple step elevates these butter pecan cookies from good to absolutely unforgettable.

    Chilling for Perfect Shape

    Don’t skip the dough chilling step! I once rushed through this process for a bake sale and ended up with flat, spread-out cookies instead of the thick, chewy ones everyone loves. Chilling the dough for at least 30 minutes (or ideally 2 hours) allows the flour to fully hydrate and the fats to solidify. This prevents excessive spreading during baking and results in cookies with perfect height and texture. If you’re really short on time, pop the shaped dough balls in the freezer for 15 minutes before baking your butter pecan cookies.

    Serving Ideas & Creative Variations

    Elevated Dessert Pairings

    These butter pecan cookies shine when paired with complementary flavors. Serve them alongside a scoop of vanilla bean ice cream for a simple yet sophisticated dessert. The warm cookie against the cold, creamy ice cream creates a delightful temperature contrast. For dinner parties, I arrange them on a wooden board with fresh berries and a drizzle of caramel sauce. Coffee and tea enthusiasts will appreciate how the nutty notes in these cookies enhance their favorite brews. For an extra special touch, sandwich two cookies with maple buttercream for an elevated treat.

    Seasonal Adaptations

    The versatile butter pecan cookie base welcomes seasonal variations. In fall, I add a teaspoon of pumpkin pie spice and a handful of dried cranberries for a harvest-inspired treat. Winter holidays call for white chocolate chips and a touch of orange zest—the bright citrus cuts through the richness beautifully. Spring cookies benefit from a light lemon glaze, while summer versions are wonderful with a handful of toffee bits. My personal favorite adaptation is adding a tablespoon of bourbon to the dough and serving alongside homemade bread pudding for a truly decadent experience.

    Storage & Troubleshooting Guide

    Keeping Cookies Fresh

    To maintain the perfect texture of your butter pecan cookies, proper storage is essential. Once completely cooled, store them in an airtight container at room temperature with a slice of bread to maintain moisture. They’ll stay fresh for up to 5 days this way. For longer storage, freeze baked cookies in a single layer, then transfer to a freezer bag once solid. They’ll keep for up to 3 months! When ready to enjoy, thaw at room temperature for about 30 minutes. To refresh slightly stale cookies, warm them in a 300°F oven for 3-4 minutes—they’ll taste almost freshly baked.

    Fixing Common Problems

    Even experienced bakers encounter issues sometimes! If your butter pecan cookies spread too much, your butter was likely too warm or you used too little flour. The fix? Chill the dough longer next time, or add an extra tablespoon of flour to the recipe. For cookies that don’t spread enough, try flattening the dough balls slightly before baking. If your pecans taste bitter, they were likely over-toasted—next time, watch them carefully and remove from the oven at the first sign of fragrance. And for cookies that brown too quickly on the bottom, try using parchment paper and moving the rack up one position in your oven.

    Frequently Asked Questions

    Can I use salted butter for butter pecan cookies?

    Yes, you can use salted butter! Simply omit the additional salt in the recipe. The slight saltiness actually enhances the nutty flavor of the pecans for a more complex taste profile.

    How do I know when my cookies are perfectly baked?

    Look for golden brown edges while the centers still appear slightly underdone. They’ll continue cooking on the hot baking sheet after removal from the oven, resulting in perfectly chewy centers.

    Can I substitute walnuts for pecans?

    Absolutely! Walnuts work beautifully, though they have a slightly different flavor profile. Toast them just as you would the pecans for the best flavor development.

    Why did my cookies turn out hard?

    Over-baking is the most common culprit. Try reducing your bake time by 1-2 minutes, or your oven temperature might be running hot—consider using an oven thermometer to check.

    Can I make these butter pecan cookies gluten-free?

    Yes! Replace all-purpose flour with a 1:1 gluten-free baking blend. Add 1/4 teaspoon xanthan gum if your blend doesn’t include it for the best texture.

    Final Thoughts

    These butter pecan cookies have become my signature dessert for good reason—they’re simple yet sophisticated, familiar yet special. The combination of browned butter, toasty pecans, and warm spices creates something truly magical that appeals to everyone from kids to grandparents. I love watching people’s faces light up with that first bite, when all the flavors come together in perfect harmony. Whether you’re baking for a special occasion or just because it’s Tuesday, these cookies deliver comfort and joy in every batch. Find more delicious recipes on Pinterest.
  • Churro Cruffins: Irresistible Cinnamon Sugar Treats Bursting with Flavor

    Churro Cruffins: Irresistible Cinnamon Sugar Treats Bursting with Flavor

    Churro Cruffins: Irresistible Cinnamon Sugar Treats Bursting with Flavor

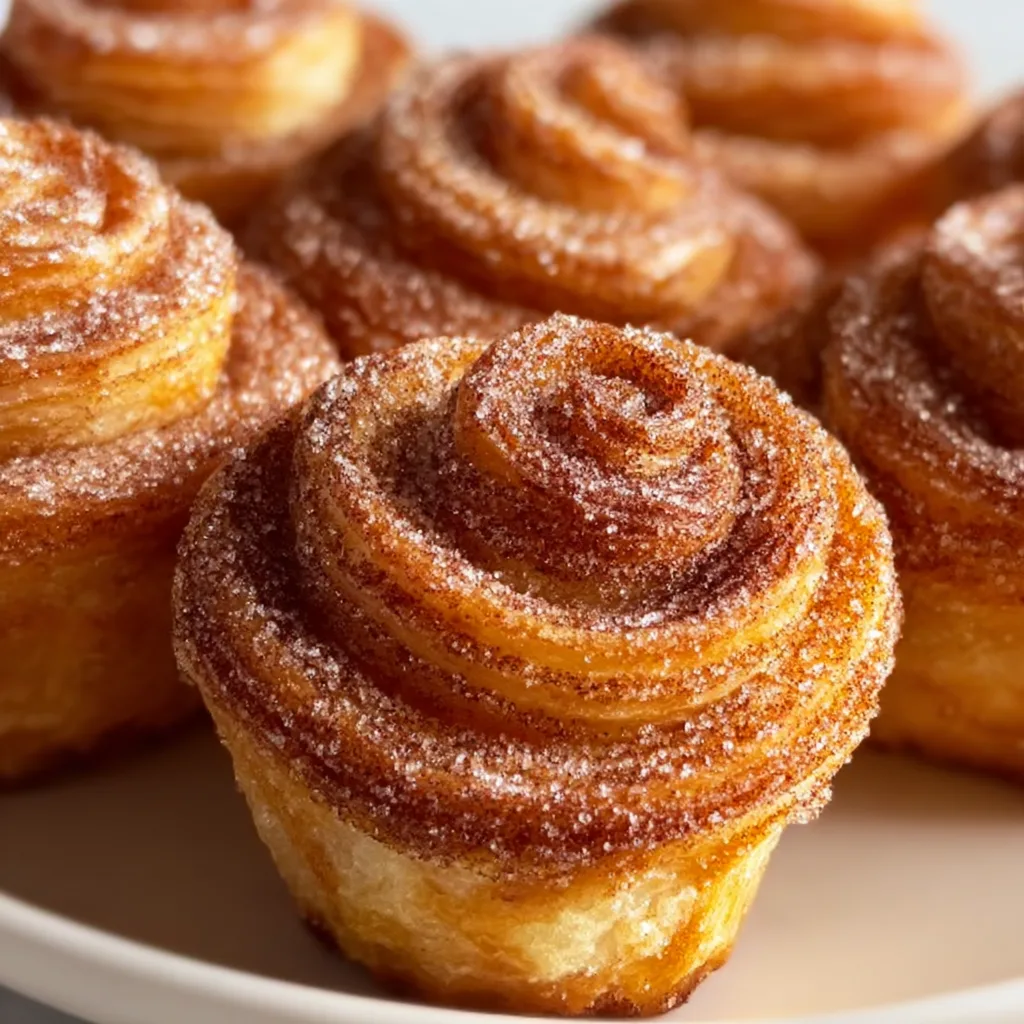
    Churro Cruffins Cinnamon Sugar Treats are what happens when the buttery layers of a croissant meet the sugary, spiced charm of a churro! I first stumbled upon this magical hybrid at a tiny bakery tucked away in my neighborhood, and I’ve been obsessed ever since. There’s something irresistibly comforting about biting through that crispy, sugar-coated exterior into the soft, flaky interior. The warm aroma of cinnamon that fills your kitchen is worth the effort alone. Whether you’re hosting brunch or simply craving something sweet, these delicious cruffins with cinnamon will quickly become your new favorite indulgence.

    Recipe

    Why You’ll Love These Churro Cruffins Cinnamon Sugar Treats

    Perfect Balance of Textures

    What makes these churro cruffins truly special is the incredible contrast between textures. The outside develops this gorgeous caramelized crunch from the cinnamon sugar coating, while the inside stays airy and tender with distinct buttery layers. I remember watching my niece take her first bite – her eyes widened with pure delight as the crispy exterior gave way to that pillowy center. The beauty of these treats is how they manage to capture both worlds: the satisfying crackle of a churro’s exterior and the delicate, pull-apart layers of a perfect croissant. It’s truly the best of both pastry worlds!

    Make-Ahead Friendly

    One of my favorite things about these churro cruffins cinnamon sugar treats is how flexible they are for busy schedules. The dough can be prepared the night before and left to rise slowly in the refrigerator, developing even more flavor overnight. I often prep everything before bed when hosting weekend guests, which means I can simply roll, shape, and bake in the morning. Nothing beats greeting sleepy-eyed visitors with the intoxicating scent of cinnamon and butter! The prep-ahead capability makes these impressive pastries surprisingly stress-free for special breakfasts or brunches when you’d rather be socializing than stuck in the kitchen.

    Essential Tips & Tricks

    Mastering the Lamination Process

    The key to perfect churro cruffins lies in the lamination technique – those beautiful, distinct layers that make each bite so special. Keep your butter cold but pliable; too hard and it will break through the dough, too soft and it will melt into it. I learned this lesson the hard way during a summer baking session when my kitchen was uncomfortably warm! Work quickly and return the dough to the refrigerator whenever it starts feeling too soft. Each fold creates more layers, so be patient with this process. Remember that properly laminated dough should show distinct streaks of butter – this is what creates those gorgeous heavenly chocolate banana split cupcakes-worthy layers that make cruffins so special.

    The Perfect Cinnamon Sugar Coating

    The signature element of churro cruffins cinnamon sugar treats is that irresistible spiced coating. For the best flavor balance, I recommend using a mixture of granulated and brown sugars with a generous amount of cinnamon. The brown sugar adds depth and a subtle molasses note that perfectly complements the buttery pastry. Apply the coating while the cruffins are still slightly warm – not hot enough to melt the sugar completely, but warm enough for it to adhere properly. I like to gently toss them in the mixture rather than just sprinkling it on top, ensuring every nook and cranny gets that delightful churro-inspired coating that makes these treats so craveable.

    Serving Ideas & Creative Variations

    Perfect Pairings

    These churro cruffins cinnamon sugar treats shine brightest when paired with the right accompaniments. Serve them alongside a rich chocolate dipping sauce for an elevated churro experience that will transport you straight to a Spanish café. For breakfast, I love them with a strong cup of coffee or chai tea to balance the sweetness. When hosting, I create a little brunch station with fresh fruit, whipped cream, and these cruffins as the star. The contrast of tart berries against the sweet, spiced pastry is absolutely divine! For an extra special touch, warm them slightly before serving – about 10 seconds in the microwave or a few minutes in a low oven brings back that fresh-baked easy wisconsin apple kringle pastry magic.

    Flavor Twists and Add-Ins

    While classic churro cruffins cinnamon sugar treats are perfect on their own, there are endless ways to make them your own. Try adding orange zest to the sugar coating for a bright, citrusy note that cuts through the richness. My personal favorite variation includes a touch of cardamom along with the cinnamon – it adds an unexpected aromatic dimension that guests always ask about. For a decadent twist, fill the center with dulce de leche or chocolate ganache before baking. You can also experiment with different spices like nutmeg, ginger, or even a pinch of cayenne for a subtle heat that plays beautifully against the sweet coating. These variations keep the basic recipe exciting all year round.

    Storage & Troubleshooting Guide

    Keeping Them Fresh

    Churro cruffins cinnamon sugar treats are at their absolute best when freshly baked, but proper storage can help maintain their quality. If you plan to enjoy them within 24 hours, store at room temperature in an airtight container lined with paper towels to absorb excess moisture. For longer storage, freeze them without the cinnamon sugar coating – simply reheat in a 300°F oven for 5-7 minutes, then apply fresh coating. I’ve found that microwaving frozen cruffins for just 15-20 seconds followed by a few minutes in a toaster oven gives them that nearly-fresh-baked texture we all crave. The sugar coating may lose some crispness over time, but the flavor remains delightful.

    Troubleshooting Common Issues

    If your churro cruffins aren’t turning out perfectly, don’t worry – a few adjustments can help. When cruffins don’t rise properly, the most common culprit is temperature issues – either the butter melted into the dough or the environment was too cold for proper proofing. Give them ample time to rise in a slightly warm spot before baking. If the centers are doughy, they likely need a few more minutes in the oven. For cruffins that brown too quickly on the outside while staying raw inside, lower your oven temperature by 25°F and extend baking time. I once salvaged an underproofed batch by letting them rest longer before the final rise – patience truly is key when working with laminated dough!

    Frequently Asked Questions

    Can I make churro cruffins cinnamon sugar treats without a stand mixer?

    Absolutely! While a mixer makes the process easier, you can knead the dough by hand. The texture might be slightly different, but the buttery, cinnamon-sugar goodness will still shine through.

    How far in advance can I prepare the dough?

    The dough can be refrigerated for up to 24 hours before shaping and baking. This cold fermentation actually improves flavor development, making it perfect for planning ahead.

    Can I use pre-made puff pastry instead?

    Yes! While not traditional, store-bought puff pastry makes a quick shortcut. The texture will be different but still delicious – just roll, shape, bake, and coat with the cinnamon sugar mixture.

    My kitchen is very warm. Any tips for keeping the dough cold?

    Work in short intervals, returning the dough to the refrigerator for 15-20 minutes whenever it feels soft. Chilled tools (rolling pin, bowl, surface) also help maintain proper temperature.

    Can these be made gluten-free?

    With some adjustments, yes. Use a cup-for-cup gluten-free flour blend with xanthan gum, but expect a slightly different texture. The lamination process may be trickier with gluten-free dough.

    Final Thoughts

    These churro cruffins cinnamon sugar treats represent everything I love about baking – the way simple ingredients transform into something magical, the joy of sharing something homemade, and the smiles they inevitably bring to the table. There’s something deeply satisfying about creating these buttery, spiced treasures in your own kitchen. Whether you’re an experienced baker or trying laminated dough for the first time, the process is rewarding and the results are absolutely worth it. Don’t forget to share your creations on Pinterest – I’d love to see your take on these irresistible treats!

  • German Chocolate Pound Cake with Caramel Nut Glaze – Irresistible!

    German Chocolate Pound Cake with Caramel Nut Glaze – Irresistible!

    German Chocolate Pound Cake with Caramel Nut Glaze – Irresistible!

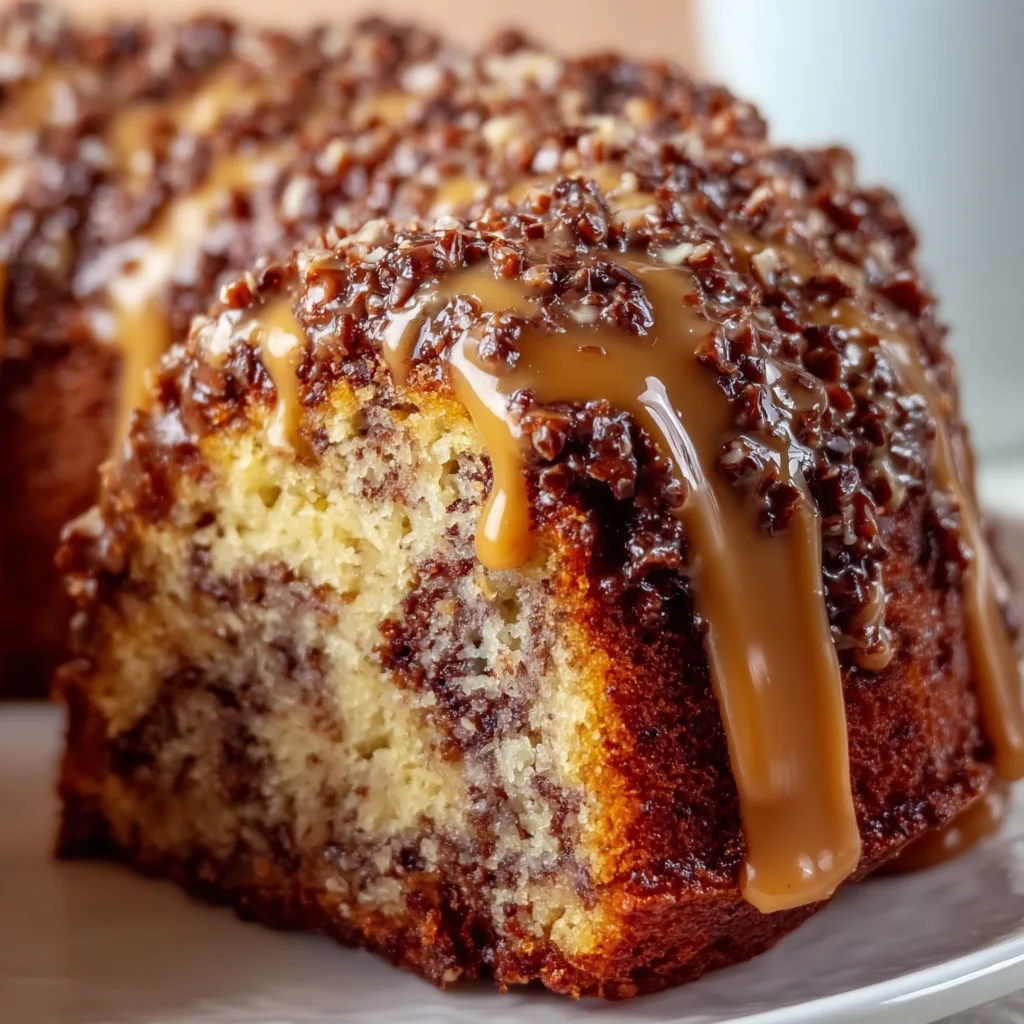
    The aroma of German Chocolate Pound Cake with caramel nut glaze wafting through my kitchen takes me back to Sunday afternoons at my grandmother’s house. This decadent dessert combines the rich tradition of German chocolate with the comforting density of pound cake, all crowned with a gooey caramel nut glaze that cascades down the sides in the most satisfying way. I’ve spent years perfecting this recipe, balancing the sweetness with just enough cocoa depth to create something truly special. If you’re looking for a showstopper that marries elegance with homey comfort, this cake delivers on all fronts.

    Recipe

    Why You’ll Love This German Chocolate Pound Cake with caramel nut glaze

    Perfect Texture & Flavor Combination

    The magic of this cake lies in its perfect balance of textures—dense, moist pound cake crumb paired with the buttery crunch of pecans and coconut in the glaze. The chocolate flavor is deep without being overwhelming, allowing the caramel notes to shine through. What makes this recipe special is the addition of buttermilk, which creates that signature tanginess that cuts through the richness. I discovered this trick during a baking mishap when I had no sour cream, and now I wouldn’t make it any other way! The slight acidity also helps activate the leavening agents for a better rise.

    Make-Ahead Convenience

    One of the best things about this German Chocolate Pound Cake with caramel nut glaze is how well it keeps—actually improving in flavor after a day! This makes it perfect for entertaining when you want to minimize day-of stress. I often bake the cake portion up to two days ahead, wrap it tightly, and then prepare the caramel nut glaze fresh before serving. The flavors meld beautifully as it sits, with the moisture from the glaze gently infusing the cake. For a dinner party last month, I made everything the day before and simply warmed the glaze slightly before pouring it over—everyone thought I’d spent the whole day baking!

    Essential Tips & Tricks

    Room Temperature Ingredients Matter

    Never underestimate the importance of room temperature ingredients when making this cake. Cold eggs, butter, or buttermilk can cause the batter to separate or bake unevenly. I learned this lesson the hard way after rushing through preparation once and ending up with a lumpy batter that never quite achieved that velvety texture we’re after. Set your ingredients out at least an hour before baking. For the caramel nut glaze, having room temperature butter helps it melt more evenly when combined with the brown sugar. If you’re short on time, place eggs in warm water for 5-10 minutes to quickly bring them to temperature.

    Proper Bundt Pan Preparation

    The heartbreak of a stuck cake is real! For this German Chocolate Pound Cake, thorough pan preparation is non-negotiable. I use a combination method that hasn’t failed me yet: butter every nook and cranny, then dust with cocoa powder instead of flour to maintain the cake’s rich color. Make sure to get into all the detailed crevices of your bundt pan. For extra insurance, let the cake cool for exactly 10 minutes before inverting—any sooner and it might fall apart, any later and it might stick. This technique works beautifully for other dense cakes too, like my Apple Cinnamon Kringle with Vanilla Glaze.

    Serving Ideas & Creative Variations

    Elegant Presentation Options

    Transform this already stunning cake into an unforgettable centerpiece with thoughtful presentation. For special occasions, I place it on a pedestal cake stand and surround the base with fresh seasonal berries or edible flowers. A light dusting of powdered sugar over the glazed cake creates a beautiful contrast against the dark caramel. For a more dramatic effect, drizzle additional chocolate ganache in thin lines across the top, letting it cascade down the sides. The combination of caramel nut glaze and chocolate drizzle creates a marbled effect that’s visually stunning and adds flavor complexity that guests always comment on.

    Flavor Twists Worth Trying

    While traditional German Chocolate Pound Cake with caramel nut glaze is divine, don’t be afraid to experiment with creative variations. Adding 1-2 tablespoons of espresso powder to the cake batter enhances the chocolate flavor without tasting like coffee. For a boozy twist, brush the warm cake with 2-3 tablespoons of dark rum or bourbon before adding the glaze—this pairs wonderfully with the caramel notes. You could also incorporate orange zest into the batter for a bright citrus contrast. For more dessert inspiration, check out my No-Bake German Chocolate Cheesecake which shares similar flavor profiles in a different format.

    Storage & Troubleshooting Guide

    Proper Storage Methods

    To maintain the perfect texture of your German Chocolate Pound Cake with caramel nut glaze, proper storage is essential. At room temperature, cover the cake with a dome or place it in an airtight container for up to 3 days. The caramel glaze acts as a natural preservative, helping the cake stay moist. For longer storage, refrigerate for up to a week, but always bring it to room temperature before serving to restore that melt-in-your-mouth texture. If you’ve made the cake in advance without the glaze, wrap it tightly in plastic wrap, then aluminum foil, and freeze for up to 3 months. Thaw completely before glazing.

    Fixing Common Issues

    Even experienced bakers encounter challenges! If your cake develops a dome top that makes it wobbly when inverted, simply level it with a serrated knife before glazing. For a glaze that’s too thin, add more powdered sugar a tablespoon at a time; if too thick, add warm cream in tiny increments. If your cake cracks, don’t panic—the caramel nut glaze will hide most imperfections. For stubborn stuck spots when unmolding, run a thin knife around the edges and gently tap the pan on the counter. If the glaze crystallizes while cooking, add a teaspoon of corn syrup to stabilize it.

    Frequently Asked Questions

    Can I make this German Chocolate Pound Cake with caramel nut glaze ahead of time?

    Absolutely! The cake actually improves after 24 hours as flavors meld. Make the cake up to 2 days ahead and store at room temperature. Add the glaze a few hours before serving for best results.

    Can I substitute buttermilk in this recipe?

    Yes. Mix 1 tablespoon of white vinegar or lemon juice with enough milk to equal 1 cup. Let stand for 5 minutes before using as a buttermilk substitute.

    Why did my caramel glaze crystallize?

    Crystallization usually happens from sugar crystals forming. Avoid stirring the caramel once it begins to boil, and add 1 teaspoon of corn syrup to prevent crystallization.

    Can this cake be frozen?

    Yes! Freeze the unglazed cake for up to 3 months, well-wrapped. Thaw completely at room temperature, then add fresh glaze before serving.

    Is Dutch-process cocoa necessary?

    Regular unsweetened cocoa works fine, but Dutch-process gives a deeper color and smoother flavor. The cake will be delicious either way!

    Final Thoughts

    This German Chocolate Pound Cake with caramel nut glaze has become my signature dessert for good reason. It strikes that perfect balance between impressive and approachable—something that looks like it took all day but actually comes together with minimal fuss. I love watching guests’ eyes light up at first sight, then close in bliss at first bite. The combination of rich chocolate cake with buttery caramel and crunchy nuts creates an experience that’s greater than the sum of its parts. I hope this recipe finds a special place in your baking repertoire and becomes the centerpiece of your own memorable gatherings. Find more of my favorite recipes on Pinterest.

  • White Russian Poke Cake Recipe That Will Blow Your Mind!

    White Russian Poke Cake Recipe That Will Blow Your Mind!

    White Russian Poke Cake Recipe That Will Blow Your Mind!

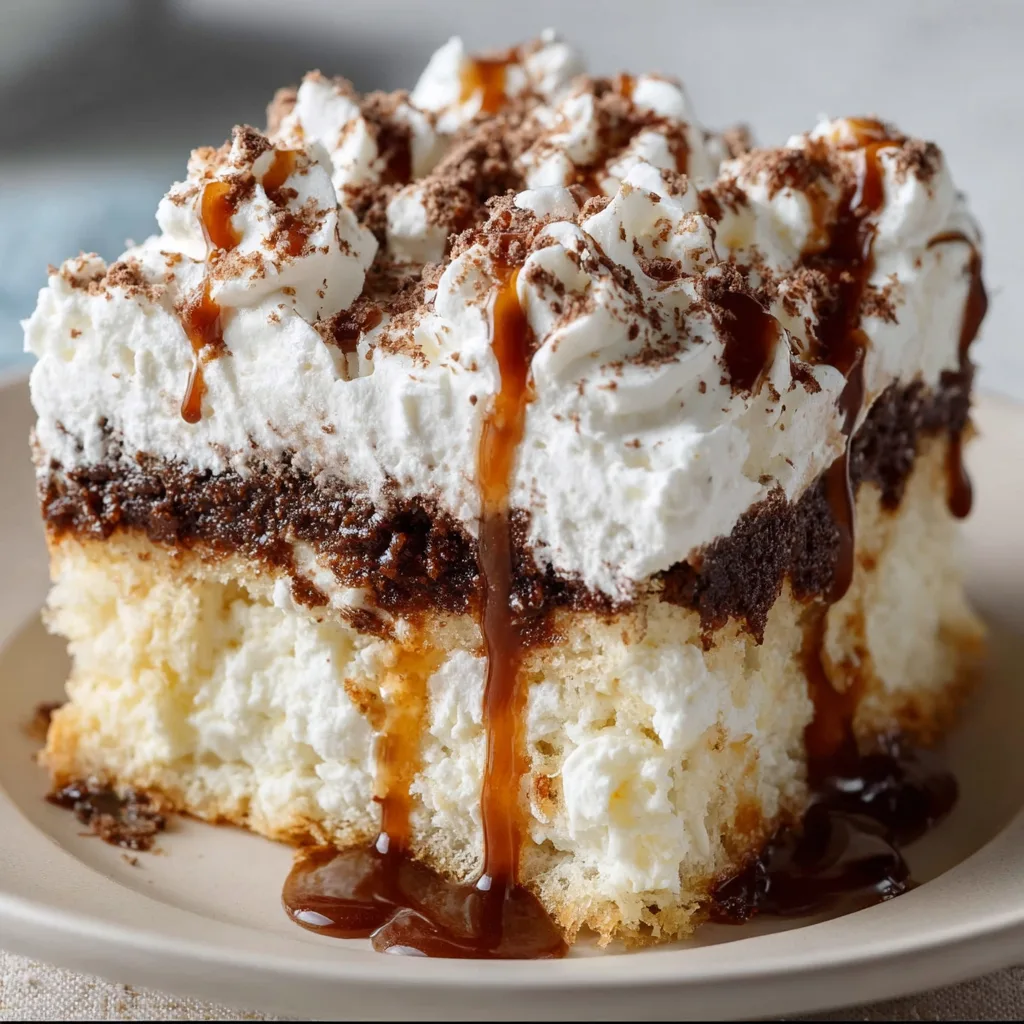
    This White Russian Poke Cake transforms everyone’s favorite cocktail into a decadent dessert that’s guaranteed to wow your guests. Imagine a moist vanilla cake infused with Kahlúa and vodka, then drenched in sweet cream and topped with a cloud of coffee-kissed whipped cream. I first made this for my sister’s 30th birthday, and now it’s requested at every family gathering! The combination of rich coffee liqueur and velvety cream creates a dessert that’s sophisticated yet comforting. Perfect for dinner parties or when you need a grown-up treat that feels a bit special. If you enjoy creative desserts, you’ll find plenty more inspiration at Recipes Darleen.

    Recipe

    Why You’ll Love This White Russian Poke Cake

    Perfect Balance of Flavors

    This White Russian Poke Cake captures the essence of the cocktail in every bite. The coffee liqueur adds depth without overwhelming, while the vodka provides that subtle kick that makes you raise an eyebrow in delight. What I adore most is how the sweet cream soaks into the poked holes, creating these pockets of moisture that keep the cake incredibly tender. It’s sophisticated enough for special occasions but simple enough that you’ll find yourself making it on random Tuesdays just because. The flavor develops overnight, making it perfect for make-ahead entertaining.

    Impressive Yet Effortless

    Don’t let the elegant appearance fool you—this cake is surprisingly easy to prepare. The beauty of poke cakes lies in their forgiving nature; even if your decorating skills aren’t bakery-level (mine certainly aren’t!), the cream topping hides any imperfections. I once made this while simultaneously helping my daughter with homework and taking a work call, and it still turned out gorgeous. The “wow” factor comes from the flavors and textures, not complicated techniques. Your guests will think you spent hours in the kitchen, and I won’t tell them it took just 20 minutes of active time.

    Essential Tips & Tricks

    Getting the Perfect Poke

    The secret to an exceptional White Russian Poke Cake lies in the poking technique. Use something round but not too wide—I find the handle of a wooden spoon creates ideal tunnels for the cream mixture. Space your pokes about 1 inch apart and push almost to the bottom without puncturing the base. Let the cake cool for about 15 minutes after baking—this is crucial! If it’s too hot, it’ll fall apart; too cool, and it won’t absorb properly. Take your time pouring the cream mixture, allowing it to seep into each hole completely before adding more. Patience here transforms a good cake into an unforgettable one.

    Liqueur Substitutions and Adjustments

    The beauty of this White Russian Poke Cake is its adaptability to your taste preferences and audience. For a family-friendly version, simply substitute the Kahlúa with strong coffee mixed with a splash of coffee extract and skip the vodka entirely. The flavor profile remains deliciously similar! If you’re serving adults but want a less boozy version, reduce the liqueur by half. For coffee lovers, try using espresso liqueur for a more pronounced flavor, similar to the rich notes in these Soft Chocolate Chip Cream Cheese Cookies. Remember that most (not all) alcohol cooks off, leaving just the flavor behind.

    Serving Ideas & Creative Variations

    Elegant Presentation Options

    Elevate your White Russian Poke Cake with thoughtful presentation touches that require minimal effort. A light dusting of cocoa powder or finely ground coffee creates a professional finish. For individual servings, try cutting neat squares and placing them on dessert plates with a small dollop of extra whipped cream and a chocolate-covered espresso bean. I served this at my book club, placing each portion on vintage dessert plates with sprigs of mint, and everyone took photos before diving in! For a stunning centerpiece, serve on a cake stand surrounded by chocolate-dipped strawberries or pirouette cookies.

    Seasonal and Flavor Twists

    This versatile White Russian Poke Cake welcomes creative variations that keep it exciting year-round. For a holiday version, add crushed peppermint to the topping and garnish with mini candy canes. Summer calls for a splash of Baileys instead of vodka, paired with fresh berries on top. Chocolate lovers can start with a chocolate cake base instead of vanilla—reminiscent of these decadent No-Bake German Chocolate Cheesecake flavors. My personal favorite twist is adding a thin layer of salted caramel between the cake and whipped cream, creating a sweet-salty contrast that makes taste buds dance.

    Storage & Troubleshooting Guide

    Optimal Storage Methods

    Your White Russian Poke Cake reaches peak flavor after resting in the refrigerator for at least 4 hours, but overnight is ideal. Store leftovers covered in the refrigerator for up to 4 days—though in my house, it never lasts that long! The cake actually improves on day two as the flavors meld together. For longer storage, you can freeze individual slices wrapped tightly in plastic wrap and then foil for up to 2 months. Just thaw overnight in the refrigerator before serving. I don’t recommend freezing the entire cake, as the texture of the topping may change slightly upon thawing.

    Fixing Common Issues

    Even experienced bakers encounter challenges! If your White Russian Poke Cake seems too dry, it likely didn’t absorb enough of the cream mixture. The fix is simple—make a small batch of additional cream mixture and carefully pour it over the problem areas. If your topping is too soft, place the cake in the freezer for 15-20 minutes before serving to firm it up. For a cake that’s too soggy, leave it uncovered in the refrigerator for an hour to allow some moisture to evaporate. Remember that poke cakes are meant to be moist, so embrace that beautiful texture rather than fighting against it!

    Frequently Asked Questions

    Can I make this White Russian Poke Cake alcohol-free?

    Absolutely! Substitute Kahlúa with strong coffee mixed with 1 teaspoon vanilla extract and a dash of coffee extract. Skip the vodka entirely or replace with additional cream for moisture.

    How far in advance can I make this cake?

    You can prepare this cake up to 2 days ahead. In fact, it improves after sitting overnight as the flavors develop and meld together beautifully.

    Can I use a different type of cake mix?

    Yes! Chocolate cake works wonderfully with the White Russian flavors. Yellow cake or even spice cake can create interesting flavor variations.

    Why is my whipped topping sliding off?

    Make sure your cake is completely cooled before adding the topping. Whip the cream to stiff peaks, and consider stabilizing it with 1 tablespoon of instant pudding mix.

    How do I know when I’ve poked enough holes?

    Aim for holes about 1 inch apart across the entire surface. You should have approximately 30-40 holes depending on your cake size.

    Final Thoughts

    This White Russian Poke Cake brings together the beloved flavors of a classic cocktail in a dessert that’s both sophisticated and comforting. I love how it bridges the gap between casual get-togethers and special occasions with its elegant presentation and irresistible taste. Every time I make it, I’m reminded that the best recipes are those that bring people together around the table, creating moments of joy and connection. Whether you’re celebrating something special or simply treating yourself, this cake delivers a slice of happiness that lingers long after the last crumb is gone. Find more inspiration at Pinterest.

  • Cinnamon Bread Pudding Recipe That Will Melt Your Heart Instantly

    Cinnamon Bread Pudding Recipe That Will Melt Your Heart Instantly

    Cinnamon Bread Pudding Recipe That Will Melt Your Heart Instantly

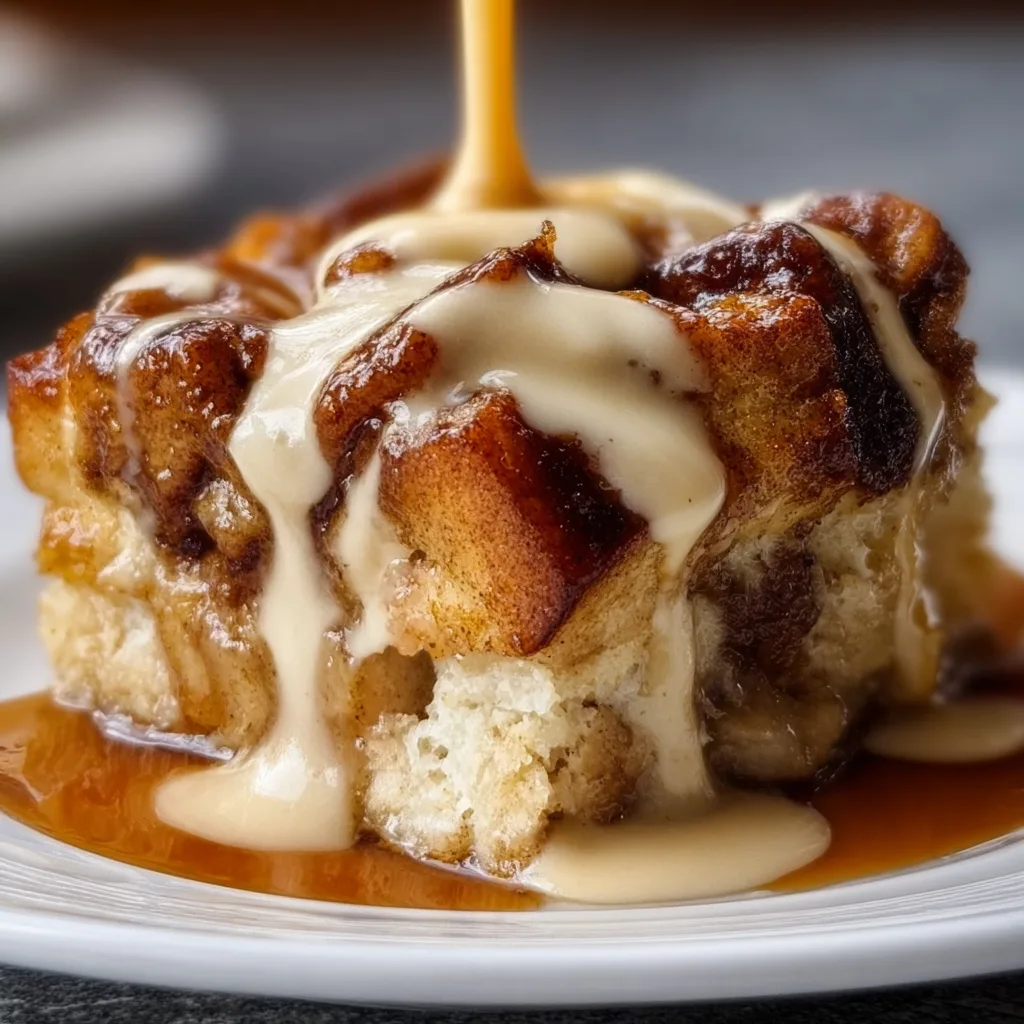
    Cinnamon bread pudding transforms humble ingredients into a dessert that wraps you in a warm hug of nostalgia. I discovered this recipe during a particularly chilly autumn weekend when my kitchen became a refuge from the rain pattering against the windows. The aroma of cinnamon and vanilla filled every corner, creating an atmosphere so cozy that my family drifted in one by one, drawn by the irresistible scent. This comforting classic combines pillowy bread chunks soaked in a rich custard that bakes into something truly magical—crisp on top and deliciously soft beneath. If you’re looking for more sweet treats with warming spices, my apple cinnamon kringle offers similar cozy vibes.

    Recipe

    Why You’ll Love This Cinnamon Bread Pudding

    Perfect Balance of Flavors and Textures

    This cinnamon bread pudding delivers a sensory symphony that’s impossible to resist. The marriage of warm cinnamon, sweet vanilla, and rich custard creates layers of flavor that dance on your tongue with each spoonful. I adore how the top develops a slightly caramelized crust while the interior remains wonderfully tender and pudding-like. The contrast between the crisp exterior and the soft, custardy center is what makes this dessert truly special. When warm from the oven, each bite offers that perfect balance between structure and silkiness that defines an exceptional bread pudding.

    Simple Ingredients, Extraordinary Results

    What amazes me about cinnamon bread pudding is how it transforms pantry staples into something extraordinary. Day-old bread that might otherwise go to waste becomes the foundation for a dessert worthy of special occasions. The magic happens when humble ingredients—eggs, milk, sugar, and cinnamon—combine to create something greater than the sum of their parts. I’ve made this recipe countless times when unexpected guests arrive, and it always earns rave reviews despite requiring minimal effort. There’s something deeply satisfying about creating such a comforting, impressive dessert from ingredients you likely already have on hand.

    Essential Tips & Tricks

    Choosing and Preparing Your Bread

    The foundation of any great cinnamon bread pudding starts with the right bread. I prefer using a hearty bread like brioche, challah, or even a good-quality French bread for the best texture. Day-old bread works beautifully as it absorbs the custard without becoming soggy. If you only have fresh bread, don’t worry! Simply cube it and toast in a 300°F oven for 10-15 minutes until slightly dry. Make sure your bread cubes are uniform in size—about 1-inch pieces work perfectly—to ensure even soaking and baking. This attention to detail makes the difference between good and extraordinary bread pudding.

    Perfecting Your Custard Mixture

    The custard is where the magic happens in cinnamon bread pudding. For the richest flavor, use whole milk or a combination of milk and heavy cream. Don’t skimp on the eggs—they provide structure and that luxurious mouthfeel we all love. When incorporating cinnamon, I like to add it both to the custard and sprinkled between layers of bread for depth of flavor. Always allow your bread to soak in the custard for at least 30 minutes before baking, gently pressing down occasionally to ensure even absorption. For an extra touch of warmth similar to my cinnamon roll cookies, add a splash of pure vanilla extract to enhance the spice notes.

    Serving Ideas & Creative Variations

    Delectable Toppings and Sauces

    Elevate your cinnamon bread pudding with complementary toppings that enhance its warm, spiced character. A drizzle of vanilla sauce creates a beautiful contrast to the cinnamon-forward flavor. For special occasions, I love serving it with a scoop of vanilla bean ice cream that slowly melts into the warm pudding. Caramel sauce adds a buttery sweetness that’s absolutely divine, while a dollop of lightly whipped cream provides a cloud-like lightness. During fall gatherings, I sometimes add a sprinkle of toasted pecans for textural contrast and nutty depth that makes guests reach for seconds.

    Seasonal and Dietary Adaptations

    This cinnamon bread pudding welcomes creative twists that keep it exciting year-round. During apple season, fold in diced apples tossed with extra cinnamon for a fruity variation. For holiday gatherings, add dried cranberries and orange zest for brightness. This versatile dessert easily adapts to dietary needs too—use gluten-free bread for celiac guests or substitute plant-based milk and a flax egg mixture for vegan friends. For a tropical twist that pairs beautifully with the cinnamon, try incorporating elements from my creamy coconut curry flavor profile like coconut milk and a hint of nutmeg.

    Storage & Troubleshooting Guide

    Keeping It Fresh and Reheating Methods

    Properly stored cinnamon bread pudding maintains its delightful texture for several days. Cover leftovers tightly with plastic wrap or transfer to an airtight container and refrigerate for up to 4 days. When ready to enjoy again, reheat individual portions in the microwave for 30-45 seconds until just warmed through. For a more indulgent approach that restores some of that freshly-baked quality, place a portion in a ramekin, add a tablespoon of milk or cream, cover with foil, and warm in a 325°F oven for about 15 minutes. The gentle heat revives the pudding without drying it out.

    Solving Common Bread Pudding Problems

    Even experienced bakers occasionally encounter texture issues with cinnamon bread pudding. If your pudding turns out too dry, you likely didn’t use enough custard or soaked the bread insufficiently. Next time, increase your liquid-to-bread ratio and ensure a full 30-minute soak. Conversely, if your pudding is too soggy, your bread might have been too fresh or you may need to extend the baking time. Remember that bread pudding continues to set as it cools, so a slight jiggle in the center when removing from the oven is perfect. For uneven baking, try using a water bath to provide gentle, even heat throughout.

    Frequently Asked Questions

    Can I prepare cinnamon bread pudding ahead of time?

    Absolutely! Assemble the bread pudding up to 24 hours in advance, cover and refrigerate. Allow it to come to room temperature for 30 minutes before baking for the best texture and even cooking.

    What’s the best bread to use for cinnamon bread pudding?

    Enriched breads like brioche, challah, or Portuguese sweet bread create the most luxurious texture. Day-old French bread or sourdough also work beautifully, adding a slight tang that balances the sweetness.

    Can I freeze leftover bread pudding?

    Yes! Portion cooled cinnamon bread pudding into individual servings, wrap tightly in plastic, then foil, and freeze for up to 3 months. Thaw overnight in the refrigerator before reheating.

    How do I know when my bread pudding is done baking?

    The top should be golden brown and slightly crisp, while the center should be set but still moist. A knife inserted in the center should come out mostly clean with no liquid custard.

    Can I reduce the sugar in this recipe?

    You can reduce the sugar by up to one-third without significantly affecting the texture. Consider adding extra cinnamon or vanilla to maintain flavor depth when decreasing sweetness.

    Final Thoughts

    This cinnamon bread pudding has become my go-to dessert for both quiet Sunday afternoons and festive gatherings. There’s something profoundly satisfying about transforming simple ingredients into something so comforting and special. The warm aroma of cinnamon filling your home as it bakes creates an atmosphere of welcome that no scented candle could ever match. I hope this recipe brings the same joy to your kitchen and becomes a treasured favorite for your family too. For more cozy recipes, follow me on Pinterest where I share seasonal favorites all year long.

  • Heavenly Chocolate Banana Split Cupcakes That Will Blow Your Mind!

    Heavenly Chocolate Banana Split Cupcakes That Will Blow Your Mind!

    Heavenly Chocolate Banana Split Cupcakes That Will Blow Your Mind!

    These Heavenly Chocolate Banana Split Cupcakes bring together everything I love about my favorite ice cream treat in a perfectly portable dessert! The moist chocolate cupcakes are filled with banana cream, topped with strawberry buttercream, and garnished with all the classic banana split toppings. I created these for my daughter’s birthday last summer, and they’ve become our most requested dessert ever since. The combination of chocolate, banana, and strawberry flavors creates a nostalgic yet sophisticated treat that’s perfect for any celebration or when you simply need to satisfy your sweet tooth. Check out my Cinnamon Roll Cookies for another crowd-pleasing dessert!

    Recipe

    Why You’ll Love These Heavenly Chocolate Banana Split Cupcakes

    Perfect Balance of Flavors and Textures

    These cupcakes deliver pure joy in every bite! The rich chocolate cake base provides the perfect foundation, while the creamy banana filling adds that authentic banana split flavor. What makes these truly special is the contrast between the tender cake and the silky fillings. The strawberry buttercream adds just the right amount of fruity sweetness without overwhelming the other components. I love watching people’s faces light up when they discover the banana cream center—it’s that unexpected surprise that makes these cupcakes truly memorable. The combination of textures creates a multi-dimensional treat that’s so much more exciting than a regular cupcake.

    Make-Ahead Friendly and Customizable

    One of the best things about these Heavenly Chocolate Banana Split Cupcakes is how versatile they are for entertaining. You can prepare the cupcakes and fillings a day ahead, then assemble just before serving. This flexibility has saved me countless times when hosting parties! The recipe is also incredibly adaptable—swap the strawberry frosting for vanilla if you prefer, or use different toppings based on what you have on hand. My husband isn’t a fan of maraschino cherries, so I often use fresh raspberries on his portion instead. These cupcakes work beautifully for birthdays, baby showers, or even as a fun weekend baking project with kids.

    Essential Tips & Tricks

    Mastering the Filling Technique

    Getting the banana filling just right is crucial for these Heavenly Chocolate Banana Split Cupcakes. I recommend using a piping bag with a long filling tip to ensure the cream reaches the center of each cupcake. If you don’t have a specialized tip, you can use a small knife to cut a cone-shaped piece from the top of each cupcake, fill the hole, and replace the cake “lid.” The key is making sure your banana cream is the perfect consistency—too thin and it will soak into the cake, too thick and it won’t provide that creamy texture we’re after. I learned this the hard way at my first attempt when my filling was runny and disappeared into the cake!

    Achieving the Perfect Frosting Swirl

    The crown jewel of these cupcakes is that beautiful strawberry buttercream swirl on top. For the best results, chill your frosting for about 15 minutes before piping—this helps it hold its shape better. I use a large star tip (Wilton 1M is perfect) and start from the outside edge, working my way toward the center with steady pressure. If your kitchen is warm, the buttercream might soften too quickly. A quick trick I use is to keep a second batch of frosting in the refrigerator, switching to it when the first batch gets too soft. For more frosting inspiration, check out my Sugar Cookie Cream Cheese Bars for another delicious topping technique.

    Serving Ideas & Creative Variations

    Festive Presentation Options

    Transform these Heavenly Chocolate Banana Split Cupcakes into a showstopping centerpiece by arranging them on a tiered stand and adding coordinating decorations. For summer parties, I love serving them on a banana-leaf lined tray with fresh fruit scattered around. During the holidays, try using red and green sprinkles or edible gold dust for a festive touch. One of my favorite presentation tricks is to place each cupcake in a colorful ice cream bowl with a small scoop of vanilla ice cream on the side—this really drives home the banana split theme and always impresses guests! The visual appeal of these cupcakes makes them perfect for special occasions.

    Creative Flavor Twists

    While the classic version is amazing, experimenting with flavors takes these cupcakes to new heights. Try a peanut butter banana variation by adding a tablespoon of peanut butter to the filling—it tastes just like Elvis’s favorite sandwich! For a tropical twist, replace the strawberry frosting with pineapple buttercream and add toasted coconut on top. My sister-in-law is allergic to strawberries, so I created a version with chocolate ganache and caramel drizzle that was a massive hit at our family gathering. For more dessert inspiration, browse my Ultimate Dark Chocolate Cake recipe that pairs beautifully with these flavors.

    Storage & Troubleshooting Guide

    Proper Storage for Maximum Freshness

    To keep your Heavenly Chocolate Banana Split Cupcakes tasting their best, proper storage is essential. These cupcakes will stay fresh in an airtight container at room temperature for up to 2 days, but I recommend refrigerating them if your kitchen is warm or if you’ve used fresh fruit toppings. The banana filling means these aren’t ideal candidates for freezing fully assembled, as the texture can change upon thawing. However, you can freeze the unfilled cupcakes for up to 3 months! Just wrap them individually in plastic wrap, then place in a freezer bag. When ready to serve, thaw at room temperature and then add your fillings and toppings.

    Fixing Common Cupcake Problems

    Even experienced bakers encounter issues sometimes! If your cupcakes sink in the middle, your oven temperature might be too high—I recommend using an oven thermometer to ensure accuracy. For cupcakes that stick to the liners, try using high-quality grease-resistant liners or lightly spray them with cooking oil before filling. If your banana filling is too runny, whisk in a tablespoon of cornstarch and chill it longer. For buttercream that’s too soft, add more powdered sugar a tablespoon at a time until you reach the desired consistency. Remember that humidity affects baking, so you might need to adjust your recipe slightly depending on the weather.

    Frequently Asked Questions

    Can I make Heavenly Chocolate Banana Split Cupcakes without dairy?

    Yes! Substitute plant-based butter in the cake and frosting, and use coconut cream for the banana filling. The texture will be slightly different, but the flavor combination still works beautifully.

    How ripe should bananas be for the filling?

    Use very ripe bananas with plenty of brown spots for the sweetest, most intense banana flavor. They’ll blend more smoothly and provide that authentic banana split taste.

    Can I prepare these cupcakes a day ahead?

    Absolutely! Bake the cupcakes and prepare the fillings, then store separately in the refrigerator. Assemble and add toppings 1-2 hours before serving for the freshest presentation.

    What’s the best chocolate to use in the cupcake batter?

    I recommend using Dutch-processed cocoa powder for a deeper, richer chocolate flavor. For an extra chocolate boost, add mini chocolate chips to the batter.

    How do I prevent the strawberry buttercream from curdling?

    Ensure all ingredients are at room temperature before mixing. Add the strawberry puree gradually, allowing each addition to incorporate fully before adding more.

    Final Thoughts

    These Heavenly Chocolate Banana Split Cupcakes have become my signature dessert for good reason—they bring together beloved flavors in an irresistible package that makes any occasion special. The joy of watching someone bite into one and discover all the delicious layers is truly one of my favorite baking moments. I’d love to see your creations if you try this recipe! Share your photos on Pinterest and tag me so I can admire your beautiful cupcakes. Happy baking, friends!

  • Orleans Bread Pudding with Bourbon Sauce That Will Melt Your Heart

    Orleans Bread Pudding with Bourbon Sauce That Will Melt Your Heart

    Orleans Bread Pudding with Bourbon Sauce That Will Melt Your Heart

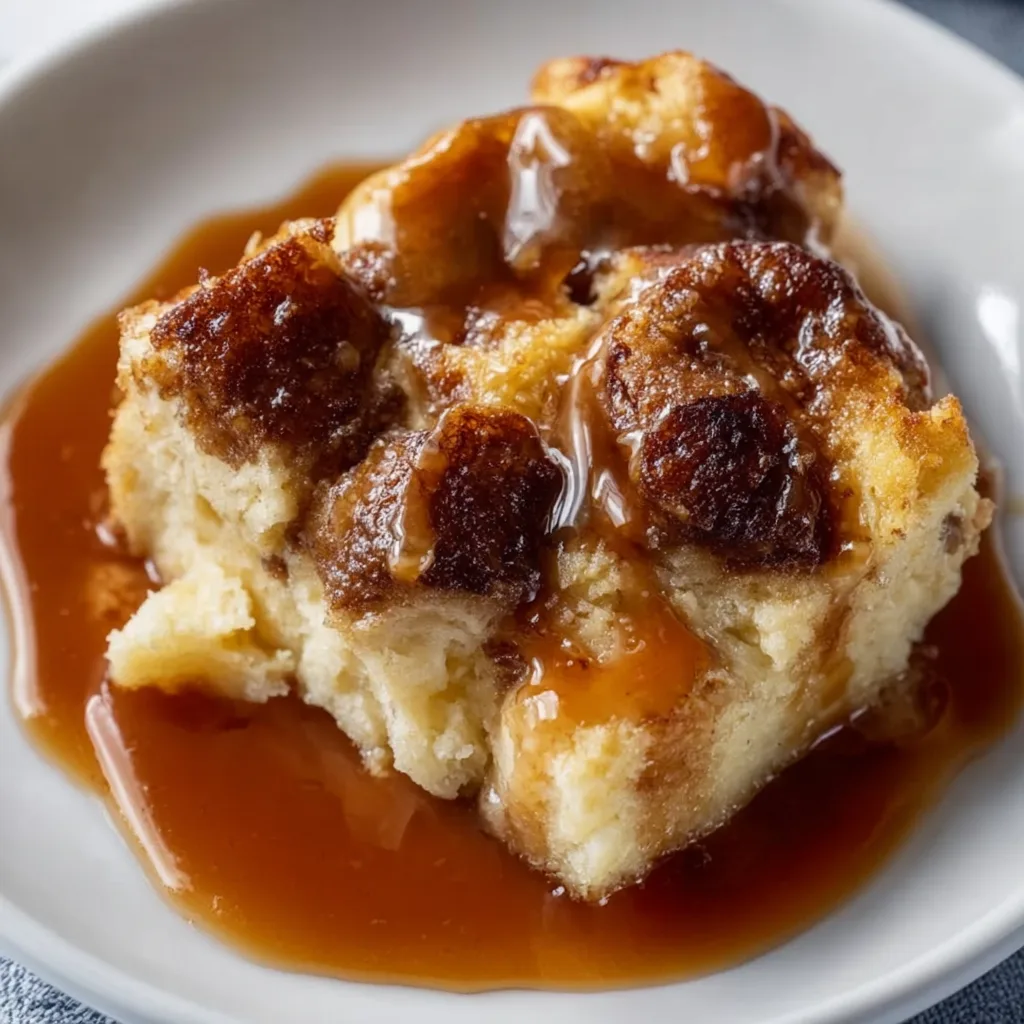
    Orleans Bread Pudding with Bourbon Sauce is one of those desserts that instantly transports me back to my grandmother’s kitchen in Louisiana. The rich, custardy bread soaked in warm spices and topped with that decadent bourbon sauce creates pure magic in every bite. I still remember the first time I made this for my own family—the way their eyes widened at that first taste told me everything. This dessert manages to be both humble and extraordinary, transforming simple ingredients into something that feels like a warm hug on a chilly evening. If you’re looking for a show-stopping dessert that’s actually straightforward to make, you’ll find it at Recipes Darleen.

    Recipe

    Why You’ll Love This Orleans Bread Pudding with Bourbon Sauce

    A Perfect Balance of Textures and Flavors

    There’s something utterly mesmerizing about the contrast between the crispy, caramelized top and the soft, custard-soaked bread beneath. Each bite delivers warmth from cinnamon and nutmeg, sweetness from brown sugar, and that distinctive richness that only real vanilla can provide. The bread itself develops this incredible texture—crisp edges giving way to a pillowy center that melts in your mouth. I’m particularly obsessed with how the raisins plump up during baking, creating little bursts of concentrated sweetness throughout. This dessert proves that simplicity can create the most profound flavors.

    Make-Ahead Convenience with Show-Stopping Results

    What I adore about Orleans Bread Pudding with Bourbon Sauce is how it fits into real life. You can assemble it the night before, allowing the bread to fully absorb all those luscious flavors while you sleep. The bourbon sauce takes just minutes to prepare but tastes like it took hours. Guests always assume I’ve been slaving away, when really, this dessert practically makes itself! The aroma that fills your home as it bakes is worth making it for that alone—warm vanilla, cinnamon, and caramelizing sugar creating an atmosphere that no candle could ever replicate. It’s impressive without being complicated.

    Essential Tips & Tricks

    Bread Selection and Preparation

    The foundation of exceptional Orleans Bread Pudding with Bourbon Sauce starts with the bread itself. Day-old French bread or brioche delivers the best results—their structure holds up beautifully while soaking up the custard. Fresh bread simply won’t work; it becomes too soggy. I tear rather than cut my bread for more textural interest and let it sit uncovered for several hours if it’s not already stale. For extra richness, try mixing in croissants with your bread. The custard needs time to fully penetrate, so aim for at least 30 minutes of soaking (overnight in the refrigerator is even better). This patience transforms good bread pudding into unforgettable bread pudding.

    Perfecting the Bourbon Sauce

    The bourbon sauce is what elevates this dessert from delicious to extraordinary. Use quality bourbon—the flavor concentrates as it cooks. My secret is adding a pinch of salt to balance the sweetness and enhance the caramel notes. Whisk constantly while cooking to prevent scorching and achieve silky smoothness. If you’re serving guests who prefer less alcohol flavor, add the bourbon earlier in the cooking process to allow more alcohol to evaporate. For a thicker sauce, let it cool slightly before serving—it will continue to thicken as it stands. Remember that restraint is key; the sauce should complement, not overwhelm, your perfectly baked pudding.

    Serving Ideas & Creative Variations

    Seasonal Adaptations

    Orleans Bread Pudding with Bourbon Sauce welcomes seasonal ingredients that keep it exciting year-round. Summer calls for fresh berries folded into the custard or a bright lemon zest addition. Fall begs for diced apples, extra cinnamon, and perhaps a touch of maple syrup in the bourbon sauce. Winter holidays shine with cranberries and orange zest, while spring might welcome a handful of chopped apricots or cherries. The bourbon sauce itself can be infused with seasonal spices—star anise and clove for winter, or fresh mint for summer. I’ve even created a pumpkin version that’s become a Thanksgiving tradition, rivaling my Cinnamon Roll Muffins for family popularity.

    Elegant Presentation Techniques

    Transform this homey dessert into a restaurant-worthy finale with thoughtful presentation. Individual ramekins create an elegant portion-controlled option that bakes faster and creates more of those coveted crispy edges. For a dramatic tableside service, warm the bourbon sauce and flame it briefly before pouring over each serving. Garnish possibilities are endless: a quenelle of lightly sweetened whipped cream, candied orange peel, a dusting of powdered sugar, or a single edible flower. For special occasions, I serve it in vintage teacups with the sauce in tiny pitchers for guests to pour themselves—the interactive element always delights and creates a memorable dining experience.

    Storage & Troubleshooting Guide

    Proper Storage for Maximum Freshness

    Properly stored Orleans Bread Pudding with Bourbon Sauce maintains its delicious quality for several days. Refrigerate leftover pudding in an airtight container for up to 4 days. The bourbon sauce should be stored separately in a glass jar with a tight-fitting lid where it will keep for up to a week. When reheating the pudding, cover it with foil and warm in a 300°F oven until just heated through—about 15-20 minutes. Alternatively, microwave individual portions for 30-45 seconds. The sauce can be gently rewarmed in a small saucepan over low heat or microwaved in short bursts, stirring between each. Never freeze the assembled pudding, as the texture will suffer dramatically.

    Troubleshooting Common Issues

    Even experienced bakers occasionally encounter challenges with bread pudding. If your pudding seems too dry, your bread-to-custard ratio may be off—next time, reduce the bread or increase the custard mixture. For pudding that’s too wet even after proper baking time, your bread might have been too fresh or you may need to extend baking time by 10-15 minutes with foil covering the top to prevent over-browning. If your bourbon sauce separates, whisk vigorously over low heat until re-emulsified. For a sauce that’s too thin, simmer a few minutes longer; if too thick, add a tablespoon of cream. Temperature control is crucial—serve the pudding warm, not hot, for the best texture.

    Frequently Asked Questions

    Can I make Orleans Bread Pudding with Bourbon Sauce without alcohol?

    Absolutely! Substitute the bourbon with apple juice, vanilla extract, or maple syrup. Add 1-2 teaspoons of butter extract for a similar richness. The flavor profile will change but remain delicious.

    What’s the best bread to use for authentic Orleans Bread Pudding with Bourbon Sauce?

    French bread or brioche are traditional choices. Day-old bread works best as it absorbs more custard. Challah and croissants also make excellent alternatives for a richer result.

    Can I prepare this dessert in advance for a dinner party?

    Yes! Assemble the bread pudding up to 24 hours ahead and refrigerate. Bring to room temperature before baking. The sauce can be made 3 days ahead and gently reheated before serving.

    Why did my bread pudding turn out soggy?

    This usually happens when the bread is too fresh or hasn’t soaked long enough. Try drying bread cubes in a low oven first or reducing the amount of liquid in your custard mixture.

    How do I know when the bread pudding is perfectly baked?

    The top should be golden brown and slightly crisp. When gently pressed in the center, it should spring back slightly. A knife inserted in the center should come out mostly clean with a few moist crumbs.

    Final Thoughts

    This Orleans Bread Pudding with Bourbon Sauce has become more than just a recipe in my household—it’s a tradition that marks special occasions and creates lasting memories. There’s something magical about watching someone taste it for the first time, their eyes closing in appreciation of those complex flavors. The beauty lies in its versatility and forgiving nature, welcoming adaptations while maintaining its soul-warming essence. Whether you’re a seasoned baker or a nervous beginner, this dessert rewards your efforts abundantly. I hope it brings the same joy to your table as it has to mine. Find more delicious inspiration on Pinterest.

  • Bread Pudding with Vanilla Sauce That Will Melt Your Heart!

    Bread Pudding with Vanilla Sauce That Will Melt Your Heart!

    Bread Pudding with Vanilla Sauce That Will Melt Your Heart!

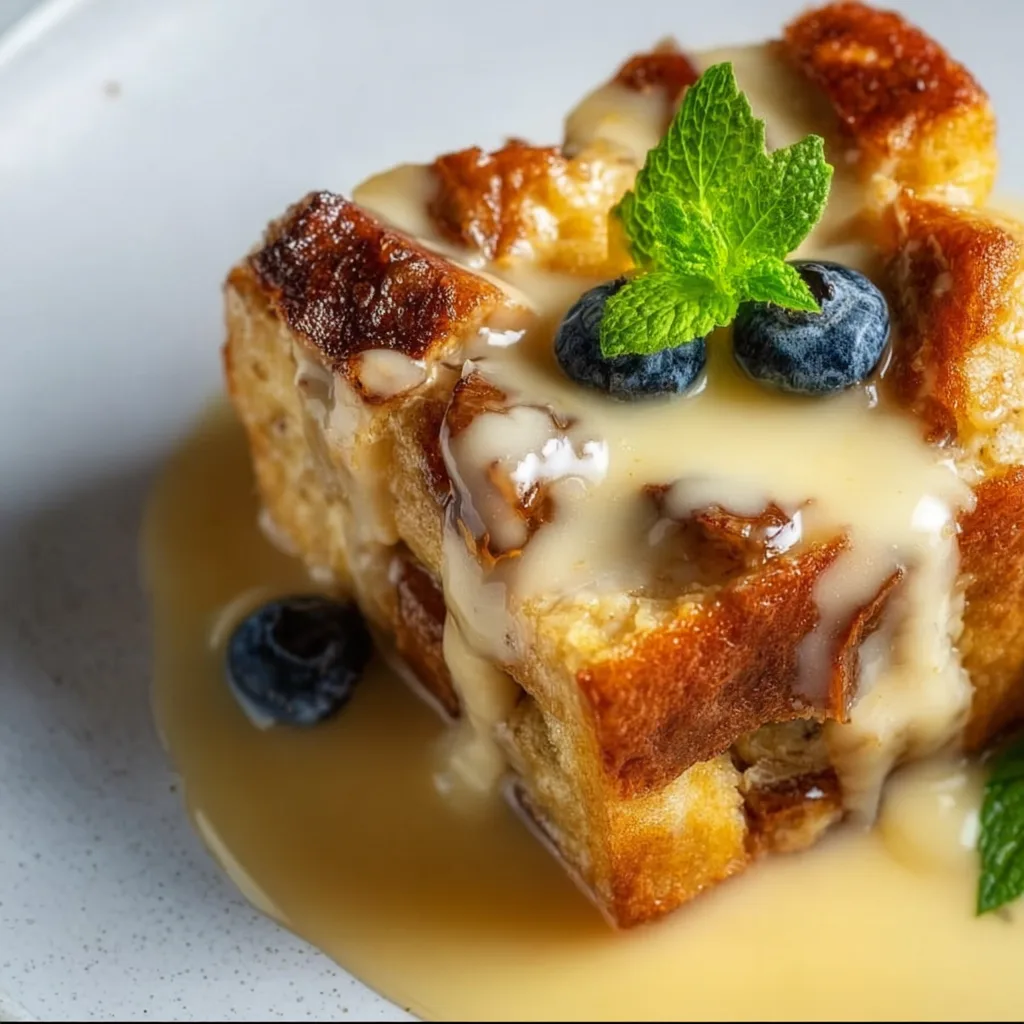
    Bread pudding with vanilla sauce takes me back to my grandmother’s kitchen, where the sweet aroma of cinnamon-spiced bread baking in custard would fill the entire house. This classic comfort dessert transforms humble ingredients into something truly magical. The contrast between the crispy golden top and the soft, custardy interior creates the perfect texture experience, while the warm vanilla sauce adds that final touch of indulgence. If you’re looking for a dessert that feels like a warm hug, this bread pudding recipe is exactly what your soul needs.

    Recipe

    Why You’ll Love This Bread Pudding with Vanilla Sauce

    Perfect Balance of Textures and Flavors

    What makes this bread pudding truly special is the beautiful contrast between textures. The edges become delightfully crisp while the center stays soft and pudding-like. I love how the bread soaks up the rich custard mixture, creating pockets of creamy goodness throughout. The warm spices—cinnamon, nutmeg, and a hint of vanilla—infuse every bite with comforting flavor. And when that first spoonful of warm bread pudding meets the cool, silky vanilla sauce? Pure bliss! It’s the kind of dessert that makes everyone at the table fall silent for a moment, just savoring.

    Simple Ingredients, Extraordinary Results

    One of the things I cherish most about bread pudding with vanilla sauce is how it transforms ordinary ingredients into something extraordinary. Day-old bread that might otherwise go to waste becomes the star of a show-stopping dessert. The custard requires just eggs, milk, sugar, and vanilla—pantry staples most of us already have on hand. Even the vanilla sauce comes together with minimal fuss, using butter, sugar, cream, and vanilla extract to create that luxurious finish. This dessert proves that sometimes the most humble ingredients create the most memorable dishes.

    Essential Tips & Tricks

    Choosing the Right Bread

    The foundation of exceptional bread pudding starts with selecting the perfect bread. I’ve found that slightly stale brioche, challah, or French bread works wonderfully because they have structure yet remain tender when soaked. Avoid pre-sliced sandwich bread which can become too mushy. Allow your bread to sit out uncovered for several hours or overnight—this drying process helps it absorb the custard without dissolving completely. For extra texture, leave some bread cubes larger than others. This simple step creates those delightful contrasts between crispy edges and soft centers that make bread pudding truly special.

    Perfecting the Custard Mixture

    The secret to a velvety bread pudding with vanilla sauce lies in the custard quality. Whisk your eggs thoroughly before adding other ingredients to ensure even distribution. For richness, I use a combination of whole milk and heavy cream rather than just milk alone. Let the bread soak in the custard mixture for at least 30 minutes—this allows proper absorption without making it soggy. Don’t rush this step! For extra flavor dimension, try adding a splash of bourbon or rum to the custard. When baking, use a water bath to maintain gentle, even heat that prevents curdling and creates that perfect silky texture.

    Serving Ideas & Creative Variations

    Seasonal Adaptations

    Bread pudding with vanilla sauce can be beautifully adapted to showcase seasonal ingredients throughout the year. In summer, fold in fresh berries or peaches before baking for bursts of fruity brightness. Fall calls for diced apples, pears, and extra cinnamon or a drizzle of caramel. Winter versions shine with cranberries and orange zest, creating festive holiday flavors. For spring, try adding lemon zest and blueberries for a refreshing twist. The vanilla sauce remains the perfect complement regardless of season, though you can infuse it with complementary flavors—a touch of maple in fall or citrus in spring—to enhance your seasonal theme.

    Elegant Presentation Ideas

    Elevate your bread pudding with vanilla sauce through thoughtful presentation. Instead of serving family-style, try individual ramekins for an elegant dinner party approach—these also create more of those coveted crispy edges! Drizzle the vanilla sauce in a decorative pattern rather than simply pouring it over. For special occasions, place a quenelle of lightly sweetened whipped cream alongside, perhaps with a dusting of cinnamon or grated nutmeg. Fresh mint leaves or edible flowers add beautiful color contrast. Consider serving on warmed plates to keep everything at the perfect temperature longer, allowing guests to fully appreciate the interplay of warm pudding and silky sauce.

    Storage & Troubleshooting Guide

    Proper Storage Techniques

    To maintain the quality of your bread pudding with vanilla sauce, proper storage is essential. Store leftover bread pudding in an airtight container in the refrigerator for up to 3 days. The vanilla sauce should be refrigerated separately to prevent the pudding from becoming soggy. When reheating individual portions, microwave on medium power with a damp paper towel covering to restore moisture. For larger portions, cover with foil and warm in a 325°F oven until heated through. The vanilla sauce may thicken when chilled—simply warm gently on the stovetop while whisking, adding a splash of cream if needed to restore its silky consistency.

    Troubleshooting Common Issues

    Even experienced bakers occasionally encounter challenges with bread pudding with vanilla sauce. If your pudding seems too dry, your bread likely absorbed too much liquid before baking—next time, reduce soaking time or add more custard. For soggy pudding, your bread may have been too fresh or you may need to extend baking time. If the vanilla sauce separates or becomes grainy, it was likely overheated—always warm gently and whisk continuously. Should the sauce be too thin, simmer a few minutes longer; if too thick, add a splash of cream until you reach desired consistency. Remember that bread pudding should have a soft interior—don’t mistake this proper texture for underbaking!

    Frequently Asked Questions

    Can I make bread pudding with vanilla sauce ahead of time?

    Yes! Prepare the bread pudding up to 24 hours ahead and refrigerate unbaked. The vanilla sauce can be made 3 days in advance and gently reheated. This makes it perfect for entertaining when you want to minimize day-of preparation.

    What’s the best bread for bread pudding with vanilla sauce?

    Brioche, challah, or French bread work best. The slightly firmer texture and rich flavor create the ideal foundation. Day-old or slightly stale bread is preferable as it better absorbs the custard without falling apart.

    Can I freeze leftover bread pudding?

    Absolutely! Wrap individual portions tightly in plastic wrap, then foil, and freeze for up to 3 months. Thaw overnight in the refrigerator and reheat gently. Freeze the vanilla sauce separately in an airtight container.

    How do I know when bread pudding is done baking?

    The pudding is done when the center reaches 160°F or when a knife inserted in the center comes out mostly clean with a few moist crumbs. The top should be golden brown and slightly puffed.

    Can I make this recipe dairy-free?

    Yes, substitute plant-based milk (almond or oat work well) and coconut cream for the heavy cream. For the vanilla sauce, use coconut cream and vegan butter for a dairy-free version that maintains the luxurious texture.

    Final Thoughts

    There’s something deeply comforting about a warm serving of bread pudding with vanilla sauce that connects us to generations past. I find myself returning to this recipe whenever I need that perfect balance of nostalgia and indulgence. The way it transforms humble ingredients into something spectacular reminds me that the best things in life often come from simplicity. Whether you’re making it for a special occasion or simply because you deserve a treat, this dessert never disappoints. Find more delicious comfort food recipes on Pinterest and discover your next favorite indulgence.