Category: Desserts

Sweet and easy dessert recipes for every craving. Simple treats, rich flavors, and quick ideas that make any moment feel special.

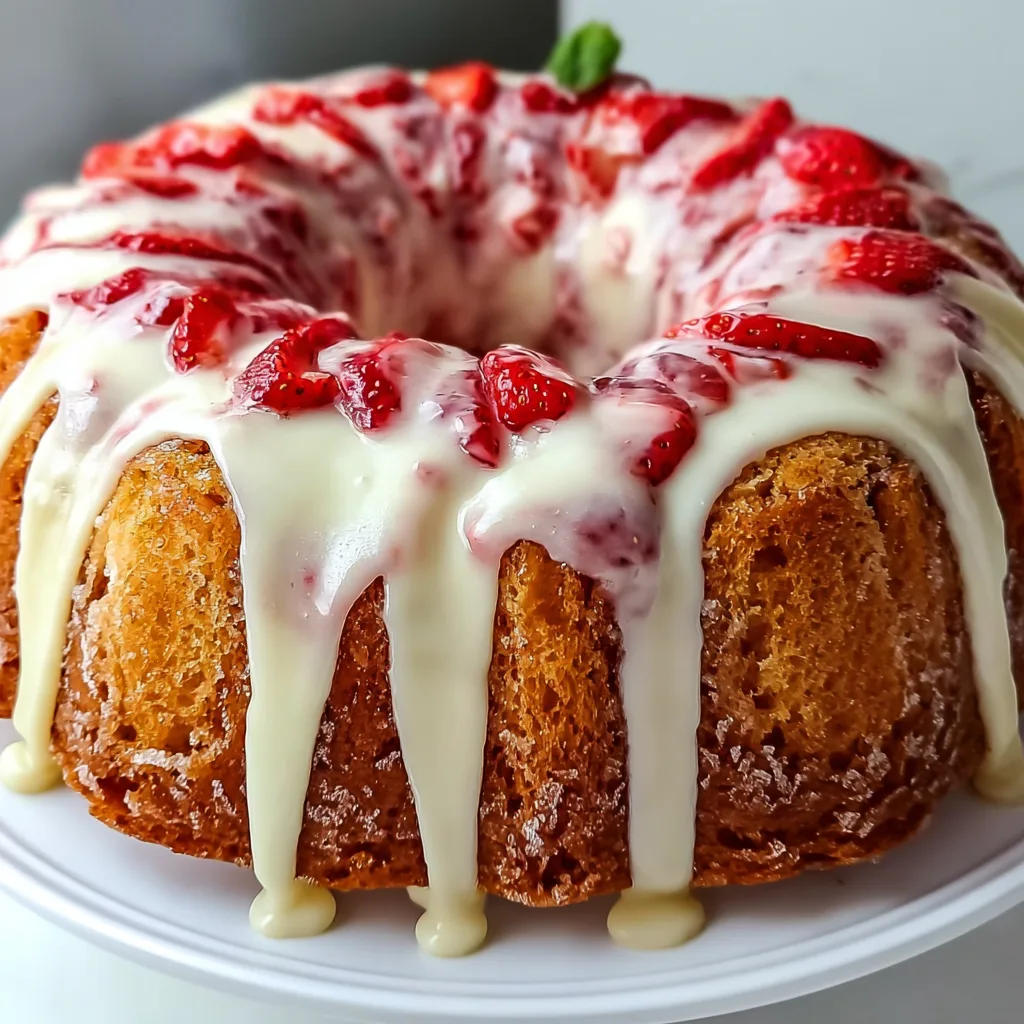
  • Homemade Strawberry Cream Cheese Pound Cake That’ll Melt Your Heart

    Homemade Strawberry Cream Cheese Pound Cake That’ll Melt Your Heart

    Homemade Strawberry Cream Cheese Pound Cake That'll Melt Your Heart

    Homemade Strawberry Cream Cheese Pound Cake has been my secret weapon for Sunday brunches and special occasions for years. There’s something magical about the way the tangy cream cheese balances the sweet, juicy strawberries in each slice. I still remember the first time I made this for my sister’s birthday—the kitchen filled with that buttery, vanilla-scented air that makes everyone drift in asking “what’s that amazing smell?” This pound cake isn’t just dessert; it’s a slice of comfort that somehow tastes like sunshine and celebrations all at once. If you’re looking for a cake that’s both impressive and foolproof, this is the one you need.

    Recipe

    Why You’ll Love This Homemade Strawberry Cream Cheese Pound Cake

    Perfect Texture & Flavor Combination

    The velvety crumb of this pound cake is what sets it apart from ordinary cakes. The cream cheese doesn’t just add tanginess—it creates this incredibly moist texture that somehow stays tender for days. I’m always amazed at how the strawberries don’t sink to the bottom but instead create these gorgeous pockets of jammy sweetness throughout each slice. The vanilla extract amplifies everything, while the slight crust that forms on the outside adds that perfect textural contrast. When you take that first bite, you get this beautiful marriage of buttery richness and bright berry flavor that makes your taste buds dance.

    Simple Ingredients, Extraordinary Results

    What I adore about this Homemade Strawberry Cream Cheese Pound Cake is that it transforms pantry staples into something truly special. You don’t need fancy equipment or obscure ingredients—just good butter, cream cheese at room temperature (this is crucial!), fresh or frozen strawberries, and quality vanilla. I’ve made this cake during strawberry season with just-picked berries, but honestly, it’s nearly as wonderful with frozen berries in the dead of winter. There’s something deeply satisfying about creating something so impressive with ingredients you likely already have on hand. It’s the perfect example of how simple ingredients, treated with care, can become extraordinary.

    Essential Tips & Tricks

    Mastering the Mixing Method

    The secret to perfection lies in how you handle the ingredients. Always—and I mean always—bring your cream cheese, butter, and eggs to room temperature before starting. This isn’t just baking snobbery; it’s chemistry! Room temperature ingredients create that silky, emulsified batter that bakes up perfectly. When creaming the butter and cream cheese, don’t rush. Those 3-4 minutes of beating incorporate air that gives your cake lift. Another game-changer? Tossing your strawberries in a tablespoon of flour before folding them in. This prevents them from sinking and creates the perfect distribution throughout your cake, just like in my other fruit-based recipes.

    Baking & Timing Essentials

    The low and slow approach is non-negotiable for pound cakes. I bake mine at 325°F (165°C) rather than the standard 350°F. This gentler heat allows the cake to rise evenly without developing a too-dark exterior before the center is done. Your kitchen timer is your best friend here—check at 60 minutes, but know that perfection might take up to 75 minutes depending on your oven. The toothpick test doesn’t lie: a few moist crumbs are perfect, but wet batter means more time is needed. And please, resist the urge to open the oven door during the first 45 minutes! That temperature drop can cause your beautiful cake to sink in the middle.

    Serving Ideas & Creative Variations

    Elegant Presentation Options

    Transform this already-stunning cake into a showstopper with thoughtful presentation. A light dusting of powdered sugar creates a snow-kissed look that’s elegant in its simplicity. For dinner parties, I serve slices with a dollop of lightly whipped cream and a few fresh strawberry slices on the side. Want something more dramatic? Try a drizzle of white chocolate ganache that cascades down the sides. The cake also looks beautiful on a vintage cake stand surrounded by edible flowers or fresh mint leaves. For brunch gatherings, I cut smaller slices and arrange them on a tiered platter with other mini treats like my Raspberry Brownie Date Energy Bites for an impressive spread.

    Seasonal & Flavor Adaptations

    The versatility of this pound cake base will amaze you. In summer, swap strawberries for blueberries or blackberries—or go wild with a triple berry mix. Fall calling? Try diced apples with cinnamon and a touch of nutmeg. For winter holidays, cranberries and orange zest create a festive variation that’s gorgeous sliced. You can also play with extracts—almond extract pairs beautifully with cherries, while lemon extract brightens up blueberry versions. For a more decadent twist, fold in white chocolate chips or toasted nuts with your fruit. I’ve even made a marbled version by separating some batter and mixing in cocoa powder before swirling it with the original batter.

    Storage & Troubleshooting Guide

    Keeping Your Pound Cake Fresh

    The cream cheese magic in this recipe means your cake stays moist longer than traditional pound cakes. Store it at room temperature under a cake dome for up to 3 days—the flavor actually improves overnight as the strawberry essence permeates the crumb. For longer storage, wrap individual slices in plastic wrap and freeze for up to 3 months. I always make an extra loaf just for freezing! To revive slightly dried-out cake, warm a slice for 10 seconds in the microwave—it’ll taste nearly freshly baked. For special occasions, I sometimes brush room-temperature slices with a simple syrup infused with vanilla or a splash of liqueur for extra moisture and flavor.

    Fixing Common Pound Cake Problems

    Even experienced bakers encounter the occasional dense bottom or cracked top. If your cake sinks in the middle, your batter was likely overmixed or your oven temperature runs low. Next time, fold ingredients more gently and consider an oven thermometer. Cracks on top are actually characteristic of pound cakes—embrace them as rustic charm! If your strawberries sink despite flouring, they might be too large; try dicing them smaller or using frozen berries, which hold their position better. A too-dark crust while the interior remains underbaked usually means your oven runs hot—cover the cake with foil halfway through baking next time to protect it while the center finishes cooking.

    Frequently Asked Questions

    Can I make this Homemade Strawberry Cream Cheese Pound Cake ahead of time?

    Absolutely! It actually tastes better on day two when the flavors have melded. Bake it up to 2 days ahead and store at room temperature under a cake dome, or freeze for up to 3 months.

    Can I use frozen strawberries instead of fresh?

    Yes! Don’t even thaw them—add them frozen and tossed in flour. This actually helps them distribute more evenly throughout the batter without bleeding color.

    Why did my pound cake crack on top?

    This is completely normal and characteristic of pound cakes! The exterior sets before the interior finishes rising, causing that beautiful crack that shows it’s homemade.

    How do I know when my pound cake is done?

    Insert a toothpick into the center—it should come out with a few moist crumbs but no wet batter. The top should spring back when lightly pressed, and the edges should pull away slightly from the pan.

    Can I make this recipe in a different pan size?

    Yes, but adjust baking times accordingly. Muffin tins take about 20-25 minutes, mini loaves about 35-40 minutes. Always watch for golden edges and do the toothpick test.

    Final Thoughts

    This Homemade Strawberry Cream Cheese Pound Cake has saved countless gatherings and created so many special memories around my table. There’s something deeply satisfying about serving something so beautiful that you made with your own hands. The way people’s eyes light up at that first bite tells me this recipe is doing exactly what good food should—bringing joy and connection. I hope you’ll make this cake part of your own story, adapting it to your tastes and creating your own traditions around it. Don’t forget to share your creations on Pinterest and tag me—I’d love to see how your pound cake turns out!
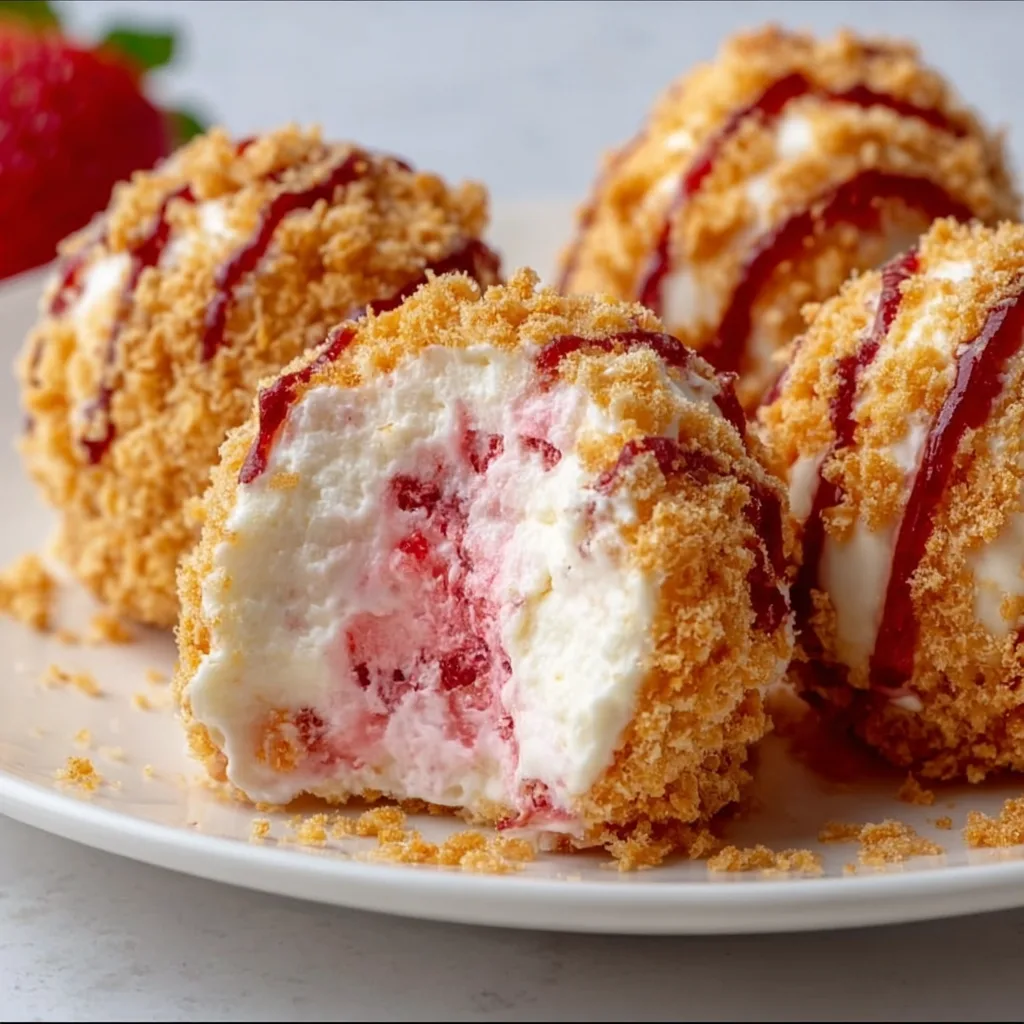
  • Easy Strawberry Cheesecake Crunch Balls – Irresistibly Delicious!

    Easy Strawberry Cheesecake Crunch Balls – Irresistibly Delicious!

    Easy Strawberry Cheesecake Crunch Balls – Irresistibly Delicious!

    These Easy Strawberry Cheesecake Crunch Balls have become my absolute summer salvation! There’s something magical about the way the creamy cheesecake filling melts against the crunchy graham cracker coating, with bursts of fresh strawberry in every bite. I first made these for my sister’s backyard gathering last June, and they disappeared faster than I could snap a photo! Perfect for those moments when you crave something sweet but don’t want to turn on the oven. These no-bake treats combine all the flavors of a classic strawberry cheesecake without the fuss.

    Recipe

    Why You’ll Love These Easy Strawberry Cheesecake Crunch Balls

    Perfect Balance of Flavors and Textures

    These little bites of heaven offer the most satisfying contrast between creamy and crunchy textures. The velvety cream cheese center, sweetened just right with powdered sugar, cradles bits of fresh strawberries that burst with juicy flavor. Then comes that golden graham cracker coating that gives the perfect crunch with every bite. I love watching people’s eyes light up when they taste that first bite—it’s like experiencing a full-sized cheesecake but in an adorable, poppable form that doesn’t require plates or forks!

    Quick No-Bake Solution for Any Occasion

    When summer temperatures soar and the thought of turning on the oven makes you wilt, these no-bake treats become your best friend. I whipped these up last-minute for an impromptu book club gathering, and everyone thought I’d spent hours in the kitchen! The truth? They take about 20 minutes of active prep, then just need some chill time in the fridge. Perfect for busy weeknights, unexpected guests, or when you need a sweet treat to bring to a potluck. The hardest part is waiting for them to firm up before diving in!

    Essential Tips & Tricks

    Mastering the Perfect Consistency

    Getting the right texture is key to ball-rolling success! If your mixture feels too sticky, pop it in the refrigerator for 15-20 minutes before rolling. Cold cream cheese is much easier to work with. I learned this the hard way when I tried making these on a hot summer day—my kitchen looked like a cheesecake explosion! For the smoothest results, make sure your cream cheese is fully softened before mixing, then beat until completely lump-free. This creates that silky-smooth center that makes these treats so irresistible and worthy of being displayed alongside other impressive desserts.

    Strawberry Selection and Preparation

    Using the right strawberries makes all the difference. Look for berries that are bright red, fragrant, and firm without soft spots. I prefer organic when possible for the best flavor. Dice them into tiny pieces (about 1/4 inch) so they distribute evenly throughout the mixture. Pat them dry with paper towels to remove excess moisture—this prevents your mixture from becoming too wet. For an intense strawberry flavor, you can also add a teaspoon of strawberry extract or fold in a tablespoon of strawberry preserves along with the fresh berries.

    Serving Ideas & Creative Variations

    Presentation That Wows

    Transform these simple treats into an elegant dessert by serving them on a beautiful platter with fresh strawberry slices and mint leaves. For special occasions, I place each ball in a mini cupcake liner and arrange them in a tiered stand—instant dessert table centerpiece! You can also drizzle them with white chocolate or dust with a bit of powdered sugar just before serving for that “wow” factor. Last Valentine’s Day, I arranged them in a heart shape on a serving board, and my husband thought I’d ordered from a fancy bakery!

    Flavor Variations to Try

    While the classic version is divine, these balls welcome creative twists! Try adding zesty citrus by mixing in lemon or orange zest for a refreshing tang. For chocolate lovers, fold in mini chocolate chips or roll the finished balls in cocoa powder instead of graham crackers. White chocolate and macadamia nuts create an indulgent tropical version. My personal favorite variation includes a hint of almond extract and a sprinkle of toasted coconut on the outside—it reminds me of those fancy coconut-based desserts at high-end restaurants!

    Storage & Troubleshooting Guide

    Proper Storage for Maximum Freshness

    These strawberry cheesecake balls need to be refrigerated properly to maintain their creamy texture and fresh flavor. Store them in an airtight container with parchment paper between layers to prevent sticking. They’ll keep beautifully for up to 5 days, though they rarely last that long in my house! For longer storage, you can freeze them for up to 3 months—just thaw in the refrigerator overnight before serving. I like to make a double batch and freeze half, so I always have a sweet treat ready for unexpected company.

    Fixing Common Issues

    Even experienced bakers encounter hiccups! If your mixture is too soft for rolling, add more crushed graham crackers a tablespoon at a time until you reach a moldable consistency. Conversely, if it’s too firm, a tablespoon of heavy cream will soften it. Balls cracking when you roll them? Your mixture might be too cold—let it warm slightly at room temperature. For graham cracker coating that won’t stick, lightly dampen your hands before rolling the balls in the crumbs. This creates just enough moisture for perfect adhesion without making them soggy.

    Frequently Asked Questions

    Can I make Easy Strawberry Cheesecake Crunch Balls ahead of time?

    Absolutely! Make them up to 3 days in advance and store in the refrigerator. The flavors actually develop beautifully with a bit of time, making them perfect for party prep.

    Can I use frozen strawberries instead of fresh?

    Yes, but thaw completely and pat very dry with paper towels to remove excess moisture. Fresh berries provide the best texture and flavor, but frozen work in a pinch.

    How do I prevent the graham cracker coating from getting soggy?

    Roll the balls in graham cracker crumbs just before serving, or apply a double coating—once after forming and again just before serving for maximum crunch.

    Are these suitable for people with gluten allergies?

    Not in their traditional form, but you can easily substitute the graham crackers with gluten-free cookies or even toasted almond flour for a gluten-free version.

    What can I use instead of cream cheese?

    Mascarpone makes a luxurious substitute, or for a lighter version, try Greek yogurt cream cheese. Each creates a slightly different flavor profile but works beautifully.

    Final Thoughts

    These Easy Strawberry Cheesecake Crunch Balls have become my go-to dessert when I want to impress without stress. There’s something magical about transforming simple ingredients into bite-sized treasures that capture the essence of summer. I love seeing the joy they bring to friends and family—that moment of pure delight with each creamy, crunchy bite. Whether you’re a seasoned baker or kitchen newbie, these little treats promise big flavor with minimal effort. Share your creations on Pinterest and spread the strawberry cheesecake love!

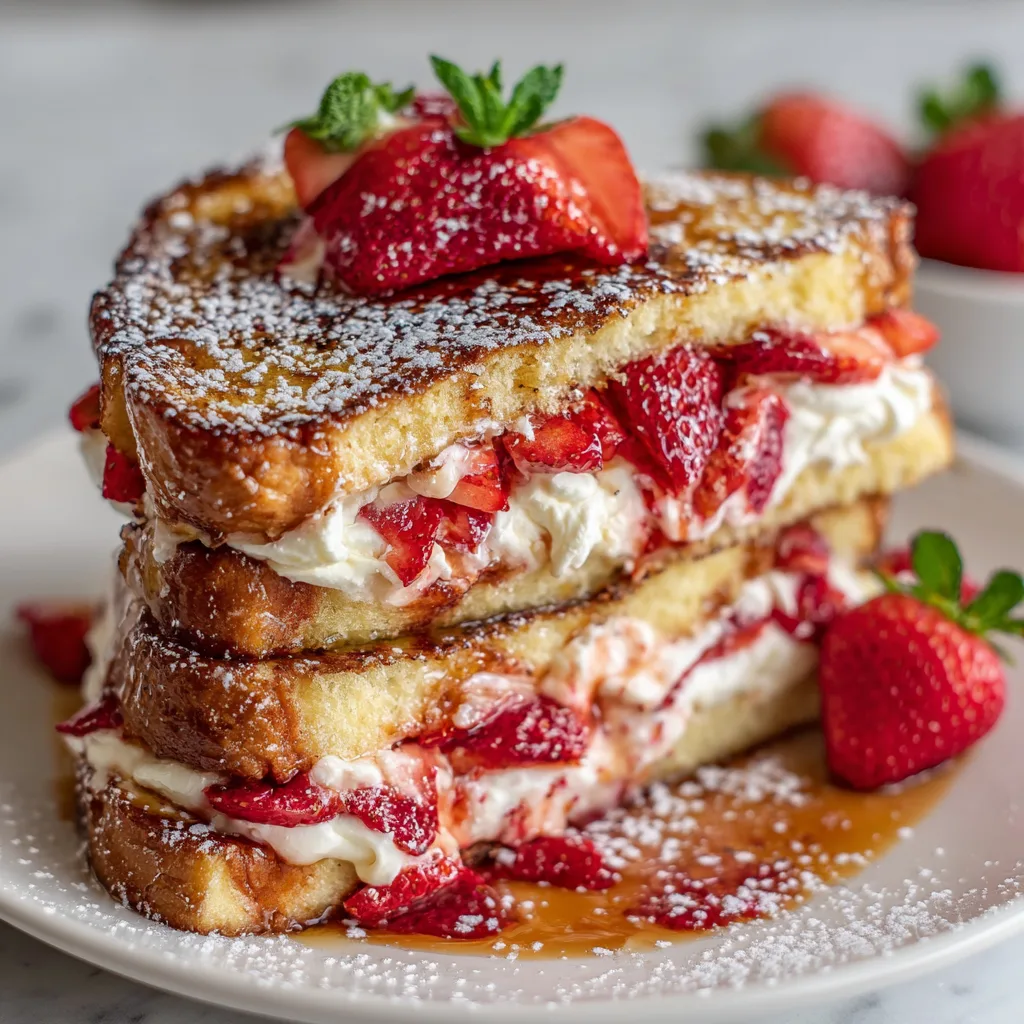
  • Strawberry Cheesecake Stuffed French Toast – Irresistibly Delicious!

    Strawberry Cheesecake Stuffed French Toast – Irresistibly Delicious!

    Strawberry Cheesecake Stuffed French Toast – Irresistibly Delicious!

    Strawberry Cheesecake Stuffed French Toast transforms ordinary breakfast into an extraordinary morning treat. The moment that warm, cream cheese-filled bread hits your plate, dripping with sweet strawberry syrup, you know you’re in for something special. I discovered this recipe during a rainy Sunday morning when my family needed cheering up, and it’s become our go-to celebration breakfast ever since. The perfect balance of crispy exterior and creamy filling makes this dish irresistible. If you love indulgent breakfast recipes, this one combines the best of both worlds – classic French toast and luscious cheesecake – all in one delectable package.

    Recipe

    Why You’ll Love This Strawberry Cheesecake Stuffed French Toast

    A Perfect Balance of Flavors

    The magic of this recipe lies in its harmonious flavor profile. The tangy cream cheese filling, sweetened just enough to complement the fresh strawberries, creates a perfect contrast against the vanilla-scented bread. I still remember my daughter’s face lighting up with her first bite—eyes closed, smile spreading. The exterior develops a beautiful golden crust while the inside remains soft and pillowy. Each mouthful delivers that satisfying combination of warm bread, cool creamy filling, and sweet-tart strawberries that makes your taste buds dance with joy.

    Make-Ahead Convenience

    One of the best features of Strawberry Cheesecake Stuffed French Toast is how easily it fits into busy mornings. You can prepare the cream cheese filling and slice the strawberries the night before, storing them separately in the refrigerator. The assembled sandwiches can even be prepared ahead and refrigerated overnight—just dip and cook in the morning! This make-ahead capability transforms what seems like a fancy brunch dish into a realistic weekday option. I’ve served this on hectic school mornings and received nothing but smiles and clean plates.

    Essential Tips & Tricks

    Bread Selection Matters

    Choosing the right bread makes all the difference in this recipe. Opt for thick-cut brioche or challah for the best results—these enriched breads have the perfect structure to hold your filling without becoming soggy. Allow slightly stale bread to sit out for 20-30 minutes before using; this helps it absorb the egg mixture without falling apart. I once tried making this with regular sandwich bread in a pinch, and while still delicious, it didn’t have that same luxurious mouthfeel that makes this recipe truly special. The ideal thickness is about 1-inch per slice for the perfect ratio of bread to filling.

    Perfecting Your Technique

    The secret to restaurant-quality Strawberry Cheesecake Stuffed French Toast lies in your cooking technique. Heat your pan or griddle to medium-low—too hot and the outside burns before the inside warms through. Add a small pat of butter before each batch for that golden crust. Don’t rush the process! Each sandwich needs about 3-4 minutes per side. I’ve found that pressing down gently with a spatula helps seal the edges and prevent filling leakage. For an extra touch of decadence, try adding a sprinkle of cinnamon sugar to the pan right before flipping.

    Serving Ideas & Creative Variations

    Elegant Presentation Options

    Elevate your Strawberry Cheesecake Stuffed French Toast with thoughtful presentation. Arrange the slices on a warmed platter with a light dusting of powdered sugar that melts slightly on contact. Create a beautiful pattern with fresh strawberry slices and mint leaves for a pop of color. For special occasions, I serve each portion with a small pitcher of warm maple syrup infused with vanilla bean. This elegant touch always impresses guests who can’t believe something so beautiful came from my kitchen. A dollop of lightly sweetened whipped cream on the side adds a professional touch that makes breakfast feel like dessert.

    Seasonal Adaptations

    While strawberries are classic, this versatile recipe shines with seasonal adaptations. In summer, try fresh peaches or blueberries mixed into the filling. Fall calls for sautéed apples with cinnamon, while winter holidays are perfect for cranberry and orange combinations. You can also experiment with different extracts in your filling—almond pairs beautifully with cherries, while coconut extract transforms this into a tropical treat with mango. I’ve even made a savory version with herbed cream cheese and roasted tomatoes for brunch that disappeared faster than the sweet versions!

    Storage & Troubleshooting Guide

    Proper Storage Methods

    Leftover Strawberry Cheesecake Stuffed French Toast (if you’re lucky enough to have any!) requires proper storage to maintain its delightful texture. Cool completely before refrigerating in an airtight container with parchment paper between layers to prevent sticking. These will keep for up to 2 days. For longer storage, freeze individual portions wrapped tightly in plastic wrap, then aluminum foil. When reheating refrigerated portions, use a toaster oven for 3-4 minutes to restore that crispy exterior. Frozen pieces should be thawed overnight in the refrigerator before reheating for best results.

    Fixing Common Issues

    Even experienced cooks encounter challenges with stuffed French toast. If your filling leaks during cooking, your sandwich may not be sealed properly—try using less filling and pressing the edges firmly before dipping. For soggy results, your bread might be too fresh or your egg mixture too thin—try adding an extra egg yolk for richness and structure. If your French toast is browning too quickly but remains cool inside, your heat is too high. Remember that patience is key; lower the temperature and give it time to cook through properly. I’ve rescued many batches by finishing them in a 300°F oven for 5 minutes.

    Frequently Asked Questions

    Can I make Strawberry Cheesecake Stuffed French Toast without dairy?

    Yes! Substitute vegan cream cheese and plant-based milk in the egg mixture. Use coconut oil instead of butter for cooking. The texture will be slightly different but still delicious with all the same flavors.

    How do I prevent my Strawberry Cheesecake Stuffed French Toast from becoming soggy?

    Use slightly stale bread, don’t soak too long in the egg mixture (just a quick dip on each side), and cook immediately after dipping until golden brown on medium-low heat.

    Can I use frozen strawberries instead of fresh?

    Absolutely! Thaw and drain them thoroughly first, then pat dry with paper towels to remove excess moisture that could make your filling runny.

    What’s the best way to slice the bread for stuffing?

    Cut 1½-inch thick slices from a loaf of brioche or challah, then make a pocket by cutting a slit in the center without going through to the edges.

    Is there a way to make this recipe healthier?

    Try whole grain bread, reduce sugar in the filling, use light cream cheese, and top with fresh fruit instead of syrup. You can also bake instead of pan-frying.

    Final Thoughts

    Strawberry Cheesecake Stuffed French Toast brings together the comfort of breakfast and the indulgence of dessert in one irresistible package. The contrast of textures—crispy exterior, soft bread, and creamy filling—creates a sensory experience that elevates this dish beyond ordinary breakfast fare. Whether you’re serving it for a special celebration or simply making an ordinary morning extraordinary, this recipe has a way of creating moments worth remembering. I hope you’ll make it part of your own family traditions and discover your favorite variations along the way.

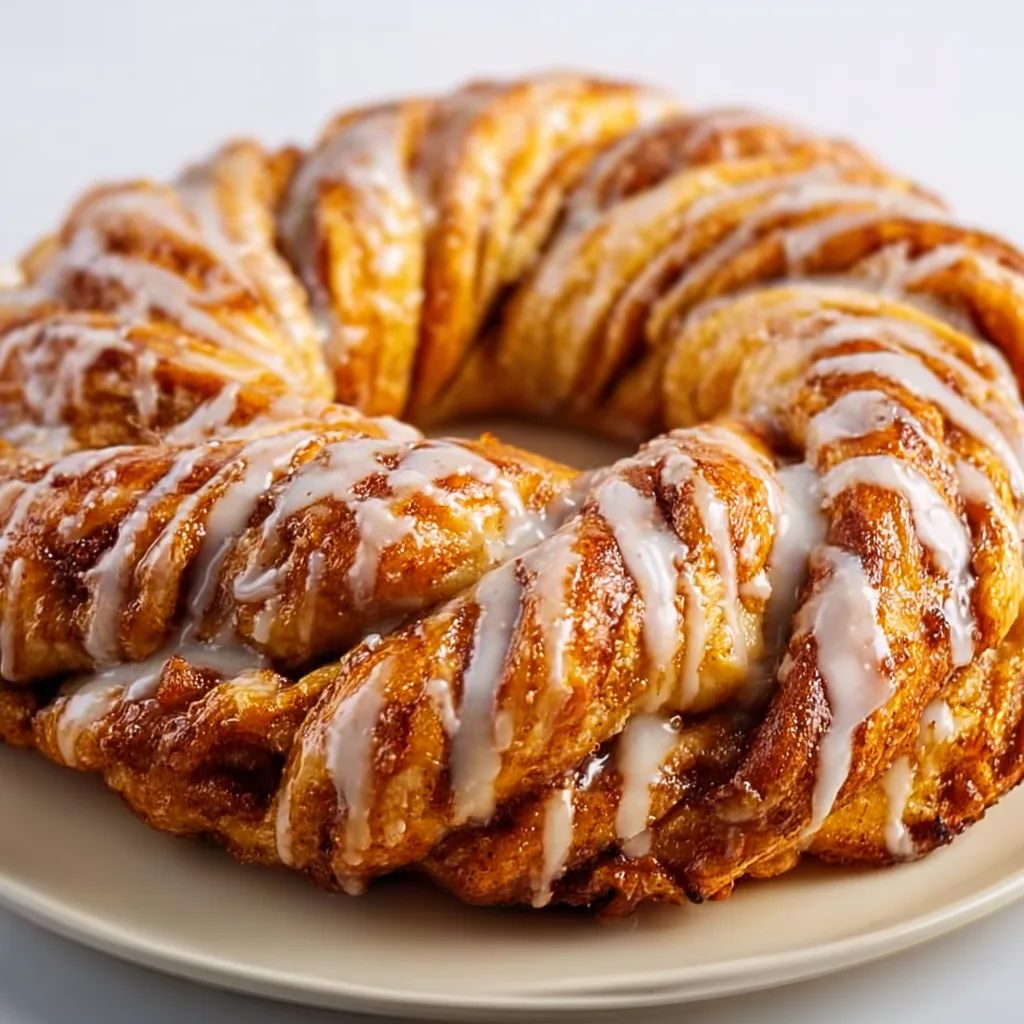
  • Apple Cinnamon Kringle with Vanilla Glaze | Irresistible Delight!

    Apple Cinnamon Kringle with Vanilla Glaze | Irresistible Delight!

    Apple Cinnamon Kringle with Vanilla Glaze | Irresistible Delight!

    The scent of Apple Cinnamon Kringle with Vanilla Glaze baking in my oven transforms an ordinary morning into something magical. There’s something about the buttery, flaky pastry layers wrapped around spiced apple filling that makes even the gloomiest day feel cozy. I discovered this Danish-inspired treat during a fall weekend at my grandmother’s lake house, and it’s become my go-to recipe when I want to impress breakfast guests. The vanilla glaze adds that perfect sweet finish that pairs beautifully with a hot cup of coffee. Trust me, this kringle will have everyone asking for seconds—and the recipe!

    Recipe

    Why You’ll Love This Apple Cinnamon Kringle with Vanilla Glaze

    Perfect Balance of Flavors and Textures

    The magic of this Apple Cinnamon Kringle with Vanilla Glaze lies in its perfect contrasts. The exterior pastry shatters delicately with each bite, revealing layers of buttery dough that practically melt on your tongue. Inside, the apple filling offers tender fruit chunks swimming in a cinnamon-spiced sauce that’s neither too sweet nor too tart. I love how the apples maintain a slight firmness, giving you something to sink your teeth into. The vanilla glaze creates a sweet cap that ties everything together with its subtle vanilla warmth and satisfying sugar crackle.

    Make-Ahead Convenience

    One thing I adore about this Apple Cinnamon Kringle with Vanilla Glaze is its impressive flexibility. You can prepare the dough and filling a day ahead, then assemble and bake when you’re ready. I’ve even frozen unbaked kringles for up to a month—just thaw overnight in the refrigerator before baking! The vanilla glaze takes literally two minutes to whisk together while your kringle cools. This make-ahead capability has saved me countless times when hosting brunches or holiday gatherings. Your guests will think you spent hours in the kitchen that morning!

    Essential Tips & Tricks

    Mastering the Flaky Pastry Layers

    Creating those signature flaky layers in your Apple Cinnamon Kringle with Vanilla Glaze requires a few key techniques. First, keep everything cold—I chill my flour, butter, and even my mixing bowl beforehand. Work quickly when incorporating the butter, leaving visible pea-sized pieces rather than fully incorporating it. This creates those beautiful layers during baking. When folding the dough, think of it like a letter: fold into thirds, then rotate and repeat. For the best results, chill the dough between folds to keep the butter from melting. Your patience will be rewarded with an incredibly flaky texture that’s worth every minute.

    Perfecting the Apple Filling

    The heart of any Apple Cinnamon Kringle with Vanilla Glaze is its apple filling. Choose firm, tart-sweet apples like Honeycrisp or Granny Smith that hold their shape during baking. I dice mine into uniform 1/4-inch cubes for even cooking. Pre-cooking the filling is my secret weapon—it prevents a soggy bottom and ensures the apples are perfectly tender. Add a splash of fresh lemon juice to brighten the flavors, and don’t skimp on the cinnamon! I also add a pinch of nutmeg and clove for depth. Let the filling cool completely before spreading it on your dough to prevent melting the carefully layered butter.

    Serving Ideas & Creative Variations

    Seasonal Pairings

    Your Apple Cinnamon Kringle with Vanilla Glaze becomes even more special with thoughtful seasonal accompaniments. In fall, I serve slices alongside warm apple cider or spiced chai tea. For winter holiday brunches, pair with cranberry mimosas for a festive touch. A dollop of maple-whipped cream takes this treat to new heights—just whip heavy cream with a splash of real maple syrup and a pinch of cinnamon. For a quick breakfast, toast leftover slices and spread with a thin layer of salted butter. The kringle also pairs beautifully with fresh fruit salads for a balanced brunch spread.

    Creative Flavor Twists

    While the classic Apple Cinnamon Kringle with Vanilla Glaze is divine, don’t be afraid to experiment with flavor variations. Try adding dried cranberries or chopped walnuts to the apple filling for texture and flavor contrast. For a caramel apple version, drizzle with homemade caramel sauce instead of vanilla glaze. Pear-ginger filling makes a sophisticated alternative—just substitute ripe pears for apples and add minced crystallized ginger. For a decadent twist, fold chocolate chips into the filling or drizzle the finished kringle with melted chocolate alongside the vanilla glaze. These variations keep this recipe exciting year-round!

    Storage & Troubleshooting Guide

    Proper Storage Methods

    Your Apple Cinnamon Kringle with Vanilla Glaze will stay fresh and delicious for up to three days when stored properly. Keep it at room temperature in an airtight container for the first day to maintain that perfect flaky texture. After that, refrigerate any leftovers—just bring slices back to room temperature before enjoying, or warm briefly in a 300°F oven for 5 minutes. For longer storage, freeze individual slices wrapped tightly in plastic wrap, then foil. Thaw at room temperature or reheat from frozen in a 325°F oven until warmed through. I find the glaze remains surprisingly intact even after freezing!

    Common Issues & Solutions

    Even experienced bakers encounter challenges with Apple Cinnamon Kringle with Vanilla Glaze, but most problems have simple solutions. If your dough becomes too sticky to work with, don’t add more flour—instead, chill it for 15 minutes before continuing. Filling leakage usually means the dough wasn’t sealed properly—use egg wash as “glue” around the edges before crimping. If your kringle splits during baking, your oven was likely too hot—next time, start at a lower temperature and increase gradually. For a glaze that’s too runny, add powdered sugar a tablespoon at a time; if too thick, thin with tiny amounts of milk until you reach that perfect drizzling consistency.

    Frequently Asked Questions

    Can I use store-bought puff pastry for Apple Cinnamon Kringle with Vanilla Glaze?

    Yes! While homemade dough creates the authentic texture, quality puff pastry makes a fantastic shortcut. Thaw according to package directions and roll slightly thinner before filling and shaping.

    What’s the best apple variety for this recipe?

    Honeycrisp, Braeburn, or Granny Smith work best as they hold their shape during baking while providing a balance of sweetness and acidity that complements the cinnamon perfectly.

    Can I make this dairy-free?

    Absolutely! Substitute plant-based butter in equal amounts and use coconut cream in the glaze. The texture will be slightly different but still delicious.

    How do I prevent a soggy bottom on my kringle?

    Pre-cook your apple filling to release excess moisture, cool completely before assembling, and bake on a preheated baking sheet to create immediate heat on the bottom.

    Can I prepare this the night before serving?

    Yes! Either refrigerate the assembled unbaked kringle overnight and bake fresh in the morning, or bake ahead and refresh in a 300°F oven for 5-7 minutes before serving.

    Final Thoughts

    This Apple Cinnamon Kringle with Vanilla Glaze has become more than just a recipe in my kitchen—it’s a tradition that marks the changing seasons and brings comfort on chilly mornings. There’s something magical about watching friends and family gather around the table, drawn by its irresistible aroma. The beauty of this kringle is in its perfect balance: impressive enough for special occasions yet approachable enough for weekend baking projects. I hope you’ll make this recipe part of your own tradition and share it with those you love. For more seasonal inspiration, check out my Pinterest collection of fall baking favorites!

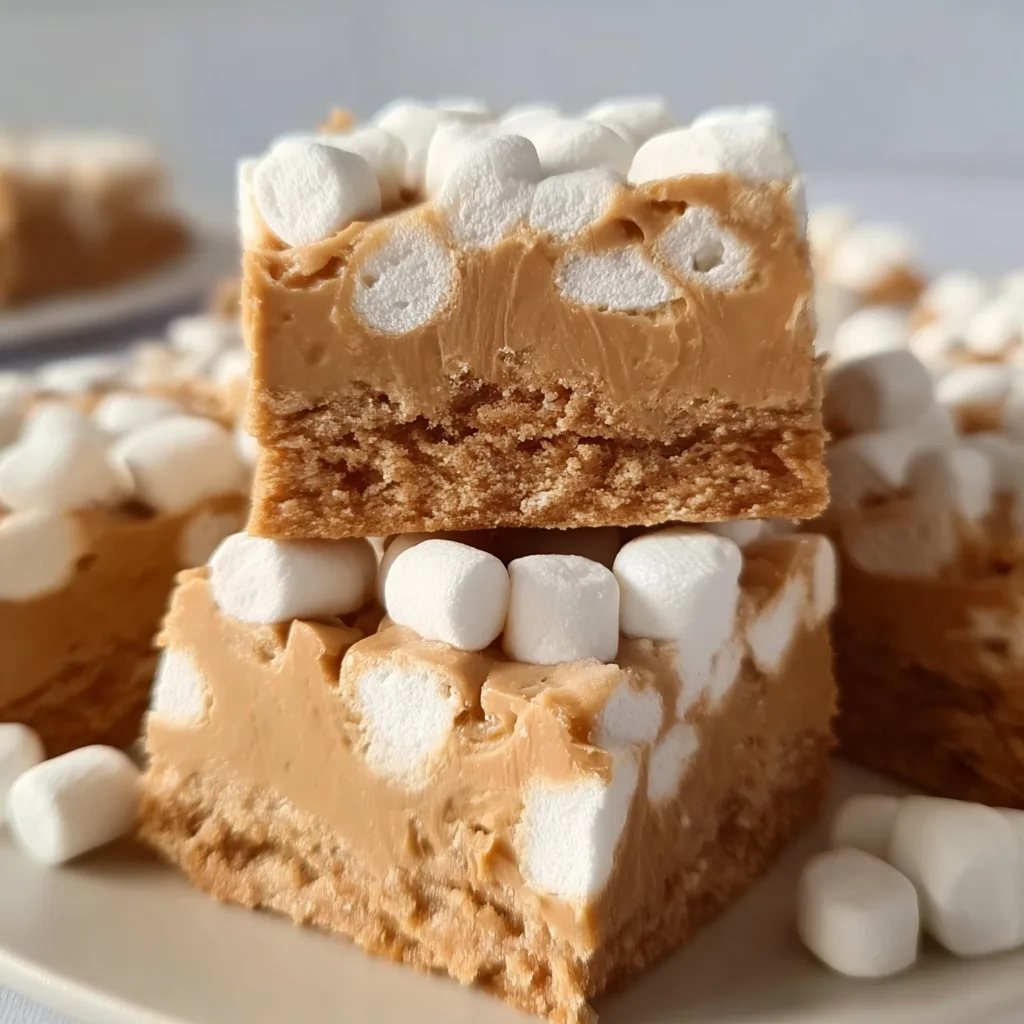
  • No-Bake Peanut Butter Marshmallow Squares Everyone Will Love!

    No-Bake Peanut Butter Marshmallow Squares Everyone Will Love!

    No-Bake Peanut Butter Marshmallow Squares Everyone Will Love!

    No-Bake Peanut Butter Marshmallow Squares have been my go-to treat since I discovered them during a summer power outage when baking was impossible. There’s something magical about the way creamy peanut butter envelops those pillowy marshmallows, creating squares that are simultaneously chewy, crunchy, and utterly irresistible. I love watching friends’ eyes light up when they bite into these nostalgic treats. The best part? You can whip these up in minutes without turning on your oven, making them perfect for hot summer days or last-minute gatherings when you need something sweet and impressive.

    Recipe

    Why You’ll Love These No-Bake Peanut Butter Marshmallow Squares

    Perfect Balance of Flavors and Textures

    These squares hit all the right notes with their perfect texture contrast between the crispy cereal, velvety peanut butter, and soft marshmallows. I still remember making these with my daughter during her first sleepover party—the girls couldn’t believe something so delicious could be made so quickly! The subtle saltiness from the peanut butter balances the sweetness of marshmallows and chocolate, creating that addictive sweet-and-salty combination that keeps everyone reaching for “just one more piece.” Plus, the satisfying chew factor makes each bite a delightful sensory experience.

    Quick and Accessible for Any Occasion

    What I adore most about these squares is their incredible convenience. With just 5-6 pantry staples and about 15 minutes of active time, you’ve got a crowd-pleasing dessert that looks like you spent hours in the kitchen. Last Christmas, when my oven unexpectedly quit working, these squares saved our holiday gathering! They’re perfect for busy weeknights, potlucks, bake sales, or anytime you need a reliable treat that won’t let you down. Even kitchen novices can nail this recipe on the first try—it’s virtually foolproof.

    Essential Tips & Tricks

    Mastering the Perfect Consistency

    The secret to success lies in properly melting your peanut butter mixture. Heat it gently—either in a heavy-bottomed pot on low heat or in 30-second microwave bursts—stirring frequently to prevent scorching. You want it warm and fluid but not bubbling hot, which could melt your marshmallows too quickly. I learned this the hard way during a summer picnic prep when I rushed and overheated the mixture! For extra creamy results, remove from heat completely before folding in marshmallows and cereal, allowing the residual warmth to gently coat everything without melting the delicate ingredients.

    Ingredient Swaps That Always Work

    Don’t stress if you’re missing an exact ingredient—these squares are wonderfully adaptable. Crunchy peanut butter creates a delightful texture variation if you prefer some nutty bits. No Rice Krispies? Graham cracker crumbs, crushed cornflakes, or even broken pretzel pieces work beautifully. For a more decadent version, fold in mini chocolate chips once the mixture has cooled slightly. I’ve even made these for my lactose-intolerant neighbor using dairy-free chocolate chips and coconut oil instead of butter—she couldn’t believe how delicious they were!

    Serving Ideas & Creative Variations

    Elegant Presentation Options

    Transform these humble squares into an impressive dessert with minimal effort. Cut them into perfect cubes and arrange on a wooden board with fresh berries for a beautiful contrast. For special occasions, I like to drizzle melted white chocolate in a zigzag pattern across the top, then sprinkle with crushed freeze-dried raspberries for a pop of color and flavor. Last Valentine’s Day, I used a heart-shaped cookie cutter for the cutest presentation that had my husband sneaking extras from the fridge all week! These also look stunning served on individual dessert plates with a small scoop of vanilla ice cream.

    Seasonal and Holiday Adaptations

    These versatile squares can be easily customized for any holiday or season. For Halloween, fold in orange and black sprinkles or candy pieces. Christmas calls for crushed candy canes and green sprinkles. For summer picnics, I love adding dried cranberries and a hint of orange zest to brighten the flavor profile. My personal favorite variation came about during fall when I swapped regular peanut butter for cookie butter and added cinnamon—the warm spice notes were absolutely divine! You can also press the mixture into themed silicone molds instead of a pan for holiday-shaped treats.

    Storage & Troubleshooting Guide

    Keeping Them Fresh and Delicious

    These squares maintain their best texture when stored properly. Keep them in an airtight container with parchment paper between layers to prevent sticking. At room temperature, they’ll stay fresh for 3-4 days, though they rarely last that long in my house! For longer storage, refrigerate for up to a week—the chilled texture creates an almost fudge-like consistency that’s equally delicious. I discovered by accident that freezing works beautifully too; just thaw for 15 minutes before serving. For summer potlucks, I keep them in a cooler with ice packs to maintain their perfect chewy-crispy balance.

    Fixing Common Issues

    Even experienced bakers encounter occasional hiccups, but most problems with these squares are easily fixable. If your mixture seems too dry or crumbly when mixing, add a tablespoon more melted butter or peanut butter. Too sticky to cut cleanly? Refrigerate for 30 minutes, then use a knife dipped in hot water and wiped dry between cuts. If your squares didn’t set properly, they likely needed more cooling time—pop them in the fridge for an hour. I once salvaged a batch that wouldn’t hold together by pressing the mixture into muffin tins and creating individual cups instead!

    Frequently Asked Questions

    Can I make No-Bake Peanut Butter Marshmallow Squares ahead of time?

    Absolutely! Make them up to 3 days in advance and store in an airtight container. They actually develop even better flavor after sitting overnight in the refrigerator.

    What’s the best peanut butter to use?

    Commercial creamy peanut butter (like Jif or Skippy) works best as it has stabilizers that help the squares set properly. Natural peanut butter can separate and affect the texture.

    Can I make these allergy-friendly?

    Yes! Substitute sunflower seed butter or almond butter for peanut butter. Use gluten-free cereal if needed, and vegan marshmallows for a vegetarian version.

    Why did my squares turn out too hard?

    You likely overcooked the sugar mixture or used too little marshmallow. Gentle heating and proper measurement of ingredients prevent this issue.

    How do I know when they’re ready to cut?

    They should feel firm but slightly yielding when pressed with a finger. If they’re still tacky, they need more cooling time—usually at least 2 hours.

    Final Thoughts

    No-Bake Peanut Butter Marshmallow Squares remain one of my most treasured recipes because they embody what I love most about cooking—creating joy through simplicity. They’ve been there for last-minute school treats, power outage emergencies, and countless happy moments around my kitchen table. The way they bring together nostalgic flavors in an effortless package makes them truly special. I hope these squares become a beloved staple in your recipe collection too, ready whenever you need a foolproof treat that always delivers smiles. Don’t forget to share your creations on Pinterest!

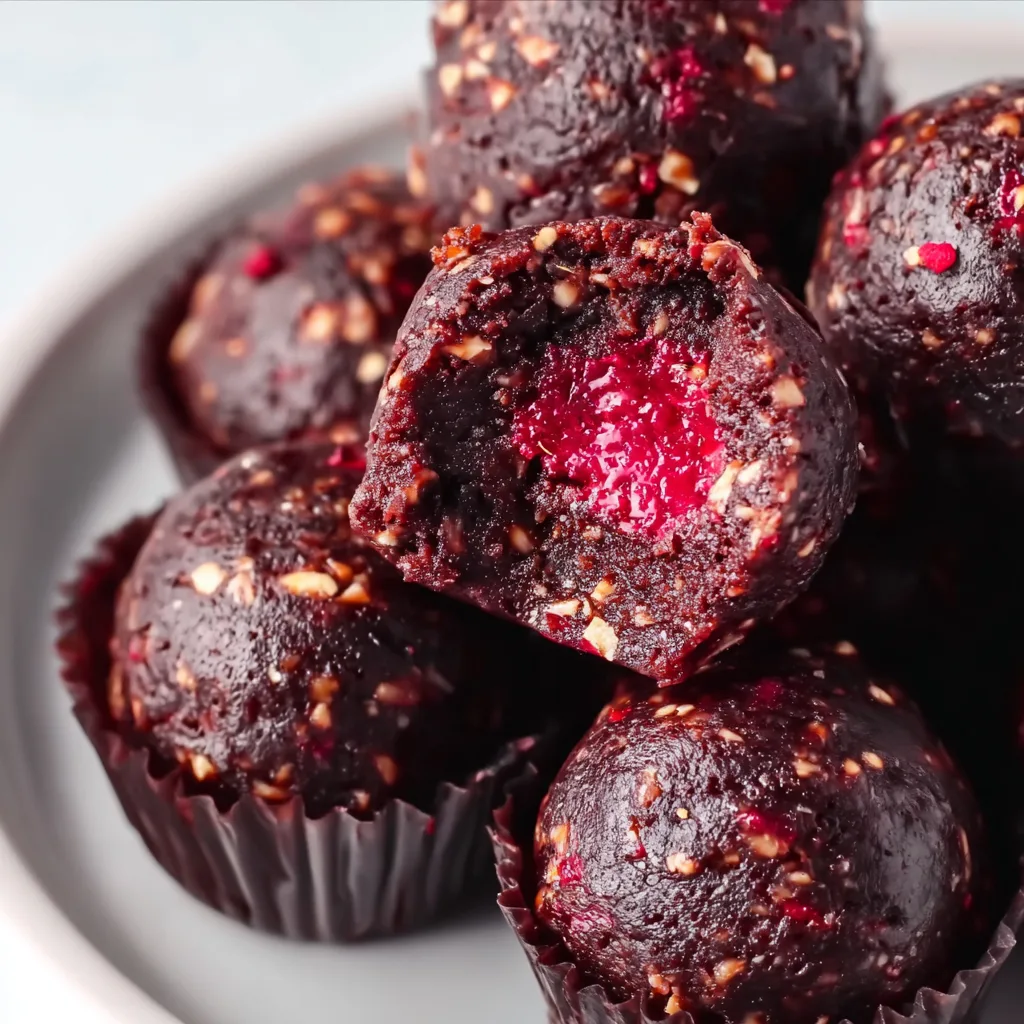
  • Raspberry Brownie Date Energy Bites: Irresistible Healthy Snack Boost!

    Raspberry Brownie Date Energy Bites: Irresistible Healthy Snack Boost!

    Raspberry Brownie Date Energy Bites: Irresistible Healthy Snack Boost!

    Raspberry Brownie Date Energy Bites have completely transformed my afternoon slump situation. That desperate 3 PM reach for something sweet yet energizing? These little powerhouses are my secret weapon. Packed with nutrient-dense dates, rich cocoa, and bright raspberries, they deliver that chocolate brownie satisfaction without the sugar crash. I started making these when my daughter begged for “something chocolatey” for her lunchbox that wasn’t junk food. Now they’re our family’s go-to treat that feels indulgent while actually fueling our bodies.

    Recipe

    Why You’ll Love This Raspberry Brownie Date Energy Bites

    Perfect Balance of Flavor & Nutrition

    These bites hit that magical sweet spot between decadent treat and wholesome snack. The dates provide natural caramel sweetness and sticky binding power, while cocoa delivers that deep chocolate flavor we crave. I love how the freeze-dried raspberries add little bursts of tartness that cut through the richness. When my son’s soccer team demolished a double batch in minutes, I knew I’d found the perfect balance. The protein from nuts keeps you satisfied, while the natural fruit sugars offer quick energy without the processed stuff.

    No-Bake Convenience

    There’s something deeply satisfying about whipping up a batch of these when you’re craving something sweet but don’t want to heat up the kitchen. The food processor does all the heavy lifting, transforming whole ingredients into a fudgy mixture in minutes. On busy weeknights when I’m helping with homework and juggling dinner prep, I can still make these with minimal effort. Just pulse, roll, and refrigerate! The hands-on time is under 15 minutes, making them perfect for last-minute snack emergencies or when unexpected guests drop by.

    Essential Tips & Tricks

    Ingredient Selection Matters

    The quality of your ingredients dramatically impacts the final result. Choose soft, fresh dates (Medjool are my favorite) for the best texture and natural sweetness. If your dates feel dry, soak them in warm water for 10 minutes before using. For the cocoa powder, a high-quality Dutch-processed variety gives that rich brownie flavor we’re after. When selecting nuts, raw unsalted varieties work best as they blend more smoothly and let you control the salt level. I learned this lesson after a batch with salted almonds turned out way too salty for my taste!

    Perfecting the Texture

    Achieving that perfect fudgy consistency requires a bit of attention. Pulse the mixture until it just starts to come together – overmixing can release too much oil from the nuts, making the bites greasy. If your mixture seems too dry, add a teaspoon of water or a small splash of coconut milk at a time until it reaches that perfect sticky-but-rollable texture. For uniform bites, I use a small cookie scoop before rolling them between my palms. Slightly damp hands prevent sticking and create beautifully smooth energy bites.

    Serving Ideas & Creative Variations

    Beyond the Basic Bite

    These versatile treats can be transformed in countless ways. Try flattening them into mini energy bars, perfect for tucking into lunchboxes. For special occasions, I dip half of each bite into melted dark chocolate and sprinkle with crushed freeze-dried raspberries – they look absolutely stunning on a dessert platter! Roll them in different coatings like shredded coconut, crushed nuts, or cacao nibs for varied texture. My personal favorite is serving them alongside my morning coffee as a little breakfast treat that feels indulgent but starts my day with natural energy.

    Flavor Customization

    The basic recipe is just the beginning – the flavor combinations are endless! Swap the raspberries for freeze-dried strawberries or blueberries for a different berry profile. Add a tablespoon of orange zest for a chocolate-orange version that tastes like those holiday chocolate balls. Spice lovers can add a pinch of cayenne or cinnamon for a Mexican chocolate variation. For a more grown-up version, I sometimes add a teaspoon of espresso powder and a splash of vanilla extract – it tastes like a sophisticated mocha truffle but with all the nutritional benefits.

    Storage & Troubleshooting Guide

    Optimal Storage Methods

    Proper storage ensures your energy bites maintain their perfect texture and flavor. Keep them refrigerated in an airtight container, where they’ll last up to two weeks. For longer storage, these freeze beautifully for up to three months. I like to freeze them on a baking sheet first, then transfer to a freezer bag – this prevents them from sticking together. For on-the-go snacking, I individually wrap them in small pieces of parchment paper. They thaw quickly at room temperature, making them perfect for tucking into gym bags or purses for emergency hunger situations.

    Fixing Common Issues

    Even experienced bakers encounter challenges. If your mixture is too sticky to roll, refrigerate it for 20-30 minutes first – the natural oils will firm up, making handling easier. Conversely, if the mixture is too dry and crumbly, add a teaspoon of water or a drizzle of honey to help it bind. Sometimes the dates aren’t moist enough to create that sticky binding effect. In that case, soak them in hot water for 5-10 minutes, drain well, and then proceed with the recipe. If the raspberry flavor isn’t pronounced enough, try pulsing in additional freeze-dried berries.

    Frequently Asked Questions

    Can I make Raspberry Brownie Date Energy Bites nut-free?

    Absolutely! Substitute sunflower seeds or pumpkin seeds for the nuts. You can also use oats as a base, though you may need to add a tablespoon of nut-free butter (like sunflower seed butter) to achieve the right consistency.

    How many calories are in each energy bite?

    Each bite contains approximately 85-95 calories, depending on your exact ingredients and size. They provide a balanced mix of natural sugars, healthy fats, and fiber that makes them satisfying despite their small size.

    Can I use fresh raspberries instead of freeze-dried?

    Fresh raspberries contain too much moisture and will make the mixture too wet. Stick with freeze-dried for intense flavor without added moisture, or substitute raspberry powder if available.

    How do I know when the mixture is processed enough?

    The mixture is ready when it sticks together when pressed between your fingers. You should still see small bits of nuts and fruit – you don’t want a completely smooth paste.

    How can I increase the protein in these energy bites?

    Add 1-2 tablespoons of your favorite protein powder or replace some of the nuts with hemp seeds. You can also roll the finished bites in collagen powder for an extra protein boost.

    Final Thoughts

    These Raspberry Brownie Date Energy Bites have become my kitchen MVP – versatile, delicious, and nourishing all at once. They’ve saved countless afternoons from the vending machine temptation and delighted everyone from picky kids to health-conscious friends. The blend of rich chocolate flavor with bright raspberry notes creates something truly special that satisfies deep cravings while providing real energy. I hope they become a staple in your recipe collection too! For more healthy treat ideas, check out my Pinterest board where I share new variations regularly.

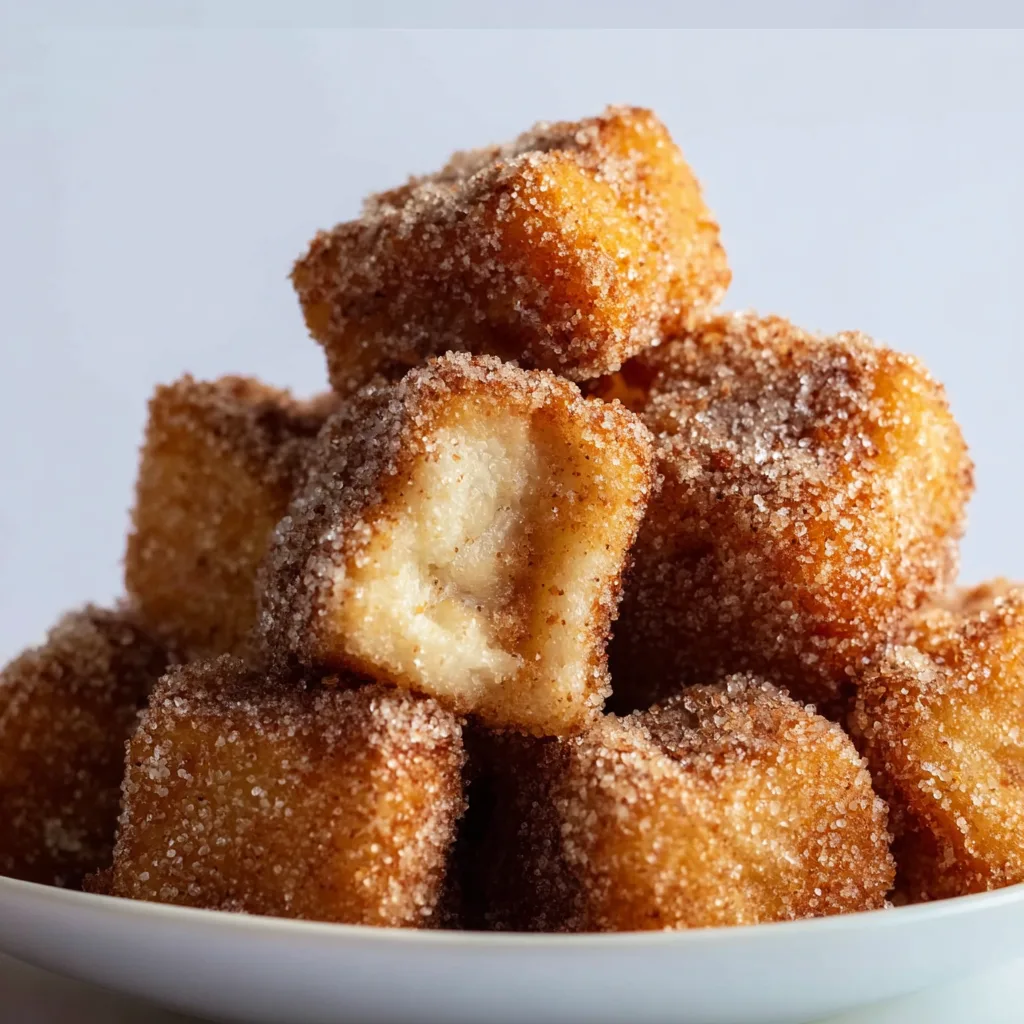
  • Crunchy Angel Cake Churro Bites: Irresistible Sweet Crunch!

    Crunchy Angel Cake Churro Bites: Irresistible Sweet Crunch!

    Crunchy Angel Cake Churro Bites: Irresistible Sweet Crunch!

    Crunchy Angel Cake Churro Bites are what happen when heavenly angel food cake meets the warm, cinnamon-sugar embrace of a churro. The first time I made these for my niece’s birthday, the entire platter disappeared before I could even announce dessert was ready! There’s something magical about that contrast between the light, airy interior and the crispy, sugar-coated exterior that makes these bites utterly irresistible. Perfect for parties or weekend treats, these little morsels bring the joy of carnival food right to your kitchen table—no deep fryer required! If you love sweet treats with texture contrast, you’ll want to add this to your must-try dessert collection.

    Recipe

    Why You’ll Love This Crunchy Angel Cake Churro Bites

    Perfect Texture Combination

    The magic of these bites lies in their contrasting textures. Starting with angel food cake gives you that signature pillowy interior that practically melts in your mouth. But the transformation happens when those cake cubes hit the butter-kissed pan, creating a delicate crust that crackles ever so slightly between your teeth. I’m obsessed with how the cinnamon-sugar coating creates tiny crystalline pockets that add the perfect amount of crunch. It’s like biting into a cloud wrapped in a sweet, crispy shell—an experience that satisfies both the comfort-food lover and texture enthusiast in all of us.

    Quick & Accessible Ingredients

    What I adore about this recipe is how it transforms ordinary ingredients into something extraordinary. You don’t need to trek to specialty stores or spend hours in the kitchen. A store-bought angel food cake works beautifully here (though homemade is lovely if you have the time). The pantry staples—butter, cinnamon, sugar—do all the heavy lifting flavor-wise. Last weekend, I whipped these up in under 20 minutes when friends dropped by unexpectedly, and they couldn’t believe something so delicious came together so quickly! The minimal prep time makes these perfect for last-minute gatherings or when that dessert craving strikes without warning.

    Essential Tips & Tricks

    Perfecting the Cut & Coating

    The key to perfect churro bites starts with how you cut your angel cake. I’ve found that 1-inch cubes work best—small enough to get crispy all around but large enough to maintain that fluffy interior. Use a serrated knife with a gentle sawing motion to avoid squishing the delicate cake. When it comes to the coating, don’t rush! Make sure your butter is hot enough to sizzle slightly but not smoking. Work in batches, giving each cube enough space in the pan to develop that golden crust. For an extra-special touch, try mixing the cinnamon-sugar in a paper bag and gently shaking the warm bites inside—just like we did with Cinnamon Sugar Tortilla Chips.

    Temperature & Timing Secrets

    Temperature control makes or breaks these churro bites. I learned this the hard way when I cranked the heat too high and ended up with burnt exteriors and still-soft middles. Keep your pan at medium heat throughout the process—this allows the cubes to develop that gorgeous golden crust while warming through completely. Each batch needs just 2-3 minutes total, turning the cubes gently with a fork to hit all sides. Watch for visual cues: you want amber rather than deep brown. The sugar can burn quickly, so stay attentive! Immediately transfer finished bites to your cinnamon-sugar mixture while still hot—this ensures maximum stickage of that sweet, spiced coating.

    Serving Ideas & Creative Variations

    Perfect Pairings & Presentations

    These Crunchy Angel Cake Churro Bites shine brightest when served warm, with the cinnamon-sugar still slightly caramelized. For an Instagram-worthy presentation, pile them in a rustic ceramic bowl or arrange on a slate board with decorative dusting of extra cinnamon sugar. My favorite way to elevate these is with accompanying dips—warm chocolate ganache, dulce de leche, or vanilla bean crème anglaise all make divine partners. For summer gatherings, I serve them alongside fresh berries and whipped cream, similar to how I plate my Tuxedo Cake Triple Chocolate Mousse Cake for a beautiful contrast. Consider small skewers for easy dipping at parties, or nestle them in paper cupcake liners for grab-and-go enjoyment.

    Flavor Twists & Variations

    While the classic cinnamon-sugar coating is timeless, these bites welcome creative adaptations. Try a pumpkin spice version by adding nutmeg, cloves, and ginger to your cinnamon-sugar mix—perfect for fall gatherings. For a tropical twist, replace some granulated sugar with coconut sugar and add lime zest to the coating. Chocolate lovers can fold cocoa powder into the sugar mixture or drizzle finished bites with melted chocolate. My recent obsession is adding a tiny pinch of cayenne for a Mexican-inspired sweet heat that’s unexpectedly delightful. For special occasions, try infusing the butter with vanilla bean or orange zest before pan-frying for subtle aromatic notes that elevate these bites to gourmet status.

    Storage & Troubleshooting Guide

    Keeping Them Crispy

    The biggest challenge with these churro bites is maintaining that perfect crispness. Ideally, enjoy them fresh within an hour of making—this is when the texture contrast truly shines. If you must store leftovers, place them in a single layer on a paper towel-lined container with the lid slightly ajar. Complete airtight storage creates condensation that softens the exterior. To revive day-old bites, preheat your oven to 300°F and warm them for 5-7 minutes on a baking sheet. Avoid the microwave at all costs—it’ll make them chewy rather than crispy! For parties, I often prepare the cake cubes ahead but do the actual pan-frying just before serving to ensure that fresh-made texture everyone loves.

    Fixing Common Issues

    If your churro bites aren’t crisping properly, your pan is likely not hot enough. The butter should be gently sizzling when the cake cubes hit the surface. Conversely, if they’re burning before cooking through, your heat is too high. Finding that perfect medium heat is crucial. Another common issue is sugar clumping instead of evenly coating—this happens when the bites aren’t buttery enough. Make sure each cube gets a light coating of butter in the pan. If your angel cake is particularly soft or fresh, try letting the cubes sit out for 30 minutes before frying—slightly stale cake actually creates a better exterior.

    For bites that seem bland, remember to salt your cinnamon-sugar mixture—just a tiny pinch enhances all the flavors.

    Frequently Asked Questions

    Can I make Crunchy Angel Cake Churro Bites ahead of time?

    While best enjoyed fresh, you can prepare them up to 4 hours ahead. Store at room temperature (not refrigerated) and reheat in a 300°F oven for 5 minutes to restore crispness before serving.

    Can I use homemade angel food cake instead of store-bought?

    Absolutely! Homemade works beautifully and often creates an even better texture. Just ensure it’s completely cooled before cutting into cubes to maintain its structure.

    Is there a way to make these without butter?

    Yes! Coconut oil makes an excellent substitute with a slight tropical flavor note. Clarified butter (ghee) also works well and has a higher smoke point for easier cooking.

    Can I freeze these churro bites?

    I don’t recommend freezing as it significantly affects the texture. The moisture released during thawing makes them soggy, and they never quite regain their signature crunch.

    How do I know when the angel cake cubes are properly cooked?

    Look for golden brown edges and a firm exterior that holds its shape when gently pressed with a fork. The interior should feel warm but still maintain its fluffy texture.

    Final Thoughts

    These Crunchy Angel Cake Churro Bites represent everything I love about creative baking—transforming simple ingredients into something magical through clever technique. The contrast between the crispy, cinnamon-sugar exterior and the pillowy angel cake interior creates a truly special dessert experience that feels both nostalgic and novel. I hope you’ll try these little bites of joy and experience the delight of watching friends and family reach for “just one more” until the plate is empty. For more dessert inspiration, follow me on Pinterest where I’m always sharing new sweet creations!

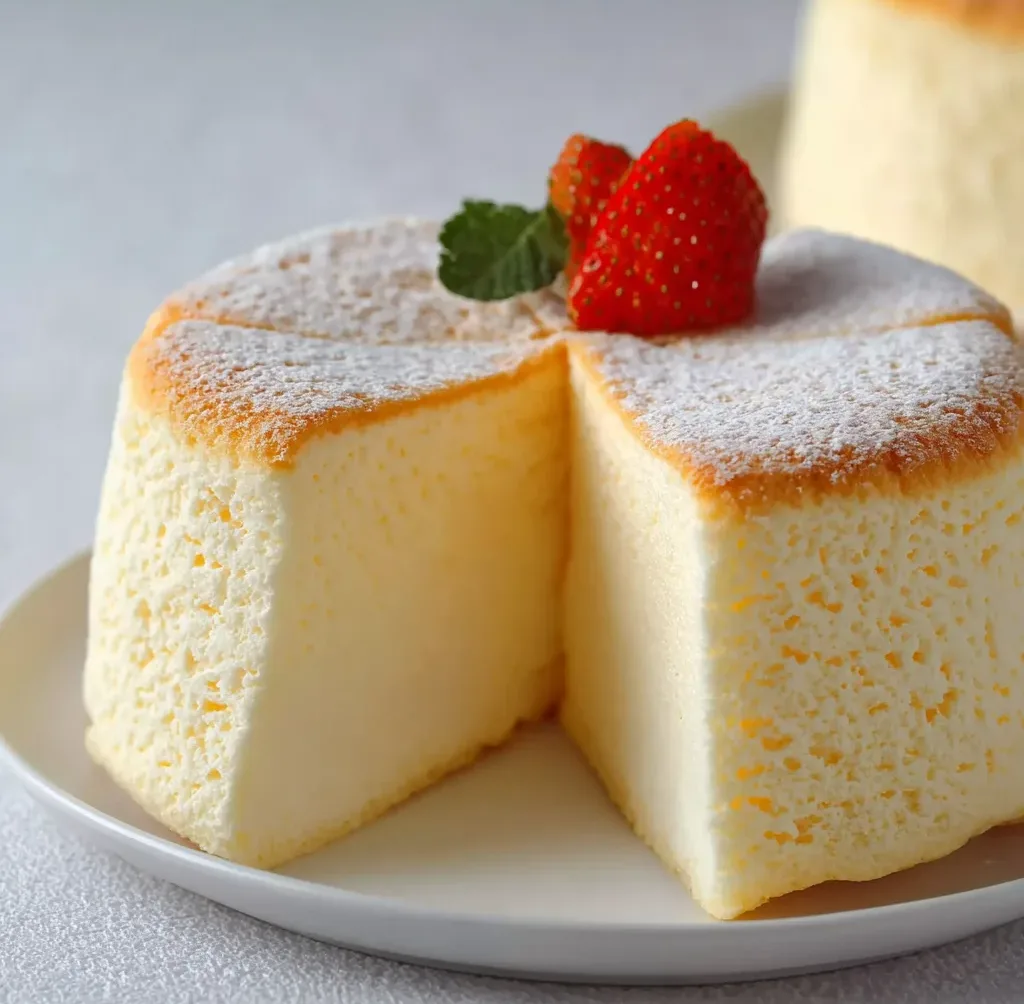
  • Fluffy Japanese Cotton Cheesecake: Melt-in-Your-Mouth Delight!

    Fluffy Japanese Cotton Cheesecake: Melt-in-Your-Mouth Delight!

    Fluffy Japanese Cotton Cheesecake: Melt-in-Your-Mouth Delight!

    Fluffy Japanese Cotton Cheesecake has been my absolute obsession since I first tasted it in a tiny café in Tokyo. Unlike traditional New York-style cheesecakes, this cloud-like dessert practically melts on your tongue with its impossibly light texture. I still remember the first time I made it at home—standing anxiously by my oven window, watching it rise like a soufflé, filling my kitchen with that warm, vanilla-scented embrace. If you’ve been searching for a dessert that balances delicate sweetness with a pillowy texture, this Japanese cotton cheesecake might just become your new favorite baking project.

    Recipe

    Why You’ll Love This Fluffy Japanese Cotton Cheesecake

    A Texture Unlike Any Other Cheesecake

    The magical mouthfeel of Japanese cotton cheesecake is what truly sets it apart. When you take your first bite, you’ll experience a gentle resistance before it dissolves into airy perfection—somewhere between a soufflé, a chiffon cake, and a traditional cheesecake. I was skeptical about achieving this texture at home until I mastered the technique of properly folding meringue into the cream cheese mixture. The way it jiggles slightly when cooled reminds me of those viral videos that made this dessert famous. Yet it’s sturdy enough to slice cleanly without collapsing like many soufflés do.

    Less Sweet, More Sophisticated

    Unlike its American counterparts that can sometimes overwhelm with sweetness, this Japanese-inspired dessert celebrates subtle flavors. The delicate notes of vanilla and cream cheese shine through without being masked by excessive sugar. My sister—who typically avoids desserts—couldn’t stop reaching for seconds when I served this at our last family gathering. The gentle tanginess from the cream cheese creates perfect balance, making it ideal for afternoon tea or as a light finish to a hearty meal. It’s sophisticated enough for special occasions yet comforting enough for everyday indulgence.

    Essential Tips & Tricks

    Mastering the Perfect Meringue

    Creating stiff, glossy peaks in your egg whites is absolutely crucial for that signature cotton-like texture. I learned this the hard way after three failed attempts! Always use room temperature eggs and ensure your mixing bowl is completely free of any grease or yolk residue. Add your sugar gradually—not all at once—while beating on medium-high speed. When you lift your beater, the meringue should form a sharp peak that holds its shape without drooping. This strong meringue structure is what creates those millions of tiny air pockets that give the cheesecake its characteristic bounce.

    The Water Bath Non-Negotiable

    Don’t even think about skipping the water bath (bain-marie) step! This gentle, moist heat prevents the cheesecake from cracking and helps it rise evenly. My first attempt without one resulted in a sad, cracked surface and dry edges. Wrap your springform pan thoroughly with aluminum foil to prevent water seepage, then place it in a larger pan filled with hot water that comes about halfway up the sides. The steam created during baking is what gives this cheesecake its incredibly tender crumb and prevents the dreaded collapse that can happen with sudden temperature changes.

    Serving Ideas & Creative Variations

    Seasonal Fruit Pairings

    This cloud-like dessert becomes even more magical when paired with fresh, seasonal fruits. During summer, I love topping it with macerated berries that create a beautiful ruby-colored sauce as they sit. The slight acidity cuts through the gentle richness perfectly. In fall, warm spiced apples or poached pears create a cozy combination that’s utterly comforting. For an elegant presentation, dust with powdered sugar and arrange fruit in a simple pattern. The neutral canvas of the cheesecake allows the vibrant colors of fresh fruits to shine, making it as beautiful as it is delicious.

    Global Flavor Inspirations

    While the classic version is perfection, I’ve experimented with several flavor variations that respect the original texture while introducing new dimensions. Adding 2 tablespoons of matcha powder creates a gorgeous green tea version with subtle bitterness. For a tropical twist, replace some of the milk with coconut milk and add lime zest. My recent black sesame variation—incorporating finely ground black sesame seeds—offers a nutty depth that’s absolutely divine. Earl Grey tea-infused versions have also been successful in my kitchen, steeping the tea leaves in warm milk before incorporating into the batter.

    Storage & Troubleshooting Guide

    Proper Cooling and Storage

    The cooling process is just as important as the baking itself. After turning off the oven, leave the door slightly ajar with the cheesecake inside for about 30 minutes—this prevents the dramatic temperature change that causes deflation. Once at room temperature, refrigerate uncovered for one hour, then cover with plastic wrap for at least 4 hours (though overnight is best). This gradual cooling helps maintain that perfect texture. Properly stored, your Japanese cotton cheesecake will keep in the refrigerator for up to 3 days, though the texture is absolutely divine on day one.

    Rescuing Common Mishaps

    Even experienced bakers encounter cheesecake challenges. If your cake cracks on top, don’t panic—a light dusting of powdered sugar works wonders as camouflage. If it deflates significantly after cooling, it likely needed more structure from properly beaten egg whites or longer baking time. For a cheesecake that’s too dense, you probably overmixed after adding the meringue—remember to fold gently with a cutting motion to preserve those air bubbles. And if the bottom gets soggy, your water bath likely leaked; double-wrap your pan with foil next time or place it in an oven bag first.

    Frequently Asked Questions

    What makes Japanese cotton cheesecake different from regular cheesecake?

    Fluffy Japanese cotton cheesecake incorporates whipped egg whites for a soufflé-like texture that’s much lighter and airier than traditional cheesecakes. It contains less sugar and cream cheese while requiring a water bath baking method.

    Can I make this cheesecake without a springform pan?

    Yes! While springform pans are ideal, you can use a regular cake pan lined with parchment paper that extends up the sides as handles to lift the cake out after cooling.

    Why did my cheesecake collapse after baking?

    Sudden temperature changes cause collapse. Cool gradually by turning off the oven, opening the door slightly, and letting it rest 30 minutes before removing to room temperature.

    Can I freeze Japanese cotton cheesecake?

    Yes, though the texture may change slightly. Wrap individual slices tightly in plastic wrap and foil, then freeze for up to one month. Thaw overnight in the refrigerator.

    How do I know when my cheesecake is properly baked?

    The top should be golden brown and spring back slightly when touched. A slight jiggle in the center is normal, but a wooden skewer inserted should come out clean or with a few moist crumbs.

    Final Thoughts

    This Fluffy Japanese Cotton Cheesecake has transformed my understanding of what cheesecake can be. There’s something magical about creating a dessert that seems so technically impressive yet brings such joy to everyone who tastes it. The process—from watching egg whites transform into glossy peaks to feeling that first springy bite—connects me to the precision and care that makes Japanese baking so special. I hope you’ll experience the same satisfaction when you see your creation rise in the oven and watch your guests’ eyes widen with that first heavenly bite. Find more of my favorite recipes on Pinterest!