Category: Desserts

Sweet and easy dessert recipes for every craving. Simple treats, rich flavors, and quick ideas that make any moment feel special.

  • No Bake Eclair Cake with Chocolate Ganache | Irresistibly Decadent!

    No Bake Eclair Cake with Chocolate Ganache | Irresistibly Decadent!

    No Bake Eclair Cake with Chocolate Ganache | Irresistibly Decadent!

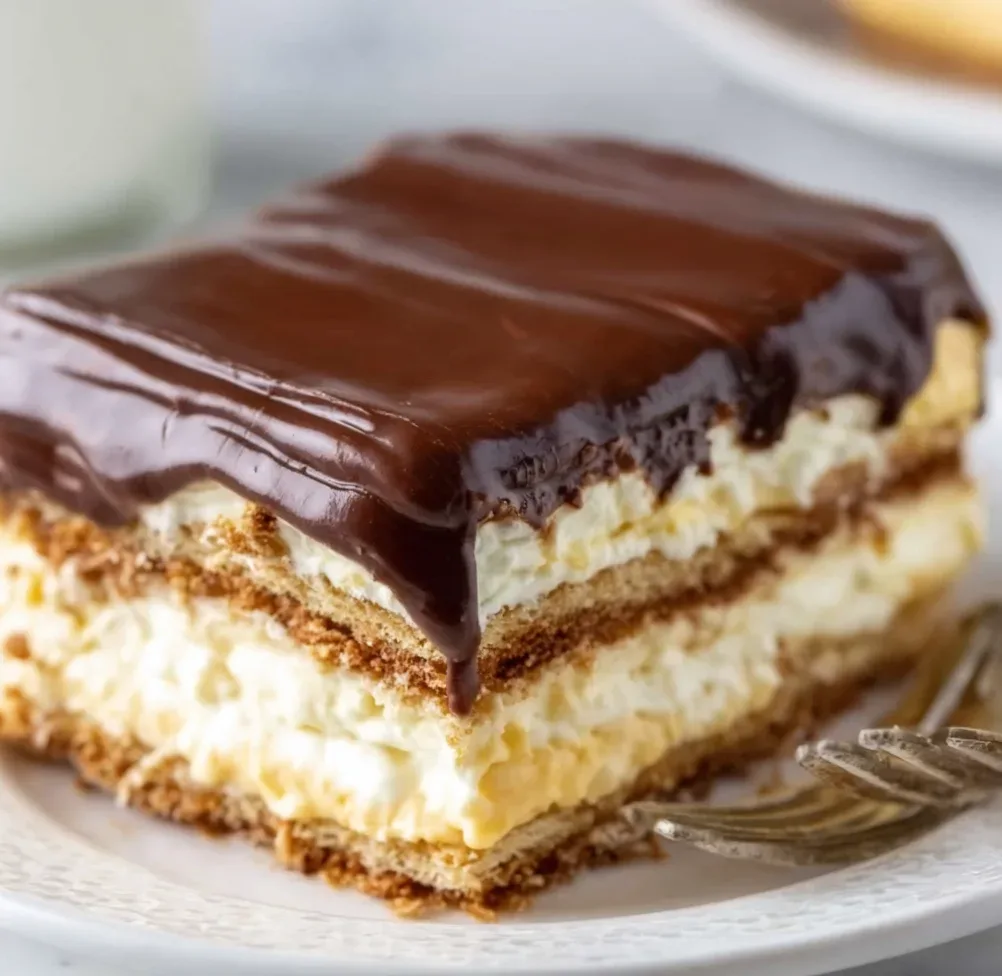
    No Bake Eclair Cake with Chocolate Ganache is the dessert that saved my last-minute dinner party when my oven decided to take an unexpected vacation. The creamy vanilla filling layered between graham crackers and topped with silky chocolate ganache creates a dessert that tastes like you spent hours in the kitchen. Trust me, this no-bake wonder has become my secret weapon for those hot summer days when turning on the oven feels criminal. The best part? It actually tastes better after chilling overnight, making it the perfect make-ahead dessert for your next gathering.

    Recipe

    Why You’ll Love This No Bake Eclair Cake with Chocolate Ganache

    Perfect for Any Occasion

    This no-bake eclair cake is incredibly versatile and always a crowd-pleaser. I’ve brought it to summer barbecues, holiday gatherings, and even my niece’s birthday when she requested “something chocolate but not too chocolate.” The elegant layers give it that wow-factor that makes guests think you’ve been slaving away, when really you spent maybe 20 minutes on actual prep. The balance of textures—crisp graham crackers that soften to a cake-like consistency, velvety pudding, and that glossy chocolate topping—creates a dessert that’s sophisticated yet comforting.

    Quick and Foolproof

    What I adore most about this recipe is how foolproof it truly is. Even when my hands were shaking from too much coffee and I spilled vanilla everywhere, this cake still turned out perfect. There’s no baking, no precise temperatures to monitor, and no risk of a fallen soufflé or cracked cheesecake. The hardest part is waiting for it to chill! This dessert is particularly perfect for novice bakers or when you need something delicious but your brain capacity is running on empty. I’ve made this at midnight for next-day events and still managed to get a good night’s sleep.

    Essential Tips & Tricks

    Perfecting the Layers

    The secret to an exceptional eclair cake lies in the layering technique. Start with a thin spread of pudding mixture on the bottom of your dish before adding the first graham cracker layer—this prevents sticking and helps soften the crackers evenly. When arranging the crackers, don’t worry about small gaps; they’ll disappear as the dessert sets. For the creamiest filling, ensure your pudding mixture is thoroughly whisked until no lumps remain. I once rushed this step and ended up with tiny pudding pockets—still delicious, but not the smooth texture we’re aiming for.

    Ganache Mastery

    For a glossy ganache that cuts perfectly without cracking, the chocolate-to-cream ratio is crucial. Too much chocolate creates a hard top that shatters when cut; too little won’t set properly. Pour the ganache while it’s still warm but not hot, then gently tilt the dish to help it spread evenly without disturbing your carefully crafted layers. For an extra touch of elegance, I sometimes add a teaspoon of espresso powder to the ganache, which deepens the chocolate flavor without making it taste like coffee. If you love this chocolate technique, you’ll also enjoy my Easy Strawberry Cake Mix Brownies with their perfect topping.

    Serving Ideas & Creative Variations

    Elegant Presentation

    Transform this humble dessert into a showstopping centerpiece with a few simple touches. Before serving, dust the top with cocoa powder using a small sieve for an artisanal finish. For special occasions, I add fresh berries along the edges—the tartness cuts through the sweetness beautifully. Individual portions served in clear glasses or mason jars create an impressive deconstructed look that’s perfect for dinner parties. I once served these at my sister’s bridal shower, layering them in champagne coupes with edible gold flakes on top, and guests still talk about them years later!

    Flavor Twists

    While the classic version is divine, this eclair cake welcomes creative adaptations. Try using chocolate graham crackers for a double-chocolate experience, or add a layer of sliced strawberries between the pudding layers for a chocolate-covered strawberry vibe. For an adult version, whisk 2 tablespoons of Bailey’s or Kahlúa into the pudding mixture. My personal favorite variation includes a thin layer of peanut butter spread on the graham crackers—it reminds me of those Classic Peanut Butter Lunch Lady Cookie Bars we all loved as kids, but with a sophisticated eclair twist.

    Storage & Troubleshooting Guide

    Optimal Storage

    For the perfect texture, this eclair cake needs at least 8 hours in the refrigerator—overnight is ideal. The magic happens during this time as the graham crackers soften to a cake-like consistency while still maintaining structural integrity. Store leftovers (if there are any!) covered tightly with plastic wrap for up to 4 days. I don’t recommend freezing this dessert, as the pudding can separate and become watery upon thawing. For the freshest taste, consume within 3 days, though I’ve never actually had it last that long in my house before eager spoons find their way to the fridge!

    Common Pitfalls

    The most common issue with eclair cake is soggy crackers from too much moisture. If your pudding mixture seems very loose, let it set in the refrigerator for 15-20 minutes before assembling. Another frequent problem is ganache that’s too firm to cut cleanly—this happens when the chocolate-to-cream ratio is off or when it’s chilled too quickly. If this happens, let the dessert stand at room temperature for 10-15 minutes before serving. And remember, if your ganache develops a light bloom (whitish appearance), it’s still perfectly safe to eat—just a cosmetic issue from temperature fluctuations.

    Frequently Asked Questions

    Can I make No Bake Eclair Cake with Chocolate Ganache ahead of time?

    Absolutely! This dessert actually improves with time. Make it 24 hours in advance for the best texture, as the graham crackers need time to soften and meld with the creamy filling.

    What if I don’t have graham crackers?

    Digestive biscuits, vanilla wafers, or even ladyfingers make excellent substitutes. The key is using a not-too-sweet cookie that will soften nicely when layered with the pudding mixture.

    Can I use homemade pudding instead of instant?

    Yes! Homemade vanilla pudding adds a luxurious touch. Just make sure it’s completely cooled before folding in the whipped topping to prevent melting.

    How do I know when my ganache is the right consistency for pouring?

    The perfect ganache should coat the back of a spoon and slowly drip off. If it runs too quickly, it needs to cool longer; if it’s too thick, gently rewarm it.

    Why did my eclair cake layers slide around?

    This typically happens when there’s too much moisture. Try placing a paper towel on top of your graham crackers for a few seconds to remove excess moisture before layering.

    Final Thoughts

    This No Bake Eclair Cake with Chocolate Ganache has become my dessert MVP—the one I turn to when I need something foolproof yet impressive. There’s something magical about transforming simple ingredients into a dessert that genuinely makes people close their eyes and savor each bite. The way the layers meld together creates something far greater than the sum of its parts. I’ve shared this recipe with countless friends who now make it for their own special occasions. For more delicious inspiration, follow me on Pinterest where I’m always pinning new no-bake wonders!
  • Caramel Bars Delight: Irresistibly Gooey Treats You Must Try!

    Caramel Bars Delight: Irresistibly Gooey Treats You Must Try!

    Caramel Bars Delight: Irresistibly Gooey Treats You Must Try!

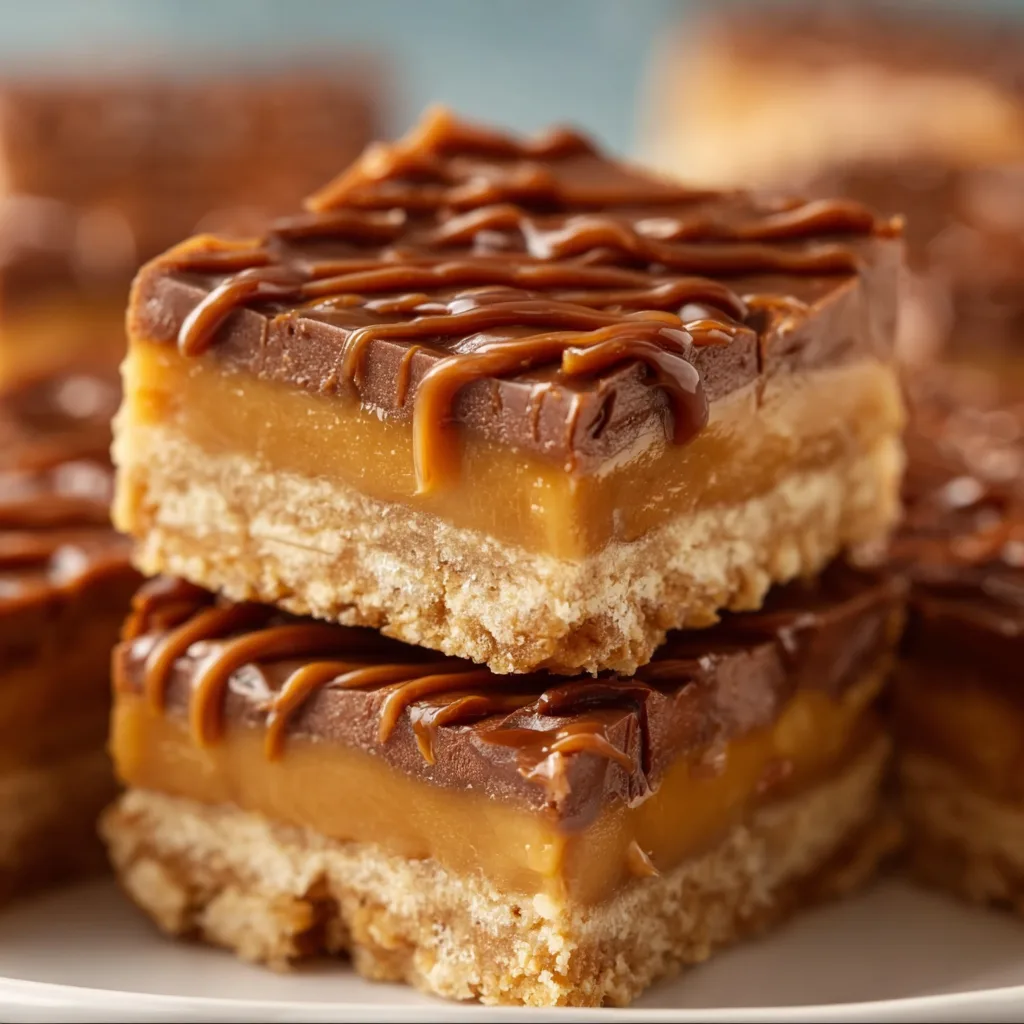
    Caramel Bars have been my secret weapon for years when I need a dessert that makes everyone’s eyes light up. These buttery, gooey treats strike the perfect balance between a cookie and a candy, with layers of rich caramel nestled between shortbread and a crumbly topping. I first made these for a neighborhood potluck where they disappeared faster than anything else on the table! The combination of textures—crisp, chewy, and melt-in-your-mouth—creates an irresistible treat that’s surprisingly simple to prepare. Let me show you how to make caramel bars that will have everyone begging for the recipe.

    Recipe

    Why You’ll Love These Caramel Bars

    Perfect Balance of Flavors and Textures

    These caramel bars deliver the most satisfying contrast between buttery shortbread and sticky-sweet caramel. The shortbread base provides a sturdy foundation while remaining tender and crumbly. When you bite into one, you first encounter that slight resistance before sinking into the gooey caramel layer that coats your palate with deep, brown sugar notes. I love watching friends take their first bite—there’s always that moment of wide-eyed surprise followed by an appreciative “mmm” that tells me they’ve discovered something special. The textural contrast is what makes these bars memorable.

    Make-Ahead Convenience

    One of my favorite things about these caramel bars is how beautifully they hold up over time. I can make them a day or two before a gathering, which is a lifesaver during busy weeks. The caramel filling actually benefits from setting up overnight, becoming more flavorful as the ingredients meld together. Last Christmas, I prepared these three days ahead for a family gathering, and they were still perfectly fresh and delicious when served. They also freeze beautifully for up to three months, making them perfect for emergency dessert stashes or when you need a quick homemade gift for unexpected visitors.

    Essential Tips & Tricks

    Perfecting the Caramel Layer

    Getting the caramel just right is crucial for these bars. I’ve learned through many batches that patience is key—low and steady heat prevents burning and creates that perfect amber color. When melting your caramel ingredients, use a heavy-bottomed saucepan and stir constantly. Watch for the moment it thickens and pulls slightly away from the sides of the pan. This usually takes about 6-7 minutes. The caramel should coat the back of a spoon but still pour easily. If it gets too thick, add a tablespoon of cream. I once rushed this step and ended up with grainy caramel—trust me, the extra few minutes of attention makes all the difference!

    Preventing Common Mistakes

    The most frequent issue I see with caramel bars is an overbaked shortbread base. For the perfect texture, bake the base just until it’s barely golden at the edges—about 15-18 minutes. Another trick is to let the base cool slightly before adding the caramel layer, which prevents the shortbread from becoming soggy. For clean-cut squares, completely cool your bars before slicing. I recommend refrigerating them for at least 2 hours, then using a sharp knife dipped in hot water and wiped clean between cuts. This simple step gives you those picture-perfect edges that make these bars look as professional as they taste.

    Serving Ideas & Creative Variations

    Elevate Your Presentation

    Transform these caramel bars from casual treat to elegant dessert with thoughtful presentation. Serve them on a wooden board with fresh berries for a rustic charm that’s perfect for gatherings. For individual servings, cut smaller pieces and place each on a decorative cupcake liner. I love drizzling extra caramel sauce in a zigzag pattern across the serving plate, then adding a light dusting of flaky sea salt just before serving. For holiday gatherings, I arrange them on a tiered stand with other classic treats like peanut butter cookie bars. The visual impact always draws guests in, and the flavor keeps them coming back!

    Exciting Flavor Twists

    While traditional caramel bars are divine, experimenting with flavors takes them to new heights. Try adding a teaspoon of espresso powder to the caramel for a mocha variation that coffee lovers adore. For fall gatherings, I incorporate apple by folding in 1/2 cup of finely diced sautéed apples to the caramel layer. Chocolate lovers can add a layer of melted dark chocolate on top of the cooled caramel before adding the crumble topping. My personal favorite variation includes toasted pecans in the topping for extra crunch and a nutty dimension that complements the sweet caramel perfectly.

    Storage & Troubleshooting Guide

    Keeping Bars Fresh

    Proper storage ensures your caramel bars maintain their perfect texture for days. Store them in an airtight container at room temperature for up to 3 days, with parchment paper between layers to prevent sticking. In warmer weather, refrigeration is best—they’ll last up to a week. Just let them come to room temperature before serving for the best flavor and texture. For longer storage, wrap individual bars in plastic wrap, then place in a freezer bag. They’ll keep for 3 months frozen. I always make a double batch specifically to freeze some for future cravings—there’s nothing better than discovering these treasures in your freezer on a day you need something sweet!

    Fixing Common Issues

    Even experienced bakers encounter challenges with caramel bars. If your caramel layer turns out too hard, it was likely cooked at too high a temperature or for too long. Next time, reduce the heat and cooking time by 1-2 minutes. For caramel that’s too soft, it needs more cooking time or cooling time. If your shortbread base crumbles when cutting, it might have been too dry—add an extra tablespoon of butter to the base next time. For bars that stick to the pan, line it with parchment paper with overhang on all sides to create handles for easy removal.

    Frequently Asked Questions

    Can I make caramel bars without a candy thermometer?

    Absolutely! Watch for visual cues instead—the caramel should be amber-colored and coat the back of a spoon. When you drag a spatula through it, it should leave a trail that slowly fills back in.

    How do I know when my caramel bars are done baking?

    The topping should be light golden brown, and the caramel might bubble slightly at the edges. Don’t overbake—they’ll continue to set as they cool.

    Why did my caramel crystallize?

    Crystallization happens when sugar crystals form. Avoid this by not stirring once the sugar dissolves, keeping the pan sides clean, and adding a teaspoon of corn syrup.

    Can I use store-bought caramel for these bars?

    You can, but homemade caramel provides better flavor and texture. If using store-bought, choose a high-quality caramel sauce and reduce it slightly for thickness.

    How do I cut caramel bars cleanly without making a mess?

    Refrigerate the bars until firm, then use a hot knife (run under hot water and dry) for each cut. Clean the knife between slices for perfect presentation.

    Final Thoughts

    These caramel bars have become my signature dessert for good reason—they strike that perfect balance between impressive and achievable. The buttery shortbread, gooey caramel, and crumbly topping create a treat that’s greater than the sum of its parts. I hope you’ll try these caramel bars and experience the joy they bring to both the baker and those lucky enough to enjoy them. Remember, baking is about sharing love, and these bars communicate that beautifully. Find more inspiration for your baking adventures on Pinterest!

  • Marshmallow Brownies That Will Melt Your Heart Instantly!

    Marshmallow Brownies That Will Melt Your Heart Instantly!

    Marshmallow Brownies That Will Melt Your Heart Instantly!

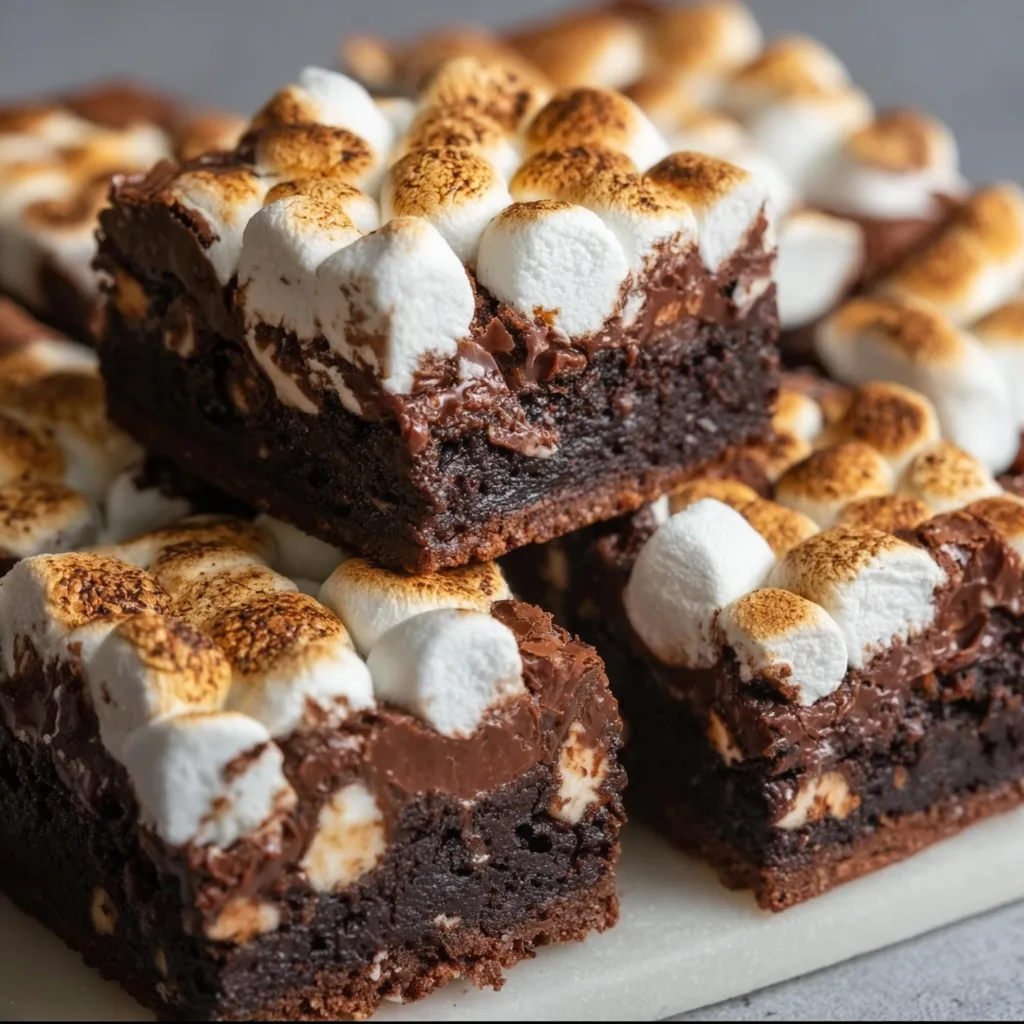
    Marshmallow Brownies have been my secret weapon for years when I need a dessert that makes people’s eyes light up with childlike wonder. There’s something magical about that perfect balance of fudgy chocolate base and pillowy marshmallow topping that creates an irresistible treat. I discovered this recipe during a rainy weekend baking marathon, and it’s been my go-to ever since. The way the marshmallows get that slight golden crust while staying gooey underneath? Pure heaven. If you’ve enjoyed my Easy Strawberry Cake Mix Brownies, you’re going to absolutely fall in love with these marshmallow-topped delights.

    Recipe

    Why You’ll Love These Marshmallow Brownies

    Perfect Texture Combination

    These marshmallow brownies deliver the ultimate textural experience that’ll make your taste buds dance. The foundation is a rich, fudgy brownie layer with that perfect crackly top we all crave. Then comes the marshmallow layer – gooey, stretchy, and slightly toasted on top. I still remember the first time my nephew tried these – his eyes went wide as he pulled his piece away, creating those irresistible marshmallow strings. The contrast between the dense chocolate base and the cloud-like topping creates a dessert experience that’s simply unforgettable.

    Simple Yet Showstopping

    Don’t let their impressive appearance fool you – these marshmallow brownies are surprisingly easy to make. You’ll need basic pantry ingredients for the brownie base, and the marshmallow topping is as simple as scattering mini marshmallows (or chopped regular ones) over the partially baked brownies. The oven does the magic of melting and toasting them to perfection. I’ve brought these to countless potlucks and family gatherings, and they always disappear first from the dessert table. People think I’ve spent hours creating this masterpiece when really, it’s one of the simplest treats in my arsenal.

    Essential Tips & Tricks

    Perfect Brownie Base Secrets

    Achieving the ideal brownie foundation is crucial for marshmallow brownies success. Don’t overmix your batter – stop stirring as soon as the ingredients are combined to avoid tough brownies. For that perfect fudgy texture, slightly underbake the brownie layer before adding marshmallows. My foolproof test: insert a toothpick 15 minutes into baking – it should come out with a few moist crumbs, not completely clean. This timing sweet spot ensures your brownies stay moist and chewy even after the second round of baking with the marshmallows. Trust me, this little trick makes all the difference!

    Marshmallow Mastery

    The marshmallow layer requires some strategic planning for that picture-perfect finish. Mini marshmallows work best as they melt more evenly, but if you only have regular ones, simply snip them into quarters with kitchen scissors. When adding marshmallows, leave a tiny border around the edges – they’ll spread as they melt. For that gorgeous golden top, switch to broil for the final 1-2 minutes, but don’t walk away! I once got distracted by a phone call and returned to find a marshmallow inferno. Watch them like a hawk, as they go from perfectly toasted to burnt in seconds. The Cheesecake Brownie Bites use a similar careful timing technique.

    Serving Ideas & Creative Variations

    Decadent Serving Suggestions

    Elevate your marshmallow brownies with some thoughtful presentation touches. Serve them slightly warm for the ultimate gooey experience – 10 seconds in the microwave works wonders for leftover pieces. For extra indulgence, drizzle with warm chocolate sauce or caramel just before serving. I love cutting these into generous squares and placing them on a vintage cake stand at the center of the table. For summer gatherings, I’ve served them alongside vanilla ice cream with fresh berries. The contrast of cold ice cream against the warm, gooey brownie creates a dessert experience that makes guests swoon.

    Flavor Twist Inspiration

    Don’t be afraid to put your personal spin on these marshmallow brownies with some creative variations. Add a layer of crushed graham crackers between the brownie and marshmallow for a s’mores-inspired treat. Peanut butter lovers can swirl 1/4 cup of warmed peanut butter into the brownie batter before baking. For a festive holiday version, I press candy cane pieces into the marshmallow layer while it’s still warm. Mint chocolate fans will love adding 1/2 teaspoon of mint extract to the brownie base, similar to my Mint Oreo Truffles recipe. The possibilities are endless!

    Storage & Troubleshooting Guide

    Keeping Them Fresh

    Proper storage technique is essential for maintaining that perfect marshmallow brownie texture. Store completely cooled brownies in an airtight container at room temperature for up to 3 days. Place parchment paper between layers to prevent sticking. For longer storage, refrigerate for up to a week, though the marshmallow texture might change slightly. I’ve found that cutting brownies with a plastic knife prevents the marshmallow from sticking to your blade. If you’re planning to freeze them, do so before adding the marshmallow layer, as frozen marshmallows can become watery when thawed.

    Common Problems Solved

    Even experienced bakers encounter occasional challenges with marshmallow brownies. If your marshmallows brown too quickly, tent the pan with foil for the remaining bake time. Sunken middle? Your brownie base likely needed another minute or two before adding marshmallows. For marshmallows that won’t properly melt, check your oven temperature with an oven thermometer – it might be running cool. If your brownies stick to the pan, next time line it with parchment paper with overhang on all sides to create handles for easy removal. I learned this the hard way after destroying a perfect batch trying to pry them out!

    Frequently Asked Questions

    Can I use homemade marshmallows for these brownies?

    Homemade marshmallows work beautifully but melt differently than store-bought. Cut them slightly larger and reduce the final baking time by 1-2 minutes to prevent over-melting.

    Why did my marshmallow layer disappear into the brownies?

    You likely added the marshmallows too early. The brownie base needs to be partially set (about 15-20 minutes of baking) before adding the marshmallow brownies topping.

    Can I make these marshmallow brownies ahead for a party?

    Absolutely! Make them up to 2 days ahead and store in an airtight container. For the freshest taste, warm individual pieces for 10 seconds in the microwave before serving.

    How do I get clean cuts through the sticky marshmallow layer?

    Chill the brownies for 30 minutes, then use a sharp knife dipped in hot water and wiped clean between cuts. This creates those beautiful, defined edges.

    What’s the best chocolate to use in the brownie base?

    Use a combination of unsweetened and semisweet chocolate for the richest flavor. High-quality chocolate chips work well, but chopped bar chocolate melts more smoothly.

    Final Thoughts

    These marshmallow brownies have become my signature dessert for good reason – they strike that perfect balance between impressive and achievable. The contrast of fudgy chocolate against pillowy marshmallow creates a treat that appeals to both kids and adults alike. I love how versatile they are, working equally well for casual family movie nights or dressed up for special occasions. Don’t forget to check out more of my favorite dessert inspirations on Pinterest. Once you master these marshmallow brownies, I guarantee they’ll become your new go-to dessert for making memories around the table.

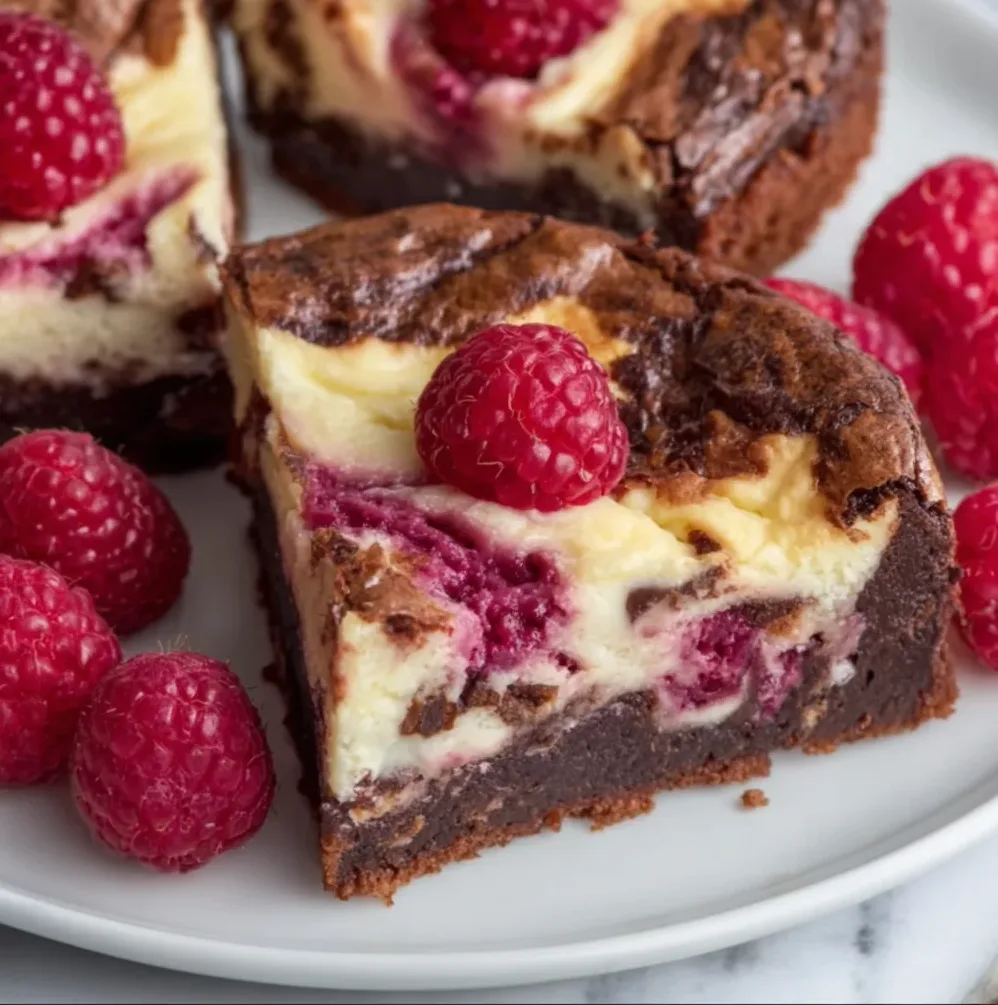
  • Raspberry Cheesecake Brownies: Irresistibly Decadent & Easy to Make!

    Raspberry Cheesecake Brownies: Irresistibly Decadent & Easy to Make!

    Raspberry Cheesecake Brownies: Irresistibly Decadent & Easy to Make!

    Raspberry Cheesecake Brownies are what happens when your two favorite desserts collide in the most delicious way possible. The first time I made these for my sister’s birthday gathering, they disappeared faster than I could snap a photo! The fudgy chocolate base, velvety cheesecake swirl, and tangy raspberry ripple create a trio of flavors that’s absolutely irresistible. Each bite delivers that perfect balance of rich, creamy, and fruity notes that’ll have everyone asking for your recipe. If you love decadent dessert mashups, these brownies need to be next on your baking list.

    Recipe

    Why You’ll Love These Raspberry Cheesecake Brownies

    Perfect Texture Combination

    There’s something magical about the textural contrast in these brownies that makes them utterly craveable. The bottom layer bakes up with that slightly crisp exterior and fudgy center that classic brownies are known for. Then comes the silky-smooth cheesecake layer that melts in your mouth, punctuated by pockets of jammy raspberry that add the perfect bright pop. I still remember the first time I nailed this recipe—standing in my kitchen, eyes closed, savoring that perfect bite while the afternoon sun streamed through my windows. It’s that kind of dessert—the one that makes you pause and appreciate the moment.

    Impressive Yet Achievable

    Don’t let the gorgeous swirls and layers intimidate you—these raspberry cheesecake brownies are surprisingly straightforward to make. Even my friend Melissa, who swears she can’t bake, mastered these on her first try! The brownie base comes together in one bowl, the cheesecake layer in another, and the raspberry swirl requires zero cooking. The marbling technique creates a beautiful pattern that looks like you spent hours perfecting it, when really it takes just minutes with a toothpick or knife. These brownies strike that perfect balance of looking fancy enough for special occasions while being simple enough for a random Tuesday night treat.

    Essential Tips & Tricks

    Ingredient Temperature Matters

    The single most important tip I can share is to ensure your cream cheese is properly softened before beginning. Cold cream cheese will leave lumps in your cheesecake layer, no matter how vigorously you mix. I learned this the hard way during a last-minute holiday baking session! Set your cream cheese out at least an hour before starting, or microwave it in 10-second intervals if you’re short on time. Similarly, use room temperature eggs for both layers—they’ll incorporate much more smoothly. For the raspberry swirl, fresh berries provide the brightest flavor, but frozen work beautifully too—just thaw and drain them thoroughly first.

    Perfecting Your Swirl Technique

    Creating those beautiful marbled swirls is easier than it looks but requires a light touch. After pouring your cheesecake layer over the brownie batter, dollop teaspoons of raspberry puree across the surface. Then take a toothpick or butter knife and gently drag it through both layers in a figure-eight motion. The key word here is “gently”—too much swirling will muddy the colors together. I like to start from the edges and work my way in, creating intricate patterns that make each brownie unique. Remember, there’s no right or wrong way to swirl—embrace the beautiful imperfections!

    Serving Ideas & Creative Variations

    Elegant Dessert Presentations

    Transform these brownies into a showstopping dessert by thinking beyond the basic square. Cut them into triangles or diamonds for a more elegant presentation, or use a round cutter for brownie medallions. For special occasions, I love to place a warm brownie in a shallow bowl, add a scoop of vanilla bean ice cream, and drizzle with additional raspberry sauce. The contrast between warm brownie and cold ice cream creates pure magic! You can also stack small squares in alternating directions and dust with powdered sugar for a dessert tower that’ll impress any guest. These brownies pair beautifully with after-dinner coffee or dessert wines.

    Flavor Twist Inspiration

    While the classic raspberry version is divine, don’t be afraid to experiment with flavor variations. Swap the raspberry puree for blackberry or strawberry for a different berry profile. For chocolate lovers, try adding mini chocolate chips to the cheesecake layer or drizzling the finished brownies with chocolate ganache. During holiday seasons, I love adding a hint of orange zest to the cheesecake mixture and a splash of Grand Marnier to the brownie base. White chocolate chips make a wonderful addition to the brownie layer, creating pockets of creamy sweetness that complement the tangy raspberry. The possibilities are endless!

    Storage & Troubleshooting Guide

    Keeping Brownies Fresh

    These raspberry cheesecake brownies taste even better the next day when the flavors have had time to meld, but proper storage is crucial. Keep them in an airtight container in the refrigerator for up to 5 days. The cheesecake component means these can’t be left at room temperature for extended periods, especially in warmer weather. For longer storage, these brownies freeze beautifully—wrap individual squares in plastic wrap, then place in a freezer bag for up to 3 months. When a craving strikes, thaw in the refrigerator overnight or at room temperature for about an hour. The texture remains remarkably good after freezing.

    Common Issues & Solutions

    If your cheesecake layer cracks during baking, don’t worry—it’s usually because the oven temperature was too high or the brownies were overbaked. Next time, try lowering your oven temperature by 25°F and checking for doneness earlier. For brownies that are too gooey in the center, they likely needed a few more minutes in the oven—remember that the toothpick test should show moist crumbs, not wet batter. If your raspberry swirl bleeds too much into the cheesecake, your puree might be too thin; strain it longer next time or reduce it slightly on the stovetop to concentrate the flavor and thicken the texture.

    Frequently Asked Questions

    Can I make Raspberry Cheesecake Brownies in advance?

    Absolutely! These brownies actually taste better after chilling overnight as the flavors deepen and meld together. Make them up to 2 days ahead for best results.

    How do I know when my brownies are done baking?

    Look for slightly puffed edges that are set and a center that’s no longer jiggly. A toothpick inserted 2 inches from the edge should come out with a few moist crumbs.

    Can I use a boxed brownie mix instead of making from scratch?

    Yes! A quality boxed mix works well as the base. Prepare according to package directions, then proceed with the cheesecake and raspberry layers as directed.

    What’s the best way to cut clean brownie squares?

    Chill the brownies completely first. Use a sharp knife dipped in hot water and wiped clean between cuts for professional-looking squares.

    Can I substitute other fruits in these raspberry cheesecake brownies?

    Definitely! Strawberries, blackberries, or even blueberries work beautifully. Just process them the same way as the raspberries in the recipe.

    Final Thoughts

    These raspberry cheesecake brownies have become my go-to when I need a dessert that’s both impressive and reliable. The combination of fudgy chocolate, creamy cheesecake, and bright berries creates something truly special that bridges seasons and occasions. Whether you’re baking for a holiday gathering, a summer picnic, or simply treating yourself after a long week, these brownies deliver that perfect balance of decadence and freshness. I hope they bring as much joy to your kitchen as they have to mine! Don’t forget to check out more delicious ideas on Pinterest.

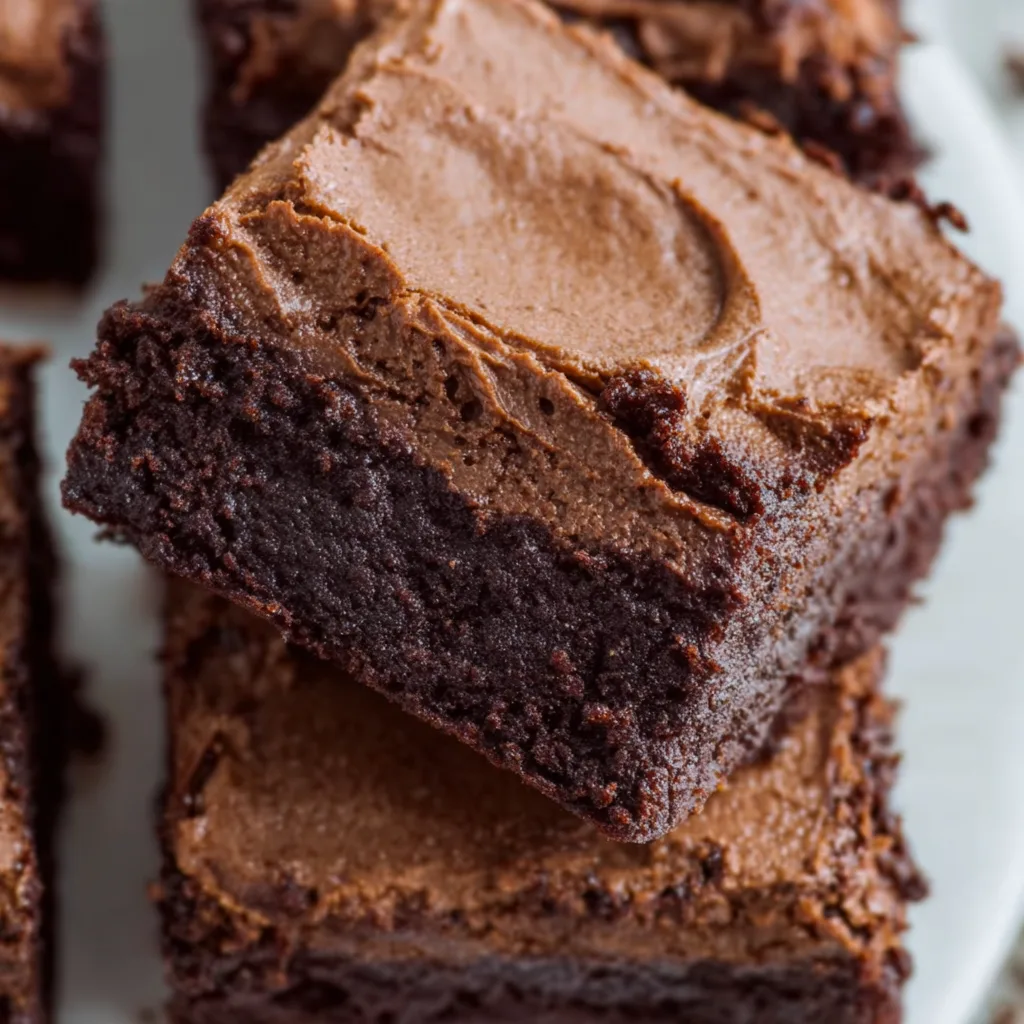
  • Chocolate Mousse Brownies: Decadent Bliss You Can’t Resist!

    Chocolate Mousse Brownies: Decadent Bliss You Can’t Resist!

    Chocolate Mousse Brownies: Decadent Bliss You Can’t Resist!

    Chocolate Mousse Brownies are the ultimate indulgence that combines two of my favorite desserts into one irresistible treat. The fudgy brownie base provides the perfect foundation for the silky, cloud-like chocolate mousse layer that practically melts in your mouth. I first created these for my sister’s birthday gathering, and the way everyone’s eyes widened at first bite told me everything I needed to know. There’s something magical about that textural contrast between dense, rich brownies and airy mousse that makes this dessert absolutely unforgettable. If you love my easy strawberry cake mix brownies, you’ll adore this chocolate-on-chocolate masterpiece.

    Recipe

    Why You’ll Love These Chocolate Mousse Brownies

    Perfect Texture Combination

    The textural contrast is what makes chocolate mousse brownies truly special. The bottom layer delivers that chewy, fudgy brownie experience with slightly crisp edges that chocolate lovers crave. Meanwhile, the top layer offers a silky, light-as-air chocolate mousse that feels like velvet on your tongue. I’ve spent years perfecting this recipe, adjusting ingredients and techniques until the mousse achieves that perfect balance of richness and fluffiness. When you take a bite with both layers together, it’s like experiencing two distinct desserts that somehow complement each other perfectly.

    Make-Ahead Convenience

    One thing I absolutely adore about these chocolate mousse brownies is their make-ahead potential. They actually improve after sitting in the refrigerator overnight, as the flavors deepen and meld together beautifully. This makes them perfect for entertaining—I often prepare them the day before guests arrive, which eliminates day-of stress. The mousse sets up perfectly during refrigeration, creating clean slices that look stunning on dessert plates. Plus, they maintain their gorgeous texture for up to three days, making them ideal for busy weekends when you want something special without the last-minute rush.

    Essential Tips & Tricks

    Brownie Layer Perfection

    The foundation of great chocolate mousse brownies is a perfectly baked brownie layer. For ultimate fudginess, remove your brownies from the oven when they’re just set but still slightly underdone—a toothpick should come out with a few moist crumbs. I’ve learned the hard way that overbaking results in dry brownies that don’t complement the mousse. Using high-quality chocolate makes a noticeable difference in flavor depth. Let the brownie layer cool completely before adding the mousse—I sometimes speed this up by placing the pan in the refrigerator for 30 minutes after it’s reached room temperature.

    Mousse Mastery

    Creating silky chocolate mousse requires attention to detail. Temperature control is crucial—chocolate should be melted and cooled just enough that it won’t seize when mixed with other ingredients or melt the whipped cream. I recommend whipping the cream to medium-firm peaks, not stiff peaks, which keeps the mousse light and spreadable. Folding technique matters too—use a large rubber spatula and gentle, sweeping motions to preserve the air bubbles that give mousse its characteristic texture. For special occasions, try my chocolate cherry dump cake for another decadent chocolate option.

    Serving Ideas & Creative Variations

    Elegant Presentation Options

    Transform your chocolate mousse brownies into an impressive dessert worthy of any celebration with thoughtful presentation. Try cutting them into perfect squares and placing each on a dessert plate with a light dusting of cocoa powder or powdered sugar. A fresh raspberry or mint leaf adds a pop of color. For dinner parties, I love creating individual brownie trifles—cube the brownies, layer them in glasses with extra mousse, and top with whipped cream and chocolate shavings. The vertical presentation shows off both layers beautifully and never fails to impress guests.

    Flavor Twists

    While classic chocolate mousse brownies are divine, experimenting with flavor variations keeps this dessert exciting. Try adding orange zest to the brownie batter and a splash of Grand Marnier to the mousse for a sophisticated chocolate-orange combination. Coffee lovers will appreciate espresso powder added to both layers for a mocha version. My personal favorite is adding a thin layer of raspberry jam between the brownie and mousse, creating a chocolate-raspberry masterpiece. For more dessert inspiration, check out these cheesecake brownie bites that offer another delicious brownie variation.

    Storage & Troubleshooting Guide

    Proper Storage Methods

    Storing chocolate mousse brownies properly ensures they remain fresh and delicious for days. Always refrigerate these brownies due to the mousse component—they’ll keep for up to 4 days in an airtight container. For the best texture, let them sit at room temperature for 15-20 minutes before serving. If you need to make them further in advance, they freeze beautifully for up to a month. I recommend slicing before freezing, then wrapping individual portions in plastic wrap and aluminum foil. Thaw overnight in the refrigerator for the best texture preservation.

    Common Problems & Solutions

    Even experienced bakers encounter challenges with layered desserts like chocolate mousse brownies. If your mousse seems too runny, it likely needs more chilling time or the cream wasn’t whipped enough before folding. For mousse that’s too firm or grainy, the chocolate might have been too hot when combined with other ingredients. When brownies crack during cutting, try warming your knife under hot water and wiping it clean between slices. If the brownie layer is too dense, you might have overmixed the batter—remember that gentle folding preserves the perfect texture in both layers.

    Frequently Asked Questions

    Can I make chocolate mousse brownies ahead of time?

    Absolutely! These brownies actually improve after 24 hours in the refrigerator as flavors meld together. They’ll keep well for up to 4 days when properly stored in an airtight container.

    How do I achieve clean cuts when slicing?

    Use a sharp knife dipped in hot water and wiped clean between each cut. Allow the brownies to chill completely—at least 4 hours or overnight—before attempting to slice them.

    Can I freeze chocolate mousse brownies?

    Yes! Wrap individual slices in plastic wrap and then foil, or place in airtight containers. They freeze well for up to one month. Thaw overnight in the refrigerator before serving.

    What’s the secret to perfectly fluffy chocolate mousse?

    Proper temperature management is key. Ensure your melted chocolate has cooled slightly and fold it gently into medium-firm whipped cream using a large spatula to preserve air bubbles.

    Why did my brownie layer turn out dry?

    Overbaking is usually the culprit. For perfect chocolate mousse brownies, remove the brownie layer from the oven when a toothpick inserted comes out with a few moist crumbs still attached.

    Final Thoughts

    These chocolate mousse brownies have become my signature dessert for good reason—they deliver an unforgettable combination of textures and deep chocolate flavor that keeps everyone coming back for more. I love watching friends’ faces light up when they take that first bite and discover the perfect harmony between fudgy brownie and silky mousse. Whether for special occasions or weekend treats, these brownies strike that perfect balance between impressive and achievable. For more delicious inspiration, follow me on Pinterest where I share my latest chocolate mousse brownies creations and other decadent desserts.

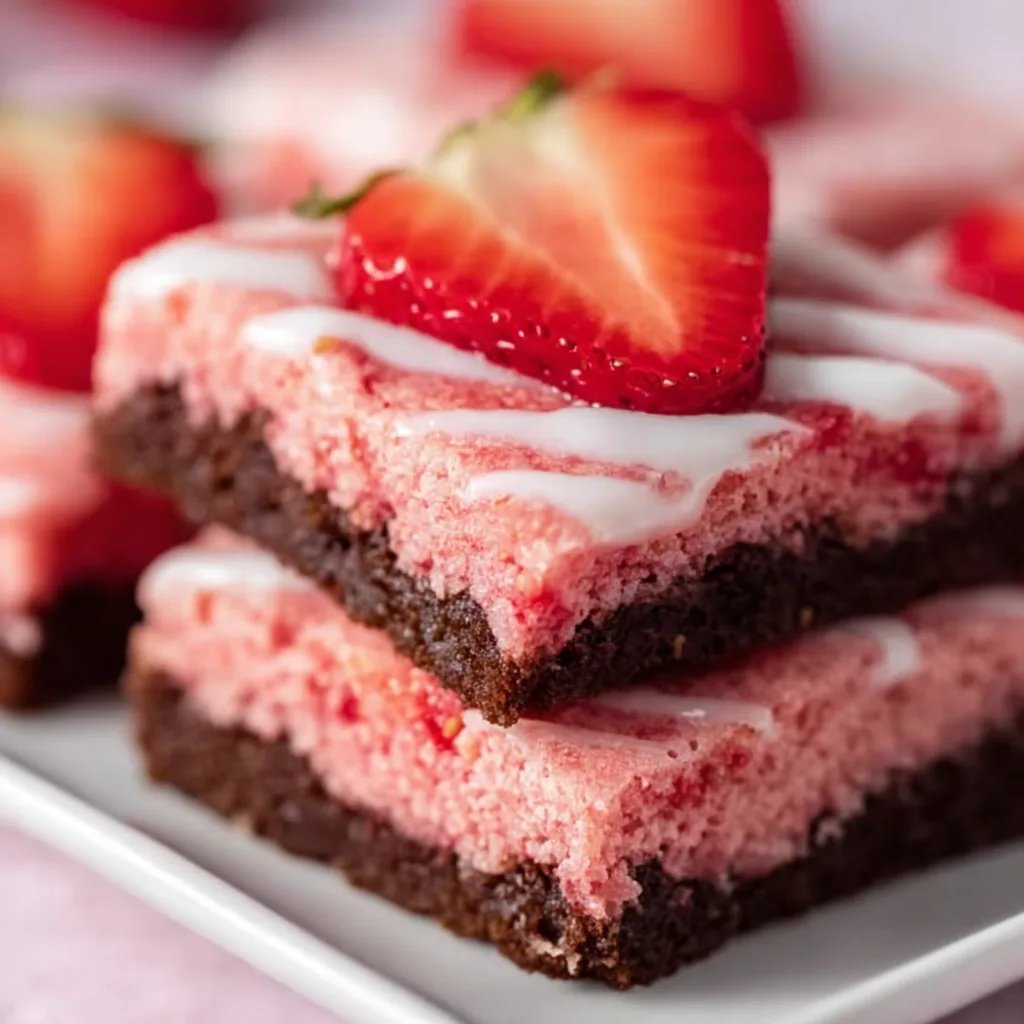
  • Easy Strawberry Cake Mix Brownies: Irresistibly Soft & Delicious!

    Easy Strawberry Cake Mix Brownies: Irresistibly Soft & Delicious!

    Easy Strawberry Cake Mix Brownies: Irresistibly Soft & Delicious!

    Easy Strawberry Cake Mix Brownies are the perfect solution for those moments when you’re craving something sweet but don’t want to spend hours in the kitchen. I discovered this recipe last summer when my niece came over unexpectedly, and I needed a quick treat that would make her eyes light up. The vibrant pink swirls against rich chocolate create a dessert that’s as beautiful as it is delicious. With just a handful of ingredients and minimal prep time, these fudgy, fruity squares have become my go-to for impromptu gatherings and late-night cravings. Trust me, these brownies from Recipes Darleen will have everyone asking for seconds!

    Recipe

    Why You’ll Love These Easy Strawberry Cake Mix Brownies

    Perfect for Beginners and Busy Bakers

    If you’ve ever felt intimidated by baking, these brownies will change everything. Using boxed mixes as your base means consistent results every time with minimal measuring. The simple swirl technique creates a gorgeous marbled effect that looks professional but requires zero artistic skill. I love making these on busy weeknights when I need a baking win without the fuss. The strawberry-chocolate combination delivers that perfect balance of fruity sweetness and rich cocoa that satisfies multiple cravings at once. Plus, the pretty pink color makes them Instagram-worthy with absolutely no food coloring needed!

    Customizable for Any Occasion

    These versatile treats can transform from casual snacks to elegant desserts with just a few tweaks. For everyday treats, simply cut them into squares and enjoy. For special occasions, try cutting them with heart-shaped cookie cutters for Valentine’s Day or adding white chocolate drizzle for birthday celebrations. I served these at my sister’s baby shower with fresh strawberry slices on top, and guests couldn’t believe they came from box mixes! The vibrant pink swirls make them perfect for gender reveals, bridal showers, or anytime you want to add a pop of color to your dessert table.

    Essential Tips & Tricks

    Mastering the Perfect Swirl

    Creating those beautiful strawberry swirls isn’t just about aesthetics—it’s about flavor distribution. The key is not overmixing! After pouring your chocolate batter into the pan, drop spoonfuls of strawberry batter on top, spacing them evenly. Then take a butter knife and gently make figure-eight motions, dragging just the tip through both batters. Stop when you see distinct swirls forming—about 5-6 passes maximum. I learned this the hard way after turning my first batch into a muddy pink-brown mess! For extra visual impact, reserve a tablespoon of strawberry batter to add as final dollops on top before baking.

    Achieving the Ideal Texture

    The difference between dry, cakey brownies and perfectly fudgy ones often comes down to baking time. Start checking these brownies about 5 minutes before the recipe suggests—they’re done when a toothpick inserted in the center comes out with a few moist crumbs (not wet batter). For extra richness, add 2 tablespoons of sour cream to your chocolate batter. If you prefer a more intense strawberry flavor, mix 1-2 tablespoons of freeze-dried strawberry powder into your strawberry batter. Check out these Cheesecake Brownie Bites for more inspiration on creating perfect brownie texture!

    Serving Ideas & Creative Variations

    Elegant Dessert Presentations

    Transform these simple brownies into showstopping desserts with a few easy additions. Try serving warm brownies with a scoop of vanilla bean ice cream and fresh strawberry slices for an elevated dessert experience. For dinner parties, cut brownies into small squares, place on dessert plates with a drizzle of white chocolate ganache and a mint leaf for a restaurant-worthy presentation. I once created a stunning dessert tower by alternating brownie squares with layers of whipped mascarpone and fresh berries—it disappeared in minutes! The contrast between warm brownies and cold toppings creates a sensory experience that makes guests feel truly special.

    Fun Flavor Twists

    While the classic recipe is delicious, experimenting with flavors takes these brownies to new heights. Try adding orange zest to the strawberry batter for a citrus kick, or mix mini white chocolate chips into the brownie batter for extra texture. For a sophisticated version, add 1-2 tablespoons of balsamic reduction to the strawberry mixture—the acidity enhances the berry flavor beautifully. Feeling adventurous? Try a version with Banana Pudding Brownies inspiration by adding banana extract to the chocolate batter for a chocolate-covered strawberry banana split effect that tastes like summer in every bite!

    Storage & Troubleshooting Guide

    Keeping Brownies Fresh

    To maintain that perfect fudgy texture, store completely cooled brownies in an airtight container at room temperature for up to 3 days. Place parchment paper between layers to prevent sticking. For longer storage, refrigerate for up to a week—just bring to room temperature before serving to restore that soft texture. If you need to freeze them, wrap individual brownies tightly in plastic wrap, then aluminum foil, and place in a freezer bag for up to 3 months. I always make a double batch specifically to freeze—there’s nothing better than discovering a forgotten brownie treasure during a late-night sweet craving!

    Fixing Common Baking Issues

    Even experienced bakers encounter problems sometimes! If your brownies come out too dry, they were likely overbaked—next time, check earlier and remember they continue cooking slightly after removal. For brownies that sink in the middle, your oven was probably too hot—invest in an oven thermometer for accuracy. If your swirls disappeared, you likely mixed too aggressively—use a lighter touch next time. For brownies that stick to the pan, try lining with parchment paper with overhanging edges to create handles for easy removal. I once saved slightly overbaked brownies by turning them into delicious milkshake mix-ins—kitchen disasters can lead to delicious discoveries!

    Frequently Asked Questions

    Can I use a different flavor of cake mix instead of strawberry?

    Absolutely! Cherry, raspberry, or even lemon cake mix works beautifully with the chocolate brownie base. Just follow the same swirling technique for equally stunning results.

    How do I know when my strawberry cake mix brownies are done baking?

    Insert a toothpick in the center—it should come out with a few moist crumbs, not wet batter. The edges will be set while the center remains slightly soft.

    Can I make these brownies ahead for a party?

    Yes! These brownies actually taste better the next day as the flavors meld. Store in an airtight container and add any fresh toppings just before serving.

    Will these work with gluten-free cake and brownie mixes?

    They do! I’ve tested with several gluten-free mixes with excellent results. Just note that some gluten-free batters may be slightly thicker, requiring gentler swirling.

    What makes Easy Strawberry Cake Mix Brownies better than regular brownies?

    The contrast between rich chocolate and sweet strawberry creates more complex flavors, while the vibrant pink swirls make them visually stunning with minimal effort.

    Final Thoughts

    These Easy Strawberry Cake Mix Brownies have saved me countless times when I needed something special without the fuss. There’s something magical about the way the fruity strawberry complements the deep chocolate—it’s like having two desserts in one! I keep the ingredients on hand for last-minute gatherings or whenever I need a reliable baking win. Whether you’re a novice baker or just short on time, these brownies deliver impressive results that look and taste like you spent hours in the kitchen. Find more delicious inspiration on our Pinterest page!

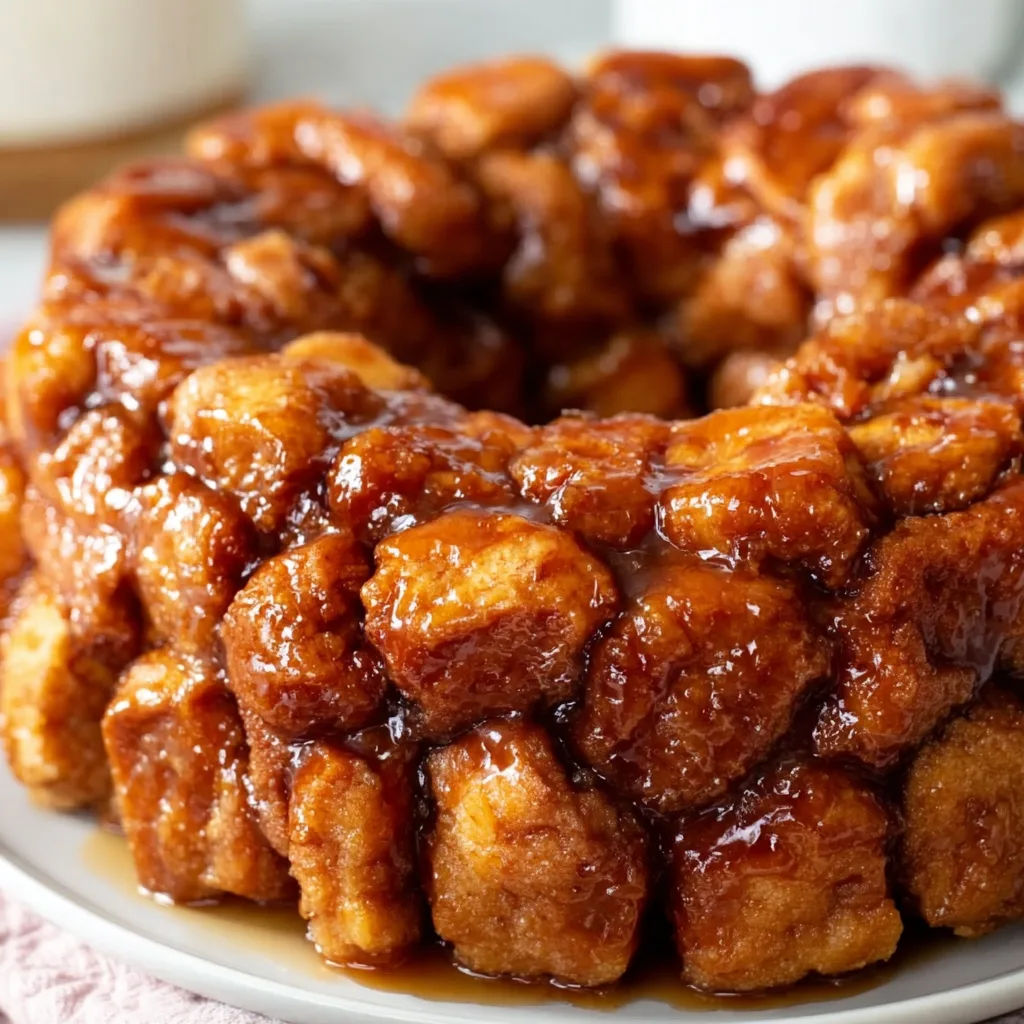
  • Easy Monkey Bread with Canned Biscuits – Irresistibly Soft & Quick!

    Easy Monkey Bread with Canned Biscuits – Irresistibly Soft & Quick!

    Easy Monkey Bread with Canned Biscuits - Irresistibly Soft & Quick!

    Easy Monkey Bread with Canned Biscuits has been my Sunday morning salvation more times than I can count. There’s something magical about the way those cinnamon-sugar coated biscuit pieces transform into a gooey, pull-apart masterpiece that fills the house with the most intoxicating aroma. I still remember the first time I made this for my nieces—their little fingers couldn’t wait to pull apart the warm, sticky pieces. This recipe is my go-to when I need comfort food that doesn’t demand hours in the kitchen. The best part? You probably have everything you need already!

    Recipe

    Why You’ll Love This Easy Monkey Bread with Canned Biscuits

    Simple Ingredients, Maximum Impact

    This recipe requires just six basic ingredients that transform into something extraordinary. The humble canned biscuits become the foundation for this gooey masterpiece, while brown sugar and cinnamon create that irresistible caramel coating. I love how accessible this recipe is—no special trips to the store required! The butter melts into every nook and cranny, creating pockets of molten goodness that make each bite pure bliss. Even on my most exhausted mornings, I can manage to toss these ingredients together and create something that makes everyone think I spent hours in the kitchen.

    Foolproof for Beginners

    I’ve yet to meet someone who couldn’t master this Easy Monkey Bread with Canned Biscuits. The beauty lies in its forgiving nature—even if you’re not precise with your measurements or your biscuit cutting isn’t perfect, it still turns out amazing. My friend Sarah, who claims she can burn water, made this as her first-ever baking project and it was a stunning success! The recipe follows a simple pattern: cut, coat, arrange, pour, bake. That’s it! The oven does all the heavy lifting while you take all the credit. It’s the perfect confidence-builder for kitchen newbies.

    Essential Tips & Tricks

    Perfecting the Caramel Sauce

    The secret to truly exceptional monkey bread lies in the caramel sauce that forms as it bakes. For the richest flavor, use dark brown sugar instead of light—those extra molasses notes make all the difference. Make sure your butter is completely melted and well-mixed with the sugar before pouring over the biscuits. I learned the hard way that rushing this step leads to uneven sweetness! Let the mixture come to a gentle bubble on the stove before removing it. This activates the caramelization process that will continue in the oven, creating that sticky-sweet coating that makes banana bread cinnamon rolls seem almost plain by comparison.

    Bundt Pan Secrets

    A properly prepared pan is non-negotiable for monkey bread success. I once skipped the thorough greasing step and spent 20 minutes chiseling my creation out in pieces—learn from my mistake! Spray every crevice of your Bundt pan with cooking spray or butter it generously. For easy release, wait 10 minutes after baking before inverting onto a plate. The slight cooling allows the caramel to set just enough to stay with the bread instead of pooling on your serving plate. If you don’t have a Bundt pan, a 9×13 baking dish works too, though you’ll lose the classic ring shape that makes presentation so impressive.

    Serving Ideas & Creative Variations

    Beyond Breakfast

    While Easy Monkey Bread with Canned Biscuits shines as a breakfast treat, it’s versatile enough for any occasion. Serve it as a showstopping dessert at dinner parties with a scoop of vanilla ice cream melting into the warm crevices. For brunch gatherings, pair it with a savory egg casserole to balance the sweetness. I’ve even served it at baby showers alongside fresh fruit and coffee—the pull-apart nature makes it perfect for grazing events. For an extra-special touch, drizzle with cream cheese glaze while still warm, creating something that rivals those cheesecake brownie bites everyone loves so much.

    Flavor Twists to Try

    The classic cinnamon-sugar version is just the beginning of your monkey bread journey. Add chopped nuts (pecans or walnuts) between layers for delightful crunch and nutty flavor. Chocolate lovers can tuck mini chocolate chips into the biscuit pieces before arranging them. For a fruity version, add diced apples tossed in lemon juice between layers—they soften perfectly while baking. My personal favorite variation includes orange zest in the sugar mixture and a splash of bourbon in the caramel sauce for a sophisticated twist. You can even go savory with herbs, cheese, and garlic butter instead of the sweet coating!

    Storage & Troubleshooting Guide

    Keeping It Fresh

    Monkey bread is at its absolute best when fresh from the oven, but leftovers (if you’re lucky enough to have any!) can be stored effectively. Cover tightly with plastic wrap or transfer to an airtight container and keep at room temperature for up to 2 days. For longer storage, refrigerate for up to 5 days. To reheat, microwave individual portions for 15-20 seconds—it revives that fresh-baked texture surprisingly well! If you want to prepare ahead, you can assemble everything the night before, refrigerate unbaked, and simply add 5-10 minutes to the baking time in the morning.

    Fixing Common Problems

    Even the most experienced bakers encounter hiccups! If your monkey bread seems doughy in the center, it likely needs more time—cover with foil to prevent over-browning and continue baking. For bread that’s stuck to the pan, run a butter knife gently around the edges and bottom, then place a warm, damp towel over the pan for a few minutes to help loosen the caramel. If your caramel sauce separates or crystallizes, it was likely heated too quickly or at too high a temperature. Next time, melt the butter and sugar together slowly over medium-low heat, stirring constantly until smooth.

    Frequently Asked Questions

    Can I make Easy Monkey Bread with Canned Biscuits without a Bundt pan?

    Absolutely! A 9×13 baking dish works well, though the baking time may decrease slightly. You can even use a loaf pan for a smaller batch—just reduce the ingredients proportionally.

    How do I know when my monkey bread is fully baked?

    The top should be golden brown, and a skewer inserted into the thickest part should come out clean with no raw dough. The internal temperature should reach about 190°F.

    Can I freeze monkey bread?

    Yes! Cool completely, wrap tightly in plastic wrap and foil, and freeze for up to 3 months. Thaw overnight in the refrigerator and reheat in a 300°F oven until warm.

    What’s the best way to cut the biscuits?

    Kitchen scissors work wonderfully! Simply snip each biscuit into quarters. A bench scraper or sharp knife works well too—just don’t use a serrated knife, which can compress the dough.

    Can I make this Easy Monkey Bread with homemade biscuit dough instead of canned?

    Certainly! Prepare your favorite biscuit recipe, but skip the final shaping and baking. Instead, pinch off small portions to use exactly as you would the canned biscuit pieces.

    Final Thoughts

    This Easy Monkey Bread with Canned Biscuits has saved countless weekend mornings in my home, bringing smiles and creating memories around my table. There’s something deeply satisfying about watching someone’s face light up as they pull apart their first warm, gooey piece. It’s become more than just a recipe in my household—it’s a tradition, a comfort, and sometimes, a peace offering. I hope it brings the same joy to your kitchen! For more delicious breakfast ideas, check out my Pinterest collection where I’m always adding new favorites.

  • Chocolate Cherry Dump Cake: Irresistibly Easy & Delicious!

    Chocolate Cherry Dump Cake: Irresistibly Easy & Delicious!

    Chocolate Cherry Dump Cake: Irresistibly Easy & Delicious!

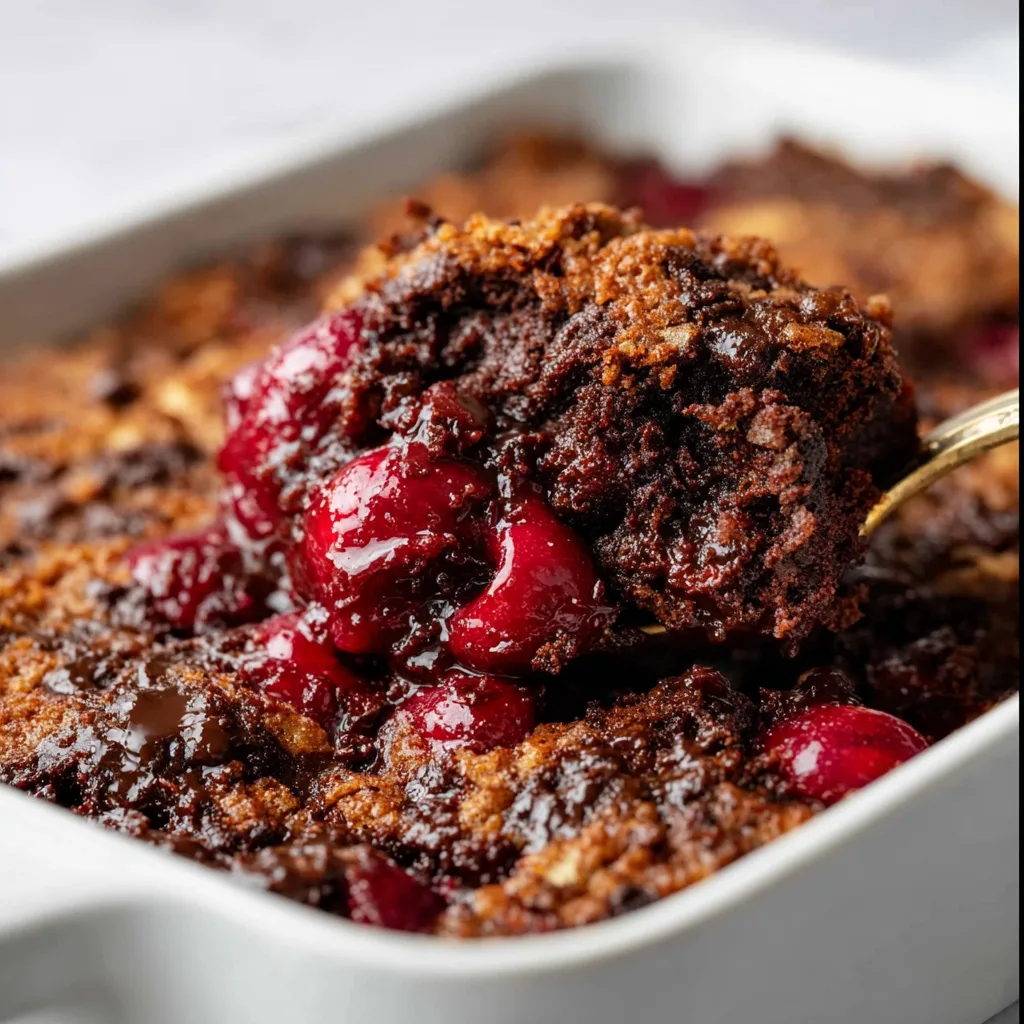
    Chocolate Cherry Dump Cake brings together the irresistible combination of fudgy chocolate cake mix and juicy cherries in what might be the easiest dessert you’ll ever make. I discovered this magical concoction during a snowy weekend when my sister dropped by unexpectedly. With minimal pantry ingredients and about five minutes of prep time, we created a warm, bubbling masterpiece that filled my kitchen with the most heavenly aroma. The contrast between the tart cherries and rich chocolate creates a flavor symphony that’s impossible to resist. If you love effortless desserts with maximum impact like my Cheesecake Brownie Bites, this dump cake deserves a permanent spot in your recipe collection.

    Recipe#

    Why You’ll Love This Chocolate Cherry Dump Cake

    Perfect for Beginners and Busy Bakers

    If you’ve ever felt intimidated by baking, this Chocolate Cherry Dump Cake will restore your confidence instantly. There’s no mixing, beating, or complicated techniques—just strategic layering of ingredients that transform in the oven. I’m not exaggerating when I say my 8-year-old nephew makes this independently! The “dump” in dump cake means exactly what it sounds like: dump the ingredients in a pan, bake, and voilà! The minimal hands-on time (literally 5 minutes) makes this perfect for busy weeknights when you crave something sweet but lack the energy for elaborate baking projects.

    Crowd-Pleasing Comfort in Every Bite

    There’s something about the combination of warm chocolate and cherries that speaks directly to the soul. The cake develops a slightly crisp top while maintaining a gooey, pudding-like interior that’s utterly comforting. I’ve brought this to potlucks, family gatherings, and office parties, and it disappears faster than anything else on the dessert table. The nostalgic flavors remind many people of Black Forest cake but without all the work. Plus, watching people’s faces light up when they take their first bite brings me genuine joy every single time—there’s always that moment of surprise when they learn how simple it was to make.

    Essential Tips & Tricks

    Ingredient Selection Matters

    While dump cakes are forgiving by nature, choosing quality ingredients elevates this simple dessert to something truly special. For the cherries, I recommend using tart cherry pie filling rather than sweet—it creates the perfect balance with the chocolate cake. If you’re feeling adventurous, mix in a handful of fresh or frozen cherries for varied texture. For the cake mix, any chocolate variety works, but dark chocolate or devil’s food creates the richest flavor. The butter should be cold and sliced thinly—this ensures it melts evenly throughout the cake, creating pockets of buttery goodness that make each bite memorable.

    Perfect Baking Technique

    The magic of Chocolate Cherry Dump Cake happens in the oven, where simple layers transform into a cohesive, delicious dessert. Always use a 9×13 baking dish for even cooking—ceramic or glass works best as they distribute heat gently. Resist the urge to mix the ingredients! Proper layering is crucial: pie filling on bottom, dry cake mix sprinkled evenly over top, and butter arranged to cover as much surface as possible. If you notice dry spots halfway through baking, a light spray of cooking oil helps. Like my Dark Chocolate Bread Pudding, this dessert continues developing flavor as it cools, so allow at least 15 minutes before serving.

    Serving Ideas & Creative Variations

    Elevate with Perfect Pairings

    Transform your Chocolate Cherry Dump Cake from casual to company-worthy with thoughtful serving choices. A scoop of vanilla bean ice cream melting into the warm cake creates a temperature and texture contrast that’s absolutely divine. For an adult twist, try a splash of kirsch or amaretto drizzled over the top before adding whipped cream. I love serving individual portions in pretty dessert bowls with a sprinkle of shaved chocolate and a fresh cherry on top when entertaining. For everyday indulgence, a simple dusting of powdered sugar and a fork is all you need—sometimes I eat it straight from the pan while watching my favorite show!

    Seasonal and Dietary Adaptations

    One of the reasons I return to this recipe repeatedly is its incredible versatility. In summer, try substituting fresh berries mixed with a little sugar and cornstarch instead of cherry pie filling. For fall, apple pie filling with a sprinkle of cinnamon creates a cozy variation. To make this gluten-free, simply use a gluten-free chocolate cake mix—no other adjustments needed! For a lighter version, try using a sugar-free cake mix and light butter. When cherries aren’t in season, frozen cherries cooked down with a little sugar make an excellent substitute for pie filling. My Strawberry White Chocolate Bars fans particularly love the white chocolate chip variation of this dump cake.

    Storage & Troubleshooting Guide

    Keeping Your Dump Cake Fresh

    Chocolate Cherry Dump Cake stays delicious for several days when stored properly. For maximum freshness, allow the cake to cool completely before covering with plastic wrap or transferring to an airtight container. At room temperature, it maintains its quality for about 2 days. For longer storage, refrigerate for up to 5 days—the flavors actually deepen and meld together beautifully overnight! To reheat, microwave individual portions for 20-30 seconds or place the entire dish (if oven-safe) in a 300°F oven for 10 minutes. The cake also freezes surprisingly well; portion into individual servings, wrap tightly, and freeze for up to 3 months.

    Solving Common Dump Cake Dilemmas

    Even with a recipe this simple, occasional challenges can arise. If your cake turns out too dry, the most common culprit is uneven butter distribution. Next time, try using more butter or melting it first and drizzling evenly. For a cake that’s too soggy in the middle, your oven temperature might be running low—try increasing by 25°F or extending the baking time by 5-10 minutes. If the top browns too quickly while the center remains underdone, loosely cover with foil halfway through baking. For a dump cake that lacks flavor intensity, try adding a teaspoon of almond extract to the cherry filling or mixing mini chocolate chips into the cake mix layer.

    Frequently Asked Questions

    Can I make Chocolate Cherry Dump Cake ahead of time?

    Absolutely! Prepare it up to 24 hours ahead, refrigerate unbaked, and add 5-10 minutes to the baking time. It actually tastes even better the next day as the flavors meld together beautifully.

    What can I substitute for cherry pie filling?

    Any fruit pie filling works wonderfully—try blueberry, strawberry, or peach. You can also use 4 cups of fresh fruit mixed with ¼ cup sugar and 2 tablespoons cornstarch.

    Can I use a different cake mix flavor?

    Yes! While chocolate complements cherries perfectly, vanilla, white, or even spice cake mix creates delicious variations with different flavor profiles.

    Is it possible to make this dump cake in a slow cooker?

    Definitely! Layer ingredients in your slow cooker, cook on low for 3-4 hours or high for 2 hours until the top is set and edges are bubbly.

    Why is my Chocolate Cherry Dump Cake still powdery on top?

    This happens when the butter doesn’t cover all the cake mix. Next time, use more butter slices or try melting the butter and drizzling it evenly over the cake mix.

    Final Thoughts

    This Chocolate Cherry Dump Cake has saved countless dinner parties and satisfied innumerable midnight cravings in my home. Its beauty lies in the perfect balance between effort and reward—minimal work yielding maximum delight. I love how it brings people together around the table, sparking conversations and creating memories. The versatility means you’ll never tire of it, while the simplicity ensures you’ll turn to it again and again. Whether you’re a novice baker or seasoned pro, this recipe deserves a permanent place in your dessert rotation. Find more inspiration and variations on my Pinterest boards!