Category: Desserts

Sweet and easy dessert recipes for every craving. Simple treats, rich flavors, and quick ideas that make any moment feel special.

  • Pecan Caramel Bread Pudding That Will Melt Your Heart Instantly!

    Pecan Caramel Bread Pudding That Will Melt Your Heart Instantly!

    Pecan Caramel Bread Pudding That Will Melt Your Heart Instantly!

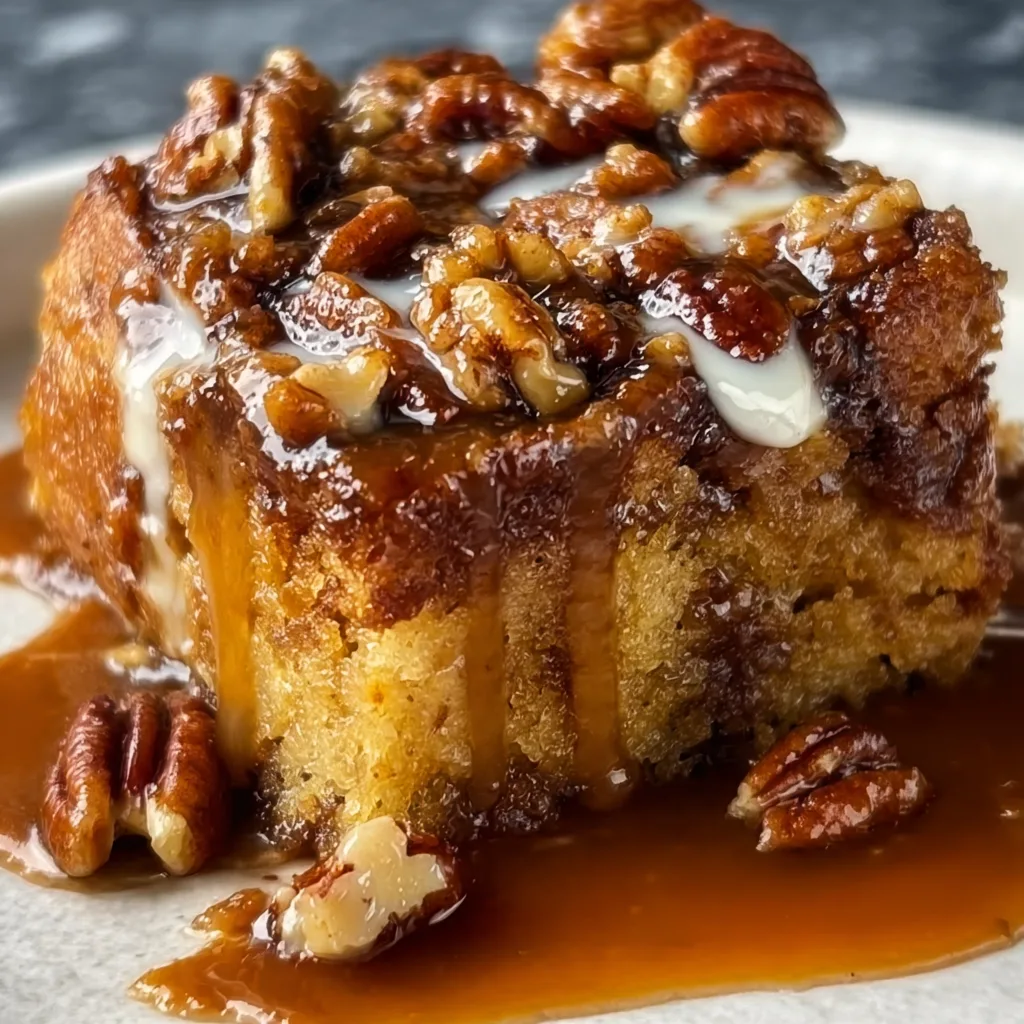
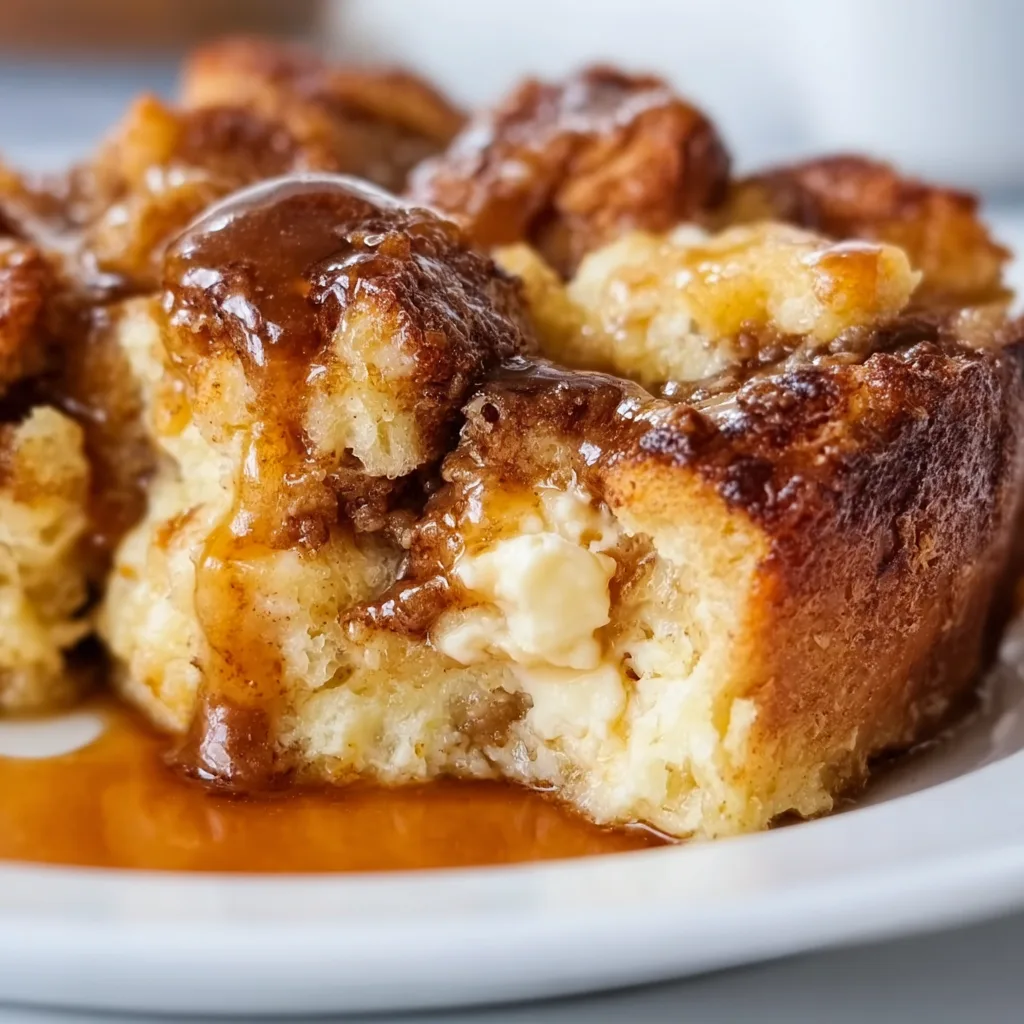
    This Pecan Caramel Bread Pudding transforms ordinary bread into a luxurious dessert that wraps you in comfort with every bite. The first time I made this for my family, the kitchen filled with the intoxicating aroma of toasted pecans and buttery caramel, and everyone wandered in asking what smelled so heavenly. There’s something magical about how the custard soaks into the bread, creating those crispy edges and soft, pudding-like center that makes you close your eyes with each spoonful. If you’re looking for a dessert that feels like a warm hug, this bread pudding is exactly what your soul needs.

    Recipe

    Why You’ll Love This Pecan Caramel Bread Pudding

    Perfect Balance of Textures and Flavors

    The contrast of textures in this dessert is what makes it truly special. The bread soaks up the rich custard, creating a velvety interior while the top gets delicately crisp during baking. Then come the pecans – those buttery, crunchy gems that add the perfect bite against the softness of the pudding. The deep caramel sauce seeps into every crevice, bringing notes of butterscotch and vanilla that harmonize with the subtle cinnamon warmth. I love watching people take their first bite – there’s always that moment of surprise when all those layers of flavor hit at once.

    Make-Ahead Friendly for Stress-Free Entertaining

    One of my favorite things about this Pecan Caramel Bread Pudding is how wonderfully practical it is for entertaining. You can prepare the entire dish up to 24 hours ahead, letting the bread fully absorb that custard magic in the refrigerator overnight. This not only saves you precious time when guests are coming but actually improves the final texture! The caramel sauce can be made 3 days in advance and gently rewarmed when serving. I’ve served this at countless dinner parties, and it’s always my secret weapon for appearing effortlessly put-together while actually minimizing day-of stress.

    Essential Tips & Tricks

    Choosing the Right Bread

    The foundation of exceptional bread pudding lies in selecting the perfect bread. Day-old bread works best as it absorbs the custard without becoming soggy. I prefer using brioche or challah for their buttery richness, but French bread or even croissants create amazing results too. Whatever you choose, make sure it’s slightly stale – fresh bread holds too much moisture. If you only have fresh bread, simply cube it and toast in a 275°F oven for 10 minutes before using. This extra step makes all the difference in achieving that perfect texture balance in your Pecan Bourbon Bread Pudding.

    Perfecting the Custard Mixture

    The custard is where the magic happens, so don’t rush this step! For the silkiest texture, warm your milk and cream slightly before whisking with the eggs – this prevents the eggs from cooking too quickly and becoming lumpy. Add a splash of bourbon or rum (optional but recommended) for depth that complements the caramel perfectly. When pouring the custard over the bread, press down gently to ensure even soaking, then let it rest for at least 30 minutes (or overnight in the refrigerator). This resting period is non-negotiable for achieving that melt-in-your-mouth consistency we’re after.

    Serving Ideas & Creative Variations

    Elegant Presentation Options

    Transform this homey dessert into a showstopping finale for any meal with thoughtful presentation. For individual servings, bake in ramekins and invert onto dessert plates, creating perfect portions with the caramel pooling artfully around each one. Or go family-style with a beautiful ceramic baking dish brought straight to the table, letting guests see those golden pecans and bubbling caramel. A light dusting of powdered sugar, a dollop of lightly whipped cream, or even a small scoop of vanilla bean ice cream melting over the warm pudding elevates the experience. I love adding a sprig of mint for a pop of color against the amber caramel.

    Seasonal and Dietary Adaptations

    This versatile dessert welcomes creative twists to match the season or dietary needs. For fall, add diced spiced apples or pears to the bread mixture before baking. Summer calls for fresh berries scattered throughout or a berry compote served alongside. Make it extra decadent with chunks of dark chocolate mixed in, or lighten it up with coconut milk instead of dairy. For gluten-free guests, use your favorite gluten-free bread and the results are just as delicious. When I’m feeding a crowd with varied preferences, I often create a bread pudding bar with different toppings so everyone can customize their serving.

    Storage & Troubleshooting Guide

    Proper Storage for Leftovers

    If you’re lucky enough to have leftovers (which rarely happens in my house!), proper storage ensures this dessert remains just as delicious the next day. Cover the cooled bread pudding tightly with plastic wrap or transfer to an airtight container and refrigerate for up to 4 days. Store any unused caramel sauce separately in a jar with a tight-fitting lid. When reheating, avoid the microwave which can make the texture rubbery. Instead, cover with foil and warm in a 300°F oven for about 15 minutes until heated through, then drizzle with rewarmed caramel sauce for that fresh-from-the-oven experience.

    Fixing Common Issues

    Even experienced bakers occasionally encounter challenges with bread pudding. If your pudding seems too dry or dense, it likely needed more custard or wasn’t allowed to soak long enough. Next time, increase the custard by about 25% and ensure longer soaking time. For a soggy bottom, try using a water bath during baking to regulate temperature and promote even cooking. If your caramel sauce crystallizes, add a tablespoon of water and gently reheat, stirring constantly until smooth again. Remember that bread pudding should have a slightly jiggly center when removed from the oven – it will continue to set as it cools.

    Frequently Asked Questions

    Can I make Pecan Caramel Bread Pudding ahead of time?

    Absolutely! Assemble the entire dish up to 24 hours in advance, cover and refrigerate. The caramel sauce can be made 3 days ahead. Allow extra baking time if coming straight from the refrigerator.

    What’s the best bread to use?

    Day-old brioche, challah or French bread work wonderfully. The slight staleness helps the bread absorb the custard without becoming soggy.

    Can I freeze leftovers?

    Yes! Freeze individual portions without the caramel sauce for up to 3 months. Thaw overnight in the refrigerator and reheat in a 300°F oven until warmed through.

    How do I know when my bread pudding is done baking?

    The top should be golden brown and slightly crisp, while the center remains slightly jiggly. A knife inserted in the center should come out mostly clean with a few moist crumbs.

    Can I make this Pecan Caramel Bread Pudding without nuts?

    Certainly! Simply omit the pecans or substitute with chocolate chips, dried fruits, or coconut for a different but equally delicious texture.

    Final Thoughts

    This Pecan Caramel Bread Pudding has become my go-to dessert when I want to make someone feel special without spending hours in the kitchen. There’s something almost magical about transforming simple ingredients into something so deeply satisfying. The combination of custardy bread, crunchy pecans, and silky caramel creates a dessert that feels both nostalgic and sophisticated at once. I hope this recipe brings the same warmth and joy to your table that it has to mine. Don’t forget to share your creations on Pinterest!
  • Wild Berry Bread Pudding: Irresistibly Sweet & Comforting Treat!

    Wild Berry Bread Pudding: Irresistibly Sweet & Comforting Treat!

    Wild Berry Bread Pudding: Irresistibly Sweet & Comforting Treat!

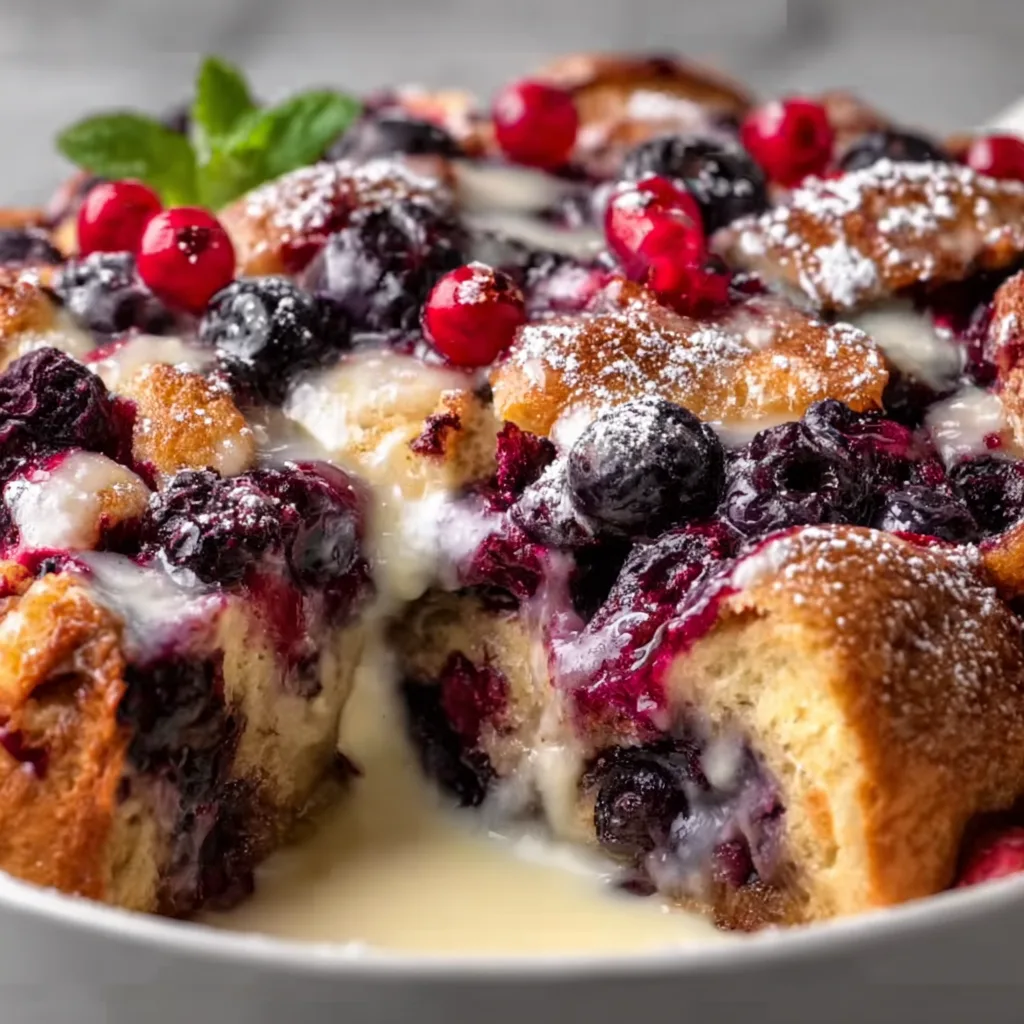
    The Wild Berry Bread Pudding of your dreams is finally here, friends! I stumbled upon this recipe during a rainy weekend when my kitchen was overflowing with berries from the farmers’ market. There’s something magical about watching day-old bread transform into a custardy, berry-studded masterpiece that fills your home with the most comforting aroma. This dessert strikes the perfect balance between rustic simplicity and elegant indulgence—making it ideal for both cozy family nights and dinner parties. Trust me, once you’ve tried this version, you’ll wonder how you lived without it!

    Recipe

    Why You’ll Love This Wild Berry Bread Pudding

    A Symphony of Textures and Flavors

    This Wild Berry Bread Pudding delivers an incredible textural experience that keeps you coming back for more. The outside develops a slight crispness while the interior remains gloriously soft and custardy. Each bite offers pockets of juicy berries that burst with bright, tangy sweetness against the rich vanilla-infused base. I love how the bread soaks up all that creamy custard, creating those perfect little pockets of velvety goodness. The natural sweetness from the berries means you don’t need to overdo it with sugar, allowing the fruit’s natural character to shine through.

    Make-Ahead Magic for Stress-Free Entertaining

    One of my favorite things about this Wild Berry Bread Pudding is its flexibility as a make-ahead dessert. I recently prepared it the night before hosting a brunch, and all I had to do the next morning was pop it in the oven. The overnight soak actually improves the pudding, allowing the bread to fully absorb the custard and the berry flavors to meld beautifully. This makes it perfect for entertaining when you want to impress without the last-minute kitchen scramble. Plus, it reheats beautifully, so you can enjoy leftovers for days—if they last that long!

    Essential Tips & Tricks

    Choosing the Right Bread Foundation

    The bread selection makes all the difference in your Wild Berry Bread Pudding. I’ve found that slightly stale brioche or challah creates the most luxurious texture, though a good French bread works wonderfully too. The key is using bread that’s 1-2 days old—fresh bread won’t absorb the custard properly and can turn mushy rather than custardy. If you only have fresh bread, cube it and leave it out for a few hours or toast it lightly in a 250°F oven for 10 minutes. This creates the perfect foundation for soaking up all that gorgeous custard without dissolving into soggy disappointment. Check out my blueberry bread pudding for another berry variation!

    Berry Selection and Preparation

    When it comes to berries, both fresh and frozen work beautifully in this Wild Berry Bread Pudding. I prefer using a mixed berry blend of strawberries, blueberries, blackberries, and raspberries for the most complex flavor profile. If using frozen berries, don’t thaw them first—add them frozen to prevent excessive bleeding into the custard. For fresh berries, gently fold them in to keep them intact. The secret touch I discovered: tossing the berries in 1 tablespoon of flour before adding them helps prevent them from sinking to the bottom, ensuring perfect berry distribution throughout your pudding.

    Serving Ideas & Creative Variations

    Elevated Serving Suggestions

    Transform your Wild Berry Bread Pudding from delicious to absolutely unforgettable with thoughtful serving additions. My personal favorite is drizzling it with a warm vanilla bean sauce that seeps into all the nooks and crannies. For a restaurant-quality presentation, add a scoop of vanilla bean ice cream that slowly melts into the warm pudding. When I serve this at brunches, I offer a side of lightly whipped cream with a hint of bourbon—the slight boozy note complements the berries beautifully. For a special touch, garnish with fresh mint leaves and a light dusting of powdered sugar for that picture-perfect finish that will have everyone reaching for their phones. Try pairing it with my peach bread pudding for a dessert buffet!

    Seasonal and Dietary Adaptations

    This Wild Berry Bread Pudding is wonderfully adaptable to different seasons and dietary needs. In summer, use fresh local berries and add lemon zest for brightness. In winter, frozen berries work perfectly, paired with warming spices like cinnamon and nutmeg for a cozy twist. For a dairy-free version, substitute coconut milk for the regular milk and cream—it adds a subtle tropical note that pairs beautifully with the berries. To make it gluten-free, use your favorite gluten-free bread and add an extra egg to help with binding. For a lower-sugar option, reduce the sugar and rely on the natural sweetness of very ripe berries.

    Storage & Troubleshooting Guide

    Proper Storage for Maximum Freshness

    To keep your Wild Berry Bread Pudding at its best quality, cool it completely before covering and refrigerating. It will stay delicious for up to 4 days in the refrigerator, though the texture is most perfect in the first 2 days. When reheating individual portions, microwave for 30-45 seconds with a small splash of milk to revive the custard’s creaminess. For larger portions, cover with foil and warm in a 300°F oven for about 15 minutes. If you want to freeze portions, wrap them tightly in plastic wrap and then foil, and they’ll keep for up to 2 months—just thaw overnight in the refrigerator before reheating.

    Troubleshooting Common Issues

    If your Wild Berry Bread Pudding turns out too dry, the most likely culprit is insufficient soaking time or too much bread for the amount of custard. Next time, allow at least 30 minutes (or ideally overnight) for the bread to fully absorb the liquid. For a too-soggy pudding, your bread was likely too fresh or you used too much liquid. The perfect consistency should be moist but still have some structure when served. If your berries all sink to the bottom, try the flour-coating trick mentioned earlier. And if your pudding isn’t setting properly in the center, it likely needs a few more minutes in the oven—the center should be set but still slightly jiggly when you remove it.

    Frequently Asked Questions

    Can I make Wild Berry Bread Pudding ahead of time?

    Absolutely! It’s actually better when prepared ahead. Assemble it up to 24 hours in advance, refrigerate, then bake when needed. The extended soaking time improves the texture and flavor.

    What’s the best bread to use?

    Day-old brioche or challah creates the richest texture, but French bread works well too. The key is using slightly stale bread that will absorb the custard without becoming mushy.

    Can I use frozen berries instead of fresh?

    Yes! Use them straight from the freezer—don’t thaw first. This prevents excess moisture and color bleeding into your custard. A mixed berry blend offers the best flavor complexity.

    How do I know when my Wild Berry Bread Pudding is done baking?

    The pudding is done when the edges are set and slightly pulled away from the dish, while the center is set but still has a slight jiggle. A knife inserted should come out mostly clean.

    Can this be made gluten-free or dairy-free?

    Definitely! Use gluten-free bread and add an extra egg for binding. For dairy-free, substitute coconut milk or almond milk for regular milk and cream.

    Final Thoughts

    This Wild Berry Bread Pudding has become my go-to dessert for everything from quiet Sunday afternoons to holiday gatherings. There’s something undeniably comforting about its warm, berry-studded goodness that makes everyone feel instantly at home. The beauty lies in its simplicity and adaptability—you can dress it up or down depending on the occasion. I hope you’ll give this recipe a special place in your collection and make it part of your own family traditions. Don’t forget to check out more delicious ideas on Pinterest for creative serving suggestions!

  • Brioche Bread Pudding Recipe That Will Melt Your Heart Instantly

    Brioche Bread Pudding Recipe That Will Melt Your Heart Instantly

    Brioche Bread Pudding Recipe That Will Melt Your Heart Instantly

    Brioche bread pudding transforms ordinary dessert into a luxurious experience that feels both indulgent and comforting. The first time I made this recipe, the buttery aroma filled my kitchen and instantly transported me back to Sunday mornings at my grandmother’s house. There’s something magical about how the rich, eggy brioche soaks up the custard, creating those perfect crispy edges and a melt-in-your-mouth center. Whether you’re hosting a brunch or craving something sweet after dinner, this brioche bread pudding strikes the perfect balance between elegant and homey. I’ve perfected this recipe through countless trials, and I’m excited to share all my secrets with you at Recipes Darleen.

    Recipe

    Why You’ll Love This Brioche Bread Pudding

    The Perfect Texture Combination

    What makes brioche bread pudding absolutely irresistible is the textural contrast in every bite. The top develops a golden, slightly crunchy crust while the inside remains custardy and tender. Unlike bread pudding made with regular bread, brioche’s buttery nature creates a richer foundation that doesn’t become soggy. I’ve found that letting the bread cubes dry out slightly before soaking them in the custard mixture is key. The brioche absorbs the vanilla-scented liquid while still maintaining its structure, creating those dreamy pockets of creamy goodness surrounded by pillowy bread.

    Make-Ahead Convenience

    One of my favorite things about this brioche bread pudding is how wonderfully it fits into a busy schedule. You can prepare the entire dish the night before, let it rest in the refrigerator, and bake it fresh the next morning. This overnight soak actually improves the final product, allowing the flavors to meld and the bread to fully absorb the custard. I’ve brought this to countless brunches and holiday gatherings, and the make-ahead factor makes it stress-free. Plus, the recipe is forgiving if you need to bake it a little longer or shorter depending on how custardy you prefer the center.

    Essential Tips & Tricks

    Choosing and Preparing Your Brioche

    The foundation of exceptional bread pudding starts with quality brioche. Look for a loaf that’s rich and buttery—either from your local bakery or a good grocery store brand. For the best texture, I recommend cutting it into 1-inch cubes and letting them sit out for a few hours (or even overnight) to dry slightly. This controlled staleness helps the bread absorb the custard without disintegrating. If you’re in a hurry, you can speed up the process by placing the cubes on a baking sheet in a 200°F oven for about 10 minutes. Just like when making Dutch Oven No-Knead Crusty Bread, the quality of your bread makes all the difference.

    Perfecting the Custard Mixture

    The custard is where all the magical flavor happens in brioche bread pudding. I always start with room temperature eggs (they incorporate more smoothly) and whisk them thoroughly with sugar before adding the dairy. For extra richness, use a combination of whole milk and heavy cream rather than just milk. Vanilla extract is essential, but don’t stop there—try adding a splash of bourbon, rum, or even orange liqueur for depth. The custard should coat the back of a spoon but still pour easily. Remember to strain your custard through a fine-mesh sieve to remove any egg bits for the silkiest texture.

    Serving Ideas & Creative Variations

    Sweet Toppings and Sauces

    Elevate your brioche bread pudding with decadent toppings that complement its rich flavor. A classic bourbon caramel sauce poured over the warm pudding creates an unforgettable dessert experience. For something lighter, fresh berries and a dusting of powdered sugar add brightness and visual appeal. Whipped cream or vanilla ice cream melting into the warm pudding creates temperature contrast that’s simply divine. I sometimes serve mine with a side of maple-infused whipped cream that I learned to make when developing my Ricotta Cranberry Orange Muffins recipe—the subtle sweetness pairs perfectly with the custard.

    Flavor Variations to Try

    The beauty of brioche bread pudding lies in its versatility as a canvas for different flavors. Add chocolate chips or chunks for a gooey chocolate version that satisfies any cocoa craving. Dried fruits like cranberries, cherries, or apricots provide chewy texture and tangy notes. For a fall-inspired variation, incorporate diced apples, cinnamon, and a pinch of nutmeg. My personal favorite is adding orange zest and dark chocolate for a sophisticated flavor combination. You can even experiment with savory versions by reducing the sugar and adding herbs, cheese, and vegetables for a brunch centerpiece.

    Storage & Troubleshooting Guide

    Proper Storage Methods

    Storing brioche bread pudding correctly maintains its delightful texture and extends its shelf life. Refrigerate leftovers within two hours of baking, covering tightly with plastic wrap or in an airtight container. The pudding will keep well for up to 4 days in the refrigerator. For longer storage, you can freeze individual portions wrapped in plastic and foil for up to 3 months. When reheating, I recommend using the oven rather than microwave—cover with foil and heat at 325°F for about 15 minutes, which preserves the crispy top while warming the center.

    Fixing Common Issues

    Even experienced bakers encounter challenges with bread pudding. If your pudding seems too dry, it likely needed more custard or less time in the oven. Next time, ensure all bread pieces are fully submerged before baking. For pudding that’s too soggy in the center, it needed more baking time—test doneness by inserting a knife in the center; it should come out mostly clean with a few moist crumbs. If your top is browning too quickly before the center cooks, simply cover with aluminum foil halfway through baking. Remember that bread pudding continues to set as it cools, so slight wobbliness in the center when removing from the oven is perfect.

    Frequently Asked Questions

    Can I use regular bread instead of brioche for bread pudding?

    Yes, but brioche creates a richer, more luxurious bread pudding. If substituting, challah or Hawaiian bread work best. Regular bread will require more custard and won’t have the same buttery flavor.

    How do I know when my brioche bread pudding is done baking?

    The top should be golden brown and slightly crisp, and a knife inserted in the center should come out mostly clean with a few moist crumbs. A slight wobble in the center is perfect, as it will continue setting while cooling.

    Can brioche bread pudding be made dairy-free?

    Absolutely! Substitute the milk and cream with full-fat coconut milk or almond milk, and use plant-based butter. The texture will be slightly different but still delicious.

    Is it necessary to let the brioche dry out first?

    While not absolutely necessary, drying the brioche helps it absorb the custard without becoming mushy. Fresh brioche may result in a soggier texture.

    How far in advance can I prepare brioche bread pudding before baking?

    You can assemble the entire brioche bread pudding up to 24 hours before baking. Store it covered in the refrigerator, allowing the bread to fully absorb the custard.

    Final Thoughts

    This brioche bread pudding recipe has become my go-to dessert for both special occasions and cozy weekend treats. The beauty lies in its simplicity and adaptability—once you master the basic technique, you can customize it endlessly to suit your taste preferences or seasonal ingredients. The combination of buttery brioche, creamy custard, and your choice of mix-ins creates a dessert that feels both nostalgic and sophisticated. Don’t forget to share your creations on Pinterest for inspiration!

  • Peach Bread Pudding Recipe That Will Melt Your Heart Instantly

    Peach Bread Pudding Recipe That Will Melt Your Heart Instantly

    Peach Bread Pudding Recipe That Will Melt Your Heart Instantly

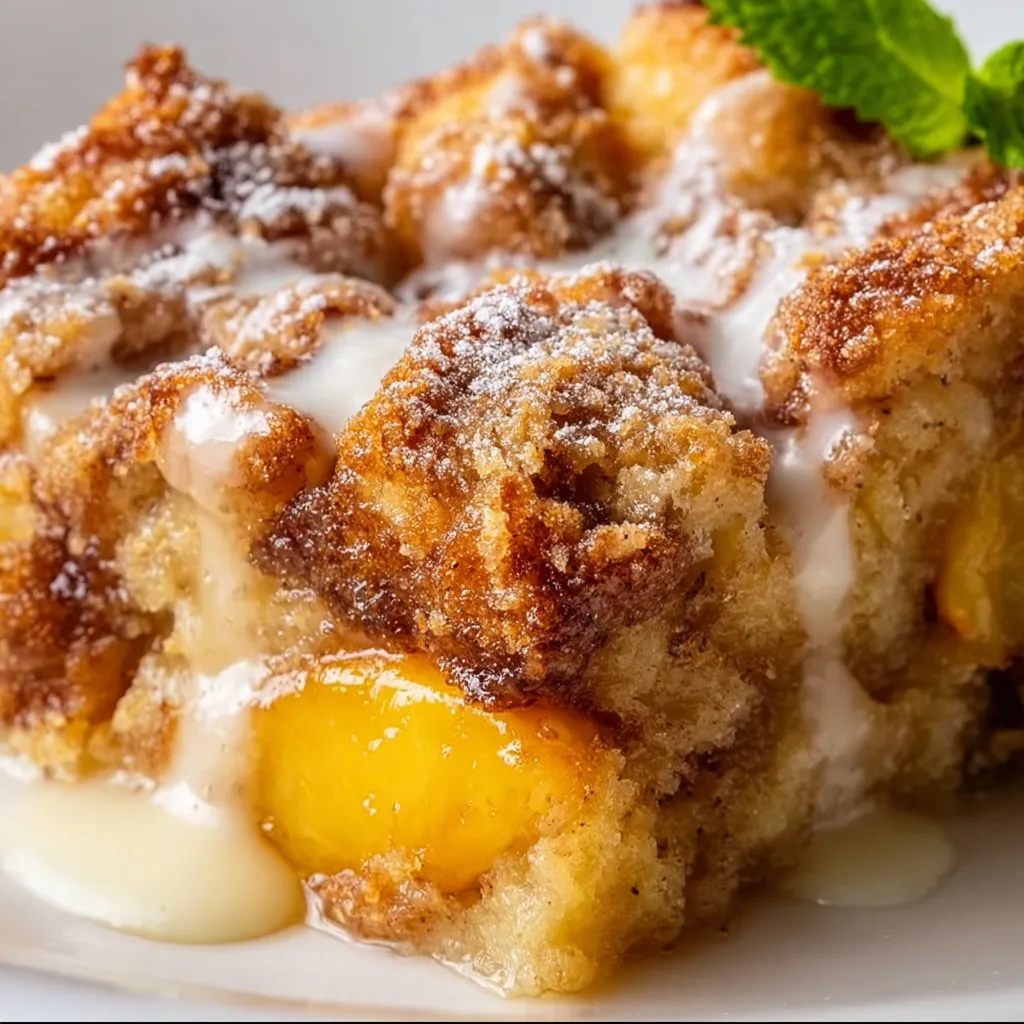
    Peach Bread Pudding transforms humble stale bread into a luxurious dessert that’s both nostalgic and impressive. The first time I made this, my kitchen filled with the sweet aroma of caramelized peaches and warm cinnamon that had my family hovering around the oven door like moths to a flame. There’s something magical about how the bread soaks up the custard, creating those crispy edges and that pillowy center. Whether you’re looking for a cozy weekend treat or a dessert to impress guests, this peach-studded comfort food hits all the right notes. Let me show you how to create this simple yet spectacular dessert.

    Recipe

    Why You’ll Love This Peach Bread Pudding

    Perfect Balance of Textures and Flavors

    There’s something utterly satisfying about the contrasting textures in a well-made peach bread pudding. The top develops this beautiful golden crust that gives way to a soft, custard-soaked center studded with juicy peach pieces. I love how the bread edges get slightly crisp while the middle remains tender and pudding-like. The natural sweetness of ripe peaches balances perfectly with the warm notes of cinnamon and vanilla, creating layers of flavor that dance on your tongue with each bite. It’s comfort food that feels both indulgent and homey at once.

    Make-Ahead Convenience

    One of my favorite things about this peach bread pudding is its incredible flexibility. You can prepare the entire dish the night before, letting the bread fully absorb that rich custard overnight in the refrigerator. This not only saves you precious time when hosting but actually improves the final texture. The extended soaking time allows the bread to fully saturate with the egg mixture, resulting in a more cohesive pudding. I’ve found this make-ahead approach particularly helpful for brunches or when I’m juggling multiple dishes for a dinner party.

    Essential Tips & Tricks

    Choosing the Right Bread

    The foundation of an exceptional peach bread pudding starts with selecting the perfect bread. I’ve discovered that slightly stale brioche, challah, or French bread creates the ideal texture—substantial enough to hold its shape while soaking up the custard without turning mushy. Day-old bread works beautifully, but if you’re in a hurry, you can cube fresh bread and toast it in a 300°F oven for about 10 minutes. This removes excess moisture, allowing the bread to better absorb the custard mixture. The bread cubes should be about 1-inch in size for the perfect balance of texture throughout.

    Perfecting Your Peaches

    The star of this show deserves special attention! For the most flavorful peach bread pudding, choose ripe, fragrant peaches that yield slightly to gentle pressure. During peak season (July-September), fresh peaches provide unmatched flavor, but frozen peaches work wonderfully year-round—just thaw and drain them first. I’ve learned that macerating the peach slices with a tablespoon of sugar for 15 minutes before folding them into your mixture enhances their natural sweetness and creates a light syrup that flavors the entire pudding. This simple step makes a noticeable difference in the final dish.

    Serving Ideas & Creative Variations

    Elevated Serving Suggestions

    Transform your peach bread pudding from delicious to unforgettable with thoughtful serving touches. I love drizzling warm bourbon caramel sauce over each portion—the slight bitterness of the caramelized sugar and warmth of bourbon perfectly complement the sweet peaches. For brunch presentations, add a dollop of lightly sweetened whipped cream and a sprinkle of toasted pecans. Serving individual portions in ramekins creates an elegant presentation, especially when dusted with powdered sugar. For a refreshing contrast, a small scoop of vanilla bean ice cream melting over the warm pudding creates temperature and texture variations that elevate each bite.

    Seasonal and Dietary Adaptations

    This versatile dessert welcomes creative variations to suit different seasons and dietary needs. For a tropical twist, substitute half the peaches with diced mango and add toasted coconut flakes. In autumn, replace peaches with apples and increase the cinnamon for a cozy fall flavor. To accommodate dietary restrictions, use gluten-free bread and plant-based milk alternatives—coconut milk creates an especially rich result. For a lighter version, substitute half the heavy cream with Greek yogurt for a tangier flavor profile with less fat. The basic formula remains the same, making experimentation both easy and rewarding.

    Storage & Troubleshooting Guide

    Proper Storage Methods

    Storing peach bread pudding properly ensures you can enjoy its deliciousness for days. Once completely cooled, cover leftovers tightly with plastic wrap or transfer to an airtight container and refrigerate for up to 4 days. The flavor actually improves after a day as the spices meld together! For longer storage, portion individual servings, wrap well in plastic wrap and then foil, and freeze for up to 3 months. When ready to enjoy, thaw overnight in the refrigerator and reheat gently. I prefer reheating in a 325°F oven for 15-20 minutes to restore some of that delightful crust texture.

    Common Issues and Solutions

    Even experienced bakers encounter challenges with bread pudding. If your pudding seems too dry, the likely culprit is insufficient soaking time. Allow at least 30 minutes (preferably longer) for the bread to absorb the custard mixture before baking. Conversely, if your pudding is too soggy, you may have used too much liquid or fresh bread that couldn’t absorb properly. The perfect bread pudding has a moist interior but shouldn’t be swimming in liquid. If the top browns too quickly while baking, loosely cover with foil to prevent burning while allowing the center to finish cooking properly.

    Frequently Asked Questions

    Can I use canned peaches for Peach Bread Pudding?

    Absolutely! Drain canned peaches well before using. I recommend the varieties packed in juice rather than heavy syrup for better flavor control. Pat them dry with paper towels to remove excess moisture before adding to your pudding.

    How do I know when my bread pudding is perfectly baked?

    The pudding is done when the center reaches 160°F on an instant-read thermometer. Visually, look for puffed edges, a golden top, and a slight jiggle in the center—it will continue to set as it cools.

    Can I make this recipe ahead for a party?

    Yes! Assemble the entire dish up to 24 hours ahead and refrigerate. Allow it to sit at room temperature for 30 minutes before baking, adding 5-10 extra minutes to the baking time.

    What’s the best bread to use if I can’t find brioche?

    Challah, French bread, or even croissants make excellent substitutes. The key is using slightly stale bread that will absorb the custard without falling apart completely.

    Why did my Peach Bread Pudding turn out soggy?

    This usually happens when the bread-to-custard ratio is off. Use less liquid next time, ensure your bread is properly dried, and allow adequate time for the bread to absorb the custard before baking.

    Final Thoughts

    This Peach Bread Pudding has become my go-to dessert when I want something that feels special without requiring hours in the kitchen. The magic happens in the oven as the custard sets and the peaches release their sweet juices into the bread. I love how it fills my home with the most inviting aroma, making everyone feel welcome and comforted. Whether you serve it warm from the oven or chilled the next day, this dessert never disappoints. Don’t forget to check out more delicious ideas on Pinterest for creative variations on this classic!

  • Blueberry Bread Pudding Recipe That Will Melt Your Heart Instantly

    Blueberry Bread Pudding Recipe That Will Melt Your Heart Instantly

    Blueberry Bread Pudding Recipe That Will Melt Your Heart Instantly

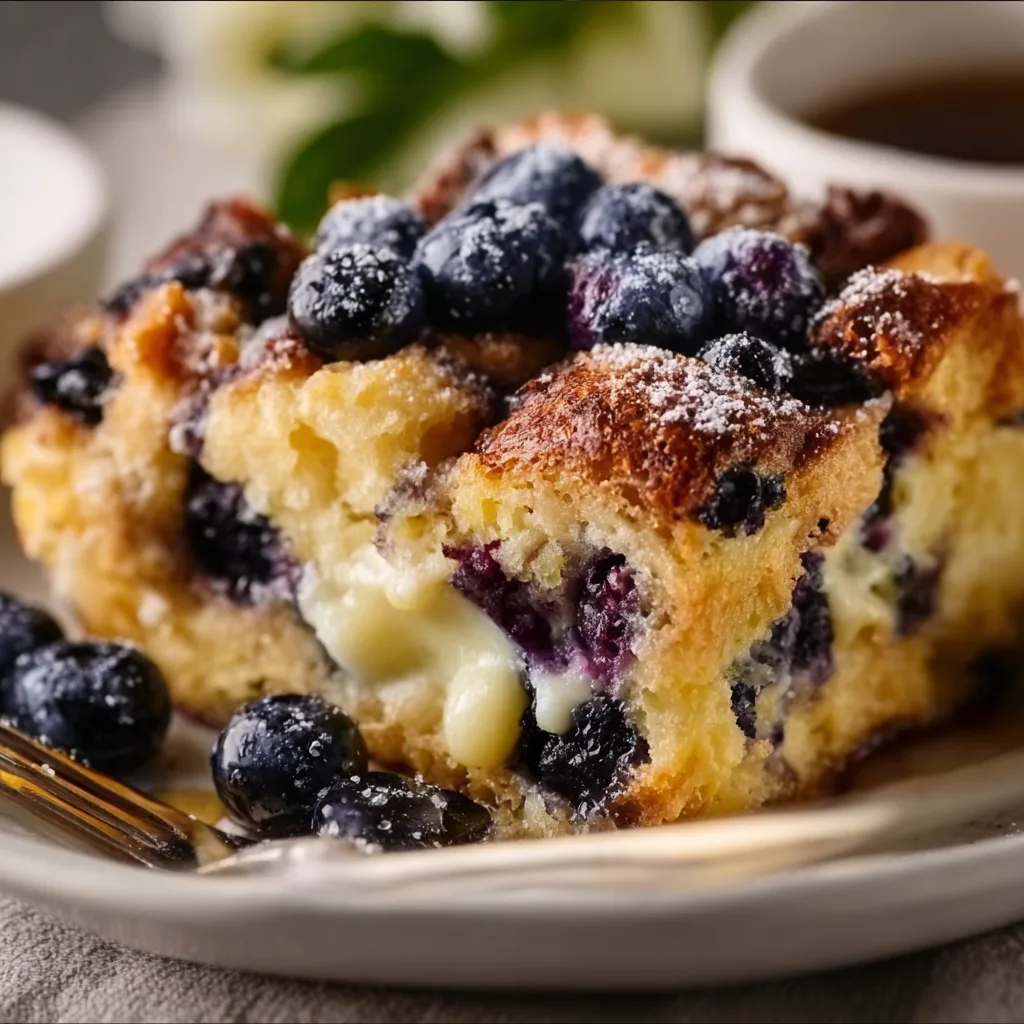
    Blueberry Bread Pudding is the ultimate comfort dessert that transforms humble ingredients into something magical. I discovered this recipe during a rainy weekend when my pantry was nearly empty, but I desperately needed something sweet and cozy. The way the bread soaks up the custard, creating those crispy edges while staying tender inside, is pure kitchen alchemy. This dessert brings together the sweet-tart pop of blueberries with warm vanilla notes that’ll make your kitchen smell like a bakery. Perfect for brunch or dessert, this bread pudding will quickly become your go-to recipe when you need a little comfort.

    Recipe

    Why You’ll Love This Blueberry Bread Pudding

    The Perfect Balance of Textures

    There’s something utterly satisfying about the contrasting textures in this blueberry bread pudding. The outside develops this gorgeous golden crust that gives way to a custardy, tender center that melts in your mouth. I love how the blueberries burst during baking, creating little pockets of jammy goodness throughout. The bread pieces on top get deliciously crisp, while the middle remains pillowy soft. It’s this play of textures that makes each bite an experience rather than just another dessert. My family fights over the corner pieces with their extra crispiness!

    Make-Ahead Convenience

    One of my favorite things about this blueberry bread pudding is how incredibly flexible it is for busy schedules. I often assemble it the night before, letting the bread fully soak up that rich custard mixture overnight in the refrigerator. This not only saves time but actually improves the final texture! The bread breaks down perfectly, creating that cohesive pudding consistency we all crave. Plus, having a ready-to-bake dessert waiting in the fridge feels like a gift to my future self. Just pop it in the oven when you’re ready, and dessert is practically done.

    Essential Tips & Tricks

    Choosing the Right Bread

    The foundation of any great bread pudding is, unsurprisingly, the bread itself. I’ve found that slightly stale bread works best because it absorbs the custard mixture without disintegrating completely. Brioche, challah, or French bread are my top choices for their structure and subtle sweetness. If your bread is fresh, don’t worry! Just cube it and leave it out for a few hours or toast it lightly in the oven for 10 minutes. This extra step ensures your blueberry bread pudding has that perfect texture rather than turning into soggy mush. The bread’s structure is what gives this dessert its distinctive character.

    Mastering the Custard Ratio

    The custard is where the magic happens in a blueberry bread pudding. Getting the perfect ratio of eggs to milk creates that silky, rich texture that defines a great bread pudding. I use 4 eggs to 3 cups of milk for balanced richness without being too eggy. Adding a splash of heavy cream creates extra lusciousness, while vanilla and a hint of cinnamon provide warmth. Don’t rush the soaking process—give your bread at least 30 minutes to absorb the custard before baking, pressing it down occasionally. This patience is what transforms simple ingredients into something extraordinary.

    Serving Ideas & Creative Variations

    Complementary Toppings

    The beauty of blueberry bread pudding lies in how you can dress it up with complementary toppings that elevate it from homey comfort food to impressive dessert. A drizzle of warm maple syrup creates beautiful sweet rivers through the pudding, while a dollop of lightly whipped cream adds a cloud-like contrast to the dense pudding. For special occasions, I love making a quick lemon glaze that cuts through the richness with bright citrus notes. Sometimes I’ll sprinkle toasted sliced almonds over the top for a nutty crunch that plays beautifully against the soft blueberries. Each topping brings a different dimension to this versatile dessert.

    Seasonal Adaptations

    While blueberries create a classic version of this bread pudding, I love how easily it adapts to whatever’s in season. In fall, swap blueberries for diced apples and increase the cinnamon for a harvest-inspired variation. Summer brings opportunities for peaches or raspberries, while winter calls for cranberries with orange zest. You can even go decadent with chocolate chips and banana slices for a dessert that rivals banana pudding brownies. The custard base remains your constant canvas while seasonal fruits bring fresh inspiration. This adaptability makes it a recipe you’ll return to throughout the year.

    Storage & Troubleshooting Guide

    Proper Storage Methods

    Blueberry bread pudding keeps beautifully when stored correctly, making it perfect for meal prep or enjoying leftovers. Once completely cooled, cover leftovers tightly with plastic wrap or transfer to an airtight container and refrigerate for up to 4 days. The flavors actually continue developing, making day-two bread pudding sometimes even better than fresh! For longer storage, you can freeze individual portions wrapped in plastic and foil for up to 2 months. To reheat, thaw overnight in the refrigerator and warm in a 300°F oven until heated through, or microwave individual servings with a damp paper towel covering to maintain moisture.

    Fixing Common Issues

    Even experienced bakers occasionally encounter challenges with bread pudding. If your pudding seems too dry, it likely needed more soaking time or additional custard. Next time, press the bread down more frequently during soaking to ensure even absorption. For a soggy pudding, your bread may have been too fresh or the oven temperature too low. Try using drier bread or increasing your oven temperature by 25°F. If your blueberries sink to the bottom, toss them in a tablespoon of flour before folding them into the mixture. This simple trick coats them and helps suspend them throughout the pudding for better distribution.

    Frequently Asked Questions

    Can I use frozen blueberries for blueberry bread pudding?

    Absolutely! No need to thaw them first—add them frozen directly to the mixture. This actually helps prevent them from bleeding too much color into the custard while baking.

    What’s the best bread to use?

    Brioche, challah, or French bread work best. The slight sweetness and sturdy texture create the perfect foundation for soaking up the custard without falling apart.

    Can I make this recipe dairy-free?

    Yes! Substitute the milk with almond, oat, or coconut milk and use coconut cream instead of heavy cream. The flavor will be slightly different but equally delicious.

    How do I know when my bread pudding is done baking?

    It’s ready when the center is set but still slightly jiggly (like gelatin) and the top is golden brown. A knife inserted in the center should come out mostly clean.

    Can I prepare blueberry bread pudding ahead of time?

    Definitely! Assemble it up to 24 hours in advance and refrigerate. Let it sit at room temperature for 30 minutes before baking for the best results.

    Final Thoughts

    This Blueberry Bread Pudding has become my go-to recipe when I want to transform simple ingredients into something truly special. The way the blueberries burst into jammy pockets throughout the custardy bread creates a comforting dessert that feels both nostalgic and fresh. I love how versatile it is—perfect for brunch with coffee or warmed for dessert with a scoop of vanilla ice cream. Don’t forget to check out more delicious ideas on Pinterest for creative variations on this classic. Your kitchen will smell amazing, and your taste buds will thank you!

  • Easy Bisquick Cinnamon Rolls: Irresistibly Fluffy & Quick Treats!

    Easy Bisquick Cinnamon Rolls: Irresistibly Fluffy & Quick Treats!

    Easy Bisquick Cinnamon Rolls: Irresistibly Fluffy & Quick Treats!

    Easy Bisquick Cinnamon Rolls have been my weekend salvation more times than I can count. When the aroma of cinnamon and brown sugar fills my kitchen on lazy Sunday mornings, everything just feels right. These rolls deliver that perfect balance of pillowy softness and gooey sweetness without the fuss of traditional yeast dough. I still remember the first time I made these with my daughter—flour dusting her nose as she giggled, helping me swirl the cinnamon filling. Whether you’re a baking novice or just craving something warm and homemade without the wait, these Bisquick cinnamon rolls are about to become your new breakfast obsession.

    Recipe

    Why You’ll Love This Easy Bisquick Cinnamon Rolls

    Quick Preparation Time

    Let’s be honest—traditional cinnamon rolls can feel like a full-day commitment. With these Bisquick cinnamon rolls, you’re looking at just 30 minutes from start to finish! The beauty lies in skipping the yeast, which means no waiting around for dough to rise. I’ve made these on sleepy mornings when my coffee hadn’t even kicked in yet, and they still turned out perfectly. The simplicity makes them ideal for busy weekends when you want something special but don’t have hours to spend in the kitchen. Plus, they’re foolproof enough that even my baking-challenged neighbor makes them regularly!

    Simple Ingredients List

    One of the things I adore about these Easy Bisquick Cinnamon Rolls is that they require ingredients you likely already have in your pantry. Beyond the Bisquick mix itself, you’ll just need basics like milk, butter, brown sugar, and cinnamon. No running to the store for specialty items! Last Christmas morning, I realized I’d forgotten to prep breakfast, but these rolls saved the day with just what I had on hand. The ingredient simplicity also makes them incredibly adaptable—I’ve made them when camping (using a pre-measured Bisquick bag), during power outages, and even in my tiny apartment kitchenette when visiting my son at college.

    Essential Tips & Tricks

    Perfecting the Dough Consistency

    Getting the dough consistency right is the secret to perfect texture in your Bisquick cinnamon rolls. You want it just tacky enough to hold together without sticking mercilessly to your fingers. My trick? Add milk gradually, stopping when the dough forms a cohesive ball that pulls away from the bowl sides. If it’s too sticky, dust with a bit more Bisquick—too dry, add a tablespoon of milk. And here’s my game-changer: chill the dough for 10 minutes before rolling. This makes handling infinitely easier and creates those beautiful defined swirls that make cinnamon rolls so irresistible.

    Rolling and Cutting Technique

    The rolling and cutting stage is where many home bakers stumble, but it’s actually quite simple with the right approach. Roll the dough into a rectangle shape about 1/4-inch thick—not too thin or your rolls will be dense. Spread your filling evenly, leaving a 1/2-inch border along one long edge. When rolling up, start from the opposite edge and roll tightly but gently. For clean cuts, my secret weapon is unflavored dental floss! Slide it under the roll, cross the ends, and pull—you’ll get perfect slices without squishing your beautiful spirals. If you don’t have floss, a serrated knife with a gentle sawing motion works too.

    Serving Ideas & Creative Variations

    Delicious Glaze Options

    The glaze is where you can really make these Easy Bisquick Cinnamon Rolls shine! While a classic powdered sugar glaze (mixed with a splash of vanilla and milk) never disappoints, don’t be afraid to experiment. My family goes wild for cream cheese glaze—just blend softened cream cheese with powdered sugar, vanilla, and enough milk to reach drizzling consistency. For a caramel twist that pairs beautifully with apple goat cheese croissant sandwiches at brunch, try brown butter glaze by gently browning butter before mixing with sugar. Maple glaze is another favorite—simply replace some of the milk with pure maple syrup for a cozy autumn flavor.

    Sweet and Savory Add-ins

    While traditional cinnamon rolls are heavenly, adding extras can transform them into something truly special. For fruit variations, try sprinkling the filling with chopped apples tossed in lemon juice, fresh blueberries, or even mashed banana. Nuts add wonderful texture—pecans, walnuts, or sliced almonds work beautifully. For a chocolate lover’s dream, scatter mini chocolate chips over the cinnamon filling. On the savory-sweet side, I once added crispy bacon bits to the filling and topped with maple glaze—it was devoured in minutes! Don’t forget warming spices like cardamom, nutmeg, or pumpkin spice to complement the cinnamon.

    Storage & Troubleshooting Guide

    Keeping Them Fresh

    These Easy Bisquick Cinnamon Rolls are best enjoyed warm from the oven, but they can be stored for later enjoyment too. For next-day freshness, keep them in an airtight container at room temperature for up to 2 days. I like to separate layers with parchment paper to prevent sticking. To reheat, microwave individual rolls for 15-20 seconds or warm the entire batch in a 300°F oven for about 10 minutes. For longer storage, freeze unfrosted rolls in a freezer-safe container for up to a month. When ready to enjoy, thaw overnight in the refrigerator, then warm and add fresh glaze for that just-baked taste.

    Fixing Common Problems

    Even experienced bakers encounter issues sometimes! If your dough is too sticky to roll, don’t panic—simply work in more Bisquick a tablespoon at a time. Conversely, if it’s too dry and cracking, moisten your hands with water and gently work it into the dough. Rolls turning out dense? You might be overworking the dough—handle it minimally for tender results. If your filling leaks out during baking, try chilling the rolled and cut rolls for 15 minutes before baking. And if the centers aren’t cooking through, lower your oven temperature by 25°F and extend baking time—this allows the centers to cook without burning the tops.

    Frequently Asked Questions

    Can I make Easy Bisquick Cinnamon Rolls ahead of time?

    Absolutely! Prepare them up to the cutting stage, place in your baking dish, cover tightly with plastic wrap, and refrigerate overnight. Let them sit at room temperature for 20 minutes before baking in the morning.

    How can I make these cinnamon rolls dairy-free?

    Replace the milk with almond or oat milk and use plant-based butter. For the glaze, coconut cream works wonderfully as a cream cheese substitute when combined with powdered sugar and vanilla.

    Why are my Bisquick Cinnamon Rolls dry?

    You might be using too much flour or overbaking them. Try adding a tablespoon more butter to the filling, and check for doneness 2-3 minutes before the recipe suggests.

    Can I use homemade Bisquick substitute?

    Yes! Mix 2 cups flour, 1 tablespoon baking powder, ½ teaspoon salt, and ¼ cup cold butter cut into the dry ingredients until crumbly. Use this in place of 2 cups Bisquick mix.

    What’s the best pan for baking these rolls?

    A 9-inch round cake pan or 8×8-inch square baking dish works perfectly. For smaller batches, a loaf pan can work too—just adjust baking time accordingly.

    Final Thoughts

    Easy Bisquick Cinnamon Rolls have earned their place in my regular rotation because they deliver that freshly baked joy without the traditional fuss. They remind us that sometimes the simplest recipes bring the most happiness. Whether you’re serving them at a holiday breakfast, weekend brunch, or just because it’s Tuesday and you deserve something special, these rolls have a way of making ordinary moments feel celebratory. I hope they become a beloved tradition in your kitchen too—where the scent of cinnamon and sugar creates memories as sweet as the rolls themselves. Check out more of my favorite breakfast treats on Pinterest!

  • Lemon Almond Cake to Die For: Irresistibly Zesty & Moist!

    Lemon Almond Cake to Die For: Irresistibly Zesty & Moist!

    Lemon Almond Cake to Die For: Irresistibly Zesty & Moist!

    Lemon Almond Cake to Die For has become my weekend obsession, and I’m not even sorry about it! There’s something magical about the bright citrus aroma that fills my kitchen as this cake bakes—it’s like sunshine in dessert form. I discovered this recipe during a particularly gloomy February when I needed something to lift my spirits. The first bite with its perfect balance of tangy lemon and nutty almond had me closing my eyes in pure bliss. If you love the combination of sweet and tart like in these Strawberry Brownies with Lemon Glaze, you’re in for a real treat!

    Recipe

    Why You’ll Love This Lemon Almond Cake to Die For

    A Symphony of Flavors and Textures

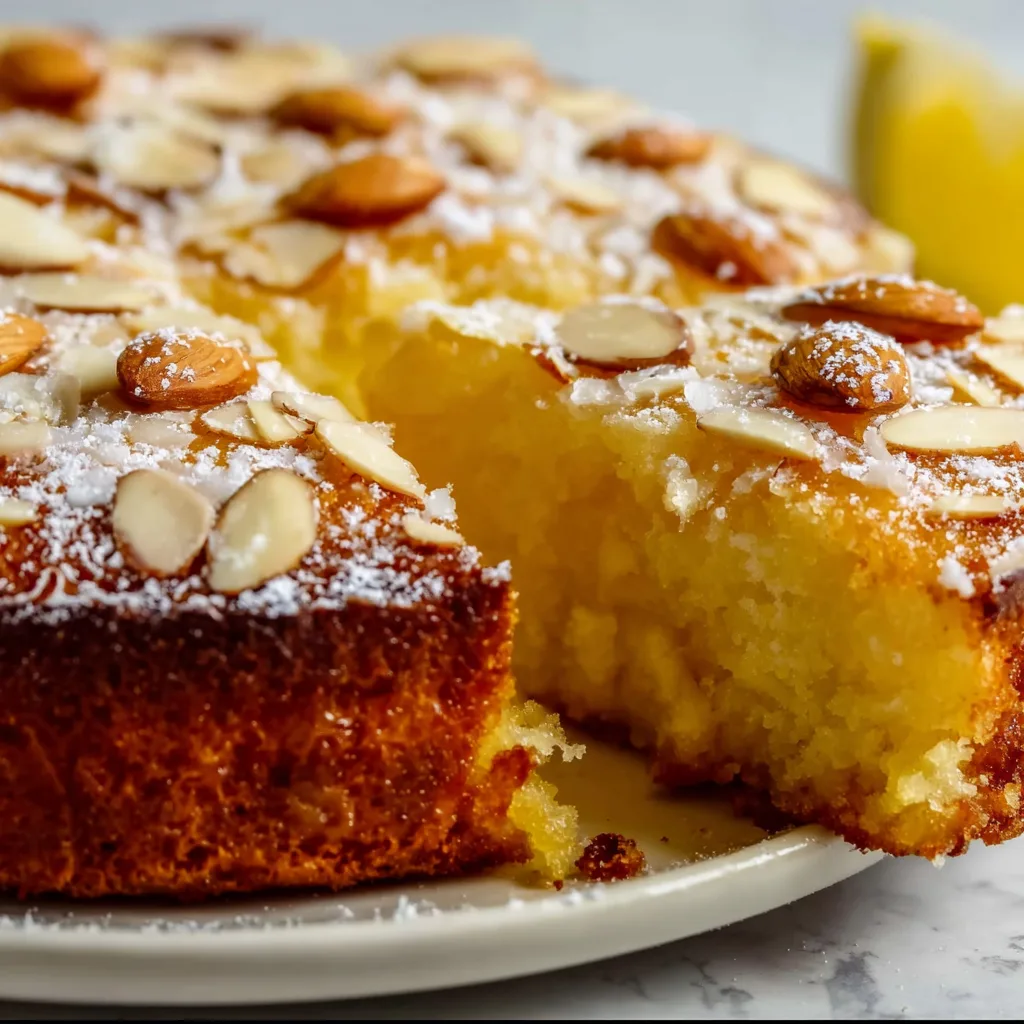
    This cake strikes the perfect balance between richness and lightness. The almond flour creates a tender, moist crumb that practically melts in your mouth, while the lemon zest and juice provide a bright, zingy contrast that wakes up your taste buds. I love how the top develops a slight crust that gives way to the softest interior. The gentle nuttiness of the almonds provides depth without overwhelming the star of the show—that vibrant lemon flavor that makes you close your eyes and savor each bite. It’s sophisticated enough for company but comforting enough for a weeknight treat.

    Impressive Yet Surprisingly Simple

    Don’t let the elegant appearance fool you—this cake is remarkably straightforward to make. Unlike fussy layer cakes, this one-bowl wonder comes together in about 15 minutes of active time. The ingredients are likely already in your pantry, and you don’t need special equipment beyond a mixing bowl and whisk. I’ve made this cake countless times when unexpected guests announced they were “just dropping by,” and it never fails to impress. There’s something deeply satisfying about creating something so beautiful with so little effort. The hardest part is waiting for it to cool before diving in!

    Essential Tips & Tricks

    Mastering the Lemon Elements

    The secret to intensity lies in how you incorporate the lemon. Always zest your lemons before juicing them, and rub the zest into the sugar with your fingertips to release the essential oils. This simple step amplifies the lemon flavor tenfold! For the juice, fresh is non-negotiable—those bottled versions simply won’t deliver the bright, clean taste we’re after. I like to add a tablespoon of lemon juice to the glaze as well, which creates a tangy finish that balances the cake’s sweetness. Remember: more zest equals more pronounced lemon flavor without additional acidity.

    Achieving the Perfect Texture

    The almond-flour ratio is crucial to this cake’s divine texture. Too much, and it becomes dense; too little, and you lose that distinctive moistness. I recommend using room-temperature ingredients to ensure proper incorporation and an even crumb. When mixing, be gentle—overmixing activates the gluten in the all-purpose flour portion, resulting in a tougher cake. For an ultra-moist version like my Dutch Oven No-Knead Crusty Bread, add 2 tablespoons of sour cream or Greek yogurt to the batter. The slight tang complements the lemon beautifully while adding incredible moisture.

    Serving Ideas & Creative Variations

    Seasonal Pairings That Shine

    This versatile cake deserves thoughtful accompaniments that enhance its lemon-almond glory. In summer, I serve it with fresh berries—particularly raspberries or blackberries whose tartness echoes the lemon notes. A dollop of lightly whipped cream or crème fraîche adds luxurious richness without overwhelming. For fall and winter, try roasted pears with a drizzle of honey or a scoop of vanilla bean ice cream. The warm-cold contrast creates a sensory experience that’s utterly delightful. For brunch settings, pair with a glass of prosecco or a creamy latte for the perfect balance.

    Inspired Flavor Twists

    While the classic version is perfection, I love creating seasonal adaptations throughout the year. Add 1/2 teaspoon of lavender buds to the sugar for a Provençal twist, or fold in 1/3 cup of poppy seeds for delightful texture. For a holiday version, incorporate 1/2 teaspoon of cardamom and a splash of amaretto into the batter. My personal favorite variation involves folding in 1/4 cup of finely chopped pistachios and topping with a rosewater glaze—it transforms the cake into something worthy of a Middle Eastern pastry shop!

    Storage & Troubleshooting Guide

    Keeping Your Cake Fresh

    The moisture retention of this cake is remarkable—it actually tastes even better on day two as the flavors meld and develop. Store at room temperature under a cake dome or wrapped in plastic for up to three days. For longer storage, refrigerate for up to a week, but always bring to room temperature before serving to revive the texture and flavors. If you want to freeze portions, wrap individual slices tightly in plastic wrap, then foil, and freeze for up to three months. Thaw overnight in the refrigerator, then unwrap and bring to room temperature for the best taste experience.

    Solving Common Baking Issues

    If your cake sinks in the middle, you likely opened the oven door too early—wait until at least 25 minutes into baking before checking. For a cake that’s too dense, check your leavening agents for freshness; baking powder loses potency after about six months. If the top browns too quickly, loosely tent with foil halfway through baking. For a cake that’s too dry, you may have overbaked it or measured the flour too heavily—I recommend spooning flour into measuring cups rather than scooping directly from the bag, which compacts it. Remember that almond flour burns easily, so watch carefully!

    Frequently Asked Questions

    Can I make this Lemon Almond Cake to Die For gluten-free?

    Absolutely! Replace the all-purpose flour with a 1:1 gluten-free flour blend. The almond flour already provides structure, making this cake particularly adaptable to gluten-free baking without sacrificing texture.

    How do I know when the cake is perfectly done?

    Insert a toothpick into the center—it should come out with a few moist crumbs but no wet batter. The cake will also begin to pull away slightly from the sides of the pan, and the top will spring back when lightly touched.

    Can I use Meyer lemons instead of regular lemons?

    Yes! Meyer lemons add a wonderful floral sweetness. Since they’re less acidic, you might want to add an extra tablespoon of juice to maintain the bright tangy flavor.

    How far in advance can I make this cake for a party?

    This cake actually improves with time! Make it up to two days ahead, store at room temperature, and add any fresh garnishes just before serving.

    Can I bake this in a different pan shape?

    Yes—try a loaf pan (adjust baking time to 45-50 minutes) or cupcakes (18-20 minutes). Just fill pans only 2/3 full as the cake will rise considerably.

    Final Thoughts

    This Lemon Almond Cake to Die For has become my signature dessert for good reason—it consistently delivers that perfect balance of simplicity and sophistication that makes guests think you spent hours in the kitchen. There’s something magical about the way the bright lemon and nutty almond flavors complement each other, creating a cake that feels both comforting and special. Whether you’re serving it at a dinner party or enjoying a slice with your afternoon tea, this cake has a way of brightening even the most ordinary moments. Don’t forget to check out more of my favorite recipes on Pinterest!

  • Classic Peach Cobbler Cheesecake Donuts: Irresistibly Delicious!

    Classic Peach Cobbler Cheesecake Donuts: Irresistibly Delicious!

    Classic Peach Cobbler Cheesecake Donuts: Irresistibly Delicious!

    Classic Peach Cobbler Cheesecake Donuts are what happen when three beloved desserts collide in the most magnificent way possible. The first time I made these for my sister’s birthday brunch, there was a moment of pure silence followed by audible gasps around the table. These pillowy donuts filled with velvety cheesecake and topped with warm, cinnamon-spiced peach cobbler topping create an irresistible symphony of textures and flavors. They’re indulgent yet approachable, and perfect for those moments when you want to create something truly special without spending hours in the kitchen. Let me show you how to bring these delightful treats to life.

    Recipe

    Why You’ll Love These Classic Peach Cobbler Cheesecake Donuts

    Perfect Fusion of Beloved Desserts

    There’s something magical about the way these three desserts complement each other. The soft, yeasted donuts provide the perfect canvas for the creamy cheesecake filling that melts in your mouth with each bite. Then comes the warm peach cobbler topping with its juicy fruit and buttery crumble that adds the perfect textural contrast. I still remember my neighbor knocking on my door after smelling these baking, practically begging for the recipe! The balance of sweet, tangy, and spiced notes creates a flavor profile that feels both nostalgic and exciting at the same time.

    Easy Make-Ahead Components

    What I adore most about these donuts is how the components can be prepared in stages, making them perfect for entertaining. The cheesecake filling can be made up to two days ahead and stored in the refrigerator. The peach topping can be prepared the day before and gently reheated when needed. Even the donut dough can rise overnight in the refrigerator, allowing you to simply fry them fresh the morning of serving. This flexibility saved me during last summer’s family reunion when I needed to impress but had limited kitchen time.

    Essential Tips & Tricks

    Mastering the Donut Dough

    The foundation of these incredible treats is a perfectly executed donut dough. The key secret is temperature control – make sure your milk is warm (110°F-115°F) to properly activate the yeast, but not hot enough to kill it. I learned this the hard way after a flat-donut disaster at my first attempt! When kneading, look for the “windowpane test” – stretch a small piece of dough; if it stretches thin enough to see light through without tearing, you’ve developed enough gluten. Allow proper rising time in a warm, draft-free spot for those airy, fluffy results.

    Perfecting the Peach Topping

    The peach cobbler element brings these donuts to life with its caramelized sweetness and warm spices. For the best flavor, use ripe, in-season peaches if possible – the fragrance alone will transport you! If using frozen peaches, thaw and drain them thoroughly to prevent excess moisture. The cinnamon-nutmeg combination is non-negotiable here, creating that authentic cobbler flavor. My personal touch? A tiny splash of bourbon in the peach mixture. It evaporates during cooking but leaves behind a complex caramel note that makes people ask, “What’s your secret?”

    Serving Ideas & Creative Variations

    Seasonal Adaptations

    While peaches create the classic version of these donuts, don’t be afraid to experiment with seasonal fruits throughout the year. In fall, substitute with spiced apples and a touch of caramel for an autumn harvest feel. Summer berries create a vibrant, tangy alternative that pairs beautifully with the cheesecake filling. Winter citrus like blood oranges can be candied and used as a sophisticated topping. I once made a strawberry version for Valentine’s Day that paired perfectly with champagne and my Strawberry Dump Cake for an unforgettable dessert table.

    Presentation Possibilities

    Elevate these donuts from delicious treats to showstopping desserts with thoughtful presentation. For brunch gatherings, arrange them on a tiered stand with fresh peach slices and mint leaves as garnish. For dessert service, place a warm donut in a shallow bowl with a scoop of vanilla bean ice cream and drizzle with additional peach syrup. Create a donut bar where guests can customize their toppings with choices like crushed graham crackers, toasted pecans, or white chocolate drizzle. The joy on people’s faces as they create their perfect combination is priceless!

    Storage & Troubleshooting Guide

    Keeping Donuts Fresh

    These donuts are best enjoyed fresh, but proper storage can extend their deliciousness. Store fully assembled donuts in an airtight container in the refrigerator for up to 2 days. Before serving, let them come to room temperature for about 20 minutes to soften the texture. For longer storage, freeze the unglazed donuts without filling or topping for up to 1 month. When ready to serve, thaw at room temperature, then warm briefly in a 300°F oven for 5 minutes before filling and topping. I’ve learned to slightly underfill frozen-then-thawed donuts as they can become more delicate.

    Solving Common Problems

    Even experienced bakers encounter challenges! If your donut dough isn’t rising properly, check your yeast’s freshness and ensure your environment is warm enough. For troubleshooting runny fillings, refrigerate the cheesecake mixture longer or add an extra tablespoon of cornstarch to the peach topping. If the donuts absorb too much oil during frying, your oil temperature might be too low – aim for a consistent 350°F. My biggest disaster was when I rushed the process and injected hot filling into warm donuts – the melting mess taught me patience is essential for these multi-component treats!

    Frequently Asked Questions

    Can I make Classic Peach Cobbler Cheesecake Donuts without a deep fryer?

    Absolutely! Bake the donuts in a 350°F oven for 12-15 minutes until golden. While the texture will be slightly different, they’ll still be delicious with all the wonderful toppings.

    Can I use canned peaches instead of fresh?

    Yes! Drain canned peaches well and reduce the sugar in the cobbler topping by 2 tablespoons since canned peaches are typically pre-sweetened.

    How far in advance can I prepare components?

    The cheesecake filling can be made 2 days ahead, the peach topping 1 day ahead, and the dough can rise overnight in the refrigerator for next-day frying.

    What’s the best way to fill the donuts?

    Use a piping bag fitted with a long filling tip. Insert the tip into the side of the donut, gently squeeze filling inside, and stop when you feel slight resistance.

    Can I make a gluten-free version?

    Yes! Substitute a 1:1 gluten-free flour blend in the donut recipe and add ½ teaspoon xanthan gum if your blend doesn’t include it already.

    Final Thoughts

    These Classic Peach Cobbler Cheesecake Donuts represent everything I love about creative baking – taking familiar favorites and transforming them into something unexpectedly wonderful. They’ve become my signature bring-along for special gatherings, earning me the unofficial title of “donut queen” among friends. The joyful reactions they inspire make every step worthwhile. I hope you’ll experience the same delight in both making and sharing these treats. Don’t forget to tag me on Pinterest when you create your own version – I can’t wait to see your delicious interpretations!