Category: Desserts

Sweet and easy dessert recipes for every craving. Simple treats, rich flavors, and quick ideas that make any moment feel special.

  • Classic Peanut Butter Lunch Lady Cookie Bars – Irresistibly Soft & Delicious!

    Classic Peanut Butter Lunch Lady Cookie Bars – Irresistibly Soft & Delicious!

    Classic Peanut Butter Lunch Lady Cookie Bars - Irresistibly Soft & Delicious!

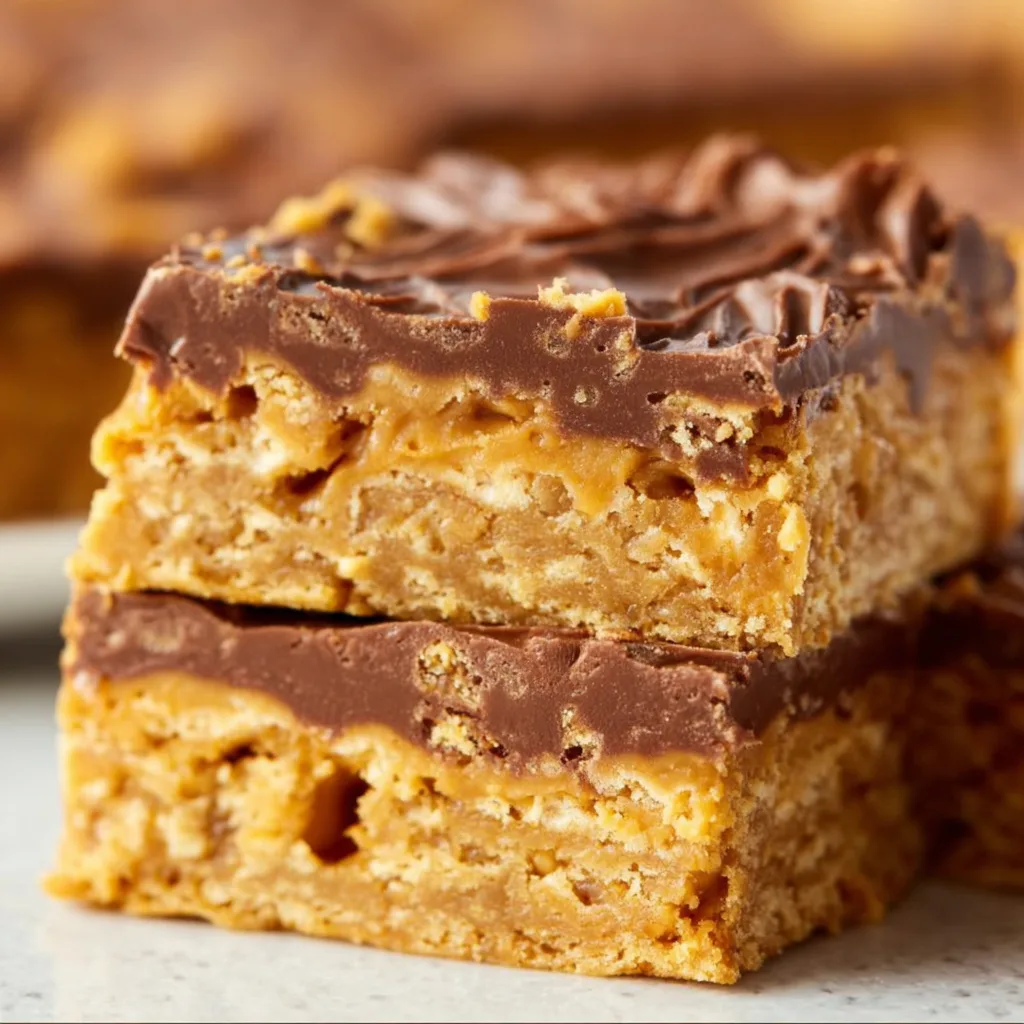
    Classic Peanut Butter Lunch Lady Cookie Bars transport me straight back to elementary school cafeteria days, where these chewy, peanutty squares were the highlight of lunch period. There’s something magical about that perfect balance of dense, buttery cookie base and sweet, creamy frosting that makes these treats utterly irresistible. I still remember trading half my sandwich just to score an extra bar! These nostalgic treats combine the comfort of homemade cookies with the ease of a one-pan dessert that’s perfect for potlucks, bake sales, or simply satisfying those weeknight sweet cravings. Let’s recreate this cafeteria classic with a homemade twist!

    Recipe

    Nostalgic Flavor with Modern Appeal

    These bars strike the perfect balance between nostalgic comfort and modern-day cravings. The peanut butter base delivers that warm, nutty flavor that wraps around you like a cozy blanket on a chilly evening. What makes these truly special is how the salt from the peanut butter cuts through the sweetness, creating a sophisticated flavor profile that appeals to both kids and adults alike. I’ve served these at everything from school functions to dinner parties, and they disappear within minutes, always accompanied by that familiar “mmm” of recognition and delight.

    Quick Preparation, Maximum Impact

    One of the greatest joys of these Classic Peanut Butter Lunch Lady Cookie Bars is their impressive simplicity. Unlike fussy desserts that require multiple bowls and complicated techniques, these bars come together in just one bowl for the base and another for the frosting. The entire process takes less than 15 minutes of active time, making them perfect for busy weeknights or last-minute gatherings. I’ve whipped these up countless times when unexpected guests announced they were “just stopping by,” and they always think I spent hours in the kitchen!

    Essential Tips & Tricks

    Perfecting the Base Texture

    The secret to authentic lunch lady cookie bars lies in achieving that perfect chewy density that’s neither too cakey nor too dry. Room temperature ingredients are non-negotiable here—cold butter and eggs will create a different texture entirely. When mixing, beat until just combined; overmixing introduces too much air, resulting in a cakey texture rather than that signature dense chew. My personal trick? I use the back of a measuring cup to firmly press the dough into the pan, creating that compact, even layer that defines these nostalgic treats. These Cheesecake Brownie Bites use a similar technique for their perfect base.

    Frosting Finesse

    The crowning glory of these bars is undoubtedly the silky frosting that sets them apart from ordinary cookie bars. Temperature is crucial here—apply the frosting while the base is still warm (but not hot) to achieve that signature slight melt at the interface. This creates a beautiful bond between layers that’s impossible to resist. For the smoothest results, sift your powdered sugar before mixing to eliminate lumps. My grandmother taught me to add a tiny pinch of salt to the frosting to enhance the peanut butter flavor—it’s subtle but makes all the difference!

    Serving Ideas & Creative Variations

    Elevated Presentation Styles

    Transform these humble bars into showstopping desserts with a few simple presentation tweaks. For casual gatherings, classic squares are perfect, but for more elegant occasions, try cutting them into slim rectangles and arranging them in a spiral on a cake stand. A light dusting of cocoa powder or a drizzle of melted chocolate adds visual interest. I once served these at a dinner party with a small scoop of vanilla bean ice cream and a warm chocolate sauce drizzle—guests were fighting over seconds! The versatility of these bars makes them perfect companions to these Banana Oatmeal Muffins for a complete dessert spread.

    Flavor Twists and Add-ins

    While the classic version is perfection, these bars welcome creative variations that maintain their nostalgic essence while introducing exciting new flavors. Try folding crunchy elements like chopped peanuts, chocolate chips, or toffee bits into the base for textural contrast. For a more sophisticated take, add a teaspoon of espresso powder to the frosting or swap half the peanut butter for cookie butter or Nutella. My personal favorite variation includes a thin layer of raspberry jam between the base and frosting—the sweet-tart berry flavor cuts through the richness beautifully.

    Storage & Troubleshooting Guide

    Optimal Storage Methods

    Preserving the perfect chewy texture of these bars requires proper storage techniques. At room temperature, store them in an airtight container with parchment paper between layers for 3-4 days. For longer storage, refrigeration works beautifully—just bring them to room temperature before serving to restore that perfect chew. These bars also freeze exceptionally well for up to three months when wrapped individually in plastic wrap and stored in freezer bags. I often make a double batch specifically to freeze, ensuring I’m always prepared for unexpected company or late-night cravings!

    Solving Common Challenges

    Even experienced bakers occasionally encounter issues with these bars, but most problems have simple solutions. If your bars turn out too dry, you likely overbaked them—next time, remove them when the center still looks slightly underdone. For frosting that’s too runny, refrigerate it for 10-15 minutes before spreading. If your bars crack when cutting, try using a warm knife (run it under hot water and wipe dry between cuts) and cut while the bars are at room temperature. For clean, professional-looking squares, refrigerate the frosted bars for 30 minutes before cutting.

    Frequently Asked Questions

    Yes! Substitute plant-based butter and milk in both the base and frosting. The bars will have a slightly different texture but maintain that nostalgic flavor. Just ensure your dairy-free butter is at room temperature for proper creaming.

    How do I know when the bars are properly baked?

    Look for golden edges and a top that’s set but not overly browned. A toothpick inserted in the center should come out with a few moist crumbs—not wet batter but not completely clean either.

    Can I use natural peanut butter in this recipe?

    Traditional lunch lady cookie bars work best with conventional peanut butter (like Jif or Skippy). Natural peanut butter’s oil separation can affect texture and stability in both the base and frosting.

    How far in advance can I make these for a party?

    These bars actually improve with a day of rest! Make them up to 2 days ahead and store at room temperature in an airtight container, or freeze for up to 3 months and thaw overnight.

    Overmixing the dough or using too much leavening agent creates a cakey texture. Mix just until ingredients are combined and double-check your measurements of baking powder and baking soda.

    Final Thoughts

    These Classic Peanut Butter Lunch Lady Cookie Bars aren’t just dessert—they’re edible nostalgia that bridges generations. There’s something profoundly satisfying about recreating these cafeteria favorites in your own kitchen, perhaps making them even better than you remember. Whether you’re baking them for a school function, family gathering, or simply because it’s Tuesday, these bars deliver that perfect blend of comfort, simplicity, and pure joy. I hope they bring as many smiles to your table as they have to mine! Find more inspiration on our Pinterest page.
  • Easy 3-Ingredient Cake Mix Cookies You’ll Love Instantly!

    Easy 3-Ingredient Cake Mix Cookies You’ll Love Instantly!

    Easy 3-Ingredient Cake Mix Cookies You’ll Love Instantly!

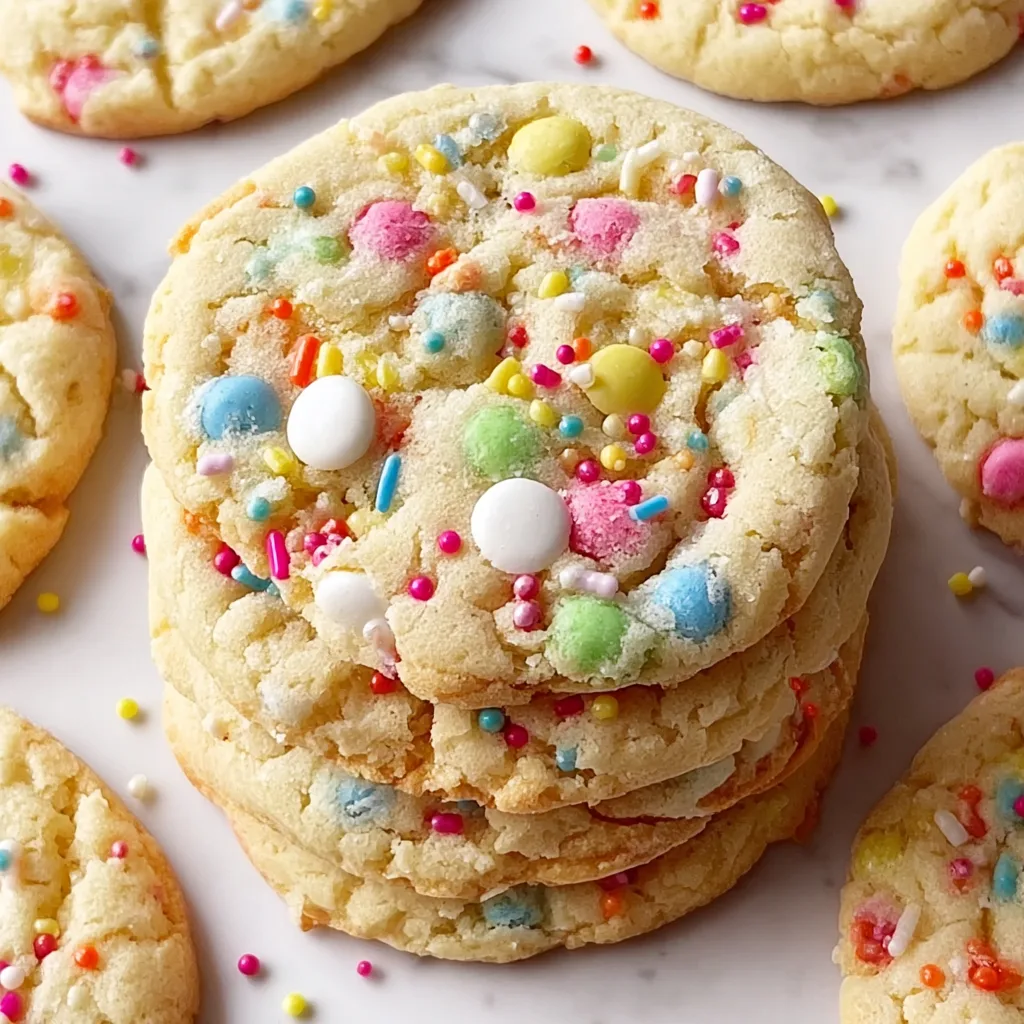
    Easy 3-Ingredient Cake Mix Cookies are the ultimate shortcut to homemade cookie bliss! When my schedule gets hectic (which seems like always these days), these miraculous little treats have saved countless family dessert nights. The beauty lies in their simplicity—just grab a box of cake mix, some oil, and eggs, and you’re minutes away from warm, soft-centered cookies with crispy edges. I first discovered this hack during a late-night baking emergency when my daughter announced she needed cookies for school… tomorrow. Now they’re my secret weapon for last-minute entertaining and satisfying those unstoppable sweet cravings!

    Recipe

    Why You’ll Love These Easy 3-Ingredient Cake Mix Cookies

    Perfect for Busy Bakers

    Let’s be honest—sometimes we want homemade cookies without the measuring marathon. These cake mix cookies are the answer to your time-crunched prayers! The boxed cake mix does all the heavy lifting by providing pre-measured dry ingredients, perfectly balanced flavors, and consistent results. I’ve made these with my 8-year-old nephew, and even he couldn’t mess them up! The prep takes literally 5 minutes, and you’ll have warm cookies in under 30 minutes total. For those chaotic weeknights when you need something sweet right now, nothing beats this foolproof method.

    Endlessly Customizable

    The true magic of these cookies lies in their versatility. Start with any cake mix flavor as your base—chocolate, vanilla, strawberry, lemon, spice cake—and build from there. While technically only three ingredients, you can fold in chocolate chips, sprinkles, nuts, or crushed candies if you’re feeling fancy. Last Christmas, I made red velvet cake mix cookies with white chocolate chips that disappeared faster than Santa down the chimney! The texture is consistently soft and chewy in the center with slightly crisp edges that make them irresistible for dunking in milk or coffee.

    Essential Tips & Tricks

    Perfecting the Texture

    The key to bakery-quality cake mix cookies is getting the texture just right. I’ve learned through many batches that chilling the dough for 15-20 minutes before baking makes a huge difference—it prevents excessive spreading and creates that perfect dome shape. Another game-changer is using a cookie scoop for uniform size (I prefer a 1½ tablespoon scoop). Don’t overbake these beauties! They should look slightly underdone in the center when you pull them out, as they’ll continue cooking on the hot baking sheet. This technique gives you that coveted soft center that melts in your mouth.

    Troubleshooting Common Issues

    Even with a recipe this simple, little adjustments can make a big difference. If your cookies spread too much, your dough might be too warm or your oven temperature might be off.

  • Chocolate Caramel Pecan Turtle Candy: Irresistibly Decadent Delight!

    Chocolate Caramel Pecan Turtle Candy: Irresistibly Decadent Delight!

    Chocolate Caramel Pecan Turtle Candy: Irresistibly Decadent Delight!

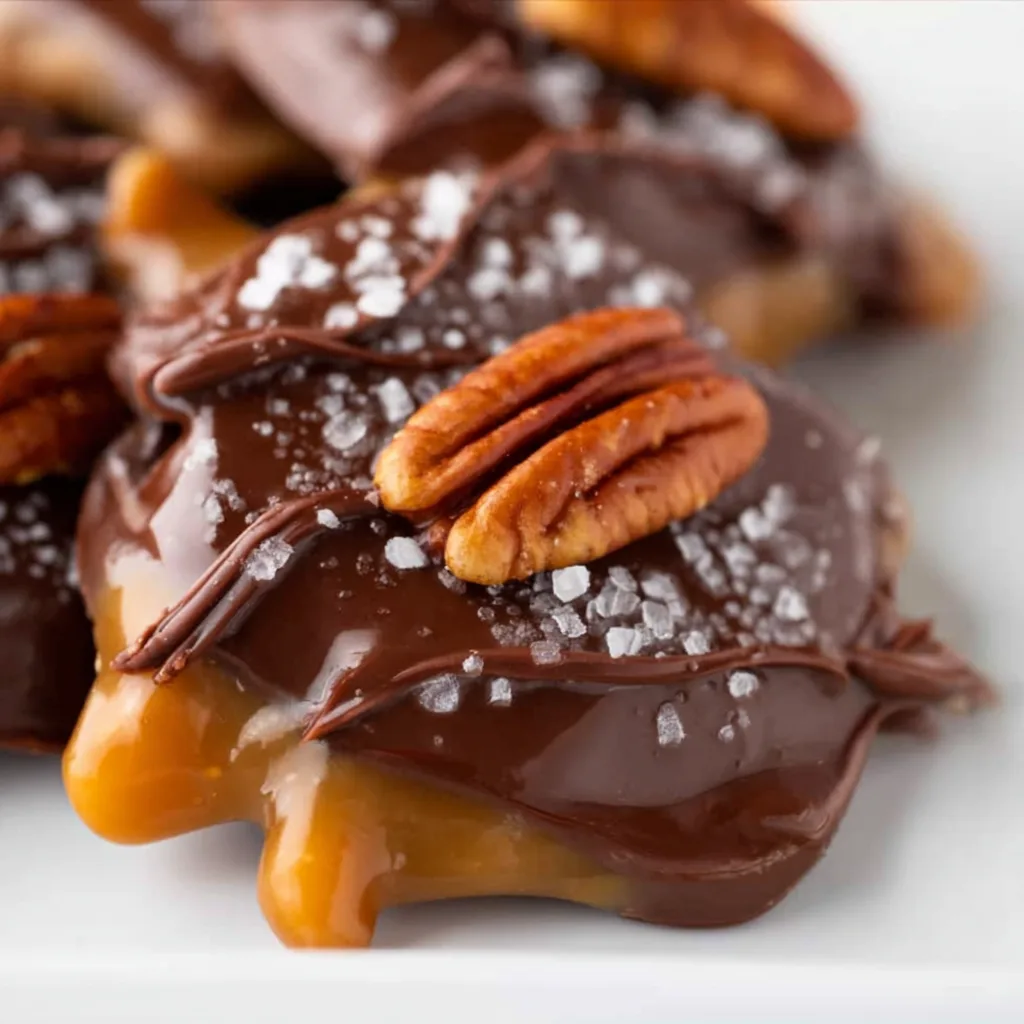
    Chocolate Caramel and Pecan Turtle Candy has been my secret weapon for holiday gifting and dessert tables for years. There’s something magical about the way buttery caramel embraces crunchy pecans, all enrobed in glossy chocolate that sets with the perfect snap. The first time I made these for my sister’s birthday gathering, they disappeared within minutes, leaving nothing but sticky fingers and requests for the recipe. These little bites of heaven strike the perfect balance between homemade charm and gourmet indulgence, making them impossible to resist. Let me show you how to create these irresistible treats that will have everyone begging for more.

    Recipe

    Why You’ll Love This Chocolate Caramel and Pecan Turtle Candy

    Perfect Balance of Flavors and Textures

    The magic of turtle candy lies in its contrasting elements working in perfect harmony. The buttery caramel slowly melts on your tongue while the pecans provide a satisfying crunch that keeps you coming back for more. That rich chocolate shell adds the final decadent note that makes these treats so special. I love watching people take their first bite—there’s always that moment of closed eyes and a little smile that tells me everything. The slight hint of salt in the caramel elevates all the flavors, creating that addictive sweet-salty combination that makes it nearly impossible to eat just one.

    Impressive Yet Surprisingly Simple

    Don’t let their elegant appearance fool you—these turtle candies are remarkably straightforward to make. With just a handful of quality ingredients and no specialized equipment required, you’ll create something that looks like it came from an upscale chocolatier. I remember being intimidated the first time I attempted them, nervously watching caramel temperatures and fussing over chocolate tempering. Now they’re my go-to when I need something impressive but don’t have hours to spend in the kitchen. The prep work is minimal, and most of the time involved is just waiting for layers to set. Perfect for busy holiday seasons!

    Essential Tips & Tricks

    Caramel Success Strategies

    The key to perfect turtle candy lies in mastering the caramel layer. Use a heavy-bottomed saucepan to prevent burning, and never step away while it’s cooking—caramel can go from perfect to scorched in seconds! I learned this the hard way during a distracted phone call that ended with a smoky kitchen. Keep a candy thermometer handy and aim for 245°F (firm ball stage) for that ideal chewy-but-not-sticky consistency. If you’re new to caramel making, try the water test: drop a small amount into cold water; it should form a firm but pliable ball. For an extra dimension of flavor, try adding a splash of vanilla or a pinch of sea salt right at the end.

    Chocolate Handling Techniques

    Properly tempered chocolate makes all the difference in creating turtle candy with a professional-looking finish and satisfying snap. I recommend using good quality chocolate chips or bars chopped into small pieces for even melting. Microwave in 30-second intervals, stirring between each, or use a double boiler for more control. The secret is keeping the temperature below 90°F for dark chocolate (slightly lower for milk or white). Last Christmas, I rushed this step and ended up with bloomed chocolate that looked dull and grainy—a mistake I won’t repeat! If tempering seems intimidating, try adding a teaspoon of coconut oil to your melted chocolate for a similar glossy finish. Check out these cheesecake brownie bites for another delicious chocolate treat.

    Serving Ideas & Creative Variations

    Elegant Presentation Options

    Transform your turtle candy into an impressive dessert worthy of special occasions with thoughtful presentation. Arrange them on a white ceramic platter with a light dusting of cocoa powder for a sophisticated look, or stack them in clear gift boxes tied with ribbon for heartfelt homemade gifts. I love creating a dessert board with turtle candies as the centerpiece, surrounded by fresh berries, small cookies, and perhaps some cheese for contrast. For an extra touch of elegance, try drizzling white chocolate in delicate patterns across the tops or adding a tiny gold leaf accent. These little details elevate your turtle candy from simple treats to memorable indulgences that guests will photograph before devouring.

    Flavor Twists and Additions

    While classic turtle candy is perfection, experimenting with flavor variations keeps things exciting. Try swapping pecans for toasted walnuts, macadamias, or a mixed nut medley for different texture profiles. Last Valentine’s Day, I added a sprinkle of pink Himalayan salt on top and a dash of bourbon to the caramel—my husband declared it the best version yet! For a spicy-sweet combination, incorporate a pinch of cayenne or cinnamon into your chocolate. White chocolate lovers can create a reverse turtle with dark chocolate pecans and caramel topped with creamy white chocolate. For a festive touch similar to my banana pudding brownies, try adding seasonal sprinkles or colored drizzles to match your celebration theme.

    Storage & Troubleshooting Guide

    Keeping Turtles Fresh and Perfect

    Proper storage techniques ensure your turtle candy maintains its delicious qualities for weeks. Store in an airtight container with parchment paper between layers to prevent sticking. At room temperature, they’ll stay fresh for up to two weeks, though I doubt they’ll last that long! In summer months or warmer climates, refrigeration is best—just bring them to room temperature before serving to allow the caramel to soften perfectly. For longer storage, these treats freeze beautifully for up to three months. I make double batches in November, freezing half for last-minute holiday gatherings. The key is protecting them from moisture and strong odors that chocolate readily absorbs.

    Fixing Common Candy Issues

    Even experienced candy makers encounter challenges, but most turtle troubles have simple solutions. If your caramel is too soft and doesn’t hold its shape, it likely didn’t reach a high enough temperature—reheat it slowly until it reaches firm ball stage. Conversely, if it’s too hard, incorporate a tablespoon of cream and warm gently. For chocolate that refuses to set properly, pop the turtles in the refrigerator for 10 minutes. Grainy chocolate usually indicates it was overheated—next time, melt it more slowly and stir frequently. I once rescued a batch with bloomed chocolate by gently remelting and adding a teaspoon of neutral oil to restore the shine.

    Frequently Asked Questions

    Can I use store-bought caramel instead of making it from scratch?

    Yes! Unwrap soft caramel candies and melt them with 1-2 tablespoons of heavy cream in the microwave, stirring every 30 seconds until smooth. This shortcut works beautifully when you’re short on time but still want homemade Chocolate Caramel and Pecan Turtle Candy.

    How do I prevent the pecans from burning?

    Toast pecans at 325°F for just 5-7 minutes, watching carefully and shaking the pan halfway through. They should smell fragrant but not dark. Remove immediately from the hot pan to stop the cooking process.

    Can I make these without a candy thermometer?

    Absolutely. Use the cold water test—drop a small amount of caramel into ice water. When it forms a firm ball that holds its shape but remains pliable when pressed, it’s ready (around 245°F).

    My chocolate seized up. Can I fix it?

    Sometimes! Add 1 teaspoon of neutral oil (like vegetable or coconut) and gently warm while stirring constantly. If it’s severely seized, you may need to start with fresh chocolate.

    How far in advance can I make turtle candy for gifting?

    These keep beautifully for up to 2 weeks in airtight containers at room temperature, or 3 months frozen. Make them 2-3 days ahead for peak freshness when gifting.

    Final Thoughts

    Chocolate Caramel and Pecan Turtle Candy represents everything I love about homemade treats—simple ingredients transformed into something truly special through a bit of care and attention. There’s a reason these little morsels of goodness have stood the test of time, appearing at gatherings generation after generation. Whether you’re making them as gifts, for a special dessert, or simply to satisfy your own sweet tooth, these turtles deliver pure joy in every bite. I hope you’ll try them and experience that magical moment when chocolate, caramel, and pecans come together in perfect harmony. Find more inspiration for your sweet creations on our Pinterest page.

  • Cheesecake Brownie Bites: Irresistible, Bite-Sized Dessert Bliss!

    Cheesecake Brownie Bites: Irresistible, Bite-Sized Dessert Bliss!

    Cheesecake Brownie Bites: Irresistible, Bite-Sized Dessert Bliss!

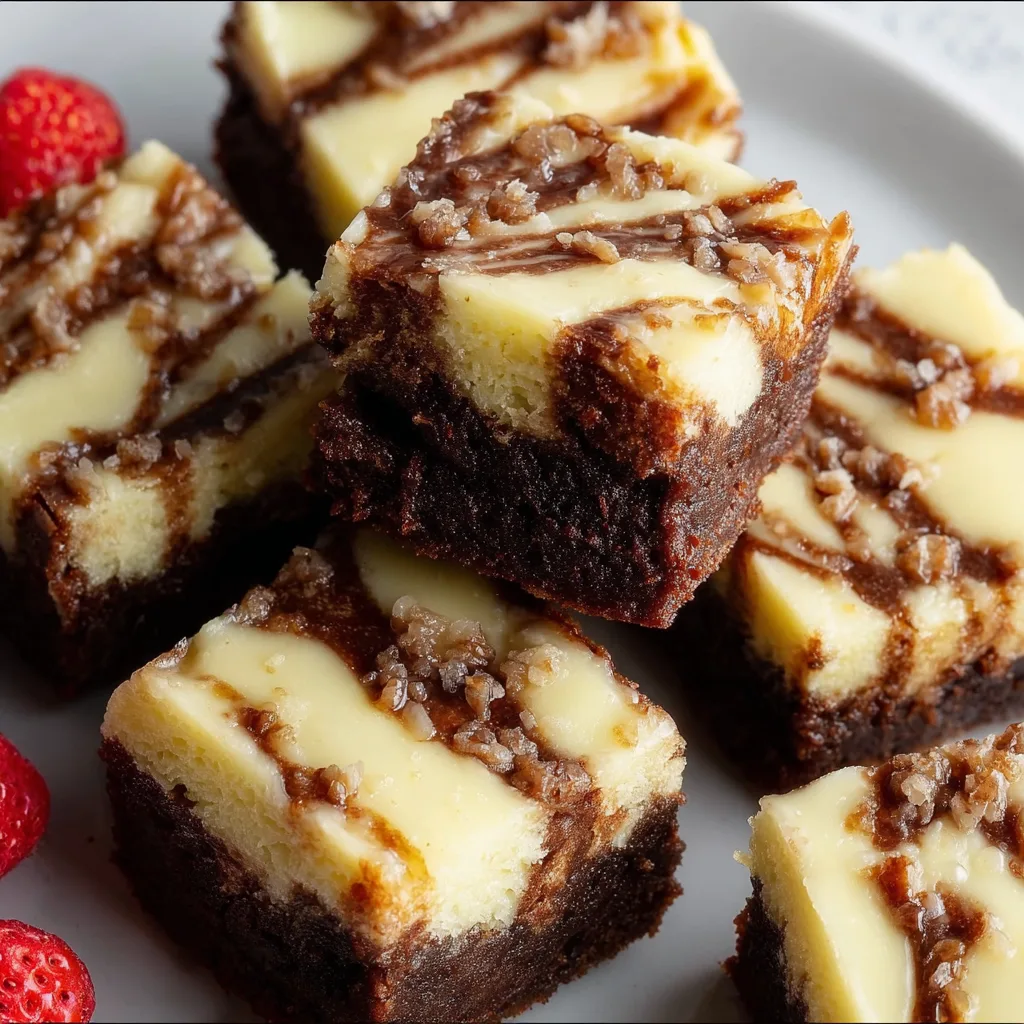
    These Cheesecake Brownie Bites combine two irresistible desserts into one perfect, poppable treat that’ll have everyone asking for your recipe. I discovered this magical pairing during a late-night baking session when I couldn’t decide between rich, fudgy brownies or creamy cheesecake. The moment that first swirled bite hit my taste buds—with its velvety texture and perfect balance of chocolate and tangy cream cheese—I knew I’d found my new signature dessert. These little squares of heaven are surprisingly simple to make but look absolutely stunning on any dessert table. Let me show you how to create these blissful little bites that’ll become your new go-to treat!

    Recipe

    Why You’ll Love These Cheesecake Brownie Bites

    Perfect Texture Combination

    There’s something magical about the textural contrast in these cheesecake brownie bites. The bottom layer delivers that classic fudgy brownie experience—rich and dense with that slightly crisp edge we all fight over. Then comes the creamy cheesecake layer, perfectly smooth and velvety against the chocolate base. I love how each bite gives you both textures in perfect harmony. The slight tang from the cream cheese cuts through the richness of the chocolate, creating a balanced bite that satisfies both chocolate lovers and cheesecake enthusiasts alike. It’s truly the best of both worlds!

    Make-Ahead Convenience

    These cheesecake brownie bites are a busy host’s dream! I’ve made them up to two days before a gathering, and they taste even better after the flavors have had time to meld. The chilled texture becomes even more divine after sitting in the refrigerator overnight. Plus, cutting them into neat squares is much easier when they’re completely cool. I love having a stress-free dessert ready to go when guests arrive—just pull them from the fridge, arrange on a pretty platter, and you’re ready to impress without the last-minute kitchen scramble. Perfect for potlucks, holiday gatherings, or just weekend treats!

    Essential Tips & Tricks

    Achieving the Perfect Swirl

    Creating those beautiful marble swirls isn’t just for show—it’s where the flavor magic happens! Start with room temperature cream cheese (this is non-negotiable for a smooth batter) and don’t overmix your brownie batter, which keeps it dense and fudgy. For that Instagram-worthy swirl, drop alternating spoonfuls of both batters into your lined pan, then use a toothpick or butter knife to create gentle figure-eight motions. The key is restraint—just 5-6 swirls are enough! Too much mixing and you’ll lose the distinct layers that make these cheesecake brownie bites so special. Trust me, that first beautiful slice is worth the patience!

    Baking Time Precision

    The secret to perfect cheesecake brownie bites lies in the baking time—it’s a delicate balance! These treats should be slightly underbaked for that fudgy center we all crave. Look for edges that are set but a center that’s still slightly jiggly (not liquid). I always use the toothpick test—when inserted about an inch from the edge, it should come out with a few moist crumbs. Never wait until the toothpick comes out completely clean, or you’ll have dry brownies! Remember that residual heat continues cooking them after removal from the oven, and refrigeration will firm everything up perfectly.

    Serving Ideas & Creative Variations

    Elegant Presentation Options

    Transform these humble cheesecake brownie bites into a show-stopping dessert with just a few simple touches. For dinner parties, I place each square on a small pool of raspberry coulis, then add a light dusting of cocoa powder and a single fresh raspberry on top. For a more casual gathering, arrange them on a rustic wooden board with scattered berries and mint leaves. You can also stack them in a pyramid on a cake stand for an impressive visual impact. These little squares look particularly stunning when cut with precision using a hot knife (wiped clean between cuts) for those crisp, professional-looking edges that will have everyone thinking you bought them from a bakery!

    Flavor Twist Inspiration

    While classic cheesecake brownie bites are divine, experimenting with flavors takes them to new heights! Add a peppermint extract to the cheesecake layer during the holidays—the cool mint against rich chocolate is heavenly. For fall gatherings, I swirl in a tablespoon of pumpkin puree and a dash of cinnamon to the cheesecake mixture. Coffee lovers will adore a teaspoon of espresso powder mixed into the brownie batter for a mocha effect. My personal favorite variation involves adding orange zest to the cheesecake layer, creating a chocolate-orange combination that’s absolutely irresistible. Each variation maintains the beloved texture while offering a new flavor experience!

    Storage & Troubleshooting Guide

    Optimal Storage Methods

    These cheesecake brownie bites actually improve with a little time in the refrigerator, making them the perfect make-ahead dessert. Store them in an airtight container with parchment paper between layers to prevent sticking. They’ll keep beautifully for up to 5 days in the refrigerator, with the flavors melding and deepening over time. For longer storage, these bites freeze exceptionally well—wrap individual squares in plastic wrap, then place in a freezer bag for up to 3 months. I love having a stash ready for unexpected guests or late-night cravings! Just thaw in the refrigerator overnight or at room temperature for about an hour before serving.

    Common Pitfalls & Solutions

    The most frequent issue with cheesecake brownie bites is overbaking, which results in dry, cakey brownies instead of that fudgy texture we crave. Always err on the side of underbaking—remember, they’ll continue cooking slightly after removal from the oven. If your cheesecake layer cracks, you likely had your oven temperature too high; next time, reduce by 25°F and consider using a water bath for gentler baking. For brownies that sink in the middle, you probably opened the oven door too early in the baking process. And if your swirls look muddy rather than distinct, you’ve overswirled—next time, limit yourself to just a few gentle figure-eight motions with your toothpick.

    Frequently Asked Questions

    Can I make these cheesecake brownie bites gluten-free?

    Absolutely! Substitute the all-purpose flour with a 1:1 gluten-free baking blend. The dense, fudgy texture of brownies makes them very forgiving for gluten-free adaptations.

    How do I know when my cheesecake brownie bites are done?

    The edges should be set while the center remains slightly jiggly. A toothpick inserted 1-inch from the edge should come out with a few moist crumbs—never completely clean.

    Can I use a boxed brownie mix for these cheesecake brownie bites?

    Yes! While homemade brownies offer better flavor control, a quality boxed mix works well for quick preparation. Just prepare according to package directions before adding the cheesecake layer.

    Why did my cheesecake layer sink into the brownie batter?

    Your brownie batter was likely too thin. Try chilling the first layer for 15 minutes before adding the cheesecake mixture, or slightly underbake the brownie layer for 10 minutes first.

    How far in advance can I make these for a party?

    These improve with time! Make them up to 2 days ahead and refrigerate. The flavors meld beautifully, and the chilled texture becomes even more luscious.

    Final Thoughts

    These cheesecake brownie bites represent the perfect marriage of two beloved desserts, creating something even greater than the sum of its parts. I’ve brought these to countless gatherings, and they never fail to disappear within minutes, with friends begging for the recipe. The beauty lies in their versatility—dress them up for elegant affairs or keep them casual for family movie nights. However you serve them, these cheesecake brownie bites deliver that perfect balance of rich chocolate and tangy creaminess that satisfies every sweet tooth. Find more delicious inspiration on Pinterest and happy baking!

  • Banana Pudding Brownies: Irresistibly Gooey + Easy Dessert Bliss

    Banana Pudding Brownies: Irresistibly Gooey + Easy Dessert Bliss

    Banana Pudding Brownies: Irresistibly Gooey + Easy Dessert Bliss

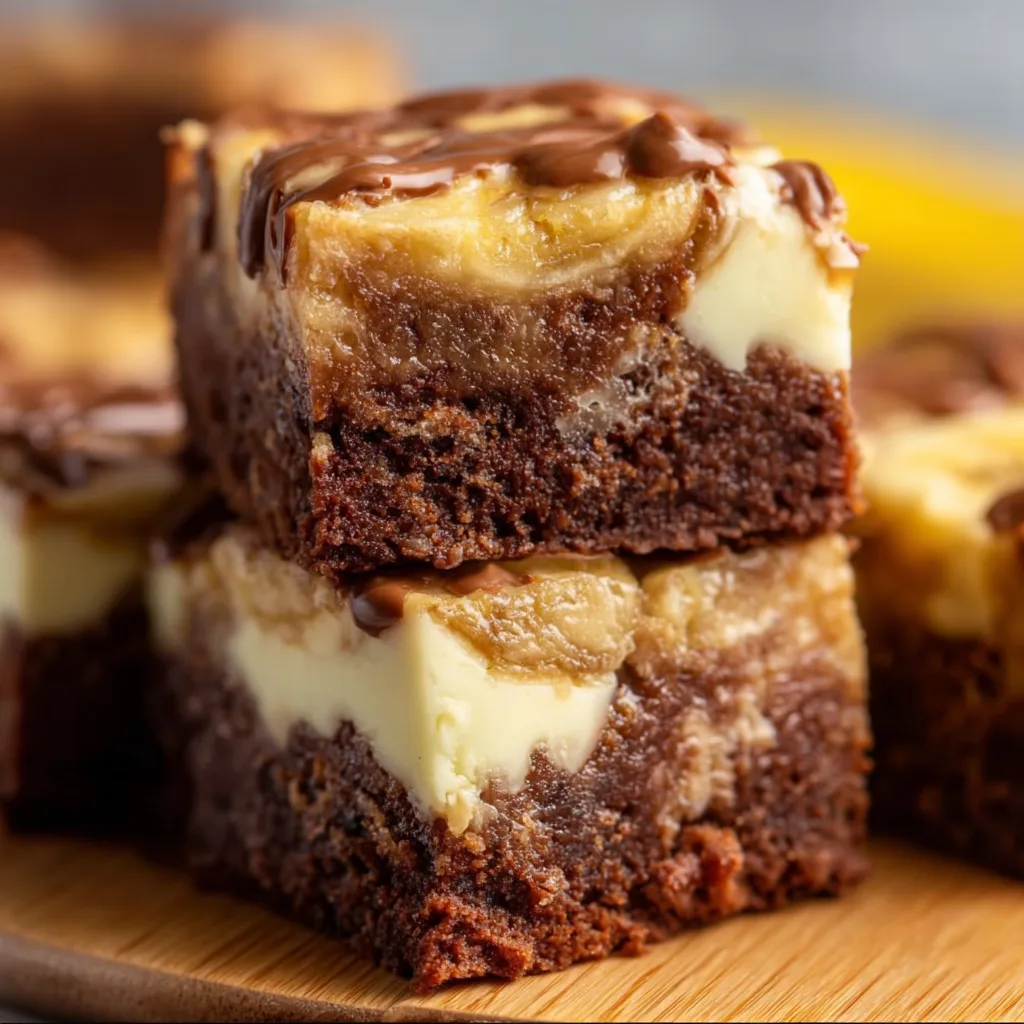
    Banana Pudding Brownies are what happens when two beloved desserts collide in the most magnificent way possible. The first time I made these for my sister’s birthday gathering, the pan was empty before I even had a chance to snap a photo! There’s something magical about the way the fudgy chocolate base mingles with creamy banana pudding layers and those nostalgic vanilla wafers. These brownies deliver all the comfort of traditional banana pudding but with an indulgent chocolate twist that’ll have everyone asking for your secret recipe. Trust me, these aren’t just brownies—they’re a sensation worth sharing at your next family get-together.

    Recipe

    Why You’ll Love This Banana Pudding Brownies

    Perfect Texture Combination

    The contrasting textures in these banana pudding brownies create an experience that’s nothing short of heavenly. The dense, fudgy brownie base provides that satisfying chew we all crave, while the silky banana pudding layer melts in your mouth with each bite. I love how the crushed vanilla wafers add just the right amount of crunch throughout. My neighbor Jen actually gasped when she first tried them, saying the texture was like nothing she’d experienced before. The slight firmness of the chilled pudding against the soft brownie creates that perfect balance that makes you close your eyes with each forkful.

    Make-Ahead Convenience

    One of my favorite things about these banana pudding brownies is how they actually improve with time. The flavors meld together beautifully as they rest, making them the perfect make-ahead dessert for busy hosts. I often prepare them the night before a gathering, which not only saves me time but results in a more developed flavor profile. The brownie layer absorbs subtle hints of banana, while the pudding takes on notes of chocolate. This dessert saved me during last-minute hosting duties when my in-laws surprised us with a visit—I simply pulled them from the refrigerator and became an instant dessert hero!

    Essential Tips & Tricks

    Achieving the Perfect Brownie Base

    The foundation of exceptional banana pudding brownies starts with a properly executed brownie layer. For that signature fudginess, be careful not to overmix the batter once you add the dry ingredients—just stir until barely combined. I learned this the hard way after creating accidental cake-like brownies during my first attempt! Another game-changer is pulling them from the oven when the center still looks slightly underdone. The residual heat will continue cooking them to perfection while cooling. For an extra depth of flavor, try browning your butter before adding it to the mixture—this small step creates caramel notes that complement the banana beautifully.

    Pudding Layer Perfection

    The key to an irresistible pudding layer lies in both ingredients and technique. Always use ripe bananas with plenty of brown spots for the most robust flavor—those yellow-green ones simply won’t deliver the same intensity. When preparing the pudding, constant whisking prevents lumps and ensures silky smoothness. My secret weapon is chilling the pudding for 30 minutes before spreading it over the cooled brownies. This creates cleaner layers and prevents unwanted mixing. For an elevated twist that impressed even my dessert-snob cousin, try folding in 1/4 cup of mascarpone cheese to the pudding for an ultra-luxurious mouthfeel.

    Serving Ideas & Creative Variations

    Elegant Presentation Options

    Transform these homey banana pudding brownies into showstopping desserts worthy of any special occasion with thoughtful presentation. Try cutting them into perfect squares and placing each on a small pool of chocolate ganache with a light dusting of cocoa powder. For dinner parties, I serve individual portions in clear glass tumblers, creating visible layers that guests can’t stop admiring. Add a fresh banana slice and a mini vanilla wafer as garnish, perhaps with a tiny mint leaf for color contrast. Last Christmas, I arranged them on a tiered stand with fairy lights woven around the base—the sparkle against the creamy yellow pudding created a magical display.

    Flavor Twist Inspirations

    While the classic version is divine, experimenting with flavor variations keeps this dessert exciting each time you make it. Try adding a layer of salted caramel between the brownie and pudding—the sweet-salty interplay is absolutely transformative. For a tropical version that transported my book club to vacation mode, fold diced mango and toasted coconut into the pudding layer. Coffee lovers might appreciate a teaspoon of espresso powder in the brownie batter, which intensifies the chocolate without tasting obviously like coffee. For a grown-up twist, consider soaking the vanilla wafers in a splash of bourbon before layering them throughout the dessert.

    Storage & Troubleshooting Guide

    Proper Storage Methods

    Keeping your banana pudding brownies fresh is essential for maintaining their delightful texture and preventing soggy disappointment. Store them in an airtight container in the refrigerator, where they’ll stay perfect for up to 4 days. I like to place a sheet of parchment between layers if stacking to prevent sticking. For longer storage, these brownies freeze surprisingly well—wrap individual portions tightly in plastic wrap, then foil, and freeze for up to 2 months. Allow them to thaw overnight in the refrigerator for best results. I learned through trial and error that room temperature storage is a no-go—the pudding layer becomes unstable after just a few hours.

    Fixing Common Issues

    Even experienced bakers encounter challenges, but most banana pudding brownie problems have simple solutions. If your pudding layer turns out too runny, refrigerate it longer before assembly or add an extra tablespoon of cornstarch to the mixture next time. For brownies that came out too dry, brush the top with simple syrup before adding the pudding layer—this rescue technique saved my dessert when I accidentally overbaked the base. Wafers losing their crunch? Try adding them just before serving rather than during assembly. And if your banana flavor isn’t pronounced enough, next time mash one extra overripe banana and fold it into the prepared pudding for intensified flavor.

    Frequently Asked Questions

    Can I use instant pudding mix instead of making pudding from scratch?

    Yes, you can use instant banana pudding for a shortcut version. Prepare according to package directions but use only 1½ cups milk instead of the recommended amount for a firmer texture that works better in layered desserts.

    How ripe should the bananas be for banana pudding brownies?

    The best bananas for this recipe are very ripe with numerous brown spots or even mostly brown skin. These provide the sweetest, most intense banana flavor for your pudding brownies.

    Can I make these banana pudding brownies gluten-free?

    Absolutely! Substitute a 1:1 gluten-free flour blend in the brownie base and use gluten-free vanilla cookies instead of traditional vanilla wafers. The pudding portion is naturally gluten-free.

    Why did my brownie layer come out too cakey?

    Over-mixing the brownie batter or adding too much flour can create a cakey texture. Mix just until ingredients are combined and measure flour by spooning into measuring cups rather than scooping directly.

    How far in advance can I make these for a party?

    These brownies actually improve with time! You can make them up to 2 days before your event and store covered in the refrigerator. Add any final garnishes just before serving.

    Final Thoughts

    These Banana Pudding Brownies represent the perfect marriage of two beloved desserts, creating something greater than the sum of its parts. I’ve watched skeptics become converts with just one bite of these indulgent layered treats. Whether you’re serving them at a casual backyard gathering or an elegant dinner party, they bring that special touch that makes memories around the table. Don’t forget to share your creations on Pinterest – I’d love to see your personal spin on this recipe that brings together chocolate decadence and creamy banana comfort!

  • Coconut Cheesecake Bread Pudding That Will Blow Your Mind!

    Coconut Cheesecake Bread Pudding That Will Blow Your Mind!

    Coconut Cheesecake Bread Pudding That Will Blow Your Mind!

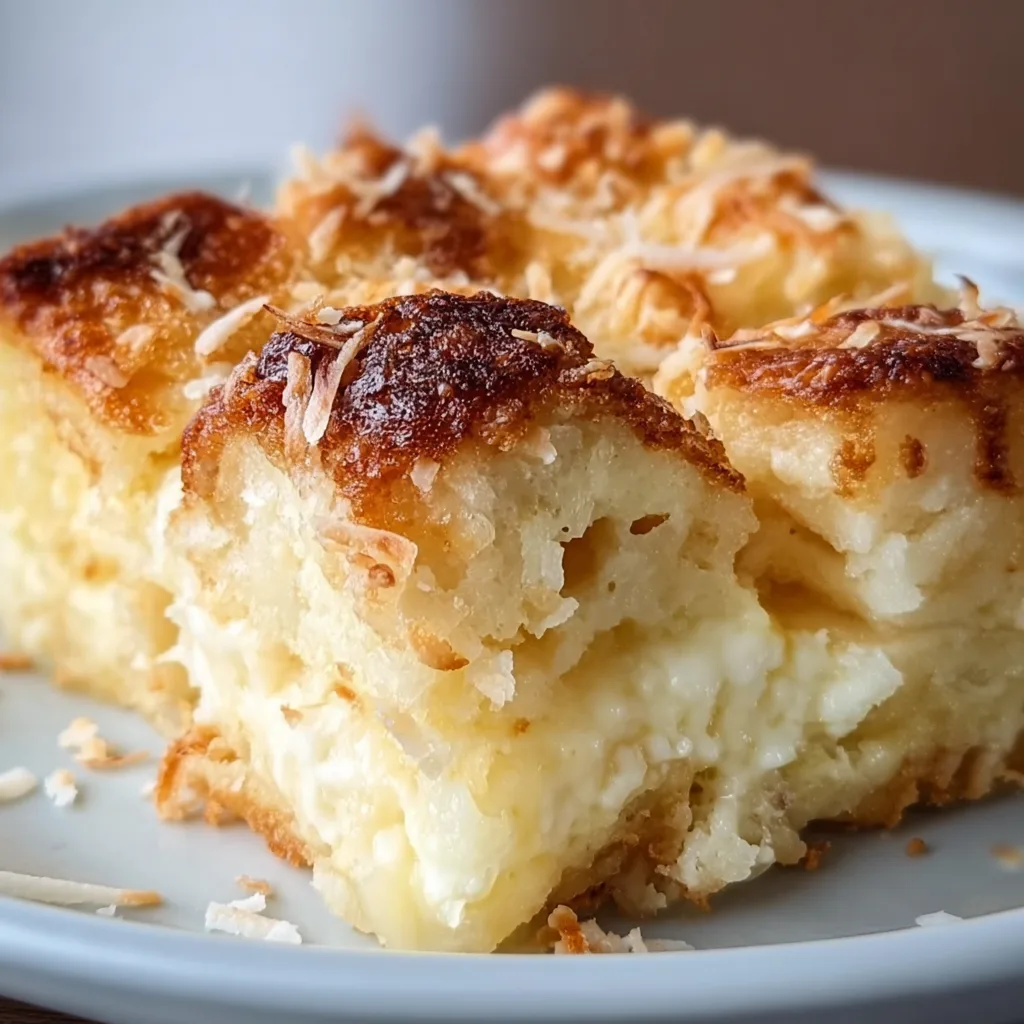
    Coconut Cheesecake Bread Pudding combines two beloved desserts into one heavenly creation that’s both comforting and indulgent. The first time I made this for my family, the kitchen filled with the sweet aroma of toasted coconut and vanilla, instantly transporting us to a tropical paradise. There’s something magical about the way the creamy cheesecake swirls melt into soft, custard-soaked bread, creating pockets of velvety sweetness in every bite. If you’re craving something that feels like a warm hug in dessert form, this recipe is about to become your new favorite.

    Recipe

    Why You’ll Love This Coconut Cheesecake Bread Pudding

    Perfect Balance of Flavors and Textures

    This dessert is a textural wonderland that satisfies all your cravings at once. The bread soaks up the rich custard while maintaining just enough structure, creating that perfect bread pudding base. But it’s the contrast between the creamy cheesecake pockets and the slightly crisp, toasted coconut topping that makes this truly special. I love how the subtle tang from the cream cheese balances the sweetness, while the coconut adds a tropical note that elevates the entire dessert. The first forkful delivers that perfect combination of soft, creamy, and just a touch of crunch.

    Make-Ahead Friendly for Effortless Entertaining

    One thing I absolutely adore about this Coconut Cheesecake Bread Pudding is how entertaining-friendly it is. You can assemble it the night before, letting the bread fully absorb all those luscious flavors overnight. This not only saves you precious time when hosting but actually improves the final result! The bread has more time to soak up the custard, and the cheesecake mixture melds beautifully with the other ingredients. I’ve served this at countless brunches and dinner parties, and guests always think I’ve spent hours in the kitchen that morning.

    Essential Tips & Tricks

    Choosing the Right Bread

    The foundation of any great bread pudding is, of course, the bread itself. For this Coconut Cheesecake Bread Pudding, I recommend using slightly stale brioche or challah for their buttery richness and ability to hold structure. Day-old bread works perfectly because it absorbs the custard without becoming too soggy. If you only have fresh bread, don’t worry! Just cube it, spread it on a baking sheet, and dry in a 275°F oven for about 10 minutes. This simple step ensures your pudding has that perfect texture—custardy inside with slightly crisp edges, just like in my pecan bourbon bread pudding.

    Perfecting the Cheesecake Swirl

    The cheesecake element is what makes this bread pudding truly special, but it requires a gentle touch. Make sure your cream cheese is completely softened to avoid lumps—I leave mine out for at least an hour before mixing. When swirling the cheesecake mixture into the soaked bread, use a light hand and don’t overmix. You want distinct pockets of cheesecake throughout rather than a uniform mixture. My favorite technique is using the back of a spoon to create little divots in the bread mixture, filling them with the cheesecake batter, then lightly swirling with a knife.

    Serving Ideas & Creative Variations

    Warm vs. Chilled Presentations

    While traditionally served warm, this Coconut Cheesecake Bread Pudding offers delightful versatility in how you can present it. For a cozy winter dessert, serve it warm from the oven with a scoop of vanilla ice cream that melts into all the nooks and crannies. In summer months, I actually prefer it chilled—the flavors concentrate and the texture becomes more like a traditional cheesecake. For an elegant brunch option, try serving individual portions in ramekins topped with fresh berries and a light dusting of powdered sugar. The contrast of the bright fruit against the creamy pudding is both visually stunning and delicious.

    Flavor Variations to Try

    The beauty of this recipe is how easily it adapts to different flavor profiles while maintaining its creamy essence. For a tropical twist, add diced mango or pineapple to the mixture before baking. Chocolate lovers can fold in white or dark chocolate chips for melty pockets of goodness throughout. During fall, I love adding cinnamon, nutmeg, and diced apples for a seasonal variation that reminds me of my blueberry cheesecake cookies but in warm pudding form. For an adult version, try soaking the bread in rum-infused custard—the alcohol cooks off, leaving behind a complex caramel-like flavor.

    Storage & Troubleshooting Guide

    Proper Storage for Maximum Freshness

    To maintain the perfect texture of your Coconut Cheesecake Bread Pudding, proper storage is essential. For leftovers (if you’re lucky enough to have any!), cool the pudding completely before covering with plastic wrap directly touching the surface—this prevents a skin from forming. Refrigerate for up to 4 days. When ready to enjoy again, reheat individual portions in the microwave for 30-45 seconds, or place the whole dish, covered with foil, in a 325°F oven for about 15 minutes. The bread pudding actually develops deeper flavors after a day in the refrigerator, making it perfect for meal prep.

    Fixing Common Issues

    Even experienced bakers can encounter texture troubles with bread pudding. If your pudding seems too dry, it likely needed more custard or less baking time. Next time, ensure your bread is properly soaked, and check for doneness earlier. For a pudding that’s too soggy in the center, it needed more baking time—remember that it should be set but still have a slight jiggle in the center. If your cheesecake swirls sink to the bottom, try chilling the cheesecake mixture before swirling, or dollop it on top during the last 15 minutes of baking for a beautiful marbled effect.

    Frequently Asked Questions

    Can I make Coconut Cheesecake Bread Pudding ahead of time?

    Absolutely! Assemble it up to 24 hours in advance and refrigerate unbaked. Let it sit at room temperature for 30 minutes before baking, or add 10-15 minutes to the baking time if cooking directly from the refrigerator.

    What type of coconut works best in this recipe?

    Use sweetened shredded coconut for the custard mixture and toasted unsweetened coconut flakes for topping. This combination provides the perfect balance of sweetness and texture without becoming overpowering.

    Can I freeze leftover bread pudding?

    Yes! Portion it into individual servings, wrap tightly in plastic wrap and foil, then freeze for up to 3 months. Thaw overnight in the refrigerator and reheat gently for best results.

    What can I substitute for cream cheese?

    Mascarpone makes a luxurious substitute with a milder flavor. For a lighter version, try Greek yogurt cream cheese, though the texture will be slightly different.

    Why did my Coconut Cheesecake Bread Pudding come out soggy?

    This usually happens when the bread-to-custard ratio is off. Make sure your bread is slightly stale and that you’ve allowed enough time (at least 30 minutes) for the bread to absorb the liquid before baking.

    Final Thoughts

    This Coconut Cheesecake Bread Pudding represents everything I love about comfort food with a creative twist. It’s the dessert I turn to when I want to impress without spending hours in the kitchen, and the one friends always request for gatherings. The combination of tropical coconut, creamy cheesecake swirls, and custardy bread creates something truly magical that works year-round. I hope you’ll try it and experience the joy of watching someone take that first bite and close their eyes in pure dessert bliss. Don’t forget to check out more of my favorite dessert creations on Pinterest!

  • Dark Chocolate Bread Pudding: Irresistibly Decadent & Comforting Treat

    Dark Chocolate Bread Pudding: Irresistibly Decadent & Comforting Treat

    Dark Chocolate Bread Pudding: Irresistibly Decadent & Comforting Treat

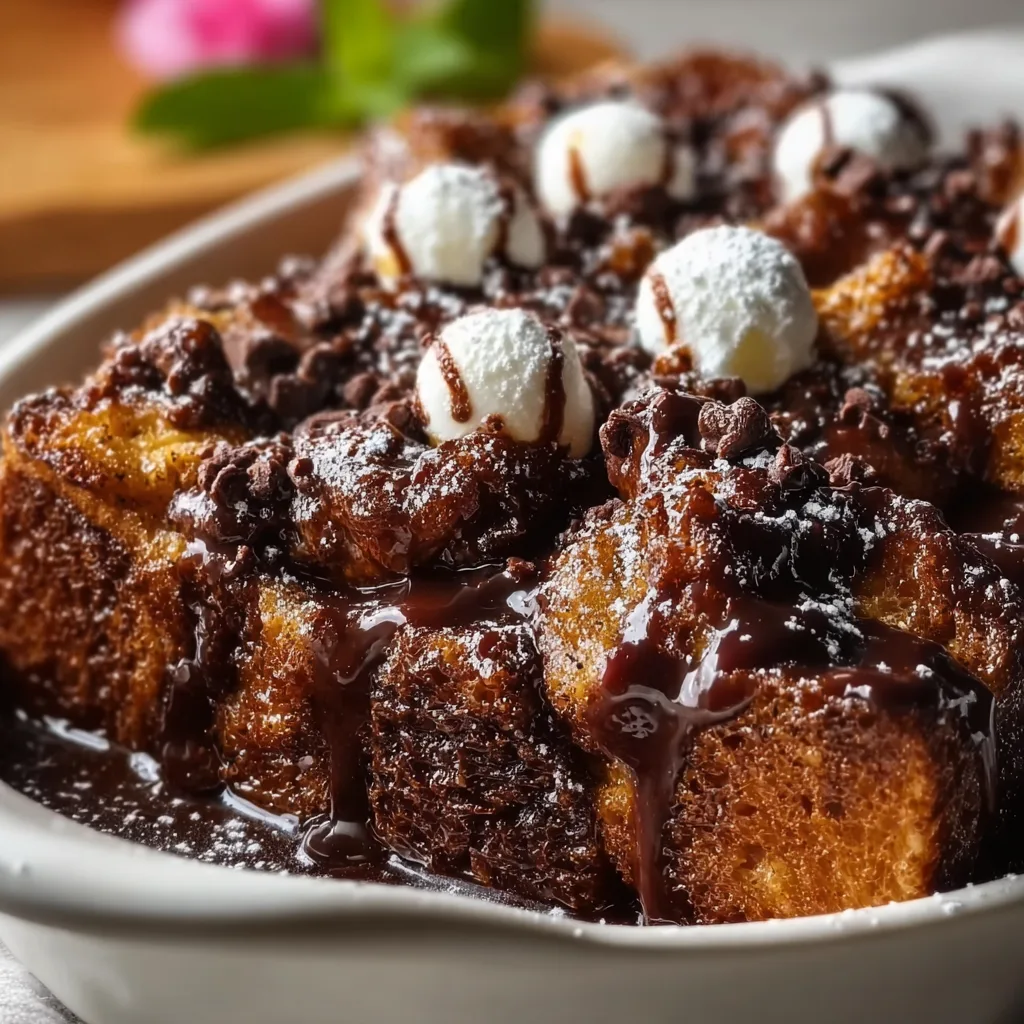
    Dark Chocolate Bread Pudding transforms humble ingredients into pure magic—rich, velvety, and utterly indulgent. I discovered this recipe during a rainy Sunday when nothing but chocolate would cure my blues. The moment the warm, intoxicating aroma filled my kitchen, I knew this would become my go-to comfort dessert. There’s something about the way the dark chocolate melts between layers of custard-soaked bread that feels like a warm hug from the inside. Trust me, this isn’t just dessert—it’s therapy in a baking dish that’ll have everyone asking for seconds.

    Recipe

    Why You’ll Love This Dark Chocolate Bread Pudding

    A Perfect Balance of Textures

    The contrasting textures are what make this dark chocolate bread pudding truly special. The crispy, caramelized top gives way to a pillowy center that’s somehow both light and decadent. I love how the edges become slightly chewy while the middle stays deliciously moist. The bread soaks up the custard like a dream, creating pockets of melted chocolate throughout. It’s this beautiful dance between soft and firm that makes each bite an adventure. When warm, the chocolate stays slightly molten, creating that perfect spoonable consistency that’s impossible to resist.

    Rich Flavor Without Overwhelming Sweetness

    Unlike many desserts that leave you with sugar overload, this dark chocolate bread pudding offers complex flavor depth that’s sophisticated yet comforting. The bittersweet notes of high-quality dark chocolate balance perfectly with the subtle vanilla-infused custard. I’ve carefully calibrated the sweetness so the chocolate’s natural character shines through. There’s a hint of warmth from cinnamon and a whisper of salt that elevates the entire experience. It’s indulgent without being cloying—the kind of dessert that satisfies your craving without sending you into a sugar coma.

    Essential Tips & Tricks

    Choosing the Right Bread

    The foundation of exceptional dark chocolate bread pudding is, unsurprisingly, the bread itself. I’ve experimented extensively and found that slightly stale brioche or challah creates the perfect structure—rich enough to stand up to the custard but tender enough to meld beautifully with the chocolate. Day-old bread works wonders as it absorbs more custard without falling apart. Avoid pre-sliced sandwich bread which tends to disintegrate. Instead, tear rustic bread into irregular chunks for more interesting texture variation. This approach creates those delightful crispy peaks and custardy valleys that make bread pudding with vanilla sauce so irresistible.

    Perfecting Your Custard Base

    The custard is where the magic happens, so don’t rush this step! For silky-smooth results, warm your milk and cream mixture just until steaming—never boiling. This gentle approach prevents the eggs from scrambling when combined. I always whisk my eggs with sugar until slightly pale before slowly incorporating the warm dairy. Adding a splash of espresso (optional but recommended) intensifies the chocolate flavor without making it taste like coffee. Let the bread soak for at least 30 minutes, occasionally pressing down gently to ensure even absorption. This patience pays off with a perfectly unified texture throughout.

    Serving Ideas & Creative Variations

    Elegant Presentation Options

    Elevate your dark chocolate bread pudding from homey comfort food to dinner party showstopper with thoughtful presentation. Individual ramekins create a sophisticated plated dessert—try dusting with cocoa powder and adding a small gold leaf for special occasions. For family-style serving, a drizzle of warm ganache creates dramatic flair as it cascades down each portion. Fresh raspberries or pomegranate seeds provide beautiful color contrast and bright flavor balance. Mint leaves add a pop of green and aromatic freshness. For height, consider a delicate chocolate curl or pirouette cookie standing upright in a dollop of whipped cream.

    Creative Flavor Combinations

    While classic dark chocolate bread pudding is divine, experimenting with complementary flavors takes it to new heights. Try adding orange zest to the custard for a chocolate-orange variation that’s reminiscent of those holiday chocolate balls. Cinnamon and cayenne create a Mexican chocolate profile with gentle warmth. For something truly decadent, fold in crushed butter toffee pretzels for salty-sweet crunch. White chocolate chunks create beautiful marbling and flavor contrast. During fall, pumpkin purée and warming spices transform this into a seasonal treat. My personal favorite: adding a layer of peanut butter between the bread for a nostalgic twist.

    Storage & Troubleshooting Guide

    Proper Storage for Maximum Freshness

    To maintain the perfect texture of your dark chocolate bread pudding, proper storage is crucial. Once completely cooled, cover tightly with plastic wrap directly touching the surface to prevent a skin from forming. Refrigerate for up to 3 days—though it rarely lasts that long in my house! For reheating, individual portions warm beautifully in the microwave for 20-30 seconds. For whole puddings, cover with foil and warm in a 300°F oven for about 15 minutes. If freezing (yes, you can!), wrap tightly in plastic, then foil, and freeze for up to 1 month. Thaw overnight in the refrigerator before reheating.

    Troubleshooting Common Issues

    Even experienced bakers encounter challenges with bread pudding. If your pudding seems too soggy in the center, it likely needs more baking time—cover with foil to prevent over-browning while the center sets. Conversely, if it’s dry, you may have used too little custard or overbaked. Next time, ensure bread is fully submerged and check earlier. For uneven chocolate distribution, try layering half the bread, then chocolate, then remaining bread before pouring custard. If your pudding puffed dramatically then collapsed, don’t worry—this is normal! A water bath can help prevent this if it bothers you aesthetically.

    Frequently Asked Questions

    Can I make dark chocolate bread pudding ahead of time?

    Absolutely! Prepare it up to 24 hours in advance, refrigerate unbaked, then bring to room temperature for 30 minutes before baking. The extra soaking time actually improves the texture.

    What’s the best dark chocolate to use?

    Use chocolate with 60-70% cacao content for the perfect balance. Chips work, but chopped bar chocolate melts more evenly and creates better pockets of chocolate throughout.

    Can I make this recipe gluten-free?

    Yes! Substitute gluten-free brioche or challah, ensuring it’s slightly stale. The structure may be slightly different, but the flavor remains delicious.

    How do I know when my bread pudding is done?

    The pudding is ready when the center reaches 160°F or a knife inserted comes out mostly clean with a few moist crumbs. The top should be set but still have slight jiggle.

    Can I reduce the sugar in this dark chocolate bread pudding?

    You can reduce sugar by up to 25% without affecting texture. Consider using a slightly less bitter chocolate (around 55% cacao) to maintain balance.

    Final Thoughts

    This dark chocolate bread pudding has been my secret weapon for years—whether I’m nursing a broken heart or celebrating life’s victories. There’s something profoundly satisfying about transforming simple ingredients into something so extraordinarily comforting. The beauty lies in its adaptability and forgiving nature, perfect for both novice bakers and seasoned pros. I hope this recipe brings the same joy to your kitchen as it has to mine. Don’t forget to check out more indulgent desserts on Pinterest for your next baking adventure!

  • Pecan Bourbon Bread Pudding Recipe That Will Melt Your Heart

    Pecan Bourbon Bread Pudding Recipe That Will Melt Your Heart

    Pecan Bourbon Bread Pudding Recipe That Will Melt Your Heart

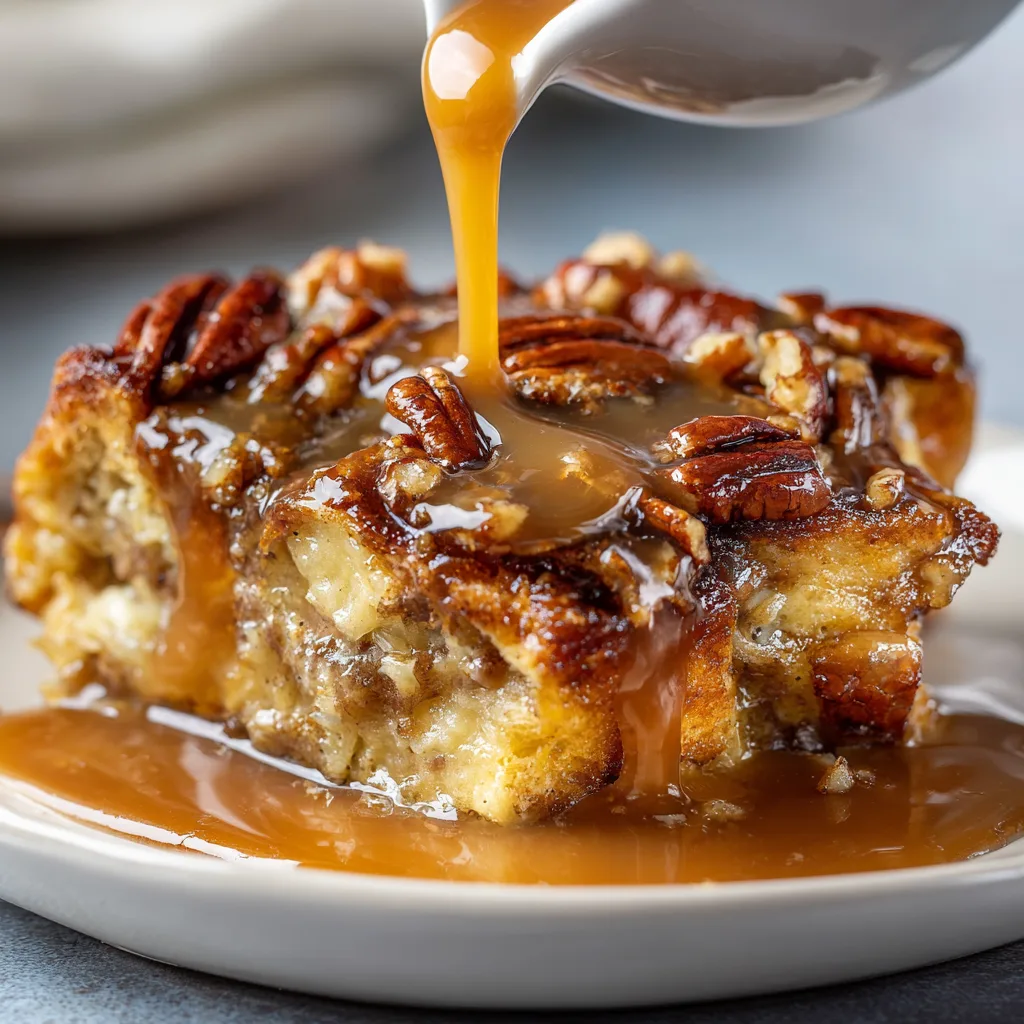
    Pecan Bourbon Bread Pudding with Sauce is the ultimate comfort dessert that transforms humble ingredients into something truly magical. The first time I made this for Sunday dinner, my kitchen filled with the intoxicating aroma of caramelizing sugar, toasted pecans, and that unmistakable bourbon warmth. There’s something about the way the crusty bread soaks up the custard, creating those perfect crispy edges while maintaining a velvety center. This isn’t just dessert—it’s a hug in a baking dish that’ll have everyone lingering at the table, scraping their spoons for one more bite of that buttery bourbon sauce.

    Recipe

    Why You’ll Love This Pecan Bourbon Bread Pudding with Sauce

    A Perfect Balance of Textures and Flavors

    The magic of this bread pudding lies in its contrasts—crispy, caramelized edges giving way to a custard-soaked center that melts in your mouth. The pecans add a delightful crunch while the bourbon infuses everything with its warm, vanilla-caramel notes. I still remember my neighbor Jen’s face when she first tasted it—eyes closed, spoon hovering mid-air—that moment of pure bliss. The bread soaks up the custard mixture like a dream, creating pockets of rich creaminess between the chunks of bread. It’s indulgent without being heavy, complex without being complicated.

    Make-Ahead Convenience for Stress-Free Entertaining

    One of my favorite things about this Pecan Bourbon Bread Pudding is how entertaining-friendly it is. I’ve made it countless times for dinner parties, always preparing it the day before. The flavors actually deepen overnight, making it even more delicious. Just reheat it before serving and warm up that bourbon sauce. Your guests will think you’ve been slaving away all day, when really, you’ve been relaxing with a cup of coffee. This dessert has saved me during last-minute dinner invitations—it’s impressive enough for company but simple enough for a cozy night in.

    Essential Tips & Tricks

    Choosing the Right Bread for Perfect Results

    The foundation of exceptional bread pudding starts with the bread itself. I’ve learned through many batches that day-old bread works best—it absorbs the custard without dissolving into mush. Brioche, challah, or French bread are my top choices for their structure and subtle sweetness. Tear rather than cut your bread for irregular pieces that create more texture. Let those bread chunks sit out uncovered for a few hours (or overnight) to dry slightly. This extra step might seem fussy, but I promise it makes the difference between good bread pudding and one that’s transcendent.

    Mastering the Bourbon Sauce

    The sauce is where this dessert truly shines—rich, buttery, and kissed with just enough bourbon to make it interesting without overwhelming. The key is adding the bourbon off-heat to preserve its complex flavor notes. I once made the mistake of boiling it too long and lost all that beautiful bourbon character! Start with quality bourbon (doesn’t have to be expensive, just decent), and remember that a little goes a long way. For a non-alcoholic version, bourbon extract works surprisingly well. Always serve the sauce warm, drizzling it over individual portions rather than the entire pudding to maintain those lovely textural contrasts.

    Serving Ideas & Creative Variations

    Seasonal Adaptations That Wow

    This versatile dessert transforms beautifully with the seasons. In summer, I fold in fresh berries and serve with a scoop of vanilla ice cream that melts into all the crevices. Fall calls for diced apples sautéed with cinnamon before mixing in. Winter holidays? Add crushed peppermint and a drizzle of chocolate sauce. Spring brings lemon zest and a dollop of whipped mascarpone. The bourbon sauce pairs wonderfully with each variation, though you can adjust the spices accordingly. My family has come to expect a new twist each time, making it our most anticipated dessert tradition.

    Elegant Presentation Techniques

    Transform this humble comfort dessert into a showstopper with thoughtful presentation. Individual ramekins create an elegant plated dessert—I brush their rims with sugar before baking for a caramelized edge. For dinner parties, I use a springform pan lined with parchment, creating a tall, cake-like presentation that slices beautifully. Garnish with candied pecans, a dusting of powdered sugar, or fresh mint. For the ultimate indulgence, place the warm sauce in a small pitcher alongside, allowing guests to pour as much or little as they desire. The ritual of the pour adds to the experience.

    Storage & Troubleshooting Guide

    Proper Storage for Leftovers

    Storing this bread pudding properly ensures you can enjoy its deliciousness for days. Refrigerate leftovers within two hours of baking, covering tightly with plastic wrap or in an airtight container. It keeps beautifully for up to 4 days. The sauce should be stored separately in its own container. When reheating, add a splash of cream or milk to the pudding to restore moisture, then warm in a 300°F oven for about 15 minutes until heated through. Microwave individual portions for 30-45 seconds. I’ve found that a quick toast under the broiler revives that lovely caramelized top.

    Fixing Common Bread Pudding Problems

    Even experienced bakers encounter challenges with bread pudding. If yours turns out too dry, your bread likely absorbed too much liquid before baking—next time, reduce soaking time or add more custard. Too soggy? Your bread pieces might have been too fresh or small. The pudding should jiggle slightly in the center when done but not slosh. If your sauce separates, whisk vigorously off heat or add a splash of cream to re-emulsify. For a sauce that’s too thin, simmer a bit longer; too thick, add a tablespoon of cream. Remember that bread pudding continues to set as it cools.

    Frequently Asked Questions

    Can I make Pecan Bourbon Bread Pudding with Sauce ahead of time?

    Absolutely! Prepare it up to 24 hours ahead, cover and refrigerate unbaked. Let it come to room temperature for 30 minutes before baking. The sauce can be made 3 days ahead and gently reheated before serving.

    What’s the best bourbon to use in this recipe?

    A mid-range bourbon works perfectly—Maker’s Mark, Buffalo Trace, or Knob Creek are excellent choices. You’ll want something smooth with vanilla and caramel notes, but save your top-shelf bottles for sipping.

    Can I freeze leftovers?

    Yes! Freeze individual portions without sauce for up to 3 months. Thaw overnight in the refrigerator and reheat in a 325°F oven until warm. Make fresh sauce or freeze it separately in an ice cube tray.

    How do I know when my bread pudding is done?

    The pudding should be golden brown on top with a slight jiggle in the center. A knife inserted comes out mostly clean but still moist. Internal temperature should reach 160°F for food safety.

    Can I make this recipe without alcohol?

    Definitely! Replace bourbon with apple juice, vanilla extract, or bourbon extract for the flavor without alcohol. You’ll still get a delicious caramel sauce that complements the pudding perfectly.

    Final Thoughts

    This Pecan Bourbon Bread Pudding with Sauce has become my signature dessert for good reason—it transforms simple ingredients into something extraordinary that creates lasting memories around the table. There’s something magical about watching someone take their first bite, eyes widening as they taste those layers of flavor. Whether you’re making it for a special occasion or just because it’s Tuesday, this bread pudding brings a touch of Southern comfort to any meal. I’d love to see your creations on Pinterest—tag me when you make your own version!