Author: Emily Carter

  • Taco Spaghetti Recipe: Irresistibly Easy & Flavor-Packed Meal!

    Taco Spaghetti Recipe: Irresistibly Easy & Flavor-Packed Meal!

    Taco Spaghetti Recipe: Irresistibly Easy & Flavor-Packed Meal!

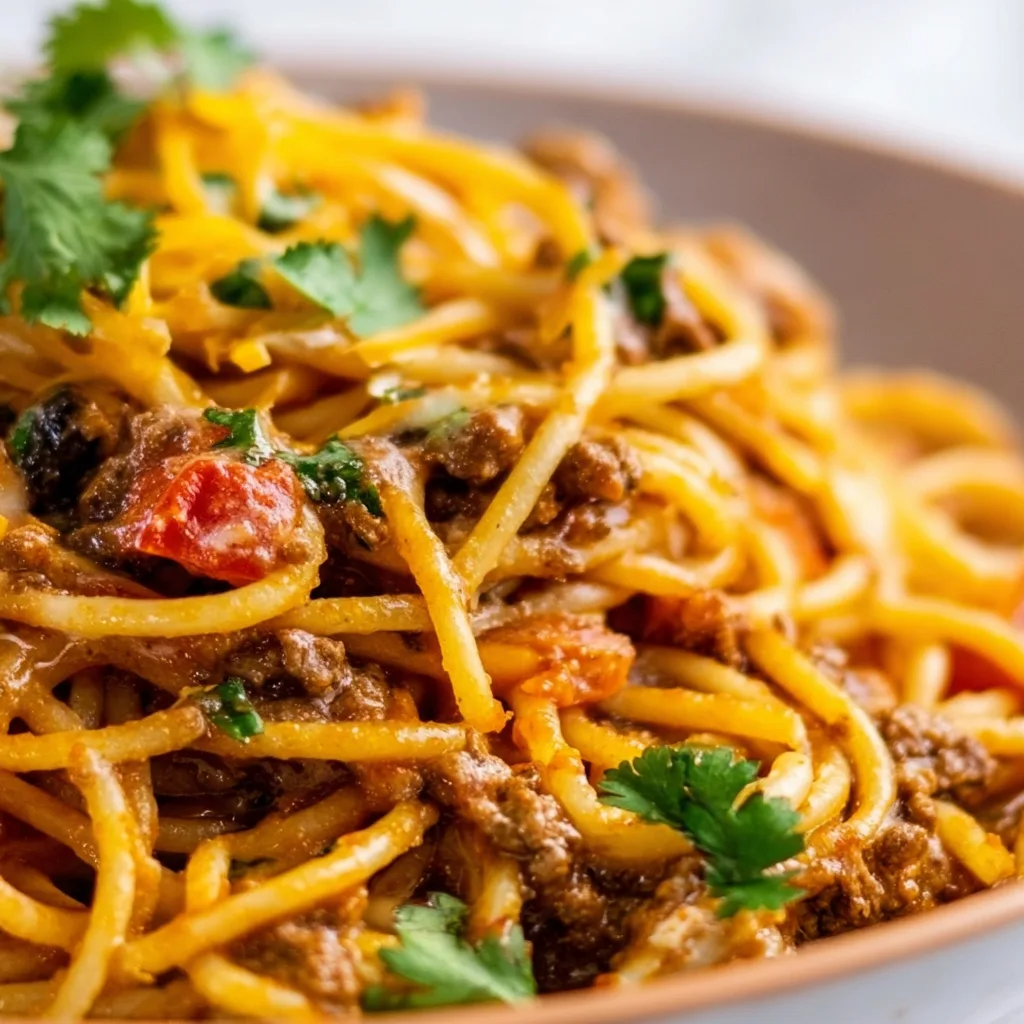
    Taco Spaghetti Recipe brings two comfort food favorites together in one irresistible dish! This fusion masterpiece combines the zesty flavors of taco night with the familiar comfort of pasta, creating a meal that’s guaranteed to become a family favorite. I discovered this recipe during a particularly hectic week when I needed something quick yet satisfying. The moment my kitchen filled with those aromatic Mexican spices swirling around the tomato-y pasta, I knew I’d found a winner. If you love hearty, crowd-pleasing meals like my Slow Cooker Chicken Spaghetti, this taco twist will absolutely delight your taste buds.

    Recipe

    Why You’ll Love This Taco Spaghetti Recipe

    Perfect Weeknight Solution

    This taco spaghetti recipe is a time-saving miracle that doesn’t sacrifice flavor for convenience. It comes together in just about 30 minutes, making it perfect for those evenings when you’re juggling homework help, work emails, and hungry family members. The one-pot approach means minimal cleanup too! I’ve made this on countless Monday nights when my energy is low but my family’s expectations are high. The beauty lies in how it transforms simple ingredients—ground beef, taco seasoning, pasta—into something that tastes like you spent hours in the kitchen.

    Crowd-Pleasing Flavor Profile

    The flavor combination in this dish is absolutely irresistible—savory ground beef seasoned with smoky taco spices, tangy tomatoes, and creamy melted cheese coating every strand of pasta. It’s the perfect balance of Mexican-inspired flavors and Italian comfort. My picky nephew who “doesn’t like casseroles” devoured two helpings without coming up for air! The dish offers that wonderful textural contrast between the al dente pasta, seasoned meat, and gooey cheese that makes each bite more satisfying than the last. It’s familiar enough for comfort food lovers but interesting enough for those seeking something beyond basic pasta.

    Essential Tips & Tricks

    Perfecting the Pasta

    The key secret to amazing taco spaghetti is cooking your pasta properly within the sauce. Always cook it about 1-2 minutes less than the package directions suggest, as it will continue absorbing liquid in the final stages. I learned this the hard way after serving my first batch with mushy noodles! For texture variation, try breaking your spaghetti into smaller pieces before cooking—this makes the final dish easier to eat and helps the pasta absorb more of those delicious taco flavors. Remember to stir occasionally to prevent sticking, especially when adding the cheese.

    Seasoning Strategies

    Don’t be afraid to customize your seasoning based on your family’s preference for heat. Store-bought taco seasoning works perfectly, but I often make my own blend with cumin, chili powder, garlic powder, and a pinch of oregano for a more controlled flavor profile. For an extra flavor boost, try toasting your spices in the pan for 30 seconds before adding the meat—this simple step awakens the essential oils in the spices for maximum impact. If cooking for little ones, you can always add hot sauce or diced jalapeños to individual portions rather than spicing up the entire dish.

    Serving Ideas & Creative Variations

    Perfect Pairings

    Taco spaghetti shines when served with fresh accompaniments that complement its rich flavors. I love setting out small bowls of diced avocado, fresh cilantro, sliced green onions, and lime wedges so everyone can customize their own plate. A simple side salad with a light vinaigrette provides a refreshing contrast to the hearty main dish. For a complete fiesta, warm some tortilla chips and serve with a quick homemade salsa or guacamole. My family particularly loves when I pair this with a batch of Mexican-inspired cornbread for sopping up every last bit of sauce.

    Creative Twists

    This recipe is wonderfully adaptable to different dietary needs and flavor preferences. Try using ground turkey or chicken for a lighter version, or black beans and extra vegetables for a vegetarian take. For a creamier variation, stir in 2-3 tablespoons of cream cheese along with the shredded cheese. Pasta shapes can be swapped too—rotini or penne hold the sauce beautifully. My daughter’s favorite version includes a can of corn and black beans for added texture and nutrition. For special occasions, I’ve even topped individual portions with a dollop of sour cream and guacamole before broiling with extra cheese for a restaurant-worthy presentation.

    Storage & Troubleshooting Guide

    Make-Ahead & Storage Tips

    Taco spaghetti is a meal-prep champion that actually improves with time as the flavors meld together. Store leftovers in an airtight container in the refrigerator for up to 4 days. When reheating, add a splash of water or broth to revive the sauce before microwaving. For freezing, portion completely cooled spaghetti into freezer-safe containers and store for up to 3 months. I often make a double batch specifically to freeze individual portions for quick lunches. Thaw overnight in the refrigerator before reheating, and consider adding a fresh sprinkle of cheese to restore that gooey texture.

    Fixing Common Issues

    If your taco spaghetti turns out too dry or soupy, there are easy fixes. For a dry dish, add ¼ cup of chicken broth or tomato sauce and gently stir while reheating to incorporate moisture without breaking the pasta. If it’s too soupy, let it sit uncovered for 5-10 minutes—the pasta will absorb excess liquid. Should your cheese clump rather than create a smooth sauce, try reducing the heat and adding cheese gradually while stirring continuously. I once salvaged an overly spicy batch by stirring in a tablespoon of sour cream, which mellowed the heat beautifully while adding a tangy richness.

    Frequently Asked Questions

    Can I make taco spaghetti in advance?

    Absolutely! Prepare it up to 2 days ahead, refrigerate, then reheat with a splash of broth. The flavors actually deepen over time, making it perfect for meal prep or busy weeknight planning.

    What can I substitute for ground beef in this taco spaghetti recipe?

    Ground turkey, chicken, or plant-based meat alternatives work beautifully. For vegetarian options, use black beans, lentils, or crumbled tofu seasoned well with the taco spices.

    How spicy is this dish?

    The spice level is customizable! Use mild taco seasoning for a family-friendly version or add cayenne pepper, hot sauce, or diced jalapeños if you prefer more heat.

    Can I use gluten-free pasta?

    Yes! Gluten-free spaghetti works well, but watch cooking time carefully as it often cooks faster than regular pasta. Add a little extra liquid as gluten-free varieties tend to absorb more.

    How do I keep the cheese from clumping?

    Turn off the heat before adding cheese, then stir continuously as you sprinkle it in gradually. Using freshly shredded cheese (not pre-packaged) also helps create a smoother melt.

    Final Thoughts

    This Taco Spaghetti Recipe has become my reliable solution for those nights when I want to serve something special without spending hours in the kitchen. The way it brings together two beloved comfort foods creates a dish that feels both familiar and exciting. I love watching people’s expressions as they take that first bite—surprise followed by pure enjoyment! Remember to make it your own with your family’s favorite toppings and sides. For more delicious fusion recipes and dinner inspiration, visit our Pinterest page where we’re always sharing new ideas to brighten your table.

  • Mexican Chicken and Rice Casserole: Irresistibly Easy & Flavor-Packed!

    Mexican Chicken and Rice Casserole: Irresistibly Easy & Flavor-Packed!

    Mexican Chicken and Rice Casserole: Irresistibly Easy & Flavor-Packed!

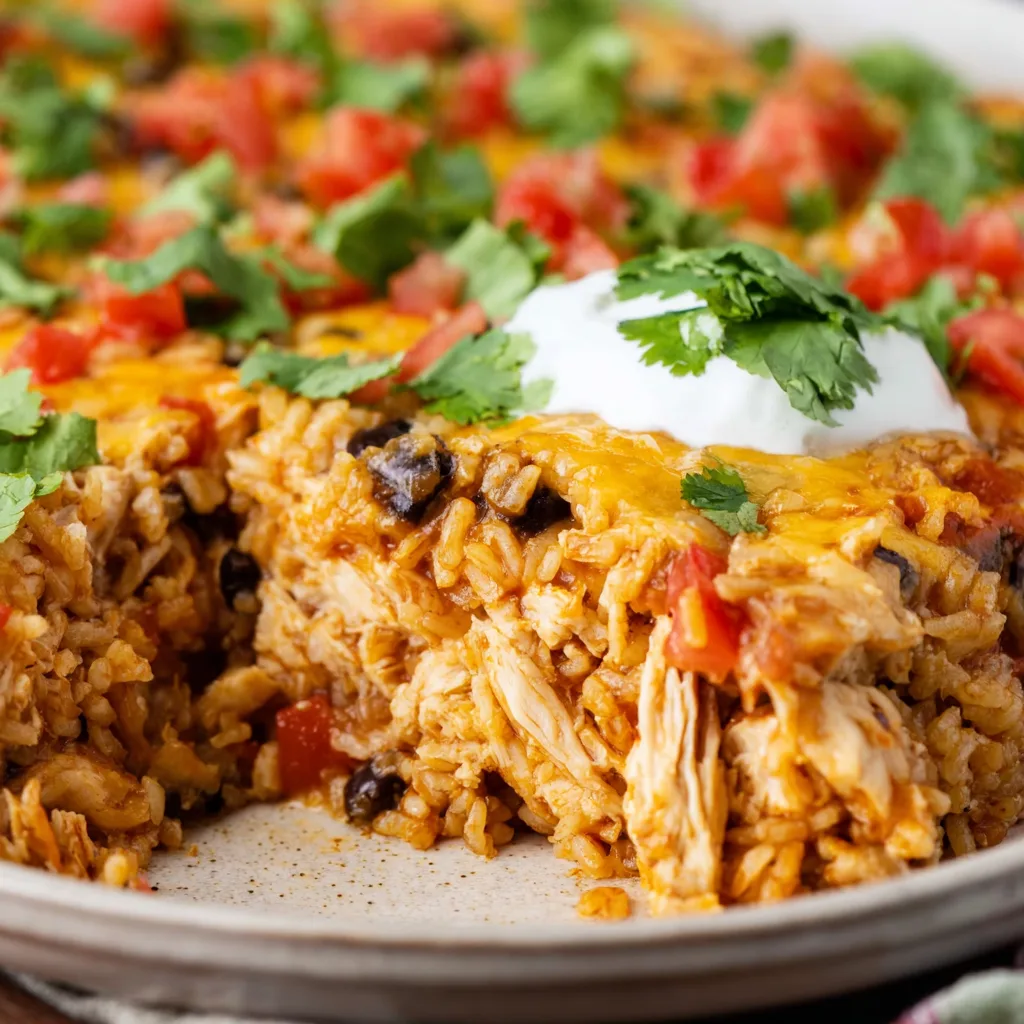
    This Mexican Chicken and Rice Casserole transforms ordinary weeknight dinners into fiesta-worthy meals with minimal effort! The combination of tender chicken, fluffy rice, and melty cheese creates a comforting dish that’s become my family’s most requested meal. When the aroma of cumin, chili powder, and garlic fills my kitchen, everyone mysteriously appears, asking how long until dinner’s ready. I love how this casserole brings together classic Mexican flavors in one hearty, satisfying dish that reminds me of the chicken korma I grew up loving – different cuisine but same level of comfort!

    Recipe

    Why You’ll Love This Mexican Chicken and Rice Casserole

    Perfect Make-Ahead Meal Solution

    This casserole has saved my sanity on countless busy weeknights! The beauty lies in its flexibility – you can prep everything the night before, store it in the refrigerator, and simply pop it in the oven when you get home. The rice absorbs all those incredible Mexican spices overnight, resulting in even more flavor. I’ll often prepare two batches on Sunday afternoon while listening to my favorite podcast, freezing one for those emergency dinner situations that inevitably arise when life gets chaotic. Your future self will thank you for this delicious time-saving gift!

    One-Dish Wonder That Pleases Everyone

    There’s something magical about dishes that satisfy the whole family while minimizing cleanup. This casserole consistently earns thumbs-up from both my picky eater and my spice-loving husband. The layers of flavor – from the zesty tomatoes to the smoky cumin and the creamy cheese – create a perfect balance that appeals to diverse palates. Plus, everything cooks together in one dish, meaning less time scrubbing pots and more time enjoying your evening. I’ve served this at potlucks and family gatherings, and the empty dish always comes home with requests for the recipe!

    Essential Tips & Tricks

    Perfecting Your Rice Texture

    Getting the rice texture just right makes all the difference between a good casserole and a great one. I recommend rinsing your rice thoroughly before adding it to remove excess starch, which helps prevent gumminess. For the perfect fluffy texture, use long-grain white rice and maintain the correct liquid-to-rice ratio (typically 2:1). If you’re using pre-cooked rice, reduce the liquid slightly. One trick I discovered after many trials: let the casserole rest for 10 minutes after baking before serving – this allows the rice to finish absorbing any remaining liquid and results in that ideal texture that one-pot jambalaya recipes are known for.

    Flavor-Building Strategy

    The secret to this casserole’s incredible flavor lies in the layering technique. Start by sautéing onions and garlic until fragrant before adding your chicken – this builds a foundation of flavor. Don’t rush browning the chicken; those caramelized bits add depth. When adding spices, toast them briefly in the pan to bloom their essential oils before adding liquids. For an extra dimension, try roasting your peppers first or using fire-roasted canned tomatoes. My personal touch is adding a tablespoon of lime zest along with the juice – it brightens everything with that perfect citrus note that makes people wonder what your secret ingredient is!

    Serving Ideas & Creative Variations

    Complementary Side Dishes

    Transform this hearty casserole into a complete feast with thoughtfully paired sides. Fresh, crisp accompaniments provide the perfect contrast to the rich, savory casserole. I love serving it with a zesty avocado salad – simply toss diced avocados, cherry tomatoes, red onion, and cilantro with lime juice and a pinch of salt. A side of tangy Mexican crema or sour cream offers a cooling element that balances the spices beautifully. For something more substantial, try warm corn tortillas or a simple chickpea feta salad that adds protein and fresh flavors. My family especially loves when I include a colorful cabbage slaw dressed with lime and honey!

    Exciting Flavor Twists

    Don’t be afraid to make this recipe your own with creative variations! For a green chile version, substitute half the tomatoes with mild diced green chiles and add a handful of chopped cilantro. Craving something creamy? Add 4 ounces of cream cheese when mixing in the shredded cheese for an indulgent twist. For extra protein power, black beans or pinto beans make excellent additions. Vegetarian guests? Simply omit the chicken and double the beans and vegetables. I once added a layer of crushed tortilla chips on top during the last 5 minutes of baking for amazing texture contrast – my kids now request this “nacho casserole” version regularly!

    Storage & Troubleshooting Guide

    Proper Storage Methods

    Properly storing your Mexican Chicken and Rice Casserole ensures you’ll enjoy those delicious leftovers without compromising taste or texture. Allow the casserole to cool completely before refrigerating to prevent condensation that could make it soggy. Store in an airtight container for up to 4 days in the refrigerator. For freezing, portion into individual servings in freezer-safe containers – this makes reheating more convenient. Label with the date and consume within 3 months for best quality. When reheating, sprinkle a few drops of water over the casserole before covering to help restore moisture, and add a fresh sprinkle of cheese on top for that just-baked experience!

    Fixing Common Issues

    Even experienced cooks occasionally encounter casserole challenges! If your rice turns out undercooked, cover the dish tightly with foil and return to the oven with an additional ¼ cup of hot broth or water for 10-15 minutes. For overly dry casserole, stir in warm broth gradually until you reach your desired consistency. If the top is browning too quickly, simply cover with foil for the remainder of the baking time. Dealing with a too-soupy result? Uncover and bake an additional 10 minutes, then let stand longer before serving to allow excess moisture to absorb. Remember that casserole texture continues to set as it cools!

    Frequently Asked Questions

    Can I use brown rice instead of white rice in this Mexican Chicken and Rice Casserole?

    Yes! Brown rice works beautifully but requires adjustments. Increase liquid by ¼ cup and extend baking time by 15-20 minutes. Pre-cooking the brown rice partially (about halfway) before adding to the casserole also helps ensure even cooking.

    How spicy is this recipe?

    The base recipe is mild to medium, suitable for most palates. Control the heat by adjusting the amount of chili powder or adding diced jalapeños (with seeds for more heat, without for milder flavor).

    Can I make this casserole vegetarian?

    Absolutely! Replace chicken with an extra cup of black beans, pinto beans, or even roasted vegetables like zucchini and corn. The Mexican flavors work wonderfully with plant-based proteins.

    What’s the best cheese to use?

    A combination works best: Mexican-blend, sharp cheddar, or Monterey Jack for melting, plus a sprinkle of cotija or queso fresco on top after baking for authentic flavor and texture contrast.

    Can I prepare this in advance for a party?

    Definitely! Assemble up to 24 hours ahead and refrigerate. When ready to serve, add an extra 10-15 minutes to the baking time since you’ll be starting with a cold casserole.

    Final Thoughts

    This Mexican Chicken and Rice Casserole has become my reliable culinary companion for everything from busy weeknights to casual entertaining. Its adaptability, comforting flavors, and ability to satisfy everyone at the table make it truly special. I love how it brings people together – there’s something about the colorful presentation and enticing aroma that creates an instant festive atmosphere. Whether you follow the recipe exactly or put your own spin on it, this casserole delivers that perfect balance of convenience and flavor that makes home cooking so rewarding. Find more delicious recipes on Pinterest!

  • Fluffy Twice Baked Potatoes Recipe That Will Blow Your Mind!

    Fluffy Twice Baked Potatoes Recipe That Will Blow Your Mind!

    Fluffy Twice Baked Potatoes Recipe That Will Blow Your Mind!

    Fluffy Twice Baked Potatoes are the ultimate comfort food that combines crispy potato skins with a cloud-like, creamy interior that melts in your mouth. I discovered these little gems during a snowy weekend at my grandmother’s farmhouse, where she taught me that the secret lies in whipping the potato filling until it’s as light as air. The contrast between the crispy exterior and the pillowy center creates a texture that’s simply irresistible. Whether you’re hosting a dinner party or craving a cozy side dish for a weeknight meal, these twice baked potatoes will elevate any dining experience with minimal effort.

    Recipe

    Why You’ll Love This Fluffy Twice Baked Potatoes

    Perfect Texture Combination

    The magic of fluffy twice baked potatoes lies in their contrasting textures. The outer shell maintains that satisfying crispness that gives way to an incredibly light, whipped interior. I’ve found that using russet potatoes works best because of their high starch content, which creates that perfect fluffiness. The first bake ensures the skin gets nice and crispy, while the second bake melds all the flavors together. When you take that first bite, you’ll experience the delightful crunch followed by the most cloud-like potato filling that practically dissolves on your tongue. It’s a textural paradise!

    Endless Customization Options

    What I absolutely adore about fluffy twice baked potatoes is their versatility. The basic recipe is delicious on its own, but it also serves as the perfect canvas for creativity. You can fold in roasted garlic for a mellow, aromatic flavor or add crispy bacon bits for a smoky punch. Experiment with different cheese combinations—sharp cheddar, tangy goat cheese, or nutty gruyère. For an herbal note, try chives, rosemary, or thyme. My family goes wild when I add caramelized onions and blue cheese! The possibilities are truly endless, making this recipe one you’ll never tire of making or eating.

    Essential Tips & Tricks

    Achieving Maximum Fluffiness

    The key to creating the fluffiest potatoes possible is in the technique. After the first bake, let the potatoes cool just enough to handle, then scoop out the flesh leaving a ¼-inch border to maintain structural integrity. For cloud-like texture, use a ricer or food processor instead of a masher—this removes all lumps. Warm your dairy ingredients (butter, sour cream, milk) before adding them; cold ingredients can make the potatoes gummy. Whip the mixture with an electric mixer for 1-2 minutes until light and airy. This extra step makes all the difference between good and extraordinary twice baked potatoes!

    Perfecting the Twice Baked Process

    Timing is everything when creating fluffy twice baked potatoes. For the initial bake, preheat your oven to 400°F and cook potatoes for 45-60 minutes until fork-tender. After filling the shells, the second bake should be at 375°F for just 15-20 minutes—enough to melt the cheese and heat through without drying out. For that beautiful golden top, switch to broil for the final 2-3 minutes, but watch carefully! They can go from perfectly browned to burnt in seconds. If preparing ahead, complete all steps except the final bake, refrigerate, then add 10 minutes to the second bake time when ready to serve.

    Serving Ideas & Creative Variations

    Perfect Pairings for Any Occasion

    Fluffy twice baked potatoes work beautifully as both elegant sides and hearty mains. For dinner parties, serve them alongside a perfectly seared steak or roasted chicken—their creamy texture complements proteins wonderfully. For casual gatherings, pair with a simple green salad dressed with vinaigrette for a refreshing contrast. They’re substantial enough to be a vegetarian main course when topped with broccoli and extra cheese. I love serving them at brunch with poached eggs and hollandaise! The versatility of these potatoes means they’re appropriate for everything from holiday feasts to Tuesday night dinners with easy honey sesame chicken.

    Innovative Flavor Combinations

    Take your fluffy twice baked potatoes to the next level with unexpected ingredients. Try a Mediterranean version with sun-dried tomatoes, feta, and olives folded into the filling. For a southwestern twist, add corn, black beans, jalapeños, and top with avocado after baking. My personal favorite is a loaded baked potato version with sharp cheddar, crispy bacon, chives, and a dollop of sour cream. For something truly special, try a truffle-infused filling with wild mushrooms and gruyère cheese. The humble potato becomes extraordinary when you think outside the traditional flavor profiles!

    Storage & Troubleshooting Guide

    Proper Storage and Reheating Methods

    Fluffy twice baked potatoes are perfect for meal prep because they store and reheat beautifully. After cooling completely, wrap individual potatoes in plastic wrap and refrigerate for up to 3 days. For longer storage, freeze them on a baking sheet until solid, then transfer to freezer bags for up to 2 months. When reheating from refrigerated, bake at 350°F for 15-20 minutes. From frozen, don’t thaw first—bake at 350°F for 30-35 minutes until heated through. For the best texture when reheating, sprinkle with a little extra cheese on top to prevent drying out.

    Solving Common Potato Problems

    Even experienced cooks encounter issues with twice baked potatoes. If your potatoes are too dense, you likely overworked the filling or used cold dairy. Next time, warm your milk and sour cream and mix gently. For potatoes that won’t crisp up, try brushing the skins with olive oil and salt before the first bake. If the filling is too runny, fold in a tablespoon of instant potato flakes to absorb excess moisture. For potatoes that collapse, you’ve likely scooped too much flesh out—always leave that ¼-inch border. Remember that different potato varieties have different moisture levels, so adjust your recipe accordingly.

    Frequently Asked Questions

    What makes twice baked potatoes so fluffy?

    The secret to fluffy twice baked potatoes is using a ricer or food processor instead of a masher, warming dairy ingredients before adding them, and whipping the mixture with an electric mixer for 1-2 minutes until light and airy.

    Can I make fluffy twice baked potatoes ahead of time?

    Absolutely! Prepare everything except the final bake, refrigerate for up to 3 days, then bake for 25-30 minutes at 375°F when ready to serve. They can also be frozen for up to 2 months.

    What’s the best potato variety to use?

    Russet potatoes are ideal because their high starch content creates the fluffiest interior. Their sturdy skins also hold up well to twice baking.

    How can I make these potatoes healthier?

    Use Greek yogurt instead of sour cream, reduce cheese, add steamed broccoli or spinach to the filling, and top with herbs instead of bacon for a lighter version that’s still delicious.

    Can I make mini fluffy twice baked potatoes as appetizers?

    Yes! Use small potatoes like fingerlings or baby reds, reduce baking times accordingly, and serve as elegant bite-sized appetizers at your next gathering.

    Final Thoughts

    Fluffy twice baked potatoes have become my go-to recipe when I want to impress without spending hours in the kitchen. There’s something magical about that moment when your fork breaks through the crispy top into the cloud-like interior—it’s comfort food perfection. I encourage you to make this recipe your own by experimenting with different fillings and toppings. The techniques you’ll learn creating these fluffy twice baked potatoes will elevate your potato game forever. For more delicious recipes and inspiration, follow me on Pinterest where I’m always sharing new comfort food ideas.

  • Chickpea Feta Avocado Salad: Fresh, Zesty & Irresistibly Healthy!

    Chickpea Feta Avocado Salad: Fresh, Zesty & Irresistibly Healthy!

    Chickpea Feta Avocado Salad: Fresh, Zesty & Irresistibly Healthy!

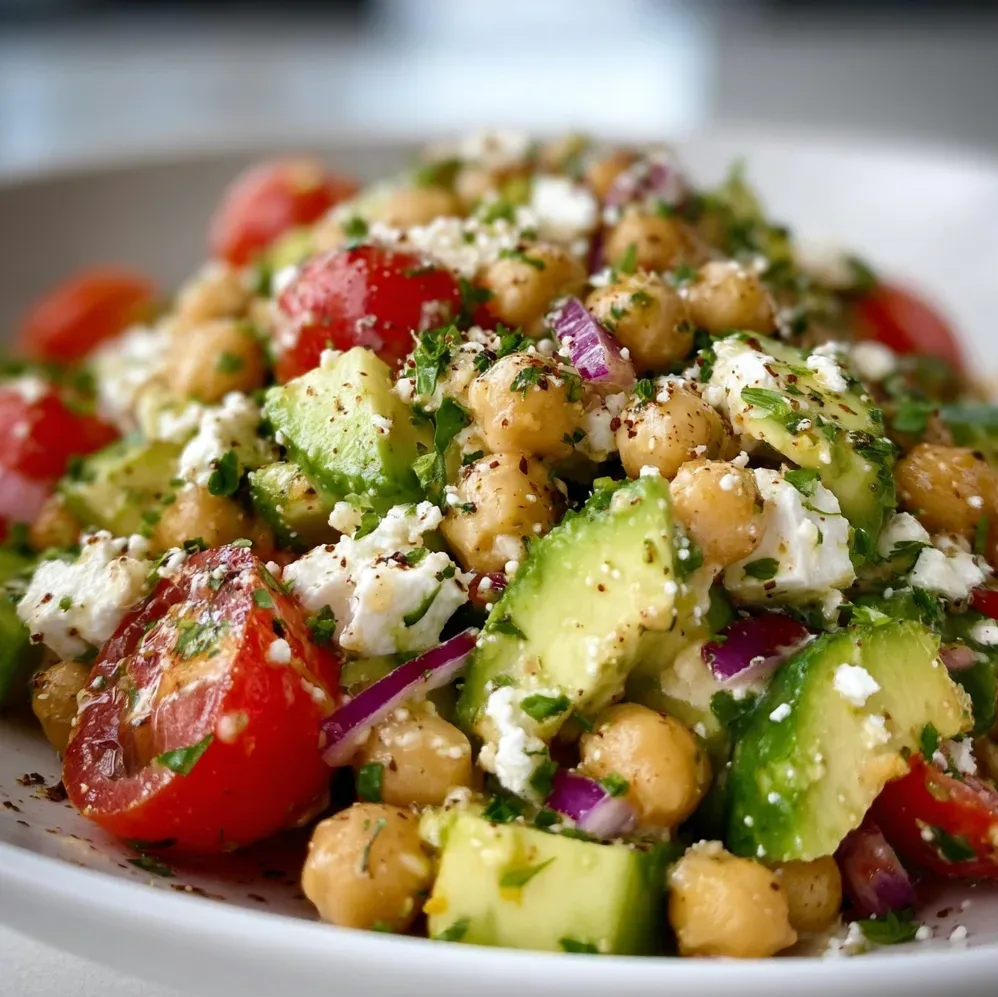
    This Chickpea Feta Avocado Salad is my go-to recipe when I want something that’s both satisfying and nourishing. The first time I made it, I was standing in my kitchen on a sweltering summer afternoon, desperately seeking something that wouldn’t require turning on the oven. The combination of creamy avocado, tangy feta, and hearty chickpeas created such a perfect harmony that it’s become a staple in my weekly meal prep. The textures and flavors complement each other beautifully, creating a dish that’s simple yet sophisticated enough for any occasion. Check out my Glow Bowl Recipe for another nutritious option!

    Recipe

    Why You’ll Love This Chickpea Feta Avocado Salad

    Perfect Balance of Flavors and Textures

    There’s something magical about the way the creamy avocado melts against the salty punch of feta cheese in this salad. The chickpeas provide a satisfying heartiness that makes this dish feel substantial rather than just a side. I love how the red onions add a gentle bite while the lemon dressing brings everything together with its bright acidity. When you take that first forkful, you’ll experience a symphony of textures – the soft avocado, the firm chickpeas, and the crumbly feta create a mouthfeel that keeps you coming back for more.

    Quick and Nutritious Meal Solution

    This salad has saved me countless times when I needed a nutrient-dense meal in minutes. It takes just about 15 minutes to throw together, making it perfect for busy weeknights or impromptu lunch guests. The protein from the chickpeas combined with healthy fats from the avocado and olive oil makes this incredibly satisfying. I’ve brought this to office potlucks and weekend picnics, and it always disappears first. The best part? You’ll feel energized rather than sluggish after enjoying this colorful bowl of goodness.

    Essential Tips & Tricks

    Ingredient Selection Matters

    The quality of ingredients makes all the difference in this simple salad. Look for firm avocados with just a slight give when gently pressed – too soft and they’ll turn mushy in the salad. For chickpeas, I prefer using canned ones rinsed thoroughly, but cooking dried chickpeas gives them an even better texture if you have the time. The feta is another crucial element – choose a block packed in brine rather than pre-crumbled for the best flavor and texture. I once made this with a cheap pre-crumbled feta, and the difference was immediately noticeable. Fresh herbs are non-negotiable here!

    Perfecting the Dressing Ratio

    The dressing is what ties this Chickpea Feta Avocado Salad together, and getting the proportions right is key. I use a 2:1 ratio of olive oil to lemon juice as the base, then add a small clove of minced garlic and a teaspoon of Dijon mustard to emulsify everything. Don’t skimp on seasoning – a generous pinch of flaky sea salt and freshly ground black pepper makes all the flavors pop. If you’re feeling adventurous, a pinch of sumac or za’atar adds a wonderful Middle Eastern twist that complements the chickpeas beautifully.

    Serving Ideas & Creative Variations

    Meal Prep and Serving Suggestions

    This salad is incredibly versatile for serving. For an elegant presentation, try serving it in avocado halves with an extra sprinkle of feta on top. If meal prepping, keep the dressing separate and add the avocado just before eating to prevent browning. I love serving this alongside Garlic Butter Cod Bites for a complete meal that impresses guests. For a portable lunch option, stuff the salad into pita pockets with some extra greens. The salad also makes a beautiful addition to a Mediterranean-inspired grazing board.

    Seasonal Adaptations and Substitutions

    Don’t be afraid to adapt this salad throughout the year with seasonal produce. In summer, I add cherry tomatoes and cucumber for extra freshness. Fall calls for roasted sweet potato cubes and a sprinkle of pepitas. Winter versions work beautifully with segments of blood orange and a handful of arugula. If you’re dairy-free, substitute the feta with a firm cashew cheese or simply add extra avocado. Vegans can enjoy this with marinated tofu cubes instead of feta. The chickpeas can be swapped for white beans or lentils depending on what you have on hand.

    Storage & Troubleshooting Guide

    Keeping It Fresh

    The biggest challenge with this salad is maintaining the avocado’s freshness. If storing leftovers, press plastic wrap directly onto the surface of the salad to minimize air exposure, which causes browning. A squeeze of extra lemon juice over the top also helps preserve the avocado’s color. Store in an airtight container in the refrigerator for up to 24 hours. For meal prep, store all components separately – chickpeas with herbs and feta in one container, diced avocado (with lemon juice) in another, and dressing in a small jar – then combine when ready to eat.

    Rescuing Common Issues

    If your salad seems too dry after being refrigerated, simply drizzle a little extra olive oil and lemon juice to refresh it. Found yourself with underripe avocados? Dice them smaller and let them sit in the dressing for 10 minutes before adding other ingredients – the acid helps soften them slightly. If your salad lacks flavor, don’t immediately add more salt; try a pinch of red pepper flakes or a drizzle of honey to balance the flavors. Soggy herbs can be revived by plunging them briefly in ice water before patting dry.

    Frequently Asked Questions

    Can I make Chickpea Feta Avocado Salad ahead of time?

    Yes, but store components separately. Combine chickpeas, feta, and vegetables with dressing up to 24 hours ahead, but add diced avocado just before serving to prevent browning.

    Is this salad suitable for vegans?

    Not as written, but you can easily substitute the feta with firm tofu marinated in lemon juice, nutritional yeast, and herbs for a vegan version that maintains the texture contrast.

    How can I make this salad more filling?

    Add cooked quinoa or farro for extra protein and fiber. You could also include roasted vegetables or grilled chicken if you want a more substantial meal.

    What herbs work best in this recipe?

    Fresh mint, parsley, dill, and basil all work beautifully. I recommend using at least two different herbs for complexity of flavor.

    Can I use dried chickpeas instead of canned?

    Absolutely! Cook dried chickpeas until tender but still firm. They’ll have better texture and flavor, though they require advance planning for soaking and cooking time.

    Final Thoughts

    This Chickpea Feta Avocado Salad has become more than just a recipe in my kitchen—it’s a solution for healthy eating that doesn’t sacrifice flavor or satisfaction. The way the ingredients come together creates something greater than the sum of its parts. I find myself craving the bright, fresh flavors and contrasting textures regularly. Whether you’re looking for a quick lunch, a side dish, or a light dinner, this versatile salad delivers every time. Don’t forget to check out more of my favorite recipes on Pinterest!

  • Asian Crispy Rice Salad That Will Blow Your Taste Buds Away!

    Asian Crispy Rice Salad That Will Blow Your Taste Buds Away!

    Asian Crispy Rice Salad That Will Blow Your Taste Buds Away!

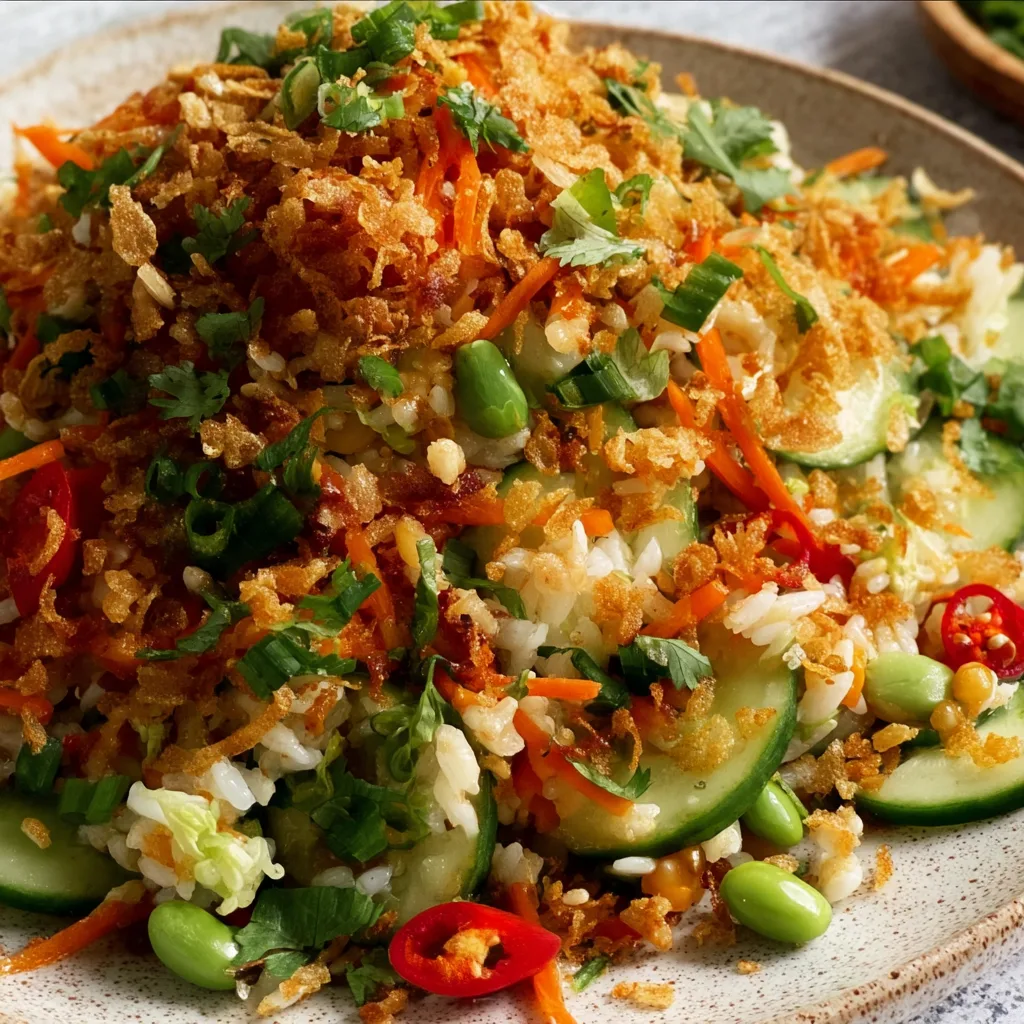
    This Asian Crispy Rice Salad completely transformed my weeknight dinner routine last month when I was stuck in a serious cooking rut. The addictive crunch of crispy rice contrasts beautifully with tender vegetables, all coated in a tangy-sweet dressing that makes your taste buds dance. I first discovered this gem at a friend’s potluck where I literally couldn’t stop sneaking spoonfuls from the serving bowl! It’s become my go-to when I need something that feels special but doesn’t require hours in the kitchen—perfect for those evenings when you want something impressive but effortless.

    Recipe

    Why You’ll Love This Asian Crispy Rice Salad

    Perfect Texture Combination

    The magical contrast of textures is what makes this salad absolutely irresistible. The rice gets crispy and golden in places while maintaining chewiness in others—creating that perfect bite every single time. I love how the crunch of fresh bell peppers and water chestnuts plays against the softness of edamame. When you take that first forkful, you’ll experience a symphony of textures that keeps you coming back for more. My husband, who typically shrugs at salads, went back for thirds the first time I made this!

    Flavor-Packed Dressing

    The umami-rich dressing ties everything together with its perfect balance of salty, sweet, and tangy notes. Soy sauce provides depth, while rice vinegar adds brightness that cuts through the richness. A touch of sesame oil brings that distinctive nutty flavor that’s unmistakably Asian-inspired. I’ve caught myself licking the spoon after mixing this dressing—it’s that good! The flavors continue to develop as the salad sits, making it even more delicious as leftovers the next day.

    Essential Tips & Tricks

    Getting Perfectly Crispy Rice

    The secret to crispy rice lies in starting with cold, day-old rice—fresh rice simply won’t crisp up properly. Spread your rice in a thin layer on a baking sheet and drizzle with a little oil before roasting at 425°F until golden and crunchy around the edges (about 15-20 minutes). I learned this technique after several soggy attempts, and it’s been a game-changer! Don’t rush this step; those crispy bits are what make this salad special, similar to the crispy elements in my Potsticker Noodle Bowl with Beef Cabbage Slaw.

    Prep-Ahead Components

    Make your life easier by prepping components in advance. The dressing can be made up to 3 days ahead and stored in the refrigerator. Chop all vegetables the night before and store them in airtight containers. The rice can even be crisped up to 2 hours ahead—just don’t combine everything until serving time to maintain those distinct textures. I often prep everything during my Sunday meal prep session, which makes throwing this salad together on busy weeknights absolutely effortless.

    Serving Ideas & Creative Variations

    Perfect Pairings

    This Asian Crispy Rice Salad works beautifully as both a standalone meal or a side dish. For a complete dinner, top with grilled shrimp, chicken, or tofu to add protein. It pairs wonderfully with other Asian-inspired dishes like dumplings or spring rolls for a feast. I recently served this alongside my Sauteed Bok Choy for a dinner party, and guests couldn’t stop raving about the combination. The cooling crunch of the salad balances perfectly with spicier main dishes, making it an ideal accompaniment.

    Seasonal Adaptations

    One thing I adore about this salad is how easily adaptable it is to whatever’s in season. In summer, add fresh corn kernels and cherry tomatoes for sweetness. Fall calls for roasted butternut squash cubes and pomegranate seeds. Winter? Try roasted Brussels sprouts and dried cranberries. Spring begs for snap peas and asparagus tips. The base recipe stays the same, but these seasonal swaps keep the salad feeling fresh and exciting year-round. I’ve made it twelve different ways, and each variation has its own special charm!

    Storage & Troubleshooting Guide

    Maintaining Freshness

    For optimal texture, store the components separately if preparing ahead. Keep the crispy rice in an airtight container at room temperature (refrigeration makes it soggy), while vegetables and dressing should be refrigerated. If you’ve already mixed everything, leftovers will keep for up to 2 days in the refrigerator, though the rice will soften over time. To revive leftover salad, spread it on a baking sheet and pop it under the broiler for 1-2 minutes—this restores some crispness to the rice!

    Fixing Common Issues

    If your rice isn’t getting crispy enough, it’s likely too fresh or too wet. Solution: spread it thinner on the baking sheet and extend roasting time by 5-10 minutes. If your dressing tastes too salty, balance it with a touch more honey or a squeeze of fresh lime juice. For a salad that seems dry after mixing, simply drizzle in a little more dressing or a splash of olive oil. And if vegetables have released too much water making the salad soggy, drain excess liquid and add a fresh batch of crispy rice.

    Frequently Asked Questions

    Can I use fresh rice instead of day-old rice?

    Fresh rice contains too much moisture to crisp properly. If you’re in a pinch, spread freshly cooked rice on a baking sheet, refrigerate uncovered for 30 minutes, then proceed with crisping.

    Is this Asian Crispy Rice Salad gluten-free?

    Not traditionally, due to the soy sauce. Simply substitute tamari or coconut aminos for the soy sauce to make it completely gluten-free.

    How can I make this salad more substantial?

    Add protein like grilled chicken, shrimp, tofu, or edamame. You can also incorporate hearty vegetables like roasted sweet potatoes or avocado.

    Can I prepare this salad the night before?

    Yes, but store components separately. Combine just before serving to maintain the signature crispy texture that makes this salad special.

    What’s the best rice variety to use?

    Medium-grain white rice works best for crispiness. Jasmine and basmati are good alternatives, but avoid sticky or short-grain varieties as they won’t crisp as well.

    Final Thoughts

    This Asian Crispy Rice Salad has become my secret weapon for potlucks and dinner parties—it consistently earns rave reviews while being deceptively simple to prepare. The contrast of textures and flavors makes it memorable, and its versatility means you’ll never tire of making it. I love how it bridges the gap between comfort food and fresh, vibrant eating. Don’t forget to check out more creative recipes on our Pinterest for endless inspiration!

  • Creamy Parmesan Baked Caesar Chicken That Will Wow Your Taste Buds!

    Creamy Parmesan Baked Caesar Chicken That Will Wow Your Taste Buds!

    Creamy Parmesan Baked Caesar Chicken That Will Wow Your Taste Buds!

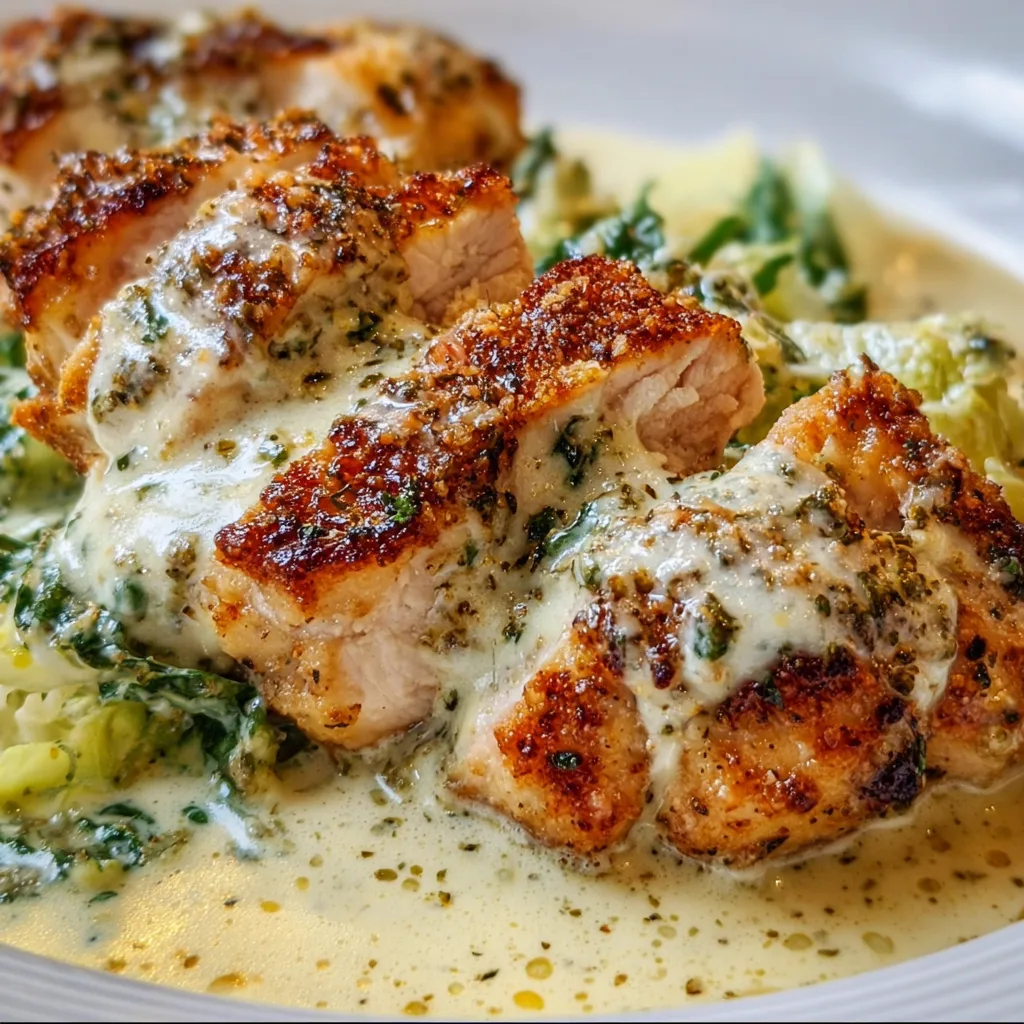
    Creamy Parmesan Baked Caesar Chicken transforms ordinary chicken breasts into a restaurant-worthy dinner that’s surprisingly simple to make at home. The first time I made this dish, my kitchen filled with the most intoxicating aroma of garlic, herbs, and melting cheese. There’s something magical about how the tangy Caesar dressing mingles with the nutty Parmesan, creating a velvety blanket over perfectly tender chicken. This easy weeknight recipe has become my go-to when I want to impress without stress – perfect for both casual family dinners and entertaining guests who’ll be begging for your culinary secrets.

    Recipe

    Why You’ll Love This Creamy Parmesan Baked Caesar Chicken

    A Time-Saving Flavor Explosion

    This dish delivers maximum flavor with minimal effort. The beauty lies in how the Caesar dressing does double duty – tenderizing the chicken while infusing it with garlicky, lemony notes. I remember rushing to prepare dinner for unexpected guests and reaching for this recipe in panic mode. Twenty-five minutes later, they were convinced I’d spent hours in the kitchen! The creamy texture develops naturally as it bakes, creating a luscious sauce that’s perfect for spooning over the chicken. No complicated techniques or fancy equipment needed – just honest ingredients coming together beautifully.

    Perfect for Meal Prep Magic

    The versatility of Creamy Parmesan Baked Caesar Chicken makes it a meal prep champion. I often make a double batch on Sundays, enjoying it fresh that evening, then repurposing leftovers throughout the week. Slice it over salads, stuff it into wraps, or pair with different sides for entirely new meals. The flavors actually deepen overnight, making day-two chicken even more delicious. Unlike many chicken recipes that dry out when reheated, the creamy Parmesan sauce keeps everything moist and tender, even after a quick zap in the microwave.

    Essential Tips & Tricks

    Selecting & Preparing Your Chicken

    Start with uniform-sized chicken breasts to ensure even cooking. If your chicken breasts are particularly thick, consider butterflying them or using a meat mallet to pound them to an even thickness of about ¾-inch. This small step makes a huge difference! Pat the chicken completely dry before adding seasonings – this helps the Caesar dressing adhere properly and prevents watery sauce. I learned this the hard way after making a soupy version when I skipped this step! For an extra flavor boost, try marinating the chicken in a tablespoon of the Caesar dressing for 30 minutes before assembling the dish, similar to my Hot Honey Chicken Cutlets.

    Perfecting the Parmesan Sauce

    The quality of ingredients truly matters in this simple recipe. Opt for freshly grated Parmesan rather than pre-packaged – it melts beautifully and delivers superior flavor. When selecting Caesar dressing, choose a thick, refrigerated version rather than shelf-stable varieties for the creamiest results. My secret ingredient? A tablespoon of sour cream stirred into the Caesar dressing adds an extra dimension of tanginess and helps the sauce cling to the chicken. Don’t rush the final broil – those 2-3 minutes create the irresistible golden crust that makes this dish truly special.

    Serving Ideas & Creative Variations

    Complementary Side Dishes

    This creamy chicken pairs beautifully with bright, acidic sides that balance its richness. My go-to combination is a simple arugula salad dressed with lemon juice and olive oil. The peppery greens cut through the creamy sauce perfectly. For heartier meals, roasted garlic mashed potatoes make an excellent base to catch every drop of sauce. Asparagus, green beans, or Sauteed Bok Choy also work beautifully. When entertaining, I serve this on a large platter surrounded by colorful vegetables and crusty bread for sopping up sauce – the presentation always impresses without requiring elaborate plating skills.

    Exciting Flavor Twists

    Don’t be afraid to put your own spin on this versatile recipe! For a Mediterranean twist, add sun-dried tomatoes, artichoke hearts, and a sprinkle of feta cheese before baking. Craving something spicy? Mix red pepper flakes or a tablespoon of hot honey into your Caesar mixture. My family’s favorite variation includes a layer of sautéed mushrooms and spinach between the chicken and sauce, adding earthy depth and sneaking in extra vegetables. For a lighter version, substitute Greek yogurt for half the Caesar dressing while maintaining that creamy texture we all crave.

    Storage & Troubleshooting Guide

    Proper Storage Methods

    Store leftover Creamy Parmesan Baked Caesar Chicken in an airtight container in the refrigerator for up to 3 days. The flavors actually improve overnight as the chicken continues to absorb the savory sauce. For freezing, I recommend portioning individual servings in freezer-safe containers – they’ll keep well for up to 2 months. The key to successful reheating is low and slow: cover with foil and warm in a 300°F oven until heated through, or microwave at 50% power with a damp paper towel covering the dish. This prevents the sauce from separating and keeps the chicken tender.

    Troubleshooting Common Issues

    If your sauce turns out too thin, there’s an easy fix! Remove the chicken to a plate, then simmer the sauce in a small saucepan with a teaspoon of cornstarch mixed with cold water until it reaches your desired consistency. Sauce curdled? This typically happens when exposed to high heat too quickly. Next time, let your Caesar dressing come to room temperature before mixing with other ingredients. For chicken that seems dry despite the sauce, you likely overcooked it. Use an instant-read thermometer to cook chicken to exactly 165°F – this precision tool has revolutionized my chicken dishes!

    Frequently Asked Questions

    Can I use chicken thighs instead of breasts for Creamy Parmesan Baked Caesar Chicken?

    Absolutely! Boneless, skinless chicken thighs work beautifully and often yield more tender results. Adjust cooking time to about 25-30 minutes, as thighs typically take slightly longer than breasts.

    Is homemade Caesar dressing better than store-bought for this recipe?

    While homemade dressing adds incredible flavor, quality store-bought works perfectly for weeknight convenience. Look for refrigerated varieties rather than shelf-stable options for the creamiest texture.

    Can this recipe be made dairy-free?

    Yes! Use dairy-free Caesar dressing and substitute nutritional yeast or dairy-free Parmesan alternatives. The texture will differ slightly but still delivers delicious flavor.

    How can I make this dish lower in calories?

    Use light Caesar dressing, reduce the Parmesan by half, and incorporate more herbs for flavor. Greek yogurt can replace some of the dressing while maintaining creaminess.

    What’s the best way to prevent the chicken from drying out?

    Don’t overcook! Remove the Creamy Parmesan Baked Caesar Chicken from the oven once it reaches 165°F internally. Covering with foil for the first portion of baking helps retain moisture.

    Final Thoughts

    Creamy Parmesan Baked Caesar Chicken deserves a spot in your regular dinner rotation. It strikes that perfect balance between comfort food indulgence and weeknight practicality that we’re all searching for. I love how this dish transforms humble chicken breasts into something that feels special enough for company yet simple enough for Monday night. The combination of tangy Caesar dressing and nutty Parmesan creates layers of flavor that belie the recipe’s simplicity. For more delicious recipe inspiration, follow me on Pinterest where I’m always sharing new favorites!

  • Baked Italian Grinder Sandwiches That Will Blow Your Taste Buds Away!

    Baked Italian Grinder Sandwiches That Will Blow Your Taste Buds Away!

    Baked Italian Grinder Sandwiches That Will Blow Your Taste Buds Away!

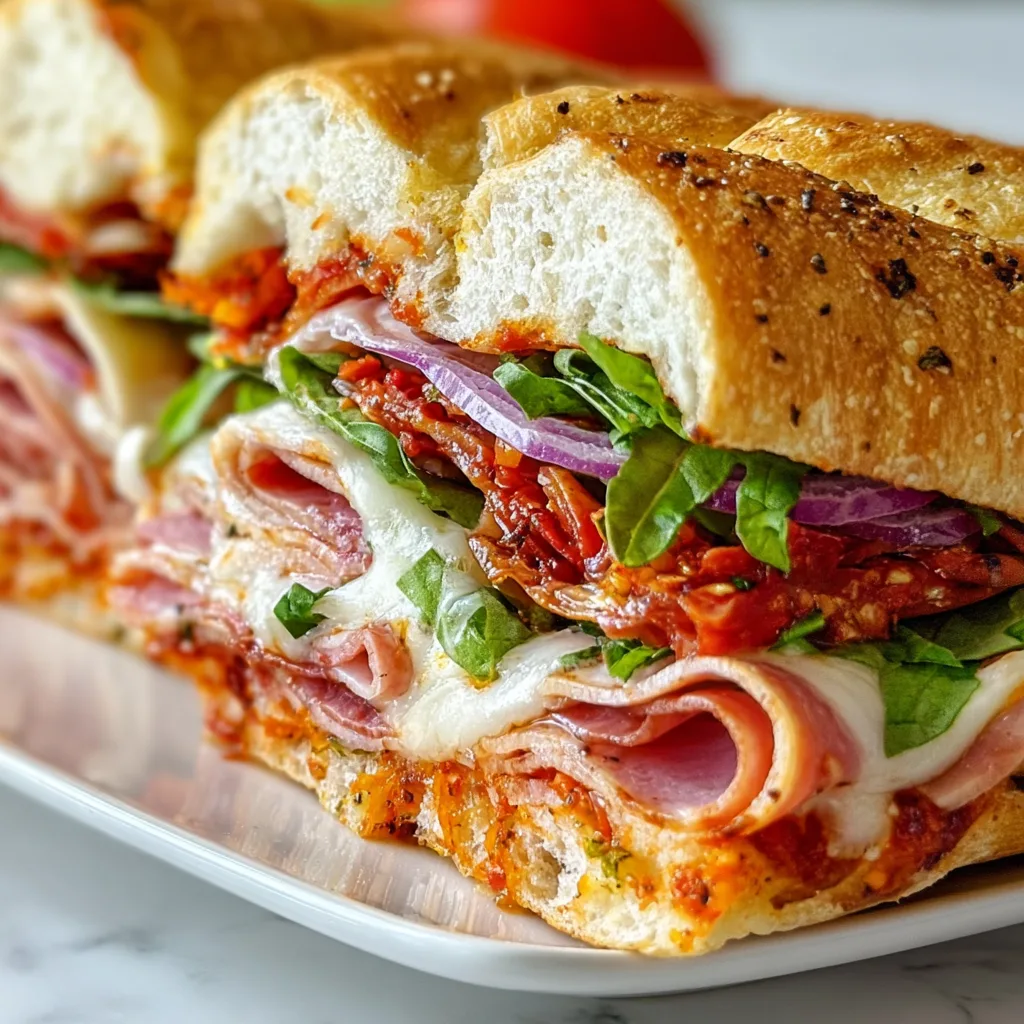
    These Baked Italian Grinder Sandwiches have completely transformed my weeknight dinner routine! Imagine layers of savory Italian meats, melty provolone, and tangy pepperoncini all nestled into crusty bread and baked until golden perfection. The first time I made these for my family, the kitchen filled with an aroma that had everyone hovering around the oven like hungry little bees. There’s something magical about how the flavors meld together when baked – it’s like a pizza and sandwich had a delicious baby, and I’m here for it!

    Recipe

    Why You’ll Love These Baked Italian Grinder Sandwiches

    A Time-Saving Crowd Pleaser

    These sandwiches are my go-to when I need to feed a hungry crowd without spending hours in the kitchen. The assembly-line approach makes preparation a breeze – just layer, wrap, and bake! I’ve served these at everything from game day gatherings to casual Friday night dinners, and they disappear faster than I can say “seconds, please!” The beauty lies in their versatility; you can prepare them ahead of time and simply pop them in the oven when guests arrive. The heavenly aroma that fills your home is just an added bonus!

    Perfect Balance of Flavors and Textures

    What makes these Baked Italian Grinder Sandwiches truly special is the perfect harmony of flavors and textures. The contrast between the crispy exterior and soft, warm interior creates a sensory experience that’s utterly satisfying. Each bite delivers a medley of savory meats, creamy cheese, and that signature tanginess from the Italian dressing and pepperoncini. I love how the heat from the oven transforms ordinary cold cuts into something extraordinary – the edges get slightly crisp while the center remains tender and juicy.

    Essential Tips & Tricks

    Bread Selection Matters

    Choosing the right bread is crucial for creating the perfect foundation for your Baked Italian Grinder Sandwiches. I learned this the hard way after using a too-soft variety that turned soggy! Opt for crusty Italian bread, ciabatta, or even a sturdy French baguette that can withstand the moisture from the fillings and dressing. For an extra touch of flavor, brush the inside with olive oil and toast it lightly before adding your ingredients. This creates a protective barrier that helps maintain that delightful textural contrast between crispy exterior and soft interior.

    Layer Like a Pro

    The secret to exceptional Baked Italian Grinder Sandwiches lies in the strategic layering of ingredients. Start with a base layer of provolone, which acts as a moisture barrier for the bread. Then alternate your meats – I typically use a combination of salami, ham, and pepperoni for authentic Italian flavor profiles. Add a second cheese layer before topping with pepperoncini, roasted red peppers, and a drizzle of Italian dressing. This method ensures that every bite contains the perfect balance of ingredients and prevents any single flavor from overwhelming the others.

    Serving Ideas & Creative Variations

    Perfect Pairings

    Elevate your Baked Italian Grinder Sandwiches with thoughtfully chosen side dishes that complement their robust flavors. I love serving these sandwiches with a crisp antipasto salad – the vinegary brightness cuts through the richness perfectly. For a heartier meal, pair with roasted vegetables or a simple tomato soup. Don’t forget the beverage pairing! A light Italian red wine like Chianti or a crisp lager beer makes for an incredible flavor combination that enhances the sandwich’s Mediterranean profile.

    Exciting Flavor Twists

    While the classic version is amazing, these sandwiches are incredibly adaptable to different flavor profiles. Create a Mediterranean twist by swapping the Italian meats for grilled chicken, adding feta cheese, olives, and a drizzle of tzatziki. For a spicy variation, incorporate calabrian chili paste into your dressing and add pickled jalapeños. My family’s current obsession is the breakfast grinder – with scrambled eggs, crispy bacon, and melted cheddar. The possibilities are endless, and each variation brings its own unique charm to the table!

    Storage & Troubleshooting Guide

    Make-Ahead and Leftovers

    These Baked Italian Grinder Sandwiches are perfect for meal prepping and storing for later enjoyment. Assemble them completely, then wrap individually in aluminum foil and refrigerate for up to 24 hours before baking. For leftovers, store in an airtight container for up to 2 days. The best reheating method is in a 300°F oven for about 10 minutes – this restores that wonderful crispy exterior. Avoid microwaving if possible, as it tends to make the bread soggy and ruins that perfect texture contrast we work so hard to achieve!

    Preventing Common Pitfalls

    The most common issue with Baked Italian Grinder Sandwiches is the dreaded soggy bottom! To prevent this, create a protective barrier by spreading a thin layer of butter or mayo on the inside of the bread before adding other ingredients. Another tip is to place moisture-rich ingredients like tomatoes in the center rather than directly against the bread. If your sandwiches are browning too quickly in the oven, simply tent them with foil for the first half of baking, then remove to allow for that perfect golden finish during the final minutes.

    Frequently Asked Questions

    Can I make Baked Italian Grinder Sandwiches vegetarian?

    Absolutely! Replace meats with grilled vegetables, portobello mushrooms, or plant-based Italian sausage. Add extra cheese varieties like fontina or mozzarella for richness, and don’t skimp on the pepperoncini for that signature tang.

    What’s the best temperature for baking Italian Grinder Sandwiches?

    Bake at 375°F for 12-15 minutes. This temperature allows the cheese to melt perfectly while giving the bread a golden exterior without burning. For extra crispiness, finish with 2 minutes under the broiler.

    Can I freeze these sandwiches before baking?

    Yes! Assemble the sandwiches, wrap individually in plastic wrap, then foil, and freeze for up to 1 month. Thaw in the refrigerator overnight before baking, adding 5-7 extra minutes to the baking time.

    How do I keep the bread from getting soggy?

    Toast the bread lightly before assembly and create a fat barrier with mayo, butter, or a layer of cheese directly against the bread. Drain wet ingredients like pepperoncini thoroughly before adding.

    What makes a sandwich officially a “grinder”?

    A grinder is traditionally a hot submarine sandwich originating from New England. Baked Italian Grinder Sandwiches feature Italian meats and cheeses on crusty bread that’s baked until hot and crispy, distinguishing them from cold subs.

    Final Thoughts

    These Baked Italian Grinder Sandwiches have earned their place in my regular recipe rotation for good reason – they’re the perfect blend of convenience and incredible flavor. There’s something magical about pulling that foil-wrapped package from the oven, unwrapping it to release a cloud of fragrant steam, and biting into those perfectly melded layers. I encourage you to make these your own by experimenting with different ingredients while keeping the essential technique intact. Don’t forget to share your creations on Pinterest – I’d love to see your personal spin on this family favorite!

  • Soft Baked Cheesy Pretzel Dogs: Irresistibly Gooey Snack Craze

    Soft Baked Cheesy Pretzel Dogs: Irresistibly Gooey Snack Craze

    Soft Baked Cheesy Pretzel Dogs: Irresistibly Gooey Snack Craze

    Soft Baked Cheesy Pretzel Dogs have completely transformed my game day snack rotation. There’s something magical about biting into that pillowy pretzel dough wrapped around a juicy hot dog, with melted cheese oozing from the center. I first made these for my nephew’s birthday party, and they disappeared faster than I could set them on the table! The combination of soft, chewy pretzel exterior with savory filling creates the ultimate comfort food that’s both nostalgic and utterly satisfying. Whether you’re hosting a movie night or need a crowd-pleaser for your next gathering, these cheesy pretzel dogs are guaranteed to impress.

    Recipe

    Why You’ll Love These Soft Baked Cheesy Pretzel Dogs

    Perfect Combination of Textures and Flavors

    The contrast of textures in these pretzel dogs is what makes them truly special. The exterior has that distinctive pretzel chew with a gorgeous amber sheen, while the inside remains pillow-soft. I love how the cheese melts into the hot dog, creating pockets of gooey goodness in every bite. The subtle tang from the baking soda bath gives these that authentic pretzel flavor that pairs perfectly with the savory hot dog. Plus, that sprinkling of coarse salt on top creates little bursts of flavor that elevate the entire experience. Trust me, the flavor combination is absolutely addictive!

    Simple Ingredients with Maximum Impact

    What I adore about these Soft Baked Cheesy Pretzel Dogs is how they transform basic pantry staples into something extraordinary. You’ll need just flour, yeast, water, butter, sugar, and salt for the dough, plus hot dogs and your favorite cheese for stuffing. I typically use cheddar, but pepper jack adds a lovely kick if you’re feeling adventurous! The magic happens in the baking soda bath, which gives the pretzel its distinctive flavor and beautiful brown crust. These humble ingredients work together to create something far greater than the sum of their parts—a truly impressive snack that looks like it came from a specialty bakery!

    Essential Tips & Tricks

    Mastering the Perfect Pretzel Dough

    The key to exceptional Soft Baked Cheesy Pretzel Dogs lies in the dough consistency. You want it slightly tacky but not sticky—it should feel smooth and elastic when properly kneaded. I’ve found that letting the dough rise until it’s doubled in size (about 45-60 minutes) creates the perfect texture. Don’t rush this step! If your kitchen is cold, place the dough in a turned-off oven with just the light on. The gentle warmth helps the yeast work its magic. When rolling out the dough strips, aim for even thickness to ensure consistent cooking. This attention to detail makes all the difference in achieving that perfect pretzel texture.

    The Secret to the Perfect Baking Soda Bath

    The baking soda bath is what transforms ordinary bread dough into true pretzel dough, giving it that distinctive flavor and beautiful brown exterior. Use a large, wide pot so you can easily maneuver the stuffed dogs. The water should be at a gentle simmer, not a rolling boil, which could damage your carefully wrapped dogs. Dip each pretzel dog for just 20-30 seconds—any longer and they’ll become too alkaline. After the bath, immediately place them on a parchment-lined baking sheet and add your toppings while the surface is still wet so they’ll stick. This quick dip is what gives you that authentic pretzel shop quality!

    Serving Ideas & Creative Variations

    Dipping Sauces That Elevate the Experience

    Nothing complements Soft Baked Cheesy Pretzel Dogs like an array of flavorful dips. My go-to combination includes honey mustard for tanginess, beer cheese for richness, and spicy ketchup for a kick. For something different, try a jalapeño ranch or buffalo sauce if you enjoy heat. I recently served these at a family gathering with a warm queso dip that had everyone asking for the recipe! The contrast between the warm, soft pretzel and cool, creamy dips creates a delightful sensory experience. You could even create a dipping station with small bowls of various sauces for guests to mix and match—it’s always a hit at parties.

    Creative Filling Variations to Try

    While the classic cheese-stuffed hot dog is delicious, don’t be afraid to experiment with fillings! Try wrapping the pretzel dough around bratwurst with sauerkraut for a German-inspired twist, or use chicken sausage with mozzarella and sun-dried tomatoes for an Italian flair. Vegetarian guests will love plant-based sausages stuffed with dairy-free cheese. For breakfast versions, wrap the dough around cooked breakfast sausage links with scrambled eggs and cheese. My personal favorite variation uses pepper jack cheese and sliced jalapeños for a spicy kick that’s absolutely irresistible. The possibilities are endless!

    Storage & Troubleshooting Guide

    Keeping Them Fresh and Reheating Properly

    To maintain the perfect texture, store any leftover Soft Baked Cheesy Pretzel Dogs in an airtight container in the refrigerator for up to 3 days. Avoid plastic wrap directly on the pretzels as it can make them soggy. When reheating, the oven is your best friend—preheat to 350°F and warm them for about 5-7 minutes until heated through. This restores that lovely contrast between the crusty exterior and soft interior. For a quick option, 20-30 seconds in the microwave works, though you’ll lose some crispness. I like to spritz them with a tiny bit of water before reheating to help restore moisture without making them soggy.

    Troubleshooting Common Issues

    If your pretzel dogs aren’t browning properly, the likely culprit is an ineffective baking soda bath. Make sure your solution is concentrated enough (⅓ cup baking soda to 5 cups water) and that the water is simmering. Pale pretzels might also result from insufficient egg wash—brush generously before baking. If the dough is cracking when you wrap the hot dogs, it’s likely too dry; add a sprinkle of water and knead briefly to incorporate. For dogs that unravel during baking, ensure you’re pinching the seams firmly and placing them seam-side down on the baking sheet. With these simple fixes, your pretzel dogs will come out perfectly every time!

    Frequently Asked Questions

    Can I make Soft Baked Cheesy Pretzel Dogs ahead of time?

    Yes! Prepare them up to the shaping stage, then refrigerate overnight. Bring to room temperature for 30 minutes, give them the baking soda bath, and bake fresh when needed. They’ll taste just as delicious!

    What’s the best cheese for stuffing pretzel dogs?

    Cheddar and American melt beautifully, while pepper jack adds spice. For best results, use block cheese cut into thin strips rather than pre-shredded, which contains anti-caking agents that affect melting.

    Can I freeze these pretzel dogs?

    Absolutely! Cool completely, wrap individually in plastic wrap, then foil, and freeze for up to 2 months. Thaw in the refrigerator overnight and reheat in a 350°F oven for 10-15 minutes.

    Why did my pretzel dogs split open during baking?

    This usually happens when the seam isn’t sealed properly. Make sure to pinch the edges firmly and place seam-side down on the baking sheet. Also, don’t overstuff with cheese.

    What if I don’t have a stand mixer for the dough?

    No problem! You can mix and knead the dough by hand. It takes about 8-10 minutes of kneading to develop the gluten properly for that perfect chewy pretzel texture.

    Final Thoughts

    These Soft Baked Cheesy Pretzel Dogs have become my signature party food for good reason—they consistently delight guests of all ages and disappear within minutes. The combination of soft pretzel exterior, juicy hot dog, and melty cheese creates a truly irresistible bite that’s both nostalgic and sophisticated. Whether you’re making them for game day, movie night, or just because it’s Tuesday, I promise they’ll bring smiles all around. Don’t forget to check out more crowd-pleasing recipes on Pinterest for your next gathering!