Author: Emily Carter

  • Fresh Pasta Salad Recipe That Will Wow Your Taste Buds!

    Fresh Pasta Salad Recipe That Will Wow Your Taste Buds!

    Fresh Pasta Salad Recipe That Will Wow Your Taste Buds!

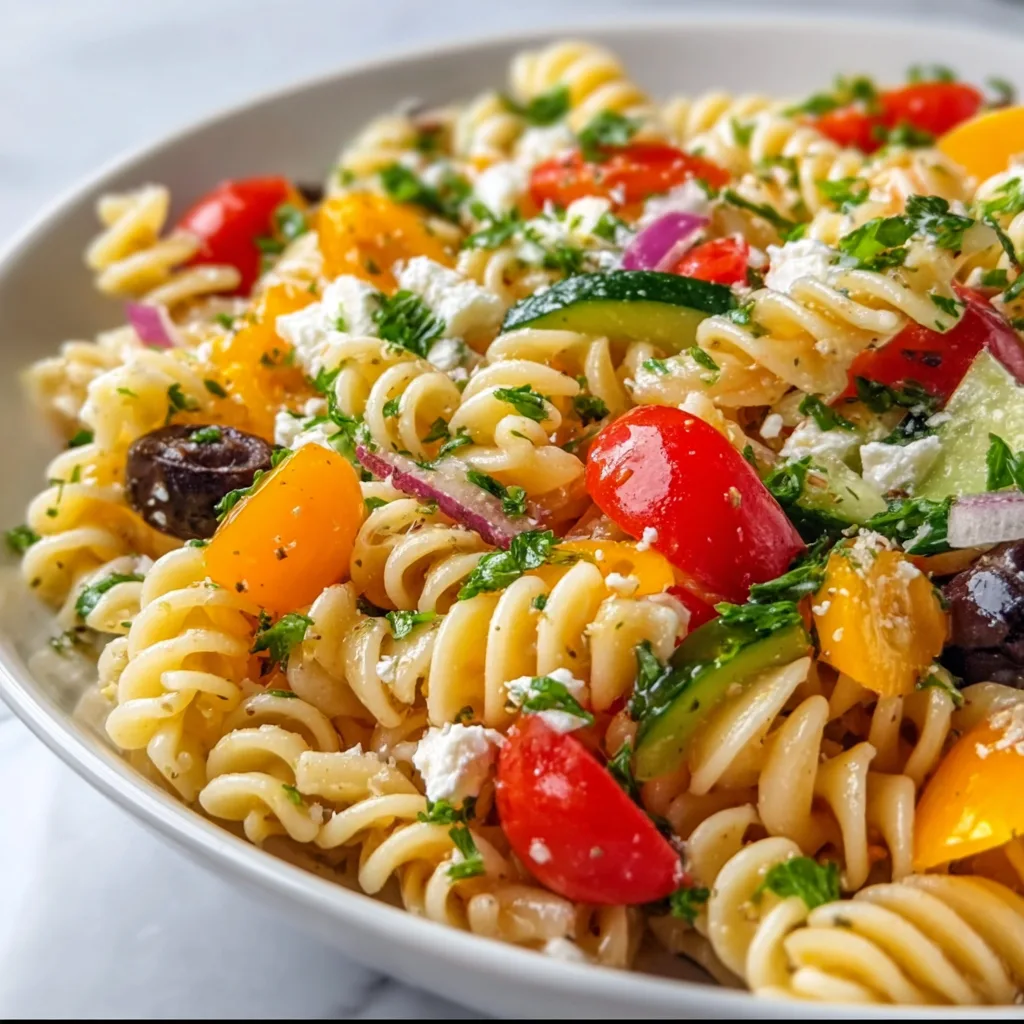
    Fresh pasta salad recipe is my ultimate summer savior—a vibrant medley of al dente pasta, crisp vegetables, and zesty dressing that never fails to brighten up any gathering. The first time I made this for my sister’s backyard party, it disappeared faster than I could refill my own plate! There’s something magical about the way the flavors meld together, creating that perfect balance of tangy, savory, and fresh. Whether you’re planning a picnic, need a quick lunch, or craving something refreshing for dinner, this pasta salad delivers big flavor with minimal effort. Let me show you how to create this colorful bowl of happiness that’s become my go-to recipe staple.

    Recipe

    Why You’ll Love This Fresh Pasta Salad Recipe

    Perfect Make-Ahead Option

    There’s nothing quite like opening the fridge to find a ready-made meal waiting for you. This fresh pasta salad recipe actually improves with time as the flavors marry together in the refrigerator. I love making a big batch on Sunday afternoons while my favorite playlist fills the kitchen. The pasta soaks up all those incredible flavors overnight, making Monday’s lunch something to look forward to rather than dread. Plus, it’s incredibly versatile—you can add protein like grilled chicken or chickpeas to transform it from side dish to satisfying main course without any extra fuss.

    Customizable to Your Taste

    One of the greatest joys of this fresh pasta salad recipe is how easily it adapts to whatever you’re craving or whatever’s in your fridge. Those cherry tomatoes starting to wrinkle? Toss them in! Cucumber looking lonely in the produce drawer? Chop it up! The base formula remains the same—pasta, veggies, dressing—but the specifics are entirely up to you. I’ve made Mediterranean versions with feta and olives, Italian-inspired ones with mozzarella and basil, and even spicy Southwest variations with corn and black beans. Your imagination is truly the only limit here.

    Essential Tips & Tricks

    Pasta Selection and Preparation

    Choosing the right pasta makes all the difference in your fresh pasta salad recipe. I always reach for medium-sized shapes with nooks and crannies that trap the dressing—think rotini, farfalle, or fusilli rather than long spaghetti or fettuccine. Always cook your pasta al dente (with a bit of bite) since it will continue to soften slightly as it absorbs the dressing. My non-negotiable step? Rinsing the pasta in cold water immediately after cooking. This stops the cooking process and prevents your pasta from becoming a mushy mess. Plus, a drizzle of olive oil after rinsing keeps those pieces perfectly separated.

    Dressing Development

    The dressing is the heart and soul of any fresh pasta salad recipe. I like to create a balance of flavors—something acidic (lemon juice or vinegar), something sweet (honey or maple syrup), something savory (Dijon mustard), and quality oil. Whisk these elements together until emulsified before pouring over your salad. My secret weapon? Adding a splash of the pasta cooking water to the dressing. The starchy water helps the dressing cling to every piece of pasta rather than pooling at the bottom of your bowl. For extra zing, try this alongside my dill pickle pasta salad for a fun contrast of flavors!

    Serving Ideas & Creative Variations

    Perfect Pairings

    This fresh pasta salad recipe works beautifully as both supporting actor and star of the show. For summer barbecues, I love serving it alongside grilled proteins—the cool, tangy salad provides the perfect counterpoint to smoky meats. For lighter meals, a scoop alongside a crusty bread and some hummus creates a satisfying lunch. The colors alone make it a standout on any buffet table! Last weekend, I paired it with my baked salmon and vibrant quinoa for a dinner party, and my guests couldn’t stop raving about how well they complemented each other.

    Seasonal Adaptations

    One of the joys of a versatile fresh pasta salad recipe is adapting it throughout the year. In summer, I load it with garden-fresh produce—juicy tomatoes, crisp cucumbers, and handfuls of herbs straight from my windowsill pots. Come fall, I pivot to roasted butternut squash, dried cranberries, and toasted pecans. Winter calls for heartier additions like roasted red peppers and artichoke hearts, while spring brings tender asparagus and sweet peas. The pasta provides a consistent canvas, but the seasonal vegetables keep the dish feeling new and exciting all year long.

    Storage & Troubleshooting Guide

    Maximizing Freshness

    To keep your fresh pasta salad recipe at its best, store it in an airtight container in the refrigerator for up to four days. I find glass containers work better than plastic for maintaining freshness and preventing any lingering odors. If you’re making this ahead for a party, hold back a small portion of the dressing to refresh the salad just before serving—this perks up the flavors instantly. For ingredients that might wilt or get soggy (like lettuce or avocado), consider adding those elements only to the portion you’ll be eating immediately rather than mixing them into the entire batch.

    Reviving Day-Old Pasta Salad

    Even the most perfect fresh pasta salad recipe might need a little help after sitting in the refrigerator overnight. The pasta continues to absorb dressing, sometimes leaving your once-vibrant salad a bit dry. My simple fix: keep a small jar of extra dressing in the fridge alongside your pasta salad. A quick drizzle and gentle toss brings everything back to life! Another trick I’ve discovered: adding a handful of fresh ingredients like cherry tomatoes or cucumber the next day introduces new texture and moisture. A sprinkle of fresh herbs or a squeeze of lemon juice can also wake up the flavors.

    Frequently Asked Questions

    Can I make this fresh pasta salad recipe gluten-free?

    Absolutely! Simply substitute your favorite gluten-free pasta. I recommend corn-rice blends as they hold their shape better than rice-only varieties. Just be sure to check all other ingredients for hidden gluten.

    How far in advance can I make pasta salad?

    You can prepare this salad up to 3 days ahead. For maximum freshness, store the dressing separately and combine a few hours before serving to allow flavors to meld without becoming soggy.

    What’s the best way to prevent pasta from sticking together?

    Rinse cooked pasta thoroughly with cold water, then toss with a tablespoon of olive oil while still in the colander. Add dressing while pasta is still slightly warm for better absorption.

    Can I add protein to make this a complete meal?

    Definitely! Grilled chicken, canned tuna, chickpeas, or cubed cheese are excellent additions that transform this side dish into a satisfying main course with minimal effort.

    How do I fix a pasta salad that’s too dry?

    If your salad seems dry after refrigeration, whisk together a quick mixture of olive oil, vinegar, and a pinch of salt. Add gradually while gently tossing until desired moisture is restored.

    Final Thoughts

    This fresh pasta salad recipe has become my reliable kitchen companion through countless gatherings, meal preps, and impromptu dinners. Its adaptability means it never gets boring, while its make-ahead nature makes it perfect for busy lives. I love watching friends’ faces light up when they taste that perfect balance of flavors—tangy, fresh, and satisfying all at once. Whether you’re a cooking novice or seasoned chef, this versatile dish deserves a spot in your regular rotation. Don’t forget to share your creations on Pinterest for inspiration!
  • Baked Salmon & Vibrant Quinoa: Irresistibly Healthy & Delicious!

    Baked Salmon & Vibrant Quinoa: Irresistibly Healthy & Delicious!

    Baked Salmon & Vibrant Quinoa: Irresistibly Healthy & Delicious!

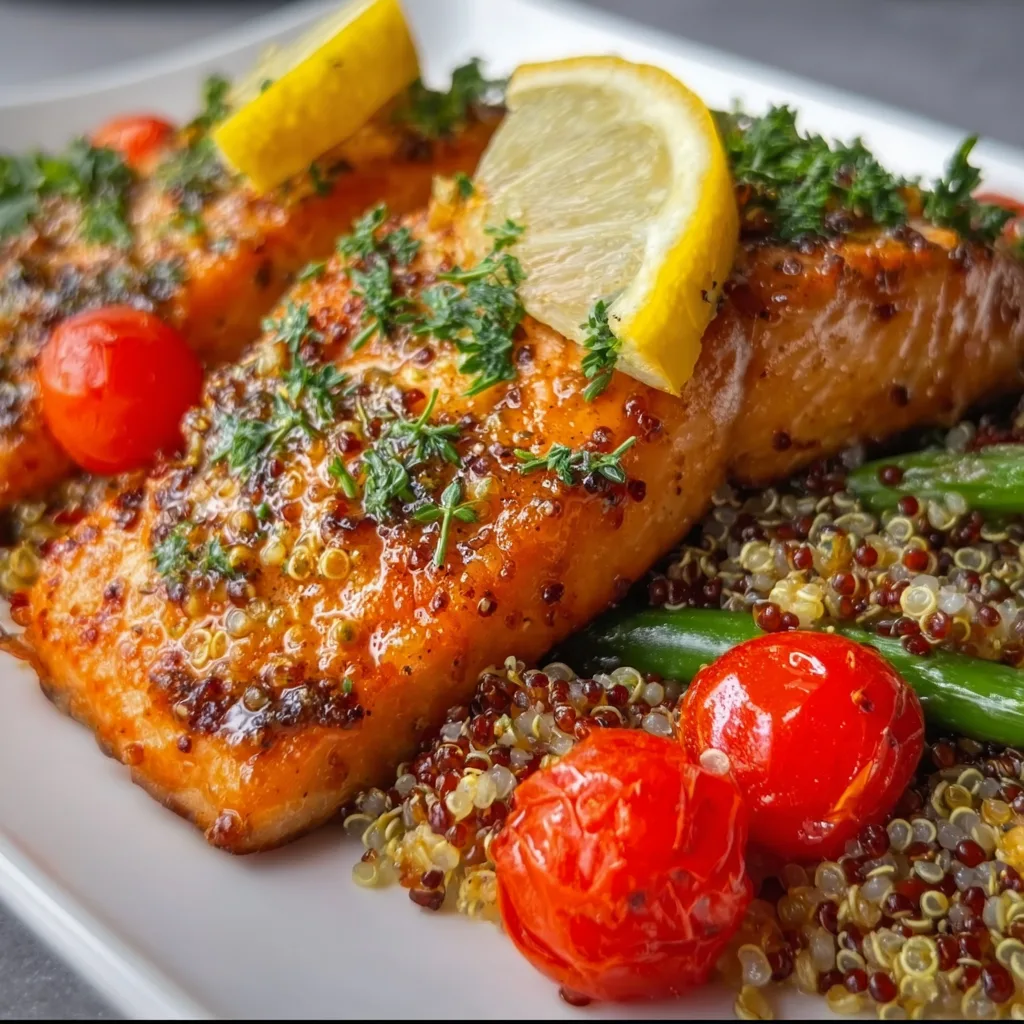
    Baked salmon and vibrant quinoa has become my ultimate weeknight savior when I want something that feels special without spending hours in the kitchen. The first time I made this dish, my kitchen filled with the most incredible aroma of herbs and lemon that had my partner wandering in from the living room asking what smelled so heavenly. There’s something magical about how the salmon’s rich oils mingle with the fluffy quinoa, creating a meal that’s both nourishing and indulgent. If you’re looking for a protein-packed dinner that delivers on flavor while keeping things light, this recipe is about to become your new favorite.

    Recipe

    Why You’ll Love This Baked Salmon and Vibrant Quinoa

    Perfect Balance of Flavors and Textures

    The magic of this dish lies in its beautiful contrast of textures and flavors. The salmon bakes to flaky perfection, with a slightly crisp exterior giving way to that buttery-soft interior that melts in your mouth. Meanwhile, the quinoa provides a subtle nuttiness and pleasing bite that complements the fish beautifully. I love how the bright citrus notes cut through the richness, while herbs like dill and parsley add freshness. The combination creates this symphony of flavors that somehow feels both sophisticated and comforting at the same time.

    Nutrient-Dense Powerhouse Meal

    This isn’t just a delicious meal—it’s practically a multivitamin on a plate! Salmon delivers those essential omega-3 fatty acids that support brain and heart health, while quinoa brings complete plant protein and fiber to the table. I started making this regularly during that post-holiday reset when I wanted something that felt cleansing but still satisfying. The vibrant rainbow of vegetables—think cherry tomatoes, cucumber, and bell peppers—adds antioxidants and phytonutrients that make this a truly balanced meal you can feel good about serving.

    Essential Tips & Tricks

    Perfecting Your Salmon

    The secret to restaurant-quality salmon is all in the timing. I’ve found that 12-15 minutes at 400°F works perfectly for most fillets, but the true test is when it flakes easily with a fork while still maintaining that luscious moisture. Pat your salmon dry before seasoning—this ensures a beautiful exterior rather than a steamed effect. My game-changing trick? A light brush of maple syrup or honey mixed with dijon mustard before baking. This creates a gorgeous glaze that caramelizes slightly in the oven, similar to my maple dijon roasted vegetables that everyone always raves about.

    Elevating Your Quinoa

    Quinoa can be bland if you don’t treat it right, but with a few simple steps, it becomes truly crave-worthy. Always rinse it thoroughly first to remove the natural saponins that can leave a bitter taste. Then, try toasting it in a dry pan for 2-3 minutes before adding liquid—this simple step develops a nutty flavor that transforms the grain. Instead of plain water, cook your quinoa in vegetable or chicken broth with a bay leaf. For this recipe, I fold in lemon zest, fresh herbs, and a splash of good olive oil right after cooking while it’s still warm, allowing the quinoa to absorb all those bright flavors.

    Serving Ideas & Creative Variations

    Beautiful Plating Suggestions

    I believe we eat with our eyes first, which is why I love creating a visually stunning presentation with this dish. Try serving the salmon atop a bed of the vibrant quinoa, then garnish with microgreens, lemon wedges, and a sprinkle of pomegranate seeds for jewel-like pops of color and tartness. For dinner parties, I’ll sometimes plate individual portions on large white plates, drizzling a quick herb oil around the edges. The contrast of the coral salmon against the multicolored quinoa creates a dish that looks like it came from a high-end restaurant but took you minimal effort.

    Exciting Flavor Variations

    The beauty of this recipe is how adaptable it is to different flavor profiles. For a Mediterranean twist, incorporate sun-dried tomatoes, olives, and feta into your quinoa, then top your salmon with a dollop of tzatziki. Feeling something spicier? Try a harissa glaze on the salmon and mix preserved lemon and pistachios into the quinoa. You could even go Asian-inspired with a ginger-soy glaze and sesame-studded quinoa with edamame. This versatility reminds me of how I adapt my creamy salmon bowl recipe to keep things interesting throughout the season.

    Storage & Troubleshooting Guide

    Proper Storage Solutions

    Leftover baked salmon and vibrant quinoa makes for the most luxurious next-day lunch! Store components separately in airtight containers to maintain their distinct textures and flavors. The salmon will keep for up to 2 days in the refrigerator, while the quinoa mixture stays fresh for 3-4 days. I prefer to enjoy the salmon cold rather than reheating, which can dry it out. For meal prep, you can freeze the cooked quinoa for up to 3 months—just thaw overnight in the refrigerator and refresh with a squeeze of lemon juice and a drizzle of olive oil before serving.

    Common Issues & Easy Fixes

    If your salmon turns out dry, you’ve likely overcooked it. Remember that salmon continues to cook slightly after removing from the oven due to residual heat. Next time, try reducing the cooking time by 2-3 minutes. For quinoa that’s too mushy, you may have used too much liquid or overcooked it. The perfect ratio is 1:1.5 (quinoa to liquid), and it should simmer gently rather than boil rapidly. If your finished dish lacks flavor, don’t be shy with acid—a generous squeeze of fresh lemon juice just before serving brightens everything and makes the flavors pop.

    Frequently Asked Questions

    Can I make baked salmon and vibrant quinoa ahead of time?

    Yes! Cook the quinoa up to 3 days ahead and store refrigerated. The salmon is best prepared fresh, but you can prep all seasonings and ingredients in advance for quick assembly.

    What’s the best type of salmon to use?

    Wild-caught salmon like sockeye or coho offers the best flavor and nutritional profile. However, good-quality farm-raised salmon works well too if that’s what’s available.

    How do I know when my salmon is perfectly cooked?

    The salmon should flake easily with a fork but still maintain a slightly translucent center. For a 1-inch thick fillet, this typically takes 12-15 minutes at 400°F.

    Can I substitute another grain for quinoa?

    Absolutely! Farro, bulgur wheat, or cauliflower rice all work beautifully. Just adjust cooking times according to your chosen grain’s requirements.

    What vegetables pair best with this dish?

    Asparagus, broccolini, or a simple side salad complement the baked salmon and quinoa perfectly. Roasting vegetables alongside the salmon saves time and adds depth.

    Final Thoughts

    This baked salmon and vibrant quinoa recipe has become a cornerstone in my kitchen for those nights when I want to nourish myself and my loved ones without spending hours cooking. There’s something deeply satisfying about creating a meal that balances flavor, nutrition, and visual appeal so effortlessly. I encourage you to make this recipe your own by playing with the seasonings and add-ins that speak to your taste buds. And don’t forget to check out more seafood inspiration on my Pinterest board for your next culinary adventure!

  • Shepherd’s Pie Soup Recipe That Warms Your Soul Instantly

    Shepherd’s Pie Soup Recipe That Warms Your Soul Instantly

    Shepherd’s Pie Soup Recipe That Warms Your Soul Instantly

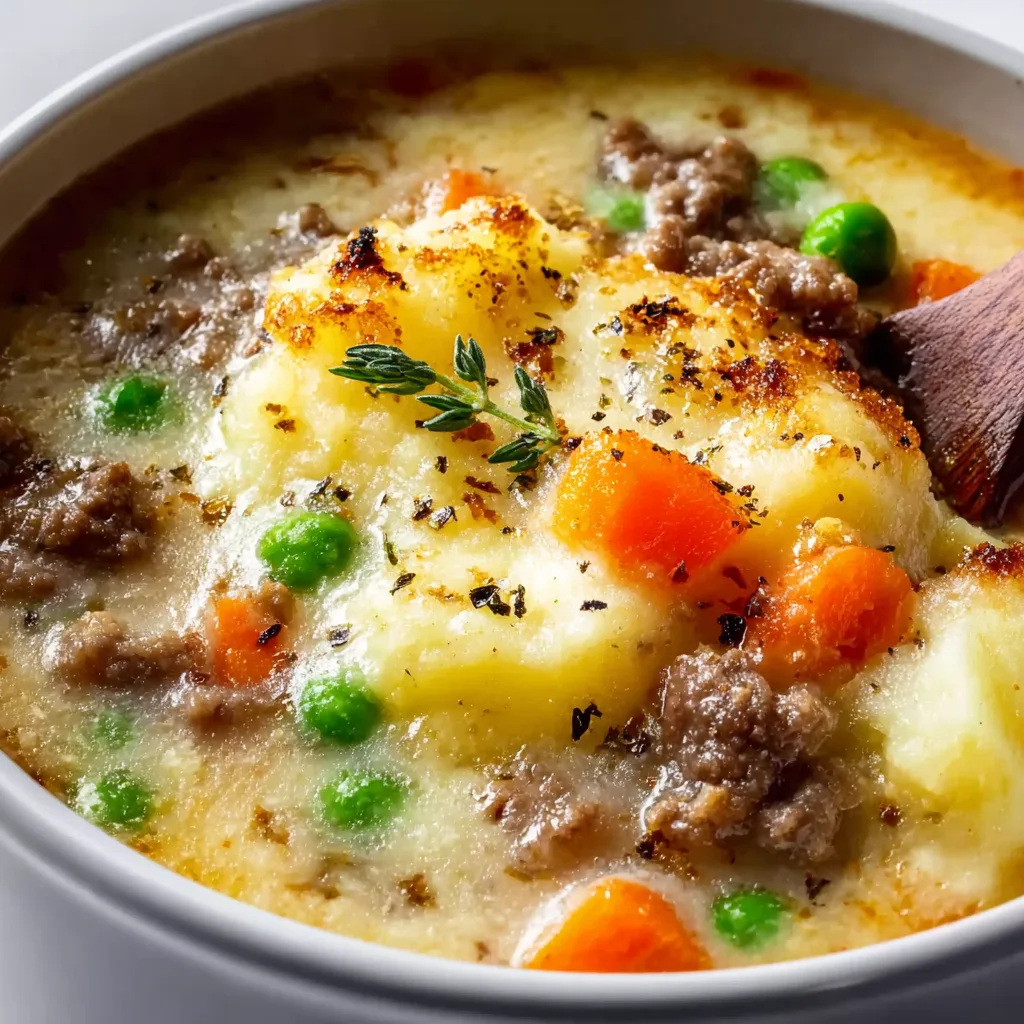
    Shepherd’s Pie Soup transforms the classic comfort dish into a hearty, spoonable delight that warms you from the inside out. The first time I made this soul-satisfying soup on a blustery winter evening, my kitchen filled with the most incredible aroma of herbs, beef, and vegetables simmering together. There’s something magical about how this recipe captures all the familiar flavors of traditional shepherd’s pie—savory ground meat, sweet carrots, earthy peas—but in a wonderfully cozy soup form. It’s like wrapping yourself in your favorite blanket, only it’s edible! Perfect for those nights when you crave comfort but want something a bit lighter than the classic casserole version found in my beef and barley soup recipe.

    Recipe

    Why You’ll Love This Shepherd’s Pie Soup

    A Complete Meal in One Pot

    This Shepherd’s Pie Soup isn’t just delicious—it’s practical. Everything simmers together in one glorious pot, meaning fewer dishes and more time to enjoy your evening. The rich broth becomes infused with rosemary and thyme, while tender chunks of potato provide that satisfying heartiness that makes shepherd’s pie so beloved. I love watching my family’s faces light up as they dip their spoons in and discover all the layers of flavor. Plus, with protein, vegetables, and starch all swimming together, you’ve got a complete nutritional profile without any fuss.

    Versatile and Adaptable

    What I adore about this Shepherd’s Pie Soup is how easily it bends to your preferences. Traditional ground lamb gives the most authentic flavor, but ground beef works beautifully too. Vegetarians can swap in lentils or a plant-based meat alternative without sacrificing that rich, satisfying texture. My neighbor tried it with ground turkey and added a splash of Worcestershire sauce for depth—she said it was a hit with her picky teenagers! The vegetables are equally flexible; I’ve tossed in leftover roasted Brussels sprouts, corn, or whatever was hiding in my produce drawer, and it’s always turned out wonderfully.

    Essential Tips & Tricks

    Building Deep Flavor Foundations

    The secret to an exceptional Shepherd’s Pie Soup lies in layering flavors from the very beginning. Don’t rush the browning of your meat—those caramelized bits on the bottom of the pot are pure gold for your soup’s flavor profile. I learned this the hard way after once hurrying through this step! Take your time sautéing the onions until they’re translucent and slightly golden. A splash of red wine (optional but recommended) helps deglaze the pan and adds wonderful complexity. For an extra umami boost, add a tablespoon of tomato paste and let it cook for a minute before adding your liquids, just like in my French onion short rib soup.

    Perfecting the Texture

    Achieving the ideal texture in your Shepherd’s Pie Soup requires a bit of finesse with the potatoes and thickening. Choose waxy potatoes like Yukon Golds that hold their shape when simmered. Cut them into uniform 1/2-inch cubes so they cook evenly. For the signature shepherd’s pie thickness, you have options: a simple flour slurry works beautifully, but for a more authentic touch, I sometimes mash a few potato cubes against the side of the pot. This releases their starch naturally into the broth. The soup should coat your spoon nicely without being gluey—think silky and substantial rather than thick and pasty.

    Serving Ideas & Creative Variations

    Delightful Garnishes

    Elevate your Shepherd’s Pie Soup with thoughtful toppings that echo the classic casserole version. My favorite way to serve this is with a small dollop of mashed potatoes floating on top—it’s like the best part of shepherd’s pie in every spoonful! Crispy fried onions add wonderful texture contrast, while a sprinkle of sharp cheddar slowly melting into the hot soup creates pockets of creamy goodness. For special occasions, I’ve been known to pipe rosettes of mashed potatoes onto each bowl and run them under the broiler for a minute, creating a beautiful golden crust that makes everyone reach for their phones to snap a picture before digging in.

    Seasonal Adaptations

    This Shepherd’s Pie Soup transforms beautifully with the changing seasons. In spring, I lighten it up with fresh peas, tender asparagus tips, and a handful of chopped fresh herbs. Summer versions welcome zucchini and fresh corn kernels. Fall calls for diced butternut squash and a hint of nutmeg. Winter versions get heartier with extra root vegetables and perhaps a splash of cream. During the holidays, I serve it alongside my Italian herbs and cheese bread for a meal that feels special yet comforting. The versatility makes this soup a year-round favorite that never feels repetitive.

    Storage & Troubleshooting Guide

    Proper Storage Techniques

    Shepherd’s Pie Soup actually improves with time as the flavors meld together, making it perfect for meal prep Sundays. Allow the soup to cool completely before transferring to airtight containers—I divide mine into single-serving portions for easy lunches. It keeps beautifully in the refrigerator for up to 4 days. For longer storage, freeze for up to 3 months. One tip I’ve learned: the potatoes can sometimes get a bit mealy after freezing, so if you know you’ll be freezing a batch, consider slightly undercooking them. When reheating, do so gently over medium-low heat, stirring occasionally to prevent scorching.

    Fixing Common Issues

    Even experienced cooks encounter soup challenges! If your Shepherd’s Pie Soup seems too thin or watery, don’t panic. Make a quick slurry with 1 tablespoon cornstarch and 2 tablespoons cold water, then stir it into the simmering soup until it reaches your desired thickness. Conversely, if it’s too thick, gradually add more broth until you reach the perfect consistency. Bland flavor is easily fixed with a splash of Worcestershire sauce, a teaspoon of Better Than Bouillon, or my secret weapon—a parmesan rind simmered in the broth. Remember that potatoes absorb salt, so you may need to adjust seasoning after they’ve cooked through.

    Frequently Asked Questions

    Can I make Shepherd’s Pie Soup in a slow cooker?

    Absolutely! Brown the meat and sauté the vegetables first, then transfer everything to your slow cooker. Cook on low for 6-7 hours or high for 3-4 hours, adding the peas in the last 30 minutes.

    What’s the difference between Shepherd’s Pie Soup and Cottage Pie Soup?

    Traditional Shepherd’s Pie Soup uses ground lamb, while Cottage Pie Soup uses ground beef. Both are delicious, so use whichever meat you prefer or have on hand.

    Can I make this soup vegetarian?

    Yes! Substitute the meat with lentils, mushrooms, or plant-based ground meat alternatives. Use vegetable broth instead of beef broth for a fully vegetarian version.

    How do I make this soup gluten-free?

    Simply use cornstarch instead of flour for thickening, and ensure your broth is certified gluten-free. The rest of the ingredients are naturally gluten-free.

    How can I make my Shepherd’s Pie Soup creamier?

    For a creamier Shepherd’s Pie Soup, add 1/4 cup of heavy cream or a dollop of sour cream just before serving. You can also increase the amount of mashed potatoes.

    Final Thoughts

    Shepherd’s Pie Soup brings together the best of two worlds—the comforting flavors of a classic casserole with the soothing qualities of a hearty soup. It’s become my go-to recipe when I need something nourishing yet simple, impressive yet unfussy. There’s a reason this dish has earned a permanent spot in my winter rotation! I’d love to see your version of this versatile soup—tag me on Pinterest if you give it a try. Whether you stick to tradition or make it entirely your own, this Shepherd’s Pie Soup promises to deliver comfort by the spoonful.

  • Bacon Alfredo Pizza: Irresistibly Creamy, Crispy Flavor Explosion!

    Bacon Alfredo Pizza: Irresistibly Creamy, Crispy Flavor Explosion!

    Bacon Alfredo Pizza: Irresistibly Creamy, Crispy Flavor Explosion!

    Bacon Alfredo Pizza combines two of life’s greatest pleasures into one indulgent masterpiece. The first time I made this for my family, the kitchen filled with the intoxicating aroma of sizzling bacon and garlic-infused alfredo sauce. My husband actually wandered in from the garage, following his nose! There’s something magical about the way the creamy sauce replaces traditional tomato, creating a rich base that perfectly complements the smoky bacon. If you’re looking to elevate your pizza night, this recipe transforms ordinary ingredients into something truly special. Let me show you how to create this crowd-pleaser that’s become a Friday night tradition in our home.

    Recipe

    Why You’ll Love This Bacon Alfredo Pizza

    A Perfect Balance of Flavors

    The magic of Bacon Alfredo Pizza lies in its perfect harmony of flavors. The creamy, garlic-infused alfredo sauce creates a luxurious base that’s worlds apart from traditional tomato sauce. When topped with crispy bacon pieces, the smoky saltiness cuts through the richness in the most satisfying way. I love adding a blend of mozzarella and parmesan cheeses that melt into gooey perfection, creating those Instagram-worthy cheese pulls. The first bite delivers a burst of complementary flavors that dance across your palate – creamy, salty, savory, and utterly irresistible.

    Quick and Impressive for Any Occasion

    This Bacon Alfredo Pizza transforms an ordinary weeknight into something special in just 30 minutes. It’s become my go-to when I want to impress guests without spending hours in the kitchen. The elegant white sauce base elevates it beyond casual pizza night fare, making it perfect for dinner parties or date nights. I’ve served this at everything from game day gatherings to impromptu dinner guests, and it never fails to draw compliments. The beauty is in its simplicity – familiar ingredients coming together in an unexpected way that feels both comforting and sophisticated.

    Essential Tips & Tricks

    Perfecting Your Alfredo Base

    The secret to an unforgettable Bacon Alfredo Pizza starts with the sauce. I recommend making your alfredo from scratch – it takes just minutes and tastes infinitely better than store-bought. The key is to gently simmer heavy cream with minced garlic before whisking in freshly grated parmesan until silky smooth. For the ultimate flavor boost, add a tablespoon of the bacon drippings to your sauce! Spread the alfredo in a thin, even layer, leaving a half-inch border for the crust. This prevents the dreaded soggy-center situation that can happen with cream-based pizzas. Trust me, this extra step makes all the difference.

    The Art of Bacon Preparation

    For the best Bacon Alfredo Pizza experience, the bacon technique matters more than you might think. I prefer cooking the bacon until it’s just shy of your desired crispness, as it will continue cooking in the oven. Chop it into small, bite-sized pieces that distribute evenly across each slice. For a flavor revelation, try using a mix of regular and peppered bacon! If you’re short on time, pre-cooked bacon bits can work in a pinch, though nothing beats freshly cooked bacon. Remember to blot away excess grease with paper towels to prevent a greasy pizza.

    Serving Ideas & Creative Variations

    Perfect Pairings for Your Pizza

    Bacon Alfredo Pizza calls for sides that complement its richness without overwhelming it. I love serving it with a bright, acidic salad – something with arugula, lemon vinaigrette, and perhaps some cherry tomatoes to cut through the creaminess. For a heartier meal, garlic knots or breadsticks make excellent companions for dipping into extra alfredo sauce. If you’re hosting, consider starting with antipasto skewers or a light bruschetta. For beverages, a crisp white wine like Pinot Grigio or a light beer perfectly balances the pizza’s decadent flavors.

    Exciting Twist Ideas

    While classic Bacon Alfredo Pizza is divine, don’t be afraid to play with variations! My family goes wild for the chicken bacon ranch version – just add shredded rotisserie chicken and a drizzle of ranch dressing after baking. For vegetable lovers, caramelized onions and sautéed mushrooms add earthy depth. Spinach and artichoke hearts transform it into a dip-inspired pizza that disappears at parties. For heat seekers, sprinkle red pepper flakes or add jalapeños before baking. My personal favorite twist is adding thinly sliced pears and a drizzle of honey after baking – the sweet-savory combination is unexpectedly magical.

    Storage & Troubleshooting Guide

    Keeping Leftovers Fresh

    Bacon Alfredo Pizza leftovers require proper storage to maintain their deliciousness. Allow the pizza to cool completely before refrigerating to prevent condensation that leads to sogginess. I prefer storing individual slices in airtight containers rather than stacking them, which helps preserve the texture. Leftovers will keep for up to 3 days in the refrigerator. For reheating, skip the microwave which makes the crust rubbery. Instead, use a skillet on medium-low heat with a lid, or a 350°F oven for 5-10 minutes until warmed through and the cheese is melty again.

    Solving Common Pizza Problems

    Even experienced home cooks encounter pizza challenges! If your crust turns out soggy, try pre-baking the crust for 5-7 minutes before adding toppings. For alfredo sauce that’s too thick, gradually thin it with a splash of milk until it reaches a spreadable consistency. If it’s too thin, simmer a few minutes longer or add a pinch more parmesan. Burnt bacon can be avoided by adding it halfway through the baking time instead of at the beginning. And if your cheese isn’t browning nicely, a quick minute under the broiler works wonders – just watch it carefully to prevent burning!

    Frequently Asked Questions

    Can I make Bacon Alfredo Pizza ahead of time?

    Yes! Prepare the components separately – cook bacon, make alfredo sauce, and shred cheese up to 2 days ahead. Store refrigerated in separate containers, then assemble and bake when ready to serve.

    What’s the best cheese for Bacon Alfredo Pizza?

    A combination of mozzarella for stretch and parmesan for flavor works best. For extra richness, add a sprinkle of fontina or provolone. Avoid pre-shredded cheese as it contains anti-caking agents that prevent proper melting.

    Can I use store-bought alfredo sauce?

    Absolutely! While homemade delivers the best flavor, a quality jarred alfredo works in a pinch. Enhance it with fresh garlic and a sprinkle of parmesan before spreading on your crust.

    Is Bacon Alfredo Pizza suitable for freezing?

    Yes, but freeze before baking for best results. Assemble on a parchment-lined baking sheet, freeze until solid, then wrap tightly. Bake from frozen, adding 5-7 minutes to the cooking time.

    What’s the secret to a crispy crust with Bacon Alfredo Pizza?

    Preheat your oven with a pizza stone or inverted baking sheet at 475°F for at least 30 minutes. This high heat creates a crispy bottom crust that supports the creamy toppings without getting soggy.

    Final Thoughts

    This Bacon Alfredo Pizza has become more than just a meal in our house—it’s an experience we look forward to sharing. There’s something magical about the contrast between the creamy alfredo base and the smoky bacon that keeps everyone coming back for seconds. Whether you’re cooking for a special occasion or simply elevating your weeknight dinner rotation, this recipe delivers restaurant-quality results with minimal effort. I’d love to see your creations on Pinterest if you give it a try! Remember, the best pizzas are made with love and a little creativity, so don’t be afraid to make this Bacon Alfredo Pizza your own.

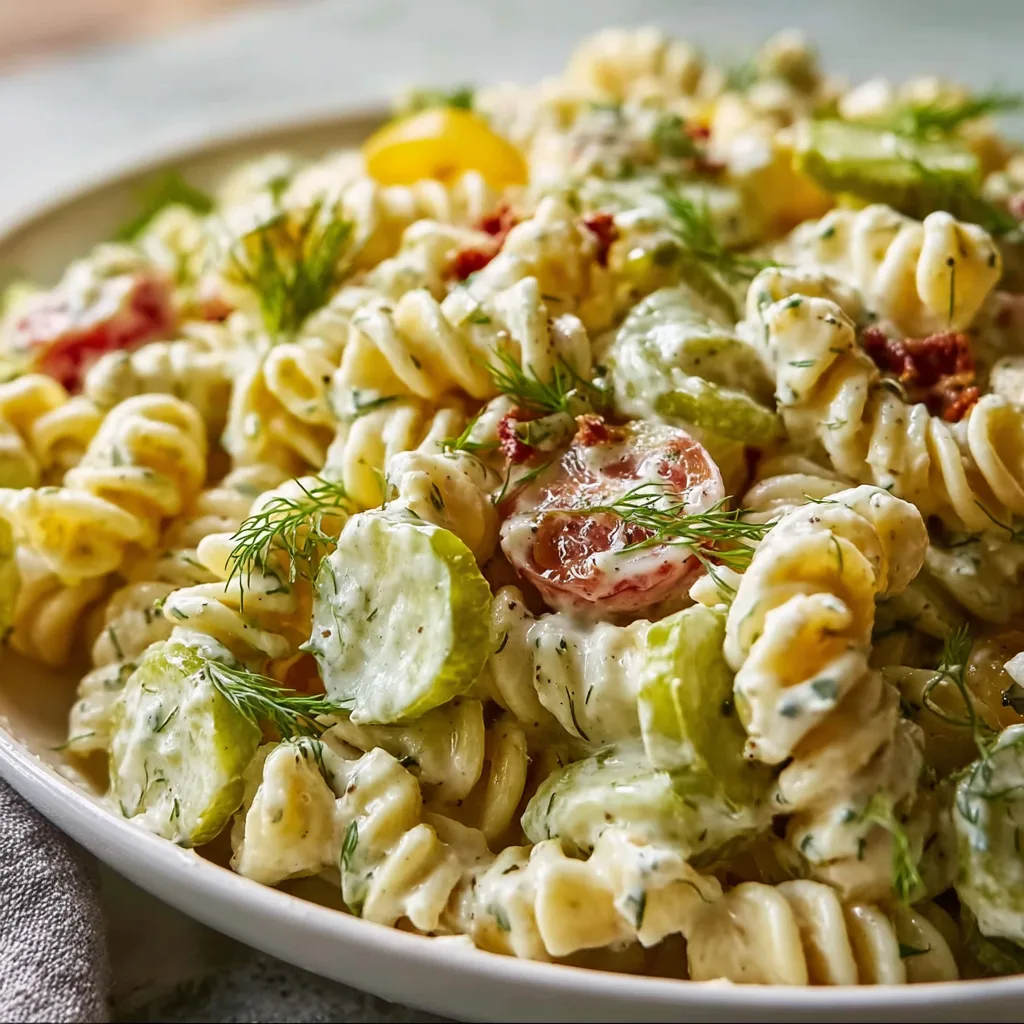
  • Dill Pickle Pasta Salad That Will Blow Your Mind!

    Dill Pickle Pasta Salad That Will Blow Your Mind!

    Dill Pickle Pasta Salad That Will Blow Your Mind!

    Dill Pickle Pasta Salad is my ultimate potluck superstar that consistently disappears within minutes at every gathering. The perfect balance of creamy, tangy, and crunchy elements creates an irresistible combination that pickle lovers absolutely dream about. I discovered this recipe during a summer cookout at my sister’s lake house, where it sparked a friendly competition for the last scoop. The bold pickle flavor pairs beautifully with the creamy dressing, creating a refreshing side dish that stands out from ordinary pasta salads. Trust me, this will become your new go-to for family gatherings and neighborhood potlucks!

    Recipe

    Why You’ll Love This Dill Pickle Pasta Salad

    Perfect Balance of Flavors and Textures

    The magic of this Dill Pickle Pasta Salad lies in its incredible flavor harmony. Every bite delivers the tangy zip from pickle juice, creamy richness from the dressing, and satisfying chew from perfectly cooked pasta. The diced pickles provide bursts of briny goodness that wake up your taste buds. I love how the creaminess coats each pasta piece while still allowing the dill and garlic notes to shine through. The textures play together beautifully – tender pasta, crunchy pickle bits, and that silky dressing create a sensory experience that makes this simple dish feel special.

    Make-Ahead Convenience

    One of my favorite things about this Dill Pickle Pasta Salad is how it actually improves with time in the refrigerator. Unlike many dishes that deteriorate, this salad develops deeper, more complex flavors as it chills. I often make it the night before a gathering, which not only saves me precious day-of prep time but results in a more flavorful dish. The pasta absorbs some of the tangy dressing, the dill infuses everything with its herbaceous notes, and all the ingredients get acquainted in the coolness of your fridge. It’s meal prep magic at its finest!

    Essential Tips & Tricks

    Pasta Selection and Preparation

    Choosing the right pasta makes all the difference in your Dill Pickle Pasta Salad. I recommend short, sturdy shapes like rotini, farfalle, or my personal favorite – cavatappi. These shapes hold the creamy dressing in their nooks and crannies, ensuring flavor in every bite. Always cook your pasta just past al dente (about 1 minute longer than package directions) since it will firm up slightly when chilled. Don’t forget to rinse under cold water immediately after cooking to stop the cooking process and remove excess starch. This prevents your pasta from becoming gummy and sticking together in your creamy chicken salad.

    The Secret to the Perfect Dressing

    The dressing is truly the heart of this Dill Pickle Pasta Salad. For the creamiest, most flavorful results, use a combination of mayonnaise and sour cream as your base. The mayo provides richness while the sour cream adds a pleasant tanginess. Don’t skimp on the pickle juice! That briny liquid is liquid gold, infusing the entire dressing with authentic pickle flavor. I always add a splash more than recipes typically call for. Fresh dill is non-negotiable here – the dried version simply can’t deliver the same bright, herbaceous punch that makes this salad special.

    Serving Ideas & Creative Variations

    Perfect Pairings for Any Occasion

    Dill Pickle Pasta Salad shines as a versatile side that complements almost any main dish. Serve it alongside grilled meats like burgers, hot dogs, or my favorite pairing – barbecue chicken. The tangy, creamy nature of the salad balances beautifully with smoky, charred flavors. For potlucks, place it next to other classic sides like baked mayonnaise parmesan chicken for a crowd-pleasing spread. I’ve even served smaller portions as a starter before a light summer dinner. The bright, zesty flavor profile makes it especially perfect for outdoor gatherings where refreshing dishes are appreciated.

    Exciting Mix-In Options

    While the classic version is delicious, don’t be afraid to customize your Dill Pickle Pasta Salad with creative add-ins. For protein, try adding diced ham, shredded chicken, or cubed cheese like sharp cheddar or pepper jack. Vegetables add wonderful texture and nutrition – consider diced bell peppers, halved cherry tomatoes, or thinly sliced radishes for crunch. For an extra dimension of flavor, sprinkle in some everything bagel seasoning or red pepper flakes. My personal favorite variation includes chopped hard-boiled eggs and crispy bacon bits, transforming it into a hearty main dish salad.

    Storage & Troubleshooting Guide

    Keeping Your Salad Fresh

    For maximum freshness, store your Dill Pickle Pasta Salad in an airtight container in the refrigerator for up to 3-4 days. The flavors actually improve during the first 24 hours as everything melds together. If you notice the salad drying out slightly after a day or two, simply stir in a tablespoon of pickle juice or a dollop of mayo to refresh the creaminess. Never leave this salad at room temperature for more than 2 hours due to the mayo content. For picnics or outdoor events, keep it chilled in a cooler with ice packs or serve it in a bowl nestled inside another bowl filled with ice.

    Fixing Common Issues

    If your Dill Pickle Pasta Salad seems too dry, the pasta has likely absorbed much of the dressing. Simply mix in additional reserved dressing (I always make extra for this reason) or a quick mixture of mayo, sour cream, and pickle juice. For a salad that’s too wet or soupy, add more pasta or fold in a handful of finely diced vegetables to absorb excess moisture. If the pickle flavor is too intense, balance it with a teaspoon of honey or a sprinkle of sugar to tame the tanginess. Too bland? Add more pickle juice, fresh dill, and a pinch of garlic powder.

    Frequently Asked Questions

    Can I make Dill Pickle Pasta Salad ahead of time?

    Absolutely! This salad actually tastes better when made 4-24 hours ahead. The flavors meld beautifully as it chills, and the pasta absorbs some of the tangy dressing.

    What’s the best pasta shape to use?

    Short pasta shapes with ridges or curves work best – rotini, farfalle, or cavatappi. They catch and hold the creamy dressing in their nooks and crannies.

    Can I use sweet pickles instead of dill pickles?

    You can, but it will significantly change the flavor profile. Sweet pickles create a different salad altogether – delicious, but not a traditional Dill Pickle Pasta Salad.

    How can I make this recipe healthier?

    Use Greek yogurt in place of some or all of the mayonnaise, choose whole wheat pasta, and add extra vegetables like bell peppers, tomatoes, and cucumbers.

    What protein goes well with this salad?

    Grilled chicken, ham, turkey, or even tuna complement the tangy flavors perfectly. For vegetarians, add chickpeas or cubed firm tofu.

    Final Thoughts

    This Dill Pickle Pasta Salad has become my signature dish for good reason – it’s uniquely flavorful, incredibly versatile, and surprisingly simple to make. The combination of tangy pickles, creamy dressing, and perfectly cooked pasta creates something truly special that stands out from ordinary side dishes. Whether you’re a pickle enthusiast or just looking for something different to bring to your next gathering, this recipe delivers bold flavor and crowd-pleasing appeal. Don’t be surprised when friends start requesting “your” Dill Pickle Pasta Salad for every event! Find more delicious recipes on Pinterest.

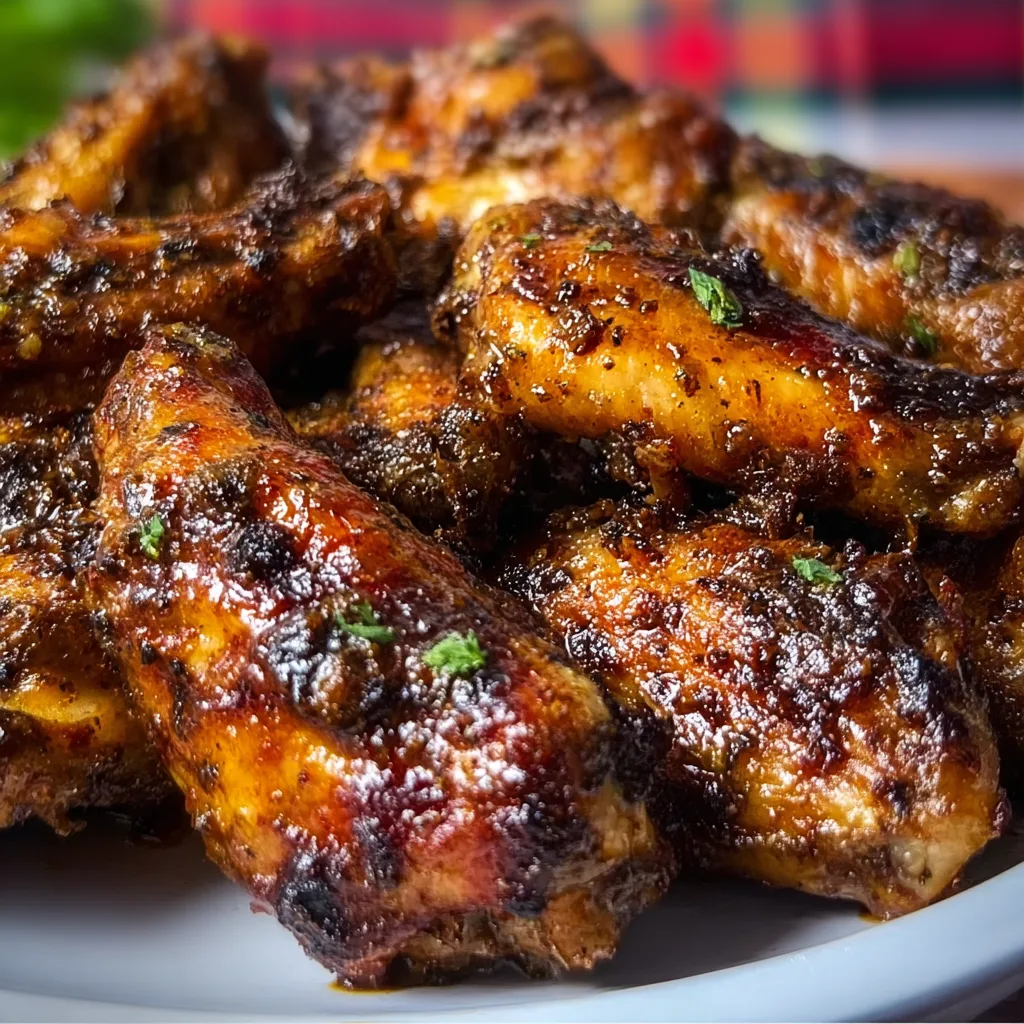
  • Baked Jamaican Jerk Chicken Wings That Will Blow Your Mind!

    Baked Jamaican Jerk Chicken Wings That Will Blow Your Mind!

    Baked Jamaican Jerk Chicken Wings That Will Blow Your Mind!

    Baked Jamaican Jerk Chicken Wings bring the vibrant flavors of the Caribbean straight to your dinner table without the hassle of firing up the grill! These wings capture that perfect balance of spicy, sweet, and smoky that makes jerk seasoning so irresistible. I discovered my love for jerk chicken during a trip to Jamaica years ago, and I’ve been perfecting this oven-baked version ever since. The aroma that fills your kitchen as these wings bake is absolutely transportive – close your eyes and you might just hear ocean waves! If you love bold flavors like I do, these wings will quickly become a staple in your recipe collection.

    Recipe

    Why You’ll Love This Baked Jamaican Jerk Chicken Wings

    Perfect Balance of Heat and Flavor

    There’s something magical about the way authentic jerk seasoning dances on your taste buds. These Baked Jamaican Jerk Chicken Wings deliver that perfect harmony of scotch bonnet heat, warm allspice, bright thyme, and sweet brown sugar. What I adore most is how the oven-baking method allows the marinade to caramelize, creating sticky, flavorful edges while keeping the inside juicy. The heat level is customizable too – dial it up for spice lovers or tone it down for family meals. You get all the complex flavors of traditional jerk without having to manage a charcoal fire or smoke up your kitchen!

    Easier Than You Think

    Don’t let the complex flavor profile fool you – these Baked Jamaican Jerk Chicken Wings are surprisingly simple to make! The marinade comes together in just minutes with a quick blitz in the blender. Most of the ingredients are pantry staples, and the hands-on time is minimal. I love that I can prep these wings the night before, letting them marinate while I sleep, then just pop them in the oven when I’m ready. The oven does all the work, transforming them into crispy, caramelized perfection. It’s the perfect recipe for entertaining – impressive flavor with minimal effort!

    Essential Tips & Tricks

    Nailing the Marinade

    The soul of great Baked Jamaican Jerk Chicken Wings lies in the marinade. For authentic flavor, use fresh ingredients whenever possible – especially thyme, ginger, and garlic. If you can find scotch bonnet peppers, they provide the traditional heat, but habaneros make a good substitute. Don’t skip the overnight marinating step; those 8+ hours allow the acids to tenderize the meat while the flavors penetrate deeply. Make small slits in the chicken wings before marinating to help the flavors reach deeper. The longer you marinate, the more pronounced the jerk flavor will be – I’ve gone up to 24 hours with amazing results!

    Perfect Baking Technique

    The key to crispy exterior and juicy interior is all in the baking method. Line your baking sheet with parchment paper (not foil – it sticks!) and use a rack if you have one to elevate the wings for even cooking. Start with a hot oven (425°F) for the first 15 minutes to kick-start browning, then reduce to 375°F to finish cooking without burning the sugars in the marinade. Baste halfway through with reserved marinade that you’ve boiled for food safety.

    For extra caramelization, brush with a little honey mixed with jerk sauce during the last 5 minutes or give them a quick broil – just watch carefully to avoid burning! These would also be fantastic in the air fryer for extra crispiness.

    Serving Ideas & Creative Variations

    Perfect Pairings

    These Baked Jamaican Jerk Chicken Wings shine as the star of your meal, but the right sides elevate the experience. Traditional Caribbean accompaniments like coconut rice and beans or fried plantains create an authentic meal. I love serving them with a cooling cucumber salad to balance the heat – the contrast is divine! A bright mango salsa adds sweetness that complements the spice perfectly. For drinks, nothing beats a cold Red Stripe beer or a rum punch. If you’re serving these at a party, provide plenty of napkins and perhaps some cooling yogurt-based dip on the side. The wings pair beautifully with other Caribbean-inspired dishes like blackened chicken for a complete feast.

    Exciting Flavor Twists

    While traditional jerk seasoning is incredible, don’t be afraid to put your own spin on these Baked Jamaican Jerk Chicken Wings! Add a pineapple twist by incorporating crushed pineapple into your marinade for tropical sweetness. For a fusion approach, mix in some soy sauce and ginger for an Asian-Jamaican hybrid that’s absolutely delicious. Coconut milk makes a creamy addition that tempers the heat while adding richness. For a citrus variation, add orange zest and juice to brighten the flavor profile. If you’re feeling adventurous, a touch of dark rum in the marinade adds complexity and helps tenderize the meat even more. Each variation maintains the jerk essence while creating a unique experience!

    Storage & Troubleshooting Guide

    Keeping Leftovers Fresh

    Properly stored, these Baked Jamaican Jerk Chicken Wings make fantastic leftovers! Allow wings to cool completely before transferring to airtight containers in the refrigerator, where they’ll keep for 3-4 days. For longer storage, freeze the wings on a baking sheet until solid, then transfer to freezer bags – they’ll maintain quality for about 3 months. When reheating refrigerated wings, the oven at 350°F for 10-15 minutes works best to restore crispiness. For frozen wings, thaw overnight in the refrigerator before reheating. Microwaving works in a pinch but sacrifices texture. I sometimes chop leftover wings and add them to salads or wraps for quick lunches with built-in flavor!

    Solving Common Problems

    If your Baked Jamaican Jerk Chicken Wings aren’t turning out perfectly, a few simple fixes can help! For wings that aren’t crispy enough, make sure you’re patting them completely dry before applying marinade, and consider a light dusting of baking powder in your marinade for extra crispiness. If they’re too spicy, serve with cooling elements like coconut rice or yogurt sauce, or reduce the hot peppers next time. For wings that burn before cooking through, lower your oven temperature and loosely tent with foil. If the flavor isn’t penetrating, try scoring the wings before marinating and extend marination time. Remember that authentic jerk has a blackened exterior – that’s not burning, it’s flavor!

    Frequently Asked Questions

    What makes Jamaican jerk seasoning unique?

    Authentic jerk seasoning combines allspice (called “pimento” in Jamaica), thyme, scotch bonnet peppers, ginger, and various other spices. This creates a complex flavor profile that’s simultaneously spicy, sweet, smoky, and herbaceous – unlike any other seasoning blend.

    Can I make Baked Jamaican Jerk Chicken Wings ahead of time?

    Absolutely! Marinate the wings up to 24 hours ahead, and you can even bake them earlier in the day and reheat at 350°F for 10-15 minutes before serving. The flavor actually improves with a little time.

    How can I adjust the spice level?

    Control the heat by adjusting the amount of hot peppers. For milder wings, remove the seeds and membranes from the peppers or substitute jalapeños. For extra heat, keep all the seeds and add a dash of cayenne.

    Can I use this same recipe for chicken thighs or breasts?

    Yes! The marinade works beautifully on all chicken cuts. Adjust cooking times accordingly – bone-in thighs need about 35-40 minutes, while boneless breasts require only 20-25 minutes at 375°F.

    Is there a way to make these wings on the grill?

    Traditional jerk chicken is grilled! Marinate as directed, then grill over medium heat, turning occasionally until cooked through (165°F internal temperature), about 20-25 minutes. Add soaked pimento wood chips for authentic smoky flavor.

    Final Thoughts

    These Baked Jamaican Jerk Chicken Wings bring a taste of the Caribbean to your table with minimal effort and maximum flavor. What I love most is how they transport me back to beachside dinners with each bite – spicy, sweet, and utterly satisfying. The oven-baked method makes this exotic dish accessible for any home cook while still honoring the authentic flavors that make jerk chicken so beloved worldwide. Whether you’re hosting a party or just craving something different for dinner, these wings deliver a memorable flavor experience that will have everyone asking for your secret. Find more delicious recipes on Pinterest and keep exploring the wonderful world of global flavors!

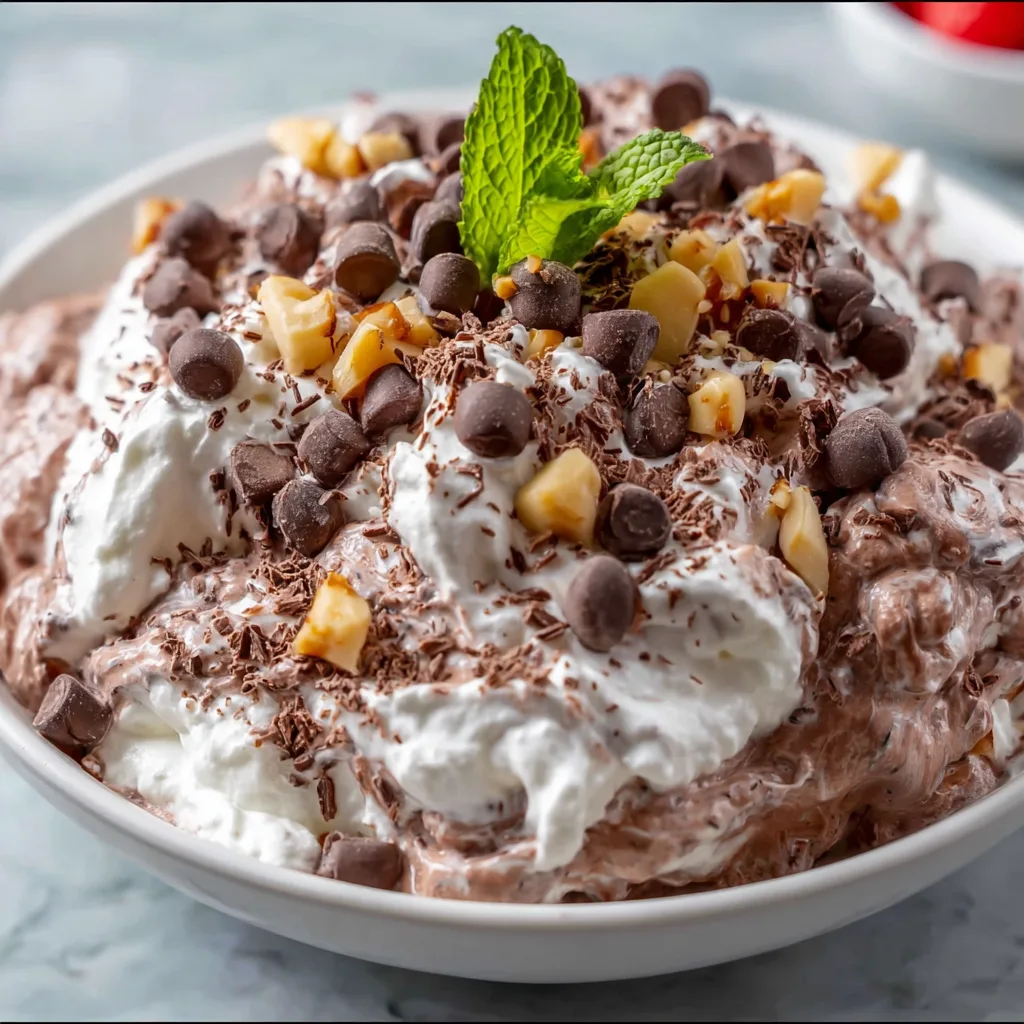
  • Chocolate Fluff Salad Recipe: Irresistibly Creamy & Delightful!

    Chocolate Fluff Salad Recipe: Irresistibly Creamy & Delightful!

    Chocolate Fluff Salad Recipe: Irresistibly Creamy & Delightful!

    Chocolate Fluff Salad is one of those magical desserts that transports me straight back to Sunday potlucks at my grandmother’s house. The pillowy clouds of whipped cream folding into rich chocolate pudding and marshmallows create a texture that’s simply heavenly. I’ve always loved how this nostalgic treat manages to be both light and decadent at the same time. The best part? You can whip it up in minutes with just a handful of ingredients. If you’re looking for a crowd-pleasing dessert that feels like a warm hug in a bowl, this easy recipe is exactly what you need.

    Recipe

    Why You’ll Love This Chocolate Fluff Salad

    Perfect Balance of Flavors and Textures

    The magic of Chocolate Fluff Salad lies in its incredible textural contrast. Velvety chocolate pudding creates a rich base while fluffy whipped cream lightens everything up. Each bite delivers a perfect harmony of creamy and airy elements that simply melt in your mouth. I love adding mini marshmallows for that subtle chewiness and bursts of sweetness throughout. The subtle crunch from chocolate chips or cookie pieces provides just enough textural interest to keep your taste buds engaged from the first spoonful to the last.

    Quick Prep with Big Impact

    One thing I absolutely adore about this recipe is how it delivers maximum wow factor with minimal effort. In just 15 minutes of active prep time, you can create a dessert that looks like you spent hours in the kitchen. I recently made this for my sister’s birthday gathering when I was short on time, and everyone thought I’d ordered it from a bakery! It’s perfect for those last-minute invitations or when you need a reliable dessert that won’t stress you out. Plus, it’s easily scalable for both intimate dinners and larger gatherings.

    Essential Tips & Tricks

    Achieving the Perfect Consistency

    The secret to a perfect Chocolate Fluff Salad is all about the folding technique. Rather than stirring vigorously, use a gentle folding motion to incorporate the whipped cream into your pudding mixture. This preserves those precious air bubbles for maximum fluffiness. I learned this the hard way after once rushing and ending up with a deflated dessert! For best results, chill your mixing bowl and beaters before whipping the cream, and make sure your pudding is completely set before combining. This creates that dreamy, cloud-like texture that makes this dessert so special.

    Ingredient Selection Matters

    Using high-quality ingredients truly elevates this simple dessert. I always opt for real whipping cream rather than pre-made whipped topping for a richer flavor and better texture. When selecting chocolate pudding, instant works perfectly fine, but cooking the pudding from scratch adds an incredible depth of flavor if you have the extra time. For a fun twist, try using chocolate cherry dump cake as inspiration and add some cherry pie filling to create a chocolate-covered cherry version that’s absolutely divine. The contrast of tart cherries against sweet chocolate is simply irresistible.

    Serving Ideas & Creative Variations

    Presentation Possibilities

    Transform your Chocolate Fluff Salad into a showstopping centerpiece by serving it in a clear trifle dish to showcase those beautiful layers. For individual servings, try parfait glasses with alternating layers of fluff and crushed cookies or graham crackers. I love adding a light dusting of cocoa powder or a sprinkle of chocolate shavings just before serving for that professional touch. For summer gatherings, I serve mine in hollowed-out watermelon halves for a fun presentation that always gets compliments. The contrast between the bright fruit exterior and chocolatey interior creates a visual treat.

    Flavor Twists and Add-ins

    The versatility of Chocolate Fluff Salad makes it perfect for creative variations. Try adding a tablespoon of espresso powder for a mocha version that coffee lovers will adore. Peanut butter chips or a swirl of creamy peanut butter creates a combination reminiscent of classic peanut butter lunch lady cookie bars. For a more sophisticated flavor profile, consider adding orange zest or a splash of Grand Marnier for chocolate-orange fluff. During the holidays, I love incorporating crushed peppermint candies and a drop of peppermint extract for a festive twist.

    Storage & Troubleshooting Guide

    Proper Storage for Maximum Freshness

    Chocolate Fluff Salad is best when enjoyed within 24-48 hours of preparation. Store it in an airtight container in the refrigerator to maintain that perfect fluffy texture. I recommend covering the surface directly with plastic wrap before putting the lid on to prevent a skin from forming on top. If you notice slight weeping or separation after storage, don’t worry! Simply give it a gentle fold with a rubber spatula just before serving to refresh the texture. For best presentation, add any crunchy toppings like cookie pieces right before serving.

    Fixing Common Issues

    If your Chocolate Fluff Salad turns out too runny, the most likely culprit is under-whipped cream or pudding that hasn’t set properly. To fix this, try chilling it for at least 2 hours to help it set up. For a too-thick consistency, gently fold in a small amount of additional whipped cream to lighten it up. If you notice the marshmallows becoming too soft after storage, try adding them just before serving next time. I once salvaged a too-sweet batch by folding in unsweetened whipped cream and a pinch of salt, which balanced the flavors perfectly.

    Frequently Asked Questions

    Can I make Chocolate Fluff Salad ahead of time?

    Yes! You can prepare it up to 24 hours in advance. For best results, store it in an airtight container in the refrigerator and add any crunchy toppings just before serving.

    What’s the difference between Chocolate Fluff Salad and chocolate mousse?

    Chocolate Fluff Salad typically contains marshmallows and has a lighter, more airy texture than mousse. Mousse is denser, richer, and often contains eggs for structure.

    Can I use sugar-free pudding for this recipe?

    Absolutely! Sugar-free instant pudding works perfectly in this recipe. Just be aware that the texture might be slightly different than with regular pudding.

    How do I prevent my Chocolate Fluff Salad from becoming watery?

    Ensure your pudding is completely set before folding in thoroughly whipped cream. Avoid overmixing, and keep refrigerated until serving time to maintain the perfect consistency.

    What can I substitute for mini marshmallows in Chocolate Fluff Salad?

    Try diced fruit like bananas or strawberries, chopped cookies, or crushed graham crackers. For a grown-up version, consider rum-soaked dried fruits or candied nuts.

    Final Thoughts

    Chocolate Fluff Salad is more than just a dessert—it’s a nostalgic treat that brings people together. The simplicity of preparation combined with its crowd-pleasing flavor makes it perfect for everything from casual family dinners to special celebrations. I hope you’ll try this versatile recipe and make it your own with creative add-ins that reflect your personal taste. Don’t forget to check out more delicious dessert ideas on Pinterest for inspiration! This fluffy chocolate delight might just become your new go-to dessert.

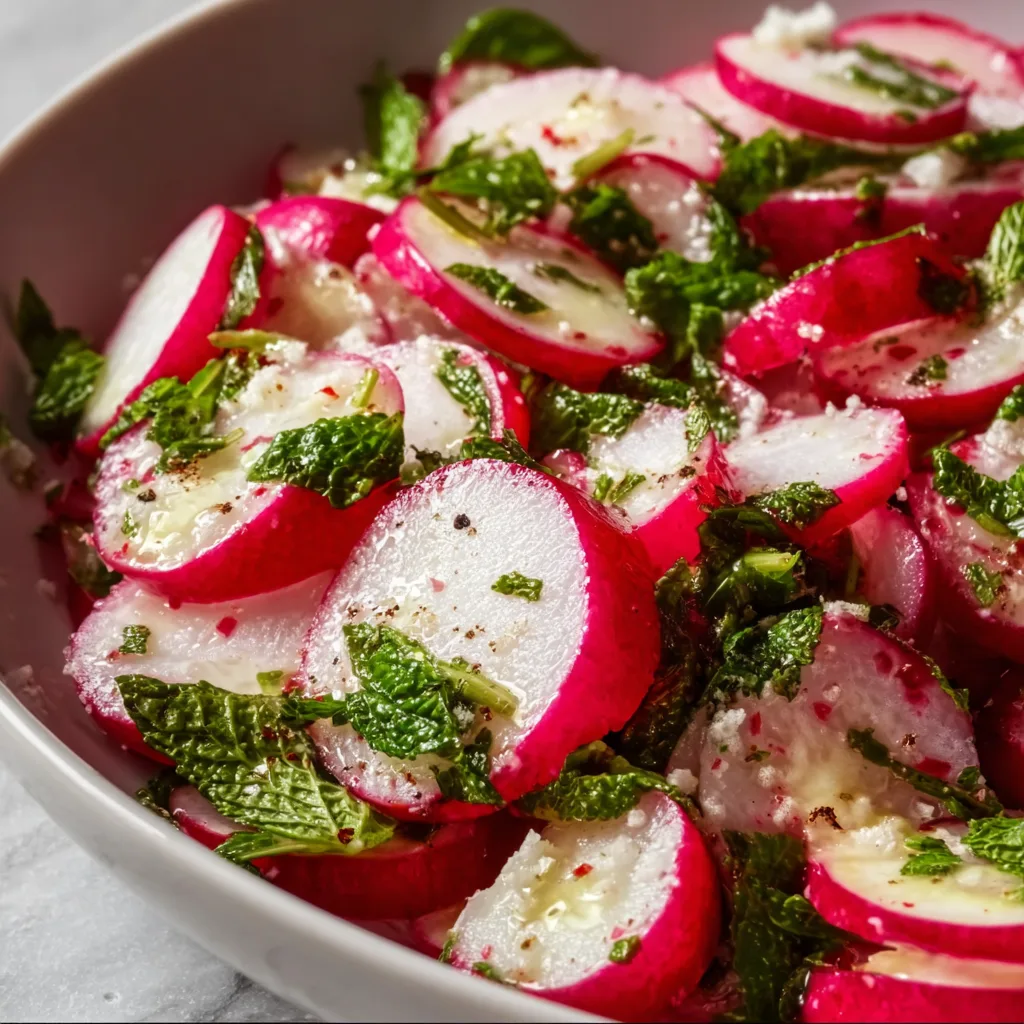
  • Gordon Ramsay Radish Salad Recipe That Will Wow Your Tastebuds!

    Gordon Ramsay Radish Salad Recipe That Will Wow Your Tastebuds!

    Gordon Ramsay Radish Salad Recipe That Will Wow Your Tastebuds!

    This Gordon Ramsay-Inspired Radish Salad changed my entire perspective on what a simple salad could be. The first time I made it, I stood in my kitchen, stunned by how the peppery crunch of fresh radishes paired so beautifully with the tangy dressing. There’s something magical about the way Chef Ramsay balances flavors—sharp, creamy, crunchy, and fresh all in one dish. I’ve adapted his technique to create a salad that’s both restaurant-worthy yet completely doable at home. If you’re looking to elevate your salad game without complicated techniques, this recipe deserves a spot in your regular rotation, just like my Dutch oven crusty bread does.

    Recipe

    Why You’ll Love This Gordon Ramsay-Inspired Radish Salad

    A Symphony of Textures and Flavors

    The beauty of this Gordon Ramsay-Inspired Radish Salad lies in its perfect balance of contrasting elements. The peppery bite of thinly sliced radishes creates a beautiful counterpoint to the creamy dressing. I love how the radishes maintain their crispness even after being dressed, giving you that satisfying crunch with every bite. There’s also a subtle heat that wakes up your palate without overwhelming it. Last week, my neighbor tried it and said it was like “a flavor explosion that somehow still feels light and refreshing”—and I couldn’t agree more!

    Quick Preparation with Maximum Impact

    One thing I adore about this Gordon Ramsay-Inspired Radish Salad is how quickly it comes together. From start to finish, you’ll spend just 15 minutes in the kitchen, yet the result looks like something from a high-end restaurant. The vibrant pink and white radish slices create a stunning visual presentation that’s Instagram-worthy. I’ve served this at impromptu dinner parties and received more compliments than dishes that took hours to prepare. It’s my secret weapon when I need to impress but don’t have much time—the perfect balance of effort to reward ratio!

    Essential Tips & Tricks

    Selecting and Preparing the Perfect Radishes

    The foundation of an exceptional Gordon Ramsay-Inspired Radish Salad starts with choosing the right radishes. Look for firm, smooth radishes with vibrant color and fresh, green tops (a sign of freshness). I prefer using a mix of varieties—French breakfast, watermelon, and classic red—for visual appeal and flavor complexity. When preparing, slice them paper-thin using a mandoline for consistent thickness. This allows the dressing to coat each slice evenly while maintaining that crucial crunch. Remember to ice-bath your sliced radishes for about 10 minutes—a trick I learned that makes them extra crisp!

    Mastering the Signature Dressing

    The dressing is what transforms this from an ordinary salad to a Gordon Ramsay-Inspired Radish Salad masterpiece. The key is achieving the perfect acid-to-oil ratio—I recommend 1:2 for balanced tanginess. Whisk your acid (lemon juice or white wine vinegar) with Dijon mustard before slowly incorporating high-quality olive oil to create a proper emulsion. Don’t skip the fresh herbs! Dill and chives add brightness that complements the peppery radishes beautifully. For an authentic Ramsay touch, finish with a pinch of Maldon salt just before serving, which adds texture and makes the flavors pop, similar to what I do in my Chickpea Feta Avocado Salad.

    Serving Ideas & Creative Variations

    Perfect Pairings for Your Radish Salad

    This Gordon Ramsay-Inspired Radish Salad shines as both a starter and a side dish. Serve it alongside grilled fish or a simple roast chicken for a complete meal that feels special yet effortless. I particularly love pairing it with rich dishes where its bright acidity cuts through heavier flavors—think creamy pasta or buttery scallops. For an elegant appetizer, spoon small portions onto endive leaves and top with a sprinkle of microgreens. The salad also makes a beautiful addition to a grazing board, offering a fresh counterpoint to cheeses and cured meats.

    Seasonal Twists and Adaptations

    While the classic Gordon Ramsay-Inspired Radish Salad is perfect on its own, don’t be afraid to make seasonal adaptations. In spring, add tender pea shoots and a sprinkle of fresh mint. Summer calls for cucumber ribbons and perhaps some crumbled feta for a Mediterranean twist. Fall versions can incorporate thinly sliced apples and toasted walnuts for warmth. I recently added avocado chunks and a squeeze of lime for a California-inspired variation that paired beautifully with my Blackened Chicken. The versatility of this salad makes it a year-round staple that never feels repetitive!

    Storage & Troubleshooting Guide

    Keeping Your Salad Fresh

    The Gordon Ramsay-Inspired Radish Salad is best enjoyed immediately after preparation, when the radishes are at their crispest texture. However, if you need to prepare components ahead, store sliced radishes in cold water in the refrigerator for up to 4 hours to maintain their crunch. The dressing can be made up to 3 days in advance and kept in an airtight container. If you have leftover dressed salad, it will keep for about 24 hours, though the radishes will soften slightly. Pro tip: I sometimes intentionally make extra to enjoy the next day—the flavors meld beautifully, creating a slightly pickled quality!

    Solving Common Salad Challenges

    Even with simple recipes, occasional challenges arise. If your Gordon Ramsay-Inspired Radish Salad tastes too peppery, balance it by adding a touch of honey to the dressing or including milder ingredients like butter lettuce as a base. For dressing that separates, simply re-whisk vigorously or add a small dollop of Dijon mustard to help re-emulsify. If your radishes release too much water and dilute the dressing, pat them dry thoroughly before combining or salt them lightly and let sit for 10 minutes, then rinse and dry—this draws out excess moisture before dressing.

    Frequently Asked Questions

    Can I make this Gordon Ramsay-Inspired Radish Salad ahead of time?

    You can prepare the components separately up to a day ahead. Slice radishes and store in cold water, and make the dressing in advance. Combine just before serving to maintain the perfect texture and flavor balance.

    What’s the best way to slice radishes thinly without a mandoline?

    Use a very sharp chef’s knife and slice carefully. Practice makes perfect! Alternatively, some vegetable peelers can create thin ribbons that work beautifully in this salad.

    Can I substitute other vegetables if radishes are too spicy for me?

    Absolutely! Try watermelon radishes which are milder, or mix in cucumber, jicama, or kohlrabi for a similar crunch with less heat.

    How can I make this salad more substantial for a main dish?

    Add protein like grilled chicken, seared tuna, or chickpeas. For a vegetarian option, include avocado, crumbled goat cheese, or toasted nuts for heartiness.

    What’s Gordon Ramsay’s secret to making this radish salad so special?

    The key to the Gordon Ramsay-Inspired Radish Salad is balancing sharp flavors with proper technique—paper-thin slicing, proper seasoning, and using the highest quality ingredients you can find.

    Final Thoughts

    This Gordon Ramsay-Inspired Radish Salad has become my go-to for elevating everyday meals and impressing dinner guests alike. There’s something magical about transforming humble radishes into something so elegant yet approachable. I encourage you to make this recipe your own—experiment with different radish varieties or seasonal additions while keeping the core technique intact. The true beauty lies in its simplicity and versatility. For more inspiration, check out my other recipes on Pinterest where I share seasonal variations of this and other favorite dishes!