Author: Darleen Vance

  • Crispy Garlic Air Fryer Broccoli – Irresistibly Crunchy & Healthy!

    Crispy Garlic Air Fryer Broccoli – Irresistibly Crunchy & Healthy!

    Crispy Garlic Air Fryer Broccoli – Irresistibly Crunchy & Healthy!

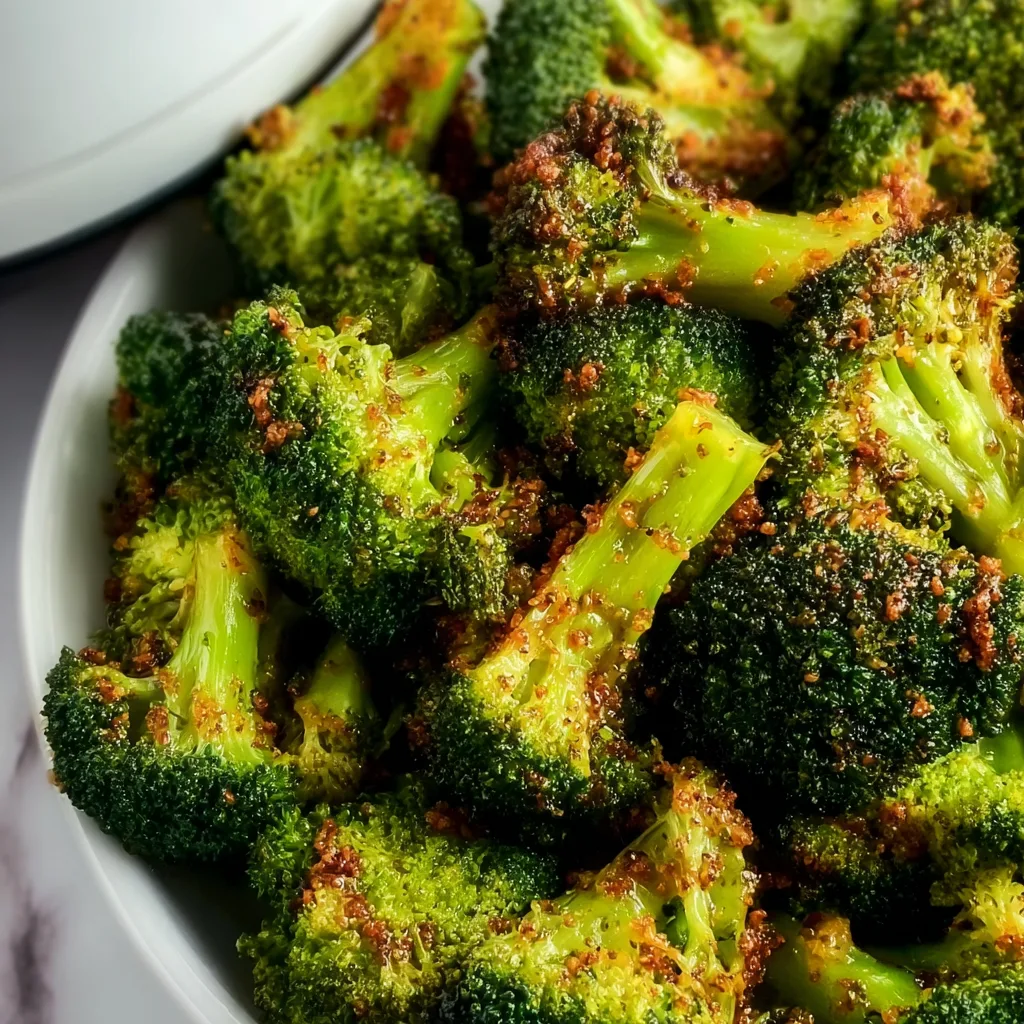
    Crispy Garlic Air Fryer Broccoli is about to revolutionize your veggie game! The first time I made this recipe, my kitchen filled with that irresistible roasted garlic aroma, and I knew I’d struck gold. There’s something magical about how the air fryer transforms ordinary broccoli into crispy, caramelized bites with minimal effort. The edges get perfectly charred while the stalks remain tender, creating that wonderful textural contrast we all crave. If you’ve been searching for a way to make vegetables the star of your meal, this recipe from Recipes Darleen is your answer.

    Recipe

    Why You’ll Love This Crispy Garlic Air Fryer Broccoli

    Perfect Texture Every Time

    The air fryer is truly a game-changer when it comes to cooking broccoli. Unlike steaming, which can leave your veggies soggy, or roasting, which requires careful timing, the air fryer creates perfectly crispy edges while maintaining a tender interior. That satisfying crunch when you bite into a floret is absolutely addictive! I love how the hot circulating air caramelizes the natural sugars in the broccoli, creating those delicious browned bits that deliver maximum flavor. Plus, you’ll get consistent results in just 8-10 minutes—way faster than preheating an oven!

    Healthier Than Traditional Methods

    One of the biggest advantages of this Crispy Garlic Air Fryer Broccoli is that it requires significantly less oil than traditional roasting. You’ll get all that wonderful crispy texture with just 1-2 tablespoons of oil instead of the usual drenching. The air fryer’s efficient cooking method also helps preserve more nutrients than boiling or steaming, where water-soluble vitamins can leach out. My family actually requests this broccoli as a snack now—who would have thought? When vegetables taste this good, getting your daily greens becomes something to look forward to rather than a chore.

    Essential Tips & Tricks

    Prep Matters

    The secret to truly exceptional Crispy Garlic Air Fryer Broccoli starts with how you prepare your florets. Cut them into uniform sizes to ensure they cook evenly—I aim for pieces about 1-1.5 inches across. Make sure to thoroughly dry your broccoli after washing; excess moisture is the enemy of crispiness! For the garlic, I prefer to mince it very finely rather than using powder for more authentic flavor. Toss everything in a bowl with olive oil, ensuring each floret gets a light coating. This preparation only takes about 3 minutes but makes all the difference in the final texture.

    Temperature and Timing

    Finding the sweet spot for temperature and timing is crucial for perfectly crispy results. I’ve found that 400°F (205°C) works best for broccoli, creating that ideal balance of crispiness without burning. Start checking at 8 minutes, but know that it might take up to 12 minutes depending on your specific air fryer model. Don’t overcrowd the basket—work in batches if necessary to allow proper air circulation. Giving the basket a good shake halfway through cooking ensures all sides get evenly crisped. Remember that the broccoli will continue to crisp slightly as it cools.

    Serving Ideas & Creative Variations

    Perfect Pairings

    This Crispy Garlic Air Fryer Broccoli works beautifully as both a side dish and a star ingredient in countless meals. I love serving it alongside Italian Sausage Pasta Bake for a complete dinner that balances indulgence with nutrition. It also pairs wonderfully with grilled chicken, roasted salmon, or even as a topping for grain bowls. For an impressive appetizer, serve the crispy broccoli with a side of lemon aioli or tahini dipping sauce. The textural contrast between the crispy florets and creamy sauces creates a truly satisfying bite that even vegetable skeptics can’t resist.

    Flavor Variations

    While the classic garlic version is a staple in my home, don’t be afraid to experiment with different flavor profiles! Add a sprinkle of parmesan cheese during the last 2 minutes of cooking for a cheesy twist. For spice lovers, incorporate red pepper flakes or a dash of cayenne. Lemon zest and a squeeze of fresh juice add brightness, while a drizzle of balsamic glaze brings sweet acidity. Asian-inspired versions with sesame oil, soy sauce, and ginger are equally delicious. My personal favorite variation includes a teaspoon of smoked paprika for a subtle smoky flavor that elevates the entire dish.

    Storage & Troubleshooting Guide

    Proper Storage Methods

    While Crispy Garlic Air Fryer Broccoli is best enjoyed immediately, proper storage can help maintain that delightful texture for later enjoyment. Allow leftover broccoli to cool completely before transferring to an airtight container. Refrigerate for up to 3 days, but be aware that the crispiness will diminish somewhat. To reheat, avoid the microwave which will make them soggy. Instead, pop them back in the air fryer at 350°F for 2-3 minutes to restore some of that crispness. I often make a double batch specifically for meal prep—they’re perfect for adding instant flavor to lunch salads or grain bowls.

    Common Issues & Solutions

    If your broccoli isn’t turning out as crispy as you’d hoped, a few simple adjustments can help. The most common culprit is overcrowding the air fryer basket, which traps steam and prevents proper crisping. Work in batches if necessary—patience yields better results! If your florets are burning on the outside but still raw inside, your pieces are likely too large or your temperature too high. Excess moisture can also hinder crispiness, so be sure to thoroughly dry your broccoli after washing. Finally, if your garlic is burning, try mixing it with the oil first to create a coating rather than having loose pieces.

    Frequently Asked Questions

    Can I make Crispy Garlic Air Fryer Broccoli without oil?

    While some oil helps achieve the crispy texture, you can reduce it to just 1 teaspoon or use an oil spray instead. For completely oil-free, try a light spritz of lemon juice and rely on the natural caramelization process.

    How do I know when my broccoli is done?

    Look for deep green florets with slightly browned, crispy edges. The stalks should be tender when pierced with a fork, but not mushy. This usually takes 8-10 minutes at 400°F.

    Can I use frozen broccoli for this recipe?

    Yes! Don’t thaw it first—cook directly from frozen, adding 2-3 minutes to the cooking time. The results won’t be quite as crispy as fresh broccoli but still delicious.

    What’s the best way to season Crispy Garlic Air Fryer Broccoli?

    Toss with oil, minced garlic, salt, and pepper before air frying. For extra flavor, add parmesan, lemon zest, red pepper flakes, or your favorite herb blend during the last 2 minutes.

    Why isn’t my broccoli getting crispy in the air fryer?

    Excess moisture, overcrowding, or too low temperature are common culprits. Make sure your broccoli is dry, the basket isn’t overcrowded, and you’re cooking at 400°F for optimal crispiness.

    Final Thoughts

    This Crispy Garlic Air Fryer Broccoli has become my go-to method for transforming an everyday vegetable into something truly crave-worthy. The combination of minimal effort and maximum flavor makes it perfect for busy weeknights or impressive enough for guests. I love how the air fryer creates that restaurant-quality crispiness without the fuss of traditional roasting. Whether you’re a veggie enthusiast or still working on incorporating more greens into your diet, this recipe proves that healthy eating can be absolutely delicious. Find more inspiration for your meals on Pinterest!

  • Crispy Chicken & Bell Pepper Ranch Burritos: Irresistibly Crunchy Flavor!

    Crispy Chicken & Bell Pepper Ranch Burritos: Irresistibly Crunchy Flavor!

    Crispy Chicken & Bell Pepper Ranch Burritos: Irresistibly Crunchy Flavor!

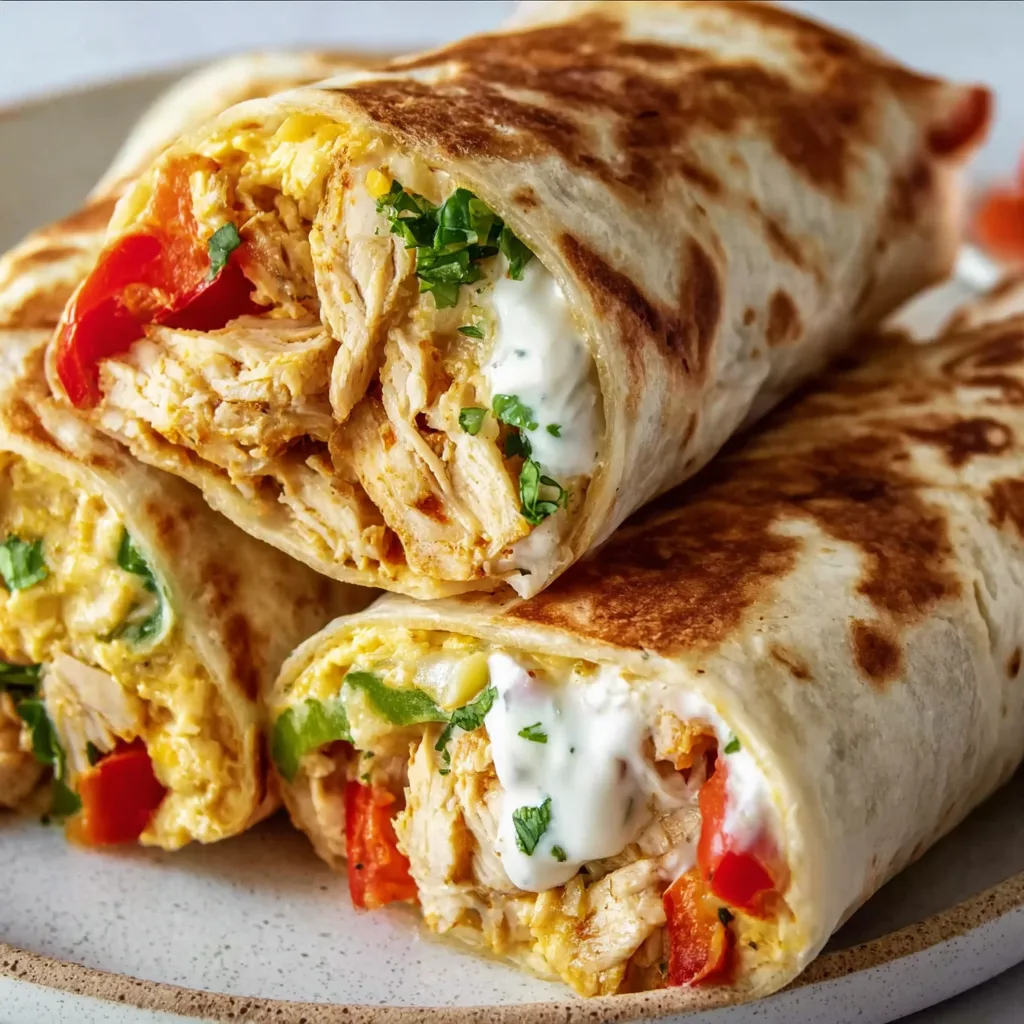
    Crispy Chicken & Bell Pepper Ranch Burritos are my weeknight savior when I’m craving something satisfying but don’t want to spend hours in the kitchen. The combination of golden, crispy chicken paired with sweet bell peppers and creamy ranch sauce wrapped in a warm tortilla creates pure comfort food magic. I discovered this recipe during a particularly chaotic Tuesday when my sister dropped by unexpectedly with her kids. We needed something quick yet impressive, and these burritos delivered spectacularly. The kids devoured them, and now they’re a regular request when family visits. Let me show you how to make these crowd-pleasing wraps!

    Recipe

    Why You’ll Love These Crispy Chicken & Bell Pepper Ranch Burritos

    Perfect Balance of Flavors and Textures

    There’s something magical about the contrast between crispy chicken and soft tortillas that makes these burritos irresistible. The bell peppers provide a sweet crunch that complements the savory chicken perfectly, while the ranch dressing adds a creamy, tangy dimension that ties everything together. I love how the peppers slightly caramelize when cooked, releasing their natural sweetness. The first time I made these, my husband—who typically reaches for hot sauce with everything—didn’t add a single condiment because the flavor balance was just right. These burritos satisfy multiple cravings in one delicious package.

    Quick and Customizable for Any Occasion

    These Crispy Chicken & Bell Pepper Ranch Burritos come together in under 30 minutes, making them perfect for busy weeknights or last-minute gatherings. The basic formula is incredibly flexible—swap chicken for crispy tofu for vegetarian guests, use different colored bell peppers for visual appeal, or adjust the spice level to suit your family’s preferences. I’ve made these for casual movie nights and for more formal dinner parties (just slice them into pinwheels!). They’re equally at home on a paper plate or on your favorite serving platter, which is why they’ve become my go-to when I need something reliably delicious without overthinking the menu.

    Essential Tips & Tricks

    Getting the Perfect Crispy Chicken

    The secret to truly outstanding Crispy Chicken & Bell Pepper Ranch Burritos lies in the chicken’s texture. I recommend using chicken thighs instead of breast meat—they stay juicier and develop a better crust. Pat the chicken completely dry before seasoning, and don’t crowd the pan when cooking. Give each piece room to release moisture and crisp up properly. A cast iron skillet works wonders here! For extra crispiness, try dredging the chicken pieces in a light coating of seasoned cornstarch before pan-frying. This creates a delicate crust that holds up even when wrapped with the other ingredients in the quick jumbo dinner rolls.

    Mastering the Assembly Process

    Assembly is where many burrito attempts fall apart—literally! Start by warming your tortillas properly; this makes them pliable and less likely to tear. Thirty seconds in a dry skillet or microwave wrapped in damp paper towels works perfectly. When placing ingredients, leave a one-inch border around the edges and don’t overstuff. The proper folding technique matters: fold in the sides first, then roll from the bottom up, keeping everything tight. For extra insurance against burrito collapse, wrap the finished burrito in foil and let it rest for 2-3 minutes. This helps the tortilla seal to itself and holds everything together when you cut into it.

    Serving Ideas & Creative Variations

    Complementary Side Dishes

    These Crispy Chicken & Bell Pepper Ranch Burritos pair beautifully with sides that enhance their Southwestern flair. My family loves them with a simple cilantro-lime rice that soaks up any escaping sauce. A crisp, tangy coleslaw provides refreshing contrast to the rich burritos—try my version with apple cider vinegar dressing and a touch of honey. For a more substantial spread, add Italian chopped salad for a surprising but delicious fusion meal. When serving for gatherings, I arrange a platter of sliced burritos surrounded by small bowls of additional ranch, hot sauce, and fresh pico de gallo. This interactive approach always gets compliments and lets guests customize each bite.

    Exciting Flavor Variations

    While the classic Crispy Chicken & Bell Pepper Ranch Burritos are fantastic, don’t be afraid to experiment! For a breakfast twist, add scrambled eggs and swap the ranch for salsa verde. Feeling indulgent? Try a buffalo version with blue cheese dressing instead of ranch and add some crispy bacon. For international flair, incorporate Greek flavors with tzatziki replacing ranch, adding cucumber and feta to the filling. My personal favorite variation includes caramelized onions and pepper jack cheese for extra sweetness and heat. These variations keep the basic recipe exciting week after week, and I’ve yet to find a combination my family doesn’t enjoy.

    Storage & Troubleshooting Guide

    Proper Storage for Maximum Freshness

    To keep your Crispy Chicken & Bell Pepper Ranch Burritos tasting their best, proper storage is essential. For make-ahead convenience, prepare all components separately and refrigerate them in airtight containers for up to three days. Assemble just before serving to maintain the perfect texture. If you have leftover assembled burritos, wrap each one tightly in aluminum foil and refrigerate for up to two days. The key to reheating without sogginess is using a dry heat method—either a 350°F oven for 15 minutes or a panini press. For longer storage, freeze uncooked burritos individually wrapped in plastic and foil, then stored in freezer bags for up to three months.

    Solving Common Burrito Problems

    Even experienced cooks encounter burrito challenges! If your tortillas keep cracking, they’re likely too cold or dry—microwave them between damp paper towels for 20 seconds to make them more pliable. Dealing with soggy burritos? Try placing the ranch and wetter ingredients in the center, surrounded by the drier ingredients like chicken. For burritos that unravel when eating, try securing them with toothpicks or wrapping the bottom half in parchment paper. If your chicken isn’t crisping properly, your pan probably isn’t hot enough—start with a screaming hot skillet and don’t add the chicken until you see wisps of smoke rising from the oil.

    Frequently Asked Questions

    Can I make Crispy Chicken & Bell Pepper Ranch Burritos ahead of time?

    Yes! Prepare components separately and store in the refrigerator for up to 3 days. Assemble just before serving, or fully assemble and wrap in foil for reheating later. This maintains the crispy texture better than storing assembled burritos.

    What’s the best way to reheat leftover burritos?

    For best results, reheat in a 350°F oven for 10-15 minutes if wrapped in foil. For a crispier exterior, unwrap and place directly on the oven rack for the last 5 minutes. Avoid microwaving as it makes tortillas soggy.

    Can I use flour alternatives for a gluten-free version?

    Absolutely! Corn tortillas or certified gluten-free flour tortillas work well. Just warm them slightly longer to increase pliability, as gluten-free options tend to be less flexible and crack more easily.

    How can I make these burritos spicier?

    Add diced jalapeños or chipotle peppers to the filling, use pepper jack cheese instead of regular, or mix hot sauce into your ranch dressing. You can also serve with additional hot sauce on the side.

    What’s the key to getting truly crispy chicken for these burritos?

    The secret is patting chicken completely dry before cooking, using high heat, and not overcrowding the pan. For extra crispiness, lightly dust chicken pieces with cornstarch seasoned with salt and pepper before frying.

    Final Thoughts

    These Crispy Chicken & Bell Pepper Ranch Burritos have saved countless dinners in my household, combining convenience with crave-worthy flavor. The beauty lies in their versatility—dress them up for guests or keep them simple for family dinner. I’ve watched even the pickiest eaters devour these without complaint, which feels like a small miracle in itself. Whether you follow my recipe exactly or use it as a springboard for your own creation, I’m confident these burritos will earn a permanent spot in your meal rotation. Check out more of my favorite recipes on Pinterest!

  • Hot & Tangy Devilled Chicken Recipe – Irresistibly Spicy Delight!

    Hot & Tangy Devilled Chicken Recipe – Irresistibly Spicy Delight!

    Hot & Tangy Devilled Chicken Recipe – Irresistibly Spicy Delight!

    Hot and tangy devilled chicken is one of those dishes that instantly transforms your dinner table into something special. The first time I made this fiery, flavor-packed dish, my kitchen filled with the most intoxicating aroma of spices and caramelizing chicken. There’s something almost magical about how the heat from the chili plays with the tangy notes, creating that perfect balance that keeps you coming back for just one more bite. If you’re looking for a dish that delivers bold flavors without hours of effort, this spicy chicken recipe might become your new weeknight favorite.

    Recipe

    Why You’ll Love This Hot and Tangy Devilled Chicken

    Perfect Balance of Heat and Flavor

    This devilled chicken hits all the right notes with its perfect spice balance. Unlike some spicy dishes that overwhelm your palate, this recipe creates layers of flavor where the heat complements rather than dominates. The marinade combines chili, garlic, and a secret touch of vinegar that tenderizes the chicken while infusing it with tanginess. I love how the spices form a gorgeous caramelized crust when cooked, sealing in all those juicy flavors. The first time my sister tried it, she immediately asked for the recipe—always a good sign!

    Quick Prep, Maximum Impact

    One thing I absolutely adore about this hot and tangy devilled chicken is how it delivers restaurant-quality flavor with minimal effort. The marinade takes just minutes to throw together, and you can prep it ahead of time for even deeper flavor development. The active cooking time is surprisingly brief, making this perfect for those evenings when you want something impressive without spending hours at the stove. I often prep the marinade in the morning before work, and by dinner time, I’m just 25 minutes away from a meal that tastes like I’ve been cooking all day.

    Essential Tips & Tricks

    Marinating Magic

    For truly spectacular hot and tangy devilled chicken, don’t rush the marinating process. I’ve found that a minimum of 2 hours makes a noticeable difference, but overnight is when the magic really happens. The acid in the marinade works to tenderize the meat while the spices penetrate deeply. A little tip I discovered by accident: adding a tablespoon of yogurt to the marinade creates an even more tender result. Make sure to massage the marinade into every nook of the chicken pieces, and don’t forget to reserve some for basting during cooking for extra flavor development.

    Temperature Control Is Key

    The difference between good and phenomenal devilled chicken often comes down to cooking temperature. Start with a hot pan to get that initial sear, then reduce the heat to allow the chicken to cook through without burning the spices. If you’re using the oven method, preheat thoroughly to 400°F before the chicken goes in. The caramelization of the spices creates that distinctive devilled flavor, but watch carefully—there’s a fine line between caramelized and burnt. I learned this lesson the hard way when trying to multitask during cooking (never again!).

    Serving Ideas & Creative Variations

    Perfect Pairings

    Hot and tangy devilled chicken pairs beautifully with cooling elements that balance its heat. I love serving it with a cucumber raita that soothes the palate between spicy bites. Fluffy basmati rice makes an excellent base to soak up all those delicious juices. For a complete meal with contrasting textures, add a side of crispy garlic bread to scoop up any sauce left on your plate. When entertaining, I arrange the chicken on a platter surrounded by lemon wedges and fresh herbs—it always makes for a stunning presentation that has guests reaching for seconds.

    Exciting Flavor Twists

    While the classic recipe is divine, don’t be afraid to put your own spin on this hot and tangy devilled chicken. Adding a tablespoon of honey creates a beautiful sweet-heat balance that’s utterly addictive. For a tropical twist, incorporate some finely diced pineapple into the marinade—the enzymes tenderize the meat while adding subtle sweetness. Coconut milk can replace some of the yogurt for a richer, more exotic flavor profile. My personal favorite variation includes a teaspoon of smoked paprika that adds incredible depth and a subtle smokiness that reminds me of outdoor grilling even when cooking indoors.

    Storage & Troubleshooting Guide

    Keeping It Fresh

    Properly stored hot and tangy devilled chicken stays delicious for up to 3-4 days in the refrigerator. I recommend cooling it completely before transferring to an airtight container to preserve its texture and flavor. When reheating, add a splash of water to prevent drying out, and warm gently over medium-low heat. For meal prep, you can freeze portions for up to 2 months—just be sure to thaw overnight in the refrigerator before reheating. I often make a double batch specifically to freeze individual portions for those nights when cooking from scratch isn’t an option.

    Solving Common Issues

    If your devilled chicken turns out too spicy, don’t panic! Serve it with cooling accompaniments like yogurt, cucumber salad, or even a mild coconut rice to balance the heat. For chicken that’s not as tender as you’d like, try slicing it against the grain before serving to break up those muscle fibers. If the marinade is burning too quickly during cooking, lower your heat and add a tablespoon of water to the pan to create steam. When I accidentally over-spiced a batch, I created a quick cucumber-yogurt sauce that saved the meal and has since become a regular side for this dish.

    Frequently Asked Questions

    What makes devilled chicken “devilled”?

    The term “devilled” refers to the spicy seasoning used in the dish. Traditionally, devilled dishes contain hot spices like cayenne pepper, mustard, and black pepper that give them their characteristic heat and robust flavor profile.

    Can I make hot and tangy devilled chicken with boneless chicken?

    Absolutely! Boneless chicken thighs or breasts work wonderfully, though they’ll cook faster than bone-in pieces. Reduce cooking time by about 5-7 minutes and check for an internal temperature of 165°F.

    Is there a way to make this recipe less spicy but still flavorful?

    Yes! Reduce the chili amount by half and increase the paprika and garlic for flavor without excessive heat. The tanginess from vinegar and lemon will still provide that signature devilled taste.

    How can I tell when the chicken is perfectly cooked?

    The chicken is done when it reaches an internal temperature of 165°F and the juices run clear when pierced. For bone-in pieces, you might see the meat starting to pull away from the bone.

    Can I prepare hot and tangy devilled chicken in advance for a party?

    Definitely! Marinate the chicken up to 24 hours ahead. You can even cook it 75% of the way through, refrigerate, then finish cooking just before serving for that fresh-off-the-stove flavor and texture.

    Final Thoughts

    Hot and tangy devilled chicken has become one of my signature dishes for good reason. It strikes that perfect balance between everyday accessible and special occasion worthy. The vibrant flavors, the tender meat, and that irresistible spicy-tangy profile make it a dish I return to again and again. Whether you’re cooking for a quiet family dinner or hosting friends, this recipe delivers impressive results without complicated techniques. I hope you’ll give this hot and tangy devilled chicken a try—and don’t be surprised if it quickly becomes a requested favorite in your home too! Find more inspiring recipes on Pinterest.

  • Mustard Croissant Breakfast Sandwiches: Irresistibly Delicious & Easy!

    Mustard Croissant Breakfast Sandwiches: Irresistibly Delicious & Easy!

    Mustard Croissant Breakfast Sandwiches: Irresistibly Delicious & Easy!

    Mustard Croissant Breakfast Sandwiches are my absolute weekend obsession. There’s something magical about the way tangy Dijon mustard cuts through buttery croissants and melty cheese that makes me weak in the knees. I discovered this combination one foggy Sunday morning when I was craving something more exciting than my usual avocado toast. The first bite was a revelation – crispy, flaky layers giving way to savory fillings with that distinctive mustard kick. If you’re looking to elevate your breakfast game, these sandwiches strike the perfect balance between fancy and fuss-free. They’ve become my go-to when hosting brunch at home or when I need a special breakfast treat.

    Recipe

    Why You’ll Love These Mustard Croissant Breakfast Sandwiches

    Perfect Balance of Flavors and Textures

    The magic of these mustard croissant breakfast sandwiches lies in their perfect contrasts. The buttery, flaky croissant provides a delicate vessel for the sharp tang of quality Dijon mustard. When you add the richness of melted cheese and the savory goodness of eggs or breakfast meats, every bite becomes a symphony of textures. The exterior gets slightly crisp when toasted, while the interior remains soft and pillowy. I love how the mustard cuts through the richness, preventing the sandwich from feeling heavy while adding that sophisticated flavor that makes these feel special compared to ordinary breakfast sandwiches.

    Quick Assembly for Busy Mornings

    Despite looking like something from a fancy café, these mustard croissant breakfast sandwiches come together in minutes. I can assemble four sandwiches in under 15 minutes on busy weekday mornings. The versatile base allows for endless customization based on what’s in your fridge. Pre-sliced croissants and pre-cooked proteins make assembly lightning-fast. You can even prepare components the night before – cook your eggs or bacon, slice your cheese, and store everything separately. Then in the morning, just spread the mustard, assemble, and give them a quick warm-through. They’re perfect for those mornings when you want something special without the extra effort.

    Essential Tips & Tricks

    Choosing the Right Mustard Blend

    Not all mustards are created equal when making mustard croissant breakfast sandwiches. I recommend using a high-quality Dijon as your base – it has the perfect balance of tang, spice and creaminess. For extra dimension, try mixing your Dijon with a spoonful of whole grain mustard for delightful texture and visual appeal. If you prefer less heat, honey mustard creates a beautiful sweet-savory profile that pairs wonderfully with ham. For adventurous palates, horseradish mustard adds fantastic zip with egg and cheddar combinations. The key is finding your personal preference – I keep a mustard bar when hosting brunch so guests can customize their own.

    Perfecting the Croissant Preparation

    The foundation of extraordinary mustard croissant breakfast sandwiches is, naturally, the croissant itself. Look for all-butter croissants with visible layers – they’ll provide the best flavor and texture. Day-old croissants actually work beautifully as they hold up better to fillings without getting soggy. Always slice horizontally with a serrated knife using a gentle sawing motion to preserve those delicate layers. For next-level results, lightly toast the cut sides in a dry skillet or under the broiler for 1-2 minutes until golden. This creates a barrier against moisture while adding wonderful texture contrast. Just be vigilant during toasting – the high butter content means croissants can go from perfectly golden to burnt in seconds.

    Serving Ideas & Creative Variations

    Seasonal Adaptations

    The beauty of mustard croissant breakfast sandwiches lies in their ability to transform with the seasons. In summer, I love adding garden-fresh tomatoes and peppery arugula alongside a lighter spread of lemon-herb mustard. Fall calls for apple slices with maple mustard and turkey. Winter sandwiches feel cozy with caramelized onions and a robust whole grain mustard paired with gruyère. Spring brings asparagus spears and soft herbs like chives mixed into the mustard spread. The seasonal approach keeps these sandwiches feeling fresh year-round while making the most of what’s available. I’ve found that matching mustard intensity to seasonal ingredients creates the most harmonious flavor profiles – lighter in warm months, bolder in cool ones.

    International Flavor Inspirations

    Take your mustard croissant breakfast sandwiches on a global flavor journey by incorporating international ingredients. Create a French-inspired version with ham, Emmental cheese, and cornichons alongside classic Dijon. Go Italian with prosciutto, fresh mozzarella, basil, and a sun-dried tomato mustard. For Scandinavian vibes, try smoked salmon, dill, cucumber, and a mustard-yogurt spread. A Mexican-inspired variation featuring chorizo, pepper jack, avocado and chipotle-spiked mustard brings wonderful heat. The croissant’s buttery neutrality provides the perfect canvas for these global flavor explorations. I’ve served international breakfast sandwich boards at gatherings, and guests love creating their own culinary adventures.

    Storage & Troubleshooting Guide

    Make-Ahead and Reheating Strategies

    While mustard croissant breakfast sandwiches are best enjoyed fresh, strategic preparation can save morning time. Assemble sandwiches without mustard the night before, wrap individually in parchment paper, then store in an airtight container. In the morning, add the mustard (prevents sogginess) and reheat. For optimal reheating, use a toaster oven at 325°F for 5-7 minutes or an air fryer at 300°F for 3-4 minutes. Avoid microwaving which makes croissants chewy. If you need to freeze components, croissants freeze surprisingly well – thaw at room temperature in their packaging, then refresh in a 300°F oven for 5 minutes before assembling. Eggs can be scrambled and frozen in portions, though fried eggs are best made fresh.

    Fixing Common Sandwich Issues

    Even seasoned cooks encounter challenges with mustard croissant breakfast sandwiches. If your sandwich feels too dry, add a thin layer of softened butter or mayo beneath the mustard for extra moisture. For overly soggy sandwiches, toast the croissant interior more thoroughly next time and place moisture-heavy ingredients (like tomatoes) in the center, surrounded by cheese or meat to create a barrier. If fillings keep sliding out, try creating a shallow well in the bottom croissant half before adding ingredients. Too-strong mustard flavor can be balanced with additional cheese or a drizzle of honey. For croissants that crumble excessively when slicing, try chilling them for 10 minutes first – the butter firms up, making them easier to cut cleanly.

    Frequently Asked Questions

    What’s the best cheese to use in mustard croissant breakfast sandwiches?

    Gruyère offers the perfect melt and nutty flavor that complements mustard beautifully. Other excellent options include sharp cheddar, Havarti, or Swiss. Choose something with good melting properties and enough flavor to stand up to the mustard.

    Can I make these sandwiches vegetarian?

    Absolutely! Replace meat with sliced avocado, roasted portobello mushrooms, or plant-based sausage alternatives. Eggs work wonderfully, or try scrambled tofu with turmeric and black salt for a vegan option.

    How do I prevent my mustard croissant breakfast sandwiches from becoming soggy?

    Toast the cut sides of your croissant before assembling, apply mustard just before serving, and place juicy ingredients like tomatoes between layers of cheese or meat to create moisture barriers.

    What’s a good side dish to serve with these sandwiches?

    Fresh fruit salad provides a refreshing contrast, while roasted breakfast potatoes complement the richness. For brunch gatherings, a simple green salad with light vinaigrette balances the meal perfectly.

    Can I use other breads instead of croissants?

    While the flaky texture of croissants makes these sandwiches special, brioche buns, English muffins, or ciabatta rolls make excellent alternatives. Just adjust the cooking time when toasting to suit the bread type.

    Final Thoughts

    Mustard croissant breakfast sandwiches have transformed my morning routine from mundane to magnificent. The combination of buttery pastry, tangy mustard, and customizable fillings creates endless possibilities for breakfast bliss. What I love most is how they straddle the line between everyday accessible and weekend special – impressive enough for guests but simple enough for Tuesday morning. Whether you’re a mustard aficionado or just dipping your toe into more adventurous breakfast territory, these sandwiches deserve a spot in your recipe collection. Try them once, and I promise they’ll become a staple in your breakfast rotation too. Don’t forget to share your creations on Pinterest!

  • Pollo Asado Magic: Irresistible Mexican Grilled Chicken Recipe!

    Pollo Asado Magic: Irresistible Mexican Grilled Chicken Recipe!

    Pollo Asado Magic: Irresistible Mexican Grilled Chicken Recipe!

    Pollo Asado – Mexican Grilled Chicken transforms ordinary chicken into a fiesta of flavors with its vibrant marinade of citrus, garlic, and authentic Mexican spices. I discovered this recipe during my trip to Oaxaca, where the aroma of sizzling marinated chicken filled the evening air at local markets. The tender, juicy meat with its slightly charred exterior creates an irresistible combination that’s both bold and comforting. Perfect for weeknight dinners or weekend gatherings, this recipe brings the authentic taste of Mexico straight to your table. If you’re looking for something that’s both impressive and easy, this street corn chicken rice bowl makes a perfect companion.

    Recipe

    Why You’ll Love This Pollo Asado – Mexican Grilled Chicken

    Perfect Balance of Flavors

    The magic of Pollo Asado lies in its perfectly balanced marinade. The bright acidity from fresh lime and orange juice tenderizes the chicken while infusing it with citrus notes. Smoky aroma from achiote paste and dried chilies creates depth, while garlic and Mexican oregano add earthy undertones that make each bite memorable. I love how the flavors build layers – first you taste the char, then the citrus, and finally that warm spice blend that lingers pleasantly. The marinade penetrates deeply into the meat, ensuring that even the simplest chicken pieces become extraordinary.

    Versatile for Any Occasion

    This Pollo Asado recipe has become my go-to for nearly every gathering. It’s impressively adaptable whether you’re hosting a casual backyard barbecue or preparing a special family dinner. The preparation is straightforward enough for busy weeknights, yet the results feel special enough for celebrations. I’ve served it for impromptu Tuesday dinners and for my sister’s graduation party with equal success. You can prepare the marinade ahead of time, which means less stress when cooking for guests. Plus, it works beautifully with any chicken parts – thighs, breasts, or even a whole spatchcocked chicken.

    Essential Tips & Tricks

    Mastering the Marinade

    The key to exceptional Pollo Asado is giving it proper marinating time. Aim for at least 4 hours, but overnight delivers truly transformative results as the acids in the citrus juices break down proteins and create incredibly tender meat. When blending your marinade, toast your dried chilies first to wake up their essential oils and deepen their flavor. For an authentic touch, source real achiote paste rather than substituting with paprika – it provides that distinctive earthy-citrus note that defines traditional Pollo Asado. I learned from a Mexican grandmother to add a splash of pineapple juice for natural sweetness that helps caramelize the exterior.

    Perfect Grilling Technique

    Achieving that restaurant-quality char while keeping the chicken juicy requires temperature control. Start with a hot zone for initial searing (about 400-450°F), then move to medium heat to finish cooking without burning. I always bring the marinated chicken to room temperature for 20 minutes before grilling for more even cooking. Use a meat thermometer to hit the sweet spot of 165°F for breasts and 175°F for thighs. Allow the chicken to rest under loose foil for 5-10 minutes after grilling – this step is non-negotiable for locking in those flavorful juices! For indoor cooking, try adapting this method for baked chicken kabobs.

    Serving Ideas & Creative Variations

    Traditional Mexican Accompaniments

    Serve your Pollo Asado with warm corn tortillas and traditional accompaniments for an authentic experience. Freshly made pico de gallo with juicy tomatoes, crisp onions, and fragrant cilantro provides a bright contrast to the rich chicken. I love adding sliced avocados drizzled with lime juice and a sprinkle of sea salt. A side of Mexican rice with its tomato-infused warmth and fluffy texture soaks up all those delicious juices. For a cooling element, offer Mexican crema or sour cream with a squeeze of lime and chopped cilantro stirred in. These simple sides let the chicken remain the star while creating a complete meal.

    Modern Fusion Approaches

    Transform your Pollo Asado into creative meals throughout the week. Slice the chicken for loaded grain bowls with quinoa, black beans, roasted corn, and a drizzle of avocado-lime dressing. Last month, I used leftover chicken to create incredible breakfast tacos with scrambled eggs and salsa verde that had my family raving. For a lighter option, chop the chicken for a Mexican-inspired salad with romaine, jicama, and a honey-chipotle vinaigrette. It also makes a fantastic filling for quesadillas with melty Oaxaca cheese, similar to these steak cheese quesadillas but with your flavorful chicken instead.

    Storage & Troubleshooting Guide

    Proper Storage Solutions

    Store your cooked Pollo Asado properly to maintain its juicy texture and flavor profile. Refrigerate leftovers within two hours of cooking in shallow airtight containers for up to 4 days. For meal prep, I portion the chicken into individual containers with complementary sides for grab-and-go lunches. To freeze, wrap individual portions tightly in plastic wrap then aluminum foil, labeling with the date – they’ll keep for up to 3 months. When reheating, add a splash of chicken broth or water to restore moisture, and warm gently in a covered skillet over medium-low heat rather than microwaving, which can toughen the meat.

    Fixing Common Issues

    If your Pollo Asado turns out too dry, the likely culprit is overcooking. Next time, use a reliable meat thermometer and remove the chicken right when it hits the proper temperature. For chicken that didn’t develop enough flavor, increase your marinating time and make sure your marinade includes enough salt – it’s crucial for flavor penetration. If the exterior burns before the inside cooks through, your grill temperature was likely too high. Create distinct heat zones on your grill: high heat for initial searing, then move to medium-low to finish cooking. For overly spicy results, balance with cooling accompaniments like avocado, sour cream, or a mango salsa.

    Frequently Asked Questions

    What cuts of chicken work best for Pollo Asado?

    Bone-in, skin-on chicken thighs and legs offer the most flavor and moisture retention. However, chicken breasts work well too if you’re careful not to overcook them. Spatchcocking a whole chicken creates impressive presentation while ensuring even cooking.

    Can I make Pollo Asado without a grill?

    Absolutely! Use a cast-iron grill pan on high heat for similar charred results. Alternatively, broil the chicken on high, positioning it 6 inches from the heat source, turning halfway through cooking time.

    How can I make authentic Pollo Asado – Mexican Grilled Chicken if I can’t find achiote paste?

    Make a substitute by mixing 1½ tablespoons paprika, 1 tablespoon white vinegar, ¼ teaspoon dried oregano, 1 minced garlic clove, and a pinch of cumin. While not identical, it provides similar color and flavor complexity.

    Can I prepare the marinade ahead of time?

    Yes! The marinade can be made up to 3 days ahead and stored in the refrigerator. This actually allows the flavors to meld beautifully before adding the chicken.

    What’s the best way to serve leftover Pollo Asado?

    Leftover Pollo Asado makes excellent tacos, quesadillas, or grain bowls. For a quick meal, chop and add to scrambled eggs with cheese for breakfast tacos, or slice for sandwiches with avocado and chipotle mayo.

    Final Thoughts

    Pollo Asado – Mexican Grilled Chicken represents the beautiful simplicity of authentic Mexican cooking – quality ingredients, balanced flavors, and time-honored techniques. The vibrant colors and aromas create an experience that goes beyond just a meal. I’ve found that mastering this recipe has given me confidence to explore more international flavors in my kitchen. Whether you’re new to Mexican cuisine or a seasoned enthusiast, this dish delivers consistent joy with every bite. Share your Pollo Asado creations on Pinterest and join our community of flavor explorers!

  • Stuffed Manicotti with Rich Meat Sauce: Irresistibly Delicious!

    Stuffed Manicotti with Rich Meat Sauce: Irresistibly Delicious!

    Stuffed Manicotti with Rich Meat Sauce: Irresistibly Delicious!

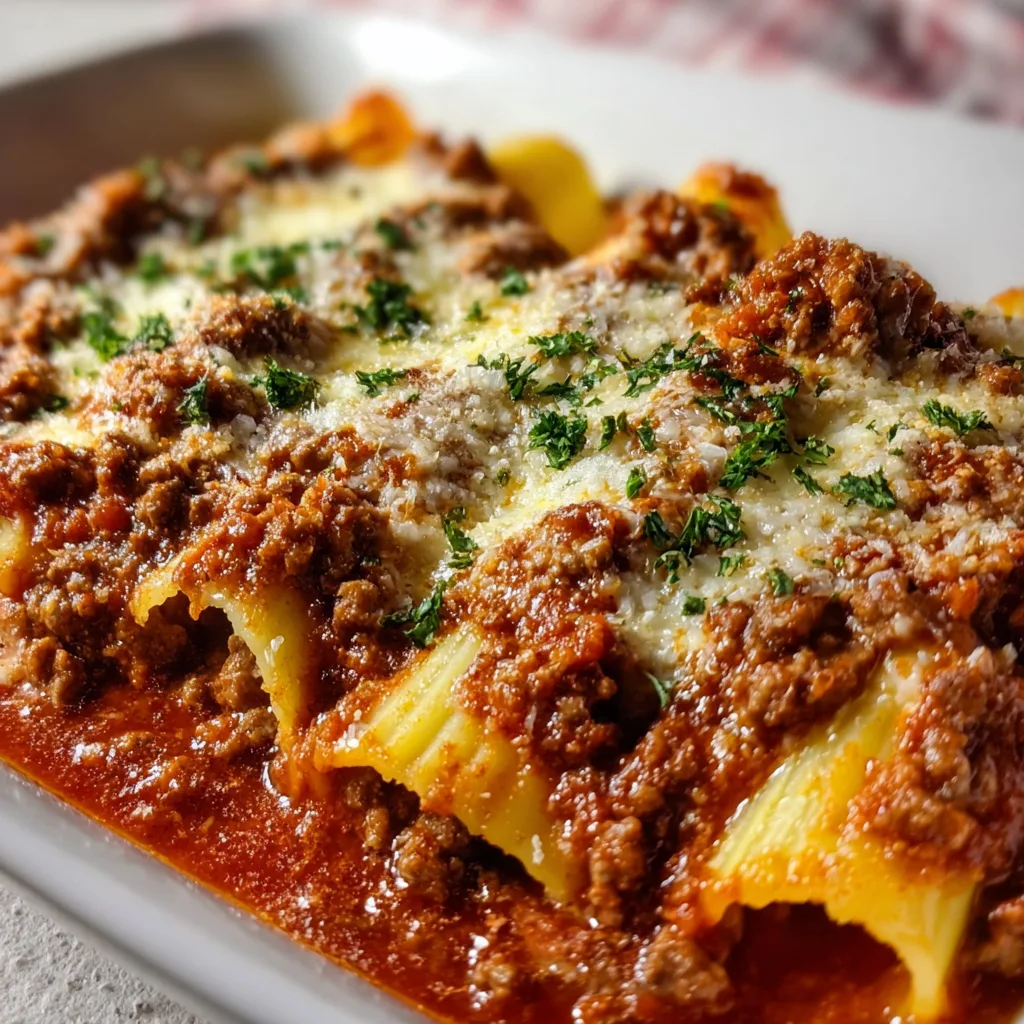
    Stuffed Manicotti with Rich Meat Sauce is one of those dishes that transforms an ordinary dinner into something truly special. The first time I made this for my family, I watched as everyone fell silent, savoring each bite of tender pasta tubes filled with creamy ricotta and smothered in a robust meat sauce. There’s something magical about that first cut into a perfectly baked manicotti, when the cheese stretches and the aromatic sauce bubbles around it. This recipe balances the richness of ground beef with the delicate flavor of the cheese filling, creating a hearty Italian classic that’s impressive yet achievable for any home cook.

    Recipe

    Why You’ll Love This Stuffed Manicotti with Rich Meat Sauce

    The Perfect Balance of Flavors and Textures

    This stuffed manicotti delivers an incredible sensory experience with every bite. The pasta shells maintain just the right amount of al dente texture, while encasing a velvety ricotta mixture that’s punctuated with herbs and Parmesan. The rich meat sauce provides a savory counterpoint with its depth of flavor from slow-simmered tomatoes, garlic, and herbs. I love how the cheese filling stays creamy even after baking, creating that wonderful contrast with the robust meat sauce that clings to every ridge of the pasta. It’s comfort food that feels both indulgent and somehow nostalgic, even if you’re making it for the first time.

    Make-Ahead Convenience for Busy Families

    One of the greatest advantages of this stuffed manicotti recipe is its flexibility. You can prepare the components in stages or assemble the entire dish up to 24 hours before baking. I often make the meat sauce on Sunday afternoons while my daughter practices piano, letting it simmer and develop those deep flavors. The filling comes together in minutes, and once assembled, the unbaked dish waits patiently in the refrigerator until we’re ready for dinner the next day. This make-ahead magic means you can serve a show-stopping meal even on hectic weeknights when time feels impossibly scarce.

    Essential Tips & Tricks

    Perfecting the Pasta

    Cooking the manicotti shells properly is crucial for a successful dish. I’ve learned through trial and error to undercook them slightly, about 2 minutes less than the package directions. This prevents tearing when you fill them and ensures they don’t become mushy during baking. A game-changing tip: after draining, lay each shell on a clean kitchen towel and pat dry. This removes excess moisture and makes handling much easier. For filling, skip the spoon method – instead, transfer your ricotta mixture to a ziplock bag, snip the corner, and pipe it directly into each shell for clean, efficient filling that reaches every corner.

    Elevating Your Meat Sauce

    The secret to an unforgettable stuffed manicotti lies in a deeply flavored meat sauce. Start by properly browning your ground beef until it develops those caramelized edges that contribute rich umami notes. Add a splash of red wine and let it reduce completely before incorporating your tomatoes. I always layer aromatics methodically – sautéed onions and garlic first, then herbs, allowing each addition time to release its flavors. For an extra dimension, try adding a Parmesan rind while the sauce simmers, removing it before assembly. This technique creates a sauce worthy of our Italian Chopped Salad as a starter.

    Serving Ideas & Creative Variations

    Complementary Side Dishes

    Stuffed manicotti with rich meat sauce deserves thoughtful accompaniments that balance its hearty nature. I love serving it with a bright, lemony arugula salad dressed simply with good olive oil and flaky salt – the peppery greens cut through the richness beautifully. Garlic bread is non-negotiable in my house, perfect for swiping up every last bit of that precious sauce. For a complete Italian feast, consider adding roasted vegetables like asparagus or zucchini tossed with herbs and a light vinaigrette. These sides add color and freshness to the plate while letting the manicotti remain the undisputed star of the meal.

    Delicious Twists on the Classic Recipe

    While traditional stuffed manicotti is divine, don’t be afraid to experiment with variations. For a lighter version, substitute ground turkey for beef and mix spinach into the ricotta filling for added nutrition and color. Seafood lovers might enjoy a coastal adaptation with shrimp or crab folded into the cheese mixture, paired with a marinara sauce instead of meat sauce. My personal favorite twist is adding caramelized mushrooms and a hint of truffle oil to the filling for an earthy, elegant variation. For more pasta inspiration, check out our Creamy Chicken Bacon Ranch Pasta for another crowd-pleasing option.

    Storage & Troubleshooting Guide

    Proper Storage and Reheating Methods

    Leftover stuffed manicotti can be just as delicious as when freshly made if stored properly. Refrigerate any leftovers within two hours of cooking, using shallow containers to ensure quick cooling. The dish will maintain its optimal flavor for up to 3-4 days in the refrigerator. When reheating, sprinkle a few drops of water over the pasta before covering with foil and warming in a 325°F oven until heated through (about 20 minutes). This gentle reheating preserves the creamy texture of the filling without drying out the pasta. For single servings, microwave on medium power with a damp paper towel covering the dish.

    Troubleshooting Common Issues

    Even experienced cooks occasionally encounter challenges with stuffed manicotti. If your pasta tears while filling, don’t panic! Simply place the torn side down in the baking dish and no one will notice. For filling that seems too runny, add a few extra tablespoons of grated Parmesan to absorb excess moisture. If your sauce reduces too much during baking, leaving the dish dry, keep some extra marinara on hand to add before serving. And for manicotti that’s browning too quickly in the oven, simply lay a piece of foil loosely over the top for the remaining bake time – this protects the surface while allowing the interior to finish cooking properly.

    Frequently Asked Questions

    Can I freeze stuffed manicotti with meat sauce?

    Absolutely! Assemble the dish but don’t bake it. Cover tightly with plastic wrap and foil, then freeze for up to 3 months. Thaw overnight in the refrigerator before baking, adding 15-20 minutes to the baking time.

    How do I prevent my stuffed manicotti from becoming soggy?

    Undercook the pasta shells slightly, drain and pat them dry before filling. Ensure your ricotta mixture isn’t too wet by draining it in a fine-mesh strainer for 30 minutes before mixing with other ingredients.

    Can I make stuffed manicotti with rich meat sauce vegetarian?

    Yes! Replace the meat sauce with a robust vegetable marinara. For the filling, add sautéed mushrooms, spinach, and roasted red peppers to maintain hearty flavor and texture.

    What’s the best cheese combination for the filling?

    A mixture of whole milk ricotta, mozzarella, and Parmesan creates the perfect balance. The ricotta provides creaminess, mozzarella adds stretch, and Parmesan contributes sharp, salty notes.

    How can I tell when my stuffed manicotti is done baking?

    The stuffed manicotti with rich meat sauce is ready when the edges are bubbling, the cheese on top is golden brown, and the center reaches 165°F when tested with an instant-read thermometer.

    Final Thoughts

    Creating a perfect Stuffed Manicotti with Rich Meat Sauce is truly an act of love. The care taken with each component – from the perfectly cooked pasta to the creamy filling and that glorious sauce – results in a dish that brings people together. I still remember my grandmother’s hands deftly filling each tube, teaching me that good food takes time but is always worth the effort. This recipe honors those traditions while fitting into our modern lives. Share your creations with me on Pinterest – I’d love to see how your stuffed manicotti turns out!

  • Hot and Tangy Devilled Chicken Recipe That’ll Ignite Your Taste Buds!

    Hot and Tangy Devilled Chicken Recipe That’ll Ignite Your Taste Buds!

    Hot and Tangy Devilled Chicken Recipe That’ll Ignite Your Taste Buds!

    Hot and tangy devilled chicken has been my secret weapon for dinner parties that leave guests begging for the recipe. There’s something magical about that perfect balance of heat and tanginess that transforms ordinary chicken into something extraordinary. The first time I made this dish, my kitchen filled with the most intoxicating aroma of spices and caramelizing chicken skin. I watched my husband’s eyes widen as he took his first bite – that moment of pure culinary bliss is why I keep coming back to this recipe. Let me show you how to create this flavor explosion that’s become a staple in my home kitchen.

    Recipe

    Why You’ll Love This Hot and Tangy Devilled Chicken

    A Perfect Balance of Flavors

    The magic of this dish lies in its harmonious blend of heat and tanginess. The marinade features a delicious combination of Dijon mustard, hot sauce, and a touch of honey that creates layers of flavor that dance on your tongue. I love how the spices form a gorgeous crust on the chicken as it cooks, sealing in all those juicy flavors. The first time I served this at a dinner party, my friend Sarah literally closed her eyes while eating – that’s the kind of reaction you can expect! The marinade penetrates deep into the meat, ensuring every bite delivers that perfect flavor balance.

    Quick Prep, Maximum Impact

    What I adore about this hot and tangy devilled chicken is how it delivers restaurant-quality results with minimal effort. The prep takes just 15 minutes of hands-on time, then the marinade does all the heavy lifting. On busy weeknights when I’m juggling work deadlines and helping with homework, I can still get this impressive dish on the table. The chicken develops its complex flavors while marinating, meaning you don’t need to babysit it. Plus, the ingredients are pantry staples I always have on hand, making this my go-to recipe when I need something reliably delicious without a special shopping trip.

    Essential Tips & Tricks

    Mastering the Marinade

    The key to truly exceptional hot and tangy devilled chicken lies in the marinade timing. While you can cook it after just 30 minutes, I find the sweet spot is 4-6 hours for the flavors to fully develop. For an even deeper flavor infusion, I sometimes prepare it the night before – the difference is remarkable! Make sure to really massage the marinade into every crevice of the chicken pieces. I also recommend scoring the chicken slightly with a knife to help the flavors penetrate. Don’t skimp on the acid component (vinegar or lemon juice) – it’s what tenderizes the meat and creates that melt-in-your-mouth texture.

    Perfect Cooking Techniques

    The cooking method you choose dramatically affects the final result. For the most delicious caramelization, I prefer roasting at 425°F, which creates that incredible sticky exterior while keeping the inside juicy. If you’re grilling, use indirect heat first, then finish over direct flames for those beautiful char marks. Always let the chicken come to room temperature before cooking – cold chicken straight from the fridge won’t cook evenly. And the most important tip? Use a meat thermometer! Chicken thighs should reach 175°F for that perfect tenderness, while breasts need 165°F to avoid drying out.

    Serving Ideas & Creative Variations

    Complementary Side Dishes

    This hot and tangy devilled chicken pairs beautifully with sides that can balance the heat. My family’s favorite combination includes a cooling cucumber raita and fluffy basmati rice that soaks up all those delicious juices. For a complete meal, I often add roasted vegetables tossed with a touch of the same spice mix – the consistency ties everything together perfectly. When I’m feeling fancy, I’ll serve it with a bright citrus salad; the acidity cuts through the richness of the chicken. For a more substantial meal, try it alongside crispy roasted potatoes – the contrast in textures is absolutely divine!

    Flavor Variations to Try

    While the classic recipe is perfection, I love experimenting with different flavor profiles. For a Mediterranean twist, add oregano, lemon zest, and olives to the marinade. When I’m craving something tropical, I incorporate coconut milk and lime for a completely different but equally delicious version. You can adjust the heat level to suit your preference – my kids prefer it milder, so I often make a batch with less chili for them. For an Asian-inspired variation, try adding ginger, five-spice powder, and a touch of sesame oil. Each variation maintains the essential tangy-spicy character while offering a fresh experience.

    Storage & Troubleshooting Guide

    Proper Storage Solutions

    To maintain the peak flavor of your hot and tangy devilled chicken, proper storage is essential. Leftovers can be refrigerated in an airtight container for up to 3 days, though the flavors actually intensify overnight, making for an even more delicious lunch the next day. If you’re meal prepping, you can freeze the cooked chicken for up to 2 months – just be sure to cool it completely before freezing. I recommend portioning it into individual servings for easier defrosting. For the best texture when reheating, let it thaw overnight in the refrigerator, then warm it in a 325°F oven until just heated through.

    Fixing Common Issues

    Even experienced cooks occasionally encounter challenges with this dish. If your chicken skin isn’t crisping properly, try patting the pieces completely dry before applying the marinade, and make sure your oven is fully preheated. For chicken that’s coming out too dry, you’re likely overcooking it – invest in a good meat thermometer for perfect results every time. If the flavor isn’t as punchy as you’d like, try adding a splash of acid (vinegar or lemon juice) just before serving to brighten everything up. And if the sauce is too thin, you can reduce it in a small saucepan until it reaches that perfect sticky consistency.

    Frequently Asked Questions

    Can I use boneless chicken for hot and tangy devilled chicken?

    Absolutely! Boneless thighs work beautifully and cook faster (about 20-25 minutes). Just watch them carefully as they can dry out more quickly than bone-in pieces.

    How spicy is this recipe?

    The heat level is moderate but customizable. Start with half the hot sauce if you’re sensitive to spice, or double it if you love that fiery kick!

    Can I make this in an air fryer?

    Yes! Cook at 380°F for about 12-15 minutes for boneless pieces, flipping halfway through. You’ll get amazingly crispy results.

    Is this recipe gluten-free?

    It can be! Just ensure your mustard, hot sauce, and other condiments are certified gluten-free, as some brands contain hidden gluten.

    Can I prepare the marinade ahead of time?

    Definitely. The marinade keeps well in the refrigerator for up to 3 days, making meal prep even easier.

    Final Thoughts

    This hot and tangy devilled chicken has become more than just a recipe in my household – it’s a celebration of bold flavors that brings everyone to the table with excitement. The beauty lies in its versatility and reliability; whether for a casual family dinner or entertaining guests, it never disappoints. I hope you’ll make this dish your own, experimenting with the spice levels and sides until you find your perfect combination. Don’t forget to check out more delicious recipes on my Pinterest board for more inspiration!

  • Crispy Fried Oyster Mushrooms That Will Blow Your Mind!

    Crispy Fried Oyster Mushrooms That Will Blow Your Mind!

    Crispy Fried Oyster Mushrooms That Will Blow Your Mind!

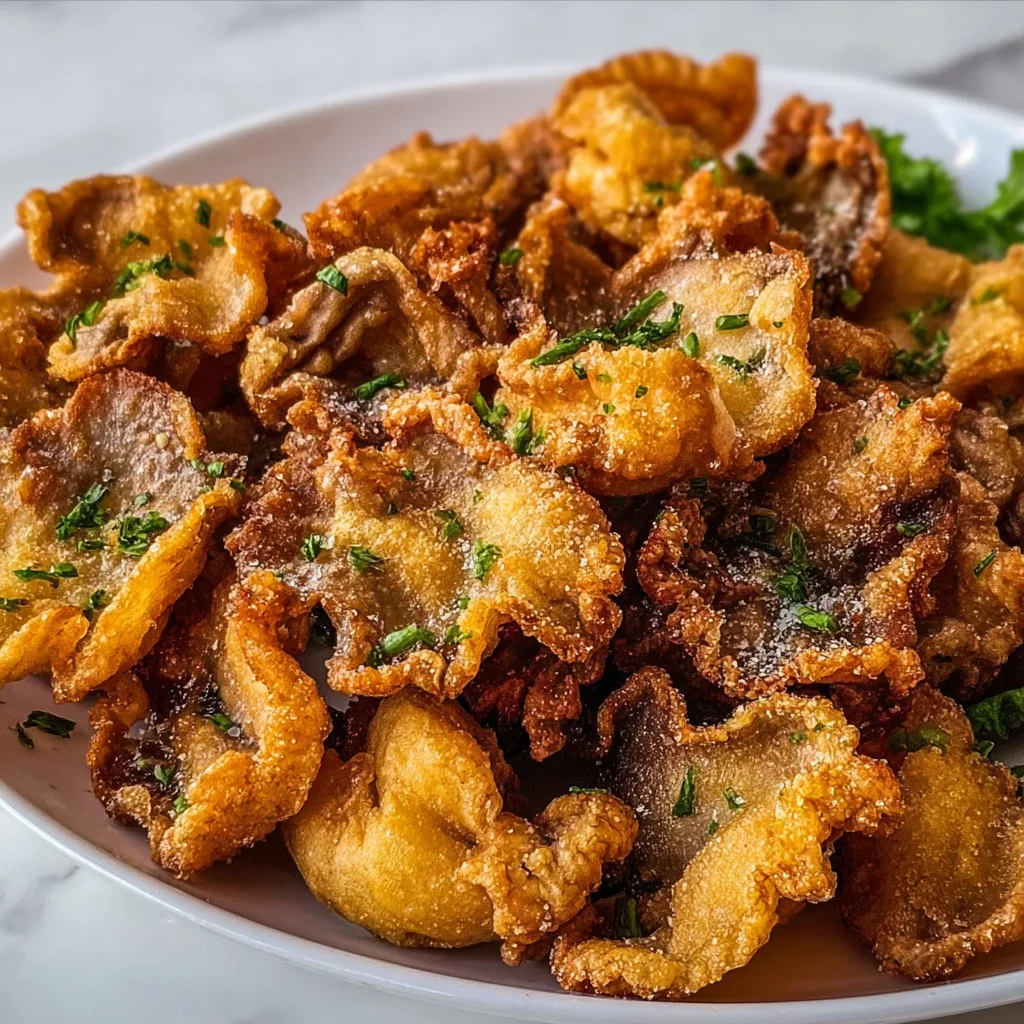
    Crispy Fried Oyster Mushrooms have completely changed my weeknight dinner game! The first time I made these golden, crunchy beauties, my kitchen filled with the most intoxicating aroma of herbs and earthy mushrooms. There’s something magical about the way these humble fungi transform when coated in a perfectly seasoned batter and fried to crispy perfection. I’ve tested dozens of variations to bring you this foolproof recipe that delivers that satisfying crunch with every bite. If you’re looking for a vegetarian alternative that even meat-lovers will devour, this recipe from my collection is about to become your new obsession!

    Recipe

    Why You’ll Love This Crispy Fried Oyster Mushrooms

    Perfect Texture Combination

    The magic of crispy fried oyster mushrooms lies in their incredible texture contrast. The exterior develops this irresistible golden crust that shatters between your teeth, while the interior remains tender and juicy. Oyster mushrooms are ideal for this technique because their natural structure holds up beautifully during frying, maintaining that meaty bite we all crave. I still remember my husband (a dedicated carnivore) reaching for thirds, completely forgetting he was eating mushrooms! The natural folds and crevices of oyster mushrooms also create extra surface area for the batter to cling to, resulting in more of that addictive crunch.

    Flavor That Adapts to Any Cuisine

    What makes crispy fried oyster mushrooms truly special is their flavor versatility. These mushrooms have a naturally subtle, earthy taste that serves as the perfect canvas for whatever seasonings you prefer. I’ve made Asian-inspired versions with five-spice powder that transported me straight to my favorite street food markets. For Italian night, a sprinkle of oregano and garlic powder in the batter creates magic. The mushrooms themselves contain natural glutamates that enhance savory flavors, making them taste remarkably rich and satisfying. You can easily customize the spice level from mild to wild depending on your mood.

    Essential Tips & Tricks

    The Perfect Batter Technique

    Creating the ideal batter for crispy fried oyster mushrooms requires a two-step approach. Start with a dry mixture containing flour, cornstarch, and your seasonings, then prepare a wet batter using cold sparkling water (my secret weapon!). The carbonation creates tiny air pockets that make the coating exceptionally light and crispy. Temperature matters tremendously here – keep your wet batter ice-cold until the moment you use it. I learned this trick after several disappointing batches with a soggy coating. Make sure to dip each mushroom in the dry mix first, then the wet batter, and finally back into the dry mix for that ultimate crispy crust similar to my Crispy Shrimp Toast.

    Mushroom Preparation Secrets

    The way you handle your oyster mushrooms before frying makes all the difference in the final result. Always pat them completely dry with paper towels before coating – any excess moisture will create steam and prevent proper crisping. I like to tear larger oyster mushrooms into bite-sized pieces rather than cutting them, which preserves their natural texture and creates those beautiful irregular edges that get extra crispy. Let the torn mushrooms rest on paper towels for 15 minutes before battering. This draws out additional moisture and allows the mushrooms to warm to room temperature, which prevents the oil temperature from dropping too much when you add them to the pan.

    Serving Ideas & Creative Variations

    Dipping Sauces That Elevate

    The right dipping sauce can take your crispy fried oyster mushrooms from delicious to absolutely unforgettable. My personal favorite is a spicy honey drizzle – just mix two tablespoons of honey with one teaspoon of hot sauce and a squeeze of lime. The sweet-heat combination perfectly complements the earthy mushrooms and crunchy exterior. For something creamy, whip up a quick sriracha mayo by combining three tablespoons of mayonnaise with one tablespoon of sriracha and a dash of lime juice. These mushrooms also pair beautifully with a tangy yogurt-based sauce similar to what I use in my Bang Bang Salmon recipe, adding a cooling contrast to the warm, crispy bites.

    Creative Serving Suggestions

    Transform your crispy fried oyster mushrooms into a complete meal with these creative serving ideas. One of my favorite weeknight shortcuts is using them as the star protein in tacos – just add some shredded cabbage, pickled onions, and avocado for an incredible meat-free taco night. They also make phenomenal sliders when tucked into small buns with some coleslaw and pickle. For a lighter option, use them as a topper for grain bowls with quinoa, roasted vegetables, and a tahini drizzle. When I’m entertaining, I arrange them on a platter with various dipping sauces as an appetizer that disappears within minutes!

    Storage & Troubleshooting Guide

    Maintaining Maximum Crispiness

    The biggest challenge with crispy fried oyster mushrooms is keeping that perfect crunch after they’re cooked. For immediate serving, place them on a wire rack instead of paper towels – this prevents steam from softening the underside. If you need to make them ahead, cool completely on a rack, then store in a single layer in an airtight container with paper towels between layers to absorb moisture. To reheat, avoid the microwave at all costs! Instead, place them on a baking sheet in a 375°F oven for 5-7 minutes. The dry heat will restore most of that fresh-fried texture without drying out the mushrooms inside.

    Troubleshooting Common Issues

    If your crispy fried oyster mushrooms aren’t turning out perfectly, a few simple adjustments can make all the difference. When facing soggy results, the culprit is usually oil temperature – invest in a kitchen thermometer and maintain 350-375°F throughout cooking. Another common issue is batter that slides off during frying, which happens when mushrooms are too wet or the batter is too thin. To fix this, ensure mushrooms are thoroughly dried and add a tablespoon more flour to thicken the batter if needed. If your mushrooms are browning too quickly but remain raw inside, your oil is likely too hot – lower the temperature and try again.

    Frequently Asked Questions

    Can I use other mushroom varieties for this recipe?

    Yes! King oyster, lion’s mane, and even large shiitake mushrooms work wonderfully. Each variety offers a different texture, but the same battering technique applies to all of them.

    How can I make crispy fried oyster mushrooms gluten-free?

    Simply substitute the all-purpose flour with a gluten-free flour blend. Add 1/4 teaspoon of xanthan gum to help with binding if your blend doesn’t already contain it.

    What’s the best oil for frying crispy oyster mushrooms?

    Neutral oils with high smoke points work best – vegetable, canola, or peanut oil are ideal. Avoid olive oil as its low smoke point can create a bitter taste.

    Can I make crispy fried oyster mushrooms in an air fryer?

    Absolutely! Spray the coated mushrooms with cooking oil, then air fry at 380°F for 8-10 minutes, flipping halfway through for even crisping.

    How do I know when my crispy fried oyster mushrooms are perfectly cooked?

    They should be golden brown with a firm exterior that doesn’t feel soggy. The mushrooms inside should be tender but not mushy when bitten into.

    Final Thoughts

    These crispy fried oyster mushrooms have earned a permanent spot in my recipe rotation for good reason. They deliver that perfect combination of addictive crunch and meaty satisfaction that keeps everyone coming back for more. I love how they can transform from a casual weeknight dinner to an impressive party appetizer with just a change in presentation. The versatility of flavors means they never get boring, and the relatively simple preparation makes them accessible even on busy days. Be sure to check out more of my recipes on Pinterest for more mushroom inspiration!