Author: Darleen Vance

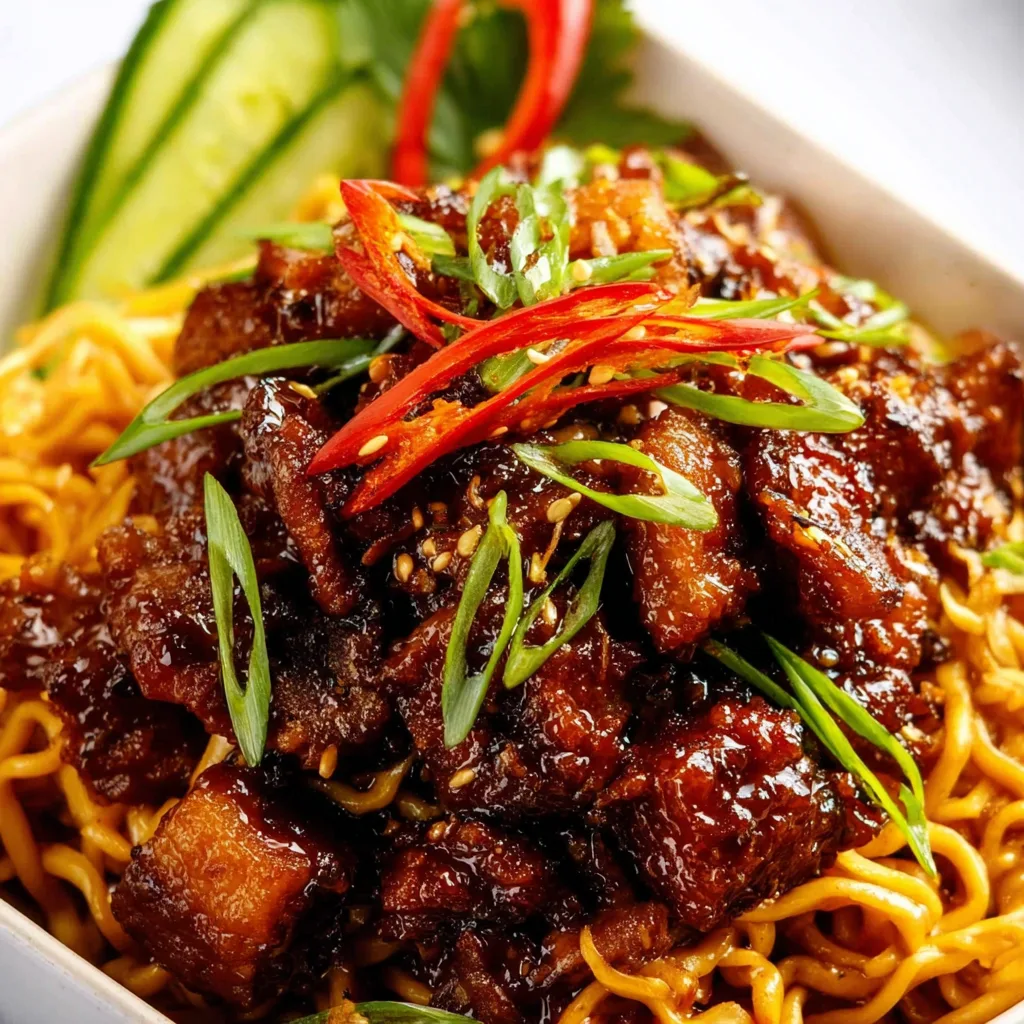
  • Crispy Beef with Spicy Saucy Noodles: Irresistibly Delicious!

    Crispy Beef with Spicy Saucy Noodles: Irresistibly Delicious!

    Crispy Beef with Spicy Saucy Noodles: Irresistibly Delicious!

    Crispy beef with Spicy Saucy Noodles is my absolute obsession lately—that perfect combination of crunchy texture and bold flavors that dance on your tongue! I first made this dish after a particularly exhausting Monday, craving something with a bit of kick to wake up my taste buds. The way the beef caramelizes and crisps up while the noodles soak up that spicy, savory sauce is pure magic. Trust me, this isn’t just dinner; it’s a mood-lifting experience that’ll have you twirling noodles with a smile. Let me show you how to create this irresistible comfort food.

    Recipe

    Why You’ll Love This Crispy Beef with Spicy Saucy Noodles

    Perfect Texture Contrast

    There’s something almost therapeutic about the textural symphony in this dish. The beef gets this incredible crispy exterior while staying tender inside—a technique I perfected after many (delicious) trial runs. The key is getting your pan screaming hot and not overcrowding the meat. When you take that first bite with the silky noodles and crunchy beef together, it’s like hitting the satisfaction jackpot! My husband actually does a little food dance whenever I make this, which is both adorable and validating. The contrast keeps every bite interesting and crave-worthy.

    Bold, Balanced Flavors

    The flavor profile here is what I call “confidently spicy”—it’s got heat that makes itself known without overwhelming everything else. I balance the spice with subtle sweetness and umami depths that make your taste buds do a happy dance. The sauce clings to both the caramelized beef and the noodles perfectly, creating this harmonious bite every time. I remember serving this to my spice-cautious friend Emma who surprised herself by going back for seconds! It’s that perfect middle ground where the flavors are bold enough to be exciting but balanced enough to keep you coming back for more.

    Essential Tips & Tricks

    Perfecting the Crispy Beef

    Getting that restaurant-quality crispiness at home isn’t magic—it’s technique! Start by slicing your beef super thin against the grain (pro tip: freeze it for 20 minutes first for easier cutting). Then the game-changer: cornstarch. Coating the beef in cornstarch creates that golden crust we’re after. Make sure your oil is properly hot before adding the beef, and work in batches—overcrowding is the enemy of crispiness! I learned this the hard way when I rushed once and ended up with beef that steamed rather than crisped. Patience here pays off in texture dividends that make the dish extraordinary.

    Sauce Consistency Secrets

    The perfect sauce should be thick enough to coat the back of a spoon but not so thick it becomes gloopy. My secret? A touch of dark brown sugar which not only adds depth but helps with caramelization. Balance your spicy elements (like chili paste) with something acidic (rice vinegar works beautifully) to create complexity. For thickening, a cornstarch slurry is your best friend—but add it gradually! I once dumped it all in at once during a dinner party and ended up with something closer to beef jelly than sauce. Timing matters too—just like with these Crispy Chicken Spring Rolls, add your sauce at the right moment for perfect results.

    Serving Ideas & Creative Variations

    Complementary Side Dishes

    This dish shines as the star but pairs beautifully with simple sides that complement without competing. Try cucumber salad with rice vinegar for a cooling contrast to the spicy beef—the refreshing crunch is perfection alongside the rich main dish. Steamed bok choy or broccoli makes for a nutritious addition that soaks up extra sauce deliciously. For a complete experience, nothing beats a small bowl of miso soup as a starter. I served this combination at my last dinner gathering, and my friend Lisa texted the next day specifically asking for the “entire spicy beef experience” recipe—sides included!

    Regional Flavor Adaptations

    While my base recipe has Chinese-inspired flavors, you can easily pivot to create different regional variations. For a Korean twist, add gochujang instead of sriracha and a sprinkle of toasted sesame seeds. Thai-inspired? Incorporate some fish sauce, lime, and Thai basil. Japanese variation? A dash of mirin and a side of pickled ginger changes everything. The versatility of the crispy beef technique means you can travel the world with your flavors! This pairs wonderfully with a simple Italian Chopped Salad for an east-meets-west fusion dinner that’ll impress anyone at your table.

    Storage & Troubleshooting Guide

    Keeping It Fresh

    Let’s be honest—this dish is at its absolute best fresh from the wok, when the beef is at peak crispiness. However, life happens! If you need to store leftovers, keep the beef separate from the noodles and sauce when possible. Store in airtight containers in the refrigerator for up to 2 days. When reheating, use a skillet rather than microwave to help revive some crispness in the beef. A light spray of oil and high heat can work wonders. I’ve found that adding a fresh garnish like sliced green onions after reheating gives leftovers new life and makes them feel special again.

    Fixing Common Issues

    If your beef isn’t crisping properly, your pan probably isn’t hot enough or you’re overcrowding it. Work in smaller batches next time. For sauce that’s too thin, whisk in additional cornstarch slurry (1 teaspoon cornstarch mixed with 2 teaspoons cold water). Too thick? A splash of chicken broth loosens it perfectly. If your dish lacks flavor depth, try adding a teaspoon of oyster sauce or a dash of fish sauce—these umami bombs transform bland to brilliant instantly. For too much heat, a drizzle of honey and extra lime juice can tame the fire while adding complexity rather than just diluting flavors.

    Frequently Asked Questions

    What cut of beef works best for Crispy Beef with Spicy Saucy Noodles?

    Flank steak or sirloin are ideal choices. They have enough fat for flavor but remain tender when sliced thin against the grain and briefly cooked at high heat.

    Can I make this dish less spicy?

    Absolutely! Reduce or omit the chili paste/sriracha and use mild paprika instead of cayenne. The dish will still have wonderful flavor without the heat.

    How do I prevent my noodles from sticking together?

    Rinse cooked noodles under cold water immediately after cooking, then toss with a small amount of sesame oil until ready to add to your sauce.

    Can I make this dish ahead for a party?

    Prepare components separately—crisp the beef and make the sauce up to a day ahead, then reheat the sauce, quickly refry the beef, and combine with fresh noodles just before serving.

    What’s the secret to restaurant-quality Crispy Beef with Spicy Saucy Noodles?

    The key is high heat, cornstarch-coated beef cooked in batches, and a well-balanced sauce with layers of flavor—sweet, salty, spicy, and umami all in perfect harmony.

    Final Thoughts

    This Crispy Beef with Spicy Saucy Noodles has become my go-to when I want to impress without stressing in the kitchen. There’s something deeply satisfying about creating those perfect textures—crispy beef against silky noodles—that makes dinner feel special. I love seeing people’s eyes light up with that first bite! The beauty of this dish lies in its adaptability; make it your own with your preferred spice level or protein. For more inspiration, check out my Pinterest board where I’m always adding new Asian-inspired recipes. Now go get your wok hot and ready—crispy beef bliss awaits!
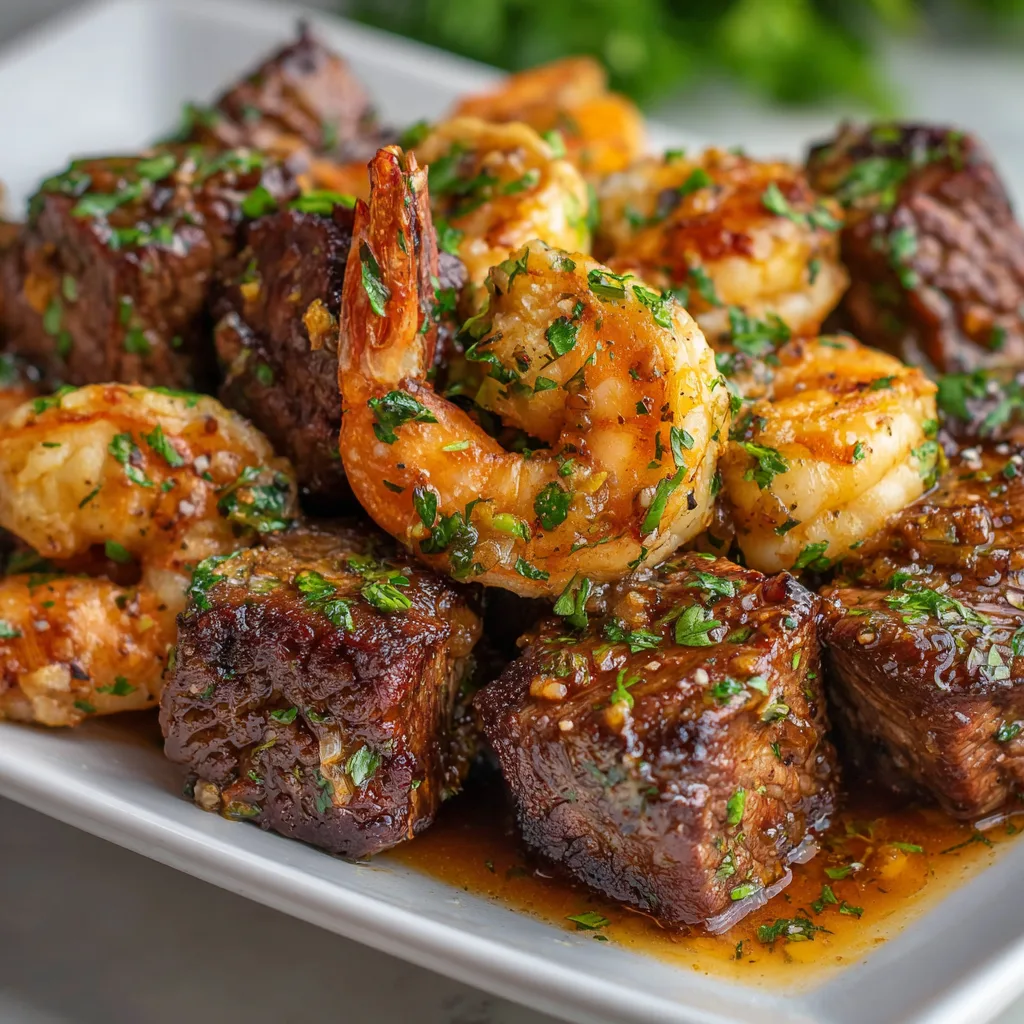

  • Garlic Butter Steak Bites & Shrimp That Melt Hearts Fast!

    Garlic Butter Steak Bites & Shrimp That Melt Hearts Fast!

    Garlic Butter Steak Bites & Shrimp That Melt Hearts Fast!

    Garlic Butter Steak Bites and Shrimp is the ultimate surf and turf dinner that combines tender, juicy steak chunks with succulent shrimp, all bathed in a rich, aromatic garlic butter sauce. I discovered this recipe during a spontaneous dinner party when I was scrambling to impress my in-laws with something special. The sizzle of the steak hitting the hot pan, the fragrant cloud of garlic butter rising into the air – it was pure magic! This one-pan wonder transforms ordinary weeknights into something extraordinary, all in under 30 minutes. Let me show you how to create this restaurant-worthy meal right in your own kitchen.

    Recipe

    Why You’ll Love This Garlic Butter Steak Bites and Shrimp

    Perfect Combination of Flavors and Textures

    There’s something truly magical about the marriage of tender steak and plump shrimp in one dish. The beef brings a rich, savory depth while the shrimp offers a sweet delicacy that perfectly complements it. When both are enveloped in that garlicky, buttery sauce with hints of herbs, every bite becomes a celebration. The textural contrast between the meaty steak and the slightly springy shrimp creates a sensory experience that keeps you coming back for more. It’s like having the best of both worlds on one plate!

    Quick and Impressive Meal Solution

    When life gets hectic but you still want something that feels special, these garlic butter steak bites and shrimp come to the rescue. Ready in just 25 minutes, this dish delivers maximum flavor with minimal effort. I’ve served this on busy weeknights and for last-minute dinner guests with equal success. The elegant presentation belies how simple it is to prepare, making it my secret weapon for those “I need something impressive but have no time” moments. Even kitchen novices can nail this recipe on the first try!

    Essential Tips & Tricks

    Mastering the Perfect Sear

    The key to restaurant-quality steak bites lies in achieving that gorgeous caramelized crust. Start with a smoking hot pan – I mean really hot – before adding your meat. Work in batches to avoid overcrowding, which steams rather than sears your steak. Pat your meat dry with paper towels before seasoning, as moisture is the enemy of a good sear. For the shrimp, cook just until they turn pink and opaque; about 2 minutes per side is usually perfect. Overcooking will transform them from succulent to rubbery faster than you can say “dinner’s ready!”

    Selecting and Preparing Your Ingredients

    Choose high-quality steak cuts like sirloin, ribeye, or New York strip for the most tender results. Cut against the grain into uniform 1-inch cubes for even cooking. For shrimp, I prefer large (16/20 count) ones with shells and tails removed for easier eating. Fresh is wonderful, but frozen shrimp work beautifully too – just thaw completely and pat dry. The garlic butter sauce really makes this dish shine, so use fresh garlic rather than pre-minced for the most vibrant flavor profile.

    Serving Ideas & Creative Variations

    Perfect Pairings for a Complete Meal

    These garlic butter steak bites and shrimp deserve worthy companions on your plate. A bed of creamy mashed potatoes makes the perfect landing pad for soaking up that luscious sauce. For a lighter option, try cauliflower mash or buttered rice. Add a bright, acidic side like a simple arugula salad with lemon vinaigrette to cut through the richness. Roasted asparagus or Brussels sprouts with hot bacon bring a welcome veggie component that complements rather than competes with your star protein duo.

    Exciting Flavor Twists to Try

    While the classic garlic butter version is divine, don’t be afraid to experiment! Add a Cajun twist with blackening spices and a squeeze of lemon. For an Asian-inspired variation, incorporate soy sauce, ginger, and a drizzle of honey into your butter sauce. Mediterranean flavors work beautifully too – try adding sun-dried tomatoes, capers, and a splash of white wine to the sauce. For heat lovers, red pepper flakes or a diced jalapeño will give your dish a pleasant kick that complements the rich butter and tender proteins.

    Storage & Troubleshooting Guide

    Proper Storage and Reheating Methods

    Store any leftover garlic butter steak bites and shrimp in an airtight container in the refrigerator for up to 2 days. The delicate nature of seafood means this isn’t a dish that keeps well for extended periods. When reheating, gentle methods work best to prevent toughening the proteins. I recommend warming in a skillet over medium-low heat with a splash of water or broth to create steam. Microwave reheating works in a pinch, but use 50% power and short intervals, checking frequently to avoid overheating the shrimp.

    Solving Common Cooking Challenges

    Tough steak bites usually indicate overcooking or poor-quality meat. For tender results, aim for medium-rare to medium doneness and rest your meat before cutting. If your shrimp turn rubbery, they’ve likely spent too long in the pan – they need just minutes to cook through. Sauce separation happens when butter breaks due to high heat; prevent this by removing the pan from heat before stirring in cold butter. If your sauce lacks flavor depth, try adding a splash of white wine or beef broth and reducing it before adding the butter.

    Frequently Asked Questions

    Can I make garlic butter steak bites and shrimp ahead of time?

    This dish is best enjoyed fresh, but you can prep ingredients 24 hours ahead. Cut and season the steak, clean the shrimp, and mince the garlic. Store separately in the refrigerator until cooking time for the freshest results.

    What’s the best cut of beef for steak bites?

    Sirloin offers the perfect balance of tenderness and flavor without breaking the bank. Ribeye and New York strip are excellent premium options. Avoid lean cuts like tenderloin which can dry out quickly when cut into small pieces.

    How do I know when the shrimp are perfectly cooked?

    Perfectly cooked shrimp form a “C” shape, turn opaque, and show a pearly pink color. If they curl into a tight “O” shape, they’re overcooked. Cook for approximately 2 minutes per side depending on size.

    Can I substitute the butter in garlic butter steak bites and shrimp?

    Yes, though it changes the flavor profile. Olive oil works for dairy-free needs, while ghee offers the butter flavor without lactose. For a lighter option, use half butter and half olive oil.

    What wine pairs best with this dish?

    A medium-bodied red like Merlot or Pinot Noir complements the steak, while an unoaked Chardonnay or Sauvignon Blanc pairs beautifully with the shrimp. For versatility, choose a sparkling wine that works with both proteins.

    Final Thoughts

    Garlic Butter Steak Bites and Shrimp has become my go-to recipe when I want to create something truly special without spending hours in the kitchen. There’s something magical about the way the rich, aromatic butter sauce brings together the tender steak and succulent shrimp. I love watching people’s eyes light up at first bite – that moment of pure food joy is why I cook. Whether for a date night, family dinner, or solo indulgence, this dish delivers restaurant-quality results with minimal effort. Don’t forget to check out more delicious recipes on Pinterest!

  • Salted Caramel Pretzel Cheesecake Balls That Will Blow Your Mind!

    Salted Caramel Pretzel Cheesecake Balls That Will Blow Your Mind!

    Salted Caramel Pretzel Cheesecake Balls That Will Blow Your Mind!

    Salted Caramel Pretzel Cheesecake Balls have become my absolute obsession this season. There’s something magical about the way the creamy cheesecake filling embraces the sweet caramel, while the pretzel coating adds that perfect salty crunch. I first made these for my sister’s holiday party last year, and they disappeared faster than I could refill the platter! The best part? They’re deceptively simple to make but look like you spent hours in the kitchen. If you’re looking for a no-bake treat that hits all the flavor notes, these little bites of heaven are exactly what you need.

    Recipe

    Why You’ll Love These Salted Caramel Pretzel Cheesecake Balls

    Perfect Balance of Flavors and Textures

    These cheesecake balls are a sensory delight in every bite. The velvety cream cheese base melts on your tongue while the caramel adds a sweet, buttery note that makes you close your eyes in appreciation. Then comes that satisfying crunch from the crushed pretzels! I love how the salt cuts through the sweetness, creating that addictive sweet-salty combination that keeps everyone reaching for “just one more.” Plus, they’re perfectly portable—ideal for holiday gatherings, potlucks, or those moments when you need a little something special with your afternoon coffee.

    Make-Ahead Convenience

    One of the things I appreciate most about these Salted Caramel Pretzel Cheesecake Balls is their incredible convenience. You can prepare them days before your event and simply store them in the refrigerator until you’re ready to serve. This has saved me countless times when hosting dinner parties! The flavors actually develop and meld together beautifully over time, making them even more delicious after a day or two. For busy holiday seasons when you’re juggling multiple responsibilities, having a show-stopping dessert ready to go is absolutely priceless.

    Essential Tips & Tricks

    Getting the Perfect Consistency

    The secret to foolproof cheesecake balls lies in the chilling time. I learned this the hard way when I tried to rush the process once and ended up with a sticky mess! Make sure your cream cheese is properly softened before mixing, but not melted. After forming the balls, give them at least 2 hours in the freezer to firm up before coating. This prevents them from falling apart during the dipping process. I also recommend using a cookie scoop for uniform sizing—it makes the entire process neater and ensures even freezing and consistent presentation that will impress your guests.

    Coating Techniques for Beautiful Results

    For that professional-looking finish, perfect your coating technique. After experimenting with different methods, I’ve found that working with just a few balls at a time while keeping the rest chilled is crucial. Use two forks to roll each ball in the crushed pretzels, applying gentle pressure to help the coating stick. For an extra special touch, try drizzling melted chocolate over the finished balls or adding a tiny pretzel on top as a garnish. These little details elevate your Salted Caramel Pretzel Cheesecake Balls from delicious to absolutely unforgettable.

    Serving Ideas & Creative Variations

    Elegant Presentation Options

    Transform these humble cheesecake balls into a showstopping dessert with thoughtful presentation. I love arranging them on a slate board with fresh mint leaves and a light dusting of powdered sugar for contrast. For dinner parties, try serving individual balls in mini cupcake liners on a tiered stand, or skewer them with fancy toothpicks for easy grabbing. During the holidays, I place them in a wreath formation around a small bowl of extra caramel sauce for dipping. The visual impact is stunning, and guests always reach for their phones to snap pictures before diving in!

    Flavor Twists and Additions

    While the classic version is divine, don’t be afraid to experiment with creative variations. Try adding a tablespoon of bourbon to the cheesecake mixture for sophisticated adult-only balls, or incorporate crushed cookies instead of graham crackers in the base. One of my favorite twists is adding a tiny cube of firm caramel candy in the center of each ball for an extra surprise when bitten into. For chocolate lovers, try coating half in dark chocolate before rolling in pretzels. These variations pair beautifully with coffee after dinner or alongside my Apple Cider Float for a complete dessert experience.

    Storage & Troubleshooting Guide

    Proper Storage for Maximum Freshness

    Maintaining the perfect texture of your cheesecake balls depends on proper storage. Keep them refrigerated in an airtight container, where they’ll stay fresh for up to 5 days. Place parchment paper between layers to prevent sticking. If you need to make them further in advance, they freeze beautifully for up to 3 months! Just thaw them in the refrigerator overnight before serving. I’ve found that the pretzel coating may soften slightly after freezing, but a quick roll in fresh crushed pretzels just before serving easily fixes this and makes them taste freshly made.

    Fixing Common Problems

    Even experienced bakers encounter issues sometimes! If your mixture is too soft to handle, it’s likely not chilled enough. Return it to the refrigerator for 30 minutes before trying again. For balls that won’t hold their coating, try pressing the pretzels in more firmly or double-dip them. If your caramel sauce is too thick to drizzle, add a teaspoon of heavy cream and microwave for 5-10 seconds. Remember that humidity affects these treats, so on particularly humid days, work quickly and return them to the refrigerator frequently during preparation.

    Frequently Asked Questions

    Can I make Salted Caramel Pretzel Cheesecake Balls without a stand mixer?

    Absolutely! While a stand mixer makes the process easier, you can achieve smooth results with a hand mixer or even vigorous stirring with a wooden spoon if your cream cheese is properly softened.

    How far in advance can I make these?

    These can be prepared up to 3 days ahead and stored in the refrigerator. For longer storage, freeze them for up to 3 months and thaw overnight in the refrigerator before serving.

    Can I use store-bought caramel sauce?

    Yes! While homemade caramel sauce adds depth of flavor, a good quality store-bought caramel works perfectly when you’re short on time.

    Why did my pretzel coating get soggy?

    Moisture from the refrigerator can soften pretzels over time. To prevent this, add the pretzel coating just a few hours before serving or use a dehydrator to ensure pretzels are completely dry.

    What’s the best cream cheese to use for cheesecake balls?

    Full-fat cream cheese produces the richest flavor and creamiest texture. Allow it to soften at room temperature for 30-45 minutes before mixing for the smoothest results.

    Final Thoughts

    These Salted Caramel Pretzel Cheesecake Balls have become my signature dessert for good reason. They embody everything I love about dessert—creamy, crunchy, sweet, salty, and utterly satisfying. The joy on people’s faces when they take that first bite makes all the effort worthwhile. Whether you’re an experienced baker or just starting out, this recipe offers that perfect balance of simplicity and impressive results. I hope these little treasures bring as much happiness to your gatherings as they have to mine! Don’t forget to share your creations on Pinterest and tag me—I’d love to see your spin on these irresistible treats.

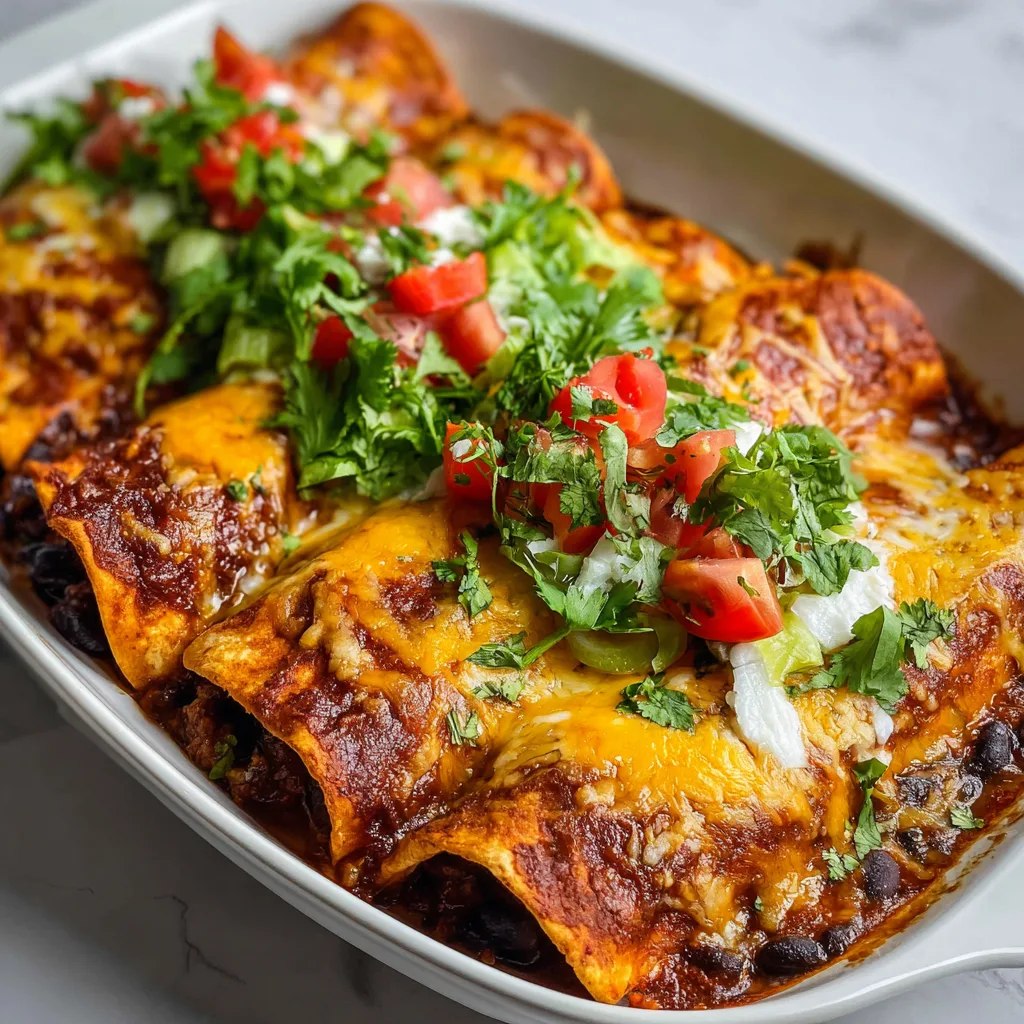
  • Vegetarian Black Bean Enchiladas: Irresistibly Delicious & Easy!

    Vegetarian Black Bean Enchiladas: Irresistibly Delicious & Easy!

    Vegetarian Black Bean Enchiladas: Irresistibly Delicious & Easy!

    Vegetarian Black Bean Enchiladas have become my absolute comfort food obsession lately! There’s something magical about that first bite—warm tortillas wrapped around creamy, spiced black beans, all smothered in a vibrant enchilada sauce and melty cheese. Every time I make these, my kitchen fills with the most incredible aromas that take me back to my favorite little Mexican restaurant in Santa Fe. These enchiladas are not just deliciously satisfying but also incredibly versatile. You can customize them with whatever veggies you have on hand, making them perfect for busy weeknights or weekend gatherings at RecipesDarleen.

    Recipe

    Why You’ll Love These Vegetarian Black Bean Enchiladas

    Perfect Balance of Flavors and Textures

    These vegetarian black bean enchiladas deliver the perfect harmony of flavors and textures in every bite. The earthy black beans provide a hearty base that absorbs all those aromatic Mexican spices. I love how the beans maintain just enough texture while becoming creamy when mixed with sautéed onions, garlic, and bell peppers. The slight char on the tortillas adds a subtle smokiness that complements the tangy enchilada sauce. When you cut through that cheese-crusted top into the tender filling, you’ll understand why these have become a staple in my dinner rotation!

    Quick and Nutritious Weeknight Solution

    What I adore most about these enchiladas is how they transform pantry staples into a nutrient-packed meal without hours of prep. Black beans offer incredible plant-based protein and fiber, while the colorful bell peppers and tomatoes add essential vitamins. I can have these ready in about 40 minutes total, making them perfect for those evenings when I’m craving something substantial but don’t have endless time. My neighbor actually texted me last week asking for the recipe after smelling these cooking through our shared wall!

    Essential Tips & Tricks

    Mastering the Enchilada Sauce

    The secret to exceptional vegetarian black bean enchiladas lies in the sauce! While store-bought works in a pinch, homemade enchilada sauce elevates these to restaurant quality. I toast dried chilies briefly before simmering them with tomatoes, garlic, and spices. This creates deeper, more complex flavors than any jarred version. Be sure to adjust the heat level by varying your chili types—ancho for mild sweetness or chipotle for smoky heat. Always blend the sauce until silky smooth and strain out any tough bits for that perfect consistency.

    Preventing Soggy Enchiladas

    Nobody wants soggy enchiladas! The key is giving your tortillas a quick flash-fry in hot oil—just 5-10 seconds per side until pliable but not crispy. This creates a protective barrier that prevents them from absorbing too much sauce and turning mushy. Another game-changer is layering some sauce on the bottom of your baking dish before adding enchiladas. For extra insurance against sogginess, try my Italian Chopped Salad technique of patting ingredients dry before filling—it works wonders for enchiladas too!

    Serving Ideas & Creative Variations

    Complementary Side Dishes

    Elevate your vegetarian black bean enchiladas with thoughtfully paired sides that balance the rich, saucy main dish. I love serving these with a bright, citrusy cilantro-lime rice that soaks up extra sauce beautifully. A simple avocado and jicama slaw with lime dressing adds refreshing crunch that cuts through the cheesy goodness. For a complete fiesta, add a side of charred corn with cotija cheese and chili powder. These sides not only complement the flavors but also add visual appeal to your plate with their vibrant colors.

    Exciting Flavor Twists

    Don’t be afraid to experiment with your enchiladas! My favorite variation adds roasted sweet potatoes to the black bean filling for a sweet-savory combination that’s absolutely divine. For a fusion twist, try incorporating Bang Bang Salmon flavors by adding a spicy-sweet sauce drizzle over the top before serving. You can also create a breakfast version by adding scrambled eggs to the filling and topping with fresh avocado slices. The possibilities are endless—just keep the basic structure and have fun with different flavor profiles!

    Storage & Troubleshooting Guide

    Proper Storage and Reheating

    These black bean enchiladas maintain their delicious flavor for days when stored properly. Allow leftovers to cool completely before transferring to an airtight container—this prevents condensation that could make them soggy. They’ll keep in the refrigerator for up to 4 days. For freezing, I recommend assembling but not baking them, then wrapping tightly in foil and freezing for up to 3 months. When reheating, cover with foil for the first 15 minutes of baking to retain moisture, then uncover to re-crisp the cheese topping.

    Troubleshooting Common Issues

    If your enchiladas are coming out too dry, try increasing the sauce by 25% or covering them with foil for most of the baking time. For enchiladas that are too wet, ensure you’re properly draining your black beans and sautéed vegetables before assembly. If your tortillas are cracking during rolling, try warming them slightly in the microwave between damp paper towels before filling. And for filling that keeps falling out during rolling, slightly mash a portion of the beans to create a more cohesive mixture that stays put.

    Frequently Asked Questions

    Can I make vegetarian black bean enchiladas ahead of time?

    Absolutely! Assemble them up to 24 hours in advance, cover tightly with plastic wrap, and refrigerate. Add an extra 10 minutes to the baking time when cooking from cold.

    What’s the best cheese for enchiladas?

    A combination works best—I recommend equal parts monterey jack for meltability and sharp cheddar for flavor. For authentic taste, try queso fresco or cotija as a finishing cheese.

    Are black bean enchiladas gluten-free?

    They can be! Simply use certified gluten-free corn tortillas and check that your enchilada sauce doesn’t contain any wheat-based thickeners.

    How can I make these enchiladas vegan?

    Replace the cheese with your favorite plant-based alternative that melts well. Also verify your tortillas don’t contain lard, which is traditional in some varieties.

    What’s the best way to warm tortillas for rolling?

    Warm them in a dry skillet for 10-15 seconds per side or wrap a stack in damp paper towels and microwave for 30 seconds until pliable but not dried out.

    Final Thoughts

    These vegetarian black bean enchiladas have become my go-to recipe whenever I need something comforting yet impressive. There’s something truly special about watching friends’ faces light up as they take that first bite—the way the flavors unfold from tangy to savory to slightly spicy. I find myself craving these on rainy evenings or when celebrating little victories. They remind me that plant-based cooking can be deeply satisfying and crave-worthy! Don’t forget to check out more of my favorite comfort food recipes on Pinterest for endless inspiration.

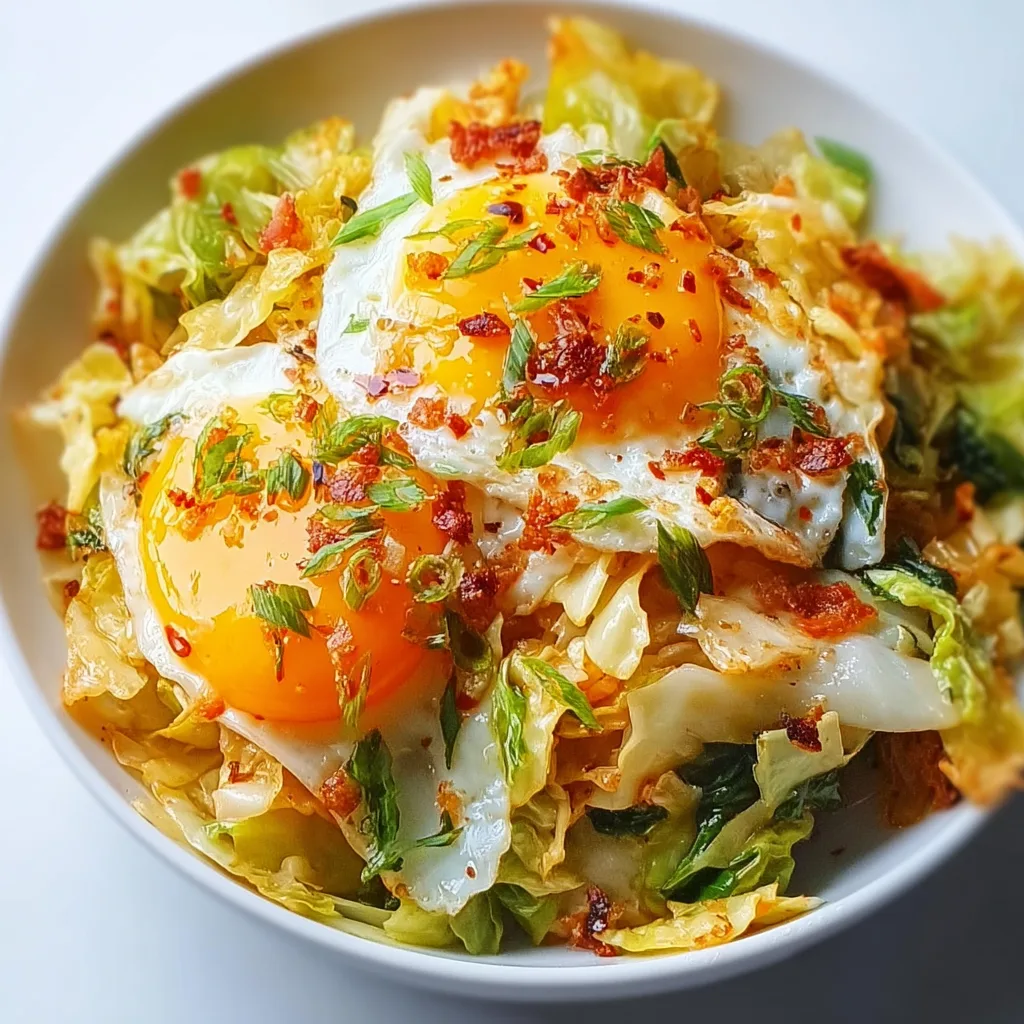
  • Breakfast Cabbage Sauté Recipe That Will Brighten Your Morning!

    Breakfast Cabbage Sauté Recipe That Will Brighten Your Morning!

    Breakfast Cabbage Sauté Recipe That Will Brighten Your Morning!

    Breakfast Cabbage Sauté transforms humble cabbage into a morning revelation that’ll change how you start your day. The first time I made this dish, the aroma of butter-kissed cabbage and garlic filled my kitchen, and I knew my breakfast game would never be the same. There’s something magical about how cabbage caramelizes in the pan, developing sweet notes that pair perfectly with runny eggs. This quick, nutrient-packed morning meal has become my go-to when I need something satisfying yet light. Perfect for meal prep and versatile enough to customize with whatever’s in your fridge, this breakfast cabbage sauté deserves a permanent spot in your morning routine.

    Recipe

    Why You’ll Love This Breakfast Cabbage Sauté

    A Nutritional Powerhouse

    This breakfast cabbage sauté isn’t just delicious—it’s practically medicine in a skillet. Cabbage delivers an impressive array of vitamins C and K, plus fiber that keeps you feeling full until lunch. I’ve noticed a real difference in my energy levels since adding this to my rotation. The natural sweetness that develops when cabbage caramelizes makes it surprisingly crave-worthy, while adding protein from eggs or bacon creates perfect macronutrient balance. My favorite morning hack is prepping the cabbage the night before, which cuts morning cooking time in half and ensures I’m getting greens before most people have had their coffee!

    Quick & Budget-Friendly

    On mornings when time feels like sand slipping through my fingers, this breakfast cabbage sauté saves the day. It comes together in under 15 minutes and costs mere pennies per serving. Cabbage is one of the most economical vegetables year-round, and it keeps forever in the fridge (okay, maybe not forever, but weeks!). I’ve calculated that this breakfast costs about $1.50 per serving—even with organic ingredients. The simplicity makes it perfect for busy weekdays, and the ingredients are pantry and fridge staples. When I’m pinching pennies at month’s end, this recipe is my saving grace without feeling like I’m sacrificing quality or flavor.

    Essential Tips & Tricks

    Mastering the Caramelization

    The secret to exceptional breakfast cabbage sauté lies in proper caramelization—don’t rush this magical process! Use a heavy-bottomed pan that distributes heat evenly and resist the urge to stir constantly. Let the cabbage rest against the hot surface until edges turn golden before tossing. I learned this the hard way after years of pale, soggy cabbage. A splash of apple cider vinegar near the end brightens flavors while helping break down the cabbage’s structure. For maximum browning, avoid overcrowding your pan; work in batches if needed. This patience transforms ordinary cabbage into something so delicious you’ll wonder why you ever relegated it to coleslaw.

    Flavor Building Strategies

    Layering flavors transforms this breakfast cabbage sauté from good to absolutely crave-worthy. Start by rendering bacon or pancetta for a smoky foundation, then sauté your cabbage in that liquid gold. Aromatics matter enormously—fresh garlic added in the final minute prevents bitterness from overcooked garlic. My game-changing discovery was adding a pinch of caraway seeds, which complement cabbage perfectly with their subtle anise notes. Don’t skip seasoning—cabbage loves salt, which helps draw out moisture and accelerate browning. A final flourish of fresh herbs (dill and cabbage are soulmates) adds brightness that makes the whole dish sing.

    Serving Ideas & Creative Variations

    Perfect Pairings

    This breakfast cabbage sauté plays beautifully with so many accompaniments. My absolute favorite way to serve it is topped with jammy eggs—the rich yolks create a luscious sauce when broken over the caramelized cabbage. A dollop of tangy Greek yogurt adds creamy contrast and extra protein. For a heartier meal, serve alongside sourdough toast or quick jumbo dinner rolls repurposed for breakfast. When hosting brunch, I present the sauté in a cast iron skillet family-style with various toppings for guests to customize. The cabbage also makes an excellent bed for smoked salmon with capers for a more sophisticated weekend option.

    Seasonal Adaptations

    One thing I adore about breakfast cabbage sauté is how it evolves through the seasons while maintaining its comforting essence. In spring, I fold in tender asparagus tips and fresh peas during the last few minutes of cooking. Summer brings opportunities for cherry tomatoes that burst in the pan, creating juicy pockets. Fall calls for diced apple and sage—the sweetness plays beautifully against the cabbage. Winter versions get heartier with additions like roasted sweet potato chunks and rosemary. The base recipe remains constant while seasonal produce keeps it fresh and exciting. This adaptability means you’ll never tire of this breakfast staple, regardless of what’s available at your market.

    Storage & Troubleshooting Guide

    Make-Ahead & Reheating

    Breakfast cabbage sauté is perfect for meal prep—I often make a double batch on Sundays. Store cooled leftovers in airtight containers in the refrigerator for up to 4 days. The flavor actually improves overnight as the ingredients meld! When reheating, add a splash of water to prevent drying, and use medium heat in a skillet rather than microwaving to maintain texture. For freezing, portion into individual servings and store for up to 2 months. Thaw overnight in the refrigerator before reheating. I find adding a fresh element when serving leftovers—like a squeeze of lemon or sprinkle of herbs—revitalizes the dish and makes it taste freshly made.

    Troubleshooting Common Issues

    If your breakfast cabbage sauté turns out watery, you’re likely overcrowding the pan or using too low heat. Cabbage releases moisture as it cooks, and without proper evaporation, you’ll end up with soggy results. The solution is simple: use a larger pan or cook in batches, and keep heat at medium-high. If your cabbage isn’t developing those coveted brown edges, your pan probably isn’t hot enough. For bitter cabbage, try adding a teaspoon of honey or maple syrup to balance flavors. If your cabbage is tough even after cooking, you might be using old cabbage or not slicing it thinly enough—aim for ¼-inch ribbons for optimal texture.

    Frequently Asked Questions

    What’s the best type of cabbage for Breakfast Cabbage Sauté?

    Green cabbage is my go-to for its sweet flavor when caramelized, but Savoy cabbage offers delicate texture. Napa cabbage cooks faster with milder flavor, while red cabbage adds beautiful color but slightly stronger taste. All work well with slight cooking time adjustments.

    Can I make Breakfast Cabbage Sauté vegetarian or vegan?

    Absolutely! Skip the bacon and use olive oil or plant-based butter. Add nutritional yeast for umami flavor, and top with avocado instead of eggs for vegan protein. Smoked paprika adds that smoky note you’d otherwise get from bacon.

    How can I meal prep this for busy mornings?

    Slice cabbage and store in airtight containers up to 3 days ahead. You can even fully cook the cabbage sauté and refrigerate for 4 days. In the morning, reheat while preparing your eggs for a complete breakfast in minutes.

    What protein works best with this dish?

    Eggs are classic—fried, poached, or scrambled all pair beautifully. Bacon, sausage, or leftover chicken integrate seamlessly. For plant-based options, crispy tofu or tempeh crumbles add satisfying texture and protein.

    How finely should I slice the cabbage for Breakfast Cabbage Sauté?

    Aim for ¼-inch ribbons for optimal texture and cooking time. Too thick and they’ll remain tough; too thin and they’ll become mushy. A sharp knife makes all the difference—or use a mandoline for consistent results.

    Final Thoughts

    This breakfast cabbage sauté has revolutionized my morning routine, proving that nutritious eating can be both simple and deeply satisfying. I find myself craving its caramelized sweetness and comforting warmth, especially on busy mornings when I need sustained energy. What began as an experiment with leftover cabbage has become a recipe I share with everyone I know. The versatility means it never gets boring, while the nutritional profile keeps me feeling my best. I hope this breakfast cabbage sauté brings as much joy to your mornings as it has to mine. For more breakfast inspiration, visit our Pinterest board filled with morning meal ideas.

  • Sugar Cookie Cream Cheese Bars That Melt Hearts Instantly!

    Sugar Cookie Cream Cheese Bars That Melt Hearts Instantly!

    Sugar Cookie Cream Cheese Bars That Melt Hearts Instantly!

    Sugar Cookie Cream Cheese Bars are the perfect blend of buttery sugar cookie dough and tangy cream cheese filling that create an irresistible dessert bar. I first made these for my sister’s baby shower, and they disappeared faster than any other treat on the table! The contrast between the soft, chewy cookie base and the velvety cream cheese layer creates a texture paradise that’ll have everyone reaching for seconds. These bars strike that perfect balance between simple and special—easy enough for weeknight baking but impressive enough for celebrations. If you love the classic flavors of cheesecake but crave something more portable, these bars are about to become your new favorite.

    Recipe

    Perfect Balance of Flavors and Textures

    There’s something magical about the combination of buttery sugar cookie and tangy cream cheese. The base has that classic vanilla-forward cookie flavor with crisp edges and a soft center, while the cream cheese layer adds a silky richness that melts in your mouth. I love how the slight tanginess cuts through the sweetness, creating a perfectly balanced dessert. The first time my neighbor tried these, she closed her eyes and sighed, “It’s like a cheesecake and cookie had the most delicious baby ever!” That pretty much sums up the appeal of these irresistible bars.

    Make-Ahead Convenience

    These bars are a meal prepper’s dream! You can make the dough up to 3 days ahead and refrigerate it, or even freeze it for up to a month. The finished bars also store beautifully, staying fresh in the refrigerator for nearly a week. I’ve become known for bringing these to potlucks because I can make them the night before when I’m not rushed. The flavors actually develop and improve after a day in the fridge, making them perfect for advance preparation. Plus, they’re easy to transport and serve without forks or plates—just grab and enjoy!

    Essential Tips & Tricks

    Getting the Perfect Texture

    The secret to bakery-quality sugar cookie cream cheese bars is all in the technique. Start with room temperature ingredients—especially the cream cheese and butter—for the smoothest, most uniform texture. When pressing the cookie dough into the pan, use slightly damp fingers to prevent sticking. For the cream cheese layer, beat until just combined; over-mixing can incorporate too much air and cause cracks during baking. I learned this the hard way when I rushed the process once and ended up with a less-than-perfect texture. Patience pays off with these bars!

    Flavor Enhancers That Make a Difference

    Don’t skip the pure vanilla extract in both layers—it’s what gives these bars their signature warmth. Adding a touch of almond extract (just ¼ teaspoon) to the cookie base creates an incredible depth of flavor that will have everyone wondering about your secret ingredient. For the cream cheese layer, a hint of lemon zest brightens everything up without making it taste lemony. When I’m feeling fancy, I’ll add a sprinkle of cinnamon to the cookie dough for a cozy twist that pairs beautifully with the cream cheese. These small touches elevate the entire dessert.

    Serving Ideas & Creative Variations

    Seasonal Adaptations

    These versatile bars can be dressed up for any occasion or season. For summer, top with fresh berries and mint right before serving. Fall calls for a light dusting of cinnamon and nutmeg in the cookie base. Winter holidays? Add crushed peppermint to the top for a festive touch. I made these for a spring brunch once by adding lemon zest to both layers and a light lemon glaze on top—they were the highlight of the meal! The base recipe is so adaptable that you can customize it for any gathering or holiday throughout the year.

    Decadent Toppings and Mix-ins

    Transform these bars from everyday treats to showstoppers with creative mix-ins and toppings. Fold mini chocolate chips into the cream cheese layer, or swirl in fruit preserves before baking. A drizzle of caramel sauce adds gorgeous visual appeal and a buttery sweetness. For texture contrast, try sprinkling chopped nuts or toffee bits on top during the last five minutes of baking. My personal favorite variation includes a thin layer of raspberry jam between the cookie base and cream cheese—the slight tartness creates an incredible flavor combination that’s always met with rave reviews.

    Storage & Troubleshooting Guide

    Keeping Them Fresh

    Store your Sugar Cookie Cream Cheese Bars in an airtight container in the refrigerator for up to 5 days. The cream cheese layer means these treats need refrigeration, but I recommend letting them sit at room temperature for about 15 minutes before serving for the best texture and flavor. If you want to freeze them, wrap individual portions in plastic wrap, then aluminum foil, and freeze for up to 3 months. I often make a double batch specifically to freeze half—it’s such a joy to have these ready to thaw whenever unexpected guests drop by or when a sudden dessert craving hits!

    Fixing Common Issues

    If your bars develop cracks on top, don’t worry! This is usually caused by sudden temperature changes. Allow the bars to cool gradually by turning off the oven and leaving the door slightly ajar for about 30 minutes before removing them. If the cookie base seems too soft, it likely needed more baking time—next time, look for golden edges as your indicator. For a cream cheese layer that’s too soft, try adding an extra tablespoon of flour to the mixture. I once salvaged slightly overbaked bars by topping them with a thin layer of sweetened whipped cream—no one ever knew, and they were still delicious!

    Frequently Asked Questions

    Yes! Use a cup-for-cup gluten-free flour blend in place of all-purpose flour. The texture may be slightly different, but still delicious. Add ¼ teaspoon xanthan gum if your blend doesn’t already include it.

    How do I know when the bars are fully baked?

    Look for slightly golden edges and a set center that still has a slight jiggle—like firm Jell-O. A toothpick inserted in the center should come out mostly clean with a few moist crumbs.

    Can I use low-fat cream cheese?

    I don’t recommend it. Full-fat cream cheese provides the best flavor and texture. Low-fat versions contain more moisture and can make your bars too soft or watery.

    Can I add food coloring to these bars?

    Absolutely! Add a few drops to the cream cheese mixture for holiday-themed treats. Divide the mixture and color differently for swirled or layered effects.

    This typically happens from opening the oven door too early. Wait until at least 25 minutes into baking before checking, and cool gradually to prevent dramatic temperature changes.

    Final Thoughts

    Sugar Cookie Cream Cheese Bars represent the perfect marriage of two beloved desserts in one easy-to-make, crowd-pleasing treat. The beauty of these bars lies in their versatility—they’re equally at home at casual family gatherings or elegant celebrations. I keep coming back to this recipe because it consistently delivers that perfect balance of sweet and tangy, crisp and creamy that everyone loves. Whether you follow the classic recipe or experiment with your own variations, these bars are sure to become a staple in your baking repertoire. Find more inspiration for your next baking adventure on Pinterest.

  • Cheesy Beef Bacon Ranch Mozzarella Bombs That Wow Your Taste Buds!

    Cheesy Beef Bacon Ranch Mozzarella Bombs That Wow Your Taste Buds!

    Cheesy Beef Bacon Ranch Mozzarella Bombs That Wow Your Taste Buds!

    Cheesy Beef Bacon Ranch Mozzarella Bombs are the ultimate comfort food mashup that will have your family begging for seconds! These little bundles of joy combine seasoned ground beef, crispy bacon, creamy ranch, and gooey mozzarella all wrapped in a golden biscuit shell. I first made these for a game day gathering, and they disappeared faster than I could set down the serving platter! The combination of savory beef, smoky bacon, and tangy ranch creates an explosion of flavor that’s simply irresistible. Perfect for parties, weeknight dinners, or anytime you need a crowd-pleasing appetizer that delivers big on flavor without hours in the kitchen.

    Recipe

    Recipe

    Why You’ll Love These Cheesy Beef Bacon Ranch Mozzarella Bombs

    Perfect Party Food with Minimal Effort

    These mozzarella bombs have become my go-to recipe when I need something impressive without spending hours in the kitchen. The hands-on prep time is just about 15 minutes, making them perfect for last-minute gatherings. I love that they’re individually portioned, eliminating the need for serving utensils or plates – just grab and enjoy! The combination of beef and bacon provides a hearty protein boost, while the ranch seasoning adds that perfect tangy kick that keeps everyone reaching for more. Plus, the sight of melted cheese stretching as guests pull them apart never fails to impress!

    Family-Friendly Comfort Food

    There’s something magical about the way these bombs bring everyone to the table. My picky nephew who “doesn’t eat anything new” devoured three in one sitting! The familiar flavors combined in a fun, handheld package make them irresistible to kids and adults alike. I’ve found they’re perfect for those busy weeknights when you want something satisfying but don’t have the energy for an elaborate meal. Pair them with a simple salad, and dinner is served! The best part? You can customize the filling based on what your family loves – spice them up or keep them mild.

    Essential Tips & Tricks

    Perfecting the Filling Balance

    The secret to exceptional mozzarella bombs lies in the filling-to-dough ratio. I’ve learned through many batches that about 1½ tablespoons of filling is ideal – enough to create that satisfying flavor explosion without risking a blowout during baking. Make sure your ground beef is well-drained to prevent soggy bottoms. I like to cook the beef with onions first, then mix in the bacon and seasonings off-heat to preserve the bacon’s crispiness. For the ultimate flavor boost, try using freshly shredded mozzarella instead of pre-packaged – it melts more beautifully and tastes noticeably fresher.

    Sealing and Shaping Techniques

    The most common pitfall with these bombs is improper sealing, which leads to the dreaded cheese leak! I’ve perfected a pinch-and-twist method that works beautifully. After placing your filling in the center of the dough, gather all edges upward, pinch firmly, and give a slight twist to ensure a tight seal. If your kitchen is warm, refrigerate the shaped bombs for 10 minutes before baking to help maintain their shape. For a professional finish, brush the tops with melted butter mixed with a touch of garlic powder and sprinkle with fresh parsley. These little touches elevate the presentation tremendously, like I do with my Garlic Butter Parmesan Knots.

    Serving Ideas & Creative Variations

    Perfect Pairings and Presentations

    Serve these bombs straight from the oven when the cheese pull is at its most dramatic! I like to arrange them on a wooden board with small bowls of marinara and additional ranch for dipping. For a complete meal, pair them with my Italian Chopped Salad for a fresh contrast to the rich bombs. If you’re hosting a party, consider making mini versions using smaller biscuit portions – they’re perfect one-bite appetizers! I also love serving them alongside soup in winter months; they’re perfect for dunking into tomato or minestrone soup for a cozy, satisfying meal.

    Exciting Flavor Variations

    While the classic beef-bacon-ranch combination is hard to beat, these bombs are incredibly versatile! Try a pizza bomb variation by substituting Italian sausage for the beef, adding pepperoni instead of bacon, and mixing in pizza sauce and Italian herbs. For a breakfast twist, fill them with scrambled eggs, cheese, and breakfast sausage – they make fantastic grab-and-go morning meals! My spicy food-loving friends go crazy for the jalapeño popper version with cream cheese, diced jalapeños, and cheddar. The possibilities are endless, and experimenting with new flavors is half the fun.

    Storage & Troubleshooting Guide

    Make-Ahead and Storage Solutions

    These bombs are perfect for meal prep and can be prepared in advance to save time. You can assemble them completely, then refrigerate unbaked for up to 24 hours – just add 2-3 minutes to the baking time when cooking from cold. For longer storage, freeze the assembled bombs on a baking sheet until solid, then transfer to a freezer bag for up to 3 months. No need to thaw before baking; just add about 5-7 minutes to the cooking time. While they’re best fresh, leftover baked bombs can be refrigerated for 2-3 days and reheated in a 350°F oven for 5-7 minutes.

    Common Issues and Easy Fixes

    If your bombs are leaking cheese during baking, your seals probably weren’t tight enough. Next time, try double-pinching the seams and placing them seam-side down on the baking sheet. Dealing with dough that’s too sticky to work with? Lightly flour your hands before handling. If the bottoms are browning too quickly before the tops are done, place the baking sheet on a higher rack and reduce the temperature by 25°F. For bombs that seem bland, remember that ground beef needs generous seasoning – don’t be shy with the salt and consider adding a dash of Worcestershire sauce to amp up the savory flavors.

    Frequently Asked Questions

    Can I make Cheesy Beef Bacon Ranch Mozzarella Bombs ahead of time?

    Absolutely! Prepare them up to 24 hours ahead and refrigerate unbaked. You can also freeze them for up to 3 months. Just add a few extra minutes to the baking time when cooking from cold or frozen.

    What’s the best dough to use for these bombs?

    Refrigerated biscuit dough works perfectly, but you can also use pizza dough, crescent roll dough, or even homemade bread dough for a more artisanal touch.

    Can I substitute the ground beef?

    Yes! Ground turkey, chicken, or plant-based meat alternatives all work well. Just adjust seasonings accordingly as some alternatives may need extra flavor boosting.

    How do I prevent the cheese from leaking out?

    Ensure you’re using a generous piece of dough and seal it very tightly by pinching and twisting. Placing the bombs seam-side down on the baking sheet also helps prevent leaks.

    How can I make these Cheesy Beef Bacon Ranch Mozzarella Bombs spicier?

    Add diced jalapeños, red pepper flakes, or hot sauce to the beef mixture. You can also use pepper jack cheese instead of mozzarella for an extra kick.

    Final Thoughts

    These Cheesy Beef Bacon Ranch Mozzarella Bombs have become my secret weapon for gatherings where I want to impress without stressing. There’s something magical about watching someone take that first bite – the moment when the golden exterior gives way to reveal the savory, cheesy center. The versatility of these little flavor bombs means they can be customized for any occasion or preference. Whether you’re feeding a hungry family on a weeknight or entertaining guests for the big game, these mozzarella bombs deliver maximum flavor with minimum fuss. Don’t forget to share your creations on Pinterest!

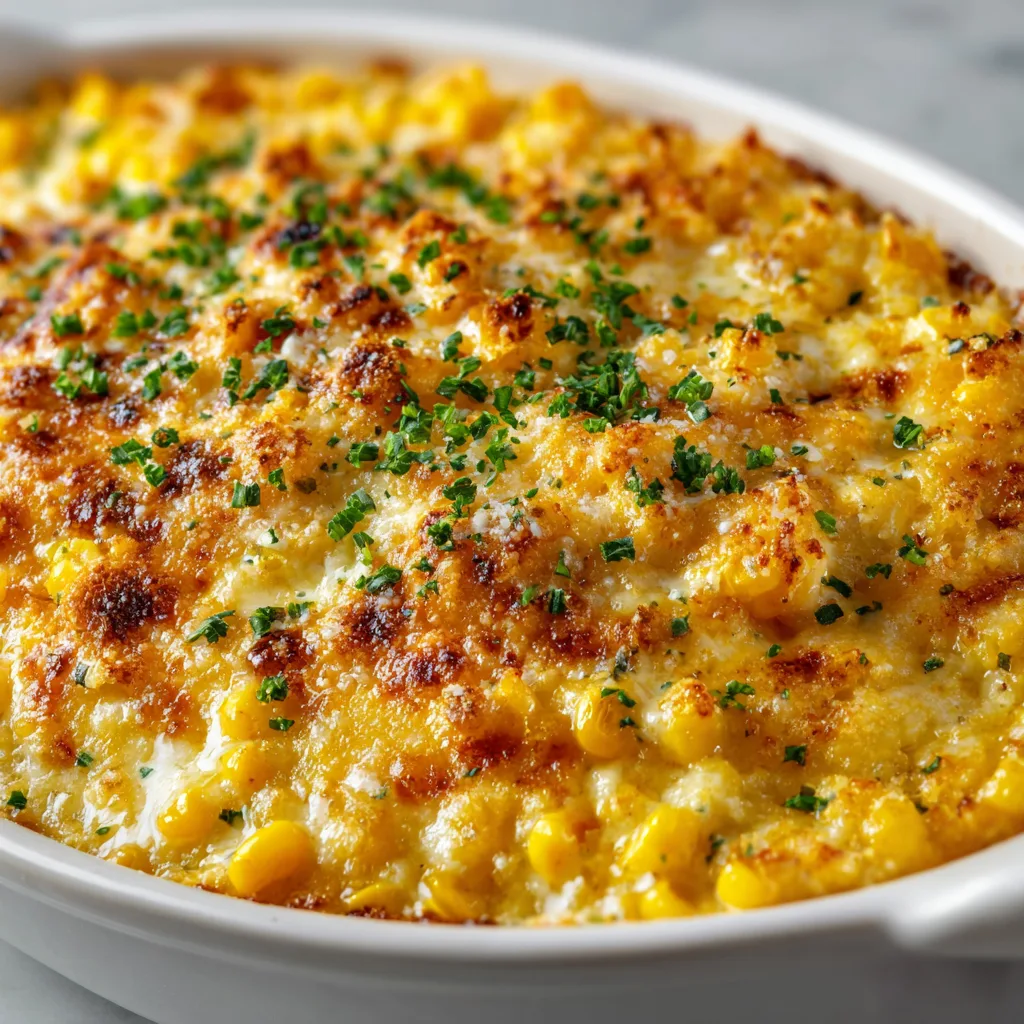
  • Ruth’s Chris Creamed Corn Au Gratin: Irresistibly Cheesy & Viral!

    Ruth’s Chris Creamed Corn Au Gratin: Irresistibly Cheesy & Viral!

    Ruth’s Chris Creamed Corn Au Gratin: Irresistibly Cheesy & Viral!

    Ruth’s Chris Creamed Corn Au Gratin has become my absolute obsession since I first tasted it at the famous steakhouse last winter. The way the sweet corn kernels swim in that velvety cheese sauce, topped with a golden, buttery crust that crackles under your fork… pure heaven! I’ve spent months perfecting this copycat recipe, and friends, I’m thrilled to finally share it with you. This indulgent side dish brings steakhouse luxury right to your dinner table, and trust me, it’ll steal the spotlight from whatever main dish you pair it with. Ready to dive into creamy, cheesy bliss? Let’s get cooking!

    Recipe

    Why You’ll Love This Ruth’s Chris Creamed Corn Au Gratin

    Restaurant-Quality Flavors at Home

    There’s something magical about that first bite of Ruth’s Chris Creamed Corn Au Gratin that makes your eyes close involuntarily as you savor the moment. The combination of sweet corn kernels, three different cheeses, and that hint of garlic creates layers of flavor that dance on your palate. What makes this recipe truly special is how it captures that perfect balance between sweet and savory. I’ve tested countless variations to nail down exactly what makes the restaurant version so addictive, and this recipe delivers that same luxurious experience without the steakhouse price tag.

    Simple Ingredients, Extraordinary Results

    Don’t let the fancy name fool you—this dish uses everyday ingredients that transform into something extraordinary. Fresh corn kernels (or good quality frozen in a pinch) form the foundation, while heavy cream and butter create that silky-smooth texture we’re after. The trio of cheeses—sharp cheddar, Gruyère, and Parmesan—each plays a crucial role in developing depth and that signature golden crust. What surprised me most when developing this recipe was how a touch of nutmeg and a hint of cayenne elevate the entire dish, adding that je ne sais quoi that keeps everyone guessing.

    Essential Tips & Tricks

    Perfecting the Cheese Sauce

    The heart of any great au gratin lies in its cheese sauce, and this one deserves your full attention. Start by creating a proper roux as your base—equal parts butter and flour cooked until it smells slightly nutty but hasn’t browned. This crucial step ensures your sauce will be silky-smooth without any graininess. When adding cheeses, always remove the pan from heat first and incorporate them gradually, stirring constantly. This prevents the proteins from seizing up and creating that dreaded stringy texture. For an extra-silky finish like they achieve at Ruth’s Chris, grate your own cheese rather than using pre-shredded, which contains anti-caking agents.

    Achieving the Perfect Golden Crust

    That crackling, golden crust is what elevates this dish from mere creamed corn to spectacular au gratin territory. The secret lies in a two-phase baking approach. First, bake covered at a moderate temperature to allow the flavors to meld and the corn to become tender. Then, uncover and increase the heat for the final 10-15 minutes, watching carefully as the top transforms into a beautiful golden brown. For that extra-special touch, I sometimes run it under the broiler for the final minute—just don’t walk away during this step! A sprinkle of fresh thyme right before serving adds a pop of color and aromatic freshness that complements the richness perfectly.

    Serving Ideas & Creative Variations

    Perfect Pairings for Any Occasion

    This Ruth’s Chris Creamed Corn Au Gratin shines as a showstopping side dish alongside almost any protein. Pair it with a perfectly seared steak to recreate the classic steakhouse experience, or serve it with roasted chicken for a more casual Sunday dinner. It’s particularly magnificent with Baked Lemon Garlic Tilapia, where the bright citrus notes of the fish balance the richness of the corn. For holiday gatherings, prepare it in individual ramekins for an elegant presentation that makes everyone feel special. The dish holds well in a warm oven, making it perfect for entertaining when timing multiple dishes can be tricky.

    Seasonal Twists and Dietary Adaptations

    One of the joys of this recipe is how beautifully it adapts to seasonal ingredients and dietary needs. In summer, use fresh sweet corn cut straight from the cob for unbeatable flavor and texture. During fall, try adding diced roasted poblano peppers for a subtle smoky heat. For a lighter version, substitute half-and-half for the heavy cream and reduce the butter slightly—it’s still delicious! To make it gluten-free, simply swap the all-purpose flour for a 1:1 gluten-free blend. Vegetarians already love this dish, but for a vegan adaptation, use plant-based butter, non-dairy milk thickened with a bit more roux, and your favorite melty vegan cheese alternatives.

    Storage & Troubleshooting Guide

    Make-Ahead and Storage Solutions

    This Ruth’s Chris Creamed Corn Au Gratin is wonderfully versatile when it comes to make-ahead options. You can prepare the entire dish up to the baking point, cover it tightly, and refrigerate for up to 48 hours before baking. Just add about 10-15 minutes to the covered baking time if cooking straight from the refrigerator. Leftovers (if you’re lucky enough to have any!) will keep in an airtight container for 3-4 days. While the texture is best fresh from the oven, you can rejuvenate day-old portions by adding a small splash of cream before reheating covered in a 325°F oven until warmed through, then uncovering for a few minutes to re-crisp the top.

    Troubleshooting Common Challenges

    Even experienced cooks occasionally encounter issues, but most problems with this dish are easily fixed. If your sauce looks curdled or broken, whisk in a tablespoon of cold heavy cream off the heat until it comes back together. For a sauce that’s too thick, gradually add warm milk until you reach your desired consistency. Too thin? Create a small amount of additional roux in a separate pan, then whisk it into your sauce. If your topping isn’t browning properly, move the dish to a higher oven rack and watch it carefully. And remember, the perfect au gratin should be bubbling around the edges when done—if it’s not, it likely needs more time to heat through completely.

    Frequently Asked Questions

    Can I use frozen corn for Ruth’s Chris Creamed Corn Au Gratin?

    Absolutely! While fresh corn offers the sweetest flavor, good-quality frozen corn works beautifully. Thaw completely and pat dry with paper towels to remove excess moisture before adding to your recipe.

    How can I make this dish ahead for a dinner party?

    Prepare everything up to the baking step, cover and refrigerate for up to 2 days. Before guests arrive, bake as directed, adding 10-15 extra minutes to the covered baking time.

    What’s the best cheese substitute if I can’t find Gruyère?

    Swiss cheese makes an excellent substitute with its similar nutty flavor. Fontina or Emmental also work well, offering that creamy melt that makes the dish special.

    Can I freeze leftovers of this corn au gratin?

    Yes, though the texture may change slightly. Freeze in an airtight container for up to 1 month. Thaw overnight in the refrigerator and reheat covered at 325°F until hot throughout.

    Is there a lighter version of this rich dish?

    For a lighter Ruth’s Chris Creamed Corn Au Gratin, substitute half-and-half for heavy cream, reduce butter by half, and use part-skim mozzarella in place of some of the cheese. It’s still delicious!

    Final Thoughts

    This Ruth’s Chris Creamed Corn Au Gratin recipe brings the essence of fine dining into your home kitchen with surprisingly little effort. There’s something deeply satisfying about watching your guests’ faces light up with that first creamy, cheesy bite—the same reaction I had at the restaurant. Whether it’s for a special occasion or simply to elevate a weeknight meal, this dish delivers restaurant-quality luxury that creates memorable dining experiences. I hope you’ll share your creations with me on Pinterest and make this indulgent side a tradition at your own table. Happy cooking!