Author: Darleen Vance

  • Crispy Fried Goat Cheese with Tarragon & Honey Bliss!

    Crispy Fried Goat Cheese with Tarragon & Honey Bliss!

    Crispy Fried Goat Cheese with Tarragon & Honey Bliss!

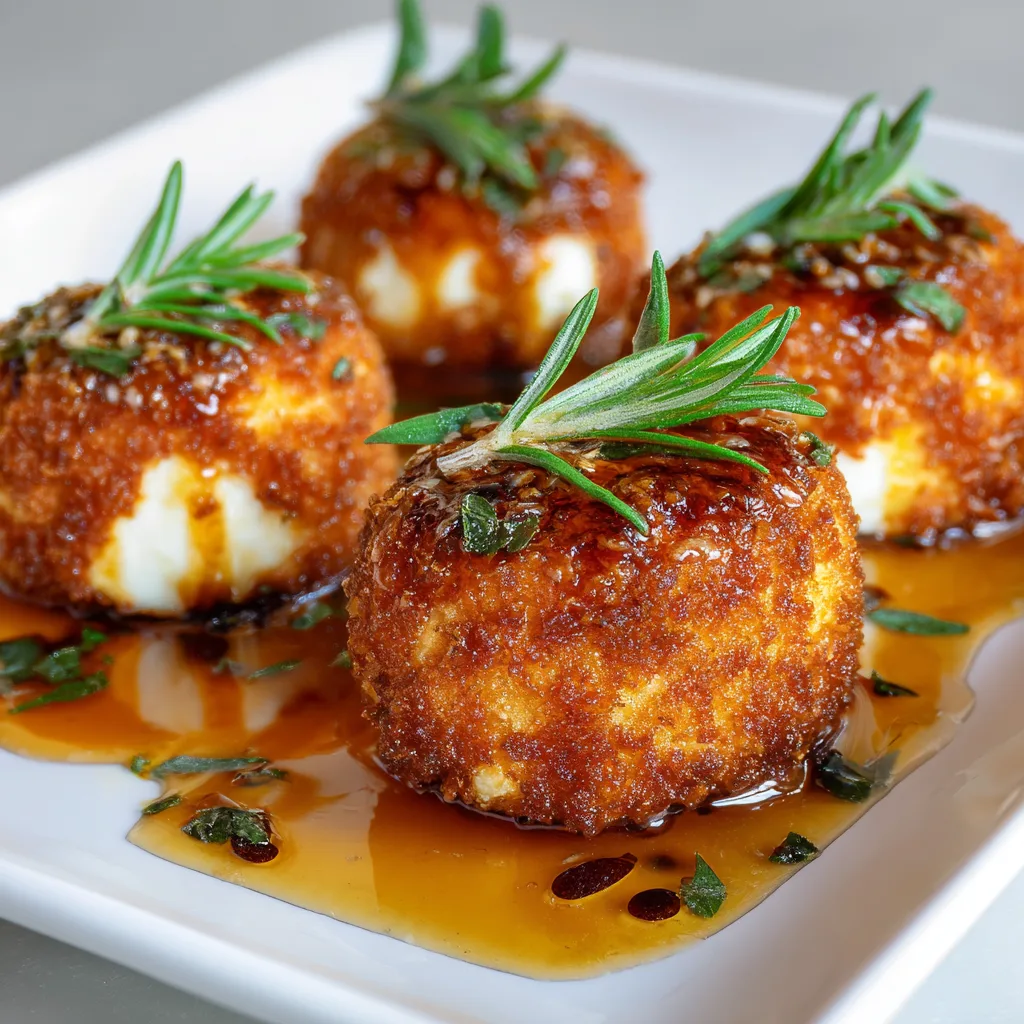
    Crispy Fried Goat Cheese with Tarragon and Honey is one of those magical appetizers that transforms a simple gathering into something special. The first time I made these golden discs of joy, my kitchen filled with the most intoxicating aroma—herbs mingling with honey’s sweetness and the irresistible scent of something being perfectly fried. I still remember my friend Sarah’s face lighting up as she bit into one, the crispy exterior giving way to that creamy, tangy center. There’s something undeniably luxurious about this dish that belies how simple it actually is to prepare. Let me show you how to create this showstopper that hits all the right notes.

    Recipe

    Why You’ll Love This Crispy Fried Goat Cheese with Tarragon and Honey

    A Perfect Balance of Textures and Flavors

    The magic of this dish lies in its contrasting elements. The exterior develops a gorgeous golden crust that audibly crackles when you cut into it, while the interior remains soft and luscious. The herbaceous notes from fresh tarragon cut through the richness of the goat cheese, while a drizzle of honey adds that perfect touch of sweetness. It’s a sensory experience that feels fancy but doesn’t require culinary school skills. I love how the tangy goat cheese warms slightly during frying, creating a velvety center that pairs beautifully with the crisp coating.

    Quick and Impressive for Any Occasion

    What I adore about these little rounds of heaven is how they elevate any meal with minimal effort. You can prep them ahead and fry just before serving, making them perfect for everything from intimate date nights to larger gatherings. The wow factor is undeniable—guests always ask for the recipe! Last Christmas, I served these instead of a cheese board, and they disappeared faster than anything else on the table. The combination of the golden-brown exterior and the herb-flecked interior creates a stunning visual that looks like you spent hours in the kitchen.

    Essential Tips & Tricks

    Perfecting the Breading Process

    Creating that perfect crispy shell requires a few key techniques. First, freeze your goat cheese rounds for about 15 minutes before breading—this prevents them from melting too quickly during frying. Use one hand for wet ingredients and one for dry to avoid the dreaded “breading fingers” that clump everything together. I learned this the hard way at a dinner party when my hands became encased in a panko-egg mixture! For the crispiest exterior, press the panko firmly onto each round and ensure complete coverage. This creates that satisfying crunch that makes crispy foods so addictive.

    Achieving the Ideal Frying Temperature

    The secret to perfectly fried goat cheese is maintaining the right oil temperature—around 350°F (175°C). Too cool, and your cheese absorbs excess oil and becomes soggy; too hot, and the outside burns before the inside warms. Use a thermometer if you have one, or test with a small piece of bread—it should bubble gently and turn golden in about 60 seconds. Work in batches to avoid crowding the pan, which drops the temperature dramatically. I like to keep my first batches warm in a low oven while finishing the rest, ensuring everyone gets that perfect bite.

    Serving Ideas & Creative Variations

    Seasonal Pairings to Elevate Your Dish

    This versatile appetizer shines brightest when paired with complementary flavors that enhance its creamy-crispy magic. In summer, I love serving these rounds atop a vibrant salad with fresh berries and peppery arugula—the contrast between warm cheese and cool greens is divine. For fall gatherings, try them alongside roasted figs or pears with a balsamic reduction. The honey drizzle works wonderfully year-round, but you can swap in maple syrup or even hot honey for a sweet-heat combo. These also make a stunning addition to a charcuterie board, adding a warm element to the traditional spread.

    Global Flavor Inspirations

    While the classic version with tarragon and honey is perfection, experimenting with global flavor profiles takes this dish in exciting new directions. Try Mediterranean-inspired rounds with oregano and lemon zest, served with olive tapenade. For a Mexican twist, mix in cilantro and chili flakes, then serve with a quick mango salsa. One of my favorite variations came from a happy accident when I was out of tarragon—I used fresh thyme and lavender honey instead, creating a Provençal version that transported me straight to the French countryside. The basic technique remains the same, allowing endless creative possibilities.

    Storage & Troubleshooting Guide

    Make-Ahead and Storing Leftovers

    While these are best served fresh and warm, you can prepare components ahead to streamline serving. Slice and bread the cheese rounds up to 24 hours in advance, storing them covered in the refrigerator. For any miraculous leftovers (which rarely happen in my house!), refrigerate them in an airtight container for up to 2 days. To reheat, avoid the microwave which makes them rubbery—instead, place them on a baking sheet in a 350°F oven for 5-7 minutes. The coating won’t be quite as crispy as fresh-fried, but the interior will warm beautifully without melting into oblivion.

    Solving Common Challenges

    If your goat cheese is melting too quickly during frying, your rounds might be too thick or your oil too hot. Aim for ½-inch thickness and ensure proper oil temperature. For cheese that won’t hold its shape during breading, place it in the freezer for an additional 10 minutes to firm up properly. If your coating falls off during frying, you might have skipped a step in the breading process—the flour-egg-breadcrumb sequence is crucial for proper adhesion. And if your finished rounds aren’t as crispy as desired, they might have steamed rather than fried—ensure you’re not overcrowding the pan and that oil is hot enough.

    Frequently Asked Questions

    Can I use a different cheese for this recipe?

    Absolutely! Firm feta works wonderfully, as does brie with the rind removed. Just adjust freezing time based on the cheese’s softness—softer cheeses need longer in the freezer before breading.

    Is there a way to make Crispy Fried Goat Cheese with Tarragon and Honey without deep frying?

    Yes! You can achieve good results by air-frying at 375°F for 5-6 minutes, or baking at 425°F for 8-10 minutes after lightly spraying with oil. The texture won’t be identical but still delicious.

    Can I make these gluten-free?

    Definitely. Substitute the all-purpose flour with rice flour and use gluten-free panko or crushed rice Chex for the coating. The results are nearly indistinguishable from the original.

    What herbs can I use instead of tarragon?

    Fresh chives, basil, thyme, or rosemary all work beautifully. Choose based on what complements your meal—chives for lighter dishes, rosemary for heartier ones.

    How far in advance can I prepare these?

    You can bread the cheese rounds up to 24 hours ahead and refrigerate them covered. For optimal results, fry them just before serving for that perfect crispy exterior.

    Final Thoughts

    Crispy Fried Goat Cheese with Tarragon and Honey represents everything I love about cooking—simple ingredients transformed into something extraordinary through technique and creativity. There’s something magical about that moment when you take the first bite—the contrast between the crunchy exterior and the warm, creamy center, elevated by fragrant tarragon and sweet honey. Whether you’re serving these as an elegant starter for a dinner party or treating yourself to a special appetizer on a quiet evening, they’re sure to bring a moment of pure culinary joy. I’d love to see your creations on Pinterest!


  • Olive Garden Chicken Gnocchi Soup Recipe That Warms Your Soul!

    Olive Garden Chicken Gnocchi Soup Recipe That Warms Your Soul!

    Olive Garden Chicken Gnocchi Soup Recipe That Warms Your Soul!

    Olive Garden Chicken Gnocchi Soup has been my ultimate comfort food obsession since that snowy evening when my sister and I ducked into Olive Garden after a disastrous shopping trip. One spoonful of that creamy, hearty soup with its pillowy gnocchi and tender chicken pieces instantly melted away our frustrations. I’ve spent years perfecting this copycat recipe, and I’m thrilled to finally share my version that captures all the rich, velvety goodness of the restaurant favorite but with even more flavor. Trust me, once you try making this at home, you’ll wonder why you ever waited in line at Olive Garden.

    Recipe

    Why You’ll Love This Olive Garden Chicken Gnocchi Soup

    A Perfect Balance of Flavors and Textures

    There’s something magical about the way each element in this soup plays its part perfectly. The pillowy potato gnocchi absorbs just enough of the savory broth without becoming mushy, while tender chunks of chicken provide satisfying protein. The delicate balance of herbs—thyme, oregano, and a touch of nutmeg—creates that distinctive Olive Garden flavor profile that’s both comforting and sophisticated. I love how the carrots and celery add a gentle sweetness and subtle crunch that contrasts beautifully with the creamy base. It’s like a warm hug in a bowl!

    Quick Comfort Food That Impresses

    Despite its restaurant-quality taste, this soup comes together in about 30 minutes, making it perfect for busy weeknights when you need soul-warming comfort without hours of cooking. The ingredients are simple pantry and refrigerator staples, so you can often whip this up without a special shopping trip. I’ve served this at last-minute dinner gatherings where guests assumed I’d been cooking all day! The rich, creamy broth looks and tastes luxurious, but the actual hands-on time is minimal—leaving you free to enjoy your evening rather than being tied to the stove.

    Essential Tips & Tricks

    Perfecting the Creamy Base

    The secret to that silky, restaurant-quality broth lies in how you build your base. Start by sautéing your aromatics (onions, carrots, celery) until they’re soft but not browned—this develops sweet, complex flavors without bitterness. When adding flour to create your roux, cook it for at least 1-2 minutes to eliminate any raw flour taste. For the creamiest texture, warm your half-and-half slightly before adding it to prevent curdling, and simmer gently after it’s added. Never boil the soup once the dairy is incorporated, or you’ll risk the broth breaking and becoming grainy instead of velvety smooth.

    Gnocchi and Chicken Techniques

    For the most authentic Olive Garden experience, the gnocchi texture is crucial. I recommend shelf-stable packaged gnocchi rather than frozen for this recipe—they hold their shape better in the soup. Cook them just until they float (about 2-3 minutes) before adding them to your soup. For the chicken, poaching boneless breasts in broth separately, then dicing them, ensures perfectly tender meat that isn’t overcooked. Alternatively, rotisserie chicken makes a wonderful time-saving option with excellent flavor. Try this technique with my Creamy Pesto Chicken Gnocchi for another delicious variation!

    Serving Ideas & Creative Variations

    Perfect Pairings for a Complete Meal

    This soup shines as both a starter and a main course. For a lighter meal, serve small portions in pretty bowls alongside a crisp Caesar salad with homemade garlic croutons. When featuring it as the star of the show, I love pairing it with warm, crusty bread for dipping—a rosemary focaccia or garlic breadsticks complete the Olive Garden experience at home. For special occasions, serve the soup in bread bowls for an impressive presentation that delights guests. The soup’s creamy nature also pairs beautifully with acidic sides like marinated tomato salad or Italian Chopped Salad for a balanced meal.

    Seasonal and Dietary Adaptations

    This versatile soup base welcomes creative modifications to suit different needs and preferences. For a lighter version, substitute the half-and-half with evaporated milk or part milk/part broth. Make it heartier by adding sautéed mushrooms or white beans for extra protein and texture. In summer, stir in fresh corn kernels and diced zucchini; in fall, add diced butternut squash. For a dairy-free option, use coconut milk and a bit more herbs to balance the flavor. Gluten-free gnocchi works beautifully, and you can thicken with cornstarch instead of flour for a completely gluten-free version.

    Storage & Troubleshooting Guide

    Proper Storage for Maximum Freshness

    This soup keeps remarkably well, but proper storage is key to maintaining its creamy texture. Cool the soup completely before refrigerating in airtight containers for up to 3 days. The gnocchi will continue absorbing liquid as it sits, so when reheating, you’ll likely need to add a splash of chicken broth or milk to restore the original consistency. For longer storage, I recommend freezing the soup base without the gnocchi and cream, then adding fresh gnocchi and cream when reheating. If you must freeze the complete soup, expect some texture changes in the gnocchi upon thawing.

    Fixing Common Soup Issues

    Even experienced cooks occasionally encounter challenges with cream-based soups. If your soup looks curdled or separated, don’t panic! Lower the heat immediately and try whisking in a tablespoon of cold cream to re-emulsify the mixture. Too thick? Simply thin with additional chicken broth. Too thin? Make a small amount of roux in a separate pan (equal parts butter and flour), cook for 1-2 minutes, then whisk into the simmering soup. If your gnocchi turned too soft, try adding a few fresh ones just before serving for textural contrast.

    Frequently Asked Questions

    Can I use frozen gnocchi in this Olive Garden Chicken Gnocchi Soup?

    Yes, but don’t thaw them first. Add frozen gnocchi directly to the simmering soup and cook until they float, usually 3-4 minutes. They may release more starch, slightly thickening your soup.

    How can I make this soup healthier?

    Substitute half-and-half with evaporated milk or equal parts milk and broth. Use whole wheat gnocchi if available, and increase the vegetables. Consider using skinless rotisserie chicken breast only.

    Can I make this soup in a slow cooker?

    Yes! Cook everything except gnocchi, spinach, and cream on low for 4-5 hours. Add gnocchi during the final 30 minutes, then stir in spinach and cream just before serving.

    What’s the best way to reheat leftovers?

    Warm gently on the stovetop over medium-low heat, stirring occasionally. Add a splash of broth or milk if it’s thickened too much. Avoid microwave reheating, which can make the texture uneven.

    Can I prepare components of this soup ahead of time?

    Absolutely! Chop vegetables and cook chicken up to two days ahead. Store separately in the refrigerator. The final soup comes together in minutes when your prep is done in advance.

    Final Thoughts

    This Olive Garden Chicken Gnocchi Soup has become my go-to recipe when I need something comforting yet impressive enough for company. The velvety broth, tender chicken, and pillowy gnocchi create a restaurant-quality experience that’s actually simple to make at home. I find myself craving it on rainy days, busy weeknights, and whenever friends drop by unexpectedly. Don’t forget to check out more cozy soup ideas on Pinterest for inspiration! Your kitchen will smell amazing, and you’ll have created something truly special with minimal effort.

  • Crispy Pickle Potatoes with Herbed Yogurt: Irresistibly Crunchy & Fresh!

    Crispy Pickle Potatoes with Herbed Yogurt: Irresistibly Crunchy & Fresh!

    Crispy Pickle Potatoes with Herbed Yogurt: Irresistibly Crunchy & Fresh!

    Crispy Pickle Potatoes with Herbed Yogurt has become my absolute go-to recipe when I want to impress without breaking a sweat. The first time I made these, the tangy dill pickle juice-soaked potatoes hit the hot pan with a satisfying sizzle that filled my kitchen with the most mouthwatering aroma. That perfect crackling crust paired with the cool, creamy herbed yogurt creates a flavor combination that’s simply irresistible. Trust me, these aren’t your average roasted potatoes—they’re a game-changer that will have everyone asking for your secret. Let me show you how to create magic with simple ingredients.

    Recipe

    Why You’ll Love This Crispy Pickle Potatoes with Herbed Yogurt

    Perfect Texture Contrast

    The magical transformation that happens when potatoes soak in pickle brine is something you have to experience. The acidity tenderizes the potatoes while infusing them with that distinctive dill flavor that makes your taste buds dance. When you smash and roast them, the edges become gloriously crispy while the centers stay fluffy and tender. I still remember the first time I served these at a dinner party—my friend Lisa actually closed her eyes and sighed with pleasure at the perfect contrast between the crunchy exterior and pillowy interior. It’s that good.

    Make-Ahead Convenience

    What I adore about this Crispy Pickle Potatoes with Herbed Yogurt recipe is how brilliantly flexible it is for entertaining. The potatoes can soak in the brine overnight, making your prep work a breeze when you’re ready to cook. Even the herbed yogurt sauce can be made a day ahead, with the flavors actually improving as they meld together in the refrigerator. Last weekend, I prepared everything before guests arrived, then simply popped the potatoes in the oven while we enjoyed appetizers. The timing worked perfectly, and I wasn’t stuck in the kitchen when I should have been socializing.

    Essential Tips & Tricks

    Brine Selection Matters

    The pickle brine choice dramatically influences your final flavor profile. I’ve experimented with everything from classic dill to spicy garlic pickle juice, and each creates a distinctly different potato experience. For a milder flavor that appeals to everyone, traditional dill pickle brine works beautifully. If you’re feeling adventurous, try half dill pickle brine and half pepperoncini juice for a tangy kick that pairs wonderfully with the cooling yogurt sauce. Don’t toss those pickle jars—they’re liquid gold for this recipe and many other creative dishes.

    Perfect Smashing Technique

    Achieving that ideal craggy texture requires a gentle touch when smashing your parboiled potatoes. I use a flat-bottomed glass or measuring cup wrapped in plastic wrap (to prevent sticking) and press down just until the potato splits but doesn’t completely fall apart. Aim for about ½-inch thickness—too thin and they’ll burn, too thick and they won’t crisp properly. The irregular surface creates more edges for crisping, which is exactly what you want. I learned this technique through many batches of trial and error, so save yourself the trouble and trust me on this one!

    Serving Ideas & Creative Variations

    Elevated Appetizer Presentation

    Transform these Crispy Pickle Potatoes with Herbed Yogurt into sophisticated bites for your next gathering. Serve each potato individually on a platter with a small dollop of the herbed yogurt, then garnish with microgreens, a sprinkle of smoked paprika, or even a tiny piece of crispy bacon. I served them this way at my sister’s engagement party, placing them on a slate board with small wooden picks, and they disappeared within minutes. For an extra touch of elegance, drizzle with high-quality olive oil and flaky sea salt just before serving. These pair beautifully with Crispy Garlic Air Fryer Broccoli for a complete appetizer spread.

    Global Flavor Adaptations

    The versatile base of these pickle-brined potatoes works wonderfully with flavors from around the world. For a Mediterranean twist, mix feta, lemon zest, and oregano into your yogurt sauce. Going for Asian-inspired? Try a sriracha-spiked yogurt with cilantro and lime. My personal favorite variation came from a happy accident when I was out of dill—I used za’atar in the yogurt along with a drizzle of pomegranate molasses for a Middle Eastern profile that had my husband requesting it weekly. The potato itself maintains that wonderful pickle tang while playing nicely with whatever global flavors you’re craving.

    Storage & Troubleshooting Guide

    Reviving Leftovers

    While these potatoes are at their absolute peak when freshly made, leftovers can be successfully revitalized with the right approach. Store leftover potatoes separate from the yogurt sauce in an airtight container for up to 3 days. To recrisp, avoid the microwave—instead, place them on a baking sheet in a 375°F oven for 7-10 minutes until heated through and crispy again. I’ve even chopped up leftover potatoes and used them in breakfast hash the next morning, where that pickle flavor adds an unexpected but delightful tang to eggs and bacon.

    Fixing Common Mishaps

    The most frequent issue with Crispy Pickle Potatoes is insufficient crispiness, usually because the potatoes retained too much moisture. If your potatoes aren’t crisping properly, increase your oven temperature by 25°F and continue baking. Another trick is to thoroughly pat dry the potatoes after the brine soak before adding oil. For yogurt sauce that’s too thin, strain regular yogurt through a coffee filter for 30 minutes or simply add more thick Greek yogurt. Too thick? A splash of pickle brine or lemon juice thins it while enhancing the tangy flavor profile.

    Frequently Asked Questions

    Can I make Crispy Pickle Potatoes with Herbed Yogurt without dairy?

    Absolutely! Substitute the yogurt with coconut yogurt or cashew cream. Add extra herbs and a splash of lemon juice to compensate for the tanginess you’d get from traditional yogurt.

    How long should potatoes soak in pickle brine?

    For best results, soak for at least 2 hours or overnight. The longer they soak, the more pronounced the pickle flavor will be. Even a 30-minute soak will impart some flavor if you’re short on time.

    Can I use sweet pickle brine instead of dill?

    Yes, though it creates a completely different flavor profile. Sweet pickle brine works wonderfully for a unique sweet-savory contrast, especially when paired with a yogurt sauce that has a hint of heat.

    What potatoes work best for this recipe?

    Waxy varieties like Yukon Gold or red potatoes hold their shape best after smashing. Avoid starchy russets as they tend to fall apart too easily when smashed.

    Can I freeze these potatoes?

    I don’t recommend freezing the finished potatoes as they’ll lose their crispy texture. However, you can parboil and brine the potatoes, then freeze them before the smashing and roasting steps.

    Final Thoughts

    These Crispy Pickle Potatoes with Herbed Yogurt have earned a permanent spot in my recipe collection for good reason. They transform humble ingredients into something truly spectacular through a simple but genius technique. The contrast between the tangy, crispy potatoes and the cool, herbaceous yogurt creates a dish that feels both comforting and sophisticated. Whether served as a show-stopping side or party appetizer, they never fail to impress. Find more inspiration for your next cooking adventure on my Pinterest page where I’m always sharing new flavor combinations!

  • Tuxedo Cake: Irresistible Triple Chocolate Mousse Delight!

    Tuxedo Cake: Irresistible Triple Chocolate Mousse Delight!

    Tuxedo Cake: Irresistible Triple Chocolate Mousse Delight!

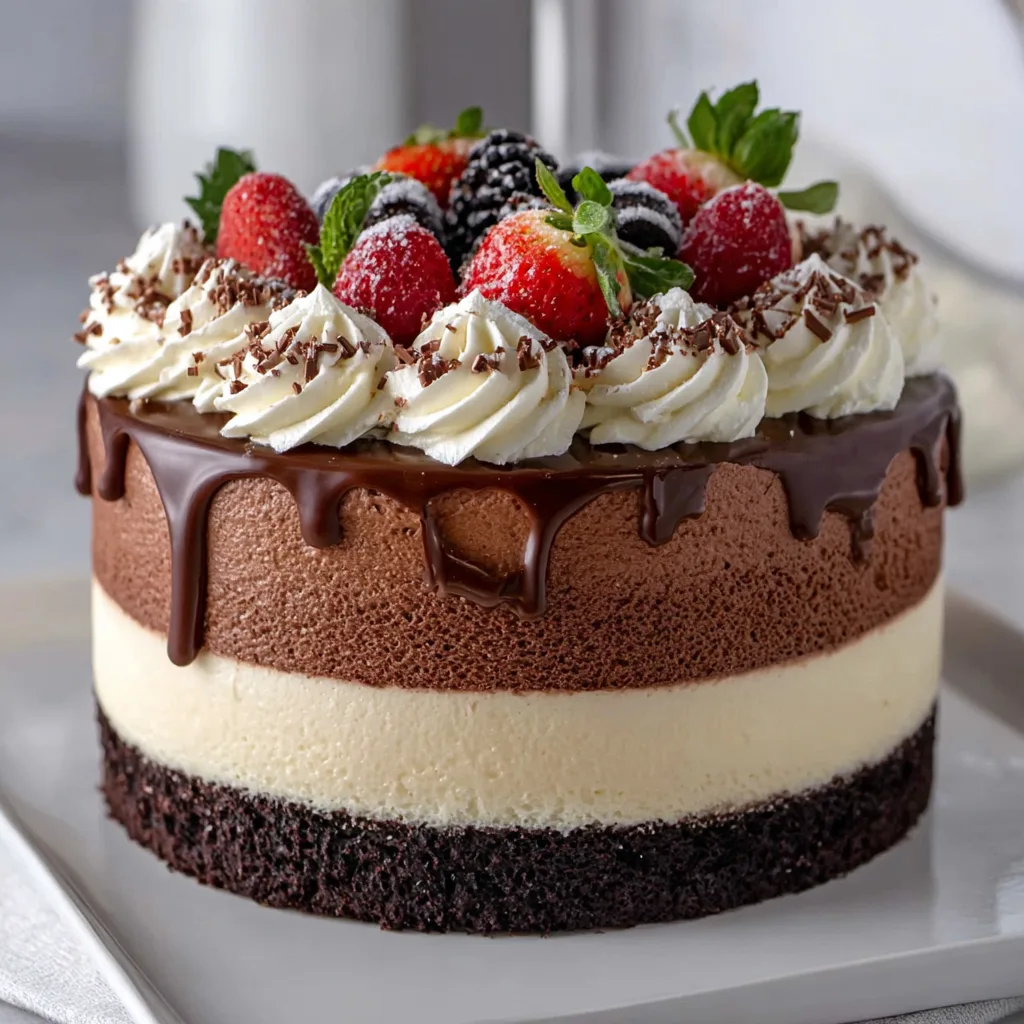
    This Tuxedo Cake Triple Chocolate Mousse Cake is what chocolate dreams are made of—three luxurious layers that create the ultimate dessert experience. The contrast between dark chocolate cake, creamy white chocolate mousse, and rich dark chocolate ganache reminds me of a sophisticated tuxedo, elegant and timeless. I first made this showstopper for my sister’s anniversary, and watching everyone’s eyes widen at first bite made all the effort worthwhile. If you love indulgent desserts like my Ultimate Dark Chocolate Cake, this triple-layer masterpiece will absolutely steal your heart.

    Recipe

    Why You’ll Love This Tuxedo Cake Triple Chocolate Mousse Cake

    A Perfect Balance of Textures and Flavors

    The magic of this Tuxedo Cake lies in its perfect textural harmony. The foundation—a moist, fudgy chocolate cake—provides a substantial base that supports the airy white chocolate mousse middle layer. That cloudlike mousse creates a beautiful contrast against the final glossy dark chocolate ganache topping that snaps ever so slightly when your fork breaks through. Each component delivers its own distinct chocolate experience, from deep and rich to sweet and creamy, creating a symphony of flavors that dance across your palate with every bite.

    An Impressive Yet Achievable Showstopper

    Don’t let the elegant appearance intimidate you—this Tuxedo Cake Triple Chocolate Mousse Cake is surprisingly approachable. While it looks like something from a high-end bakery window, the individual components come together with straightforward techniques. The cake layer can be made a day ahead, and the mousse sets beautifully while you prepare the ganache. I’ve broken down each step to be manageable even for intermediate bakers. The “wow” factor when you present this striking black and white creation makes it perfect for special occasions when you want to impress without spending days in the kitchen.

    Essential Tips & Tricks

    Mastering the Mousse Layers

    The secret to perfect mousse layers is temperature control. Allow your gelatin to bloom properly in cold water for at least 5 minutes until completely softened. When melting chocolate, use a double boiler or microwave in short bursts to prevent scorching. For the white chocolate mousse, ensure your heavy cream is ice cold before whipping—I even chill my mixing bowl beforehand. Fold the whipped cream into your chocolate mixture with a gentle hand using a figure-eight motion to maintain maximum air and fluffiness. Patience here creates that cloud-like texture that makes this cake extraordinary.

    Creating Clean, Sharp Layers

    For those picture-perfect layers that make the Tuxedo Cake Triple Chocolate Mousse Cake so striking, a springform pan is non-negotiable. Line the bottom with parchment and lightly grease the sides. After adding each layer, refrigerate until completely set before adding the next—I recommend at least 2 hours between layers. For the cleanest cut, dip your knife in hot water, wipe dry, and slice with one confident motion. This technique, borrowed from my Salted Caramel Pretzel Cheesecake Balls recipe, ensures each slice showcases those beautiful contrasting layers.

    Serving Ideas & Creative Variations

    Elegant Presentation Techniques

    Transform your Tuxedo Cake Triple Chocolate Mousse Cake into a restaurant-quality dessert with simple garnishes that enhance its sophisticated appearance. Fresh raspberries create stunning color contrast against the dark and white layers. Gold leaf flakes add a touch of luxury when placed strategically on top. For a more dramatic presentation, dust the edges with cocoa powder using a paper stencil to create patterns. Serve on chilled plates with a small dollop of lightly sweetened whipped cream and a mint sprig. These finishing touches elevate the visual appeal without competing with the cake’s inherent beauty.

    Seasonal and Flavor Adaptations

    While the classic Tuxedo Cake is timeless, seasonal adaptations keep it fresh and exciting. For summer, infuse the white chocolate mousse with fresh citrus zest—orange pairs beautifully with chocolate. In fall, add a hint of cinnamon and nutmeg to the chocolate cake base. For a holiday twist, incorporate peppermint extract into the ganache layer, reminiscent of my Candy Cane Pie. You can also experiment with different liqueurs: Baileys in the mousse or Grand Marnier in the ganache adds sophisticated depth for adult gatherings. Each variation maintains the elegant tuxedo appearance while offering new flavor experiences.

    Storage & Troubleshooting Guide

    Proper Storage for Maximum Freshness

    The delicate nature of the mousse layers requires careful storage. Keep your Tuxedo Cake Triple Chocolate Mousse Cake refrigerated in an airtight cake container to prevent it from absorbing refrigerator odors. It stays fresh for up to 4 days, though the texture is at its peak within the first 48 hours. For longer storage, you can freeze individual slices—wrap each piece in plastic wrap, then aluminum foil, and place in a freezer-safe container. Thaw frozen slices in the refrigerator overnight rather than at room temperature to maintain the distinct layers and prevent the mousse from breaking down.

    Fixing Common Mousse Mishaps

    Even experienced bakers occasionally encounter challenges with mousse-based desserts. If your white chocolate mousse is too runny, it likely needs more time to set or was too warm when assembled. Place it back in the refrigerator for at least 2 more hours. For a ganache that’s too firm or cracked, gently warm the surface with a kitchen torch held 6 inches away, moving constantly to create shine without melting. If your cake layer is dry, brush it with simple syrup or a complementary liqueur before adding the mousse. Remember that imperfections can always be disguised with strategic garnishes—chocolate curls are particularly effective for covering surface flaws.

    Frequently Asked Questions

    Can I make this Tuxedo Cake Triple Chocolate Mousse Cake in advance?

    Yes! Make it up to 2 days ahead. Complete all layers, then keep refrigerated in an airtight container. Add any fresh garnishes just before serving for the best presentation.

    What’s the best chocolate to use for the ganache?

    Use high-quality dark chocolate with 60-70% cocoa content. The better the chocolate quality, the smoother and more flavorful your ganache will be. Avoid chocolate chips as they contain stabilizers.

    Can I substitute the gelatin in the mousse?

    For vegetarians, substitute with agar-agar powder using a 1:1 ratio. Follow package directions for blooming and activation, as the process differs slightly from traditional gelatin.

    Why did my mousse layer not set properly?

    Insufficient gelatin, under-whipped cream, or adding warm chocolate to cold ingredients can prevent setting. Ensure all components are at the correct temperature before combining.

    Can I make a mini version of this cake?

    Absolutely! Use 4-inch springform pans for individual Tuxedo Cakes. Reduce baking time for the cake layer to about 15-18 minutes and scale other ingredients proportionally.

    Final Thoughts

    This Tuxedo Cake Triple Chocolate Mousse Cake represents the perfect balance of elegance and indulgence—a dessert that proves homemade can rival any bakery creation. The striking visual contrast between layers mirrors the delightful flavor journey from rich cake to creamy mousse to glossy ganache. While it requires some patience, the result is a showstopping dessert worthy of life’s special moments. I hope you’ll share your creations with me on Pinterest and experience the joy of watching friends and family fall silent with that first perfect bite.

  • Indian Potato Masala Recipe: Irresistible Flavor Explosion You Must Try!

    Indian Potato Masala Recipe: Irresistible Flavor Explosion You Must Try!

    Indian Potato Masala Recipe: Irresistible Flavor Explosion You Must Try!

    Indian Potato Masala has been my culinary love affair for years—a dish that transforms humble potatoes into something truly magical. The first time I made this aromatic spice-infused potato dish, my kitchen filled with such intoxicating scents that my neighbor actually knocked on my door asking what I was cooking! This versatile side dish pairs beautifully with everything from naan to rice, becoming a cornerstone in my weekly meal rotation. If you’re looking for a potato recipe that’s budget-friendly yet bursting with complex flavors, this Indian-inspired classic deserves a permanent spot in your recipe collection.

    Recipe

    Why You’ll Love This Indian Potato Masala

    Perfect Balance of Spices and Textures

    The beauty of Indian Potato Masala lies in its perfect harmony of spices. The warming blend of cumin, mustard seeds, and turmeric creates layers of flavor that dance on your tongue. I love how the potatoes develop this incredible crispy exterior while maintaining a fluffy, tender center. The first time I served this to my spice-hesitant mother-in-law, she shocked everyone by asking for seconds! The aromatic combination is bold without being overwhelming, making it accessible even to those who typically shy away from Indian cuisine.

    Versatile and Budget-Friendly

    This dish has saved my dinner plans more times than I can count! When my pantry seems empty, I can always count on having potatoes and basic spices. The humble potato transforms into something extraordinary with just a few affordable ingredients. Last month when unexpected guests arrived, I quickly whipped this up alongside some yogurt, and everyone raved about my “planned” dinner. It’s equally delightful as a breakfast side with eggs, a lunch companion to salads, or a dinner star alongside grilled proteins.

    Essential Tips & Tricks

    Perfecting Your Potato Preparation

    The foundation of exceptional masala starts with properly prepared potatoes. I’ve learned through many attempts that parboiling them for exactly 7 minutes before sautéing creates the ideal texture. Cut your potatoes into uniform 1-inch cubes to ensure even cooking—a mistake I made early on that left me with some undercooked chunks! Pat them dry thoroughly after boiling; this seemingly small step makes a dramatic difference in achieving that coveted golden exterior while maintaining a fluffy interior.

    Layering Spices for Maximum Flavor

    The secret to authentic Indian Potato Masala lies in the proper spice sequencing. Always begin by tempering whole spices (mustard seeds, cumin) in hot oil until they pop and release their aromatic oils. Only then should you add your onions and ginger-garlic paste. I once rushed this process for a dinner party and missed that magical depth of flavor that makes this dish special. For an extra dimension of flavor, try adding a pinch of asafoetida (hing) at the tempering stage—it’s a game-changer!

    Serving Ideas & Creative Variations

    Traditional and Modern Pairings

    Indian Potato Masala shines brightest when served with complementary dishes. Traditionally, pair it with fluffy basmati rice and dal for a complete protein-rich meal. I love serving it alongside warm naan bread for scooping up every last morsel. For a fusion approach, try stuffing it into wraps with fresh greens and yogurt sauce. Last summer, I created potato masala tacos topped with cilantro-lime crema that had my dinner guests begging for the recipe! The versatility makes it perfect for both authentic Indian feasts and creative weeknight innovations.

    Regional Adaptations Worth Trying

    Each region of India puts its unique spin on potato masala, offering exciting variations to explore. South Indian versions often incorporate curry leaves and coconut, creating a lighter, fragrant profile. Northern adaptations might include more warming garam masala. My personal favorite twist comes from adding a handful of green peas during the final cooking stage, adding pops of sweetness and color. For a delicious breakfast variation similar to my Breakfast Cabbage Saute, try adding scrambled eggs directly into the finished masala!

    Storage & Troubleshooting Guide

    Keeping Your Masala Fresh

    Indian Potato Masala actually improves with time as the spices continue to infuse the potatoes. Store leftovers in an airtight container in the refrigerator for up to 4 days. I often make a double batch on Sundays specifically for meal prep! When reheating, add a splash of water and cover to steam slightly, preventing the potatoes from drying out. For the best texture, avoid microwaving when possible—a quick reheat in a skillet with a touch of oil restores the original crispy exterior while keeping the interior tender.

    Fixing Common Masala Mishaps

    Even experienced cooks encounter challenges with Indian Potato Masala. If your potatoes are sticking to the pan, the likely culprit is insufficient oil or too-high heat. Simply add a tablespoon more oil and reduce the temperature. For potatoes that seem bland despite following the recipe, try adding a final squeeze of fresh lemon juice just before serving—the acidity brightens all the flavors. If your masala turns out too spicy, incorporate a dollop of yogurt or coconut milk to balance the heat while adding creamy richness.

    Frequently Asked Questions

    What potatoes work best for Indian Potato Masala?

    Yukon Gold or russet potatoes are ideal choices. Yukon Golds hold their shape while becoming creamy inside, while russets offer a fluffier texture. Avoid waxy potatoes like red or new potatoes as they won’t absorb the spices as effectively.

    Can I make Indian Potato Masala ahead of time?

    Absolutely! It actually tastes better the next day as flavors continue to develop. Store in the refrigerator for up to 4 days and reheat in a skillet with a splash of water to refresh the texture.

    Is Indian Potato Masala vegan?

    Yes! Traditional Indian Potato Masala is naturally vegan when made with vegetable oil instead of ghee. It’s a perfect plant-based side dish that’s satisfying and protein-rich when served with legumes.

    How spicy is this dish typically?

    The heat level is customizable. For authentic flavor without overwhelming heat, use Kashmiri chili powder which provides color and mild warmth. Adjust the chili quantity to your preference.

    Can I freeze leftover masala?

    Yes, though the texture may change slightly. Cool completely before freezing in airtight containers for up to 2 months. Thaw overnight in the refrigerator and reheat in a skillet with a bit of fresh oil.

    Final Thoughts

    Indian Potato Masala has earned its place as one of my most treasured recipes—a dish that proves simple ingredients can create extraordinary flavors. The aromatic spices, tender potatoes, and endless adaptability make it perfect for both novice cooks and seasoned chefs. Whether you’re exploring Indian cuisine for the first time or looking to perfect your masala technique, I hope you’ll discover the same joy I find in this beloved dish. Don’t forget to check out more international inspirations on our Pinterest for your next culinary adventure!

  • Classic British Fish & Chips: Crispy, Golden, Irresistible Delight!

    Classic British Fish & Chips: Crispy, Golden, Irresistible Delight!

    Classic British Fish & Chips: Crispy, Golden, Irresistible Delight!

    Classic British Fish & Chips brings the taste of seaside holidays right to your kitchen. There’s something magical about that first bite through crispy, golden batter into tender, flaky white fish. As a child, I remember unwrapping newspaper parcels on Brighton Beach, the vinegar-soaked chips steaming in the cool sea breeze. That distinctive combination of crispy exterior and pillowy interior creates an irresistible comfort food that’s stood the test of time. Today, I’m sharing my perfected recipe that captures that authentic British chippy experience. Grab your deep fryer—we’re about to embark on a deliciously nostalgic journey!

    Recipe

    Why You’ll Love This Classic British Fish & Chips

    The Perfect Batter Secret

    The soul of exceptional fish and chips lies in the batter consistency. I’ve tested dozens of variations, and the magic happens with cold beer and self-rising flour. The carbonation creates those beautiful air pockets that make the coating light yet crispy. For authentic results, keep everything ice cold until the moment it hits the hot oil. I always rest my batter 15 minutes before using—this allows the gluten to relax, preventing that heavy, chewy texture that ruins good fish. The transformation from pale batter to golden perfection is truly one of cooking’s most satisfying moments.

    Double-Fried Chips Technique

    Traditional British chips require a double-frying method that creates that distinctive texture—crispy outside, fluffy inside. Start with starchy potatoes like Russets or Maris Pipers, cut them thicker than American fries (about 1/2 inch), and soak them in cold water to remove excess starch. The first fry at a lower temperature (325°F) essentially poaches the potatoes, while the second at higher heat (375°F) delivers that golden crunch. I learned this technique from a third-generation chip shop owner in Whitby, and it’s absolutely transformative. The difference between single and double-fried chips is immediately noticeable.

    Essential Tips & Tricks

    Oil Temperature Control

    Maintaining proper oil temperature is critical for fish and chips success. Too cool, and your food absorbs oil, becoming greasy; too hot, and the exterior burns before the interior cooks. I recommend using a deep-fry thermometer and aiming for 350-375°F for fish and the second chip fry. Between batches, allow the oil to return to temperature before adding more food. Working in small batches prevents dramatic temperature drops. My favorite oils are peanut or vegetable, which have high smoke points and neutral flavors. Never fill your pot more than halfway with oil to prevent dangerous overflow.

    Authentic Seasoning Approach

    The traditional British seasoning approach is beautifully simple—malt vinegar and sea salt are your best friends here. Sprinkle salt immediately after removing from the fryer when the surface is still slightly moist so it adheres properly. For an authentic touch, serve with lemon wedges, homemade tartar sauce, and mushy peas. I keep a small spray bottle filled with malt vinegar for even distribution without sogginess. While Americans often reach for ketchup, true British fish and chips enthusiasts consider this almost sacrilegious—though I won’t judge if that’s your preference!

    Serving Ideas & Creative Variations

    Classic Accompaniments

    Serving fish and chips with the right sides elevates the entire experience. Mushy peas made with fresh or frozen peas, butter, and mint create that authentic chippy experience. Homemade tartar sauce with capers, cornichons, and fresh herbs offers the perfect tangy counterpoint to the rich fish. I always warm my serving plates slightly to keep everything hot longer. For presentation, try newspaper-lined baskets or parchment paper cones for that takeaway feel. My family’s favorite Friday tradition involves setting up a “chip shop” buffet with various vinegars, sauces, and crispy shrimp toast on the side for a complete seafood feast.

    Modern Twists & Variations

    While traditionalists might raise eyebrows, these creative variations can breathe new life into this classic dish. Try beer-battering different fish—haddock offers a sweeter flavor than cod, while halibut provides firmer texture. For a lighter option, use sparkling water instead of beer and add tempura-style seasonings. Experiment with chip alternatives like sweet potato, parsnip, or even zucchini fries for variety. My personal favorite twist is adding crushed salt and vinegar chips into the batter for extra flavor and crunch. For special occasions, serve with homemade curry sauce or garlic aioli for dipping—surprisingly delicious with the traditional fish.

    Storage & Troubleshooting Guide

    Proper Storage Methods

    While fish and chips are best enjoyed immediately, proper storage techniques can help preserve leftovers. If storing, separate the fish from the chips to prevent sogginess, and cool completely before refrigerating in airtight containers for up to 2 days. For reheating, avoid the microwave which ruins the texture. Instead, use an oven preheated to 350°F for 10-15 minutes until crispy and heated through. The air fryer works brilliantly too—just 3-4 minutes at 370°F. I’ve found that freezing battered fish works surprisingly well; freeze pieces separately on a baking sheet before transferring to freezer bags for up to 1 month.

    Common Problems & Solutions

    Even experienced cooks encounter troubleshooting challenges with fish and chips. If your batter slides off, ensure your fish is completely dry before coating and consider dusting with flour first. For soggy batter, check your oil temperature—it’s likely too low. Greasy results usually indicate the oil wasn’t hot enough or has degraded from overuse. If chips turn out limp, you’ve likely overcrowded the fryer—work in smaller batches. I once saved an entire dinner party when my batter wouldn’t crisp by adding a tablespoon of cornstarch to the remaining mixture, which instantly improved the texture and saved the meal.

    Frequently Asked Questions

    What’s the best fish for authentic British fish and chips?

    Traditional British fish and chips typically uses cod or haddock. Cod offers a mild, clean taste with large flakes, while haddock has a slightly sweeter flavor with firmer texture. Both work beautifully when fresh and sustainably sourced.

    Can I make fish and chips without a deep fryer?

    Absolutely! Use a heavy-bottomed Dutch oven with a thermometer. Fill it no more than halfway with oil, maintain proper temperature, and work in small batches. This method produces results just as delicious as dedicated fryers.

    How do I keep my Classic British Fish & Chips crispy until serving?

    Place fried pieces on a wire rack over a baking sheet in a 200°F oven. This maintains crispiness without continuing to cook the food. Avoid covering with foil, which traps steam and creates sogginess.

    What’s the secret to non-greasy fish and chips?

    The key is proper oil temperature (350-375°F), not overcrowding the fryer, and briefly draining on paper towels after frying. Using fresh oil and cold batter ingredients also significantly reduces greasiness.

    Can I prepare components of fish and chips ahead of time?

    You can cut and soak potatoes up to 24 hours ahead (refrigerated in water) and mix dry batter ingredients. However, only add wet ingredients right before cooking, and never coat fish until you’re ready to fry.

    Final Thoughts

    Classic British Fish & Chips represents comfort food at its finest—simple ingredients transformed through technique into something truly special. The combination of crispy, golden fish with perfectly double-fried chips creates a meal that transcends its humble origins. Whether you’re recreating holiday memories or experiencing this British staple for the first time, the joy of breaking through that crunchy exterior to the steaming fish beneath is unmatched. I hope this recipe brings a little bit of seaside magic to your table. Don’t forget to check out more comfort food classics on Pinterest for inspiration on your culinary journey!

  • Cinnamon Sugar Tortilla Chips – Irresistibly Crispy & Sweet Snack!

    Cinnamon Sugar Tortilla Chips – Irresistibly Crispy & Sweet Snack!

    Cinnamon Sugar Tortilla Chips – Irresistibly Crispy & Sweet Snack!

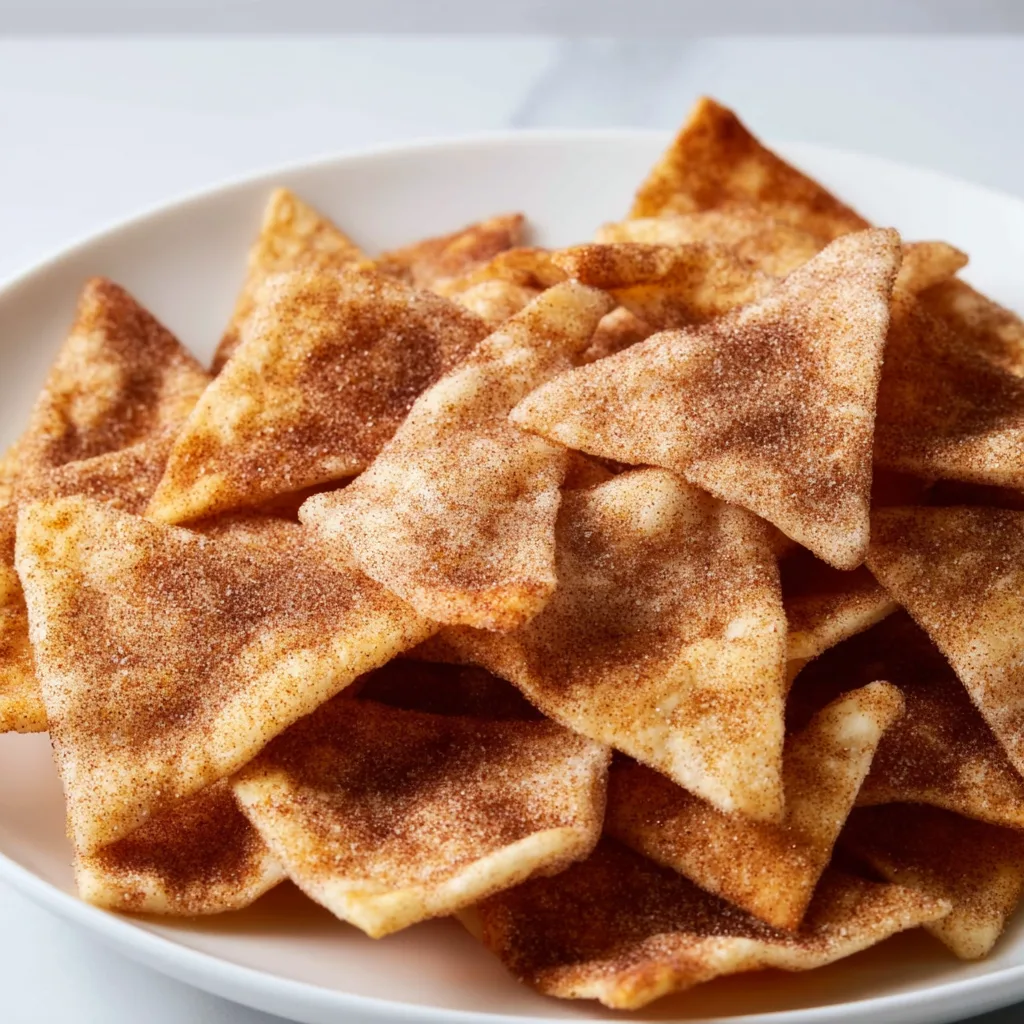
    Cinnamon Sugar Tortilla Chips are the perfect sweet treat when you’re craving something crispy with just the right amount of sweetness. I discovered this simple recipe years ago during a movie night when we ran out of popcorn, and it’s been a family favorite ever since! With just a few pantry staples, you can transform ordinary tortillas into a dessert that’s both impressive and incredibly easy. The warm cinnamon aroma that fills your kitchen as these bake is absolutely heavenly – reminiscent of those mall cinnamon rolls we all secretly love. Ready in under 15 minutes, these chips are perfect for dipping in fruit salsa or enjoying on their own.

    Recipe

    Why You’ll Love These Cinnamon Sugar Tortilla Chips

    Quick & Easy Preparation

    These cinnamon sugar tortilla chips require minimal effort but deliver maximum flavor impact. All you need are flour tortillas, melted butter, cinnamon, and sugar – ingredients you likely already have in your pantry! I love that I can whip these up in just 10 minutes when unexpected guests arrive or when my sweet tooth demands immediate attention. The simplicity is part of their charm; just brush, sprinkle, cut, and bake. Even on my busiest weeknights, I can manage this recipe without breaking a sweat. The hardest part? Waiting those few minutes while they crisp up in the oven!

    Versatile Sweet Treat

    What makes these chips truly special is their incredible versatility. They’re perfect on their own as a sweet snack, but they also elevate so many desserts. Serve them alongside fresh fruit, dip them in chocolate sauce, or crumble them over ice cream for added texture. My daughter loves using them to scoop up yogurt parfaits for breakfast, while my husband prefers them with his afternoon coffee. They’re also a hit at parties when paired with fruit salsa or caramel dip. I’ve even packed them in lunchboxes as a special treat – much more exciting than regular chips!

    Essential Tips & Tricks

    Perfect Crispiness Every Time

    Achieving the ideal texture is crucial for these cinnamon sugar tortilla chips. The secret? Make sure your oven is fully preheated before baking. I recommend 350°F (175°C) for even browning without burning. Watch them closely after the 6-minute mark – they can go from perfectly golden to overdone in seconds! Another pro tip: use a silicone brush to apply the butter evenly, ensuring complete coverage without soaking the tortillas. For extra crispiness, let them cool completely on the baking sheet before serving. This allows them to firm up properly, giving you that satisfying crunch with every bite.

    Flavor Enhancements

    While the classic cinnamon-sugar combination is delicious, don’t be afraid to experiment with flavors! Adding a pinch of nutmeg or cardamom to your cinnamon sugar mixture creates a more complex spice profile. For a Mexican-inspired twist, try mixing in a tiny bit of chili powder – the sweet-heat combination is surprisingly addictive! You can also swap the butter for coconut oil to add a subtle tropical note. For special occasions, I like to sprinkle a bit of vanilla sugar instead of regular sugar for an aromatic boost. The possibilities are endless once you master the basic recipe!

    Serving Ideas & Creative Variations

    Perfect Pairings

    These cinnamon sugar tortilla chips shine brightest when paired with the right complementary flavors. My absolute favorite combination is serving them with a fresh fruit salsa made from diced strawberries, mango, and a hint of lime. The contrast between the crisp, sweet chips and juicy fruit is simply divine! They also pair beautifully with chocolate fondue, caramel sauce, or cream cheese dip. For brunch gatherings, I arrange them alongside a yogurt bar with various toppings. During fall, they’re perfect with warm apple butter or pumpkin dip. The textural contrast makes every bite interesting and keeps guests coming back for more.

    Creative Twists

    Don’t limit yourself to the traditional triangle shape! Get creative with presentation by using cookie cutters to make festive shapes – stars for holidays, hearts for Valentine’s Day, or circles for a more elegant look. For a dessert nacho platter, arrange the chips on a serving tray, drizzle with chocolate sauce, sprinkle with mini marshmallows and fresh berries, then broil briefly until the marshmallows are golden. Another variation I love is making cinnamon-sugar tortilla bowls by draping the prepared tortillas over oven-safe bowls before baking – perfect for holding ice cream! You can also layer them with whipped cream for a quick Mexican-inspired napoleon.

    Storage & Troubleshooting Guide

    Proper Storage Methods

    To maintain optimal freshness, store your cinnamon sugar tortilla chips in an airtight container at room temperature. They’ll stay crisp for up to 3 days this way. If you live in a particularly humid climate, add a paper towel to the container to absorb excess moisture. Avoid refrigerating the chips as this can make them soggy. If you want to prepare them in advance for a party, I recommend making the cinnamon-sugar mixture ahead of time but baking the chips just before serving. If they do lose some crispness, a quick 2-minute reheat in a 300°F oven will refresh them perfectly!

    Common Issues & Solutions

    The most frequent problem with homemade chips is uneven browning. To prevent this, rotate your baking sheet halfway through cooking and make sure your tortillas are cut into similar-sized pieces. If your chips aren’t crisping properly, they might need a bit more time in the oven – but watch carefully to prevent burning! Too much butter can make them soggy rather than crisp, so use a light hand when brushing. If your cinnamon sugar isn’t sticking well, try applying the butter more generously or slightly pressing the sugar mixture onto the tortillas before baking. For chips that are too hard, you likely overcooked them – next time, reduce the baking time by 1-2 minutes.

    Frequently Asked Questions

    Can I use corn tortillas instead of flour tortillas for cinnamon sugar tortilla chips?

    Yes! Corn tortillas work beautifully but may require a slightly shorter baking time. They offer a different texture and slight corn flavor that pairs wonderfully with the cinnamon sugar.

    How do I know when the chips are done baking?

    Look for golden brown edges and a firm center. They’ll continue to crisp as they cool, so don’t wait until they’re completely hard in the oven.

    Can I make these cinnamon sugar tortilla chips in an air fryer?

    Absolutely! Cook at 350°F for about 3-4 minutes. They cook faster in an air fryer, so check them frequently to prevent burning.

    Are these suitable for people with dietary restrictions?

    You can easily adapt this recipe using gluten-free tortillas and plant-based butter. The cinnamon and sugar components are naturally vegan and gluten-free.

    How far in advance can I make these for a party?

    For best results, make them no more than 24 hours in advance. Store in an airtight container and give them a quick reheat if they lose crispness.

    Final Thoughts

    These Cinnamon Sugar Tortilla Chips have become my go-to recipe whenever I need a quick sweet treat that impresses without much effort. There’s something magical about transforming a simple tortilla into a crispy, sweet delight that everyone loves. Whether you’re serving them at a party, enjoying them as an afternoon snack, or using them to elevate your dessert game, they never disappoint. I’d love to see your creations on Pinterest! The beauty of this recipe is in its simplicity and how it brings a touch of sweetness to ordinary moments.
  • Smoked Salmon Grilled Cheese: Irresistible Crunch & Creamy Delight!

    Smoked Salmon Grilled Cheese: Irresistible Crunch & Creamy Delight!

    Smoked Salmon Grilled Cheese: Irresistible Crunch & Creamy Delight!

    Smoked Salmon Grilled Cheese transforms the humble sandwich into a gourmet experience that’s both elegant and comforting. I discovered this luxurious twist on a rainy afternoon when nothing in my pantry seemed appealing—until I spotted cream cheese and that precious package of smoked salmon. The buttery, golden-brown exterior gives way to a creamy center where tangy cream cheese meets smoky salmon in perfect harmony. What I love most is how this sandwich straddles the line between everyday comfort food and sophisticated fare. It’s perfect for those days when you crave something special but don’t want to spend hours in the kitchen. Check out my Italian Chopped Salad for the perfect accompaniment!

    Recipe

    Why You’ll Love This Smoked Salmon Grilled Cheese

    The Perfect Balance of Flavors

    There’s something magical about the way the rich smokiness of the salmon cuts through the creamy cheese. Each bite offers layers of flavor—tangy cream cheese, delicate salmon, sharp cheddar, and subtle hints of dill and capers if you’re feeling adventurous. I’ve found that adding a thin slice of red onion creates a pleasant sharpness that balances the richness. The textural contrast is equally satisfying: crispy, buttered bread against the melty interior creates that delightful mouthfeel we all crave from a perfect grilled cheese. It’s comfort food elevated to new heights.

    Quick and Impressive

    What I adore about this sandwich is how it transforms simple ingredients into something that feels special enough for company. It takes just 10 minutes from start to finish but tastes like something you’d order at a trendy bistro. I’ve served these at impromptu brunches and watched guests’ eyes widen with that first bite. The beautiful pink salmon peeking through the golden bread makes for an Instagram-worthy presentation without any fussy techniques. It’s my go-to when I want to impress someone with minimal effort—perfect for those days when you want something a bit luxurious without the luxury of time.

    Essential Tips & Tricks

    Choosing the Right Ingredients

    The quality of ingredients makes all the difference in this simple sandwich. Look for cold-smoked salmon rather than hot-smoked for that silky texture and delicate flavor. For cheese, I recommend a combination of cream cheese and a good melting cheese like Gruyère or white cheddar. The bread matters tremendously—sourdough or rye provide the perfect sturdy base with flavor that complements the salmon. Remember to bring cream cheese to room temperature for easier spreading. Fresh herbs like dill or chives add brightness, while capers introduce little bursts of briny flavor that cut through the richness beautifully.

    Perfecting Your Technique

    The secret to a perfect smoked salmon grilled cheese lies in the low and slow approach. Too high heat will burn the bread before the inside melts properly. I spread a thin layer of softened butter on the outside of each bread slice rather than melting it in the pan—this ensures even browning. Press down gently with a spatula as it cooks, but don’t flatten completely; you want some height to your sandwich. For the ultimate upgrade, try adding a thin layer of Garlic Butter Parmesan Knots filling to your bread before assembling—the garlic butter creates an incredible flavor foundation.

    Serving Ideas & Creative Variations

    Perfect Pairings

    This elevated sandwich deserves thoughtful accompaniments. I love serving smoked salmon grilled cheese with a light cucumber salad dressed simply with lemon and dill—the crispness cuts through the richness beautifully. A small bowl of tomato soup makes for a classic pairing with an upscale twist. For brunch, add a poached egg on top and let that golden yolk create an instant sauce. When entertaining, I slice these into small triangles and serve alongside Crispy Crab Cake Bites with Lemon Dill Sauce for an impressive seafood-themed appetizer spread that always earns compliments.

    Creative Twists

    Don’t be afraid to experiment with this versatile sandwich! My favorite variation includes thinly sliced green apple for a sweet-tart crunch that plays beautifully against the smoky salmon. For a Scandinavian-inspired version, try adding a thin layer of lingonberry jam—the sweet-tart flavor creates an incredible contrast. Substitute bagel slices for bread and add capers for a deconstructed lox bagel experience. For a lighter option, use whipped goat cheese instead of cream cheese. When I’m feeling indulgent, I add thin slices of avocado for extra creaminess. Each variation maintains the essence while creating a completely new experience.

    Storage & Troubleshooting Guide

    Making Ahead and Storage

    While smoked salmon grilled cheese is best enjoyed fresh off the pan, there are ways to prep components ahead. I often mix cream cheese with herbs and seasonings a day in advance—this actually improves the flavor as everything melds together. For parties, assemble sandwiches without cooking, wrap tightly in plastic, and refrigerate for up to 4 hours before grilling. Leftover cooked sandwiches can be wrapped and refrigerated, then reheated in a dry skillet over medium-low heat for 2-3 minutes per side. The texture won’t be quite as perfect, but the flavors remain delicious.

    Solving Common Problems

    If your sandwich is browning too quickly before the cheese melts, you’re likely using heat that’s too high. Lower the temperature and be patient—perfect grilled cheese requires gentle heat. If your sandwich feels too rich or heavy, try adding acid: lemon zest, pickled red onions, or a few capers create balance. Soggy bread often results from salmon that’s too wet; pat it dry with paper towels before assembling. If cream cheese squishes out during cooking, chill the assembled sandwich for 10 minutes before grilling to firm everything up. Remember that less is more with fillings—overstuffing leads to structural problems!

    Frequently Asked Questions

    Can I use other types of fish for this grilled cheese?

    Absolutely! Try hot-smoked trout, flaked poached salmon, or even canned tuna mixed with a bit of mayo. Each creates a different flavor profile while maintaining the seafood-cheese harmony that makes this sandwich special.

    What’s the best bread for smoked salmon grilled cheese?

    Sourdough is my top choice for its sturdy structure and tangy flavor. Rye pairs beautifully with salmon’s smokiness, while brioche adds richness. Avoid very soft breads that might collapse under the weight of fillings.

    Can I make a smoked salmon grilled cheese without dairy?

    Yes! Use dairy-free cream cheese and a good melting plant-based cheese. The salmon’s rich flavor ensures the sandwich remains delicious even without traditional dairy components.

    How do I prevent my sandwich from becoming too greasy?

    Use good quality cheese that melts without releasing excessive oil. Butter only the outside of the bread lightly, and cook over medium-low heat. Blotting excess oil from smoked salmon before assembling also helps.

    What herbs work best with smoked salmon grilled cheese?

    Dill is the classic pairing that enhances salmon’s flavor. Chives add mild onion notes, while fresh thyme brings earthy complexity. A combination of herbs creates the most interesting flavor profile.

    Final Thoughts

    The Smoked Salmon Grilled Cheese represents everything I love about cooking—transforming familiar ingredients into something that feels special without complicated techniques. It’s a reminder that luxury in food often comes from thoughtful combinations rather than expensive components. The contrast of textures, the harmony of flavors, and that beautiful golden exterior make this sandwich a true standout in my recipe collection. Whether you’re serving it for a solo lunch or as part of an elegant brunch spread, it delivers comfort and sophistication in equal measure. Find more inspiration for your next culinary adventure on Pinterest!