Author: Darleen Vance

  • Low-Carb Keto Cheeseburger Stuffed Peppers – Irresistibly Delicious!

    Low-Carb Keto Cheeseburger Stuffed Peppers – Irresistibly Delicious!

    Low-Carb Keto Cheeseburger Stuffed Peppers – Irresistibly Delicious!

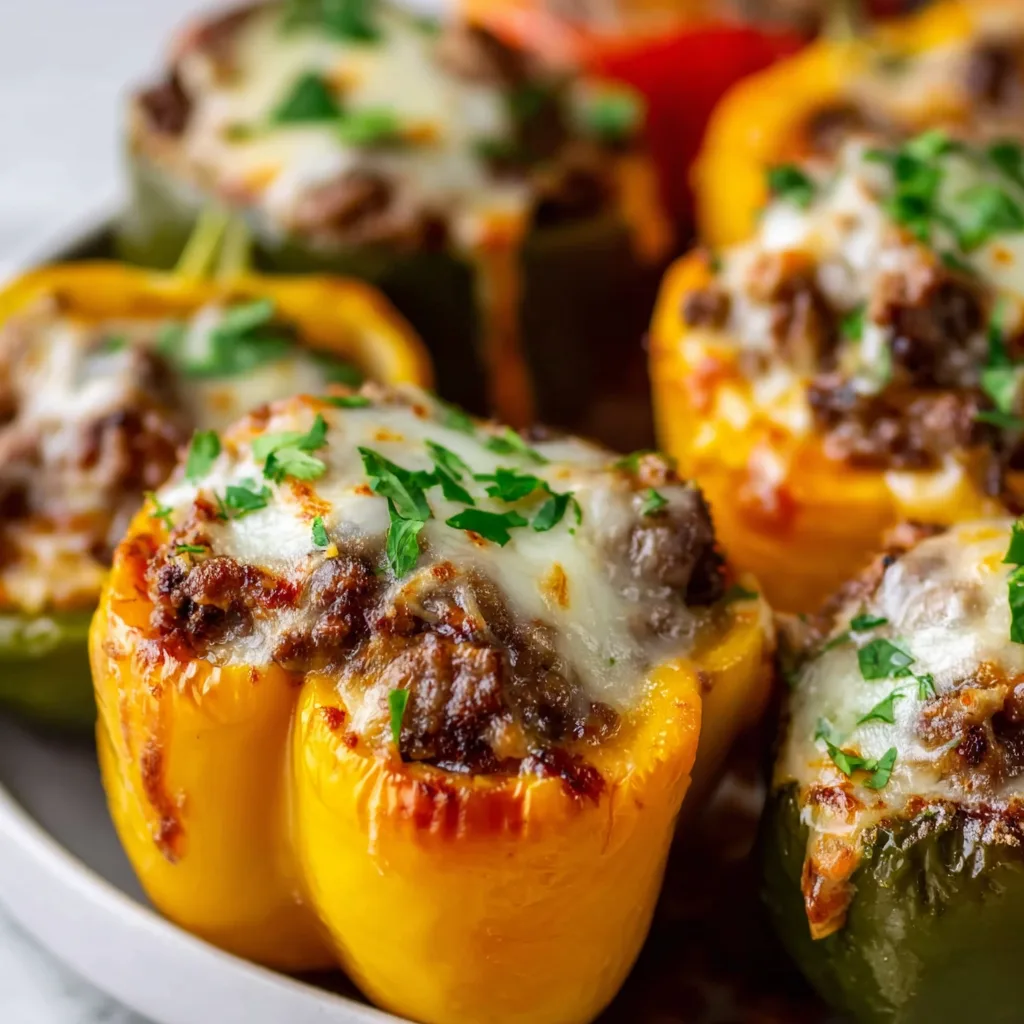
    Low-Carb Keto Cheeseburger Stuffed Peppers have completely revolutionized my weeknight dinner routine! These vibrant bell peppers cradle all the savory goodness of a juicy cheeseburger without the carb-heavy bun. The first time I made these for my family, my husband couldn’t believe they were keto-friendly – he went back for seconds before I could even finish my first serving! There’s something magical about the way the peppers soften in the oven while the cheesy beef filling gets deliciously caramelized on top. If you’re craving comfort food that won’t derail your low-carb goals, these stuffed peppers are about to become your new obsession.

    Recipe

    Why You’ll Love This Low-Carb Keto Cheeseburger Stuffed Peppers

    Perfect Macros for Keto Enthusiasts

    These stuffed peppers are a macro powerhouse for anyone following a ketogenic lifestyle. Each serving delivers substantial protein from the ground beef while keeping carbs impressively low (under 8g net carbs per pepper). The combination of melty cheese, savory beef, and natural sweetness from the bell peppers creates a deeply satisfying meal that keeps you full for hours. I’ve found these particularly helpful during those first challenging weeks of keto when cravings hit hard. The familiar cheeseburger flavors trick your brain into thinking you’re indulging while actually staying perfectly on track with your nutrition goals.

    Quick & Customizable Family Meal

    What I adore about this recipe is how incredibly versatile it is for feeding different preferences. My daughter loves extra pickles in hers, while my husband prefers bacon and jalapeños for heat. The base recipe comes together in just 15 minutes of prep time, making it weeknight-friendly even during the busiest times. You can prep everything the night before, then simply pop them in the oven when you get home. I’ve served these to guests who aren’t even following keto, and they’re always impressed by how satisfying and flavorful they are without feeling like “diet food.”

    Essential Tips & Tricks

    Selecting & Preparing the Perfect Peppers

    Choosing the right peppers makes all the difference in this recipe. Look for firm, symmetrical bell peppers with flat bottoms that will stand upright in your baking dish without tipping over. I prefer using red, orange, or yellow peppers as they’re naturally sweeter and complement the savory beef filling beautifully. When cutting the tops, leave about 1/4 inch of the stem attached to use as a “handle” if you’re serving the tops as lids. Don’t waste those pepper tops! Dice them finely and add to the meat mixture for extra flavor and to reduce food waste – a trick I learned from my grandmother that I use in my BBQ Chicken Pasta Salad too.

    Achieving the Perfect Texture & Flavor

    The secret to exceptional stuffed peppers is balancing textures and preventing sogginess. I always pre-bake my empty peppers for 10 minutes before filling them – this gives them a head start and prevents the final dish from becoming watery. For the filling, drain your cooked beef thoroughly and use a high-quality sharp cheddar that melts beautifully without becoming greasy. Don’t skimp on seasonings! The classic burger elements like mustard, Worcestershire sauce, and garlic powder are what transform this from basic stuffed peppers into an authentic cheeseburger experience. Finish with a quick broil to get that irresistible golden cheese crust on top.

    Serving Ideas & Creative Variations

    Complementary Side Dishes

    While these stuffed peppers are hearty enough to serve as a complete meal, I love pairing them with simple keto-friendly sides for a more substantial dinner. A crisp side salad with creamy avocado dressing adds freshness and healthy fats. For family members not following keto, you might add a side of sweet potato fries or garlic bread. On particularly busy evenings, I simply serve these with a dollop of sour cream and fresh herbs. For an impressive presentation at dinner parties, arrange the stuffed peppers on a large platter surrounded by Crispy Garlic Air Fryer Broccoli florets for a colorful, nutritious spread that always gets compliments.

    Exciting Flavor Variations

    The beauty of this recipe lies in how easily you can adapt it to different flavor profiles while maintaining its keto-friendly status. For a Mediterranean twist, mix in chopped olives, feta cheese, and oregano with the beef. My family’s current favorite variation includes bacon and blue cheese crumbles for an indulgent steakhouse flavor. For spice lovers, incorporate diced jalapeños and pepper jack cheese. You can even switch up the meat entirely – ground turkey works beautifully for a lighter option, or use a mixture of Italian sausage and beef for extra richness. Don’t be afraid to experiment with different cheeses too – smoked gouda adds incredible depth of flavor.

    Storage & Troubleshooting Guide

    Proper Storage & Reheating Methods

    These stuffed peppers are meal-prep champions and actually taste even better the next day as the flavors meld together. Store leftovers in an airtight container in the refrigerator for up to 4 days. For reheating, avoid the microwave if possible as it can make the peppers soggy. Instead, place them in a 350°F oven for 15-20 minutes until heated through. If you’re making these ahead for a busy week, you can freeze them either before or after baking. I like to individually wrap each pepper in parchment paper before placing in a freezer bag – this makes it easy to grab just one or two for a quick meal.

    Fixing Common Issues

    If your peppers aren’t standing upright, create a stable base by slicing a thin piece off the bottom, being careful not to cut through to the hollow center. For peppers that seem undercooked even after the recommended baking time, your peppers might be particularly large or thick-walled. Simply cover with foil and continue baking until tender. If your filling seems too wet, add 2-3 tablespoons of almond flour or crushed pork rinds to absorb excess moisture. Conversely, if the filling seems dry, mix in a tablespoon of beef broth or a dollop of cream cheese for added moisture and richness without adding carbs.

    Frequently Asked Questions

    Can I make these Low-Carb Keto Cheeseburger Stuffed Peppers ahead of time?

    Absolutely! Prepare everything up to 24 hours in advance, refrigerate, then add an extra 5-10 minutes to the baking time when you’re ready to cook them. They’re perfect for meal prep and actually develop better flavor overnight.

    What’s the best cheese to use for authentic cheeseburger flavor?

    Sharp cheddar provides that classic cheeseburger taste, but feel free to experiment with American cheese, pepper jack, or a blend of your favorites. For extra indulgence, mix some cream cheese into the filling for richness.

    Can I use ground turkey instead of beef?

    Yes! Ground turkey works wonderfully as a leaner option. I recommend using 85/15 ground turkey rather than the very lean 99% version to maintain moisture and flavor in the filling.

    How do I prevent the peppers from becoming too soft?

    Pre-bake empty peppers for 10 minutes before filling them. Also, avoid overcooking – peppers should be tender but still hold their shape. For firmer peppers, reduce baking time by 5-7 minutes.

    Are these suitable for freezing?

    Definitely! Freeze them either before or after baking. Wrap individually and store for up to 3 months. Thaw overnight in the refrigerator before reheating at 350°F until hot throughout.

    Final Thoughts

    These Low-Carb Keto Cheeseburger Stuffed Peppers have become my secret weapon for staying on track while never feeling deprived. There’s something deeply satisfying about cutting into that colorful pepper and watching the cheesy filling ooze out – a true feast for both eyes and taste buds! The combination of familiar comfort food flavors with nutritious ingredients makes this dish a regular in my meal rotation. Whether you’re strictly keto or simply looking for a creative low-carb dinner option, these stuffed peppers deliver big on flavor while keeping carbs in check. Don’t forget to share your creations with me on Pinterest!

  • Crab Stuffed Shrimp That Will Blow Your Taste Buds Away!

    Crab Stuffed Shrimp That Will Blow Your Taste Buds Away!

    Crab Stuffed Shrimp That Will Blow Your Taste Buds Away!

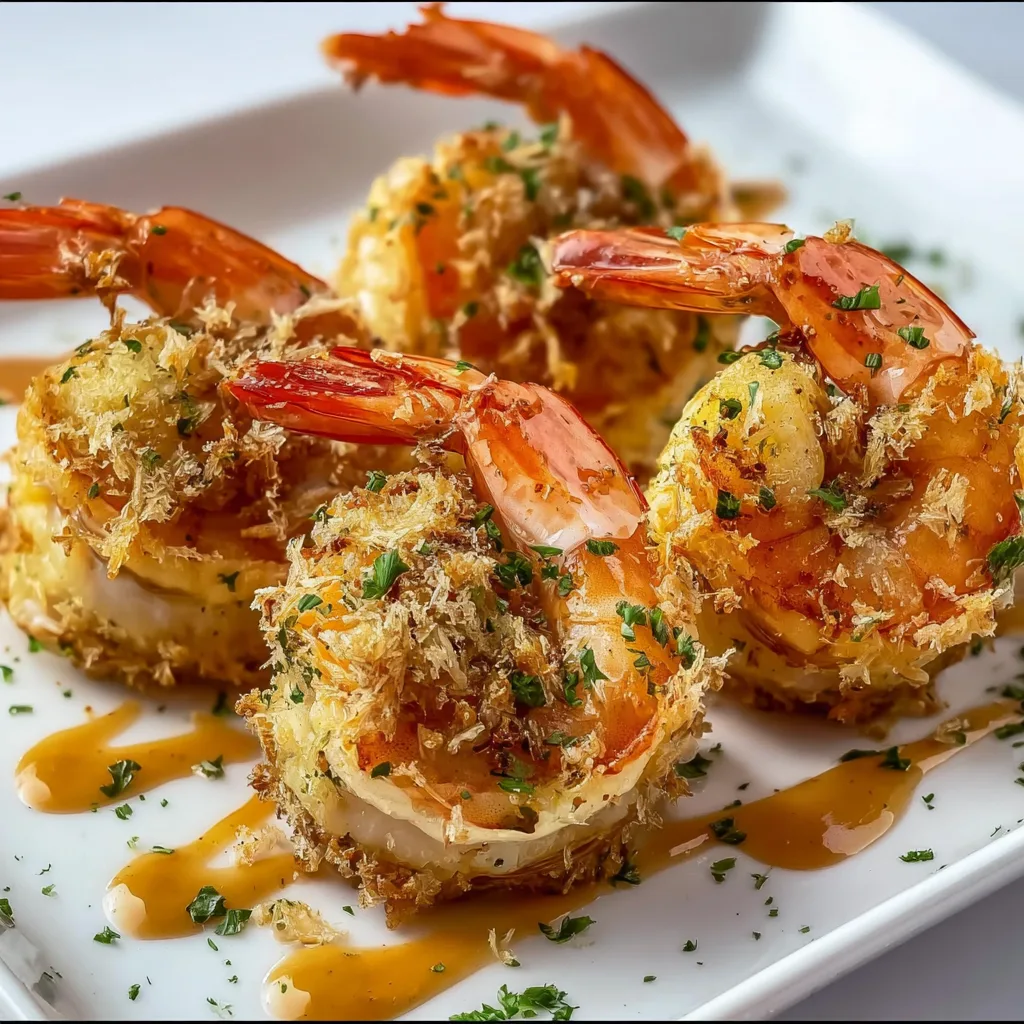
    Crab Stuffed Shrimp combines two beloved seafood treasures into one spectacular appetizer that never fails to impress. The first time I served these at a dinner party, my guests literally gasped when I brought out the platter! There’s something magical about tender jumbo shrimp embracing a delicate crab filling, all topped with a buttery crumb mixture that turns golden and crispy under the broiler. If you’re looking for an elegant seafood dish that delivers major wow-factor without hours in the kitchen, this crab-filled delicacy is your answer.

    Recipe

    Why You’ll Love This Crab Stuffed Shrimp

    Restaurant-Quality Results at Home

    Trust me when I say these stuffed shrimp will rival anything you’d order at a high-end seafood restaurant. The sweet, succulent shrimp paired with lump crabmeat creates a luxurious mouthfeel that feels special occasion-worthy. Yet the preparation is surprisingly straightforward! I love watching friends’ faces light up with that “you made these?” expression. The contrast between the tender shrimp and the slightly crispy, herb-infused topping creates a textural experience that keeps everyone reaching for seconds.

    Perfect for Any Occasion

    Whether you’re hosting an intimate dinner party or preparing a romantic date night meal, these Crab Stuffed Shrimp fit the bill perfectly. I’ve served them as elegant appetizers at holiday gatherings and as the star protein for summer dinner parties on the deck. They cook quickly enough for a special weeknight dinner but feel indulgent enough for celebrations. The presentation alone—those beautiful curved shrimp cradling golden crab filling—elevates any table setting and makes guests feel truly pampered.

    Essential Tips & Tricks

    Selecting the Best Ingredients

    The secret to exceptional Crab Stuffed Shrimp starts at the seafood counter. Look for jumbo or colossal shrimp (16-20 count per pound) with shells that are firm and translucent, never slimy. For the crab, lump crabmeat offers the perfect balance of flavor and texture, though jumbo lump works beautifully if you’re splurging. Fresh is ideal, but quality pasteurized crabmeat from the refrigerated section works wonderfully too. Just avoid canned varieties, which lack the sweet, delicate flavor that makes this dish special. Fresh ingredients truly make all the difference.

    Perfecting the Butterfly Technique

    Properly butterflying your shrimp creates the perfect cradle for your crab filling. With a sharp knife, cut along the outer curve (the back) of each peeled shrimp, slicing about three-quarters of the way through—never completely in half. When you open the shrimp, it should lie flat with the two sides still connected, resembling a butterfly. I learned through trial and error to leave the tails on—they provide a convenient handle for dipping and add visual appeal to the finished dish. Pat the shrimp dry before filling to ensure the stuffing adheres properly.

    Serving Ideas & Creative Variations

    Perfect Pairings for a Complete Meal

    These Crab Stuffed Shrimp deserve accompanying sides that complement without overwhelming. I love serving them atop a bed of lemon butter pasta or with roasted asparagus drizzled with olive oil and sea salt. For a lighter approach, pair with a crisp fennel and citrus salad that cuts through the richness. Rice pilaf or crusty bread for soaking up the delicious juices works beautifully too. For wine pairings, a chilled Sauvignon Blanc or unoaked Chardonnay enhances the seafood flavors without overpowering the delicate crab.

    Creative Twists on the Classic

    While the traditional recipe is divine, don’t be afraid to experiment! Add a Cajun kick by incorporating blackened seasoning into your breadcrumb mixture. For an Asian-inspired variation, mix some ginger, scallions, and a touch of sesame oil into the crab filling. Mediterranean lovers might enjoy adding feta cheese, diced roasted red peppers, and oregano. During summer months, I sometimes add corn kernels and diced bell pepper to the stuffing for a seasonal twist. The versatility of this dish means you can adapt it to complement almost any cuisine.

    Storage & Troubleshooting Guide

    Make-Ahead and Storage Solutions

    These Crab Stuffed Shrimp can be prepped several hours ahead, making entertaining stress-free. Prepare the stuffed shrimp, cover tightly with plastic wrap, and refrigerate for up to 4 hours before baking. For leftovers (though there rarely are any!), store in an airtight container in the refrigerator for up to 2 days. Reheat gently in a 300°F oven for about 10 minutes to avoid toughening the shrimp. I don’t recommend freezing the prepared dish, as both shrimp and crab can become watery and lose their delicate texture when thawed.

    Solving Common Preparation Challenges

    If your crab stuffing seems too wet and doesn’t hold together, add additional panko breadcrumbs one tablespoon at a time until you reach the right consistency. Conversely, if the mixture is too dry, a small amount of mayonnaise or melted butter helps bind ingredients. To prevent overcooking (the most common pitfall), watch carefully during the final broiling stage—the topping should be golden brown, but the shrimp underneath should remain tender and juicy. If your broiler runs hot, position the rack in the middle of the oven instead of the top.

    Frequently Asked Questions

    Can I use imitation crab for Crab Stuffed Shrimp?

    While imitation crab will work in a pinch, it lacks the sweet, delicate flavor of real crab. If budget is a concern, use a smaller amount of real crab mixed with finely diced bell pepper to extend the filling.

    What’s the best way to tell when the shrimp are perfectly cooked?

    Perfectly cooked shrimp turn opaque pink with a slight C-shape. If they curl into a tight O-shape, they’re overcooked. Look for the flesh to be just firm and no longer translucent.

    Can I prepare Crab Stuffed Shrimp on the grill?

    Absolutely! Place the stuffed shrimp on foil or in a grill-safe dish and cook over medium heat with the lid closed for 8-10 minutes, until the shrimp are pink and filling is hot.

    What can I substitute if someone has a shellfish allergy?

    For a shellfish-free version, try stuffing large portobello mushroom caps with the same filling (minus the crab), or use the stuffing in halved bell peppers for a colorful alternative.

    How do I prevent my Crab Stuffed Shrimp from becoming rubbery?

    Don’t overcook! Shrimp cook extremely quickly. Bake just until the shrimp turn pink and opaque, usually 10-12 minutes at 375°F, then broil briefly to brown the topping.

    Final Thoughts

    Crab Stuffed Shrimp delivers that perfect balance of impressive presentation and approachable preparation that makes home cooking so rewarding. Every time I serve this dish, I’m reminded how the simplest ingredients—when treated with care—can create truly memorable moments around the table. The sweet tenderness of the shrimp paired with the rich crab filling creates a flavor harmony that’s simply irresistible. I hope this recipe brings as much joy to your table as it has to mine! For more seafood inspiration, visit our Pinterest board dedicated to ocean treasures.

  • Caramelized Banana Carrot Cake | Moist, Spiced & Irresistible!

    Caramelized Banana Carrot Cake | Moist, Spiced & Irresistible!

    Caramelized Banana Carrot Cake | Moist, Spiced & Irresistible!

    Caramelized Banana Carrot Cake with Moist Spiced Crumb is one of those magical desserts that transforms ordinary ingredients into something extraordinary. I discovered this recipe during a rainy Sunday baking marathon when I was craving something comforting yet sophisticated. The aroma of warm spices filled my kitchen as the caramelized bananas melted into the batter, creating pockets of gooey sweetness throughout the cake. If you’re looking for a dessert that balances rich flavors with a tender crumb that practically melts in your mouth, this cake is about to become your new favorite indulgence.

    Recipe

    Why You’ll Love This Caramelized Banana Carrot Cake with Moist Spiced Crumb

    Perfect Balance of Flavors and Textures

    This cake delivers an incredible depth of flavor that will make your taste buds dance. The caramelized bananas develop a rich, almost butterscotch-like sweetness that perfectly complements the earthy carrots. Each bite offers a beautiful contrast between the tender, moist crumb and the slight crunch from toasted nuts (if you choose to add them). The warm spice blend—cinnamon, nutmeg, and a hint of cardamom—creates layers of flavor that unfold as you savor each bite. I’ve found this cake actually tastes even better the next day when the spices have had time to meld together.

    Simple Ingredients, Spectacular Results

    What I adore about this recipe is how it transforms humble ingredients into something truly special. You likely have most of these staples in your pantry already—carrots, bananas, flour, and basic spices. The caramelization process might sound fancy, but it’s actually quite simple: just a quick sauté of banana slices in butter and brown sugar. This extra step elevates the entire cake, adding pockets of intense flavor throughout. Even my friend who claims to dislike carrot cake was converted after one bite of this version—the caramelized banana adds that special something that makes this recipe stand out.

    Essential Tips & Tricks

    Mastering the Caramelization Process

    The key to this cake’s distinctive flavor lies in properly caramelizing the bananas. Use ripe bananas with some brown spots—they’ll caramelize more easily and provide better flavor. When cooking them, be patient and let them truly develop that golden-brown color before removing from heat. I learned this the hard way when I rushed this step once and missed out on that deep caramel flavor. Keep the heat medium-low to prevent burning, and gently fold the cooled caramelized bananas into your batter to maintain those delicious pockets of flavor rather than fully incorporating them. This technique creates wonderful surprise moments in each slice.

    Creating the Perfect Spiced Crumb

    For that ideal moist crumb texture, don’t overmix your batter once you add the dry ingredients. I mix just until combined, which keeps the cake tender rather than tough. The oil in this recipe (rather than butter) contributes significantly to the moisture level, so don’t be tempted to substitute. For the spice blend, freshly grated nutmeg makes a noticeable difference compared to pre-ground. If you’re looking for other delicious spiced treats, my Cinnamon Roll Cookies use a similar warming spice profile that’s absolutely delightful. Remember to test for doneness with a toothpick—it should come out with a few moist crumbs, not wet batter.

    Serving Ideas & Creative Variations

    Elegant Presentation Options

    Transform this homey cake into an elegant dessert with thoughtful presentation. Try serving thin slices with a dollop of mascarpone slightly sweetened with honey and a sprinkle of crushed pistachios. For dinner parties, I plate individual slices with a drizzle of salted caramel sauce and a quenelle of cinnamon whipped cream. The cake also pairs beautifully with coffee or tea for brunch gatherings. If you’re feeling adventurous, try toasting slices lightly and serving with a scoop of vanilla bean ice cream—the contrast of warm cake and cold ice cream creates a sensational dessert experience similar to my Carrot Cake Cheesecake that guests always rave about.

    Seasonal and Dietary Adaptations

    This versatile recipe welcomes adaptations for different seasons and dietary needs. For a summer version, fold in fresh berries alongside the caramelized bananas. In fall, try adding diced apples or pears caramelized with the bananas. For gluten-free guests, a cup-for-cup gluten-free flour blend works beautifully—I’ve tested this multiple times with great results. To reduce sugar, you can decrease the amount in the cake batter slightly since the caramelized bananas add natural sweetness. For a dairy-free version, use coconut oil for caramelizing the bananas and a plant-based cream cheese for frosting if desired.

    Storage & Troubleshooting Guide

    Optimal Storage Methods

    To maintain the cake’s moist texture, proper storage is essential. At room temperature, store unfrosted cake in an airtight container with a piece of bread (the bread will keep the cake from drying out) for up to 3 days. If frosted with cream cheese frosting, refrigerate but bring to room temperature before serving to experience the full flavor profile. This cake also freezes beautifully—wrap individual slices tightly in plastic wrap, then foil, and freeze for up to 3 months. I often make a double batch and freeze half for those emergency dessert situations. Thaw overnight in the refrigerator, then bring to room temperature before serving.

    Fixing Common Baking Issues

    If your cake sinks in the middle, you likely opened the oven door too early or underbaked it. The temperature gradient in your oven matters—I recommend using an oven thermometer to verify accuracy. For dry cake, you may have overbaked or measured flour incorrectly—try spooning flour into measuring cups rather than scooping directly from the bag. If your caramelized bananas stick to the pan, deglaze with a splash of bourbon or rum (the alcohol cooks off) for an easy release and bonus flavor. For uneven caramelization, try using a wider pan next time to give the banana slices more space.

    Frequently Asked Questions

    Can I make this Caramelized Banana Carrot Cake with Moist Spiced Crumb ahead of time?

    Absolutely! This cake actually improves with time as the flavors meld. Make it 1-2 days ahead, store in an airtight container, and the spices will develop beautifully. If frosting, add that the day of serving.

    Can I substitute applesauce for oil in this recipe?

    You can replace half the oil with applesauce for a lighter version, but I don’t recommend substituting all of it as the cake may become too dense and lose its characteristic moistness.

    How ripe should bananas be for caramelizing?

    Use bananas with yellow peels spotted with brown—not green or completely brown. They should be ripe enough to be sweet but firm enough to hold their shape when sliced and caramelized.

    Can I add pineapple to this cake?

    Yes! Drain canned pineapple thoroughly or use fresh pineapple caramelized alongside the bananas. Reduce other wet ingredients slightly to compensate for the additional moisture.

    What frosting pairs best with this cake?

    A classic cream cheese frosting complements the spices beautifully. For something different, try brown butter frosting or maple cream cheese frosting for enhanced caramel notes.

    Final Thoughts

    This Caramelized Banana Carrot Cake with Moist Spiced Crumb has become my signature dessert for good reason. The extra step of caramelizing the bananas transforms an already delicious carrot cake into something truly memorable. I love watching people’s expressions as they take their first bite—that moment of surprise and delight never gets old. Whether you’re baking for a special occasion or simply treating yourself, this cake delivers comfort and sophistication in equal measure. Find more inspiration for your baking adventures on my Pinterest page, where I’m always sharing new flavor combinations and techniques.

  • Creamy Garlic Shrimp Over Mashed Potatoes – Irresistibly Delicious!

    Creamy Garlic Shrimp Over Mashed Potatoes – Irresistibly Delicious!

    Creamy Garlic Shrimp Over Mashed Potatoes – Irresistibly Delicious!

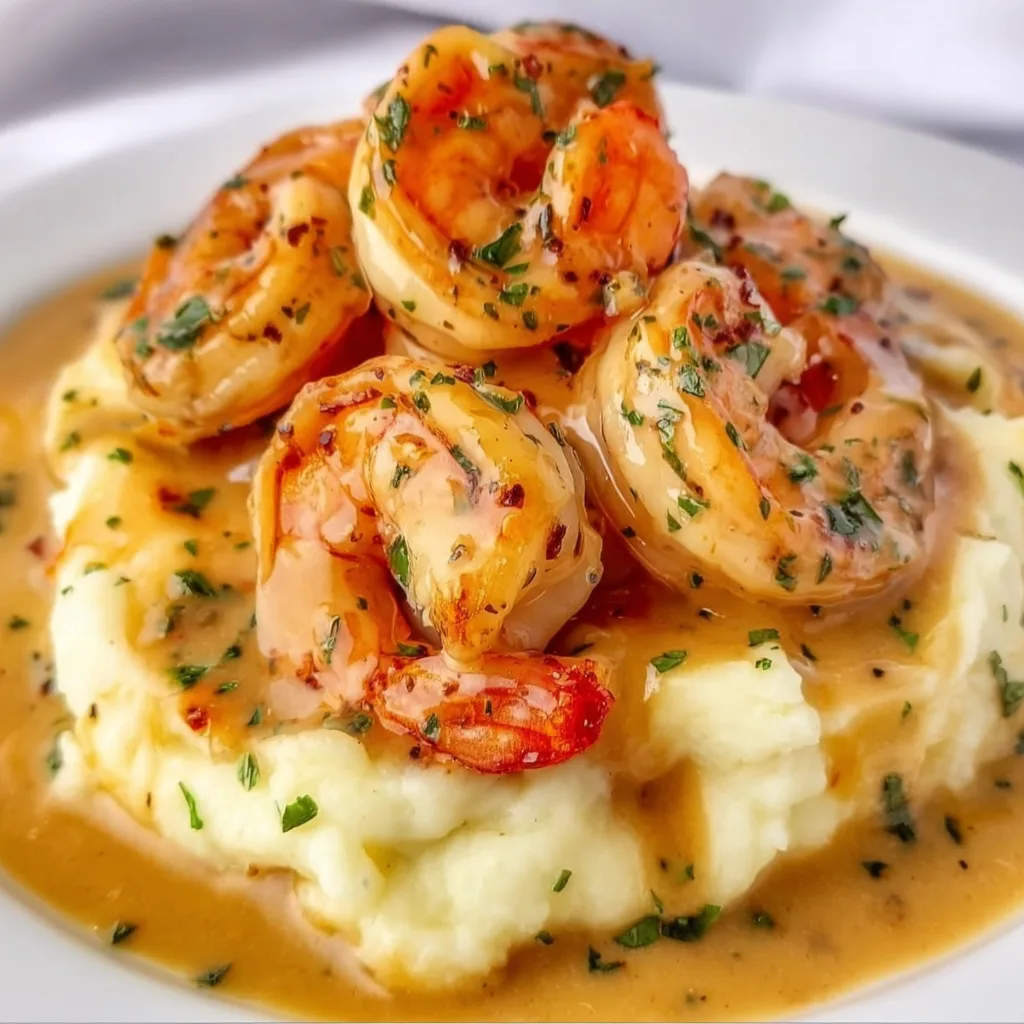
    Creamy Garlic Shrimp Over Mashed Potatoes is the ultimate comfort food that feels both indulgent and homey at the same time. The first time I made this dish, my kitchen filled with the intoxicating aroma of garlic and butter, and I knew I’d stumbled upon something special. There’s something magical about plump, succulent shrimp swimming in a velvety garlic sauce, all nestled on a cloud of creamy mashed potatoes. It’s the kind of meal that makes everyone at the table fall silent for those first few bites – you know, that wonderful quiet that happens when food is just too good for words. Let me show you how to create this showstopper dish that’s actually simpler than it looks!

    Recipe

    Why You’ll Love This Creamy Garlic Shrimp Over Mashed Potatoes

    Perfect Balance of Flavors and Textures

    This dish hits all the right notes – creamy, garlicky, and savory with just the right amount of brightness from fresh herbs and lemon. The contrast between the silky mashed potatoes and the slight snap of perfectly cooked shrimp creates a textural masterpiece. I love how the garlic-infused cream sauce seeps into the potatoes, creating these little pockets of flavor that burst with each bite. It’s comfort food elevated to restaurant quality, but without the fussy techniques or hard-to-find ingredients. My husband always says this dish makes an ordinary Tuesday feel like date night!

    Quick Yet Impressive Dinner Solution

    When you need to get dinner on the table in under 30 minutes but still want something that feels special, this creamy garlic shrimp delivers every time. I’ve served it for last-minute dinner guests who thought I’d spent hours in the kitchen! The beauty lies in its simplicity – while the potatoes boil, you can prepare the shrimp and sauce, meaning everything comes together almost simultaneously. It’s become my secret weapon for those evenings when I want to serve something that looks like I put in way more effort than I actually did.

    Essential Tips & Tricks

    Perfecting Your Shrimp

    The key to exceptional garlic shrimp is avoiding overcooking. Shrimp need just 1-2 minutes per side until they turn pink and opaque – any longer and they’ll become rubbery. I learned this the hard way during a dinner party when I got distracted chatting! Another game-changer: pat your shrimp completely dry before cooking to ensure they sear rather than steam. For maximum flavor, leave the tails on during cooking (they release wonderful flavor into the sauce), but feel free to remove them before serving for easier eating. Your guests will appreciate not having to fish out tails while trying to enjoy their meal!

    Creating the Creamiest Mashed Potatoes

    For truly cloud-like mashed potatoes, Yukon Gold potatoes are your best friend – they have the perfect starch content for creamy results without becoming gluey. Start potatoes in cold water (never hot!) and add a generous pinch of salt to the cooking water. After draining, return them to the hot pot for 30 seconds to evaporate excess moisture before adding butter and warmed cream. This technique, which I learned from my grandmother, makes all the difference in texture. For an even more luxurious base for your shrimp, try my Indian Potato Masala for a flavorful twist on the classic.

    Serving Ideas & Creative Variations

    Elegant Presentation Options

    Transform this homey comfort dish into a dinner-party worthy presentation with a few simple touches. Serve individual portions in shallow bowls or on warmed plates with the shrimp artfully arranged over the potatoes. A light sprinkle of microgreens, a drizzle of high-quality olive oil, or a few paper-thin lemon slices adds visual appeal. I once served this at a holiday gathering in scallop shells I found at a flea market – everyone thought it was the most elegant seafood dish they’d ever seen! Remember that people eat with their eyes first, so taking an extra minute for presentation elevates the entire experience.

    Flavor Variations To Try

    While the classic version is divine, don’t be afraid to experiment with flavor profiles. Add a Mediterranean twist with sun-dried tomatoes, kalamata olives, and crumbled feta. For a touch of heat, incorporate red pepper flakes or a dash of cayenne. My personal favorite variation includes a splash of white wine and fresh tarragon for a French-inspired take. You could also transform this into a surf-and-turf experience by adding small pieces of seared steak alongside the shrimp, similar to my Garlic Butter Steak Bites and Shrimp recipe that’s always a crowd-pleaser.

    Storage & Troubleshooting Guide

    Proper Storage and Reheating

    While this dish is best enjoyed fresh, leftovers can be salvaged with proper technique. Store the shrimp and sauce separately from the mashed potatoes in airtight containers for up to 2 days. When reheating, warm the potatoes with a splash of milk or cream over low heat, stirring frequently. For the shrimp, reheat gently in a skillet over medium-low heat just until warmed through – about 2 minutes. Microwaving is convenient but risks overcooking the shrimp, so if you must use this method, do so at 50% power in short bursts, checking frequently.

    Fixing Common Issues

    If your sauce breaks or appears curdled, don’t panic! Lower the heat immediately and whisk in 1-2 tablespoons of cold cream. For sauce that’s too thick, gradually add warm chicken broth until you reach your desired consistency. If your mashed potatoes turned out gluey, transform them by adding a beaten egg, some cheese, and herbs, then baking as potato cakes – a delicious save! And if you accidentally overcooked your shrimp, chop them into smaller pieces and fold into the sauce, which helps mask the rubbery texture while preserving the flavor.

    Frequently Asked Questions

    Can I make Creamy Garlic Shrimp Over Mashed Potatoes ahead of time?

    Prepare the components separately up to 24 hours ahead. Make the mashed potatoes and refrigerate, then reheat with extra cream. Cook the shrimp and sauce just before serving for the best texture and flavor.

    What’s the best type of shrimp to use for this recipe?

    Large or jumbo shrimp (16-20 count per pound) work best. They provide the perfect bite and cook quickly without becoming tough. Fresh is ideal, but good-quality frozen shrimp, properly thawed, works wonderfully too.

    Can I substitute the heavy cream for a lighter option?

    Half-and-half can work in a pinch, but the sauce won’t be as rich. For a lighter version, use 2% milk mixed with 1 tablespoon of cornstarch to help thicken the sauce.

    What side dishes pair well with this meal?

    A simple green salad with lemon vinaigrette provides nice contrast. Roasted asparagus or steamed broccoli also complement the richness of the dish perfectly.

    How do I know when the shrimp are perfectly cooked?

    Shrimp are done when they turn pink, opaque, and form a loose “C” shape. If they curl into a tight “O” shape, they’re overcooked. The entire cooking process takes only 3-4 minutes.

    Final Thoughts

    Creamy Garlic Shrimp Over Mashed Potatoes has become my go-to dish whenever I want to create a memorable meal without spending hours in the kitchen. There’s something about the combination of tender shrimp, velvety sauce, and fluffy potatoes that feels like a warm hug on a plate. I hope you’ll try this recipe and experience the simple joy of watching loved ones’ faces light up with that first delicious bite. For more inspiration, check out my other comfort food recipes on Pinterest where I’m always sharing new favorites!

  • Crispy Southwest Egg Rolls: Irresistibly Crunchy & Flavor-Packed!

    Crispy Southwest Egg Rolls: Irresistibly Crunchy & Flavor-Packed!

    Crispy Southwest Egg Rolls: Irresistibly Crunchy & Flavor-Packed!

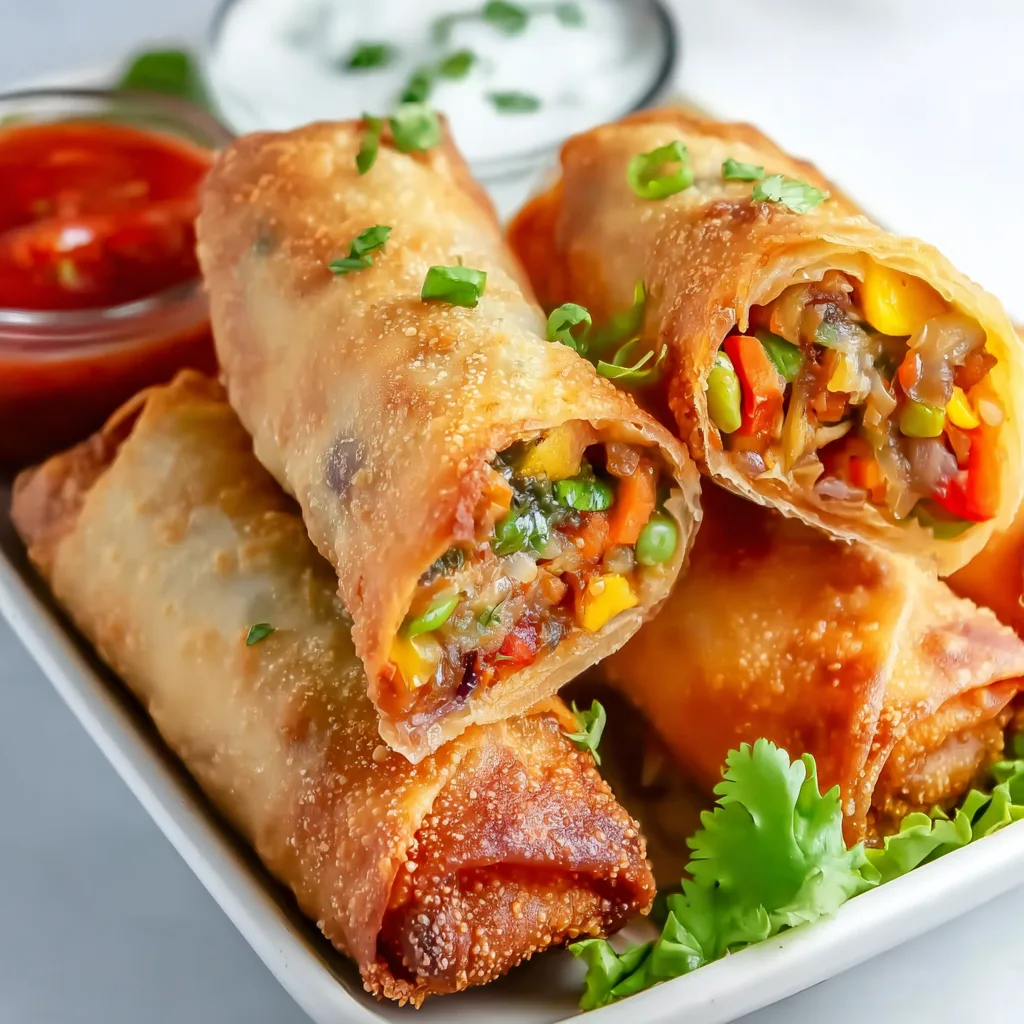
    Crispy southwest egg rolls have become my absolute obsession this season! There’s something magical about that first bite—the satisfying crunch giving way to a warm, spicy filling that hits all the right notes. I discovered these beauties at a friend’s game night and immediately needed to recreate them at home. The combination of seasoned chicken, black beans, corn, and melty cheese wrapped in a crispy shell is pure comfort food perfection. When my kitchen fills with that unmistakable aroma of southwest spices, I know I’m about to serve something that’ll have everyone asking for the recipe. If you love buffalo chicken quesadillas, these egg rolls will be your new favorite!

    Recipe

    Why You’ll Love These Crispy Southwest Egg Rolls

    Perfect Texture Contrast

    The textural magic of these egg rolls is what makes them truly special. The exterior achieves that golden-brown crispiness that makes your teeth sink in with the most satisfying crackle. Meanwhile, the interior stays wonderfully tender and moist. I’ve found the secret is patting the filling ingredients dry before mixing—this prevents soggy wrappers! The combination of creamy cheese, tender chicken, and the slight pop from the corn kernels creates a textural symphony that keeps you coming back for “just one more.” My husband claims he can identify my egg rolls blindfolded just by that distinctive crunch!

    Make-Ahead Convenience

    One of my favorite aspects of these crispy southwest egg rolls is their incredible meal prep potential. You can prepare the filling up to two days ahead and store it covered in the refrigerator. When you’re ready to assemble, the rolling process becomes quick and effortless. You can even roll them all and freeze them uncooked for up to three months! This makes them perfect for unexpected guests or busy weeknights when cooking from scratch feels impossible. I always keep a batch in my freezer for those “nothing in the fridge” emergencies that inevitably happen on Thursday nights.

    Essential Tips & Tricks

    Wrapping Technique Mastered

    The key to perfectly sealed egg rolls is all in the wrapping technique. Start by placing the wrapper diamond-style with a point facing you. Add about 2-3 tablespoons of filling just below the center line. Fold the bottom point up over the filling, then fold in the sides tightly. Roll upward, keeping everything snug, and seal the final point with a bit of water or egg wash. Don’t overfill—this is the most common mistake! When I first started making these, mine would burst open during cooking until I learned the “less is more” approach with filling. Now they come out picture-perfect every time!

    The Perfect Fry (or Bake!)

    Achieving that golden-brown exterior requires the right cooking method. For traditional frying, maintain your oil at 350°F—too hot and they’ll burn before cooking through, too cool and they’ll absorb too much oil. Use a thermometer for precision! If you prefer baking, brush them lightly with oil and bake at 425°F for 15-20 minutes, flipping halfway. For air fryer enthusiasts like me, spray with a little oil and cook at 375°F for about 8 minutes, turning halfway. This method gives you that crispy exterior with less oil, similar to these crispy garlic air fryer broccoli results!

    Serving Ideas & Creative Variations

    Dipping Sauce Pairings

    The right dipping sauce elevates these crispy southwest egg rolls to restaurant-quality status. My go-to is a simple avocado crema—blend ripe avocado with sour cream, lime juice, cilantro, and a pinch of salt until smooth. For heat lovers, mix mayo with chipotle peppers in adobo sauce and a squeeze of lime. Ranch dressing with a few dashes of hot sauce is always a crowd-pleaser at parties. I’ve even served them with mango salsa for a sweet-spicy contrast that my guests still talk about months later. The tanginess cuts through the richness perfectly!

    Creative Filling Variations

    While the classic filling is amazing, these egg rolls welcome creative adaptations! For a breakfast twist, use scrambled eggs, chorizo, potatoes, and cheese. Vegetarians will love a version with roasted sweet potatoes, black beans, corn, and pepper jack cheese. Seafood lovers can try a shrimp and corn version with Old Bay seasoning. My personal favorite variation uses leftover BBQ chicken pasta salad chopped fine with extra cheese—it’s an incredible way to transform leftovers! Just remember to keep moisture levels in check with any substitutions to maintain that perfect crispy exterior.

    Storage & Troubleshooting Guide

    Proper Storage Methods

    To maintain that signature crispiness, proper storage is crucial. Allow cooked egg rolls to cool completely before refrigerating. Store them in a single layer with paper towels between any stacked layers to absorb moisture. They’ll keep in the refrigerator for 3-4 days. For reheating, avoid the microwave which makes them soggy! Instead, place them on a wire rack in a 350°F oven for 10 minutes. For longer storage, freeze fully cooled egg rolls in a single layer, then transfer to a freezer bag once frozen solid. They’ll maintain quality for up to three months.

    Fixing Common Problems

    If your egg rolls are splitting during cooking, you’re likely dealing with moisture issues or overfilling. Make sure your filling isn’t too wet—drain and pat ingredients dry before mixing. If the wrappers tear while rolling, they may be too dry; keep unused wrappers covered with a damp paper towel while working. For egg rolls that aren’t browning evenly, your oil temperature may be fluctuating—use a deeper pot for more stable heat. If baking and they’re not crisping, try brushing with a bit more oil or increasing the oven temperature by 25 degrees for the last few minutes.

    Frequently Asked Questions

    Can I make crispy southwest egg rolls ahead of time?

    Yes! Prepare the filling up to 2 days ahead and refrigerate. You can also roll them completely and freeze uncooked for up to 3 months. Cook directly from frozen, adding 2-3 minutes to the cooking time.

    What’s the best oil for frying egg rolls?

    Neutral oils with high smoke points work best. Vegetable, canola, or peanut oil are excellent choices. Avoid olive oil as its flavor can overpower the filling and it has a lower smoke point.

    How do I prevent my egg rolls from getting soggy?

    Ensure filling ingredients are well-drained and slightly cooled before rolling. Fry at the proper temperature (350°F) and drain on paper towels immediately after cooking. Serve promptly for maximum crispiness.

    Can I use different wrappers for southwest egg rolls?

    Yes! Traditional egg roll wrappers work best, but you can substitute spring roll wrappers (thinner, crispier result) or even flour tortillas (for a southwestern-style chimichanga variation).

    Are crispy southwest egg rolls spicy?

    The spice level is customizable! For mild egg rolls, use less chili powder and omit jalapeños. For extra heat, add diced jalapeños with seeds or a dash of cayenne pepper to the filling.

    Final Thoughts

    These crispy southwest egg rolls have become my signature party appetizer for good reason—they combine the best of comfort food with impressive presentation. There’s something about that perfect crunch giving way to a flavorful, cheesy filling that makes people’s eyes light up. Whether you’re serving them for game day, as a fun dinner side, or as the star appetizer at your next gathering, they’re guaranteed to disappear quickly! Don’t forget to check out more of my favorite appetizer recipes on Pinterest for more inspiration to pair with these irresistible egg rolls.

  • Roasted Japanese Sweet Potatoes with Miso Glaze – Irresistibly Flavorful!

    Roasted Japanese Sweet Potatoes with Miso Glaze – Irresistibly Flavorful!

    Roasted Japanese Sweet Potatoes with Miso Glaze – Irresistibly Flavorful!

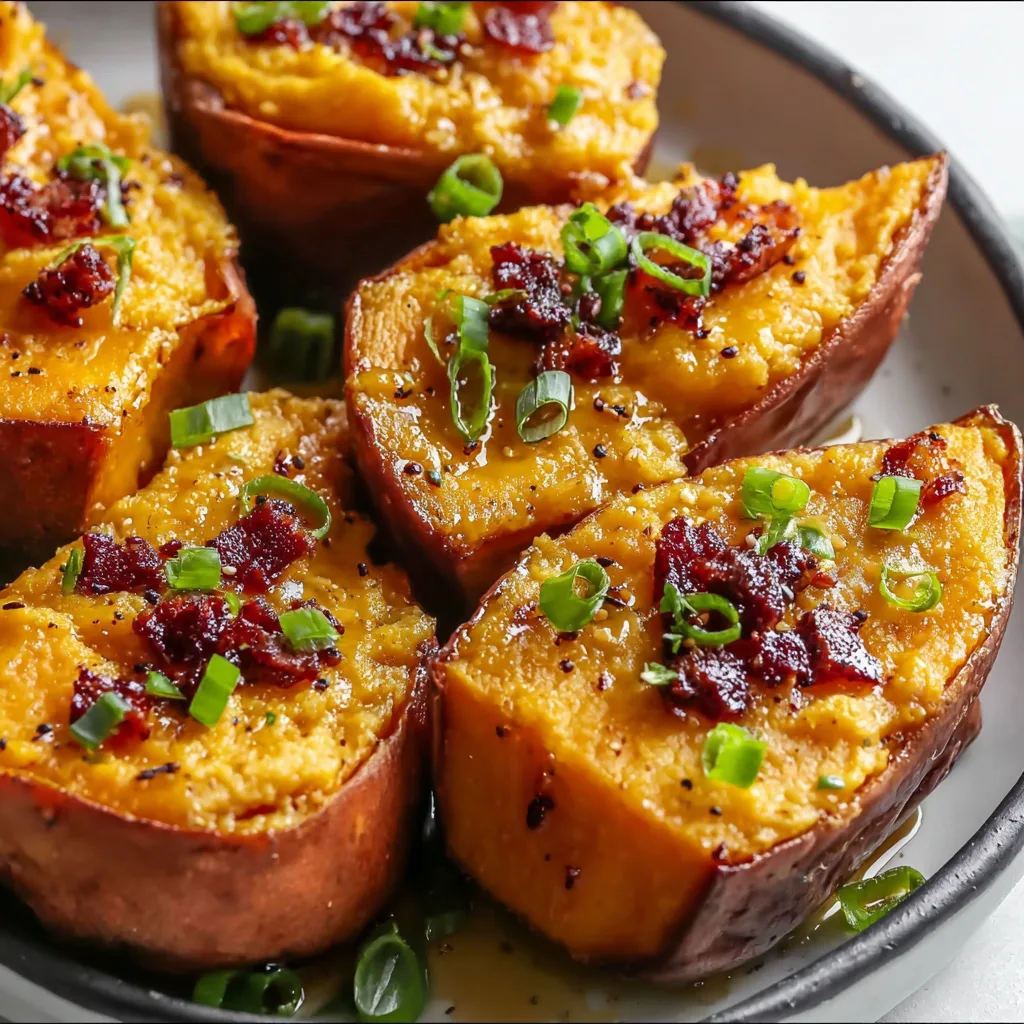
    The first time I made Roasted Japanese Sweet Potatoes with Miso Glaze, I knew I’d discovered something magical. These aren’t your ordinary sweet potatoes—Japanese varieties have a chestnut-like sweetness that transforms into something extraordinary when roasted until caramelized. The umami-rich miso glaze creates this perfect sweet-savory balance that makes each bite absolutely crave-worthy. I’ve served these at countless dinner parties, and they disappear within minutes! If you’re looking for a side dish that feels both comforting and sophisticated, this recipe deserves a permanent spot in your rotation.

    Recipe

    Why You’ll Love This Roasted Japanese Sweet Potatoes with Miso Glaze

    Perfect Texture & Flavor Combination

    Japanese sweet potatoes develop this incredible caramelized exterior while maintaining a fluffy, slightly sweet interior that’s distinctly different from orange varieties. The natural sugars concentrate during roasting, creating edges that crisp beautifully against the tender center. I love how the miso glaze adds complexity—slightly salty, deeply savory, with just enough sweetness from the mirin to balance everything. The first time my neighbor tried these, she immediately asked for the recipe and now makes them weekly. It’s that perfect balance of everyday simple but special enough for company.

    Simple Yet Impressive Side Dish

    What I adore about this recipe is how it transforms humble ingredients into something that looks and tastes restaurant-worthy. With just a handful of pantry staples and about 10 minutes of active prep time, you’ll create a side dish that elevates any meal. The glaze caramelizes beautifully in the oven, creating these gorgeous, glossy potatoes that look stunning on a serving platter. I’ve brought these to potlucks where they’ve outshined dishes that took three times the effort. They’re equally perfect alongside a weeknight chicken dinner or as part of a special holiday spread.

    Essential Tips & Tricks

    Selecting & Preparing Japanese Sweet Potatoes

    Look for Japanese sweet potatoes with smooth, unblemished skin and firm flesh—they have purple-ish skin and cream-colored flesh inside. Don’t substitute regular orange sweet potatoes; the texture and flavor profile are completely different. I learned this the hard way when I tried to use regular sweet potatoes once, and while still tasty, they weren’t the same magical experience. Cut them into evenly sized wedges (about 1-inch thick) to ensure they cook uniformly. Don’t skip the step of patting them dry before roasting—this is crucial for achieving that perfect caramelized exterior rather than steamed potatoes.

    Perfecting the Miso Glaze

    The miso glaze is where the magic happens! I prefer white miso for its milder, sweeter flavor that complements the natural sweetness of the potatoes. If you only have red miso, use slightly less as it’s more intense. Whisk the glaze ingredients thoroughly until smooth before brushing onto the potatoes. For an extra flavor boost, try adding a touch of grated ginger or a splash of rice vinegar. Apply the glaze in two stages—halfway through roasting and again in the final minutes—to build layers of flavor without burning the sugars in the miso.

    Serving Ideas & Creative Variations

    Perfect Pairings

    These sweet potatoes work beautifully as a side to almost any protein—grilled salmon, roasted chicken, or even alongside vegetarian black bean enchiladas. I love serving them with a simple green salad dressed with a light vinaigrette to balance the richness. For a complete Asian-inspired meal, pair them with teriyaki chicken and steamed broccoli. They’re also stunning as part of a vegetable-forward dinner party spread. The versatility is what makes this recipe a true keeper—elegant enough for special occasions but simple enough for Tuesday night dinner.

    Delicious Variations

    While the classic recipe is perfection, I love playing with variations. Try adding a sprinkle of togarashi (Japanese spice blend) or sesame seeds right before serving for texture and visual appeal. For a spicy twist, mix a little gochujang into your miso glaze—the heat plays beautifully against the sweet potatoes. Sometimes I’ll drizzle a quick sauce of Greek yogurt mixed with a touch of lime juice and zest over the finished potatoes. For a complete meal, top the roasted potatoes with a fried egg and sliced avocado. The possibilities are endless!

    Storage & Troubleshooting Guide

    Proper Storage Methods

    These roasted Japanese sweet potatoes with miso glaze keep remarkably well. Store leftovers in an airtight container in the refrigerator for up to 4 days. For the best texture when reheating, avoid the microwave which can make them soggy. Instead, place them on a baking sheet and warm in a 350°F oven for about 10 minutes until heated through. The glaze may darken slightly when stored, but the flavor remains delicious. If you want to prep ahead for a party, you can roast the potatoes and prepare the glaze separately, then combine and finish them just before serving.

    Common Issues & Solutions

    If your potatoes aren’t crisping properly, your oven may be too crowded or not hot enough. Always arrange them in a single layer with space between pieces—overcrowding creates steam instead of caramelization. If the glaze burns before the potatoes are tender, your pieces may be cut too large. Next time, cut them smaller or reduce the oven temperature slightly. For potatoes that seem dry, brush with a little olive oil before applying the glaze. If your miso glaze separates, simply whisk it again vigorously before applying, or add a tiny splash of hot water to help emulsify.

    Frequently Asked Questions

    Can I use regular orange sweet potatoes instead of Japanese ones?

    You can, but the texture and flavor will differ significantly. Japanese sweet potatoes have a drier, starchier texture and chestnut-like flavor that caramelizes beautifully with the miso glaze.

    What’s the best type of miso to use for Roasted Japanese Sweet Potatoes with Miso Glaze?

    White (shiro) miso works best for its mild, slightly sweet flavor. Yellow miso is a good alternative, while red miso can be used in smaller amounts for a stronger umami flavor.

    Can I make this recipe vegan?

    Absolutely! The recipe is naturally vegan if you use maple syrup instead of honey in the glaze and ensure your mirin is a non-alcoholic variety.

    How far in advance can I prepare these potatoes?

    You can cut the potatoes up to a day ahead (store submerged in cold water in the refrigerator) and prepare the glaze separately. Combine and roast just before serving for best results.

    What should I serve with these sweet potatoes?

    They pair beautifully with grilled proteins, hearty salads, or as part of an Asian-inspired meal. Try them alongside salmon, chicken thighs, or tofu steaks.

    Final Thoughts

    These Roasted Japanese Sweet Potatoes with Miso Glaze have become my go-to recipe when I want to impress without spending hours in the kitchen. The combination of naturally sweet potatoes with the umami-rich glaze creates something truly special and memorable. Don’t be surprised if this becomes a regular request from family and friends! For more delicious side dish ideas, check out my Pinterest boards where I’m always adding new inspiration. Happy cooking!

  • Soul-Warming Cabbage & Chicken Soup Recipe to Heal Your Soul

    Soul-Warming Cabbage & Chicken Soup Recipe to Heal Your Soul

    Soul-Warming Cabbage & Chicken Soup Recipe to Heal Your Soul

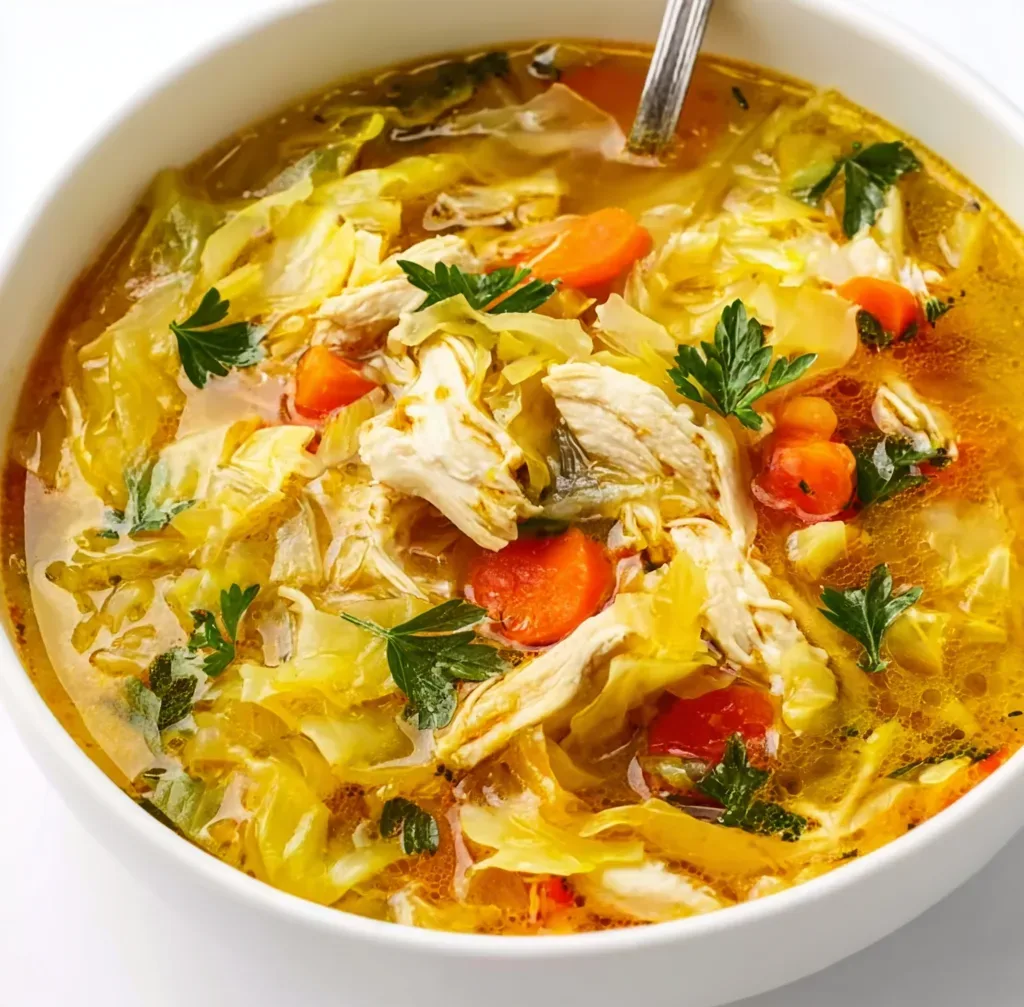
    There’s nothing quite like a bowl of Soul-Warming Cabbage & Chicken Soup on those days when you need comfort in edible form. I discovered this recipe during a particularly harsh winter when my immune system was waving a white flag, and it’s been my go-to ever since. The gentle simmer of chicken and cabbage creates this incredible aroma that wraps around you like a hug. With each spoonful, you’ll taste layers of savory broth, tender chicken, and velvety cabbage that somehow manages to retain just enough texture. If you’re craving something that nourishes both body and spirit, this creamy cauliflower carrot soup has a similar comforting quality, but today’s recipe offers its own special magic.

    Recipe

    Why You’ll Love This Soul-Warming Cabbage & Chicken Soup

    Perfect Balance of Simplicity & Flavor

    This soup strikes that rare balance between effortless preparation and complex flavor. The ingredients list isn’t intimidating—just everyday items that transform into something extraordinary when they mingle. I love how the cabbage softens just enough to absorb the chicken-infused broth while still maintaining a slight bite. There’s something about the way the thyme and bay leaves work their aromatic magic, creating depth that makes people wonder what your secret ingredient might be. The beauty lies in how these humble ingredients create something so satisfying without requiring culinary school expertise.

    Nutritional Powerhouse in a Bowl

    Beyond the soul-warming comfort, this soup delivers serious nutritional benefits. Cabbage brings impressive amounts of vitamin C and fiber, while chicken provides that satisfying protein that keeps you full. I noticed my energy levels actually improved during that illness-prone winter after I started making this regularly. The combination creates a meal that’s surprisingly light yet deeply satisfying. What I appreciate most is how it manages to be genuinely healthful without tasting like “health food”—it’s just delicious food that happens to nourish your body from the inside out.

    Essential Tips & Tricks

    Mastering the Cabbage Technique

    The secret to perfect cabbage texture lies in the cutting technique and timing. Slice your cabbage into uniform pieces about 1/4-inch thick—this ensures even cooking and the perfect texture. I learned the hard way that adding cabbage too early results in mushy, flavorless strands! Add it only in the last 15-20 minutes of cooking for that ideal tender-crisp result. For an extra layer of flavor, try quickly sautéing the cabbage with a touch of butter before adding it to the broth. This small step creates a subtle sweetness that elevates the entire soup.

    Building Layers of Flavor

    The difference between good soup and amazing soup lies in how you build flavor foundations. Start by properly browning your chicken—those caramelized bits at the bottom of the pot are flavor gold! Deglaze with a splash of white wine before adding your broth for a subtle acidity that balances the richness. Don’t rush the onion and garlic cooking process; letting them slowly soften and become translucent releases their natural sweetness. For an umami boost similar to what makes Vietnamese lemongrass chicken so irresistible, add a parmesan rind during simmering (just remember to remove before serving).

    Serving Ideas & Creative Variations

    Perfect Pairings to Complete Your Meal

    This soup deserves thoughtful accompaniments to create a complete experience. My favorite pairing is a thick slice of crusty sourdough bread, lightly toasted and rubbed with a garlic clove. For something heartier, try serving smaller portions alongside a simple arugula salad dressed with lemon and olive oil—the peppery greens and bright acidity complement the soup beautifully. When I’m hosting, I serve the soup in pre-warmed bowls (just rinse with hot water) and offer toppings like fresh dill, a dollop of Greek yogurt, or a drizzle of good olive oil for guests to customize their bowls.

    Exciting Twists on the Classic

    While the classic version holds a special place in my heart, these creative variations keep the recipe exciting. For a spicy kick, add red pepper flakes and substitute kimchi for half the cabbage—the fermented flavor adds incredible depth. Craving something creamy? Stir in a splash of coconut milk just before serving. You can also transform this into a complete one-skillet pepperoncini chicken inspired meal by adding pepperoncini and their brine along with white beans for a Mediterranean twist. For a heartier version, add wild rice or barley during the last 30 minutes of cooking.

    Storage & Troubleshooting Guide

    Maximizing Freshness & Flavor

    This soup actually improves with time, making it perfect for meal prepping. Store cooled soup in airtight containers in the refrigerator for up to 4 days. The flavors will continue to develop overnight, making day-two soup even more delicious. For freezing, slightly undercook the cabbage since it will soften more when reheated. Portion into freezer-safe containers, leaving an inch of space at the top, and freeze for up to 3 months. Thaw overnight in the refrigerator, then reheat gently on the stovetop, adjusting seasoning as needed.

    Solving Common Soup Dilemmas

    Even experienced cooks encounter soup challenges, but these troubleshooting tips will save your meal. If your soup lacks flavor, don’t just add salt—try brightening with a squeeze of lemon juice or a splash of vinegar. Broth too thin? Make a quick slurry with 1 tablespoon cornstarch and 2 tablespoons cold water, then gradually stir in while the soup simmers. For too-tough cabbage, cover and simmer a bit longer. If your chicken seems dry, next time try using bone-in thighs instead of breast meat—they stay juicier and add more flavor to the broth.

    Frequently Asked Questions

    Can I make Soul-Warming Cabbage & Chicken Soup in a slow cooker?

    Absolutely! Brown the chicken and sauté aromatics first, then transfer to your slow cooker with remaining ingredients. Add cabbage during the last hour of cooking on low to maintain texture. Total cooking time: 4-5 hours on low.

    What type of cabbage works best for this soup?

    Green cabbage is traditional and holds up well during cooking. Savoy cabbage offers a more delicate texture, while Napa cabbage cooks faster and has a milder flavor. Avoid red cabbage as it discolors the broth.

    Can I make this soup vegetarian?

    Yes! Substitute vegetable broth and replace chicken with cannellini beans or chunks of firm tofu added in the last 10 minutes. Mushrooms make an excellent addition for umami depth.

    Is this soup freezer-friendly?

    Definitely. Slightly undercook the cabbage, cool completely, then freeze in portions for up to 3 months. Thaw overnight in the refrigerator before gently reheating.

    How can I make this Soul-Warming Cabbage & Chicken Soup more filling?

    Add cooked pasta, rice, or potatoes during the last few minutes of cooking. For protein boost, include white beans or top with a soft-boiled egg when serving.

    Final Thoughts

    This Soul-Warming Cabbage & Chicken Soup has become more than just a recipe in my kitchen—it’s a reliable friend on cold days, busy weeknights, and anytime I need nourishment that goes beyond mere calories. There’s something magical about how these simple ingredients transform into something so deeply satisfying. I hope it brings the same comfort to your table that it has to mine. For more cozy recipes that wrap you in culinary warmth, check out my Pinterest collection where I save all my favorite comfort foods for every season.

  • Green Bean Bacon Bundles: Irresistibly Crispy & Delicious Fun!

    Green Bean Bacon Bundles: Irresistibly Crispy & Delicious Fun!

    Green Bean Bacon Bundles: Irresistibly Crispy & Delicious Fun!

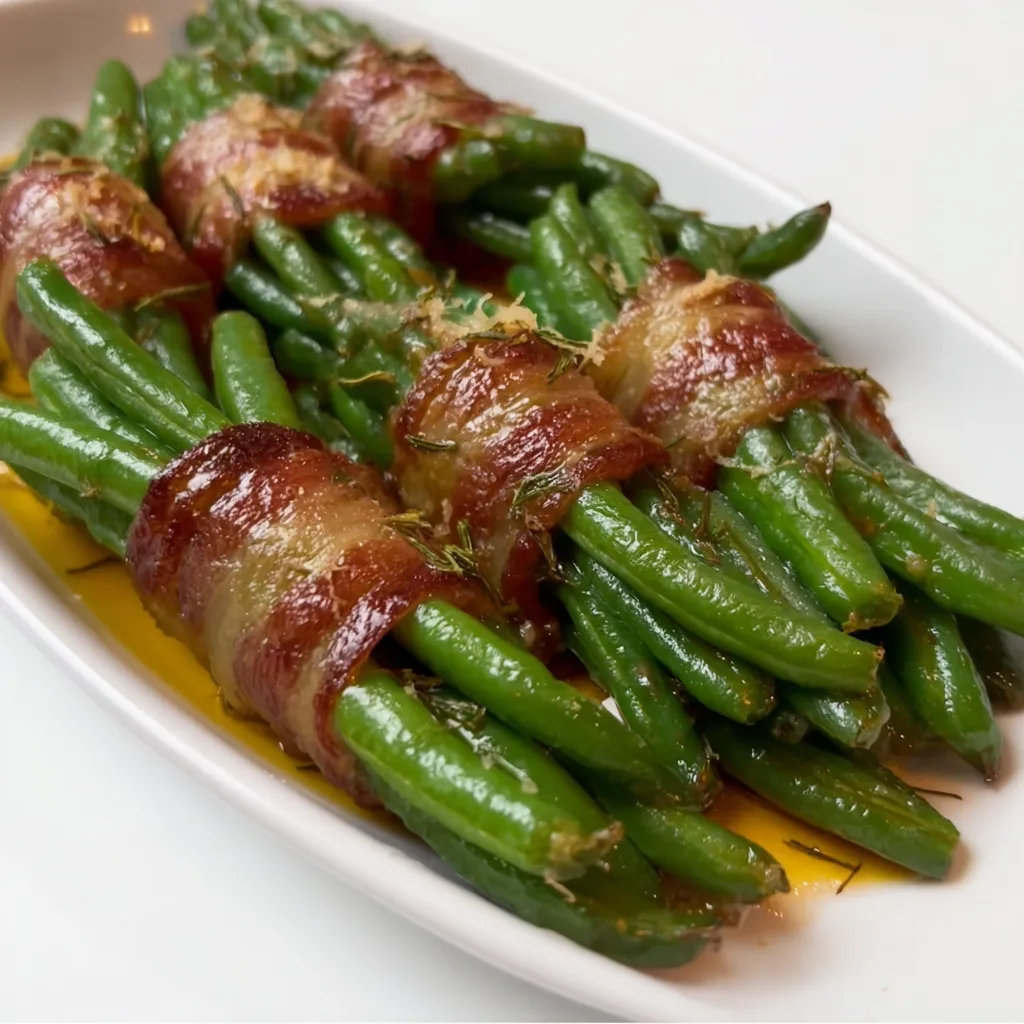
    Green bean bacon bundles have completely transformed my holiday side dish game! There’s something absolutely magical about the way tender green beans get wrapped in savory bacon and roasted to perfection. The first time I served these at Thanksgiving, my brother-in-law (who normally pushes veggies to the side of his plate) asked for seconds! These bundles aren’t just delicious—they’re also elegant enough for special occasions while being simple enough for weeknight dinners. If you’re looking for a vegetable dish that will have everyone reaching for more, these bacon-wrapped green bean bundles are your answer.

    Recipe

    Why You’ll Love These Green Bean Bacon Bundles

    The Perfect Balance of Flavors and Textures

    These bundles are a sensory delight from the first bite to the last. The green beans maintain just enough crispness while the bacon gets perfectly caramelized around the edges. I love how the beans absorb the smoky bacon flavor while still tasting fresh and vibrant. The slight sweetness from the brown sugar glaze creates an irresistible caramelization that makes these bundles absolutely addictive. When I’m feeling fancy, I add a tiny sprinkle of red pepper flakes for heat that cuts through the richness. Trust me—the combination of tender-crisp vegetables with savory, crispy bacon is simply unbeatable.

    Impressive Presentation with Minimal Effort

    Nothing makes me feel like a kitchen superstar quite like serving these elegant bundles at a dinner party. Despite their fancy appearance, they require surprisingly little work! I love watching guests’ eyes widen when I bring out the platter—they always think I’ve spent hours in the kitchen. The truth? These can be prepped ahead and popped in the oven just before dinner. Last Christmas, I assembled them the night before, and they were the star of the meal despite taking me less than 15 minutes of active prep time. For busy hosts, these bundles offer maximum impact with minimal stress.

    Essential Tips & Tricks

    Selecting and Preparing the Perfect Ingredients

    Start with fresh green beans that are bright in color and snap when bent—these will give you the best texture and flavor. I’ve learned (the hard way!) that thin haricots verts work better than thicker green beans since they cook more evenly. For the bacon, choose a medium thickness—too thin and it’ll crisp too quickly before the beans cook; too thick and it may remain chewy. Pre-blanching the beans for 2-3 minutes before assembling ensures they’ll cook perfectly in the oven. Pat them completely dry before wrapping to help the bacon crisp up beautifully around them. These crispy fried green beans use a similar preparation technique.

    Mastering the Cooking Method

    The secret to perfection lies in the two-temperature cooking method. Start at a higher temperature (425°F) for the first 10 minutes to render the bacon fat, then reduce to 375°F to finish cooking without burning. Always use a rimmed baking sheet to catch the bacon drippings, and line it with parchment paper for easier cleanup. Arrange the bundles with a bit of space between them—overcrowding leads to steaming instead of roasting. For that gorgeous caramelization, brush the bundles with a mixture of brown sugar, butter and a touch of balsamic vinegar about halfway through cooking. This final step elevates them from good to absolutely unforgettable.

    Serving Ideas & Creative Variations

    Perfect Pairing Suggestions

    These green bean bacon bundles are incredibly versatile and pair beautifully with almost any main dish. They’re exceptional alongside a juicy steak or roasted chicken, but they also complement fish dishes wonderfully. For holiday meals, I serve them with turkey or ham—they’re always the first side dish to disappear! The slight sweetness from the glaze makes them a perfect counterpoint to savory mains. For a complete meal that will impress anyone, serve these bundles with garlic butter steak bites and shrimp and some creamy mashed potatoes. The combination of flavors will make any dinner feel special.

    Delicious Variations to Try

    While the classic version is perfect, these bundles welcome creative adaptations. Try wrapping them with prosciutto instead of bacon for a more delicate flavor. For an Italian twist, sprinkle with Parmesan cheese during the last 5 minutes of baking. My personal favorite variation includes a drizzle of maple syrup instead of brown sugar and a sprinkle of chopped pecans for amazing texture contrast. For a holiday version, add dried cranberries to the bundles before wrapping. When I’m cooking for spice-lovers, I add a dusting of cajun seasoning that transforms these bundles into something with a delightful kick.

    Storage & Troubleshooting Guide

    Proper Storage and Reheating

    These bundles are best enjoyed fresh from the oven, but leftovers can be stored in an airtight container in the refrigerator for up to 3 days. To reheat, avoid the microwave which will make the bacon soggy. Instead, place them on a baking sheet in a 350°F oven for 7-10 minutes until heated through. The bacon will re-crisp beautifully this way. If you want to prepare these ahead for a party, I recommend assembling the bundles completely, refrigerating them uncooked, then baking just before serving. This approach gives you the freshest result while still allowing for advance preparation.

    Solving Common Challenges

    The most common issue with these bundles is uneven cooking—sometimes the bacon isn’t crisp enough while the beans are overdone. To prevent this, make sure your beans are all similar in size and thickness. If your bacon isn’t crisping, try placing the bundles on a wire rack set over your baking sheet so hot air circulates all around them. If your bundles are unwrapping during cooking, secure them with toothpicks soaked in water (to prevent burning). For beans that are too crunchy, blanch them a minute longer before assembling. Remember that patience is key—these bundles need adequate time in the oven to develop their best flavor.

    Frequently Asked Questions

    Can I make green bean bacon bundles ahead of time?

    Yes! Assemble the bundles up to 24 hours in advance, refrigerate covered, and bake just before serving. You can also blanch the beans 2 days ahead and store them in an airtight container until assembly time.

    How many green beans should I use per bundle?

    For perfectly proportioned green bean bacon bundles, use 7-9 beans per bundle. This amount allows the bacon to cook properly while ensuring each bundle is substantial enough to serve as a side portion.

    Can I use frozen green beans instead of fresh?

    Fresh beans work best, but if using frozen, thaw completely and pat very dry before assembling. The texture won’t be quite as good, but the flavor will still be delicious.

    What’s the best bacon to use for these bundles?

    Medium-thickness bacon works best. Avoid thick-cut bacon which takes too long to crisp, and thin bacon which can burn before the beans are tender.

    How do I keep the bacon wrapped around the green beans?

    Stretch the bacon slightly as you wrap it around the beans to help it adhere. If needed, secure with a toothpick soaked in water, removing before serving.

    Final Thoughts

    Green bean bacon bundles have become my go-to side dish whenever I want to elevate a meal without spending hours in the kitchen. The combination of crisp-tender vegetables and savory bacon creates a side dish that disappears quickly from every plate. I love how these bundles transform an ordinary vegetable into something extraordinary that even the pickiest eaters enjoy. Whether for holiday gatherings or weeknight dinners, these bundles bring both elegance and incredible flavor to the table. For more delicious recipes, check out my Pinterest board where I share new inspiration regularly!