Author: Darleen Vance

  • Mediterranean Tortellini Soup with Spinach, Feta & Chicken — Irresistible!

    Mediterranean Tortellini Soup with Spinach, Feta & Chicken — Irresistible!

    Mediterranean Tortellini Soup with Spinach, Feta & Chicken — Irresistible!

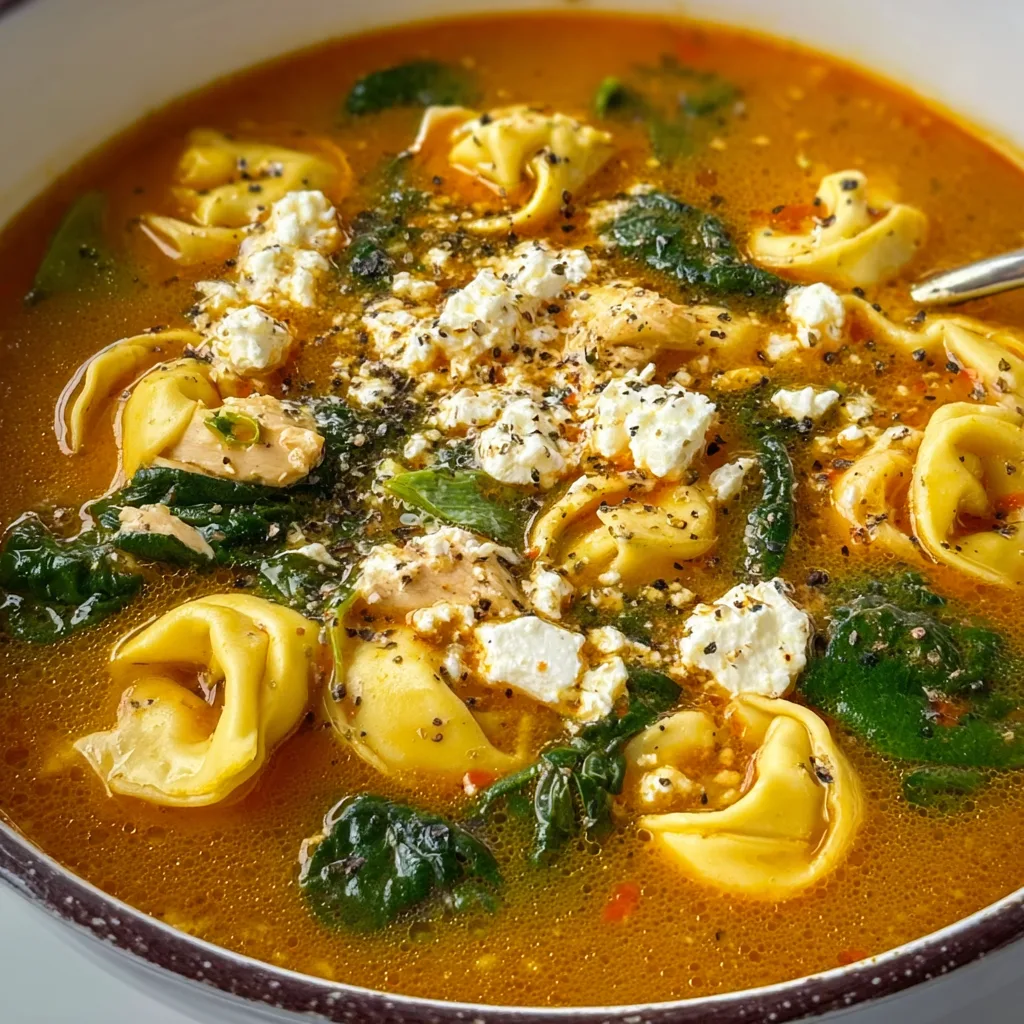
    There’s something magical about Mediterranean Tortellini Soup with Spinach, Feta, & Chicken that speaks directly to my soul on chilly evenings. The first time I made this soup, my kitchen filled with the aromatic blend of herbs and garlic that transported me straight to a seaside taverna. This hearty yet fresh soup combines pillowy cheese tortellini, tender chicken, vibrant spinach, and creamy feta cheese in a tomato-infused broth that’s both nourishing and comforting. I’ve perfected this recipe over countless family dinners, and I’m thrilled to share my version that balances authentic Mediterranean flavors with everyday convenience.

    Recipe

    Why You’ll Love This Mediterranean Tortellini Soup with Spinach, Feta, & Chicken

    A One-Pot Wonder for Busy Weeknights

    This Mediterranean tortellini soup is the ultimate time-saving miracle for those hectic evenings when you need something substantial but don’t have hours to spend in the kitchen. I discovered this recipe during my busiest season at work, and it quickly became my salvation. The beauty lies in its simplicity—everything comes together in just one pot, meaning fewer dishes and more time to unwind. The soup takes only about 30 minutes from start to finish, yet tastes like it’s been simmering all day, with layers of flavor that will make your taste buds dance.

    Nutritional Powerhouse with Mediterranean Benefits

    Beyond its incredible taste, this soup packs a serious nutritional punch. The Mediterranean diet is consistently rated as one of the healthiest eating patterns, and this soup embodies its principles perfectly. Lean protein from the chicken keeps you satisfied, while spinach delivers iron, vitamins, and antioxidants. The tomato broth contains lycopene for heart health, and the modest amount of feta adds calcium without excessive calories. I love that I can serve my family something that’s both deliciously crave-worthy and supports our wellbeing in one steaming, aromatic bowl.

    Essential Tips & Tricks

    Perfecting the Broth Base

    The soul of any great soup is its broth foundation, and this Mediterranean tortellini soup is no exception. I learned through trial and error that starting with a quick flavor base—sautéing onions, garlic, and herbs in olive oil until fragrant—creates depth that can’t be rushed. For maximum flavor, deglaze the pot with a splash of white wine before adding your broth. If you’re short on time, quality store-bought chicken stock works beautifully, but homemade takes it to another level. Don’t skip the pinch of red pepper flakes—they add warmth without overwhelming heat that perfectly balances the tomato acidity.

    Tortellini Timing Matters

    The most common mistake I see with this soup is overcooking the tortellini. These delicate pasta pillows need special attention! Add them to the simmering broth just 5-7 minutes before serving, depending on whether you’re using fresh, frozen, or dried varieties. They’ll continue cooking slightly after you remove the pot from heat. For meal prep, I recommend keeping the cooked tortellini separate from the broth until serving time—this prevents them from absorbing too much liquid and becoming mushy. This technique is similar to how I prepare my Homemade Chicken Ramen, keeping components separate for the best texture.

    Serving Ideas & Creative Variations

    Mediterranean-Inspired Accompaniments

    Elevate your Mediterranean tortellini soup experience with thoughtfully chosen complementary sides. A chunk of crusty sourdough bread for dipping is non-negotiable in my house—it’s perfect for soaking up every last drop of that flavorful broth! For a complete Mediterranean feast, serve alongside a simple Greek salad with cucumber, tomatoes, red onion, and olives dressed with lemon and olive oil. When entertaining, I start with Cream Cheese Avocado Bacon Bites as an appetizer before revealing this spectacular soup as the main attraction. The contrast of cool appetizer and warm, aromatic soup creates a memorable dining experience.

    Seasonal Adaptations Worth Trying

    One reason I return to this Mediterranean tortellini soup repeatedly is its incredible versatility across seasons. In summer, I lighten it up with yellow squash, zucchini, and fresh basil from my garden, using less broth for a more stew-like consistency. Fall calls for adding roasted butternut squash cubes and a sprinkle of toasted pine nuts. For a vegetarian version, substitute white beans for chicken and use vegetable broth. My personal favorite variation includes a handful of chopped kalamata olives and artichoke hearts added during the last few minutes of cooking—these briny additions create irresistible pops of flavor against the savory broth.

    Storage & Troubleshooting Guide

    Proper Storage for Maximum Freshness

    This Mediterranean tortellini soup makes exceptional leftovers when stored correctly. For best results, refrigerate the soup in airtight containers within two hours of cooking. It keeps beautifully for 3-4 days, with flavors that actually improve overnight as they meld together. When freezing, I recommend a slightly different approach—freeze the broth base without the tortellini and spinach, then add fresh elements when reheating. If you do freeze the complete soup, use within 2 months and be aware the tortellini texture may change slightly, though the flavor remains delicious.

    Fixing Common Soup Dilemmas

    Even experienced cooks occasionally encounter soup challenges, but most are easily resolved. If your soup seems too thin, simmer uncovered for 5-10 additional minutes to reduce and concentrate flavors. Conversely, if it’s too thick, add chicken broth in ¼-cup increments until you reach your desired consistency. Bland soup? Try adding a squeeze of fresh lemon juice, which brightens all the flavors, or stir in an extra tablespoon of tomato paste for depth. If the spinach has turned an unappealing color, don’t worry—this is just oxidation and doesn’t affect taste. Next time, add it just before serving.

    Frequently Asked Questions

    Can I make Mediterranean Tortellini Soup with Spinach, Feta, & Chicken ahead of time?

    Absolutely! Prepare the soup base without tortellini and spinach up to 2 days ahead. When ready to serve, reheat the broth, add tortellini until tender, then stir in spinach and feta just before serving.

    Is this soup freezer-friendly?

    Yes, but freeze only the broth with chicken, without tortellini, spinach or feta. These ingredients are best added fresh when reheating for optimal texture and flavor.

    Can I use a different type of pasta?

    Certainly! Small pasta shapes like orzo, ditalini, or small shells work beautifully. Adjust cooking time according to package directions for the pasta you choose.

    What’s the best chicken to use?

    Rotisserie chicken provides excellent flavor and convenience. Alternatively, quickly poach 2 boneless chicken breasts in the broth before adding other ingredients, then shred and return to the soup.

    How can I make this soup vegetarian?

    Replace chicken with a can of drained cannellini beans or chickpeas, and use vegetable broth instead of chicken broth. The feta can remain for a vegetarian version.

    Final Thoughts

    This Mediterranean Tortellini Soup with Spinach, Feta, & Chicken has become more than just a recipe in my household—it’s a reliable comfort that bridges the gap between nutritious and delicious. I find myself returning to it whenever I need a meal that feels like a warm hug but doesn’t require hours in the kitchen. The Mediterranean flavors transport us somewhere sunny and serene, even on the dreariest days. I hope this soup brings the same joy to your table as it has to mine. For more cozy inspiration, visit my Pinterest board where I’m always adding new Mediterranean-inspired recipes!
  • Pistachio Puppy Chow Snack Mix: Irresistible Crunch You Can’t Stop!

    Pistachio Puppy Chow Snack Mix: Irresistible Crunch You Can’t Stop!

    Pistachio Puppy Chow Snack Mix: Irresistible Crunch You Can’t Stop!

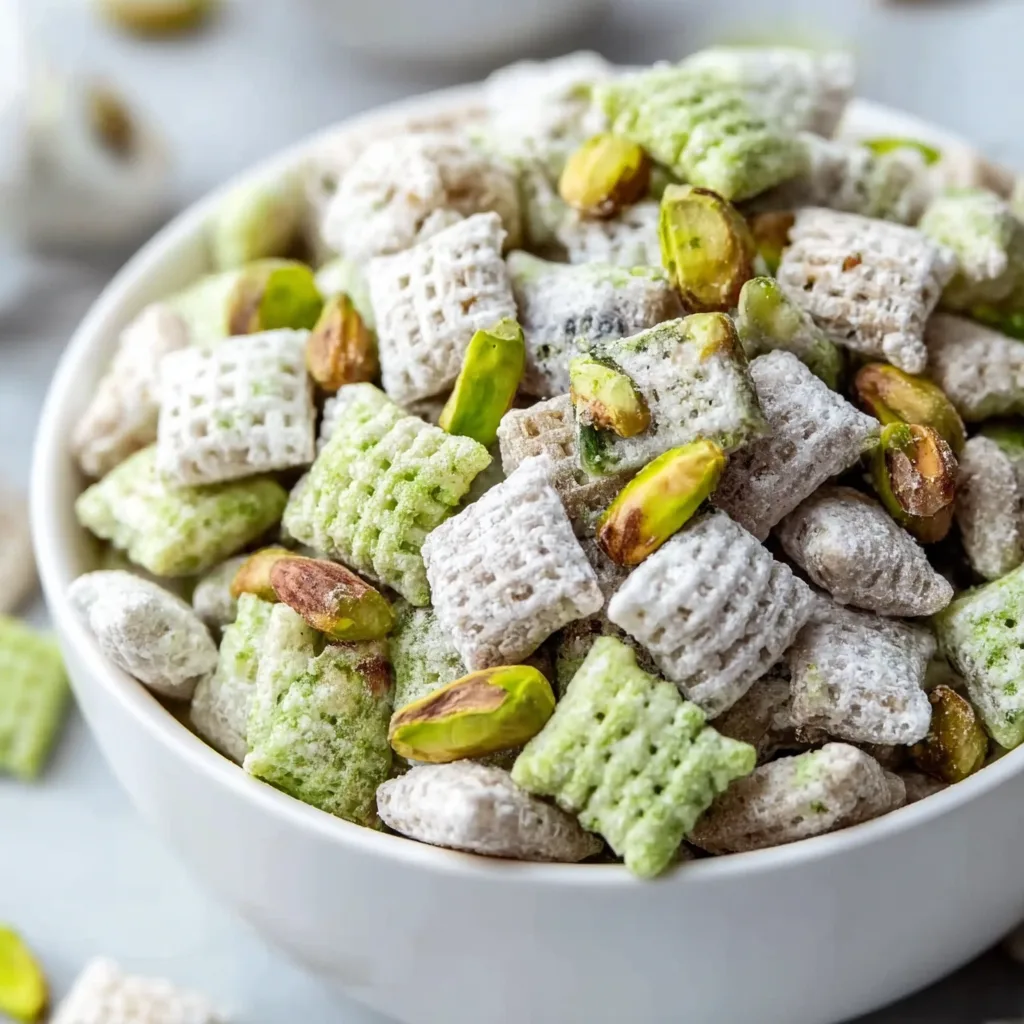
    Pistachio Puppy Chow Snack Mix is my absolute favorite treat to whip up when I need something sweet, crunchy, and utterly irresistible. The first time I made this green-tinted delight for my niece’s birthday party, it vanished within minutes! There’s something magical about the combination of rich white chocolate, nutty pistachios, and powdered sugar that transforms ordinary cereal into a treat that’s impossible to stop munching. The best part? It comes together in just 15 minutes, making it perfect for last-minute gatherings or when those sweet cravings hit unexpectedly. If you love easy no-bake treats like my Strawberry Freezer Jam, this puppy chow will be your new obsession.

    Recipe

    Why You’ll Love This Pistachio Puppy Chow Snack Mix

    Perfect Balance of Flavors and Textures

    This isn’t your ordinary puppy chow! The pistachio flavor adds a sophisticated twist that elevates this classic treat. Each bite delivers the perfect balance of sweetness from the white chocolate, nuttiness from the pistachios, and that satisfying crunch from the cereal. I still remember my husband’s face when he tried it for the first time – eyes closed, savoring each bite like it was some fancy dessert! The subtle hint of almond extract creates an amazing aroma that will have everyone asking what that incredible smell is. Trust me, the combination of textures and flavors in this pistachio puppy chow creates a truly addictive snack experience.

    Quick and Easy Preparation

    One of the things I adore most about this Pistachio Puppy Chow Snack Mix is how ridiculously simple it is to make. Even on my busiest days, I can throw this together in minutes. Just melt, mix, shake, and you’re done! No complicated techniques or special equipment required – just a microwave, a bowl, and a zip-top bag. My daughter loves helping me shake the bag of cereal in the powdered sugar, calling it our “snow shower.” It’s become our special weekend ritual, and the anticipation of that first sweet, crunchy bite makes the minimal effort so worthwhile. Perfect for beginners or when you need a quick treat!

    Essential Tips & Tricks

    Perfecting the Coating Process

    The secret to amazing pistachio puppy chow is all in the coating technique. I’ve found that working in smaller batches—about 3 cups of cereal at a time—ensures every piece gets evenly coated with that luscious white chocolate mixture. Don’t rush this step! Let the excess chocolate drip off before transferring to your powdered sugar bag. My first attempt was a bit of a mess because I dumped everything in at once! For the smoothest coating, make sure your white chocolate is completely melted but not overheated. If it seizes or becomes grainy, you’ll need to start over. The green color should be vibrant but not artificial-looking—just a few drops of food coloring does the trick.

    Choosing Quality Ingredients

    Using the right ingredients makes all the difference in this simple recipe. Opt for high-quality white chocolate chips that melt smoothly—I learned this the hard way after using bargain brands that separated and became grainy. For the pistachio flavor, real pistachio pudding mix gives the best authentic taste, though artificial versions work in a pinch. I once substituted generic cereal and immediately noticed the difference—it didn’t hold up as well to the coating. Chex cereal provides the perfect foundation because its grid pattern holds more of that delicious coating. Fresh pistachios add amazing texture, but make sure they’re unsalted unless you’re specifically going for that sweet-salty contrast that’s become my family’s favorite variation.

    Serving Ideas & Creative Variations

    Festive Presentation Options

    Transform your Pistachio Puppy Chow into a show-stopping treat with creative presentation! I love serving it in clear glass jars tied with ribbon for holiday gifts—the pretty green color looks so festive for St. Patrick’s Day or spring gatherings. For parties, try filling small paper cones for individual servings, or create a puppy chow bar with different varieties. Last Easter, I served this in little “nests” made from shredded paper in small baskets, and the kids went wild! For a more elegant approach, serve in martini glasses for adult gatherings. This snack mix pairs beautifully with other finger foods like my Cream Cheese Avocado Bacon Bites for a complete party spread that will have guests raving.

    Flavor Twist Suggestions

    Don’t be afraid to put your own spin on this versatile snack mix! My family’s favorite variation adds crushed freeze-dried strawberries for a pistachio-strawberry combination that’s absolutely divine. For chocolate lovers, try mixing in mini chocolate chips after the mixture has completely cooled. During the holidays, I add crushed peppermint pieces for a festive touch. For a more indulgent version, drizzle with extra white chocolate after the initial coating has set. Want something truly special? Try browning the butter before adding it to the white chocolate mixture—it adds an incredible nutty depth that complements the pistachios perfectly. The possibilities are endless, and each variation brings its own unique charm to this already irresistible treat.

    Storage & Troubleshooting Guide

    Keeping Your Puppy Chow Fresh

    To maintain that perfect crispy texture, proper storage is essential. I store my Pistachio Puppy Chow Snack Mix in airtight containers at room temperature, where it stays fresh for up to 2 weeks—though it rarely lasts that long in my house! Avoid refrigeration, as the moisture can make the cereal soggy and cause the powdered sugar coating to dissolve. If you’re making this for gifts, portion it into cellophane bags and seal tightly, pushing out as much air as possible before tying. For longer storage, you can freeze the mix in zip-top freezer bags for up to 3 months. Just let it come to room temperature before serving. I’ve found that adding a paper towel to the storage container helps absorb any excess moisture and keeps everything perfectly crunchy.

    Common Issues and Solutions

    Even experienced bakers encounter challenges! If your white chocolate seizes or clumps when melting, it’s likely due to overheating or moisture. Start over with fresh chocolate and melt it slowly in 30-second intervals. If your final product seems too sticky, you probably need more powdered sugar—don’t be shy about adding extra for that perfect coating. Color too intense? Next time, add food coloring drop by drop. If the pistachio flavor isn’t strong enough, try adding a quarter teaspoon of pistachio extract. Sometimes my mix gets a bit crushed during the shaking process, so I’ve learned to use gentle rolling motions instead of vigorous shaking. And if you notice the coating melting in warm weather, a brief chill in the refrigerator will firm everything up nicely.

    Frequently Asked Questions

    Can I make Pistachio Puppy Chow Snack Mix ahead of time?

    Absolutely! Make it up to 2 weeks in advance and store in airtight containers at room temperature. The flavor actually improves after a day as the pistachio notes develop more fully.

    Is there a gluten-free version of this recipe?

    Yes! Simply use gluten-free rice Chex cereal and verify that your pistachio pudding mix is gluten-free. All other ingredients are naturally gluten-free.

    Can I use regular chocolate instead of white chocolate?

    You can, but it will change the flavor profile significantly. The white chocolate allows the pistachio flavor to shine through, while dark chocolate would compete with it.

    How do I prevent the powdered sugar from clumping?

    Sift your powdered sugar before coating the cereal mixture, and make sure the white chocolate is slightly cooled before adding to the sugar to prevent melting.

    What makes the pistachio flavor in this puppy chow snack mix?

    The pistachio flavor comes primarily from pistachio pudding mix, enhanced with real chopped pistachios and a touch of almond extract that complements the nutty profile perfectly.

    Final Thoughts

    This Pistachio Puppy Chow Snack Mix has become my signature treat for good reason—it’s impossibly addictive, beautifully festive, and ridiculously easy to make. There’s something about that sweet, nutty crunch that keeps everyone coming back for more. I love seeing the surprised delight on people’s faces when they try it for the first time, expecting traditional chocolate puppy chow and discovering this unique pistachio version instead. Whether you’re making it for a party, gifting it to friends, or just treating yourself on a cozy night in, this green-tinted delight is sure to become a favorite in your recipe collection too. Find more of my favorite snack recipes on Pinterest!

  • Caramel Macchiato Cheesecake Recipe That’ll Melt Your Heart!

    Caramel Macchiato Cheesecake Recipe That’ll Melt Your Heart!

    Caramel Macchiato Cheesecake Recipe That’ll Melt Your Heart!

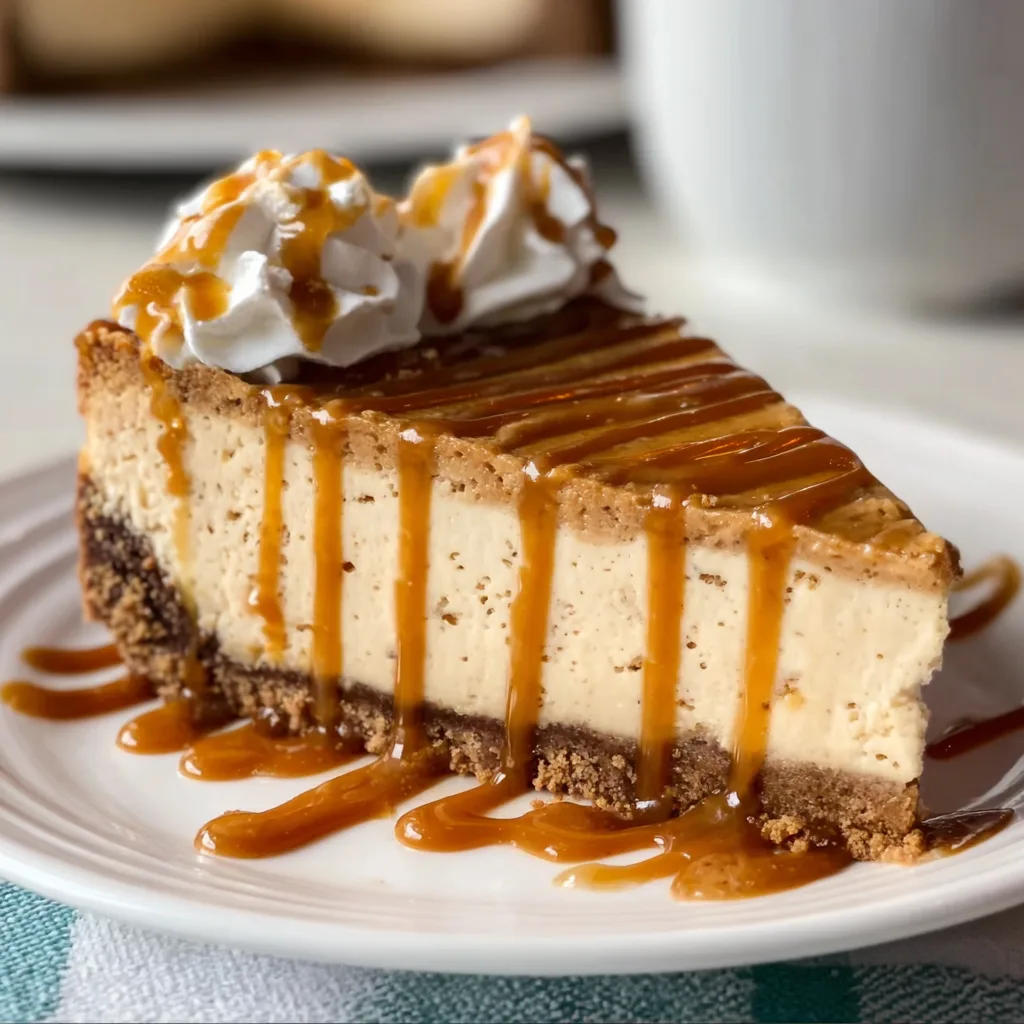
    This Caramel Macchiato Cheesecake Recipe brings together two of my greatest loves: creamy cheesecake and my favorite coffee shop indulgence. The first time I made this for my sister’s birthday gathering, the room fell silent as everyone took their first bite. Then came the chorus of “Oh my goodness!” and “Can I have this recipe?” The rich coffee flavor perfectly balances the sweet caramel, creating a dessert that feels both sophisticated and comforting. It’s like wrapping yourself in a cozy blanket on a rainy afternoon – pure bliss in every forkful.

    Recipe

    Why You’ll Love This Caramel Macchiato Cheesecake Recipe

    A Perfect Balance of Flavors

    There’s something magical about how the bold espresso notes dance with buttery caramel in this cheesecake. I’ve always believed that coffee and caramel were meant to be together, like old friends who bring out the best in each other. The graham cracker crust adds that perfect textural contrast to the velvety filling. What makes this recipe special is how it captures the essence of your favorite coffee shop drink but transforms it into something you can savor slowly, appreciating each creamy layer. The subtle coffee aroma that fills your kitchen while baking is simply intoxicating.

    No Special Equipment Required

    Don’t let fancy cheesecake recipes intimidate you! This Caramel Macchiato Cheesecake doesn’t demand professional bakery equipment or obscure ingredients. You’ll need basic kitchen tools like a mixing bowl, electric mixer, and springform pan. The simplicity of preparation belies the sophisticated result. I remember being nervous the first time I made a cheesecake, but this recipe is surprisingly forgiving. The most important ingredients are good quality cream cheese and fresh espresso (though instant works in a pinch!). The rest comes together with pantry staples you likely already have on hand.

    Essential Tips & Tricks

    Achieving the Perfect Texture

    The secret to a crack-free cheesecake lies in patience and temperature control. Always bring your ingredients to room temperature before mixing – I set mine out at least an hour before baking. This creates that silky-smooth texture we all crave. Another game-changer is using a water bath (simply place your springform pan inside a larger pan with hot water). This gentle, moist heat prevents the dreaded center crack. Don’t rush the cooling process either! Let it cool in the oven with the door cracked, then refrigerate overnight for that perfect slice. Just like my Strawberry Freezer Jam Recipe, patience yields the best results.

    Mastering the Caramel Swirl

    Creating those beautiful caramel ribbons throughout your cheesecake isn’t just for looks – they deliver pockets of sweet, buttery goodness in every bite. The trick is to warm your caramel sauce slightly so it’s pourable but not hot (which would melt your filling). Use a butter knife to create swirls by dragging it through small dollops of caramel. Don’t overdo it! Less is more with swirling – aim for distinct ribbons rather than fully incorporating the caramel. I like to reserve extra sauce for drizzling over slices when serving. The contrast between the white cheesecake and golden caramel creates a stunning presentation.

    Serving Ideas & Creative Variations

    Perfect Pairings

    This Caramel Macchiato Cheesecake stands beautifully on its own, but why stop there? I love serving it with a freshly brewed espresso or cappuccino to amplify those coffee notes. For special occasions, add a small scoop of vanilla bean ice cream alongside – the temperature contrast is divine. A light dusting of cocoa powder or chocolate-covered espresso beans makes for an elegant garnish. If you’re feeling particularly indulgent, try it with a drizzle of my Pecan Caramel Bread Pudding sauce for an extra layer of richness. The possibilities for elevating this dessert are endless!

    Seasonal Adaptations

    One of the joys of this recipe is how easily it can be customized for seasons or dietary needs. For fall gatherings, I add a pinch of pumpkin spice to the filling and garnish with candied pecans. In summer, fresh berries provide a bright, acidic contrast to the rich cheesecake. For a holiday version, try infusing the cream with peppermint or adding crushed peppermint candies to the crust. Need a gluten-free option? Simply swap the graham crackers for gluten-free cookies in the crust. The coffee-caramel combination works as a beautiful canvas for your creative touches while maintaining its signature flavor profile.

    Storage & Troubleshooting Guide

    Proper Storage Techniques

    Your Caramel Macchiato Cheesecake will maintain its peak freshness for up to 5 days when properly stored in the refrigerator. Always cover it tightly with plastic wrap or place it in an airtight container to prevent it from absorbing other food odors. For longer storage, this cheesecake freezes beautifully for up to 2 months! I recommend slicing it first, then wrapping individual pieces in plastic wrap and foil. This way, you can thaw just what you need. Allow frozen slices to thaw overnight in the refrigerator for the best texture restoration. Never leave cheesecake at room temperature for more than 2 hours.

    Common Issues & Solutions

    Even experienced bakers encounter challenges! If your cheesecake develops cracks, don’t panic – this is purely cosmetic and won’t affect the flavor. Simply cover with additional caramel sauce or whipped cream before serving. For a sunken center, your cheesecake likely needed more baking time. Next time, look for a slight jiggle in just the center – the outer 2-3 inches should appear set. If your crust becomes soggy, try brushing it with egg white before adding the filling, or pre-bake it for 10 minutes. Remember that cheesecakes continue to set as they cool, so patience during the cooling process is essential.

    Frequently Asked Questions

    Can I make this Caramel Macchiato Cheesecake without an espresso machine?

    Absolutely! Use 2 tablespoons of instant espresso powder dissolved in 1/4 cup hot water. For a milder flavor, substitute strong brewed coffee, but reduce other liquids slightly to maintain the proper consistency.

    How do I prevent my cheesecake from cracking?

    Avoid overmixing (which incorporates air), use a water bath during baking, and cool gradually. Turn off the oven when done, crack the door open, and let the cheesecake cool inside for an hour before refrigerating.

    Can I make this recipe ahead of time?

    Yes! This cheesecake actually improves with time as flavors meld. Make it 1-2 days before serving for optimal taste and texture. Just keep it refrigerated and add any fresh garnishes just before serving.

    Is there a non-dairy version of this Caramel Macchiato Cheesecake Recipe?

    Yes, substitute plant-based cream cheese and coconut cream for heavy cream. The texture will be slightly different but still delicious. Use dairy-free caramel sauce made with coconut milk and brown sugar.

    How can I tell when my cheesecake is done baking?

    Your cheesecake is ready when the outer 2-3 inches look set and slightly puffed, but the center still has a slight jiggle (like Jell-O). It will continue to set as it cools. Avoid overbaking!

    Final Thoughts

    This Caramel Macchiato Cheesecake Recipe has become my signature dessert for good reason – it transforms an everyday coffee shop favorite into an extraordinary dessert experience. The balance of flavors creates something truly special that both coffee enthusiasts and dessert lovers appreciate. I find myself returning to this recipe whenever I want to create a memorable ending to a meal or celebrate someone special. There’s something deeply satisfying about watching someone close their eyes with that first bite, knowing you’ve created a moment of pure joy. Happy baking!

    For more delicious dessert inspiration, follow me on Pinterest.

  • Gluten-Free Cottage Cheese Bagel: Irresistibly Soft & Guilt-Free!

    Gluten-Free Cottage Cheese Bagel: Irresistibly Soft & Guilt-Free!

    Gluten-Free Cottage Cheese Bagel: Irresistibly Soft & Guilt-Free!

    Gluten-Free Cottage Cheese Bagels have completely transformed my morning routine! As someone who’s always hunting for high-protein breakfast options that don’t sacrifice that chewy, satisfying bagel texture, this recipe has been nothing short of a revelation. The first time I pulled these golden-brown beauties from my oven, the aroma of toasty, cheesy goodness filled my kitchen, and I knew I’d found something special. Unlike traditional bagels that leave you hungry an hour later, these protein-packed circles of joy keep me full until lunch while satisfying my carb cravings without the gluten. They’re incredibly versatile too – perfect for everything from avocado toast upgrades to breakfast sandwiches!

    Recipe

    Why You’ll Love This Gluten-Free Cottage Cheese Bagel

    Perfect Protein-Packed Breakfast

    These aren’t just any gluten-free bagels – they’re nutritional powerhouses disguised as comfort food! Each bagel delivers a generous serving of protein from the cottage cheese, making them substantially more filling than traditional versions. The texture is what truly wins me over – slightly dense with that characteristic chew we all crave, but with a tender interior that toasts beautifully. I’ve found they keep my energy levels steady throughout the morning, unlike regular bagels that often lead to that dreaded mid-morning crash. Plus, they’re remarkably easy to customize with your favorite mix-ins like everything bagel seasoning or cinnamon.

    Simple Ingredients, Impressive Results

    What I adore about this recipe is its beautiful simplicity. You’ll need just a handful of pantry staples – gluten-free flour blend, eggs, cottage cheese, baking powder, and a touch of salt. That’s it! No complicated techniques, no specialty equipment, and definitely no waiting for dough to rise. The cottage cheese does double duty here, providing both moisture and protein while creating that perfect bagel texture. I remember being skeptical the first time I made them, but watching these transform from a sticky dough to perfectly golden rings in under 30 minutes felt like culinary magic. Even my gluten-loving friends request these now!

    Essential Tips & Tricks

    Perfecting Your Bagel Texture

    The secret to achieving that authentic bagel chew lies in handling the dough with care. When mixing your ingredients, aim for a sticky consistency that holds its shape but still feels tacky to touch. If your dough seems too wet, add gluten-free flour one tablespoon at a time until it reaches that sweet spot. For the best rise and texture, don’t skip the boiling step! A quick 1-minute bath in water with a touch of honey gives these bagels their characteristic shiny exterior and chewy bite. I learned this the hard way after skipping this step once – the difference was immediately noticeable in both appearance and texture.

    Avoiding Common Pitfalls

    Temperature control is crucial for these bagels. Your oven should be fully preheated to 425°F before the bagels go in – this initial heat blast creates that beautiful crust while allowing the inside to stay tender. Another game-changer? Let your eggs and cottage cheese come to room temperature before mixing. Cold ingredients can cause your dough to seize up, resulting in dense, heavy bagels. If you’re new to gluten-free baking, remember that different flour blends behave differently – I recommend a 1:1 baking blend like the ones used in my gluten-free cookies for consistent results every time.

    Serving Ideas & Creative Variations

    Sweet & Savory Topping Combinations

    Transform these versatile bagels into crave-worthy meals with the right toppings! For a sweet breakfast treat, try spreading whipped honey butter and a sprinkle of cinnamon sugar – it’s reminiscent of a cinnamon roll but with more protein. My weekend favorite is a schmear of cream cheese topped with sliced strawberries and a drizzle of honey. On the savory side, nothing beats a generous layer of mashed avocado, everything bagel seasoning, and a perfectly fried egg with a runny yolk. The protein from both the bagel and egg keeps me satisfied for hours, making it perfect for busy mornings when I need sustained energy.

    Flavor Variations Worth Trying

    The basic recipe is just your canvas – the flavor possibilities are endless! Fold fresh herbs like chopped chives, dill, or rosemary directly into the dough for an aromatic twist. For cheese lovers, mix in 1/4 cup of shredded sharp cheddar or crumbled feta before shaping. My personal favorite variation involves adding 2 tablespoons of pesto and sun-dried tomatoes to the dough – it’s like an Italian bakery in bagel form! For sweet versions, try folding in cinnamon and raisins or blueberries and lemon zest. The cottage cheese base works beautifully with both sweet and savory additions, making this recipe incredibly versatile.

    Storage & Troubleshooting Guide

    Keeping Your Bagels Fresh

    These gluten-free cottage cheese bagels stay fresh longer than you might expect! Store completely cooled bagels in an airtight container at room temperature for up to 2 days, or refrigerate for up to 5 days for maximum freshness. For longer storage, these freeze beautifully – simply slice before freezing, then pop directly into the toaster when ready to enjoy. I like to make a double batch on weekends, freeze most of them, and have fresh-tasting bagels all week long. The texture actually holds up remarkably well to freezing, unlike many gluten-free baked goods that can become crumbly after thawing.

    Troubleshooting Common Issues

    If your bagels turn out dense or don’t rise properly, your baking powder might be expired – always check the date! Another common issue is overmixing the dough, which can develop too much structure and result in tough bagels. Mix just until ingredients are combined, then stop. If your bagels spread too much during baking, your dough may be too wet – next time, add a bit more flour or chill the shaped bagels for 15 minutes before boiling. And if they’re browning too quickly in the oven, place a sheet of foil loosely over the top halfway through baking to protect them while allowing them to finish cooking through.

    Frequently Asked Questions

    Can I use regular flour instead of gluten-free for these cottage cheese bagels?

    Yes! Substitute all-purpose flour in equal amounts. The texture will be slightly different – typically chewier with regular flour – but equally delicious.

    How can I make these bagels dairy-free?

    Try using a plant-based cottage cheese alternative. Several brands now make coconut or almond-based versions that work well, though the protein content may be lower.

    Can I skip the boiling step for these Gluten-Free Cottage Cheese Bagels?

    I don’t recommend it. Boiling creates that characteristic chewy exterior that defines a true bagel. Without it, you’ll essentially have round bread.

    How do I know when the bagels are fully baked?

    They should be golden brown and sound hollow when tapped on the bottom. An internal temperature of 190°F also indicates they’re done.

    Can I make mini bagels with this recipe?

    Absolutely! Divide the dough into 12 portions instead of 6, reduce the boiling time to 30 seconds per side, and bake for 15-18 minutes.

    Final Thoughts

    These Gluten-Free Cottage Cheese Bagels have earned their place as a staple in my kitchen – balancing nutrition, taste, and convenience in one perfect package. What began as an experiment has become my go-to breakfast solution, proving that gluten-free eating doesn’t mean sacrificing the foods you love. The protein boost from the cottage cheese makes these substantially more satisfying than traditional bagels, while the endless customization options keep breakfast exciting. Whether you’re gluten-sensitive or simply looking for a protein-packed breakfast option, these bagels deliver on all fronts. Find more inspiration for your breakfast creations on Pinterest!

  • Shamrock Shake Dessert Lasagna: Irresistibly Creamy & Viral!

    Shamrock Shake Dessert Lasagna: Irresistibly Creamy & Viral!

    Shamrock Shake Dessert Lasagna: Irresistibly Creamy & Viral!

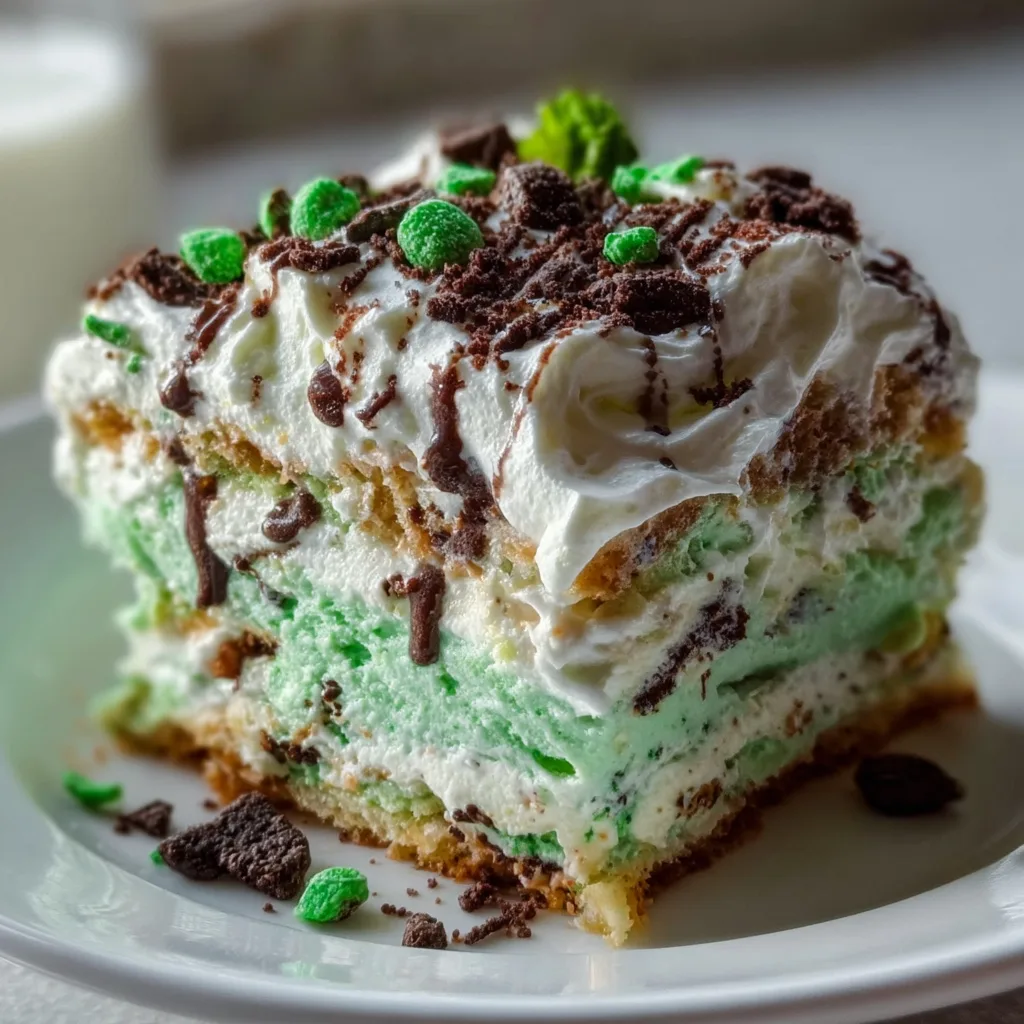
    Shamrock Shake Dessert Lasagna brings the magic of McDonald’s seasonal favorite to your dessert table in spectacular layered form! This no-bake treat combines creamy mint cheesecake layers with chocolate cookie crumbles and whipped topping for a show-stopping dessert that tastes like spring in every bite. I first created this for my sister’s St. Patrick’s Day party, and now my family requests it year-round! The vibrant green layers and cool mint flavor make this dessert irresistible, while the chocolate cookie base adds the perfect contrast. If you love no-bake desserts, this festive creation will become your new favorite!

    Recipe

    Why You’ll Love This Shamrock Shake Dessert Lasagna

    Perfect Make-Ahead Dessert

    This Shamrock Shake Dessert Lasagna is a time-saving miracle that actually improves with time in the refrigerator. I love making it the night before a gathering, allowing the mint flavor to deepen and the layers to set perfectly. The chocolate cookies soften just enough to create that ideal texture – not too crunchy, not too soggy. Plus, when party day arrives, you’ll have one less thing to worry about! The vibrant green color never fails to bring smiles when I unveil it from the refrigerator.

    No Special Equipment Needed

    Don’t let the impressive appearance fool you – this dessert requires zero baking skills or fancy equipment. All you need is a hand mixer (or strong arm for whisking!), a 9×13 dish, and basic measuring tools. I actually assembled this entire dessert while my mixer was being repaired, using just a whisk and some determination! The simplicity makes it perfect for beginning bakers or anyone who wants an impressive dessert without turning on the oven. The hardest part is waiting for it to chill!

    Essential Tips & Tricks

    Achieving the Perfect Mint Flavor

    Finding the right balance of mint flavor is crucial – too little and it’s forgettable, too much and it tastes like toothpaste! I recommend starting with less mint extract than you think you need (about ¼ teaspoon) and gradually adding more after tasting. Remember that the flavor intensifies as it chills. For authentic Shamrock Shake flavor, use a combination of mint extract and vanilla extract in a 2:1 ratio. The vanilla softens the mint’s edge while enhancing the creamy sweetness that makes dessert lasagnas so irresistible.

    Creating Beautiful Layers

    The secret to Instagram-worthy layers is patience and proper chilling between steps. After spreading each layer, refrigerate for at least 20 minutes before adding the next. I use the back of a spoon dipped in warm water to smooth each layer perfectly. For the most vibrant green color, gel food coloring works better than liquid drops. Start with a small amount and build up gradually – you can always add more, but you can’t take it away! Finally, chill the completed dessert for at least 4 hours before serving.

    Serving Ideas & Creative Variations

    Festive Presentation Options

    Transform this dessert into a conversation starter with creative toppings! I love adding chocolate curls, crushed Andes mints, or a drizzle of chocolate ganache just before serving. For St. Patrick’s Day gatherings, sprinkle gold sugar crystals or edible gold leaf for a magical touch. Serve in clear glasses for a dramatic presentation that showcases the layers. For casual family dinners, I simply dust with cocoa powder and add a fresh mint sprig. Pair with Irish coffee for adults or hot chocolate for a delightful contrast to the cool mint flavor.

    Seasonal Adaptations

    This versatile dessert can be customized for any occasion throughout the year. For summer, add fresh berries between layers or on top. During fall, swap mint for pumpkin spice and green coloring for orange. Winter holidays call for peppermint extract and crushed candy canes as garnish. Last Easter, I divided the mixture and created a pastel rainbow version with different food colorings for each layer! The basic structure remains the same – it’s the flavors and colors that transform to match your celebration.

    Storage & Troubleshooting Guide

    Proper Storage Methods

    For optimal freshness, keep your Shamrock Shake Dessert Lasagna tightly covered in the refrigerator. It stays perfect for up to 4 days, though the colors may slightly fade after day 3. I use plastic wrap pressed directly onto the surface to prevent any skin from forming on top. If making ahead for an event, add any delicate toppings like whipped cream rosettes or chocolate shavings just before serving. Never freeze this dessert – the texture will become grainy and the layers may separate upon thawing.

    Fixing Common Issues

    If your dessert lasagna develops texture problems, there are easy fixes! Too soft? Your cream cheese might not have been cold enough during mixing. Pop it back in the refrigerator for an hour. Layers bleeding together? You likely didn’t chill long enough between additions. For future batches, extend chilling time to 30 minutes between layers. If the mint flavor is too strong, balance it by adding an extra layer of whipped topping or serving with chocolate sauce. Weeping or watery texture usually means your whipped topping wasn’t fully thawed and mixed properly.

    Frequently Asked Questions

    Can I make Shamrock Shake Dessert Lasagna without artificial coloring?

    Absolutely! Use spinach powder or matcha for natural green coloring. Start with ½ teaspoon and increase until you achieve your desired shade. The flavor is so mild it won’t affect the taste.

    How far in advance can I prepare this dessert?

    You can make this up to 2 days before serving. The flavors actually improve with time in the refrigerator, making it perfect for busy hosts who need make-ahead options.

    Can I use homemade whipped cream instead of store-bought whipped topping?

    Yes, but stabilize it with 1 tablespoon of powdered gelatin per 2 cups of cream to maintain the structure. Whipped topping holds up better for longer periods.

    Chocolate sandwich cookies create the classic Shamrock Shake contrast. For a more intense mint experience, try chocolate-mint cookies or chocolate graham crackers with a drop of mint extract.

    How do I get perfectly clean slices when serving my Shamrock Shake Dessert Lasagna?

    Dip a sharp knife in hot water and wipe clean between each cut. This melts through the layers cleanly without dragging or smearing the beautiful green colors.

    Final Thoughts

    This Shamrock Shake Dessert Lasagna has become my signature contribution to spring gatherings, bringing smiles with its vibrant layers and nostalgic flavor. The beauty of this dessert lies in its versatility and visual impact – it’s both deliciously simple and impressively complex-looking. Whether you’re celebrating St. Patrick’s Day or simply craving something minty and refreshing, this layered creation delivers that beloved Shamrock Shake experience in sliceable form. Find more seasonal inspiration on Pinterest and enjoy watching faces light up when you serve this showstopper!

  • Ooey-Gooey Cheesy Garlic Chicken Wraps That Melt Hearts Instantly

    Ooey-Gooey Cheesy Garlic Chicken Wraps That Melt Hearts Instantly

    Ooey-Gooey Cheesy Garlic Chicken Wraps That Melt Hearts Instantly

    Oh my goodness, these Ooey-Gooey Cheesy Garlic Chicken Wraps have become an absolute staple in my weeknight dinner rotation! There’s something magical about that first bite when the melted cheese stretches between your lips and the garlicky aroma fills your senses. I discovered this recipe during a particularly hectic Tuesday when I needed something quick but still crave-worthy. My husband declared them “restaurant quality” and my kids actually cleaned their plates without negotiation! If you’re looking for a 30-minute meal that delivers maximum comfort with minimal effort, these wraps are your new best friend.

    Recipe

    Why You’ll Love These Ooey-Gooey Cheesy Garlic Chicken Wraps

    A Perfect Balance of Flavors and Textures

    The beauty of these wraps lies in their perfect flavor harmony – tender, seasoned chicken paired with a creamy, garlicky cheese sauce that melts into every bite. The tortillas get just crispy enough on the outside while staying soft inside, creating that satisfying textural contrast we all crave. I love how the subtle heat from the red pepper flakes cuts through the richness, making each bite interesting without overwhelming. My daughter Emma, who typically picks out “spicy things,” didn’t even notice them! These wraps hit that sweet spot between comfort food and something that feels special enough for when friends drop by unexpectedly.

    Quick Preparation for Busy Weeknights

    Let’s be real – weeknight cooking needs to be efficient and satisfying. These wraps come together in about 25 minutes, making them perfect for those evenings when you’re juggling homework help, laundry, and everything else life throws your way. I’ve made these after long workdays when takeout was tempting, but I wanted something homemade. The beauty is that you can prep components ahead of time – cook the chicken and make the cheese sauce on Sunday, then simply assemble and heat when needed. They’re also endlessly customizable with whatever veggies are lurking in your crisper drawer, making them a perfect clean-out-the-fridge meal!

    Essential Tips & Tricks

    Mastering the Cheese Sauce

    The cheese sauce is truly the star of this recipe, so don’t rush this step! Start with a roux (equal parts butter and flour) and cook it until it smells slightly nutty but isn’t brown. This prevents that raw flour taste. When adding cheese, remove the pan from heat first and stir gradually – this prevents the sauce from separating or becoming grainy. I learned this the hard way after a particularly sad, clumpy disaster! For extra flavor depth, try using a combination of cheeses like sharp cheddar and creamy monterey jack. And don’t skimp on the garlic – those 3-4 cloves make all the difference in creating that irresistible aroma that will bring everyone to the table.

    Tortilla Selection and Preparation

    Choosing the right tortilla makes a significant difference in the final result. I recommend large flour tortillas (10-inch) as they’re easier to fold without tearing and hold up better to the filling. Warm them slightly before filling – 10 seconds in the microwave or a quick pass over a gas flame – to make them more pliable. This prevents cracking when you fold them. For an extra-special touch, try brushing the outside with a little melted butter before toasting in the pan. This creates a gorgeous golden crust that reminds me of the crispy Italian chicken cutlets I love so much. The buttery exterior adds another dimension of flavor that elevates these wraps to restaurant quality.

    Serving Ideas & Creative Variations

    Perfect Pairings for a Complete Meal

    These wraps are substantial on their own, but I love serving them with simple sides that complement without competing. A crisp green salad with a light vinaigrette provides a refreshing contrast to the rich, cheesy wraps. For heartier appetites, a side of sweet corn rotini bake makes for an incredible comfort food feast. When entertaining, I arrange the cut wraps on a platter surrounded by small bowls of toppings like fresh pico de gallo, sliced avocado, and sour cream so everyone can customize their experience. Don’t forget some lime wedges for squeezing over the top – that bright acidity cuts through the richness beautifully!

    Exciting Flavor Twists to Try

    The basic recipe is fantastic, but don’t be afraid to play with flavor variations! For a southwestern twist, add a tablespoon of taco seasoning to the chicken and mix black beans and corn into the filling. Craving something Mediterranean? Swap the cheddar for feta, add spinach and roasted red peppers, and sprinkle in some oregano. My personal favorite variation happened by happy accident when I had leftover buffalo sauce in the fridge – a few tablespoons mixed into the cheese sauce created a buffalo chicken wrap that had my husband requesting “that spicy wrap thing” for weeks! These adaptations keep the recipe exciting even when it becomes part of your regular rotation.

    Storage & Troubleshooting Guide

    Make-Ahead and Freezing Options

    These wraps are surprisingly freezer-friendly, making them perfect for meal prep. To freeze, prepare the wraps but stop before the final toasting step. Wrap each one individually in parchment paper, then aluminum foil, and freeze for up to 3 months. When ready to eat, unwrap and heat from frozen in a 375°F oven for about 25-30 minutes until heated through and crispy. For refrigerator storage, fully cooked wraps will keep for 3-4 days. I like to reheat them in a dry skillet over medium heat to restore the crispy exterior – the microwave tends to make them soggy. The cheese sauce can also be made ahead and stored separately for up to 5 days.

    Solving Common Preparation Issues

    If your cheese sauce turns out grainy or separated, don’t panic! You can often rescue it by removing from heat and whisking in 1-2 tablespoons of warm milk until smooth. For too-thick sauce, gradually add milk; for too-thin sauce, cook a bit longer or add a small amount of additional cheese. If your wraps are leaking while cooking, you may have overfilled them or not sealed them properly. Try using less filling and make sure to fold the ends in first, then roll tightly. Securing with toothpicks can help during cooking. And if the tortillas tear, try warming them more before filling or switch to a more pliable brand – I find Mission tortillas work consistently well.

    Frequently Asked Questions

    Can I use rotisserie chicken for these Ooey-Gooey Cheesy Garlic Chicken Wraps?

    Absolutely! Shredded rotisserie chicken works perfectly and saves time. Just mix it with the seasonings and a splash of broth to moisten before adding to your wraps. It’s my go-to shortcut for busy nights.

    What’s the best cheese to use for maximum meltiness?

    A combination of freshly grated cheddar and monterey jack creates the perfect melt. Pre-shredded cheese contains anti-caking agents that can make your sauce grainy, so grating your own makes a noticeable difference.

    Can I make these wraps vegetarian?

    Yes! Replace chicken with sautéed mushrooms, black beans, or crumbled firm tofu. Season the substitute exactly as you would the chicken for similar flavor depth. The cheese sauce works beautifully with any filling.

    How do I prevent my tortillas from getting soggy?

    Toast your assembled wraps in a dry skillet until golden on both sides. This creates a barrier that helps keep moisture in. Also, if using wet ingredients like tomatoes, drain them thoroughly first.

    Can I prepare components ahead for a quick assembly later?

    Definitely! Cook and season the chicken, prepare the cheese sauce, and chop all add-ins up to 3 days ahead. Store separately in the refrigerator, then just assemble and toast when ready to eat.

    Final Thoughts

    These Ooey-Gooey Cheesy Garlic Chicken Wraps have earned their place in my family’s regular meal rotation because they hit all the right notes – they’re quick enough for busy weeknights, adaptable to whatever ingredients you have on hand, and satisfying enough to quiet even the loudest hunger grumbles. There’s something undeniably comforting about that moment when the cheese stretches between the wrap and your plate, promising a bite full of flavor and satisfaction. Whether you’re feeding a family or meal prepping for one, these wraps deliver big on flavor with minimal effort – and isn’t that what great home cooking is all about? Don’t forget to share your creations on Pinterest!

  • Sourdough Discard Kolaches: Irresistibly Soft, Fluffy & Delicious!

    Sourdough Discard Kolaches: Irresistibly Soft, Fluffy & Delicious!

    Sourdough Discard Kolaches: Irresistibly Soft, Fluffy & Delicious!

    Sourdough discard kolaches are the perfect marriage of Czech pastry tradition and practical sourdough baking. That first bite—pillowy dough giving way to a sweet or savory center—is pure comfort in pastry form. I discovered kolaches during a road trip through Texas, and I’ve been obsessed with perfecting my recipe ever since. The genius twist? Using sourdough discard adds a subtle tang that elevates these treats beyond ordinary pastries. If you’ve been wondering what to do with that jar of discard sitting in your fridge, these kolaches are your delicious answer. They’re easier than you might think and will quickly become a weekend breakfast staple.

    Recipe

    Why You’ll Love This Sourdough Discard Kolaches

    Perfect Balance of Flavors and Textures

    These kolaches hit all the right notes—tender, slightly tangy dough paired with fillings that can range from sweet fruit preserves to savory cheese and sausage combinations. The sourdough discard adds complexity without overpowering, creating layers of flavor that store-bought pastries simply can’t match. I love how the edges bake up golden and slightly crisp while the centers remain cloud-soft. Plus, there’s something deeply satisfying about transforming what would otherwise be waste into something spectacular. The slight fermented quality makes these kolaches uniquely addictive.

    Make-Ahead Magic for Busy Mornings

    One of my favorite things about these kolaches is their flexibility. You can prepare the dough the night before, let it slowly develop flavor in the refrigerator, then shape and bake in the morning. The cold fermentation not only fits into busy schedules but actually improves the texture and flavor profile. I’ve found this particularly useful when hosting weekend guests—I can enjoy coffee with everyone instead of being stuck in the kitchen. And if you’re really pressed for time, you can freeze the shaped, unbaked kolaches and bake them straight from frozen.

    Essential Tips & Tricks

    Mastering the Perfect Dough Consistency

    Getting the right dough texture is crucial—aim for soft and tacky but not sticky. If your dough feels too wet after mixing, resist adding too much flour at once. Instead, use a light dusting during kneading and give the dough time to absorb moisture. I learned this the hard way after creating dense hockey pucks on my first attempt! The sourdough discard adds hydration, so you’ll need slightly less liquid than traditional recipes. When proofing, look for the dough to be puffy and increased in volume by about 50%—not necessarily doubled like regular bread.

    Creating Perfect Filling Pockets

    The traditional kolache indentation requires a special technique. After dividing and shaping your dough into balls, let them rest for 10-15 minutes to relax the gluten. Then use your fingers (or the bottom of a measuring cup) to create a deep depression without puncturing through the bottom. If making sweet kolaches, brush the centers with melted butter before adding filling to create a moisture barrier. For savory versions like my sausage and cheese kolaches, fully wrap the filling for a more enclosed style.

    Serving Ideas & Creative Variations

    Sweet and Seasonal Adaptations

    While traditional fruit fillings like prune, apricot, and poppy seed are classics, don’t be afraid to experiment with seasonal inspirations. In summer, I love using fresh berries mixed with a bit of cornstarch and sugar. Fall brings opportunities for apple butter or pumpkin cream cheese. During the holidays, cranberry-orange or eggnog custard fillings feel festive. The key is balancing sweetness with the tanginess of the sourdough. A light streusel topping (butter, flour, sugar) adds wonderful texture contrast and makes these reminiscent of brioche bread pudding in the best possible way.

    Savory Brunch and Dinner Pairings

    Savory kolaches make an impressive addition to brunch spreads or light dinners. Try jalapeño-cheddar fillings, breakfast sausage with scrambled egg, or caramelized onion with goat cheese. I serve them alongside a simple green salad dressed with lemon vinaigrette for a complete meal. For entertaining, make mini versions as appetizers—they’re always the first to disappear! The sourdough base pairs beautifully with smoky and spicy flavors, making these much more versatile than their sweet counterparts. They’re also perfect for packed lunches or picnics since they taste delicious at room temperature.

    Storage & Troubleshooting Guide

    Keeping Kolaches Fresh

    Kolaches are best enjoyed the day they’re baked, but proper storage can extend their life. Once completely cooled, store them in an airtight container at room temperature for up to 2 days. For longer storage, refrigerate for up to 5 days or freeze for up to 3 months. To reheat, wrap in foil and warm in a 325°F oven for about 10 minutes (or 15-20 minutes from frozen). Avoid microwaving if possible as it can make the texture gummy. I find spritzing them with a little water before reheating helps restore their freshly-baked texture.

    Solving Common Kolache Problems

    If your kolaches spread too much during baking, your dough may be too wet or over-proofed. For next time, reduce liquid slightly or shorten the final rise. If the bottoms are getting too dark before the tops are done, try double-panning (stacking two baking sheets) to insulate the bottoms. For filling that bubbles over, make deeper depressions and slightly reduce filling amounts. If your dough seems dense, you likely need more proofing time—sourdough works on its own schedule! Remember that room temperature affects rising times dramatically, so be patient in cooler weather.

    Frequently Asked Questions

    Can I use active sourdough starter instead of discard?

    Yes, but reduce the added yeast by half and expect a longer rise time. Active starter will create a more pronounced sourdough flavor and potentially lighter texture.

    How can I make these kolaches dairy-free?

    Substitute plant-based butter and milk alternatives at a 1:1 ratio. Coconut oil works well for the butter, while almond or oat milk provides good flavor compatibility.

    What’s the difference between kolaches and klobasniky?

    Traditional Czech kolaches have fruit filling in an indentation, while klobasniky (often called kolaches in Texas) are fully wrapped around savory fillings like sausage.

    Can I make sourdough discard kolaches without commercial yeast?

    Yes, but plan for 8-12 hours of rising time and use active, recently fed sourdough discard. The texture will be slightly denser but with enhanced sourdough flavor.

    How long does the sourdough discard need to be out of the refrigerator before using?

    For best results, let your sourdough discard come to room temperature (about 30-45 minutes) before incorporating into your kolache dough.

    Final Thoughts

    These sourdough discard kolaches represent the beautiful intersection of waste reduction, cultural tradition, and creative baking. I love how they transform humble ingredients into something truly special—whether for weekend brunch or an afternoon treat with coffee. The versatility of sweet or savory fillings means they never get boring, while the distinctive sourdough character keeps them interesting. Don’t be intimidated by the process; embrace the journey and adjust to your taste. Find more inspiration for your baking adventures on Pinterest and happy baking!

  • Olive Garden Shrimp Alfredo: Creamy, Irresistible, Must-Try Recipe!

    Olive Garden Shrimp Alfredo: Creamy, Irresistible, Must-Try Recipe!

    Olive Garden Shrimp Alfredo: Creamy, Irresistible, Must-Try Recipe!

    The moment I tasted my first homemade Olive Garden Shrimp Alfredo, I knew I’d never need to wait for a table at the restaurant again. This creamy, indulgent pasta dish combines tender shrimp with a velvety parmesan sauce that coats every strand of fettuccine perfectly. The best part? You can create this restaurant-quality meal right in your own kitchen in under 30 minutes. Last weekend, I made this for my sister’s birthday dinner, and the silence around the table as everyone took their first bites told me everything I needed to know. Ready to bring that Olive Garden magic home? Let’s dive in!

    Recipe

    Why You’ll Love This Olive Garden Shrimp Alfredo

    Restaurant-Quality Results with Half the Effort

    This copycat Olive Garden Shrimp Alfredo recipe delivers that signature creaminess without the complexity you might expect. The sauce comes together while your pasta cooks, making this perfect for weeknight dinners when you’re craving something special but short on time. I’ve perfected the balance of heavy cream, butter, and freshly grated parmesan to create that silky texture that clings beautifully to both the pasta and shrimp. The aroma that fills your kitchen—garlic sizzling in butter, fresh herbs, and that unmistakable parmesan scent—will have everyone gathering around before you even call them to the table.

    Customizable to Your Taste Preferences

    One thing I adore about this Olive Garden Shrimp Alfredo is how easily it adapts to what you love. Prefer extra garlic? Go for it! Want to add a pinch of red pepper flakes for heat? Absolutely divine. You can swap the shrimp for chicken if seafood isn’t your thing, or go vegetarian with sautéed mushrooms and peas. The base sauce recipe remains your canvas. My husband likes his with extra black pepper, while I add fresh basil from our windowsill garden. The possibilities are endless, making this recipe one you’ll return to again and again, creating new variations each time while maintaining that classic Olive Garden flavor profile.

    Essential Tips & Tricks

    Perfect Pasta & Shrimp Techniques

    The secret to restaurant-quality Olive Garden Shrimp Alfredo lies in the timing and temperature. Always cook your fettuccine just shy of al dente—it’ll finish cooking in the sauce, absorbing all that creamy goodness. For the shrimp, pat them completely dry before cooking and use a screaming hot pan for just 1-2 minutes per side. Overcooking is the enemy! I learned this the hard way when I once multitasked during cooking and ended up with rubber-like shrimp. Now I give them my full attention, watching for that perfect pink color with a slight translucence in the center before removing them from heat.

    Sauce Secrets for Silky Perfection

    The heart of any Olive Garden Shrimp Alfredo is undeniably the sauce, and achieving that velvety consistency requires attention to detail. Always use room temperature cream and freshly grated parmesan—pre-shredded won’t melt properly. Keep your heat medium-low when adding cheese to prevent separation, and stir constantly in a figure-eight motion. If your sauce ever looks too thick, add a splash of reserved pasta water instead of more cream. This starchy liquid helps emulsify the sauce while maintaining the perfect consistency. I keep a coffee mug next to the stove specifically for scooping out that liquid gold before draining my pasta.

    Serving Ideas & Creative Variations

    Elegant Presentation Touches

    Elevate your Olive Garden Shrimp Alfredo with thoughtful garnishes that transform this comfort food into an impressive dinner party centerpiece. A light dusting of freshly grated parmesan, a scattering of chopped parsley, and a few turns of cracked black pepper create visual appeal and fresh flavor accents. For special occasions, I like to serve the pasta in warmed bowls with a lemon wedge on the side—the hint of acidity cuts through the richness beautifully. Consider pairing with my Italian Herbs and Cheese Bread for an authentic restaurant experience that will have your guests convinced you ordered takeout.

    Seasonal & Dietary Adaptations

    This Olive Garden Shrimp Alfredo recipe welcomes creative modifications to suit different dietary needs and seasonal availability. For a lighter spring version, fold in fresh asparagus tips and peas during the last minute of cooking. Summer calls for cherry tomatoes and fresh basil, while fall begs for sautéed mushrooms and a sprinkle of nutmeg. Need a gluten-free option? Simply swap in your favorite gluten-free pasta. For dairy sensitivities, modern plant-based cream alternatives and nutritional yeast can create a surprisingly authentic alfredo experience. I’ve served the dairy-free version to skeptical friends who couldn’t believe it wasn’t the traditional recipe.

    Storage & Troubleshooting Guide

    Keeping Leftovers Fresh & Delicious

    Properly storing leftover Olive Garden Shrimp Alfredo ensures you’ll enjoy it just as much the second time around. Allow the pasta to cool completely before transferring to airtight containers, which helps prevent condensation that can make the sauce watery. Refrigerate for up to 3 days, but never freeze—the cream sauce will separate and the pasta texture will suffer dramatically. When reheating, add a splash of milk or cream and warm gently over low heat, stirring frequently. Microwaving works in a pinch, but cover with a damp paper towel and use 50% power in short intervals, stirring between each to revive that silky texture.

    Rescuing Common Sauce Mishaps

    Even experienced cooks occasionally encounter challenges with Alfredo sauce, but most issues have simple solutions. If your sauce breaks or curdles, lower the heat immediately and whisk in a tablespoon of cold cream. For sauce that’s too thin, simmer gently until it reaches your desired consistency, keeping in mind it will thicken further as it cools. Too thick? Add pasta water a tablespoon at a time. If your sauce lacks flavor depth, try adding a teaspoon of white miso paste or a dash of fish sauce—these secret ingredients boost umami without overpowering. I once rescued a bland sauce with a pinch of roasted garlic powder and it transformed the entire dish.

    Frequently Asked Questions

    Can I make Olive Garden Shrimp Alfredo ahead of time?

    For best results, prepare the components separately. Cook shrimp and refrigerate up to one day ahead. Make the sauce fresh before serving, then combine with freshly cooked pasta and reheated shrimp for that restaurant-quality experience.

    What’s the best pasta for authentic Olive Garden Shrimp Alfredo?

    Traditional fettuccine is ideal as its flat, wide surface area captures the creamy sauce perfectly. In a pinch, linguine or tagliatelle work well too. Avoid thin pasta shapes like spaghetti which won’t hold the rich sauce properly.

    How do I prevent my Alfredo sauce from separating?

    Keep your heat medium-low when adding cheese, use room-temperature ingredients, and stir constantly. Never boil the sauce after adding cheese, and use freshly grated parmesan instead of pre-shredded varieties containing anti-caking agents.

    Can I use frozen shrimp for this recipe?

    Absolutely! Thaw completely and pat thoroughly dry before cooking. I prefer shell-off, deveined shrimp for convenience, but shell-on often provides better flavor if you’re willing to do the extra work.

    What wine pairs best with Olive Garden Shrimp Alfredo?

    A crisp Pinot Grigio or unoaked Chardonnay complements the creamy richness perfectly. The bright acidity cuts through the sauce while enhancing the delicate shrimp flavors without overwhelming the dish.

    Final Thoughts

    Creating Olive Garden Shrimp Alfredo at home gives you the power to enjoy this beloved classic whenever the craving strikes, without waiting for a table or paying restaurant prices. The simple yet sophisticated combination of tender shrimp, silky sauce, and perfectly cooked pasta creates a memorable dining experience worth mastering. Once you’ve tried this homemade version, you might find yourself hosting more dinner parties just to show off your new signature dish! Don’t forget to check out more pasta inspiration on Pinterest and tag me when you make your own Olive Garden Shrimp Alfredo masterpiece!