Author: Darleen Vance

  • Crispy Teriyaki Chicken Wonton Tacos: Irresistibly Crunchy Delight!

    Crispy Teriyaki Chicken Wonton Tacos: Irresistibly Crunchy Delight!

    Crispy Teriyaki Chicken Wonton Tacos: Irresistibly Crunchy Delight!

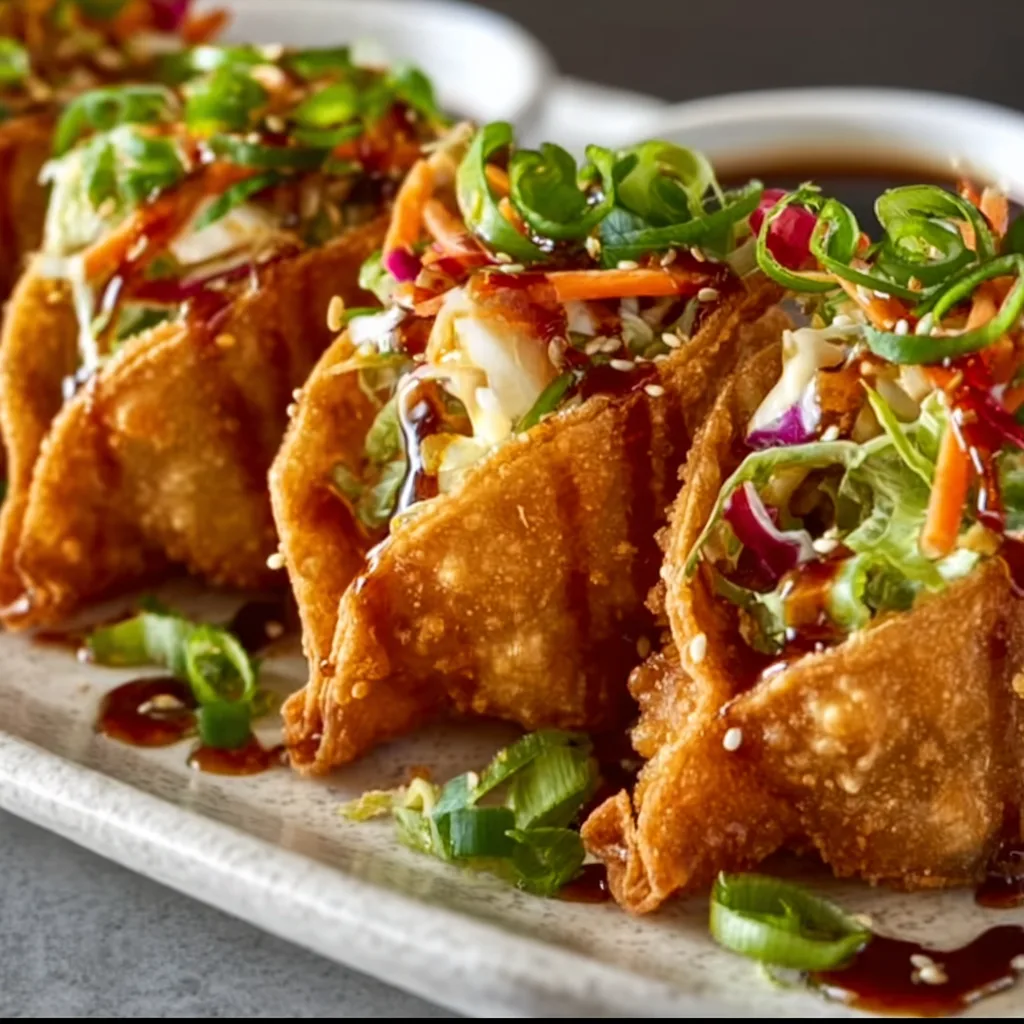
    Crispy teriyaki chicken wonton tacos have become my absolute obsession this season! These little handheld delights combine the satisfying crunch of fried wonton wrappers with the sweet-savory magic of teriyaki chicken for an irresistible fusion experience. The first time I made these for my sister’s birthday gathering, they disappeared faster than I could set down the serving platter! The combination of textures and flavors is simply magical – tender chicken coated in that sticky-sweet teriyaki glaze, all nestled in a crispy wonton shell that shatters delightfully with each bite. If you’re looking for an impressive appetizer that delivers big on flavor without hours of work, these crispy chicken tenders have met their match!

    Recipe

    Why You’ll Love These Crispy Teriyaki Chicken Wonton Tacos

    Perfect Party Food That Impresses

    These crispy teriyaki chicken wonton tacos are the ultimate crowd-pleaser for any gathering. I’ve served them at everything from casual game nights to fancier dinner parties, and they’ve earned rave reviews every single time. The visual appeal alone makes them Instagram-worthy – those perfectly golden wonton shells filled with glossy teriyaki chicken and topped with vibrant slaw create an irresistible presentation. Plus, they’re substantial enough to satisfy without being too filling, making them perfect for grazing throughout an evening of socializing. The handheld nature means guests can easily mingle while enjoying them!

    Quick Prep with Major Flavor Payoff

    One of the biggest reasons to love these crispy teriyaki chicken wonton tacos is how much flavor you get for relatively little effort. The chicken marinates quickly in the teriyaki sauce, absorbing all those sweet-savory notes while you prep the other components. The assembly process is straightforward and can even become a fun activity with family or friends helping out. I love that I can prepare most elements ahead of time and simply fry the wonton shells and assemble right before serving. For a busy host, this kind of efficient yet impressive recipe is absolute gold – maximum impact with manageable preparation!

    Essential Tips & Tricks

    Mastering the Perfect Wonton Shell

    Creating the ideal wonton taco shell requires a bit of technique, but it’s easier than you might think! The key temperature for frying is 350°F – any cooler and they’ll absorb too much oil, any hotter and they’ll burn before crisping properly. I use a pair of tongs to hold each wonton wrapper in a taco shape for about 30 seconds in the hot oil. Watch for that golden hue – it happens quickly! Let them drain on paper towels standing upright (I lean them against a rolled kitchen towel). For extra crispiness that stands up to the fillings, let them cool completely before assembling. This prevents any disappointing soggy shells!

    Teriyaki Sauce Secrets

    The soul of these crispy teriyaki chicken wonton tacos lies in the sauce. While store-bought works in a pinch, homemade teriyaki delivers incomparable flavor. My foolproof ratio is 1/4 cup soy sauce, 2 tablespoons brown sugar, 1 tablespoon mirin, 1 teaspoon grated ginger, and 1 clove minced garlic. The reduction technique makes all the difference – simmer until it coats the back of a spoon for that perfect glossy finish that clings to the chicken. For an extra flavor dimension, add a touch of sesame oil at the end. This approach creates a balanced sweet-savory profile that elevates the entire taco experience!

    Serving Ideas & Creative Variations

    Complementary Side Dishes

    These crispy teriyaki chicken wonton tacos pair beautifully with light, fresh accompaniments that balance their rich flavors. I love serving them alongside a cucumber-avocado salad dressed simply with rice vinegar and sesame oil – the cooling creaminess provides the perfect counterpoint to the sweet-savory tacos. For a more substantial spread, consider adding coconut rice or a simple miso soup. When entertaining, I arrange the tacos on a large platter surrounded by small bowls of additional toppings like sliced scallions, sesame seeds, and extra teriyaki sauce for drizzling. This interactive approach always delights guests!

    Exciting Flavor Twists

    While the classic crispy teriyaki chicken wonton tacos are incredible, don’t be afraid to experiment with variations! For a spicy kick, add sriracha to your teriyaki sauce or incorporate thinly sliced jalapeños in your slaw. For a luxurious upgrade, try adding diced mango or pineapple to bring a tropical sweetness that complements the teriyaki beautifully. Seafood lovers can substitute the chicken with shrimp or even salmon for an elegant twist. My personal favorite variation includes a drizzle of spicy mayo sauce – just mix mayonnaise with a bit of sriracha and lime juice for an incredible flavor boost!

    Storage & Troubleshooting Guide

    Proper Storage Methods

    The components of crispy teriyaki chicken wonton tacos are best stored separately to maintain their integrity. The cooked teriyaki chicken keeps well in an airtight container in the refrigerator for up to 3 days and can be gently reheated in a skillet with a splash of water. The wonton shells are trickier – they’re best when freshly fried, but if necessary, store completely cooled shells in a paper bag (not plastic, which traps moisture) at room temperature for up to 2 days. Any prepared slaw should be stored without dressing and combined just before serving to prevent sogginess. Never store assembled tacos, as they’ll quickly become a sad, soggy disappointment!

    Fixing Common Problems

    Even experienced cooks encounter challenges with crispy teriyaki chicken wonton tacos. If your wonton shells are breaking during frying, your oil might be too hot or you may be handling them too roughly – try reducing the temperature and using gentler movements with your tongs. For shells that aren’t crispy enough, they likely need more frying time or your oil temperature is too low. If your teriyaki sauce is too thin, continue reducing it until it reaches that perfect sticky consistency. For chicken that seems dry, try marinating it longer next time, or add a tablespoon of cornstarch to your sauce to help it cling better to the meat.

    Frequently Asked Questions

    Can I make crispy teriyaki chicken wonton tacos ahead of time?

    You can prepare the chicken and toppings a day ahead, but fry the wonton shells and assemble just before serving. For best results, keep components separate until the last minute to maintain that signature crispiness.

    What’s the best way to shape the wonton shells?

    Use tongs to hold each wonton wrapper in a taco shape in hot oil for about 30 seconds until golden. Drain upright against a rolled kitchen towel to maintain their shape while cooling.

    Can I bake the wonton shells instead of frying?

    Yes! Drape wonton wrappers over the edges of an oven-safe rack, spray with oil, and bake at 375°F for 5-7 minutes until golden and crisp. They’ll have a slightly different texture but still delicious.

    How do I keep the tacos from getting soggy?

    Ensure your chicken isn’t too saucy, drain any excess liquid from toppings, and assemble just before serving. The wonton shells should be completely cooled before filling.

    What can I substitute for wonton wrappers?

    Egg roll wrappers cut in half work well, as do small flour tortillas. For a gluten-free option, try thin rice paper wrappers, though the texture will differ significantly.

    Final Thoughts

    These crispy teriyaki chicken wonton tacos represent everything I love about fusion cooking – playful combinations that honor multiple culinary traditions while creating something uniquely delicious. The contrast between the crunchy wonton shell and tender, flavor-packed chicken creates an experience that’s greater than the sum of its parts. Whether you’re looking to impress at your next gathering or simply want to elevate your weeknight dinner routine, these tacos deliver big on flavor and fun. I hope you’ll give them a try and perhaps even create your own signature variation! Find more inspiration on my Pinterest where I’m always sharing new fusion creations.
  • Caramelized Onion Pizza with Melty Cheese That Will Blow Your Mind!

    Caramelized Onion Pizza with Melty Cheese That Will Blow Your Mind!

    Caramelized Onion Pizza with Melty Cheese That Will Blow Your Mind!

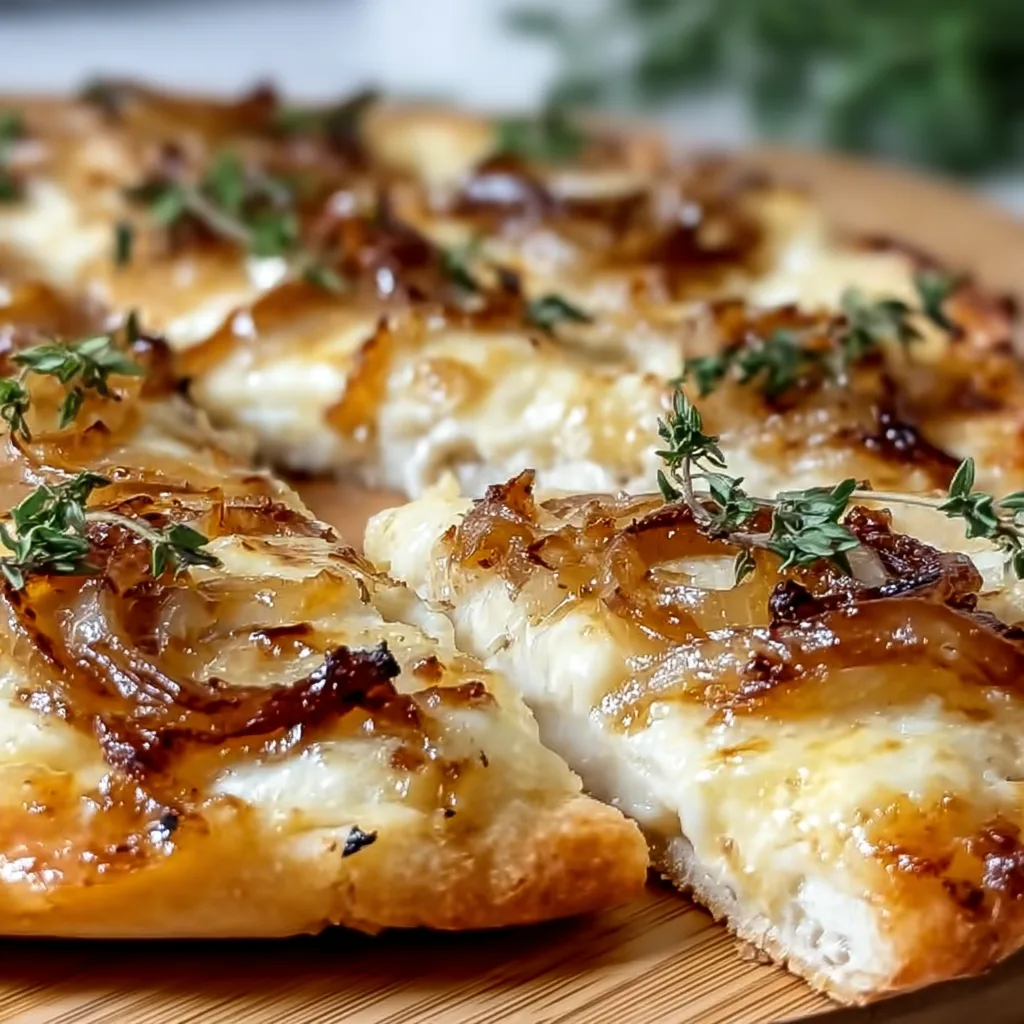
    Caramelized Onion Pizza with Melty Cheese has been my Friday night salvation more times than I can count. There’s something almost magical about the way those deeply golden, sweet onions melt into pools of bubbling cheese on a perfectly crisp crust. The first time I made this pizza, my kitchen filled with an aroma so intoxicating that my neighbor actually texted to ask what I was cooking! This isn’t just dinner—it’s a sensory experience that transforms simple ingredients into something extraordinary. If you’ve been searching for that perfect homemade pizza recipe that rivals your favorite restaurant, your search ends here.

    Recipe

    Why You’ll Love This Caramelized Onion Pizza with Melty Cheese

    The Perfect Balance of Flavors

    The magic of this caramelized onion pizza lies in its perfect balance of sweet and savory notes. The onions transform during their slow cook, releasing natural sugars that caramelize into a jam-like consistency with deep amber color and incredible depth. I love how they create pockets of intense flavor against the backdrop of creamy, melty cheese. The slight char from a hot oven adds that subtle smokiness that makes you close your eyes with each bite. This isn’t just pizza—it’s a carefully orchestrated symphony where each ingredient plays its essential part.

    A Surprisingly Simple Technique

    Don’t let the gourmet results fool you—this caramelized onion pizza with melty cheese is remarkably approachable for beginners. The most time-consuming part is caramelizing the onions, but it’s mostly hands-off time where patience does the heavy lifting. I’ve found that slicing onions thinly and cooking them low and slow creates that melt-in-your-mouth texture that makes this pizza special. The rest comes together in minutes: stretching dough, layering toppings, and watching your creation transform in a hot oven. My favorite moments are those final minutes when the cheese bubbles and edges crisp to golden perfection.

    Essential Tips & Tricks

    Mastering the Onion Caramelization

    The soul of this pizza lies in perfectly caramelized onions—rich, golden, and intensely flavorful. Start with 2-3 large onions sliced thinly, a tablespoon of butter, and a splash of olive oil in a wide pan. The key is patience: keep the heat medium-low and stir occasionally for 30-45 minutes. I learned the hard way that rushing this process leads to burned, bitter onions instead of sweet, jammy goodness. A pinch of salt helps draw out moisture, while a teaspoon of brown sugar near the end enhances that natural caramelization. The result should be deeply golden, intensely aromatic, and almost melting.

    Cheese Selection Secrets

    Choosing the right cheese blend elevates your caramelized onion pizza from good to unforgettable. I recommend a combination of mozzarella for that perfect stretch, fontina for rich meltability, and a touch of sharp Parmesan for depth. Grating your own cheese (rather than using pre-shredded) makes a remarkable difference in how evenly it melts. For an extra dimension, try adding small dollops of goat cheese or blue cheese between the onions—the tangy contrast against the sweet onions creates magical bites that will have everyone reaching for seconds. Remember that less is more; overloading causes soggy centers.

    Serving Ideas & Creative Variations

    Perfect Pairings for Your Pizza Night

    Elevate your caramelized onion pizza experience with thoughtfully chosen complementary sides. A peppery arugula salad dressed simply with lemon and olive oil cuts through the richness perfectly. For something heartier, my roasted red grape pizza makes an unexpected but delicious companion that continues the sweet-savory theme. When serving for guests, I arrange small bowls of infused olive oils, chili flakes, and honey for drizzling—the honey especially creates magic with the caramelized onions. For beverages, a crisp white wine or a light amber ale balances the pizza’s rich flavors without overwhelming them.

    Seasonal Twists and Add-Ons

    The beauty of this caramelized onion pizza with melty cheese lies in its adaptability to seasonal ingredients. In summer, try adding thinly sliced fresh figs or peaches during the last few minutes of baking—their natural sweetness intensifies the caramelized onions. Fall calls for thin apple slices and a sprinkle of fresh thyme. Winter versions shine with roasted butternut squash cubes and crispy sage leaves. For meat lovers, crispy pancetta or prosciutto added after baking provides a perfect salty contrast. My personal favorite variation includes a drizzle of balsamic glaze and a handful of fresh arugula added just before serving.

    Storage & Troubleshooting Guide

    Keeping Your Pizza Fresh

    Properly storing leftover caramelized onion pizza preserves its delicious flavors for enjoyment later. Allow pizza to cool completely before refrigerating to prevent condensation that makes the crust soggy. Place slices in an airtight container with parchment paper between layers, or wrap individually in aluminum foil. Refrigerate for up to 3 days. For reheating, avoid the microwave which leaves the crust chewy—instead, use a preheated 350°F oven for 5-7 minutes until warmed through. The cheese will re-melt beautifully while the crust regains its crispness without drying out.

    Solving Common Pizza Problems

    Even experienced bakers encounter challenges with homemade pizza. If your crust turns out soggy in the center, try pre-baking the dough for 3-4 minutes before adding toppings. For caramelized onion pizza specifically, drain any excess moisture from the onions before topping your pizza. If cheese browns too quickly before the crust is done, lower your oven rack position or cover loosely with foil. When onions burn rather than caramelize, remember the process can’t be rushed—keep heat low and extend cooking time. Lastly, if your dough springs back when stretching, let it rest 10-15 minutes to relax the gluten.

    Frequently Asked Questions

    How long does it take to caramelize onions for pizza?

    Properly caramelizing onions takes 30-45 minutes over medium-low heat. This slow process develops their sweet, complex flavor and jammy texture that makes caramelized onion pizza so special. Rushing this step results in inferior flavor.

    Can I make caramelized onion pizza ahead of time?

    Yes! Prepare and caramelize the onions up to 3 days ahead and refrigerate. You can even assemble the entire pizza, freeze unbaked, and cook directly from frozen, adding 5-7 minutes to your baking time.

    What’s the best cheese for caramelized onion pizza with melty cheese?

    A combination of mozzarella, fontina, and Parmesan creates the perfect melt and flavor profile. For extra dimension, add small dollops of goat cheese or blue cheese between the caramelized onions.

    How do I prevent my pizza crust from getting soggy?

    Pre-bake your crust for 3-4 minutes before adding toppings. Also, make sure your caramelized onions aren’t too wet by cooking off excess moisture, and don’t overload with cheese.

    Can I make this pizza without a pizza stone?

    Absolutely! A preheated baking sheet or cast iron pan works well. For extra crispiness, sprinkle cornmeal on the pan before adding your dough to prevent sticking and add texture.

    Final Thoughts

    This caramelized onion pizza with melty cheese has become more than just a recipe in my kitchen—it’s a celebration of how simple ingredients transform with a little time and attention. The contrast between sweet, jammy onions and savory, stretchy cheese creates something truly special that’s worth every minute of preparation. I love seeing the expressions on friends’ faces with that first bite, when expectations are exceeded and conversations momentarily pause. Don’t forget to check out more creative pizza ideas on our Pinterest for endless inspiration. Your perfect pizza night awaits!

  • Garlic-Ranch Chicken Pizza Recipe That Will Blow Your Mind!

    Garlic-Ranch Chicken Pizza Recipe That Will Blow Your Mind!

    Garlic-Ranch Chicken Pizza Recipe That Will Blow Your Mind!

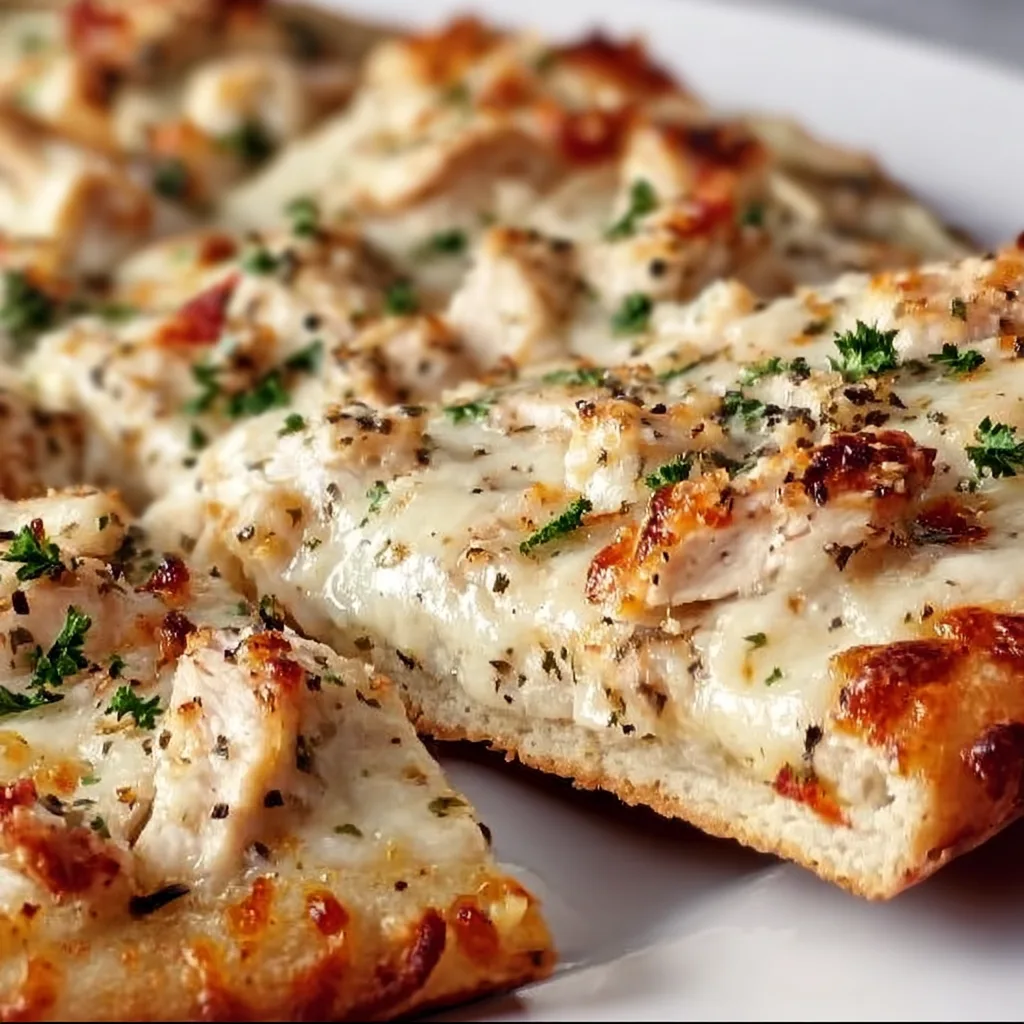
    Garlic-Ranch Chicken Pizza has become my family’s Friday night tradition, and I’m thrilled to share this recipe with you! There’s something magical about the combination of tangy ranch, aromatic garlic, and tender chicken that creates pure comfort food bliss. The first time I made this pizza, my kitchen filled with an irresistible aroma that had everyone hovering near the oven, impatiently waiting for the timer to ding. This isn’t just any pizza—it’s a flavor explosion that balances creamy, savory, and herbaceous notes in every bite. Whether you’re hosting friends or enjoying a cozy night in, this homemade pizza will quickly become your new favorite.

    Recipe

    Why You’ll Love This Garlic-Ranch Chicken Pizza

    A Flavor Combination That Wows

    The magic of this Garlic-Ranch Chicken Pizza lies in its perfect balance of flavors. The tangy ranch base replaces traditional tomato sauce, creating a creamy foundation that pairs beautifully with roasted garlic. I still remember my daughter’s face lighting up with her first bite, declaring it “the best pizza ever!” The chicken adds hearty protein while fresh herbs bring brightness. What makes this truly special is how the cheese gets golden and bubbly while the crust develops that perfect crisp-yet-chewy texture. It’s comfort food elevated to something truly crave-worthy.

    Quick & Easy for Busy Weeknights

    Despite its impressive flavor profile, this Garlic-Ranch Chicken Pizza comes together surprisingly fast. You can use pre-cooked rotisserie chicken and store-bought dough to slash prep time on hectic evenings. I’ve made this on countless Wednesday nights when energy was low but dinner expectations were high! The assembly takes just minutes—spread the ranch, sprinkle the toppings, and pop it in the oven. While it bakes, you’ll have time to toss a simple salad or set the table. It’s the perfect solution for those nights when you want something delicious without spending hours in the kitchen.

    Essential Tips & Tricks

    Perfecting Your Pizza Dough

    The foundation of any great Garlic-Ranch Chicken Pizza starts with the dough. For the best texture, let store-bought dough come to room temperature for at least 30 minutes before stretching. This prevents that frustrating snap-back that happens with cold dough! I learned this trick after one disastrous attempt where my dough kept shrinking. For homemade dough, a slow rise in the refrigerator develops deeper flavor. Don’t rush the pre-bake step—giving your crust a 5-minute head start in the oven ensures it won’t become soggy under those delicious toppings. Your patience will be rewarded with perfectly crisp edges.

    Layering Technique for Maximum Flavor

    The secret to an exceptional Garlic-Ranch Chicken Pizza is all in how you build those layers. Start with a thin layer of ranch dressing (homemade takes it to another level!) followed by a sprinkle of minced garlic. Add half your cheese before the chicken—this creates a protective barrier that prevents the crust from getting soggy. I discovered this method after serving one too many floppy-centered pizzas! Reserve some fresh herbs to add after baking for a burst of color and flavor. For an extra flavor boost, try drizzling hot honey over the finished pizza just before serving.

    Serving Ideas & Creative Variations

    Perfect Pairings for Your Pizza Night

    Elevate your Garlic-Ranch Chicken Pizza experience with thoughtfully chosen sides. A crisp Caesar salad with homemade dressing creates a restaurant-worthy meal at home. On summer evenings, I love serving this pizza alongside grilled vegetables tossed in balsamic glaze—the slight sweetness complements the savory pizza perfectly! For casual gatherings, pair with garlic knots or breadsticks for dipping. If you’re hosting a pizza night, consider setting up a dessert station with brownies for after. Don’t forget a light beverage like sparkling water with lemon or a crisp white wine to cut through the richness.

    Exciting Twists on the Classic Recipe

    While the classic Garlic-Ranch Chicken Pizza is delicious, don’t be afraid to experiment! Swap traditional mozzarella for smoked gouda for a deeper flavor profile—this was an accidental discovery when I ran out of mozzarella one night! Add crispy bacon bits or substitute grilled chicken with buffalo chicken for heat lovers. Vegetarian guests? Replace chicken with roasted cauliflower or broccoli tossed in the same seasonings. For a fresh summer version, finish with arugula and a squeeze of lemon after baking. My family’s current favorite variation includes caramelized onions and a drizzle of balsamic glaze—it’s sophisticated enough for company but easy enough for weeknights.

    Storage & Troubleshooting Guide

    Keeping Leftovers Fresh

    Store leftover Garlic-Ranch Chicken Pizza properly to maintain its delicious flavor and texture. For maximum freshness, let pizza cool completely before refrigerating to prevent condensation from making the crust soggy. I place slices in a single layer in an airtight container with parchment paper between layers. Refrigerate for up to 3 days—though honestly, leftovers rarely last that long in my house! To reheat, avoid the microwave which leaves the crust chewy. Instead, use a skillet on medium-low heat with a lid for 3-4 minutes, or an air fryer at 350°F for 3 minutes to restore that perfect crispy-yet-tender texture.

    Solving Common Pizza Problems

    Even experienced home cooks encounter pizza challenges! If your Garlic-Ranch Chicken Pizza crust turns out soggy in the middle, try pre-baking the crust longer before adding toppings. I learned this after serving an undercooked pizza that left everyone disappointed. Too much ranch dressing can also create moisture issues—use a light hand when spreading it. If your cheese isn’t browning properly, switch to the broiler for the final minute of cooking (but watch carefully!). For a crust that’s burning before the toppings are done, lower your oven rack and reduce temperature by 25°F. Remember that every oven is different, so note what works best with yours.

    Frequently Asked Questions

    Can I make Garlic-Ranch Chicken Pizza ahead of time?

    Yes! Prepare components separately (pre-bake crust, cook chicken, mix garlic-ranch sauce) up to 2 days ahead. Assemble and bake just before serving for the freshest result. This makes entertaining much easier!

    What’s the best cheese for this pizza?

    A combination of mozzarella for meltability and sharp cheddar for flavor works beautifully. For extra richness, add a sprinkle of Parmesan or Asiago on top during the last few minutes of baking.

    Can I freeze leftover pizza?

    Absolutely! Wrap individual slices tightly in plastic wrap, then foil. Freeze for up to 2 months. Reheat from frozen in a 375°F oven for 12-15 minutes until hot and crispy.

    Is there a good vegetarian alternative to chicken?

    Roasted chickpeas seasoned with garlic powder and Italian herbs make an excellent protein substitute. Sautéed mushrooms also provide a meaty texture that pairs wonderfully with the garlic-ranch flavors.

    How do I prevent my Garlic-Ranch Chicken Pizza from getting soggy?

    Pre-bake your crust for 5-7 minutes before adding toppings. Also, drain any excess moisture from your chicken and vegetables before placing them on the pizza to ensure a perfectly crispy result.

    Final Thoughts

    This Garlic-Ranch Chicken Pizza has transformed our family’s pizza nights from ordinary to extraordinary. The combination of creamy ranch, aromatic garlic, tender chicken, and melty cheese creates something truly special that friends and family will request again and again. I love how versatile this recipe is—perfect for everything from casual weeknights to entertaining guests. Whether you follow the recipe exactly or make it your own with creative variations, I’m confident this will become a beloved addition to your recipe collection. For more delicious inspiration, check out my Pinterest page where I share new pizza ideas regularly!

  • Sweet Chili Pineapple Shrimp That’ll Ignite Your Taste Buds!

    Sweet Chili Pineapple Shrimp That’ll Ignite Your Taste Buds!

    Sweet Chili Pineapple Shrimp That’ll Ignite Your Taste Buds!

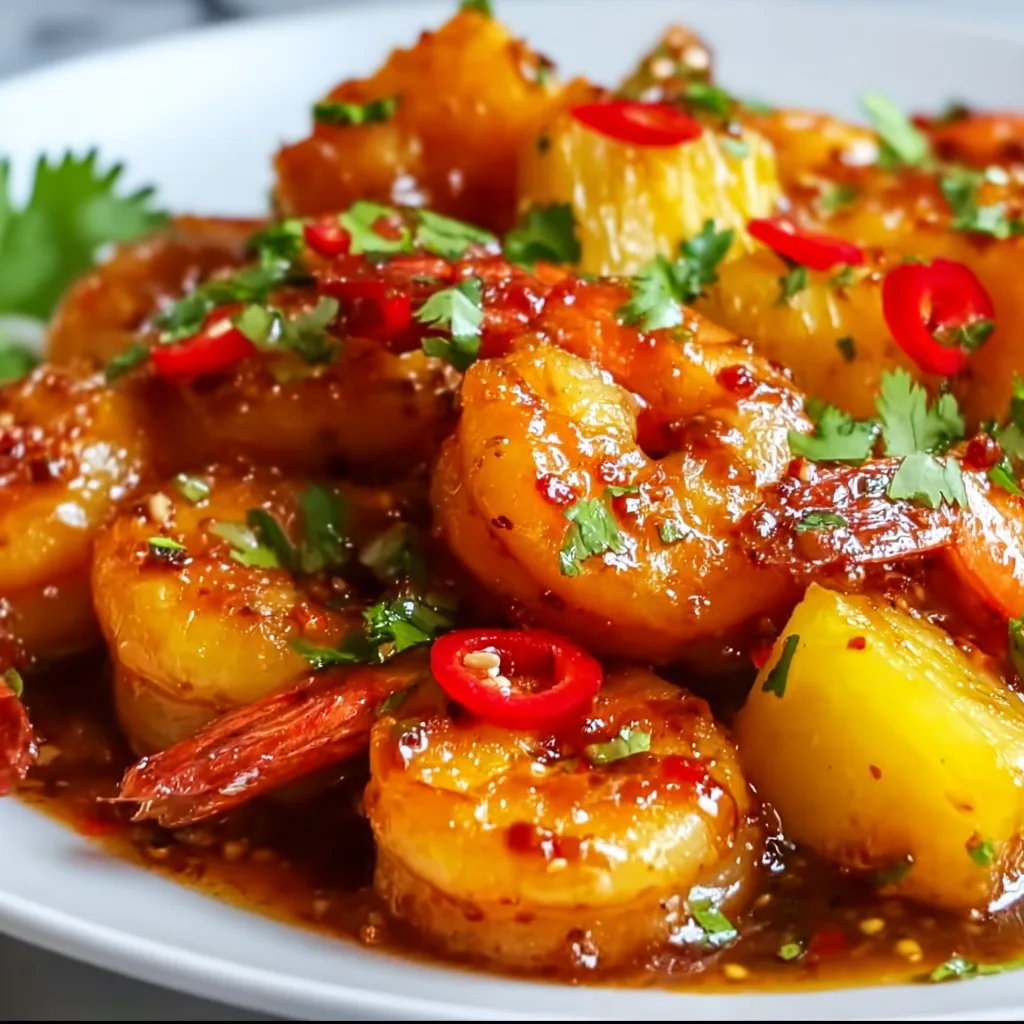
    Sweet Chili Pineapple Shrimp is my absolute go-to when I want to impress dinner guests without spending hours in the kitchen. The perfect balance of sweet, tangy pineapple and spicy chili sauce creates a flavor explosion that transforms ordinary shrimp into something extraordinary. I discovered this recipe during a beach vacation when a local chef shared his secret for the most addictive appetizer I’d ever tasted. The juicy pineapple chunks caramelize slightly while cooking, creating little pockets of tropical sweetness that complement the succulent shrimp perfectly. Trust me, this dish will transport you straight to paradise with every bite!

    Recipe

    Why You’ll Love This Sweet Chili Pineapple Shrimp

    Quick Yet Impressive

    This Sweet Chili Pineapple Shrimp comes together in just 20 minutes, making it perfect for both weeknight dinners and spontaneous gatherings. The vibrant colors alone make it Instagram-worthy without any fancy plating techniques. I love how the glossy sauce clings to each plump shrimp, creating that restaurant-quality appearance with minimal effort. Last month when my in-laws dropped by unexpectedly, I whipped this up and they thought I’d been cooking all day! The combination of convenience and visual appeal makes this recipe a true keeper in my busy household.

    Perfect Flavor Balance

    The magic of this Sweet Chili Pineapple Shrimp lies in its harmonious blend of contrasting flavors. The sweet pineapple juice caramelizes slightly during cooking, creating a natural sweetness that balances perfectly with the spicy kick from the chili sauce. There’s also a subtle tanginess that keeps your taste buds engaged with every bite. I’m particularly fond of how the garlic and ginger create a fragrant base that elevates the entire dish. When my daughter (who typically avoids anything with “spicy” in the name) requested seconds, I knew this recipe had achieved the perfect flavor equilibrium.

    Essential Tips & Tricks

    Selecting the Best Ingredients

    Starting with high-quality shrimp makes all the difference in this Sweet Chili Pineapple Shrimp recipe. Look for plump, firm shrimp with a mild ocean scent – nothing fishy! I prefer 16-20 count shrimp for the perfect bite-size experience. For the pineapple, fresh is ideal, but high-quality canned chunks in natural juice (not syrup) work wonderfully in a pinch. The sweet chili sauce is the star ingredient – I recommend Mae Ploy or similar authentic brands rather than generic versions. When I use fresh ginger instead of powdered, the aromatic difference is remarkable, adding that special “what’s in this?” quality guests always notice.

    Perfecting the Cooking Technique

    The secret to perfectly cooked shrimp is paying close attention to their color transformation. They should turn from translucent gray to opaque pink in just 2-3 minutes per side. Overcooking leads to rubbery disappointment! I learned this lesson the hard way during a dinner party last year. For the ideal caramelization, use a cast-iron skillet if possible – the even heat distribution creates beautiful golden edges on both the shrimp and pineapple chunks. Let the sauce reduce just until it coats the back of a spoon for that perfect sticky-but-not-too-thick consistency.

    Serving Ideas & Creative Variations

    Beautiful Presentation Options

    Elevate your Sweet Chili Pineapple Shrimp by serving it in a hollowed pineapple boat for maximum tropical vibes. This presentation trick never fails to impress at my summer gatherings! Garnish with thinly sliced green onions, sesame seeds, and fresh cilantro for pops of color and texture. For a more elegant dinner party approach, serve individual portions in martini glasses with a lime wedge perched on the rim. When I’m hosting a casual get-together, I serve this dish with decorative toothpicks alongside other finger foods for easy mingling. The vibrant colors make this dish a natural centerpiece.

    Exciting Recipe Adaptations

    Transform this Sweet Chili Pineapple Shrimp into various meals by making simple adjustments. For a heartier dinner, serve over coconut rice or noodles to soak up the delicious sauce. My family loves when I add bell peppers, snap peas, and water chestnuts for extra crunch and nutrition. For a spicier version, add a diced jalapeño or red pepper flakes during cooking. You can even substitute chicken for shrimp if you’re serving guests with shellfish allergies. My favorite weekend variation includes adding a splash of rum to the sauce (which cooks off) for an elevated tropical flavor that makes dinner feel like a special occasion.

    Storage & Troubleshooting Guide

    Proper Storage Methods

    Store leftover Sweet Chili Pineapple Shrimp in an airtight container in the refrigerator for up to two days. The flavors actually develop nicely overnight, making this a great make-ahead option for busy weekends. I recommend reheating gently in a skillet rather than microwaving to preserve the shrimp’s texture. If you want to prep components ahead of time, marinate the raw shrimp in a separate container from the chopped pineapple and sauce ingredients. This preparation strategy has saved me countless minutes during hectic weeknight dinners. For food safety, always cool the dish completely before refrigerating to prevent bacterial growth.

    Fixing Common Issues

    If your Sweet Chili Pineapple Shrimp sauce is too thin, create a quick slurry with 1 teaspoon cornstarch and 1 tablespoon cold water. Add this thickening agent gradually while the sauce simmers until you reach your desired consistency. For sauce that’s too thick, simply add a splash of pineapple juice or chicken broth. If you accidentally oversalted the dish, add a squeeze of fresh lime juice to balance the flavors. When I once found my sauce too sweet, a tablespoon of rice vinegar perfectly counteracted the sweetness. Remember that shrimp cook extremely quickly – if they start to curl tightly, they’re likely overcooked.

    Frequently Asked Questions

    Can I make Sweet Chili Pineapple Shrimp ahead of time?

    Yes! Prepare the sauce and cut pineapple up to 24 hours ahead. Cook the shrimp just before serving for best texture. The dish reheats well but fresh-cooked shrimp have superior texture.

    What can I substitute for sweet chili sauce?

    Mix 3 tablespoons honey, 2 tablespoons rice vinegar, 1 teaspoon sriracha, and ½ teaspoon garlic powder. Adjust heat level to taste. This homemade version works beautifully in a pinch!

    Is this recipe gluten-free?

    Most sweet chili sauces contain wheat-based soy sauce. Use tamari instead of soy sauce and verify your sweet chili sauce is certified gluten-free for a safe gluten-free version.

    How spicy is Sweet Chili Pineapple Shrimp?

    It’s moderately spicy with a sweet balance. Adjust heat by using more or less sweet chili sauce. For kid-friendly versions, reduce chili and add extra pineapple juice.

    Can I use frozen shrimp?

    Absolutely! Thaw completely and pat dry before cooking to prevent excess moisture. Pre-cooked frozen shrimp work too—just add them at the very end to warm through without overcooking.

    Final Thoughts

    Sweet Chili Pineapple Shrimp has become my signature dish for good reason—it delivers maximum flavor with minimum effort. The bright colors, bold flavors, and versatility make it perfect for everything from quick family dinners to impressive entertaining. I love watching people’s eyes light up with that first bite as the sweet, tangy, and spicy notes dance across their palate. Whether you serve it as an appetizer, main course, or party snack, this recipe proves that sometimes the simplest combinations create the most memorable meals. Find more tropical-inspired recipes on Pinterest!

  • Mediterranean Steak Bowl Recipe: Bold Flavors You’ll Crave!

    Mediterranean Steak Bowl Recipe: Bold Flavors You’ll Crave!

    Mediterranean Steak Bowl Recipe: Bold Flavors You’ll Crave!

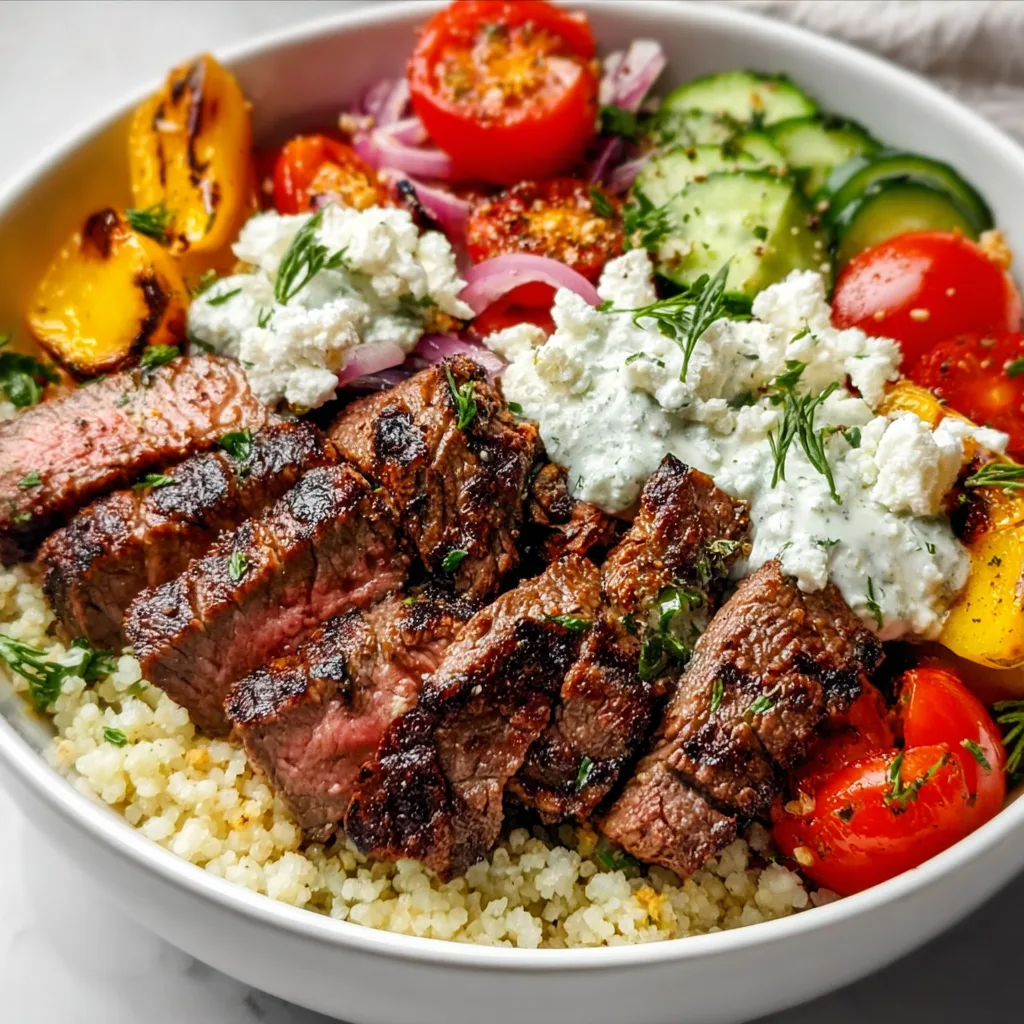
    This Mediterranean Steak Bowl Recipe transforms your kitchen into a coastal paradise with just a few simple ingredients. The sizzle of perfectly seasoned steak meeting a hot pan instantly transports me to sun-drenched shores, even on the dreariest days. I first created this bowl after returning from a trip to Greece, desperately trying to capture those vibrant flavors that lingered in my memory. The combination of juicy steak strips, tangy tzatziki, and colorful vegetables creates a balanced meal that’s both satisfying and nutritious. Trust me, this recipe will quickly become your go-to when you’re craving something special without hours of preparation.

    Recipe

    Why You’ll Love This Mediterranean Steak Bowl Recipe

    Perfect Balance of Flavors and Textures

    The magic of this Mediterranean Steak Bowl Recipe lies in its harmonious blend of contrasting elements. The charred steak with its smoky exterior and tender interior creates the perfect foundation. I love how the cooling tzatziki sauce provides a refreshing counterpoint to the warm meat, while the crisp vegetables add a satisfying crunch. The first time I served this to friends, they couldn’t believe how the simple combination of lemon, garlic, and herbs transformed ordinary ingredients into something extraordinary. Each bite offers a different sensation – from the creaminess of feta to the pop of juicy tomatoes.

    Quick and Nutritionally Complete

    What initially drew me to this Mediterranean Steak Bowl Recipe was how it delivers a complete meal in under 30 minutes. The lean protein from the steak pairs beautifully with fiber-rich vegetables and complex carbohydrates from the grain base. I’ve made this on countless busy weeknights when I wanted something nutritious but lacked the energy for elaborate cooking. The healthy fats from olive oil and avocado leave you satisfied without feeling heavy. My favorite part? You can prep most components ahead, making assembly lightning-fast when hunger strikes. It’s truly the perfect balance of convenience and nutrition.

    Essential Tips & Tricks

    Mastering the Steak

    The heart of any Mediterranean Steak Bowl Recipe is, of course, the steak itself. For maximum tenderness, start with room-temperature meat and pat it thoroughly dry before seasoning. I learned the hard way that cold, damp steak never achieves that beautiful sear we’re after. Let your pan get screaming hot before adding the meat, then resist the urge to move it around – that’s how you get those gorgeous caramelized edges. For medium-rare perfection, I cook about 3-4 minutes per side, then let it rest for at least 5 minutes before slicing against the grain. This resting period is non-negotiable if you want those juices redistributed!

    Building the Perfect Bowl

    The assembly order of your Mediterranean Steak Bowl Recipe makes a surprising difference in the final experience. Start with a base of warm grains like bulgur, quinoa, or couscous – they absorb the flavorful juices beautifully. Then create distinct sections for each component rather than mixing everything together. This preserves the integrity of delicate ingredients and allows for customized bites. I always place my tzatziki in a separate container if meal prepping to prevent sogginess. For the ultimate presentation, add a final drizzle of high-quality olive oil and a sprinkle of fresh herbs just before serving to wake up all those Mediterranean flavors.

    Serving Ideas & Creative Variations

    Family-Style Mediterranean Feast

    Transform this Mediterranean Steak Bowl Recipe into an interactive dining experience by serving it family-style. I arrange all components in separate colorful bowls down the center of my table, allowing everyone to build their own perfect creation. This approach has saved many dinners with picky eaters! Include some unexpected additions like marinated olives, roasted red peppers, or pickled onions to elevate the spread. For special occasions, I’ll add warm pita bread on the side for scooping up extra tzatziki. The communal nature of sharing creates a convivial atmosphere that perfectly captures the Mediterranean spirit of gathering around food.

    Seasonal and Dietary Adaptations

    One reason I return to this Mediterranean Steak Bowl Recipe throughout the year is its incredible adaptability. In summer, I incorporate garden-fresh tomatoes and cucumbers, while autumn calls for roasted sweet potatoes or butternut squash. For vegetarian guests, I simply swap the steak for grilled halloumi or hearty mushrooms marinated in the same spices. My sister follows a keto diet and enjoys this with cauliflower rice instead of grains. For a lighter lunch version, I often use the components to fill lettuce cups rather than creating a full bowl. The Mediterranean flavor profile works beautifully across these variations while maintaining its essential character.

    Storage & Troubleshooting Guide

    Meal Prep and Storage Solutions

    The Mediterranean Steak Bowl Recipe makes an ideal meal prep option with a few strategic adjustments. I recommend storing the components separately in glass containers for up to three days. Keep the tzatziki and any fresh herbs in their own containers on top to add just before eating. The steak reheats surprisingly well at 50% power in the microwave with a damp paper towel over it to retain moisture. For the freshest experience, consider prepping the marinade and chopping vegetables ahead, but cooking the steak the day you plan to eat. This approach gives you the convenience of meal prep with the quality of freshly cooked protein.

    Solving Common Challenges

    Even experienced cooks encounter issues with Mediterranean Steak Bowl Recipe execution. If your steak turns out tough, you’ve likely either overcooked it or failed to slice against the grain. For tender results, invest in an instant-read thermometer and aim for 130-135°F for medium-rare. Soggy vegetables can ruin the textural contrast – solve this by keeping watery ingredients like tomatoes and cucumbers separate until serving time. If your tzatziki sauce becomes too thin, strain your yogurt through cheesecloth before mixing in other ingredients. And for those times when the flavors seem flat, a squeeze of fresh lemon and an extra pinch of salt just before serving works wonders to brighten everything up.

    Frequently Asked Questions

    What cut of beef works best for Mediterranean Steak Bowl Recipe?

    Ribeye or sirloin steak offer the best balance of flavor and tenderness. For a budget-friendly option, flank steak works well if marinated for at least 30 minutes and sliced thinly against the grain.

    Can I make this recipe vegetarian?

    Absolutely! Substitute the steak with grilled halloumi cheese, portobello mushrooms, or even roasted chickpeas seasoned with the same Mediterranean spices for a satisfying plant-based alternative.

    How do I make authentic tzatziki sauce?

    Combine Greek yogurt with grated cucumber (squeezed dry), minced garlic, dill, olive oil, and lemon juice. Let it rest for at least 30 minutes before serving to allow flavors to meld together.

    What grains work best as the base?

    Bulgur wheat, quinoa, farro, or couscous all make excellent bases. For a lower-carb option, cauliflower rice or a bed of mixed greens works beautifully.

    Can I prepare components of this bowl ahead of time?

    Yes! Marinate and cook the steak, prepare the tzatziki, and chop vegetables up to 2-3 days in advance. Store separately and assemble just before serving for the freshest experience.

    Final Thoughts

    This Mediterranean Steak Bowl Recipe has become my culinary lifeline on days when I crave something special without the fuss. The vibrant colors, bold flavors, and nourishing ingredients never fail to uplift my mood and satisfy my hunger. I find myself returning to it season after season, tweaking components based on what’s fresh and available. There’s something deeply comforting about this perfect balance of protein, vegetables, and grains coming together in one beautiful bowl. I hope it brings the same joy to your table as it consistently does to mine! Find more inspiring bowl recipes on Pinterest.

  • Loaded BBQ Chicken Sweet Fries | Irresistibly Delicious & Viral!

    Loaded BBQ Chicken Sweet Fries | Irresistibly Delicious & Viral!

    Loaded BBQ Chicken Sweet Fries | Irresistibly Delicious & Viral!

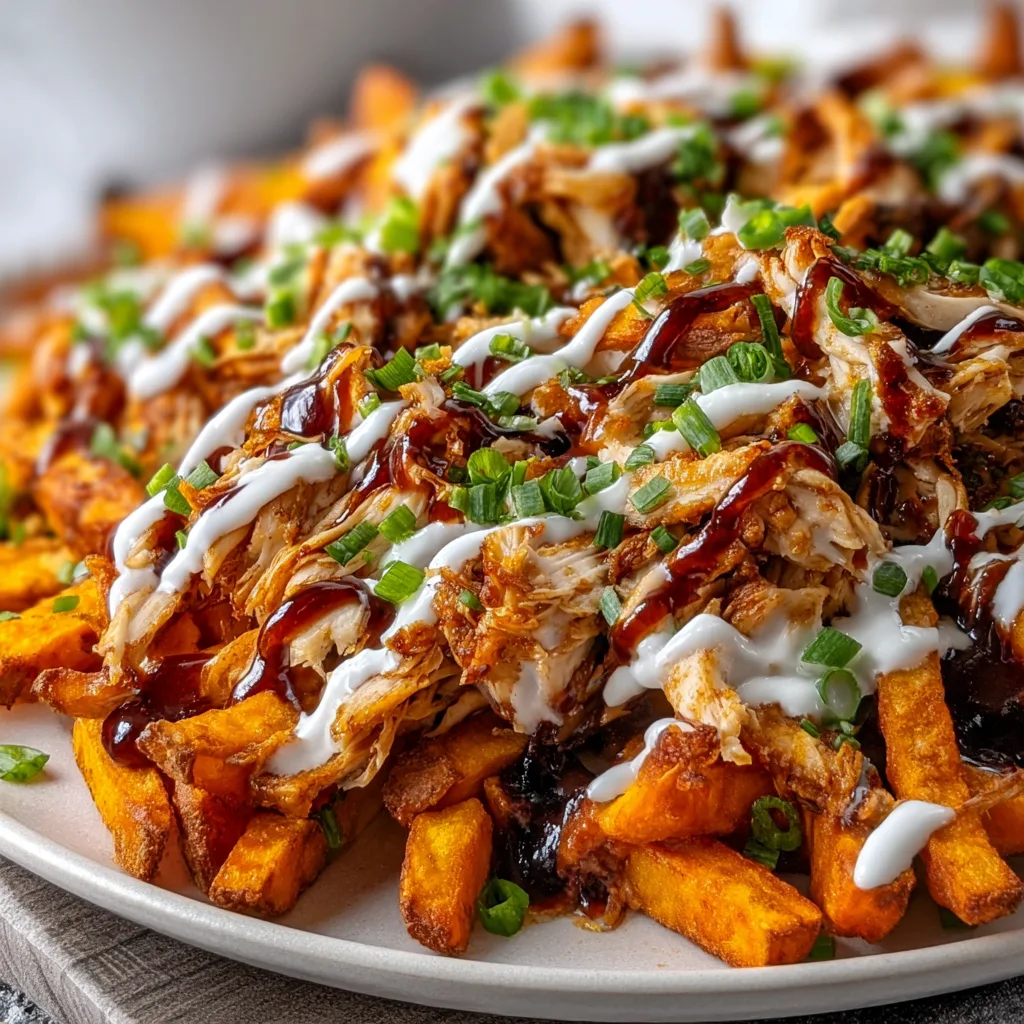
    Loaded BBQ Chicken Sweet Fries are my absolute comfort food obsession that combines crispy sweet potato fries with juicy BBQ chicken and all the fixings. The first time I made these for my family game night, there was a moment of pure silence followed by a chorus of “WOW!” as everyone dove in for seconds. The contrast between the sweet potatoes, tangy BBQ sauce, and melty cheese creates a flavor explosion that’s impossible to resist. Perfect for casual gatherings or a cozy night in, these loaded fries are like honey BBQ chicken mac and cheese reimagined in a crispy, handheld form.

    Recipe

    Why You’ll Love This Loaded BBQ Chicken Sweet Fries

    A Perfect Balance of Flavors and Textures

    The magic of Loaded BBQ Chicken Sweet Fries lies in the harmonious contrast between ingredients. The natural sweetness of the roasted sweet potatoes creates a beautiful foundation for the savory, slightly tangy BBQ chicken. When topped with sharp cheddar cheese that melts into all the nooks and crannies, you get this incredible texture play with each bite. I love how the crispy edges of the sweet potatoes maintain their structure even under all those toppings. It’s like a flavor treasure hunt where every forkful offers something slightly different – a bit of green onion here, a touch of sour cream there.

    Quick Prep for Maximum Impact

    What I adore most about these Loaded BBQ Chicken Sweet Fries is how they deliver restaurant-quality results with minimal effort. You can use leftover chicken or rotisserie chicken to cut prep time in half, making this perfect for busy weeknights. The visual wow factor is off the charts – that moment when you pull the tray from the oven with the cheese bubbling and golden always makes me feel like a culinary genius. My teenagers request these constantly, and I love watching their friends’ eyes widen when I set down a platter of these loaded fries during their hangouts.

    Essential Tips & Tricks

    Perfect Sweet Potato Preparation

    The foundation of amazing Loaded BBQ Chicken Sweet Fries is properly cooked sweet potatoes. For ultimate crispiness, cut your sweet potatoes into evenly sized fries (about ¼-inch thick) and don’t overcrowd the baking sheet – use two if necessary! Toss them with cornstarch before oil and seasoning to create that crispy exterior. I learned this trick after several soggy attempts, and it’s been a game-changer. Roasting at 425°F gives that perfect caramelization without burning. Remember to flip halfway through cooking for even browning and that delicious contrast between crispy outside and tender inside.

    Layering for Success

    The secret to next-level Loaded BBQ Chicken Sweet Fries is all in the strategic layering. Start with a layer of crispy sweet potato fries, then add half your cheese before adding the BBQ chicken – this creates a “cheese glue” that helps everything stick together. Add the remaining cheese on top of the chicken and return to the oven just until melted. I once made the mistake of adding all toppings before melting the cheese and ended up with a soggy mess! Save your cold toppings (sour cream, green onions, cilantro) for after baking to maintain textural contrast and fresh flavor pops.

    Serving Ideas & Creative Variations

    Family-Style Presentations

    Serving Loaded BBQ Chicken Sweet Fries family-style creates an instant party atmosphere. I love presenting them on a large wooden board with small bowls of extra toppings around the edges so everyone can customize their portion. For game days, try individual servings in paper food boats for that stadium feel without the mess. My favorite weekend brunch twist is topping them with a fried egg – that runny yolk creates a decadent sauce that elevates everything it touches. The casual, shareable nature of this dish makes it perfect for bringing people together without the formality of a plated meal.

    Exciting Flavor Twists

    While the classic Loaded BBQ Chicken Sweet Fries are incredible, don’t be afraid to experiment with different flavor profiles. Try a southwestern version with black beans, corn, and avocado for a Mexican-inspired fiesta. For heat lovers, add diced jalapeños and drizzle with spicy mayo before serving. My daughter’s favorite variation uses pulled pork instead of chicken with a Carolina-style vinegar sauce that cuts through the sweetness of the potatoes beautifully. For a Mediterranean twist, try using Greek yogurt instead of sour cream and sprinkle with feta and olives after baking.

    Storage & Troubleshooting Guide

    Proper Storage for Leftovers

    Loaded BBQ Chicken Sweet Fries are best enjoyed fresh, but proper storage can help maintain their texture and flavor if you have leftovers. Store the components separately when possible – keep the baked sweet potato fries in an airtight container, and store the BBQ chicken and cold toppings separately. This prevents everything from becoming a soggy mess. When reheating, use an air fryer or oven at 350°F for about 5-7 minutes to restore crispiness. I’ve found that microwaving is the enemy of crispy fries, so avoid this method if possible! Properly stored, components will last 2-3 days in the refrigerator.

    Troubleshooting Common Issues

    The most common challenge with Loaded BBQ Chicken Sweet Fries is maintaining the perfect texture balance. If your sweet potato fries turn out soggy, they were likely overcrowded on the baking sheet or the oven temperature wasn’t high enough. For next time, use multiple baking sheets and check that your oven is properly calibrated. If your BBQ sauce is burning before the fries are done, try adding it to the chicken in the last 5-10 minutes of cooking instead. I once had a disaster when my cheese wouldn’t melt properly – the solution was to let the fries cool slightly before adding cheese, as extremely hot fries can cause cheese to separate.

    Frequently Asked Questions

    Can I make Loaded BBQ Chicken Sweet Fries ahead of time?

    Prepare components separately up to 24 hours ahead. Roast sweet potatoes and prepare BBQ chicken, then store refrigerated. Reheat fries until crispy, add chicken and cheese, then broil briefly before adding cold toppings.

    How do I ensure my sweet potato fries get crispy?

    Cut fries uniformly, toss with cornstarch before oil, arrange in a single layer without overcrowding, and bake at high heat (425°F). Flip halfway through baking for even crispiness.

    What’s the best BBQ sauce for Loaded BBQ Chicken Sweet Fries?

    Use a sauce with balanced sweetness and tanginess. I prefer hickory or honey BBQ for sweet potatoes. Homemade sauce gives the best flavor, but quality store-bought works great too.

    Can I make this recipe vegetarian?

    Absolutely! Replace chicken with black beans, chickpeas, or plant-based chicken alternatives. Use the same BBQ sauce coating technique and keep all other toppings the same.

    What sides pair well with Loaded BBQ Chicken Sweet Fries?

    A simple green salad with vinaigrette balances the richness. For heartier appetites, add corn on the cob or coleslaw. A cold pickle spear provides refreshing contrast.

    Final Thoughts

    These Loaded BBQ Chicken Sweet Fries have become my go-to recipe when I want to impress without spending hours in the kitchen. There’s something magical about the combination of sweet potatoes, tangy BBQ chicken, and all those colorful toppings that just makes people happy. I’ve watched this dish bring together picky eaters and food enthusiasts alike around my table. Whether you’re feeding a crowd or treating yourself to something special, these loaded fries deliver maximum satisfaction with minimal effort. Find more inspiration for your next gathering on Pinterest.

  • Cream Cheese Cinnamon Swirl Banana Bread That Melts in Your Mouth!

    Cream Cheese Cinnamon Swirl Banana Bread That Melts in Your Mouth!

    Cream Cheese Cinnamon Swirl Banana Bread That Melts in Your Mouth!

    There’s something magical about the aroma of Cream Cheese Cinnamon Swirl Banana Bread baking in the oven. It transforms my kitchen into a cozy haven, especially on those chilly Sunday mornings when the world feels a bit too hectic. I’ve spent years perfecting this recipe, balancing the sweetness of overripe bananas with tangy cream cheese and warming cinnamon swirls. The first time I served this to my family, my nephew declared it “the best thing ever baked” – and honestly, I couldn’t disagree! If you’re looking for that perfect balance of comfort and indulgence, this recipe delivers both with every slice.

    Recipe

    Why You’ll Love This Cream Cheese Cinnamon Swirl Banana Bread

    Perfect Balance of Flavors and Textures

    This isn’t your ordinary banana bread. The cream cheese layer creates pockets of tangy richness that perfectly counterbalance the sweet, moist banana bread base. Each bite offers a different experience – sometimes you’ll get the warmth of cinnamon, other times the creamy richness of cheese. I love how the top develops a slightly crisp edge while the inside stays impossibly tender. The cinnamon swirl creates beautiful ribbons throughout the loaf, making it as gorgeous to look at as it is delicious to eat. Your taste buds will dance between sweet, tangy, and warmly spiced notes.

    Simple Ingredients, Extraordinary Results

    What makes this recipe truly special is how everyday ingredients transform into something extraordinary. You likely have most of these items in your pantry already – ripe bananas (the spottier the better!), cream cheese, cinnamon, and basic baking staples. I remember making this during a snowstorm when grocery runs weren’t an option, and it still turned out magnificent. The magic happens in how these simple ingredients interact: the natural enzymes in overripe bananas create a deeper flavor, while the fat in cream cheese adds moisture that keeps the bread fresh for days. It’s kitchen alchemy at its finest!

    Essential Tips & Tricks

    Mastering the Perfect Swirl

    The secret to those gorgeous cinnamon ribbons lies in the technique. After preparing your batters, alternate dollops of banana mixture and cream cheese mixture in your loaf pan. Then, take a butter knife and gently swirl in a figure-eight pattern – but don’t overdo it! Three or four passes through the batter is plenty. I learned this the hard way after once creating a muddled mess by over-swirling. Remember to reserve some cinnamon-sugar mixture for sprinkling on top before baking. This creates a delightful crackly crust that adds wonderful texture contrast to the soft interior. Your patience during this step pays off beautifully.

    Banana Selection and Preparation

    For truly exceptional banana bread, banana ripeness is non-negotiable. Look for bananas with abundant brown spots or even mostly black peels – these contain more sugar and flavor compounds. If your bananas aren’t quite ready, try placing them in a paper bag with an apple to speed ripening. When mashing, leave some small chunks for texture variation. I prefer using a fork rather than a blender for more control over the consistency. The natural moisture in overripe bananas contributes to the bread’s tender crumb, so resist the urge to use underripe fruit, which will result in drier, less flavorful bread.

    Serving Ideas & Creative Variations

    Perfect Pairings for Any Occasion

    This versatile treat shines in so many settings. For breakfast, try warming a slice and adding a small pat of salted butter that melts into all the crevices. For dessert, top with a scoop of vanilla ice cream or a dollop of whipped cream. I love serving this at brunches alongside savory dishes like my Cream Cheese Avocado Bacon Bites for a perfect sweet-savory balance. For afternoon tea, cut into smaller squares and arrange on a tiered tray with fresh berries. The bread also makes a thoughtful homemade gift – wrap a loaf in parchment paper, tie with twine, and attach a handwritten note for a personal touch.

    Seasonal and Dietary Adaptations

    The beauty of this recipe is how easily it adapts to dietary needs and seasonal variations. For gluten-free guests, substitute a 1:1 gluten-free flour blend. Dairy-free? Try plant-based cream cheese alternatives that still provide that tangy richness. In fall, add a tablespoon of pumpkin pie spice to the batter for autumn warmth. Summer brings opportunities for adding fresh blueberries or strawberries to the batter. I’ve even created a tropical version with coconut flakes and a teaspoon of rum extract that transported me straight to vacation mode. The versatility makes this bread a year-round favorite that never gets boring.

    Storage & Troubleshooting Guide

    Keeping Your Bread Fresh

    The moisture retention in this bread is remarkable thanks to the cream cheese and bananas. Store at room temperature in an airtight container for up to 3 days, though I doubt it will last that long! For longer storage, wrap individual slices in plastic wrap, then place in a freezer bag for up to 3 months. When ready to enjoy, thaw at room temperature or microwave for 20-30 seconds. I like to slice the entire loaf before freezing for easy single servings. The cream cheese swirl actually helps the bread maintain its moisture even after freezing, making this an excellent make-ahead treat.

    Solving Common Baking Issues

    If your bread isn’t rising properly, check if your baking powder is fresh – it loses potency after about 6 months. For sinking middles, your oven temperature may be too high initially; consider getting an oven thermometer to verify accuracy. If the top browns too quickly before the center is done, loosely tent with foil halfway through baking. Underbaking results in a gummy texture, while overbaking creates dryness. The perfect doneness test: a toothpick inserted in the center should come out with a few moist crumbs, but no wet batter. Remember that the bread continues cooking slightly as it cools in the pan.

    Frequently Asked Questions

    Can I make Cream Cheese Cinnamon Swirl Banana Bread without eggs?

    Yes! Replace each egg with either ¼ cup applesauce or a flax egg (1 tablespoon ground flaxseed mixed with 3 tablespoons water, left to gel for 15 minutes). The texture will be slightly denser but still delicious.

    How ripe should my bananas be?

    The riper, the better! Look for bananas with abundant brown spots or even completely black peels. These contain more sugar and banana flavor that makes the bread incredibly moist and flavorful.

    Can I use low-fat cream cheese?

    Full-fat cream cheese provides the best texture and flavor, but you can use low-fat in a pinch. Avoid fat-free varieties as they contain stabilizers that don’t bake well and can make your swirl watery.

    Why did my cream cheese sink to the bottom?

    This happens when the cream cheese mixture is too thin. Make sure your cream cheese is at room temperature but not overly soft, and don’t overmix it with other ingredients. Adding 1 tablespoon of flour to the cheese mixture can help.

    Can I make this recipe as muffins instead?

    Absolutely! Pour the batter into lined muffin tins and reduce baking time to 18-22 minutes. This makes portion control easier and creates perfect grab-and-go breakfast options.

    Final Thoughts

    This Cream Cheese Cinnamon Swirl Banana Bread has become my signature bake for good reason. It transforms simple ingredients into something truly special – a treat that bridges the gap between everyday snack and decadent dessert. The contrast between tangy cream cheese, sweet bananas, and warm cinnamon creates complexity that keeps everyone coming back for “just one more slice.” I’d love to see your creations on Pinterest – tag me when you make this recipe! Remember, the most important ingredient is the love you put into making it. Happy baking!

  • Creamy Spaghetti and Meatballs Recipe That Will Melt Your Heart!

    Creamy Spaghetti and Meatballs Recipe That Will Melt Your Heart!

    Creamy Spaghetti and Meatballs Recipe That Will Melt Your Heart!

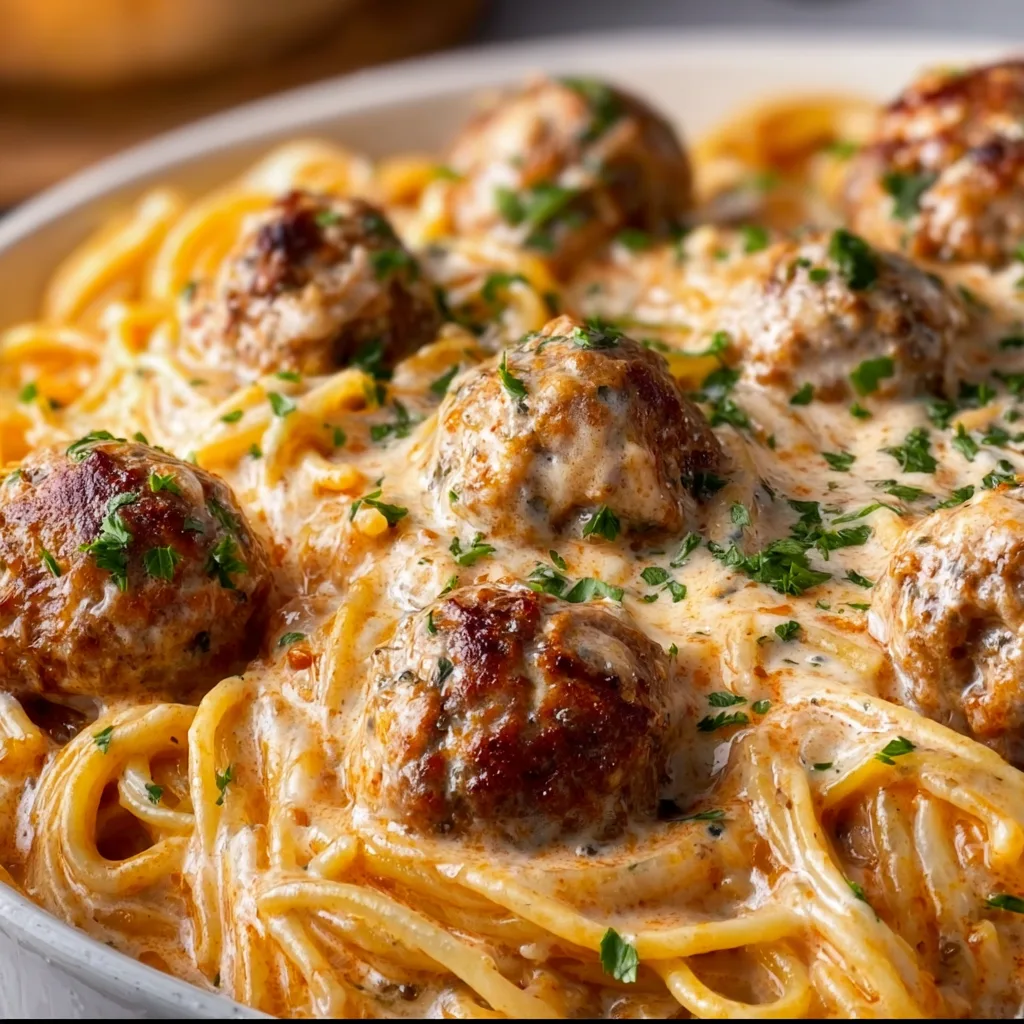
    Creamy Spaghetti and Meatballs has been my comfort food salvation on countless rainy evenings. There’s something almost magical about twirling those perfectly al dente noodles around your fork, each strand coated in velvety sauce that clings just right. The first time I made this recipe, my kitchen filled with an aroma so inviting that my neighbor actually texted to ask what I was cooking! This isn’t just dinner—it’s a warm hug in a bowl that transforms ordinary weeknights into something special. Trust me, this isn’t your basic spaghetti recipe; it’s an elevated classic that deserves a permanent spot in your recipe collection.

    Recipe

    Why You’ll Love This Creamy Spaghetti and Meatballs

    The Perfect Balance of Flavors and Textures

    The magic of this dish lies in its contrasting elements that somehow create perfect harmony. Tender, juicy meatballs with their slightly charred exteriors provide a satisfying bite against the silky sauce. I’ve added a touch of cream that transforms the traditional tomato base into something luxurious without feeling heavy. The sauce clings to each strand of pasta in the most beautiful way, creating that restaurant-quality experience at home. The gentle tang from the tomatoes balances the richness, while fresh herbs add brightness that lifts the entire dish. It’s comfort food that doesn’t sacrifice sophistication.

    A Crowd-Pleasing One-Pot Wonder

    I’ve streamlined this recipe to be as stress-free as possible without sacrificing flavor. The meatballs and sauce come together in one pot, meaning fewer dishes and more time to enjoy your evening. I’ve watched this dish work its magic at everything from casual family dinners to dinner parties where guests practically licked their plates clean. The recipe scales beautifully for crowds, and the leftovers? Even better the next day as the flavors continue to develop. When life gets chaotic, having this reliable, universally loved recipe in your back pocket is absolutely priceless.

    Essential Tips & Tricks

    Mastering the Meatballs

    The secret to incredibly tender meatballs is handling the meat mixture with a light touch. Overmixing leads to tough, dense results, so mix just until ingredients are combined. I learned this the hard way after serving what felt like meat marbles to dinner guests years ago! For maximum flavor, use a blend of meats—I love equal parts beef and pork. Don’t skip the breadcrumb soak in milk (called a panade), which keeps everything moist. And here’s my non-negotiable: sear those meatballs before they hit the sauce to develop a flavor-packed crust that seals in all the juices.

    Creating the Creamiest Sauce

    The depth of flavor in this sauce comes from building layers. Start by sautéing onions until truly translucent—don’t rush this step! The fond (those browned bits) from searing the meatballs becomes the foundation of your sauce, so deglaze the pan with a splash of wine or broth to capture every bit of flavor. When adding cream, reduce your heat to prevent curdling and stir constantly. For a sauce that coats the pasta perfectly, similar to my Creamy Pesto Chicken, reserve some pasta water before draining—the starch helps the sauce cling to each strand beautifully.

    Serving Ideas & Creative Variations

    Perfect Pairings for a Complete Meal

    This creamy pasta deserves thoughtfully chosen sides that complement without competing. A simple arugula salad with lemon vinaigrette cuts through the richness perfectly. For bread, skip basic garlic bread and try focaccia or a crusty ciabatta to soak up every drop of that precious sauce. Wine-wise, a medium-bodied red like Sangiovese balances the creaminess without overpowering. For a complete Italian-inspired feast, start with a small antipasto platter—just a few quality ingredients like olives, cheese, and thinly sliced prosciutto. Keep dessert light with fresh berries or a small scoop of lemon sorbet.

    Exciting Twists on the Classic

    Don’t be afraid to make this recipe your own with creative flavor variations! For a spicy kick, add red pepper flakes or a spoonful of Calabrian chili paste to the sauce. Seafood lovers can swap the meatballs for seared scallops or shrimp for an elegant spin. Vegetarians aren’t left out—replace meatballs with roasted eggplant or mushroom balls that soak up the sauce beautifully, similar to my Mushroom and Spinach Lasagna. For a lighter summer version, finish with fresh cherry tomatoes and basil added just before serving. The versatility of this dish is what makes it a true kitchen staple.

    Storage & Troubleshooting Guide

    Keeping Leftovers at Their Best

    Properly stored leftovers can be almost better than fresh! Store sauce and pasta separately when possible—this prevents the pasta from absorbing all the sauce and becoming soggy. Refrigerate in airtight containers for up to 3 days. When reheating, add a splash of water or cream to loosen the sauce as it tends to thicken when chilled. For freezing, focus on the sauce and meatballs (pasta freezes poorly). Portion into freezer-safe containers, leaving room for expansion, and freeze for up to 3 months. Thaw overnight in the refrigerator for best results.

    Fixing Common Cooking Challenges

    Even experienced cooks encounter hiccups! If your sauce breaks or looks curdled, lower the heat immediately and whisk in a tablespoon of cold cream or pasta water until smooth. For meatballs that fall apart during cooking, the mixture might be too wet—add more breadcrumbs next time, or try chilling the formed meatballs for 30 minutes before cooking to help them set. Sauce too thin? Simmer uncovered a bit longer. Too thick? A splash of pasta water works wonders. Remember that adjusting seasoning is always easier than fixing texture, so taste frequently and adjust salt, pepper, or herbs as needed.

    Frequently Asked Questions

    Can I make Creamy Spaghetti and Meatballs ahead of time?

    Absolutely! Make the meatballs and sauce up to 2 days ahead, storing them separately in the refrigerator. Cook pasta fresh when ready to serve, and gently reheat the sauce, adding a splash of cream if needed.

    What pasta shapes work best with this creamy sauce?

    Long pasta like spaghetti, linguine, or fettuccine works beautifully. The sauce clings to each strand. For something different, try rigatoni or pappardelle—their shapes catch pockets of the delicious sauce.

    Can I use turkey instead of beef for the meatballs?

    Yes! Turkey meatballs work wonderfully but tend to be leaner. Add an extra tablespoon of olive oil to the mixture and be careful not to overcook them, as they can dry out more easily.

    How can I make this recipe dairy-free?

    Replace cream with full-fat coconut milk or cashew cream for richness. For the meatballs, use breadcrumbs soaked in dairy-free milk. The flavor profile changes slightly but remains delicious.

    What’s the secret to preventing my Creamy Spaghetti and Meatballs sauce from breaking?

    Add cream to the sauce off the heat or at a very low temperature. Never boil cream-based sauces. When reheating, do so gently on low heat, stirring frequently to maintain the smooth texture.

    Final Thoughts

    This Creamy Spaghetti and Meatballs recipe has become my reliable culinary hug—the dish I turn to when I need guaranteed smiles around my table. There’s a reason certain foods earn the title of “comfort”—they nourish not just our bodies but something deeper within us. The beauty of cooking lies in these moments of connection, whether you’re making this for a crowd or simply treating yourself to something special. I’d love to see your creations on Pinterest and hear how this creamy, dreamy pasta becomes part of your own kitchen story.