Author: Darleen Vance

  • Melt-in-Your-Mouth Beef Short Ribs: Irresistibly Tender & Juicy!

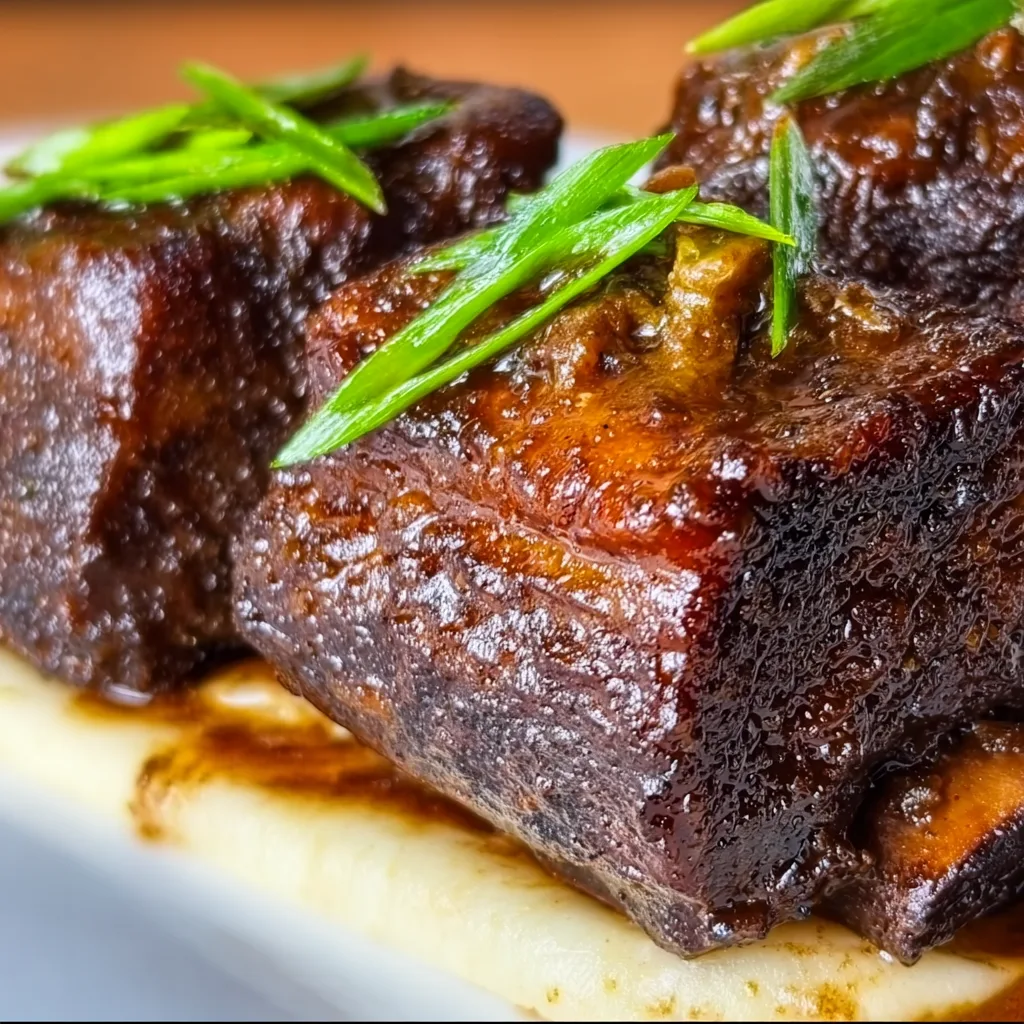
    Melt-in-Your-Mouth Beef Short Ribs: Irresistibly Tender & Juicy!

    Melt-in-Your-Mouth Beef Short Ribs: Irresistibly Tender & Juicy!

    Melt-in-Your-Mouth Beef Short Ribs have been my ultimate comfort food obsession ever since that snowy weekend when I first attempted them. The aroma that filled my kitchen—rich, savory, with herbs—created an atmosphere so cozy that my neighbor actually texted to ask what I was cooking! These succulent, fall-off-the-bone ribs transform an ordinary dinner into something extraordinary. The magic happens during the slow braising process, where tough meat surrenders into buttery tenderness that quite literally melts on your tongue. If you’re looking to impress at your next gathering or simply treat yourself to a restaurant-quality meal, this recipe delivers every time.

    Recipe

    Why You’ll Love This Melt-in-Your-Mouth Beef Short Ribs

    Perfect for Special Occasions & Everyday Indulgence

    There’s something undeniably impressive about presenting a platter of glossy, tender beef short ribs at the dinner table. They carry that special occasion energy while being surprisingly approachable to prepare. The deep, complex flavors develop almost effortlessly during the long, slow cook, making this dish perfect for both holiday gatherings and elevated Sunday dinners. I love that most of the work happens early, allowing me to mingle with guests instead of being trapped in the kitchen. Plus, the aroma that fills your home creates an atmosphere of warmth that no scented candle could ever match!

    The Science Behind That Melt-in-Your-Mouth Texture

    The magic of these short ribs lies in the transformation of collagen to gelatin during the cooking process. When you braise tough cuts low and slow, something remarkable happens—the connective tissues break down, creating that signature melt-in-your-mouth texture we crave. The marbling throughout the meat acts like little pockets of flavor that baste the meat from within. This is why short ribs deliver such a luxurious mouthfeel compared to leaner cuts. The rendered fat and gelatin create a silky sauce that clings to each bite, making these ribs an unmatched sensory experience that’s worth every minute of cooking time.

    Essential Tips & Tricks

    Selecting and Preparing Your Short Ribs

    Choosing the right ribs is your first step toward success. Look for English-cut short ribs with good marbling—those white streaks of fat promise flavor and tenderness. I prefer bone-in ribs as they contribute richness to the sauce and help the meat retain moisture. Before cooking, pat the meat completely dry and season generously with salt and pepper at least 40 minutes before browning. The deep caramelization you achieve during searing is crucial—it’s not just for color but creates the foundation of your flavor profile. Don’t rush this step! Work in batches to avoid overcrowding, which leads to steaming instead of that beautiful crust you’re after.

    Mastering the Braising Liquid

    Your braising liquid is where the magic happens—it’s essentially flavor-infused jacuzzi for your short ribs. I always include a dry red wine (something you’d actually drink) for depth and acidity to balance the richness. Adding aromatics like onions, carrots, and celery creates a flavor foundation, while fresh herbs like thyme and rosemary infuse the meat with earthy notes. Don’t forget umami boosters like tomato paste, soy sauce, or Worcestershire. The liquid should come about halfway up the sides of the meat—not completely submerged. This allows for both braising and roasting effects, creating that perfect sticky exterior while keeping the meat juicy and tender.

    Serving Ideas & Creative Variations

    Classic and Contemporary Accompaniments

    These short ribs deserve worthy companions on the plate. Traditional pairings include creamy polenta or mashed potatoes to soak up the luscious sauce—I’ve watched guests practically lick their plates clean! For a lighter option, try cauliflower puree or celery root mash. Add brightness with quick-pickled vegetables or a simple arugula salad dressed with lemon and olive oil to cut through the richness. Don’t forget crusty bread for sauce-mopping duties! For a complete meal experience, consider starting with a light appetizer like these Bang Bang Chicken Skewers to prime everyone’s appetite without filling them up before the main event.

    Global Flavor Inspirations

    While classic wine-braised short ribs are divine, exploring global flavor profiles keeps this dish exciting. Try Korean-inspired ribs with gochujang, pear, and soy for sweet-spicy perfection, served over rice with kimchi. For Italian flair, braise in tomatoes, red wine, and herbs, then serve over pappardelle pasta. Mexican-inspired short ribs with chipotle, orange, and cinnamon create a complex profile perfect for tacos with pickled onions and cilantro. For an Asian twist, incorporate star anise, ginger, and soy sauce, finishing with fresh herbs and lime. Each variation maintains that signature tenderness while offering a completely different taste experience.

    Storage & Troubleshooting Guide

    Storing, Freezing and Reheating

    Short ribs actually improve with time, making them perfect for meal prep. Store leftovers in an airtight container with plenty of sauce to prevent drying out—they’ll keep for 3-4 days in the refrigerator. For freezing, cool completely before transferring to freezer-safe containers, leaving some headspace for expansion. They’ll maintain quality for up to 3 months. When reheating, go low and slow to preserve tenderness. I prefer gently warming them in a covered dish in a 300°F oven with extra sauce added. Stovetop reheating works too—use low heat and stir occasionally. The collagen-rich sauce will likely solidify when chilled—this is normal and will melt beautifully when reheated.

    Troubleshooting Common Issues

    If your short ribs aren’t fork-tender, the most likely culprit is insufficient cooking time. Unlike other cuts, short ribs aren’t done at a specific temperature—they’re done when the collagen has fully broken down. If they’re still tough after your planned cooking time, simply continue braising for another 30-45 minutes and check again. For sauce that’s too thin, remove the meat once tender and reduce the liquid on the stovetop until it reaches your desired consistency. Conversely, if your sauce reduced too much, add beef stock or water to thin it. Remember that fat separation is normal—either skim it off or embrace it for extra richness.

    Frequently Asked Questions

    How long do I need to cook beef short ribs for that melt-in-your-mouth texture?

    For truly tender melt-in-your-mouth beef short ribs, plan for 2.5-3 hours of braising at 325°F. They’re done when a fork slides in with almost no resistance and the meat is practically falling off the bone.

    Can I make these short ribs in a slow cooker instead of the oven?

    Absolutely! Brown them first on the stovetop, then transfer to a slow cooker with your braising liquid. Cook on low for 7-8 hours or high for 4-5 hours until fork-tender.

    What’s the best wine to use for braising short ribs?

    Choose a dry, full-bodied red wine like Cabernet Sauvignon, Merlot, or Syrah. The wine should be good enough to drink—cooking concentrates flavors, so poor-quality wine means poor-quality sauce.

    Can I make these short ribs ahead of time for a dinner party?

    They’re perfect for make-ahead meals! Cook them 1-2 days before, refrigerate in their sauce, then gently reheat. The flavors actually improve with time, making your entertaining much less stressful.

    How do I know when my short ribs are done?

    They’re done when the meat easily pulls away from the bone and a fork slides in with almost no resistance. If there’s any toughness, they need more time—even 30 more minutes can make a significant difference.

    Final Thoughts

    These Melt-in-Your-Mouth Beef Short Ribs represent everything I love about slow cooking—the transformation of humble ingredients into something extraordinary through patience and technique. There’s something deeply satisfying about mastering this dish, watching guests close their eyes with that first tender bite. The beauty lies in its forgiving nature—even if timing isn’t perfect or measurements aren’t exact, the slow braise will likely yield something delicious. I encourage you to make this recipe your own, adjusting seasonings and accompaniments to suit your taste. Share your creations on Pinterest and tag me—I’d love to see your take on this classic comfort food!
  • Moroccan Couscous with Roast Vegetables: Irresistibly Flavorful & Healthy!

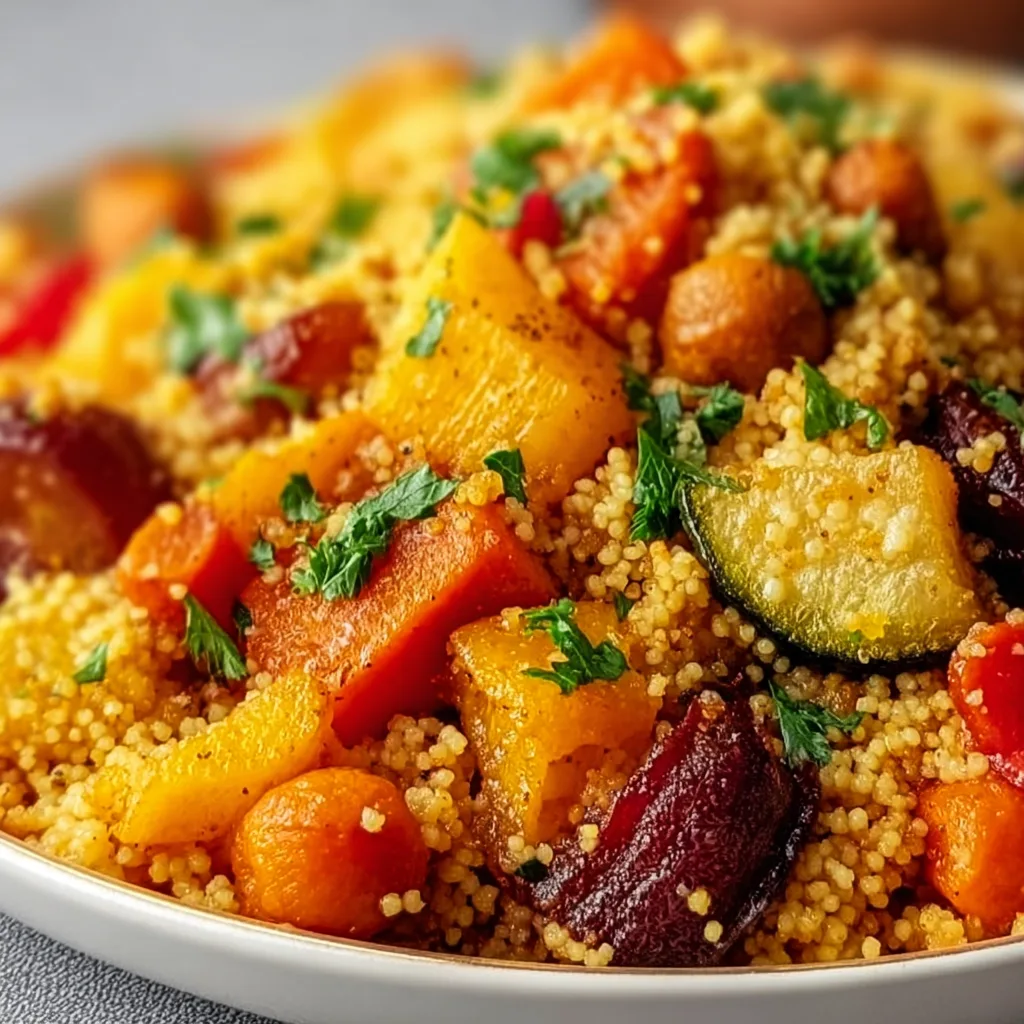
    Moroccan Couscous with Roast Vegetables: Irresistibly Flavorful & Healthy!

    Moroccan Couscous with Roast Vegetables: Irresistibly Flavorful & Healthy!

    Moroccan Couscous with Roast Vegetables has become my absolute go-to when I’m craving something that feels both nourishing and exciting. The first time I made this dish, the aroma of cumin, cinnamon, and roasting vegetables transformed my kitchen into a little slice of Marrakech. There’s something magical about how the fluffy couscous soaks up all those warm spices while colorful roasted veggies add both texture and nutrition. Whether you’re meal prepping for the week ahead or serving a crowd, this vibrant dish delivers big flavors with minimal effort – exactly what I look for in my favorite recipes at Recipes Darleen.

    Recipe

    Why You’ll Love This Moroccan Couscous with Roast Vegetables

    A Symphony of Flavors and Textures

    This dish is a beautiful balance of sweet and savory elements that dance together perfectly. The natural sweetness of roasted bell peppers, carrots, and butternut squash caramelizes in the oven, creating deep flavor dimensions that plain vegetables simply don’t have. Meanwhile, the couscous provides a light, fluffy base that soaks up the aromatic spice blend. I love how the chickpeas add protein and heartiness, making this a complete meal. The first forkful always transports me straight to a bustling Moroccan market – the warm spices tickling my nose before I’ve even taken a bite.

    Nourishing and Satisfying

    What I adore most about this Moroccan Couscous with Roast Vegetables is how it manages to be both incredibly satisfying and genuinely nutritious. The rainbow of vegetables delivers a powerful nutrient punch – from vitamin A in carrots to antioxidants in bell peppers. Last Tuesday, after a particularly exhausting day, I threw this together and felt instantly restored after eating. The protein from chickpeas and healthy fats from olive oil make it surprisingly filling, while the complex carbohydrates in the couscous provide sustained energy. It’s comfort food that actually fuels your body properly.

    Essential Tips & Tricks

    Perfecting Your Vegetable Roast

    The secret to elevating this dish lies in how you roast your vegetables. Always preheat your oven thoroughly to 425°F – this high heat ensures caramelization rather than steaming. Cut vegetables into uniform sizes (about 1-inch pieces) so they cook evenly. I learned the hard way that crowding the pan leads to soggy veggies, so use two baking sheets if needed. Toss everything in olive oil, making sure each piece is coated, then sprinkle with salt before roasting. This draws out moisture and intensifies flavors. For perfect texture, roast until edges are browned but centers remain tender – usually 25-30 minutes.

    Mastering Fluffy Couscous

    The difference between mediocre and magnificent couscous comes down to technique. Start with the right liquid-to-couscous ratio – generally 1:1 for instant couscous, but check your package instructions. The game-changer is adding a tablespoon of olive oil or butter to the boiling water before stirring in the couscous. This prevents clumping and adds richness. After adding couscous, immediately remove from heat, cover, and let stand untouched for 5 minutes. Then, the crucial step: fluff with a fork, never a spoon! This separates the grains without crushing them. For extra flavor, try substituting vegetable broth for water like in my Ranch Chicken Veggie Soup.

    Serving Ideas & Creative Variations

    Perfect Pairings and Garnishes

    Elevate your Moroccan Couscous with Roast Vegetables by adding thoughtful finishing touches that make it restaurant-worthy. A sprinkle of fresh herbs – mint, cilantro, or parsley – adds brightness and color contrast. For texture, scatter toasted sliced almonds or pine nuts on top just before serving. I love adding a dollop of cool yogurt (dairy or plant-based) with a squeeze of lemon to balance the warm spices. For special occasions, serve alongside Blackened Chicken or grilled lamb for a protein boost. Don’t forget a final drizzle of good olive oil and flaky sea salt to make all the flavors pop!

    Seasonal and Dietary Adaptations

    One reason I return to this recipe constantly is its incredible flexibility across seasons and dietary needs. In summer, swap winter squash for zucchini, eggplant, and fresh tomatoes. Fall calls for root vegetables like parsnips and sweet potatoes. For a gluten-free version, use quinoa or millet instead of traditional couscous. Need it vegan? It already is! Want more protein? Add roasted tofu cubes or white beans. For a lower-carb option, try cauliflower “couscous.” I’ve even made a spicier version with harissa paste mixed into the spice blend that was absolutely divine when I needed to warm up on a chilly evening.

    Storage & Troubleshooting Guide

    Keeping It Fresh

    This Moroccan Couscous with Roast Vegetables maintains its quality beautifully for meal prep. Store in airtight containers in the refrigerator for up to 4 days. The flavors actually deepen overnight as the spices meld together! When reheating, add a splash of water or broth to revive the couscous, then microwave until just heated through (about 1-2 minutes). For best texture, keep any fresh garnishes separate until serving time. If you’re planning to freeze portions, slightly undercook the vegetables as they’ll soften more when reheated. Frozen portions last up to 2 months and can be thawed overnight in the refrigerator.

    Solving Common Issues

    If your couscous turned out gummy, you likely used too much liquid or stirred it while it was absorbing. Next time, stick to the exact 1:1 ratio and resist peeking under the lid during the standing time. For vegetables that aren’t caramelizing properly, check that your oven temperature is accurate (an oven thermometer helps) and that you’re not overcrowding the pan. If your dish tastes bland, don’t be shy with spices – Moroccan cuisine is bold! Toast whole spices in a dry pan before grinding for more intense flavor. And remember that a final touch of acid (lemon juice) and salt at the end brightens all the flavors.

    Frequently Asked Questions

    Can I make Moroccan Couscous with Roast Vegetables ahead of time?

    Absolutely! Roast the vegetables and prepare the couscous up to 3 days ahead. Store separately in airtight containers, then combine and reheat when ready to serve. Add fresh herbs just before serving.

    What spices are essential for authentic Moroccan flavor?

    Cumin, coriander, cinnamon, and paprika form the backbone. For depth, add turmeric, ginger, and a pinch of cayenne. Toast whole spices first for maximum flavor impact.

    Can I use pearl couscous instead of regular couscous?

    Yes! Pearl couscous (Israeli couscous) works beautifully but requires different cooking. Simmer it for about 10 minutes until tender, then drain any excess liquid before combining with vegetables.

    What vegetables work best in Moroccan Couscous with Roast Vegetables?

    Root vegetables, bell peppers, zucchini, and eggplant roast perfectly. Choose a colorful mix for visual appeal and nutritional variety. Harder vegetables may need longer roasting time.

    How can I make this dish more substantial for a main course?

    Add protein like chickpeas, grilled chicken, or lamb. Increase healthy fats with avocado slices or a generous drizzle of olive oil. Serve with a side of warm flatbread.

    Final Thoughts

    This Moroccan Couscous with Roast Vegetables has saved countless weeknight dinners at my house while still feeling special enough for entertaining. The beautiful balance of warming spices, nutrient-rich vegetables, and fluffy couscous creates something greater than the sum of its parts. I love how it’s endlessly adaptable to whatever’s in season or in my pantry. Whether you’re looking for a satisfying meatless main or a spectacular side dish, this recipe delivers bold flavors and nourishing ingredients that will transport your taste buds straight to North Africa. Find more inspiration for global flavors on our Pinterest board!

  • Honey BBQ Chicken Mac & Cheese That’ll Blow Your Mind!

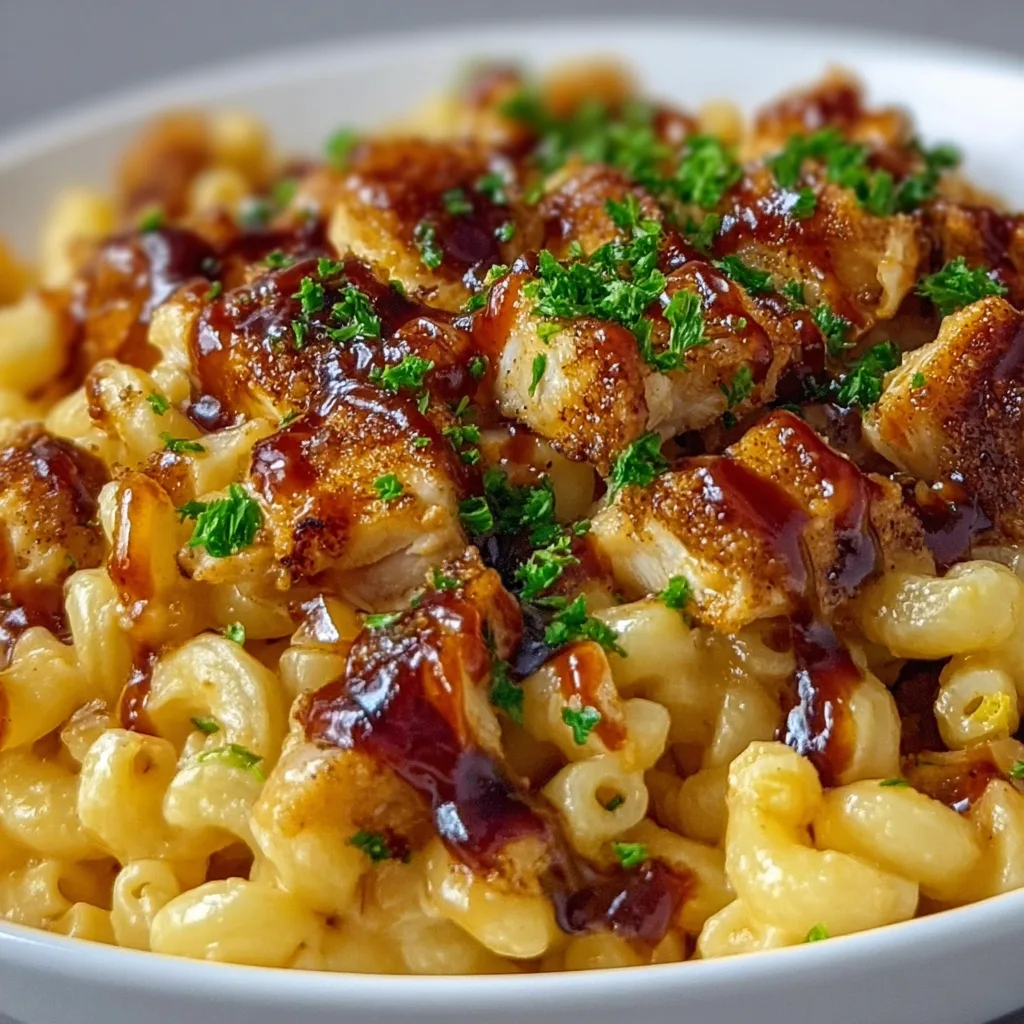
    Honey BBQ Chicken Mac & Cheese That’ll Blow Your Mind!

    Honey BBQ Chicken Mac & Cheese That’ll Blow Your Mind!

    Honey BBQ Chicken Mac & Cheese combines two comfort food classics into one irresistible dish that’ll have everyone asking for seconds. The smoky-sweet BBQ sauce and tender shredded chicken transform ordinary mac and cheese into something truly special. I discovered this recipe during a rainy Sunday when I was craving something cozy but wanted to elevate my usual pasta night. The moment that first bite hit my taste buds—creamy cheese sauce mingling with tangy BBQ chicken—I knew I’d found my new go-to comfort food. Let me show you how to create this perfect balance of smoky, sweet, and cheesy goodness.

    Recipe

    Why You’ll Love This Honey BBQ Chicken Mac & Cheese

    Perfect Comfort Food Fusion

    There’s something magical about the way honey BBQ sauce hugs each piece of chicken, creating little pockets of sweet-tangy goodness throughout the creamy mac and cheese. The textural contrast between the tender pasta, gooey cheese, and succulent chicken creates the ultimate comfort food experience. I love how the honey adds just enough sweetness to balance the smokiness of the BBQ sauce. My neighbor actually knocked on my door the first time I made this, drawn by the incredible aroma wafting from my kitchen window. It’s that kind of dish—impossible to resist!

    Quick and Family-Friendly Option

    This Honey BBQ Chicken Mac & Cheese has become my secret weapon for busy weeknights when I need something substantial and crowd-pleasing. The recipe comes together in about 30 minutes, especially if you use rotisserie chicken or leftover chicken from another meal. My picky nephew, who normally turns his nose up at anything new, asked for thirds of this dish! The familiar mac and cheese base makes it approachable for kids, while the honey BBQ chicken elevates it for adults. It’s truly the perfect middle ground for family dinners.

    Essential Tips & Tricks

    Cheese Selection Matters

    The perfect cheese blend makes all the difference in this dish. I recommend using a combination of sharp cheddar for flavor and monterey jack for meltability. Avoid pre-shredded cheeses which contain anti-caking agents that can make your sauce grainy. Grating your own cheese takes just a few extra minutes but delivers that silky-smooth texture we’re after. For an extra flavor boost, add a handful of smoked gouda—it amplifies the BBQ notes beautifully. I learned this trick from my cheese-obsessed friend who insists that “life’s too short for mediocre mac and cheese.” She’s right!

    Sauce Consistency Secrets

    Creating the perfect sauce consistency is crucial for Honey BBQ Chicken Mac & Cheese success. Start with a roux base (equal parts butter and flour) before slowly incorporating warm milk. This prevents lumps and creates a velvety foundation. When mixing in the BBQ sauce, add it gradually while tasting as you go—different brands vary in sweetness and tanginess. If your sauce seems too thick, add a splash of pasta water to thin it out. For a richer version, try the technique I use in my Creamy Blackened Chicken Alfredo Pasta by adding a touch of cream cheese.

    Serving Ideas & Creative Variations

    Perfect Pairings

    This Honey BBQ Chicken Mac & Cheese shines as the star of your meal, but the right sides can take the experience to new heights. I love serving it with a crisp green salad dressed simply with lemon and olive oil to cut through the richness. For a complete comfort food experience, pair with buttery garlic bread for scooping up every last bit of sauce. When I’m hosting friends, I serve it alongside Wonton Jalapeno Poppers for a fun appetizer that complements the sweet-smoky flavors. The contrast between the creamy mac and cheese and the crunchy poppers is absolutely divine!

    Exciting Flavor Twists

    Don’t be afraid to customize your Honey BBQ Chicken Mac & Cheese with delicious add-ins! Try stirring in caramelized onions for sweet depth, crispy bacon for smoky crunch, or roasted red peppers for a pop of color and flavor. For a spicy kick, mix in diced jalapeños or a dash of hot sauce. My personal favorite variation includes a layer of crushed Fritos on top before baking—it adds the perfect salty crunch! When corn is in season, I fold in fresh kernels for bursts of sweetness that play beautifully against the BBQ sauce. The possibilities are endless!

    Storage & Troubleshooting Guide

    Proper Storage Methods

    To keep your Honey BBQ Chicken Mac & Cheese tasting its best, cool it completely before transferring to airtight containers. It will stay fresh in the refrigerator for up to 3-4 days. For longer storage, portion it into freezer-safe containers, leaving a little room for expansion. When reheating, add a splash of milk to revive the creamy texture. I learned the hard way that microwaving at full power can make the sauce separate—instead, use 50% power and stir occasionally. For best results when freezing, slightly undercook the pasta initially, as it will soften more during reheating.

    Fixing Common Issues

    If your Honey BBQ Chicken Mac & Cheese sauce breaks or becomes grainy, don’t panic! Slowly heat it over low heat while adding a splash of warm milk and whisking constantly to re-emulsify the sauce. For mac and cheese that’s too dry after baking, drizzle in a mixture of warm milk and butter before gently folding to incorporate. If your dish lacks flavor, try adding a teaspoon of Dijon mustard or a dash of Worcestershire sauce—both enhance cheese flavors without overpowering. When my sauce once came out too sweet, a squeeze of fresh lemon juice perfectly balanced the honey BBQ elements.

    Frequently Asked Questions

    Can I use pre-cooked or rotisserie chicken for this Honey BBQ Chicken Mac & Cheese?

    Absolutely! Rotisserie chicken saves time and adds great flavor. Shred it while still warm for easier handling, and toss with a bit of extra BBQ sauce before adding to the mac and cheese.

    What’s the best pasta shape to use?

    Medium shells, cavatappi, or elbow macaroni work best as they capture pockets of the creamy sauce. Avoid long pasta shapes like spaghetti which don’t hold the sauce as effectively.

    Can I make this recipe ahead of time?

    Yes! Prepare through assembly, then refrigerate unbaked for up to 24 hours. Add 10-15 minutes to the baking time if cooking from cold, and consider extra milk to refresh the sauce.

    Is this recipe freezer-friendly?

    Definitely. Freeze in portion-sized containers for up to 3 months. Thaw overnight in the refrigerator before reheating gently with a splash of milk to restore creaminess.

    How can I make this recipe spicier?

    Add diced jalapeños, a dash of cayenne pepper, or substitute spicy BBQ sauce. For heat lovers, mix in buffalo sauce with the BBQ sauce for a flavor kick.

    Final Thoughts

    This Honey BBQ Chicken Mac & Cheese represents comfort food at its finest—familiar yet exciting, simple yet impressive. The way the sweet-tangy BBQ sauce transforms ordinary mac and cheese into something crave-worthy makes this recipe a true keeper. I find myself returning to it whenever I need a reliable crowd-pleaser or just a warm hug in food form. Whether you’re cooking for picky eaters, entertaining friends, or simply treating yourself, this dish delivers big flavor with minimal effort. Don’t forget to check out more comfort food inspirations on Pinterest!

  • Texas Roadhouse Butter Chicken Skillet Recipe That Will Blow Your Mind!

    Texas Roadhouse Butter Chicken Skillet Recipe That Will Blow Your Mind!

    Texas Roadhouse Butter Chicken Skillet Recipe That Will Blow Your Mind!

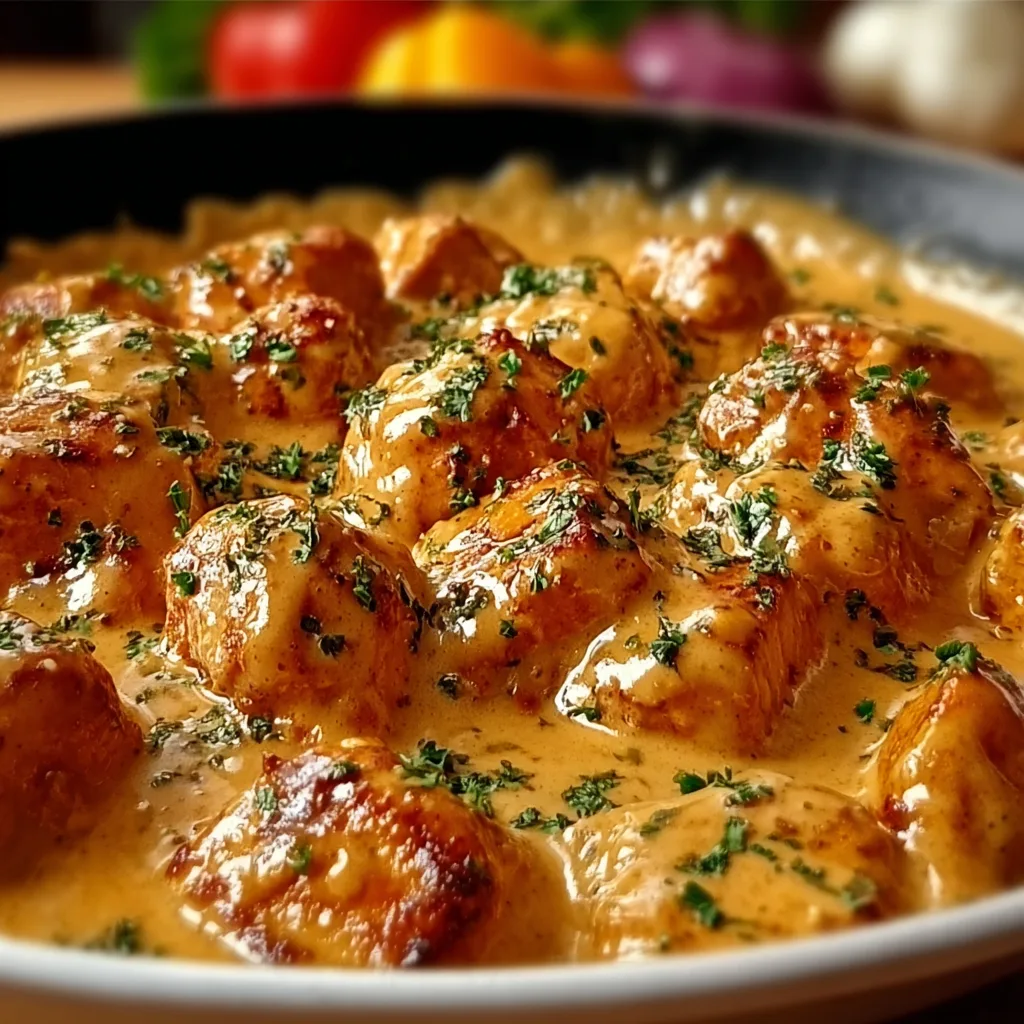
    The Texas Roadhouse Butter Chicken Skillet brings all the cozy vibes of your favorite steakhouse right to your dinner table. I discovered this recipe last winter when I was craving something indulgent but didn’t want to brave the snow for a night out. The first time I made it, my kitchen filled with the most intoxicating aroma of garlic butter and herbs that had my family hovering around before I could even call them for dinner. It’s become our Friday night tradition—a restaurant-quality meal without the wait or the bill! If you love creamy chicken recipes, this skillet wonder will become your new obsession.

    Recipe

    Why You’ll Love This Texas Roadhouse Butter Chicken Skillet

    A Perfect Balance of Flavors

    This skillet dish captures that signature Texas Roadhouse flavor that keeps us coming back for more. The chicken breasts are perfectly seared on the outside while remaining juicy inside, then bathed in a velvety butter sauce that’s enhanced with garlic, herbs, and a touch of lemon. What makes this dish special is how the sauce reduces in the skillet, concentrating all those flavors and creating little caramelized bits that you’ll find yourself scraping up with a spoon. I’ve caught my husband doing exactly that more than once!

    Quick and Impressive Results

    On a busy weeknight when I need to get dinner on the table fast but still want something that feels special, this one-pan wonder is my go-to. It takes just about 30 minutes from start to finish, making it faster than takeout but infinitely more satisfying. The presentation alone—golden chicken nestled in a bubbling butter sauce with fresh herbs scattered on top—makes it look like you spent hours in the kitchen. It’s become my secret weapon for last-minute dinner guests who always leave asking for the recipe.

    Essential Tips & Tricks

    Mastering the Perfect Sear

    The key to restaurant-quality results lies in getting that golden-brown crust on your chicken. Make sure your skillet is properly heated before adding the chicken—you should hear a satisfying sizzle when it hits the pan. Pat the chicken dry with paper towels before seasoning, as moisture prevents proper browning. Don’t crowd the pan or move the chicken too soon; give it 4-5 minutes undisturbed on each side. This patience creates that beautiful caramelization that seals in juices and builds the foundation for the sauce’s flavor.

    Creating the Ultimate Butter Sauce

    The magic of this dish is in its sauce, which starts with a base of browned butter that develops nutty, complex notes. Use real butter here—no substitutes—and let it foam and begin to brown slightly before adding garlic. This prevents the garlic from burning while infusing the butter with its essence. When adding your liquid ingredients, scrape up those flavorful brown bits from the bottom of the pan. For an extra layer of richness, try adding a splash of cream at the end, which creates a silkier texture that clings beautifully to the chicken.

    Serving Ideas & Creative Variations

    Perfect Pairings

    Serve this Texas Roadhouse Butter Chicken Skillet with sides that complement its rich flavors without overshadowing them. Fluffy garlic mashed potatoes make an ideal bed for soaking up that luscious sauce, while steamed asparagus or green beans provide a fresh counterpoint. For a complete Texas Roadhouse experience, add homemade dinner rolls brushed with melted honey butter. When I’m feeling particularly indulgent, I’ll whip up some cilantro lime rice instead of potatoes for a bright, zesty base that balances the buttery richness.

    Exciting Flavor Twists

    While the classic version is divine, don’t be afraid to put your own spin on this recipe. For a Cajun twist, add blackened seasoning to your chicken and finish with a sprinkle of cayenne in the sauce. Mushroom lovers can add sliced cremini or baby bella mushrooms when sautéing the garlic for an earthy dimension. For a Mediterranean variation, incorporate sun-dried tomatoes, olives, and a sprinkle of feta cheese just before serving. My family’s favorite twist includes a tablespoon of honey in the sauce for a subtle sweetness that plays beautifully against the savory elements.

    Storage & Troubleshooting Guide

    Proper Storage Solutions

    This Texas Roadhouse Butter Chicken Skillet reheats beautifully, making it perfect for meal prep. Store leftovers in an airtight container in the refrigerator for up to 3 days. The sauce may solidify when chilled—this is normal! For best results when reheating, let it come to room temperature for about 15 minutes, then warm gently on the stovetop over medium-low heat. Add a splash of chicken broth if needed to revive the sauce. If freezing, freeze the chicken and sauce separately for up to 2 months, then thaw overnight in the refrigerator before reheating.

    Common Issues and Fixes

    If your sauce breaks or looks curdled, don’t panic! Lower the heat immediately and whisk in a tablespoon of cold butter to re-emulsify. For sauce that’s too thin, simmer a few minutes longer or add a cornstarch slurry (1 teaspoon cornstarch mixed with 1 tablespoon cold water). If your chicken is browning too quickly on the outside but remains undercooked inside, finish it in a 350°F oven for 5-7 minutes. Tough chicken usually means it’s overcooked—next time, use a meat thermometer and remove the chicken from heat when it reaches 160°F, as it will continue cooking to 165°F while resting.

    Frequently Asked Questions

    What makes this Texas Roadhouse Butter Chicken Skillet different from regular chicken dishes?

    The signature Texas Roadhouse flavor comes from the combination of perfectly seared chicken and a rich, complex butter sauce enhanced with specific herbs and spices. The one-pan cooking method also allows flavors to concentrate beautifully.

    Can I use chicken thighs instead of breasts?

    Absolutely! Chicken thighs work wonderfully and often stay juicier. Adjust cooking time slightly as thighs may take 2-3 minutes longer per side, depending on their thickness.

    How do I know when the chicken is cooked perfectly?

    Use a meat thermometer inserted into the thickest part—it should read 165°F. Alternatively, cut into the chicken; when fully cooked, juices will run clear with no pink remaining.

    Can I make this dish dairy-free?

    You can substitute high-quality plant-based butter, though the flavor profile will change slightly. Coconut cream can replace heavy cream if used in your variation.

    What’s the best type of skillet to use?

    A cast-iron skillet is ideal for this recipe as it retains heat beautifully and creates the best sear. Stainless steel works well too, but avoid non-stick pans as they won’t develop the same flavorful fond.

    Final Thoughts

    This Texas Roadhouse Butter Chicken Skillet has become more than just a recipe in my household—it’s a celebration of comfort food done right. There’s something magical about recreating restaurant favorites at home, especially when they turn out even better than the original. I hope this dish brings the same joy to your table as it has to mine. Don’t forget to check out more comfort food inspiration on Pinterest and tag me when you make your own version of this buttery, succulent chicken skillet masterpiece!

  • Crockpot French Onion Meatloaf with Melted Swiss Cheese Bliss!

    Crockpot French Onion Meatloaf with Melted Swiss Cheese Bliss!

    Crockpot French Onion Meatloaf with Melted Swiss Cheese Bliss!

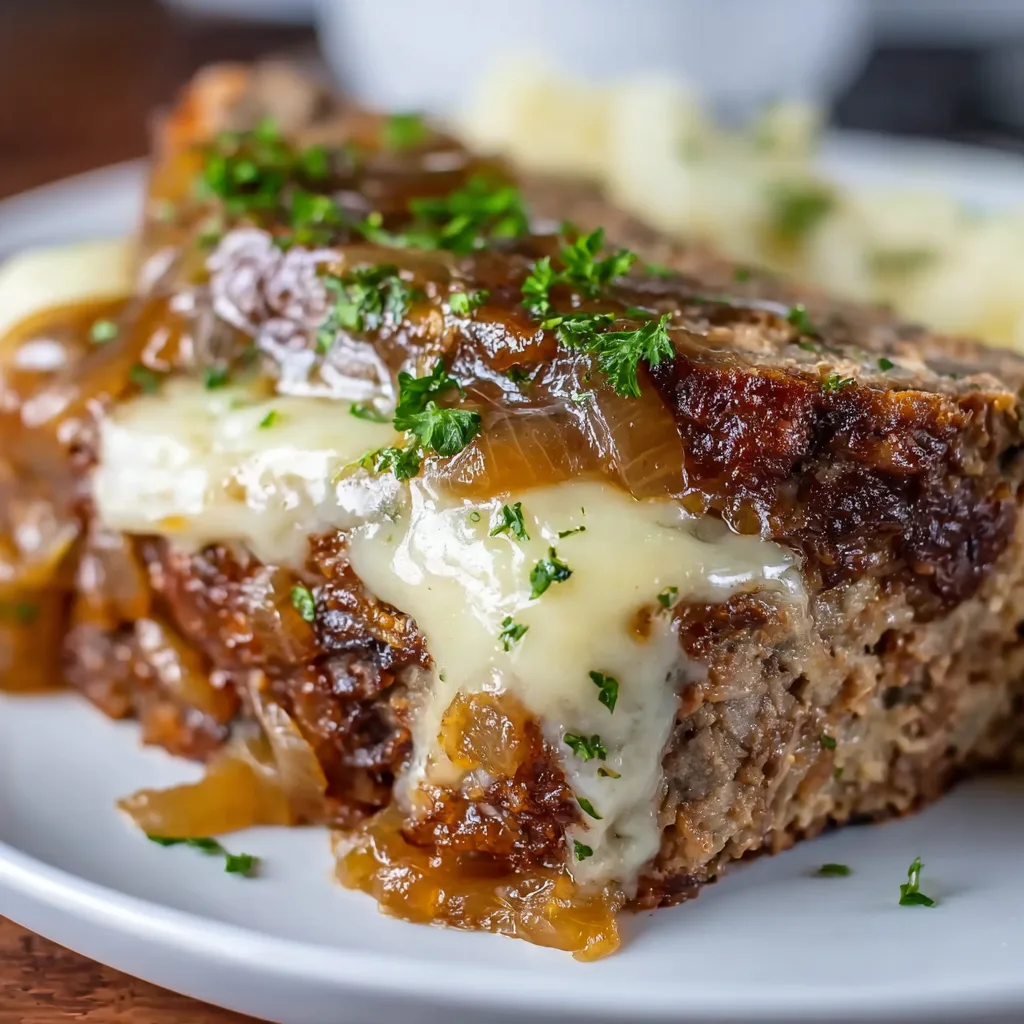
    Crockpot French Onion Meatloaf With Melted Swiss Cheese combines two comfort food classics into one irresistible dinner that practically makes itself. The slow cooker transforms ordinary meatloaf into something extraordinary, infusing it with rich French onion flavors while you go about your day. I discovered this recipe during a particularly hectic week when I needed something that would feel special without requiring me to hover over the stove. The moment I lifted the lid to find that bubbling, cheese-topped masterpiece, I knew I’d found a permanent addition to my family dinner rotation.

    Recipe

    Why You’ll Love This Crockpot French Onion Meatloaf With Melted Swiss Cheese

    Perfect Weeknight Solution

    This set-it-and-forget-it meatloaf is the answer to busy weeknights when you crave something hearty but don’t have time to babysit a meal. The slow cooker creates the perfect environment for the meat to stay tender while absorbing all those caramelized onion flavors. I love how the kitchen fills with that unmistakable French onion aroma while I’m helping the kids with homework or catching up on laundry. The combination of beef broth, sweet onions, and herbs creates layers of flavor that taste like you’ve been cooking all day.

    Crowd-Pleasing Comfort Food

    There’s something magical about pulling the lid off to reveal that melted Swiss cheese blanket covering your meatloaf. Even my pickiest eater, who normally turns his nose up at “mixed foods,” devours this without hesitation. The familiar comfort of meatloaf gets elevated with the sophisticated flavors of French onion soup, making it perfect for both family dinners and casual entertaining. The combination of savory meat, sweet caramelized onions, and nutty Swiss cheese creates a harmony of flavors that feels like a warm hug on a plate.

    Essential Tips & Tricks

    Perfecting Your Meatloaf Mixture

    The key to an exceptional Crockpot French Onion Meatloaf starts with the right meat-to-filler ratio. I recommend using 85/15 ground beef for the perfect balance of flavor and moisture. Don’t overmix your ingredients—gentle folding preserves the tender texture. For maximum flavor, pre-sauté half of your onions until caramelized, then mix them into the meat. The remaining onions create that classic French onion layer around the meatloaf. This technique gives you those sweet, jammy onion pockets throughout while maintaining the signature flavor profile you’re craving.

    Slow Cooker Success Strategies

    Creating the perfect environment in your slow cooker prevents a soggy meatloaf. Shape your loaf on a foil sling with holes punched in the bottom to allow excess moisture to drain away. This simple trick ensures your meatloaf maintains its shape and develops a more roasted exterior. Another game-changer is adding a layer of breadcrumbs to the bottom of the crockpot before placing your meatloaf—they absorb excess moisture while adding flavor. For that irresistible cheesy crust, wait until the last 30 minutes to add your Swiss cheese slices.

    Serving Ideas & Creative Variations

    Perfect Pairings

    This Crockpot French Onion Meatloaf shines brightest when served with sides that complement its rich flavor. Creamy mashed potatoes make the ideal base, soaking up all that savory onion gravy. For a lighter option, try roasted green beans or a simple arugula salad dressed with lemon and olive oil. The brightness cuts through the richness beautifully. I’ve found that a crusty baguette is non-negotiable—perfect for swiping through any sauce left on your plate. For a complete meal that will have everyone asking for seconds, consider adding these fluffy twice-baked potatoes to your menu.

    Flavorful Twists

    Don’t be afraid to make this recipe your own with delicious variations. For a mushroom lover’s dream, add sautéed cremini mushrooms to both the meat mixture and the onion layer. Provolone or Gruyère make excellent alternatives to Swiss cheese, each bringing their unique character. For a hint of sweetness, try adding a tablespoon of balsamic glaze to your onion mixture. My family’s favorite twist includes adding a layer of crispy bacon under the cheese during the final cooking stage—the smoky flavor takes this comfort food classic to new heights.

    Storage & Troubleshooting Guide

    Keeping Leftovers Fresh

    Leftover Crockpot French Onion Meatloaf makes meal prep magic happen throughout the week. Store completely cooled meatloaf in an airtight container for up to 4 days in the refrigerator. For best results, slice before storing to make reheating quicker and more even. I love transforming leftovers into incredible sandwiches—simply reheat a slice, place it on toasted sourdough with extra Swiss cheese, and broil until melted. For longer storage, freeze individual portions wrapped in parchment then foil for up to 3 months. This method prevents freezer burn while making future meals a breeze.

    Solving Common Challenges

    If your meatloaf turns out too wet, there are easy fixes for next time. Ensure you’re using a liner or foil sling to elevate the meatloaf above collecting juices. Adding extra breadcrumbs or a beaten egg can help bind moisture if your mixture seems too loose before cooking. For crockpots that run hot, check for doneness earlier than the recipe suggests—overcooked meatloaf quickly becomes dry. If your cheese isn’t browning nicely, try a quick 2-minute broil after transferring to an oven-safe dish. Remember that different slow cookers vary in temperature, so adjust cooking times accordingly.

    Frequently Asked Questions

    Can I make this Crockpot French Onion Meatloaf ahead of time?

    Yes! Prepare the meatloaf mixture up to 24 hours ahead and refrigerate. You can also fully cook it, refrigerate, and reheat when needed. The flavor actually improves after a day as the ingredients meld together.

    What’s the best cheese to use for French onion meatloaf?

    Swiss cheese is traditional, but Gruyère, provolone, or a combination works beautifully. Look for cheese that melts well and complements the sweet onion flavor without overwhelming it.

    Can I use ground turkey instead of beef?

    Absolutely! Ground turkey works well, but add 2 tablespoons of olive oil to compensate for the lower fat content. The cooking time remains the same, just ensure it reaches 165°F internal temperature.

    How do I know when my Crockpot French Onion Meatloaf is done?

    Use a meat thermometer to verify the internal temperature has reached 160°F. The meatloaf should be firm to the touch, and the cheese on top should be completely melted and slightly golden.

    Can I make this recipe without a slow cooker?

    Yes! Bake your French onion meatloaf in a 350°F oven for about 60-70 minutes. Add the cheese during the last 10 minutes of cooking for perfect melting.

    Final Thoughts

    This Crockpot French Onion Meatloaf With Melted Swiss Cheese has become my secret weapon for those days when I want to serve something special without being chained to the kitchen. The way the slow cooker transforms simple ingredients into a masterpiece of comfort food never fails to amaze me. I hope this recipe brings the same warm, satisfied smiles to your table that it does to mine. Don’t forget to share your creations on Pinterest – I’d love to see how you make this meatloaf your own!

  • Spinach Garlic Meatballs Stuffed With Mozzarella – Irresistibly Cheesy!

    Spinach Garlic Meatballs Stuffed With Mozzarella – Irresistibly Cheesy!

    Spinach Garlic Meatballs Stuffed With Mozzarella – Irresistibly Cheesy!

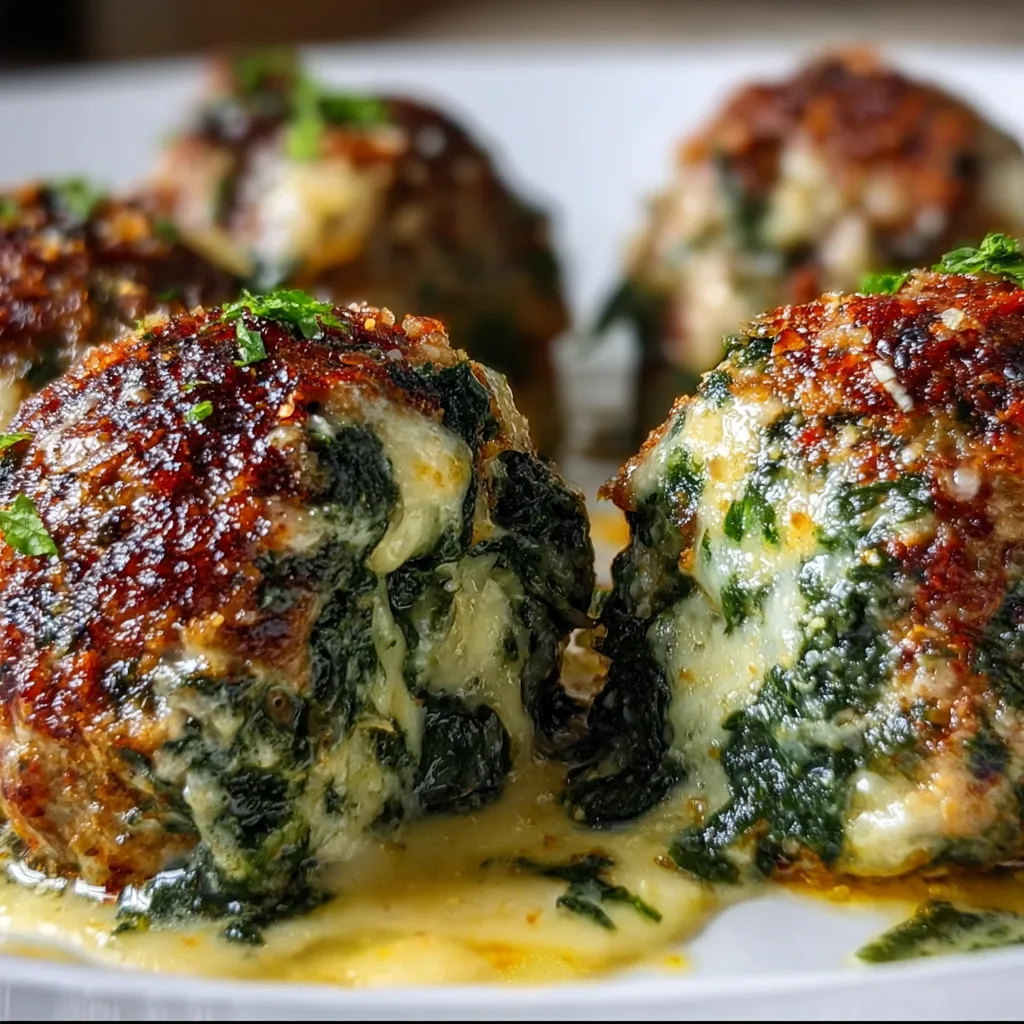
    Spinach Garlic Meatballs Stuffed With Mozzarella have completely transformed my weeknight dinner game! There’s something truly magical about cutting into a perfectly seasoned meatball to discover that melty cheese center. The first time I made these for my family, my youngest actually clapped at the dinner table! These meatballs combine nutrient-rich spinach with savory garlic and gooey mozzarella for a dish that feels both indulgent and wholesome. Perfect for pasta night, sandwich filling, or even as appetizers at your next gathering. Trust me, once you try these meatballs, you’ll wonder how you lived without them.

    Recipe

    Why You’ll Love This Spinach Garlic Meatballs Stuffed With Mozzarella

    Perfect Texture & Flavor Combination

    These meatballs hit all the right notes with their juicy interior and slightly crisp exterior. The spinach adds moisture while bringing earthy freshness that balances the robust garlic perfectly. I’ve found that finely chopping the spinach helps it incorporate seamlessly into the meat mixture, ensuring even cooking and flavor distribution. The real magic happens when you bite in and discover that molten mozzarella center! The cheese creates this wonderful contrast against the savory meat. My husband, who typically avoids “green things” in his food, requests these weekly – that’s how you know they’re something special!

    Versatile & Meal-Prep Friendly

    What I adore about these spinach garlic meatballs is their incredible versatility. They’re the ultimate meal prep champion, lasting beautifully in the fridge for quick weekday meals. I often make a double batch on Sundays, using half for dinner with pasta and saving the rest for creative meals throughout the week. They’re fantastic sliced on pizzas, tucked into sandwiches, or even served as protein-packed snacks with a side of marinara. The spinach and cheese filling keeps them moist even when reheated, which isn’t always true for regular meatballs. Your future self will thank you for the effort!

    Essential Tips & Tricks

    Getting The Perfect Cheese Stuff

    The secret to cheese-stuffed perfection lies in both technique and temperature. Start with cold mozzarella – I recommend freezing small cubes for about 15 minutes before assembly. This prevents premature melting during cooking. When forming the meatballs, flatten about 2 tablespoons of mixture in your palm, place the cheese cube in the center, then gently fold the meat around it. Roll between your palms with light pressure until sealed. If you see any cracks, gently pinch them closed. I learned this technique after several “cheese explosion” incidents that left me with empty meatballs and a cheese-covered baking sheet!

    Achieving The Ideal Texture

    The moisture balance is crucial for these meatballs. Too dry and they’ll be tough; too wet and they won’t hold shape. After squeezing excess water from your spinach (don’t skip this step!), mix it with breadcrumbs before adding to the meat mixture. This distributes the moisture evenly. For extra tenderness, I add 2 tablespoons of ricotta to my mix – a tip I learned from my Italian neighbor that makes a noticeable difference. When forming the meatballs, avoid overworking the meat, which can make them dense. Like my Chicken Cheese Steak Sandwiches, the gentle touch makes all the difference in texture.

    Serving Ideas & Creative Variations

    Family-Friendly Serving Suggestions

    These versatile meatballs can transform into countless delicious meals. My family’s favorite is serving them atop creamy polenta with extra marinara sauce and fresh basil. For a lighter option, nestle them into zucchini noodles with pesto or pair with a bright Mediterranean salad. They’re also perfect for meatball subs – just tuck them into toasted rolls with provolone and broil until bubbly. For entertaining, I serve them skewered with cocktail picks alongside warm marinara for dipping. My kids love them sliced on homemade pizza, where the cheese inside creates pockets of extra gooey goodness!

    Creative Flavor Variations

    Don’t be afraid to experiment with different flavor profiles to keep things exciting! Mediterranean-style meatballs with feta instead of mozzarella, olives, and oregano create a Greek-inspired dish that pairs beautifully with tzatziki. For an Asian twist, try adding ginger, scallions, and a touch of soy sauce to the meat mixture, then serve with a sesame-soy glaze. My recent favorite is a Mexican variation with pepper jack cheese, cilantro, and cumin – perfect for serving with Ranch Chicken Veggie Soup for a complete meal. The spinach works wonderfully with all these flavor combinations while keeping the meatballs moist.

    Storage & Troubleshooting Guide

    Proper Storage & Reheating

    To maintain the best quality of your meatballs, cool them completely before storing in airtight containers. They’ll keep in the refrigerator for up to 4 days or in the freezer for 3 months. When freezing, place them on a parchment-lined baking sheet until solid, then transfer to freezer bags – this prevents them from sticking together. For reheating, my preferred method is gentle warming in sauce over low heat, which keeps them moist. Microwaving works in a pinch, but cover with a damp paper towel and use 50% power to prevent the cheese from becoming rubbery.

    Fixing Common Problems

    If your meatballs are cracking open during cooking, the mixture might be too dry – try adding an extra tablespoon of ricotta or an egg yolk. For meatballs that flatten while cooking, your mixture might be too wet. The fix is simple: add more breadcrumbs, one tablespoon at a time, until the mixture holds its shape when rolled. If cheese is leaking out during cooking, your meatballs might have tiny holes – ensure you’re completely sealing the meat around the cheese. Finally, if they’re browning too quickly but still raw inside, lower your oven temperature by 25°F and cook them longer.

    Frequently Asked Questions

    Can I make Spinach Garlic Meatballs Stuffed With Mozzarella ahead of time?

    Absolutely! Prepare them up to 24 hours ahead and refrigerate uncooked. You can also freeze them raw on a parchment-lined tray, then transfer to freezer bags once solid. Cook directly from frozen, adding 5-7 minutes to the cooking time.

    What’s the best meat to use for these meatballs?

    I recommend an 80/20 beef blend for juiciness, but you can use a mixture of beef and pork for more flavor. Ground turkey or chicken works too, but add 2 tablespoons of olive oil to prevent dryness.

    Can I use frozen spinach instead of fresh?

    Yes! Thaw completely and squeeze out ALL excess moisture using a clean kitchen towel. One 10oz package of frozen spinach equals about 1½ cups fresh chopped spinach.

    How do I know when the meatballs are fully cooked?

    They should reach an internal temperature of 165°F. If you don’t have a thermometer, cut one open – the meat should be no longer pink and the cheese completely melted.

    Can I make these meatballs gluten-free?

    Definitely! Substitute regular breadcrumbs with gluten-free breadcrumbs or crushed gluten-free crackers. Almond flour can also work, though the texture will be slightly different.

    Final Thoughts

    These Spinach Garlic Meatballs Stuffed With Mozzarella have become a staple in my kitchen for good reason. They strike that perfect balance between wholesome and indulgent, practical and impressive. Whether you’re feeding picky eaters, meal prepping for a busy week, or looking to wow dinner guests, these meatballs deliver every time. The combination of earthy spinach, aromatic garlic, and that surprise mozzarella center creates a memorable bite that keeps everyone coming back for more. Don’t forget to check out more of my favorite recipes on Pinterest!

  • Mozzarella Stuffed Soft Pretzels That Will Melt Your Heart!

    Mozzarella Stuffed Soft Pretzels That Will Melt Your Heart!

    Mozzarella Stuffed Soft Pretzels That Will Melt Your Heart!

    Mozzarella Stuffed Soft Pretzels are the ultimate comfort food mashup that combines two of my favorite things—pillowy soft pretzel dough and gooey melted cheese. The first time I made these for my family game night, they disappeared faster than I could say “touchdown!” There’s something magical about biting through that distinctive chewy exterior, hitting the tender dough, and then discovering the molten cheese center. Whether you’re hosting a movie marathon or need a crowd-pleasing appetizer, these homemade pretzels bring that irresistible mall pretzel shop experience right to your kitchen—but with a cheesy surprise inside that makes them even better.

    Recipe

    Why You’ll Love These Mozzarella Stuffed Soft Pretzels

    Perfect Texture Combination

    The contrast of textures in these pretzels is what makes them truly special. The outside develops that characteristic deep amber color and slight crunch from the baking soda bath, while the inside stays pillowy soft. I still remember the look on my nephew’s face when he bit into his first one—pure joy as the warm cheese stretched between his teeth! The dough itself has just the right amount of chew, and when you add that stretchy mozzarella center, it creates a sensory experience that’s impossible to resist. The light dusting of coarse salt on top adds tiny bursts of flavor with each bite.

    Versatile Snack for Any Occasion

    These stuffed pretzels are incredibly versatile and perfect for practically any gathering. I’ve served them at everything from casual Netflix binges to sophisticated wine tastings (yes, they pair beautifully with a bold red!). They’re substantial enough to satisfy hungry teenagers after sports practice yet elegant enough for adult gatherings. The best part? You can prepare the dough ahead of time and have a fun pretzel-making session with friends or kids. Everyone loves customizing their own toppings, from classic salt to cinnamon sugar for a sweet twist. They’re also portable, making them ideal for picnics or tailgating.

    Essential Tips & Tricks

    Mastering the Pretzel Bath

    The baking soda bath is what gives pretzels their distinctive flavor and gorgeous brown exterior—don’t skip this crucial step! I learned this the hard way after my first pale, bread-like attempt. For best results, bring the water to a gentle simmer before adding the baking soda (it will fizz dramatically, so use a large pot!). Each pretzel needs just 30 seconds in the bath—any longer and they can develop a metallic taste. Use a slotted spatula to carefully transfer them in and out of the water, then place them on a parchment-lined baking sheet. This process creates that authentic pretzel flavor that reminds me of baseball games with my dad.

    Cheese Selection and Handling

    Choosing the right mozzarella makes all the difference in these stuffed pretzels. Low-moisture mozzarella works best as it melts beautifully without making the surrounding dough soggy. I like to use string cheese sticks for convenience—they’re perfectly portioned and easy to work with. For an extra flavor boost, try mixing in a bit of sharp cheddar like I do in my Chicken Cheese Steak Sandwiches. Make sure to completely seal the dough around the cheese to prevent leakage during baking. A little trick I’ve learned: chill the cheese in the freezer for 10 minutes before stuffing to make it easier to handle.

    Serving Ideas & Creative Variations

    Dipping Sauces That Elevate

    The right dipping sauce can transform these pretzels from delicious to absolutely unforgettable. My personal favorite is a spicy honey mustard that balances the richness of the cheese perfectly. Simply mix Dijon mustard with honey and a dash of cayenne—I’ve had friends literally ask for the recipe while still chewing! Cheese sauce is another crowd-pleaser; think velvety smooth with a hint of white pepper. For something unexpected, try a marinara sauce similar to what I pair with my Wonton Jalapeno Poppers—the tanginess cuts through the richness beautifully. Don’t forget about sweet options like caramel or chocolate for dessert variations!

    Creative Flavor Twists

    While classic salted pretzels are always a hit, experimenting with flavors keeps things exciting! My garlic parmesan version with herbs mixed into the dough has become legendary among my friends. For a breakfast-inspired twist, try stuffing with scrambled eggs and bacon bits alongside the cheese—it’s like a complete breakfast in pretzel form! Everything bagel seasoning sprinkled on top creates an amazing flavor profile that’s both familiar and unique. I’ve even made a dessert version with cinnamon sugar coating and cream cheese filling instead of mozzarella. The possibilities are endless, and half the fun is creating your own signature pretzel.

    Storage & Troubleshooting Guide

    Keeping Pretzels Fresh

    These mozzarella stuffed pretzels are at their absolute best when eaten fresh from the oven while the cheese is still gloriously melty. However, life happens, and sometimes you need to store leftovers or prepare ahead. To maintain that perfect texture, allow pretzels to cool completely, then store in an airtight container at room temperature for up to 2 days. For longer storage, freeze them individually wrapped in plastic and foil. To reheat, spritz with water and warm in a 350°F oven for about 5 minutes—this reactivates the crust while heating the cheese center without making the pretzels tough.

    Fixing Common Pretzel Problems

    Even experienced bakers sometimes encounter pretzel challenges. If your dough isn’t rising, check that your yeast is fresh and your water wasn’t too hot (which kills yeast). For pretzels that aren’t browning properly, make sure your baking soda bath is at the right temperature and concentration. Cheese leakage is a common issue—prevent this by pinching seams tightly and doing a “double seal” by rolling the sealed area gently under your palm. If your pretzels are too dense, you might have added too much flour during kneading. Remember that pretzel dough should feel slightly tacky but not sticky enough to cling to your fingers.

    Frequently Asked Questions

    Can I make Mozzarella Stuffed Soft Pretzels ahead of time?

    Yes! You can prepare the dough up to 24 hours in advance and refrigerate it. You can also freeze shaped, unbaked pretzels for up to 1 month. Thaw in the refrigerator before proceeding with the baking soda bath and baking.

    What’s the best cheese for stuffing pretzels?

    Low-moisture mozzarella works best as it melts well without releasing too much moisture. String cheese is convenient, but you can also use block mozzarella cut into sticks or combine with other melting cheeses like cheddar or provolone.

    Can I freeze leftover pretzels?

    Absolutely! Wrap each cooled pretzel individually in plastic wrap, then place in a freezer bag. They’ll keep for up to 3 months. Reheat in a 350°F oven for 5-7 minutes until warmed through.

    Why do you dip pretzels in a baking soda solution?

    The alkaline bath creates the distinctive pretzel flavor and characteristic brown crust. It’s what transforms regular bread dough into true pretzels by altering the surface chemistry before baking.

    Can I make these pretzels without a stand mixer?

    Definitely! While a stand mixer makes the process easier, you can mix and knead the dough by hand. Just be prepared for about 10 minutes of kneading to develop the proper gluten structure.

    Final Thoughts

    These Mozzarella Stuffed Soft Pretzels represent everything I love about homemade baking—simple ingredients transformed into something truly special that brings people together. There’s something almost magical about the moment when someone bites into one and discovers that perfect cheese pull. Whether you’re a seasoned baker or trying your hand at pretzels for the first time, this recipe rewards your efforts with irresistible results. I hope these cheesy pretzel twists bring as much joy to your kitchen as they have to mine! Don’t forget to check out more of my favorite recipes on Pinterest for more inspiration.

  • Mississippi Mud Potatoes Recipe That Will Blow Your Mind!

    Mississippi Mud Potatoes Recipe That Will Blow Your Mind!

    Mississippi Mud Potatoes Recipe That Will Blow Your Mind!

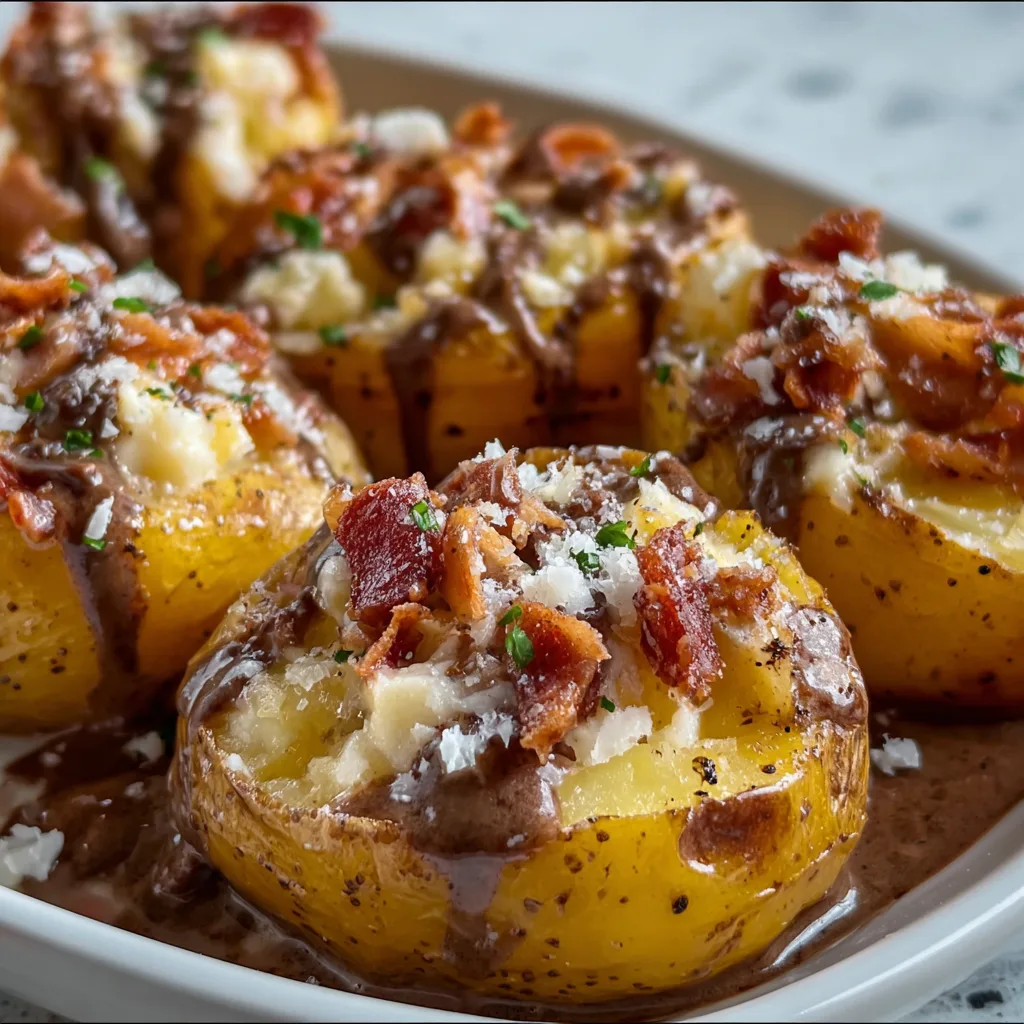
    Mississippi Mud Potatoes recipe combines creamy, cheesy goodness with a crispy golden top that’s absolutely irresistible. I discovered this Southern comfort dish at my aunt’s potluck last summer, and I’ve been obsessed ever since! The layers of tender potatoes, sour cream, and melty cheese create this magical texture that’s somehow both luxuriously rich and homey at the same time. Trust me, the aroma that fills your kitchen as these bake will have everyone hovering around the oven, asking “Is it ready yet?” It’s the ultimate crowd-pleaser that disappears within minutes at any gathering.

    Recipe

    Why You’ll Love This Mississippi Mud Potatoes recipe

    Perfect Comfort Food for Any Occasion

    This Mississippi Mud Potatoes recipe hits all the right notes when you’re craving something deeply satisfying. The combination of creamy potatoes with cheese creates that stick-to-your-ribs goodness that makes everyone feel instantly at home. I’ve served these at everything from casual Sunday dinners to holiday feasts, and the dish is always scraped clean. There’s something about the way the cheese forms that slightly crispy edge while the center stays creamy that makes it impossible to resist going back for seconds (or thirds!). It’s comfort food magic in its purest form.

    Simple Ingredients, Extraordinary Flavor

    What I adore about this recipe is how it transforms everyday ingredients into something spectacular. You don’t need fancy components or complicated techniques—just potatoes, cheese, sour cream, butter, and a few seasonings you already have in your pantry. The magic happens in how these simple elements come together, creating layers of flavor that taste like you spent hours in the kitchen. The slight tanginess from the sour cream balances the richness of the cheese, while the potatoes provide that perfect hearty base that soaks up all the deliciousness.

    Essential Tips & Tricks

    Getting the Perfect Texture

    The secret to achieving that dreamy texture in Mississippi Mud Potatoes lies in how you prepare the potatoes. I’ve found that slicing them to an even 1/4-inch thickness ensures they cook uniformly. Soaking the sliced potatoes in cold water for 15 minutes removes excess starch and prevents that gluey texture that can ruin the dish. Pat them completely dry before assembling! Another game-changer is layering—don’t dump everything in at once. Create intentional layers of potatoes, cheese, and cream mixture for that perfect bite every time. Your patience will be rewarded!

    Flavor Boosting Techniques

    Elevate your Mississippi Mud Potatoes by incorporating some flavor enhancers that make all the difference. Adding a pinch of smoked paprika gives a subtle smokiness that complements the cheese beautifully. I also love mixing in 2-3 cloves of minced garlic to the cream mixture for depth. For an extra flavor dimension, try sprinkling crispy bacon bits between layers—the saltiness cuts through the richness perfectly. Remember to season each layer lightly rather than just the top—this ensures flavor in every forkful!

    Serving Ideas & Creative Variations

    Perfect Pairings for a Complete Meal

    Mississippi Mud Potatoes shine as both a side dish and a main attraction. Pair with a simple protein like roasted chicken or grilled steak for a classic comfort meal. For Sunday dinner, I serve it alongside a fresh green salad with vinaigrette to balance the richness. It also works beautifully with roasted vegetables for a colorful plate. My family’s favorite combination is Mississippi Mud Potatoes with glazed ham and steamed green beans—the flavors complement each other perfectly! Remember to let it rest 5-10 minutes after baking to set up properly before serving.

    Exciting Twists on the Classic Recipe

    Don’t be afraid to put your own spin on this versatile dish! Add seasonal ingredients to create variations throughout the year. In summer, fold in fresh corn kernels and diced bell peppers for sweetness and color. For a Tex-Mex version, incorporate diced green chiles, pepper jack cheese, and top with crushed tortilla chips. My personal favorite twist is adding caramelized onions and thyme for an elegant French-inspired version. You can even make it breakfast-worthy by adding crumbled breakfast sausage and serving with eggs!

    Storage & Troubleshooting Guide

    Proper Storage for Maximum Freshness

    Keep your Mississippi Mud Potatoes perfectly fresh by cooling completely before transferring to airtight containers. Refrigerate for up to 4 days—though in my house, leftovers rarely last that long! For reheating, avoid the microwave which can make them soggy. Instead, place in a 350°F oven for 15-20 minutes until heated through. This dish also freezes surprisingly well! Portion into freezer-safe containers, label with the date, and freeze for up to 2 months. Thaw overnight in the refrigerator before reheating for best results.

    Solving Common Preparation Issues

    If your Mississippi Mud Potatoes turn out watery, the culprit is likely excess moisture in the potatoes. Always pat them thoroughly dry after slicing and soaking. For potatoes that aren’t cooking evenly, check your slicing consistency—using a mandoline ensures uniform thickness. If the top browns too quickly before the center is cooked, cover loosely with foil halfway through baking. And if your cheese sauce breaks or looks curdled, lower your oven temperature and consider adding a tablespoon of cornstarch to the mixture next time to stabilize it.

    Frequently Asked Questions

    Can I make Mississippi Mud Potatoes ahead of time?

    Absolutely! Assemble up to 24 hours ahead, cover tightly with plastic wrap, and refrigerate. Add an extra 10-15 minutes to the baking time when cooking from cold. Let sit at room temperature for 30 minutes before baking for best results.

    What potatoes work best for this recipe?

    Yukon Gold or Russet potatoes are ideal. Yukon Golds offer a buttery texture and hold their shape well, while Russets absorb flavors beautifully. Avoid waxy potatoes like red potatoes which don’t break down enough.

    Can I make this Mississippi Mud Potatoes recipe in a slow cooker?

    Yes, though you’ll lose the crispy top. Layer ingredients in a greased slow cooker and cook on low for 4-5 hours. For crispiness, transfer to a baking dish and broil for 3-5 minutes before serving.

    Is there a lighter version of this dish?

    Try using light sour cream, reduced-fat cheese, and replace some of the dairy with chicken broth. Adding extra vegetables like cauliflower or broccoli also lightens it while maintaining volume and satisfaction.

    Why did my potatoes turn gray after slicing?

    This happens when sliced potatoes are exposed to air. Immediately place sliced potatoes in cold water with a splash of vinegar or lemon juice until ready to use, then dry thoroughly before assembling.

    Final Thoughts

    This Mississippi Mud Potatoes recipe has become my go-to when I want to bring people together around something truly special yet comforting. There’s something magical about watching someone take that first bite and seeing their eyes light up with pleasure. I’ve shared it countless times on Pinterest where it’s always a hit! Whether you’re making it for a quiet family dinner or a festive gathering, these potatoes deliver that perfect combination of simplicity and indulgence that makes food so much more than just sustenance.