Blog

  • Easy Mac and Cheese Bites: Irresistibly Cheesy, Perfect Snack!

    Easy Mac and Cheese Bites: Irresistibly Cheesy, Perfect Snack!

    Easy Mac and Cheese Bites: Irresistibly Cheesy, Perfect Snack!

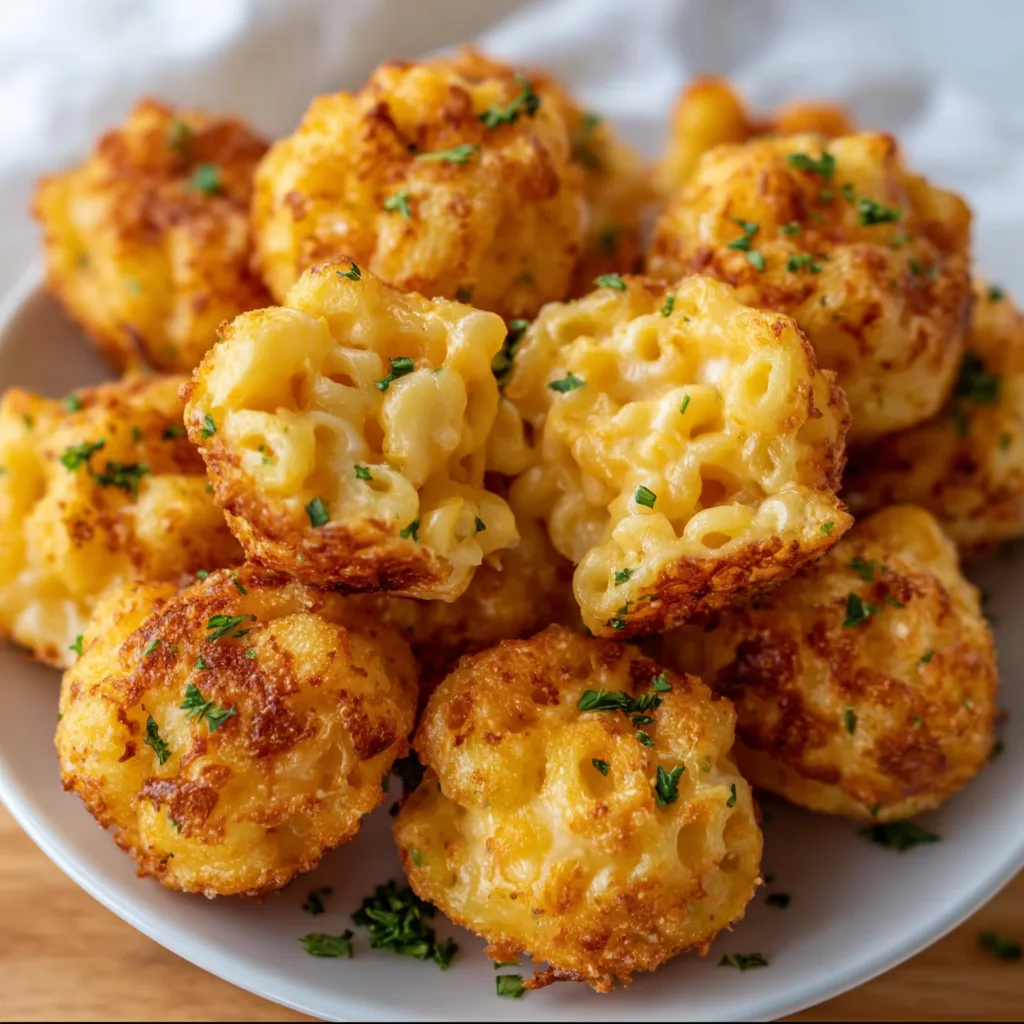
    Easy Mac and Cheese Bites have completely transformed my appetizer game! There’s something magical about that first bite—the crispy exterior giving way to gooey, cheesy goodness that just melts in your mouth. I stumbled upon this recipe during a chaotic holiday gathering when I needed something quick that would please both my picky niece and my food-critic brother. The look of pure delight on everyone’s faces told me these little bites of heaven were an instant classic. Perfect for parties, after-school snacks, or anytime you need a comforting bite of cheesy perfection that’s portable and fun.

    Recipe

    Why You’ll Love These Easy Mac and Cheese Bites

    Perfect Texture Combination

    There’s nothing quite like the textural magic happening in these mac and cheese bites. The outside develops this gorgeous golden crust that makes the most satisfying little crunch when you bite into it, while the inside stays delightfully creamy. I love watching people’s eyes widen at that first bite—it’s the ultimate comfort food transformed into a portable, poppable form! The secret lies in the breadcrumb coating that toasts up beautifully in the oven while protecting that gooey center. It’s like getting the coveted corner piece of a mac and cheese casserole in every single bite.

    Make-Ahead Convenience

    As someone who perpetually runs ten minutes behind schedule, I deeply appreciate that these bites can be prepped entirely in advance. You can assemble them the day before, refrigerate overnight, and just pop them in the oven when guests arrive. The prep flexibility is a game-changer for entertaining! I’ve even frozen batches after baking and reheated them for impromptu gatherings. The cheese maintains that stretchy pull even after reheating, which is pretty much miraculous. This recipe has saved me countless times when I’ve needed something impressive with minimal day-of effort.

    Essential Tips & Tricks

    Cheese Selection Matters

    The cheese blend you choose will make or break these bites. I’ve found that a combination of sharp cheddar for flavor and mozzarella for that Instagram-worthy cheese pull creates the perfect balance. Avoid pre-shredded options which contain anti-caking agents that prevent proper melting. Grate your cheese fresh—I promise the extra two minutes makes a world of difference! For an elevated version, try adding a bit of gruyère or smoked gouda. The depth of flavor pairs beautifully with the crispy exterior, creating a sophisticated appetizer that still feels like nostalgic comfort food at its core.

    Cooling Is Critical

    Here’s where patience becomes a virtue—you must let the mac and cheese cool completely before shaping your bites. I learned this the hard way after a messy first attempt! Refrigerate the prepared mac and cheese for at least 2 hours, but overnight chilling yields the best results. This firming-up time ensures your bites hold their shape during baking. For an extra flavor boost while cooling, add a pinch of nutmeg or smoked paprika to the mixture. Looking for more cooling techniques? Check out my Garlic Parmesan Cheeseburger Bombs for similar tips.

    Serving Ideas & Creative Variations

    Dipping Sauce Pairings

    These bites are delicious on their own, but the right dipping sauce elevates them to new heights! My personal favorite is a spicy sriracha mayo that cuts through the richness with just enough heat. Simply mix mayonnaise with sriracha and a squeeze of lime juice. For something more classic, try marinara sauce or a grainy mustard aioli. Buffalo sauce is another crowd-pleaser, especially when served alongside celery sticks for a play on buffalo wings. The contrast between the creamy, cheesy bites and tangy, spicy sauces creates a flavor explosion that keeps everyone reaching for more.

    Fun Flavor Twists

    Don’t be afraid to customize these bites to match your menu or mood! Fold in crispy bacon bits and jalapeños for a kicked-up version that disappears in minutes at game day parties. For an Italian twist, mix in sun-dried tomatoes, basil, and a pinch of red pepper flakes. You could even go gourmet with caramelized onions and fresh thyme. For a complete meal, serve alongside my Creamy Garlic Parmesan Chicken Pasta for the ultimate comfort food experience. The possibilities are endless, and each variation brings something special to the table.

    Storage & Troubleshooting Guide

    Perfect Storage Solutions

    These mac and cheese bites maintain their deliciousness even after storage, making them perfect for meal prep. Refrigerate leftover bites in an airtight container for up to 3 days. To reheat, avoid the microwave which can make them soggy—instead, place them on a baking sheet in a 350°F oven for 7-10 minutes until heated through. For longer storage, freeze the bites on a baking sheet until solid, then transfer to a freezer bag. They’ll keep for up to 2 months! This make-ahead capability has saved me countless times when unexpected guests drop by.

    Fixing Common Issues

    If your mac and cheese bites aren’t holding their shape, the mixture likely wasn’t cold enough before shaping. Pop it back in the refrigerator for at least an hour. For bites that aren’t getting crispy enough, try a higher temperature (425°F) for the last few minutes of baking. If they’re browning too quickly but still cold in the center, lower your oven temperature and cover loosely with foil. Remember that different cheese blends melt differently—higher moisture cheeses may need more binding ingredients like egg or breadcrumbs to maintain their shape during baking.

    Frequently Asked Questions

    Can I make Easy Mac and Cheese Bites gluten-free?

    Absolutely! Substitute your favorite gluten-free pasta and breadcrumbs. The texture may be slightly different, but they’ll still be delicious. Just ensure the pasta isn’t overcooked before baking.

    How far in advance can I prepare these?

    You can prepare the mac and cheese mixture up to 2 days ahead. Shape and bread the bites up to 24 hours before baking, keeping them refrigerated until ready to bake.

    Can I use boxed mac and cheese as a shortcut?

    Yes! Prepare according to package directions, but use less milk than called for to create a firmer consistency. Cool completely before shaping into bites.

    What’s the best way to shape the bites evenly?

    A cookie scoop or ice cream scoop works perfectly for consistent sizing. You can also use a mini muffin tin for more uniform shapes.

    Why are my Easy Mac and Cheese Bites falling apart?

    This usually happens when the mixture is too warm or there’s not enough binding agent. Make sure to thoroughly chill the mac and cheese and consider adding an extra egg if needed.

    Final Thoughts

    These Easy Mac and Cheese Bites have become my secret weapon for gatherings of all kinds. There’s something magical about transforming a beloved comfort food into a portable, poppable treat that brings smiles to everyone’s faces. The versatility of this recipe means you can adapt it to any occasion or preference, making it a true kitchen staple. I hope you’ll give these cheesy little morsels a try—they might just become your new signature dish! For more inspiration, follow me on Pinterest where I’m always sharing new appetizer ideas.

  • High Protein Baked Mac and Cheese That Will Blow Your Mind!

    High Protein Baked Mac and Cheese That Will Blow Your Mind!

    High Protein Baked Mac and Cheese That Will Blow Your Mind!

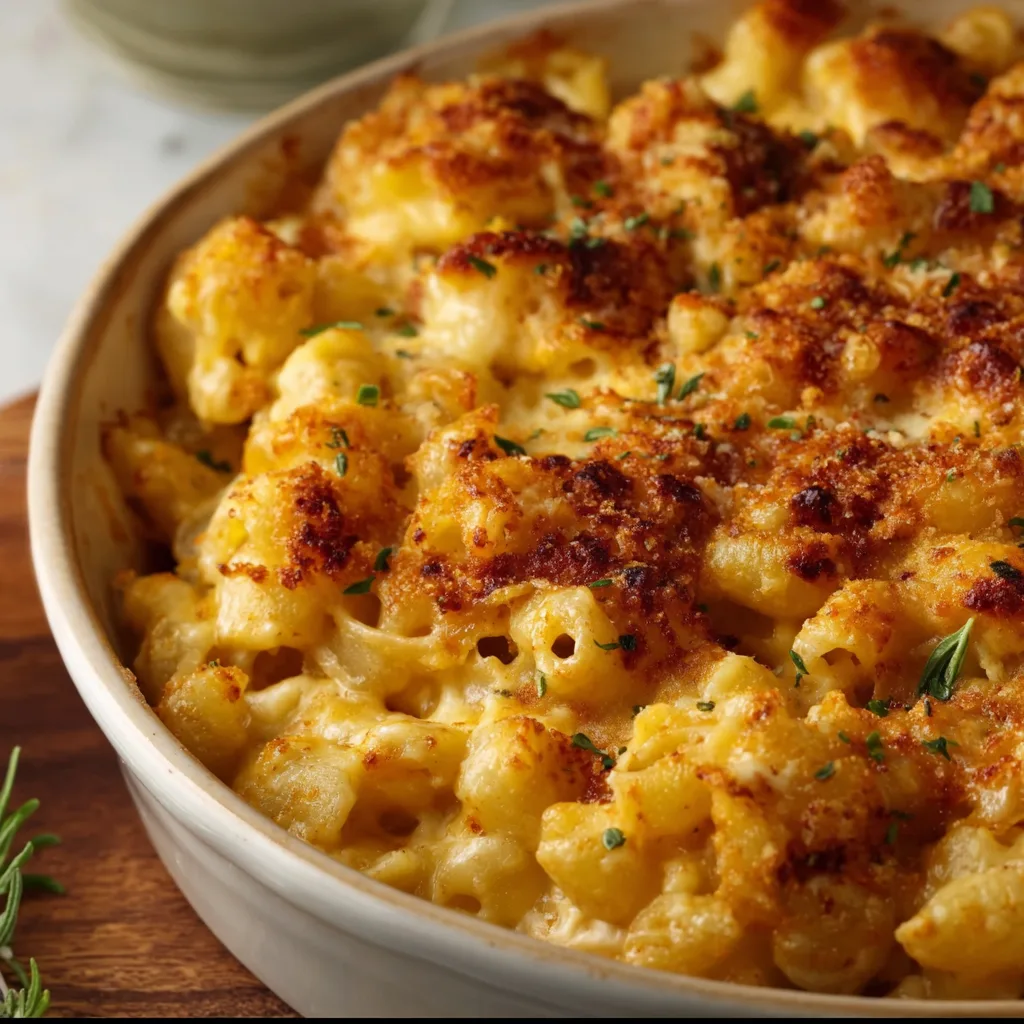
    High Protein Baked Mac and Cheese isn’t just comfort food—it’s a game-changer for those evenings when you’re craving something indulgent but don’t want to sacrifice your nutrition goals. I discovered this recipe during my post-workout hunger panics, when a regular mac and cheese just wasn’t cutting it protein-wise. The first time I pulled this bubbling dish from the oven, with its golden-brown crust and the aroma of sharp cheddar mingling with herbs, I knew I’d found my new favorite. This protein-packed version delivers all the creamy satisfaction of traditional mac and cheese while keeping you fuller longer—perfect for busy weeknight dinners.

    Recipe

    Why You’ll Love This High Protein Baked Mac and Cheese

    Perfect Balance of Flavor and Nutrition

    The magic of this high protein baked mac and cheese lies in its thoughtful ingredients. By incorporating protein-rich elements like cottage cheese, Greek yogurt, and chicken breast, you’ll get about 30-35 grams of protein per serving without sacrificing that classic mac and cheese experience. The blend of sharp cheddar and gruyere creates depth while a touch of mustard powder and garlic adds dimension that elevates it beyond basic comfort food. I love how the protein additions actually improve the texture, making it creamier and more satisfying than traditional versions that can sometimes feel one-dimensional.

    Simple Prep with Maximum Impact

    Don’t let the “high protein” label fool you—this isn’t complicated fitness food. The beauty of this dish is how effortlessly it comes together using mostly pantry staples. You’ll spend about 15 minutes of active prep time, then let your oven do the heavy lifting. The pasta cooks right in the sauce, absorbing all those incredible flavors while creating fewer dishes to wash. My favorite shortcut? Using rotisserie chicken when I’m really pressed for time. The protein boost transforms this from a side dish into a complete meal that keeps everyone at the table satisfied for hours.

    Essential Tips & Tricks

    Choosing the Right Pasta and Proteins

    The pasta you select makes a significant difference in your high protein baked mac and cheese. I recommend protein-enriched pasta varieties like chickpea, lentil, or whole wheat options that add 5-7 extra grams of protein per serving. For the creamiest texture, slightly undercook your pasta by 1-2 minutes before baking. When it comes to protein additions, cottage cheese provides incredible creaminess while boosting protein content, but you can also incorporate shredded chicken, ground turkey, or even chopped ham for variety without compromising that classic mac and cheese experience.

    Perfecting Your Cheese Sauce

    The heart of any mac and cheese is its sauce, and this high-protein version deserves special attention. Start by creating a roux with butter and flour, whisking constantly until it smells slightly nutty. Add warm milk gradually, whisking between additions to prevent lumps. For maximum protein impact, substitute part of the milk with Greek yogurt—it adds tanginess and creaminess while boosting protein content. Always grate your own cheese rather than using pre-shredded varieties which contain anti-caking agents that can make your sauce grainy. My secret ingredient? A tablespoon of Dijon mustard which enhances the cheese flavor without tasting “mustardy.”

    Serving Ideas & Creative Variations

    Family-Friendly Add-Ins

    Transform your high protein baked mac and cheese into a complete meal by incorporating colorful vegetables. Roasted broccoli florets, sautéed spinach, or diced bell peppers not only add nutritional value but also bring beautiful color contrast to the golden cheese. For picky eaters, try blending cooked cauliflower directly into the cheese sauce—it’s virtually undetectable while adding fiber and nutrients. My kids particularly love when I add crispy bacon bits or caramelized onions on top. These little touches make the dish feel special without complicating the preparation, and they’re perfect for introducing vegetables in a way that even the most selective eaters will enjoy.

    Gourmet Twists for Special Occasions

    When I’m serving this high protein baked mac and cheese for guests, I love elevating it with sophisticated flavor combinations. Try adding sun-dried tomatoes and fresh basil for a Mediterranean twist, or incorporate caramelized mushrooms and thyme for an earthy, elegant variation. For seafood lovers, fold in lump crab meat or sautéed shrimp just before baking. A drizzle of truffle oil or a sprinkle of smoked paprika adds a gourmet touch that transforms this comfort food classic. For a stunning presentation, serve individual portions in ramekins topped with a parmesan and panko crust that gets perfectly golden under the broiler for the last two minutes.

    Storage & Troubleshooting Guide

    Make-Ahead and Freezing Instructions

    This high protein baked mac and cheese is perfect for meal prep because it reheats beautifully. You can assemble the entire dish up to 24 hours before baking—just cover tightly and refrigerate. For freezing, prepare the dish but stop before baking, cool completely, then wrap in a double layer of foil and freeze for up to 3 months. When ready to enjoy, thaw overnight in the refrigerator and add an extra 15-20 minutes to the baking time. For individual portions, freeze in silicone muffin cups or small containers for grab-and-go lunches that can be microwaved directly from frozen in 2-3 minute intervals until heated through.

    Fixing Common Issues

    If your high protein baked mac and cheese turns out grainy, it’s likely due to overheating the cheese or using pre-shredded varieties. To fix a broken sauce, try whisking in a tablespoon of lemon juice or cream while gently reheating. For a dish that’s too dry after baking, drizzle in warm milk mixed with a tablespoon of Greek yogurt and gently fold to incorporate. If your mac and cheese lacks flavor, boost the umami with a teaspoon of miso paste or Worcestershire sauce. Remember that high-protein ingredients like cottage cheese can release moisture during baking, so if your dish seems too wet, let it rest for 10 minutes before serving.

    Frequently Asked Questions

    How much protein is in this baked mac and cheese?

    Each serving contains approximately 25-30 grams of protein, depending on your specific protein additions. This is roughly triple the amount found in traditional mac and cheese recipes.

    Can I make this high protein baked mac and cheese vegetarian?

    Absolutely! Replace chicken with white beans, tofu crumbles, or additional cottage cheese. You can also use chickpea or lentil pasta for even more plant-based protein.

    What cheeses work best for flavor and protein content?

    Sharp cheddar, gruyere, and parmesan create the best flavor profile. For additional protein, incorporate cottage cheese, Greek yogurt, or even a small amount of nutritional yeast.

    How can I make this recipe gluten-free?

    Simply substitute your favorite gluten-free pasta and use rice flour or cornstarch for thickening the sauce. The protein content remains high regardless of these substitutions.

    Will kids enjoy this healthier version?

    Yes! The creamy texture and familiar cheese flavor appeal to children, while the protein keeps them fuller longer. The nutrition boost is our little secret!

    Final Thoughts

    This High Protein Baked Mac and Cheese has become my go-to solution for satisfying comfort food cravings without derailing my nutrition goals. The beauty lies in its versatility—whether you’re feeding picky eaters, meal prepping for the week, or hosting a dinner party, this dish delivers on both flavor and function. I love seeing the surprised expressions when I tell people it’s packed with protein! For more protein-rich comfort foods that don’t compromise on taste, check out my Pinterest collection where I’m constantly adding new favorites.

  • Buffalo Chicken Pinwheels: Irresistibly Spicy, Easy & Delicious!

    Buffalo Chicken Pinwheels: Irresistibly Spicy, Easy & Delicious!

    Buffalo Chicken Pinwheels: Irresistibly Spicy, Easy & Delicious!

    These Buffalo Chicken Pinwheels are the appetizer that always disappears first at my gatherings. Imagine the bold, tangy flavor of buffalo chicken wrapped in a soft tortilla with creamy cheese that melts in your mouth with each bite. I first made these for a last-minute game day party when I needed something quick but impressive. The combination of spicy buffalo sauce, tender chicken, and cooling ranch creates the perfect flavor balance that’s simply irresistible. Whether you’re hosting a party or looking for a fun lunch option, these pinwheels deliver big flavor with minimal effort.

    Recipe

    Why You’ll Love These Buffalo Chicken Pinwheels

    Perfect Party Food That Travels Well

    These pinwheels aren’t just delicious—they’re incredibly practical. I’ve transported them to potlucks, picnics, and tailgates without a single issue. The tight spiral holds everything together beautifully, and unlike many appetizers, they taste amazing at room temperature. The flavors actually deepen as they sit, making them perfect for prepping ahead. Last summer, I made a double batch for my sister’s backyard gathering, and guests kept circling back to the platter, snagging “just one more” until they were completely gone. The combination of convenience and crowd-pleasing flavor makes these an absolute must for your recipe collection.

    Quick Prep with Big Flavor Payoff

    When you need something impressive but don’t have hours to spend in the kitchen, these Buffalo Chicken Pinwheels are your secret weapon. The active prep time is just 15 minutes, with most of that being assembly. I love recipes that deliver maximum flavor with minimal effort, and this one hits that sweet spot perfectly. The buffalo sauce brings that signature tangy heat while the cream cheese mixture cools things down just enough. My husband, who typically gravitates toward traditional buffalo wings, now requests these regularly for our movie nights. They satisfy that buffalo craving without the mess of traditional wings.

    Essential Tips & Tricks

    Getting the Perfect Spiral

    The key to beautiful pinwheels is achieving that tight, even spiral when you roll them up. Start by spreading your filling all the way to the edges, leaving just a small border at the far end. When rolling, use firm, even pressure and pull back slightly as you go to create tension in the roll. After rolling, wrap tightly in plastic wrap and refrigerate for at least 30 minutes before slicing. This firms everything up and prevents the dreaded filling squish-out. I learned this trick after my first attempt left me with lopsided wheels that fell apart. Now they slice beautifully every time, just like the ones you’d see at fancy cheese and charcuterie boards.

    Balancing Heat and Creaminess

    Finding the perfect buffalo heat level is essential for pleasing a crowd. I recommend starting with 3 tablespoons of buffalo sauce and adjusting to taste. The cream cheese and ranch dressing provide the cooling balance, but you can control exactly how spicy these get. For milder palates, use less sauce and add a touch more ranch. For heat lovers (like my brother-in-law), add an extra tablespoon of buffalo sauce and mix in a sprinkle of cayenne. Taste as you go until you find your perfect balance. Remember that the flavors will meld and intensify slightly as the pinwheels chill.

    Serving Ideas & Creative Variations

    Presentation Tips That Wow

    Arrange your Buffalo Chicken Pinwheels in a spiral pattern on a round platter for maximum visual impact. Place a small bowl of extra ranch or blue cheese dressing in the center for dipping. I like to garnish with thinly sliced green onions or tiny celery leaves for a pop of color and freshness. At my last book club gathering, I served these on a wooden board with little cocktail picks, and everyone commented on how elegant yet approachable they looked. For a more casual presentation, try alternating the pinwheels with celery sticks and carrot slices to create a complete buffalo chicken experience similar to my Creamy Garlic Chicken Wraps.

    Creative Twists on the Classic

    While the classic recipe is perfect as is, don’t be afraid to experiment with flavor variations. Try substituting blue cheese crumbles for some of the cream cheese for a more authentic buffalo wing experience. For a southwestern twist, add a can of drained black beans and some corn kernels to the filling. My personal favorite variation includes finely diced celery for a refreshing crunch and a sprinkle of everything bagel seasoning on the outside of the tortilla before rolling. You can also swap the chicken for chickpeas or jackfruit for a vegetarian version that still captures that buffalo essence.

    Storage & Troubleshooting Guide

    Make-Ahead and Storage Solutions

    These pinwheels are perfect for meal prep and actually benefit from being made ahead. You can prepare the rolls up to 24 hours in advance and keep them wrapped tightly in plastic wrap in the refrigerator. For longer storage, slice the pinwheels and arrange them in a single layer in an airtight container with parchment between layers. They’ll keep for up to 3 days. I often make a double batch on Sunday for quick lunches throughout the week. The flavors continue to develop, making day-two pinwheels even more delicious than freshly made ones.

    Fixing Common Pinwheel Problems

    If your filling is too runny and leaking out of the sides, try chilling the mixture for 15-20 minutes before spreading it on the tortillas. Another common issue is tortillas that crack when rolling. To prevent this, warm your tortillas slightly before assembly by placing them between damp paper towels and microwaving for 10-15 seconds. If your pinwheels unravel after cutting, they likely needed more chill time. Pop the whole roll back in the refrigerator for an hour, then try again with a sharper knife. I’ve rescued many batches using these simple fixes!

    Frequently Asked Questions

    Can I make Buffalo Chicken Pinwheels ahead of time?

    Absolutely! These pinwheels actually taste better when made 4-24 hours ahead. The flavors meld beautifully, and the chilling time helps them hold their shape when sliced.

    What’s the best way to slice Buffalo Chicken Pinwheels?

    Use a very sharp knife and clean it between cuts. For the cleanest slices, refrigerate the rolled tortillas for at least 30 minutes before cutting.

    Can I use canned chicken for this recipe?

    Yes! Drained canned chicken works well for convenience. Just be sure to shred it finely and blot away excess moisture before mixing with other ingredients.

    How spicy are these pinwheels?

    The spice level is customizable. Using 3 tablespoons of buffalo sauce creates a medium heat that most people enjoy, but you can adjust up or down to taste.

    What can I serve with Buffalo Chicken Pinwheels?

    Celery sticks, carrot slices, and extra ranch or blue cheese dressing make perfect accompaniments. For a complete spread, add a fresh vegetable platter.

    Final Thoughts

    Buffalo Chicken Pinwheels have become my go-to recipe when I need something that’s both impressive and effortless. The balance of spicy buffalo sauce, creamy cheese, and tender chicken creates an irresistible bite that keeps everyone coming back for more. What I love most is their versatility—perfect for everything from game day gatherings to packed lunches. Don’t be surprised when friends start requesting “those amazing buffalo pinwheels” at every get-together! Check out more of my appetizer ideas on Pinterest for creative pairings.

  • Carrot Cake Cheesecake Recipe That Will Melt Your Heart Instantly

    Carrot Cake Cheesecake Recipe That Will Melt Your Heart Instantly

    Carrot Cake Cheesecake Recipe That Will Melt Your Heart Instantly

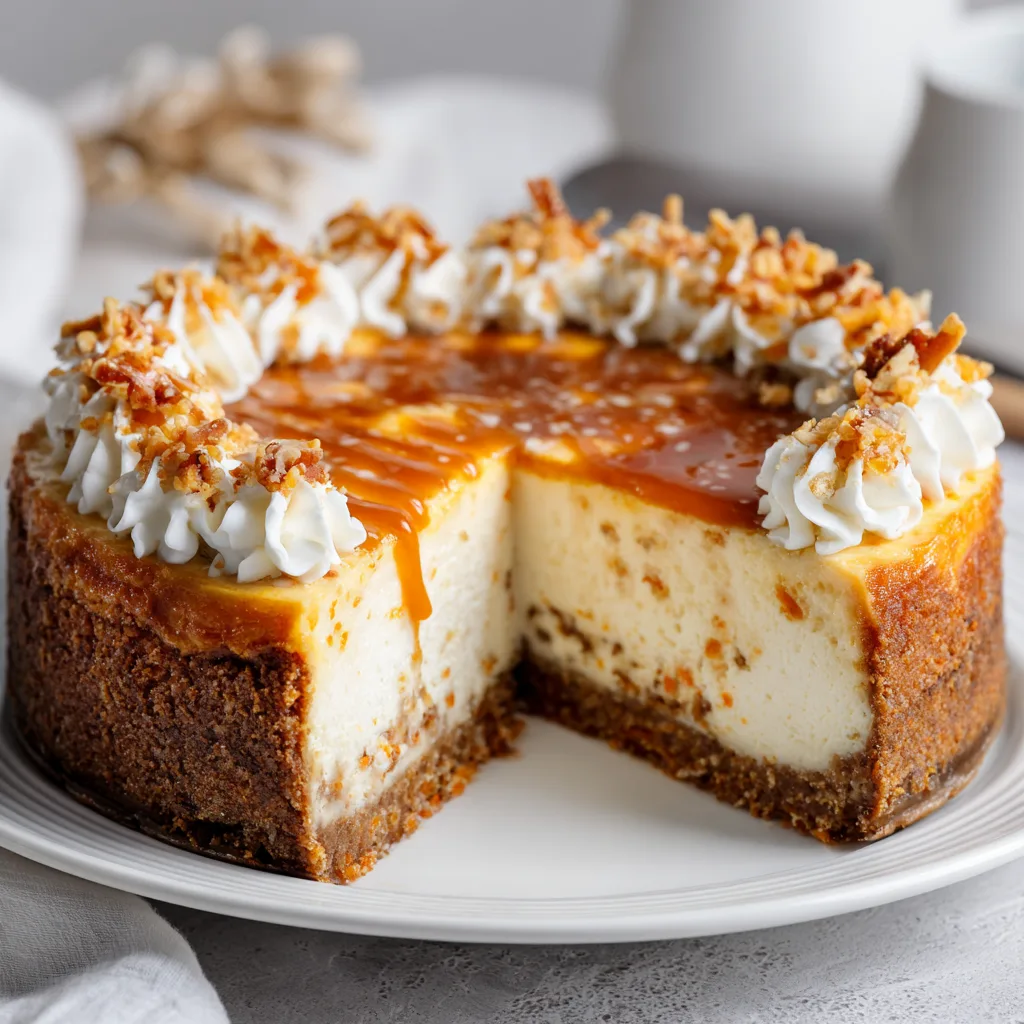
    Carrot Cake combines two beloved desserts into one showstopping treat that never fails to impress. The first time I made this for my family’s Easter gathering, the kitchen filled with that warm, spiced aroma that instantly transports you to grandma’s kitchen. There’s something magical about the way the creamy cheesecake layer complements the spiced carrot cake, creating the perfect balance of textures and flavors. If you love classic desserts with a twist, this carrot cake cheesecake recipe will become your new go-to for special occasions or whenever you need a little sweet comfort.

    Recipe

    Why You’ll Love This Carrot Cake Cheesecake

    Perfect Texture Combination

    The contrasting textures in this dessert create a sensory experience that’s truly unforgettable. The bottom layer offers that slightly dense, moist carrot cake filled with tender shreds of carrot and warm spices that gently yield with each bite. Meanwhile, the top layer delivers that signature creamy, velvety cheesecake smoothness that melts on your tongue. I love watching guests’ expressions as they discover that first perfect forkful with both layers. The textural interplay is what makes this dessert so special—it’s like getting two desserts in one without having to choose!

    Make-Ahead Convenience

    One of the best things about this carrot cake cheesecake is its time-friendly nature. You can prepare it up to three days before serving, making it perfect for busy holiday planning or dinner parties. I often make mine the day before, letting those flavors deepen and meld overnight in the refrigerator. The cheesecake actually improves with a little time, developing more complex flavor notes as it rests. This make-ahead quality has saved me countless times when hosting, allowing me to focus on other dishes while knowing dessert is already perfectly prepared and waiting.

    Essential Tips & Tricks

    Room Temperature Ingredients Matter

    Always use room temperature cream cheese, eggs, and sour cream for the smoothest cheesecake layer possible. Cold ingredients don’t blend properly and can create lumps that never fully incorporate. I learned this the hard way after rushing through my first attempt! Now I set my ingredients out at least an hour before starting. The cream cheese should feel soft when pressed gently with your finger. This small step makes an enormous difference in achieving that silky-smooth texture that makes cheesecake so luxurious. Trust me, this patience pays off in the final result.

    Water Bath Success

    A water bath is your secret weapon for crack-free cheesecake, but proper leak protection is crucial. Double-wrap your springform pan with heavy-duty aluminum foil, making sure there are no tears or openings where water could seep in. I like to add a circle of parchment paper to the bottom of the pan before adding the batter for extra insurance. For an even better option, try using a silicone cake pan wrap! This technique creates gentle, even heat that helps your carrot pound cake layers bake perfectly without drying out or cracking.

    Serving Ideas & Creative Variations

    Perfect Pairings

    This carrot cake cheesecake pairs beautifully with freshly brewed coffee or a delicate tea. The slight bitterness of coffee cuts through the sweetness, creating a balanced experience. For special occasions, try serving small slices alongside a glass of dessert wine or bourbon—the caramel notes complement the spices wonderfully. I love to add a dollop of lightly whipped cream and a sprinkle of toasted pecans just before serving. The cool cream and crunchy nuts add another dimension that elevates the whole experience, especially when entertaining guests.

    Seasonal Adaptations

    Don’t be afraid to customize your carrot cake cheesecake throughout the year. In spring, add a touch of lemon zest to brighten the flavor profile. Summer calls for fresh berries on top, while fall is perfect for adding extra cinnamon and a drizzle of caramel sauce. During winter holidays, try incorporating a hint of orange zest and a splash of bourbon into the batter. I’ve even created a pumpkin-carrot variation that’s perfect for Thanksgiving! For more seasonal dessert inspiration, check out my white chocolate cranberry cookies that pair wonderfully with this cheesecake.

    Storage & Troubleshooting Guide

    Proper Storage Methods

    Store your carrot cake cheesecake properly to maintain its perfect texture for up to five days. Always refrigerate in an airtight container or tightly wrapped with plastic wrap to prevent it from absorbing refrigerator odors. For the best flavor experience, remove the cheesecake from the refrigerator about 20-30 minutes before serving—cold temperatures dull flavors and firm the texture too much. If you need longer storage, you can freeze individual slices wrapped in plastic wrap and foil for up to two months. Just thaw overnight in the refrigerator for best results.

    Fixing Common Issues

    Even experienced bakers encounter occasional problems, but most are easily fixed. If your cheesecake develops small cracks, simply top with cream cheese frosting or whipped cream to conceal them. For a sunken center, which usually happens from overmixing, transform it into a feature by filling the depression with caramel sauce or fruit compote. If your carrot cake layer seems too dry, brush it lightly with simple syrup flavored with cinnamon before adding the cheesecake batter. Remember that most “mistakes” can be deliciously disguised—I once dropped a whole cheesecake and served it as parfaits!

    Frequently Asked Questions

    Can I make carrot cake cheesecake without a springform pan?

    You can use a regular cake pan lined with parchment paper with long overhanging edges to help lift it out after cooling. For easy removal, chill completely before attempting to lift it from the pan.

    How do I know when my cheesecake is perfectly baked?

    The edges should be set but the center should still have a slight jiggle—like Jell-O. It will continue to firm up as it cools. Overbaking leads to cracks and dry texture.

    Can I use pre-shredded carrots for this recipe?

    Fresh-grated carrots work best as they’re moister and more flavorful. Pre-shredded carrots are often dry and can affect the texture of your carrot cake layer.

    What’s the best cream cheese to use for cheesecake?

    Full-fat brick-style cream cheese produces the richest, creamiest results. Light versions contain more water and can make your cheesecake texture less stable.

    How far in advance can I make carrot cake cheesecake?

    You can prepare it up to 3 days before serving if refrigerated properly. The flavors actually improve with a day of rest, making it perfect for planning ahead.

    Final Thoughts

    This carrot cake cheesecake represents the best of both worlds—the comforting warmth of spiced carrot cake with the luxurious creaminess of classic cheesecake. Every time I serve it, I’m reminded of how food brings people together and creates moments worth savoring. The beauty of this dessert lies in its versatility and the way it bridges seasons and occasions. Whether you’re celebrating a special event or simply treating yourself, this recipe delivers pure dessert joy in every slice. For more delicious inspiration, follow me on Pinterest where I share my latest creations!

  • Crockpot Steak Bites with Garlic: Juicy, Tender & Irresistible!

    Crockpot Steak Bites with Garlic: Juicy, Tender & Irresistible!

    Crockpot Steak Bites with Garlic: Juicy, Tender & Irresistible!

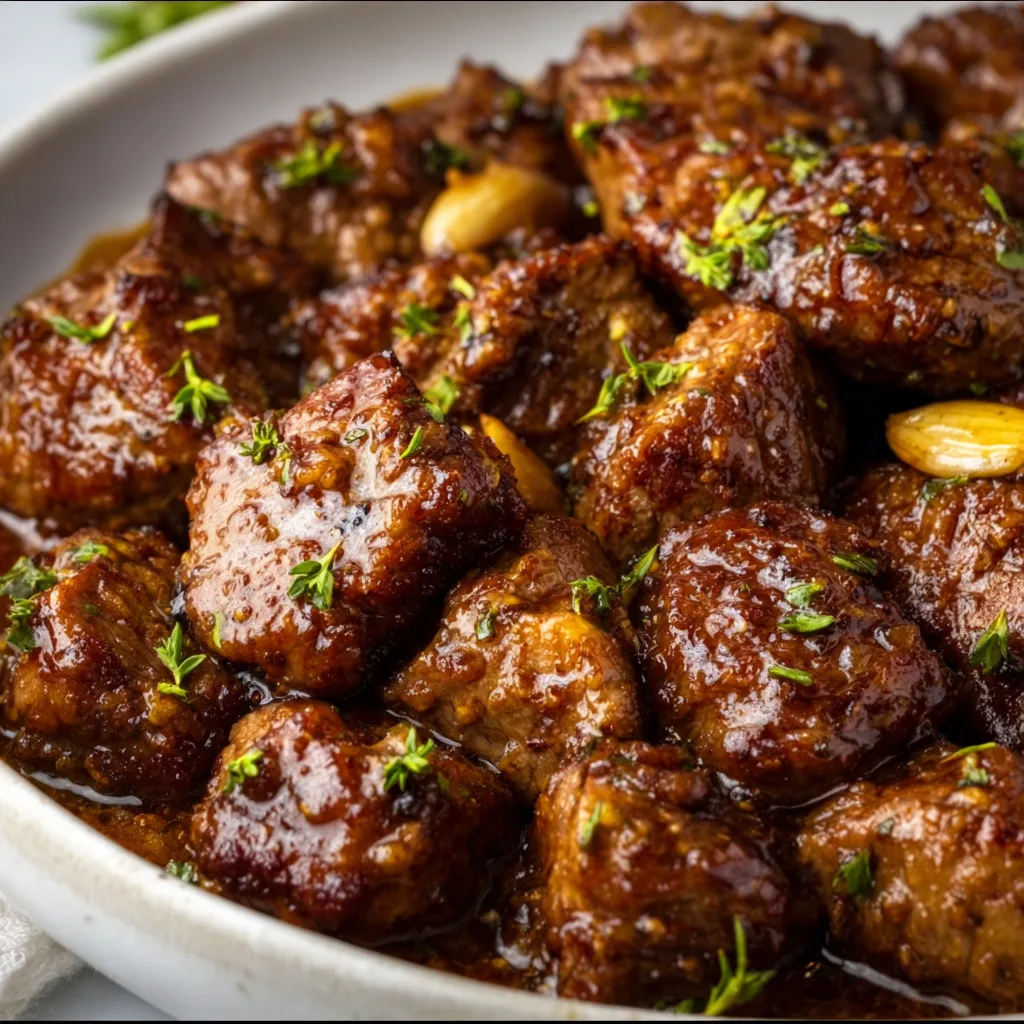
    Crockpot Steak Bites with Garlic might just become your new weeknight hero. I discovered this recipe during a particularly hectic week when I needed something that would practically cook itself while filling my home with that irresistible aroma of garlic-infused beef. The tender, juicy steak chunks swimming in a rich, buttery garlic sauce are nothing short of magical. What makes this dish truly special is how the slow cooking transforms even budget-friendly cuts into melt-in-your-mouth bites that taste like they came from a fancy steakhouse. If you love quick, flavorful meals, this one’s about to become a regular in your rotation.

    Recipe

    Why You’ll Love This Crockpot Steak Bites with Garlic

    Effortless Preparation with Maximum Flavor

    There’s something deeply satisfying about a recipe that delivers restaurant-quality results with minimal effort. These garlic steak bites require just 10 minutes of prep before your crockpot takes over the heavy lifting. I love that I can quickly cube the beef, toss it with seasonings, and then walk away. The slow cooking process allows the garlic to infuse every bite while the beef releases its juices, creating a self-basting environment that keeps everything incredibly tender. Even on my busiest days, I can manage this preparation in the morning and come home to a dinner that tastes like I spent hours in the kitchen.

    Budget-Friendly Gourmet Experience

    One of my favorite things about this recipe is how it transforms economical beef cuts into something truly special. Chuck roast or sirloin tip—cuts that might be tough with quick cooking methods—become buttery-soft in the crockpot. I discovered this by accident when I was trying to stretch my grocery budget during the holidays. The slow cooking breaks down the connective tissues, resulting in steak bites so tender they practically melt on your tongue. The rich garlic butter sauce elevates everything, making an affordable meal feel like a special occasion dinner that would impress even my pickiest dinner guests.

    Essential Tips & Tricks

    Selecting and Preparing the Perfect Beef

    Choosing the right cut makes all the difference in this recipe. Look for well-marbled beef like chuck roast, sirloin tip, or even stew meat. The fat distributed throughout the meat will render during cooking, creating more flavor and tenderness. I’ve found that cutting the beef into uniform 1-inch cubes ensures even cooking. Pat the meat dry with paper towels before seasoning—this might seem like an extra step, but it helps the seasonings adhere better and creates a better sear if you’re browning the meat first. For an extra flavor boost, marinate the cubed beef overnight with a tablespoon of Worcestershire sauce and a clove of minced garlic.

    Mastering the Garlic Flavor Profile

    The garlic intensity in this dish is completely customizable to your preference. For a subtle background note, 4-5 cloves of minced garlic work perfectly. If you’re a garlic enthusiast like me (no vampire problems here!), don’t hesitate to double that amount. I discovered a game-changing technique: add half the garlic at the beginning of cooking and reserve the rest to stir in during the final 30 minutes. This creates layers of garlic flavor—deeply infused notes plus that fresh, vibrant punch. For an even more complex profile, try roasting a whole head of garlic and adding the soft, caramelized cloves to the creamy sauce during the final hour.

    Serving Ideas & Creative Variations

    Perfect Pairing Suggestions

    These succulent steak bites deserve worthy accompaniments that can stand up to their rich, garlicky goodness. My go-to option is buttery mashed potatoes that soak up all that incredible sauce—I’ve literally seen dinner guests scraping their plates to get every last drop. Creamy polenta or pearl couscous also make excellent bases. For a lighter option, try serving over roasted vegetables like cauliflower, Brussels sprouts, or asparagus. The slight char on the vegetables complements the tender meat beautifully. Don’t forget a simple side salad with a bright vinaigrette to cut through the richness, or some crusty bread for sauce-mopping duties.

    Exciting Flavor Twists

    While the classic garlic butter version is divine, this recipe welcomes creative adaptations. Try adding a balsamic glaze during the last 30 minutes for a sweet-tangy dimension that caramelizes beautifully on the meat. For a Mediterranean twist, incorporate sun-dried tomatoes, olives, and a sprinkle of feta just before serving. My family goes wild for the spicy Cajun variation—just add Cajun seasoning to your initial spice blend and finish with a dash of hot sauce. For special occasions, a splash of red wine and some sautéed mushrooms transform this into a sophisticated bourguignon-inspired dish that never fails to impress dinner guests.

    Storage & Troubleshooting Guide

    Proper Storage and Reheating Methods

    These garlic steak bites reheat beautifully, sometimes tasting even better the next day as the flavors continue to meld. Store leftovers in an airtight container in the refrigerator for up to 3 days. When reheating, add a splash of beef broth to restore moisture and prevent the meat from drying out. The microwave works in a pinch, but for best results, reheat gently on the stovetop over medium-low heat. If you’re meal prepping, you can freeze portions for up to 2 months—just thaw overnight in the refrigerator before reheating. I like to portion leftovers with some sauce over rice for grab-and-go lunches that make my coworkers jealous.

    Solving Common Cooking Challenges

    If your steak bites turn out tougher than expected, the most likely culprit is either the cut of meat or cooking time. For maximum tenderness, make sure you’re using a well-marbled cut and cooking on low for the full recommended time. If your sauce seems too thin, remove the lid during the last 30 minutes of cooking to allow some liquid to evaporate. Alternatively, make a quick slurry with 1 tablespoon cornstarch mixed with 2 tablespoons cold water and stir it in. For overly salty results, add a quartered potato to absorb some salt, or balance with a teaspoon of brown sugar or honey.

    Remember that crockpot sizes vary—a too-large slow cooker might cook faster and dry out the meat.

    Frequently Asked Questions

    Can I use frozen beef for Crockpot Steak Bites with Garlic?

    While possible, I don’t recommend it. Frozen meat cooks unevenly and releases excess water, diluting flavors. For best results, thaw your beef completely and pat dry before cooking to achieve that perfect tender texture and concentrated garlic flavor.

    What’s the best cut of beef to use?

    Chuck roast, sirloin tip, or stew meat work beautifully. Look for well-marbled cuts that become tender with slow cooking. Even tougher, economical cuts transform into buttery-soft bites after several hours in the crockpot.

    Can I make this recipe dairy-free?

    Absolutely! Substitute the butter with olive oil or a dairy-free butter alternative. The garlic flavor will still shine through, and you’ll maintain that luscious mouthfeel without any dairy ingredients.

    How can I thicken the sauce?

    Create a cornstarch slurry with 1 tablespoon cornstarch mixed with 2 tablespoons cold water. Stir into the crockpot during the last 30 minutes of cooking with the lid off to achieve a silky, thickened sauce.

    Can I add vegetables to the crockpot?

    Yes! Hardy vegetables like carrots, mushrooms, and onions work wonderfully. Add them at the beginning of cooking. For quicker-cooking vegetables like bell peppers or zucchini, add during the last hour to prevent them from becoming mushy.

    Final Thoughts

    These Crockpot Steak Bites with Garlic have become my secret weapon for those days when I want to impress without stress. There’s something magical about walking through the door after a long day to the aroma of garlic-infused beef that’s been slowly simmering to perfection. This dish strikes that perfect balance between effortless preparation and incredible results—proving that sometimes the simplest recipes deliver the most satisfaction. Whether you’re serving it for a weeknight family dinner or a casual gathering with friends, these tender, flavorful bites never disappoint. For more delicious inspiration, check out my Pinterest collection of comfort food favorites!

  • Roasted Tomato & Garlic Ricotta Pasta: Irresistibly Creamy Bliss!

    Roasted Tomato & Garlic Ricotta Pasta: Irresistibly Creamy Bliss!

    Roasted Tomato & Garlic Ricotta Pasta: Irresistibly Creamy Bliss!

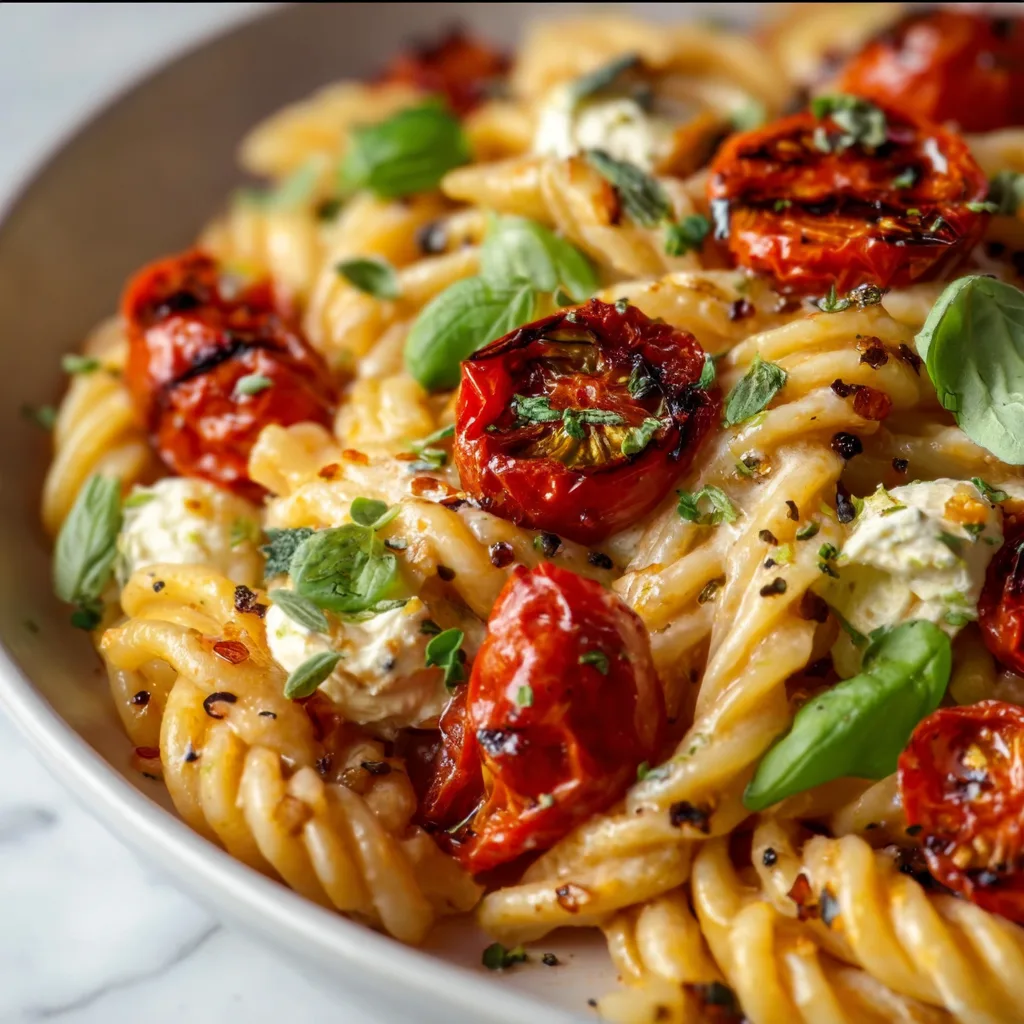
    Roasted Tomato and Garlic Ricotta Pasta is one of those magical dishes that transforms simple ingredients into something extraordinary. The first time I made this for my family on a chilly Sunday evening, the kitchen filled with the most intoxicating aroma of sweet roasted garlic and caramelized tomatoes. Everyone wandered in, asking what that heavenly smell was! There’s something so comforting about watching cherry tomatoes slowly burst in the oven, releasing their sweet juices that mingle with the creamy ricotta. It’s a dish that feels fancy enough for company but easy enough for weeknights—exactly the kind of recipe I treasure most. Check out my other pasta favorites for more dinner inspiration!

    Recipe

    Why You’ll Love This Roasted Tomato and Garlic Ricotta Pasta

    A Symphony of Simple Flavors

    What makes this Roasted Tomato and Garlic Ricotta Pasta truly special is how a handful of humble ingredients create such complex flavors. The tomatoes develop a deep sweetness when roasted, while the garlic becomes mellow and buttery. When tossed with al dente pasta and dollops of creamy ricotta, every bite offers a perfect balance of acidity, richness, and texture. I love how the hot pasta slightly melts the ricotta, creating little pockets of creaminess throughout the dish. It’s simple food elevated to something that feels like it came from a trattoria in Italy!

    Quick Yet Impressive

    Despite its gourmet flavor profile, this pasta comes together with minimal effort. While the tomatoes and garlic roast (mostly hands-off), you can boil the pasta and prepare any sides. The entire dish takes about 30 minutes from start to finish, making it perfect for those evenings when you want something spectacular without the fuss. I’ve served this at last-minute dinner parties and for casual family meals alike. The presentation—with those vibrant roasted tomatoes and creamy white dollops of ricotta against the pasta—always looks stunning on the plate.

    Essential Tips & Tricks

    Perfecting Your Roast

    The magic of this dish happens in the oven, so don’t rush this step! Arrange your tomatoes in a single layer on your baking sheet to ensure even roasting. I like to drizzle them generously with olive oil and season with flaky sea salt before they go in. For the garlic, I wrap the entire head in foil with a splash of olive oil—this creates a gentle steam that makes the cloves buttery soft and easy to squeeze out. Keep an eye on your tomatoes around the 20-minute mark; you want them blistered and juicy but not completely collapsed.

    Choosing the Right Pasta Shape

    Not all pasta shapes work equally well with this sauce. I’ve found that shapes with ridges or crevices capture the roasted tomato juices and little bits of ricotta perfectly. Rigatoni, orecchiette, and fusilli are my top choices, though pappardelle works beautifully if you prefer long pasta. Always reserve about ½ cup of starchy pasta water before draining—it’s liquid gold for bringing the sauce together! If you’re looking for another pasta dish with incredible texture contrasts, my Alfredo Tortellini Bake offers similar satisfaction.

    Serving Ideas & Creative Variations

    Perfect Pairings

    This Roasted Tomato and Garlic Ricotta Pasta shines as the star of the meal, but a few thoughtful accompaniments can elevate the experience. A simple arugula salad dressed with lemon and olive oil provides a peppery contrast to the creamy pasta. For protein, I love adding grilled chicken or sautéed shrimp on the side. A basket of crusty bread is essential for sopping up every last bit of the roasted tomato sauce. When I’m feeling fancy, I’ll open a bottle of crisp Pinot Grigio or Sauvignon Blanc—the acidity cuts through the richness of the ricotta beautifully.

    Seasonal Adaptations

    One reason I return to this recipe again and again is its versatility throughout the year. In summer, I use a rainbow of heirloom cherry tomatoes straight from the farmers’ market. Come fall, I might add roasted butternut squash cubes or crispy pancetta. Winter calls for sun-dried tomatoes and a pinch of red pepper flakes for warmth. Spring brings opportunities to fold in fresh peas or asparagus tips. For a heartier version similar to my Cheesy Chicken and Spinach Casserole, try adding shredded rotisserie chicken and wilted spinach to the mix.

    Storage & Troubleshooting Guide

    Keeping Leftovers Fresh

    This pasta is one of those rare dishes that maintains its charm as leftovers. Store any remaining Roasted Tomato and Garlic Ricotta Pasta in an airtight container in the refrigerator for up to 3 days. When reheating, add a splash of water or olive oil to revive the sauce, as the pasta will have absorbed some of the liquid. I prefer reheating gently on the stovetop rather than the microwave—it helps maintain the distinct textures that make this dish special. For a fresh touch, add a new spoonful of ricotta and a sprinkle of basil just before serving the leftovers.

    Fixing Common Issues

    If your pasta seems dry after mixing, don’t panic! The most common fix is adding more of that reserved pasta water you smartly set aside. Add just a tablespoon at a time while tossing until you reach the desired consistency. If your ricotta seems too firm or doesn’t incorporate well, try bringing it to room temperature before using, or mix it with a little olive oil to soften. For tomatoes that didn’t burst properly, you can help them along by gently pressing with the back of a spoon. Remember that imperfection is charming—this rustic dish doesn’t need to look perfect to taste amazing.

    Frequently Asked Questions

    Can I use regular tomatoes instead of cherry tomatoes?

    Yes! Roma or plum tomatoes work well—just quarter them before roasting. They may need an extra 5-10 minutes in the oven since they’re larger than cherry varieties.

    Is there a substitute for ricotta cheese?

    Absolutely. Soft goat cheese, mascarpone, or even cottage cheese can work. Each brings a different flavor profile, but all provide that creamy element that makes Roasted Tomato and Garlic Ricotta Pasta special.

    Can this dish be made ahead of time?

    You can roast the tomatoes and garlic a day ahead. Store them in the refrigerator, then warm them while cooking the pasta. Add fresh ricotta just before serving.

    How can I make this recipe vegan?

    Replace the ricotta with a cashew-based cheese alternative or silken tofu blended with nutritional yeast, lemon juice, and salt. The roasted vegetables are already vegan-friendly!

    What herbs work best with this Roasted Tomato and Garlic Ricotta Pasta?

    Fresh basil is classic, but thyme, oregano, or sage are delicious alternatives. In winter, try rosemary for a warming touch. Add hardy herbs before roasting and tender ones just before serving.

    Final Thoughts

    There’s something deeply satisfying about a dish like Roasted Tomato and Garlic Ricotta Pasta that celebrates simple ingredients at their best. I find myself returning to this recipe whenever I crave something comforting yet impressive, quick yet memorable. The contrast between the sweet roasted tomatoes, mellow garlic, and creamy ricotta creates a pasta experience that feels like a warm hug at the end of a long day. I hope this becomes a beloved staple in your kitchen too! For more inspiration, follow me on Pinterest where I share my favorite seasonal variations.

  • Teriyaki Glazed Brussels Sprouts That Will WOW Your Taste Buds!

    Teriyaki Glazed Brussels Sprouts That Will WOW Your Taste Buds!

    Teriyaki Glazed Brussels Sprouts That Will WOW Your Taste Buds!

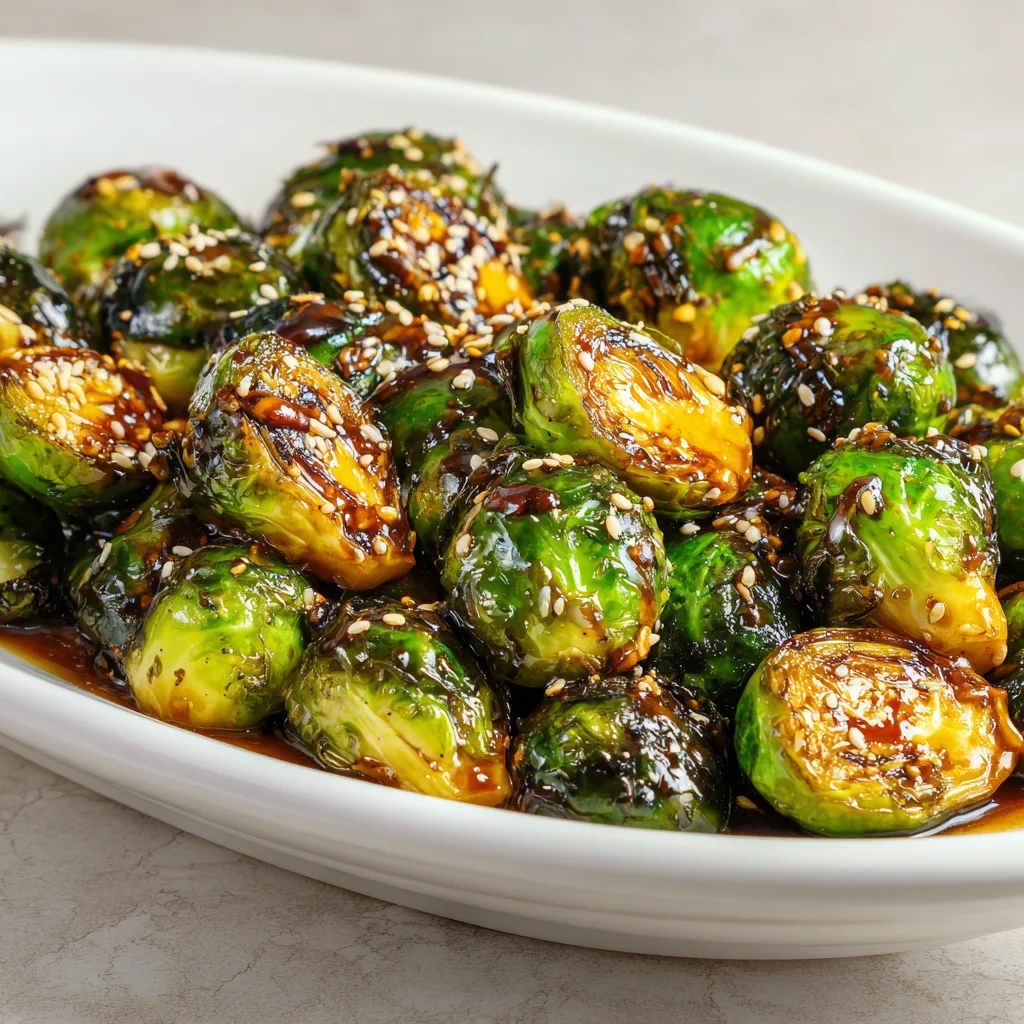
    Teriyaki Glazed Brussels Sprouts transformed my veggie-hating household into eager vegetable enthusiasts! There’s something magical about how the sweet-savory glaze caramelizes on these little green gems, creating crispy edges and tender centers that’ll make you forget you’re eating something healthy. I discovered this recipe during a rainy weekend when I was craving something different from my usual roasted carrots. Now it’s my go-to side dish that disappears faster than dessert at family gatherings. Let me share how these irresistible bites can become your new favorite too!

    Recipe

    Why You’ll Love This Teriyaki Glazed Brussels Sprouts

    Perfect Balance of Flavors

    The umami-rich teriyaki sauce creates a perfect harmony with the naturally nutty flavor of brussels sprouts. I love how the soy sauce depth gets brightened by sweet honey and a hint of ginger that wakes up your taste buds with each bite. The first time I made these, my husband (who claimed to despise brussels sprouts) kept sneaking more onto his plate! The slight char from roasting adds that irresistible smoky note that makes these veggies taste almost indulgent, while still being a nutritious addition to any meal.

    Quick and Simple Preparation

    These teriyaki brussels sprouts come together in just 25 minutes, making them perfect for busy weeknights when you need a vegetable side that doesn’t require constant attention. I love that I can trim and halve the sprouts, toss them with the glaze, and let the oven do the work while I focus on the main dish. The hands-off cooking time gives me space to pull together the rest of dinner or simply enjoy a moment of calm. Plus, the ingredient list is refreshingly short—just pantry staples you likely already have on hand!

    Essential Tips & Tricks

    Achieving the Perfect Texture

    For crispy-edged brussels sprouts that still maintain a tender center, don’t overcrowd your baking sheet. This was a game-changer for me! When sprouts have breathing room, they roast rather than steam, developing that gorgeous caramelization we’re after. I also recommend trimming the woody stems and removing any loose outer leaves that might burn. For larger sprouts, quarter them instead of halving to ensure even cooking. And don’t skip that mid-roast toss—it helps redistribute the teriyaki glaze for an even coating that glazes every nook and cranny.

    Mastering the Teriyaki Glaze

    The secret to an exceptional teriyaki glaze lies in balancing sweet, salty, and tangy notes. I recommend using low-sodium soy sauce so you can control the saltiness. For extra depth, add a teaspoon of sesame oil to your mixture—it adds a nutty dimension that complements the brussels sprouts beautifully. If you like heat, a pinch of red pepper flakes works wonders! For a thicker glaze that really clings to your sprouts, try reducing some of the sauce in a small pan before tossing, similar to how I prepare the sauce for my Easy Paleo Chicken Teriyaki.

    Serving Ideas & Creative Variations

    Perfect Pairings

    These teriyaki glazed brussels sprouts shine alongside grilled salmon or a juicy steak, but they’re versatile enough to complement almost any protein. I love serving them with sticky rice to soak up any extra glaze—pure comfort food! They also make an unexpected but delightful addition to grain bowls or as a side to Creamy Peri Peri Chicken Rice for a fusion-inspired meal. For a complete vegetarian dinner, pair them with crispy tofu and quinoa. The beautiful thing about these sprouts is how they elevate simple meals into something special.

    Exciting Flavor Twists

    When I’m feeling adventurous, I love adding crunchy elements like toasted sesame seeds, chopped cashews, or crispy bacon bits just before serving. For a citrus twist, try adding orange zest to your teriyaki glaze—the bright notes cut through the richness beautifully. Maple syrup can replace honey for a deeper sweetness, and a drizzle of sriracha adds welcome heat. My family’s favorite variation includes a sprinkle of furikake (Japanese seasoning) for an umami boost. These simple additions keep the recipe exciting even when it becomes a regular in your rotation.

    Storage & Troubleshooting Guide

    Proper Storage Methods

    For maximum freshness, let your teriyaki glazed brussels sprouts cool completely before storing in an airtight container. They’ll keep in the refrigerator for up to 4 days, though they’re at their crispiest within the first 2 days. I find that reheating them in a hot skillet rather than the microwave helps restore some of that delightful texture—just a quick toss over medium-high heat until warmed through. If you’re meal prepping, consider slightly undercooking the sprouts initially so they don’t become too soft when reheated. The flavor actually deepens overnight as they marinate in any remaining glaze!

    Common Issues and Solutions

    If your brussels sprouts turn out soggy instead of crispy, your oven was likely too cool or the pan was overcrowded. Next time, try increasing the temperature by 25°F and using two baking sheets if needed. Burnt spots? The natural sugars in teriyaki sauce can caramelize quickly, so position your rack in the middle of the oven and check 5 minutes before the recommended cooking time. If the glaze seems too thin and doesn’t cling well to the sprouts, try reducing it separately until slightly thickened before tossing with the vegetables. This creates that perfect coating that makes these sprouts irresistible.

    Frequently Asked Questions

    Can I use frozen brussels sprouts for this recipe?

    Fresh is best for optimal texture, but if using frozen, thaw completely and pat dry before roasting. Increase cooking time by 5-7 minutes and expect slightly less crispy results, though the flavor will still be delicious.

    How do I know when my Teriyaki Glazed Brussels Sprouts are perfectly done?

    They should be fork-tender with crispy, caramelized edges and a deep golden-brown color. The teriyaki glaze will appear slightly sticky rather than wet, and the sprouts will have shrunk slightly.

    Can I make these brussels sprouts ahead for a dinner party?

    Yes! Roast them 80% of the way, then refrigerate. Reheat at 400°F for 5-7 minutes just before serving. They’ll finish cooking and crisp up beautifully without drying out.

    What’s the best way to trim brussels sprouts?

    Cut off the woody stem end, remove any discolored outer leaves, and slice larger sprouts in half (or quarters if they’re very large) to ensure even cooking and maximum glazed surface area.

    Can I make this recipe vegan?

    Absolutely! Replace honey with maple syrup or agave nectar in your teriyaki glaze. Just check your soy sauce ingredients to ensure it’s vegan-friendly.

    Final Thoughts

    These Teriyaki Glazed Brussels Sprouts have become my secret weapon for converting vegetable skeptics and adding excitement to weeknight dinners. The magic lies in how the sweet-savory glaze transforms an often-overlooked vegetable into something truly craveable. I hope you’ll give this recipe a try and experience the joy of watching even the pickiest eaters reach for seconds! For more vegetable inspiration, follow my seasonal favorites on Pinterest where I’m constantly adding new ways to make healthy eating deliciously satisfying.

  • Baked Chicken Kabobs Recipe That Will Wow Your Taste Buds!

    Baked Chicken Kabobs Recipe That Will Wow Your Taste Buds!

    Baked Chicken Kabobs Recipe That Will Wow Your Taste Buds!

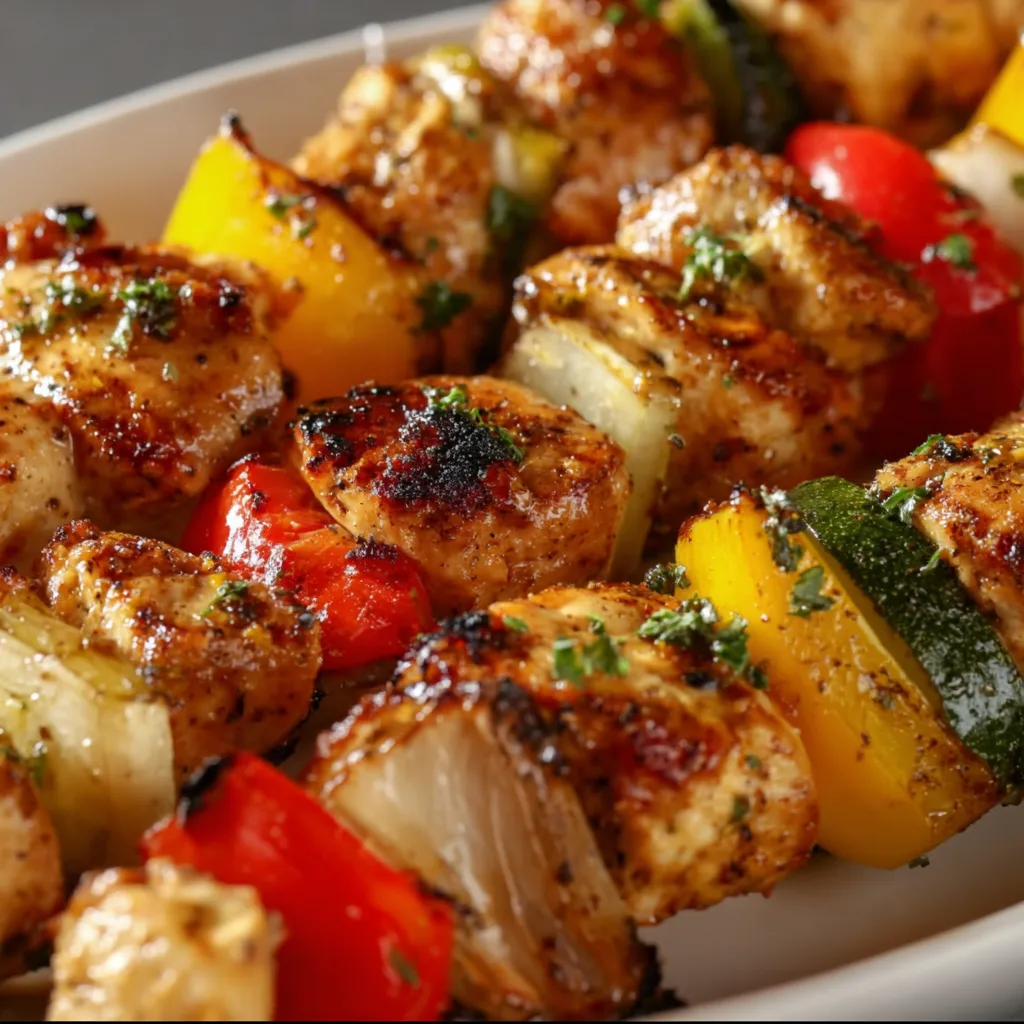
    These Baked Chicken Kabobs have completely transformed my weeknight dinner routine! Juicy chicken chunks marinated in a blend of Mediterranean spices, threaded with colorful bell peppers, red onions, and zucchini, then baked to perfection. I first made these on a rainy Tuesday when grilling outside wasn’t an option, and my family couldn’t stop raving about them. The oven-baking method creates that perfect char without the hassle of manning a grill. Plus, cleanup is a breeze compared to traditional grilling methods. These kabobs deliver restaurant-quality flavor with minimal effort—exactly what busy weeknights call for!

    Recipe

    Why You’ll Love These Baked Chicken Kabobs

    Perfect Texture Every Time

    The magic of oven-baked kabobs lies in the consistent cooking temperature that yields perfectly tender chicken and vegetables. I’ve struggled with unevenly cooked kabobs on the grill for years—some pieces charred while others remained undercooked. Baking solves this problem completely! The dry heat circulates evenly around each skewer, creating that beautiful caramelization on the edges while keeping the chicken incredibly juicy inside. The vegetables develop a lovely roasted sweetness that’s hard to achieve on a stovetop. My kids, who typically push vegetables aside, devour these colorful skewers without complaint!

    Make-Ahead Convenience

    These kabobs are a meal-prepper’s dream! You can prepare the marinated chicken and cut vegetables up to 24 hours in advance, storing them separately in the refrigerator. This flexibility has saved me countless times during hectic weeks. I often prep everything during my Sunday routine, then simply thread and bake when needed. The marinade actually improves over time, infusing the chicken with deeper flavor. For busy families, this recipe offers that perfect balance between impressive presentation and practical preparation. I’ve even assembled the skewers completely and refrigerated them for a few hours before baking with excellent results.

    Essential Tips & Tricks

    Marinating Magic

    The secret to irresistible baked chicken kabobs lies in the marinade timing. While 30 minutes works in a pinch, I’ve found that 4-6 hours creates flavor that penetrates deep into the meat. My go-to marinade combines olive oil, lemon juice, garlic, oregano, and a touch of honey—the acid tenderizes while the honey promotes beautiful caramelization. For an extra flavor boost, reserve a small portion of the marinade (before adding raw chicken) to brush on during the final minutes of baking. This creates a gorgeous glaze that makes the kabobs look and taste like they came from a fancy Mediterranean restaurant.

    Perfect Cutting Technique

    Uniform sizing is absolutely crucial for evenly cooked kabobs. I aim for 1½-inch cubes of chicken and similarly sized vegetable pieces. This consistency ensures everything finishes cooking at the same time. When cutting bell peppers, I’ve found that 1½-inch squares work perfectly—large enough to thread easily but small enough to cook through. For onions, separating the layers before cutting helps them cook more evenly. Zucchini should be sliced slightly thicker than other vegetables (about ¾-inch rounds) since they cook faster. This attention to detail makes all the difference between good kabobs and great ones!

    Serving Ideas & Creative Variations

    Complementary Side Dishes

    These baked chicken kabobs pair beautifully with a variety of sides. My family’s favorite combination includes fluffy basmati rice that soaks up all the flavorful juices and a crisp Greek salad with cucumber, tomato, and feta. For a heartier meal, try serving them alongside roasted garlic potatoes or a warm pita bread with homemade tzatziki sauce. When entertaining, I arrange the kabobs over a bed of lemon-herb couscous for an impressive presentation. The bright, fresh flavors of the kabobs also complement creamy dishes perfectly, creating a balanced meal that satisfies everyone at the table.

    Flavor Variations

    While the classic Mediterranean version remains my go-to, these baked chicken kabobs are incredibly versatile! For an Asian-inspired twist, try a teriyaki marinade with pineapple chunks and bell peppers. My husband loves when I make them with a spicy honey-sriracha glaze paired with zucchini and mushrooms. For a Greek variation, use a lemon-oregano marinade and add cherry tomatoes to the skewers, finishing with crumbled feta after baking. Kids especially enjoy a milder version with a garlic butter marinade. The beauty of this recipe is its adaptability—you can customize the flavors based on your family’s preferences or whatever ingredients you have on hand.

    Storage & Troubleshooting Guide

    Proper Storage Methods

    Leftover baked chicken kabobs maintain their delicious flavor when stored properly. Allow them to cool completely before transferring to an airtight container. They’ll keep in the refrigerator for up to 3 days. For best results, I recommend removing the meat and vegetables from the skewers before storing—this saves space and makes reheating easier. To freeze, place the cooled kabob components in a freezer-safe container, separating layers with parchment paper. They’ll maintain quality for about 2 months. When reheating, a quick 2-3 minutes in a hot skillet revives their texture better than microwaving, which can make the chicken rubbery.

    Common Problems & Solutions

    If your chicken kabobs turn out dry, the most likely culprit is overcooking. I always use an instant-read thermometer to check when the chicken reaches 165°F—any higher and you risk dryness. Another common issue is vegetables cooking at different rates. If you notice this happening, try parboiling denser vegetables like carrots for 2 minutes before threading. For kabobs that stick to the pan, make sure you’re using enough oil on both the food and the baking sheet. Line with parchment paper for extra insurance against sticking. If your kabobs lack flavor, try increasing the salt in your marinade or adding a finishing sprinkle of flaky sea salt before serving.

    Frequently Asked Questions

    Can I make baked chicken kabobs without skewers?

    Absolutely! You can prepare this as a sheet pan meal by spreading the marinated chicken and vegetables evenly on a parchment-lined baking sheet. Bake at the same temperature, stirring once halfway through cooking.

    How do I prevent wooden skewers from burning in the oven?

    Soak wooden skewers in water for at least 30 minutes before threading. For extra protection, wrap exposed ends with small pieces of aluminum foil before baking.

    What’s the best chicken cut for baked chicken kabobs?

    Boneless, skinless chicken thighs provide the juiciest results as they’re more forgiving when baked. Chicken breast works well too but requires more careful monitoring to prevent drying out.

    Can I prepare these kabobs for a large crowd?

    Definitely! The recipe scales easily for parties. Prepare multiple batches of skewers and bake them in shifts, keeping the first batches warm in a low oven (200°F) while finishing the rest.

    How can I tell when my baked chicken kabobs are done?

    Use an instant-read thermometer inserted into the thickest chicken piece to verify it reaches 165°F. The chicken should be opaque throughout with no pink remaining.

    Final Thoughts

    These baked chicken kabobs have earned their spot in my regular dinner rotation for good reason. They transform ordinary chicken into a colorful, flavorful feast that satisfies both kids and adults alike. The oven-baking method delivers consistent results that make this recipe accessible year-round, regardless of weather or grilling equipment. I encourage you to make these versatile kabobs your own by experimenting with different marinades and vegetable combinations. Don’t forget to check out more delicious recipes on Pinterest for endless inspiration!