Blog

  • White Cheddar Spinach Chicken Burgers That Wow Your Taste Buds!

    White Cheddar Spinach Chicken Burgers That Wow Your Taste Buds!

    White Cheddar Spinach Chicken Burgers That Wow Your Taste Buds!

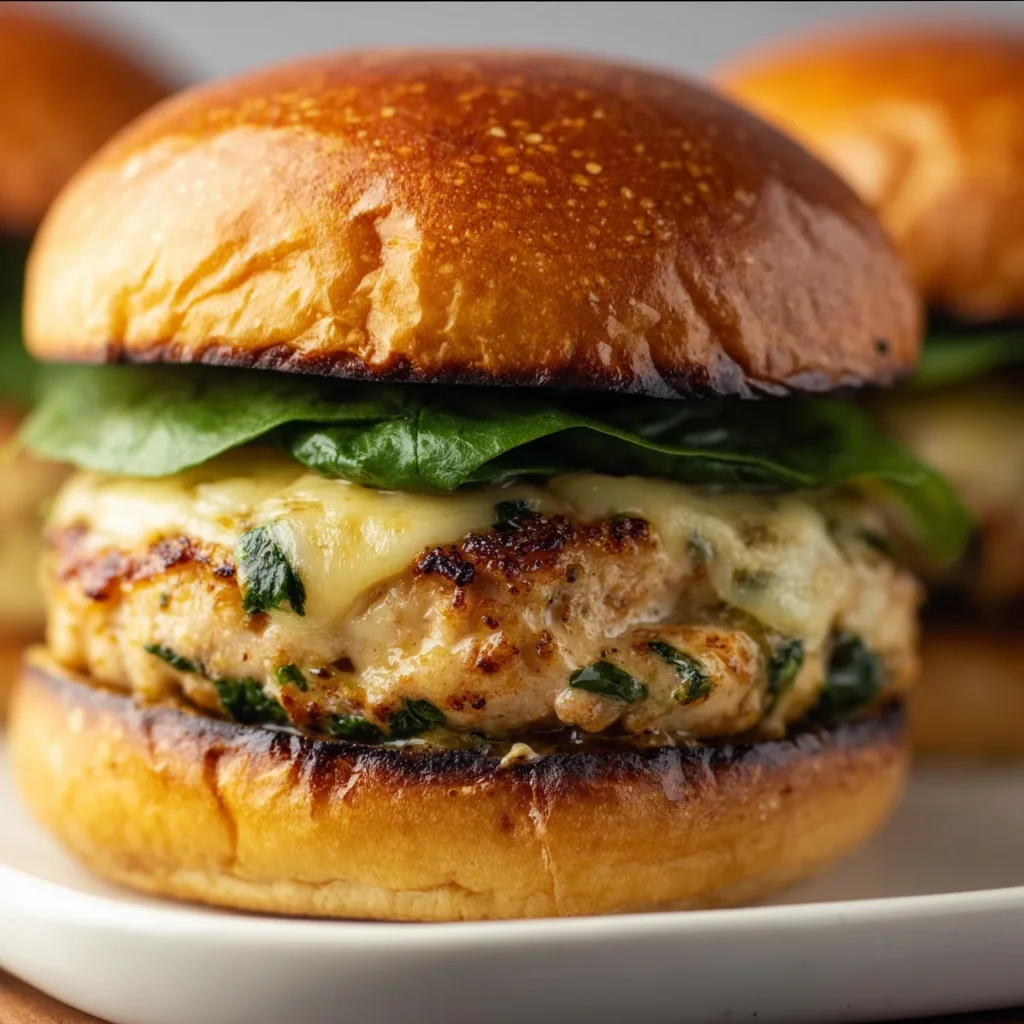
    White Cheddar Spinach Chicken Burgers have completely transformed my weeknight dinner game! There’s something magical about the combination of juicy ground chicken, melty white cheddar, and vibrant spinach that creates a burger that’s both incredibly satisfying and lighter than traditional beef patties. The first time I made these for my family, my husband (who typically turns his nose up at chicken burgers) went back for seconds! These burgers strike that perfect balance between wholesome and indulgent—a true dinnertime winner that I’m excited to share with you today on Recipes Darleen.

    Recipe

    Why You’ll Love This White Cheddar Spinach Chicken Burgers

    Perfect Balance of Flavors and Textures

    These White Cheddar Spinach Chicken Burgers deliver an incredible flavor explosion with every bite. The mild, juicy chicken provides the perfect canvas for the sharp, creamy white cheddar that melts gloriously throughout the patty. Fresh spinach adds a subtle earthiness and beautiful flecks of green, while garlic and herbs bring depth and complexity. I’ve carefully balanced these ingredients so none overwhelm the others. The exterior develops a beautiful golden crust when cooked, while the inside remains tender and moist—solving the dry chicken burger problem once and for all!

    Healthier Without Sacrificing Taste

    I’m all about creating healthier versions of comfort foods that don’t make you feel like you’re missing out, and these burgers absolutely deliver! Ground chicken contains significantly less saturated fat than beef while still providing plenty of protein. The addition of spinach sneaks in extra nutrients, fiber, and a gorgeous pop of color. My kids don’t even realize they’re eating something nutritious because the flavors are so delicious! The white cheddar brings richness without going overboard on calories, creating a perfectly balanced burger that satisfies cravings while aligning with healthier eating goals.

    Essential Tips & Tricks

    Perfecting Your Patty Mixture

    The secret to incredible White Cheddar Spinach Chicken Burgers lies in how you handle the mixture. Always start with cold ingredients to help the patties hold together better. When adding spinach, make sure it’s very well drained and chopped finely—excess moisture is the enemy of a good burger! I like to gently fold the ingredients rather than overmix, which can make the patties tough. For maximum flavor infusion, let the prepared mixture rest in the refrigerator for 15-30 minutes before forming patties. This allows the herbs and seasonings to permeate the meat, similar to how I prepare my Crispy Dill Chicken Burger with Homemade Mayo.

    Cooking For Perfect Doneness

    Achieving the perfect doneness with chicken burgers requires a bit more attention than beef. Use a meat thermometer to ensure they reach 165°F internally—this is non-negotiable for food safety! I recommend cooking over medium heat rather than high to prevent the outside from burning before the inside is done. Create a small dimple in the center of each patty with your thumb to prevent them from puffing up during cooking. For an extra flavor boost, brush the patties with a little melted butter mixed with garlic powder halfway through cooking. This creates a mouthwatering aroma and helps develop that golden crust we’re after!

    Serving Ideas & Creative Variations

    Building The Ultimate Burger

    Elevate your White Cheddar Spinach Chicken Burgers by thoughtfully considering each component of your burger build. I love serving these on lightly toasted brioche buns for a touch of sweetness that complements the savory patty. For toppings, avocado slices add creamy richness, while arugula provides a peppery contrast to the mild chicken. A spread of garlic aioli or honey mustard takes these burgers to the next level! Don’t forget the pickle—the tanginess cuts through the richness perfectly. These burgers pair beautifully with sweet potato fries or a light side salad, similar to how I serve my Chicken Pesto Sandwiches for a complete meal.

    Exciting Flavor Variations

    The beauty of these White Cheddar Spinach Chicken Burgers lies in their versatility! Try a Mediterranean twist by swapping the white cheddar for feta, adding chopped sun-dried tomatoes, and mixing in fresh oregano and lemon zest. For a southwest version, incorporate pepper jack instead of white cheddar, add a diced jalapeño, and mix in some cumin and chili powder. You can even form the mixture into meatballs instead of patties to serve over pasta or zucchini noodles! For a fun appetizer option, make mini sliders topped with cranberry sauce and arugula—these are always the first to disappear at my gatherings!

    Storage & Troubleshooting Guide

    Proper Storage Methods

    To maintain the quality of your White Cheddar Spinach Chicken Burgers, proper storage is essential. Refrigerate cooked burgers in an airtight container for up to 3 days—they make excellent leftovers for quick lunches! For make-ahead convenience, form uncooked patties, place parchment paper between them, and freeze in a zip-top bag for up to 3 months. I recommend thawing frozen patties in the refrigerator overnight before cooking for the best texture. If you’re meal prepping, consider making a double batch—these reheat beautifully in a covered skillet with a splash of water to maintain moisture, or for about 30 seconds in the microwave when you’re really pressed for time.

    Solving Common Issues

    If your White Cheddar Spinach Chicken Burgers are falling apart during cooking, the mixture may be too wet. Add 2-3 tablespoons of panko breadcrumbs to absorb excess moisture and help bind the ingredients. For burgers that seem dry after cooking, you may need more fat in your mixture—try using ground chicken thigh meat instead of breast, or incorporate an extra tablespoon of olive oil into the raw mixture. If your burgers are browning too quickly on the outside while remaining undercooked inside, lower your heat and cover the pan for a few minutes to help them cook through evenly without burning. Remember that chicken needs to reach 165°F internally for food safety!

    Frequently Asked Questions

    Can I use ground turkey instead of chicken for White Cheddar Spinach Chicken Burgers?

    Absolutely! Ground turkey works beautifully as a substitute with virtually identical cooking times and methods. The flavor will be slightly different but equally delicious.

    How do I prevent my chicken burgers from drying out?

    Add moisture-retaining ingredients like grated onion or a tablespoon of mayonnaise to your mixture. Also, avoid overcooking—use a meat thermometer to reach exactly 165°F, not higher.

    Can I make these burgers ahead of time?

    Yes! Form patties up to 24 hours ahead and refrigerate covered, or freeze them with parchment paper between each patty for longer storage.

    What’s the best cheese substitute if I don’t have white cheddar?

    Monterey Jack, provolone, or mozzarella work well as milder substitutes. For more flavor, try pepper jack or a mild blue cheese.

    Are these burgers gluten-free?

    The patties themselves can be gluten-free if you use certified gluten-free breadcrumbs or oats as a binder. Serve on lettuce wraps or gluten-free buns to keep the entire meal gluten-free.

    Final Thoughts

    These White Cheddar Spinach Chicken Burgers have become a staple in my kitchen for good reason—they deliver incredible flavor while keeping things on the lighter side. I love watching friends and family devour these burgers with surprise and delight, never missing the beef for a second! The combination of juicy chicken, melty white cheddar, and nutritious spinach creates something truly special that works for both weeknight dinners and weekend gatherings. I hope you’ll give them a try and discover your own favorite way to enjoy them! Don’t forget to check out more delicious recipes on Pinterest.
  • Hot Honey Salmon Bites That’ll Ignite Your Taste Buds!

    Hot Honey Salmon Bites That’ll Ignite Your Taste Buds!

    Hot Honey Salmon Bites That’ll Ignite Your Taste Buds!

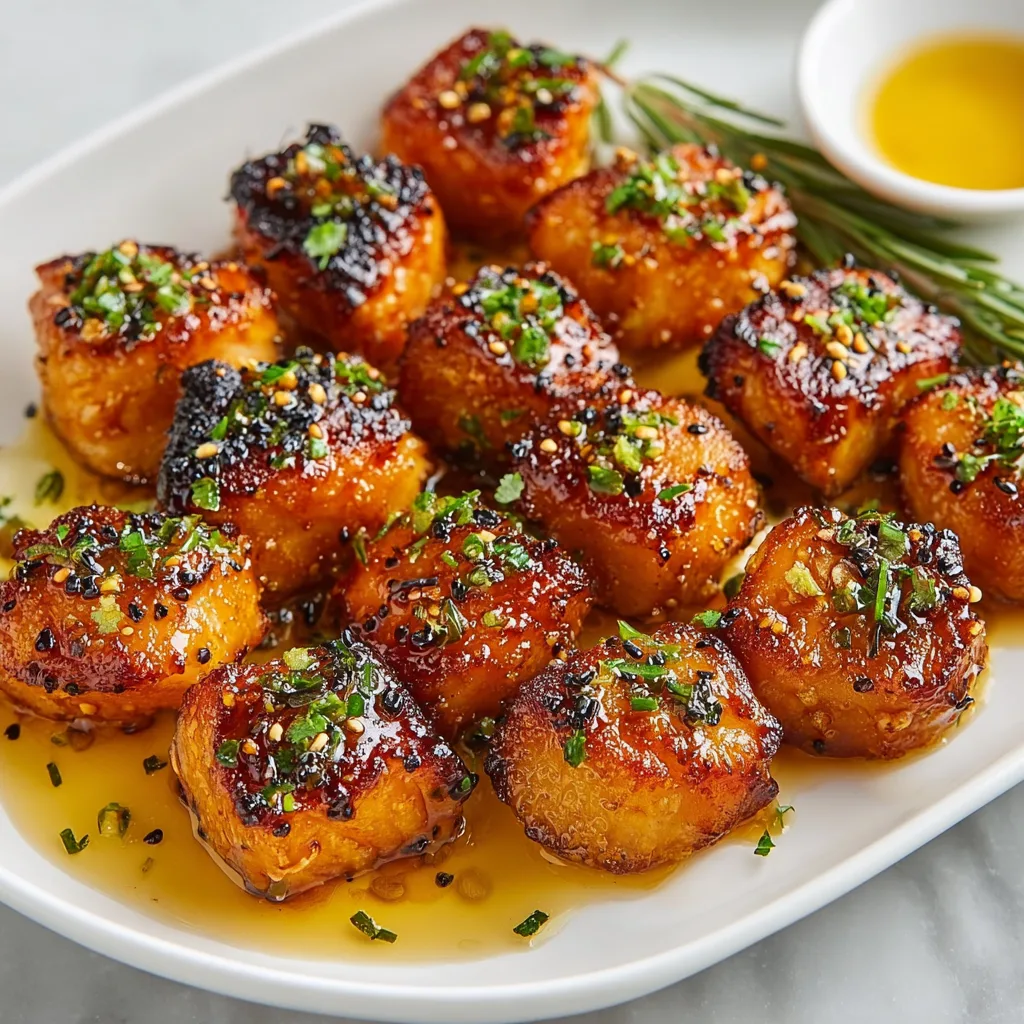
    These Hot Honey Salmon Bites have completely changed my weeknight dinner game! Tender, bite-sized salmon pieces glazed with spicy-sweet hot honey create an irresistible flavor explosion that’s ready in under 20 minutes. I discovered this recipe during a particularly chaotic Tuesday when I needed something quick but impressive for unexpected dinner guests. The combination of that sticky, spicy glaze with the buttery salmon had everyone asking for seconds! Perfect as an appetizer or main course, these little flavor bombs deliver big on taste while keeping prep time minimal. If you love the sweet-heat combination in my Honey Garlic Shrimp, you’ll absolutely adore these salmon bites.

    Recipe

    Why You’ll Love These Hot Honey Salmon Bites

    Perfect Balance of Flavors and Textures

    The magic of these hot honey salmon bites lies in their perfect balance of flavors. The natural richness of salmon creates a beautiful canvas for the spicy-sweet hot honey glaze that caramelizes slightly when cooked. I love how the exterior develops a light crispness while the interior stays tender and flaky. The heat level is customizable too—I keep mine medium-spicy with just enough kick to make things interesting without overwhelming the delicate salmon. My husband, who typically reaches for the hot sauce with everything, doesn’t even need it with these bites!

    Quick and Impressive Solution

    On those evenings when cooking feels like a chore, these salmon bites are my secret weapon. They require minimal prep yet deliver restaurant-quality results. I’ve served them at last-minute dinner gatherings and planned celebrations alike, always to rave reviews. The entire dish comes together in about 15 minutes, making it perfect for busy weeknights. Even better, the ingredients are simple pantry staples (besides the salmon) that I always have on hand. These bites have saved me countless times when I needed something special without spending hours in the kitchen.

    Essential Tips & Tricks

    Selecting and Preparing the Salmon

    Starting with high-quality salmon makes all the difference in this recipe. Look for salmon with firm, bright flesh and a fresh, clean scent—never fishy. I prefer center-cut salmon fillets for their even thickness, which helps the bites cook uniformly. When cutting into cubes, aim for 1-inch pieces and pat them thoroughly dry with paper towels before seasoning. This crucial step ensures proper browning and helps the glaze adhere better. I learned this the hard way after making a soggy first batch that never developed that beautiful caramelization we’re after!

    Perfecting the Hot Honey Glaze

    The hot honey glaze is where the magic happens! I recommend making your own by combining quality honey with your favorite hot sauce or red pepper flakes. For extra depth, add a touch of garlic powder and a squeeze of fresh lime juice. Let the mixture sit for at least 5 minutes before using to allow the flavors to meld. When cooking, add the glaze during the final minute of cooking—adding it too early can cause burning. For an extra flavor boost, try my technique of drizzling a fresh batch of the glaze right before serving.

    Serving Ideas & Creative Variations

    Appetizer and Main Course Options

    These versatile bites shine as both starters and main dishes. For appetizers, serve them on small skewers with a side of extra hot honey for dipping. When hosting, I place them atop cucumber rounds with a tiny dollop of crème fraîche for an elegant one-bite appetizer. As a main course, pair them with coconut rice and steamed vegetables for a complete meal. My favorite weeknight combination is serving them over a simple salad with avocado and mango—the creamy and sweet elements beautifully complement the spicy salmon. The possibilities are truly endless!

    Flavor Variations to Try

    While the classic hot honey version is incredible, don’t be afraid to experiment! Adding a tablespoon of soy sauce creates an Asian-inspired variation that’s absolutely delicious. For a Mediterranean twist, mix in lemon zest and dried oregano. My current obsession is incorporating a teaspoon of miso paste into the glaze for umami depth. If you’re serving guests with varying heat preferences, consider making a batch of my Maple Glazed Sheet Pan Salmon alongside these spicier bites to offer options. The cooking method remains the same—only the flavor profile changes!

    Storage & Troubleshooting Guide

    Proper Storage and Reheating

    These hot honey salmon bites are best enjoyed fresh, but leftovers can be stored in an airtight container in the refrigerator for up to 2 days. When reheating, avoid the microwave which can make the salmon rubbery. Instead, warm them gently in a skillet over medium-low heat just until heated through. For meal prep, I recommend preparing the salmon cubes and glaze separately, storing them in the refrigerator, then cooking fresh when ready to eat. If you must reheat, a light brush of olive oil before warming helps maintain moisture.

    Common Issues and Solutions

    The most frequent challenge with these bites is overcooking. Salmon continues cooking after being removed from heat, so take the pieces off when they’re just slightly underdone in the center. If your glaze is burning before the salmon is cooked, your heat is likely too high—medium heat works best for this recipe. For those finding the bites too spicy, balance with a side of cooling cucumber yogurt sauce. Not spicy enough? Add a pinch of cayenne to your hot honey mixture. Remember that the size of your salmon pieces affects cooking time—keep them uniform for best results.

    Frequently Asked Questions

    Can I make Hot Honey Salmon Bites in the air fryer?

    Yes! Preheat your air fryer to 400°F, arrange the seasoned salmon pieces in a single layer, and cook for 5-7 minutes. Add the hot honey glaze during the final 2 minutes for perfect caramelization without burning.

    What’s the best type of salmon to use for this recipe?

    Wild-caught salmon varieties like sockeye or coho work beautifully for their firm texture and rich flavor. Farm-raised Atlantic salmon is also good if you prefer a milder, buttery taste.

    How spicy are these Hot Honey Salmon Bites?

    The spice level is customizable! Start with 1 teaspoon of hot sauce in your honey for mild heat, increasing to 1-2 tablespoons for a more pronounced kick. Taste and adjust before glazing.

    Can I make these ahead for a party?

    Prepare the salmon cubes and glaze up to 8 hours ahead, storing separately in the refrigerator. Cook just before serving for the best texture and flavor—they take only minutes!

    What sides pair well with these salmon bites?

    Light, refreshing sides balance these bites perfectly—try cucumber salad, coconut rice, roasted vegetables, or a simple green salad with citrus vinaigrette.

    Final Thoughts

    These Hot Honey Salmon Bites have earned their place in my regular rotation for good reason—they’re impossibly delicious while being deceptively simple. The combination of tender salmon with that sticky-spicy glaze creates something truly special that feels indulgent without hours of effort. Whether you’re cooking for a crowd or just treating yourself to something delicious on a weeknight, these bites deliver major flavor with minimal fuss. I’d love to see your creations on Pinterest—tag me when you make these spicy-sweet morsels!

  • Cheddar Bacon Turkey Melt: Irresistible, Crispy, Melted Perfection!

    Cheddar Bacon Turkey Melt: Irresistible, Crispy, Melted Perfection!

    Cheddar Bacon Turkey Melt: Irresistible, Crispy, Melted Perfection!

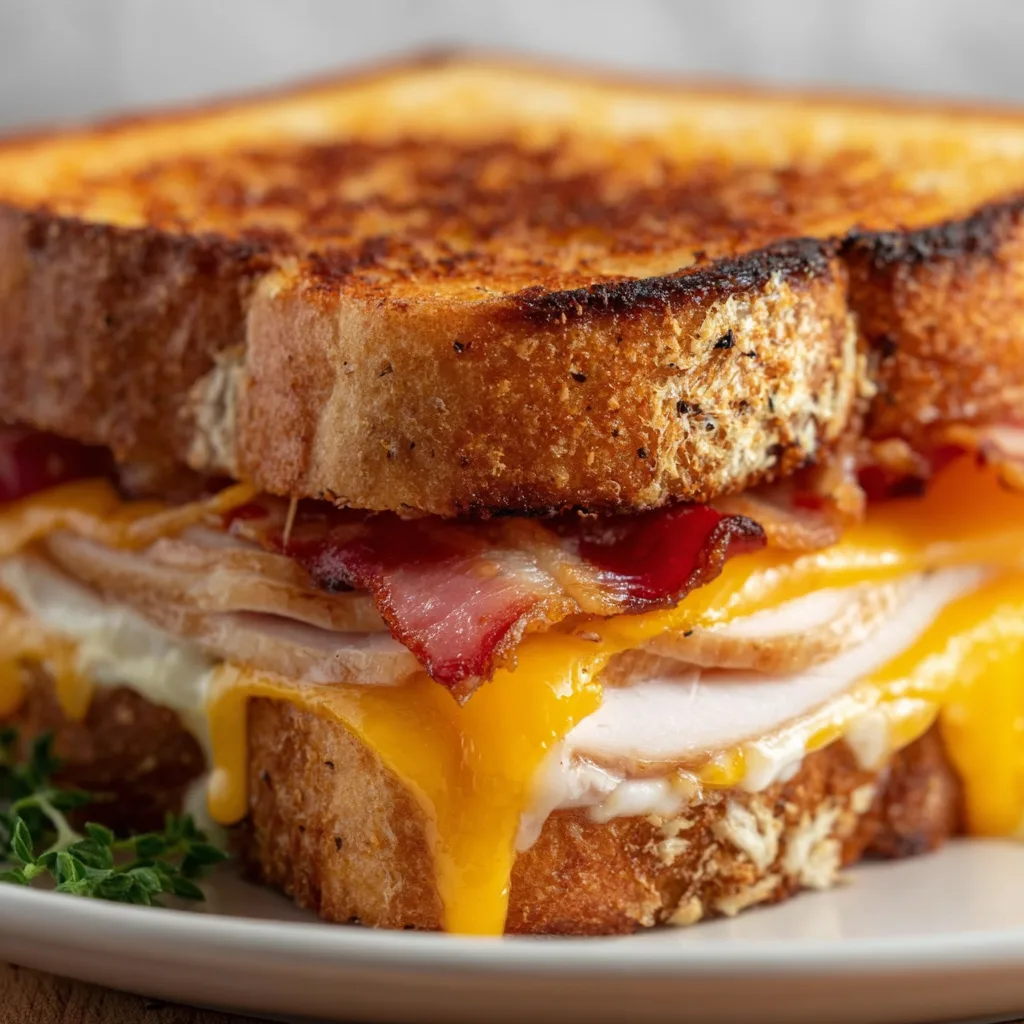
    The Cheddar and Bacon Turkey Melt Sandwich is my absolute favorite comfort food creation when I’m craving something warm, gooey, and satisfying. There’s something magical about the way sharp cheddar melts into crispy bacon and tender turkey, all nestled between slices of perfectly toasted bread. I first made this sandwich on a rainy Sunday afternoon when my pantry was nearly empty, and it’s been my go-to ever since. The combination of smoky, savory, and creamy elements creates a flavor explosion that will make your taste buds dance with joy.

    Recipe

    Why You’ll Love This Cheddar and Bacon Turkey Melt Sandwich

    Perfect Balance of Flavors and Textures

    This sandwich hits all the right notes with its harmonious blend of ingredients. The sharpness of quality cheddar cheese cuts through the richness of the bacon, while the turkey provides a hearty, protein-packed foundation. I love how the outside gets crispy and golden from a light butter coating, while the inside remains moist and tender. The textural contrast between the crunchy bread exterior and the melty cheese interior creates that satisfying bite that makes you close your eyes and savor the moment. It’s comfort food perfection!

    Quick and Convenient Meal Solution

    When life gets hectic, this sandwich is my time-saving savior. I can have it ready in under 15 minutes, making it perfect for busy weeknights or quick lunches. Most of the ingredients are staples I always have on hand—bread, cheese, and some form of protein. Even better, it’s customizable based on whatever’s in your refrigerator. I’ve made this sandwich countless times when I needed something substantial but didn’t have the energy for elaborate cooking. It’s filling enough to satisfy hunger without requiring a nap afterward!

    Essential Tips & Tricks

    Cheese Selection and Melting Techniques

    The secret to the perfect turkey melt lies in your cheese strategy. While pre-sliced cheddar works fine, I prefer freshly grated for superior melting. The key is to use room temperature cheese—cold cheese straight from the refrigerator won’t melt evenly before your bread burns. For an extra-gooey result, try mixing sharp cheddar with a bit of mozzarella or monterey jack. And don’t rush the melting process! Cook over medium-low heat with a lid to create a mini oven effect that melts the cheese perfectly while keeping the bread from burning.

    Bread and Assembly Considerations

    Choosing the right bread makes all the difference in your Cheddar and Bacon Turkey Melt Sandwich. I recommend sturdy varieties like sourdough, rye, or a good quality white bread that can stand up to the fillings without getting soggy. Butter the outside of the bread rather than the pan for even browning and that irresistible crispy exterior. When layering ingredients, place cheese slices directly against the bread on both sides with the turkey and bacon in between—this creates a seal that prevents the bread from becoming soggy and ensures maximum cheese meltage.

    Serving Ideas & Creative Variations

    Complementary Side Dishes

    This sandwich pairs beautifully with lighter sides that balance its richness. My go-to accompaniments include a tangy coleslaw with apple cider vinegar dressing or a simple green salad with lemon vinaigrette. For a heartier meal, try serving alongside a cup of Tomato Soup for that classic comfort food combination. Sweet potato fries with a sprinkle of smoked paprika also make an excellent side, adding color and complementary flavors to your plate. In summer months, I love pairing this sandwich with fresh cucumber slices tossed in dill and yogurt.

    Innovative Flavor Combinations

    Don’t be afraid to experiment with exciting flavor enhancements! Try adding thinly sliced apples or pears for a sweet-savory contrast that works beautifully with the cheddar. For heat lovers, incorporate jalapeño slices or a spread of chipotle mayo. One of my favorite variations uses leftover cranberry sauce after Thanksgiving—the sweet-tart flavor cuts through the richness perfectly. You could also try different proteins like smoked turkey, rotisserie chicken, or even sliced steak for a more substantial sandwich. Fresh herbs like thyme or rosemary added to the butter for toasting elevate the flavor profile.

    Storage & Troubleshooting Guide

    Make-Ahead and Reheating Methods

    While these sandwiches are best enjoyed fresh, you can prep components in advance for quick assembly. Cook bacon ahead of time and store in the refrigerator for up to three days. For reheating a fully assembled sandwich, avoid the microwave which makes the bread soggy. Instead, wrap loosely in foil and warm in a 300°F oven for about 10 minutes. If you’re packing this for lunch, toast the bread extra crispy initially, let cool completely before assembling, and wrap in parchment paper rather than plastic wrap to prevent sogginess.

    Common Issues and Solutions

    The most frequent problem with melts is uneven cooking—burnt bread with unmelted cheese. The solution is patience and lower heat. If your cheese isn’t melting fast enough, cover the pan with a lid to trap heat. For bread that’s browning too quickly, reduce the heat immediately and consider finishing the sandwich in a 300°F oven. If your sandwich seems dry, add a spread like mayo, mustard, or avocado to one side of the bread. And if ingredients keep sliding out while eating, let the sandwich rest for 2-3 minutes after cooking to allow the cheese to set slightly.

    Frequently Asked Questions

    What’s the best cheese for a Cheddar and Bacon Turkey Melt Sandwich?

    Sharp cheddar provides the classic flavor, but mixing cheeses works wonderfully. Try combining cheddar with Gruyère, fontina, or Havarti for enhanced meltability and depth of flavor.

    Can I make this sandwich with leftover Thanksgiving turkey?

    Absolutely! Leftover turkey makes this sandwich even more delicious. The roasted flavors add depth, and you can incorporate other Thanksgiving leftovers like cranberry sauce or gravy.

    How do I keep my sandwich from getting soggy?

    Toast both bread slices lightly before assembly, place cheese directly against the bread as a moisture barrier, and avoid overloading with wet ingredients.

    What’s the best way to cook the bacon for this sandwich?

    Oven-baking bacon on a rack at 400°F for 15-20 minutes yields perfectly crisp, flat bacon strips that fit nicely in sandwiches without curling.

    Can I make this sandwich vegetarian?

    Yes! Substitute the turkey and bacon with grilled portobello mushrooms, avocado slices, or plant-based meat alternatives while keeping the delicious cheddar cheese.

    Final Thoughts

    The Cheddar and Bacon Turkey Melt Sandwich has become my reliable comfort food hero for good reason. It strikes that perfect balance between convenience and indulgence, making everyday meals feel special. Whether you’re cooking for yourself after a long day or impressing friends with an elevated lunch, this sandwich delivers satisfaction in every bite. I hope you’ll make this recipe your own by experimenting with different breads, cheeses, and add-ins. Don’t forget to check out more sandwich inspiration on Pinterest and share your creations!

  • Chicken Fajita Casserole Recipe That Will WOW Your Taste Buds!

    Chicken Fajita Casserole Recipe That Will WOW Your Taste Buds!

    Chicken Fajita Casserole Recipe That Will WOW Your Taste Buds!

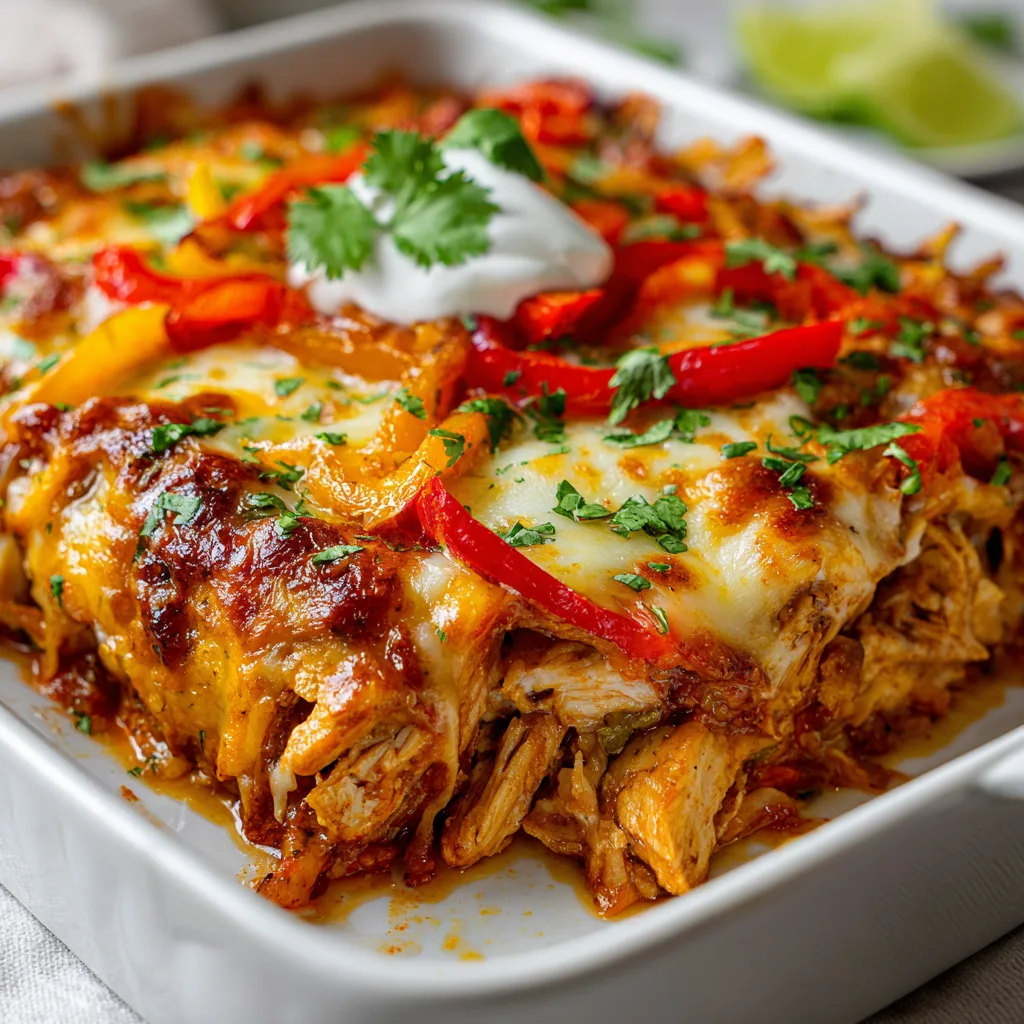
    This Chicken Fajita Casserole transforms everyone’s favorite Tex-Mex dish into a comforting, one-pan wonder that’s perfect for busy weeknights. The first time I made this, my kitchen filled with the most intoxicating aroma of sizzling peppers and warm spices. My family literally followed their noses to the table! Combining tender chicken, colorful bell peppers, and melty cheese with those bold fajita flavors we all crave, this casserole delivers all the satisfaction of traditional fajitas without the fuss. If you love simple yet flavorful meals like I do, this recipe deserves a permanent spot in your dinner rotation.

    Recipe

    Why You’ll Love This Chicken Fajita Casserole

    Family-Friendly Comfort Food

    There’s something magical about watching my picky 10-year-old nephew devour this casserole when he normally picks around bell peppers on his plate. The familiar flavors blend so harmoniously that even vegetable skeptics clean their plates! The combination of tender chicken, sweet peppers, and gooey cheese creates a texture wonderland that appeals to all ages. Plus, it’s endlessly customizable to suit different spice preferences—add extra jalapeños for heat lovers or keep things mild for sensitive palates. The hands-off baking time means I can help with homework or take a moment for myself while dinner practically makes itself.

    Simple One-Pan Solution

    On those days when I can barely summon the energy to cook (we’ve all been there!), this casserole feels like a kitchen lifeline. With just one baking dish to wash afterward, cleanup becomes almost effortless. I love how the preparation follows a simple layer-and-bake approach that doesn’t require constant attention or complicated techniques. The ingredients are straightforward pantry and refrigerator staples I typically have on hand. When life gets chaotic, knowing I can assemble this dish in about 15 minutes before popping it in the oven creates the kind of cooking confidence that turns an ordinary Tuesday into a deliciously manageable evening.

    Essential Tips & Tricks

    Perfect Chicken Every Time

    The secret to incredibly tender chicken in this casserole lies in two simple techniques. First, slice against the grain into thin, even strips that cook quickly and remain juicy. Second, don’t skip the brief marination with lime juice—even 15 minutes makes a noticeable difference in flavor and tenderness! I learned this the hard way after rushing through preparation once and missing that bright citrus note. For maximum flavor infusion, season your chicken generously with the spice blend, making sure every piece gets evenly coated. If time allows, marinating the chicken for up to 4 hours in the refrigerator will elevate your casserole from good to absolutely crave-worthy.

    Vegetable Preparation Matters

    The way you cut your vegetables dramatically impacts both cooking time and flavor distribution. Aim for uniform slices about ¼-inch thick so everything cooks evenly—nothing’s worse than some perfectly tender peppers mixed with raw crunchy ones! I’ve found that slightly charring the peppers and onions in a hot skillet before adding them to the casserole creates that authentic fajita flavor that makes this dish special. Just a quick 3-5 minute sauté until they begin to soften but still hold their shape works wonders. For an extra flavor boost, try roasting your peppers first, like in these delicious pesto chicken flatbreads that use a similar technique.

    Serving Ideas & Creative Variations

    Build-Your-Own Fajita Bar

    Transform dinner into an interactive experience by serving this casserole as the centerpiece of a build-your-own bar! I set out small bowls of fresh toppings like diced avocado, sour cream, pico de gallo, and lime wedges, allowing everyone to customize their plate. Warm flour tortillas or crispy tostadas make perfect vehicles for scooping up the casserole contents. My niece loves creating “fajita boats” with lettuce leaves for a lighter option. This serving style works beautifully for casual gatherings where conversation flows as freely as the food. For more interactive dinner ideas, check out these steak cheese quesadillas that follow a similar customizable concept.

    Global Flavor Twists

    While traditional fajita seasoning creates a reliable crowd-pleaser, experimenting with different flavor profiles keeps this casserole exciting in regular rotation. Try a Mediterranean version with oregano, lemon, and feta cheese, or venture into Thai-inspired territory with coconut milk, lime, and curry paste instead of the traditional tomato base. My personal favorite variation incorporates a layer of black beans and corn beneath the chicken for added texture and nutrition. For a fusion twist, sprinkle crushed tortilla chips on top during the last five minutes of baking for a satisfying crunch that contrasts beautifully with the tender filling.

    Storage & Troubleshooting Guide

    Make-Ahead & Freezing Success

    This casserole shines as a meal prep champion that actually improves with a bit of time. Assemble everything up to 24 hours before baking, cover tightly with plastic wrap, and refrigerate—the flavors meld beautifully! For freezing, I’ve found that slightly undercooking the vegetables before assembling prevents them from becoming mushy during reheating. Cool the baked casserole completely before freezing in portion-sized containers for up to 3 months. The texture of the cheese may change slightly upon thawing, but a quick sprinkle of fresh cheese during reheating solves this issue. Always thaw overnight in the refrigerator for the best results.

    Fixing Common Issues

    If your casserole turns out watery, the likely culprits are excess moisture from the vegetables or undrained tomatoes. Next time, pre-cook the peppers and onions slightly longer to release more moisture, and be sure to drain canned ingredients thoroughly. For casseroles that lack flavor, boost the seasoning with an extra tablespoon of fajita mix and a splash of lime juice just before serving. Undercooked chicken usually means the pieces were cut too thick—aim for thinner, more uniform slices. If the cheese browns too quickly before the casserole is fully cooked, simply cover with foil for the remainder of the baking time.

    Frequently Asked Questions

    Can I use pre-cooked chicken for this Chicken Fajita Casserole?

    Absolutely! Rotisserie chicken works beautifully—just shred or dice about 3 cups and toss with the fajita seasoning before assembling. This shortcut saves about 15 minutes of prep time without sacrificing flavor.

    What’s the best cheese to use?

    A combination of sharp cheddar and Monterey Jack provides the perfect balance of flavor and meltability. For an authentic touch, try Oaxaca or Chihuahua cheese if you can find them at specialty markets.

    Can I make this vegetarian?

    Yes! Replace chicken with 2 cans of drained black beans or 1 pound of firm tofu cut into cubes. The spice blend works just as well with these protein alternatives for a delicious meatless option.

    How do I prevent the casserole from becoming soggy?

    Pre-cooking the peppers and onions releases their moisture before baking. Also, thoroughly drain any canned ingredients and avoid overfilling the casserole dish to allow proper heat circulation.

    What sides pair well with this dish?

    Cilantro-lime rice, Mexican street corn, or a simple green salad with avocado complement the flavors perfectly. For a lighter meal, serve with cauliflower rice or a fresh cucumber salad.

    Final Thoughts

    This Chicken Fajita Casserole has become my reliable solution for satisfying Tex-Mex cravings without the restaurant price tag or multiple pans to clean. The way the spices permeate every bite, creating layers of flavor that somehow taste even better the next day, makes this dish truly special. I find myself returning to this recipe whenever I need a guaranteed dinner victory that bridges the gap between comfort food and healthful eating. Whether you’re feeding a hungry family or meal prepping for a busy week ahead, this versatile casserole deserves a starring role in your recipe collection. Don’t forget to share your creations on Pinterest!

  • Spinach Mushroom Spaghetti Recipe That Will Blow Your Mind!

    Spinach Mushroom Spaghetti Recipe That Will Blow Your Mind!

    Spinach Mushroom Spaghetti Recipe That Will Blow Your Mind!

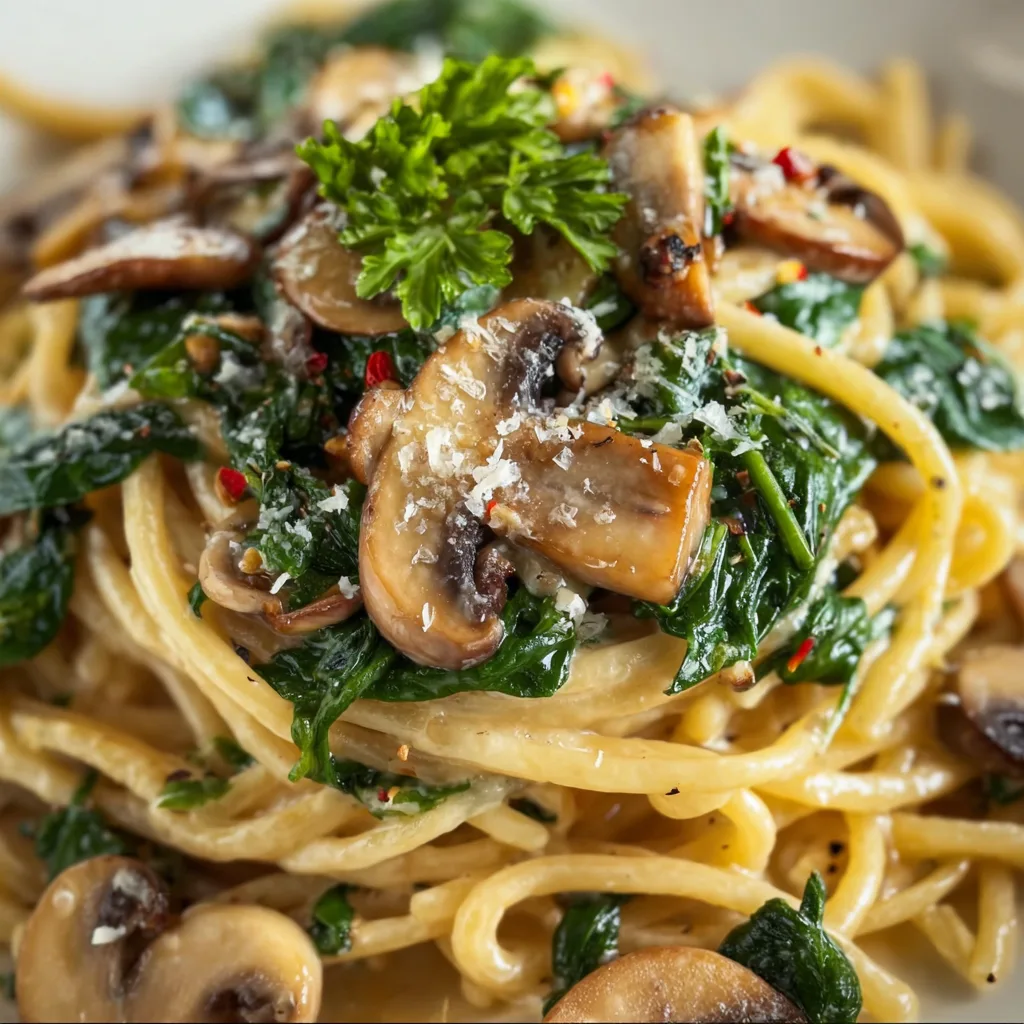
    There’s something magical about a steaming plate of Spinach Mushroom spaghetti that speaks to my soul on chilly evenings. The earthy mushrooms, vibrant spinach, and al dente pasta strands come together in a symphony of flavors that feels both indulgent and nourishing. I first created this recipe during a rainy weekend when the cupboard was nearly bare, and it’s since become my go-to comfort meal. The way the garlic-infused olive oil coats each strand of spaghetti makes this simple dish feel like a warm hug in pasta form. Best of all, it comes together in under 30 minutes—perfect for those evenings when you crave something delicious but effortless.

    Recipe

    Why You’ll Love This Spinach Mushroom spaghetti

    A Perfect Balance of Flavors and Textures

    There’s something incredibly satisfying about the textural contrast in this dish—tender spinach wilts into silky ribbons while the mushrooms maintain that perfect meaty bite. I love how the earthy mushrooms develop a beautiful caramelization when properly sautéed, creating deep umami notes that elevate the entire dish. The spinach adds brightness, color, and a gentle sweetness that balances the savory elements. When these ingredients mingle with perfectly cooked spaghetti and that garlicky olive oil base, each twirl of your fork delivers a perfect bite that feels both comforting and sophisticated.

    Quick, Nutritious, and Budget-Friendly

    This Spinach Mushroom spaghetti has saved my weeknight dinner plans more times than I can count. It requires just a handful of ingredients that I typically have on hand, making it incredibly budget-friendly. The combination of mushrooms and spinach packs serious nutritional value—fiber, vitamins, and minerals—while keeping the calorie count reasonable. I love that I can have a complete, satisfying meal on the table in about 25 minutes, from chopping to plating. On particularly hectic evenings, I’ve been known to prep the vegetables earlier in the day, making the actual cooking process even faster.

    Essential Tips & Tricks

    Perfecting Your Mushroom Technique

    The secret to exceptional Spinach Mushroom spaghetti lies in how you handle those mushrooms. First, never wash mushrooms under running water—they’re like little sponges and will absorb too much moisture. Instead, wipe them gently with a damp paper towel. When cooking, give them space in the pan and resist the urge to stir constantly. Let them develop a golden-brown crust before flipping. This patient approach creates that gorgeous caramelization that transforms basic button mushrooms into flavor powerhouses. I learned this technique after years of rushing the process and wondering why my mushrooms lacked depth.

    Creating the Perfect Sauce Base

    The foundation of this dish is a simple but flavor-packed sauce that coats every strand of spaghetti perfectly. Start with quality olive oil and fresh garlic—this isn’t the place for the pre-minced stuff. Allow the garlic to gently infuse the oil without browning, which creates bitterness. A splash of white wine or pasta water creates the perfect light sauce that carries the flavors without heaviness. For an extra dimension, consider adding a touch of cream or a sprinkle of red pepper flakes for heat. Remember to reserve some pasta water—that starchy liquid is liquid gold for binding your sauce.

    Serving Ideas & Creative Variations

    Elegant Presentation Touches

    Transform this humble Spinach Mushroom spaghetti into a dinner-party worthy dish with a few simple presentation upgrades. A dramatic swirl of pasta in the center of a wide, shallow bowl creates an impressive foundation. Top with additional sautéed mushrooms and a few fresh spinach leaves for color contrast. A light dusting of microplaned Parmesan creates a snow-like effect that melts beautifully into the warm pasta. For special occasions, I love adding a drizzle of truffle oil or balsamic glaze in a thin spiral pattern. These small touches elevate the visual appeal without requiring additional cooking skills.

    Delicious Flavor Variations

    While the classic version of this dish is perfection, I love experimenting with different flavor profiles. For a Mediterranean twist, add sun-dried tomatoes, kalamata olives, and crumbled feta cheese. Craving something heartier? Incorporate Italian sausage or pancetta for richness. For a creamy variation, stir in a spoonful of mascarpone or cream cheese just before serving. Plant-based diners can add protein with white beans or chickpeas. My personal favorite variation includes wild mushroom varieties like oyster or shiitake mixed with the standard cremini—the complex flavor profile is worth the splurge for special occasions.

    Storage & Troubleshooting Guide

    Proper Storage for Leftovers

    This Spinach Mushroom spaghetti makes excellent leftovers when stored properly. Allow the pasta to cool completely before transferring to an airtight container—this prevents condensation that can make pasta soggy. Refrigerate for up to three days. When reheating, add a splash of water or broth to revive the sauce, as pasta tends to absorb liquid as it sits. For the best texture, reheat gently in a skillet rather than the microwave. The flavors actually develop beautifully overnight, making day-two pasta sometimes even better than the original. I often make a double batch specifically to enjoy these enhanced next-day flavors.

    Troubleshooting Common Issues

    Even experienced cooks encounter challenges with pasta dishes. If your Spinach Mushroom spaghetti turns out too dry, the solution is simple: add reserved pasta water a tablespoon at a time until you reach your desired consistency. Dealing with clumpy pasta? Be sure to stir frequently during cooking and add a drizzle of olive oil to the cooking water. If your mushrooms released too much liquid and created a watery sauce, continue cooking uncovered until it reduces to your preferred thickness. For spinach that turned slimy rather than silky, try adding it at the very last minute, letting the residual heat wilt it gently.

    Frequently Asked Questions

    Can I use frozen spinach in this Spinach Mushroom spaghetti?

    Yes, but thaw and squeeze out excess moisture first. Use about 1/3 the quantity of frozen compared to fresh spinach, as it’s more concentrated. Add it to the pan slightly earlier than fresh to ensure it heats thoroughly.

    What mushroom varieties work best?

    Cremini (baby bella) mushrooms offer the best flavor-to-price ratio. White button mushrooms work well too, while shiitake, oyster, or portobello add more complex flavors for special occasions. A mixture creates interesting texture variations.

    Can I make this dish ahead of time?

    I recommend preparing components separately if making ahead. Cook pasta al dente, rinse with cool water, and toss with olive oil. Sauté mushrooms and store separately. Combine and add fresh spinach when reheating for best results.

    Is this recipe suitable for vegans?

    Absolutely! The base recipe is naturally vegan if you skip the Parmesan. For added richness, nutritional yeast makes an excellent substitute, providing that savory, cheesy flavor without dairy products.

    How can I add protein to this dish?

    White beans, chickpeas, or tofu work beautifully for plant-based options. For non-vegetarians, grilled chicken, Italian sausage, or shrimp complement the flavors perfectly. Just cook protein separately and add when combining ingredients.

    Final Thoughts

    This Spinach Mushroom spaghetti has become my kitchen salvation on countless occasions—elegant enough for impromptu dinner guests yet simple enough for Tuesday night dinner. The magic lies in respecting each ingredient: perfectly cooked pasta, caramelized mushrooms, and just-wilted spinach coming together in harmonious balance. I hope this recipe brings the same comfort and joy to your table that it has to mine. Remember that cooking is about making something that satisfies your soul as much as your appetite. For more pasta inspiration, visit our Pinterest board where we share new recipes weekly!

  • Cheeseburger Pasta Skillet: Irresistibly Easy Comfort Food Delight

    Cheeseburger Pasta Skillet: Irresistibly Easy Comfort Food Delight

    Cheeseburger Pasta Skillet: Irresistibly Easy Comfort Food Delight

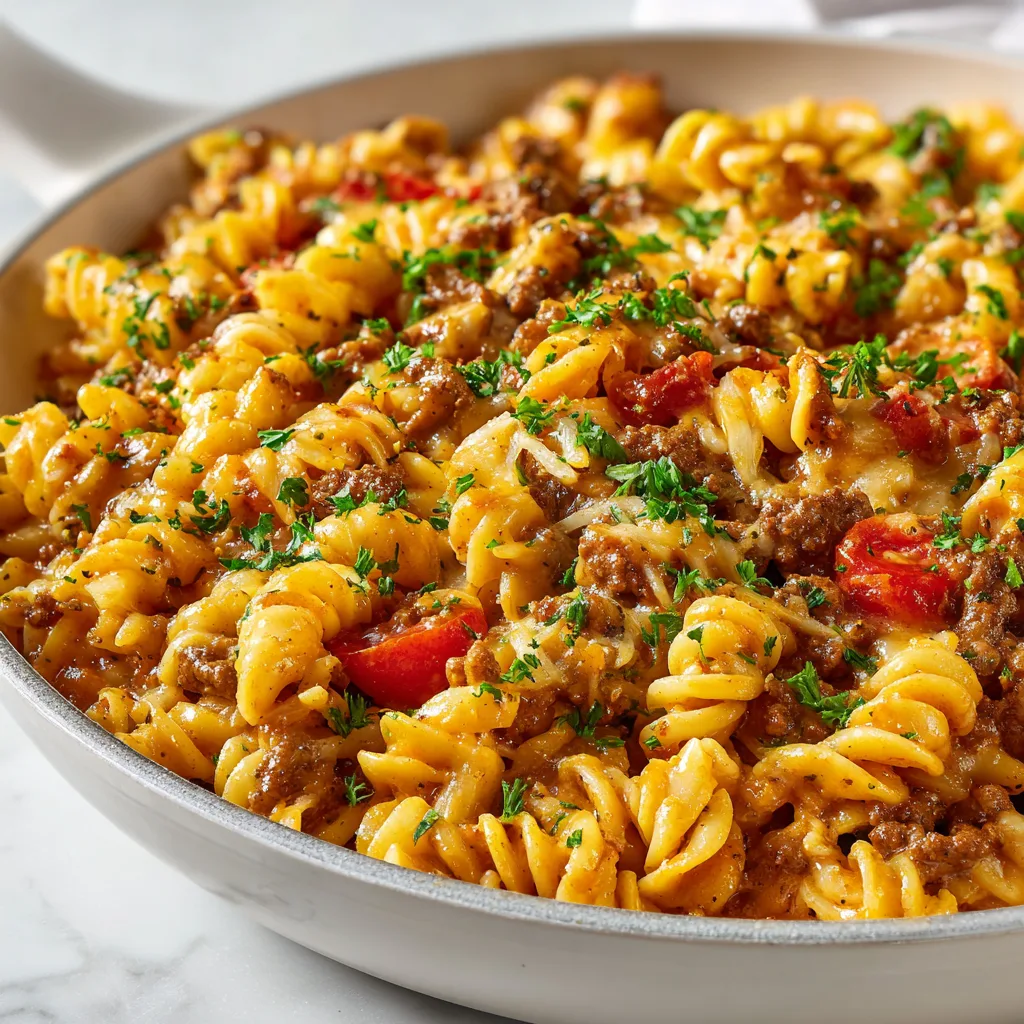
    Cheeseburger pasta skillet combines two comfort food favorites into one irresistible meal that’s ready in under 30 minutes. The first time I made this dish, my kitchen filled with the savory aroma of seasoned beef and melting cheese, instantly transporting me back to family dinners where we’d gather around sizzling skillets of goodness. There’s something magical about the way pasta soaks up all those juicy burger flavors, creating a dish that satisfies both pasta lovers and burger enthusiasts alike. If you’re looking for a weeknight dinner that brings smiles to the table, this creamy one-pot wonder deserves a permanent spot in your recipe collection.

    Recipe

    Why You’ll Love This Cheeseburger Pasta Skillet

    Perfect One-Pot Convenience

    This cheeseburger pasta skillet truly shines in its simplicity. Everything cooks in a single pan, which means minimal cleanup afterward—music to my ears after a long day! The pasta cooks directly in the seasoned beef broth, absorbing all those rich flavors while creating a naturally creamy sauce. I still remember the first time I made this for my sister who hates doing dishes; her eyes lit up not just from the delicious taste but when she realized there was only one pan to wash. The convenience factor alone makes this recipe worth its weight in gold for busy weeknights when you want something hearty without the hassle.

    Family-Friendly Flavor Profile

    If you’re cooking for picky eaters, this cheeseburger pasta skillet is your new secret weapon. The familiar burger flavors transform ordinary pasta into something extraordinary that even the most selective family members will devour. My nephew, who normally picks around vegetables, happily gobbles this up—even with diced onions and tomatoes mixed in! The melted cheese creates that gooey, comforting texture kids love, while the seasoned beef provides the satisfying richness adults crave. It’s that rare unicorn of a recipe that bridges the gap between sophisticated flavor and kid-approved comfort food, making dinner time peaceful instead of a battlefield.

    Essential Tips & Tricks

    Choosing the Right Pasta

    The pasta you select can make or break this dish. Short, sturdy shapes like elbow macaroni, rotini, or medium shells work best because they catch all that delicious sauce in their nooks and crannies. Avoid long pasta like spaghetti, which can be unwieldy in a skillet dish. I once attempted this recipe with angel hair pasta (big mistake!) and ended up with a clumpy mess. The pasta should be able to withstand the entire cooking process without breaking down or becoming mushy. For an extra nutrition boost, try whole wheat pasta—it adds a nutty flavor that complements the beef beautifully, just like in my honey pepper chicken mac & cheese.

    Perfecting the Cheese Blend

    The cheese is not just a topping—it’s an essential component that creates that authentic cheeseburger experience. For best results, use freshly shredded cheese rather than pre-packaged varieties, which often contain anti-caking agents that prevent proper melting. I prefer a combination of sharp cheddar for flavor and mozzarella or American cheese for that stretchy, gooey texture. Add the cheese in two stages: stir some into the hot pasta to create a creamy sauce, then sprinkle the remainder on top and cover briefly to melt. This two-step approach ensures maximum cheesy goodness throughout the entire dish.

    Serving Ideas & Creative Variations

    Burger-Inspired Toppings

    Transform your cheeseburger pasta skillet into a truly customizable experience by setting up a topping bar with all the classic burger fixings. Crispy bacon bits, diced pickles, fresh tomatoes, and shredded lettuce allow everyone to garnish their portion exactly how they like their burgers. I started doing this for family dinner nights, and it’s become our favorite way to serve this dish. A drizzle of special sauce (mix mayo, ketchup, and a dash of pickle juice) takes it to the next level. For a fun presentation, serve in individual bowls with toasted sesame seed buns on the side, just like you might enjoy with homemade Big Mac wraps.

    Global Flavor Twists

    While the classic American cheeseburger flavor is delicious, don’t be afraid to experiment with international variations. For a Mexican-inspired version, add taco seasoning instead of burger seasoning, mix in black beans and corn, then top with avocado and cilantro. My personal favorite is the Italian twist—incorporate Italian seasoning, sun-dried tomatoes, and finish with fresh basil and a dollop of ricotta. For an Asian-fusion approach, try adding a splash of soy sauce, ginger, and green onions to the beef, then garnish with sesame seeds. These variations keep the dish exciting when it becomes a regular in your meal rotation.

    Storage & Troubleshooting Guide

    Proper Storage Techniques

    This cheeseburger pasta skillet makes excellent leftovers if stored correctly. Allow the dish to cool completely before transferring to airtight containers—this prevents condensation that could make the pasta soggy. Refrigerate for up to 3-4 days for best quality. When reheating, add a splash of beef broth or milk to revive the creamy texture, as the pasta will have absorbed much of the sauce overnight. For freezing portions, slightly undercook the pasta initially, as it will soften during the thawing and reheating process. I often make a double batch specifically to freeze individual portions for quick lunches when I’m working from home.

    Fixing Common Issues

    Even experienced cooks occasionally encounter challenges with one-pot pasta dishes. If your sauce seems too watery, simply simmer uncovered for a few extra minutes to reduce the liquid. Conversely, if the pasta has absorbed too much liquid and seems dry, add ¼ cup of beef broth or milk and gently stir to incorporate. For pasta that’s still too firm after the recommended cooking time, add ¼ cup more liquid, cover, and cook for an additional 2-3 minutes. And if your cheese has become stringy rather than creamy, try lowering the heat and adding a splash of cream while stirring constantly—this usually smooths out the sauce beautifully.

    Frequently Asked Questions

    Can I use ground turkey instead of beef in the cheeseburger pasta skillet?

    Absolutely! Ground turkey works wonderfully as a leaner alternative. Add 1-2 teaspoons of Worcestershire sauce to enhance the savory flavor that beef naturally provides. Turkey may release less fat, so you might need a touch more oil when browning.

    How can I make this recipe gluten-free?

    Simply substitute your favorite gluten-free pasta and ensure your broth and seasonings are certified gluten-free. Gluten-free pasta often requires less cooking time, so check for doneness about 2 minutes earlier than the recipe suggests.

    Can I prep this cheeseburger pasta skillet ahead of time?

    You can brown the meat with onions and garlic up to two days ahead. Store refrigerated, then continue with the recipe when ready to serve, adding a few extra minutes to heat the meat mixture thoroughly.

    What vegetables can I add to make this more nutritious?

    Bell peppers, zucchini, spinach, and mushrooms all work beautifully. Add firmer vegetables like peppers when sautéing the onions, and stir in leafy greens like spinach during the last minute of cooking.

    Why is my sauce separating or looking grainy?

    This usually happens when cheese is added to too high heat. Always remove the skillet from direct heat for 1-2 minutes before adding cheese, and use freshly shredded cheese for the smoothest results.

    Final Thoughts

    This cheeseburger pasta skillet has become my go-to recipe when I need comfort food that doesn’t require hours in the kitchen. There’s something magical about transforming simple ingredients into a meal that feels like a warm hug at the end of a long day. The beauty lies in its versatility—dress it up for guests or keep it simple for a weeknight dinner. I’d love to see your versions of this dish on Pinterest! However you customize your cheeseburger pasta skillet, I guarantee it will bring that special combination of nostalgia and novelty to your dinner table.

  • Roasted Tomato Salsa: Irresistibly Bold & Bursting with Flavor!

    Roasted Tomato Salsa: Irresistibly Bold & Bursting with Flavor!

    Roasted Tomato Salsa: Irresistibly Bold & Bursting with Flavor!

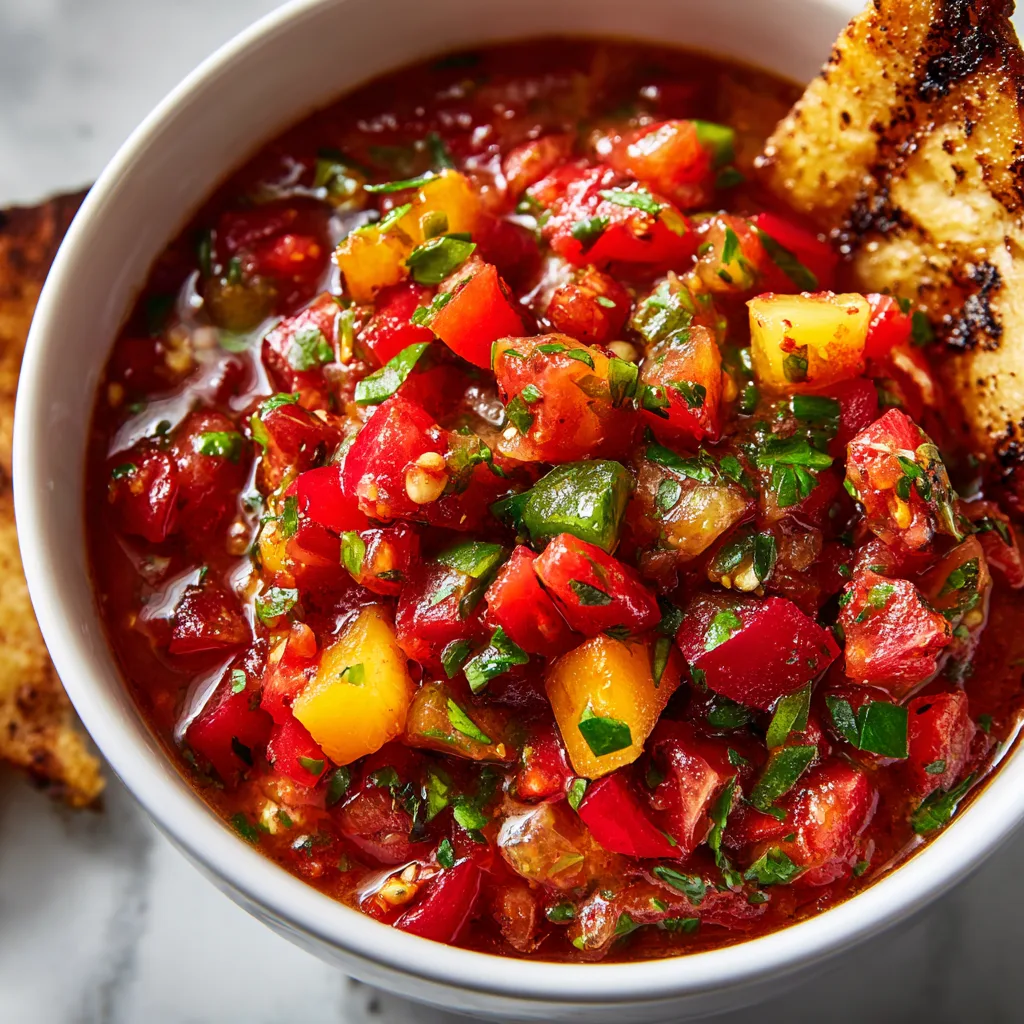
    There’s something magical about Roasted Tomato Salsa that transforms ordinary meals into memorable feasts. The first time I made this recipe, the aroma of charred tomatoes and smoky garlic filled my kitchen, and I knew I’d never go back to store-bought versions again. That deep, complex flavor profile simply can’t be replicated in a jar! Whether you’re planning a casual taco night or need a show-stopping appetizer for guests, this homemade salsa strikes the perfect balance between sweet, smoky, and spicy. I’ve perfected this recipe over countless summer gatherings, and now it’s a staple in my kitchen arsenal.

    Recipe

    Why You’ll Love This Roasted Tomato Salsa

    Perfect Flavor Balance

    There’s a remarkable transformation that happens when you roast tomatoes. Their natural sugars caramelize and concentrate, creating a depth that’s impossible to achieve with raw ingredients. The slight char on the vegetables adds a smoky undertone that pairs beautifully with the bright acidity of lime juice. What I love most is how the heat level is completely customizable—keep the jalapeño seeds for a fiery kick or remove them for a milder version that everyone can enjoy. This isn’t just salsa; it’s a symphony of flavors that dance together in perfect harmony.

    Versatile Kitchen Staple

    This roasted tomato salsa goes far beyond just a chip dipping companion. I’ve discovered it’s an incredible flavor booster for countless dishes throughout the week. Spoon it over scrambled eggs for a breakfast that wakes up your taste buds. Stir it into plain rice for an instant side dish upgrade. Use it as a marinade base for chicken or fish—the acidity helps tenderize while infusing amazing flavor. The roasted elements create a complexity that elevates even the simplest meals, making this recipe a true kitchen workhorse that justifies the small effort it takes to prepare.

    Essential Tips & Tricks

    Ingredient Selection Matters

    The quality of tomatoes makes all the difference in this recipe. Roma or plum varieties work beautifully because they have less water content and more flesh, resulting in a thicker, more concentrated salsa. During summer, I use garden-fresh tomatoes at their peak ripeness, but in winter, don’t hesitate to use good-quality canned fire-roasted tomatoes as a shortcut. For the best flavor development, make sure your onions get nice char marks—those blackened bits aren’t burning; they’re creating the complex flavor profile that makes this salsa special. Fresh cilantro added at the end provides that essential brightness.

    Perfect Roasting Technique

    The roasting method is what separates ordinary salsa from extraordinary salsa. Position your oven rack in the top third of the oven and use the broiler setting to get that beautiful char without cooking the vegetables all the way through. You want blackened spots, not mush! I line my baking sheet with foil for easy cleanup and arrange the vegetables in a single layer with a bit of space between them to promote browning rather than steaming. This approach to roasting tomatoes creates concentrated flavor bombs that form the foundation of an unforgettable salsa.

    Serving Ideas & Creative Variations

    Beyond Basic Chips and Dip

    While there’s nothing wrong with the classic chips and salsa combo, this roasted version deserves some creative serving options. Try spooning it over grilled fish for an instant sauce that cuts through richness with its acidity. Dollop it on creamy soups like black bean or butternut squash for textural contrast. One of my favorite discoveries was using it as the base for a quick vinaigrette—just whisk in some olive oil and drizzle over roasted vegetables. For an impressive appetizer, top crostini with goat cheese and a spoonful of this salsa for a bite that balances creamy, crunchy, and zesty in one perfect mouthful.

    Flavor Adaptations

    The beauty of homemade salsa is how easily you can adapt it to your preferences or what’s available. For a smoky variation, add a chipotle pepper in adobo sauce to the blender for heat with a deep, smoldering quality. Roast a couple tomatillos alongside your tomatoes for a tangy twist that brightens the entire mixture. During peach season, I love adding one roasted peach to the mix for subtle sweetness that complements the acidity. For an unexpected depth, try incorporating roasted garlic instead of raw—the mellow, caramelized flavor integrates beautifully with the other roasted elements.

    Storage & Troubleshooting Guide

    Proper Storage Methods

    To maintain optimal freshness and flavor, transfer your roasted tomato salsa to an airtight glass container rather than plastic, which can absorb odors. The salsa will keep in the refrigerator for up to one week, with flavors actually improving after the first day as they meld together. If you’ve made a large batch, portion some into ice cube trays and freeze—these flavor bombs are perfect for adding to soups or sauces later. For longer storage, consider water bath canning using proper acidification techniques, allowing you to enjoy your summer tomato bounty all year round.

    Fixing Common Issues

    If your salsa turns out too watery, don’t panic! There’s an easy fix. Simply strain excess liquid through a fine-mesh sieve, then return the solids to your blender and pulse briefly. The removed liquid isn’t wasted—use it to add depth to soups or as the base for a quick vinaigrette. If your salsa lacks punch, brighten it with an additional squeeze of lime juice or a pinch of salt, which amplifies all the other flavors. Too spicy? Add another roasted tomato or even half a roasted red bell pepper to dilute the heat while maintaining that gorgeous roasted flavor profile.

    Frequently Asked Questions

    Can I make roasted tomato salsa ahead of time?

    Absolutely! The flavors actually improve after 24 hours of refrigeration as they meld together. Make it up to 3 days ahead for parties or meal prep.

    How spicy is this roasted tomato salsa recipe?

    The heat level is completely customizable. Remove seeds and membranes from jalapeños for mild salsa, or keep them in (or add more peppers) for extra spice.

    Can I use canned tomatoes instead of fresh?

    Yes! When fresh tomatoes aren’t in season, use high-quality canned fire-roasted tomatoes. Drain them well and skip the roasting step.

    What’s the best way to achieve that smoky flavor in roasted tomato salsa?

    Char your vegetables under the broiler until they have blackened spots. For extra smokiness, add a chipotle pepper in adobo sauce.

    How long will homemade roasted tomato salsa keep in the refrigerator?

    Your salsa will maintain its best quality for about 5-7 days when stored in an airtight glass container in the refrigerator.

    Final Thoughts

    This roasted tomato salsa has become more than just a recipe in my kitchen—it’s a solution for elevating simple meals and impressing guests with minimal effort. The depth of flavor from roasting transforms ordinary ingredients into something truly special. I love how it connects me to seasonal cooking, especially when summer tomatoes are at their peak. Whether you’re a salsa aficionado or trying homemade for the first time, this recipe delivers unforgettable results that will have everyone asking for your secret. Find more inspiration for using your homemade salsa on my Pinterest board.

  • Crispy Baked Chicken Wings: Irresistibly Crunchy & Juicy Delight!

    Crispy Baked Chicken Wings: Irresistibly Crunchy & Juicy Delight!

    Crispy Baked Chicken Wings: Irresistibly Crunchy & Juicy Delight!

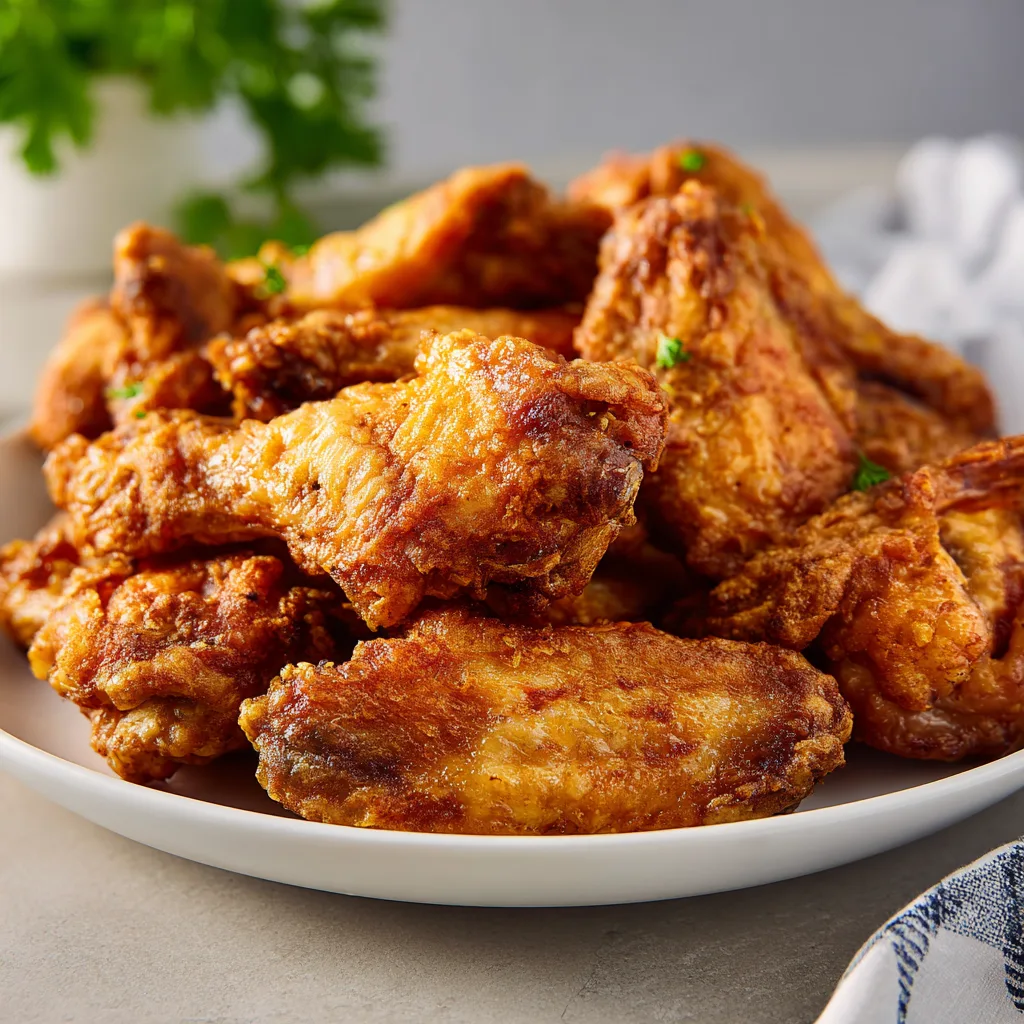
    Crispy Baked Chicken Wings have become my absolute obsession lately. There’s something magical about that perfect crunch giving way to tender, juicy meat underneath—without the mess and guilt of deep-frying! I’ve tested countless methods in my kitchen, and I’m thrilled to share the secrets I’ve discovered for achieving that coveted restaurant-quality crispiness right in your home oven. Whether you’re planning game day snacks or just craving something deliciously satisfying, these wings deliver that irresistible texture that’ll have everyone reaching for seconds. Check out my pesto chicken flatbreads for another crowd-pleasing option!

    Recipe

    Why You’ll Love These Crispy Baked Chicken Wings

    Perfect Texture Without Deep Frying

    The secret technique I’m sharing creates that coveted crispy exterior while keeping the inside perfectly juicy. By patting the wings completely dry and using a special coating mixture with baking powder (not soda!), you’ll achieve a texture that rivals any deep-fried version. I still remember the first time I tried this method—my husband couldn’t believe they weren’t from our favorite wing spot! The skin gets delightfully crunchy while the meat stays tender and full of flavor, giving you that satisfying contrast in every bite.

    Simple Ingredients, Maximum Flavor

    What I adore about these wings is how they transform basic pantry ingredients into something extraordinary. You’ll need just chicken wings, baking powder, salt, garlic powder, and your favorite seasonings. The baking powder (aluminum-free works best) creates a chemical reaction with the chicken skin that produces those crispy results. I love customizing the flavor profile—sometimes going for a spicy cajun blend, other times leaning into garlic parmesan territory. The versatility means you can adapt them to whatever you’re craving or what your guests prefer.

    Essential Tips & Tricks

    The Drying Method That Changes Everything

    The single most important step is thoroughly drying your wings before seasoning. I place mine on a wire rack in the refrigerator, uncovered, for at least 2 hours (overnight is even better). This might seem fussy, but trust me—this air-drying process removes surface moisture that would otherwise steam the wings instead of crisping them. I learned this trick after countless batches of disappointing wings, and it was the game-changer that finally delivered that satisfying crackle when you bite in.

    Temperature Techniques for Maximum Crispiness

    Start with a lower temperature (250°F) for about 30 minutes, then crank it up to 425°F for the final 40-50 minutes. This two-temperature approach renders the fat slowly first, then creates that beautiful crispy finish. Make sure to flip the wings halfway through the high-temperature cooking. For even better results, place them on a wire rack over your baking sheet so hot air circulates completely around each wing. Check out my crispy chicken parmesan zucchini boats for another delicious crispy chicken option!

    Serving Ideas & Creative Variations

    Sauce Strategies That Preserve Crispiness

    The timing of saucing is crucial—apply too early and you’ll sacrifice that perfect crunch. I serve my wings with dipping sauces on the side, or if coating them, I wait until just before serving and toss them quickly. For an extra layer of flavor without compromising texture, brush a thin layer of sauce during the last 5 minutes of baking. My family goes wild for buffalo sauce with blue cheese dressing, but honey garlic and sweet chili are close runners-up. Remember that less is more when it comes to preserving that crispy exterior.

    Unexpected Flavor Combinations

    Move beyond traditional buffalo and try bold flavor profiles that will surprise your taste buds. My current obsession is a maple-sriracha glaze that creates the perfect sweet-heat balance. Another winner is lemon-pepper with a touch of honey—it’s bright, zesty, and slightly sweet. For an Asian-inspired twist, try a mixture of soy sauce, ginger, and a touch of five-spice powder. These unexpected combinations keep this classic appetizer feeling fresh and exciting. Try pairing them with my garlic butter parmesan knots for a complete spread!

    Storage & Troubleshooting Guide

    Maintaining Crispiness When Reheating

    The challenge with leftover wings is keeping that crispy texture when reheating. Skip the microwave (which creates steam and soggy skin) and opt for a 375°F oven for about 10-15 minutes. For even better results, place them on a wire rack during reheating. Air fryers work beautifully too—just 3-4 minutes at 390°F brings back that wonderful crunch. I store leftover wings in a paper towel-lined container in the refrigerator, which helps absorb excess moisture and preserves their texture better than airtight containers.

    Troubleshooting Common Wing Problems

    If your wings aren’t crisping properly, a few common culprits might be to blame. First, check that you’re using baking powder, not baking soda (which creates a metallic taste). Second, ensure your wings are completely dry before baking. If they’re still not crisping, your oven temperature might be off—an inexpensive oven thermometer can help verify. Finally, overcrowding the pan creates steam and prevents proper crisping, so give those wings plenty of space. I learned this lesson the hard way during a Super Bowl party when I tried to cram too many on one tray!

    Frequently Asked Questions

    Can I use frozen chicken wings for this recipe?

    Yes, but thaw them completely first and pat them very dry. Frozen wings contain excess moisture that prevents proper crisping. I recommend thawing in the refrigerator overnight for best results.

    How do I know when my crispy baked chicken wings are done?

    Wings should reach an internal temperature of 165°F. The skin should be visibly crispy and golden brown, and the meat should pull easily from the bone when tested.

    Can I make these wings ahead of time for a party?

    Absolutely! Bake them fully, let cool, then refrigerate. Reheat at 375°F for 10-15 minutes just before serving. They’ll maintain most of their crispiness with this method.

    What’s the difference between party wings and whole wings?

    Party wings are separated into drumettes and flats, while whole wings include these sections plus the wing tip. I prefer party wings for more consistent cooking and easier eating.

    Why is baking powder essential for crispy baked chicken wings?

    Baking powder raises the pH level of the chicken skin, breaking down proteins and creating tiny bubbles during baking. This results in that crackly, crispy texture without deep frying.

    Final Thoughts

    These crispy baked chicken wings have become my go-to recipe whenever I’m craving that perfect combination of juicy meat and crunchy exterior. The beauty lies in their simplicity—just a few ingredients and techniques transform an ordinary cut into something extraordinary. Whether you’re hosting a game day gathering or simply treating yourself to a delicious dinner, these wings deliver restaurant-quality results without the mess or expense of deep-frying. I’d love to see your wing creations on Pinterest!