Blog

  • No-Bake Peanut Butter Marshmallow Squares Everyone Will Love!

    No-Bake Peanut Butter Marshmallow Squares Everyone Will Love!

    No-Bake Peanut Butter Marshmallow Squares Everyone Will Love!

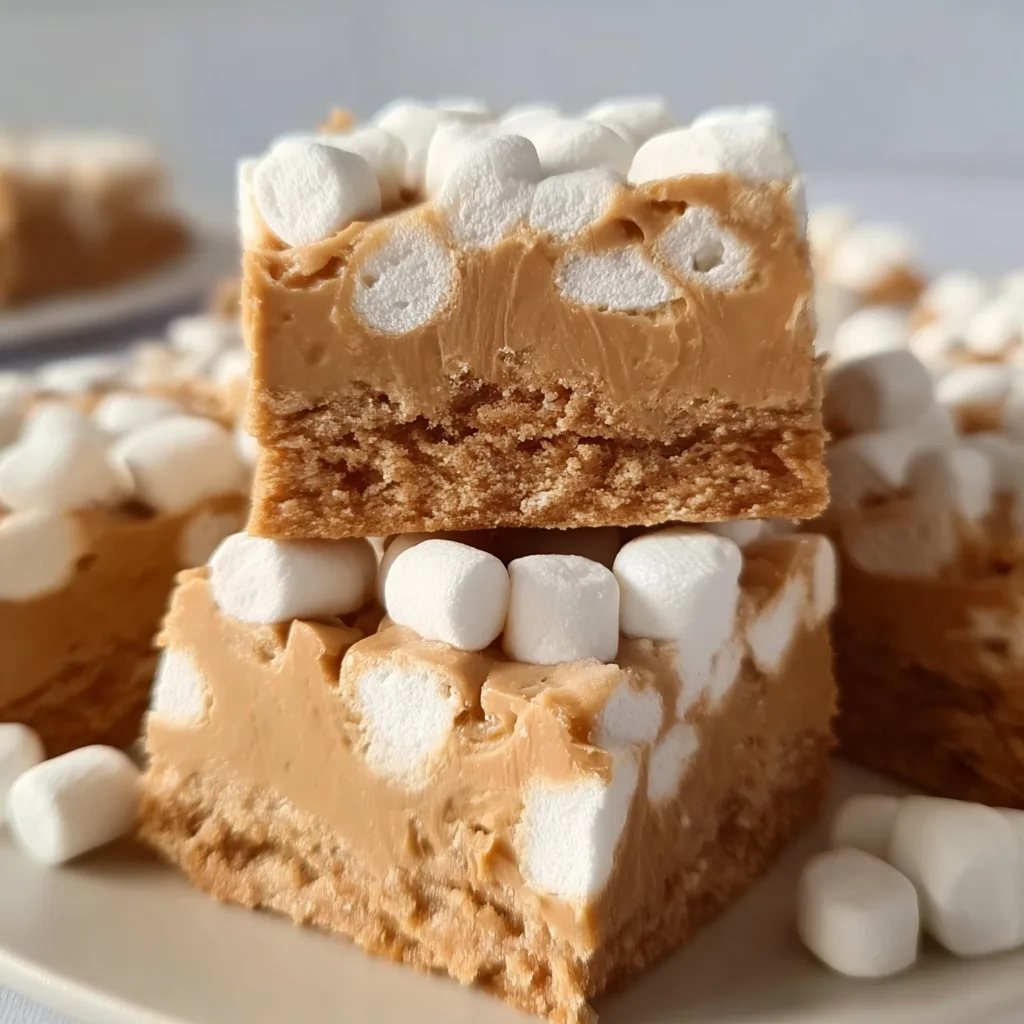
    No-Bake Peanut Butter Marshmallow Squares have been my go-to treat since I discovered them during a summer power outage when baking was impossible. There’s something magical about the way creamy peanut butter envelops those pillowy marshmallows, creating squares that are simultaneously chewy, crunchy, and utterly irresistible. I love watching friends’ eyes light up when they bite into these nostalgic treats. The best part? You can whip these up in minutes without turning on your oven, making them perfect for hot summer days or last-minute gatherings when you need something sweet and impressive.

    Recipe

    Why You’ll Love These No-Bake Peanut Butter Marshmallow Squares

    Perfect Balance of Flavors and Textures

    These squares hit all the right notes with their perfect texture contrast between the crispy cereal, velvety peanut butter, and soft marshmallows. I still remember making these with my daughter during her first sleepover party—the girls couldn’t believe something so delicious could be made so quickly! The subtle saltiness from the peanut butter balances the sweetness of marshmallows and chocolate, creating that addictive sweet-and-salty combination that keeps everyone reaching for “just one more piece.” Plus, the satisfying chew factor makes each bite a delightful sensory experience.

    Quick and Accessible for Any Occasion

    What I adore most about these squares is their incredible convenience. With just 5-6 pantry staples and about 15 minutes of active time, you’ve got a crowd-pleasing dessert that looks like you spent hours in the kitchen. Last Christmas, when my oven unexpectedly quit working, these squares saved our holiday gathering! They’re perfect for busy weeknights, potlucks, bake sales, or anytime you need a reliable treat that won’t let you down. Even kitchen novices can nail this recipe on the first try—it’s virtually foolproof.

    Essential Tips & Tricks

    Mastering the Perfect Consistency

    The secret to success lies in properly melting your peanut butter mixture. Heat it gently—either in a heavy-bottomed pot on low heat or in 30-second microwave bursts—stirring frequently to prevent scorching. You want it warm and fluid but not bubbling hot, which could melt your marshmallows too quickly. I learned this the hard way during a summer picnic prep when I rushed and overheated the mixture! For extra creamy results, remove from heat completely before folding in marshmallows and cereal, allowing the residual warmth to gently coat everything without melting the delicate ingredients.

    Ingredient Swaps That Always Work

    Don’t stress if you’re missing an exact ingredient—these squares are wonderfully adaptable. Crunchy peanut butter creates a delightful texture variation if you prefer some nutty bits. No Rice Krispies? Graham cracker crumbs, crushed cornflakes, or even broken pretzel pieces work beautifully. For a more decadent version, fold in mini chocolate chips once the mixture has cooled slightly. I’ve even made these for my lactose-intolerant neighbor using dairy-free chocolate chips and coconut oil instead of butter—she couldn’t believe how delicious they were!

    Serving Ideas & Creative Variations

    Elegant Presentation Options

    Transform these humble squares into an impressive dessert with minimal effort. Cut them into perfect cubes and arrange on a wooden board with fresh berries for a beautiful contrast. For special occasions, I like to drizzle melted white chocolate in a zigzag pattern across the top, then sprinkle with crushed freeze-dried raspberries for a pop of color and flavor. Last Valentine’s Day, I used a heart-shaped cookie cutter for the cutest presentation that had my husband sneaking extras from the fridge all week! These also look stunning served on individual dessert plates with a small scoop of vanilla ice cream.

    Seasonal and Holiday Adaptations

    These versatile squares can be easily customized for any holiday or season. For Halloween, fold in orange and black sprinkles or candy pieces. Christmas calls for crushed candy canes and green sprinkles. For summer picnics, I love adding dried cranberries and a hint of orange zest to brighten the flavor profile. My personal favorite variation came about during fall when I swapped regular peanut butter for cookie butter and added cinnamon—the warm spice notes were absolutely divine! You can also press the mixture into themed silicone molds instead of a pan for holiday-shaped treats.

    Storage & Troubleshooting Guide

    Keeping Them Fresh and Delicious

    These squares maintain their best texture when stored properly. Keep them in an airtight container with parchment paper between layers to prevent sticking. At room temperature, they’ll stay fresh for 3-4 days, though they rarely last that long in my house! For longer storage, refrigerate for up to a week—the chilled texture creates an almost fudge-like consistency that’s equally delicious. I discovered by accident that freezing works beautifully too; just thaw for 15 minutes before serving. For summer potlucks, I keep them in a cooler with ice packs to maintain their perfect chewy-crispy balance.

    Fixing Common Issues

    Even experienced bakers encounter occasional hiccups, but most problems with these squares are easily fixable. If your mixture seems too dry or crumbly when mixing, add a tablespoon more melted butter or peanut butter. Too sticky to cut cleanly? Refrigerate for 30 minutes, then use a knife dipped in hot water and wiped dry between cuts. If your squares didn’t set properly, they likely needed more cooling time—pop them in the fridge for an hour. I once salvaged a batch that wouldn’t hold together by pressing the mixture into muffin tins and creating individual cups instead!

    Frequently Asked Questions

    Can I make No-Bake Peanut Butter Marshmallow Squares ahead of time?

    Absolutely! Make them up to 3 days in advance and store in an airtight container. They actually develop even better flavor after sitting overnight in the refrigerator.

    What’s the best peanut butter to use?

    Commercial creamy peanut butter (like Jif or Skippy) works best as it has stabilizers that help the squares set properly. Natural peanut butter can separate and affect the texture.

    Can I make these allergy-friendly?

    Yes! Substitute sunflower seed butter or almond butter for peanut butter. Use gluten-free cereal if needed, and vegan marshmallows for a vegetarian version.

    Why did my squares turn out too hard?

    You likely overcooked the sugar mixture or used too little marshmallow. Gentle heating and proper measurement of ingredients prevent this issue.

    How do I know when they’re ready to cut?

    They should feel firm but slightly yielding when pressed with a finger. If they’re still tacky, they need more cooling time—usually at least 2 hours.

    Final Thoughts

    No-Bake Peanut Butter Marshmallow Squares remain one of my most treasured recipes because they embody what I love most about cooking—creating joy through simplicity. They’ve been there for last-minute school treats, power outage emergencies, and countless happy moments around my kitchen table. The way they bring together nostalgic flavors in an effortless package makes them truly special. I hope these squares become a beloved staple in your recipe collection too, ready whenever you need a foolproof treat that always delivers smiles. Don’t forget to share your creations on Pinterest!
  • Slow Cooker Chicken Posole Recipe: Cozy, Flavorful & Easy!

    Slow Cooker Chicken Posole Recipe: Cozy, Flavorful & Easy!

    Slow Cooker Chicken Posole Recipe: Cozy, Flavorful & Easy!

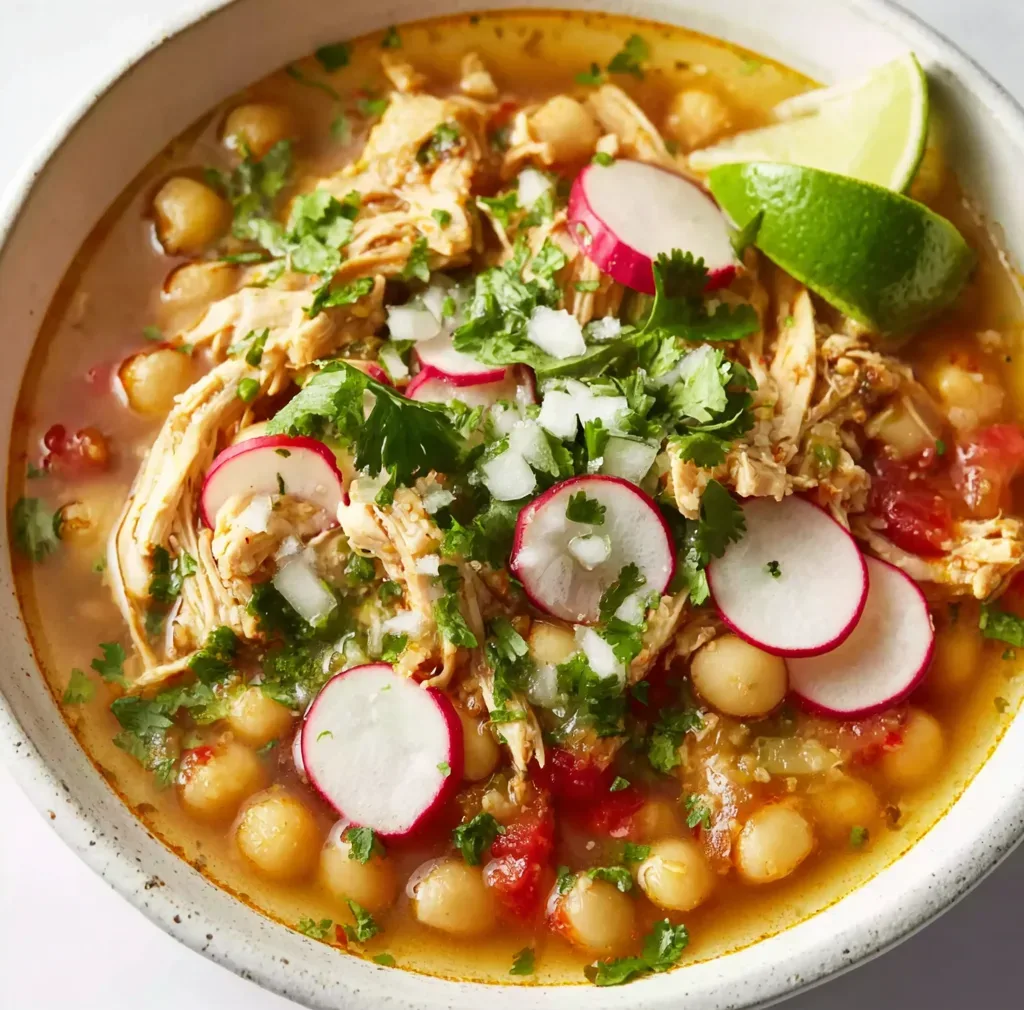
    This Slow Cooker Chicken Posole Recipe brings the rich, soul-warming flavors of traditional Mexican cuisine right to your kitchen with minimal effort. The first time I made this, my kitchen filled with the most intoxicating aroma of chilies, hominy, and tender chicken that had me hovering near the slow cooker for hours. There’s something magical about the transformation that happens when these simple ingredients meld together over low, gentle heat. If you’re craving a hearty, authentic meal that practically cooks itself, this posole is about to become your new favorite comfort food from Recipes Darleen.

    Recipe

    Why You’ll Love This Slow Cooker Chicken Posole Recipe

    Perfect Make-Ahead Comfort Food

    There’s nothing quite like coming home to a meal that’s ready and waiting. This chicken posole practically creates itself while you’re away, developing those deep, complex flavors that make you feel like you’ve been cooking all day. I love prepping this on Sunday mornings, letting it simmer while I catch up on my reading, then enjoying it throughout the week. The aromatic chilies and tender hominy create a symphony of textures that only get better with time, making this the perfect dish for meal prep enthusiasts or busy weeknight warriors.

    Authentic Flavors with Simple Ingredients

    Don’t let the rich flavors fool you—this posole relies on accessible ingredients you can find at most grocery stores. The magic happens when humble elements like dried chilies, oregano, and hominy transform through slow cooking. I remember serving this to my friend Maria, who grew up eating her grandmother’s posole in Mexico City. Her eyes widened with that first spoonful, followed by a quiet nod of approval that meant everything. The slow cooker method allows these flavors to develop authentically without standing over a stove for hours.

    Essential Tips & Tricks

    Preparing Your Chilies Properly

    Getting the chili preparation right makes all the difference in your posole’s depth of flavor. Toast dried chilies in a dry skillet just until fragrant (about 30 seconds per side) before soaking them in hot water. This awakens their oils and creates that signature earthy richness that defines great posole. I learned this technique after making a sadly bland batch years ago—now I never skip this step! Remove the seeds for a milder flavor or leave some in for extra heat. Blend them into a smooth paste before adding to your slow cooker for the most evenly distributed flavor.

    Hominy Handling Secrets

    Hominy is the star ingredient that makes posole, well, posole! This transformed corn brings a unique texture and subtle sweetness that balances the spice. Drain and rinse canned hominy thoroughly before adding it to remove any metallic taste from the can. For the best texture, add the hominy during the last 2-3 hours of cooking—this prevents it from becoming too mushy while still allowing it to absorb those delicious flavors. If you’re feeling adventurous, try a mix of white and yellow hominy for visual appeal, like I learned from my Creamy Cauliflower Carrot Soup experiments with color contrast.

    Serving Ideas & Creative Variations

    Traditional Garnish Combinations

    The toppings aren’t just pretty additions—they’re essential components that bring your posole experience to life! Create a vibrant toppings bar with thinly sliced radishes, shredded cabbage, diced avocado, and lime wedges. The crisp, fresh garnishes create a beautiful contrast against the rich, warm soup. I love setting everything out in little bowls, letting everyone customize their bowls. Don’t forget the cilantro for brightness and crumbled queso fresco for a creamy finish. This interactive serving style makes posole perfect for casual entertaining—I’ve even served it for game days alongside my Buffalo Chicken Quesadilla.

    Exciting Fusion Twists

    While traditional posole is unbeatable, don’t be afraid to play with fusion elements that make it your own. Try adding a smoky element with fire-roasted tomatoes or a spoonful of chipotle in adobo. For a heartier version, mix in black beans during the last hour of cooking. My favorite twist is adding a splash of orange juice and a cinnamon stick for subtle warmth—an idea I borrowed from Yucatecan cuisine. You could even serve it over rice for a complete one-bowl meal, or use the leftovers as a filling for enchiladas the next day.

    Storage & Troubleshooting Guide

    Maximizing Leftovers

    Posole is one of those magical dishes that actually improves with time as the flavors continue to develop. Store leftovers in airtight containers in the refrigerator for up to 5 days. For the best texture when reheating, add a splash of fresh chicken broth to loosen the consistency. The hominy will continue absorbing liquid as it sits. For longer storage, freeze portions in freezer-safe containers for up to 3 months. I like to freeze individual portions without toppings, then add fresh garnishes after reheating for that just-made taste.

    Fixing Common Issues

    Even experienced cooks encounter challenges! If your posole seems too thin, remove the lid during the last hour of cooking to allow some liquid to evaporate. Alternatively, blend a small portion of the hominy and return it to the pot as a natural thickening agent. If it’s too thick, simply add more chicken broth until you reach your desired consistency. For posole that lacks flavor depth, try adding a tablespoon of tomato paste, a splash of vinegar, or an extra pinch of toasted, ground cumin to wake up the flavors. Remember, salt is your friend—sometimes that’s all it needs!

    Frequently Asked Questions

    Can I make Slow Cooker Chicken Posole with pork instead?

    Absolutely! Substitute 2-3 pounds of pork shoulder cut into 1-inch cubes. The cooking time remains the same, and many consider pork posole (pozole rojo) the more traditional version.

    Is hominy necessary for authentic posole?

    Yes, hominy is essential—it’s what defines posole. Without it, you’d have a delicious Mexican chicken soup, but it wouldn’t technically be posole. The distinctive texture and flavor are irreplaceable.

    Can I make this recipe spicier?

    Definitely! Leave more seeds in your dried chilies, add a diced jalapeño, or serve with hot sauce on the side. You can also include a small can of diced green chilies for extra heat.

    How can I make this in an Instant Pot instead?

    Use the sauté function for the onions and garlic, then pressure cook on high for 25 minutes with a 10-minute natural release. Add hominy after pressure cooking and use sauté function for 10 minutes.

    What’s the best way to toast dried chilies for Slow Cooker Chicken Posole?

    Heat a dry skillet over medium heat and toast chilies for 20-30 seconds per side until fragrant but not burned. They should become slightly pliable and aromatic.

    Final Thoughts

    This Slow Cooker Chicken Posole Recipe exemplifies comfort food at its finest—authentic, adaptable, and absolutely delicious. The beauty lies in its simplicity and depth, creating a meal that feels special without demanding hours of active cooking time. I find myself returning to this recipe throughout the year, not just for its incredible flavor but for the way it fills my home with warmth and brings people together. Don’t forget to check out more of my slow cooker favorites on Pinterest for your next cozy meal inspiration!

  • Wonton Soup Recipe: Irresistible Comfort in Every Spoonful!

    Wonton Soup Recipe: Irresistible Comfort in Every Spoonful!

    Wonton Soup Recipe: Irresistible Comfort in Every Spoonful!

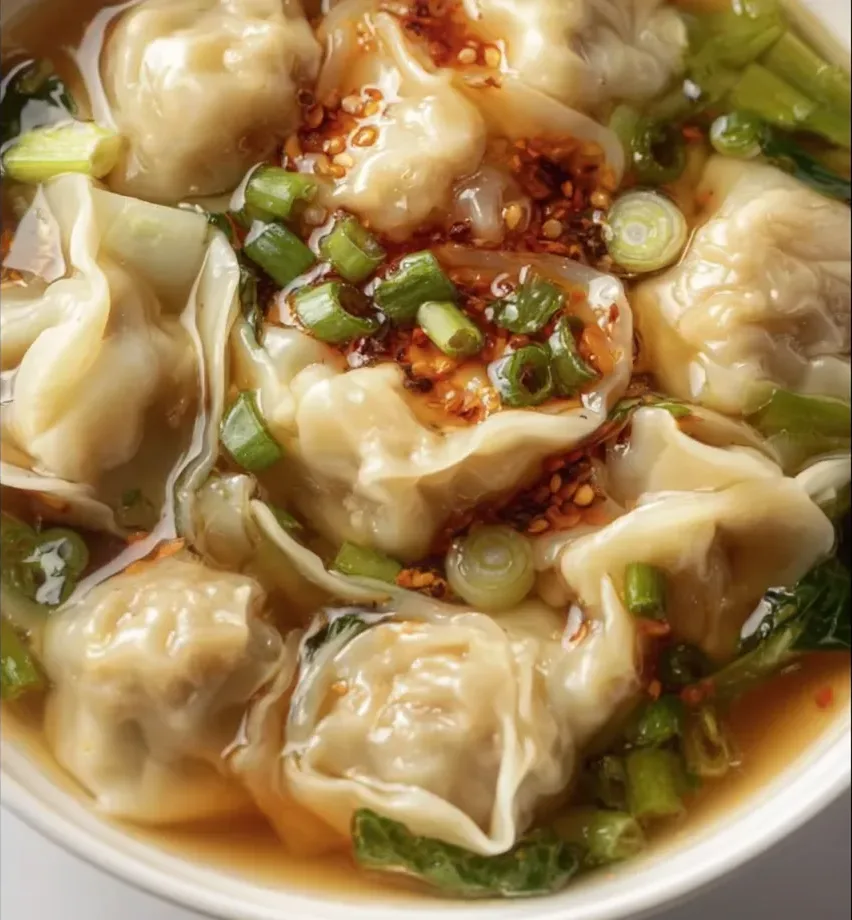
    This wonton soup recipe holds a special place in my heart. On chilly evenings when the rain taps against my kitchen window, I find myself reaching for my wonton wrapper stash. There’s something magical about watching delicate parcels of seasoned pork and shrimp dance in a clear, aromatic broth. The first time I made this soup, my kitchen filled with ginger-scented steam that fogged my glasses, but that first spoonful—tender wontons swimming in umami-rich broth—was worth every minute of prep. This homemade version rivals any restaurant offering, and I’m thrilled to share my perfected recipe with you.

    Recipe

    Why You’ll Love This Wonton Soup Recipe

    Perfect Balance of Flavors

    The secret to exceptional wonton soup lies in its balance. The broth—infused with ginger, garlic, and green onions—creates a foundation that’s both delicate and deeply satisfying. I’ve spent years tweaking the seasoning until it sings with just the right notes of umami and brightness. The wontons themselves offer textural contrast: silky wrappers give way to juicy filling that’s perfectly seasoned with sesame oil, white pepper, and a touch of sugar that enhances the natural sweetness of the shrimp. Each spoonful delivers a harmonious blend that’ll make you close your eyes in appreciation.

    Surprisingly Simple Technique

    Don’t let those perfectly pleated restaurant wontons intimidate you! My foolproof method makes wonton folding accessible to beginners. The beauty of homemade wontons is that they taste incredible even when they’re not picture-perfect. I’ll walk you through a simple triangle fold that seals effectively without frustration. The filling comes together in minutes—just mix, fold, and simmer. While there’s some hands-on time required for assembly, it’s meditative rather than difficult. I often recruit family members for wonton-folding parties, turning prep into quality time that ends with a rewarding meal.

    Essential Tips & Tricks

    Mastering Wonton Assembly

    The key technique for perfect wontons is avoiding overstuffing. About 1 teaspoon of filling is ideal—any more and you’ll struggle to seal them properly. Keep a small bowl of water nearby to moisten the edges before folding. When sealing, press firmly to remove air pockets that could cause wontons to burst during cooking. Work with small batches of wrappers at a time, keeping the rest covered with a damp cloth to prevent drying. If you’re making them ahead, dust a baking sheet with cornstarch before arranging your finished wontons to prevent sticking. This attention to detail makes all the difference.

    Building Flavor Layers

    The broth foundation determines whether your soup is good or extraordinary. Start with high-quality chicken stock—homemade is best, but a good store-bought version works well too. Simmer it with ginger slices, smashed garlic cloves, and green onion whites for at least 20 minutes before straining. For deeper flavor, add a splash of mushroom soaking liquid if you’re including dried shiitakes. Season gradually, tasting as you go—remember that soy sauce and salt levels should be slightly milder than you think, as the wontons will add their own savory notes. A final drizzle of sesame oil just before serving adds aromatic richness.

    Serving Ideas & Creative Variations

    Traditional Accompaniments

    The classic presentation of wonton soup is beautifully simple—clear broth, floating wontons, and a scatter of thinly sliced green onions. For restaurant-style serving, add blanched bok choy or spinach for color and nutrition. Crispy fried shallots make an excellent garnish, adding textural contrast and intense flavor. I love setting out small dishes of chili oil, black vinegar, and extra soy sauce so everyone can customize their bowl. For a complete meal, pair with crispy spring rolls or simple steamed rice to balance the soup’s delicate nature.

    Modern Twists & Adaptations

    Don’t be afraid to make this versatile recipe your own! For spice lovers, add a tablespoon of chili oil or Sichuan peppercorns to the broth. Vegetarians can enjoy wontons filled with shiitake mushrooms, tofu, and cabbage in vegetable broth. For a heartier version, transform it into a noodle soup by adding fresh ramen or udon. I sometimes make a “wonton soup bar” for guests with various toppings—corn kernels, soft-boiled eggs, microgreens, or crispy wonton strips. For special occasions, try adding a few drops of truffle oil or a sprinkle of furikake for unexpected flavor dimensions.

    Storage & Troubleshooting Guide

    Proper Storage Solutions

    Uncooked wontons freeze beautifully for future meals. Arrange them in a single layer on a parchment-lined tray, freeze until solid, then transfer to freezer bags. They’ll keep for up to three months—no need to thaw before cooking, just add an extra minute to the cooking time. For leftover soup, store the broth and wontons separately; otherwise, the wrappers will absorb liquid and become mushy. Refrigerated broth keeps for 4-5 days, while cooked wontons are best consumed within 2 days. Reheat gently on the stovetop rather than microwaving to maintain the wontons’ delicate texture.

    Fixing Common Issues

    Even experienced cooks encounter wonton challenges occasionally. If your wontons are bursting during cooking, you’re likely overfilling them or not sealing properly—try using less filling and pressing out all air pockets. For wontons that stick to each other, dust them lightly with cornstarch before storing. If your broth lacks depth, try adding a piece of kombu or a splash of fish sauce. Cloudy broth usually means you’re boiling rather than simmering—keep the heat gentle. Wontons with tough wrappers have likely been overcooked; they need just 2-3 minutes to cook through while maintaining their tender bite.

    Frequently Asked Questions

    Can I make wonton soup ahead of time?

    Yes! Prepare the broth and assemble wontons separately up to two days ahead. Store broth refrigerated and freeze uncooked wontons on a tray before transferring to freezer bags. Combine just before serving for the freshest texture.

    What’s the best meat for wonton filling?

    Traditional wonton filling uses ground pork and shrimp for the perfect balance of flavor and texture. The fat content in pork keeps the filling juicy, while shrimp adds sweetness and a pleasant bounce.

    How do I know when my wonton soup recipe wontons are cooked?

    Properly cooked wontons float to the surface and become translucent. This typically takes 2-3 minutes in simmering broth. Cut one open if unsure—the filling should be firm and fully cooked.

    Can I use store-bought broth for this soup?

    Absolutely! Choose a high-quality, low-sodium chicken broth and enhance it with fresh ginger, garlic, and green onions. Simmer for 20 minutes before straining for restaurant-quality flavor.

    What vegetables work well in wonton soup?

    Baby bok choy, spinach, snow peas, and thinly sliced mushrooms complement wontons beautifully. Blanch heartier vegetables separately before adding to avoid overcooking the wontons.

    Final Thoughts

    This wonton soup recipe transforms simple ingredients into something truly special. There’s a reason it remains one of my most-requested dishes—it strikes that perfect balance between impressive and achievable. The gentle process of folding each wonton becomes a meditation, and the reward is a bowl of comfort that nourishes body and spirit alike. I hope you’ll experience the same joy I do when watching loved ones slurp up these delicate treasures. Don’t forget to check out more of my favorite Asian-inspired recipes on Pinterest for your next cooking adventure!

  • One-Pan Garlic Potatoes & Asparagus: Easy, Crispy, Flavor Boost!

    One-Pan Garlic Potatoes & Asparagus: Easy, Crispy, Flavor Boost!

    One-Pan Garlic Potatoes & Asparagus: Easy, Crispy, Flavor Boost!

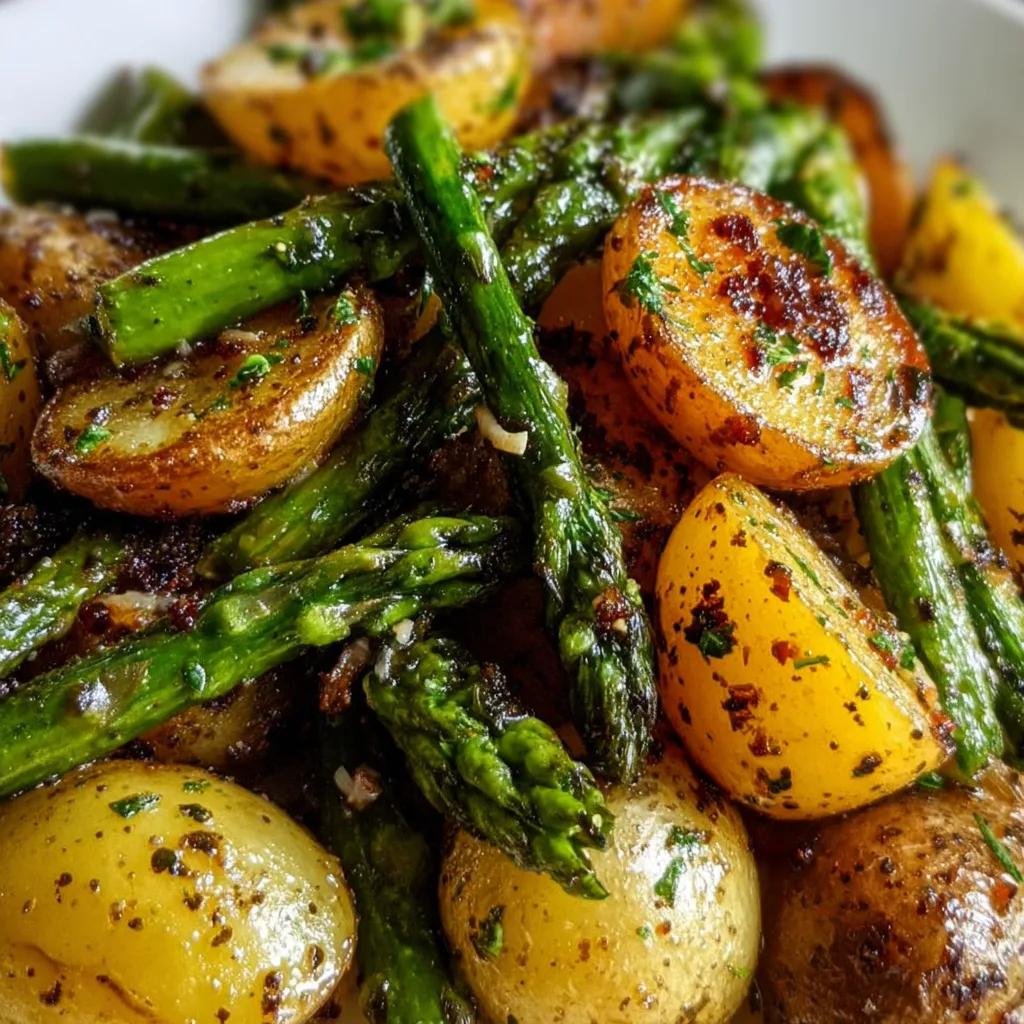
    One-Pan Garlic Potatoes and Asparagus has become my absolute go-to when I need something impressive yet effortless for dinner parties. There’s something magical about the way the potatoes get perfectly crispy while the asparagus maintains that satisfying snap. I discovered this recipe during a chaotic Thursday when unexpected guests announced they’d be over in an hour—and it’s been saving my weeknight dinners ever since! The best part? Everything roasts together on one baking sheet, creating an incredible aroma that fills your kitchen with that unmistakable garlic comfort.

    Recipe

    Why You’ll Love This One-Pan Garlic Potatoes and Asparagus

    Perfect Texture Combination

    The contrasting textures in this dish create a truly satisfying eating experience. The potatoes develop this gorgeous golden crust outside while staying fluffy and tender inside—a texture achievement that still makes me smile every time. Meanwhile, the asparagus retains just the right amount of bite, not too crunchy and definitely not mushy. I remember serving this at my sister’s birthday dinner, and my nephew (who typically avoids anything green) actually asked for seconds! The way these vegetables complement each other creates a harmony on your plate that feels surprisingly sophisticated for such a simple preparation.

    Time-Saving Convenience

    This recipe is a weeknight miracle that has saved me countless times when I’m exhausted but still want something delicious. Everything cooks together on one pan, which means minimal prep and practically no cleanup—just line your baking sheet with parchment and you’re golden! The active hands-on time is under 10 minutes, letting your oven do all the heavy lifting. Last Tuesday, after a particularly draining workday, I managed to throw this together while simultaneously helping my daughter with homework. The efficiency of this dish makes it perfect for those nights when cooking feels overwhelming but takeout isn’t calling your name.

    Essential Tips & Tricks

    Perfect Potato Prep

    The secret to evenly cooked potatoes lies in how you cut them. I aim for uniform 1-inch pieces to ensure they all finish cooking at the same time—a lesson I learned the hard way after serving partially raw chunks to my in-laws (mortifying!). For extra crispiness, pat the potatoes dry before tossing them with oil and seasonings. I’ve found that Yukon Golds or red potatoes work beautifully here, developing that perfect crisp exterior while maintaining a buttery interior. If you’re feeling adventurous, try the technique from my Crispy Pickle Potatoes for an extra flavor dimension.

    Asparagus Timing Perfection

    The trickiest part of this recipe is getting both vegetables perfectly cooked, as asparagus needs significantly less time than potatoes. My foolproof approach: give the potatoes a 15-minute head start, then add the asparagus for the final 10-12 minutes of roasting. The thickness of your asparagus matters tremendously—pencil-thin spears might need only 8 minutes, while thicker ones could require up to 15. I’ll never forget serving sadly overcooked, mushy asparagus at a dinner party until I discovered this staggered cooking method. Look for that vibrant green color with slight browning at the tips as your visual cue for perfection.

    Serving Ideas & Creative Variations

    Complementary Protein Pairings

    This versatile side dish becomes a complete meal when paired with the right protein. I love serving it alongside a simple roasted chicken breast or pan-seared salmon that can cook while the vegetables roast. The garlic flavor profile complements almost any protein beautifully. For vegetarian options, a fried egg with a runny yolk creates magic when it breaks over the vegetables, or try adding white beans tossed with lemon during the last five minutes of cooking. Last weekend, I served this with Ginger Soy Glazed Salmon, and the combination of flavors had my husband asking for the recipe to share at work!

    Flavor Variations

    While the classic garlic version is wonderful, this recipe welcomes creative adaptations. Try adding a sprinkle of parmesan cheese during the last few minutes of cooking for a nutty, savory crust. For brightness, squeeze fresh lemon over everything right after roasting. My personal favorite variation includes a teaspoon of smoked paprika and a pinch of red pepper flakes added to the original seasoning mix—it adds a subtle heat that transforms the dish entirely. During summer months, I often toss in halved cherry tomatoes with the asparagus, creating little bursts of sweetness that complement the savory potatoes perfectly.

    Storage & Troubleshooting Guide

    Proper Storage Methods

    For maximum freshness, allow leftover One-Pan Garlic Potatoes and Asparagus to cool completely before storing in an airtight container in the refrigerator for up to 3 days. The texture will change slightly upon refrigeration—the asparagus softens and the potatoes lose some crispness—but the flavor remains delicious. To reheat, I avoid the microwave which can make everything soggy. Instead, spread the vegetables on a baking sheet and warm in a 350°F oven for about 7-10 minutes. This method helps restore some of the original texture that makes this dish so special in the first place.

    Common Problems & Solutions

    The most frequent issue with this recipe is uneven cooking—either potatoes that remain firm while asparagus overcooks, or perfectly done potatoes with raw asparagus. If your potatoes aren’t crisping properly, check that your oven is actually reaching the correct temperature (an oven thermometer is worth the investment!). Crowding the pan is another common mistake; vegetables need space to roast rather than steam. I once tried to double the recipe without increasing the pan size and ended up with soggy results. If your asparagus browns too quickly, simply cover just the asparagus portion of the pan loosely with foil while the potatoes finish cooking.

    Frequently Asked Questions

    Can I make One-Pan Garlic Potatoes and Asparagus ahead of time?

    Yes! Prep the vegetables and store them separately in the refrigerator. The potatoes can be partially roasted earlier in the day, then finish cooking with the asparagus just before serving for the best texture.

    What’s the best type of potato to use?

    Yukon Gold potatoes are ideal because they have the perfect balance of starch and moisture. They develop a beautiful golden crust while maintaining a creamy interior when roasted.

    Can I substitute other vegetables?

    Absolutely! Green beans, brussels sprouts, or broccoli work wonderfully in place of asparagus. Just adjust cooking times accordingly—broccoli needs about the same time as asparagus.

    How do I know when the asparagus is perfectly cooked?

    Look for vibrant green color with slight browning at the tips. The spears should be tender but still have a slight resistance when pierced with a fork.

    What if I don’t have fresh garlic for my One-Pan Garlic Potatoes and Asparagus?

    Garlic powder works in a pinch—use 1 teaspoon for the recipe. While fresh garlic provides more complex flavor, powder distributes more evenly throughout the dish.

    Final Thoughts

    This One-Pan Garlic Potatoes and Asparagus recipe proves that spectacular flavor doesn’t require complicated techniques or endless ingredients. It’s become my reliable kitchen hero—elegant enough for company yet simple enough for hectic weeknights. The magic lies in how it transforms humble ingredients into something truly special with minimal effort. I encourage you to make this recipe your own by playing with seasonings and complementary proteins. For more inspiration, check out my other vegetable-forward recipes on Pinterest and discover your next kitchen favorite!

  • Couscous with Shrimp: Easy Mediterranean Recipe to Savor Today!

    Couscous with Shrimp: Easy Mediterranean Recipe to Savor Today!

    Couscous with Shrimp: Easy Mediterranean Recipe to Savor Today!

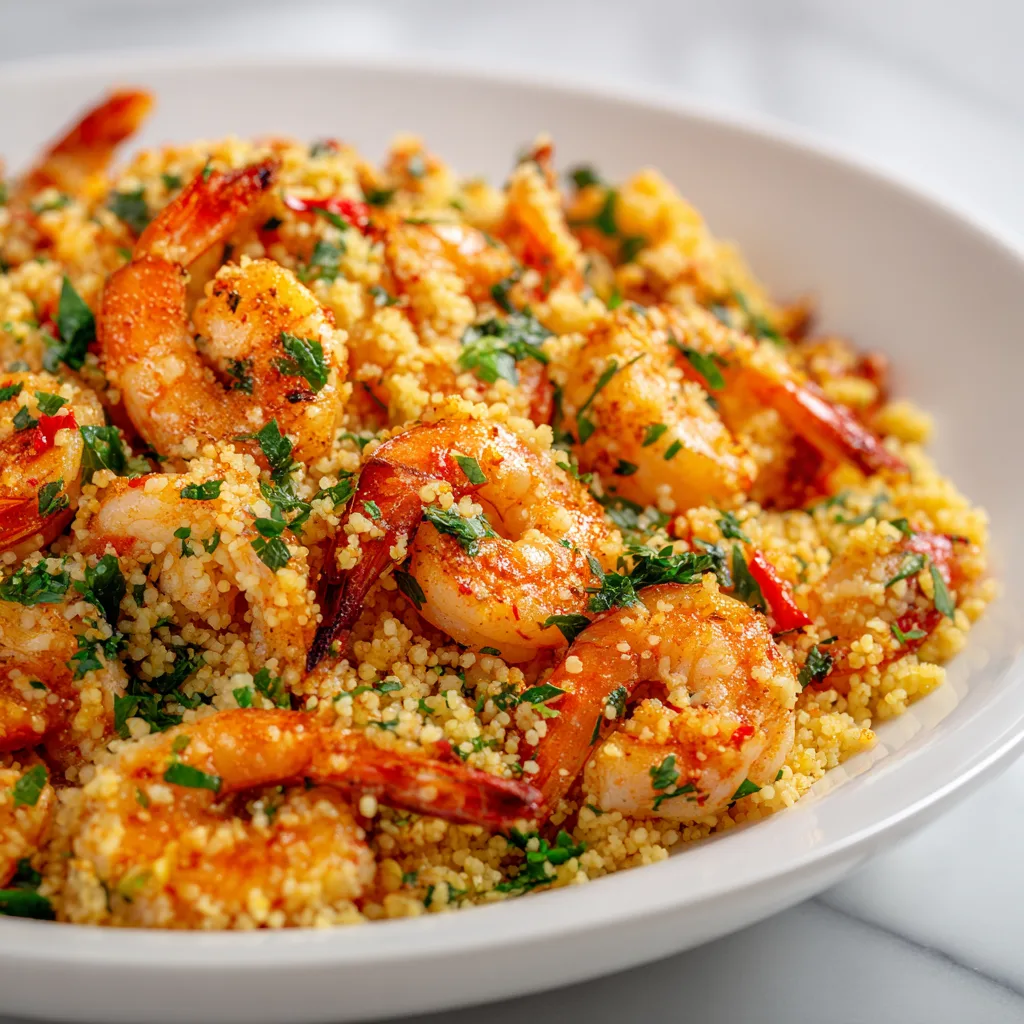
    Couscous with Shrimp Easy Mediterranean Recipe has completely transformed my weeknight dinner routine! The first time I made this dish, the aroma of garlic and lemon zest dancing through my kitchen transported me straight to a seaside café in Greece. There’s something magical about how quickly this meal comes together—fluffy couscous soaking up Mediterranean flavors while plump shrimp turn perfectly pink. When life gets hectic, I turn to this recipe for a taste of coastal bliss without the plane ticket. Trust me, your kitchen will become your favorite vacation spot with this simple yet impressive dish.

    Recipe

    Why You’ll Love This Couscous with Shrimp Easy Mediterranean Recipe

    Quick & Nutritious Weeknight Solution

    This dish is a true time-saving miracle that doesn’t sacrifice nutrition or flavor. On those evenings when I’m exhausted but still craving something special, I can have this on the table in under 25 minutes. The protein-packed shrimp pairs beautifully with vitamin-rich vegetables, creating a balanced meal that feels indulgent. I love how the pearl couscous creates a satisfying texture that soaks up the zesty lemon-herb dressing. The Mediterranean flavor profile delivers big impact with minimal effort—exactly what we all need after a long day!

    Impressive Yet Effortless Entertaining Option

    Whenever I host impromptu gatherings, this Couscous with Shrimp Easy Mediterranean Recipe is my secret weapon. There’s something about the vibrant colors and enticing aromas that makes guests think I spent hours in the kitchen. The truth? I was probably relaxing with a glass of wine while it came together! Serve it family-style in a beautiful bowl with fresh herbs scattered on top, and watch everyone’s eyes widen. What I appreciate most is how this dish feels special enough for company but doesn’t leave me stressed or chained to the stove.

    Essential Tips & Tricks

    Perfecting Your Shrimp Technique

    The key to this recipe is not overcooking the shrimp—they should be just pink and tender. I learned this the hard way after serving rubber-like shrimp to my in-laws (mortifying!). Now I always pat them dry before cooking to ensure a beautiful sear rather than steaming them. Watch carefully—they need only 1-2 minutes per side depending on size. For maximum flavor, marinate them briefly in olive oil, minced garlic, and lemon zest while you prep other ingredients. This small step makes a remarkable difference in the final dish’s taste profile.

    Elevating Your Couscous Game

    Pearl couscous (also called Israeli couscous) creates the most luxurious texture in this Mediterranean dish. The trick is toasting it in a dry pan for 2-3 minutes before adding liquid—this develops a nutty flavor that elevates the entire meal. Always use broth instead of water for cooking; I prefer vegetable or seafood broth for this recipe. For perfect fluffy results, avoid lifting the lid while it simmers. Once cooked, fluff with a fork and let it rest uncovered for 5 minutes to allow excess moisture to evaporate.

    Serving Ideas & Creative Variations

    Mediterranean-Inspired Accompaniments

    Create a complete feast by serving this dish with simple sides that complement its coastal flavors. A classic Greek salad with cucumber, tomato, feta, and kalamata olives makes the perfect fresh counterpoint. Warm pita bread brushed with olive oil and sprinkled with za’atar is ideal for scooping up every last morsel. For a showstopping presentation, serve in a large, shallow bowl garnished with lemon wedges, fresh mint, and a drizzle of high-quality olive oil. The bright colors and enticing aromas will transport everyone to a seaside taverna!

    Seasonal Adaptations Worth Trying

    This recipe functions beautifully as a flexible template that evolves with the seasons. In summer, I fold in blistered cherry tomatoes and fresh corn kernels for sweet pops of flavor. Fall calls for roasted butternut squash cubes and toasted pine nuts. For a heartier winter version, try adding sautéed kale and crispy chickpeas for extra texture. Vegetarian guests? Simply omit the shrimp and add grilled halloumi cheese or white beans. The Mediterranean flavor profile works wonderfully with whatever produce is at its peak.

    Storage & Troubleshooting Guide

    Proper Storage for Maximum Freshness

    For optimal results, store any leftover Couscous with Shrimp Easy Mediterranean Recipe in an airtight container in the refrigerator for up to two days. The flavors actually develop beautifully overnight, making this dish excellent for meal prep. However, I recommend keeping the fresh herbs separate and adding them just before serving to maintain their bright flavor and color. When reheating, add a small splash of broth or water to revive the couscous, and warm gently over medium-low heat. Microwaving works in a pinch, but the stovetop method preserves the texture better.

    Solving Common Recipe Challenges

    If your couscous turns out too mushy, you likely added too much liquid or overcooked it. The perfect ratio is 1:1.25 couscous to liquid. Timing matters too—pearl couscous needs exactly 8-10 minutes to reach ideal tenderness. For shrimp that seems tough or rubbery, remember that residual heat continues cooking them even after removal from the pan. I always transfer them to a plate slightly before they look done. Bland flavor? Don’t skimp on the fresh herbs, lemon zest, or quality olive oil—these ingredients are essential for authentic Mediterranean character.

    Frequently Asked Questions

    Can I make this Couscous with Shrimp Easy Mediterranean Recipe ahead of time?

    Yes! Prepare the couscous and vegetables up to a day ahead, but cook the shrimp just before serving. Reheat the couscous mixture gently with a splash of broth, then add the freshly cooked shrimp and herbs.

    What’s the best shrimp size to use?

    Medium shrimp (31-35 count per pound) work best. They cook quickly while remaining tender and pair perfectly with the pearl couscous texture. Large shrimp can also work but may need an extra minute of cooking time.

    Can I substitute regular couscous for pearl couscous?

    Absolutely. Regular couscous cooks even faster (5 minutes) but has a different texture. Simply pour boiling broth over it, cover, and let stand until absorbed. The flavor profile remains deliciously Mediterranean.

    Is this recipe suitable for meal prep?

    Yes! Store in portioned containers for up to 2 days. The flavors actually improve overnight, though the texture is best the first day. Reheat gently with a splash of water.

    What wine pairs well with this Mediterranean shrimp dish?

    A crisp, dry white wine complements this dish beautifully. Try a Greek Assyrtiko, Spanish Albariño, or French Sauvignon Blanc for authentic Mediterranean pairing that enhances the citrus and herb notes.

    Final Thoughts

    This Couscous with Shrimp Easy Mediterranean Recipe has become my culinary passport to sun-soaked coastal flavors, no matter the season. What I love most is how it bridges the gap between everyday cooking and special occasions with its perfect balance of simplicity and sophistication. The bright flavors, beautiful colors, and satisfying textures create a meal that nourishes both body and spirit. Whether you’re cooking for yourself after a long day or hosting friends for dinner, this Mediterranean-inspired dish delivers warmth, comfort, and a touch of coastal magic to your table.

    For more Mediterranean-inspired recipes, check out my Pinterest collection!

  • Raspberry Brownie Date Energy Bites: Irresistible Healthy Snack Boost!

    Raspberry Brownie Date Energy Bites: Irresistible Healthy Snack Boost!

    Raspberry Brownie Date Energy Bites: Irresistible Healthy Snack Boost!

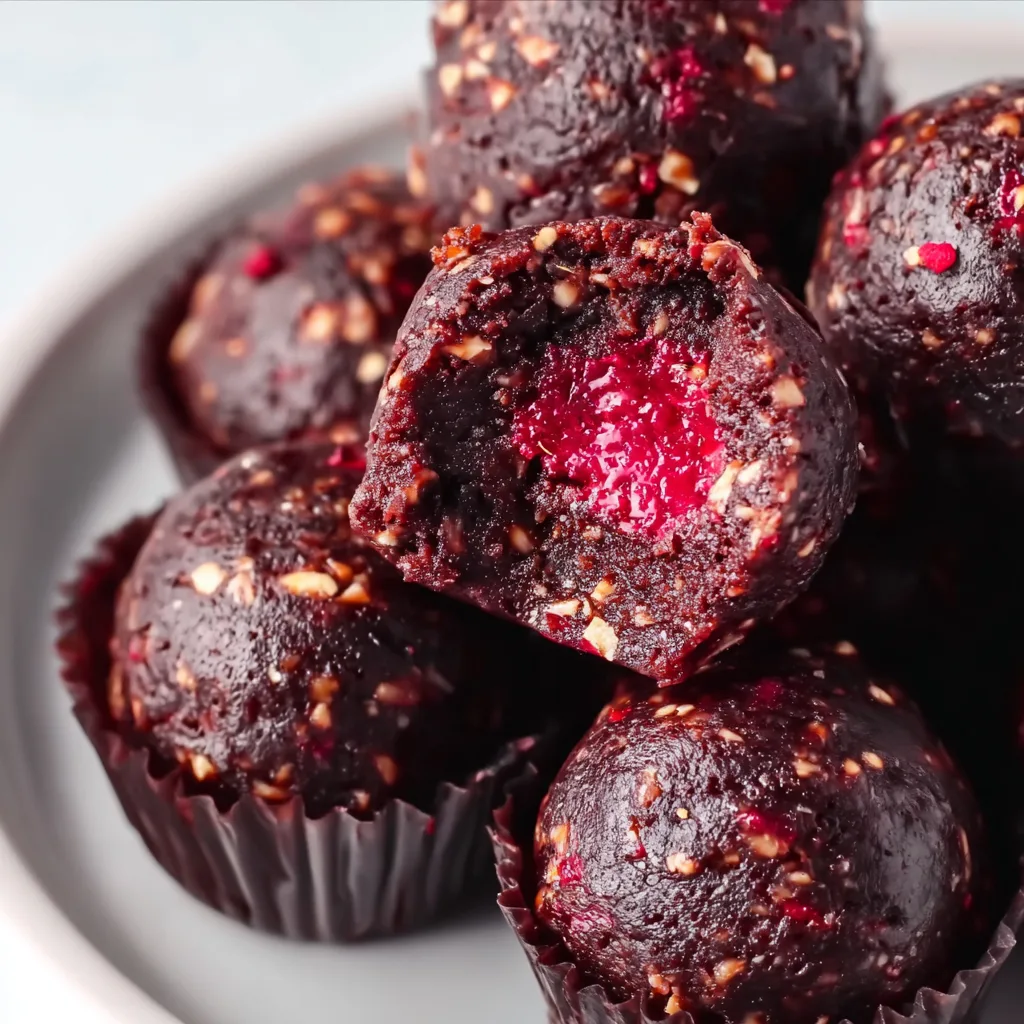
    Raspberry Brownie Date Energy Bites have completely transformed my afternoon slump situation. That desperate 3 PM reach for something sweet yet energizing? These little powerhouses are my secret weapon. Packed with nutrient-dense dates, rich cocoa, and bright raspberries, they deliver that chocolate brownie satisfaction without the sugar crash. I started making these when my daughter begged for “something chocolatey” for her lunchbox that wasn’t junk food. Now they’re our family’s go-to treat that feels indulgent while actually fueling our bodies.

    Recipe

    Why You’ll Love This Raspberry Brownie Date Energy Bites

    Perfect Balance of Flavor & Nutrition

    These bites hit that magical sweet spot between decadent treat and wholesome snack. The dates provide natural caramel sweetness and sticky binding power, while cocoa delivers that deep chocolate flavor we crave. I love how the freeze-dried raspberries add little bursts of tartness that cut through the richness. When my son’s soccer team demolished a double batch in minutes, I knew I’d found the perfect balance. The protein from nuts keeps you satisfied, while the natural fruit sugars offer quick energy without the processed stuff.

    No-Bake Convenience

    There’s something deeply satisfying about whipping up a batch of these when you’re craving something sweet but don’t want to heat up the kitchen. The food processor does all the heavy lifting, transforming whole ingredients into a fudgy mixture in minutes. On busy weeknights when I’m helping with homework and juggling dinner prep, I can still make these with minimal effort. Just pulse, roll, and refrigerate! The hands-on time is under 15 minutes, making them perfect for last-minute snack emergencies or when unexpected guests drop by.

    Essential Tips & Tricks

    Ingredient Selection Matters

    The quality of your ingredients dramatically impacts the final result. Choose soft, fresh dates (Medjool are my favorite) for the best texture and natural sweetness. If your dates feel dry, soak them in warm water for 10 minutes before using. For the cocoa powder, a high-quality Dutch-processed variety gives that rich brownie flavor we’re after. When selecting nuts, raw unsalted varieties work best as they blend more smoothly and let you control the salt level. I learned this lesson after a batch with salted almonds turned out way too salty for my taste!

    Perfecting the Texture

    Achieving that perfect fudgy consistency requires a bit of attention. Pulse the mixture until it just starts to come together – overmixing can release too much oil from the nuts, making the bites greasy. If your mixture seems too dry, add a teaspoon of water or a small splash of coconut milk at a time until it reaches that perfect sticky-but-rollable texture. For uniform bites, I use a small cookie scoop before rolling them between my palms. Slightly damp hands prevent sticking and create beautifully smooth energy bites.

    Serving Ideas & Creative Variations

    Beyond the Basic Bite

    These versatile treats can be transformed in countless ways. Try flattening them into mini energy bars, perfect for tucking into lunchboxes. For special occasions, I dip half of each bite into melted dark chocolate and sprinkle with crushed freeze-dried raspberries – they look absolutely stunning on a dessert platter! Roll them in different coatings like shredded coconut, crushed nuts, or cacao nibs for varied texture. My personal favorite is serving them alongside my morning coffee as a little breakfast treat that feels indulgent but starts my day with natural energy.

    Flavor Customization

    The basic recipe is just the beginning – the flavor combinations are endless! Swap the raspberries for freeze-dried strawberries or blueberries for a different berry profile. Add a tablespoon of orange zest for a chocolate-orange version that tastes like those holiday chocolate balls. Spice lovers can add a pinch of cayenne or cinnamon for a Mexican chocolate variation. For a more grown-up version, I sometimes add a teaspoon of espresso powder and a splash of vanilla extract – it tastes like a sophisticated mocha truffle but with all the nutritional benefits.

    Storage & Troubleshooting Guide

    Optimal Storage Methods

    Proper storage ensures your energy bites maintain their perfect texture and flavor. Keep them refrigerated in an airtight container, where they’ll last up to two weeks. For longer storage, these freeze beautifully for up to three months. I like to freeze them on a baking sheet first, then transfer to a freezer bag – this prevents them from sticking together. For on-the-go snacking, I individually wrap them in small pieces of parchment paper. They thaw quickly at room temperature, making them perfect for tucking into gym bags or purses for emergency hunger situations.

    Fixing Common Issues

    Even experienced bakers encounter challenges. If your mixture is too sticky to roll, refrigerate it for 20-30 minutes first – the natural oils will firm up, making handling easier. Conversely, if the mixture is too dry and crumbly, add a teaspoon of water or a drizzle of honey to help it bind. Sometimes the dates aren’t moist enough to create that sticky binding effect. In that case, soak them in hot water for 5-10 minutes, drain well, and then proceed with the recipe. If the raspberry flavor isn’t pronounced enough, try pulsing in additional freeze-dried berries.

    Frequently Asked Questions

    Can I make Raspberry Brownie Date Energy Bites nut-free?

    Absolutely! Substitute sunflower seeds or pumpkin seeds for the nuts. You can also use oats as a base, though you may need to add a tablespoon of nut-free butter (like sunflower seed butter) to achieve the right consistency.

    How many calories are in each energy bite?

    Each bite contains approximately 85-95 calories, depending on your exact ingredients and size. They provide a balanced mix of natural sugars, healthy fats, and fiber that makes them satisfying despite their small size.

    Can I use fresh raspberries instead of freeze-dried?

    Fresh raspberries contain too much moisture and will make the mixture too wet. Stick with freeze-dried for intense flavor without added moisture, or substitute raspberry powder if available.

    How do I know when the mixture is processed enough?

    The mixture is ready when it sticks together when pressed between your fingers. You should still see small bits of nuts and fruit – you don’t want a completely smooth paste.

    How can I increase the protein in these energy bites?

    Add 1-2 tablespoons of your favorite protein powder or replace some of the nuts with hemp seeds. You can also roll the finished bites in collagen powder for an extra protein boost.

    Final Thoughts

    These Raspberry Brownie Date Energy Bites have become my kitchen MVP – versatile, delicious, and nourishing all at once. They’ve saved countless afternoons from the vending machine temptation and delighted everyone from picky kids to health-conscious friends. The blend of rich chocolate flavor with bright raspberry notes creates something truly special that satisfies deep cravings while providing real energy. I hope they become a staple in your recipe collection too! For more healthy treat ideas, check out my Pinterest board where I share new variations regularly.

  • Crispy Parmesan Crusted Air Fryer Tilapia: Irresistibly Easy!

    Crispy Parmesan Crusted Air Fryer Tilapia: Irresistibly Easy!

    Crispy Parmesan Crusted Air Fryer Tilapia: Irresistibly Easy!

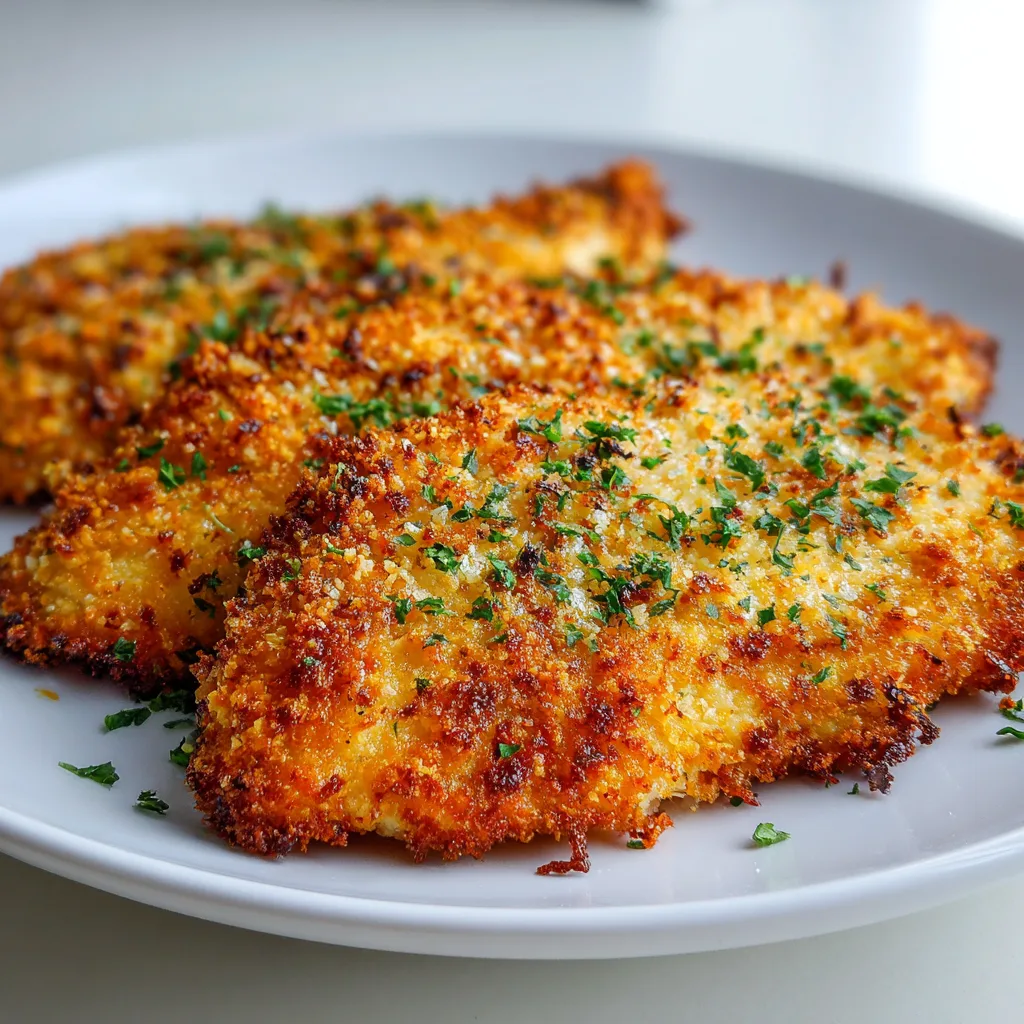
    Crispy Parmesan Crusted Air Fryer Tilapia transforms ordinary fish into a restaurant-worthy meal in just minutes! I discovered this game-changing recipe last summer when I was craving something light yet satisfying for dinner. The air fryer creates that perfect golden crust while keeping the fish tender and moist inside. There’s something magical about the combination of savory Parmesan, herbs, and the delicate flavor of tilapia. When my kitchen fills with that irresistible aroma of herbs and cheese, I know I’m about to enjoy a meal that feels indulgent but is actually quite wholesome. Let me show you how to make this family favorite that never disappoints!

    Recipe

    Why You’ll Love This Crispy Parmesan Crusted Air Fryer Tilapia

    Perfect Texture in Minutes

    The air fryer magic truly shines with this recipe! Traditional breaded fish often leaves you with either a soggy bottom or an overcooked interior. Not here! The circulating hot air creates a uniformly crispy exterior while maintaining that tender, flaky fish inside. I still remember the first time I made this—I actually gasped when I took that first bite. The contrast between the crunchy coating and the delicate fish is simply divine. Plus, it’s ready in about 10 minutes, making it perfect for those evenings when you want something impressive without spending hours in the kitchen.

    Healthier Than Traditional Frying

    One thing I absolutely adore about this recipe is how it delivers that satisfying fried food experience without the heavy oil. Using just a light spray of olive oil, you get all the crispiness with a fraction of the calories. The Parmesan cheese adds richness and flavor while creating that golden crust we all crave. My husband, who typically reaches for seconds of anything fried, couldn’t believe this was made with minimal oil. It’s become our go-to for satisfying those comfort food cravings without the guilt that sometimes follows traditional fried meals.

    Essential Tips & Tricks

    Perfecting Your Parmesan Crust

    The secret to an extraordinary Parmesan crust lies in the preparation. I’ve found that grating your own Parmesan makes a world of difference—pre-grated cheese often contains anti-caking agents that can inhibit proper melting and browning. For the ultimate crisp factor, mix your Parmesan with panko breadcrumbs in a 2:1 ratio. Another game-changer? Adding a teaspoon of lemon zest to the mixture, which brightens the entire dish. Remember to press the coating firmly onto the fish to ensure it adheres properly. This technique creates that crispy, golden finish that makes this dish so special.

    Avoiding Common Air Fryer Mistakes

    The key to success with air fryer tilapia is proper spacing and temperature management. Never overcrowd your air fryer basket—the fish needs room for the hot air to circulate. I learned this the hard way when I tried to cook four fillets at once! Always preheat your air fryer for 3-5 minutes to ensure even cooking. Another tip: spritz your coated tilapia with olive oil just before cooking, which helps achieve that golden-brown perfection. If your air fryer runs hot, reduce the temperature by 25°F. These small adjustments make the difference between good and absolutely mouthwatering results.

    Serving Ideas & Creative Variations

    Perfect Pairings for a Complete Meal

    This Crispy Parmesan Crusted Air Fryer Tilapia shines as the star of the meal, but the right sides elevate it to dinner party status. My favorite pairing is a bright citrus salad with arugula, orange segments, and a light vinaigrette—the acidity cuts through the richness beautifully. For a heartier option, roasted garlic potatoes or a simple lemon orzo complement the fish without overwhelming it. A dollop of homemade tartar sauce with capers and fresh dill takes this dish to another level. For a special touch, serve with a chilled glass of Pinot Grigio and watch your guests reach for seconds of this impressive yet simple creation.

    Exciting Flavor Variations

    The beauty of this recipe lies in its versatility. While the classic Parmesan crust is divine, don’t be afraid to experiment! For a Mediterranean twist, add chopped olives, sun-dried tomatoes, and oregano to your coating mixture. Craving something spicy? Incorporate a teaspoon of cajun seasoning or chipotle powder into your breadcrumbs. My personal favorite variation includes finely chopped fresh herbs—dill, parsley, and chives—mixed into the Parmesan coating. For a tropical take, try adding toasted coconut flakes and a hint of lime zest. Each variation keeps this dish exciting and new, even when it’s in regular rotation.

    Storage & Troubleshooting Guide

    Proper Storage for Leftovers

    While this Crispy Parmesan Crusted Air Fryer Tilapia is best enjoyed fresh from the fryer, proper storage can maintain much of its delightful texture. Allow any leftovers to cool completely before refrigerating to prevent condensation from making the crust soggy. Store in an airtight container lined with paper towels to absorb excess moisture. Leftovers will keep for up to 2 days in the refrigerator. When reheating, avoid the microwave which will leave you with a disappointing soggy crust. Instead, place the fish in your air fryer at 350°F for 3-4 minutes. This revives that crispy exterior while gently warming the fish without drying it out.

    Troubleshooting Common Issues

    Even experienced cooks occasionally encounter challenges with crispy coatings. If your Parmesan crust isn’t as golden as you’d like, try patting the tilapia completely dry before coating—excess moisture is often the culprit. If the coating falls off during cooking, ensure you’re using the right sequence: flour first (which acts as glue), then egg wash, then the Parmesan mixture. For tilapia that’s cooking unevenly, check that your fillets are similar in thickness. You can gently flatten thicker parts with your palm before coating. If your air fryer has hot spots, rotate the basket halfway through cooking for more consistent results.

    Frequently Asked Questions

    Can I use frozen tilapia for Crispy Parmesan Crusted Air Fryer Tilapia?

    Yes, but thaw it completely first and pat it very dry with paper towels. Excess moisture will prevent your coating from crisping properly and may cause steaming instead of air frying.

    How do I know when the fish is done?

    Tilapia is done when it flakes easily with a fork and reaches an internal temperature of 145°F. For a 4-ounce fillet, this typically takes 8-10 minutes at 380°F.

    Can I make this recipe gluten-free?

    Absolutely! Substitute regular breadcrumbs with gluten-free panko and ensure your Parmesan cheese doesn’t contain any gluten additives. The results are equally delicious.

    What’s the best way to prevent the coating from falling off?

    Ensure your fish is completely dry, dredge in flour first, then egg wash, and finally press firmly into the Parmesan mixture. Let it rest for 5 minutes before air frying.

    Can I make this without an air fryer?

    Yes! Bake in a preheated oven at 425°F for 12-15 minutes on a parchment-lined baking sheet. While not quite as crispy, it’s still delicious.

    Final Thoughts

    This Crispy Parmesan Crusted Air Fryer Tilapia has revolutionized weeknight dinners at my house. There’s something deeply satisfying about transforming simple ingredients into a meal that feels special enough for company yet easy enough for busy evenings. The combination of that golden, crunchy crust with tender fish creates a textural symphony that keeps everyone coming back for more. I hope you’ll give this recipe a try and experience the joy of creating restaurant-quality fish at home with minimal effort. Don’t forget to check out more delicious recipes on Pinterest for endless inspiration!

  • Authentic Greek Shrimp Saganaki: Irresistible Flavor Explosion!

    Authentic Greek Shrimp Saganaki: Irresistible Flavor Explosion!

    Authentic Greek Shrimp Saganaki: Irresistible Flavor Explosion!

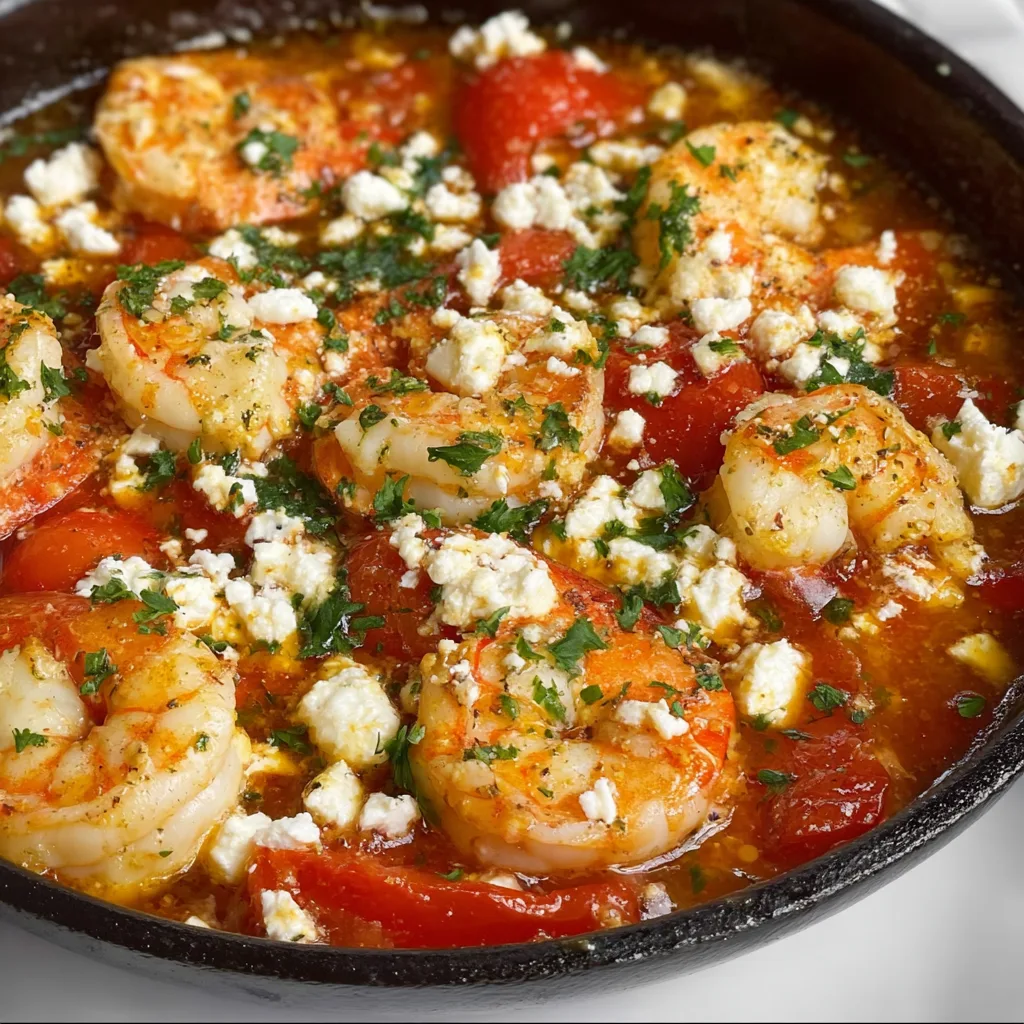
    Authentic Greek Shrimp Saganaki brings the sun-soaked flavors of the Mediterranean right to your dinner table. The first time I made this dish, the intoxicating aroma of garlic, tomatoes, and fresh herbs transported me straight to a seaside taverna in Santorini. There’s something magical about the way the plump shrimp simmers in that vibrant tomato sauce, mingling with the briny feta that melts just enough to create creamy pockets throughout. If you’re craving a taste of Greece that’s both impressive and approachable, this classic dish delivers coastal comfort in every bite. It’s become my go-to when I want to transform ordinary weeknight dinners into something special.

    Recipe

    Why You’ll Love This Authentic Greek Shrimp Saganaki

    A Perfect Balance of Flavors and Textures

    The beauty of Authentic Greek Shrimp Saganaki lies in its harmonious blend of bright acidity and rich depth. The tomatoes provide a sweet-tart foundation while the shrimp offers that perfect oceanic sweetness. I adore how the feta cheese doesn’t completely melt but instead softens just enough to create pockets of creamy saltiness throughout the dish. The oregano and dill add that distinctive Greek profile that makes this dish instantly recognizable. When you take that first bite with all components together—juicy shrimp, tangy sauce, and creamy cheese—it’s a symphony of Mediterranean flavors that feels both comforting and sophisticated.

    Quick Yet Impressive Enough for Any Occasion

    What makes this dish a regular in my rotation is how it manages to be both weeknight-friendly yet dinner-party worthy. In just about 30 minutes, you can create something that looks and tastes like it took hours. I’ve served this on busy Tuesdays when time was tight and for Saturday dinner parties where I wanted something special without being chained to the stove. The vibrant red sauce studded with pink shrimp and white feta creates a visual impact that always draws compliments. Plus, it’s naturally gluten-free and can be adapted for various dietary needs without losing its authentic character.

    Essential Tips & Tricks

    Selecting and Preparing the Perfect Shrimp

    For truly authentic results, choose large or jumbo shrimp (16-20 count per pound) with shells removed but tails left on for presentation. I’ve learned through many iterations that slightly undercooked shrimp works best since they’ll continue cooking in the hot sauce. Pat them completely dry before adding to the pan—this ensures proper searing rather than steaming. The difference in texture is remarkable! For maximum flavor, marinate the shrimp briefly in a splash of ouzo (or white wine) with minced garlic and a pinch of salt while you prepare the sauce. This small step elevates the dish from good to memorable.

    Creating the Ultimate Tomato Sauce Base

    The heart of this dish is the aromatic tomato sauce that develops incredible depth in just minutes. Start with good quality olive oil and build layers of flavor—sautéing onions until translucent before adding garlic prevents burning. Use ripe summer tomatoes when in season, but high-quality canned San Marzano tomatoes work beautifully year-round. A splash of white wine deglazes the pan and adds complexity. Don’t rush this stage—allowing the sauce to reduce slightly concentrates the flavors and creates the perfect consistency to cradle those succulent shrimp and feta chunks.

    Serving Ideas & Creative Variations

    Traditional and Modern Accompaniments

    Serve your Authentic Greek Shrimp Saganaki straight from the skillet for dramatic effect, accompanied by crusty bread for sauce-sopping—an essential part of the experience! For a complete meal, pair with a simple Greek salad dressed with good olive oil and a squeeze of lemon. I sometimes add a side of lemon-herb rice or roasted potatoes with oregano to make it more substantial. For a contemporary twist that still honors tradition, try serving it over creamy polenta or alongside crispy roasted Brussels sprouts for textural contrast. The versatility of this dish means it works equally well as a shared appetizer or main course.

    Regional Variations Worth Exploring

    While the classic recipe is perfect as is, exploring regional Greek variations adds exciting dimensions to this beloved dish. In some island versions, a splash of ouzo adds subtle anise notes that complement the seafood beautifully. Northern Greek interpretations might include a pinch of cinnamon and allspice for warmth. For a spicier kick inspired by the Peloponnese region, add a small amount of boukovo (Greek red pepper flakes). I’ve experimented with adding capers and olives for a more complex brine flavor, while some coastal areas include a mix of seafood like mussels and small fish alongside the shrimp.

    Storage & Troubleshooting Guide

    Proper Storage and Reheating Methods

    Authentic Greek Shrimp Saganaki is best enjoyed immediately, but leftovers can be stored in an airtight container for up to two days in the refrigerator. The feta will continue to break down, creating a creamier sauce—many of my friends actually prefer it this way! When reheating, do so gently over low heat, adding a splash of water if the sauce has thickened too much. I recommend removing the shrimp first and adding them back in the final minute to prevent overcooking. For meal prep, consider making just the tomato base ahead of time, then adding the shrimp and feta fresh when you’re ready to serve.

    Solving Common Saganaki Challenges

    The most common issue with this dish is overcooked shrimp that become tough and rubbery. Remember that shrimp continue cooking in the hot sauce even after removing from heat. If your sauce seems too watery, simmer uncovered for a few extra minutes before adding the shrimp. For sauce that’s too thick, add a splash of fish stock or white wine. If your feta is melting too quickly and disappearing into the sauce, try adding it in larger chunks or reducing the heat before incorporating it. Finally, if you find the flavor lacks depth, a teaspoon of honey balances acidity while a squeeze of lemon brightens the entire dish.

    Frequently Asked Questions

    What is authentic Greek Shrimp Saganaki?

    Authentic Greek Shrimp Saganaki is a traditional Mediterranean dish where shrimp are cooked in a rich tomato sauce with garlic, herbs, and topped with crumbled feta cheese. It’s typically finished under a broiler or in a hot oven until bubbly.

    Can I make this dish ahead of time?

    Yes! Prepare the tomato sauce base up to 2 days ahead, then reheat and add the shrimp and feta just before serving. This actually allows the flavors to develop more deeply.

    What type of feta cheese works best?

    Traditional Greek feta made from sheep’s milk provides the most authentic flavor and texture. Look for blocks packed in brine rather than pre-crumbled varieties for the best melting properties.

    Is there a substitute for ouzo in this recipe?

    Absolutely. While ouzo adds authentic anise notes, you can substitute with dry white wine, a splash of Pernod, or simply omit it entirely and add a squeeze of lemon instead.

    What’s the best pan to use for Shrimp Saganaki?

    A wide, shallow skillet with slightly raised sides works best—cast iron is ideal. It conducts heat evenly and can go from stovetop to oven for the final melting of the feta.

    Final Thoughts

    Authentic Greek Shrimp Saganaki embodies everything I love about Mediterranean cooking—it’s unfussy yet sophisticated, quick yet deeply flavorful, and tells a story with every bite. There’s something almost magical about how a handful of simple ingredients transforms into something so spectacularly satisfying. Whether you’re cooking for a special someone or treating yourself to a taste of the Greek isles, this dish delivers sunshine in a skillet. I hope it brings as much joy to your table as it has to mine! Don’t forget to check out more Mediterranean-inspired recipes on Pinterest for your next culinary adventure.