Blog

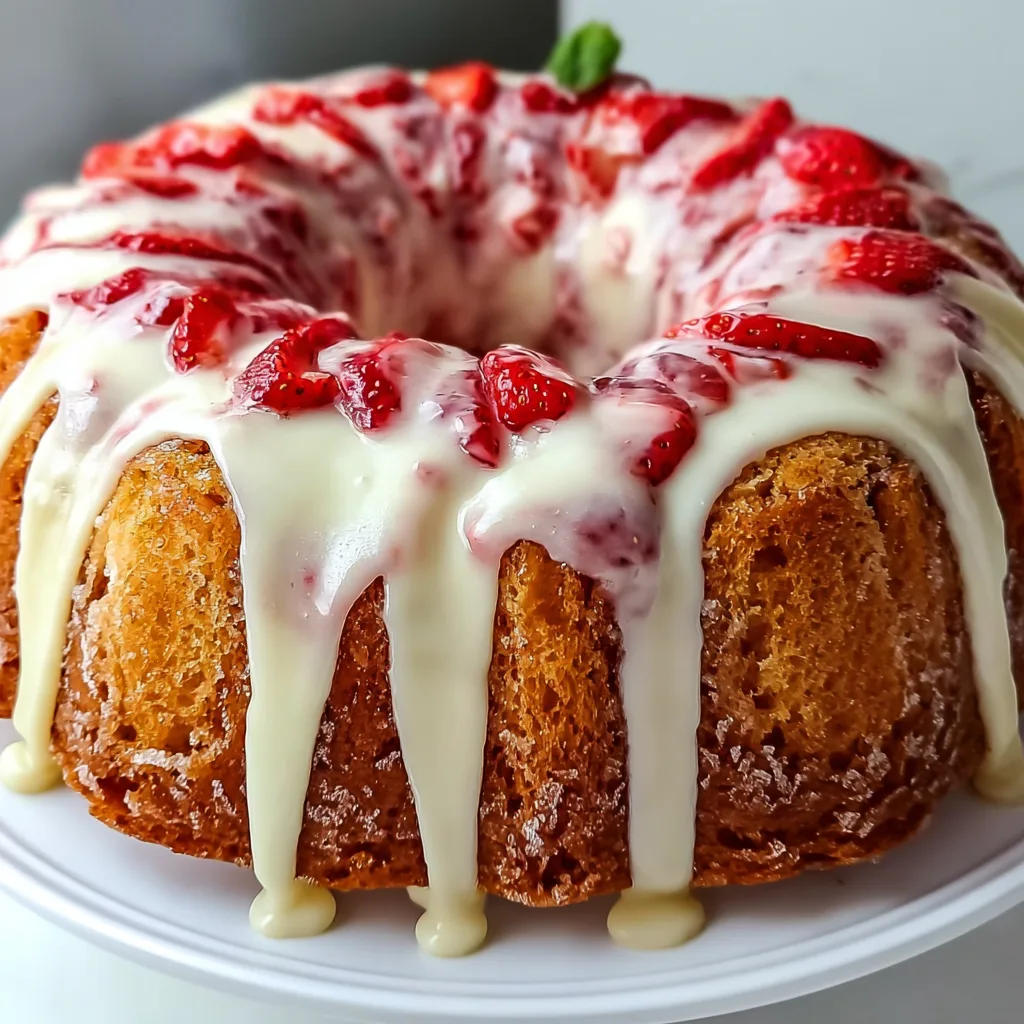
  • Homemade Strawberry Cream Cheese Pound Cake That’ll Melt Your Heart

    Homemade Strawberry Cream Cheese Pound Cake That’ll Melt Your Heart

    Homemade Strawberry Cream Cheese Pound Cake That'll Melt Your Heart

    Homemade Strawberry Cream Cheese Pound Cake has been my secret weapon for Sunday brunches and special occasions for years. There’s something magical about the way the tangy cream cheese balances the sweet, juicy strawberries in each slice. I still remember the first time I made this for my sister’s birthday—the kitchen filled with that buttery, vanilla-scented air that makes everyone drift in asking “what’s that amazing smell?” This pound cake isn’t just dessert; it’s a slice of comfort that somehow tastes like sunshine and celebrations all at once. If you’re looking for a cake that’s both impressive and foolproof, this is the one you need.

    Recipe

    Why You’ll Love This Homemade Strawberry Cream Cheese Pound Cake

    Perfect Texture & Flavor Combination

    The velvety crumb of this pound cake is what sets it apart from ordinary cakes. The cream cheese doesn’t just add tanginess—it creates this incredibly moist texture that somehow stays tender for days. I’m always amazed at how the strawberries don’t sink to the bottom but instead create these gorgeous pockets of jammy sweetness throughout each slice. The vanilla extract amplifies everything, while the slight crust that forms on the outside adds that perfect textural contrast. When you take that first bite, you get this beautiful marriage of buttery richness and bright berry flavor that makes your taste buds dance.

    Simple Ingredients, Extraordinary Results

    What I adore about this Homemade Strawberry Cream Cheese Pound Cake is that it transforms pantry staples into something truly special. You don’t need fancy equipment or obscure ingredients—just good butter, cream cheese at room temperature (this is crucial!), fresh or frozen strawberries, and quality vanilla. I’ve made this cake during strawberry season with just-picked berries, but honestly, it’s nearly as wonderful with frozen berries in the dead of winter. There’s something deeply satisfying about creating something so impressive with ingredients you likely already have on hand. It’s the perfect example of how simple ingredients, treated with care, can become extraordinary.

    Essential Tips & Tricks

    Mastering the Mixing Method

    The secret to perfection lies in how you handle the ingredients. Always—and I mean always—bring your cream cheese, butter, and eggs to room temperature before starting. This isn’t just baking snobbery; it’s chemistry! Room temperature ingredients create that silky, emulsified batter that bakes up perfectly. When creaming the butter and cream cheese, don’t rush. Those 3-4 minutes of beating incorporate air that gives your cake lift. Another game-changer? Tossing your strawberries in a tablespoon of flour before folding them in. This prevents them from sinking and creates the perfect distribution throughout your cake, just like in my other fruit-based recipes.

    Baking & Timing Essentials

    The low and slow approach is non-negotiable for pound cakes. I bake mine at 325°F (165°C) rather than the standard 350°F. This gentler heat allows the cake to rise evenly without developing a too-dark exterior before the center is done. Your kitchen timer is your best friend here—check at 60 minutes, but know that perfection might take up to 75 minutes depending on your oven. The toothpick test doesn’t lie: a few moist crumbs are perfect, but wet batter means more time is needed. And please, resist the urge to open the oven door during the first 45 minutes! That temperature drop can cause your beautiful cake to sink in the middle.

    Serving Ideas & Creative Variations

    Elegant Presentation Options

    Transform this already-stunning cake into a showstopper with thoughtful presentation. A light dusting of powdered sugar creates a snow-kissed look that’s elegant in its simplicity. For dinner parties, I serve slices with a dollop of lightly whipped cream and a few fresh strawberry slices on the side. Want something more dramatic? Try a drizzle of white chocolate ganache that cascades down the sides. The cake also looks beautiful on a vintage cake stand surrounded by edible flowers or fresh mint leaves. For brunch gatherings, I cut smaller slices and arrange them on a tiered platter with other mini treats like my Raspberry Brownie Date Energy Bites for an impressive spread.

    Seasonal & Flavor Adaptations

    The versatility of this pound cake base will amaze you. In summer, swap strawberries for blueberries or blackberries—or go wild with a triple berry mix. Fall calling? Try diced apples with cinnamon and a touch of nutmeg. For winter holidays, cranberries and orange zest create a festive variation that’s gorgeous sliced. You can also play with extracts—almond extract pairs beautifully with cherries, while lemon extract brightens up blueberry versions. For a more decadent twist, fold in white chocolate chips or toasted nuts with your fruit. I’ve even made a marbled version by separating some batter and mixing in cocoa powder before swirling it with the original batter.

    Storage & Troubleshooting Guide

    Keeping Your Pound Cake Fresh

    The cream cheese magic in this recipe means your cake stays moist longer than traditional pound cakes. Store it at room temperature under a cake dome for up to 3 days—the flavor actually improves overnight as the strawberry essence permeates the crumb. For longer storage, wrap individual slices in plastic wrap and freeze for up to 3 months. I always make an extra loaf just for freezing! To revive slightly dried-out cake, warm a slice for 10 seconds in the microwave—it’ll taste nearly freshly baked. For special occasions, I sometimes brush room-temperature slices with a simple syrup infused with vanilla or a splash of liqueur for extra moisture and flavor.

    Fixing Common Pound Cake Problems

    Even experienced bakers encounter the occasional dense bottom or cracked top. If your cake sinks in the middle, your batter was likely overmixed or your oven temperature runs low. Next time, fold ingredients more gently and consider an oven thermometer. Cracks on top are actually characteristic of pound cakes—embrace them as rustic charm! If your strawberries sink despite flouring, they might be too large; try dicing them smaller or using frozen berries, which hold their position better. A too-dark crust while the interior remains underbaked usually means your oven runs hot—cover the cake with foil halfway through baking next time to protect it while the center finishes cooking.

    Frequently Asked Questions

    Can I make this Homemade Strawberry Cream Cheese Pound Cake ahead of time?

    Absolutely! It actually tastes better on day two when the flavors have melded. Bake it up to 2 days ahead and store at room temperature under a cake dome, or freeze for up to 3 months.

    Can I use frozen strawberries instead of fresh?

    Yes! Don’t even thaw them—add them frozen and tossed in flour. This actually helps them distribute more evenly throughout the batter without bleeding color.

    Why did my pound cake crack on top?

    This is completely normal and characteristic of pound cakes! The exterior sets before the interior finishes rising, causing that beautiful crack that shows it’s homemade.

    How do I know when my pound cake is done?

    Insert a toothpick into the center—it should come out with a few moist crumbs but no wet batter. The top should spring back when lightly pressed, and the edges should pull away slightly from the pan.

    Can I make this recipe in a different pan size?

    Yes, but adjust baking times accordingly. Muffin tins take about 20-25 minutes, mini loaves about 35-40 minutes. Always watch for golden edges and do the toothpick test.

    Final Thoughts

    This Homemade Strawberry Cream Cheese Pound Cake has saved countless gatherings and created so many special memories around my table. There’s something deeply satisfying about serving something so beautiful that you made with your own hands. The way people’s eyes light up at that first bite tells me this recipe is doing exactly what good food should—bringing joy and connection. I hope you’ll make this cake part of your own story, adapting it to your tastes and creating your own traditions around it. Don’t forget to share your creations on Pinterest and tag me—I’d love to see how your pound cake turns out!

  • Cheesy Pizza Pockets That Will Blow Your Mind Every Time!

    Cheesy Pizza Pockets That Will Blow Your Mind Every Time!

    Cheesy Pizza Pockets That Will Blow Your Mind Every Time!

    Cheesy Pizza Pockets are the ultimate handheld comfort food that brings me right back to after-school snack time—but with a homemade upgrade that puts those frozen varieties to shame! There’s something magical about biting through that golden, flaky crust and hitting that first pocket of molten cheese and zesty sauce. I discovered this recipe during a rainy weekend when my kids were climbing the walls with boredom, and now it’s our Friday night tradition. The beauty is in their simplicity: basic ingredients, minimal prep, maximum satisfaction. Trust me, once you make these from scratch, there’s no going back to store-bought.

    Recipe

    Why You’ll Love These Cheesy Pizza Pockets

    Perfect for Meal Prep and On-the-Go Eating

    These pizza pockets are absolute meal prep champions! I make a double batch on Sunday afternoons while my favorite playlist fills the kitchen, and we’re set for quick lunches all week. The pockets reheat beautifully in just minutes, making them perfect for busy weekday lunches or after-school snacks. My teenagers can grab them straight from the fridge and reheat them themselves—a small miracle in itself! The individual portions mean no arguments over who got more, and they’re sturdy enough to pack in lunchboxes without turning into a sad, soggy mess by noon.

    Customizable for Every Palate

    The beauty of these cheesy pizza pockets lies in their infinite customization possibilities. My husband loves the classic pepperoni and mozzarella, while my youngest insists on ham and pineapple (don’t judge us!). I’ve fallen in love with a spinach, feta, and sun-dried tomato version that feels slightly more grown-up. The base recipe stays the same, but you can adapt the fillings to whatever you have on hand or whatever your family craves. This flexibility makes them perfect for picky eaters—everyone gets exactly what they want without extra cooking effort from me!

    Essential Tips & Tricks

    Mastering the Perfect Dough

    The secret to irresistible pizza pockets starts with the dough consistency. I’ve found that letting the dough rest for at least 30 minutes makes all the difference—it relaxes the gluten and creates that perfect chewy-yet-tender texture we’re after. Room temperature ingredients blend more smoothly, so plan ahead! A light dusting of cornmeal on your work surface prevents sticking while adding a subtle crunch. Don’t overwork the dough when rolling it out; gentle hands make for flakier pockets. If you’re short on time, quality store-bought pizza dough works beautifully too—I won’t tell if you don’t! These garlic butter parmesan knots use a similar dough technique.

    Preventing the Dreaded Filling Leakage

    Nothing’s more disappointing than watching all that glorious cheese and sauce escape during baking! The sealing technique is crucial—I dampen the edges with a bit of water or egg wash before pressing firmly with fork tines. Don’t overfill your pockets; about 2-3 tablespoons of filling is perfect for a 4-inch pocket. Allow at least half an inch of dough border for proper sealing. For extra insurance against leaks, chill the assembled pockets for 15 minutes before baking—this firms up the dough and helps maintain the seal. Finally, those steam vents aren’t just decorative! Cut 2-3 small slits in the top to release pressure and prevent explosive cheese situations.

    Serving Ideas & Creative Variations

    Perfect Pairings for a Complete Meal

    Transform these cheesy pizza pockets from snack to satisfying meal with thoughtful side pairings. My family loves them alongside a crisp green salad with tangy vinaigrette—the fresh crunch balances the rich, melty pockets perfectly. For heartier appetites, a cup of tomato soup creates that classic grilled-cheese-and-soup comfort vibe that never fails to please. In summer, I serve them with cucumber spears and cherry tomatoes for a no-cook side. For entertaining, I make mini versions and serve them with crispy zucchini rings with creamy dip for an appetizer spread that disappears in minutes!

    Global Flavor Inspirations

    Take your pizza pockets on a flavor adventure by drawing inspiration from global cuisines! For Mediterranean vibes, fill with feta, olives, and roasted red peppers with a sprinkle of oregano. My taco-inspired version with seasoned ground beef, cheddar, and a touch of corn salsa is always a hit on Tuesdays. For an Italian twist beyond the classic, try prosciutto with fig jam and fontina cheese—unexpectedly delicious! Asian-inspired fillings like teriyaki chicken with a sprinkle of mozzarella create a fusion that somehow works brilliantly. The dough recipe stays consistent while the fillings take your taste buds traveling around the world.

    Storage & Troubleshooting Guide

    Freezing and Reheating for Best Results

    These cheesy pizza pockets are freezer-friendly superstars! For best results, freeze them unbaked on a parchment-lined sheet until solid (about 2 hours), then transfer to freezer bags. They’ll keep for up to 3 months! When ready to enjoy, you can bake them straight from frozen—just add about 5-7 minutes to the baking time and watch for that golden-brown perfection. For already-baked pockets, reheat in a 350°F oven for 10 minutes to restore that crispy exterior. Microwaving works in a pinch (about 45 seconds), but you’ll sacrifice some crispness. I label each freezer bag with filling types and dates—my color-coded system makes weeknight dinner decisions effortless!

    Troubleshooting Common Issues

    Even experienced bakers encounter challenges! If your dough feels too sticky, resist adding too much flour—just a light dusting on your hands and work surface should do it. Sticky dough actually produces a better texture after baking. For stubborn leaks, try reducing your filling slightly and double-check your seals before baking. If your pockets are browning too quickly but aren’t cooked through, lower your oven temperature by 25°F and cover loosely with foil for the remaining bake time. Pale, soggy bottoms usually mean your oven wasn’t hot enough to start—try preheating longer or using a pizza stone for more even heat distribution.

    Frequently Asked Questions

    Can I make Cheesy Pizza Pockets ahead of time?

    Absolutely! Assemble them up to 24 hours ahead and refrigerate unbaked. You can also freeze them for up to 3 months. For best results, freeze them individually on a baking sheet before transferring to freezer bags.

    What’s the best cheese for pizza pockets?

    Low-moisture mozzarella is ideal as it melts beautifully without releasing too much liquid. For extra flavor, mix in some sharp cheddar, provolone, or parmesan. Pre-shredded cheese works but freshly grated melts more smoothly.

    How do I prevent my pizza pockets from getting soggy?

    Avoid watery fillings and pat ingredients like pineapple or vegetables dry before using. Let tomato sauce reduce slightly to thicken, and don’t overfill your pockets. Those steam vents on top are essential!

    Can I make these Cheesy Pizza Pockets in an air fryer?

    Yes! Preheat your air fryer to 375°F and cook for 8-10 minutes until golden and crispy. They cook faster than in a conventional oven, so check them early to prevent burning.

    Are these suitable for vegetarians?

    Definitely! Fill with your favorite vegetables, cheeses, and meat alternatives. Try combinations like spinach and ricotta, roasted vegetables with pesto, or plant-based pepperoni substitutes.

    Final Thoughts

    These Cheesy Pizza Pockets have become more than just a recipe in our home—they’re a flexible solution for busy days, a creative cooking project for rainy weekends, and sometimes even the peace offering that ends sibling squabbles. The joy of watching someone bite into a pocket and get that first taste of gooey, savory goodness never gets old. Whether you stick with classic pizza flavors or venture into creative territory, these handheld delights deliver comfort food satisfaction every time. I’d love to see your creations on Pinterest—tag me in your pizza pocket masterpieces!

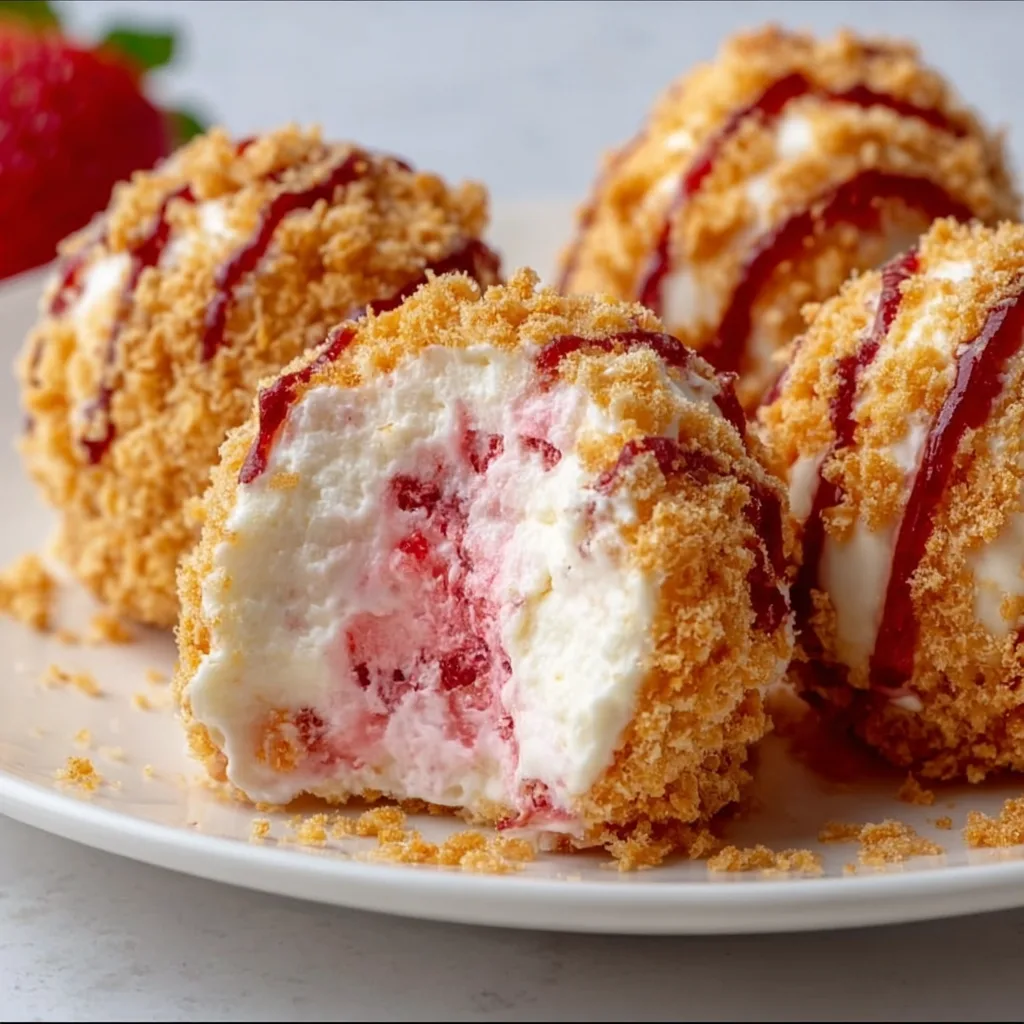
  • Easy Strawberry Cheesecake Crunch Balls – Irresistibly Delicious!

    Easy Strawberry Cheesecake Crunch Balls – Irresistibly Delicious!

    Easy Strawberry Cheesecake Crunch Balls – Irresistibly Delicious!

    These Easy Strawberry Cheesecake Crunch Balls have become my absolute summer salvation! There’s something magical about the way the creamy cheesecake filling melts against the crunchy graham cracker coating, with bursts of fresh strawberry in every bite. I first made these for my sister’s backyard gathering last June, and they disappeared faster than I could snap a photo! Perfect for those moments when you crave something sweet but don’t want to turn on the oven. These no-bake treats combine all the flavors of a classic strawberry cheesecake without the fuss.

    Recipe

    Why You’ll Love These Easy Strawberry Cheesecake Crunch Balls

    Perfect Balance of Flavors and Textures

    These little bites of heaven offer the most satisfying contrast between creamy and crunchy textures. The velvety cream cheese center, sweetened just right with powdered sugar, cradles bits of fresh strawberries that burst with juicy flavor. Then comes that golden graham cracker coating that gives the perfect crunch with every bite. I love watching people’s eyes light up when they taste that first bite—it’s like experiencing a full-sized cheesecake but in an adorable, poppable form that doesn’t require plates or forks!

    Quick No-Bake Solution for Any Occasion

    When summer temperatures soar and the thought of turning on the oven makes you wilt, these no-bake treats become your best friend. I whipped these up last-minute for an impromptu book club gathering, and everyone thought I’d spent hours in the kitchen! The truth? They take about 20 minutes of active prep, then just need some chill time in the fridge. Perfect for busy weeknights, unexpected guests, or when you need a sweet treat to bring to a potluck. The hardest part is waiting for them to firm up before diving in!

    Essential Tips & Tricks

    Mastering the Perfect Consistency

    Getting the right texture is key to ball-rolling success! If your mixture feels too sticky, pop it in the refrigerator for 15-20 minutes before rolling. Cold cream cheese is much easier to work with. I learned this the hard way when I tried making these on a hot summer day—my kitchen looked like a cheesecake explosion! For the smoothest results, make sure your cream cheese is fully softened before mixing, then beat until completely lump-free. This creates that silky-smooth center that makes these treats so irresistible and worthy of being displayed alongside other impressive desserts.

    Strawberry Selection and Preparation

    Using the right strawberries makes all the difference. Look for berries that are bright red, fragrant, and firm without soft spots. I prefer organic when possible for the best flavor. Dice them into tiny pieces (about 1/4 inch) so they distribute evenly throughout the mixture. Pat them dry with paper towels to remove excess moisture—this prevents your mixture from becoming too wet. For an intense strawberry flavor, you can also add a teaspoon of strawberry extract or fold in a tablespoon of strawberry preserves along with the fresh berries.

    Serving Ideas & Creative Variations

    Presentation That Wows

    Transform these simple treats into an elegant dessert by serving them on a beautiful platter with fresh strawberry slices and mint leaves. For special occasions, I place each ball in a mini cupcake liner and arrange them in a tiered stand—instant dessert table centerpiece! You can also drizzle them with white chocolate or dust with a bit of powdered sugar just before serving for that “wow” factor. Last Valentine’s Day, I arranged them in a heart shape on a serving board, and my husband thought I’d ordered from a fancy bakery!

    Flavor Variations to Try

    While the classic version is divine, these balls welcome creative twists! Try adding zesty citrus by mixing in lemon or orange zest for a refreshing tang. For chocolate lovers, fold in mini chocolate chips or roll the finished balls in cocoa powder instead of graham crackers. White chocolate and macadamia nuts create an indulgent tropical version. My personal favorite variation includes a hint of almond extract and a sprinkle of toasted coconut on the outside—it reminds me of those fancy coconut-based desserts at high-end restaurants!

    Storage & Troubleshooting Guide

    Proper Storage for Maximum Freshness

    These strawberry cheesecake balls need to be refrigerated properly to maintain their creamy texture and fresh flavor. Store them in an airtight container with parchment paper between layers to prevent sticking. They’ll keep beautifully for up to 5 days, though they rarely last that long in my house! For longer storage, you can freeze them for up to 3 months—just thaw in the refrigerator overnight before serving. I like to make a double batch and freeze half, so I always have a sweet treat ready for unexpected company.

    Fixing Common Issues

    Even experienced bakers encounter hiccups! If your mixture is too soft for rolling, add more crushed graham crackers a tablespoon at a time until you reach a moldable consistency. Conversely, if it’s too firm, a tablespoon of heavy cream will soften it. Balls cracking when you roll them? Your mixture might be too cold—let it warm slightly at room temperature. For graham cracker coating that won’t stick, lightly dampen your hands before rolling the balls in the crumbs. This creates just enough moisture for perfect adhesion without making them soggy.

    Frequently Asked Questions

    Can I make Easy Strawberry Cheesecake Crunch Balls ahead of time?

    Absolutely! Make them up to 3 days in advance and store in the refrigerator. The flavors actually develop beautifully with a bit of time, making them perfect for party prep.

    Can I use frozen strawberries instead of fresh?

    Yes, but thaw completely and pat very dry with paper towels to remove excess moisture. Fresh berries provide the best texture and flavor, but frozen work in a pinch.

    How do I prevent the graham cracker coating from getting soggy?

    Roll the balls in graham cracker crumbs just before serving, or apply a double coating—once after forming and again just before serving for maximum crunch.

    Are these suitable for people with gluten allergies?

    Not in their traditional form, but you can easily substitute the graham crackers with gluten-free cookies or even toasted almond flour for a gluten-free version.

    What can I use instead of cream cheese?

    Mascarpone makes a luxurious substitute, or for a lighter version, try Greek yogurt cream cheese. Each creates a slightly different flavor profile but works beautifully.

    Final Thoughts

    These Easy Strawberry Cheesecake Crunch Balls have become my go-to dessert when I want to impress without stress. There’s something magical about transforming simple ingredients into bite-sized treasures that capture the essence of summer. I love seeing the joy they bring to friends and family—that moment of pure delight with each creamy, crunchy bite. Whether you’re a seasoned baker or kitchen newbie, these little treats promise big flavor with minimal effort. Share your creations on Pinterest and spread the strawberry cheesecake love!

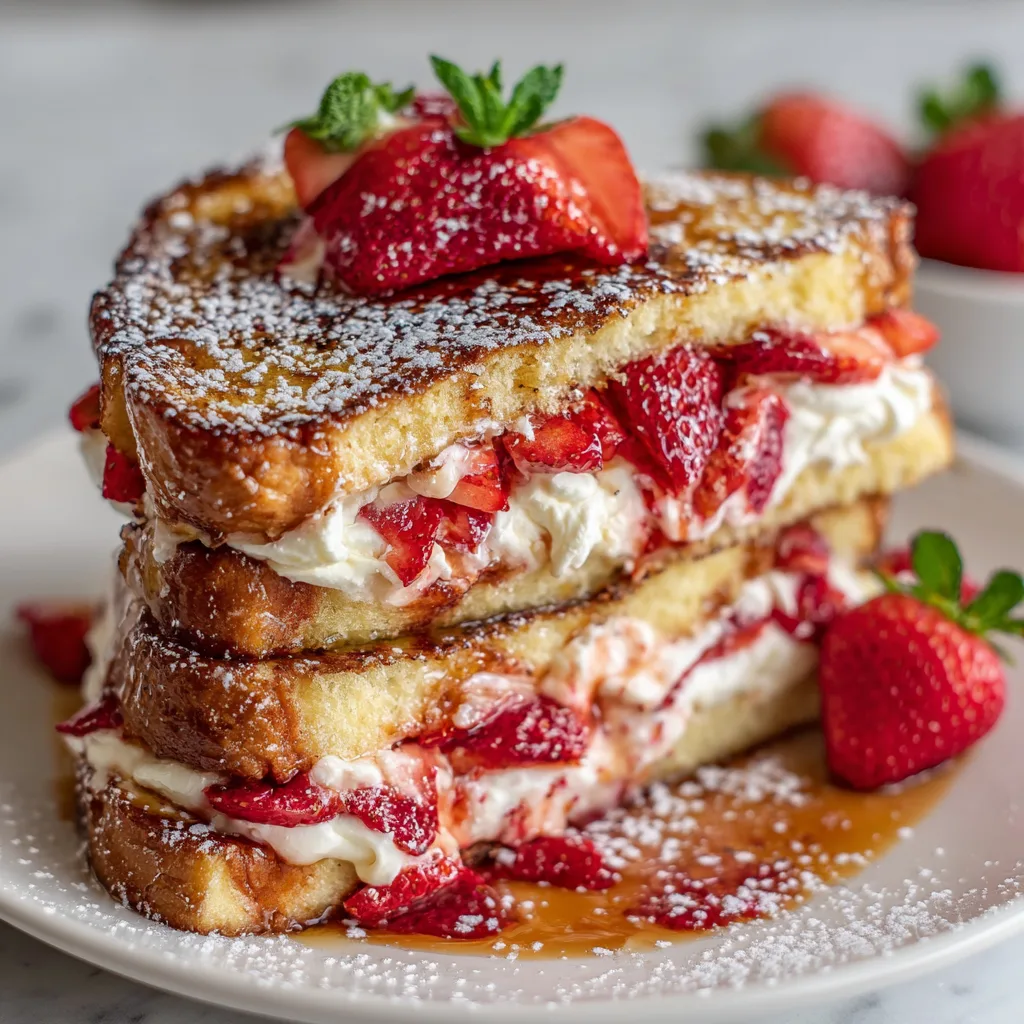
  • Strawberry Cheesecake Stuffed French Toast – Irresistibly Delicious!

    Strawberry Cheesecake Stuffed French Toast – Irresistibly Delicious!

    Strawberry Cheesecake Stuffed French Toast – Irresistibly Delicious!

    Strawberry Cheesecake Stuffed French Toast transforms ordinary breakfast into an extraordinary morning treat. The moment that warm, cream cheese-filled bread hits your plate, dripping with sweet strawberry syrup, you know you’re in for something special. I discovered this recipe during a rainy Sunday morning when my family needed cheering up, and it’s become our go-to celebration breakfast ever since. The perfect balance of crispy exterior and creamy filling makes this dish irresistible. If you love indulgent breakfast recipes, this one combines the best of both worlds – classic French toast and luscious cheesecake – all in one delectable package.

    Recipe

    Why You’ll Love This Strawberry Cheesecake Stuffed French Toast

    A Perfect Balance of Flavors

    The magic of this recipe lies in its harmonious flavor profile. The tangy cream cheese filling, sweetened just enough to complement the fresh strawberries, creates a perfect contrast against the vanilla-scented bread. I still remember my daughter’s face lighting up with her first bite—eyes closed, smile spreading. The exterior develops a beautiful golden crust while the inside remains soft and pillowy. Each mouthful delivers that satisfying combination of warm bread, cool creamy filling, and sweet-tart strawberries that makes your taste buds dance with joy.

    Make-Ahead Convenience

    One of the best features of Strawberry Cheesecake Stuffed French Toast is how easily it fits into busy mornings. You can prepare the cream cheese filling and slice the strawberries the night before, storing them separately in the refrigerator. The assembled sandwiches can even be prepared ahead and refrigerated overnight—just dip and cook in the morning! This make-ahead capability transforms what seems like a fancy brunch dish into a realistic weekday option. I’ve served this on hectic school mornings and received nothing but smiles and clean plates.

    Essential Tips & Tricks

    Bread Selection Matters

    Choosing the right bread makes all the difference in this recipe. Opt for thick-cut brioche or challah for the best results—these enriched breads have the perfect structure to hold your filling without becoming soggy. Allow slightly stale bread to sit out for 20-30 minutes before using; this helps it absorb the egg mixture without falling apart. I once tried making this with regular sandwich bread in a pinch, and while still delicious, it didn’t have that same luxurious mouthfeel that makes this recipe truly special. The ideal thickness is about 1-inch per slice for the perfect ratio of bread to filling.

    Perfecting Your Technique

    The secret to restaurant-quality Strawberry Cheesecake Stuffed French Toast lies in your cooking technique. Heat your pan or griddle to medium-low—too hot and the outside burns before the inside warms through. Add a small pat of butter before each batch for that golden crust. Don’t rush the process! Each sandwich needs about 3-4 minutes per side. I’ve found that pressing down gently with a spatula helps seal the edges and prevent filling leakage. For an extra touch of decadence, try adding a sprinkle of cinnamon sugar to the pan right before flipping.

    Serving Ideas & Creative Variations

    Elegant Presentation Options

    Elevate your Strawberry Cheesecake Stuffed French Toast with thoughtful presentation. Arrange the slices on a warmed platter with a light dusting of powdered sugar that melts slightly on contact. Create a beautiful pattern with fresh strawberry slices and mint leaves for a pop of color. For special occasions, I serve each portion with a small pitcher of warm maple syrup infused with vanilla bean. This elegant touch always impresses guests who can’t believe something so beautiful came from my kitchen. A dollop of lightly sweetened whipped cream on the side adds a professional touch that makes breakfast feel like dessert.

    Seasonal Adaptations

    While strawberries are classic, this versatile recipe shines with seasonal adaptations. In summer, try fresh peaches or blueberries mixed into the filling. Fall calls for sautéed apples with cinnamon, while winter holidays are perfect for cranberry and orange combinations. You can also experiment with different extracts in your filling—almond pairs beautifully with cherries, while coconut extract transforms this into a tropical treat with mango. I’ve even made a savory version with herbed cream cheese and roasted tomatoes for brunch that disappeared faster than the sweet versions!

    Storage & Troubleshooting Guide

    Proper Storage Methods

    Leftover Strawberry Cheesecake Stuffed French Toast (if you’re lucky enough to have any!) requires proper storage to maintain its delightful texture. Cool completely before refrigerating in an airtight container with parchment paper between layers to prevent sticking. These will keep for up to 2 days. For longer storage, freeze individual portions wrapped tightly in plastic wrap, then aluminum foil. When reheating refrigerated portions, use a toaster oven for 3-4 minutes to restore that crispy exterior. Frozen pieces should be thawed overnight in the refrigerator before reheating for best results.

    Fixing Common Issues

    Even experienced cooks encounter challenges with stuffed French toast. If your filling leaks during cooking, your sandwich may not be sealed properly—try using less filling and pressing the edges firmly before dipping. For soggy results, your bread might be too fresh or your egg mixture too thin—try adding an extra egg yolk for richness and structure. If your French toast is browning too quickly but remains cool inside, your heat is too high. Remember that patience is key; lower the temperature and give it time to cook through properly. I’ve rescued many batches by finishing them in a 300°F oven for 5 minutes.

    Frequently Asked Questions

    Can I make Strawberry Cheesecake Stuffed French Toast without dairy?

    Yes! Substitute vegan cream cheese and plant-based milk in the egg mixture. Use coconut oil instead of butter for cooking. The texture will be slightly different but still delicious with all the same flavors.

    How do I prevent my Strawberry Cheesecake Stuffed French Toast from becoming soggy?

    Use slightly stale bread, don’t soak too long in the egg mixture (just a quick dip on each side), and cook immediately after dipping until golden brown on medium-low heat.

    Can I use frozen strawberries instead of fresh?

    Absolutely! Thaw and drain them thoroughly first, then pat dry with paper towels to remove excess moisture that could make your filling runny.

    What’s the best way to slice the bread for stuffing?

    Cut 1½-inch thick slices from a loaf of brioche or challah, then make a pocket by cutting a slit in the center without going through to the edges.

    Is there a way to make this recipe healthier?

    Try whole grain bread, reduce sugar in the filling, use light cream cheese, and top with fresh fruit instead of syrup. You can also bake instead of pan-frying.

    Final Thoughts

    Strawberry Cheesecake Stuffed French Toast brings together the comfort of breakfast and the indulgence of dessert in one irresistible package. The contrast of textures—crispy exterior, soft bread, and creamy filling—creates a sensory experience that elevates this dish beyond ordinary breakfast fare. Whether you’re serving it for a special celebration or simply making an ordinary morning extraordinary, this recipe has a way of creating moments worth remembering. I hope you’ll make it part of your own family traditions and discover your favorite variations along the way.

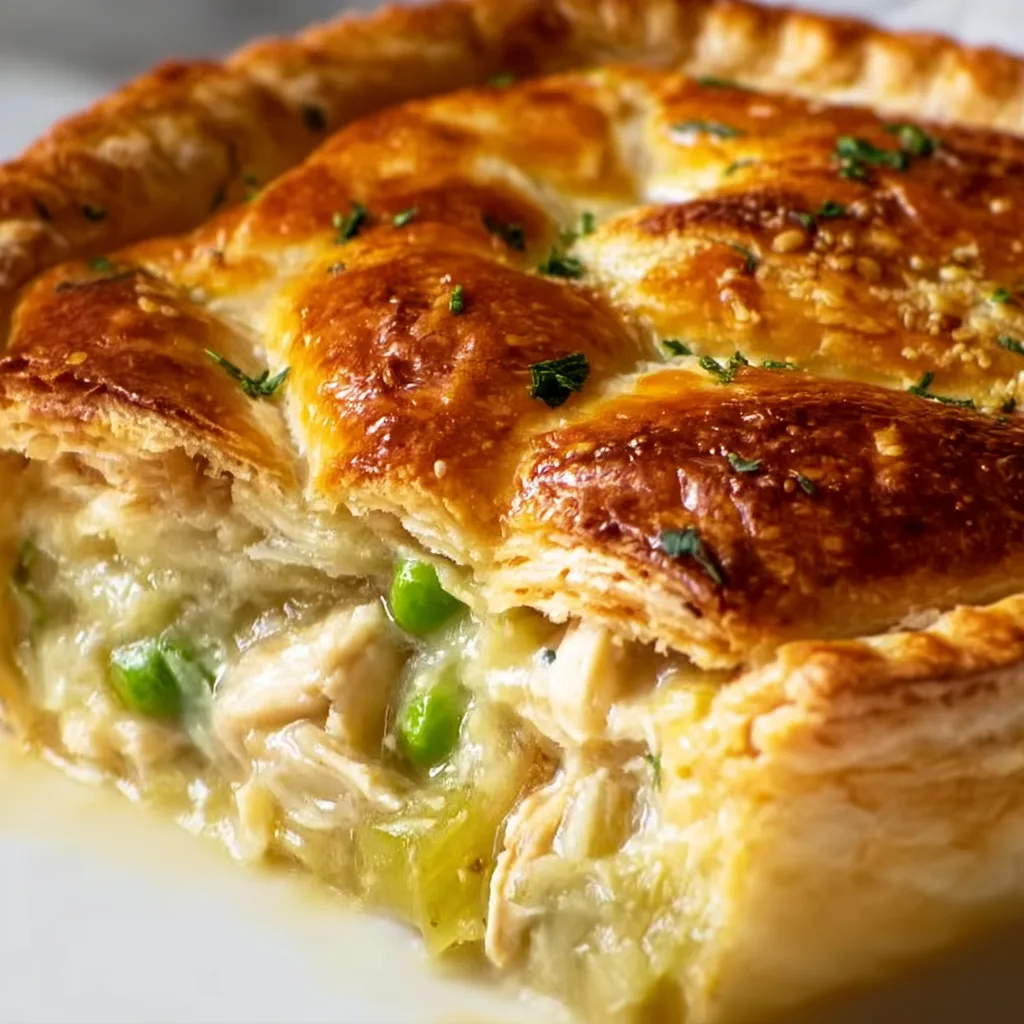
  • Mary Berry Chicken and Leek Pie Recipe That Will Melt Your Heart

    Mary Berry Chicken and Leek Pie Recipe That Will Melt Your Heart

    Mary Berry Chicken and Leek Pie Recipe That Will Melt Your Heart

    Mary Berry Chicken and Leek Pie has been my comfort food salvation on countless rainy Sunday afternoons. There’s something magical about the way the creamy sauce envelops tender chicken and sweet leeks, all tucked beneath a golden puff pastry crust. This British classic combines simple ingredients into something truly extraordinary. The first time I made this pie, my kitchen filled with an aroma so inviting that my neighbor actually texted to ask what I was baking! Whether you’re seeking comfort food perfection or looking to impress dinner guests, this recipe delivers warmth in every bite.

    Recipe

    Why You’ll Love This Mary Berry Chicken and Leek Pie

    Perfect Balance of Flavors and Textures

    The genius of Mary Berry’s chicken and leek pie lies in its perfect harmony of flavors. Tender chicken pieces soak up the delicate leek-infused sauce, while the buttery pastry provides a satisfying contrast. I love how the leeks become silky and sweet when cooked slowly, losing their sharp edge and melting into the creamy sauce. The first forkful is a revelation – crisp pastry giving way to that velvety filling. It’s comfort food that doesn’t feel heavy, with each component playing its essential role in creating a dish that’s greater than the sum of its parts.

    Make-Ahead Convenience

    What I adore about this Mary Berry chicken and leek pie is its impressive versatility for busy schedules. You can prepare the filling up to two days ahead, storing it in the refrigerator until you’re ready to assemble. I’ve even frozen the cooled filling for up to a month with excellent results! On particularly hectic weeknights, I assemble the entire pie in the morning, refrigerate it covered, and simply pop it in the oven when I get home. The pastry stays crisp, the filling remains luscious, and dinner is served with minimal evening effort – perfect for those days when cooking feels like too much.

    Essential Tips & Tricks

    Mastering the Perfect Filling

    The secret to an exceptional Mary Berry chicken and leek pie filling is gentle cooking and proper seasoning. I always cook my leeks slowly until they’re buttery soft but not browned – about 10 minutes on medium-low heat does the trick. For the chicken, I prefer thighs over breasts for their richer flavor and resistance to drying out. A splash of white wine deglazes all those flavorful bits from the pan, adding complexity. My personal touch? A teaspoon of Dijon mustard whisked into the sauce for subtle warmth. Remember to let your filling cool completely before topping with pastry to prevent a soggy bottom.

    Perfecting Your Pastry

    Whether using homemade or store-bought, the pastry technique makes all the difference in your Mary Berry chicken and leek pie. I always bring refrigerated pastry to room temperature for 15 minutes before rolling – this prevents cracking while maintaining its structure. For that signature golden finish, brush with beaten egg rather than just egg white, and don’t forget to cut a small vent in the center to release steam. For extra insurance against a soggy bottom, try brushing the rim of your pie dish with beaten egg before adding pastry, creating a waterproof seal. Similar techniques work beautifully when making classic British fish & chips for a complete UK-inspired meal.

    Serving Ideas & Creative Variations

    Complementary Side Dishes

    A Mary Berry chicken and leek pie deserves thoughtful accompaniments that enhance without overwhelming. I love serving it with buttered green beans or peas that echo the spring-like flavors in the pie. For something heartier, try a simple watercress salad dressed with lemon and olive oil – the peppery greens cut through the richness beautifully. On chillier evenings, a small portion of buttery mashed potatoes makes this meal absolutely unbeatable. The key is balance: you want sides that complement rather than compete with your star attraction. For a complete comfort food experience, consider following with no-bake mini Biscoff cheesecakes for dessert.

    Exciting Flavor Twists

    While the classic Mary Berry chicken and leek pie is perfect as-is, I’ve discovered some delightful variations worth trying. For a hint of brightness, add the zest of one lemon to your filling. Seeking more depth? Stir in 2 tablespoons of fresh tarragon or thyme. For a luxurious twist, fold in 100g of sautéed mushrooms and a splash of cream right before assembling. My personal favorite adaptation is adding a handful of crispy pancetta pieces for a subtle smoky note. These simple additions respect the original while creating something uniquely yours – each variation maintaining the comforting essence that makes this pie so beloved.

    Storage & Troubleshooting Guide

    Proper Storage Methods

    Storing your Mary Berry chicken and leek pie properly ensures extended enjoyment without sacrificing quality. Once cooled completely, cover any leftovers with foil and refrigerate for up to 3 days. For reheating, I’ve found that 20 minutes in a 350°F oven works perfectly, with a piece of foil loosely covering the top to prevent over-browning. If freezing the unbaked pie, wrap it tightly in plastic followed by foil and freeze for up to one month. There’s no need to thaw before baking – simply add 15-20 minutes to the baking time and cover with foil for the first half of cooking.

    Fixing Common Issues

    Even experienced bakers encounter challenges with Mary Berry chicken and leek pie, but most are easily fixed with simple adjustments. If your filling seems too watery, whisk 1 tablespoon of cornstarch with 2 tablespoons of cold water and stir it into the simmering sauce. For pastry that’s browning too quickly, loosely cover with foil for the remainder of baking time. If your bottom crust turns soggy, try blind baking the base for 10 minutes before adding filling. And if your filling lacks flavor, don’t hesitate to add a chicken stock cube or a splash of Worcestershire sauce – these little flavor bombs can transform a good pie into an exceptional one.

    Frequently Asked Questions

    Can I use rotisserie chicken for Mary Berry chicken and leek pie?

    Absolutely! Shredded rotisserie chicken works beautifully and saves time. Just add it toward the end of cooking your filling since it’s already cooked through.

    What’s the best pastry for this pie?

    All-butter puff pastry delivers the best flavor and flakiness, but shortcrust works wonderfully too if you prefer a sturdier base.

    Can I make this pie vegetarian?

    Yes! Replace chicken with a mix of mushrooms and white beans. Add a teaspoon of smoked paprika to compensate for the lost chicken flavor.

    Why is my filling too runny?

    Your sauce likely needs more reduction or thickening. Simmer longer uncovered or add a cornstarch slurry (1 tablespoon cornstarch mixed with 2 tablespoons cold water).

    How do I prevent a soggy bottom crust?

    Ensure your filling is completely cool before adding it to the pastry. You can also blind bake the bottom crust for 10-12 minutes before filling.

    Final Thoughts

    Mary Berry chicken and leek pie represents comfort food at its finest – approachable yet impressive, familiar yet special. I find myself returning to this recipe whenever I need a dose of culinary self-care or want to share something truly heartwarming with loved ones. The beauty lies in its perfect simplicity, allowing quality ingredients to shine through thoughtful preparation. Whether following the classic method or adding your personal twist, this pie promises to deliver that rare combination of comfort and elegance that makes British cooking so enduringly appealing. Find more inspiration for your next cooking adventure on Pinterest.

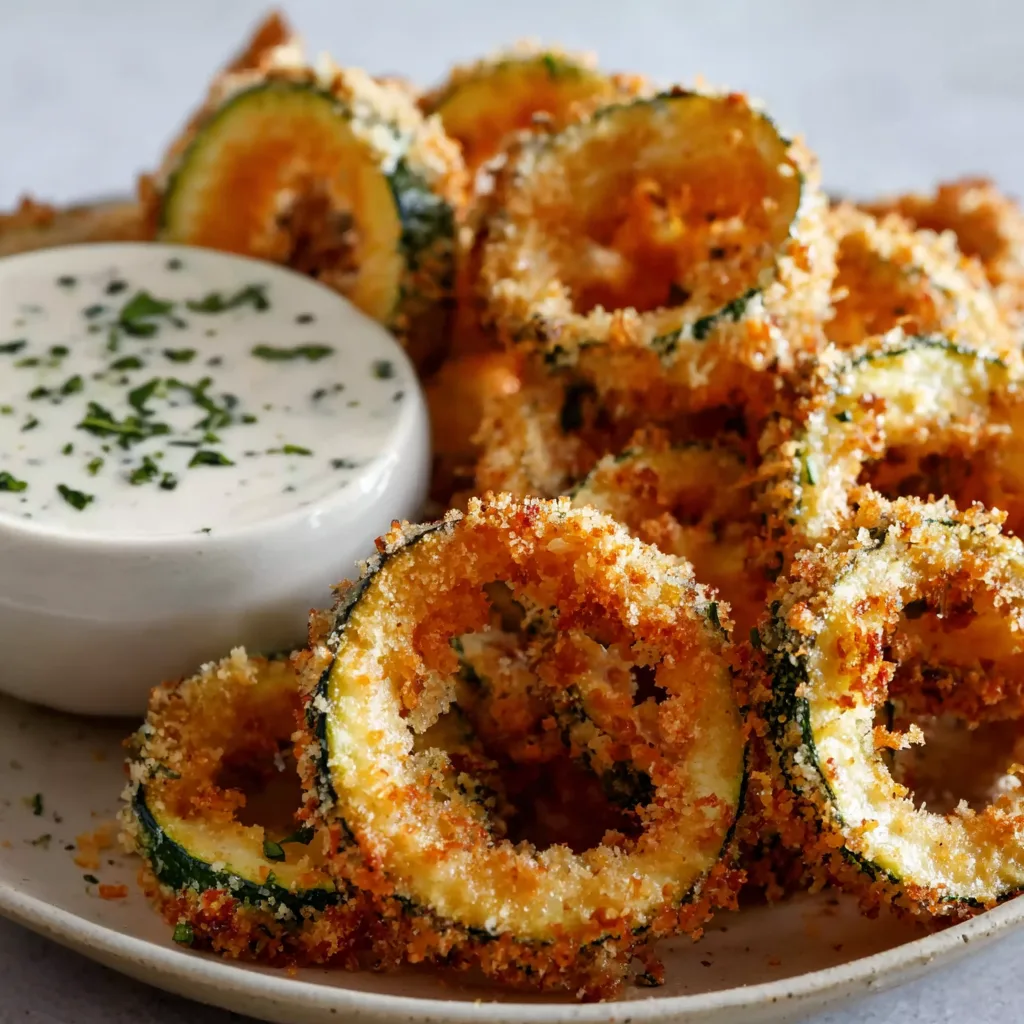
  • Crispy Zucchini Rings Recipe with Irresistible Creamy Dip!

    Crispy Zucchini Rings Recipe with Irresistible Creamy Dip!

    Crispy Zucchini Rings Recipe with Irresistible Creamy Dip!

    Crispy Zucchini Rings with Creamy Dip have completely transformed my appetizer game, friends! There’s something magical about that perfect crunch giving way to tender zucchini inside, especially when paired with a cooling dip that makes every bite sing. I first made these for my sister’s backyard gathering last summer, and they disappeared faster than I could refill the platter! The beauty lies in their simplicity—just a few pantry staples transform humble zucchini into a crowd-pleasing snack that even veggie-skeptics can’t resist. Let me show you how to make these irresistible rings that’ll have everyone asking for your secret recipe.

    Recipe

    Why You’ll Love This Crispy Zucchini Rings with Creamy Dip

    Perfect Texture Contrast

    The ultimate crunch factor is what makes these zucchini rings so addictive! The outside develops this gorgeous golden coating that shatters when you bite into it, revealing the tender zucchini inside. I’m all about that textural magic. The panko breadcrumbs are the real hero here—they create a lighter, airier coating than regular breadcrumbs. And that moment when they’re fresh from the fryer? Pure bliss! The zucchini itself stays just firm enough without becoming soggy, creating that perfect balance that keeps you reaching for “just one more.”

    Quick Prep, Big Flavor

    Would you believe these Crispy Zucchini Rings with Creamy Dip come together in under 30 minutes? That’s my kind of appetizer! The simple seasoning blend wakes up the mild zucchini with just the right amount of flavor—garlic powder, paprika, and a touch of cayenne for those who like a gentle kick. What I adore most is how the natural sweetness of the zucchini shines through. The creamy dip counters with cool tanginess that makes each bite completely irresistible. It’s that perfect balance of effort-to-reward that makes this recipe a keeper.

    Essential Tips & Tricks

    Perfecting Your Batter

    Getting that dream coating on your Crispy Zucchini Rings starts with proper preparation. I’ve learned (the hard way!) that patting the zucchini slices dry with paper towels is absolutely non-negotiable. Extra moisture is the enemy of crispiness! For the batter, keep one hand for dry ingredients and one for wet to avoid the dreaded “club fingers” situation. My secret weapon? A pinch of baking powder in the flour mixture—it creates tiny air pockets that make the coating extra light. And don’t rush the three-step breading process—it’s what builds that perfect crust that’ll stay crispy.

    Frying for Maximum Crispiness

    The key to perfectly crisp zucchini rings lies in maintaining the right oil temperature—365°F to 375°F is your sweet spot. Too cool and they’ll absorb oil like a sponge; too hot and they’ll burn before cooking through. I always fry in small batches to avoid crowding, which drops the oil temperature. After frying, transfer to a wire rack instead of paper towels—this prevents steam from softening that beautiful crust we worked so hard for! Listen for that sizzle when you drop them in—it’s the sound of crispy perfection in the making.

    Serving Ideas & Creative Variations

    Beyond the Basic Dip

    While the classic creamy dip is heavenly, these Crispy Zucchini Rings deserve a dip wardrobe! I love offering a trio of options: the traditional herb-spiked sour cream, a spicy sriracha mayo that brings heat, and a bright lemon-garlic aioli that cuts through the richness. For a Mediterranean twist, try tzatziki with fresh cucumber and dill. These rings also pair beautifully with marinara for an Italian vibe, similar to my Crispy Chicken Parmesan Zucchini Boats. The dips can be made a day ahead, which is perfect when you’re entertaining and want to minimize day-of prep.

    Seasonal Adaptations

    These versatile rings transform beautifully with the seasons! In summer, I love adding fresh garden herbs to both the coating and dip—basil, parsley, and chives are my go-to trio. For fall gatherings, warming spices like smoked paprika and a pinch of cumin create a cozy flavor profile. You can even swap half the zucchini for yellow squash to create a colorful platter. During holiday seasons, I’ll add cranberry sauce as an unexpected sweet-tart dipping option. The basic technique stays the same, but these simple tweaks keep the recipe feeling fresh and exciting all year round.

    Storage & Troubleshooting Guide

    Keeping That Crunch

    Let’s be honest—these Crispy Zucchini Rings with Creamy Dip are at their absolute best when freshly made. But if you find yourself with leftovers (a rare occurrence in my house!), store them uncovered in the refrigerator for up to 2 days. To revive their crispiness, avoid the microwave at all costs! Instead, place them on a baking sheet in a 375°F oven for 5-7 minutes until they’re heated through and the coating crisps up again. The dip can be stored separately in an airtight container for up to 4 days—just give it a good stir before serving.

    Troubleshooting Common Issues

    The most frequent problem with zucchini rings is soggy coating, which usually happens when the zucchini releases moisture during cooking. My foolproof solution? After slicing, sprinkle the rings with salt and let them sit for 15 minutes before patting thoroughly dry—this draws out excess moisture. If your coating isn’t sticking properly, make sure your flour layer is complete before dipping in egg, and that your egg mixture isn’t too thin. For pale rings that lack that golden color, your oil likely isn’t hot enough. Use a thermometer to maintain that perfect 365°F-375°F range for Instagram-worthy results.

    Frequently Asked Questions

    Can I bake these Crispy Zucchini Rings instead of frying?

    Yes! Arrange them on a parchment-lined baking sheet, spray with cooking oil, and bake at 425°F for 15-18 minutes, flipping halfway. They won’t be quite as crispy but still delicious and healthier.

    Why are my zucchini rings soggy?

    Excess moisture is the culprit. Salt the zucchini slices and let them sit for 15 minutes, then pat thoroughly dry before coating. Also ensure your oil is hot enough (365°F-375°F).

    Can I make these ahead for a party?

    You can prepare the dip and slice the zucchini (store in water) a day ahead, but coat and fry just before serving for best results.

    What’s the best thickness for zucchini rings?

    Aim for ¼-inch thick slices. Too thin and they’ll become floppy; too thick and the coating will burn before the zucchini cooks through.

    What can I serve with Crispy Zucchini Rings with Creamy Dip?

    They’re perfect alongside grilled meats, burgers, or as part of an appetizer spread with other finger foods like mozzarella sticks or chicken wings.

    Final Thoughts

    These Crispy Zucchini Rings with Creamy Dip have earned their place in my entertaining rotation for good reason—they’re that perfect balance of impressive yet achievable. There’s something so satisfying about transforming a humble vegetable into something that disappears in minutes! The contrast between the crunchy exterior and tender zucchini creates that “just one more” quality that makes them irresistible. I’d love to see your creations if you make them—tag me on Pinterest so I can admire your golden rings of deliciousness!

  • Apple Cinnamon Kringle with Vanilla Glaze | Irresistible Delight!

    Apple Cinnamon Kringle with Vanilla Glaze | Irresistible Delight!

    Apple Cinnamon Kringle with Vanilla Glaze | Irresistible Delight!

    The scent of Apple Cinnamon Kringle with Vanilla Glaze baking in my oven transforms an ordinary morning into something magical. There’s something about the buttery, flaky pastry layers wrapped around spiced apple filling that makes even the gloomiest day feel cozy. I discovered this Danish-inspired treat during a fall weekend at my grandmother’s lake house, and it’s become my go-to recipe when I want to impress breakfast guests. The vanilla glaze adds that perfect sweet finish that pairs beautifully with a hot cup of coffee. Trust me, this kringle will have everyone asking for seconds—and the recipe!

    Recipe

    Why You’ll Love This Apple Cinnamon Kringle with Vanilla Glaze

    Perfect Balance of Flavors and Textures

    The magic of this Apple Cinnamon Kringle with Vanilla Glaze lies in its perfect contrasts. The exterior pastry shatters delicately with each bite, revealing layers of buttery dough that practically melt on your tongue. Inside, the apple filling offers tender fruit chunks swimming in a cinnamon-spiced sauce that’s neither too sweet nor too tart. I love how the apples maintain a slight firmness, giving you something to sink your teeth into. The vanilla glaze creates a sweet cap that ties everything together with its subtle vanilla warmth and satisfying sugar crackle.

    Make-Ahead Convenience

    One thing I adore about this Apple Cinnamon Kringle with Vanilla Glaze is its impressive flexibility. You can prepare the dough and filling a day ahead, then assemble and bake when you’re ready. I’ve even frozen unbaked kringles for up to a month—just thaw overnight in the refrigerator before baking! The vanilla glaze takes literally two minutes to whisk together while your kringle cools. This make-ahead capability has saved me countless times when hosting brunches or holiday gatherings. Your guests will think you spent hours in the kitchen that morning!

    Essential Tips & Tricks

    Mastering the Flaky Pastry Layers

    Creating those signature flaky layers in your Apple Cinnamon Kringle with Vanilla Glaze requires a few key techniques. First, keep everything cold—I chill my flour, butter, and even my mixing bowl beforehand. Work quickly when incorporating the butter, leaving visible pea-sized pieces rather than fully incorporating it. This creates those beautiful layers during baking. When folding the dough, think of it like a letter: fold into thirds, then rotate and repeat. For the best results, chill the dough between folds to keep the butter from melting. Your patience will be rewarded with an incredibly flaky texture that’s worth every minute.

    Perfecting the Apple Filling

    The heart of any Apple Cinnamon Kringle with Vanilla Glaze is its apple filling. Choose firm, tart-sweet apples like Honeycrisp or Granny Smith that hold their shape during baking. I dice mine into uniform 1/4-inch cubes for even cooking. Pre-cooking the filling is my secret weapon—it prevents a soggy bottom and ensures the apples are perfectly tender. Add a splash of fresh lemon juice to brighten the flavors, and don’t skimp on the cinnamon! I also add a pinch of nutmeg and clove for depth. Let the filling cool completely before spreading it on your dough to prevent melting the carefully layered butter.

    Serving Ideas & Creative Variations

    Seasonal Pairings

    Your Apple Cinnamon Kringle with Vanilla Glaze becomes even more special with thoughtful seasonal accompaniments. In fall, I serve slices alongside warm apple cider or spiced chai tea. For winter holiday brunches, pair with cranberry mimosas for a festive touch. A dollop of maple-whipped cream takes this treat to new heights—just whip heavy cream with a splash of real maple syrup and a pinch of cinnamon. For a quick breakfast, toast leftover slices and spread with a thin layer of salted butter. The kringle also pairs beautifully with fresh fruit salads for a balanced brunch spread.

    Creative Flavor Twists

    While the classic Apple Cinnamon Kringle with Vanilla Glaze is divine, don’t be afraid to experiment with flavor variations. Try adding dried cranberries or chopped walnuts to the apple filling for texture and flavor contrast. For a caramel apple version, drizzle with homemade caramel sauce instead of vanilla glaze. Pear-ginger filling makes a sophisticated alternative—just substitute ripe pears for apples and add minced crystallized ginger. For a decadent twist, fold chocolate chips into the filling or drizzle the finished kringle with melted chocolate alongside the vanilla glaze. These variations keep this recipe exciting year-round!

    Storage & Troubleshooting Guide

    Proper Storage Methods

    Your Apple Cinnamon Kringle with Vanilla Glaze will stay fresh and delicious for up to three days when stored properly. Keep it at room temperature in an airtight container for the first day to maintain that perfect flaky texture. After that, refrigerate any leftovers—just bring slices back to room temperature before enjoying, or warm briefly in a 300°F oven for 5 minutes. For longer storage, freeze individual slices wrapped tightly in plastic wrap, then foil. Thaw at room temperature or reheat from frozen in a 325°F oven until warmed through. I find the glaze remains surprisingly intact even after freezing!

    Common Issues & Solutions

    Even experienced bakers encounter challenges with Apple Cinnamon Kringle with Vanilla Glaze, but most problems have simple solutions. If your dough becomes too sticky to work with, don’t add more flour—instead, chill it for 15 minutes before continuing. Filling leakage usually means the dough wasn’t sealed properly—use egg wash as “glue” around the edges before crimping. If your kringle splits during baking, your oven was likely too hot—next time, start at a lower temperature and increase gradually. For a glaze that’s too runny, add powdered sugar a tablespoon at a time; if too thick, thin with tiny amounts of milk until you reach that perfect drizzling consistency.

    Frequently Asked Questions

    Can I use store-bought puff pastry for Apple Cinnamon Kringle with Vanilla Glaze?

    Yes! While homemade dough creates the authentic texture, quality puff pastry makes a fantastic shortcut. Thaw according to package directions and roll slightly thinner before filling and shaping.

    What’s the best apple variety for this recipe?

    Honeycrisp, Braeburn, or Granny Smith work best as they hold their shape during baking while providing a balance of sweetness and acidity that complements the cinnamon perfectly.

    Can I make this dairy-free?

    Absolutely! Substitute plant-based butter in equal amounts and use coconut cream in the glaze. The texture will be slightly different but still delicious.

    How do I prevent a soggy bottom on my kringle?

    Pre-cook your apple filling to release excess moisture, cool completely before assembling, and bake on a preheated baking sheet to create immediate heat on the bottom.

    Can I prepare this the night before serving?

    Yes! Either refrigerate the assembled unbaked kringle overnight and bake fresh in the morning, or bake ahead and refresh in a 300°F oven for 5-7 minutes before serving.

    Final Thoughts

    This Apple Cinnamon Kringle with Vanilla Glaze has become more than just a recipe in my kitchen—it’s a tradition that marks the changing seasons and brings comfort on chilly mornings. There’s something magical about watching friends and family gather around the table, drawn by its irresistible aroma. The beauty of this kringle is in its perfect balance: impressive enough for special occasions yet approachable enough for weekend baking projects. I hope you’ll make this recipe part of your own tradition and share it with those you love. For more seasonal inspiration, check out my Pinterest collection of fall baking favorites!

  • Creamy Coconut Curry Prawn Spaghetti Recipe That’ll Wow You!

    Creamy Coconut Curry Prawn Spaghetti Recipe That’ll Wow You!

    Creamy Coconut Curry Prawn Spaghetti Recipe That’ll Wow You!

    Creamy Coconut Curry Prawn Spaghetti Recipe has become my absolute go-to for those evenings when I crave something luxurious yet surprisingly simple. The first time I made this dish, the aroma of simmering coconut milk and curry spices filled my kitchen, instantly transporting me to a beachside restaurant in Thailand. There’s something magical about how the silky coconut sauce clings to each strand of pasta while plump prawns provide bursts of sweetness. This 30-minute wonder strikes the perfect balance between creamy comfort and exotic flair that’ll have everyone at your table reaching for seconds. Ready to transform your weeknight dinner routine? Let’s dive in!

    Recipe

    Why You’ll Love This Creamy Coconut Curry Prawn Spaghetti Recipe

    Perfect Balance of Flavors

    This Creamy Coconut Curry Prawn Spaghetti Recipe delivers that rare harmony where every element sings. The rich coconut milk creates a velvety base that’s both indulgent and light, while curry paste adds depth without overwhelming heat. I love how the natural sweetness of the prawns plays against the aromatic spices, creating layers of flavor that unfold with each bite. What makes this dish truly special is how it manages to feel both familiar and exotic simultaneously—comforting like your favorite pasta but with an adventurous twist that breaks the weeknight dinner monotony.

    Quick Yet Impressive Results

    Don’t you adore recipes that seem fancy but come together in minutes? This Creamy Coconut Curry Prawn Spaghetti Recipe is exactly that kind of culinary magic trick. The sauce develops incredible depth of flavor in just 15 minutes, making it perfect for busy weeknights when you’re craving something special. I’ve served this to last-minute dinner guests who were convinced I’d been cooking all day! The vibrant colors alone—pink prawns, green herbs, and golden curry sauce—create an Instagram-worthy presentation that belies the minimal effort required. It’s my secret weapon for turning an ordinary Tuesday into something memorable.

    Essential Tips & Tricks

    Perfecting the Prawns

    The star of this Creamy Coconut Curry Prawn Spaghetti Recipe deserves special attention. For the juiciest results, avoid overcooking your prawns—they need just 2-3 minutes until they turn pink and opaque. I like to sear them separately first, then remove them while finishing the sauce. This prevents that disappointing rubbery texture that comes from excessive heat. Another game-changing tip: pat the prawns dry before cooking to get that beautiful caramelization. The difference in flavor is remarkable! For an extra flavor boost, try marinating them in a splash of lime juice and pinch of salt for 10 minutes before cooking.

    Creating the Ultimate Coconut Sauce

    The soul of this dish lies in its luscious sauce. For the most flavorful Creamy Coconut Curry Prawn Spaghetti Recipe, always use full-fat coconut milk—the light versions simply won’t deliver that silky richness we’re after. My secret ingredient? A tablespoon of fish sauce for umami depth that makes people wonder what your secret is. Start by sautéing aromatics (garlic, ginger, and shallots) until fragrant before adding your curry paste—this blooms the spices and transforms the flavor profile. For the perfect consistency, simmer uncovered for the final few minutes, allowing the sauce to thicken and coat the spaghetti beautifully.

    Serving Ideas & Creative Variations

    Complementary Side Dishes

    The versatility of this Creamy Coconut Curry Prawn Spaghetti Recipe means it pairs wonderfully with so many sides. My personal favorite is a simple cucumber salad with rice vinegar and a touch of sugar—the cool crispness cuts through the rich sauce perfectly. For a more substantial meal, garlic naan bread makes an excellent sauce-sopping companion. When entertaining, I often serve this alongside a platter of roasted vegetables tossed with lime zest for brightness. The colorful presentation always impresses guests! For a refreshing counterpoint, consider a simple side of mango slices with a squeeze of lime and pinch of chili flakes.

    Exciting Recipe Adaptations

    While the classic version is divine, this recipe welcomes creative tweaks! For a heartier Creamy Coconut Curry Prawn Spaghetti Recipe, try adding roasted butternut squash cubes or crispy tofu for textural contrast. Vegetarians can skip the prawns entirely and load up on colorful bell peppers, snow peas, and mushrooms. I’ve even made a fusion version with a tablespoon of peanut butter and a splash of soy sauce for Thai-inspired notes. If you’re serving spice-lovers, stir in some fresh Thai chilies for heat that builds with each bite. The foundation remains deliciously adaptable for whatever ingredients you have on hand.

    Storage & Troubleshooting Guide

    Proper Storage Solutions

    This Creamy Coconut Curry Prawn Spaghetti Recipe stores surprisingly well despite its seafood component. For leftovers, cool completely before refrigerating in an airtight container for up to 2 days. The flavors actually develop beautifully overnight! When reheating, add a splash of coconut milk or water to loosen the sauce, as it tends to thicken when chilled. For meal prep, I recommend preparing the sauce separately and storing it without the prawns, then cooking fresh prawns and pasta just before serving. This maintains the perfect texture while still giving you a head start on dinner.

    Fixing Common Issues

    Even experienced cooks encounter challenges! If your sauce for the Creamy Coconut Curry Prawn Spaghetti Recipe separates or appears curdled, don’t panic. Lower the heat immediately and whisk vigorously until smooth again. For sauce that’s too thin, simmer uncovered for a few extra minutes; if too thick, add coconut milk tablespoon by tablespoon until you reach desired consistency. Bland sauce? Brighten with lime juice, fish sauce, or an extra teaspoon of curry paste. Remember that pasta continues absorbing liquid after cooking, so if making ahead, keep your sauce slightly thinner than you’d ultimately want it.

    Frequently Asked Questions

    Can I use frozen prawns for this Creamy Coconut Curry Prawn Spaghetti Recipe?

    Absolutely! Thaw them completely and pat dry before cooking. I actually keep frozen prawns on hand specifically for this recipe, making it perfect for impromptu dinner plans.

    What’s the best curry paste to use?

    Red or yellow curry paste works beautifully. Red offers more heat, while yellow provides a milder, aromatic profile. Start with 1-2 tablespoons and adjust to your taste preference.

    Can I substitute the spaghetti with other pasta?

    Certainly! Linguine works wonderfully, and rice noodles create a more authentic Southeast Asian feel. Even zucchini noodles work for a lower-carb option.

    Is there a dairy-free alternative to cream?

    The beauty of this recipe is it’s naturally dairy-free! The coconut milk provides all the creaminess you need without any heavy cream or butter.

    How can I make this recipe spicier?

    Add fresh sliced chilies, a teaspoon of chili flakes, or an extra tablespoon of curry paste. A dash of cayenne pepper works wonders for heat without altering the flavor profile.

    Final Thoughts

    This Creamy Coconut Curry Prawn Spaghetti Recipe has become my reliable escape from ordinary weeknight cooking—a little culinary vacation in a bowl. What I adore most is how it transforms simple ingredients into something that feels special enough for celebrations yet easy enough for Monday nights. The way the aromatic sauce clings to each strand of pasta, punctuated by tender prawns, creates a sensory experience that satisfies on every level. I hope this becomes a beloved addition to your recipe collection, one that brings both comfort and excitement to your table. For more inspiration, check out our Pinterest collection of seafood favorites!