Blog

  • One Pot Cajun Chicken Shellbows Pasta: Irresistibly Bold & Easy!

    One Pot Cajun Chicken Shellbows Pasta: Irresistibly Bold & Easy!

    One Pot Cajun Chicken Shellbows Pasta: Irresistibly Bold & Easy!

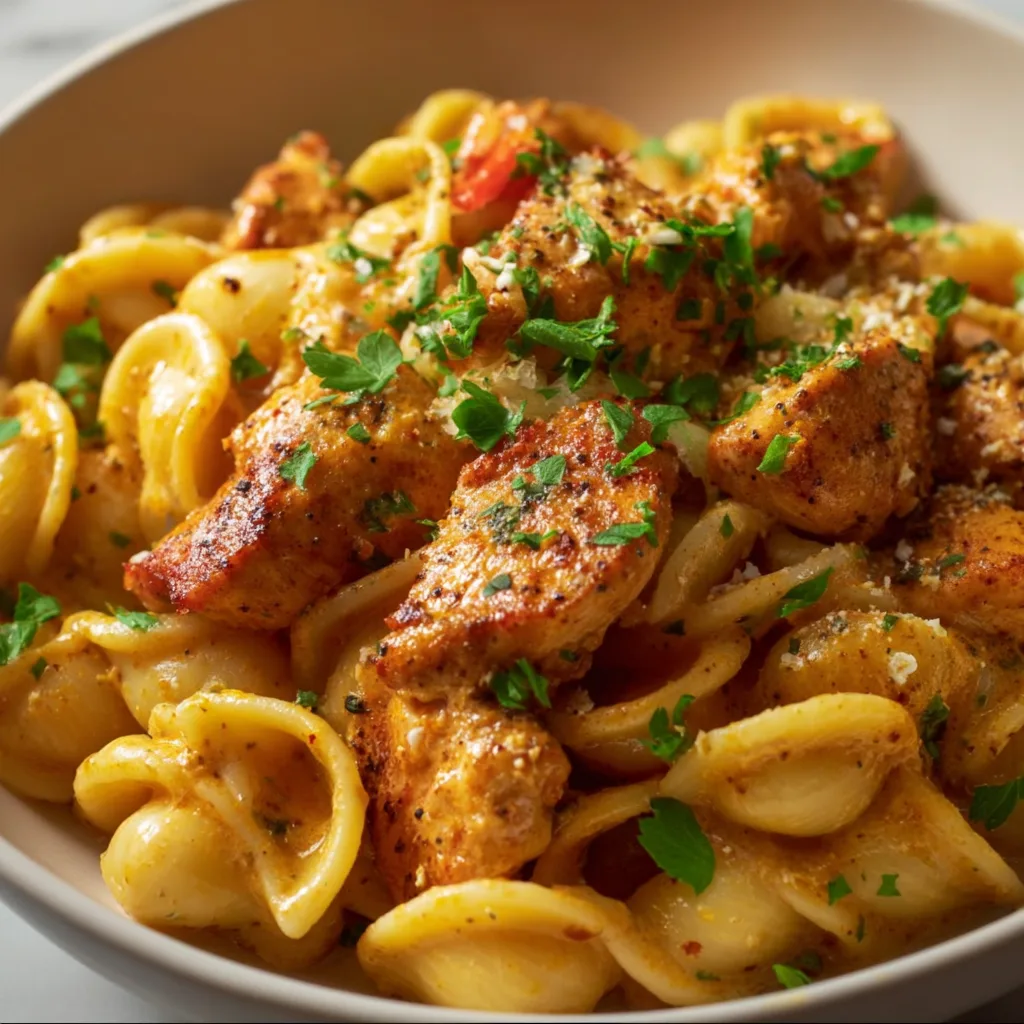
    One Pot Cajun Chicken Shellbows Pasta has completely revolutionized my weeknight dinner routine! There’s something magical about the way those adorable shell-shaped pasta pieces cradle the spicy Cajun sauce, creating the perfect bite every single time. As someone who dreads washing multiple pots and pans after cooking, this recipe has become my ultimate salvation on busy evenings. The combination of tender chicken, colorful bell peppers, and creamy sauce creates a symphony of flavors that will transport you straight to New Orleans without leaving your kitchen. Trust me, this one-pan wonder will become your new family favorite!

    Recipe

    Why You’ll Love This One Pot Cajun Chicken Shellbows Pasta

    Perfect Weeknight Solution

    This One Pot Cajun Chicken Shellbows Pasta is the ultimate time-saver for those hectic evenings when cooking feels like a mountain to climb. I remember the first time I made this—I had just finished a 10-hour workday and was contemplating takeout when I realized I had all the ingredients on hand. Within 30 minutes, I was curled up on my couch with a steaming bowl of comfort! The beauty lies in its simplicity: everything cooks in a single pot, which means minimal cleanup and maximum flavor as the pasta absorbs all those incredible Cajun spices while cooking. Your future exhausted self will thank you for this recipe!

    Balanced Flavor Profile

    The magic of this One Pot Cajun Chicken Shellbows Pasta lies in its perfectly balanced flavor profile. The Cajun seasoning brings just enough heat to wake up your taste buds without overwhelming them, while the cream cheese adds a luxurious richness that tempers the spice. I’ve carefully calibrated the seasoning so it’s adjustable for every palate—add an extra sprinkle for spice lovers or dial it back for sensitive taste buds. The shellbows pasta isn’t just cute; its unique shape captures pockets of sauce in every bite. When those bell peppers caramelize slightly against the edges of the pot, they create these little bursts of sweetness that perfectly complement the savory chicken.

    Essential Tips & Tricks

    Mastering the One-Pot Technique

    The key to perfect One Pot Cajun Chicken Shellbows Pasta is understanding the liquid-to-pasta ratio. I’ve learned through many (sometimes soggy) attempts that shellbows need slightly less liquid than you might think—about 2½ cups of broth for 8 ounces of pasta works perfectly. Start by searing your chicken until golden; this creates those delicious browned bits on the bottom of the pan that become the foundation of your flavor. When adding your pasta, resist the urge to stir constantly! Let it cook undisturbed for a minute or two between stirs to prevent it from becoming mushy. This technique creates the ideal texture similar to my Creamy Mushroom Chicken Pasta but with a Cajun twist.

    Ingredient Substitutions

    Don’t panic if you’re missing an ingredient for your One Pot Cajun Chicken Shellbows Pasta—this recipe is incredibly flexible! No shellbows? Any medium pasta shape works beautifully—penne, rotini, or even farfalle will capture that sauce wonderfully. For a lighter version, swap the cream cheese for Greek yogurt (added after cooking to prevent curdling). The chicken can be replaced with shrimp for a quicker cook time, or use chickpeas for a vegetarian option. My favorite hack: if you don’t have Cajun seasoning, create your own with paprika, garlic powder, onion powder, oregano, thyme, cayenne, salt and black pepper. Just remember that the spice level varies, so taste as you go!

    Serving Ideas & Creative Variations

    Perfect Pairings

    Elevate your One Pot Cajun Chicken Shellbows Pasta experience with thoughtfully chosen side dishes that complement without competing. A simple arugula salad dressed with lemon and olive oil cuts through the richness perfectly, while garlic bread provides the ideal vehicle for sopping up every last drop of that incredible sauce. For a complete Louisiana-inspired feast, serve alongside my Authentic Cajun Crawfish Etouffee for an unforgettable dinner party. I love setting the table with colorful Mardi Gras beads and playing some jazz in the background—it transforms an ordinary Tuesday dinner into a mini celebration that my family looks forward to all week!

    Seasonal Adaptations

    This One Pot Cajun Chicken Shellbows Pasta effortlessly transforms with the seasons, making it a year-round favorite in my kitchen. In summer, fold in fresh corn kernels and cherry tomatoes during the last few minutes of cooking for bursts of sweetness. Fall calls for diced butternut squash added with the bell peppers for a subtle earthy note. Winter comfort comes from stirring in a handful of chopped kale or spinach just before serving, adding color and nutrients. Spring brings opportunities for tender asparagus pieces or fresh peas. My family’s current obsession is the “breakfast version” with crumbled breakfast sausage instead of chicken and a fried egg on top—the runny yolk creates an incredible sauce!

    Storage & Troubleshooting Guide

    Proper Storage Techniques

    Storing your leftover One Pot Cajun Chicken Shellbows Pasta properly ensures it remains just as delicious the next day. Allow it to cool completely before transferring to an airtight container—this prevents condensation that can make the pasta soggy. It will keep beautifully in the refrigerator for up to 3 days. When reheating, add a splash of chicken broth or cream to revive the sauce, as the pasta will have absorbed some of the liquid overnight. For meal prep, I often make a double batch and portion it into individual containers for grab-and-go lunches. While technically freezable for up to 2 months, the texture is best when enjoyed fresh or within those first few days.

    Troubleshooting Common Issues

    Even experienced cooks encounter challenges with One Pot Cajun Chicken Shellbows Pasta, but these simple fixes will save your dinner. If your pasta is still too firm but the liquid has been absorbed, add ¼ cup hot broth or water, cover, and cook for 2-3 more minutes. Conversely, if it’s too soupy, remove the lid and increase the heat for a few minutes to reduce the sauce. Bland flavor? Don’t just add salt—a splash of vinegar or lemon juice brightens everything. If the sauce breaks or appears curdled, whisk in a tablespoon of cream cheese off the heat until smooth. And my personal rescue trick: a handful of freshly grated Parmesan fixes almost any pasta emergency!

    Frequently Asked Questions

    Can I make One Pot Cajun Chicken Shellbows Pasta ahead of time?

    Yes! Prepare it up to 2 days ahead, but undercook the pasta slightly. Refrigerate in an airtight container, then reheat with a splash of broth, stirring gently until hot and creamy.

    What can I substitute for shellbows pasta?

    Any medium pasta shape works well—penne, rotini, farfalle, or cavatappi. The cooking time might vary slightly, so check for doneness as you go.

    How spicy is this dish?

    The spice level is moderate but customizable. For milder flavor, reduce the Cajun seasoning by half. For extra heat, add cayenne pepper or hot sauce to taste.

    Can I make a vegetarian version?

    Absolutely! Replace chicken with chickpeas, black beans, or plant-based protein. Use vegetable broth instead of chicken broth for a fully vegetarian dish.

    How do I prevent the pasta from sticking to the pot?

    Stir the One Pot Cajun Chicken Shellbows Pasta occasionally during cooking, but not constantly. Ensure there’s enough liquid, and keep the heat at a gentle simmer rather than a rapid boil.

    Final Thoughts

    This One Pot Cajun Chicken Shellbows Pasta has become more than just a recipe in my household—it’s a solution to hectic weeknights and a gateway to exploring bold flavors without intimidating techniques. I love how it brings everyone to the table with eager anticipation, creating those precious moments of connection we all crave. The versatility means it never gets boring, and the simplicity means I actually enjoy the cooking process rather than dreading it. For more cozy comfort food inspiration, follow me on Pinterest where I’m always sharing new one-pot wonders!
  • Peach Cobbler Cheesecake That Will Melt Your Heart Instantly!

    Peach Cobbler Cheesecake That Will Melt Your Heart Instantly!

    Peach Cobbler Cheesecake That Will Melt Your Heart Instantly!

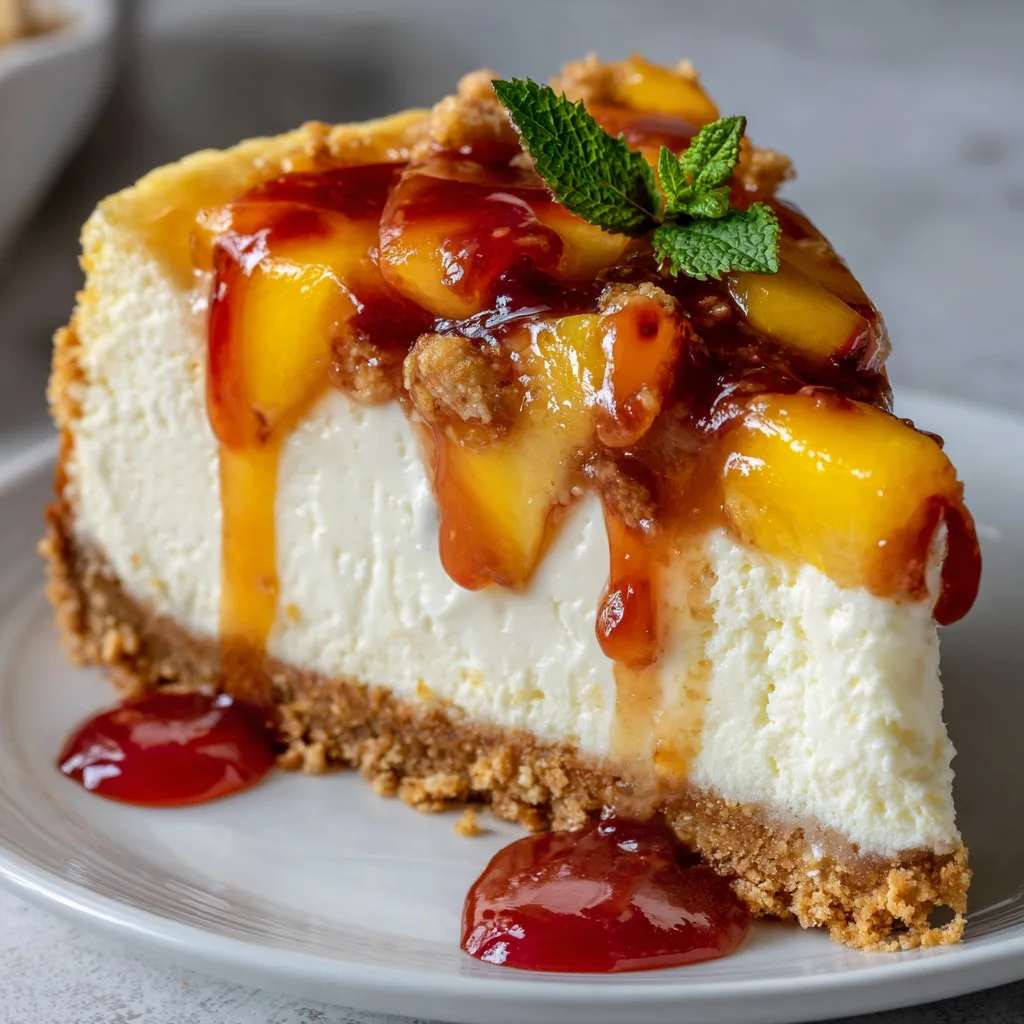
    Peach Cobbler Cheesecake combines two beloved desserts into one showstopping treat that’ll have everyone begging for seconds. The first time I made this for my family reunion, my cousin literally gasped when I set it on the table! There’s something magical about the way the creamy cheesecake layer mingles with the warm spiced peaches and that buttery cobbler topping. It’s like summer sunshine on a plate, and I’m so excited to share this recipe that’s become my signature dessert for special gatherings. If you love the comfort of classic desserts with a twist like I do, you’ll adore this fluffy Japanese cotton cheesecake too!

    Recipe

    Why You’ll Love This Peach Cobbler Cheesecake

    The Perfect Texture Combination

    The beauty of this peach cobbler cheesecake lies in its contrasting textures that somehow work in perfect harmony. The bottom graham cracker crust provides that essential crisp foundation, while the middle layer of velvety cheesecake feels like silk against your tongue. Then comes the juicy peach filling with its tender fruit pieces swimming in that warm cinnamon-kissed syrup. Finally, the cobbler topping adds those delightful buttery crumbles that make each bite a textural adventure. I love watching people’s eyes close in bliss when they take their first bite!

    Make-Ahead Convenience

    One reason this peach cobbler cheesecake has become my entertaining secret weapon is its make-ahead potential. You can prepare the entire dessert up to two days before your event, which means less stress when company’s coming! The flavors actually develop and meld together beautifully during their time in the refrigerator. I’ve found that making it the day before allows the peach essence to subtly infuse the cheesecake layer, creating an even more cohesive flavor experience. It’s perfect for busy hosts who still want to impress!

    Essential Tips & Tricks

    Preventing Cracks and Sinkage

    The most common pitfall with cheesecakes is dealing with those frustrating cracks or the dreaded center sinkage. The secret lies in water bath baking—this gentle, moist heat ensures even cooking. Place your springform pan (wrapped well in foil to prevent leaks) in a larger pan filled with about an inch of hot water before baking. Another game-changer? Let your cream cheese and eggs come completely to room temperature before mixing. This creates a silky-smooth batter that bakes more evenly. I learned this technique after three failed attempts that taught me patience pays off!

    Perfecting the Peach Layer

    For the most flavorful peach cobbler cheesecake, the quality and preparation of your peaches matters enormously. During peak season, use fresh, ripe peaches that yield slightly to pressure and smell sweetly fragrant. Off-season, high-quality frozen peaches work wonderfully (and save time since they’re pre-sliced). The key is properly draining either type to prevent excess moisture from making your dessert soggy. I like to macerate the peaches with sugar and a squeeze of lemon juice for 30 minutes, then drain before adding to the caramelized banana carrot cake topping mixture.

    Serving Ideas & Creative Variations

    Seasonal Adaptations

    While classic peach cobbler cheesecake shines in summer, you can enjoy this dessert year-round with creative seasonal swaps. In fall, replace peaches with apples and add extra cinnamon and nutmeg for a cozy autumn version. Winter calls for poached pears with a hint of ginger. Spring? Try fresh strawberries with a touch of basil for an unexpected twist. The cheesecake base remains the same—it’s the fruit layer that transforms with the seasons. My family has come to expect a new version at each holiday gathering, and deciding which seasonal variation to serve has become a fun tradition!

    Elegant Presentation Touches

    Transform your peach cobbler cheesecake from delicious to dazzling with thoughtful presentation elements. A light dusting of powdered sugar creates a beautiful snow-like effect, while a drizzle of caramel sauce adds glossy elegance. For special occasions, I arrange thin peach slices in a spiral pattern on top before adding the cobbler crumble around the edges. Serve on a wooden board with fresh mint sprigs and edible flowers for a stunning centerpiece. Individual portions in small mason jars make charming personalized desserts for dinner parties!

    Storage & Troubleshooting Guide

    Proper Storage Methods

    Keeping your peach cobbler cheesecake fresh requires proper storage techniques. After serving, cover any leftover cake with plastic wrap or transfer to an airtight container. It will maintain peak flavor and texture in the refrigerator for up to 5 days. For longer storage, you can freeze individual slices—wrap each piece tightly in plastic wrap, then foil, and place in a freezer bag. They’ll keep beautifully for up to 3 months! Just thaw overnight in the refrigerator before enjoying. I often make a double batch specifically to freeze portions for those emergency dessert cravings!

    Fixing Common Issues

    Even experienced bakers encounter challenges with this complex dessert. If your cheesecake layer seems too soft, it likely needed more baking time—next time, look for a slight jiggle only in the very center. For a soggy cobbler topping, try pre-baking the crumble separately on a baking sheet until golden, then adding it during the last 15 minutes of bake time. If your peach layer released too much juice, toss future peaches with a tablespoon of cornstarch before adding them to the cake. Remember that even “imperfect” versions still taste amazing—my first attempt collapsed in the center but disappeared just as quickly!

    Frequently Asked Questions

    Can I use canned peaches for peach cobbler cheesecake?

    Yes! Drain canned peaches thoroughly and pat dry with paper towels. They’re a convenient option when fresh aren’t available, though they may provide a slightly different texture and sweetness level.

    How do I know when my cheesecake is fully baked?

    The edges should be set but the center should still have a slight jiggle—like firm Jell-O. It will continue setting as it cools. Overbaking causes cracks and a dry texture.

    Can I make this dessert gluten-free?

    Absolutely! Use gluten-free graham crackers for the crust and a one-to-one gluten-free flour blend for the cobbler topping. The cheesecake layer is naturally gluten-free.

    Why did my peach cobbler cheesecake crack?

    Rapid temperature changes often cause cracks. Allow it to cool in the oven with the door slightly open for an hour after baking, then bring to room temperature before refrigerating.

    How far in advance can I make this dessert?

    This peach cobbler cheesecake can be made up to 2 days ahead and stored covered in the refrigerator. The flavors actually improve with a day of resting!

    Final Thoughts

    This peach cobbler cheesecake has become more than just a recipe in my collection—it’s a celebration on a plate that brings together the best of two classic desserts. The way the tangy cheesecake complements the sweet, juicy peaches creates something truly magical. Whether you’re making it for a special occasion or just because you deserve something extraordinary, this dessert delivers pure joy with every forkful. I hope it brings as many smiles to your table as it has to mine!

  • Cheesecake Bars with Chocolate Chips: Irresistibly Creamy & Gooey!

    Cheesecake Bars with Chocolate Chips: Irresistibly Creamy & Gooey!

    Cheesecake Bars with Chocolate Chips: Irresistibly Creamy & Gooey!

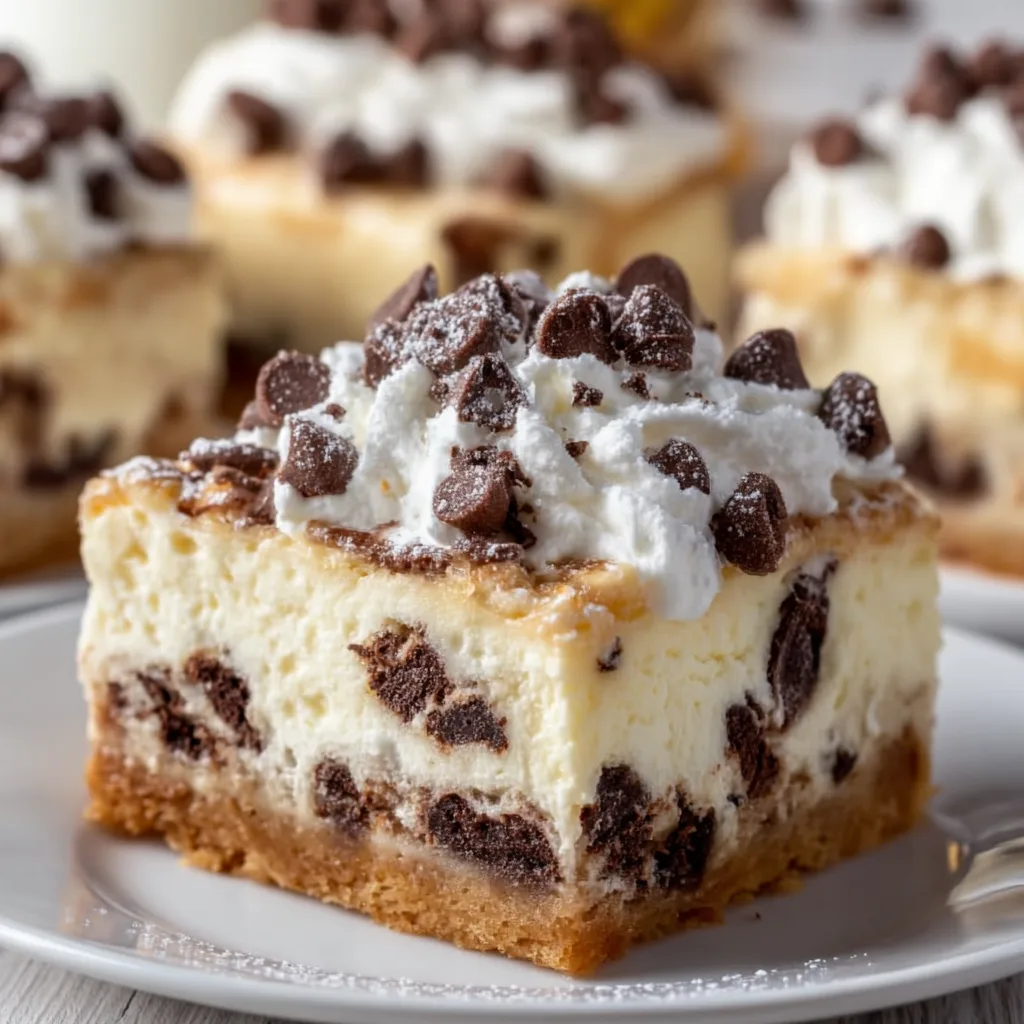
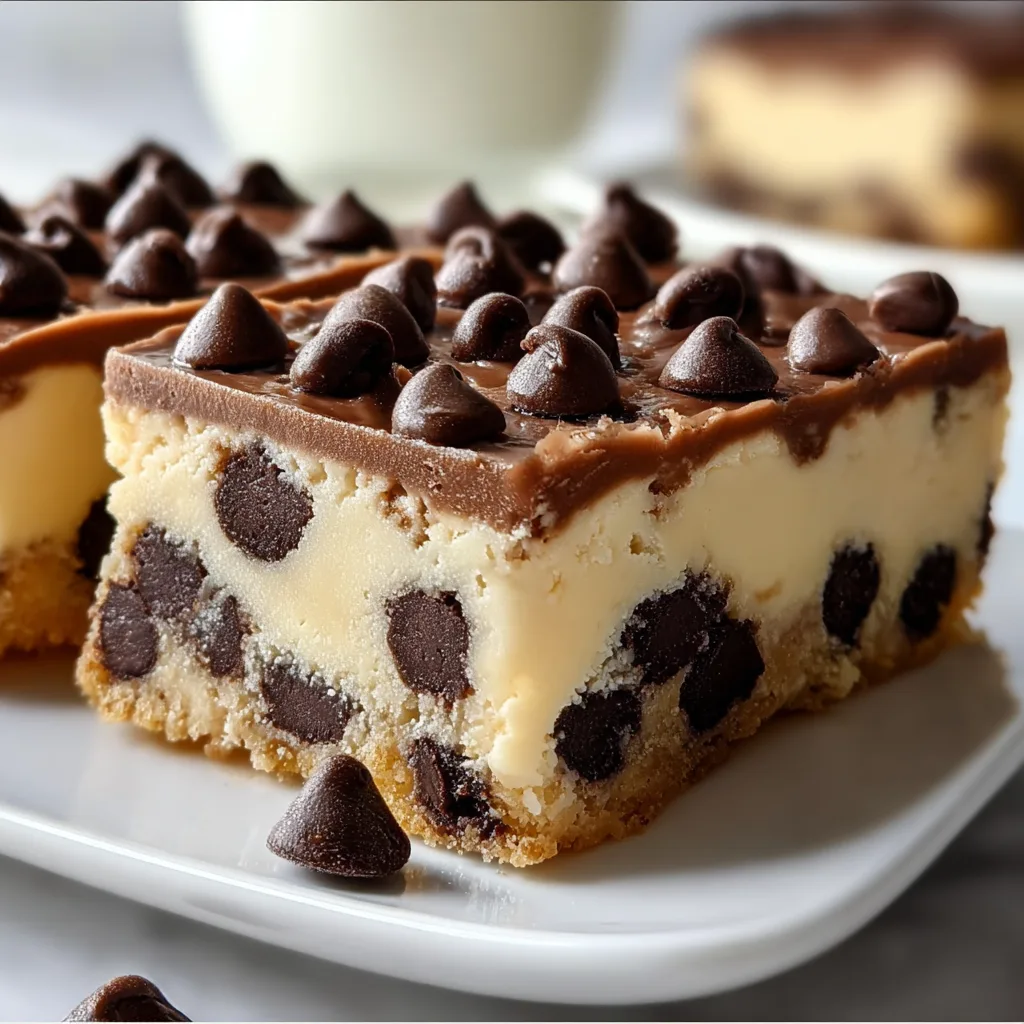
    Cheesecake Bars with Chocolate Chips are my absolute weakness—that perfect balance of creamy, tangy cheesecake and decadent chocolate chips nestled in a buttery graham cracker crust. Every time I make these, my kitchen fills with that unmistakable vanilla-kissed aroma that makes it nearly impossible to wait until they’re properly chilled. I still remember the first time I brought these to my sister’s housewarming; they disappeared faster than any other dessert! If you love the richness of New York cheesecake but crave something more portable and chocolate-studded, these bars are your dream come true.

    Recipe

    Why You’ll Love These Cheesecake Bars with Chocolate Chips

    Perfect Balance of Flavors and Textures

    There’s something magical about the way these cheesecake bars with chocolate chips hit all the right notes. The velvety cheesecake filling is tangy and sweet without being cloying, while the chocolate chips add bursts of rich cocoa goodness in every bite. I adore how the graham cracker crust provides that perfect textural contrast—slightly crunchy yet tender enough to yield easily to your fork. The first time I served these at a dinner party, my friend Melissa literally closed her eyes and sighed after her first bite. That’s the reaction you’ll get too—pure, blissful satisfaction that makes the minimal effort completely worthwhile.

    Make-Ahead Convenience

    One of my favorite things about these cheesecake bars with chocolate chips is how perfect they are for planning ahead. You can prepare them up to three days before your event, which is a lifesaver when you’re hosting. The flavors actually develop and meld together beautifully during refrigeration, making them taste even better on day two! I often make these on Friday for weekend gatherings, and it’s such a relief to have a show-stopping dessert ready to go. Plus, unlike traditional cheesecake, these bars set more quickly and are much more forgiving if you’re newer to baking cheesecake. The chocolate chips also help mask any minor imperfections!

    Essential Tips & Tricks

    Perfecting Your Ingredients

    Starting with room temperature ingredients makes all the difference in your cheesecake bars with chocolate chips. Cold cream cheese will leave you battling lumps forever! I learned this the hard way when I once tried to rush the process—never again. Set your cream cheese, eggs, and sour cream on the counter for at least 30 minutes before beginning. Another game-changer is using high-quality chocolate chips—I prefer semi-sweet for the perfect balance, but dark chocolate chips create a more sophisticated flavor profile. And don’t forget to toast your graham cracker crumbs slightly before mixing with butter for that enhanced nutty flavor that elevates the entire dessert.

    Mastering the Technique

    The secret to silky-smooth cheesecake bars with chocolate chips lies in how you mix your batter. Over-mixing introduces too much air, which can cause cracks and an uneven texture. I use my mixer on low speed and stop as soon as ingredients are incorporated. Another crucial technique is the water bath—even for bars! Place your pan inside a larger one filled with about an inch of hot water. This creates gentle, even heat that prevents the dreaded crack across the top. For chocolate chip distribution, I like to fold in half the chips and then sprinkle the rest on top, giving you that beautiful bakery-style finish that looks professionally done.

    Serving Ideas & Creative Variations

    Elegant Presentation Options

    Transform these cheesecake bars with chocolate chips into an impressive dessert spread with thoughtful presentation. Cut them into precise squares using a hot knife (run under hot water, then wipe dry between cuts) for that professional look. I love arranging them on a white platter with fresh berries scattered around—the color contrast is stunning! For dinner parties, try individual servings on small plates with a light dusting of cocoa powder and a mint leaf. During the holidays, I add a tiny dollop of whipped cream and a raspberry to each bar. The red and white against the creamy cheesecake creates a festive display that guests always photograph before devouring.

    Flavor Twists and Add-ins

    While classic cheesecake bars with chocolate chips are divine, experimenting with variations keeps things exciting! My personal favorite twist is adding 2 tablespoons of espresso powder to the filling—it enhances the chocolate flavor without tasting coffee-forward. For a festive twist, try folding in crushed peppermint candies during the holidays. Nutella swirls are another crowd-pleaser—just warm 1/4 cup slightly and swirl it through the batter before baking. If you’re feeling adventurous, try a caramel drizzle over the cooled bars, or swap the graham crackers for crushed Oreos in the crust. Each variation maintains the cheesecake’s integrity while offering a delightful surprise.

    Storage & Troubleshooting Guide

    Proper Storage Techniques

    Storing your cheesecake bars with chocolate chips properly ensures they maintain that perfect creamy texture. Always cool them completely at room temperature before refrigerating to prevent condensation from forming on top. I like to cover them loosely with foil rather than plastic wrap, which can stick to the surface. They’ll keep beautifully in the refrigerator for up to 5 days, though they rarely last that long in my house! For longer storage, these bars freeze exceptionally well. Cut them first, then freeze on a baking sheet until solid before transferring to a freezer container with parchment between layers. This way, you can thaw individual portions whenever a craving strikes.

    Fixing Common Issues

    Even experienced bakers encounter challenges with cheesecake bars with chocolate chips occasionally. If your bars develop cracks, don’t panic! A simple chocolate ganache poured over the top not only hides imperfections but adds another layer of decadence. For a too-soft center, it likely needs more time in the oven—next time, look for a slight jiggle in just the center, not across the entire surface. If your crust gets soggy, try baking it for 8-10 minutes before adding the filling. And for chocolate chips that sink to the bottom, try coating them in a teaspoon of flour before folding into the batter. This light coating helps them stay suspended throughout the filling.

    Frequently Asked Questions

    Can I make these cheesecake bars with chocolate chips without a water bath?

    Yes, you can skip the water bath, but your bars may crack on top. To minimize this, bake at a lower temperature (325°F instead of 350°F) and leave them in the turned-off oven with the door cracked for 30 minutes after baking.

    How do I know when my cheesecake bars are perfectly done?

    Look for set edges with a slight jiggle in the center when you gently shake the pan. The center should not be liquid but should move slightly. They’ll continue to set as they cool.

    Can I use low-fat cream cheese for this recipe?

    I don’t recommend it. Full-fat cream cheese provides the rich, creamy texture that makes these bars special. Low-fat versions contain more water and can result in a less stable dessert.

    My chocolate chips sank to the bottom. What went wrong?

    Toss your chocolate chips in a teaspoon of flour before adding them to the batter. This helps them stay suspended throughout the filling during baking.

    How far in advance can I make these for a party?

    These cheesecake bars with chocolate chips can be made up to 3 days in advance. The flavors actually improve after a day in the refrigerator!

    Final Thoughts

    These cheesecake bars with chocolate chips have become my signature dessert for good reason—they strike that perfect balance between impressive and achievable. Every time I make them, I’m reminded of how simple pleasures often create the most memorable moments. The way conversation flows more easily when everyone’s enjoying something delicious, the appreciative murmurs as people take their first bites. I’d love to see your creations if you try this recipe—tag me on Pinterest so I can celebrate your baking success!

  • Cannoli Cheesecake Bars Recipe That Will Blow Your Taste Buds!

    Cannoli Cheesecake Bars Recipe That Will Blow Your Taste Buds!

    Cannoli Cheesecake Bars Recipe That Will Blow Your Taste Buds!

    Cannoli Cheesecake Bars blend two of my favorite desserts into one irresistible treat that’s easier than making traditional cannoli but just as delicious. The buttery graham cracker crust cradles a creamy cheesecake filling studded with mini chocolate chips and hints of orange zest, all topped with a sprinkle of crushed pistachios. I first made these for my sister’s birthday gathering, and they disappeared faster than any dessert I’ve ever served! If you love the classic Italian pastry but want something more approachable to make at home, these bars are your answer.

    Recipe

    Why You’ll Love These Cannoli Cheesecake Bars

    Perfect Balance of Textures and Flavors

    These Cannoli Cheesecake Bars offer the perfect harmony between crisp and creamy elements. The graham cracker base provides that satisfying crunch that contrasts beautifully with the silky cheesecake layer. What makes these truly special is how the ricotta cheese lightens the texture while maintaining richness. The mini chocolate chips add little bursts of sweetness throughout, while the subtle notes of orange zest and cinnamon create that authentic cannoli flavor profile. I love how each bite manages to capture the essence of a freshly filled cannoli but in a more substantial, satisfying form.

    Make-Ahead Convenience

    One thing I absolutely adore about these Cannoli Cheesecake Bars is their make-ahead potential. Unlike traditional cannoli that need to be filled just before serving to maintain their crisp shells, these bars actually benefit from chilling overnight. This makes them perfect for entertaining or holiday gatherings when you’re juggling multiple dishes. I often prepare them the day before a family dinner, which not only saves me time but actually improves the flavor as the spices have time to meld together. The bars slice more cleanly when properly chilled, giving you those picture-perfect squares that look like they came from a bakery.

    Essential Tips & Tricks

    Perfecting the Cheese Mixture

    The secret to achieving that authentic cannoli flavor lies in the cheese blend. While some recipes use all cream cheese, incorporating ricotta gives you that traditional cannoli filling texture. Make sure to drain your ricotta in a fine-mesh sieve lined with cheesecloth for at least 2 hours (or overnight in the refrigerator) to remove excess moisture. Room temperature ingredients are absolutely essential here—cold cream cheese will leave you with lumps no matter how long you mix. I learned this the hard way during my first attempt! For the most vibrant flavor, don’t skip the orange zest and vanilla—they’re subtle but make all the difference.

    Avoiding Common Pitfalls

    The most common issue with cheesecake bars is overbaking, which leads to cracks and a dry texture. Look for a slight jiggle in the center—the bars will continue to set as they cool. Another trick I’ve learned is to run a thin knife around the edges immediately after removing from the oven, which prevents the bars from sticking to the pan as they contract during cooling. For the cleanest cuts, chill the bars completely (at least 4 hours), then use a sharp knife dipped in hot water and wiped clean between each slice. This simple technique gives you bakery-worthy presentation every time.

    Serving Ideas & Creative Variations

    Elegant Presentation Options

    Transform these Cannoli Cheesecake Bars from casual to company-worthy with a few simple touches. For a dinner party, I like to cut them into smaller, bite-sized squares and dust them with powdered sugar just before serving. For an extra special presentation, place each square in a mini cupcake liner and arrange on a tiered stand. A light drizzle of melted chocolate creates beautiful contrast against the creamy filling. During the holidays, I sometimes add a small dollop of whipped cream and a candied orange peel garnish. These little details elevate the bars without requiring much additional effort but make guests feel truly special.

    Seasonal and Dietary Adaptations

    These Cannoli Cheesecake Bars are wonderfully versatile and can be adapted for different preferences and occasions. For a summer variation, fold in fresh berries instead of chocolate chips, or try a lemon zest version for brightness. During fall, I love adding pumpkin spice and a bit of pumpkin puree for a seasonal twist. For gluten-free guests, simply substitute the graham cracker crust with crushed gluten-free cookies or nuts. To make a lighter version, use Neufchâtel cheese instead of full-fat cream cheese and part-skim ricotta. The basic recipe serves as a perfect canvas for creativity while maintaining that classic cannoli essence.

    Storage & Troubleshooting Guide

    Proper Storage Methods

    Cannoli Cheesecake Bars need to be refrigerated due to their dairy content. They’ll keep beautifully in an airtight container for up to 5 days, though the crust may soften slightly over time. For the best texture, I recommend consuming them within 3 days of baking. If you want to prepare further in advance, these bars freeze exceptionally well. Simply wrap individual portions in plastic wrap, then aluminum foil, and freeze for up to 3 months. To thaw, transfer to the refrigerator overnight rather than using the microwave, which can make the texture uneven. The mini chocolate chips actually help preserve the texture during freezing and thawing.

    Fixing Common Issues

    If your Cannoli Cheesecake Bars develop cracks during baking, don’t worry! This is purely cosmetic and won’t affect the taste. Simply cover with a thin layer of sweetened whipped cream or a dusting of powdered sugar before serving. If your crust seems too crumbly when cutting, it likely needed more butter or wasn’t compacted firmly enough before baking. For future batches, use the bottom of a measuring cup to really press the crust mixture into the pan. If your filling seems too wet, the ricotta probably wasn’t drained sufficiently. Next time, let it drain longer or gently press out excess moisture with paper towels.

    Frequently Asked Questions

    Can I use mascarpone instead of ricotta in Cannoli Cheesecake Bars?

    Yes! Mascarpone creates a creamier, richer texture. Blend it with the cream cheese as directed, but you won’t need to drain it like ricotta. The flavor will be slightly different but equally delicious.

    How do I know when the bars are done baking?

    Look for set edges with a slight jiggle in the center. The bars will continue firming up as they cool. Overbaking leads to cracks and dry texture, so it’s better to slightly underbake than overbake.

    Can these be made without a springform pan?

    Absolutely! Line a regular 9×9 baking dish with parchment paper with overhang on all sides. After chilling, lift the entire dessert out using the paper handles before cutting.

    My filling seems lumpy—how can I fix it?

    Ensure all ingredients are at room temperature before mixing. If you still have lumps, press the mixture through a fine-mesh sieve before adding chocolate chips.

    What’s the best way to incorporate traditional cannoli shells into these bars?

    For a fun twist, crush cannoli shells and mix with the graham crackers for your crust. You can also sprinkle crushed shells on top just before serving for added crunch.

    Final Thoughts

    These Cannoli Cheesecake Bars have become my go-to dessert when I want to impress without spending hours in the kitchen. They capture all the beloved flavors of traditional cannoli in a convenient, shareable format that’s perfect for gatherings or simple family desserts. The balance of creamy filling, chocolate, and that hint of citrus creates something truly special that keeps people coming back for seconds. I hope you’ll give these bars a try and experience the joy of bringing a bit of Italian bakery magic into your home. Don’t forget to check out more of my favorite dessert recipes on Pinterest!

  • Cajun Chicken Alfredo Recipe That Will Totally Blow Your Mind!

    Cajun Chicken Alfredo Recipe That Will Totally Blow Your Mind!

    Cajun Chicken Alfredo Recipe That Will Totally Blow Your Mind!

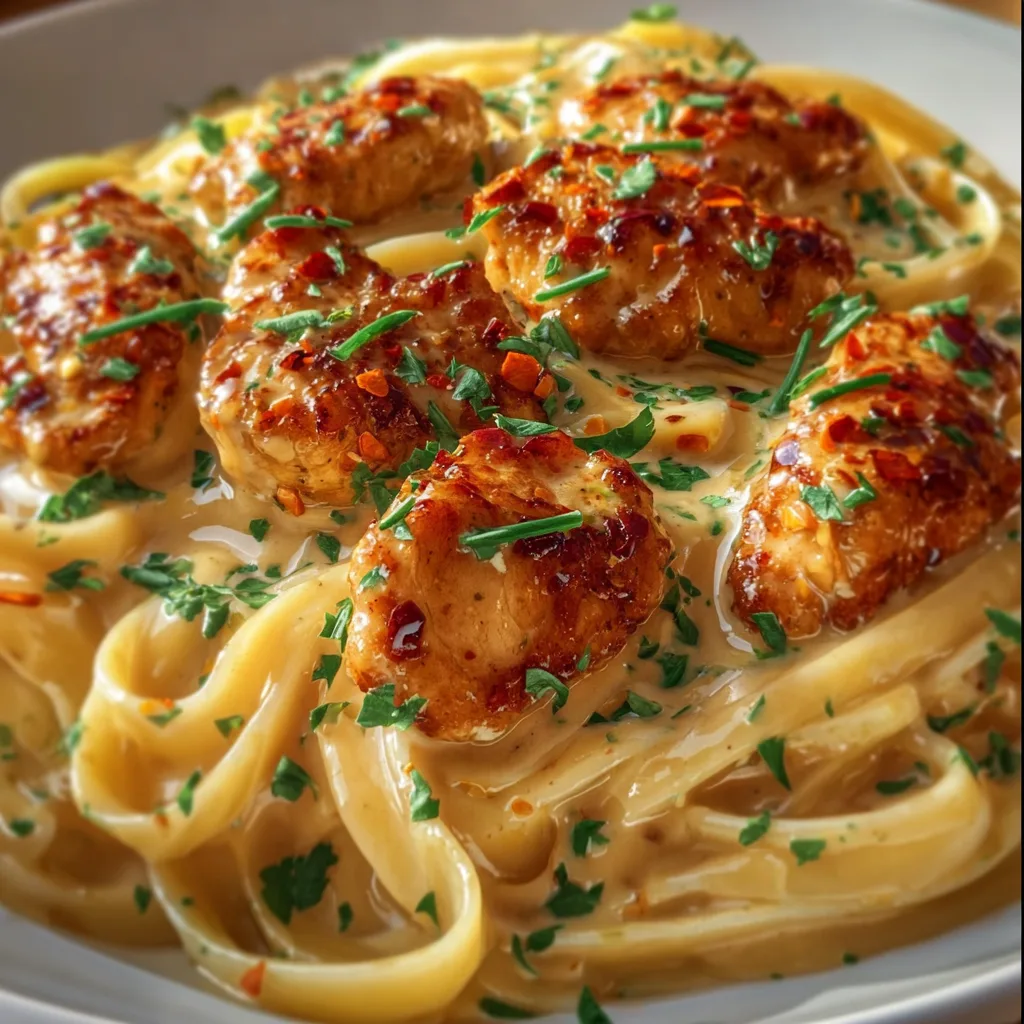
    Cajun Chicken Alfredo combines two culinary worlds in one irresistible dish – the bold, spicy kick of Cajun seasoning and the creamy comfort of classic Alfredo sauce. I discovered this magical pairing years ago during a rainy weekend when I craved something that would warm me from the inside out. The first forkful was a revelation – tender chicken bathed in velvety sauce with just enough heat to make my taste buds dance. It’s become my go-to for dinner parties where I want to impress without spending hours in the kitchen. Like my Creamy Garlic Parmesan Chicken Pasta, this dish delivers maximum flavor with minimal fuss.

    Recipe

    Why You’ll Love This Cajun Chicken Alfredo

    The Perfect Balance of Creamy and Spicy

    There’s something almost magical about the way the rich Alfredo sauce mellows the bold Cajun spices in this dish. I remember making this for my sister who typically avoids spicy food, and watching her eyes light up with that first bite. The heat builds gradually, warming your palate without overwhelming it. The cream creates a luxurious mouthfeel that carries the flavors beautifully, while the Cajun seasoning adds depth and character. It’s that perfect harmony that makes you close your eyes and savor each bite – indulgent enough for a special occasion but simple enough for a Tuesday night dinner.

    Quick and Impressive for Any Occasion

    This Cajun Chicken Alfredo has saved me countless times when I needed a showstopper meal without spending hours in the kitchen. From last-minute dinner guests to date nights at home, it never fails to impress. The entire dish comes together in about 30 minutes, making it perfect for busy weeknights when you still want something special. I love watching people’s reactions when they take that first bite – the surprise that something so flavorful could be whipped up so quickly. It’s become my secret weapon for those nights when I want to serve something that feels restaurant-worthy without the restaurant effort.

    Essential Tips & Tricks

    Mastering the Cajun Seasoning Balance

    Finding the perfect spice level is crucial for Cajun Chicken Alfredo that pleases everyone at your table. I learned this the hard way after accidentally over-spicing a batch for my in-laws! Start with less seasoning than you think you need – you can always add more, but you can’t take it away. For authentic flavor, toast your Cajun spices in the pan before adding cream, which releases their essential oils and deepens the flavor profile. Make your own seasoning blend for complete control over heat levels, or try my favorite shortcut: combine pre-made Cajun seasoning with a pinch of brown sugar to round out the flavors beautifully.

    Achieving the Silkiest Alfredo Sauce

    The secret to a velvety-smooth Alfredo lies in patience and temperature control. I once rushed this process and ended up with a grainy, separated mess! Always warm your cream before adding it to the pan – cold cream hitting a hot surface is a recipe for curdling. Use room temperature cream cheese for easier incorporation, and add it in small pieces, whisking constantly. For the richest texture, finish with freshly grated Parmesan (never pre-shredded) and remove the pan from heat before stirring it in. Like in my Alfredo Tortellini Bake, a splash of pasta water helps create that restaurant-quality silkiness that coats every strand of pasta perfectly.

    Serving Ideas & Creative Variations

    Perfect Pairings to Complete Your Meal

    Cajun Chicken Alfredo deserves thoughtful accompaniments that complement its rich flavors without competing. My favorite pairing is a simple arugula salad with lemon vinaigrette – the peppery greens and bright acidity cut through the creamy sauce beautifully. Garlic bread is non-negotiable in my house, perfect for sopping up every last bit of that precious sauce. For a lighter option that still satisfies, try roasted asparagus or broccolini with a squeeze of lemon. When I’m hosting, I serve this with a crisp white wine like Pinot Grigio or an unoaked Chardonnay – the clean flavors balance the richness and refresh the palate between bites.

    Creative Twists on the Classic Recipe

    Don’t be afraid to make this Cajun Chicken Alfredo your own with some exciting variations! Seafood lovers can swap chicken for shrimp or add both for an indulgent surf and turf version. I’ve experimented with adding roasted red peppers and sun-dried tomatoes for a Mediterranean twist that earned rave reviews at my last dinner party. For a healthier spin, try my favorite hack: replace half the cream with pureed cauliflower – it maintains the silky texture while lightening the dish. Vegetarians can substitute mushrooms and bell peppers for chicken, creating a satisfying meal like my Creamy Mushroom Chicken Pasta (just omit the chicken!). Each variation maintains the soul of the dish while offering something new.

    Storage & Troubleshooting Guide

    Proper Storage for Leftovers

    Properly storing your Cajun Chicken Alfredo ensures those precious leftovers remain as delicious as when freshly made. Allow the pasta to cool completely before transferring to airtight containers – this prevents condensation that can make your pasta soggy. Refrigerate within two hours of cooking and consume within 3-4 days for best quality. I always portion leftovers into individual containers for quick lunches. When reheating, add a splash of cream or milk to revive the sauce, as it tends to thicken when chilled. For the best texture, reheat gently on the stovetop rather than microwave, stirring frequently to prevent the sauce from breaking or becoming gummy.

    Fixing Common Sauce Problems

    Even experienced cooks occasionally encounter sauce challenges with Alfredo. If your sauce breaks or becomes grainy, don’t panic! I’ve rescued many batches with a simple fix: remove from heat immediately and whisk in 1-2 tablespoons of cold cream. For sauce that’s too thin, simmer gently until it reaches your desired consistency, but watch carefully as it thickens quickly. Too thick? Simply thin with warm pasta water or cream. If your sauce lacks flavor, brighten it with a squeeze of lemon juice or boost richness with an extra pat of butter. Remember that Alfredo continues to thicken as it cools, so it’s better to err on the slightly thinner side when serving.

    Frequently Asked Questions

    Can I make Cajun Chicken Alfredo ahead of time?

    Yes, but I recommend preparing the components separately. Cook the chicken and make the sauce up to 2 days ahead, then refrigerate. Cook fresh pasta when ready to serve and gently reheat the sauce, adding a splash of cream if needed.

    How spicy is Cajun Chicken Alfredo?

    The spice level is completely customizable! Start with 1-2 teaspoons of Cajun seasoning for mild heat, or increase to 1-2 tablespoons for a more authentic kick. The cream helps temper the heat significantly.

    What pasta works best for this recipe?

    Fettuccine is traditional, but any pasta that holds sauce well works beautifully. I love linguine for elegance, penne for catching sauce in its ridges, or cavatappi for a fun twist.

    Can I use half-and-half instead of heavy cream?

    Yes, though your sauce won’t be quite as rich. Mix 1 tablespoon cornstarch with the half-and-half before adding to help achieve a similar thickness without the heavy cream.

    How do I prevent my Cajun Chicken Alfredo sauce from breaking?

    Keep your heat medium-low when making the sauce, add cold ingredients gradually, and remove from heat before adding cheese. Stir constantly and avoid boiling once the cream is added.

    Final Thoughts

    Cajun Chicken Alfredo represents what I love most about cooking – the way simple ingredients transform into something extraordinary with just a little knowledge and care. The contrast between creamy sauce and bold spices creates a dish that’s both comforting and exciting. I’ve seen this recipe bring people together around my table countless times, sparking conversation and second helpings. Whether you follow my recipe exactly or add your own creative touches, I hope this Cajun Chicken Alfredo brings as much joy to your table as it has to mine. Don’t forget to share your creations on Pinterest – I’d love to see your spin on this beloved dish!

  • Crispy Cilantro Lime Chicken Sandwiches That’ll Wow Your Taste Buds!

    Crispy Cilantro Lime Chicken Sandwiches That’ll Wow Your Taste Buds!

    Crispy Cilantro Lime Chicken Sandwiches That'll Wow Your Taste Buds!

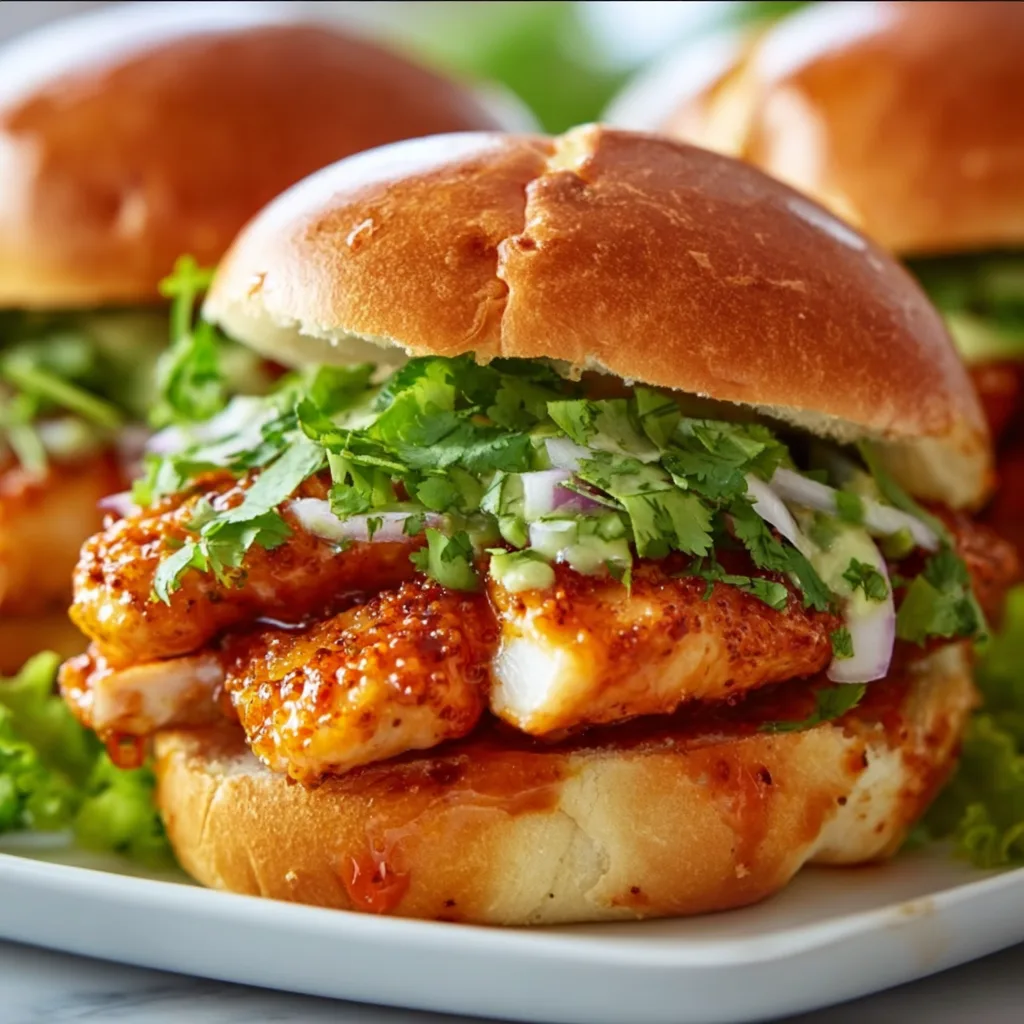
    Crispy Cilantro Lime Chicken Sandwiches have completely transformed my weeknight dinner routine! The first time I made these, my kitchen filled with the most intoxicating aroma of lime zest and fresh cilantro that had my family hovering around the stove like hungry satellites. That perfect crunch when you bite through the golden exterior gives way to juicy, tender chicken infused with bright, zesty flavors. I’ve tested countless chicken sandwich recipes from my collection, but this one strikes the perfect balance between quick preparation and restaurant-quality results. Trust me, these sandwiches will make you feel like a culinary genius!

    Recipe

    Why You’ll Love These Crispy Cilantro Lime Chicken Sandwiches

    Perfect Texture Combination

    The contrasting textures in these crispy cilantro lime chicken sandwiches create a truly memorable eating experience. The chicken’s exterior develops a satisfying crackle from a quick dredge in seasoned flour before pan-frying, while the interior remains incredibly juicy. I love adding creamy avocado slices that melt against the warm chicken and crisp lettuce that provides a fresh crunch. My daughter always says the perfect sandwich needs “crispy, creamy, and juicy” elements – this recipe delivers all three! The toasted brioche buns add that final buttery crunch that elevates everything.

    Bright, Bold Flavor Profile

    The cilantro-lime marinade is what makes these sandwiches truly special. The acidic lime juice tenderizes the chicken while infusing it with brightness that cuts through the richness. Fresh cilantro adds that distinctive herbal note that makes these sandwiches instantly craveable. I’ve found that adding a touch of honey balances the acidity perfectly, creating a complex flavor that’s tangy, slightly sweet, and deeply savory. My family particularly loves the garlic-lime mayo I spread on the buns – it ties all the flavors together and adds another layer of zesty goodness.

    Essential Tips & Tricks

    Perfecting the Crispy Coating

    Achieving that golden-brown crust requires a few simple techniques. First, thoroughly pat your chicken dry before marinating – excess moisture is the enemy of crispiness. After marinating, let any excess drip off before dredging in the flour mixture. I press the coating firmly onto each piece to ensure good adhesion. Maintain your oil at a steady medium-high heat (about 350°F) for optimal crispiness without burning. The most important tip? Don’t overcrowd your pan! Cook in batches if needed – those crispy cilantro lime chicken cutlets need space to develop their perfect texture, just like my Crispy Zucchini Rings with Creamy Dip.

    Mastering the Marinade

    The marinade timing makes all the difference in these sandwiches. I’ve found 30 minutes is the minimum for good flavor, but 2-4 hours creates magic. The lime juice can actually start “cooking” the chicken if left too long (similar to ceviche), so I never exceed 4 hours. For maximum flavor infusion, make shallow cuts in thicker chicken pieces before marinating. I also reserve 2 tablespoons of the marinade (before adding raw chicken) to mix into the mayo for an extra flavor boost. Fresh ingredients are non-negotiable here – bottled lime juice simply can’t replicate the brightness of fresh-squeezed.

    Serving Ideas & Creative Variations

    Perfect Pairings

    These crispy cilantro lime chicken sandwiches shine alongside complementary sides that enhance their vibrant flavors. My family’s favorite pairing is sweet potato fries dusted with a touch of chili powder – the sweetness balances the tangy chicken beautifully. A simple slaw dressed with lime vinaigrette makes for a refreshing side that echoes the sandwich’s flavor profile. For something heartier, try my Creamy Coconut Curry Prawn Spaghetti for a complete feast. On hot summer days, a watermelon-feta salad provides the perfect cool contrast to these warm, crispy sandwiches.

    Creative Twists

    The versatility of these cilantro lime chicken creations allows for endless variations. Transform them into wraps using flour tortillas for a portable lunch option. For a lower-carb alternative, serve the crispy chicken over mixed greens with avocado, corn, and black beans for a satisfying salad. My husband loves when I dice the chicken and stuff it into tacos with mango salsa for a fusion twist. You can also adjust the heat level – add jalapeño to the marinade for spice lovers or keep it mild with just a touch of black pepper. For special occasions, top with pepper jack cheese and crispy bacon for an indulgent treat.

    Storage & Troubleshooting Guide

    Keeping It Fresh

    Proper storage techniques ensure these crispy cilantro lime chicken sandwiches remain delicious even as leftovers. Store cooked chicken separate from toppings and buns in an airtight container for up to 3 days. To maintain crispiness when reheating, use a 350°F oven for 10 minutes rather than the microwave, which will make the coating soggy. I often make extra chicken specifically for leftovers – it’s fantastic cold in salads or quickly reheated for lunch. If you’re meal prepping, prepare the marinade and chicken in advance, but wait to cook until serving day for the freshest results.

    Common Challenges Solved

    Even experienced cooks encounter troubleshooting moments with crispy chicken. If your coating falls off during cooking, the likely culprit is either oil that’s not hot enough or chicken that’s too wet. Make sure your oil reaches temperature before adding chicken, and thoroughly pat dry between marinade and flour coating. If your chicken is browning too quickly but remains undercooked inside, lower your heat and finish cooking with a lid to trap heat. For chicken that’s not flavorful enough, try marinating longer or adding more zest to the flour mixture. Remember that thinner, pounded chicken pieces cook more evenly and absorb marinade better.

    Frequently Asked Questions

    Can I make these Crispy Cilantro Lime Chicken Sandwiches ahead of time?

    Yes! Marinate the chicken up to 4 hours ahead, and prepare the toppings. Cook just before serving for maximum crispiness, or reheat in a 350°F oven for 8-10 minutes if needed.

    What’s the best substitute for cilantro if I don’t like it?

    Fresh parsley makes a great substitute, though it changes the flavor profile. Basil or mint can also work beautifully, creating a different but equally delicious sandwich variation.

    Can I bake these instead of frying?

    Absolutely! Spray breaded chicken with cooking oil and bake at 425°F for 15-18 minutes, flipping halfway through. The coating won’t be quite as crispy but still delicious.

    How do I prevent the breading from falling off?

    Ensure your chicken is patted dry before dredging, press the flour mixture firmly onto the meat, and don’t disturb the chicken for the first 3-4 minutes of cooking.

    What’s the best bread for these sandwiches?

    Brioche buns offer the perfect buttery complement to the tangy chicken, but ciabatta rolls, potato buns, or even sliced sourdough all work beautifully.

    Final Thoughts

    These crispy cilantro lime chicken sandwiches have earned permanent status in my recipe collection for good reason – they deliver restaurant-quality flavor with home-kitchen simplicity. The bright, zesty profile combined with that irresistible crunch creates something truly special that feels both comforting and exciting. I love seeing my family’s eyes light up when these appear on our dinner table! Whether you’re cooking for a weeknight dinner or weekend gathering, these sandwiches strike that perfect balance between impressive and approachable. Find more inspiration for your next meal on Pinterest!

  • Caramel Toffee Crunch Cheesecake: Irresistible Bliss You Need Now

    Caramel Toffee Crunch Cheesecake: Irresistible Bliss You Need Now

    Caramel Toffee Crunch Cheesecake: Irresistible Bliss You Need Now

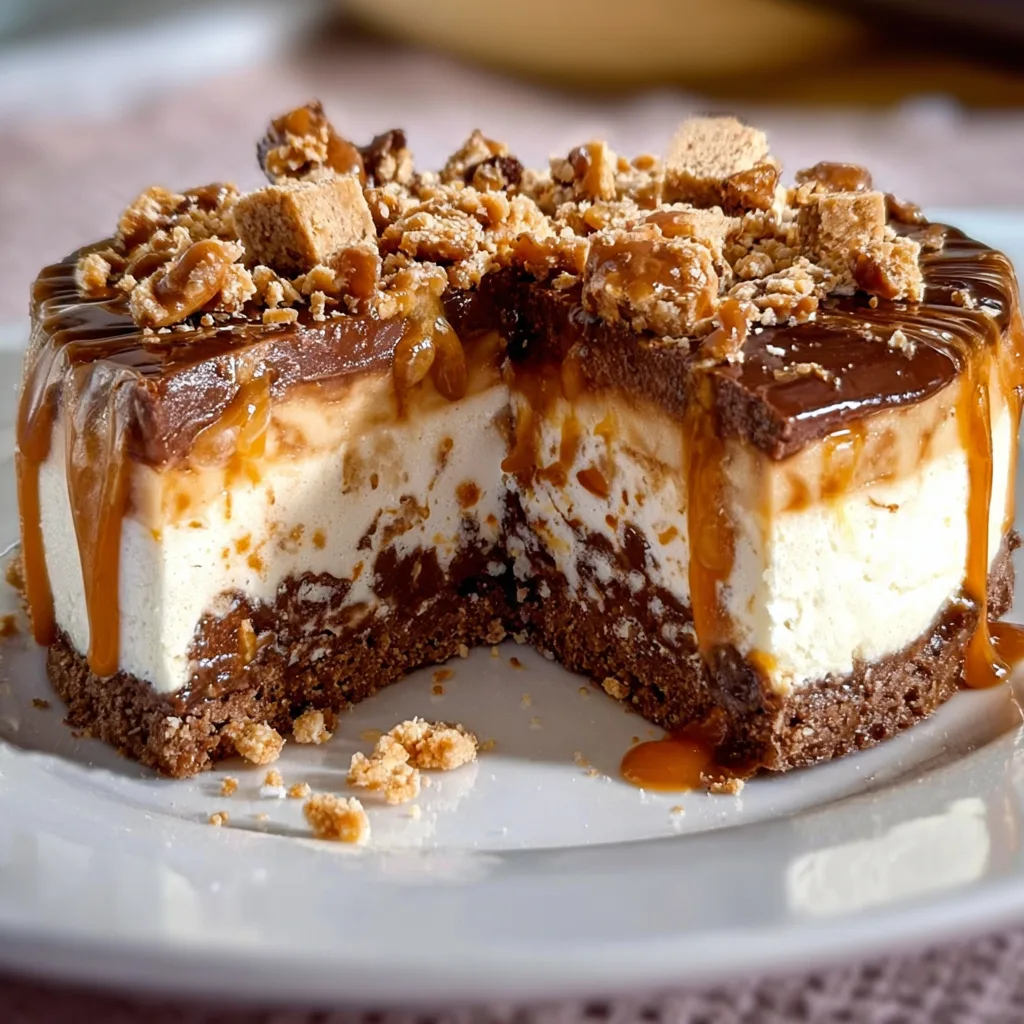
    Caramel Toffee Crunch Cheesecake has completely transformed my dessert game! The first time I made this decadent masterpiece, my kitchen filled with the intoxicating aroma of buttery toffee and warm caramel that had my family hovering around the oven like eager honeybees. This isn’t just any cheesecake—it’s a textural symphony of silky cream cheese filling, crunchy toffee bits, and that irresistible caramel drizzle that creates beautiful amber ribbons across the top. If you’ve been craving something that balances sweet indulgence with sophisticated flavor, this recipe will become your new obsession, just as it has become mine at RecipesDarleen.

    Recipe

    Why You’ll Love This Caramel Toffee Crunch Cheesecake

    Perfect Balance of Textures and Flavors

    The magic of this Caramel Toffee Crunch Cheesecake lies in its extraordinary contrasts. The velvety smooth cheesecake filling provides the perfect canvas for the scattered toffee pieces that offer delightful crunch in every bite. I’ve carefully balanced the sweetness level so the tanginess of the cream cheese still shines through, complementing rather than competing with the caramel. The graham cracker crust adds that essential toasty foundation that supports all these luxurious layers. What makes this recipe special is how each component maintains its distinct character while creating a harmonious whole that will have your taste buds dancing with joy.

    Make-Ahead Convenience for Stress-Free Entertaining

    One thing I absolutely adore about this Caramel Toffee Crunch Cheesecake is how perfectly it fits into my busy hosting schedule. You can prepare this showstopper up to three days before your event, which means no last-minute baking stress! The flavors actually develop and meld beautifully as it rests in the refrigerator, making this the ideal dessert for planning ahead. I still remember making this for my sister’s birthday dinner—I prepared it two days early, which left me completely relaxed on the actual celebration day. Your guests will never guess this masterpiece didn’t just come fresh from the oven, and you’ll love having an impressive dessert ready and waiting.

    Essential Tips & Tricks

    Mastering the Water Bath Method

    The secret to achieving that perfectly smooth, crack-free Caramel Toffee Crunch Cheesecake lies in using a proper water bath. This technique creates a gentle, humid environment that prevents the cheesecake from drying out or cracking during baking. Double-wrap your springform pan with heavy-duty aluminum foil to prevent water seepage—trust me, I learned this lesson the hard way! Fill your roasting pan with hot water halfway up the sides of your cheesecake pan. This method might seem fussy, but it’s worth every extra minute for that professional-quality result that will make your Fluffy Japanese Cotton Cheesecake seem like just a practice run!

    Temperature Control for Perfect Texture

    The key to a silky-smooth Caramel Toffee Crunch Cheesecake is respecting temperature at every stage. Always start with room temperature ingredients—especially the cream cheese and eggs—which will blend seamlessly without lumps. After baking, resist the urge to immediately remove your cheesecake from the oven. Instead, turn off the heat and crack the door open, allowing it to cool gradually for about an hour. This slow cooling prevents the dramatic temperature change that causes those dreaded surface cracks. Finally, a minimum of 4 hours (preferably overnight) in the refrigerator allows the cheesecake to set properly and develop its full flavor profile.

    Serving Ideas & Creative Variations

    Elegant Presentation Techniques

    Elevate your Caramel Toffee Crunch Cheesecake from delicious to unforgettable with thoughtful presentation. I love creating a dramatic drizzle pattern with slightly warmed caramel sauce just before serving—the way it cascades down the sides creates an irresistible visual appeal. For special occasions, pipe small rosettes of whipped cream around the perimeter and nestle chocolate-dipped toffee pieces on top. Serving each slice on a plate with a light dusting of cocoa powder and a small pool of additional caramel sauce creates restaurant-quality presentation. My guests always reach for their phones to capture these picture-perfect slices before diving in, much like they do with my No-Bake German Chocolate Cheesecake.

    Seasonal and Dietary Adaptations

    This versatile Caramel Toffee Crunch Cheesecake welcomes creative modifications to suit different preferences and occasions. For fall gatherings, I incorporate warm spices like cinnamon and nutmeg into the filling and substitute apple butter for some of the caramel. During summer, a fresh berry compote alongside the caramel creates a refreshing contrast. For those with dietary restrictions, this recipe works beautifully with gluten-free graham crackers for the crust. You can also experiment with reduced-fat cream cheese, though I find using at least half full-fat maintains that luxurious mouthfeel we all crave in a proper cheesecake.

    Storage & Troubleshooting Guide

    Proper Storage for Maximum Freshness

    Keeping your Caramel Toffee Crunch Cheesecake at its best requires proper storage techniques. After it has completely cooled, refrigerate it uncovered for one hour to set the surface, then wrap it loosely with plastic wrap to prevent it from absorbing other flavors from your refrigerator. The cheesecake will maintain peak freshness for up to 5 days when properly stored. If you need longer storage, freezing works remarkably well—slice the cheesecake first, place pieces on a baking sheet until frozen solid, then wrap each piece individually. This method allows you to thaw only what you need, ensuring every slice tastes as magnificent as the first.

    Fixing Common Cheesecake Problems

    Even experienced bakers encounter challenges with cheesecakes, but most issues have simple solutions. If your Caramel Toffee Crunch Cheesecake develops surface cracks, don’t panic! Strategic topping placement with caramel sauce and toffee pieces can beautifully disguise them. For a sunken center, your cheesecake likely needed more baking time—but it’s still delicious! Simply fill the depression with extra caramel sauce and call it intentional. If your crust becomes soggy, try blind-baking it for 10 minutes before adding the filling next time. Remember, even imperfect cheesecakes taste amazing, and most guests will never notice the flaws you’re concerned about.

    Frequently Asked Questions

    Can I make Caramel Toffee Crunch Cheesecake without a springform pan?

    Yes! Use a regular cake pan lined with parchment paper with extra hanging over the sides to create “handles” for lifting. Chill thoroughly before attempting to remove it, and the sides won’t be as pristine, but the taste remains divine.

    How do I prevent my toffee bits from sinking to the bottom?

    Toss your toffee pieces in 1 tablespoon of flour before folding them into the batter. This light coating helps them stay suspended throughout the filling during baking rather than sinking.

    Can I use store-bought caramel sauce?

    Absolutely! While homemade caramel offers deeper flavor, a high-quality store-bought sauce works perfectly when you’re short on time. Look for thicker varieties that won’t soak completely into the cheesecake.

    Why did my cheesecake crack even with a water bath?

    Overmixing incorporates too much air, leading to expansion and cracking during baking. Mix just until ingredients are combined and avoid opening the oven door frequently, which causes temperature fluctuations.

    How far in advance can I make this cheesecake for an event?

    This Caramel Toffee Crunch Cheesecake can be made up to 3 days in advance and refrigerated. For longer storage, freeze for up to 2 months and thaw overnight in the refrigerator before serving.

    Final Thoughts

    This Caramel Toffee Crunch Cheesecake has become my signature dessert for good reason—it delivers that perfect balance of impressive presentation and unforgettable flavor that keeps everyone asking for the recipe. The combination of buttery caramel, crunchy toffee bits, and creamy cheesecake creates a dessert that feels both familiar and special at once. Don’t be intimidated by the process; take it step by step, and you’ll create something truly magnificent. I’d love to see your creations over on Pinterest where we can continue sharing our baking adventures!

  • Easy Wisconsin Apple Kringle Pastry – Irresistibly Flaky & Delicious!

    Easy Wisconsin Apple Kringle Pastry – Irresistibly Flaky & Delicious!

    Easy Wisconsin Apple Kringle Pastry – Irresistibly Flaky & Delicious!

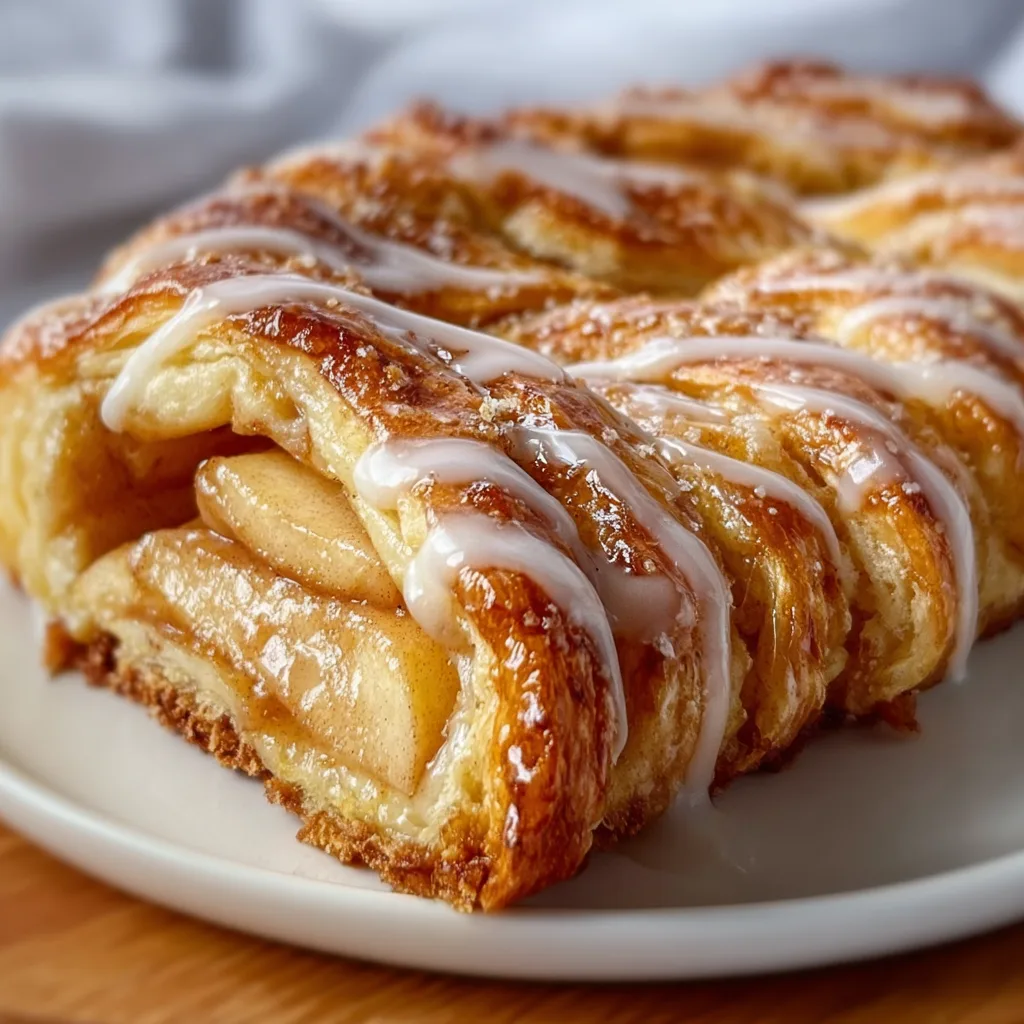
    Easy Wisconsin Apple Kringle Pastry has been my weekend obsession lately. There’s something magical about that buttery, flaky crust wrapped around tender cinnamon-spiced apples that transports me straight to my grandmother’s kitchen in Door County. This simplified version skips the traditional Danish pastry method but delivers all that authentic flavor without the fuss. I’ve tested this recipe six times (my neighbors aren’t complaining!), and it’s perfect for both special occasions and casual Sunday mornings. If you’ve been intimidated by pastry-making, this approachable version will change your mind.

    Recipe

    Why You’ll Love This Easy Wisconsin Apple Kringle Pastry

    Perfect Balance of Flavors and Textures

    The magic of this Easy Wisconsin Apple Kringle Pastry lies in its contrasting textures – that satisfying crackle when your fork breaks through the sugar-crusted exterior, giving way to buttery layers and warm, cinnamon-scented apples. I’m particularly proud of the balance here: the pastry offers just enough sweetness without overwhelming the natural tartness of the apples. The touch of almond extract in the glaze? That’s my little secret that elevates this from good to unforgettable. Your kitchen will smell like heaven as it bakes.

    Simple Ingredients, Impressive Results

    Don’t let the elegant appearance fool you – this Easy Wisconsin Apple Kringle Pastry uses pantry staples you likely already have. Granny Smith apples provide the perfect balance of tartness and structure, while store-bought puff pastry eliminates the most technical aspect of traditional kringle-making. The brown sugar-cinnamon filling caramelizes slightly during baking, creating pockets of gooey goodness throughout. I love how this recipe transforms humble ingredients into something that looks like it came from a high-end bakery. Your guests will never guess how easy it was!

    Essential Tips & Tricks

    Mastering the Apple Filling

    The key to perfect Easy Wisconsin Apple Kringle Pastry is getting your apple filling just right. I recommend pre-cooking your apples briefly until they’re just starting to soften – about 3-4 minutes in a skillet with butter. This prevents that dreaded soggy bottom! Slice your apples uniformly (about ¼ inch thick) for even cooking, and let them cool completely before assembling. A touch of lemon juice prevents browning and adds brightness. If your apples release excess juice during cooking, drain it off to keep your pastry crisp and flaky.

    Perfecting the Pastry Technique

    Working with puff pastry requires a few simple tricks. Always thaw completely in the refrigerator overnight – never at room temperature, which makes it sticky and difficult to handle. Keep it cold until the last minute, and work quickly with lightly floured hands. When folding your pastry, don’t worry about perfection – those rustic edges create beautiful texture! For that signature golden shine, brush with egg wash before baking, and don’t skip the 10-minute rest in the refrigerator before it hits the oven.

    Serving Ideas & Creative Variations

    Perfect Pairings for Any Occasion

    This Easy Wisconsin Apple Kringle Pastry shines as the centerpiece of a brunch spread alongside fresh fruit and coffee. For an indulgent dessert, serve it slightly warm with a scoop of vanilla ice cream or a dollop of lightly sweetened whipped cream. I love serving thin slices with afternoon tea – the contrast of bitter tea and sweet pastry is divine! For holiday gatherings, arrange slices on a wooden board with cheese and honey for an unexpected sweet addition to your charcuterie. The versatility of this pastry makes it perfect for any gathering.

    Seasonal Adaptations and Flavor Twists

    While apple is the classic filling, this Easy Wisconsin Apple Kringle Pastry framework welcomes creative variations. In summer, try fresh berries mixed with a touch of cornstarch to thicken their juices. Fall calls for pear-cranberry with warming spices, while winter holidays shine with chocolate-hazelnut spread and crushed candy canes. You can also play with the glaze – try maple, orange, or even a bourbon-spiked version for adults. My personal favorite twist is adding a layer of almond paste beneath the apples for a marzipan-like flavor that’s utterly addictive.

    Storage & Troubleshooting Guide

    Keeping Your Kringle Fresh

    Your Easy Wisconsin Apple Kringle Pastry will stay fresh at room temperature for 2-3 days when stored in an airtight container. For longer storage, refrigerate for up to 5 days, though the texture is best within the first 48 hours. You can also freeze individual slices wrapped tightly in plastic wrap and foil for up to 3 months – perfect for emergency dessert cravings! To refresh day-old kringle, warm it in a 300°F oven for 5-7 minutes. I find the flavors actually develop beautifully overnight, making this an ideal make-ahead treat.

    Fixing Common Pastry Problems

    If your Easy Wisconsin Apple Kringle Pastry dough becomes too soft while working with it, don’t panic! Simply pause and chill everything for 15 minutes in the refrigerator. Leaky filling can be prevented by leaving a wider border around the edges and sealing thoroughly with egg wash. If your pastry puffs unevenly, you likely have hot spots in your oven – rotate halfway through baking. For pale pastry, brush with additional egg wash and return to the oven. Remember that homemade kringles have character – those little imperfections are what make yours special!

    Frequently Asked Questions

    Can I make this Easy Wisconsin Apple Kringle Pastry ahead of time?

    Absolutely! You can prepare the entire kringle up to the baking stage, then refrigerate overnight. Bake fresh in the morning, adding 3-5 minutes to the baking time since you’re starting with a cold pastry.

    What apples work best for kringle?

    Firm, tart varieties like Granny Smith, Honeycrisp, or Braeburn hold their shape during baking. Avoid softer apples like McIntosh or Red Delicious, which turn mushy and release too much liquid.

    Can I use homemade puff pastry instead of store-bought?

    Yes! Homemade puff pastry works beautifully if you have the time and skill. The flavor will be even more buttery and rich, though the technique remains the same.

    Is this authentic Wisconsin kringle?

    Traditional Wisconsin kringles use a laminated dough similar to Danish pastry. This Easy Wisconsin Apple Kringle Pastry version simplifies the technique while honoring the flavors and oval shape of the classic.

    How do I know when my kringle is perfectly baked?

    Look for a deep golden-brown color and dry, crisp edges. The bottom should be firm and caramelized, not pale or soggy. If in doubt, bake for an extra 2-3 minutes.

    Final Thoughts

    This Easy Wisconsin Apple Kringle Pastry has become my signature bring-along for gatherings, earning requests and recipe shares wherever it goes. There’s something so satisfying about creating something this beautiful with relatively little effort. The way it bridges the gap between special-occasion treat and everyday indulgence makes it a recipe I return to again and again. I hope it brings the same joy to your kitchen! For more delightful pastry creations, visit my Pinterest collection where I share my latest baking inspirations.