Blog

  • Dump-and-Bake Chicken Tzatziki Casserole | Easy, Creamy & Irresistible!

    Dump-and-Bake Chicken Tzatziki Casserole | Easy, Creamy & Irresistible!

    Dump-and-Bake Chicken Tzatziki Casserole | Easy, Creamy & Irresistible!

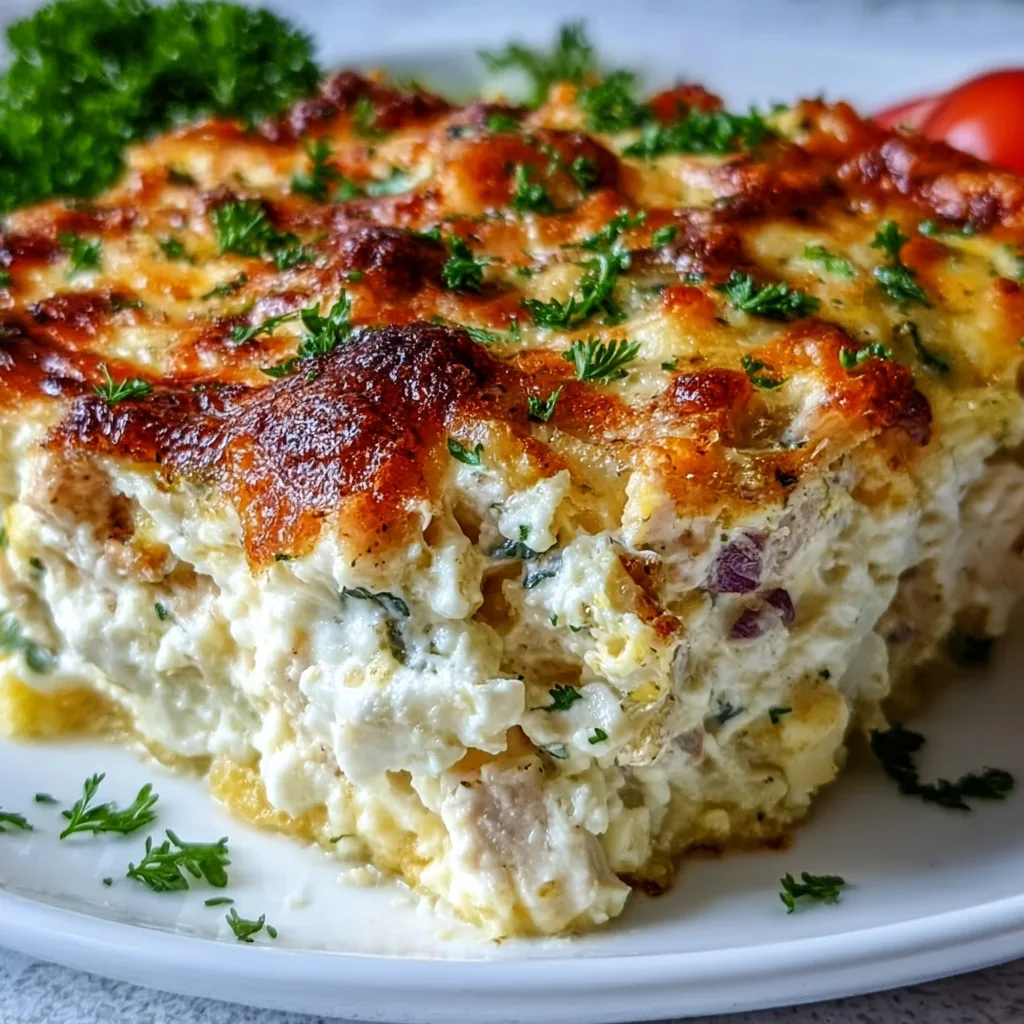
    The Dump-and-Bake Chicken Tzatziki Casserole has become my absolute go-to for those evenings when I crave something comforting yet fresh. There’s something magical about the way the tangy Greek yogurt sauce envelops tender chicken and transforms into a bubbling, golden-topped masterpiece with minimal effort. I still remember the first time I made this for my sister’s impromptu visit—her eyes widened with that first bite, and now it’s her most requested dish! The beauty of this Mediterranean-inspired casserole lies in its simplicity: just layer, bake, and enjoy the aromatic blend of dill, cucumber, and garlic that fills your kitchen with the most inviting scent.

    If you’re looking for a fuss-free dinner option that delivers on flavor, this one’s for you.

    Recipe

    Why You’ll Love This Dump-and-Bake Chicken Tzatziki Casserole

    Perfect for Busy Weeknights

    This Dump-and-Bake Chicken Tzatziki Casserole is a true time-saver that doesn’t sacrifice flavor for convenience. On those evenings when I’m racing against the clock but refuse to settle for takeout, this dish saves the day. The prep work takes just 10 minutes—slice a few cucumbers, whisk together the creamy tzatziki-inspired sauce, and arrange your chicken. Then the oven does all the heavy lifting! The hands-off cooking means you can help with homework, catch up on emails, or simply put your feet up while dinner essentially makes itself. The resulting tender chicken bathed in creamy, garlicky goodness will have everyone thinking you spent hours in the kitchen.

    A Crowd-Pleasing Flavor Profile

    There’s something universally appealing about the tangy-creamy combination that makes this Dump-and-Bake Chicken Tzatziki Casserole a hit with even picky eaters. The familiar comfort of a casserole meets the bright, fresh flavors of Greek cuisine in perfect harmony. My nephew, who typically turns his nose up at anything green, devoured this without complaint—the cucumber pieces become mellow and tender while baking. The lemon brightens everything, the dill adds that distinctive Mediterranean note, and the garlic infuses throughout. It’s familiar enough for comfort food lovers but interesting enough for those seeking something beyond the usual chicken dinner routine.

    Essential Tips & Tricks

    Ingredient Selection Matters

    When making Dump-and-Bake Chicken Tzatziki Casserole, choosing the right ingredients elevates the final result dramatically. Opt for full-fat Greek yogurt rather than regular yogurt—its thickness and tanginess are essential for that authentic tzatziki flavor and prevents the sauce from becoming watery. For chicken, thighs work beautifully as they stay moist through baking, but breasts can work if sliced to even thickness. English cucumbers are my preference as they have fewer seeds and less water content. I learned this the hard way when I once used regular cucumbers and ended with a slightly soupy (though still delicious) casserole! Fresh dill makes a noticeable difference, but in a pinch, dried works at about 1/3 the amount.

    Perfect Layering Technique

    The magic of this Dump-and-Bake Chicken Tzatziki Casserole happens in the layering process. Start by lightly oiling your baking dish to prevent sticking and add a thin layer of the yogurt mixture on the bottom—this creates a protective cushion that keeps the chicken from drying out. Arrange the chicken pieces so they’re slightly overlapping rather than stacked, ensuring even cooking. The cucumber slices should be distributed throughout the layers, not just on top, allowing their flavor to infuse the entire dish. For that beautiful golden finish, a final sprinkle of crumbled feta and a light drizzle of olive oil works wonders.

    This layering approach reminds me of how I layer flavors in my Creamy Garlic Shrimp over Mashed Potatoes—building depth with each component.

    Serving Ideas & Creative Variations

    Perfect Pairing Suggestions

    This Dump-and-Bake Chicken Tzatziki Casserole pairs beautifully with simple sides that complement its creamy, tangy profile. A fluffy rice pilaf absorbs the delicious sauce perfectly—I like to add a pinch of oregano and lemon zest to the cooking water for extra Mediterranean flair. For a lower-carb option, roasted cauliflower or a simple Greek salad provides refreshing contrast. Warm pita bread is non-negotiable at my table; there’s something deeply satisfying about tearing off a piece to scoop up that last bit of sauce. For special occasions, I serve this with a side of Crispy Zucchini Rings with Creamy Dip as an additional texture contrast that keeps everyone reaching for more.

    Exciting Flavor Twists

    Don’t hesitate to make this Dump-and-Bake Chicken Tzatziki Casserole your own with creative variations that keep it exciting meal after meal. Add a Mediterranean twist by incorporating chopped artichoke hearts, roasted red peppers, or kalamata olives into the yogurt mixture. For a protein variation, swap the chicken for firm white fish fillets or even chickpeas for a vegetarian option—just adjust the cooking time accordingly. My personal favorite twist is adding a layer of sautéed spinach with a sprinkle of nutmeg between the chicken pieces. For heat lovers, a pinch of red pepper flakes or a few slices of fresh jalapeño transforms the dish completely. Each variation keeps the essence of the original while offering a new experience.

    Storage & Troubleshooting Guide

    Proper Storage Methods

    Your Dump-and-Bake Chicken Tzatziki Casserole stores beautifully, making it perfect for meal prep or planned leftovers. Once cooled, transfer portions to airtight containers and refrigerate for up to 3 days. The flavors actually continue to develop overnight, making day-two servings sometimes even better than the first! For freezing, I recommend portioning into individual servings before freezing for up to 2 months. Thaw overnight in the refrigerator for best results. When reheating, add a splash of chicken broth or a dollop of fresh yogurt to revive the sauce if it seems dry. I’ve found glass containers work best for storage as they won’t absorb the garlic scent and can go straight from fridge to microwave or oven for reheating.

    Common Issues & Solutions

    Even this foolproof Dump-and-Bake Chicken Tzatziki Casserole can occasionally present challenges, but they’re easily fixed. If your sauce separates or looks curdled, it’s likely due to overheating or using yogurt with stabilizers. The solution is simple: lower baking temperature by 25°F and use quality Greek yogurt. For watery results, salt and drain your cucumbers for 15 minutes before adding them to the mix. If the top isn’t browning nicely, a quick 2-minute broil at the end works wonders—just watch it closely!

    Chicken turning out tough usually means it’s overcooked; using a meat thermometer to reach just 165°F prevents this. And if the garlic flavor is too intense, roast the garlic cloves before adding them to the sauce for a mellower, sweeter profile.

    Frequently Asked Questions

    Can I make Dump-and-Bake Chicken Tzatziki Casserole ahead of time?

    Absolutely! Assemble the casserole up to 24 hours in advance, cover and refrigerate. Add 5-10 minutes to the baking time when cooking from cold. The flavors actually develop beautifully during this rest time.

    Is this recipe keto-friendly?

    Yes, Dump-and-Bake Chicken Tzatziki Casserole is naturally low in carbs. The Greek yogurt contains some carbs, but they’re minimal per serving. Serve with roasted vegetables instead of rice for a complete keto meal.

    Can I use non-dairy yogurt for this recipe?

    Unsweetened coconut or almond-based yogurt alternatives work well. Choose thicker varieties and add an extra squeeze of lemon to replicate the tanginess of traditional Greek yogurt.

    How do I prevent the yogurt sauce from curdling?

    Use full-fat Greek yogurt and avoid high temperatures. Bake at 350°F maximum and don’t let it boil. Tempering the yogurt with a bit of warm liquid before adding helps maintain its creamy texture.

    What’s the best chicken cut to use for this casserole?

    Boneless, skinless chicken thighs are ideal as they remain tender and juicy. If using breasts, pound them to even thickness (about ¾-inch) to ensure they cook evenly without drying out.

    Final Thoughts

    This Dump-and-Bake Chicken Tzatziki Casserole has earned its place in my regular rotation for good reason—it delivers restaurant-worthy flavor with minimal effort. There’s something deeply satisfying about creating a dish that feels both nourishing and indulgent while barely lifting a finger. I love seeing friends’ surprise when they discover how simple it is to make! Whether you’re cooking for a busy weeknight, meal prepping for the week ahead, or entertaining guests, this versatile casserole rises to the occasion. Don’t forget to check out more of my easy dinner ideas on Pinterest for inspiration that keeps mealtime fresh and exciting.

  • Orleans Bread Pudding with Bourbon Sauce That Will Melt Your Heart

    Orleans Bread Pudding with Bourbon Sauce That Will Melt Your Heart

    Orleans Bread Pudding with Bourbon Sauce That Will Melt Your Heart

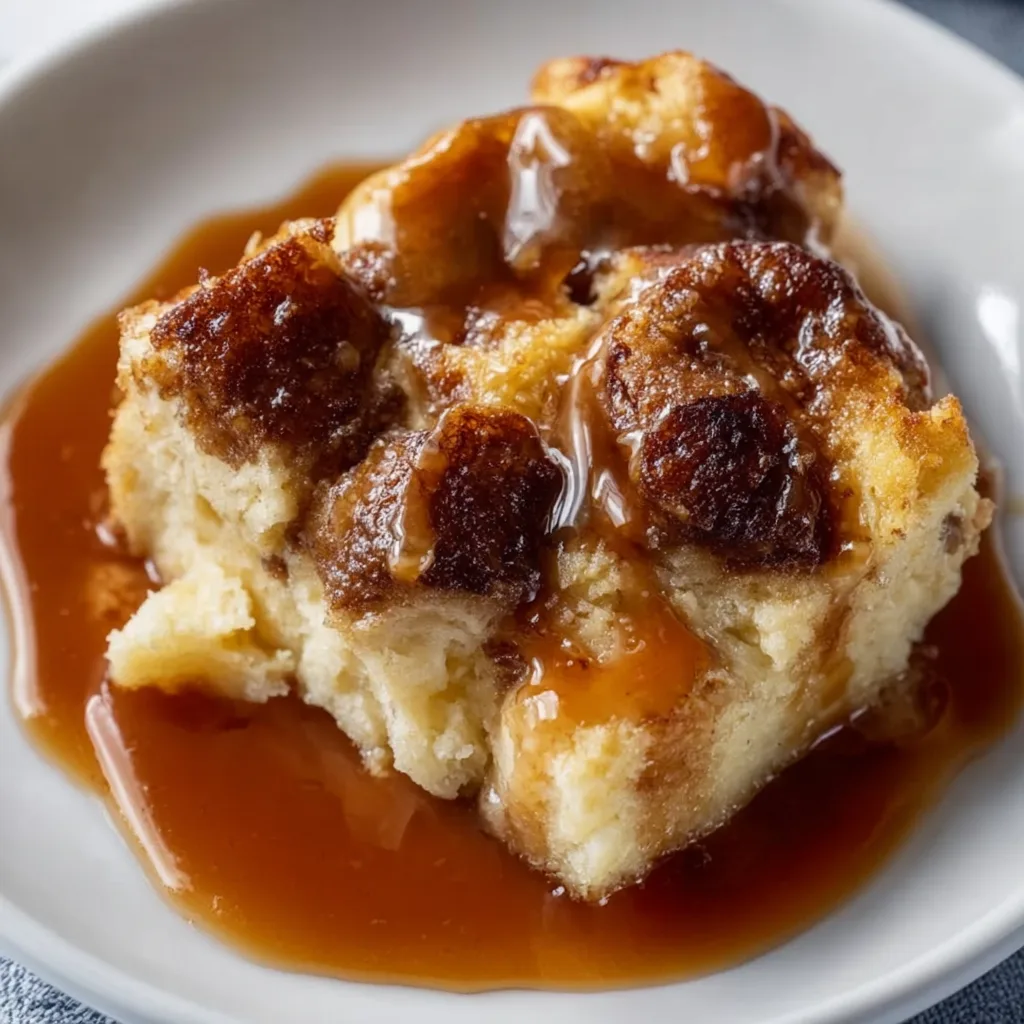
    Orleans Bread Pudding with Bourbon Sauce is one of those desserts that instantly transports me back to my grandmother’s kitchen in Louisiana. The rich, custardy bread soaked in warm spices and topped with that decadent bourbon sauce creates pure magic in every bite. I still remember the first time I made this for my own family—the way their eyes widened at that first taste told me everything. This dessert manages to be both humble and extraordinary, transforming simple ingredients into something that feels like a warm hug on a chilly evening. If you’re looking for a show-stopping dessert that’s actually straightforward to make, you’ll find it at Recipes Darleen.

    Recipe

    Why You’ll Love This Orleans Bread Pudding with Bourbon Sauce

    A Perfect Balance of Textures and Flavors

    There’s something utterly mesmerizing about the contrast between the crispy, caramelized top and the soft, custard-soaked bread beneath. Each bite delivers warmth from cinnamon and nutmeg, sweetness from brown sugar, and that distinctive richness that only real vanilla can provide. The bread itself develops this incredible texture—crisp edges giving way to a pillowy center that melts in your mouth. I’m particularly obsessed with how the raisins plump up during baking, creating little bursts of concentrated sweetness throughout. This dessert proves that simplicity can create the most profound flavors.

    Make-Ahead Convenience with Show-Stopping Results

    What I adore about Orleans Bread Pudding with Bourbon Sauce is how it fits into real life. You can assemble it the night before, allowing the bread to fully absorb all those luscious flavors while you sleep. The bourbon sauce takes just minutes to prepare but tastes like it took hours. Guests always assume I’ve been slaving away, when really, this dessert practically makes itself! The aroma that fills your home as it bakes is worth making it for that alone—warm vanilla, cinnamon, and caramelizing sugar creating an atmosphere that no candle could ever replicate. It’s impressive without being complicated.

    Essential Tips & Tricks

    Bread Selection and Preparation

    The foundation of exceptional Orleans Bread Pudding with Bourbon Sauce starts with the bread itself. Day-old French bread or brioche delivers the best results—their structure holds up beautifully while soaking up the custard. Fresh bread simply won’t work; it becomes too soggy. I tear rather than cut my bread for more textural interest and let it sit uncovered for several hours if it’s not already stale. For extra richness, try mixing in croissants with your bread. The custard needs time to fully penetrate, so aim for at least 30 minutes of soaking (overnight in the refrigerator is even better). This patience transforms good bread pudding into unforgettable bread pudding.

    Perfecting the Bourbon Sauce

    The bourbon sauce is what elevates this dessert from delicious to extraordinary. Use quality bourbon—the flavor concentrates as it cooks. My secret is adding a pinch of salt to balance the sweetness and enhance the caramel notes. Whisk constantly while cooking to prevent scorching and achieve silky smoothness. If you’re serving guests who prefer less alcohol flavor, add the bourbon earlier in the cooking process to allow more alcohol to evaporate. For a thicker sauce, let it cool slightly before serving—it will continue to thicken as it stands. Remember that restraint is key; the sauce should complement, not overwhelm, your perfectly baked pudding.

    Serving Ideas & Creative Variations

    Seasonal Adaptations

    Orleans Bread Pudding with Bourbon Sauce welcomes seasonal ingredients that keep it exciting year-round. Summer calls for fresh berries folded into the custard or a bright lemon zest addition. Fall begs for diced apples, extra cinnamon, and perhaps a touch of maple syrup in the bourbon sauce. Winter holidays shine with cranberries and orange zest, while spring might welcome a handful of chopped apricots or cherries. The bourbon sauce itself can be infused with seasonal spices—star anise and clove for winter, or fresh mint for summer. I’ve even created a pumpkin version that’s become a Thanksgiving tradition, rivaling my Cinnamon Roll Muffins for family popularity.

    Elegant Presentation Techniques

    Transform this homey dessert into a restaurant-worthy finale with thoughtful presentation. Individual ramekins create an elegant portion-controlled option that bakes faster and creates more of those coveted crispy edges. For a dramatic tableside service, warm the bourbon sauce and flame it briefly before pouring over each serving. Garnish possibilities are endless: a quenelle of lightly sweetened whipped cream, candied orange peel, a dusting of powdered sugar, or a single edible flower. For special occasions, I serve it in vintage teacups with the sauce in tiny pitchers for guests to pour themselves—the interactive element always delights and creates a memorable dining experience.

    Storage & Troubleshooting Guide

    Proper Storage for Maximum Freshness

    Properly stored Orleans Bread Pudding with Bourbon Sauce maintains its delicious quality for several days. Refrigerate leftover pudding in an airtight container for up to 4 days. The bourbon sauce should be stored separately in a glass jar with a tight-fitting lid where it will keep for up to a week. When reheating the pudding, cover it with foil and warm in a 300°F oven until just heated through—about 15-20 minutes. Alternatively, microwave individual portions for 30-45 seconds. The sauce can be gently rewarmed in a small saucepan over low heat or microwaved in short bursts, stirring between each. Never freeze the assembled pudding, as the texture will suffer dramatically.

    Troubleshooting Common Issues

    Even experienced bakers occasionally encounter challenges with bread pudding. If your pudding seems too dry, your bread-to-custard ratio may be off—next time, reduce the bread or increase the custard mixture. For pudding that’s too wet even after proper baking time, your bread might have been too fresh or you may need to extend baking time by 10-15 minutes with foil covering the top to prevent over-browning. If your bourbon sauce separates, whisk vigorously over low heat until re-emulsified. For a sauce that’s too thin, simmer a few minutes longer; if too thick, add a tablespoon of cream. Temperature control is crucial—serve the pudding warm, not hot, for the best texture.

    Frequently Asked Questions

    Can I make Orleans Bread Pudding with Bourbon Sauce without alcohol?

    Absolutely! Substitute the bourbon with apple juice, vanilla extract, or maple syrup. Add 1-2 teaspoons of butter extract for a similar richness. The flavor profile will change but remain delicious.

    What’s the best bread to use for authentic Orleans Bread Pudding with Bourbon Sauce?

    French bread or brioche are traditional choices. Day-old bread works best as it absorbs more custard. Challah and croissants also make excellent alternatives for a richer result.

    Can I prepare this dessert in advance for a dinner party?

    Yes! Assemble the bread pudding up to 24 hours ahead and refrigerate. Bring to room temperature before baking. The sauce can be made 3 days ahead and gently reheated before serving.

    Why did my bread pudding turn out soggy?

    This usually happens when the bread is too fresh or hasn’t soaked long enough. Try drying bread cubes in a low oven first or reducing the amount of liquid in your custard mixture.

    How do I know when the bread pudding is perfectly baked?

    The top should be golden brown and slightly crisp. When gently pressed in the center, it should spring back slightly. A knife inserted in the center should come out mostly clean with a few moist crumbs.

    Final Thoughts

    This Orleans Bread Pudding with Bourbon Sauce has become more than just a recipe in my household—it’s a tradition that marks special occasions and creates lasting memories. There’s something magical about watching someone taste it for the first time, their eyes closing in appreciation of those complex flavors. The beauty lies in its versatility and forgiving nature, welcoming adaptations while maintaining its soul-warming essence. Whether you’re a seasoned baker or a nervous beginner, this dessert rewards your efforts abundantly. I hope it brings the same joy to your table as it has to mine. Find more delicious inspiration on Pinterest.

  • Hawaiian BBQ Pizza: Irresistibly Delicious & Viral-Worthy Slice!

    Hawaiian BBQ Pizza: Irresistibly Delicious & Viral-Worthy Slice!

    Hawaiian BBQ Pizza: Irresistibly Delicious & Viral-Worthy Slice!

    Hawaiian BBQ Pizza brings the tropical flavors of the islands right to your dinner table! There’s something magical about the combination of tangy BBQ sauce, sweet pineapple, savory ham, and melty cheese that makes this pizza absolutely irresistible. The first time I made this for my family, the kitchen filled with the most mouthwatering aroma of caramelizing pineapple and BBQ sauce. My husband, who usually wrinkles his nose at “fruit on pizza,” couldn’t resist grabbing a second slice! This Hawaiian BBQ Pizza recipe is perfect for Friday night family dinners or weekend gatherings with friends. Let me show you how to create this tropical delight that will transport your taste buds straight to paradise!

    Recipe

    Why You’ll Love This Hawaiian BBQ Pizza

    Perfect Balance of Sweet and Savory

    The magic of Hawaiian BBQ Pizza lies in its perfect flavor balance. The sweetness from the pineapple chunks and the tanginess from the BBQ sauce create this incredible harmony that dances on your taste buds. I love how the sauce caramelizes slightly in the oven, creating these little pockets of intensified flavor. The savory elements from the ham (or Canadian bacon if you prefer) ground the sweetness, while the red onions add a gentle bite that cuts through the richness. It’s like a tropical vacation in every bite – the kind of pizza that makes you close your eyes and savor each mouthful.

    Quick and Customizable for Any Occasion

    This Hawaiian BBQ Pizza is incredibly versatile and adaptable. You can whip it up in under 30 minutes, making it perfect for busy weeknights when you’re craving something delicious but don’t have hours to spend in the kitchen. The beauty of this recipe is how easily you can customize it – use store-bought dough when you’re short on time or make your own when you want to impress. Add jalapeños for heat, swap ham for crispy bacon, or go vegetarian with extra bell peppers. I’ve even made mini versions on English muffins for my kids’ after-school snacks, and they disappeared in seconds!

    Essential Tips & Tricks

    Perfecting Your Pizza Base

    The foundation of an amazing Hawaiian BBQ Pizza is a well-prepared crust. Whether you’re using homemade or store-bought dough, always let it come to room temperature before stretching – cold dough springs back and won’t hold its shape. I like to pre-bake my crust for 3-4 minutes before adding toppings, which prevents that dreaded soggy middle. When applying the BBQ sauce, use the back of a spoon to spread it in a thin, even layer, leaving a half-inch border for the crust to rise. This little extra step makes such a difference in the final texture – crispy edges with a tender center that perfectly complements the toppings.

    Topping Strategies for Maximum Flavor

    The key to exceptional Hawaiian BBQ Pizza is in the topping distribution. Rather than piling everything in the center, spread ingredients evenly across the surface, ensuring every bite has that perfect sweet-savory balance. For the cheese, I recommend using a combination of mozzarella for stretch and a bit of smoked gouda for depth. Thinly slice your red onions so they cook properly, and pat your pineapple chunks dry to prevent excess moisture. If using fresh pineapple (which I highly recommend!), a quick 1-minute sauté beforehand caramelizes the sugars and intensifies the flavor. This simple step elevates your pizza from good to absolutely crave-worthy.

    Serving Ideas & Creative Variations

    Perfect Pairings for Your Pizza Night

    Hawaiian BBQ Pizza deserves thoughtful accompaniments that complement its sweet-savory profile. I love serving it with a crisp green salad dressed simply with lemon and olive oil – the brightness cuts through the pizza’s richness perfectly. For a complete tropical theme, consider coconut-lime rice or a side of crispy zucchini rings with a pineapple-yogurt dip. For beverages, tropical iced tea or a light lager beer pairs beautifully. And don’t forget the finishing touch – a drizzle of hot honey or a sprinkle of red pepper flakes on the table lets everyone customize their slice with a touch of heat that awakens all those island flavors.

    Exciting Twists on the Classic Recipe

    While traditional Hawaiian BBQ Pizza is delicious, exploring creative variations keeps things exciting! Try a “Luau” version with pulled pork instead of ham and a drizzle of teriyaki glaze. For a spicy kick, add thinly sliced jalapeños or a sprinkle of Cajun seasoning. Vegetarian guests? Replace the meat with grilled zucchini and bell peppers. My family’s favorite twist is what we call “Hawaiian Sunrise” – adding a few dollops of cream cheese and cracked eggs that bake to perfection for brunch. The runny yolks create an incredible sauce when you cut into the pizza, taking this island-inspired dish to a whole new level.

    Storage & Troubleshooting Guide

    Keeping Your Pizza Fresh

    Proper storage techniques ensure your Hawaiian BBQ Pizza remains delicious for days. Once cooled completely, place leftover slices in an airtight container with parchment paper between layers to prevent sticking. Refrigerate for up to 3 days – any longer and the pineapple starts to affect the texture. For reheating, skip the microwave which makes the crust soggy. Instead, use a skillet over medium-low heat with a lid until the cheese melts, or a 350°F oven for 5-7 minutes. The best part? The flavors actually intensify overnight as the BBQ sauce melds with the other ingredients, making day-two pizza sometimes even better than fresh!

    Solving Common Pizza Problems

    Even experienced cooks encounter pizza challenges, but they’re easy to fix! If your crust turns out soggy, the likely culprit is too much sauce or wet toppings. Next time, pat pineapple pieces thoroughly dry and use a lighter hand with the BBQ sauce. For a crust that’s too hard or burnt on the bottom, your oven was probably too hot – use a pizza stone if you have one, as it distributes heat more evenly. If cheese browns too quickly before the crust is done, start with the crust partially covered with foil, removing it halfway through baking. And remember, pizza-making improves with practice – each pie teaches you something new about your oven’s quirks!

    Frequently Asked Questions

    Can I make Hawaiian BBQ Pizza ahead of time?

    Yes! Prepare the dough and toppings up to 24 hours ahead and store separately in the refrigerator. You can even par-bake the crust for 5 minutes, cool completely, then wrap tightly until ready to top and finish baking.

    Is there a good substitute for pineapple in Hawaiian BBQ Pizza?

    Mango chunks work beautifully as a pineapple alternative, offering similar sweetness with a different flavor profile. For less sweetness, try roasted yellow bell peppers, which provide color and a mild sweet note.

    How can I make my Hawaiian BBQ Pizza crust crispier?

    For an extra-crispy crust, brush the edges with olive oil before baking and use a preheated pizza stone or steel. Baking on the lowest oven rack also helps develop that perfect crunch.

    Can I freeze leftover Hawaiian BBQ Pizza?

    Absolutely! Wrap individual slices tightly in plastic wrap, then foil, and freeze for up to 2 months. Reheat from frozen in a 375°F oven until hot and crispy, about 12-15 minutes.

    What’s the best BBQ sauce to use for authentic Hawaiian BBQ Pizza?

    The best BBQ sauce for Hawaiian BBQ Pizza combines sweetness with tanginess. Look for sauces with pineapple, mango, or honey notes. I prefer medium-thickness sauces that won’t make the crust soggy.

    Final Thoughts

    Hawaiian BBQ Pizza represents the beautiful harmony that happens when different culinary traditions meet. The combination of tangy BBQ sauce, sweet pineapple, savory ham, and melted cheese creates something truly greater than the sum of its parts. I hope this recipe inspires you to bring a taste of the islands into your kitchen and perhaps start some new family traditions around pizza night. There’s something so special about gathering loved ones around a homemade Hawaiian BBQ Pizza – the conversations flow, laughter fills the air, and for a moment, your dining room feels like a little slice of paradise. Find more tropical-inspired recipes on Pinterest!

  • Power-Packed High Protein Cheesy Chicken & Potatoes That WOW!

    Power-Packed High Protein Cheesy Chicken & Potatoes That WOW!

    Power-Packed High Protein Cheesy Chicken & Potatoes That WOW!

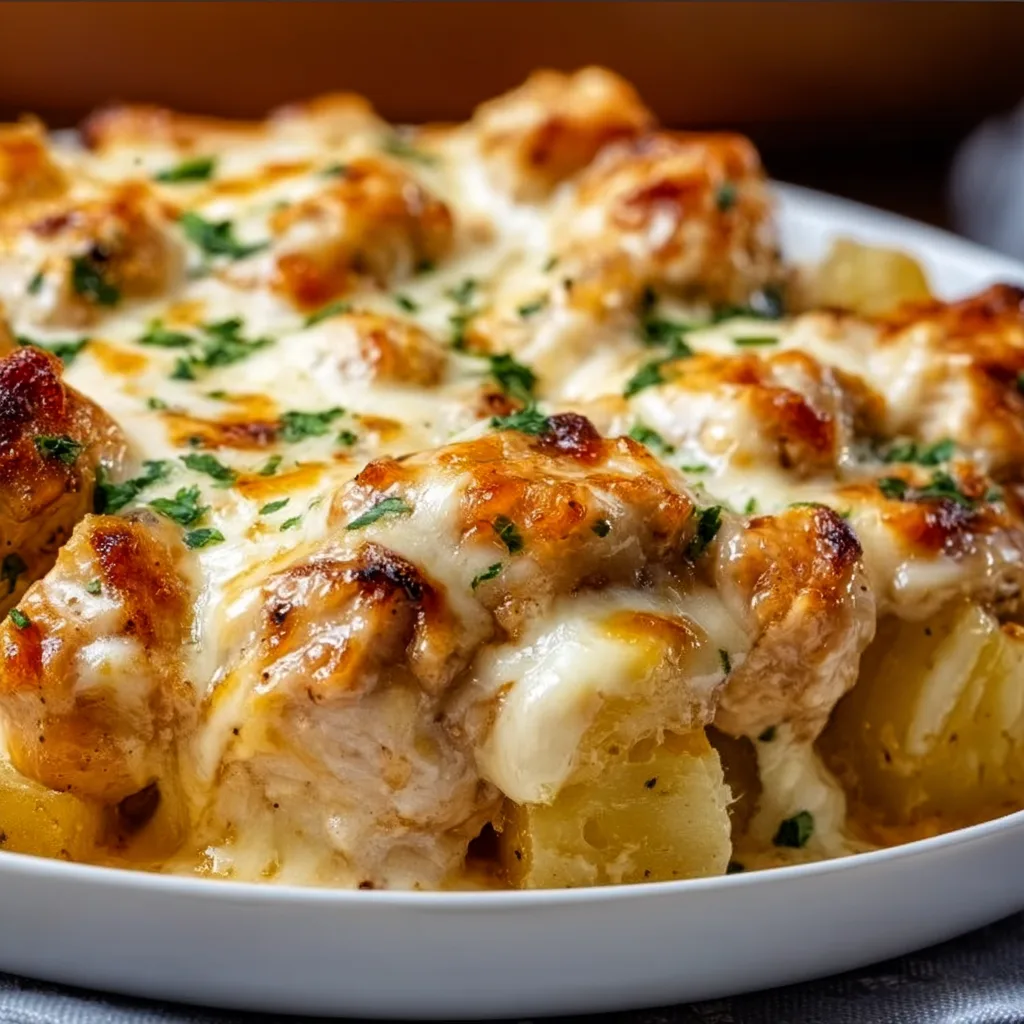
    This Power-Packed High Protein Cheesy Chicken & Potatoes dish has become my absolute salvation on those hectic weeknights when I need something substantial yet easy. The first time I made it, my kitchen filled with the comforting aroma of herbs and melting cheese, and I knew I’d found a keeper. With over 30g of protein per serving, it’s the perfect balance of nourishing and indulgent—crispy potatoes nestled beneath tender chicken and blankets of gooey cheese. If you’re craving a hearty, filling meal that doesn’t skimp on flavor or nutrition, this one-pan wonder deserves a permanent spot in your recipe collection.

    Recipe

    Why You’ll Love This Power-Packed High Protein Cheesy Chicken & Potatoes

    Perfect Balance of Nutrition and Comfort

    This dish strikes that elusive sweet spot between wholesome nutrition and soul-satisfying comfort food. Each serving delivers a substantial protein punch from the chicken breast, while the potatoes provide complex carbs for sustained energy. I’ve carefully balanced the macronutrients so you feel satisfied without heaviness. The cheese adds calcium while contributing that irresistible gooey texture we all crave. When my fitness-focused sister tried this recipe, she immediately asked for seconds—proof that healthy eating doesn’t mean bland or boring meals!

    One-Pan Simplicity for Busy Lives

    Let’s be honest—who has time for complicated recipes with endless dishes? This Power-Packed High Protein Cheesy Chicken & Potatoes comes together in one baking dish, meaning minimal cleanup and maximum efficiency. I created this recipe during a particularly chaotic work week, and it saved my sanity. The active prep takes just 15 minutes, then your oven does all the heavy lifting. The potatoes and chicken cook together perfectly, absorbing all those amazing flavors while you handle other parts of your life. It’s meal prep magic!

    Essential Tips & Tricks

    Mastering the Protein-Packed Marinade

    The secret to incredibly flavorful chicken lies in the protein-boosting marinade. I recommend marinating for at least 30 minutes, but overnight works wonders if you plan ahead. The combination of Greek yogurt (extra protein!), lemon juice, and herbs tenderizes the meat while infusing it with flavor. For maximum protein content, choose chicken breasts that are plump and even-sized. A quick tip I learned from a chef friend: lightly scoring the chicken breasts helps the marinade penetrate deeper, resulting in more flavor and juicier results in your High Protein Cheesy Chicken & Potatoes.

    Perfecting the Potato Base

    The potatoes aren’t just a side—they’re an integral part of this protein powerhouse. For the best texture, cut your potatoes into uniform pieces (about 1-inch cubes) so they cook evenly. Par-boiling them for just 5 minutes before baking gives them a head start, ensuring they’ll be perfectly tender when the chicken is done. I learned this trick after several batches of undercooked potatoes! Toss them in olive oil and seasonings while still hot—they’ll absorb the flavors much better. For extra protein, I sometimes add a sprinkle of nutritional yeast to the potato mixture.

    Serving Ideas & Creative Variations

    Complementary Side Dishes

    While this Power-Packed High Protein Cheesy Chicken & Potatoes is hearty enough to stand alone, pairing it with the right sides can create a truly memorable meal. A simple arugula salad with lemon vinaigrette adds a peppery brightness that cuts through the richness. For extra vegetables, I love serving roasted broccoli or Brussels sprouts alongside—they can even roast on a separate rack in the same oven! For special occasions, consider crispy garlic air fryer broccoli for a delightful textural contrast. Remember to keep your sides light since the main dish is already substantial.

    Flavor Variations to Keep It Fresh

    The beauty of this protein-packed dish is how easily it adapts to different flavor profiles. For a Mediterranean twist, swap the cheddar for feta, add olives, and sprinkle with oregano. Craving something spicy? Add jalapeños, pepper jack cheese, and a dash of cayenne to the chicken marinade. My personal favorite variation uses smoked paprika, rosemary, and gouda for a woodsy, aromatic profile that’s perfect for fall evenings. You can also boost the protein further by adding white beans to the potato mixture—they become deliciously creamy during baking.

    Storage & Troubleshooting Guide

    Proper Storage for Maximum Freshness

    This Power-Packed High Protein Cheesy Chicken & Potatoes makes excellent leftovers when stored correctly. Allow the dish to cool completely before transferring to airtight containers—I prefer glass containers to prevent any flavor transfer. Refrigerate for up to 4 days. For reheating, cover with foil and warm in a 325°F oven for about 15 minutes to maintain moisture. Microwaving works in a pinch, but the texture suffers slightly. If you’re meal prepping, portion individual servings right away—it makes grabbing a protein-rich lunch much easier!

    Troubleshooting Common Issues

    Even experienced cooks encounter challenges! If your chicken is cooking faster than your potatoes, simply cover the chicken pieces with small foil “tents” to prevent over-browning while the potatoes finish cooking. Dealing with excess moisture? Try patting your chicken completely dry before marinating and ensure your baking dish has enough surface area for proper evaporation. If your cheese isn’t browning nicely, switch to broil for the final 2-3 minutes, watching carefully. Remember that different ovens vary—get to know yours and adjust cooking times accordingly.

    Frequently Asked Questions

    Can I make this Power-Packed High Protein Cheesy Chicken & Potatoes ahead of time?

    Yes! Prep everything up to 24 hours ahead, store the marinated chicken and seasoned potatoes separately in the refrigerator, then assemble and bake when ready to serve.

    What’s the best cheese to use for maximum protein content?

    Mozzarella and cheddar offer excellent protein content while melting beautifully. For even more protein, add a sprinkle of Parmesan on top during the final 10 minutes of baking.

    Can I substitute sweet potatoes in this recipe?

    Absolutely! Sweet potatoes work wonderfully and add extra nutrients. Cut them slightly larger as they tend to cook faster than regular potatoes.

    Is this recipe freezer-friendly?

    Yes, though the potatoes may change texture slightly. Freeze in airtight containers for up to 3 months and thaw overnight in the refrigerator before reheating.

    How can I make this dish even higher in protein?

    Add a protein-rich topping like crispy bacon bits, chopped nuts, or hemp seeds just before serving. You can also serve with a side of Greek yogurt mixed with herbs.

    Final Thoughts

    This Power-Packed High Protein Cheesy Chicken & Potatoes has become a true staple in my kitchen—the recipe I turn to when I need nourishment, comfort, and simplicity all on one plate. There’s something magical about the way the flavors meld together, creating a dish that feels both special and familiar. I love seeing the look of satisfaction on people’s faces when they take that first bite! Whether you’re feeding a hungry family or meal prepping for a busy week ahead, this protein-rich wonder delivers every time. Don’t forget to check out more of my protein-packed recipes on Pinterest!

  • Bread Pudding with Vanilla Sauce That Will Melt Your Heart!

    Bread Pudding with Vanilla Sauce That Will Melt Your Heart!

    Bread Pudding with Vanilla Sauce That Will Melt Your Heart!

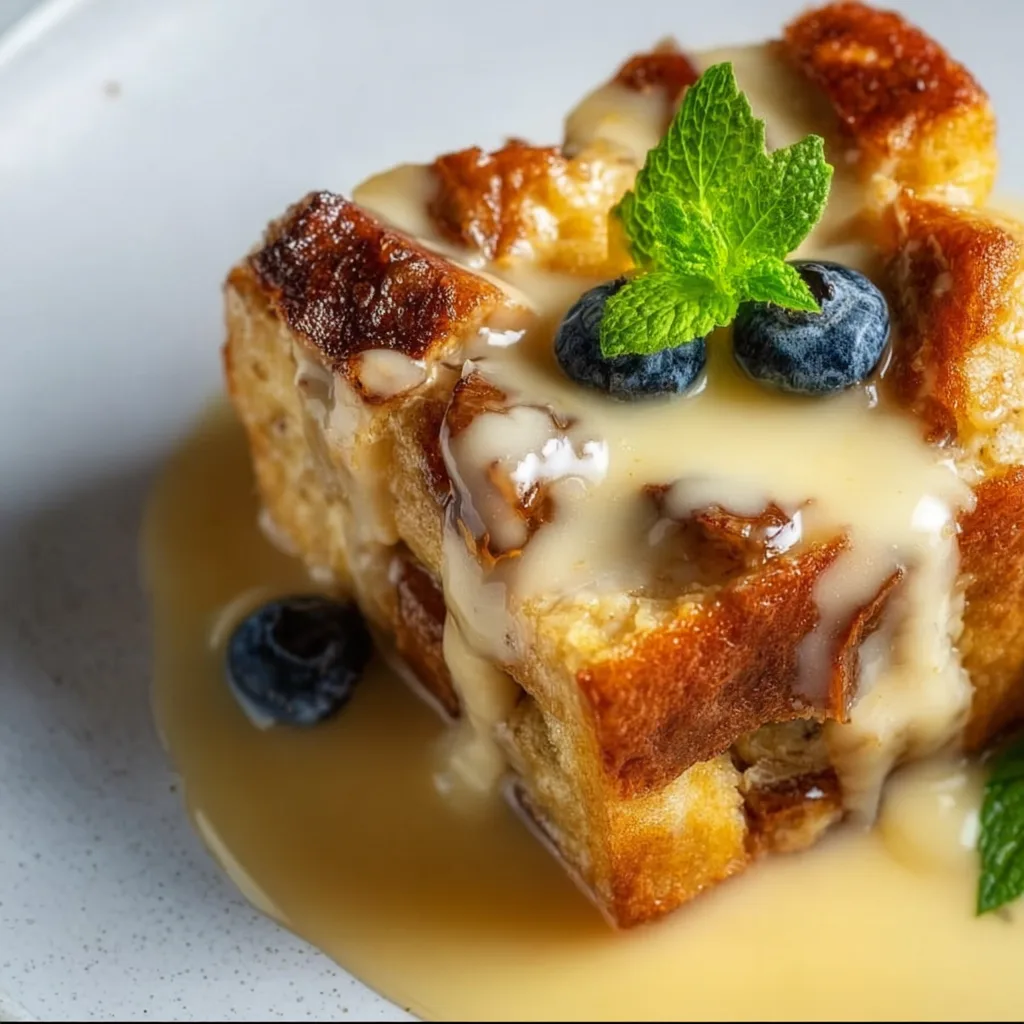
    Bread pudding with vanilla sauce takes me back to my grandmother’s kitchen, where the sweet aroma of cinnamon-spiced bread baking in custard would fill the entire house. This classic comfort dessert transforms humble ingredients into something truly magical. The contrast between the crispy golden top and the soft, custardy interior creates the perfect texture experience, while the warm vanilla sauce adds that final touch of indulgence. If you’re looking for a dessert that feels like a warm hug, this bread pudding recipe is exactly what your soul needs.

    Recipe

    Why You’ll Love This Bread Pudding with Vanilla Sauce

    Perfect Balance of Textures and Flavors

    What makes this bread pudding truly special is the beautiful contrast between textures. The edges become delightfully crisp while the center stays soft and pudding-like. I love how the bread soaks up the rich custard mixture, creating pockets of creamy goodness throughout. The warm spices—cinnamon, nutmeg, and a hint of vanilla—infuse every bite with comforting flavor. And when that first spoonful of warm bread pudding meets the cool, silky vanilla sauce? Pure bliss! It’s the kind of dessert that makes everyone at the table fall silent for a moment, just savoring.

    Simple Ingredients, Extraordinary Results

    One of the things I cherish most about bread pudding with vanilla sauce is how it transforms ordinary ingredients into something extraordinary. Day-old bread that might otherwise go to waste becomes the star of a show-stopping dessert. The custard requires just eggs, milk, sugar, and vanilla—pantry staples most of us already have on hand. Even the vanilla sauce comes together with minimal fuss, using butter, sugar, cream, and vanilla extract to create that luxurious finish. This dessert proves that sometimes the most humble ingredients create the most memorable dishes.

    Essential Tips & Tricks

    Choosing the Right Bread

    The foundation of exceptional bread pudding starts with selecting the perfect bread. I’ve found that slightly stale brioche, challah, or French bread works wonderfully because they have structure yet remain tender when soaked. Avoid pre-sliced sandwich bread which can become too mushy. Allow your bread to sit out uncovered for several hours or overnight—this drying process helps it absorb the custard without dissolving completely. For extra texture, leave some bread cubes larger than others. This simple step creates those delightful contrasts between crispy edges and soft centers that make bread pudding truly special.

    Perfecting the Custard Mixture

    The secret to a velvety bread pudding with vanilla sauce lies in the custard quality. Whisk your eggs thoroughly before adding other ingredients to ensure even distribution. For richness, I use a combination of whole milk and heavy cream rather than just milk alone. Let the bread soak in the custard mixture for at least 30 minutes—this allows proper absorption without making it soggy. Don’t rush this step! For extra flavor dimension, try adding a splash of bourbon or rum to the custard. When baking, use a water bath to maintain gentle, even heat that prevents curdling and creates that perfect silky texture.

    Serving Ideas & Creative Variations

    Seasonal Adaptations

    Bread pudding with vanilla sauce can be beautifully adapted to showcase seasonal ingredients throughout the year. In summer, fold in fresh berries or peaches before baking for bursts of fruity brightness. Fall calls for diced apples, pears, and extra cinnamon or a drizzle of caramel. Winter versions shine with cranberries and orange zest, creating festive holiday flavors. For spring, try adding lemon zest and blueberries for a refreshing twist. The vanilla sauce remains the perfect complement regardless of season, though you can infuse it with complementary flavors—a touch of maple in fall or citrus in spring—to enhance your seasonal theme.

    Elegant Presentation Ideas

    Elevate your bread pudding with vanilla sauce through thoughtful presentation. Instead of serving family-style, try individual ramekins for an elegant dinner party approach—these also create more of those coveted crispy edges! Drizzle the vanilla sauce in a decorative pattern rather than simply pouring it over. For special occasions, place a quenelle of lightly sweetened whipped cream alongside, perhaps with a dusting of cinnamon or grated nutmeg. Fresh mint leaves or edible flowers add beautiful color contrast. Consider serving on warmed plates to keep everything at the perfect temperature longer, allowing guests to fully appreciate the interplay of warm pudding and silky sauce.

    Storage & Troubleshooting Guide

    Proper Storage Techniques

    To maintain the quality of your bread pudding with vanilla sauce, proper storage is essential. Store leftover bread pudding in an airtight container in the refrigerator for up to 3 days. The vanilla sauce should be refrigerated separately to prevent the pudding from becoming soggy. When reheating individual portions, microwave on medium power with a damp paper towel covering to restore moisture. For larger portions, cover with foil and warm in a 325°F oven until heated through. The vanilla sauce may thicken when chilled—simply warm gently on the stovetop while whisking, adding a splash of cream if needed to restore its silky consistency.

    Troubleshooting Common Issues

    Even experienced bakers occasionally encounter challenges with bread pudding with vanilla sauce. If your pudding seems too dry, your bread likely absorbed too much liquid before baking—next time, reduce soaking time or add more custard. For soggy pudding, your bread may have been too fresh or you may need to extend baking time. If the vanilla sauce separates or becomes grainy, it was likely overheated—always warm gently and whisk continuously. Should the sauce be too thin, simmer a few minutes longer; if too thick, add a splash of cream until you reach desired consistency. Remember that bread pudding should have a soft interior—don’t mistake this proper texture for underbaking!

    Frequently Asked Questions

    Can I make bread pudding with vanilla sauce ahead of time?

    Yes! Prepare the bread pudding up to 24 hours ahead and refrigerate unbaked. The vanilla sauce can be made 3 days in advance and gently reheated. This makes it perfect for entertaining when you want to minimize day-of preparation.

    What’s the best bread for bread pudding with vanilla sauce?

    Brioche, challah, or French bread work best. The slightly firmer texture and rich flavor create the ideal foundation. Day-old or slightly stale bread is preferable as it better absorbs the custard without falling apart.

    Can I freeze leftover bread pudding?

    Absolutely! Wrap individual portions tightly in plastic wrap, then foil, and freeze for up to 3 months. Thaw overnight in the refrigerator and reheat gently. Freeze the vanilla sauce separately in an airtight container.

    How do I know when bread pudding is done baking?

    The pudding is done when the center reaches 160°F or when a knife inserted in the center comes out mostly clean with a few moist crumbs. The top should be golden brown and slightly puffed.

    Can I make this recipe dairy-free?

    Yes, substitute plant-based milk (almond or oat work well) and coconut cream for the heavy cream. For the vanilla sauce, use coconut cream and vegan butter for a dairy-free version that maintains the luxurious texture.

    Final Thoughts

    There’s something deeply comforting about a warm serving of bread pudding with vanilla sauce that connects us to generations past. I find myself returning to this recipe whenever I need that perfect balance of nostalgia and indulgence. The way it transforms humble ingredients into something spectacular reminds me that the best things in life often come from simplicity. Whether you’re making it for a special occasion or simply because you deserve a treat, this dessert never disappoints. Find more delicious comfort food recipes on Pinterest and discover your next favorite indulgence.

  • California Turkey Club Wraps: Irresistibly Fresh & Perfectly Packed!

    California Turkey Club Wraps: Irresistibly Fresh & Perfectly Packed!

    California Turkey Club Wraps: Irresistibly Fresh & Perfectly Packed!

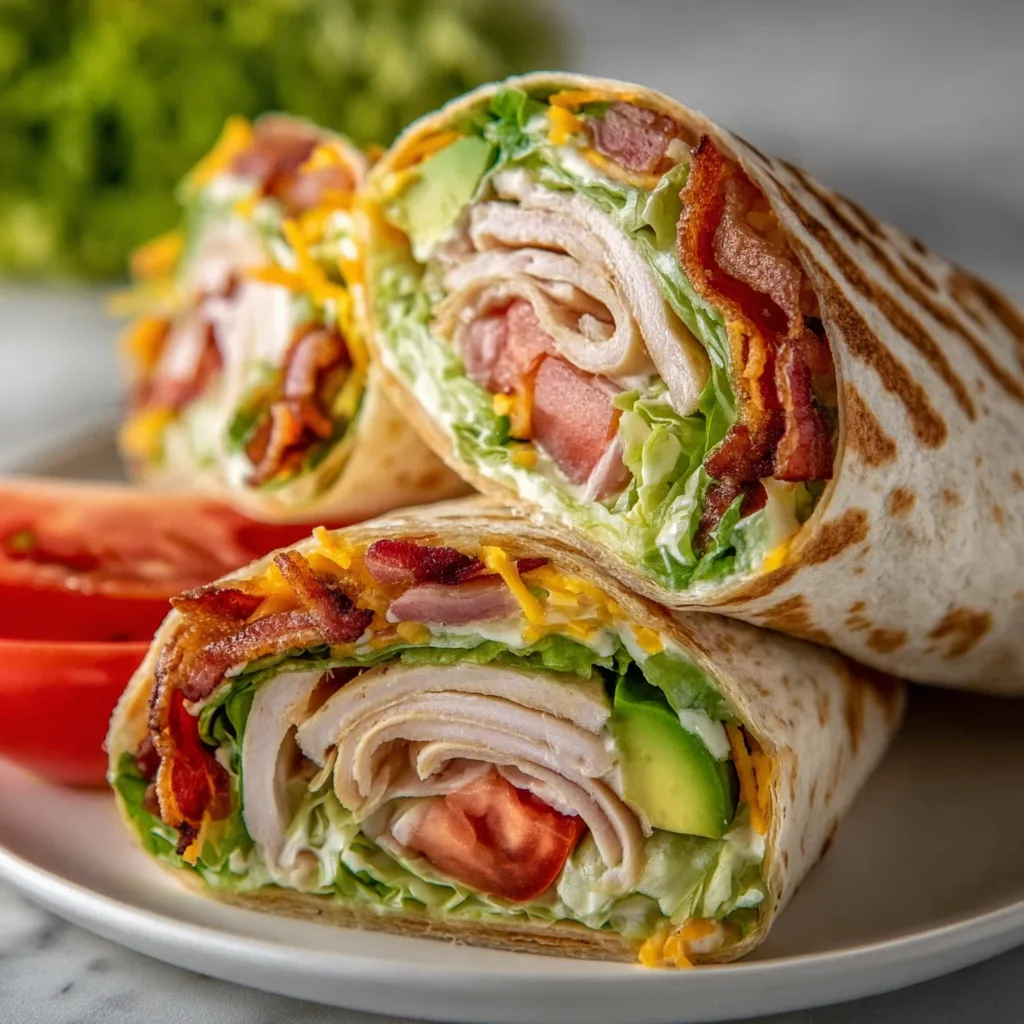
    California Turkey Club Wraps are my latest obsession, combining crisp bacon, juicy turkey, and creamy avocado in a portable package that’s perfect for lunch on the go. Every bite delivers that classic club sandwich experience without the fuss of traditional bread. I first made these wraps during a particularly hectic week when I needed something substantial that wouldn’t leave crumbs all over my keyboard during working lunches. The combination of flavors and textures instantly won me over, and I’ve been perfecting my California Turkey Club Wraps ever since. Trust me, these wraps will revolutionize your lunch routine just like they did mine.

    Recipe

    Why You’ll Love These California Turkey Club Wraps

    Perfect Balance of Flavors and Textures

    There’s something magical about the way these California Turkey Club Wraps combine savory and fresh elements. The smoky bacon plays against the cool, creamy avocado while the roasted turkey brings that satisfying protein punch. I love how the crisp lettuce adds a refreshing crunch that contrasts beautifully with the soft tortilla. The tanginess of the mayo-based sauce ties everything together, creating that perfect umami experience that keeps me coming back for more. These wraps hit all the right notes without being complicated or fussy.

    Quick and Customizable Meal Solution

    What makes California Turkey Club Wraps truly special is how adaptable they are to your preferences and schedule. You can prep components ahead of time for lightning-fast assembly when hunger strikes. Running late? Grab your wrap and go! Need to feed a crowd? Set up a DIY wrap station and let everyone customize their own. I’ve made these with leftover Thanksgiving turkey, deli slices, and even rotisserie chicken in a pinch. The versatility means you’ll never get bored, and you can adjust ingredients based on what’s in your fridge.

    Essential Tips & Tricks

    Mastering the Perfect Wrap Technique

    The secret to exceptional California Turkey Club Wraps lies in the assembly method. Start with a slightly warmed tortilla (10 seconds in the microwave works wonders) to make it more pliable and prevent tearing. Layer ingredients in the center, leaving a one-inch border all around. Apply spreads directly to the tortilla rather than on top of vegetables to prevent slippage. When rolling, fold in the sides first, then roll from the bottom up, keeping everything tight. For the cleanest cut, let the wrapped tortilla rest for 2-3 minutes before slicing.

    Ingredient Selection and Preparation

    Choosing the right components elevates your California Turkey Club Wraps from good to unforgettable. Opt for thick-cut bacon cooked until perfectly crisp – no soggy bacon allowed! For turkey, freshly roasted and sliced is divine, but quality deli meat works beautifully too. Avocados should be ripe but firm (gently squeeze – it should yield slightly without being mushy). Pre-shredded lettuce saves time, but nothing beats the freshness of just-torn romaine or butter lettuce. These wraps pair wonderfully with crispy zucchini rings for a complete meal.

    Serving Ideas & Creative Variations

    Presentation and Pairing Suggestions

    Transform your California Turkey Club Wraps into an impressive meal with thoughtful presentation. Cut wraps diagonally and arrange attractively on a platter with colorful garnishes like cherry tomatoes or pickle spears. For a picnic, secure each wrap with parchment paper and twine for an Instagram-worthy touch. These wraps pair beautifully with light sides like cucumber salad, potato chips, or fresh fruit. For dinner, serve alongside a warm cup of tomato soup or creamy cauliflower carrot soup for a satisfying meal that feels special without hours of preparation.

    Exciting Flavor Variations

    While classic California Turkey Club Wraps are divine, experimenting with variations keeps lunch exciting. Try a Southwest twist by adding pepper jack cheese and chipotle mayo. For Mediterranean flair, incorporate feta, olives, and tzatziki sauce instead of traditional mayo. Craving something lighter? Swap the tortilla for large lettuce leaves for a low-carb option. My personal favorite variation uses cranberry sauce instead of mayo during the holiday season – the sweet-tart flavor against the savory turkey is absolutely magical. Don’t be afraid to play with different spreads, cheeses, and greens!

    Storage & Troubleshooting Guide

    Proper Storage for Maximum Freshness

    Keeping your California Turkey Club Wraps fresh requires proper storage techniques. For make-ahead wraps, avoid soggy tortillas by placing a layer of lettuce between the tortilla and wet ingredients like tomatoes or spreads. Wrap tightly in parchment paper first, then aluminum foil, and refrigerate for up to 24 hours. For meal prep, store components separately: pre-cook bacon, slice vegetables, and prepare spreads in individual containers. This approach keeps everything fresh and allows for quick assembly throughout the week, maintaining that perfect texture contrast that makes these wraps so satisfying.

    Solving Common Wrap Problems

    Even experienced cooks occasionally struggle with California Turkey Club Wraps. If your wrap keeps unraveling, you’re likely overfilling or not tucking the sides properly before rolling. The solution? Use slightly less filling and practice the fold-and-roll technique. Dealing with torn tortillas? Warm them slightly or choose a higher quality, fresher brand. If ingredients slide around during eating, try spreading a thin layer of cream cheese on the tortilla first – it acts as “glue.” For wraps that become soggy in lunchboxes, pack wet ingredients separately in small containers and assemble just before eating.

    Frequently Asked Questions

    Can I make California Turkey Club Wraps ahead of time?

    Yes! Assemble up to 24 hours in advance, but place a barrier of lettuce between wet ingredients and the tortilla. Wrap tightly in parchment paper then foil for best results.

    What’s the best tortilla to use for these wraps?

    Large (10-12 inch) flour tortillas work best. For a healthier option, try whole wheat, spinach, or low-carb varieties, but ensure they’re fresh and pliable.

    How can I make these wraps vegetarian?

    Replace turkey with smoked tempeh, plant-based deli slices, or extra avocado. Keep the bacon flavor by using coconut bacon or smoked paprika in your spread.

    What sauce works best for California Turkey Club Wraps?

    Classic mayo is traditional, but try avocado mayo, chipotle aioli, or ranch dressing. For tanginess, mix mayo with Dijon mustard and a squeeze of lemon.

    Can I use leftover Thanksgiving turkey in these wraps?

    Absolutely! Leftover Thanksgiving turkey works beautifully in these wraps – just slice or shred it thinly and warm slightly before assembling.

    Final Thoughts

    California Turkey Club Wraps have become my go-to solution for satisfying, portable meals that don’t sacrifice flavor for convenience. The beauty lies in their simplicity and adaptability—perfect for busy weekdays, casual gatherings, or packed lunches. I love how they transform basic ingredients into something that feels special, yet requires minimal effort. Whether you follow my classic version or create your own signature variation, these wraps deliver that perfect balance of protein, freshness, and comfort. For more wrap inspiration, check out our Pinterest board and elevate your lunch game with these California-inspired delights.

  • Red Velvet Brownies with Chocolate Frosting That Will Blow Your Mind!

    Red Velvet Brownies with Chocolate Frosting That Will Blow Your Mind!

    Red Velvet Brownies with Chocolate Frosting That Will Blow Your Mind!

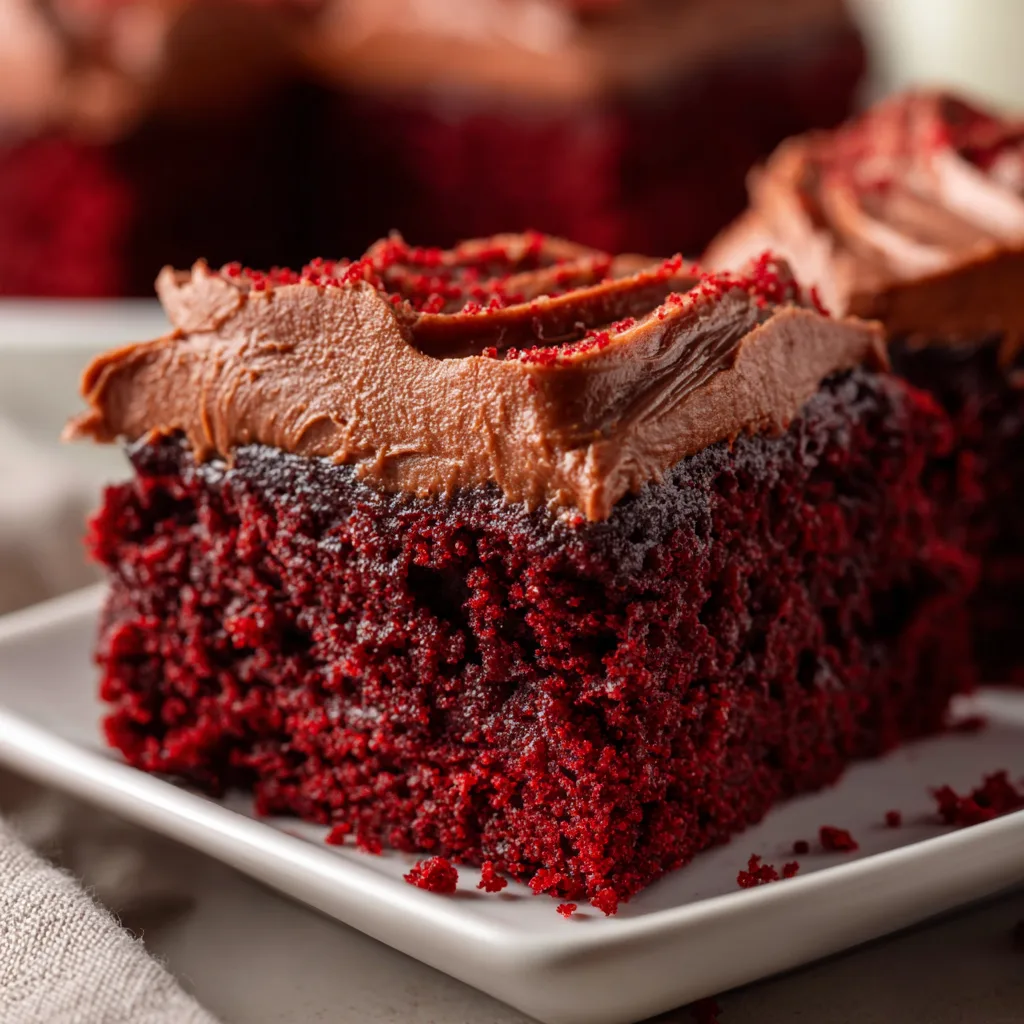
    Red Velvet Brownies with Chocolate Frosting have become my absolute obsession this winter! There’s something magical about that perfect balance of cocoa-kissed crimson batter transforming into fudgy squares topped with silky chocolate frosting. Every time I make these for gatherings, they vanish within minutes—leaving nothing but crumbs and requests for the recipe. The vibrant color against that decadent frosting creates a showstopping treat that’s both visually stunning and irresistibly delicious. If you’ve been searching for a dessert that combines the classic appeal of red velvet cake with the fudgy texture of your favorite brownie, this recipe is about to become your new favorite.

    Recipe

    Why You’ll Love These Red Velvet Brownies with Chocolate Frosting

    Perfect Texture & Flavor Combination

    The magic moment happens when you bite into these brownies—that perfect balance between cake-like structure and fudgy interior that melts on your tongue. The subtle cocoa notes in the red velvet batter provide just enough chocolate flavor without overwhelming, while the vibrant color makes them instantly recognizable. I’ve tested countless versions to get the right ratio of buttermilk to cocoa powder, creating that signature red velvet tang that pairs perfectly with the rich chocolate frosting. These aren’t just brownies; they’re an experience of contrasting textures and complementary flavors that dance together beautifully.

    Impressive Yet Simple to Make

    Don’t let their elegant appearance fool you—these red velvet brownies with chocolate frosting are surprisingly straightforward to prepare! The batter comes together in just one bowl (fewer dishes is always a win in my kitchen), and the frosting requires minimal effort for maximum impact. I love that these brownies elevate any occasion while requiring basic pantry ingredients and standard baking equipment. Even my teenage niece mastered these on her first try! The dramatic color contrast between the ruby-red base and glossy chocolate topping creates a professional-looking dessert that will have everyone convinced you spent hours in the kitchen.

    Essential Tips & Tricks

    Achieving the Perfect Red Velvet Color

    The signature red hue is crucial for authentic red velvet brownies with chocolate frosting. My secret? Use gel food coloring rather than liquid for more intense color without affecting the batter consistency. Start with 1-2 teaspoons and adjust as needed—different brands vary in potency. Natural alternatives like beet powder work too, though the color will be more subtle. The reaction between cocoa powder, vinegar, and buttermilk enhances the red tones, so don’t skip these ingredients! Room temperature ingredients blend more evenly, creating that consistent ruby color throughout your brownies that makes them instantly recognizable.

    Frosting Techniques for Bakery-Quality Results

    For that bakery-perfect finish on your red velvet brownies with chocolate frosting, patience is key! Allow your brownies to cool completely before frosting—even a hint of warmth will cause the frosting to melt. I like to refrigerate my brownies for 30 minutes before frosting for cleaner cuts. For ultra-smooth frosting, warm your offset spatula under hot water and dry it between strokes. Create decorative swirls by using the back of a spoon to make gentle peaks, or keep it sleek and smooth for a modern look. A light dusting of cocoa powder or red velvet cake crumbs on top adds a professional finishing touch.

    Serving Ideas & Creative Variations

    Elegant Presentation Suggestions

    Transform these red velvet brownies with chocolate frosting into showstopping desserts by cutting them into precise squares and placing each on a small dessert plate with a light dusting of powdered sugar. For dinner parties, add a quenelle of vanilla bean ice cream and a few fresh raspberries alongside. I love creating a dessert board with these brownies as the centerpiece, surrounded by chocolate-dipped strawberries and cinnamon sugar tortilla chips for textural contrast. For gifting, stack them in a clear box tied with ribbon, separating layers with parchment paper to preserve that perfect frosting. The vibrant color makes them especially festive for Valentine’s Day or Christmas gatherings.

    Flavor Twists on the Classic Recipe

    While traditional red velvet brownies with chocolate frosting are divine, experimenting with variations keeps things exciting! My favorite twist is adding 1/2 cup of mini chocolate chips to the batter for pockets of melty chocolate throughout. For a tangy contrast, swap the chocolate frosting for cream cheese frosting with a hint of lemon zest. Coffee lovers can add 1 tablespoon of espresso powder to the frosting for a mocha variation. White chocolate chips folded into the batter create beautiful contrast against the red. For special occasions, try layering cheesecake batter between two red velvet layers before baking for an indulgent marbled effect.

    Storage & Troubleshooting Guide

    Keeping Your Brownies Fresh

    The moisture retention in red velvet brownies with chocolate frosting makes them perfect for make-ahead treats. Store them in an airtight container at room temperature for up to 3 days—the frosting actually helps seal in moisture! For longer storage, refrigerate for up to a week, but always bring to room temperature before serving to restore that fudgy texture. These brownies freeze beautifully for up to 3 months; just separate layers with parchment paper and thaw overnight in the refrigerator. I like to individually wrap portions for grab-and-go treats that defrost in about an hour at room temperature.

    Fixing Common Baking Issues

    If your red velvet brownies with chocolate frosting aren’t turning out perfectly, don’t worry—simple adjustments can help! For overly cakey brownies, reduce the flour by 2 tablespoons next time and don’t overmix the batter. Too fudgy? Add an extra egg for more structure. If the color isn’t vibrant enough, your cocoa powder might be too dark—try using a regular (not Dutch-processed) variety. Cracked tops usually indicate too high an oven temperature; consider getting an oven thermometer to check accuracy. For frosting that’s too thick, add a splash of milk; too thin, incorporate more powdered sugar until you reach that perfect spreadable consistency.

    Frequently Asked Questions

    Can I make red velvet brownies without food coloring?

    Yes! Use 2 tablespoons of beet powder instead of food coloring. The color will be more burgundy than bright red, but you’ll get a natural version with the same delicious flavor and no artificial ingredients.

    How do I know when my red velvet brownies with chocolate frosting are done baking?

    A toothpick inserted in the center should come out with a few moist crumbs (not wet batter). The edges will be set while the center remains slightly soft. Don’t overbake or you’ll lose the fudgy texture.

    Can I make these brownies gluten-free?

    Absolutely! Replace the all-purpose flour with a 1:1 gluten-free baking blend. Add 1/4 teaspoon xanthan gum if your blend doesn’t include it for the best texture.

    Why did my frosting turn grainy?

    Grainy frosting usually results from adding powdered sugar to warm butter. Ensure your butter is at room temperature (not melted) and sift your powdered sugar before incorporating it slowly.

    Can I prepare these brownies in advance for a party?

    Definitely! Make them 1-2 days ahead and store in an airtight container. The flavor actually improves overnight as the ingredients meld together.

    Final Thoughts

    These red velvet brownies with chocolate frosting have become my signature dessert for good reason—they combine visual drama with incredible flavor in every bite. The contrast between that vibrant ruby base and rich chocolate topping creates something truly special that stands out on any dessert table. Whether you’re baking for a holiday gathering, special celebration, or simply treating yourself on a cozy evening, these brownies deliver that perfect balance of indulgence and elegance. Find more inspiration for your baking adventures on my Pinterest collection where I share new recipe ideas weekly!

  • Sticky Honey Garlic Steak & Rotini: Irresistibly Delicious!

    Sticky Honey Garlic Steak & Rotini: Irresistibly Delicious!

    Sticky Honey Garlic Steak & Rotini: Irresistibly Delicious!

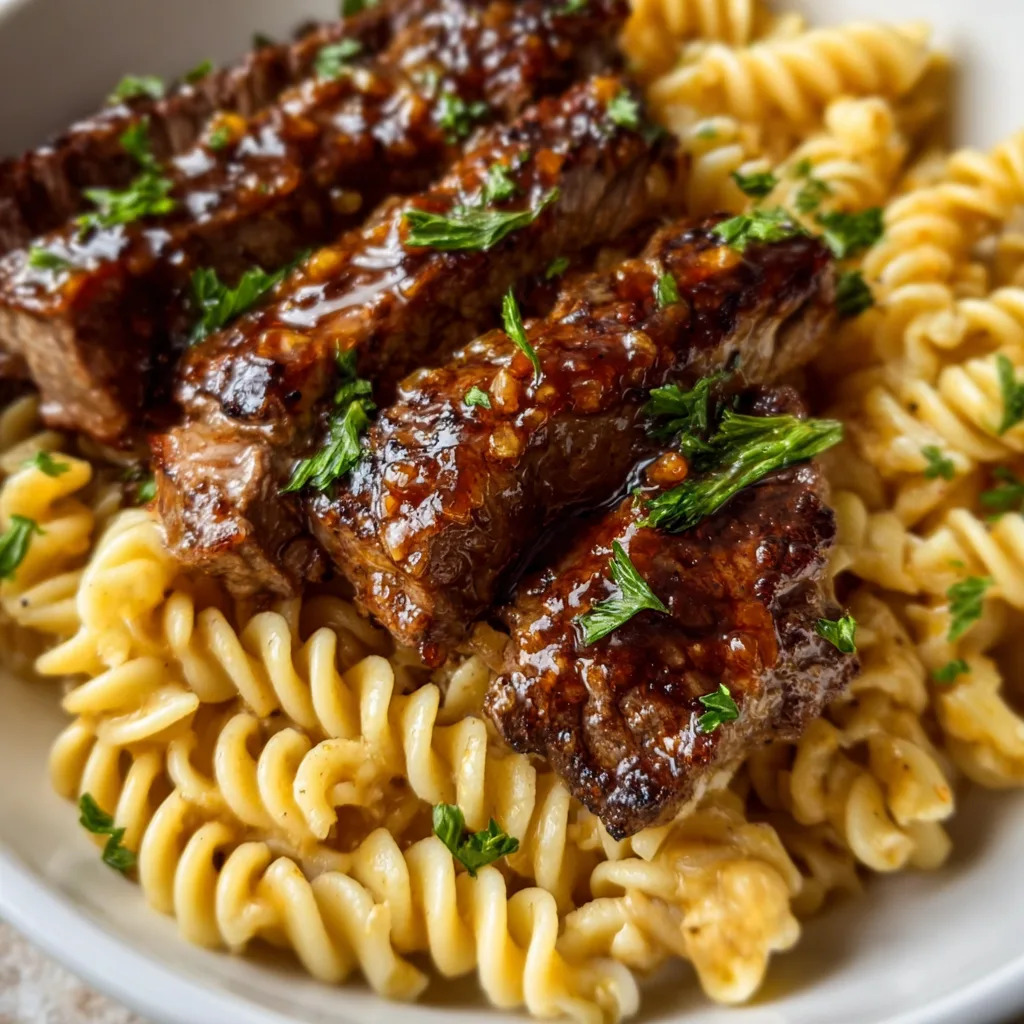
    This Sticky Honey Garlic Steak and Rotini is the dinner revelation I’ve been waiting to share with you! The tender strips of marinated steak glazed in that irresistible sweet-savory sauce cling perfectly to al dente rotini pasta, creating the ultimate comfort food experience. I first created this recipe on a rainy Sunday when my family was craving something cozy yet special. The kitchen filled with that intoxicating aroma of caramelizing garlic and honey, and I knew I’d stumbled upon something magical. It’s now become our go-to for those nights when we want restaurant quality without leaving home, just like my Creamy Garlic Shrimp over Mashed Potatoes.

    Recipe

    Why You’ll Love This Sticky Honey Garlic Steak and Rotini

    Perfect Balance of Flavors

    The magic of this Sticky Honey Garlic Steak and Rotini lies in its impeccable flavor harmony. The honey creates a glossy, sweet coating that caramelizes beautifully around the edges of the steak, while the garlic provides that essential savory depth. I’ve carefully balanced soy sauce for umami, a touch of rice vinegar for tang, and just enough red pepper flakes to wake up your taste buds without overwhelming them. When these flavors mingle with the pasta, each bite delivers that perfect sweet-savory-spicy combination that makes your eyes close involuntarily with pleasure. It’s comfort food elevated to new heights.

    Quick Yet Impressive

    Despite its gourmet appearance, this Sticky Honey Garlic Steak and Rotini comes together in under 30 minutes! I’ve streamlined the process so you can marinate the steak while the pasta cooks, then quickly sear everything together in one pan. The sauce thickens to that perfect clingy consistency in minutes, making this ideal for busy weeknights when you’re craving something special. My husband actually thought I’d spent hours in the kitchen the first time I made this! The efficiency-to-impressiveness ratio is off the charts, making this recipe perfect for last-minute dinner guests or treating yourself after a long day.

    Essential Tips & Tricks

    Steak Selection & Preparation

    For truly exceptional Sticky Honey Garlic Steak and Rotini, start with the right cut. I recommend flank or sirloin steak sliced very thinly against the grain for maximum tenderness. A chef’s trick: freeze the steak for 15 minutes before slicing to make those paper-thin cuts easier. Don’t skip the marinating step—even 15 minutes makes a difference in flavor penetration. Pat the steak dry before searing to achieve that beautiful caramelization instead of steaming. The steak should hit a hot pan for just 1-2 minutes per side—overcooking will toughen it. For more protein perfection, check out my Garlic Butter Steak Bites and Shrimp recipe.

    Sauce Secrets

    The sticky sauce is the crown jewel of this Sticky Honey Garlic Steak and Rotini, so don’t rush this step! Use real honey (not substitute) for that authentic stickiness. Bloom your minced garlic in butter first until fragrant but not brown—this releases the aromatic oils without bitterness. When adding liquid ingredients, let each one reduce slightly before adding the next. The sauce should coat the back of a spoon before adding the pasta and steak back in. For extra glossiness, finish with a cold butter swirl at the end. This creates that restaurant-quality sheen that makes everyone say “wow” at first glance.

    Serving Ideas & Creative Variations

    Perfect Pairings

    Sticky Honey Garlic Steak and Rotini shines brightest with simple, fresh accompaniments that balance its rich flavors. I love serving it with a bright side salad dressed with rice vinegar and sesame oil to cut through the sweetness. Steamed broccoli or asparagus tucked around the edge of the plate adds color and nutritional balance. For a complete Asian-inspired feast, start with my Crispy Shrimp Toast as an appetizer. When plating, try a sprinkle of toasted sesame seeds and thinly sliced green onions for visual appeal. A chilled Riesling or unfiltered sake makes this meal feel like a special occasion, even on a Tuesday.

    Delicious Twists

    While the classic version is heavenly, this Sticky Honey Garlic Steak and Rotini welcomes creative adaptations! For a spicier kick, add sriracha or sambal oelek to the sauce. Craving more veggies? Toss in snow peas, bell peppers, or mushrooms during the final minute of cooking. The pasta is flexible too—try it with whole wheat rotini for extra nuttiness or switch to rice noodles for a gluten-free option. For a budget-friendly version, substitute chicken thighs or even firm tofu for the steak. My family loves it with a handful of baby spinach stirred in at the last minute, wilting just enough from the residual heat.

    Storage & Troubleshooting Guide

    Keeping It Fresh

    Sticky Honey Garlic Steak and Rotini maintains its delicious flavor for up to three days when stored properly. Transfer leftovers to an airtight container once completely cooled—this prevents condensation that can make the pasta soggy. When reheating, add a splash of water or broth to revive the sauce, as the pasta will have absorbed some moisture overnight. For best results, reheat gently in a skillet over medium-low heat rather than microwaving, which can toughen the steak. If you’re meal prepping, consider keeping the pasta and steak mixture separate until serving time to maintain optimal textures.

    Fixing Common Issues

    Even experienced cooks occasionally encounter challenges with Sticky Honey Garlic Steak and Rotini. If your sauce isn’t thickening properly, try a slurry of 1 teaspoon cornstarch mixed with 1 tablespoon cold water. For sauce that’s too sweet, balance it with an extra splash of soy sauce or rice vinegar. If your steak turns out tough, it’s likely either sliced with rather than against the grain or overcooked—next time, aim for thinner slices and a quicker sear. Pasta clumping? Be sure to stir it occasionally while cooking and don’t rinse after draining (the starch helps the sauce adhere).

    Frequently Asked Questions

    Can I make Sticky Honey Garlic Steak and Rotini ahead of time?

    Yes, but for best results, prepare the components separately. Cook the pasta al dente and the steak medium-rare, then refrigerate. Combine and reheat with a splash of broth when ready to serve.

    What’s the best cut of beef for this recipe?

    Flank, sirloin, or ribeye work beautifully. The key is slicing thinly against the grain for tender bites that absorb the sticky honey garlic sauce.

    Can I substitute the rotini with another pasta?

    Absolutely! Any medium pasta shape with ridges or curves works well because they capture the Sticky Honey Garlic Steak sauce effectively. Penne, fusilli, or farfalle are excellent alternatives.

    Is there a way to make this recipe gluten-free?

    Yes! Use gluten-free rotini and substitute tamari for soy sauce. Double-check your other condiments for hidden gluten ingredients.

    How spicy is this dish?

    The standard recipe has a mild warmth. Adjust red pepper flakes to your preference—½ teaspoon for gentle heat, 1-2 teaspoons for significant spice.

    Final Thoughts

    This Sticky Honey Garlic Steak and Rotini has become my secret weapon for those nights when I want to impress without stress. The way the glossy sauce clings to each piece of pasta and tender steak creates a dish that feels indulgent yet comes together with remarkable ease. I’ve served it for casual family dinners and special celebrations alike, always to rave reviews. There’s something magical about the balance of sweet honey, savory garlic, and umami-rich steak that makes this recipe truly unforgettable. Find more inspiration for your next meal on my Pinterest board!