Blog

  • Mediterranean Beef Pita Pockets: Irresistibly Delicious & Easy!

    Mediterranean Beef Pita Pockets: Irresistibly Delicious & Easy!

    I didn’t expect these Mediterranean Beef Pita Pockets to become my family’s new obsession, but the first time I served them, they vanished so fast I barely got a second bite! There’s something truly special about the spiced beef mingling with fresh, vibrant toppings, all tucked into a warm, fluffy pita. It's that kind of meal that makes you close your eyes and savor every single flavor, instantly transporting you to sun-drenched shores. Trust me, you'll crave this again.

    Why You'll Love This Mediterranean Beef Pita Pockets

    An Irresistible Flavor Journey

    These pita pockets are a symphony of textures and tastes, making them an instant hit for anyone craving something beyond the ordinary. The perfectly seasoned ground beef, infused with aromatic Mediterranean spices like cumin, oregano, and paprika, creates a deeply savory foundation. When combined with crisp vegetables, tangy feta, and a drizzle of creamy tzatziki, each bite is bursting with freshness. It’s a complete meal that feels gourmet yet comes together with surprising ease. This is seriously addictive.

    Quick, Easy, and Famously Delicious

    Life gets busy, but delicious meals shouldn't be a compromise. This recipe for Mediterranean Beef Pita Pockets is incredibly straightforward, perfect for a weeknight dinner when you need something satisfying without a fuss. From browning the beef to assembling the pockets, it’s a process that’s both engaging and rewarding. Plus, the vibrant colors and enticing aromas make it a showstopper, even if it took you less than 30 minutes to prepare. Everyone will ask you for this recipe!

    Essential Tips & Tricks

    Perfecting Your Spiced Beef Filling

    The key to truly crave-worthy Mediterranean Beef Pita Pockets lies in the beef seasoning. Don't be shy with the spices! Toasting your cumin and coriander seeds lightly before grinding them can unlock even more intense flavor, if you have whole spices on hand. Ensure your ground beef is fully browned and crumbled finely for optimal texture. A little trick: drain any excess fat after browning to prevent soggy pita, ensuring that delicious, savory richness remains concentrated in the meat.

    Choosing and Preparing Your Pita Bread

    Not all pita bread is created equal, and the right choice makes all the difference for these Mediterranean Beef Pita Pockets. Look for soft, thick pita pockets that are easy to open without tearing. Warming them gently in a dry skillet or microwave for a few seconds before filling makes them more pliable and enhances their texture. This also helps them absorb the delicious beef juices without becoming overly saturated. A perfectly warmed pita is the ideal vessel for this flavorful feast.

    Serving Ideas & Variations

    Creative Topping Combos

    While the classic cucumber, tomato, and feta combination for Mediterranean Beef Pita Pockets is always a winner, don't hesitate to get creative with your toppings! Consider adding pickled red onions for a tangy crunch, Kalamata olives for briny depth, or a sprinkle of fresh mint or dill for an aromatic lift. A dollop of hummus or a spicy harissa drizzle can also elevate the experience. For an extra layer of flavor, try a squeeze of fresh lemon juice over the finished pockets.

    Sides That Complete the Meal

    To make your Mediterranean Beef Pita Pockets a truly unforgettable meal, pair them with complementary sides. A simple crisp green salad with a lemon vinaigrette is always a fresh choice, or you could opt for a vibrant https://recipesdarleen.com/mediterranean-lentil-salad/. If you're feeling adventurous, some fluffy couscous or a side of crispy roasted potatoes would be absolutely divine. Don't forget a generous bowl of extra tzatziki for dipping – it's practically mandatory!

    Storage & Troubleshooting

    Keeping Leftovers Fresh

    If you happen to have any leftover Mediterranean Beef Pita Pockets – a rare occurrence in my house! – it's best to store the components separately. Keep the spiced beef in an airtight container in the refrigerator for up to 3-4 days. Store the fresh toppings like chopped cucumber and tomato separately to maintain their crispness. The pita bread can be kept at room temperature or refrigerated. This way, you can assemble fresh, delicious pockets whenever a craving strikes, maintaining optimal taste and texture.

    Preventing Soggy Pitas

    The biggest challenge with any stuffed pita is preventing it from becoming soggy. The best way to avoid this with your Mediterranean Beef Pita Pockets is to ensure your beef filling isn't overly wet. After cooking, make sure to drain any excess liquid or fat from the ground beef. Additionally, assemble the pockets right before serving. If you're prepping ahead, keep the beef warm and the toppings chilled, then stuff the warmed pita just before eating. This guarantees a perfectly textured bite every time.

    Frequently Asked Questions

    Can I use a different type of meat?

    Absolutely! Ground lamb or a mix of beef and lamb would be fantastic for these pockets, offering a slightly richer, more authentic Mediterranean flavor. You could also use ground chicken or turkey.

    What if I don't have all the spices?

    Don't worry! While the full spice blend is best, you can still make delicious Mediterranean Beef Pita Pockets. Focus on cumin and oregano if you're short, and consider a dash of garlic powder for depth.

    Can these be made ahead of time?

    You can prepare the spiced beef filling and chop all the vegetables a day or two in advance. Store them separately in airtight containers. Assemble the Mediterranean Beef Pita Pockets just before serving for the best experience.

    Is there a dairy-free option for the sauce?

    Yes! For a dairy-free alternative to tzatziki, you can blend silken tofu with cucumber, garlic, lemon juice, and fresh dill. It provides a similar creamy, tangy profile.

    What kind of pita bread is best?

    Opt for thicker, softer pita breads that are easy to open into a pocket. Whole wheat pitas also work well and add a nutty flavor. Avoid thin, crispy varieties that might tear.

    Final Thoughts

    Making these Mediterranean Beef Pita Pockets is more than just cooking; it's an invitation to a vibrant culinary experience that’s both comforting and exciting. The blend of savory, spiced beef with crisp, fresh vegetables and creamy tzatziki is simply unmatched. It’s a meal that brings joy to the table, perfect for sharing with loved ones or savoring on a cozy night in. I love how effortlessly this dish combines wholesome ingredients into something truly spectacular. For more delicious inspiration, make sure to check out my collection of recipes at Recipes Darleen. This recipe truly captures the essence of fresh, flavorful home cooking. You'll be making these again and again.
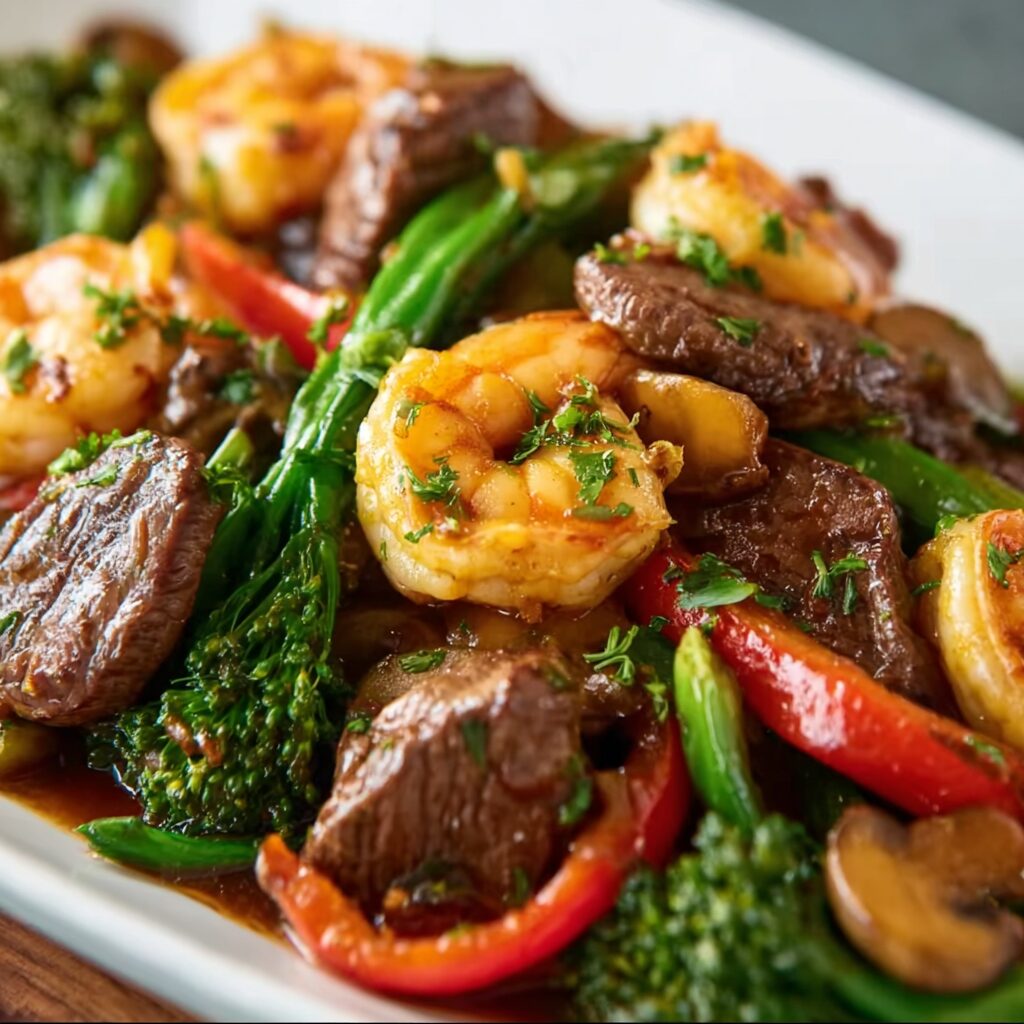

  • Protein-Rich Steak & Shrimp Stir-Fry: Irresistibly Healthy Feast!

    Protein-Rich Steak & Shrimp Stir-Fry: Irresistibly Healthy Feast!

    The first time I whipped up this Protein-Rich Steak and Shrimp Stir-Fry, I honestly didn't expect the reaction. My husband, who usually takes his time, practically inhaled his plate, and then immediately asked if there was more. It was gone before I could even sit down properly! This dish isn't just a meal; it’s a vibrant explosion of flavors and textures, making it an absolute weeknight hero that you'll crave again and again. It truly brings that takeout experience right to your kitchen, but even better.

    Why You'll Love This Protein-Rich Steak and Shrimp Stir-Fry

    A Flavor Explosion That Satisfies Every Craving

    This isn't just any stir-fry; it's a symphony of savory, sweet, and umami notes that dance on your palate. Imagine tender, seared steak strips mingling with succulent, juicy shrimp, all coated in a rich, glossy sauce. The crisp-tender vegetables add a delightful crunch, creating a textural masterpiece that is truly irresistible. It’s the kind of comforting, hearty meal that makes you feel nourished and completely satisfied, dispelling any thought of bland, boring healthy eating.

    Effortless Elegance for Busy Weeknights

    Life gets hectic, but that doesn't mean your meals have to suffer. This Protein-Rich Steak and Shrimp Stir-Fry comes together in a flash, making it perfect for those evenings when you need something quick, yet impressive. With minimal prep and a single wok or large skillet, you can achieve restaurant-quality results in under 30 minutes. It’s a fantastic way to get a balanced, protein-packed dinner on the table without sacrificing precious time. This is dangerously addictive.

    Essential Tips & Tricks

    Mastering the Sear for Perfect Protein

    Achieving that beautiful, caramelized crust on your steak and shrimp is key to unlocking maximum flavor. Ensure your wok or skillet is smoking hot before adding your protein. Cook the steak in batches to avoid overcrowding the pan, allowing each piece to develop a deep brown sear. For the shrimp, cook them quickly until they just turn pink; overcooking will make them rubbery. A little patience here pays off immensely, transforming good ingredients into extraordinary bites.

    The Secret to a Silky Stir-Fry Sauce

    The sauce is the heart of any great stir-fry, and ours is no exception. Whisk all your sauce ingredients together thoroughly before you start cooking, ensuring there are no lumps. Add it to the pan only after your proteins and vegetables are cooked, allowing it to thicken and coat everything beautifully. The cornstarch in the sauce is your secret weapon for that desirable glossy finish and perfect consistency. Trust me, you'll want to lick the pan clean.

    Serving Ideas & Variations

    Classic Pairings and Creative Twists

    While this Protein-Rich Steak and Shrimp Stir-Fry is fantastic on its own, pairing it with a simple side of fluffy white or brown rice is a classic choice that soaks up all that incredible sauce. For a lighter option, consider serving it over cauliflower rice or even a bed of fresh mixed greens. If you're feeling adventurous, try adding some toasted sesame seeds, chopped peanuts, or a drizzle of sriracha for an extra kick. This dish is incredibly versatile, adapting to your mood!

    Elevate Your Stir-Fry with Exciting Add-Ins

    Don't be afraid to get creative with your vegetables and other additions. Broccoli florets, snap peas, bell peppers, and carrots are traditional, but consider experimenting with bok choy, mushrooms, or even some water chestnuts for added crunch. For an extra layer of richness, a sprinkle of crispy fried shallots or a dollop of chili garlic paste can truly elevate the experience. You could even swap out the steak for ground turkey for a different spin, perhaps inspired by our ground turkey rice bowls.

    Storage & Troubleshooting

    Keeping Leftovers Fresh and Flavorful

    Storing your leftover Protein-Rich Steak and Shrimp Stir-Fry properly ensures you can enjoy it for days. Allow the stir-fry to cool completely before transferring it to an airtight container. It will keep beautifully in the refrigerator for up to 3-4 days. When reheating, I prefer to use a skillet over medium heat to help maintain the texture of the steak and shrimp, rather than microwaving which can sometimes make the protein tough.

    Common Stir-Fry Snafus and How to Fix Them

    Did your stir-fry turn out watery? This often happens if the pan isn't hot enough or if you've overcrowded it, causing the vegetables to steam instead of sear. To fix it, remove the protein and vegetables, then reduce the sauce over high heat until it thickens. If your sauce is too thick, simply whisk in a tablespoon of water or broth at a time until it reaches your desired consistency. Don't worry, every chef has had a stir-fry hiccup!

    Frequently Asked Questions

    Can I prepare the ingredients ahead of time?

    Absolutely! Chop all your vegetables and whisk together the sauce ingredients a day in advance. Store them separately in airtight containers in the refrigerator. This makes assembly a breeze on a busy weeknight.

    What kind of steak is best for stir-fry?

    Flank steak, sirloin, or skirt steak are excellent choices. They are lean, flavorful, and tenderize beautifully when sliced thinly against the grain. Look for well-marbled cuts for the best taste.

    Can I use frozen shrimp?

    Yes, you can! Just make sure to thaw the shrimp completely and pat them very dry before cooking. Excess moisture will prevent them from searing properly and can make your stir-fry watery.

    Is this Protein-Rich Steak and Shrimp Stir-Fry gluten-free?

    To make it gluten-free, simply ensure your soy sauce is gluten-free (tamari is a great substitute) and double-check any other sauce ingredients for hidden gluten. Most other components are naturally gluten-free.

    How do I make the stir-fry spicier?

    For a spicier kick, add a pinch of red pepper flakes to your sauce, or finish the dish with a drizzle of sriracha or chili oil. You can also add sliced fresh chilies with your vegetables.

    Final Thoughts

    This Protein-Rich Steak and Shrimp Stir-Fry has quickly become a cornerstone in my kitchen, a dish I turn to when I want something incredibly satisfying, flavorful, and quick. It’s more than just a meal; it’s an experience that brings joy and warmth to the dinner table. The vibrant colors, the incredible aroma, and the perfectly balanced flavors make every bite a delight. I genuinely hope you give this recipe a try and discover its magic for yourself. It’s a testament to how delicious and exciting healthy eating can be. You'll thank me later!

  • Cheesy Chicken Crescent Bake: Irresistibly Gooey Comfort Food!

    Cheesy Chicken Crescent Bake: Irresistibly Gooey Comfort Food!

    Cheesy Chicken Crescent Bake: Irresistibly Gooey Comfort Food!

    The first time I made this Cheesy Chicken Crescent Bake, I genuinely didn’t expect it to become the most requested dish at our weekly family dinner. My husband took one bite and declared it insanely good, practically inhaling his portion before I even finished plating mine. It’s that kind of comforting, golden-brown perfection that instantly makes you feel all warm and fuzzy inside. This recipe is a true weeknight hero, promising a delicious, hearty meal with minimal effort and maximum flavor. Get ready for a new family favorite that will have everyone asking for seconds!

    Recipe

    Why You’ll Love This Cheesy Chicken Crescent Bake

    Unbeatable Comfort and Flavor

    There’s something truly magical about tender chicken enveloped in a rich, creamy, and dangerously addictive cheesy sauce, all baked inside flaky, buttery crescent rolls. This Cheesy Chicken Crescent Bake hits all the right notes for a satisfying meal. It’s the kind of dish that brings a smile to your face after a long day, wrapping you in a warm hug of savory goodness. The layers of texture, from the soft chicken to the crisp crescent, make every bite an experience.

    It’s perfect for those evenings when you crave something hearty but don’t want to spend hours in the kitchen. The blend of seasoned chicken with gooey melted cheese creates an irresistible combination that will have your family asking for it again and again. Trust me, this won’t last long on the table!

    Effortless Prep for Busy Lives

    One of the biggest reasons I adore this Cheesy Chicken Crescent Bake is how incredibly simple it is to throw together, even on the busiest weeknights. We’re talking minimal chopping and maximum flavor impact. You can have this bubbling, golden masterpiece ready for the oven in under 15 minutes, making it a lifesaver when dinner needs to be on the table fast. It’s an ideal recipe for beginner cooks or anyone looking for a stress-free meal solution.

    The simple ingredient list means less grocery shopping hassle, too. It’s a fantastic way to use up leftover cooked chicken, transforming it into something extraordinary without much fuss. This dish proves that delicious, homemade meals don’t have to be complicated.

    Essential Tips & Tricks

    Perfecting Your Chicken Filling

    For the most succulent Cheesy Chicken Crescent Bake, ensure your chicken is cooked and shredded or diced evenly. This allows it to mix seamlessly with the creamy cheese sauce, guaranteeing a flavorful bite in every single crescent roll. Don’t be shy with seasoning the chicken; a good pinch of garlic powder, onion powder, and a dash of paprika will elevate the taste significantly. An expert tip: using rotisserie chicken saves immense time and adds incredible flavor depth, making your prep even quicker.

    Make sure your cream cheese is softened to room temperature before mixing. This prevents lumps and ensures a smooth, luscious filling that spreads easily.

    Achieving Golden Crescent Perfection

    The key to a truly irresistible Cheesy Chicken Crescent Bake lies in the golden-brown, flaky crust of the crescent rolls. Before baking, gently brush the tops of the crescent rolls with a little melted butter or an egg wash. This simple step creates that beautiful sheen and helps them crisp up to perfection. Keep an eye on them during the last few minutes of baking; ovens can vary, and you want them perfectly golden, not burnt.

    If you notice the crescents browning too quickly, you can loosely tent the dish with aluminum foil. This protects the crust while allowing the filling to heat through completely.

    Serving Ideas & Variations

    Delightful Side Pairings

    This Cheesy Chicken Crescent Bake is hearty enough to be a meal on its own, but pairing it with a fresh side can really elevate the experience. A vibrant green salad, like this refreshing chopped salad, offers a nice contrast to the richness of the bake. Steamed broccoli or green beans tossed with a little garlic butter also make excellent, easy additions. For something a bit more substantial, a light rice pilaf or roasted potatoes would complement the flavors beautifully.

    Don’t forget a sprinkle of fresh parsley or chives over the top right before serving for a pop of color and herbaceous freshness. It’s the little touches that make it feel extra special!

    Creative Flavor Twists

    Feeling adventurous with your Cheesy Chicken Crescent Bake? The beauty of this recipe is its versatility. Consider adding a can of drained, diced green chiles to the chicken mixture for a subtle kick, or a spoonful of your favorite salsa for a Tex-Mex twist. For a touch of smoky flavor, crumbled bacon bits are always a welcome addition. You could even swap out the cheddar for a spicier Monterey Jack or a smoky gouda.

    Don’t be afraid to experiment with different herbs too; a pinch of dried dill or a touch of thyme can completely transform the profile. This is seriously addictive, so get creative!

    Storage & Troubleshooting

    Keeping Leftovers Delicious

    Should you miraculously have any leftovers of this Cheesy Chicken Crescent Bake (a rare occurrence in my house!), storing them properly ensures they remain just as delicious. Allow the bake to cool completely before transferring it to an airtight container. It will keep well in the refrigerator for up to 3-4 days. For reheating, a quick stint in the microwave works, but for best results, warm it in a preheated oven at 350°F (175°C) for about 10-15 minutes.

    This method helps the crescent rolls regain some of their original crispiness, preventing them from becoming soggy. You can also freeze individual portions for convenient future meals.

    Common Hiccups and Fixes

    Even the simplest recipes can sometimes present small challenges, but don’t worry, I’ve got you covered. If your crescent rolls aren’t browning evenly, try rotating your baking dish halfway through the cooking time. If the filling seems a bit too runny, you might have added too much liquid or your cream cheese wasn’t fully softened. A quick fix is to add a tablespoon of flour or cornstarch to the chicken mixture next time.

    If your chicken filling is a bit dry, a splash of chicken broth or milk can easily remedy that. Remember, practice makes perfect, and every bake is a learning experience!

    Frequently Asked Questions

    Can I make this Cheesy Chicken Crescent Bake ahead of time?

    Absolutely! You can assemble the entire bake, cover it tightly, and refrigerate it for up to 24 hours before baking. Just add about 5-10 minutes to the baking time if baking from cold.

    What kind of chicken works best?

    Cooked and shredded or diced chicken is ideal. Rotisserie chicken is a fantastic shortcut, but leftover baked or boiled chicken works perfectly too.

    Can I use other types of cheese?

    Yes, feel free to experiment! While cheddar is classic, Monterey Jack, Colby, or a Mexican blend would also be delicious and melt beautifully in this recipe.

    Is it possible to freeze this bake?

    Yes, you can freeze the assembled, unbaked casserole for up to a month. Thaw in the refrigerator overnight and then bake as directed, adding extra time.

    How do I prevent soggy crescent rolls?

    Ensure your filling isn’t overly wet. Also, baking on a rack placed over a baking sheet can help air circulate and keep the bottom of the Cheesy Chicken Crescent Bake crispier.

    Final Thoughts

    This Cheesy Chicken Crescent Bake isn’t just a recipe; it’s a promise of effortless joy and delicious comfort. It’s the kind of meal that brings everyone to the table, eager for that first bite of golden, flaky crust and creamy, cheesy chicken filling. I remember one evening, after a particularly hectic day, just how much this simple dish provided a moment of pure bliss and togetherness. It quickly became a staple, proving that the best food doesn’t need to be complicated. So go ahead, whip this up tonight and watch it disappear. You deserve this kind of easy, comforting deliciousness!

  • Crispy Garlic Parmesan Ranch Smash Chicken That’ll Wow Your Tastebuds!

    Crispy Garlic Parmesan Ranch Smash Chicken That’ll Wow Your Tastebuds!

    Crispy Garlic Parmesan Ranch Smash Chicken That’ll Wow Your Tastebuds!

    I didn’t think chicken could surprise me anymore, until I made this Crispy Garlic Parmesan Ranch Smash Chicken. The first time, my family actually fell silent at the dinner table, completely engrossed in the incredible crunch and savory flavor. It was that good, an unexpected explosion of taste and texture that instantly became our new obsession. This recipe isn’t just dinner; it’s a moment of pure, unadulterated joy that you’ll crave constantly.

    Recipe

    Why You’ll Love This Crispy Garlic Parmesan Ranch Smash Chicken

    Irresistible Flavor Fusion

    This isn’t just chicken; it’s a symphony of flavors designed to make your taste buds sing. The Crispy Garlic Parmesan Ranch Smash Chicken brings together the savory depth of garlic, the salty tang of Parmesan, and the creamy, herby goodness of ranch. Each bite delivers an explosion of umami that’s utterly captivating. The unique smashing technique ensures maximum surface area for that golden, crispy crust, making every morsel incredibly satisfying. It’s a flavor profile that’s bold, comforting, and undeniably addictive.

    Weeknight Wonder

    Forget complicated recipes; this smash chicken is your new weeknight hero. It’s incredibly simple to prepare, requiring minimal ingredients and fuss, yet it delivers restaurant-quality results. From pantry to plate, you’re looking at a meal that comes together quickly, perfect for those busy evenings when you crave something extraordinary without the extra effort. My kids literally cheer when they know this is on the menu, making dinner a breeze. Trust me, this won’t last long once it hits the table!

    Essential Tips & Tricks

    Achieving the Perfect Smash

    The secret to truly crispy garlic parmesan ranch smash chicken lies in the “smash.” Start with boneless, skinless chicken breasts and place them between two pieces of parchment paper. Use a heavy pan or meat mallet to firmly flatten them to about 1/4-inch thickness. This not only tenderizes the chicken but creates a larger surface area, allowing for that incredible, shatteringly crisp crust. Don’t be shy with the smash; a uniform thinness is key for even cooking and maximum crispiness.

    Flavor Layering Secrets

    To elevate your chicken, don’t just sprinkle; press the seasonings! After smashing, generously coat both sides of the chicken with a mix of garlic powder, dried ranch seasoning, and freshly grated Parmesan. Press these spices firmly into the meat to ensure they adhere and create a rich, flavorful crust as it cooks. A little extra olive oil in the hot skillet helps to bloom the garlic and ranch, intensifying their aromas and flavors for a truly sensational finish.

    Serving Ideas & Variations

    Delicious Pairings

    This crispy chicken is incredibly versatile, making it perfect for various meal combinations. Serve your Crispy Garlic Parmesan Ranch Smash Chicken alongside a fresh green salad for a lighter meal, or with creamy mashed potatoes and roasted asparagus for a hearty dinner. It’s also fantastic with a side of my honey butter skillet corn recipe or even tucked into warm buns for a gourmet sandwich experience. The flavors are robust enough to stand alone but complement many sides beautifully.

    Creative Twists

    Want to mix things up? Try adding a pinch of smoked paprika to your seasoning blend for a subtle smoky kick. For a spicier version, a dash of cayenne pepper can really awaken the palate. You could also experiment with different cheeses, like sharp cheddar or a spicy Monterey Jack, to change the flavor profile. These variations keep the dish exciting and allow you to tailor it to your personal cravings. This is dangerously addictive, so get ready to experiment!

    Storage & Troubleshooting

    Keeping it Fresh

    Leftover Crispy Garlic Parmesan Ranch Smash Chicken can be stored in an airtight container in the refrigerator for up to 3 days. To reheat and retain some of that glorious crispiness, avoid the microwave. Instead, warm it gently in a dry skillet over medium-low heat or pop it into a preheated oven or air fryer at 350°F (175°C) for 5-7 minutes, or until heated through. This method helps reactivate the crispy texture, making leftovers almost as good as fresh.

    Common Fixes

    If your chicken isn’t as crispy as you’d hoped, ensure your skillet is hot enough before adding the chicken and don’t overcrowd the pan. Cooking in batches allows for better browning. If it’s drying out, you might be overcooking it; remember, thin chicken cooks quickly! A meat thermometer should read 165°F (74°C). If the flavor isn’t popping, try adding a squeeze of fresh lemon juice or a sprinkle of fresh herbs like parsley or chives right before serving.

    Frequently Asked Questions

    Can I use chicken thighs instead of breasts?

    Absolutely! Boneless, skinless chicken thighs work wonderfully. They tend to be more forgiving and retain moisture well, though they might require a slightly longer cooking time to achieve the desired crispiness.

    What if I don’t have ranch seasoning?

    No problem! You can make your own with a blend of dried dill, parsley, chives, garlic powder, onion powder, salt, and pepper. Adjust to your taste preferences for a similar flavor profile.

    How do I prevent the Parmesan from burning?

    Ensure your heat isn’t too high. Medium-high heat is ideal. Also, press the Parmesan firmly into the chicken so it adheres well and cooks with the chicken, rather than burning separately in the pan.

    Can I bake this chicken instead of pan-frying?

    Yes, you can! Bake the Crispy Garlic Parmesan Ranch Smash Chicken on a parchment-lined baking sheet at 400°F (200°C) for 15-20 minutes, flipping halfway, until cooked through and golden brown.

    Is this recipe gluten-free?

    Yes, as long as your ranch seasoning and any other ingredients used are certified gluten-free, this recipe is naturally gluten-free. Always check labels to be sure!

    Final Thoughts

    This Crispy Garlic Parmesan Ranch Smash Chicken truly delivers on its promise of incredible flavor and satisfying crunch. It’s the kind of meal that disappears from plates almost as fast as you can cook it, leaving everyone asking for the recipe. I love how it transforms simple chicken breasts into something truly special with minimal effort. Whether it’s a busy Tuesday night or a casual weekend dinner, this dish brings comfort and excitement to your table. Don’t forget to share your culinary creations with me over on Pinterest! Get ready for a new family favorite that you’ll crave again and again.

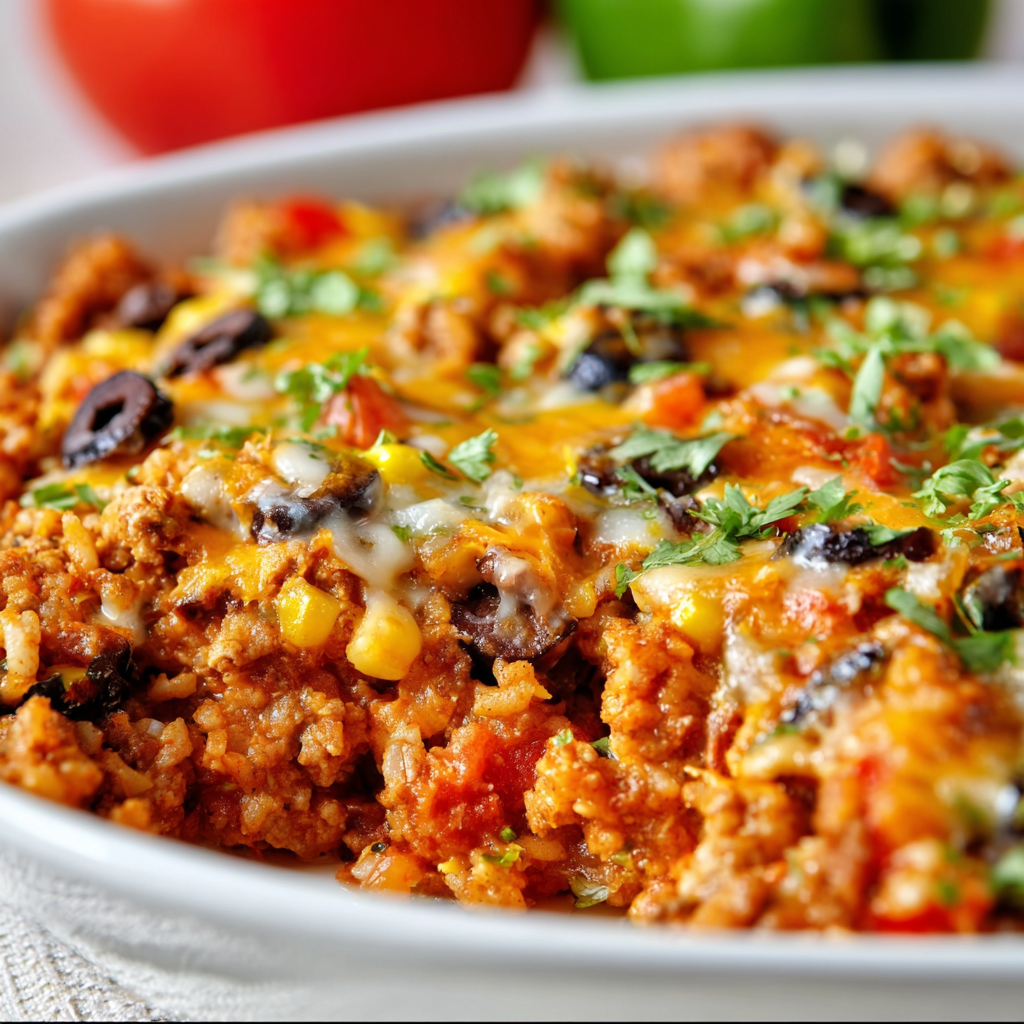
  • Southwestern Ground Turkey Casserole: Irresistibly Easy & Delicious!

    Southwestern Ground Turkey Casserole: Irresistibly Easy & Delicious!

    Southwestern Ground Turkey Casserole: Irresistibly Easy & Delicious!

    The first time I made this Southwestern Ground Turkey Casserole, I honestly didn’t expect it to vanish before I even finished clearing the dinner table. My husband, usually a slow eater, went back for seconds so fast I barely registered his first plate was empty! It’s become a go-to for busy weeknights, offering a burst of vibrant flavor and comforting warmth that makes everyone instantly happy. Get ready for a seriously crave-worthy dish.

    Recipe

    Why You’ll Love This Southwestern Ground Turkey Casserole

    Unbeatable Comfort in Every Bite

    This casserole is the ultimate hug in a dish, perfect for those evenings when you just need something hearty and satisfying. Imagine layers of seasoned ground turkey, tender rice, black beans, and sweet corn, all nestled under a blanket of gooey, melted cheese. It’s the kind of meal that instantly makes you feel cozy and nourished from the inside out. The spices are warm and inviting, providing a comforting experience that’s ideal for family dinners or a casual gathering with friends.

    A Flavor Explosion That Keeps You Coming Back

    Prepare your taste buds for an incredible journey! The Southwestern Ground Turkey Casserole is packed with bold, zesty flavors that truly pop. From the smoky chili powder and cumin to the bright kick of Rotel tomatoes, every spoonful delivers a harmonious blend of savory and slightly spicy notes. The lean ground turkey absorbs all these delicious seasonings, creating a rich, deeply satisfying base that pairs perfectly with the creamy textures of the cheese and corn. This is dangerously addictive.

    Essential Tips & Tricks

    Perfecting the Turkey Base

    The key to an outstanding Southwestern Ground Turkey Casserole starts with perfectly browned and seasoned turkey. Always cook your ground turkey until it’s no longer pink, breaking it up into fine crumbles as it cooks. Drain any excess fat to prevent a greasy casserole. Don’t be shy with the seasonings; let the chili powder, cumin, and garlic powder really bloom in the hot pan with the turkey. This step builds the foundational flavor, ensuring every bite is rich and savory. A well-seasoned base makes all the difference.

    Smart Layering for Casserole Success

    Achieving that beautiful, cohesive casserole texture is all about thoughtful layering. Start with your rice mixture, creating an even base that will absorb all the delicious flavors. Next, spread the ground turkey mixture evenly, ensuring every serving gets a good portion of meat and beans. Finish with a generous layer of cheese—I love a mix of cheddar and Monterey Jack for optimal meltiness. Pressing down lightly on each layer helps everything meld together as it bakes. Trust me, this won’t last long!

    Serving Ideas & Variations

    Beyond the Casserole Dish

    While this Southwestern Ground Turkey Casserole is fantastic straight from the oven, don’t stop there! Serve it with a dollop of sour cream or Greek yogurt, a sprinkle of fresh cilantro, and a squeeze of lime for an extra burst of freshness. It’s also incredible scooped into warm tortillas for impromptu tacos, or even over a bed of crisp lettuce for a hearty salad. For an even more indulgent meal, consider pairing it with a vibrant side like a quick Mexican Street Corn Pasta Salad.

    Customizing Your Southwestern Creation

    The beauty of this casserole lies in its versatility. Feel free to swap out ground turkey for lean ground beef or even shredded chicken if you prefer. Want more veggies? Dice up some bell peppers or zucchini and sauté them with the turkey. For an extra kick, add a can of diced green chilies or a pinch of cayenne pepper. You can also experiment with different cheese blends or add a layer of crushed tortilla chips on top during the last few minutes of baking for a delightful crunch. Everyone will ask for this recipe!

    Storage & Troubleshooting

    Make-Ahead and Leftover Brilliance

    This Southwestern Ground Turkey Casserole is a fantastic make-ahead meal. You can assemble the entire casserole (without baking) and refrigerate it for up to 24 hours. Just add an extra 10-15 minutes to the baking time. Leftovers store beautifully in an airtight container in the refrigerator for up to 3-4 days. It reheats wonderfully in the microwave or oven, making it perfect for meal prepping. For longer storage, freeze individual portions for quick, comforting meals whenever you need them.

    Solving Common Casserole Conundrums

    If your casserole seems a bit dry, ensure you haven’t overbaked it and that your turkey wasn’t too lean without enough moisture from the sauce. A splash of chicken broth mixed into the turkey layer can prevent this. If it’s too soupy, you might have added too much liquid or didn’t drain the turkey properly. A quick fix is to bake it uncovered for an extra 5-10 minutes to allow some moisture to evaporate. For extra cheesy goodness, add more cheese during the last 10 minutes of baking.

    Frequently Asked Questions

    Can I use brown rice instead of white rice?

    Yes, absolutely! Brown rice will work, but it may require a slightly longer cooking time or a bit more liquid to ensure it becomes tender within the casserole. Adjust accordingly.

    Is this casserole spicy?

    The heat level is mild to medium, depending on the type of Rotel you use. For more spice, choose “hot” Rotel or add a pinch of cayenne pepper. For less, use “mild” Rotel.

    Can I prepare this casserole ahead of time?

    You can assemble the Southwestern Ground Turkey Casserole up to 24 hours in advance. Cover tightly and refrigerate. Add about 10-15 minutes to the baking time when ready.

    How do I store leftovers?

    Store any leftover Southwestern Ground Turkey Casserole in an airtight container in the refrigerator for up to 3-4 days. Reheat in the microwave or oven until warmed through.

    Can I freeze this casserole?

    Yes, this casserole freezes well! Bake completely, let it cool, then wrap tightly in plastic wrap and foil. Freeze for up to 2-3 months. Thaw overnight in the fridge before reheating.

    Final Thoughts

    This Southwestern Ground Turkey Casserole truly embodies everything I love about a great meal: it’s flavorful, comforting, and incredibly satisfying. It’s a dish that brings people together, fills hungry tummies, and leaves everyone feeling happy and content. Whether you’re feeding a family or simply craving a hearty meal, this recipe delivers on all fronts. I promise, once you try this vibrant, cheesy, and utterly delicious casserole, it will quickly become a cherished favorite in your recipe rotation. Enjoy every single amazing bite!

  • Nutella Cookie Pie Recipe: Irresistibly Gooey & Perfectly Sweet!

    Nutella Cookie Pie Recipe: Irresistibly Gooey & Perfectly Sweet!

    Nutella Cookie Pie Recipe: Irresistibly Gooey & Perfectly Sweet!

    The first time I made this Nutella Cookie Pie, my husband took one bite and declared it the best thing I’d ever baked. Seriously, it disappeared before the leftovers even had a chance to cool completely. This isn’t just a dessert; it’s a dangerously addictive experience, a warm hug in pie form that will have everyone begging for the recipe. Imagine that perfect fusion of a chewy chocolate chip cookie and the luscious, hazelnut embrace of Nutella. It’s an absolute game-changer for dessert nights and special occasions.

    Recipe

    Irresistible Comfort in Every Slice

    This Nutella Cookie Pie is the epitome of comfort food, combining the familiar joy of a classic chocolate chip cookie with the rich, creamy indulgence of Nutella. It creates a dessert that feels both nostalgic and excitingly new. The warm, gooey center and slightly crisp edges are simply divine, making every forkful a moment of pure bliss. It’s perfect for satisfying those deep, undeniable cravings for something sweet and utterly satisfying. Trust me, you’ll crave this again and again.

    A Crowd-Pleaser That’s Surprisingly Simple

    Don’t let the decadent appearance fool you; this Nutella Cookie Pie is surprisingly straightforward to make. It uses simple ingredients you likely already have on hand, transforming them into a show-stopping dessert with minimal fuss. It’s the ideal recipe for busy weeknights when you need a quick treat or for impressing guests without spending hours in the kitchen. Everyone will ask you for this recipe, I promise, because it truly is that good.

    Essential Tips & Tricks

    Achieving the Perfect Gooey Center

    For that quintessential gooey Nutella Cookie Pie center, timing is everything. You want the edges to be golden and set, but the middle should still have a slight wobble when gently shaken. Overbaking will result in a drier pie, so keep a close eye on it, especially during the last few minutes. A pro tip: slightly underbake it if you prefer an ultra-molten center, as it will continue to set as it cools.

    Handling Nutella Like a Pro

    Working with Nutella can sometimes be a little tricky due to its thick consistency. For easier spreading and a smoother swirl in your cookie pie, gently warm the Nutella slightly in the microwave for about 15-20 seconds. This makes it more pliable and prevents it from tearing your cookie dough. Also, ensure your Nutella is at room temperature before you begin, which helps it integrate seamlessly into the pie.

    Serving Ideas & Variations

    Serving this Nutella Cookie Pie warm is non-negotiable for the ultimate experience. A generous scoop of vanilla bean ice cream melting over the warm, chocolatey goodness is pure heaven. You could also add a drizzle of salted caramel sauce or a sprinkle of flaky sea salt to enhance the flavors. For a fun twist, offer a variety of toppings like whipped cream, chopped toasted hazelnuts, or even mini chocolate chips for extra texture.

    Creative Twists for Every Palate

    While the classic Nutella Cookie Pie is perfect, don’t be afraid to experiment! Consider adding a layer of peanut butter swirl alongside the Nutella for a chocolate-hazelnut-peanut butter explosion. You could also mix in different types of chocolate chips into the cookie dough, like white chocolate or dark chocolate chunks, for varying levels of sweetness. For a truly indulgent treat, try crumbling some Biscoff cookies over the top before baking. This is seriously addictive.

    Storage & Troubleshooting

    Keeping Your Pie Fresh and Delicious

    To keep your Nutella Cookie Pie at its best, store any leftovers in an airtight container at room temperature for up to 2-3 days. If you prefer a warmer, gooey texture, simply pop a slice in the microwave for 15-20 seconds before serving. For longer storage, you can refrigerate it for up to a week, but ensure it’s well-wrapped to prevent it from drying out.

    Common Issues and Quick Fixes

    If your Nutella layer seems to sink, try chilling your prepared pie in the fridge for 15-20 minutes before baking. This helps the Nutella firm up slightly. If the edges are browning too quickly, loosely tent the pie with foil during the last part of baking. Remember, baking times can vary by oven, so trust your instincts and adjust as needed. For more dessert inspiration, check out my recipe for No-Bake Pumpkin Cheesecake Balls. This pie is foolproof once you get the hang of it!

    Frequently Asked Questions

    Absolutely! You can prepare the cookie dough up to 2-3 days in advance. Store it tightly covered in the refrigerator. Let it come to room temperature for about 15 minutes before pressing into the pie dish.

    What if I don’t have a pie dish?

    A 9-inch cast iron skillet or an 8×8 inch square baking dish works perfectly for this Nutella Cookie Pie. Adjust baking time slightly if your dish size varies.

    Yes, you can! Wrap individual slices tightly in plastic wrap, then foil, and freeze for up to 1 month. Thaw at room temperature or warm gently in the microwave.

    Is there a substitute for Nutella?

    While Nutella offers a unique flavor, you could use another hazelnut spread or even a thick layer of melted chocolate chips mixed with a little heavy cream as an alternative.

    How do I get a clean slice?

    For the cleanest slices, allow the Nutella Cookie Pie to cool for at least 30 minutes before cutting. A warm knife dipped in hot water can also help.

    Final Thoughts

    This Nutella Cookie Pie isn’t just a recipe; it’s an invitation to create pure joy in your kitchen. From the moment the aroma fills your home to that first warm, gooey bite, it’s an experience that’s truly unforgettable. It brings people together, sparks smiles, and satisfies even the deepest chocolate and hazelnut cravings. Whether you’re making it for a special occasion or simply to treat yourself, this pie is guaranteed to become a cherished favorite. Get ready to bake a masterpiece that tastes like pure happiness and spreads warmth with every single slice.

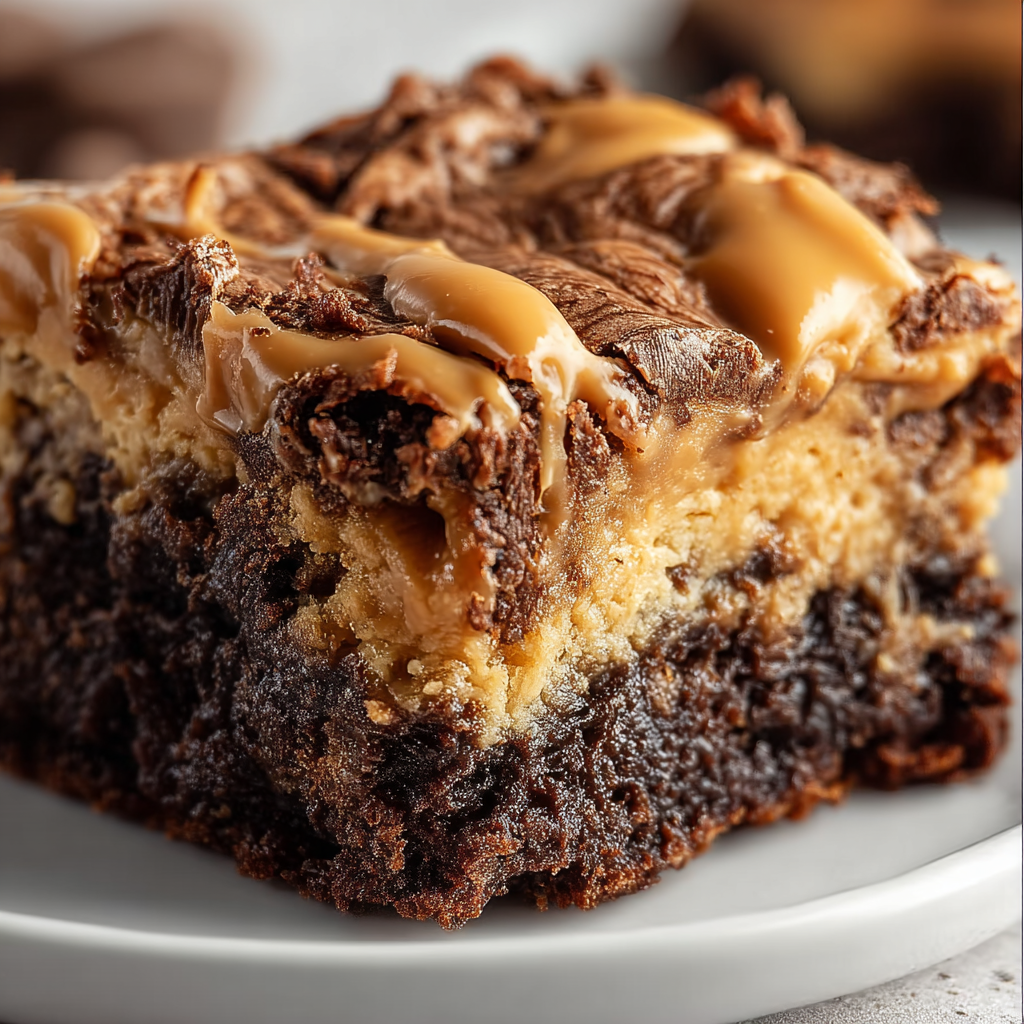
  • Gooey Peanut Butter Earthquake Cake That Will Blow Your Mind!

    Gooey Peanut Butter Earthquake Cake That Will Blow Your Mind!

    Gooey Peanut Butter Earthquake Cake That Will Blow Your Mind!

    I made this Gooey Peanut Butter Earthquake Cake once for a potluck, and I swear, it vanished before I even managed to grab a second slice. The way the rich chocolate cake intertwines with creamy peanut butter swirls creates a truly irresistible dessert that’s both comforting and exciting. Every bite is an explosion of flavor and texture, leaving you craving more. This recipe is a guaranteed crowd-pleaser that will have everyone begging for your secret.

    Recipe

    Why You’ll Love This Gooey Peanut Butter Earthquake Cake

    Irresistible Flavor Combination

    This cake brings together two universally loved flavors: rich, decadent chocolate and creamy, salty-sweet peanut butter. The “earthquake” effect isn’t just for show; it creates pockets of gooey peanut butter fudge throughout the moist chocolate cake, ensuring every forkful is a perfect blend. It’s truly a symphony of textures, from the tender cake to the soft, molten peanut butter core. This is dangerously addictive. The interplay of sweet and slightly savory notes makes it profoundly satisfying, perfect for any occasion when you want to impress with minimal effort.

    Effortless Indulgence

    Despite its show-stopping appearance, this Gooey Peanut Butter Earthquake Cake is surprisingly simple to make. It starts with a convenient cake mix, which means less time measuring and more time enjoying. The magic happens with the simple yet ingenious technique of swirling the peanut butter mixture into the batter, creating those beautiful, cracked patterns that give it its name. You’ll achieve a bakery-quality dessert without the fuss. It’s the ultimate treat for busy bakers who still want to deliver big on flavor and presentation. Trust me, you’ll crave this again and again.

    Essential Tips & Tricks

    Perfecting the Swirl

    Achieving that signature “earthquake” look is easier than you think. After pouring your chocolate cake batter into the pan, dollop spoonfuls of the peanut butter mixture over the top. Then, take a butter knife or a skewer and gently swirl through the layers. Don’t overmix; just a few deliberate passes are enough to create those beautiful, deep cracks and ensure a gooey surprise in every piece. The key is to let the mixture sink naturally, forming those delightful pockets of peanut butter. This simple step elevates the cake from good to absolutely spectacular.

    Ingredient Quality Matters

    While this recipe is incredibly forgiving, using quality ingredients can truly elevate your Gooey Peanut Butter Earthquake Cake. Opt for a good quality chocolate cake mix that you know and love, and don’t skimp on the peanut butter. A creamy, natural peanut butter (without too much added sugar) works best for that rich, authentic flavor. For an extra touch of decadence, use good quality chocolate chips that melt beautifully. These small choices make a big difference in the final taste and texture, ensuring a truly exceptional dessert experience.

    Serving Ideas & Variations

    Delicious Pairings

    This rich and gooey peanut butter earthquake cake is fantastic on its own, but a scoop of vanilla bean ice cream or a dollop of fresh whipped cream takes it to another level. The cool, creamy additions perfectly complement the warm, dense cake. For a touch of sophistication, a drizzle of warm caramel sauce or a sprinkle of flaky sea salt can enhance the flavors even further. Imagine serving this at your next gathering – it’s a guaranteed showstopper that pairs beautifully with a strong cup of coffee or a glass of cold milk.

    Creative Twists

    Want to get creative with your earthquake cake? Consider adding a layer of mini chocolate chips or chopped Reese’s peanut butter cups into the peanut butter swirl for an extra textural crunch and flavor burst. You could also experiment with different cake mix flavors, like yellow cake or even a devil’s food cake for deeper chocolate notes. For a holiday twist, stir in some crushed peppermint candies during the festive season. You can easily adapt this recipe to your cravings, making it a versatile dessert that never gets boring. For another easy dessert, check out these 3-ingredient Biscoff cookies.

    Storage & Troubleshooting

    Keeping it Fresh

    To keep your Gooey Peanut Butter Earthquake Cake tasting its best, store it covered tightly with plastic wrap or in an airtight container at room temperature for up to 3 days. If you prefer it slightly firmer or live in a warmer climate, you can refrigerate it for up to a week. Just be sure to let it come to room temperature or warm it slightly before serving to restore that signature gooey texture. This cake is so good, it rarely lasts long enough to worry about long-term storage, but these tips will ensure optimal enjoyment.

    Common Fixes

    Did your cake not get enough “earthquake” cracks? Don’t worry! Sometimes, the peanut butter mixture might be too cold or too thick. Try warming it slightly to a more pourable consistency next time. If your cake seems a little dry, it might have been slightly overbaked; keep an eye on it towards the end of the baking time. Remember, the beauty of this cake lies in its imperfect, rustic charm. Even if it’s not picture-perfect, the incredible flavor combination will still shine through, making it utterly delicious.

    Frequently Asked Questions

    Can I use crunchy peanut butter?

    Absolutely! Using crunchy peanut butter will add a delightful textural contrast to the gooeyness of the cake. It’s a fantastic variation if you love a bit of extra crunch.

    What kind of chocolate cake mix is best?

    Any standard chocolate cake mix will work beautifully. Choose your favorite brand or a devil’s food cake mix for a richer, deeper chocolate flavor that complements the peanut butter.

    Can I make this cake ahead of time?

    Yes, this gooey peanut butter earthquake cake is perfect for making ahead! It actually tastes even better the next day as the flavors meld. Store it covered at room temperature.

    How do I know when the cake is done?

    The cake is done when a toothpick inserted into the chocolate cake portion (avoiding the gooey peanut butter pockets) comes out with moist crumbs, not wet batter.

    Can I freeze leftover cake?

    Yes, you can freeze individual slices or the whole cake, tightly wrapped, for up to 2-3 months. Thaw at room temperature before serving for the best texture.

    Final Thoughts

    This Gooey Peanut Butter Earthquake Cake is more than just a dessert; it’s an experience. It’s that perfect blend of nostalgic flavors and surprising textures that makes every bite feel like a warm hug. Whether you’re making it for a special occasion or just to satisfy a serious craving, this recipe delivers big on flavor with minimal fuss. I truly believe everyone needs this recipe in their repertoire. Head over to Pinterest for more delicious ideas, but make this cake first. Get ready to fall in love with your new favorite dessert; it’s truly unforgettable!

  • Baja Fish Tacos with Avocado Crema: Irresistibly Fresh & Zesty!

    Baja Fish Tacos with Avocado Crema: Irresistibly Fresh & Zesty!

    Baja Fish Tacos with Avocado Crema: Irresistibly Fresh & Zesty!

    Baja Fish Tacos with Avocado Crema became an obsession in my house the moment I first brought them to the table. I didn’t expect this recipe to cause such a frenzy, but my husband declared them “better than any restaurant” on the very first bite! That immediate, intense reaction solidified their spot as a weekly craving. The combination of crispy fish, vibrant slaw, and that dreamy avocado crema is truly irresistible, transforming a simple meal into an unforgettable culinary experience. You’ll find yourself reaching for this recipe again and again, trust me.

    Recipe

    Why You’ll Love This Baja Fish Tacos with Avocado Crema

    Irresistibly Flavorful & Fresh

    These Baja Fish Tacos with Avocado Crema are a symphony of textures and tastes, designed to excite your palate. The flaky, perfectly seasoned fish provides a satisfying crunch, while the bright, zesty cabbage slaw adds a refreshing counterpoint. But the real star? That incredibly creamy, cool avocado crema that ties everything together with a luxurious finish. Each bite is an explosion of fresh, vibrant flavors that will transport you straight to the sunny coasts of Baja California. This is seriously addictive.

    Quick & Easy Weeknight Meal

    Don’t let the gourmet taste fool you; these fish tacos are surprisingly simple to whip up, making them perfect for a busy weeknight. Most of the prep can be done in advance, like chopping the cabbage or blending the crema, drastically cutting down on cooking time. The fish cooks quickly, ensuring a delicious and satisfying meal without hours in the kitchen. It’s a fantastic way to bring exciting flavors into your home with minimal effort, proving that incredible food doesn’t have to be complicated.

    Essential Tips & Tricks

    Perfecting Your Fish Fillets

    Achieving perfectly crispy, flaky fish for your Baja Fish Tacos is key. Start by patting your chosen white fish fillets (like cod or tilapia) thoroughly dry with paper towels; this ensures a crispier exterior. A light dredge in seasoned flour or cornstarch before frying creates that desirable golden crust. Don’t overcrowd the pan, as this lowers the oil temperature and steams the fish instead of frying it. Cook in batches for optimal crispness and a wonderfully tender interior.

    Crafting the Creamiest Avocado Crema

    The avocado crema is the heart and soul of these Baja Fish Tacos with Avocado Crema. For the silkiest texture, use ripe avocados – they should yield slightly to gentle pressure. Combine them with Greek yogurt or sour cream for tang, a squeeze of fresh lime juice for brightness, and a handful of fresh cilantro. A little pinch of salt and a touch of garlic powder enhance the flavors beautifully. Blend until completely smooth, adding a tablespoon of water if needed to reach your desired consistency. Everyone will ask you for this recipe!

    Serving Ideas & Variations

    Creative Topping Combinations

    While the classic cabbage slaw is fantastic, don’t be afraid to get creative with your toppings for these Baja Fish Tacos. Consider a vibrant pico de gallo for extra freshness, or a sprinkle of crumbled cotija cheese for a salty, creamy kick. Sliced radishes add a peppery crunch, while a drizzle of hot sauce can introduce a delightful heat. You could even try a quick pickled red onion for a tangy contrast. The possibilities are endless for customizing your perfect taco experience.

    Beyond the Tortilla

    If you’re looking to switch things up, these Baja Fish Tacos with Avocado Crema fillings are incredibly versatile. Transform them into a delicious fish taco bowl by serving the crispy fish and all the toppings over a bed of cilantro lime rice or quinoa. For a lighter option, use large lettuce cups as your “tortillas.” You could also chop everything up and make a vibrant fish taco salad, tossing it with extra greens. This is better than takeout, truly! For another fantastic meal, check out our Grilled Chicken Orzo Salad with Avocado.

    Storage & Troubleshooting

    Keeping Your Tacos Fresh

    To maximize freshness, it’s best to store the components of your Baja Fish Tacos separately. Keep the cooked fish in an airtight container in the refrigerator for up to 2-3 days, and the avocado crema in a separate sealed container for 1-2 days (the lime juice helps prevent browning). The cabbage slaw will stay crisp for a day or two. Reheat fish gently in a pan or oven to restore some crispness. Assembled tacos are best enjoyed immediately to avoid soggy tortillas.

    Common Issues & Quick Fixes

    Sometimes things don’t go exactly as planned, but don’t worry! If your fish isn’t crispy enough, ensure your oil is hot enough and you’re not overcrowding the pan. For an avocado crema that’s too thick, simply add a splash more water or lime juice until it reaches your desired consistency. If the crema is browning, stir in more lime juice to reactivate its anti-oxidant properties. A small adjustment can often save the day and get you back to delicious tacos.

    Frequently Asked Questions

    What kind of fish is best for Baja Fish Tacos?

    Firm, white-fleshed fish like cod, tilapia, mahi-mahi, or halibut are excellent choices. They hold up well to frying or grilling and flake beautifully, soaking up all the delicious seasonings.

    Can I bake or grill the fish instead of frying?

    Absolutely! For a healthier option, you can bake the seasoned fish at 400°F (200°C) for 12-15 minutes or grill it over medium-high heat for 3-4 minutes per side until cooked through and flaky.

    How do I prevent the avocado crema from browning?

    The key is plenty of fresh lime juice. Its acidity helps to prevent oxidation. Store the crema in an airtight container with plastic wrap pressed directly onto the surface to minimize air exposure.

    Can I make the slaw ahead of time?

    Yes, you can prepare the cabbage slaw up to a day in advance. Keep the dressing separate and toss it with the cabbage right before serving to maintain maximum crunch and freshness.

    Are Baja Fish Tacos with Avocado Crema spicy?

    Traditionally, they have a mild spice from chili powder in the fish seasoning, but the creamy avocado crema balances any heat. You can adjust the spice level by adding more or less chili, or a dash of hot sauce.

    Final Thoughts

    Making these Baja Fish Tacos with Avocado Crema at home is an absolute game-changer. The vibrant flavors, the perfect crunch of the fish, and that unbelievably smooth, tangy crema create a culinary experience that’s both exciting and deeply satisfying. It’s the kind of meal that brings smiles to faces and happy sighs around the dinner table. Trust me, once you master this recipe, it will become a cherished staple in your cooking repertoire, a testament to how simple ingredients can create extraordinary dishes. Don’t forget to share your taco creations on Pinterest! Follow me on Pinterest.