Blog

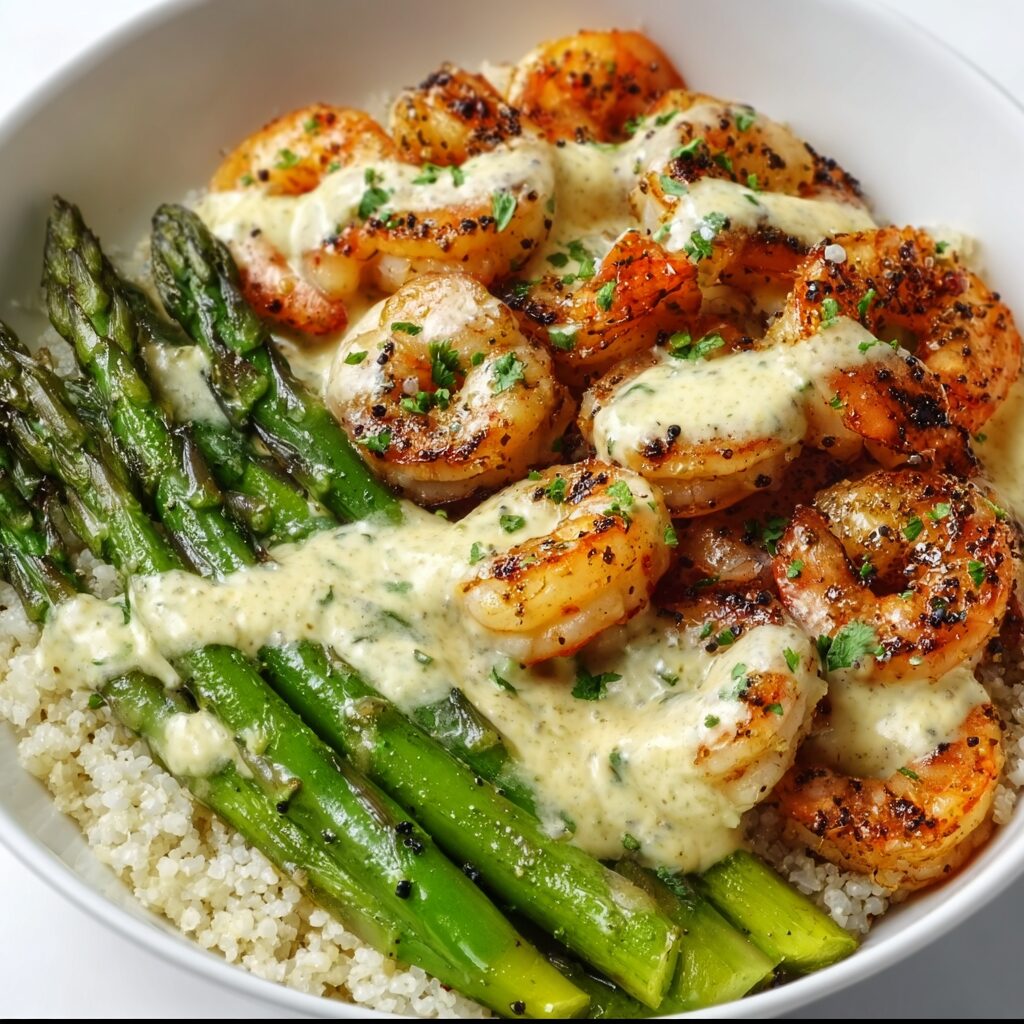
  • Grilled Shrimp Bowl with Asparagus & Creamy Garlic Sauce: Irresistible!

    Grilled Shrimp Bowl with Asparagus & Creamy Garlic Sauce: Irresistible!

    I didn’t expect this Grilled Shrimp Bowl with Asparagus & Creamy Garlic Sauce to become my family’s most requested dinner, but the first time I made it, the bowls were practically licked clean. There’s just something about the succulent grilled shrimp, tender asparagus, and that rich, velvety garlic sauce that makes everyone reach for more. It’s a flavor explosion that feels indulgent yet is surprisingly simple to whip up, making weeknights feel a little more special. Trust me, you'll crave this again.

    Why You'll Love This Grilled Shrimp Bowl with Asparagus & Creamy Garlic Sauce

    Irresistibly Delicious Flavor Profile

    This bowl isn’t just a meal; it's an experience for your taste buds. The shrimp are marinated to perfection, getting a beautiful char on the grill that locks in their natural sweetness. Paired with crisp-tender asparagus, every bite offers a delightful contrast in textures. But the real star? That creamy garlic sauce. It’s rich, garlicky, and utterly luxurious, coating every ingredient in a luscious embrace. It transforms simple components into a cohesive, deeply satisfying dish that feels gourmet. This is dangerously addictive.

    Quick, Easy, and Weeknight-Friendly

    Despite its impressive taste, this grilled shrimp bowl is incredibly straightforward to make, perfect for those busy evenings. From prep to plate, you can have this vibrant, flavorful meal on the table in under 30 minutes. The grilling process is quick for both the shrimp and asparagus, and the creamy garlic sauce comes together with minimal effort. It’s a fantastic option for a healthy, homemade dinner without spending hours in the kitchen. Plus, it uses fresh ingredients you likely already have.

    Essential Tips & Tricks

    Perfecting Your Grilled Shrimp

    For truly perfect grilled shrimp, don't overcrowd your grill or pan. Give each shrimp a little space to ensure they get a beautiful sear instead of steaming. Marinating them for at least 15-20 minutes allows the flavors to penetrate, but avoid marinating for too long (over 30 minutes) as the acid can start to "cook" the delicate shrimp. Cook until they turn opaque and pink, about 2-3 minutes per side. Overcooked shrimp become tough, so watch them closely!

    Crafting the Creamy Garlic Sauce

    The creamy garlic sauce is what elevates this dish to legendary status. For the best flavor, use fresh garlic and sauté it gently until fragrant, but don't let it brown, as it can turn bitter. A good quality heavy cream will give you that desired richness and velvety texture. If you want a slightly lighter sauce, you can use half-and-half, but the indulgence of heavy cream is unmatched. This sauce is truly the secret weapon; you'll want to put it on everything, perhaps even on a creamy garlic butter beef pasta from https://recipesdarleen.com/creamy-garlic-butter-beef-pasta/.

    Serving Ideas & Variations

    Beyond the Bowl: Creative Pairings

    While fantastic on its own, this Grilled Shrimp Bowl with Asparagus & Creamy Garlic Sauce is incredibly versatile. Serve it over a bed of fluffy jasmine rice or quinoa for a heartier meal. For a low-carb option, cauliflower rice or extra greens work wonderfully. You could even turn it into a gourmet taco night by adding the shrimp and asparagus to warm tortillas with a drizzle of extra sauce. My husband loves it with a side of crispy garlic bread to sop up every last drop of that incredible sauce.

    Flavor Twists and Additions

    Feel free to get creative with your grilled shrimp bowl! Add cherry tomatoes or bell peppers to the grill alongside the asparagus for extra color and sweetness. A squeeze of fresh lemon juice over the finished dish brightens all the flavors. For a touch of heat, a pinch of red pepper flakes in the creamy garlic sauce or a sprinkle of chopped fresh chili can really kick things up. Experiment with different herbs like fresh dill or parsley for a new aromatic dimension.

    Storage & Troubleshooting

    Storing Leftovers Safely

    If you're lucky enough to have any leftovers of this Grilled Shrimp Bowl with Asparagus & Creamy Garlic Sauce, store them in an airtight container in the refrigerator for up to 2-3 days. Keep the shrimp, asparagus, and sauce separate if possible, as this helps maintain the best texture and flavor. Reheating the components separately and then combining them just before serving is ideal to prevent the shrimp from becoming overcooked or rubbery.

    Common Issues and Quick Fixes

    Sometimes, things don't go exactly as planned. If your shrimp turn out a little rubbery, it’s usually a sign of overcooking; next time, reduce the cooking time. If your creamy garlic sauce is too thick, simply whisk in a splash of chicken broth or milk until it reaches your desired consistency. If it's too thin, let it simmer gently for a few more minutes to reduce and thicken, or whisk in a tiny bit of cornstarch slurry. Don't stress, these minor adjustments are easy!

    Frequently Asked Questions

    Can I use frozen shrimp for this recipe?

    Absolutely! Just ensure your frozen shrimp are fully thawed and patted dry before marinating and grilling. This helps them cook evenly and get that lovely sear.

    What can I use instead of asparagus?

    Broccoli florets, green beans, or zucchini slices make excellent substitutes for asparagus. Grill them until tender-crisp for a similar texture and vibrant addition to your bowl.

    Is this Grilled Shrimp Bowl with Asparagus & Creamy Garlic Sauce healthy?

    Yes, it's a balanced and nutritious meal! Lean protein from shrimp, essential vitamins from asparagus, and healthy fats make it a wholesome choice, especially when served with a light base like quinoa.

    Can I make the creamy garlic sauce ahead of time?

    You can definitely prepare the creamy garlic sauce a day in advance. Store it in an airtight container in the fridge and gently reheat it on the stovetop, whisking in a little liquid if it's too thick.

    What kind of rice pairs best with this bowl?

    Jasmine rice or brown rice are fantastic choices. Their mild flavors complement the rich sauce and succulent shrimp beautifully, making for a satisfying base. You might also like our ground turkey rice bowls with bang bang sauce for another great bowl option over at https://recipesdarleen.com/ground-turkey-rice-bowls-with-bang-bang-sauce/.

    Final Thoughts

    This Grilled Shrimp Bowl with Asparagus & Creamy Garlic Sauce isn’t just another recipe; it’s a culinary hug in a bowl, a dish that brings smiles and satisfied sighs around the dinner table. The way the tender, smoky shrimp and crisp asparagus meld with that luscious, garlicky sauce is pure magic. It’s the kind of meal that makes you feel like a gourmet chef without all the fuss. Whether you’re cooking for a crowd or enjoying a quiet night in, this bowl delivers on flavor, comfort, and pure deliciousness. It's a true weeknight hero.
  • Cowboy Butter Lemon Bowtie Chicken: Irresistibly Zesty & Juicy!

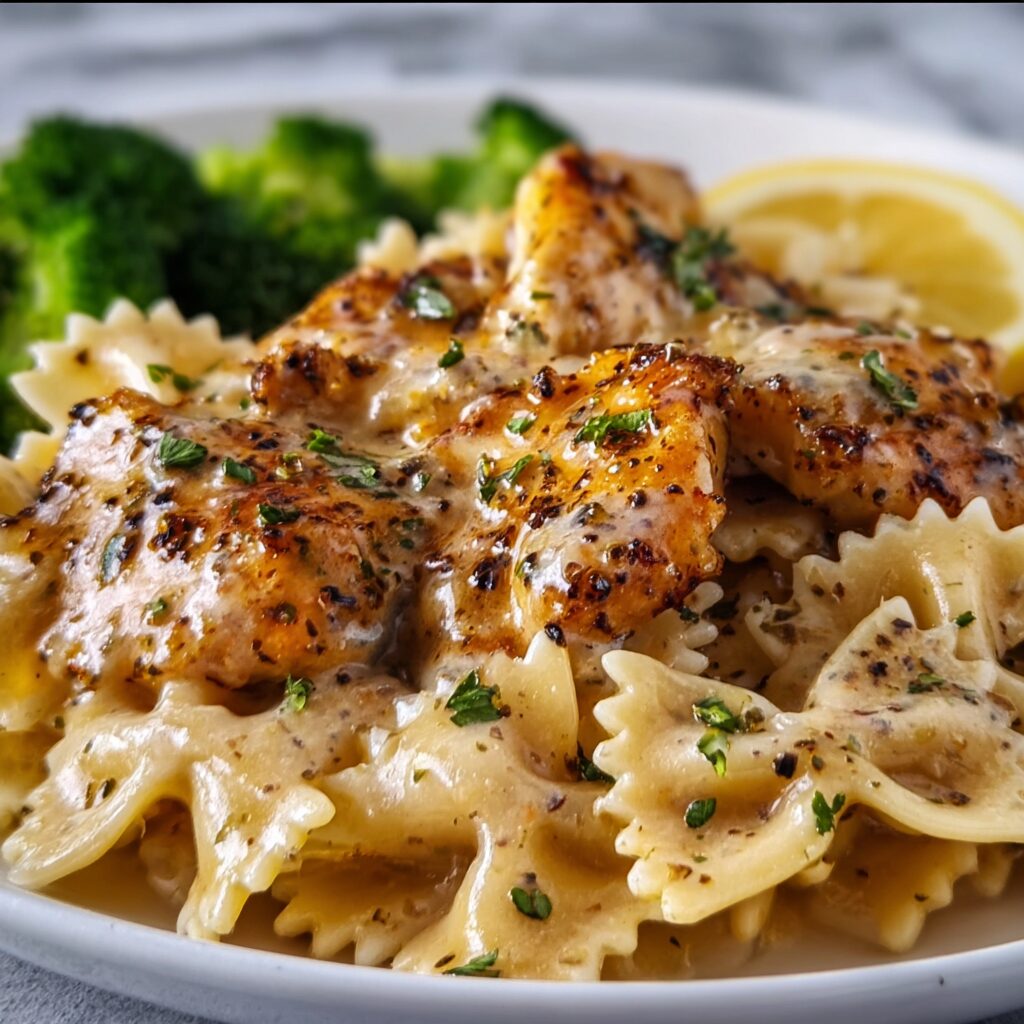
    Cowboy Butter Lemon Bowtie Chicken: Irresistibly Zesty & Juicy!

    I made this Cowboy butter lemon bowtie chicken for a casual dinner party once, and it completely disappeared before I even got a second helping. My friend, usually so reserved, practically demanded the recipe on the spot! That’s when I knew this wasn't just another weeknight meal; it was a bona fide crowd-pleaser. Get ready for a dish that’s bursting with vibrant flavors and a richness that will have everyone asking for more. Trust me, you'll crave this again and again.

    Why You'll Love This Cowboy butter lemon bowtie chicken

    Irresistible Flavor Fusion

    This dish brings together the bold, savory richness of cowboy butter with the bright, zesty kick of fresh lemon, creating an incredibly dynamic flavor profile. The herbs and spices in the butter deeply infuse the tender chicken, while the lemon brightens every bite, preventing any heaviness. It's a symphony of savory, tangy, and subtly spicy notes that dance on your palate. The combination is truly dangerously addictive, making it a standout meal that satisfies deep cravings. You'll find yourself making this on repeat.

    Effortless Weeknight Wonder

    Despite its sophisticated taste, this cowboy butter lemon bowtie chicken is surprisingly simple to prepare, making it perfect for busy weeknights. With straightforward steps and readily available ingredients, you can have a gourmet-ttasting meal on the table without hours of effort. It’s designed for maximum flavor with minimal fuss, ensuring you spend less time cooking and more time enjoying. This dish truly proves that comforting food doesn't have to be complicated or time-consuming to be utterly delicious.

    Essential Tips & Tricks

    Mastering the Butter Sauce

    The key to an outstanding cowboy butter lemon bowtie chicken lies in the butter sauce. Don't skimp on good quality butter; it makes a huge difference. Ensure your butter is softened before mixing in the herbs and spices for a smooth, even blend. Gently melt it over low heat, allowing the flavors to meld without burning the garlic. A pro tip: let the compound butter sit for a few minutes before using, allowing the herbs to release their aromatic oils. This simple step amplifies the entire dish's depth.

    Perfecting Your Chicken

    For the most tender and flavorful chicken, use boneless, skinless chicken breasts or thighs. Pound the chicken breasts to an even thickness (about ½ inch) to ensure they cook uniformly and remain juicy. This also helps them absorb more of that incredible cowboy butter flavor. Sear the chicken quickly to get a beautiful golden crust, then finish cooking gently to avoid drying it out. No one likes dry chicken, and these steps guarantee perfectly cooked, succulent pieces every time. For another delicious chicken idea, try my Crispy Garlic Parmesan Ranch Smash Chicken.

    Serving Ideas & Variations

    Delicious Pairings

    This cowboy butter lemon bowtie chicken pairs beautifully with a variety of sides. For a light and fresh option, serve it alongside a crisp green salad with a vinaigrette dressing to complement the lemon. Roasted asparagus or steamed broccoli tossed with a little extra lemon zest and a sprinkle of parmesan cheese also make excellent accompaniments. If you're looking for something more substantial, creamy mashed potatoes or a fluffy rice pilaf would soak up all that incredible buttery sauce. Don't forget a crusty baguette for dipping!

    Creative Twists

    Want to mix things up? Add some cherry tomatoes or sautéed spinach to the pasta for extra color and nutrients. A sprinkle of red pepper flakes will give it a subtle heat, enhancing the "cowboy" aspect of the butter. For a richer, creamier sauce, stir in a splash of heavy cream at the end, just before serving. You could even swap the bowtie pasta for fettuccine or linguine, or try it with gnocchi for a different texture. This dish is incredibly versatile, inviting you to experiment and make it your own.

    Storage & Troubleshooting

    Keeping it Fresh

    Store any leftover cowboy butter lemon bowtie chicken in an airtight container in the refrigerator for up to 3-4 days. To reheat, gently warm it on the stovetop over low heat, adding a splash of chicken broth or water to loosen the sauce and prevent the pasta from drying out. You can also microwave it, but the stovetop method yields better results, maintaining the chicken's tenderness and pasta's texture. Avoid freezing this dish, as pasta can become mushy upon thawing and reheating.

    Common Fixes

    If your sauce seems too thick, a little extra lemon juice or chicken broth will thin it out perfectly. If it's too thin, let it simmer gently for a few more minutes to reduce slightly, or stir in a tiny bit of cornstarch slurry (1 tsp cornstarch mixed with 1 tsp cold water). Overcooked chicken can be tough; ensure you don't cook it past its internal temperature of 165°F. If your pasta is sticking, ensure you're using a large enough pot and plenty of salted water. For more pasta inspiration, check out my Creamy Garlic Butter Beef Pasta.

    Frequently Asked Questions

    What is cowboy butter?

    Cowboy butter is a flavorful compound butter infused with a blend of garlic, herbs like parsley and thyme, lemon zest, paprika, and a touch of cayenne. It adds a rich, savory, and slightly spicy kick to any dish.

    Can I make the cowboy butter ahead of time?

    Absolutely! You can prepare the cowboy butter up to a week in advance. Store it tightly wrapped in plastic wrap in the refrigerator. This makes weeknight cooking even faster.

    What kind of pasta works best?

    While bowtie pasta (farfalle) is charming, any medium-sized pasta like penne, rotini, or orecchiette works wonderfully to capture the rich cowboy butter lemon sauce. Choose your favorite!

    Is this dish spicy?

    The traditional cowboy butter lemon bowtie chicken has a very mild heat from a pinch of cayenne or red pepper flakes. You can easily adjust the spice level by adding more or omitting it entirely to suit your preference.

    Can I use a different protein?

    Yes! This versatile cowboy butter sauce and lemon combination also works beautifully with shrimp, pork tenderloin, or even firm white fish. Adjust cooking times accordingly for your chosen protein.

    Final Thoughts

    This cowboy butter lemon bowtie chicken has truly become a staple in my kitchen, and I know it will in yours too. The incredible blend of rich, herby butter and bright, zesty lemon creates a flavor experience that's both comforting and exciting. It's the kind of meal that feels special enough for guests but is easy enough for any weeknight. Don't be surprised when your family asks for it again and again. It's a testament to how simple ingredients, when combined thoughtfully, can create something truly unforgettable and crave-worthy. For more delicious recipes and kitchen inspiration, follow me on Pinterest.

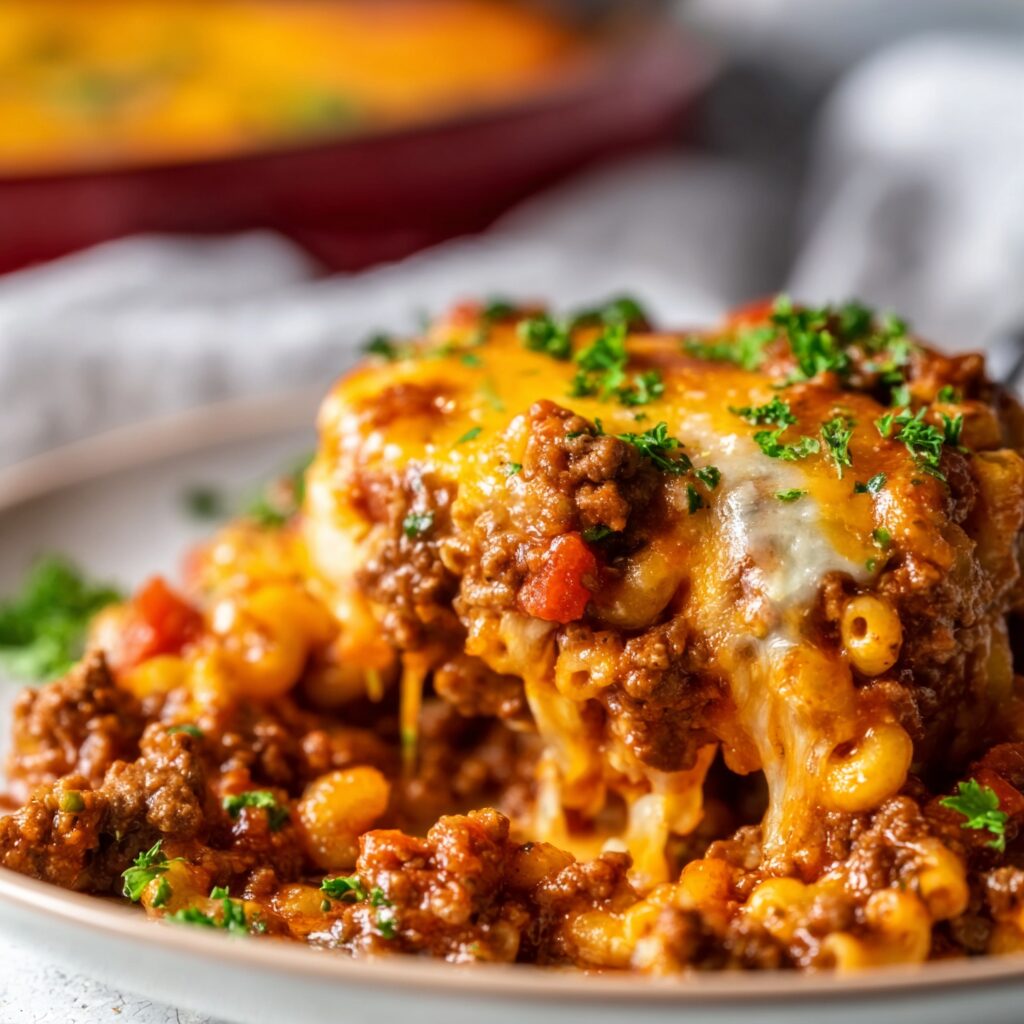
  • Sloppy Joe Ground Turkey Casserole That’ll Wow Your Family!

    Sloppy Joe Ground Turkey Casserole That’ll Wow Your Family!

    The first time I served this Sloppy Joe Ground Turkey Casserole, my brother-in-law, who usually sticks to classic beef, asked for seconds before he even finished his first plate. It was a moment of pure culinary triumph! This dish isn't just a weeknight meal; it's a nostalgic hug in a baking dish, transforming a childhood favorite into something even more comforting and satisfying. Get ready to experience a dish that will quickly become a family legend.

    Why You'll Love This Sloppy Joe Ground Turkey Casserole

    Unforgettable Comfort in Every Bite

    There’s something inherently cozy and comforting about a casserole, and this Sloppy Joe Ground Turkey Casserole takes that feeling to a whole new level. Imagine tender ground turkey simmered in a rich, tangy, and slightly sweet sloppy joe sauce, all topped with a golden, cheesy layer that melts in your mouth. It’s the ultimate antidote to a busy day, offering a familiar flavor profile that instantly transports you back to simpler times. This dish delivers pure, unadulterated comfort.

    A Weeknight Hero That's Dangerously Addictive

    This casserole isn't just delicious; it's incredibly practical for busy weeknights. With minimal prep and straightforward ingredients, you can have a hearty, flavor-packed meal on the table without hours in the kitchen. The lean ground turkey makes it a lighter option than traditional sloppy joes, but it sacrifices none of the robust flavor. My kids absolutely devour this every time I make it, proving it's a winner across all age groups. Trust me, this is dangerously addictive.

    Essential Tips & Tricks

    Achieving the Perfect Sloppy Joe Base

    The secret to an outstanding Sloppy Joe Ground Turkey Casserole lies in the base. Start by browning your ground turkey thoroughly, ensuring no pink remains, then drain any excess fat to keep the casserole from becoming greasy. Don't rush the simmering process of the sauce; allowing it to gently bubble for 10-15 minutes helps the flavors meld beautifully and thicken to the ideal consistency. This crucial step guarantees a rich, deeply flavored foundation for your casserole.

    Mastering the Topping for Golden Perfection

    The topping is what truly elevates this casserole from a simple sloppy joe to a crave-worthy baked dish. For a golden, crispy potato topping, ensure your tater tots or shredded potatoes are evenly spread in a single layer. A light spray of cooking oil before baking can help them achieve that irresistible crunch. If you're adding cheese, sprinkle it on during the last 10 minutes of baking so it melts perfectly without burning. This creates a beautifully textured contrast to the savory filling.

    Serving Ideas & Variations

    Creative Sides to Complete Your Meal

    This Sloppy Joe Ground Turkey Casserole is a complete meal on its own, but pairing it with the right side can elevate the experience. A crisp, fresh green salad with a light vinaigrette offers a refreshing contrast to the hearty casserole. You could also serve it alongside some fluffy cornbread or even roasted vegetables like broccoli or green beans for added nutrition. My favorite is a simple side of sweet creamed corn casserole – it's an irresistible combination.

    Exciting Twists and Customizations

    Feel free to get creative with your Sloppy Joe Ground Turkey Casserole! For a touch of heat, add a pinch of red pepper flakes to the sloppy joe mixture or a dash of hot sauce. You could also mix in finely diced bell peppers or onions with the turkey for extra veggies and texture. Another delicious idea is to swap out the potato topping for a layer of mashed potatoes or even biscuits for a different kind of comforting crust. This dish is incredibly versatile.

    Storage & Troubleshooting

    Storing Leftovers for Future Enjoyment

    Leftovers of this Sloppy Joe Ground Turkey Casserole are just as delicious the next day, if not better! Allow the casserole to cool completely before transferring it to an airtight container. It will keep beautifully in the refrigerator for up to 3-4 days. For longer storage, you can freeze individual portions for up to 2-3 months. Simply thaw overnight in the fridge and reheat in the oven or microwave until piping hot. This casserole is perfect for meal prepping!

    Tackling Common Casserole Conundrums

    Encountering a soggy topping or dry turkey? Don’t fret! If your potato topping isn't getting crispy, try baking it uncovered for a few extra minutes or increase the oven temperature slightly at the end. To prevent dry turkey, ensure you don't overcook the ground turkey mixture before assembling the casserole; it will continue to cook in the oven. A splash of extra broth or water can also rehydrate a slightly dry filling. These simple fixes ensure a perfect outcome every time.

    Frequently Asked Questions

    Can I make Sloppy Joe Ground Turkey Casserole ahead of time?

    Absolutely! You can assemble the entire casserole, cover it, and refrigerate it for up to 24 hours before baking. Just add about 10-15 minutes to the baking time if baking from cold.

    What kind of cheese works best?

    A sharp cheddar or a Monterey Jack blend melts beautifully and adds a fantastic savory depth to the casserole. Feel free to use your favorite shredded cheese for the topping.

    Can I use different ground meat?

    Yes, you can easily substitute ground beef or even ground chicken for the turkey. Adjust cooking times slightly as needed, ensuring the meat is fully cooked before assembling.

    Is this recipe gluten-free?

    This recipe can be easily made gluten-free by ensuring your sloppy joe sauce ingredients and potato topping (like tater tots) are certified gluten-free. It's a delicious, adaptable meal.

    How can I make this spicier?

    To add a kick, incorporate diced jalapeños, a pinch of cayenne pepper, or a dash of your favorite hot sauce into the ground turkey mixture. Start with a little and add more to taste.

    Final Thoughts

    This Sloppy Joe Ground Turkey Casserole is more than just a recipe; it’s a celebration of comfort food, reimagined for today's busy kitchens. It brings together familiar, beloved flavors in a convenient, hearty package that everyone at your table will adore. From the savory, tangy turkey base to the golden, crispy potato topping, every forkful is pure bliss. I promise, this dish will quickly become a cherished favorite, delivering warmth and satisfaction with every bite. It’s truly an unforgettable meal that you'll crave again and again.

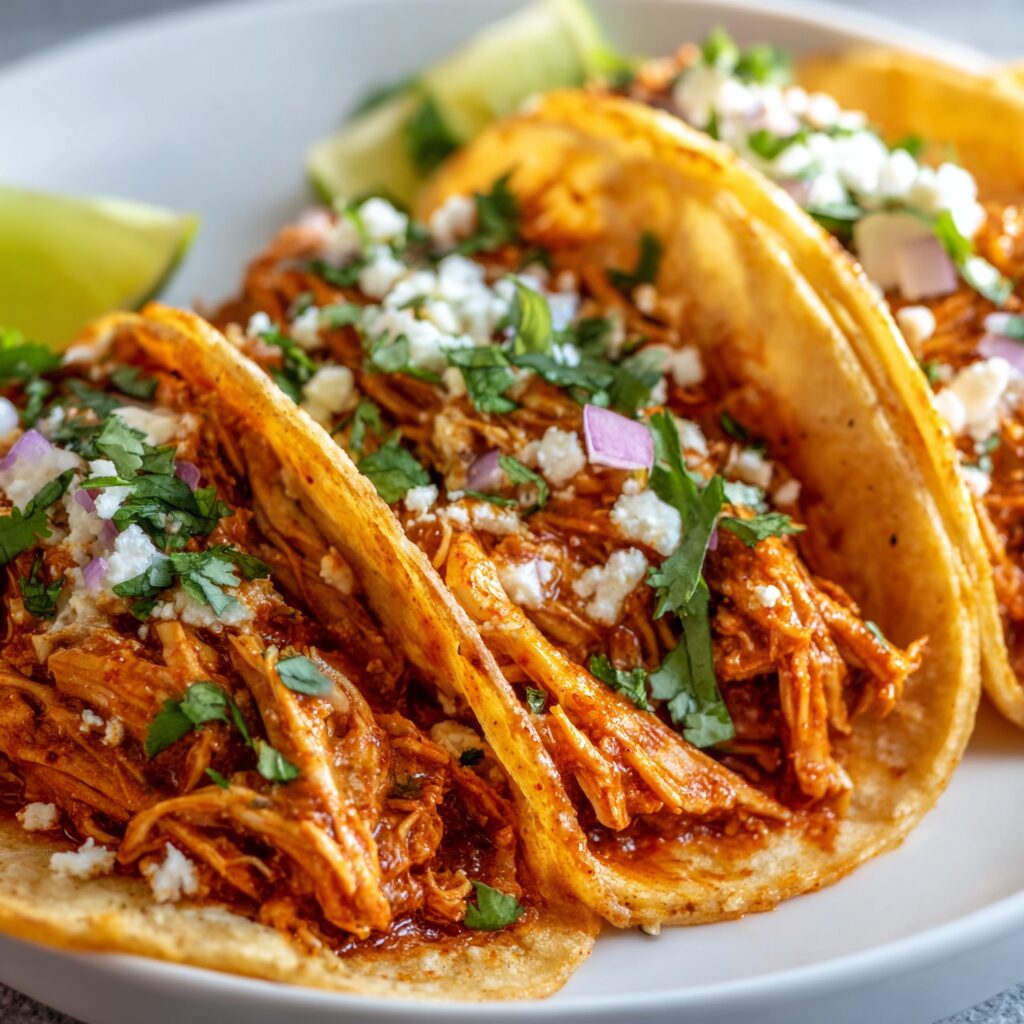
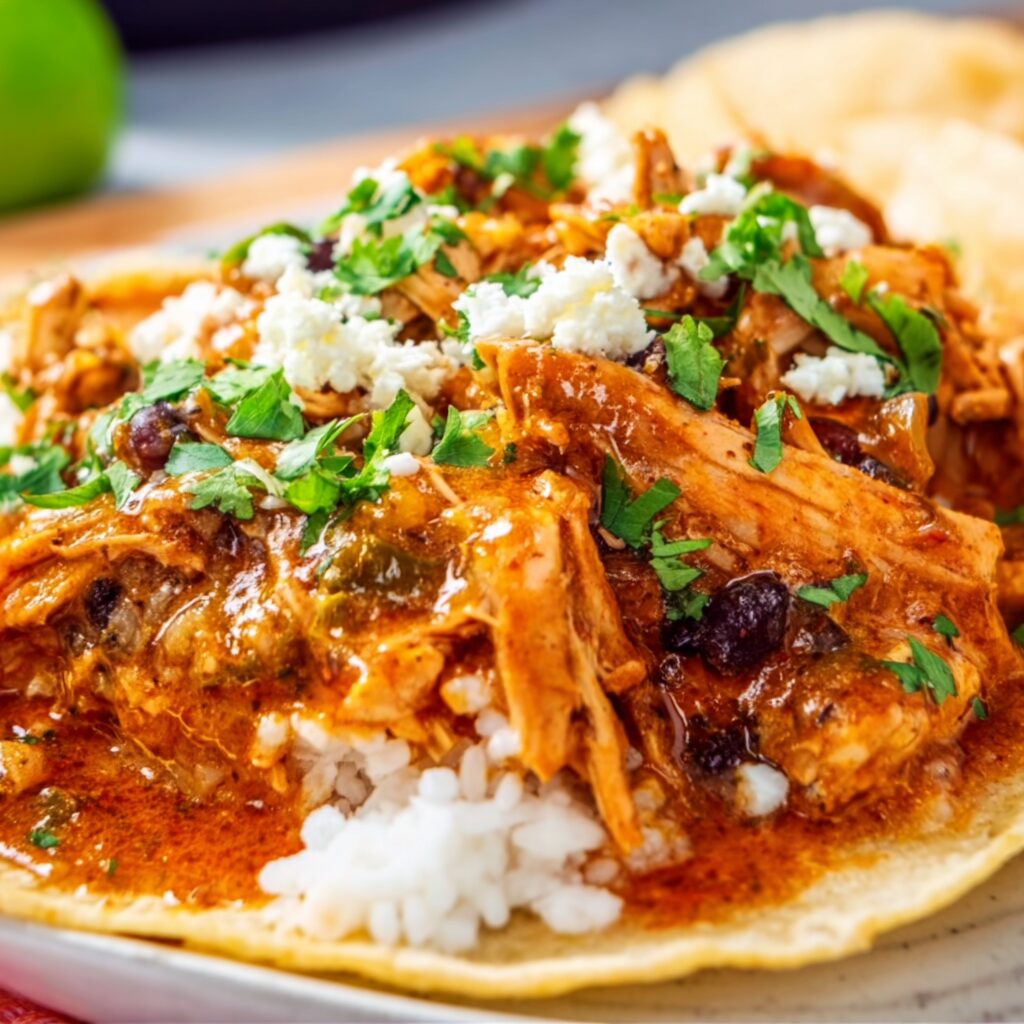
  • Spicy Chicken Tinga Tacos with Chipotle: Irresistibly Bold Flavor!

    Spicy Chicken Tinga Tacos with Chipotle: Irresistibly Bold Flavor!

    The first time I made these Spicy Chicken Tinga Tacos with Chipotle, my family devoured them so quickly I barely got a second bite! It was a chaotic, happy blur of hands reaching for more. The rich, smoky chipotle sauce clinging to tender shredded chicken, piled high in warm tortillas, creates an utterly irresistible flavor experience. This isn't just dinner; it's a vibrant fiesta for your taste buds, guaranteed to become a new favorite in your rotation. Get ready for some serious taco magic!

    Why You'll Love This Spicy Chicken Tinga Tacos with Chipotle

    Flavor Explosion in Every Bite

    These tacos are a symphony of flavors and textures that will make your taste buds sing. The star is the smoky, spicy chipotle sauce, which perfectly coats the juicy shredded chicken. Each bite offers a harmonious blend of heat, sweetness, and tang, creating a truly memorable meal. It’s the kind of dish that makes you close your eyes and savor the moment. This is dangerously addictive. The layers of flavor are so complex, yet the dish remains incredibly comforting and approachable for any weeknight.

    So Easy, Yet So Impressive

    You might think such a flavorful dish would be complicated, but these Spicy Chicken Tinga Tacos with Chipotle are surprisingly simple to prepare. Using readily available ingredients and straightforward steps, you can create a meal that tastes like it came from your favorite taqueria. It’s perfect for busy weeknights or when you want to impress guests without spending hours in the kitchen. Plus, the aroma filling your home as it simmers is utterly divine, building anticipation for the deliciousness to come.

    Essential Tips & Tricks

    Achieving Perfectly Shredded Chicken

    The secret to mouth-watering tinga tacos lies in perfectly tender, shredded chicken. I recommend using boneless, skinless chicken thighs for their flavor and moisture, though breasts work too. You can poach them gently in seasoned water or chicken broth until cooked through, then shred them easily with two forks. For an even quicker method, use a stand mixer with the paddle attachment on low speed – it shreds chicken in seconds! This ensures every strand of chicken soaks up that incredible chipotle sauce.

    Mastering the Chipotle Sauce

    The chipotle sauce is the heart of these tacos, so getting it right is key. Don't be shy with the chipotles in adobo – they provide that signature smoky heat. Adjust the amount to your spice preference; I usually go for 2-3 peppers. Blending the sauce until completely smooth ensures a velvety texture that clings beautifully to the chicken. A splash of chicken broth or water can help achieve the perfect consistency. Trust me, everyone will ask you for this recipe!

    Serving Ideas & Variations

    Classic Toppings and Fresh Additions

    Serving these spicy chicken tinga tacos is where the fun truly begins! Classic toppings like crumbled cotija cheese, finely diced white onion, and fresh cilantro are a must. For a refreshing contrast to the rich, spicy chicken, add a squeeze of fresh lime juice and a dollop of sour cream or crema. I also love adding some thinly sliced radishes for a peppery crunch. For an extra layer of flavor, consider a simple authentic pico de gallo or a vibrant avocado salsa.

    Creative Twists for Your Taco Night

    Beyond the traditional, these tinga tacos are incredibly versatile. Transform them into a crave-worthy bowl by serving the chicken over rice with black beans and corn. For a low-carb option, use lettuce wraps instead of tortillas. You could also turn the tinga into quesadillas or enchiladas for another delicious meal. Don't be afraid to experiment with different cheeses or even a sprinkle of pickled red onions for an added zing. This dish is truly a canvas for your culinary creativity!

    Storage & Troubleshooting

    Storing Leftover Tinga

    Leftover Spicy Chicken Tinga is a gift that keeps on giving! Once cooled, transfer the chicken to an airtight container and refrigerate for up to 3-4 days. It’s fantastic for meal prep, making quick lunches or dinners a breeze. You can easily reheat it on the stovetop over medium-low heat, adding a splash of chicken broth if it seems a little dry. The flavors often deepen overnight, making the next day's meal even more enjoyable and satisfying.

    Common Tinga Troubles and Fixes

    Sometimes, things don't go exactly as planned, but don't worry! If your tinga sauce is too thick, simply stir in a tablespoon of chicken broth or water at a time until it reaches your desired consistency. If it's too spicy, a dollop of sour cream or a squeeze of lime juice can help mellow the heat. If it lacks depth, a pinch more salt, a dash of cumin, or even a tiny bit of brown sugar can balance the flavors. It’s all about tasting and adjusting as you go.

    Frequently Asked Questions

    Can I make Chicken Tinga in a slow cooker?

    Absolutely! Cook chicken breasts or thighs with the sauce ingredients on low for 3-4 hours or high for 2 hours. Shred the chicken in the pot and stir to coat. Effortlessly delicious!

    What kind of tortillas are best for Tinga Tacos?

    Warm corn tortillas are traditional and highly recommended for their authentic flavor and texture. Flour tortillas also work wonderfully if you prefer them, offering a softer bite.

    Is Spicy Chicken Tinga Tacos with Chipotle very hot?

    The spice level is adjustable! Control the heat by varying the number of chipotles in adobo you add. Start with one, taste, and add more if you desire extra kick.

    Can I prepare the chicken tinga ahead of time?

    Yes, this recipe is excellent for meal prep. You can make the chicken tinga up to 3 days in advance and store it in the refrigerator. Reheat gently before serving.

    What side dishes pair well with these tacos?

    Classic sides include Mexican rice, refried beans, or a simple crisp green salad. Corn on the cob or a fresh Mexican street corn salad also makes a perfect accompaniment.

    Final Thoughts

    These Spicy Chicken Tinga Tacos with Chipotle are more than just a meal; they're an experience. The incredible depth of flavor from the smoky chipotle and tender chicken is truly something special. I love how they bring everyone to the table, eager for more, creating those wonderful, shared food memories. Whether it’s a quick weeknight dinner or a festive gathering, these tacos deliver on taste and comfort every single time. Get ready to fall head over heels for this recipe – it’s a keeper you’ll return to again and again.

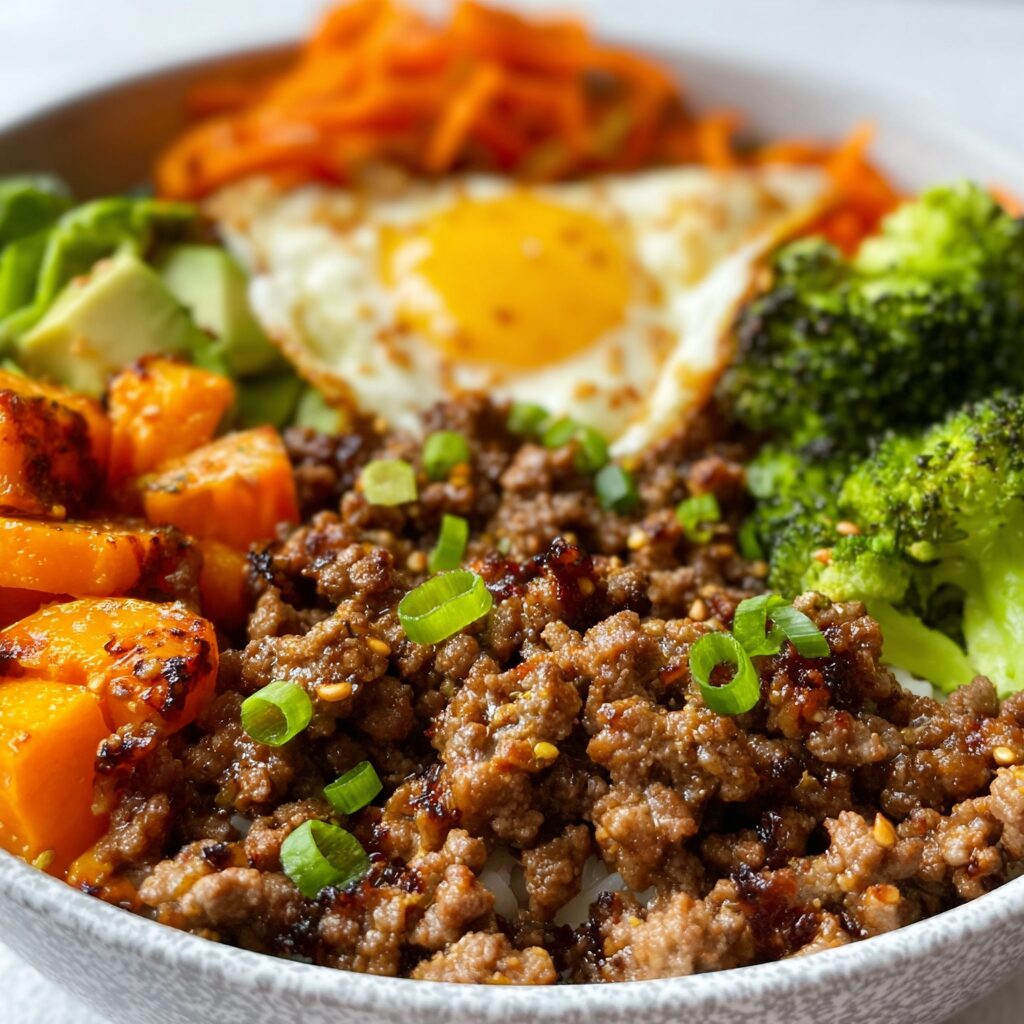
  • Hot Honey Ground Beef Bowls That’ll Fire Up Your Dinner Tonight!

    Hot Honey Ground Beef Bowls That’ll Fire Up Your Dinner Tonight!

    I made these Hot Honey Ground Beef Bowls once for a casual weeknight dinner, and my family completely devoured them before I even finished plating my own bowl. The unexpected blend of savory ground beef with that irresistible sweet and spicy kick was an instant hit, leaving everyone asking for the recipe immediately. Trust me, this dish is so good, it’s dangerously addictive and will become your new go-to.

    Why You'll Love This Hot Honey Ground Beef Bowls

    A Flavor Explosion You Won't Forget

    These hot honey ground beef bowls are a symphony of flavors, perfectly balancing savory, sweet, and spicy notes in every single bite. The rich, seasoned ground beef is coated in a sticky, glistening hot honey sauce that truly transforms it into something extraordinary. This isn't just another weeknight meal; it’s an experience that will wake up your taste buds and leave you deeply satisfied. You’ll be craving these flavors long after the last spoonful.

    Effortless Weeknight Dinner Solution

    Life gets busy, but delicious meals shouldn't be complicated. This recipe for hot honey ground beef bowls is designed for maximum flavor with minimal effort, making it perfect for those hectic weeknights. With simple ingredients and straightforward steps, you can have a wholesome, crave-worthy dinner on the table in under 30 minutes. It’s a complete meal in one bowl, meaning fewer dishes and more time to relax. This is better than takeout, hands down.

    Essential Tips & Tricks

    Perfecting Your Hot Honey Sauce

    The secret to truly sensational hot honey ground beef bowls lies in the sauce. Don't be shy with the chili flakes if you love a good kick, but remember you can always adjust to your preference. Simmer the hot honey sauce until it slightly thickens and coats the back of a spoon – this ensures that glossy, sticky texture that clings beautifully to the beef. A perfectly balanced sauce elevates the entire dish, making every bite an absolute delight.

    Achieving Crispy, Flavorful Beef

    For ground beef that truly shines in these hot honey bowls, focus on getting a good sear. Brown the beef thoroughly in a hot skillet, breaking it up into small, even pieces. This creates more surface area for that delicious caramelization and ensures every morsel is packed with flavor. Drain any excess fat before adding the sauce to keep the texture perfect and prevent a greasy finish. This step is crucial for a truly satisfying bowl experience.

    Serving Ideas & Variations

    Creative Bowl Combinations

    While these hot honey ground beef bowls are fantastic on their own, don't hesitate to get creative with your base and toppings! Serve them over fluffy white rice, nutty brown rice, or even quinoa for a wholesome meal. For a low-carb option, try cauliflower rice or a bed of fresh greens. Pile on crisp cucumber, shredded carrots, or a sprinkle of toasted sesame seeds for added texture and visual appeal. For another incredible bowl idea, check out these Ground Turkey Rice Bowls with Bang Bang Sauce.

    Elevating Your Toppings Game

    The right toppings can transform your hot honey ground beef bowls from great to extraordinary. Consider a dollop of cool sour cream or Greek yogurt to mellow the heat, or a sprinkle of fresh cilantro for a burst of herbaceousness. Thinly sliced green onions add a mild oniony crunch, while a squeeze of fresh lime juice brightens the whole dish. For an extra layer of flavor and crunch, try some crushed roasted peanuts or cashews. These simple additions make a huge difference.

    Storage & Troubleshooting

    Storing Leftovers Safely

    Leftover hot honey ground beef bowls are fantastic for meal prep! Store the cooked ground beef and any rice or grain base separately in airtight containers in the refrigerator for up to 3-4 days. This helps maintain the texture of both components. When reheating, it’s best to warm the beef and base separately, then combine and add fresh toppings. This ensures every component tastes its best, making your future meals just as delicious.

    Troubleshooting Common Issues

    If your hot honey sauce turns out too thin, simply simmer it for a few more minutes over medium-low heat until it reduces and thickens to your desired consistency. If it's too spicy, a touch more honey or a squeeze of lime juice can help balance the heat. Conversely, if it's not spicy enough, a dash more chili flakes or a tiny bit of sriracha will do the trick. Don't be afraid to adjust seasonings to your taste; that's the beauty of home cooking.

    Frequently Asked Questions

    Can I use a different protein for this recipe?

    Absolutely! While ground beef is classic, you can easily substitute ground turkey, chicken, or even crumbled firm tofu for a vegetarian option. Adjust cooking times as needed.

    Is hot honey difficult to make from scratch?

    Not at all! You can easily make your own hot honey by gently warming honey with chili flakes or a dash of your favorite hot sauce. It's super simple!

    What vegetables pair well with these bowls?

    Broccoli florets, bell peppers, snap peas, or even roasted sweet potatoes make excellent additions. Sauté them with the beef or serve them on the side.

    Can I prepare components of this dish ahead of time?

    Yes! You can cook the ground beef and prepare the hot honey sauce a day in advance. Store them separately in the fridge, then combine and reheat when ready to serve.

    What makes these Hot Honey Ground Beef Bowls so special?

    The unique combination of savory beef and the sweet-spicy hot honey sauce creates an irresistible flavor profile that's both comforting and exciting, making it a truly memorable meal.

    Final Thoughts

    These Hot Honey Ground Beef Bowls are more than just a meal; they're an invitation to experience a symphony of flavors that will quickly become a cherished part of your recipe rotation. The blend of sticky, sweet heat with savory beef is truly a culinary delight, proving that simple ingredients can create something extraordinary. I promise, once you try this, you'll understand why it's so incredibly addictive. Get ready for a dish that will constantly have you reaching for another bite.

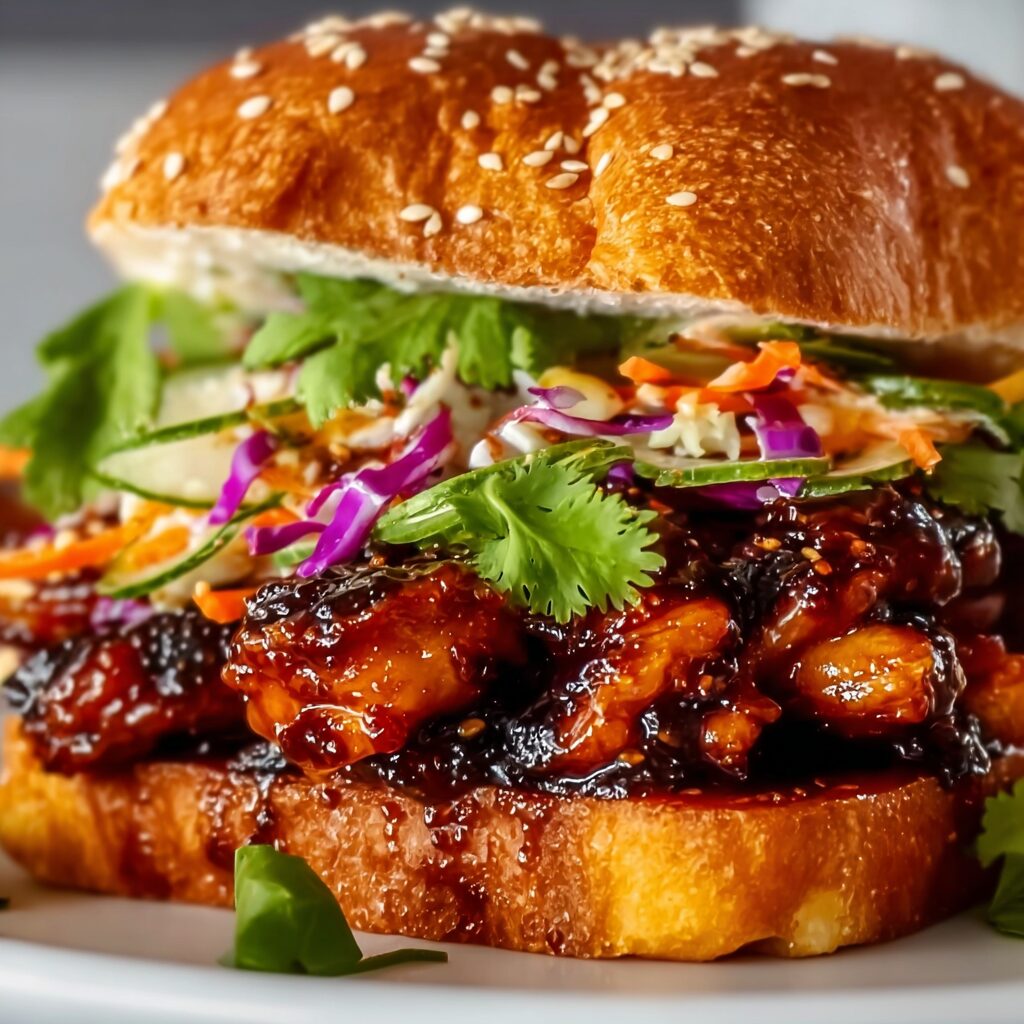
  • Korean BBQ Chicken Sandwich: Irresistibly Flavorful & Juicy Bite!

    Korean BBQ Chicken Sandwich: Irresistibly Flavorful & Juicy Bite!

    The first time I served this korean bbq chicken sandwich at a casual get-together, I didn’t expect it to vanish so quickly. My sister-in-law, who usually just picks, devoured hers and immediately asked for the recipe. It was a chaotic, delicious blur of sticky-sweet, savory chicken and crunchy slaw, and honestly, I barely got a bite myself! This sandwich is pure magic, transforming simple ingredients into a crave-worthy experience that everyone will obsess over. Trust me, you’ll want to make this again and again.

    Why You'll Love This Korean BBQ Chicken Sandwich

    Irresistible Flavor Fusion

    This korean bbq chicken sandwich brings together the best of sweet, savory, and tangy flavors in every bite. The tender chicken is coated in a rich, glossy Korean BBQ sauce that’s perfectly balanced with a hint of ginger and garlic. Paired with a vibrant, crunchy slaw, it creates an explosion of textures and tastes that dance on your palate. It’s the kind of comforting, yet exciting, meal that satisfies deep cravings and leaves you feeling utterly content. This is seriously addictive.

    Quick & Easy Weeknight Win

    Who knew something so incredibly flavorful could be so simple to prepare? This sandwich is ideal for busy weeknights when you need a delicious meal without spending hours in the kitchen. With minimal prep and cooking time, you can have a gourmet-tasting dinner on the table faster than you can order takeout. It's a fantastic way to impress your family and friends with a dish that tastes complex but is surprisingly straightforward. Plus, the cleanup is a breeze!

    Essential Tips & Tricks

    Marinating for Maximum Flavor

    For the most intensely flavored korean bbq chicken sandwich, don't skip the marinating step! Aim for at least 30 minutes, but if you have the time, letting the chicken soak in that glorious Korean BBQ marinade overnight in the fridge is a game-changer. This allows the chicken to fully absorb all those delicious sweet and savory notes, resulting in incredibly tender and juicy meat. You'll notice a significant difference in depth of flavor.

    Achieving Perfect Chicken Texture

    The key to a stellar korean bbq chicken sandwich is perfectly cooked chicken. Whether you're grilling, pan-frying, or baking, ensure your chicken breasts are cooked through but remain juicy. Pounding them to an even thickness helps them cook uniformly. For that beautiful caramelized crust, finish by brushing extra sauce on the chicken during the last few minutes of cooking. This creates a sticky, slightly charred exterior that's absolutely divine.

    Serving Ideas & Variations

    Creative Toppings & Sides

    While the classic korean bbq chicken sandwich with crunchy slaw is phenomenal, don't hesitate to get creative! Add a slice of melted provolone or pepper jack cheese for an extra layer of richness. A sprinkle of toasted sesame seeds or chopped green onions adds visual appeal and a fresh pop of flavor. For sides, consider serving with crispy sweet potato fries, a light cucumber salad, or even some kimchi for an authentic kick. You can find more inspiration for sides and other delicious recipes on Recipes Darleen.

    Beyond the Bun

    Think outside the sandwich! This Korean BBQ chicken is so versatile it can be enjoyed in many ways. Shred the chicken and serve it over fluffy rice bowls with extra sauce and a fried egg for a hearty meal. It’s also fantastic in lettuce wraps for a lighter, low-carb option, or even as a topping for nachos or quesadillas. Imagine it tucked into soft tacos with a vibrant salsa – the possibilities are endless for this dangerously addictive chicken.

    Storage & Troubleshooting

    Keeping Your Sandwich Fresh

    To keep your korean bbq chicken sandwich components fresh, store the cooked chicken and the slaw separately in airtight containers in the refrigerator. The chicken will last for up to 3-4 days, while the slaw is best enjoyed within 1-2 days to maintain its crunch. When ready to assemble, gently reheat the chicken, refresh the slaw if needed, and toast your buns for the best experience. This ensures every bite is as delicious as the first.

    Common Fixes for Flavor & Texture

    If your Korean BBQ chicken isn't quite hitting the mark, don't fret! If the sauce tastes too sweet, a splash of rice vinegar or lime juice can balance it out. If it lacks depth, a dash of soy sauce or a pinch more ginger and garlic will boost the savory notes. For dry chicken, try shredding it and tossing it with extra warm sauce to rehydrate. Overly soggy slaw can be remedied by draining excess liquid and adding a fresh squeeze of lime.

    Frequently Asked Questions

    What kind of buns work best?

    Brioche buns are fantastic for their buttery richness, but potato rolls or even a sturdy ciabatta will hold up well to the juicy Korean BBQ chicken. Toasting them is key!

    Can I make the Korean BBQ sauce from scratch?

    Absolutely! A homemade Korean BBQ sauce often includes gochujang, soy sauce, sesame oil, ginger, garlic, and brown sugar. It’s easy and tastes incredibly fresh.

    What are good toppings for a korean bbq chicken sandwich?

    Beyond the slaw, consider pickled red onions, sliced jalapeños for heat, fresh cilantro, or a drizzle of spicy mayo to elevate your sandwich experience.

    Can I use chicken thighs instead of breasts?

    Yes, chicken thighs work beautifully! They tend to be more forgiving and stay juicier. Adjust cooking times as needed to ensure they are thoroughly cooked.

    Is this recipe spicy?

    The spiciness depends on your Korean BBQ sauce. Many store-bought sauces are mild, but you can add gochujang or sriracha to the marinade for an extra kick.

    Final Thoughts

    Crafting the perfect korean bbq chicken sandwich doesn't have to be complicated. It’s all about balancing those incredible sweet, savory, and tangy flavors with a satisfying crunch. This recipe is more than just a meal; it's a moment of pure culinary delight, bringing smiles and satisfied sighs to everyone at the table. So go ahead, whip up a batch, and prepare to fall head over heels for this unbelievably delicious creation. For more comforting recipes, explore recipesdarleen.com. It's truly better than takeout!

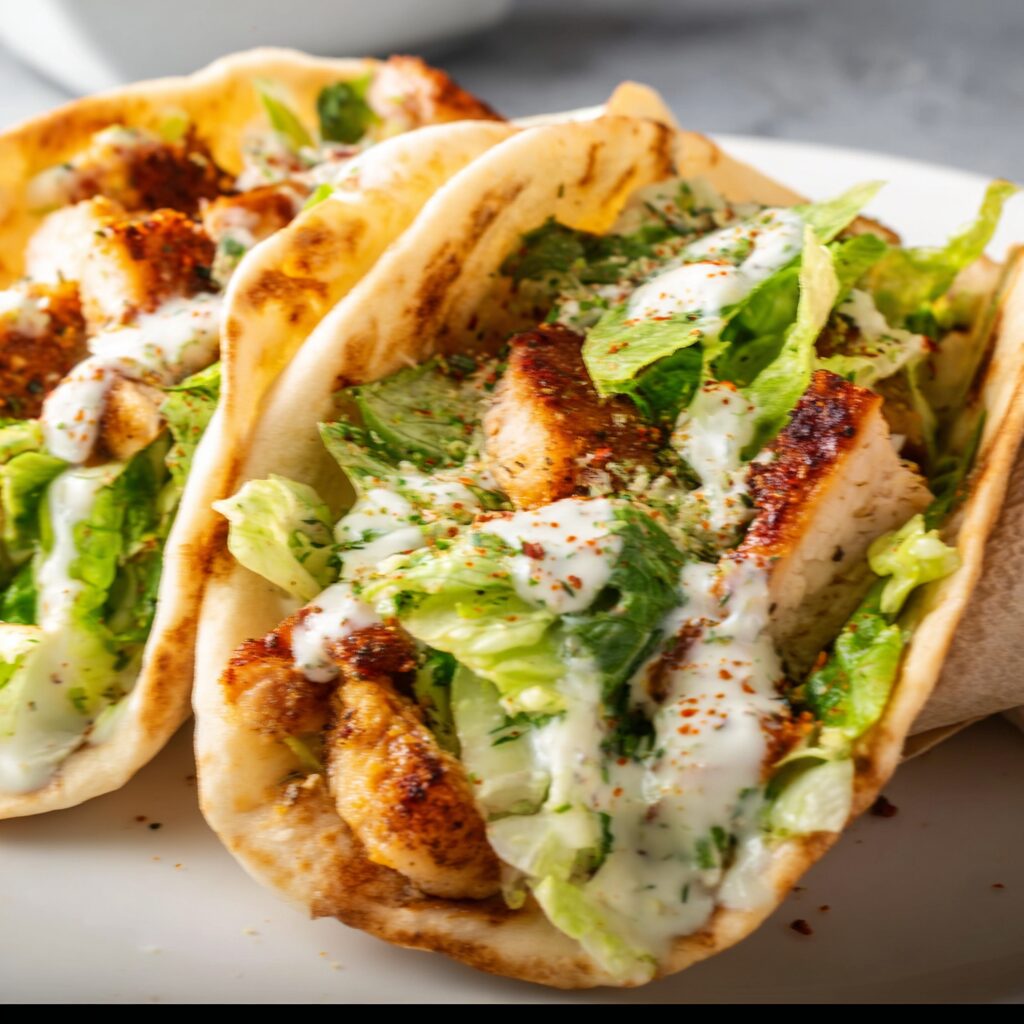
  • Chicken Caesar Smash Tacos: Irresistibly Crispy, Burst of Flavor!

    Chicken Caesar Smash Tacos: Irresistibly Crispy, Burst of Flavor!

    The first time I served these Chicken Caesar Smash Tacos, my husband, who usually just nods politely at new recipes, stopped mid-bite and declared, "Okay, this is a keeper." It was an unexpected reaction, but truly, these aren't just any tacos. They take everything you adore about a classic Caesar salad – the creamy dressing, the crisp romaine, the savory Parmesan, and tender chicken – and smash it into a crispy, golden tortilla. Get ready for a weeknight dinner that feels like a gourmet treat, igniting a craving you didn't know you had.

    Why You'll Love This Chicken Caesar Smash Tacos

    Insanely Flavorful & Addictively Crispy

    These Chicken Caesar Smash Tacos are an absolute game-changer, combining classic flavors with an exciting new format. Imagine perfectly seasoned ground chicken, smashed onto a warm tortilla, creating those irresistible crispy edges that deliver texture in every bite. The savory chicken, combined with tangy Caesar dressing, fresh romaine, and salty Parmesan, creates a flavor explosion that’s both familiar and thrillingly fresh. It’s a dish that feels incredibly comforting yet surprisingly gourmet, making it perfect for both quick weeknight meals and entertaining. Trust me, these disappear fast.

    Quick, Easy & Utterly Satisfying

    One of the best parts about these smash tacos is how incredibly quick and easy they are to whip up. You’ll be amazed at how such a simple concept yields such a profoundly satisfying meal. With minimal prep and a single skillet, you can have dinner on the table in under 30 minutes. It's the ideal solution for those busy evenings when you crave something delicious without spending hours in the kitchen. The combination of protein, fresh greens, and a hearty tortilla ensures a complete and utterly fulfilling meal that will leave everyone at the table happy and reaching for more.

    Essential Tips & Tricks

    Achieving the Perfect "Smash"

    The secret to the best smash tacos lies in the technique. Use 80/20 ground chicken for the best flavor and juiciness, forming small, loose balls. Place them on a hot, lightly oiled tortilla in your skillet, then use a sturdy spatula or the bottom of a heavy pan to firmly press them down until the chicken is thin and covers the tortilla. Don't be shy with the pressure! This creates maximum surface contact for that gorgeous, crispy browning and ensures the chicken cooks evenly and quickly. A truly crispy smash taco is all about that initial, decisive press.

    Elevate Your Caesar Game

    While a good quality store-bought Caesar dressing is perfectly fine for these tacos, don't underestimate the power of a few small additions. A squeeze of fresh lemon juice brightens everything up, while a dash of Worcestershire sauce or a tiny bit of anchovy paste (if you’re feeling adventurous) can deepen the umami notes in the dressing. For an extra kick, a pinch of red pepper flakes mixed into the chicken or dressing adds a subtle warmth. Remember, the dressing is a star here, so make it shine! This is seriously addictive.

    Serving Ideas & Variations

    Creative Topping Combos

    While the classic Caesar toppings of romaine and Parmesan are fantastic, don't hesitate to get creative! Add some crunchy croutons (or even crushed tortilla chips) for an extra layer of texture. Diced avocado brings a creamy richness that beautifully complements the tangy dressing. Thinly sliced red onion or a sprinkle of fresh chives can add a pop of color and a fresh bite. For a spicier twist, a drizzle of hot sauce or a few pickled jalapeños can really elevate the experience. Think of these Chicken Caesar Smash Tacos as a canvas for your culinary imagination.

    Delicious Side Pairings

    These smash tacos are hearty enough to be a meal on their own, but they also pair wonderfully with a variety of sides. A simple side salad, like a fresh tomato and cucumber salad, offers a refreshing contrast. For something more substantial, consider a batch of crispy sweet potato fries or a light pasta salad. If you're looking for other chicken dishes, check out our Crispy Garlic Parmesan Ranch Smash Chicken. For a truly indulgent experience, a creamy corn salsa or a simple bowl of black beans can round out the meal beautifully. Experiment to find your perfect combination!

    Storage & Troubleshooting

    Reheating for Best Results

    For the best experience, these Chicken Caesar Smash Tacos are definitely best enjoyed fresh, when the chicken is hot and crispy and the lettuce is cool and crisp. However, if you have leftovers, store the cooked chicken and tortillas separately from the fresh toppings (romaine, dressing, Parmesan) in airtight containers in the refrigerator for up to 2-3 days. To reheat, warm the chicken and tortillas in a dry skillet over medium heat until crispy again, then assemble with fresh toppings. This way, you avoid soggy tacos and enjoy a near-fresh experience.

    Common Smash Taco Pitfalls

    Sometimes, things don't go perfectly, but troubleshooting is easy. If your chicken isn't getting crispy, ensure your skillet is hot enough and don't overcrowd the pan. Cook in batches if necessary. If the tortillas are getting too hard, you might be cooking them too long or using too high heat; aim for a golden crisp, not a brittle crunch. If your tacos are bland, remember to season your ground chicken generously before smashing. A little extra salt, pepper, and garlic powder go a long way. Don't forget, you can always adjust the dressing and toppings to your taste.

    Frequently Asked Questions

    Can I use a different type of ground meat?

    Absolutely! Ground turkey or even ground beef (for a beef Caesar taco twist) would work wonderfully. Adjust cooking times slightly as needed, but the smashing technique remains the same for great texture.

    What kind of tortillas are best?

    Small flour tortillas (fajita or street taco size) work best for smashing. They are pliable enough to press down and achieve that perfect crispy edge while holding up to the fillings.

    Can I make Chicken Caesar Smash Tacos dairy-free?

    Yes, you can! Use a dairy-free Caesar dressing and omit the Parmesan cheese, or use a dairy-free Parmesan alternative. The chicken and romaine are naturally dairy-free.

    How can I make these tacos spicier?

    To add heat, incorporate a pinch of red pepper flakes into the ground chicken mixture, or drizzle some hot sauce over the finished tacos. Pickled jalapeños are also a fantastic spicy addition.

    Can I meal prep these tacos?

    You can cook the chicken and store it separately. Prepare the dressing and chop the romaine. Assemble just before eating to ensure the freshest, crispiest Chicken Caesar Smash Tacos experience.

    Final Thoughts

    These Chicken Caesar Smash Tacos have quickly become a staple in my kitchen, and for good reason. They’re a testament to how simple ingredients, combined with a clever technique, can create something truly extraordinary and deeply satisfying. The crispy, savory chicken, the creamy Caesar dressing, and the fresh crunch of romaine come together in a way that feels both comforting and exciting. I hope these tacos bring as much joy and deliciousness to your table as they have to mine. This isn't just dinner; it's a crave-worthy experience that you’ll want to revisit again and again.

  • Crockpot Fiesta Chicken: Irresistibly Easy, Flavor-Packed Meal!

    Crockpot Fiesta Chicken: Irresistibly Easy, Flavor-Packed Meal!

    The first time I made this Crockpot Fiesta Chicken, I genuinely didn't expect it to become such a sensation. My family devoured it so fast, I barely got a second helping! It’s one of those magical dishes where minimal effort yields maximum flavor, leaving everyone asking for the recipe. This is seriously addictive. You'll find yourself craving the vibrant, zesty taste of this incredibly easy meal time and time again.

    Why You'll Love This Crockpot Fiesta Chicken

    Effortless Weeknight Wonder

    Life gets hectic, and sometimes cooking a delicious, wholesome meal feels like an impossible task. This Crockpot Fiesta Chicken solves that problem beautifully. You simply toss a few ingredients into your slow cooker, set it, and forget it. Imagine coming home to the most incredible aromas filling your kitchen, knowing dinner is already handled. It’s the ultimate comfort food without the fuss, perfect for busy evenings. This recipe practically cooks itself, leaving you more time for what truly matters.

    Bursting with Irresistible Flavors

    Get ready for a flavor explosion! This dish is a celebration of vibrant, zesty, and savory notes that dance on your palate. Tender chicken breast soaks up a rich blend of salsa, corn, black beans, and a secret medley of spices, creating a truly irresistible meal. Each bite delivers that perfect balance of warmth and tang, making it a guaranteed crowd-pleaser. Trust me, you'll crave this again. It’s comforting, satisfying, and packed with that crave-worthy Tex-Mex goodness everyone adores.

    Essential Tips & Tricks

    Choose Your Chicken Wisely

    For the best results with your Crockpot Fiesta Chicken, I highly recommend using boneless, skinless chicken breasts or thighs. Breasts are leaner and shred beautifully, while thighs offer a richer flavor and stay incredibly moist. Whichever you choose, ensure they are roughly uniform in size to promote even cooking. Patting them dry before adding to the crockpot can also help them absorb the delicious seasonings even better. This simple step ensures every piece is infused with incredible taste.

    Don't Skimp on Quality Ingredients

    While this recipe is wonderfully forgiving, using good quality ingredients really elevates the flavor of your Crockpot Fiesta Chicken. A great jar of salsa, fresh or frozen corn, and well-drained black beans make all the difference. Consider adding a squeeze of fresh lime juice at the end for a bright finish; it truly awakens all the flavors. For an extra layer of deliciousness, try making your own homemade salsa, or choose a brand you absolutely love. For another easy chicken dish, check out my Crispy Garlic Parmesan Ranch Smash Chicken.

    Serving Ideas & Variations

    Versatile Ways to Enjoy Your Fiesta Chicken

    The beauty of Crockpot Fiesta Chicken lies in its incredible versatility! Serve it traditionally over a bed of fluffy rice or quinoa for a hearty meal. It also makes fantastic tacos, burritos, or quesadillas – just spoon the shredded chicken into warm tortillas with your favorite toppings. For a lighter option, pile it into lettuce wraps or create a vibrant salad. It's also delicious as a topping for nachos, creating an instant party appetizer! This dish is a true chameleon in the kitchen.

    Creative Twists for Extra Fun

    Want to elevate your Crockpot Fiesta Chicken even further? Consider stirring in a block of cream cheese during the last 30 minutes of cooking for an extra creamy texture. A sprinkle of fresh cilantro or diced avocado just before serving adds a pop of freshness and healthy fats. For a kick, add a diced jalapeño or a pinch of cayenne pepper with the spices. You can even serve it alongside my Sweet Creamed Corn Casserole for a truly indulgent side. The possibilities are endless for customizing this fiesta.

    Storage & Troubleshooting

    Storing Leftovers Like a Pro

    Proper storage ensures your delicious Crockpot Fiesta Chicken stays fresh and tasty for days. Once cooled, transfer any leftovers to an airtight container and refrigerate for up to 3-4 days. For longer storage, it freezes beautifully! Portion the chicken into freezer-safe bags or containers and freeze for up to 3 months. Thaw overnight in the refrigerator before reheating gently on the stovetop or in the microwave. This simple planning makes meal prep a breeze.

    Common Issues and Quick Fixes

    Sometimes, even the easiest recipes can throw a curveball. If your Crockpot Fiesta Chicken seems a bit too watery, simply remove the lid for the last 30 minutes of cooking on high, allowing some moisture to evaporate. If it's too thick, a splash of chicken broth will loosen it right up. Overcooked chicken can be tough, so stick to the recommended cooking times. If your chicken is undercooked, simply continue cooking until it reaches an internal temperature of 165°F (74°C). Don't let small hiccups deter you!

    Frequently Asked Questions

    Can I use frozen chicken breasts?

    Yes, you can! Just ensure they are separated before adding to the crockpot. You may need to add an extra hour to the cooking time to ensure they cook through properly and safely.

    What are good toppings for Crockpot Fiesta Chicken?

    Classic toppings include shredded cheese, sour cream or Greek yogurt, fresh cilantro, diced avocado, jalapeños, or a squeeze of lime juice. Get creative with your favorites!

    Can I make this spicier?

    Absolutely! Add a diced jalapeño or serrano pepper with the other ingredients, or a pinch of cayenne pepper, red pepper flakes, or a dash of hot sauce.

    Is this recipe healthy?

    This Crockpot Fiesta Chicken can be very healthy! It's lean protein with plenty of vegetables. To make it even healthier, use low-sodium ingredients and serve with brown rice or a salad.

    Can I cook this on high?

    Yes, you can cook it on high for 2-3 hours. The chicken should be easily shredded with two forks when done. Always check the internal temperature.

    Final Thoughts

    This Crockpot Fiesta Chicken is more than just a meal; it's a vibrant, comforting experience that brings smiles to the table with minimal effort. I absolutely adore how it transforms simple ingredients into something truly spectacular and crave-worthy. Whether it's a busy weeknight or a relaxed weekend gathering, this recipe consistently delivers on flavor and ease. It's a dish that truly nourishes both body and soul, making you feel like a kitchen superstar without breaking a sweat. Pin this recipe to your Pinterest board – it’s destined to become a family favorite!