Category: Dinner

Easy, tasty dinner ideas for busy nights. Simple recipes, quick prep, and family-friendly meals you’ll make again and again.

  • 2-Ingredient Salsa Verde Chicken (Juicy, Fast, Weeknight Win)

    2-Ingredient Salsa Verde Chicken (Juicy, Fast, Weeknight Win)

    This recipe started as a last-minute meal when I had exactly two things in the fridge: chicken and a jar of salsa verde. I tossed them in a baking dish, crossed my fingers, and 25 minutes later discovered the juiciest, tangiest chicken I’d made all month. Now I keep salsa verde on standby because it transforms simple chicken into tacos, bowls, or salads without any chopping. If you love set-it-and-forget-it dinners that deliver big flavor with minimal effort, this 2-ingredient Salsa Verde Chicken is about to become your midweek hero.
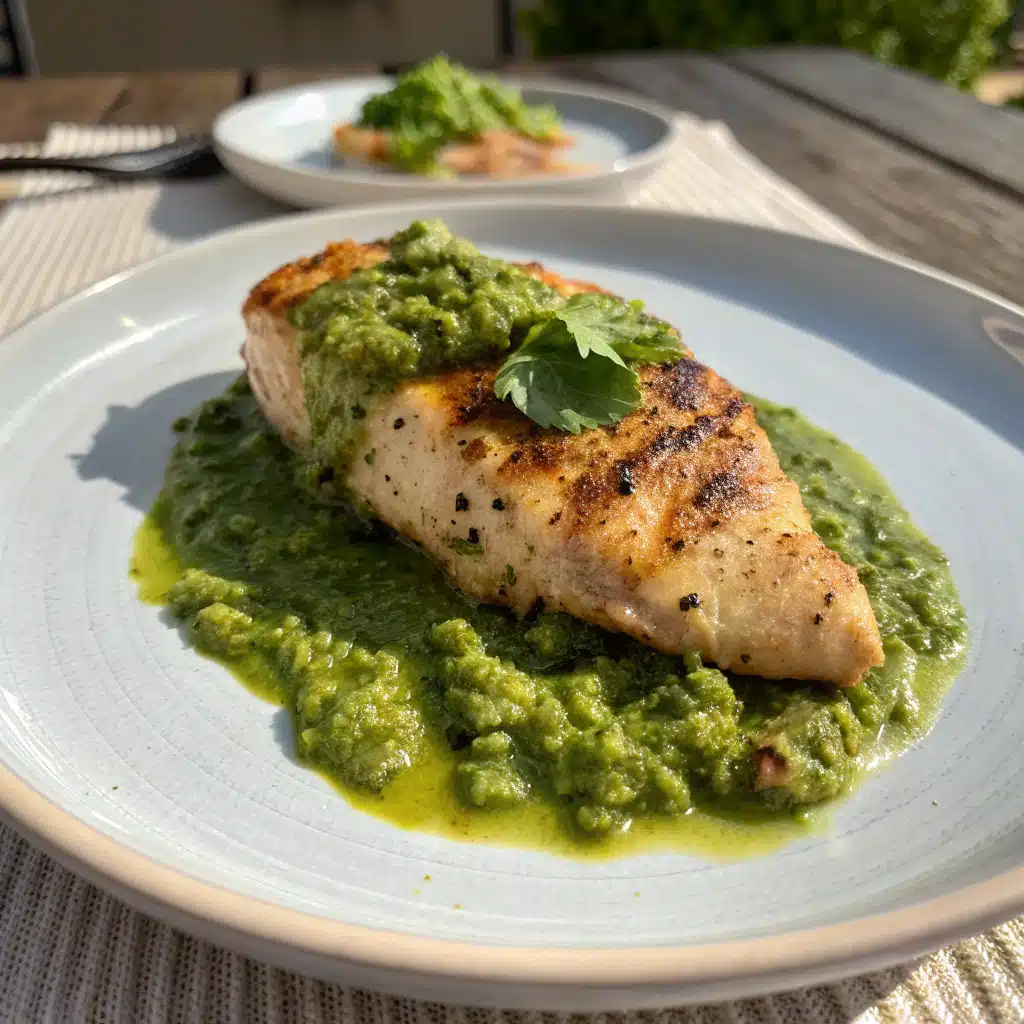
    2-Ingredient Salsa Verde Chicken (Juicy, Fast, Weeknight Win)

    Recipe

    Why You’ll Love This 2-Ingredient Salsa Verde Chicken

    Some recipes are so simple they feel like a trick. This 2-ingredient Salsa Verde Chicken is one of them: bright, tangy, savory, and ridiculously versatile, it belongs in every busy cook’s rotation.

    What makes it special:
    – Pure ease: two ingredients, one pan, and minimal cleanup.
    – Fast: ready in about 30 minutes in the oven (or hands-off in the slow cooker).
    – Juicy results: the acidity and moisture in salsa verde help keep chicken tender.
    – Versatility: shred it for tacos, pile over rice, or layer into enchiladas. It fits nearly any dinner mood.
    – Meal-prep friendly: it reheats beautifully and tastes even better on day two as flavors meld.

    The flavor backbone is salsa verde, a tomatillo-based sauce that’s naturally bright and slightly tart. Think roasted tomatillos, jalapeños or serranos, cilantro, onion, and lime working together to both season and baste the chicken as it cooks. As the chicken releases juices, it mingles with the salsa verde to create a tangy pan sauce that begs to be spooned over rice or sopped up with warm tortillas.

    Choose your chicken: breasts deliver lean, sliceable pieces; thighs are more forgiving and nearly impossible to overcook. Either way, you get melt-in-your-mouth bites with barely any effort.

    If your week is crowded with errands, kids’ activities, or late work calls, this dish acts like a pressure release valve. It’s nearly as easy as ordering takeout, but healthier, cheaper, and more customizable. Bonus: it’s naturally gluten-free and can be dairy-free, low-carb, and high-protein without any extra work.

    Use it as a launchpad for flavor. Want heat? Grab a spicier salsa verde. Prefer mild? Go with a tomatillo-forward jar. Craving creaminess? Stir in a spoonful of Greek yogurt or cream cheese after cooking (totally optional and beyond the base two ingredients). No matter how you riff, the base stays the same: two ingredients, big payoff.

    Ingredient Notes, Substitutions, and Store-Bought Shortcuts

    Chicken: Boneless, skinless chicken breasts or thighs both work. For sliceable breast meat, aim for evenly sized pieces about 3/4 inch thick so they cook at the same rate. If using thighs, trim excess fat for cleaner pan juices. Organic or air-chilled chicken tends to have better texture, but any good-quality chicken will shine thanks to the saucy bath.

    Salsa verde: Jarred, refrigerated, or homemade are all excellent. Look for a clean label with tomatillos near the top of the ingredient list. Flavor varies by brand—some are bright and citrusy, others smoky or spicy. A few great options: Herdez (classic and widely available), Trader Joe’s (consistent and bright), Frontera (restaurant-style), and La Victoria (mild and family-friendly). If sodium is a concern, choose a lower-sodium jar and taste the sauce before cooking.

    Substitutions and tweaks:
    – Protein swap: boneless pork tenderloin medallions or boneless, skinless turkey cutlets cook similarly to chicken breasts. Keep an eye on temperature and pull at 165°F for poultry, 145°F for pork.
    – Heat control: if your jar runs spicy, add a splash of chicken broth to soften the heat after cooking, or finish with a squeeze of lime for brightness without extra spice.
    – Fresh herbs: cilantro and green onion make beautiful garnishes, but they’re optional.
    – Texture: prefer shredded chicken for tacos and nachos? Bake or slow cook, then shred directly in the pan juice.

    Make it yours without complicating dinner:
    – Citrus lift: a final squeeze of lime over the sliced chicken.
    – Creamy variation: stir a spoonful of cream cheese, Mexican crema, or Greek yogurt into the hot pan sauce for a silky finish (this takes it beyond two ingredients, but it is a delicious twist).
    – Extra aromatics: a pinch of ground cumin or garlic powder before baking can add warmth—but truly, the salsa verde does the heavy lifting.

    If your household loves set-it-and-forget-it meals, this recipe pairs perfectly with slow cooker classics like our comforting chicken noodle soup (crock pot secrets) or creamy indulgences such as Olive Garden Chicken Pasta (Crockpot). If high-protein dinners are your thing, check out the fan-favorite High-Protein Marry Me Chicken (Slow Cooker) for another easy weeknight win.

    How to Make Salsa Verde Chicken (Oven, Skillet, Slow Cooker, Instant Pot)

    Key tip for all methods: cook to an internal temperature of 165°F and rest 5 minutes before slicing or shredding. That pause lets juices redistribute so the meat stays moist.

    Oven method (fast and foolproof)
    1) Prep: Preheat oven to 400°F. If using breasts, lightly pound the thick end to even the thickness. Pat chicken dry.
    2) Pan it: Place chicken in a baking dish in a single layer. Pour salsa verde over the top, coating every piece and letting some sauce pool around the sides. You want a generous sauce layer—it bastes the chicken as it cooks.
    3) Bake: Cook for 22 to 28 minutes, depending on thickness. Start checking at 20 minutes. Breasts usually finish closer to 22–25 minutes; thighs, 25–28 minutes. When the thickest part hits 165°F, pull it.
    4) Rest and serve: Let rest 5 minutes. Slice or shred. Toss in the pan juices and spoon extra sauce over your plate.

    Skillet method (sear + simmer)
    1) Sear: Heat a large skillet over medium-high with a light film of oil. Sear chicken 2–3 minutes per side to develop color.
    2) Sauce and cook: Reduce heat to medium-low, pour salsa verde over, cover, and simmer 8–12 minutes until the chicken reaches 165°F.
    3) Finish: Rest, slice or shred, and return to the skillet to soak up the sauce.

    Slow cooker method (hands-off)
    1) Load: Add chicken to a slow cooker and pour salsa verde over. Cover.
    2) Cook: 3–4 hours on low or 2–3 hours on high, until the chicken shreds easily and reaches 165°F.
    3) Shred in pot: Use two forks to shred directly in the sauce. Keep on warm until serving.

    Instant Pot method (fast shreddable)
    1) Layer: Add chicken and salsa verde. No extra liquid is usually needed because salsa verde is thin, but if your model is sensitive to burn warnings, add 1–2 tablespoons water.
    2) Pressure cook: Seal and cook on High for 10 minutes (boneless breasts) or 12 minutes (thighs). Natural release 5 minutes, then quick release.
    3) Shred: Shred in the pot and stir to coat in the sauce. If the sauce is thin, simmer on Sauté for a few minutes to reduce.

    Troubleshooting and pro tips
    – Dry chicken: Slice thickness matters. Even 3/4-inch breasts cook more evenly. If your chicken tends to dry, choose thighs or pull breasts at 160–162°F and let carryover heat finish.
    – Watery sauce: Chicken releases juices as it cooks. For a thicker sauce, simmer the pan juices in a small saucepan to reduce, or whisk in a small knob of cream cheese off heat for a creamy variation.
    – Flavor balance: Salsa verde leans tangy. A quick squeeze of lime and a sprinkle of chopped cilantro right before serving keeps it fresh and bright.

    Serving Ideas, Side Dishes, and Meal Prep

    This is where 2-ingredient Salsa Verde Chicken becomes a dinner chameleon. Make one batch, then reimagine it all week.

    Serving ideas
    – Taco night: tuck shredded chicken into warmed corn tortillas with diced onion, cilantro, and a squeeze of lime. Add crumbly cotija for richness.
    – Rice bowl: spoon over cilantro-lime rice or cauliflower rice with black beans, charred corn, and avocado.
    – Nachos: scatter across tortilla chips, drizzle extra salsa verde, add cheese, and broil until melty. Finish with pickled jalapeños.
    – Enchiladas: roll into tortillas, nestle in a baking dish, top with more salsa verde and cheese, and bake until bubbly.
    – Salad: layer over chopped romaine with radishes, cucumbers, pepitas, and a yogurt-lime drizzle.
    – Baked potatoes: load a fluffy baked russet or sweet potato with chicken, salsa, and a dollop of Greek yogurt.

    Side dishes
    – Quick skillet corn with lime and cilantro.
    – Simple slaw with cabbage, red onion, and apple cider vinegar.
    – Roasted peppers and onions for fajita-style plates.
    – Warm beans—black or pinto—with a pinch of cumin.

    Meal prep and storage
    – Fridge: store in an airtight container up to 4 days. Keep some of the sauce with the chicken to maintain moisture.
    – Freezer: portion into freezer bags or containers (with sauce) and freeze up to 3 months. Thaw overnight in the fridge.
    – Reheat: gently on the stovetop over low heat or in the microwave at 50–60% power, stirring once or twice. If dry, add a spoonful of salsa verde or a splash of broth to revive juiciness.
    – Batch cooking: double the recipe in a 9×13-inch dish for a crowd. The cook time remains similar; avoid overcrowding so the sauce can bubble.

    Turn leftovers into new meals
    – Quesadillas with pepper jack and sautéed onions.
    – Breakfast tacos with scrambled eggs and a little hot sauce.
    – Tortilla soup topper: add shredded chicken to your favorite tomato-tomatillo broth.
    – Burrito bowls with rice, beans, lettuce, and pico de gallo.

    Nutrition-friendly swaps
    – Low-carb: pair with cauliflower rice and sautéed greens.
    – High-protein: add extra chicken and a side of beans or Greek yogurt.
    – Dairy-free: skip creamy finishes and lean on avocado for richness.

    With a jar of salsa verde and a pack of chicken, you’re never far from a craveable dinner. Keep both on your weekly shopping list and you’ll always have a plan.

    Conclusion

    When dinner needs to be quick, unfussy, and not remotely boring, 2-ingredient Salsa Verde Chicken delivers every time. Lean protein, bold flavor, and maximum flexibility mean you can eat it a different way all week—tacos tonight, bowls tomorrow, and maybe enchiladas on the weekend. Whether you bake, slow cook, or hit the Instant Pot, the method is simple and the results are consistently juicy. Keep this recipe in your back pocket and your weeknight meals will feel lighter, brighter, and a lot more fun.

    If this two-ingredient wonder becomes a weeknight staple in your kitchen, share it with a friend on facebook and make a double batch next time—future you will be thrilled to have it ready for tacos, bowls, and beyond.

    FAQ

    Can I use frozen chicken? Yes, but thaw it completely first for even cooking. If cooking from frozen in the Instant Pot, add 2–3 minutes to the pressure time. For oven or slow cooker, thawing is best for texture and food safety.

    Breasts or thighs: which is better? Both work. Breasts are lean and slice neatly; thighs are richer and extra juicy. If you struggle with dry chicken breasts, try thighs—they’re more forgiving.

    How do I prevent the chicken from drying out? Cook to 165°F and rest 5 minutes. Even thickness helps, and letting the meat sit in its warm pan juices before serving keeps it moist.

    Is salsa verde spicy? It depends on the brand. Most are mild to medium. If you’re heat-sensitive, choose a mild jar or balance the tang with a little extra lime and avocado at serving.

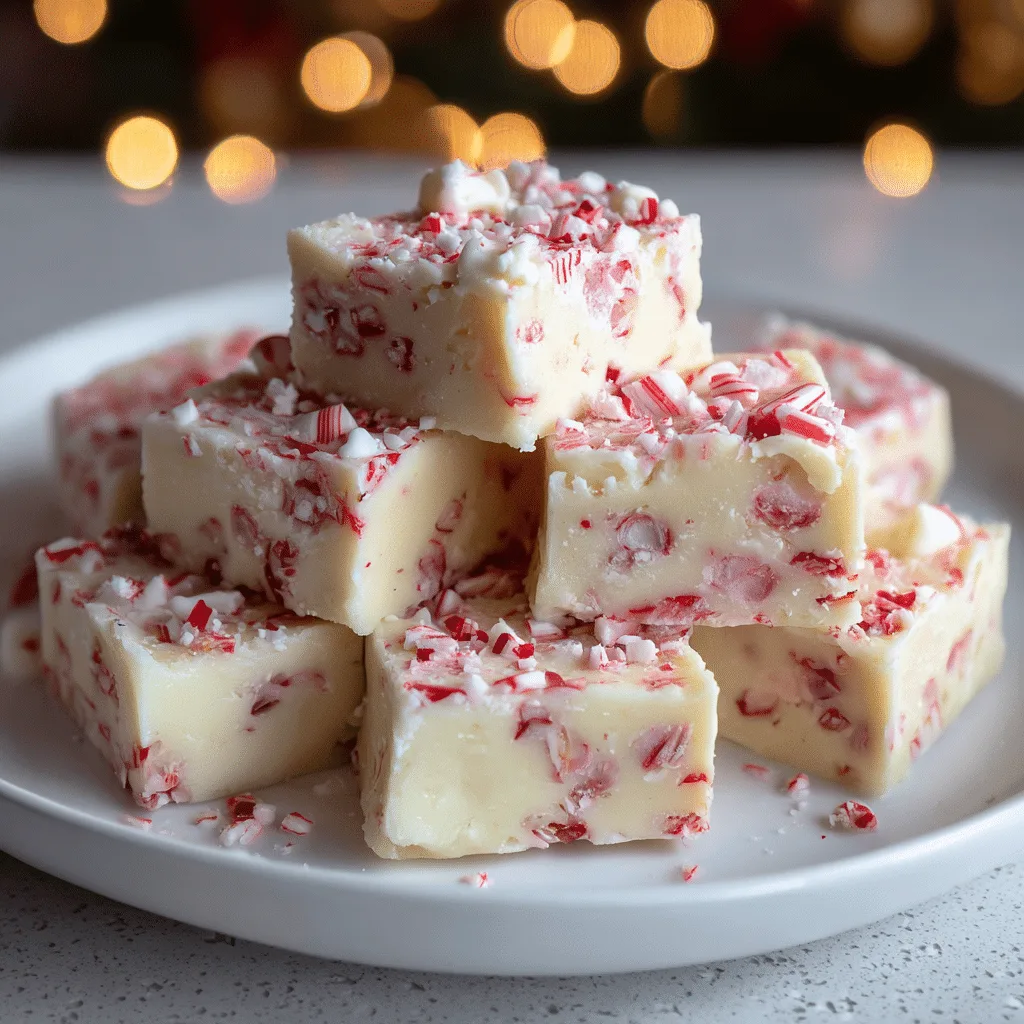
  • Fudgy Red Velvet Crinkle Cookies | Festive, Chewy, and Easy

    Fudgy Red Velvet Crinkle Cookies | Festive, Chewy, and Easy

    Every December, I bake a parade of cookies for our neighborhood swap, but these fudgy red velvet crinkle cookies always disappear first. They’re deeply cocoa-kissed with that classic red velvet tang and a soft, brownie-like center that makes everyone reach for seconds. The snow-dusted finish looks dramatic without any fuss, so the cookies feel special even on a busy weeknight. Over the years, I’ve perfected a few tricks—chilling the dough, a double sugar coat, and a careful bake—that guarantee bold crinkles and tender chew. This is the festive cookie you’ll be proud to gift, plate up for parties, and sneak from the cooling rack before they’re even cool.

    Fudgy Red Velvet Crinkle Cookies | Festive, Chewy, and Easy

    ???? Recipe Card

    Why These Fudgy Red Velvet Crinkle Cookies Steal the Holiday Spotlight

    There’s a reason red velvet bakes dominate during the holidays: they’re equal parts cozy nostalgia and show-stopping color. These Red Velvet Crinkle Cookies bring everything you love about red velvet cake—gentle cocoa, vanilla warmth, and that signature tang—into a fudgy, handheld bite that’s tailor-made for cookie exchanges and dessert boards. The hallmark of a great crinkle cookie is contrast: a soft, brownie-like center surrounded by dramatic, snow-like fissures of powdered sugar. This recipe maximizes those crinkles with a few key techniques and ingredients that keep the cookies plush without sacrificing structure.

    The flavor base starts with unsweetened cocoa powder for depth, vanilla to round things out, and a touch of distilled white vinegar—an essential red velvet element that adds a subtle tang and helps the leaveners lift. To achieve the fudgiest texture, we use both softened butter and a bit of neutral oil; the butter brings flavor while the oil keeps the crumb moist for days.

    Color matters for visual impact. A gel or concentrated liquid food coloring yields a deep crimson hue that won’t fade while baking. Don’t worry: the coloring won’t affect flavor when used as directed. And because red velvet loves a creamy counterpart, a handful of white chocolate chips is optional but delightful—melty pools that punctuate the cocoa and vanilla.

    The snowcapped look comes from rolling well-chilled dough balls first in granulated sugar and then in confectioners’ sugar. The granulated sugar creates a thin barrier that helps the powdered sugar sit on top without dissolving, so your cookies emerge with dramatic cracks instead of a muted dusting.

    On a festive dessert tray, these cookies shine alongside classics like peppermint bark or simple fudge. If you want an easy candy to pair with your cookie tins, try this no-fuss 3-Ingredient Candy Cane Fudge. Together, they make a polished, giftable duo with big holiday flavor and a fraction of the effort.

    Step-by-Step: How to Make Red Velvet Crinkle Cookies with Perfect Cracks

    Set yourself up for success by starting with room-temperature ingredients. When butter and eggs are slightly warm, they emulsify more smoothly, which leads to a uniform crumb and even rise. A kitchen scale is helpful for accuracy, especially with flour and cocoa.

    1) Whisk your dry mix: In a medium bowl, whisk all-purpose flour, unsweetened cocoa powder, baking powder, a pinch of baking soda, and salt. Cocoa can clump; take a few extra seconds to break it up thoroughly for an even bake.

    2) Cream with intention: In a large bowl, beat softened unsalted butter with granulated sugar and light brown sugar until pale and fluffy, about 2–3 minutes. This step traps air, helping your cookies puff and crackle properly. Beat in a splash of neutral oil. The oil adds moisture that keeps the centers fudgy after cooling.

    3) Layer flavor: Beat in eggs one at a time until fully incorporated, then add vanilla and a teaspoon of distilled white vinegar. The vinegar brightens the cocoa and works with the leaveners to create that pillowy, crinkled top.

    4) Color control: Add red gel food coloring a little at a time until you reach a vibrant, deep red. Gel coloring is potent, so you’ll use less for stronger results than with standard liquid color.

    5) Combine with care: Add the dry ingredients to the wet on low speed until just combined; overmixing can toughen the cookie. Fold in white chocolate chips if using. The dough should be soft but workable.

    6) Chill for confidence: Cover the bowl and chill for at least 45 minutes (or up to 48 hours). Chilling firms the dough, prevents excessive spreading, and deepens the flavors. If you chill overnight, let the dough sit at room temperature for 10–15 minutes to become scoopable again.

    7) Double-coat for dramatic crinkles: Prepare two shallow bowls—one with granulated sugar and the other with confectioners’ sugar. Scoop dough into 1.5-tablespoon portions (a #40 scoop works well), roll each into a ball, coat generously in granulated sugar, then coat thoroughly in confectioners’ sugar. A thick powdered sugar layer is key to bold, lasting contrast.

    8) Bake precisely: Arrange on a parchment-lined baking sheet, spacing well. Bake in a 350°F (175°C) oven for 10–12 minutes. Look for edges that are set and centers that are puffed and slightly underdone; the crinkles should be prominent. Avoid overbaking—cookies continue to set as they cool, and overbaking erases that brownie-like center.

    9) Cool with patience: Let cookies rest on the sheet for 5 minutes, then transfer to a rack to cool completely. If needed, dust with additional confectioners’ sugar after cooling.

    Pro tips for consistent results:
    – Flour matters: Spoon and level flour into the cup or use a scale to avoid dry, cakey cookies.
    – Pans count: Light-colored aluminum sheets and parchment promote even baking and cleaner bottoms.
    – Batch timing: Work in small batches, keeping unbaked dough covered and chilled so it stays firm for rolling and coating.
    – Visual cues over time: Ovens vary. Your first batch is a test—aim for cookies that are just set at the edges with soft centers and defined cracks.

    Variations, Make-Ahead, and Storage Tips for Busy Festive Schedules

    One recipe, many moods—that’s the beauty of red velvet cookies. Once you master the base, small tweaks deliver fresh flavors and textures.

    Flavor twists to try:


    – Peppermint White Chocolate: Swap in peppermint chips or add 1/2 teaspoon peppermint extract. Finish with crushed candy cane for sparkle.
    – Cream Cheese Glaze: Whisk softened cream cheese with confectioners’ sugar, a pinch of salt, and a splash of milk until drizzly. Drizzle over cooled cookies for that classic red velvet–cream cheese pairing.
    – Mocha Velvet: Add 1 teaspoon instant espresso powder to the dry ingredients to deepen the cocoa notes.
    – Beets for Color: For a natural hue, use beet powder (1–2 teaspoons) along with a touch of gel color if needed. You’ll get a more muted, earthy red with zero bitterness.
    – Gluten-Free Swap: Use a quality 1:1 gluten-free baking blend and let the dough rest in the fridge for an extra 15–20 minutes to hydrate the starches.

    Make-ahead plans that work:
    – Chill the Dough: The dough keeps covered in the fridge for up to 48 hours. Scoop directly from chilled and roll in sugars right before baking so the coating stays bright.
    – Freeze the Dough Balls: Scoop and roll dough into balls, freeze on a tray until firm, then store in a zip-top bag up to 2 months. Roll in granulated and powdered sugar straight from frozen and add 1–2 minutes to the bake time.
    – Bake and Freeze: Baked cookies freeze beautifully. Cool completely, layer with parchment in an airtight container, and freeze up to 2 months. Thaw at room temperature and re-dust with confectioners’ sugar if needed.

    Creative serving and gifting:
    – Sandwich Cookies: Pair two cookies with a thin layer of buttercream, marshmallow fluff, or thick caramel. A slow-cooker caramel is especially simple—make a batch of slow cooker dulce de leche and spread a teaspoon between two cookies for an irresistible treat.
    – Cookie Charcuterie Boards: Arrange your crinkles with a mix of textures—crisp biscotti, chewy ginger cookies, and a few dipped fruits—so every bite on the board feels intentional. Include a small sifter of powdered sugar to refresh the look just before serving.

    Storage guidelines:
    – Room Temperature: Store cookies in an airtight container at cool room temperature for 4–5 days. Slip in a piece of parchment to prevent sticking if the environment is humid.
    – Humidity Control: To protect the powdered sugar finish, add a small packet of food-safe desiccant or a teaspoon of dry rice wrapped in cheesecloth to the container.
    – Re-Crinkle Trick: If the tops look dull after storage, dust lightly with confectioners’ sugar just before serving for a fresh “snow” effect.

    Serving Ideas, Pairings, and Troubleshooting for Bakery-Style Results

    Setting a festive scene is half the joy of holiday baking. These cookies are naturals on a dessert table with hot cocoa, coffee, or even a celebratory glass of bubbly. For New Year’s gatherings, I like to plate them with tart berries (raspberries or pomegranate arils) to contrast the sweetness and accent the red hue. On game days or casual potlucks, balance the dessert spread with a few savory crowd-pleasers; a warm, creamy option like this slow cooker jalapeño corn dip keeps the table interesting and rounds out your menu.

    Troubleshooting common issues:
    – Cookies Spread Too Much: Your dough was likely too warm or under-measured on flour. Chill the dough longer and confirm your flour measurement. If still spreading, add 1–2 tablespoons flour and test another cookie.
    – Crinkles Don’t Show: The powdered sugar may be dissolving. Be sure to double-coat—first in granulated sugar, then a heavy layer of confectioners’ sugar—and bake immediately after coating. Work with chilled dough and avoid overcrowding the pan.
    – Dry or Cakey Texture: Overbaking is the usual culprit. Pull the cookies when edges are just set and centers are soft and puffy. Measure flour carefully and don’t overmix once the flour goes in.
    – Bitter Flavor: Using too much liquid food coloring can leave a harsh aftertaste. Switch to gel color and add gradually. Also check your cocoa—Dutch-process will taste smoother, while some natural cocoas can lean sharper.
    – Flat Tops, Minimal Lift: Cream your butter and sugars fully to incorporate air, and make sure your baking powder and baking soda are fresh. The vinegar + leavener combo needs active agents to do its job.

    Scaling for crowds and timing:
    – Double the Recipe: Mix in a large bowl and chill the dough in two shallow containers for faster cooling. Bake on two racks, rotating halfway, to keep batches uniform.
    – Smart Staging: Scoop the next tray while one is in the oven, keeping the remaining dough covered and chilled so every batch crinkles the same.

    Presentation polish:
    – Sift-and-Serve: Right before serving, give cookies a quick snowfall of sugar to revive that fresh-baked, high-contrast look.
    – Color Coordination: Plate on matte white or slate boards so the crimson pops. Add rosemary sprigs or edible gold stars for instant holiday elegance without extra sweetness.

    Conclusion

    Fudgy Red Velvet Crinkle Cookies bring timeless holiday charm in a format that’s easy to bake, stunning to serve, and guaranteed to draw compliments. With a balanced cocoa profile, a whisper of tang, and brownie-soft centers, they’re everything you want from a celebration cookie. The method—chill, double-coat, bake just until set—delivers those sought-after crinkles every time. Whether you’re packing tins, building a dessert board, or sneaking a warm cookie with your evening cocoa, this recipe will become your festive classic for years to come.

    If you made these Fudgy Red Velvet Crinkle Cookies, leave a rating and a comment to share your tips and twists. Snap a photo and tag your bake—your holiday board might inspire someone else’s new favorite cookie! For more cozy, time-saving recipes, subscribe to get new ideas delivered to your inbox.

    FAQ

    Can I make these cookies without food coloring? Yes. The flavor won’t change if you omit the food coloring. For a natural alternative, try beet powder for a muted red or simply enjoy them as cocoa crinkle cookies.

    How do I keep the powdered sugar from melting into the cookies? Work with well-chilled dough, roll first in granulated sugar, then generously in confectioners’ sugar, and bake immediately after coating. Store in a cool, dry container and re-dust before serving if needed.

    Can I freeze the dough or baked cookies? Absolutely. Freeze portioned dough balls up to 2 months and bake from frozen, adding 1–2 minutes. Baked cookies also freeze well; thaw at room temperature and re-dust with sugar before serving.

    Why add vinegar to red velvet cookies? Vinegar adds classic red velvet tang and reacts with baking soda for lift, helping create puffy centers and pronounced crinkles without making the cookies taste acidic.

  • 3-Ingredient Candy Cane Fudge: A No-Bake Delight for the Holidays

    3-Ingredient Candy Cane Fudge: A No-Bake Delight for the Holidays

    It was a snowy afternoon, and the aroma of peppermint wafted through my cozy kitchen. As the world outside transformed into a winter wonderland, I found myself reminiscing about my childhood, filled with sweet treats and holiday cheer.

    One of my fondest memories is making fudge with my mom, her laughter ringing through the air as we melted chocolate and stirred in goodies. This year, I wanted to create something special, yet simple enough to share with my friends and family, so I thought, why not whip up some Candy Cane Fudge? With just three ingredients and a slow cooker, it’s the perfect no-bake solution for a sweet holiday treat that melts in your mouth and brings a smile to your face.

    A festive no-bake fudge made easily in a slow cooker, perfect for the holiday season. This pepperminty tre


    ???? Recipe


    Gather Your Ingredients for Candy Cane fudge

    To make this delightful Candy Cane Fudge, you’ll need just three ingredients, which means less time shopping and more time enjoying! First, gather one 14-ounce can of sweetened condensed milk, which will lend a creamy texture and sweetness that’s simply irresistible. Next, grab two cups of white chocolate chips. You can find these in the baking aisle, and they’ll melt down beautifully to create a luscious base for your fudge. Lastly, you’ll need about five candy canes, crushed into little pieces. This adds that delightful crunch and a burst of minty flavor that’s synonymous with the holiday season.

    I love using the mini candy canes for this because they’re cute and perfect for sprinkling on top. Now that you have your ingredients ready, let’s talk about preparation. There’s something so comforting about using a slow cooker, allowing you to blend and meld flavors without constant supervision. It’s like a warm hug for your kitchen, and the smell of melting chocolate is enough to make anyone feel festive! You can also prepare this fudge in a traditional saucepan, but I find the slow cooker to be a game-changer for recipes like this.

    Melting the Chocolate

    Begin by adding the sweetened condensed milk and white chocolate chips to your slow cooker. Set it on low and let those ingredients mingle, stirring occasionally to ensure everything melts evenly. You’ll notice the sweet aroma filling your kitchen; it’s almost like a warm invitation to gather around the table! Stirring is key here, as it helps prevent any chocolate from sticking to the sides or bottom. It usually takes about 30 minutes for the chocolate and milk to transform into a smooth, velvety mixture. Once everything is melted and well-combined, it’s time to add your crushed candy canes.

    I love the moment when you sprinkle those vibrant red and white bits into the creamy fudge; it’s like confetti on a celebration cake! Fold the candy canes into the mixture gently, allowing their minty essence to infuse the fudge. The texture is so creamy and thick; you can’t help but sneak a taste right then and there. Don’t worry, I won’t tell anyone! After you’ve mixed in the candy canes, it’s time to prepare your baking dish. Line an 8×8 inch square pan with parchment paper; this makes it easy to lift the fudge out later. Pour the creamy fudge mixture into the pan, spreading it evenly with a spatula. Don’t forget to reserve a few crushed candy canes for the top! Sprinkle them generously over the fudge before it sets, adding that lovely pop of color and crunch.

    Setting the Fudge

    Now comes the hardest part—waiting for the fudge to set! I like to place my fudge in the refrigerator for about 2-3 hours until it’s firm to the touch. If you’re like me and can’t resist snacking, just remember that patience is a virtue! While you wait, you can sip on a warm cup of cocoa, or even better, invite a friend over to share in the excitement of holiday baking. Once the fudge has set, it’s time for the grand reveal!

    Carefully lift the fudge out of the pan using the parchment paper. The fudge should come out easily, and you’ll be greeted by an inviting sight of creamy white fudge speckled with bright red bits of candy cane. Cut it into squares—don’t worry about them being perfect; the charm is in their homemade look! Store any leftovers (if there are any!) in an airtight container in the fridge. The fudge will keep well for about two weeks, though I doubt it’ll last that long with how delicious it is! You can serve it on a festive platter during your holiday gatherings, or package it up as sweet gifts for friends and family. Just imagine the delighted smiles as they unwrap this sweet surprise!

    Variations and Serving Suggestions for Candy Cane fudge

    While this Candy Cane Fudge is perfect as is, you can always get creative with variations! For a richer flavor, try adding a teaspoon of vanilla extract or a hint of peppermint extract for an extra kick. If white chocolate isn’t your favorite, you can substitute it with milk chocolate chips for a different taste experience. Another fun twist is to mix in different types of crushed candies, like Oreos or M&Ms, to change things up! You could even drizzle some melted chocolate on top before sprinkling the candy canes for a decorative touch that’s sure to impress.

    Serving ideas are endless! This fudge is perfect for holiday parties, movie nights, or cozy evenings by the fire. You can also incorporate it into a dessert charcuterie board alongside cookies, brownies, and other festive treats. Don’t forget to pair it with a warm drink like hot cocoa or spiced cider; the combination is heavenly! Whether you’re sharing it with loved ones or keeping it all to yourself, this Candy Cane Fudge will surely bring joy to your holiday season.

    Conclusion

    I hope this 3-Ingredient Candy Cane Fudge becomes a delightful addition to your holiday traditions, just like it has for me. It’s not only incredibly easy to make, but it also fills your home with the most wonderful aromas and creates memories that last a lifetime. So, gather your ingredients, fire up that slow cooker, and let the magic happen! As you savor each bite, remember that the best part of any recipe is the love and joy shared with friends and family. Happy holidays and happy cooking, my dear friend!

    If you loved this recipe, be sure to check out my classic Chocolate Fudge and my Peppermint Bark recipes for more holiday sweetness!

    FAQ about no-bake Candy Cane fudge

    Can I use dark chocolate instead of white chocolate? Absolutely! Dark chocolate will give the fudge a richer flavor, and you can still add the candy canes for that festive touch.

    How long does the fudge need to set? It typically takes about 2-3 hours in the refrigerator for the fudge to set properly.

    Can I freeze the fudge? Yes, you can freeze the fudge! Just wrap it tightly in plastic wrap and place it in an airtight container. It will keep well for about two months.

    What’s the best way to cut fudge? For clean cuts, use a sharp knife dipped in warm water. Wipe the knife clean between cuts for neat squares.

  • Slow Cooker Crack Chicken Chili: 7 lovely Secrets

    Slow Cooker Crack Chicken Chili: 7 lovely Secrets

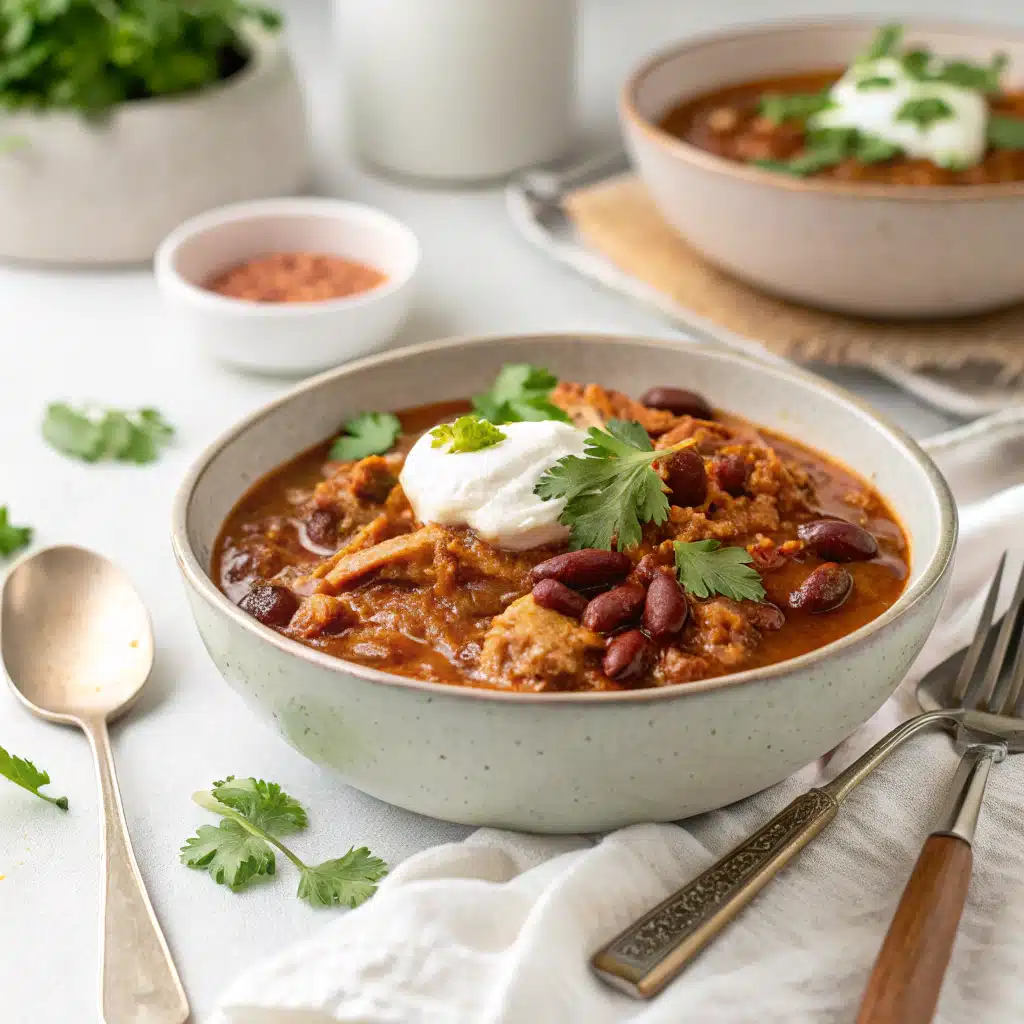
    Slow Cooker Crack Chicken Chili saved my Tuesday nights. The first time I made Slow Cooker Crack Chicken Chili, the house smelled like a cozy diner and the kids asked for seconds before the lid came off. Now it’s my secret weapon: dump, set, forget, and bam—comfort in a bowl. When friends drop by, Slow Cooker Crack Chicken Chili lets me be the relaxed host, not the frantic cook. I’m sharing exactly how to nail the creamy, bacon-ranch magic every single time.

    7 Secrets for Slow Cooker Crack Chicken Chili


    Slow Cooker Crack Chicken Chili Recipe Guide

    Ingredients that make it addictive

    Slow Cooker Crack Chicken Chili owes its cult status to a dreamy trio: ranch, bacon, and cheese. The ranch seasoning tucks savory herbs into every bite, bacon adds smoky crunch, and cheddar turns the broth into a creamy blanket. Layer those with tender shredded chicken and you’ve got the kind of crockpot crack chicken chili that disappears fast. To keep your Slow Cooker Crack Chicken Chili balanced, I use low-sodium broth, fresh onion and garlic, and a squeeze of lime at the end so the richness sings, not overwhelms.

    Want it classic? Use diced tomatoes with green chilies, sweet corn, and black beans for a hearty, creamy chicken chili with a Tex-Mex vibe. Low-carb night? Skip the corn and beans, add extra peppers, and it becomes keto crack chicken chili without losing that signature ranch-and-bacon comfort. I keep cream cheese cubed so it melts silk-smooth, then finish with cilantro and green onions for freshness. It’s the same slow-simmered magic you love in my pot roast slow cooker recipe, but fully loaded and ultra-creamy.

    Step-by-step for foolproof results

    Build flavor from the bottom up: aromatics, spices, then chicken and broth. Set it and walk away—Slow Cooker Crack Chicken Chili thrives on time. Shred the chicken when tender, stir in cream cheese until glossy, and only then add bacon and cheddar so they keep their character. If your slow cooker runs hot, switch to warm during the creamy finish to prevent curdling. For game day, keep it on warm with a ladle and a toppings bar. Craving more cozy slow cooker comfort? Try my fan-favorite Olive Garden Chicken Pasta (Crockpot) next. With this simple flow, Slow Cooker Crack Chicken Chili comes out restaurant-level every time.

    Crockpot Crack Chicken Chili Tips & Variations

    Keto, low-carb, and dairy swaps

    Slow Cooker Crack Chicken Chili is endlessly customizable. For low-carb or keto crack chicken chili, omit corn and beans and add diced bell peppers or cauliflower rice in the last 30 minutes so they stay tender-crisp. Want a lighter bowl? Use reduced-fat cream cheese and sprinkle the cheddar just on top at serving. Dairy-free? Sub dairy-free cream cheese and full-fat coconut milk; ranch seasoning still delivers that signature herby punch for a creamy chicken chili without the dairy.

    If you’re short on time, cube chicken into 1-inch pieces to shave an hour off cook time. Prefer thighs? Use boneless, skinless thighs and cook the full time for deep flavor. For spice, swap in chipotle powder or add minced jalapeños. A smoky pinch of paprika boosts the bacon vibe. When you crave a gentle, kid-friendly chili, dial back chili powder and lean into cheddar and bacon. This is the same flexible spirit behind my Chicken Noodle Soup (Crock Pot) secrets: simple methods, big comfort.

    Instant Pot and stovetop notes

    To pressure cook Slow Cooker Crack Chicken Chili, combine everything except cheeses, bacon, and cream; cook 12 minutes at high pressure (natural release 10 minutes). Shred chicken, stir in cream cheese, then finish with cheddar and bacon. For stovetop, simmer covered 25–30 minutes until the chicken shreds easily, then follow the creamy finish. No matter the method, Slow Cooker Crack Chicken Chili stays true to its bacon-ranch soul, making weeknights feel like weekends.

    Make-Ahead, Freezer, and Meal Prep

    Freezer directions that really work

    Slow Cooker Crack Chicken Chili is a freezer hero. Assemble a freezer kit with raw chicken, onion, garlic, ranch, spices, tomatoes, and broth in a gallon bag; freeze flat up to 3 months. Thaw overnight, then slow cook as directed. Keep dairy and bacon out until the end for best texture. You can also freeze fully cooked Slow Cooker Crack Chicken Chili: cool completely, portion into meal-prep containers, and freeze up to 3 months. Reheat gently and add a splash of broth or cream to revive the luscious body.

    For lunch prep, portion 1 1/2 cups per container with toppings packaged separately. It’s high-protein, satisfying, and costs less than takeout. I love pairing a cup of this creamy chicken chili with a crisp salad or roasted veggies to round out the plate. And when you want to stock your freezer further, these comfort-forward ideas fit right in: Creamy Italian Chicken and the ultra-simple Grape Jelly Meatballs. With these strategies, Slow Cooker Crack Chicken Chili becomes your smartest meal-prep move.

    Reheat without losing creaminess

    Warm Slow Cooker Crack Chicken Chili on the stove over low heat or in the microwave at 50–60% power, stirring every minute. If it thickens too much, loosen with a little broth or milk. Add fresh green onions and a sprinkle of cheddar right before serving to wake it up. Avoid boiling; gentle heat is the key to keeping the cream cheese silky. With this approach, your Slow Cooker Crack Chicken Chili tastes as dreamy on day three as it did the night you made it.

    Serving Ideas, Sides, and Leftover Magic

    Create an irresistible toppings bar

    Make Slow Cooker Crack Chicken Chili the star of a DIY chili night. Set out bowls of shredded cheddar, crispy bacon, sliced jalapeños, avocado, crushed tortilla chips, sour cream, hot sauce, cilantro, green onions, and lime wedges. The creamy base loves bright toppings. For a low-carb spread, swap chips for pork rinds or roasted pepitas. This setup keeps the crockpot on warm and guests happy, and it turns Slow Cooker Crack Chicken Chili into a party centerpiece with zero stress.

    Leftovers transform beautifully: spoon over baked potatoes, tuck into tortillas for cheesy ranch chicken tacos, or pile onto nachos. Stir in cooked rice or cauliflower rice to stretch a final serving. When you want a full slow cooker feast, pair it with juicy bites like my Cowboy Butter Steak and finish with silky Slow Cooker Dulce de Leche. However you serve it, Slow Cooker Crack Chicken Chili brings cozy, crowd-pleasing energy to the table.

    What to serve with it

    Round out Slow Cooker Crack Chicken Chili with warm cornbread, a simple green salad, or roasted broccoli. Garlic bread or cheesy biscuits make excellent dunkers. For a heartier duo on game day, add a platter of Smothered Turkey Wings or keep it classic with a crisp slaw. If you prefer a lighter contrast, a bowl of High-Protein Tomato Soup before the chili is surprisingly perfect. However you plate it, the creamy bacon-ranch comfort of Slow Cooker Crack Chicken Chili plays well with bright, crunchy sides.

    FAQs

    Can I make Slow Cooker Crack Chicken Chili without cream cheese? Yes. Use Neufchâtel for lighter texture, or dairy-free cream cheese plus 1/2 cup coconut milk for creaminess without dairy.

    How do I keep Slow Cooker Crack Chicken Chili from getting too thick? Stir in warm chicken broth or milk, 2 tablespoons at a time, until it reaches your ideal consistency. Reheat gently over low heat.

    Is Slow Cooker Crack Chicken Chili keto-friendly? It can be. Skip corn and beans, add bell peppers or cauliflower rice, and keep the ranch, bacon, and cheese for classic flavor.

    Can I use rotisserie chicken? Absolutely. Simmer broth, spices, tomatoes, and aromatics for 1 hour on Low, then add shredded rotisserie chicken, cream cheese, and finish as directed.

    Conclusion

    Slow Cooker Crack Chicken Chili is the fuss-free bowl that makes weeknights cozy and weekends effortless. Built on ranch-herb comfort, creamy cheese, and smoky bacon, it’s endlessly flexible—low-carb if you want it, family-friendly if you need it, party-ready when you set out a toppings bar. Keep a freezer kit on hand, and dinner practically cooks itself. When you’re craving that sure-thing recipe that wins every time, let Slow Cooker Crack Chicken Chili be your go-to. For more slow cooker comfort and smart kitchen shortcuts, visit the homepage at Pinterest. I can’t wait for you to ladle this into bowls and hear the first spoon-clink of pure satisfaction.

  • Slow Cooker Jalapeño Corn Dip Recipe: Creamy, Cheesy, Spicy Perfection

    Slow Cooker Jalapeño Corn Dip Recipe: Creamy, Cheesy, Spicy Perfection

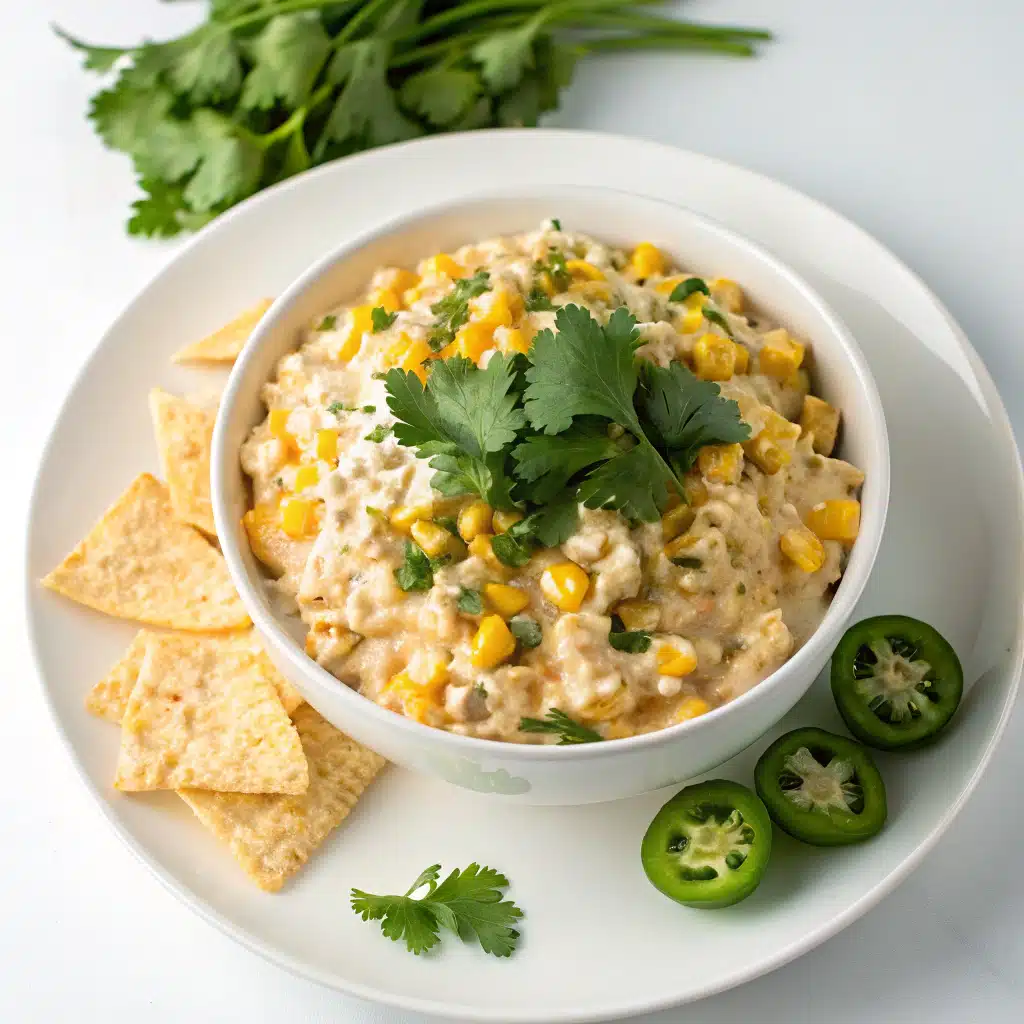
    A slow cooker dip that practically makes itself? Sign us up. This Slow Cooker Jalapeño Corn Dip is the kind of party food that disappears faster than you can say “seconds.” It’s rich, creamy, and layered with gentle heat from jalapeños and warming spices, balanced by the natural sweetness of corn. Best of all, it’s a set-it-and-forget-it recipe that frees you up to actually enjoy your gathering. With everyday ingredients and a flexible spice level, this dip wins over both heat-seekers and mild palates alike.

    Slow Cooker Jalapeño Corn Dip

    What makes this dip special is the flavor balance. Sweet corn and creamy cheeses form a lush base, while jalapeños, cumin, and a hint of smoked paprika add dimension and warmth. A squeeze of lime and a sprinkle of fresh herbs at the end brighten every bite. Serve it with tortilla chips, crostini, or crunchy veggies—you’ll be surprised how versatile it is. It’s equally at home on a game day snack table, a potluck spread, or a casual family night on the couch.

    Because we’re using the slow cooker, there’s no worrying about scorching or babysitting a bubbling pot. The gentle heat melts everything into a perfectly scoopable dip, and the slow cooker doubles as a warmer during your event. If you love set-and-serve recipes, you’ll also enjoy the savory comfort of our slow cooker mains, like this crowd-favorite Olive Garden Chicken Pasta (Crockpot) or these party-ready Grape Jelly Meatballs. Pair one of those with this jalapeño corn dip and you’ve got an instant menu.

    ???? Recipe

    Ingredients You’ll Need (and Easy Substitutions)

    This recipe makes about 8–10 appetizer-sized servings. You can scale it up or down to suit your slow cooker size.

    Base ingredients:
    – Corn: 4 cups frozen corn (about 20 ounces), no need to thaw. You can also use canned corn (drained well) or fresh corn cut from the cob in peak season.
    – Jalapeños: 2–3 fresh jalapeños, seeded and finely diced. For more heat, keep some seeds and membranes. For less, use only 1 jalapeño or substitute 1 small can (4 ounces) diced green chiles.
    – Cream cheese: 8 ounces, cut into cubes for faster melting. Full-fat melts the smoothest, but reduced-fat can work with slightly thinner texture.
    – Sour cream: 1 cup to add tang and creaminess. Greek yogurt also works well and boosts protein.
    – Shredded cheese: 2 cups total, divided. A blend of sharp cheddar and pepper jack gives the best flavor and stretch. Monterey Jack or Colby can be used for milder taste; add mozzarella for extra pull.
    – Mayonnaise (optional but recommended): 1/4 cup for richness and a silky finish.
    – Canned diced green chiles (optional): 1 can (4 ounces) for mild heat and floral chile notes.

    Seasonings and aromatics:
    – Garlic powder: 1/2 teaspoon.
    – Onion powder: 1/2 teaspoon.
    – Ground cumin: 1/2 teaspoon for warmth and depth.
    – Smoked paprika: 1/4 teaspoon for subtle smokiness (or regular paprika for color).
    – Kosher salt: 1/2 teaspoon, to taste.
    – Black pepper: 1/4 teaspoon, freshly cracked if possible.

    Finishing touches:
    – Lime juice: 1–2 teaspoons (about 1/2 lime), to brighten and balance richness.
    – Fresh cilantro or parsley: 2–3 tablespoons, finely chopped.
    – Green onions: 2 tablespoons, thinly sliced.

    Optional mix-ins and toppings:
    – Bacon: 4–6 slices, cooked crisp and crumbled, folded in at the end for smoky crunch.
    – Chipotle in adobo: 1–2 teaspoons minced for heat and smoke.
    – Cotija or queso fresco: Crumbled on top right before serving.
    – Extra jalapeño coins: For garnish and a little extra kick.
    – Hot sauce: A few dashes to taste.

    Ingredient notes and substitutions:
    – Corn: Frozen corn keeps texture best in the slow cooker; if using canned, drain and pat dry. Fresh corn is fantastic in summer—cut kernels cleanly and use 4 cups, lightly sauté first if you like a roasted note.
    – Dairy swaps: Lactose-free cream cheese and sour cream work, but check thickness; add an extra handful of cheese if your dip seems thin.
    – Cheese choices: At least half of your 2 cups should be a flavorful melter like sharp cheddar or pepper jack. Softer cheeses can make the dip stringy without taste.
    – Heat level: Jalapeños vary. Taste a small piece—if it’s extra spicy, start with less and adjust with hot sauce at the end.
    – Herbs and acid: Don’t skip lime at the end; it keeps the dip vibrant. If you’re not into cilantro, use parsley or extra green onions instead.

    What you’ll need equipment-wise:
    – Slow cooker: 2–3 quart for a standard batch; a 4–6 quart works too but may cook faster.
    – Mixing spoon or silicone spatula.
    – Small skillet if cooking bacon or lightly blooming spices first (optional).

    How to Make Slow Cooker Jalapeño Corn Dip (Step-by-Step)

    1) Prep the base:
    Add the frozen corn, jalapeños, cream cheese cubes, sour cream, 1 1/2 cups of the shredded cheese (reserve 1/2 cup for topping), mayonnaise (if using), diced green chiles (if using), garlic powder, onion powder, cumin, smoked paprika, salt, and black pepper directly to your slow cooker. Give everything a gentle stir.

    2) Set and cook:
    – On Low: 2 to 3 hours, stirring once halfway through to help everything melt evenly.
    – On High: 1 to 1 1/2 hours, stirring once at the 30–45 minute mark.
    You’re looking for fully melted cheese, steamy-hot dip, and a creamy, scoopable consistency. If your slow cooker runs hot or is larger than needed, check early to prevent browning on the edges.

    3) Finish and adjust:
    Stir in lime juice, half the cilantro, and half the green onions. Taste and adjust salt, pepper, and heat. Want it hotter? Add minced jalapeño, a splash of hot sauce, or a pinch more cumin and paprika to taste.

    4) Top and serve:
    Sprinkle the remaining 1/2 cup shredded cheese over the dip, cover for 5 minutes to melt. Alternatively, transfer to an oven-safe dish and broil 1–2 minutes for bubbly, lightly browned cheese. Garnish with remaining cilantro, green onions, crumbled cotija (if using), and jalapeño coins.

    Serving suggestions:
    – Serve right from the slow cooker on Warm. Stir occasionally to maintain silky texture.
    – Offer dippers like tortilla chips, corn chips, warm pita, baguette slices, pretzels, and crunchy veggies (carrots, celery, bell pepper strips, jicama).
    – For a game day spread, pair with another slow cooker star like these sweet-and-savory Grape Jelly Meatballs for a no-stress, two-crock feast.

    Troubleshooting texture:
    – Too thick? Stir in 2–4 tablespoons milk or a splash of cream until it loosens.
    – Too thin? Add 1/2 cup extra shredded cheese and heat 10 minutes; or stir in 2 ounces more cream cheese.
    – Grainy or oily? This can happen with pre-shredded cheese blends that contain anti-caking agents. Whisk in a little sour cream or cream cheese and keep the heat on Low; it often smooths out.

    Food safety notes:
    – Keep the dip at safe serving temps. If sitting out longer than 2 hours, return it to Warm or refrigerate and reheat.
    – Always reheat leftovers to 165°F.

    Pro timing tip for parties:
    Start the dip 2–3 hours before guests arrive, then switch to Warm. It will hold beautifully for another 1–2 hours with periodic stirring.

    Make-Ahead, Storage, Reheating, and Pro Tips

    Make-ahead options:
    – Partial prep: Mix all ingredients (except lime juice and fresh herbs) in the slow cooker crock, cover, and refrigerate up to 24 hours in advance. Set out at room temperature for 20–30 minutes, then cook as directed.
    – Fully cooked: You can cook the dip, cool it, and refrigerate up to 3 days. Reheat on Low for 1–1 1/2 hours, stirring once or twice, then finish with lime and fresh herbs.
    – Freezing: Creamy dips can separate after freezing. If you must freeze, cool completely and freeze up to 1 month. Thaw in the fridge, then rewarm gently and whisk well, adding a splash of cream or sour cream to restore texture.

    Storage:
    – Refrigerate leftovers in an airtight container for 3–4 days. Store garnishes separately.
    – Rewarm in the slow cooker on Low, stirring occasionally, or microwave in short bursts with stirring. Add a little milk if it thickens in the fridge.

    Reheating tips for best texture:
    – Low and slow wins. High heat can cause the cheese to separate.
    – Stir periodically to reincorporate fats and ensure even heat.
    – Add acid (lime) after reheating; acid can sometimes encourage curdling if added too early in the heating process.

    Pro tips for flawless dip:
    – Choose cheeses wisely: Use at least 50% flavorful melters like sharp cheddar and pepper jack. Avoid pre-shredded blends that are heavy on anti-caking agents; shredding your own yields silkier results.
    – Harness jalapeño flavor: Sauté jalapeños briefly in a teaspoon of butter or bacon fat before adding to mellow raw bite while preserving heat.
    – Bloom spices: For a deeper, toasty flavor, briefly bloom cumin and paprika in a warm pan before adding to the slow cooker.
    – Balance richness: Don’t skip lime and a fresh herb garnish. That hit of acid and freshness keeps each bite lively.
    – Keep it warm: Once melted and mixed, maintain on Warm with the lid slightly ajar to prevent excess condensation.
    – Double batch like a pro: For large crowds, double the recipe in a 6–7 quart slow cooker and increase time slightly, stirring every 45–60 minutes to ensure even melting.

    Entertaining game plan:
    – Make dip in one slow cooker, protein in another for a stress-free spread. Try pairing with the creamy comfort of Olive Garden Chicken Pasta (Crockpot) so guests can graze on dip while your main cooks to perfection.

    Serving Ideas, Pairings, and Flavor Variations

    Serving ideas:
    – Party board: Serve the dip in its slow cooker with a rim of garnishes—cilantro, green onions, crumbled cotija, lime wedges, jalapeño slices—plus a basket of dippers (tortilla chips, corn chips, toasted baguette rounds, warm naan).
    – Taco night upgrade: Spoon onto tacos, nachos, or burrito bowls as a creamy, spicy topper. It’s especially good with grilled chicken or roasted sweet potatoes.
    – Brunch twist: Serve with scrambled eggs and breakfast potatoes for a Tex-Mex brunch spread.

    Perfect pairings for a full menu:
    – Add a slow cooker main to keep oven space free. Guests love the nostalgic flavor combo in these easy Grape Jelly Meatballs.
    – For a cozy soup-and-dip night, serve bowls of our ultra-comforting Creamy Sausage Tortellini Soup alongside a mountain of chips and this dip.

    Flavor variations to try:
    – Bacon-Jalapeño Corn Dip: Cook 6 slices bacon until crisp; crumble and fold in at the end. Use some bacon fat to sauté jalapeños for bonus flavor.
    – Chipotle-Lime Corn Dip: Add 1–2 teaspoons minced chipotle in adobo plus an extra teaspoon lime zest for smoky-tangy depth.
    – Elote Street Corn Dip: Stir in 1 teaspoon chili powder, 1/2 teaspoon tajín (optional), a handful of cotija, and extra lime; finish with cilantro and a dusting of tajín on top.
    – Chorizo Corn Dip: Brown 8 ounces of fresh Mexican chorizo, drain, and fold in at the end for a hearty, spicy bite.
    – Veggie Fiesta Dip: Add 1 cup finely diced red bell pepper and 1/2 cup black beans (drained and rinsed). Increase cumin to 3/4 teaspoon and add an extra squeeze of lime.
    – Extra-Spicy Serrano Corn Dip: Replace one jalapeño with a serrano or add 1/2 teaspoon crushed red pepper flakes.
    – Three-Cheese Deluxe: Use sharp cheddar, pepper jack, and a touch of cream Havarti for extra meltability; finish with a sprinkle of cotija for a salty pop.

    Dipper ideas beyond chips:
    – Baked pretzel bites, pita chips, seeded crackers, endive leaves, thick cucumber rounds, jicama sticks, roasted potato wedges, and warm soft pretzels.

    How to scale for crowds:
    – 12–15 guests: 1.5x the recipe in a 5–6 quart slow cooker; extend time by 20–30 minutes and stir twice.
    – 20+ guests: Double in a 6–7 quart and keep a second batch warming in a smaller crock to refill quickly.

    Hosting tip:
    – Label heat levels. If you’re making both mild and spicy batches, garnish mild with cilantro only and spicy with jalapeño coins so guests can easily choose.

    Conclusion

    Slow Cooker Jalapeño Corn Dip is the effortless appetizer that feels like you fussed for hours. Sweet corn, creamy cheeses, and jalapeño heat meld into a velvety dip that your slow cooker keeps perfectly warm and scoopable. Customize the spice, mix in bacon or chipotle, and serve with plenty of crunchy dippers. Pair it with a slow cooker main or cozy soup, and you’ve got a low-stress, high-reward menu that suits game day, potlucks, holidays, or any casual get-together. One taste and this dip will be your new go-to crowd-pleaser.

    Loved this Slow Cooker Jalapeño Corn Dip? Leave a rating and comment, then share it with a friend. For more easy slow cooker winners and cozy comfort food, visit facebook Page and subscribe so you never miss a recipe.

  • Slow Cooker Pumpkin Turkey Chili Recipe

    As the leaves turn golden and a crispness fills the air, there’s nothing quite like the comfort of a warm bowl of chili. This slow cooker pumpkin turkey chili combines the richness of pumpkin with the hearty flavor of turkey, creating an Autumn dish that’s both nutritious and delicious. Whether you’re hosting a fall gathering or simply craving something cozy, this chili is sure to delight your taste buds. Easy to prepare and full of seasonal flavors, it’s an ideal recipe for those who love to embrace the fall season. Let’s dive into how you can make this delightful chili right in your slow cooker!

    Slow Cooker Pumpkin Turkey Chili Recipe


    ???? Recipe

    Recipe Card - Slow Cooker Pumpkin Turkey Chili Recipe


    ???? Slow Cooker Pumpkin Turkey Chili

    Author Name : Darleen Vance

    A hearty and flavorful chili made with ground turkey, pumpkin puree, and a blend of spices, perfect for fall.

    ???? Ingredients:

    • 1 pound ground turkey
    • 1 can (15 oz) pumpkin puree
    • 1 can (15 oz) black beans, rinsed and drained
    • 1 can (15 oz) diced tomatoes
    • 1 cup chicken broth
    • 1 medium onion, chopped
    • 2 cloves garlic, minced
    • 1 tablespoon chili powder
    • 1 teaspoon cumin
    • 1 teaspoon paprika
    • 1/2 teaspoon salt
    • 1/4 teaspoon black pepper
    • 1/4 teaspoon cayenne pepper (optional)
    • 1 bell pepper, chopped
    • 1 cup corn (frozen or canned)
    • Fresh cilantro for garnish (optional)

    ????‍???? Directions:

    1. Step 1: In a skillet, brown the ground turkey over medium heat until fully cooked. Drain any excess fat.
    2. Step 2: In the slow cooker, combine the cooked turkey, pumpkin puree, black beans, diced tomatoes, chicken broth, onion, garlic, chili powder, cumin, paprika, salt, black pepper, cayenne pepper, bell pepper, and corn.
    3. Step 3: Stir everything together until well mixed.
    4. Step 4: Cover and cook on low for 6-8 hours or on high for 3-4 hours.
    5. Step 5: Serve hot, garnished with fresh cilantro if desired.

    ⏱️ Prep Time: 15 minutes | ???? Cook Time: 6-8 hours | ⌛ Total Time: 6-8 hours 15 minutes | ????️ Servings: 6

    ???? Nutrition Facts (per serving):

    Calories 250
    Total Fat 6g
    Saturated Fat 1.5g
    Carbohydrates 32g
    Sugars 4g
    Protein 20g
    Sodium 400mg


    Why Choose Pumpkin Turkey Chili?

    Pumpkin turkey chili offers a unique twist on the traditional chili we all know and love. The use of pumpkin not only adds a delightful sweetness but also enhances the nutritional profile of the dish. Rich in vitamin A and fiber, pumpkin is a powerhouse ingredient that pairs beautifully with lean turkey. This combination results in a lower-calorie, high-protein meal that’s perfect for a cozy night in. Plus, using a slow cooker means you can set it and forget it, making meal prep a breeze.

    Ingredients You’ll Need

    To create this delicious chili, you’ll need the following ingredients: ground turkey, canned pumpkin puree, diced tomatoes, kidney beans, black beans, an onion, garlic, chili powder, cumin, salt, and pepper. Optional garnishes include shredded cheese, sour cream, and chopped cilantro. Each of these ingredients contributes to the rich flavor profile of the dish, ensuring every bite is packed with taste.

    Step-by-Step Cooking Instructions

    Start by browning the ground turkey in a skillet over medium heat. Once cooked, transfer it to your slow cooker. Add in diced onions and minced garlic, followed by the canned pumpkin puree, diced tomatoes, and beans. Sprinkle in the chili powder, cumin, salt, and pepper. Stir everything together until well combined. Set your slow cooker to low and let it cook for 6 to 8 hours. The long, slow cooking process allows the flavors to meld together beautifully, resulting in a hearty, flavorful chili.

    Serving and Storing Your Chili

    Once your chili is ready, serve it hot with your choice of garnishes. Shredded cheese and sour cream add a creamy touch, while fresh cilantro provides a pop of color and freshness. If you have leftovers, this chili stores well in the refrigerator for up to four days. You can also freeze it for up to three months, making it a great option for meal prep. Just reheat it on the stove or in the microwave and enjoy a quick, warming meal any time.

    Conclusion

    This slow cooker pumpkin turkey chili is the perfect dish to embrace the flavors of fall. Simple, nutritious, and full of flavor, it’s sure to become a staple in your autumn meal rotation. The ease of preparation and the comforting taste make it a winner for busy weeknights or relaxed weekends. Try it out and experience the cozy warmth of this delightful chili.

    Ready to savor the flavors of fall? Try making our slow cooker pumpkin turkey chili today and enjoy a comforting, delicious meal!

    FAQ

    Can I use fresh pumpkin instead of canned? Yes, you can use fresh pumpkin, but you’ll need to cook and puree it first.

    What can I substitute for turkey? You can substitute ground chicken or beef if you prefer.

    Is this chili spicy? The chili has a mild spice, but you can adjust the chili powder to your preferred heat level.

    Can I make this chili vegetarian? Absolutely, simply omit the turkey and add more beans or vegetables.

  • Slow Cooker Cowboy BBQ Sandwiches Recipe

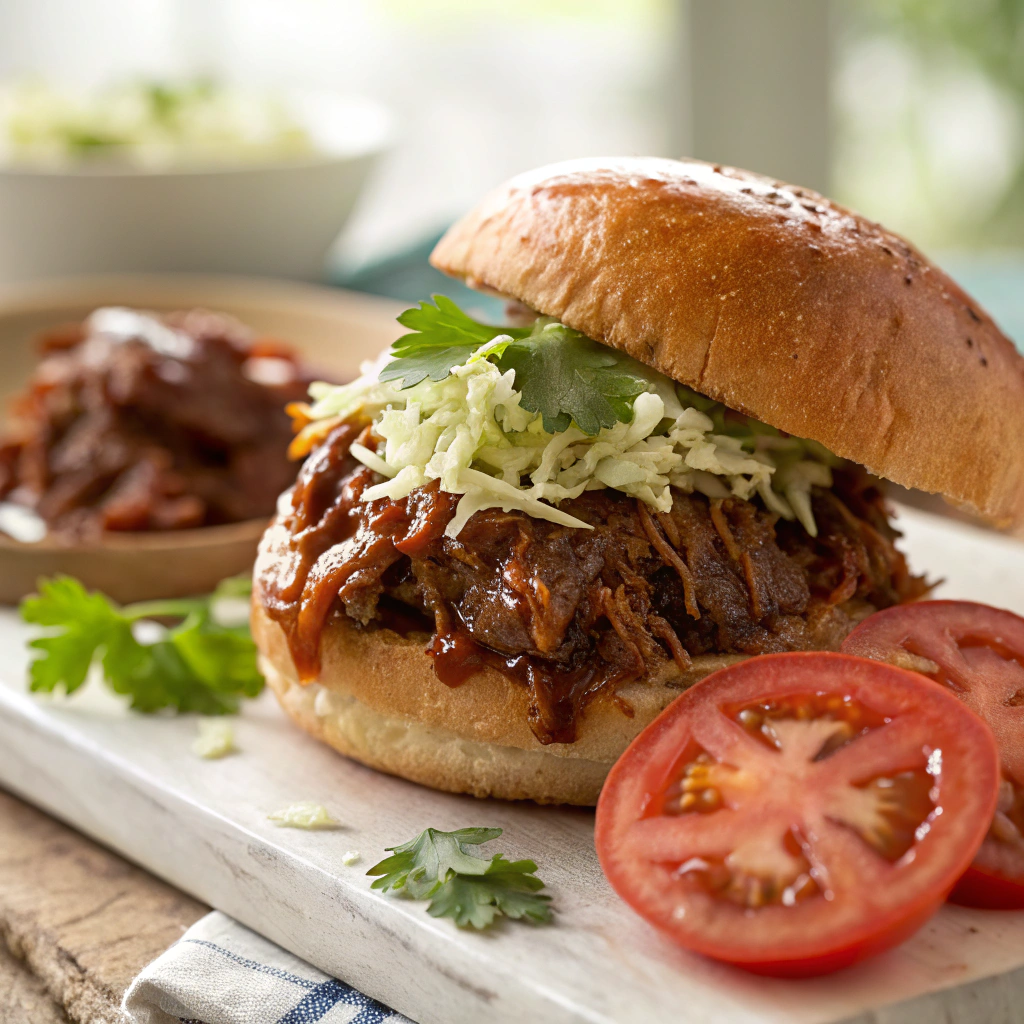
    Welcome to another delightful recipe on recipesdarleen.com! Today, we’re diving into the world of slow-cooked goodness with our Slow Cooker Cowboy BBQ Sandwiches. This recipe is perfect for those who crave a hearty, flavorful meal without spending hours in the kitchen. The slow cooker does all the work, transforming simple ingredients into a mouthwatering dish. Whether you’re planning a family dinner or a casual get-together with friends, these sandwiches are sure to impress. Let’s explore the magic of slow cooking and discover how to create these scrumptious Cowboy BBQ Sandwiches.

    Slow Cooker Cowboy BBQ Sandwiches Recipe

    ???? Recipe

    Recipe Card - Slow Cooker Cowboy BBQ Sandwiches Recipe


    ???? Slow Cooker Cowboy BBQ Sandwiches

    Author Name : Darleen Vance

    Hearty and flavorful BBQ sandwiches made with tender beef and a smoky sauce, perfect for a crowd.

    ???? Ingredients:

    • 2 pounds beef chuck roast
    • 1 cup BBQ sauce
    • 1/2 cup beef broth
    • 1 onion, chopped
    • 2 cloves garlic, minced
    • 1 tablespoon Worcestershire sauce
    • 1 tablespoon brown sugar
    • 1 teaspoon smoked paprika
    • 1/2 teaspoon black pepper
    • 8 hamburger buns
    • Pickles and coleslaw for topping (optional)

    ????‍???? Directions:

    1. Step 1: Place the beef chuck roast in the slow cooker.
    2. Step 2: In a bowl, mix together BBQ sauce, beef broth, chopped onion, minced garlic, Worcestershire sauce, brown sugar, smoked paprika, and black pepper.
    3. Step 3: Pour the sauce mixture over the beef in the slow cooker.
    4. Step 4: Cover and cook on low for 8 hours or on high for 4 hours, until the beef is tender and shreds easily.
    5. Step 5: Remove the beef from the slow cooker and shred it with two forks.
    6. Step 6: Return the shredded beef to the slow cooker and stir to combine with the sauce.
    7. Step 7: Serve the BBQ beef on hamburger buns, topped with pickles and coleslaw if desired.

    ⏱️ Prep Time: 15 minutes | ???? Cook Time: 8 hours | ⌛ Total Time: 8 hours 15 minutes | ????️ Servings: 8

    ???? Nutrition Facts (per serving):

    Calories 450
    Total Fat 20g
    Saturated Fat 8g
    Carbohydrates 40g
    Sugars 10g
    Protein 30g
    Sodium 800mg


    The Magic of Slow Cooking

    Slow cooking is a culinary technique that has been cherished for its ability to infuse flavors deeply into food while maintaining tenderness. The Slow Cooker Cowboy BBQ Sandwiches epitomize this magic. By allowing the beef to simmer gently over hours, it absorbs the rich BBQ sauce, resulting in a dish that’s succulent and bursting with flavor. This method is not only convenient but also perfect for busy individuals who want to come home to a ready-made meal.

    Ingredients You’ll Need

    To create these delicious sandwiches, you’ll need the following ingredients: 3 pounds of beef chuck roast, 1 cup of your favorite BBQ sauce, 1 cup of beef broth, 1 onion (sliced), 3 cloves of garlic (minced), 1 tablespoon of Worcestershire sauce, salt, and pepper to taste, and hamburger buns for serving. These simple ingredients come together to create a dish that’s both comforting and satisfying.

    Step-by-Step Preparation

    Start by seasoning the beef chuck roast with salt and pepper. In a slow cooker, combine the BBQ sauce, beef broth, sliced onion, minced garlic, and Worcestershire sauce. Place the seasoned beef into the slow cooker and ensure it’s well coated with the sauce mixture. Cover and cook on low for 8-10 hours or until the beef is tender and easily shredded. Once done, shred the beef using two forks, mix it with the sauce, and serve on toasted hamburger buns.

    Serving Suggestions and Variations

    These Slow Cooker Cowboy BBQ Sandwiches are versatile and can be served with a variety of sides. Consider pairing them with coleslaw, potato salad, or even a fresh green salad for a balanced meal. For a twist, you can add toppings like pickles, jalapeños, or cheese. If you’re interested in exploring more slow cooker recipes, check out our [slow cooker bone broth health secrets](https://recipesdarleen.com/slow-cooker-bone-broth-health-secrets) and [pot roast slow cooker recipe](https://recipesdarleen.com/pot-roast-slow-cooker-recipe) for more delicious ideas.

    Conclusion

    In conclusion, Slow Cooker Cowboy BBQ Sandwiches are a testament to the beauty of slow cooking. They’re easy to prepare, packed with flavor, and perfect for any occasion. Whether you’re feeding a crowd or looking for a comforting meal for yourself, these sandwiches won’t disappoint. So, gather your ingredients, set your slow cooker, and let the delicious aroma fill your home.

    Ready to try this delicious recipe? Gather your ingredients and start slow cooking your way to a delightful meal with these Cowboy BBQ Sandwiches!

    FAQ

    What cut of beef is best for these sandwiches? The beef chuck roast is ideal due to its marbling and tenderness when slow-cooked.

    Can I use a different sauce? Absolutely! Feel free to experiment with different BBQ sauces to suit your taste.

    How can I store leftovers? Store any leftovers in an airtight container in the refrigerator for up to 3 days.

    Can I make this recipe in advance? Yes, it’s perfect for making ahead of time and reheating before serving.

  • Delicious Slow Cooker Lemon Chicken Orzo Soup Recipe

    Delicious Slow Cooker Lemon Chicken Orzo Soup Recipe

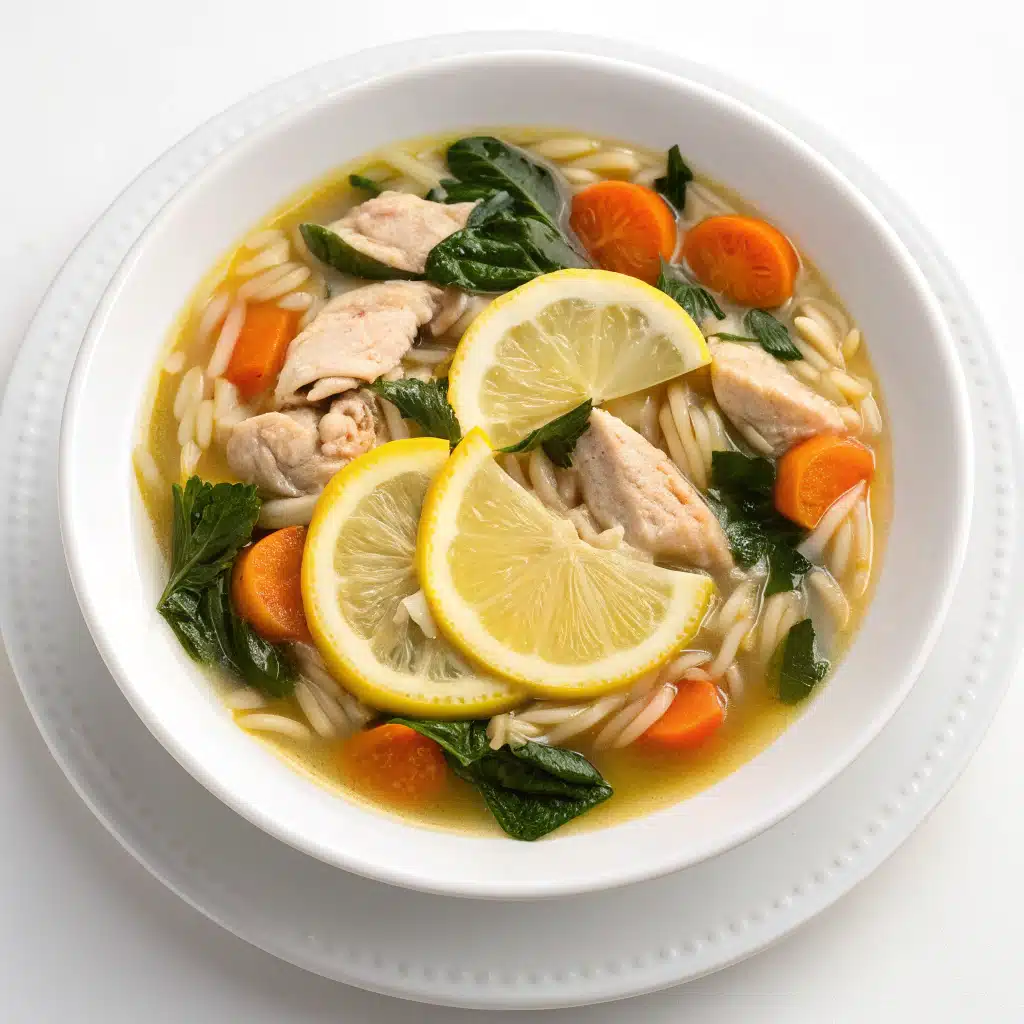
    As the crisp air of fall sets in, there’s nothing more comforting than a hearty bowl of soup. Imagine coming home to the welcoming aroma of Slow Cooker Lemon Chicken Orzo Soup, simmering away and ready to warm your soul. This delightful recipe combines the zesty brightness of lemon with tender chicken and the delicate textures of orzo, creating a symphony of flavors that will have everyone asking for seconds. Perfect for those busy weekdays or lazy weekends, this dish is not only easy to prepare but also incredibly satisfying. Let’s dive into this savory delight that’s sure to become a family favorite!

    Slow Cooker Lemon Chicken Orzo Soup


    ???? Recipe

    Recipe Card - Delicious Slow Cooker Lemon Chicken Orzo Soup Recipe


    ???? Slow Cooker Lemon Chicken Orzo Soup

    Author Name : Darleen Vance

    A comforting and flavorful soup with tender chicken, orzo pasta, and a zesty lemon finish, cooked slowly to perfection.

    ???? Ingredients:

    • 1 pound boneless, skinless chicken breasts
    • 1 cup orzo pasta
    • 4 cups chicken broth
    • 1 medium onion, diced
    • 3 carrots, sliced
    • 3 celery stalks, sliced
    • 3 cloves garlic, minced
    • 1 lemon, juiced and zested
    • 1 teaspoon dried thyme
    • 1 teaspoon dried oregano
    • Salt and pepper to taste
    • 2 cups fresh spinach
    • 1 tablespoon olive oil
    • Fresh parsley for garnish

    ????‍???? Directions:

    1. Step 1: In a slow cooker, combine chicken breasts, onion, carrots, celery, garlic, thyme, oregano, salt, and pepper.
    2. Step 2: Pour in the chicken broth and add the lemon juice and zest.
    3. Step 3: Cook on low for 6-8 hours or on high for 3-4 hours until the chicken is cooked through.
    4. Step 4: Remove the chicken, shred it with two forks, and return it to the slow cooker.
    5. Step 5: Stir in the orzo and cook on high for an additional 30 minutes, or until the orzo is tender.
    6. Step 6: Add the fresh spinach and stir until wilted.
    7. Step 7: Serve hot, garnished with fresh parsley.

    ⏱️ Prep Time: 15 minutes | ???? Cook Time: 6-8 hours | ⌛ Total Time: 6 hours 15 minutes | ????️ Servings: 6

    ???? Nutrition Facts (per serving):

    Calories 320
    Total Fat 7g
    Saturated Fat 1.5g
    Carbohydrates 40g
    Sugars 2g
    Protein 25g
    Sodium 620mg


    Why You’ll Love This Recipe

    This Slow Cooker Lemon Chicken Orzo Soup is a game-changer for several reasons. First, it’s incredibly convenient to make, requiring minimal prep work. Just toss everything into the slow cooker and let it do the hard work for you. The result? A rich, flavorful soup that tastes like you’ve been slaving over the stove all day. The combination of lemon and chicken is a classic pairing that never fails to please, while the addition of orzo adds a satisfying texture that turns this soup into a complete meal.

    Ingredients You’ll Need

    To create this delicious soup, you will need the following ingredients:

    – 1 pound of boneless, skinless chicken breasts
    – 1 cup of orzo pasta
    – 4 cups of chicken broth
    – Juice of 2 lemons
    – 2 carrots, sliced
    – 2 celery stalks, chopped
    – 1 onion, diced
    – 3 garlic cloves, minced
    – 1 teaspoon of dried thyme
    – Salt and pepper to taste
    – Fresh parsley, chopped (for garnish)

    These ingredients are easy to find and provide a balance of flavors and textures that make this soup truly special.

    Step-by-Step Instructions

    1. **Prep the Ingredients**: Start by prepping your vegetables. Slice the carrots, chop the celery, and dice the onion. Mince the garlic cloves and set everything aside.
    2. **Add to Slow Cooker**: Place the chicken breasts at the bottom of the slow cooker. Add the sliced carrots, chopped celery, diced onion, and minced garlic on top.
    3. **Season and Pour**: Sprinkle the dried thyme, salt, and pepper over the ingredients. Pour in the chicken broth and lemon juice, ensuring everything is well-covered.
    4. **Cook on Low**: Set the slow cooker to low and cook for 6-8 hours, or until the chicken is tender and cooked through.
    5. **Shred Chicken and Add Orzo**: Remove the chicken breasts and shred them with two forks. Return the shredded chicken to the slow cooker and add the orzo. Cook for an additional 30 minutes or until the orzo is tender.
    6. **Serve**: Garnish with fresh parsley before serving hot.

    Tips and Variations

    To enhance the flavors of your Slow Cooker Lemon Chicken Orzo Soup, consider these tips and variations:

    – **Add Vegetables**: Feel free to add more vegetables like spinach or kale for added nutrition and color.
    – **Zest It Up**: For a more intense lemon flavor, add a bit of lemon zest when serving.
    – **Make it Creamy**: Stir in a splash of cream or a dollop of yogurt for a creamy texture.
    – **Herb Variations**: Experiment with different herbs like rosemary or dill to suit your taste preferences.

    Conclusion

    This Slow Cooker Lemon Chicken Orzo Soup is more than just a meal; it’s a comforting hug in a bowl that promises to bring warmth to your day. With its ease of preparation and delightful flavors, it’s sure to become a staple in your household. Whether you’re serving it as a main course or a starter, this soup is a testament to the magic of slow cooking and the joy of simple, wholesome ingredients.

    Try this comforting Slow Cooker Lemon Chicken Orzo Soup today and don’t forget to explore more delicious recipes at recipesdarleen.com!

    Q1: Can I use chicken thighs instead of breasts? A1: Absolutely! Chicken thighs will add a richer flavor and can be used in place of chicken breasts.

    Q2: Can I freeze leftovers? A2: Yes, this soup freezes well. Store in airtight containers and freeze for up to 3 months.

    Q3: What can I use instead of orzo? A3: You can substitute orzo with small pasta shapes like ditalini or even rice for a gluten-free option.

    Q4: How can I make it vegetarian? A4: Replace chicken with chickpeas and use vegetable broth instead of chicken broth for a vegetarian version.