Category: Dinner

Easy, tasty dinner ideas for busy nights. Simple recipes, quick prep, and family-friendly meals you’ll make again and again.

  • Maple Bourbon Meatball Appetizers – Crowd-Pleasers

    Maple Bourbon Meatball Appetizers – Crowd-Pleasers

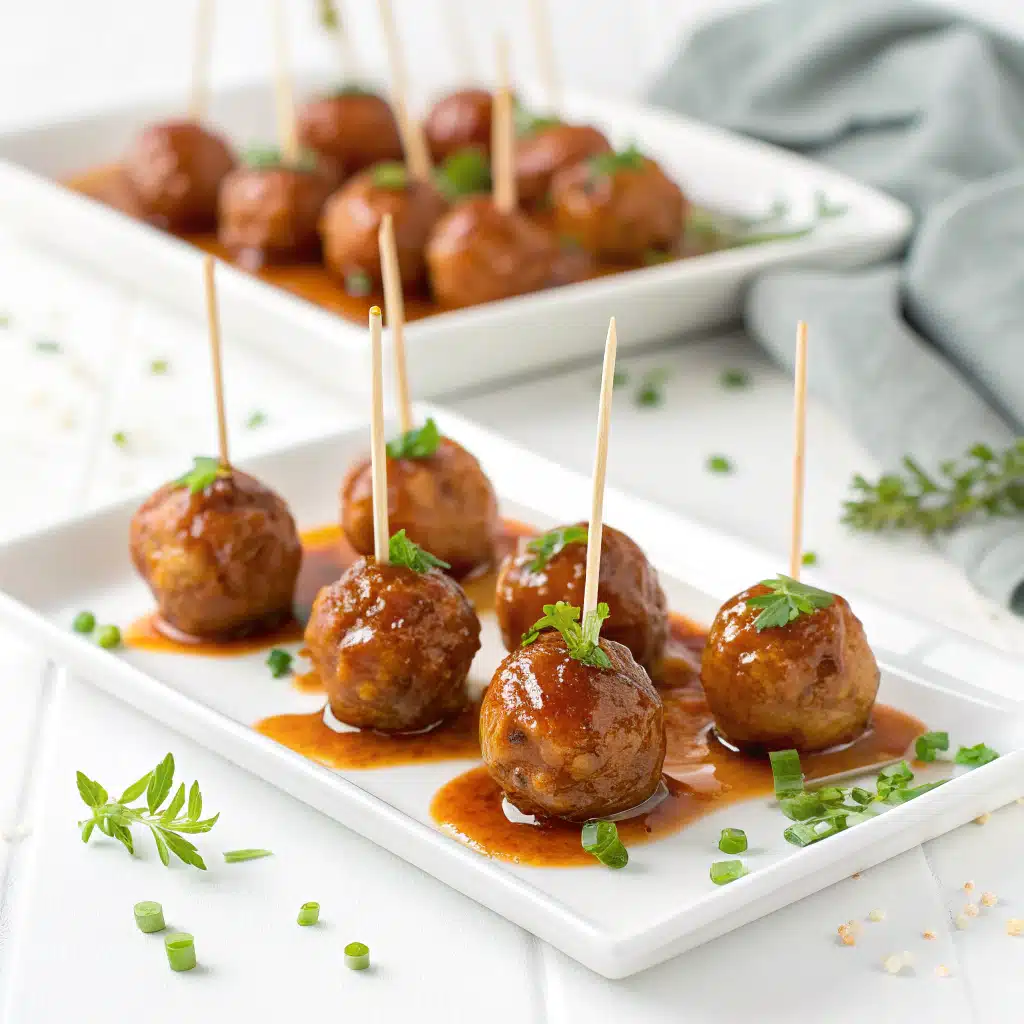
    Maple Bourbon Meatball Appetizers remind me of the night my tiny kitchen turned into a bustling party hub. I stirred the glossy glaze while neighbors drifted in, drawn by that sweet-smoky aroma. One bite and the room went quiet—then cheers. Maple Bourbon Meatball Appetizers are that kind of magic: cozy, nostalgic, and just bold enough to feel special. When I want a no-fuss, high-reward win, Maple Bourbon Meatball Appetizers always deliver. Grab your pan. Let’s stir up a memory.
    Maple Bourbon Meatball Appetizers – 7 Crowd-Pleasers

    Recipe


    Maple Bourbon Meatball Appetizers Recipe Guide

    Ingredients for Maple Bourbon Meatball Appetizers

    These Maple Bourbon Meatball Appetizers balance sweet, smoky, and savory flavors in a way that feels both cozy and elevated. The meatball base blends ground beef and pork for juicy richness, while panko and milk keep things tender. Grated onion and garlic build aroma. Smoked paprika and a pinch of chili add that party-worthy whisper of heat. The maple-bourbon glaze is the heart of Maple Bourbon Meatball Appetizers—pure maple syrup for a caramel note, a friendly splash of bourbon for depth, Dijon and ketchup for tang and body, and a butter-glossed finish for that irresistible sheen. It’s a cocktail meatball you’ll crave.

    Use real maple syrup (Grade A amber) so the glaze tastes like maple—not just sweetness. If you prefer to skip alcohol, swap bourbon for apple cider or apple juice plus 1 teaspoon vanilla extract. Either way, the glaze still sings. The result is Maple Bourbon Meatball Appetizers that are sticky, glossy, and endlessly snackable.

    Why These Cocktail Meatballs Go Viral

    Every bite lands: tender meat, lacquered glaze, and balanced seasoning. Maple Bourbon Meatball Appetizers are built for low-effort hosting—brown on the stovetop or bake on a sheet pan, then toss in sauce. Keep warm in a slow cooker so guests can graze. They’re friendly with game day, holidays, and Tuesday nights.

    Build a party board by pairing with crisp veggies, sharp cheddar, and toothpicks. Add a creamy side like this Cheesy Jalapeño Popper Dip or balance richness with something fresh like the Harvest Grain Bowl with Cranberries and Pecans. For a full spread, set out Slow Cooker BBQ Chicken Sliders—a crowd-pleasing partner to Maple Bourbon Meatball Appetizers.

    How to Make Maple Bourbon Meatball Appetizers

    Step-by-Step for Perfect Texture

    Start by hydrating panko with milk—this panade guarantees tender Maple Bourbon Meatball Appetizers. Mix the meat gently; overmixing compacts proteins and toughens texture. Shape evenly: 1 to 1 1/4-inch balls cook quickly and hold on toothpicks. Brown in a hot skillet for flavor-packed fond, or bake for hands-off ease. The maple-bourbon sauce comes together in one pan: whisk maple syrup, bourbon, ketchup, Dijon, cider vinegar, soy sauce, smoked paprika, and cinnamon. Simmer, then finish with a touch of butter and a simple cornstarch slurry to hit that glossy, clingy texture.

    Toss meatballs in the glaze and simmer until cooked through. The result? Maple Bourbon Meatball Appetizers with an ultra-juicy bite and sticky-sweet finish that clings to every curve. Keep them warm in your slow cooker for stress-free serving.

    Pro Tips for Sticky, Glossy Glaze

    • Use real maple syrup. I love Grade A amber for pure maple character.
    • Reduce first, thicken last. Simmer to concentrate, then add cornstarch for shine.
    • Don’t skip butter. It rounds sharp edges and adds a restaurant-style finish.
    • Balance sweet with tang. Cider vinegar and Dijon keep Maple Bourbon Meatball Appetizers from tasting flat.
    • Brown fast, don’t fully cook in the pan. Finish in the sauce for ultra-moist bites.
    • Make ahead: Shape and chill meatballs up to 24 hours; cook just before guests arrive. Or cook fully and reheat in sauce.

    Want a similar weeknight comfort? Try these sweet-savory cousins: Slow Cooker Honey Garlic Meatballs and Rice.

    Maple Bourbon Meatball Appetizers Variations

    Alcohol-Free, Lighter, and Gluten-Free Options

    Maple Bourbon Meatball Appetizers are endlessly flexible. For alcohol-free, sub bourbon with apple cider or apple juice and 1 teaspoon vanilla extract. You’ll still get warm depth without the booze. For lighter Maple Bourbon Meatball Appetizers, use 100% lean ground turkey and add 1 tablespoon olive oil to the mix for moisture. Gluten-free? Swap panko for certified GF breadcrumbs and use tamari instead of soy sauce. Dairy-free? Replace milk with unsweetened almond milk or omit and add an extra tablespoon of Dijon.

    Heat levels are customizable. Add more crushed red pepper, a pinch of cayenne, or a few dashes of hot sauce to your glaze. For a woodsy twist, a hint of rosemary or orange zest is delightful. You can also roll mini meatballs (3/4-inch) for bite-size party picks or go larger (1 1/2-inch) for a small-plate entrée over mashed sweet potatoes.

    • Sheet-Pan Broil: Bake meatballs, then broil 1–2 minutes after glazing for extra char and shine.
    • Air Fry Option: Cook at 390°F (200°C) for 8–10 minutes, shaking halfway; glaze in a skillet.
    • Cranberry-Maple Glaze: Stir 1/2 cup cranberry sauce into the maple-bourbon sauce during the holidays.
    • Smoky BBQ Mashup: Add 2 tablespoons of your favorite BBQ sauce to the glaze for a tailgate vibe.
    • Skewer Board: Thread meatballs with charred pineapple, then brush with extra glaze.

    No matter the path, the core flavor of Maple Bourbon Meatball Appetizers shines: sweet maple, toasty bourbon notes, and a savory backbone that makes people reach for seconds.

    Serving Maple Bourbon Meatball Appetizers

    Plating, Pairings, and Party Flow

    Make Maple Bourbon Meatball Appetizers the hero of your board. Serve in a shallow bowl with extra glaze and plenty of picks. Balance the richness with crunchy elements—radishes, celery sticks, or endive. Add sharp cheddar cubes, orange wedges, or toasted pecans. For a full party spread, pair Maple Bourbon Meatball Appetizers with a bright dip like the viral Tangy Dill Pickle Dip.

    Beverage matches: bourbon or rye cocktails (Old Fashioned, anyone?), dry sparkling wine, or crisp apple cider. For zero-proof, try ginger beer with a squeeze of lime. However you serve them, Maple Bourbon Meatball Appetizers are built to mingle with other flavors and keep guests nibbling.

    Storage, Reheating, and Troubleshooting

    • Fridge: Store fully cooked Maple Bourbon Meatball Appetizers with sauce up to 4 days.
    • Freeze: Freeze meatballs (cooked or uncooked) on a sheet, then bag up to 3 months. Freeze sauce separately.
    • Reheat: Simmer gently on the stovetop or warm in a slow cooker. Add a splash of water if the glaze is too thick.
    • Too Sweet? Add 1–2 teaspoons cider vinegar or a splash of soy sauce.
    • Too Thin? Simmer 2–3 minutes or add a tiny extra slurry (1/2 tsp cornstarch + 1/2 tsp water).
    • Not Shiny Enough? Finish with a teaspoon of butter to restore gloss.
    • Breaking Sauce? Pull off heat, whisk vigorously, and add a tablespoon of water to re-emulsify.

    Common question: Will the alcohol cook off? Most evaporates during simmering, but if you prefer zero alcohol, the cider-vanilla swap in these Maple Bourbon Meatball Appetizers gives depth without bourbon.

    FAQs

    Can I make Maple Bourbon Meatball Appetizers ahead?

    Yes. Shape and chill up to 24 hours before cooking, or fully cook and refrigerate up to 4 days. Reheat gently in sauce.

    What can I use instead of bourbon?

    Apple cider or apple juice plus 1 tsp vanilla extract makes a great alcohol-free swap for Maple Bourbon Meatball Appetizers.

    Can I use just one meat?

    Absolutely. All beef works well; add 1 tbsp olive oil for moisture. All turkey is great too—don’t overcook.

    How do I keep them warm for parties?

    Transfer Maple Bourbon Meatball Appetizers and sauce to a slow cooker on WARM, stirring occasionally so the glaze stays glossy.

    Conclusion

    When I want a guaranteed yes from my guests, I make Maple Bourbon Meatball Appetizers. They’re unfussy to pull together, endlessly adaptable, and so much more than the sum of their parts—tender centers, a gleaming maple-bourbon coat, and that sweet-smoky balance that keeps people hovering by the bowl. I hope you’ll bring these to your next gathering and watch the room lean in at the first whiff.

    If you cook them, leave a note and tell me your spin—cranberry twist, turkey version, or air-fried crunch. Your table, your story. Now go make Maple Bourbon Meatball Appetizers and let the night unfold.
  • Cranberry Jalapeño Cream Cheese Dip – Make It Tonight

    Cranberry Jalapeño Cream Cheese Dip – Make It Tonight

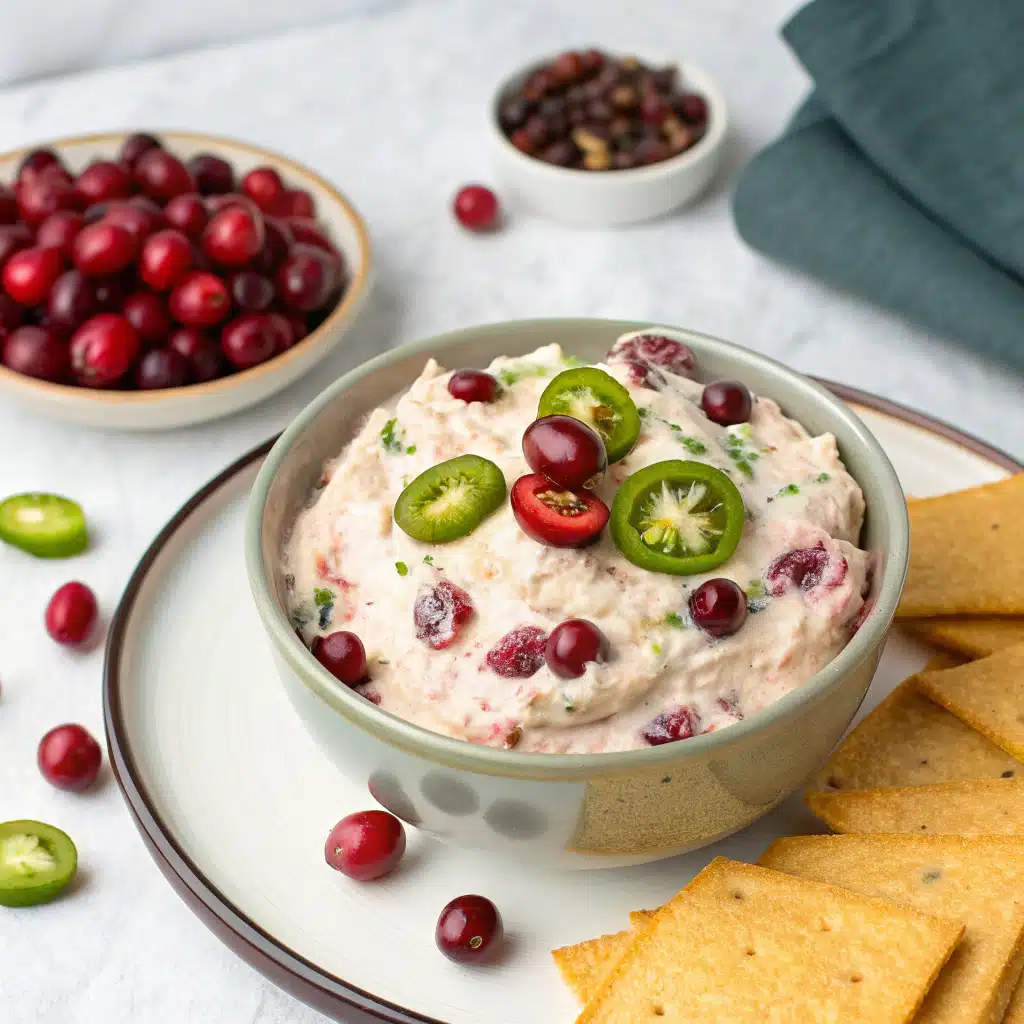
    Cranberry Jalapeño Cream Cheese Dip saved my holiday sanity more than once. I made Cranberry Jalapeño Cream Cheese Dip after hockey practice when the kids were hangry and the doorbell was ringing. And yes, I served Cranberry Jalapeño Cream Cheese Dip right on the block of cream cheese because life is real and my slow cooker can’t do everything, even if it saved my mind back when our twins were toddlers in snowy Salt Lake City. This dip is sweet and spicy. Creamy and bright. Minimal chopping, no cooking, big cheers.

    Cranberry Jalapeño Cream Cheese Dip – Make It Tonight

    Recipe

    Cranberry Jalapeño Cream Cheese Dip: Sweet-Heat Magic

    What Makes This Cranberry Jalapeño Cream Cheese Dip Pop

    Cranberry Jalapeño Cream Cheese Dip is all about contrast. Tart cranberries meet creamy dairy. Jalapeño brings happy heat. Lime adds zip. A little sugar keeps it friendly for kids and spice-shy grownups. In my Salt Lake City kitchen, this has become the first thing I set down when neighbors drop in. It looks like a jeweled crown, but it takes less time than hunting for the good platter.

    When you need a fast holiday appetizer, this dip shows up. No stove. No oven. No fuss. You can chop the cranberries early, then rest the mixture so it softens and gets saucy. That quick rest turns fresh cranberries from squeaky tart to jammy-sweet. Then you spoon it over soft cream cheese and call it magic. I promise, people hover.

    Another reason I love this Cranberry Jalapeño Cream Cheese Dip: it scales easily. Double it for a big party. Halve it for a family movie night. It travels well, too. Assemble at the party or carry the parts and put it together there. If your crew likes extra kick, add a pinch of cayenne. If not, keep it mellow. Everyone is happy, and you look like a hero.

    Every season needs a star. This year, Cranberry Jalapeño Cream Cheese Dip is the bright, easy star. It’s a Christmas appetizer that glows red and green without plastic bells. It’s a Thanksgiving appetizer that plays nice with turkey. It’s the quick party dip that wins game day and potlucks. Plus, it photographs like a dream, so your snack board looks influencer-level with zero drama.

    Short videos made it viral because it’s fast and dramatic: block of cream cheese, ruby spoonfuls, big swoop with a cracker. Done. It’s also smart budget cooking. Fresh cranberries are affordable in season. Cream cheese is a pantry staple in my house. Jalapeños are pocket change. For more spicy party ideas, try my Cheesy Jalapeño Popper Dip (Crockpot Style)—rich, melty, and slow-cooker friendly, naturally.

    And if you’re planning a fall table with color and crunch, you’ll love my Harvest Grain Bowl with Cranberries and Pecans. It pairs beautifully with this Cranberry Jalapeño Cream Cheese Dip for a full spread that feels fresh, not heavy.

    Jalapeño Cranberry Cream Cheese Dip: Step-by-Step

    How to Make Cranberry Jalapeño Cream Cheese Dip (Fast)

    First, rinse and dry your cranberries. Drying matters, so the salsa stays bright, not watery. Next, pulse the berries in a food processor. Quick pulses. You want tiny bits, not a smoothie. If you’re chopping by hand, a sharp chef’s knife does the trick. Then, stir cranberries with sugar, lime juice, orange zest, salt, and black pepper. Fold in minced jalapeño, cilantro, and green onion. Taste. Adjust the heat or sweetness.

    Now comes the chill. Slide the bowl into the fridge for 30 minutes. This is the secret step that takes Cranberry Jalapeño Cream Cheese Dip from fine to fabulous. The sugar softens the berries. The jalapeño relaxes. The whole mix gets saucy and spoonable. Meanwhile, soften your cream cheese. Whip it if you like it fluffy. Or go classic and set the block on a plate. Both work. No judgment in this kitchen.

    When guests arrive, spoon the cranberry-jalapeño mixture over the cream cheese. If it looks a little juicy, drain a tablespoon or two before topping. Garnish with extra cilantro. Serve with sturdy crackers, pita chips, or cucumber slices for a gluten-free bite. The first dip is always a little messy, which I love. It means it’s good. It means you did it right.

    Practical Mom Tips for Success

    • Chop size: Tiny bits cling better to the cream cheese, so the dip scoops cleanly.
    • Heat control: Keep jalapeño seeds and membranes for hotter. Remove for mild.
    • Sweetness: Start with 1/2 cup sugar. Add a spoon more if your cranberries are extra tart.
    • Make-ahead: Mix the cranberry layer a day early. Top the cream cheese right before serving.
    • Presentation: One big platter looks dramatic. Two small plates are easier to refill.
    • Slow-cooker assist: Set your slow cooker to Warm with an inch of hot water. Park your serving bowl on top to keep the dip slightly warm and scoopable.

    For another viral-ish nibble, check out my Tangy Dill Pickle Dip. Different vibe, same “where did it go?” speed. But when I need holiday sparkle fast, I reach for Cranberry Jalapeño Cream Cheese Dip every time.

    Creamy Cranberry Jalapeño Party Dip Ideas

    How to Serve Cranberry Jalapeño Cream Cheese Dip

    Cranberry Jalapeño Cream Cheese Dip loves a crunchy partner. Try butter crackers, rye crisps, pita chips, or pretzel thins. If you want something fresh, cucumber rounds and jicama sticks are clean and crisp. I also spoon leftovers onto turkey sandwiches. It’s like a spicy cranberry cream cheese schmear—very deli-chic, very easy.

    Board building? Start with a low bowl of cream cheese, spoon the cranberry topping on, and ring it with crackers and sliced veggies. Add a small bowl of salted nuts and a wedge of sharp cheddar for balance. Color matters on a snack board, and this dip brings ruby sparkle against anything beige. When lights are low and snow is high (hello, Utah), bright food makes a table feel like a party.

    Sometimes I set out two versions of Cranberry Jalapeño Cream Cheese Dip. One mild, one spicy. I label them with sticky notes. Kids love choosing their heat level. Grownups do too. A quick tip: keep an extra portion of the cranberry mixture chilled so you can refresh the platter mid-party. It keeps the top glossy and makes you look on it, even if you were wiping the counter with your sleeve five minutes before guests arrived.

    Swaps & Variations (Pinterest-Style)

    • Dairy-free: Use your favorite plant-based cream cheese. The cranberry topping stays the same.
    • Goat cheese: Swap in a log of chèvre for a tangy twist. Still Cranberry Jalapeño Cream Cheese Dip, just sassier.
    • Orange-forward: Double the zest and add 1 tbsp orange juice for a citrus pop.
    • Honeyed heat: Replace some sugar with honey and add a pinch of cayenne.
    • Herb swap: Try mint or flat-leaf parsley if cilantro isn’t your family’s thing.
    • Nut crunch: Sprinkle toasted pecans or pistachios on top before serving.
    • Warm service: Keep assembled dip slightly warm using the slow-cooker steam trick noted below. Creamy, scoopable, cozy.
    • Low sugar: Start with 1/3 cup sugar and sweeten to taste after the chill.
    • No processor: Hand-chop for a chunkier cranberry salsa. Rustic and charming.

    This Cranberry Jalapeño Cream Cheese Dip also plays well with a cozy main. Serve it while a pot of my slow-cooker comfort simmers, like Slow Cooker Italian Wedding Soup. People snack, you breathe, dinner finishes itself. That’s the energy we want.

    Make-Ahead Cranberry Jalapeño Cream Cheese Dip

    Plan, Prep, and Breathe

    Make the cranberry-jalapeño mixture up to 24 hours ahead. It actually improves overnight. Keep it in an airtight container and give it a quick stir before topping the cream cheese. If the mixture looks watery, spoon off a little liquid. The flavors will be brighter than day-of. Cream cheese can be softened 30–60 minutes before guests arrive. If the room is cool, cut it into cubes so it softens quicker. When everyone walks in, assemble the Cranberry Jalapeño Cream Cheese Dip in seconds and enjoy your own party.

    If you want to serve it warm-ish without melting, use my slow-cooker hack. Fill a slow cooker with an inch of hot water and set it to Warm. Place your serving bowl or a heat-safe dish right on top of the insert so the steam keeps the dip supple but not hot. My slow cooker saved my sanity with babies; now it saves my appetizers.

    Storage, Troubleshooting, and Quick Fixes

    • Storage: Leftover Cranberry Jalapeño Cream Cheese Dip keeps 2–3 days. Store the cranberry topping and cream cheese separately for best texture.
    • Too spicy? Stir in extra sugar, more cream cheese, or a splash of orange juice.
    • Too tart? Add a drizzle of honey. Let it sit 10 minutes, then taste again.
    • Too watery? Drain a little liquid before topping, or stir in a spoon of finely chopped pecans for texture.
    • Too sweet? Add more lime juice and a pinch of salt.
    • No fresh cranberries? Use thawed frozen cranberries. Pat dry well before chopping.

    However you tweak it, the heart stays the same: Cranberry Jalapeño Cream Cheese Dip delivers big flavor fast. That’s the kind of kitchen win we need in the thick of the holidays.

    FAQs

    Can I make Cranberry Jalapeño Cream Cheese Dip ahead?

    Yes. Make the cranberry mixture up to 24 hours ahead. Assemble right before serving.

    How do I cut the heat?

    Remove jalapeño seeds and membranes. Add an extra tablespoon of sugar and more lime.

    What if I don’t have a food processor?

    Hand-chop the cranberries with a sharp knife. Keep pieces small so they scoop well.

    Is it gluten-free?

    The dip is gluten-free. Serve with gluten-free crackers or sliced veggies.

    Conclusion

    When life gets loud, I reach for simple wins. Cranberry Jalapeño Cream Cheese Dip is my go-to because it looks special and takes minutes. I’ve carried it to school parties in snow boots, served it before Sunday soup, and set it out with cocoa by the fire. Sweet, spicy, creamy—every bite tastes like a tiny celebration. Try it at home and tag me so I can cheer you on. And if you need a cozy main to follow, my Slow Cooker BBQ Chicken Sliders are weeknight gold. Big hugs from my Salt Lake City kitchen—and happy dipping with Cranberry Jalapeño Cream Cheese Dip.

  • 7-Min Prep Cheesy Jalapeño Popper Dip (Crockpot)

    7-Min Prep Cheesy Jalapeño Popper Dip (Crockpot)

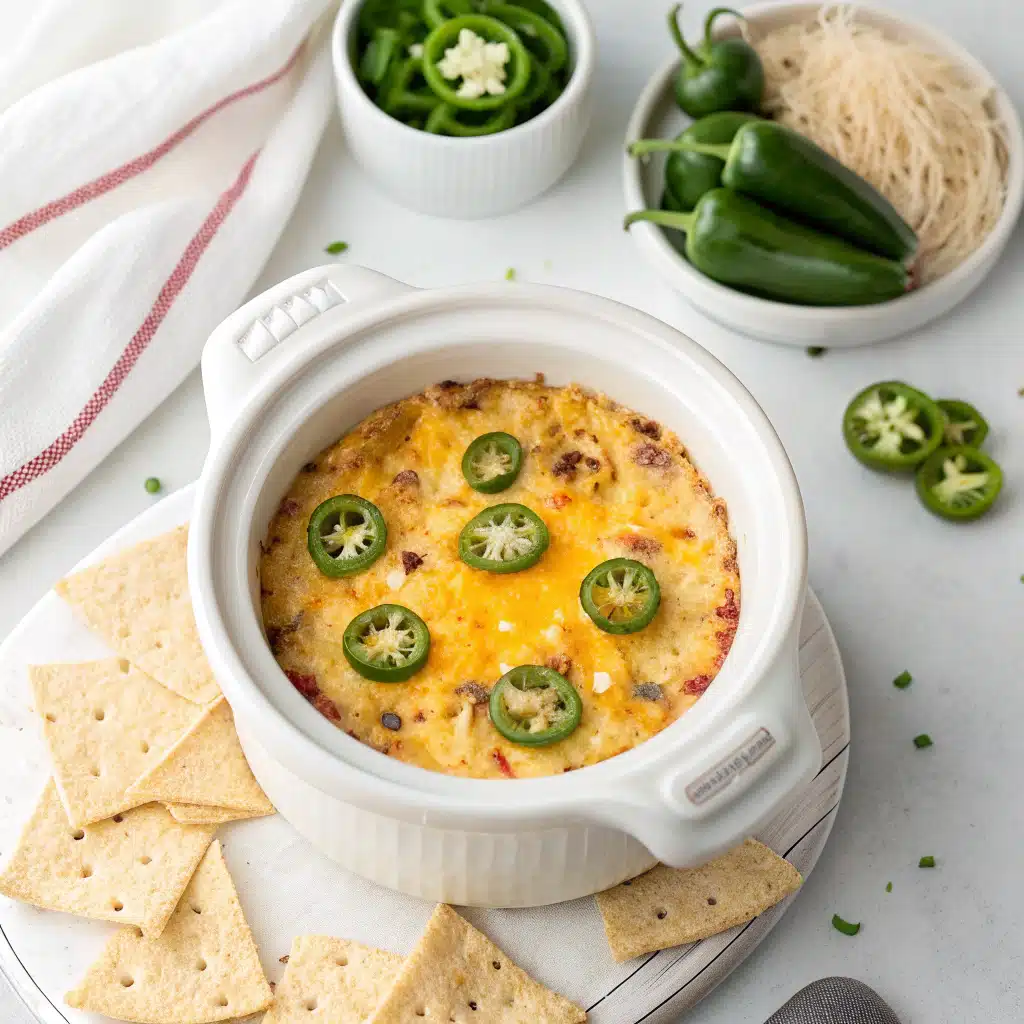
    Cheesy Jalapeño Popper Dip (Crockpot Style) started as my “save the party” move when the oven was packed with wings and sliders. I tossed everything into my trusty slow cooker, and by kickoff, the house smelled like a stadium snack bar. Now Cheesy Jalapeño Popper Dip (Crockpot Style) is my signature bring-along—no babysitting, just a creamy, smoky, spicy swirl that makes everyone hover around the counter. I love that Cheesy Jalapeño Popper Dip (Crockpot Style) gives me seven minutes of prep and a whole evening of compliments—plus zero stress.

    7-Min Prep Cheesy Jalapeño Popper Dip (Crockpot)

    Recipe

    Why This Cheesy Jalapeño Popper Dip (Crockpot Style) Wins Game Day

    What makes Cheesy Jalapeño Popper Dip (Crockpot Style) irresistible

    Cheesy Jalapeño Popper Dip (Crockpot Style) hits every comfort craving: creamy, melty cheese, a whisper of smoke, and bright jalapeño heat. In the slow cooker, this creamy bacon jalapeño dip stays warm and scoopable for hours, so your crowd keeps circling back. The big win is that Cheesy Jalapeño Popper Dip (Crockpot Style) takes just 7 minutes of prep. Toss the cream cheese, sour cream, cheddar, and mozzarella into the crockpot, stir in jalapeños and seasonings, and let the low-and-slow magic work. You get that classic jalapeño popper flavor—without stuffing and frying. It’s a game day appetizer engineered for easy hosting and constant praise.

    Because Cheesy Jalapeño Popper Dip (Crockpot Style) melts gently, jalapeño flavor blooms without turning bitter. Bacon adds salty crunch, while lime juice and pickled jalapeños brighten everything. If you love low-carb appetizers, this slow cooker jalapeño popper dip also happens to be naturally low in carbs—serve it with celery and pork rinds to keep it keto-friendly. It’s a superstar at potlucks, tailgates, and holiday parties. Bonus: the slow cooker keeps counters clear and ovens free for wings and sliders. If you like creamy party dips, you might also love my Tangy Dill Pickle Dip—another viral snack that disappears fast.

    Everyone’s craving familiar flavors with effortless prep, and Cheesy Jalapeño Popper Dip (Crockpot Style) nails that trend. This slow cooker jalapeño popper dip channels the exact nostalgic taste of pub-style jalapeño poppers—smoky, creamy, and a little fiery—but skips deep frying. It’s perfect for football Sunday spreads, holiday appetizer boards, or any casual night when friends drop in. Cheesy Jalapeño Popper Dip (Crockpot Style) is also a social media favorite because a bubbling crock of cheese is pure reel-worthy content. Add a crunchy panko-Parmesan topping under the broiler for that golden, Pinterest-famous finish, then slide it back into the crock to stay warm and wow-worthy all night.

    Ingredients & Pro Tips for Slow Cooker Perfection

    Choosing ingredients for the best Cheesy Jalapeño Popper Dip (Crockpot Style)

    For the creamiest Cheesy Jalapeño Popper Dip (Crockpot Style), choose full-fat dairy. Cream cheese, sour cream, and a touch of mayonnaise make the base silky-smooth. Sharp cheddar brings bold flavor; mozzarella adds that luscious stretch. Fresh jalapeños give clean, grassy heat. If you want extra tang, stir in a bit of diced pickled jalapeño. Bacon is optional, but in Cheesy Jalapeño Popper Dip (Crockpot Style) it adds smoky depth. Garlic powder, onion powder, smoked paprika, and black pepper round out a classic jalapeño popper profile. A dash of lime juice brightens the richness, making every bite pop.

    LSI tip: If you’re heat-sensitive, remove seeds and membranes. Love the burn? Keep a few seeds or add a splash of hot sauce. For a keto dip or low-carb appetizer, serve with cucumber rounds, celery sticks, or pork rinds. Want a vegetarian slow cooker jalapeño popper dip? Skip the bacon and add a teaspoon of liquid smoke for complexity.

    Pro tips to master slow cooker jalapeño dip

    • Reserve some cheese for topping. Sprinkle reserved cheddar and mozzarella during the final 10 minutes for an oozy, picture-perfect finish.
    • Use a 3–4 quart crockpot for best melt. Larger slow cookers can heat too quickly; keep it on LOW and stir once.
    • Line the crock with a liner for ultra-easy cleanup—ideal when Cheesy Jalapeño Popper Dip (Crockpot Style) is on repeat.
    • Season-to-taste at the end. Salt amplifies cheddar and bacon, but heat can reduce salt perception—taste and adjust.
    • Hold on WARM for serving. The slow cooker keeps Cheesy Jalapeño Popper Dip (Crockpot Style) creamy without scorching.

    For more slow cooker crowd-pleasers, peek at my Slow Cooker BBQ Chicken Sliders—they pair perfectly with this dip on game day.

    Bacon, Cheese, and Trendy Twists

    Load it up: bacon and cheese in Cheesy Jalapeño Popper Dip (Crockpot Style)

    In Cheesy Jalapeño Popper Dip (Crockpot Style), bacon and cheese are the headliners. Crisp bacon delivers salty pops in every scoop, while a blend of sharp cheddar and mozzarella creates gooey pull and robust flavor. For even more jalapeño popper authenticity, top your slow cooker jalapeño dip with a panko-Parmesan mix for crunch after a quick broil. The contrast—creamy, spicy, crunchy—keeps hands dipping nonstop. Cheesy Jalapeño Popper Dip (Crockpot Style) shines with tortilla chips, crisp baguette, pretzel thins, or veggie dippers. If you’re planning a game day spread, pair this crockpot jalapeño popper dip with a pot of Slow Cooker Jalapeño Corn Dip to make a spicy duo.

    • Extra cheesy: Swap in pepper jack for half the cheddar to boost creamy heat in Cheesy Jalapeño Popper Dip (Crockpot Style).
    • Roasted jalapeños: Roast or air-fry jalapeños first for smoky sweetness with less bite. Great for family-friendly slow cooker jalapeño popper dip.
    • Green chile spin: Mix in mild green chiles for New Mexico vibes; it’s a gentle twist that keeps Cheesy Jalapeño Popper Dip (Crockpot Style) universally loved.
    • Buffalo popper dip: Add 2–3 tablespoons buffalo sauce for a tangy, spicy riff. Blue cheese crumbles on top are a bold move.
    • Bacon-free crunch: Toasted panko in butter with Parmesan adds that jalapeño popper coating feel—no bacon required.
    • Low-carb crackers: Serve with almond flour crackers or pork rinds to keep this keto dip squarely in low-carb territory.

    Whichever route you choose, Cheesy Jalapeño Popper Dip (Crockpot Style) stays the star—creamy, spicy, and wildly shareable.

    Make-Ahead, Storage, Troubleshooting & FAQs

    How to prep Cheesy Jalapeño Popper Dip (Crockpot Style) ahead

    Assemble Cheesy Jalapeño Popper Dip (Crockpot Style) up to 2 days in advance: mix everything except the toppings in the crock insert, cover, and refrigerate. Set the insert in the slow cooker and cook on LOW for 2–3 hours, adding 15–20 minutes if starting cold. Keep on WARM for serving. Leftovers of this slow cooker jalapeño popper dip reheat beautifully—microwave gently or warm in the crockpot on LOW with a splash of milk to restore creaminess.

    Storage, troubleshooting, and extra tips

    • Storage: Refrigerate Cheesy Jalapeño Popper Dip (Crockpot Style) in an airtight container up to 4 days. For best texture, avoid freezing (dairy can separate).
    • Too thick? Stir in warm milk, a tablespoon at a time. Too mild? Mix in a pinch of cayenne or hot sauce.
    • Oily top: Natural with high-fat cheese. Stir vigorously or blot gently with a paper towel before serving.
    • Stringy cheese: Use freshly shredded cheese and cook on LOW. Pre-shredded works, but fresh shreds melt silkier in Cheesy Jalapeño Popper Dip (Crockpot Style).
    • Serving a crowd: Double the recipe and use a 6-quart crockpot; stir more often to prevent hot spots.

    Craving more slow cooker comfort? Try my cozy Slow Cooker Spinach Artichoke Chicken Soup. It’s a soothing bowl after a feast of cheesy dips.

    FAQs

    Can I make Cheesy Jalapeño Popper Dip (Crockpot Style) without bacon?

    Yes. Skip the bacon and add 1 teaspoon liquid smoke or extra smoked paprika for depth. It stays creamy and delicious.

    How do I make this slow cooker jalapeño popper dip milder?

    Remove seeds and membranes from jalapeños and use only fresh peppers. Skip hot sauce and pickled jalapeños, then adjust salt to taste.

    What size slow cooker works best for Cheesy Jalapeño Popper Dip (Crockpot Style)?

    A 3–4 quart crockpot melts evenly and keeps the dip warm without scorching. For a double batch, use a 6-quart and stir more often.

    How long can I keep the dip on WARM?

    Up to 3 hours. Stir occasionally and add a splash of milk if it thickens. Keep the lid on between scoops to avoid drying out.

    Conclusion

    Cheesy Jalapeño Popper Dip (Crockpot Style) delivers maximum joy with minimum effort—exactly what busy hosts need. With 7-minute prep, the slow cooker transforms simple ingredients into a creamy, smoky, gently spicy crowd favorite. Whether you serve it on game day, at a potluck, or for a cozy movie night, this slow cooker jalapeño popper dip stays warm and scoopable, inviting everyone back for one more taste.

    Customize the heat, add bacon or go vegetarian, and play with a crunchy topping; Cheesy Jalapeño Popper Dip (Crockpot Style) flexes to your vibe every time. If you make it, tag me and tell me how your crew liked it—and grab another slow cooker classic from the site to round out your menu. Happy dipping!

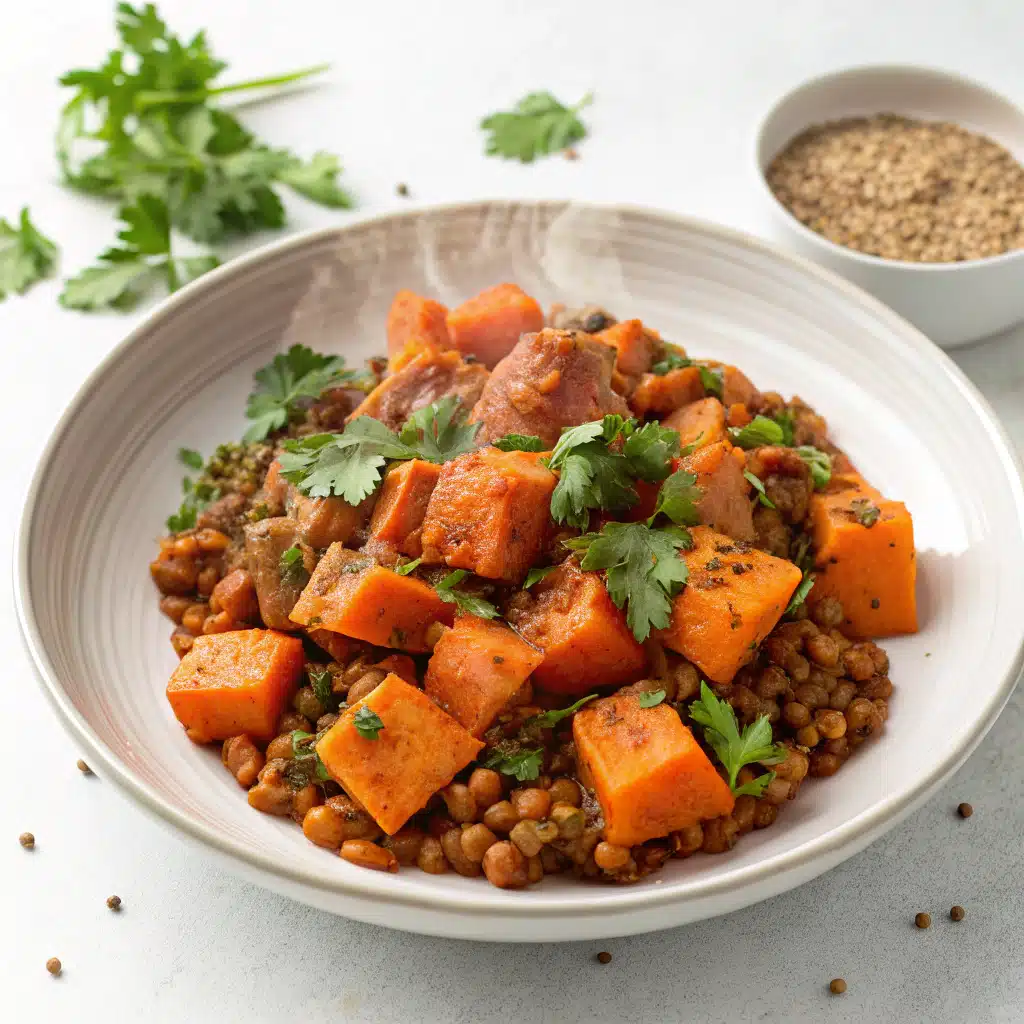
  • Sweet Potato & Lentil Stew: 9 Cozy Secrets to Love

    Sweet Potato & Lentil Stew: 9 Cozy Secrets to Love


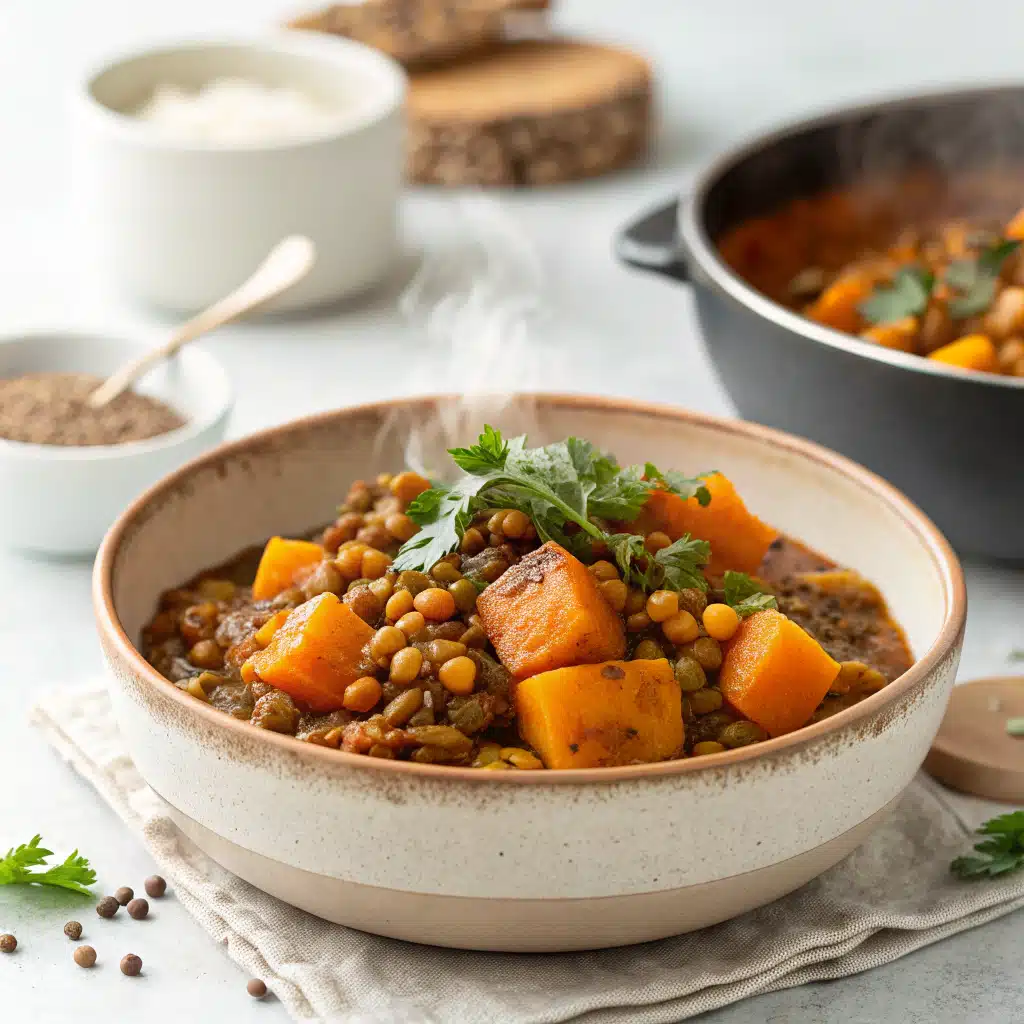
    Sweet Potato & Lentil Stew came to the rescue on a Tuesday when my grocery list and my patience were both short. I tossed sweet potatoes and lentils in a pot, added a few warm spices, and let the house fill with comfort. That night, Sweet Potato & Lentil Stew fed my kids, my neighbor who “just stopped by,” and me—twice. Since then, Sweet Potato & Lentil Stew has been my weeknight hug: affordable, nourishing, and always ready to stretch one more bowl for someone I love.

    Sweet Potato & Lentil Stew: 9 Cozy Secrets to Love

    Recipe

    Why This Sweet Potato & Lentil Stew Works

    Comfort in a Bowl, Built from Pantry Staples

    Sweet Potato & Lentil Stew delivers slow-simmered flavor in a fast, one-pot package. It’s the kind of plant-based, protein-packed, healthy comfort food that fills you up without weighing you down. Lentils bring satisfying body and 13g+ protein per serving, while sweet potatoes add natural sweetness, fiber, and creamy texture as they soften. Warm spices—cumin, smoked paprika, turmeric, coriander, and a whisper of cinnamon—turn simple ingredients into a cozy, crave-worthy dinner. The gentle simmer coaxes everything into harmony, making Sweet Potato & Lentil Stew taste like it cooked all afternoon, even when it’s ready in 40 minutes.

    Because Sweet Potato & Lentil Stew is vegan and budget-friendly, it’s perfect for meal prep and weeknights. Coconut milk melts into the broth for a velvety finish, though you can use light coconut milk or skip it for a lighter, dairy-free take. A squeeze of lemon at the end brightens the stew, keeping flavors fresh. If you love hearty bowls like my Slow Cooker Butternut Squash Lentil Curry, this Sweet Potato & Lentil Stew delivers a similarly comforting payoff with minimal effort.

    The Weeknight Win: One Pot, Zero Fuss

    We’re talking true one-pot ease: sauté aromatics, bloom spices, add lentils and sweet potatoes, then simmer. That’s it. Sweet Potato & Lentil Stew rewards you with a deeply savory, slightly sweet, and gently spiced bowl that tastes restaurant-level. It’s naturally gluten-free if you use certified broth, and the recipe scales effortlessly to feed a crowd. Serve with a crisp salad or spoon over rice for an extra-hearty meal. This plant-based stew proves healthy doesn’t have to be complicated; one pot, a few pantry staples, and you’re home.

    How to Build Big Flavor Fast

    Bloom Your Spices and Layer Your Aromatics

    To get the most from Sweet Potato & Lentil Stew, start by sautéing onion until translucent, then add garlic and ginger. That quick sizzle unlocks sweet, savory depth. Next, bloom your spices with tomato paste—this is where the magic happens. Cumin, smoked paprika, coriander, turmeric, and cinnamon toast briefly in oil, creating a flavorful base that permeates lentils and sweet potatoes. This small step transforms Sweet Potato & Lentil Stew from “good” to “I’m making this again.”

    Use a flavorful vegetable broth and don’t skip the acidic finish. Lemon or lime lifts the stew, balancing coconut milk’s richness. For heat lovers, a pinch of red pepper flakes adds warmth without overwhelming. If you’re into hearty bowls, try pairing this with my Harvest Grain Bowl with Cranberries and Pecans for a cozy, plant-forward dinner spread.

    Practical Tips for Creamy, Cozy Results

    • Rinse lentils to reduce bitterness and ensure even cooking.
    • Cut sweet potatoes in even 1/2-inch cubes so they turn tender just as lentils finish.
    • For thicker Sweet Potato & Lentil Stew, mash a few cubes in the pot before serving.
    • Salt in stages: a little after simmering begins, then adjust at the end.
    • Finish with herbs: cilantro or parsley adds fresh contrast.

    These steps build a velvety, plant-based, one-pot stew that tastes like cozy fall dinners all year round. Sweet Potato & Lentil Stew rewards tiny technique tweaks with big, craveable payoff.

    Variations, Swaps, and Dietary Tweaks

    Make It Yours Without Losing the Heart

    Sweet Potato & Lentil Stew is endlessly flexible, so you can use what you have and still nail the cozy factor. Swap kale for spinach, or stir in frozen peas at the end. Prefer more heat? Add a chopped jalapeño with the onion. Need extra protein? Spoon the stew over quinoa or stir in a can of chickpeas during the last 10 minutes. For a lighter Sweet Potato & Lentil Stew, use light coconut milk or omit it and add an extra cup of broth. To make it extra creamy without coconut, blend 1 cup of the stew and return it to the pot.

    For spice shifts, try garam masala instead of coriander and cinnamon, or add a bay leaf during the simmer. If you eat dairy, a swirl of plain yogurt on top is lovely. This plant-based recipe also pairs well alongside bolder mains like my reader-favorite Slow Cooker Three-Bean Chili Mac when you’re feeding a mixed crowd.

    Pinterest-Ready Twists You’ll Love

    • Moroccan-leaning: add 1/2 tsp ras el hanout and golden raisins.
    • Thai-inspired: stir in 1 tbsp red curry paste and finish with basil.
    • Tuscan vibe: skip coconut milk, add white beans and rosemary.
    • Smoky Southwest: add fire-roasted tomatoes and a dash of chipotle.

    All roads lead to a satisfying Sweet Potato & Lentil Stew—vegan, budget-friendly, and easy to style for a Pinterest-worthy bowl.

    Storage, Reheating, and Troubleshooting

    Meal Prep Like a Pro

    Sweet Potato & Lentil Stew is a meal-prep hero. Portion into airtight containers for up to 4 days in the fridge or up to 3 months in the freezer. Reheat gently on the stovetop with a splash of broth or water to loosen. Because this vegan stew thickens as it rests, that extra liquid brings back the perfect spoonable texture. If you love prep-ahead comfort, you’ll also enjoy my slow cooker collection on RecipesDarleen.com.

    Fixes and FAQs at a Glance

    • Too thick? Add warm broth until you hit your ideal consistency.
    • Too thin? Simmer uncovered 5–10 minutes, or mash a few cubes of sweet potato.
    • Lacking depth? Add 1 tsp soy sauce or tamari for umami (use gluten-free if needed).
    • Not bright enough? A second squeeze of lemon wakes it up.
    • Not creamy? Blend a ladle of stew and stir it back in, or add 1/4 cup coconut milk.

    With these tricks, Sweet Potato & Lentil Stew transforms from good to great, staying plant-based, wholesome, and weeknight-fast.

    FAQs

    Can I use red lentils instead of brown or green?

    Yes, but reduce cook time to 15–20 minutes and expect a creamier texture since red lentils break down more quickly.

    How do I make Sweet Potato & Lentil Stew without coconut milk?

    Use an extra cup of vegetable broth and stir in 2–3 tbsp tahini or cashew cream at the end for richness.

    Is this Sweet Potato & Lentil Stew gluten-free?

    It is naturally gluten-free when made with certified gluten-free vegetable broth and seasonings.

    Can I cook this in an Instant Pot?

    Yes. Sauté aromatics on Sauté, add remaining ingredients (greens and lemon after), then pressure cook on High for 8 minutes; quick release, stir in greens and lemon.

    Conclusion

    When you want comfort fast, Sweet Potato & Lentil Stew shows up warm, fragrant, and ready to serve seconds. It’s a plant-based, one-pot, budget-friendly bowl that proves simple ingredients can taste luxurious. Between the silky coconut finish, bright lemon, and spoon-tender lentils, every bite delivers cozy nourishment. Whether you meal-prep for the week or ladle it straight from the pot, Sweet Potato & Lentil Stew adapts to your life—vegan, gluten-free friendly, and endlessly flexible. If this pot made you as happy as it makes my family, share it with a friend, pin your favorite variation, and come back for more weeknight wins. I’ll keep the pot warm.


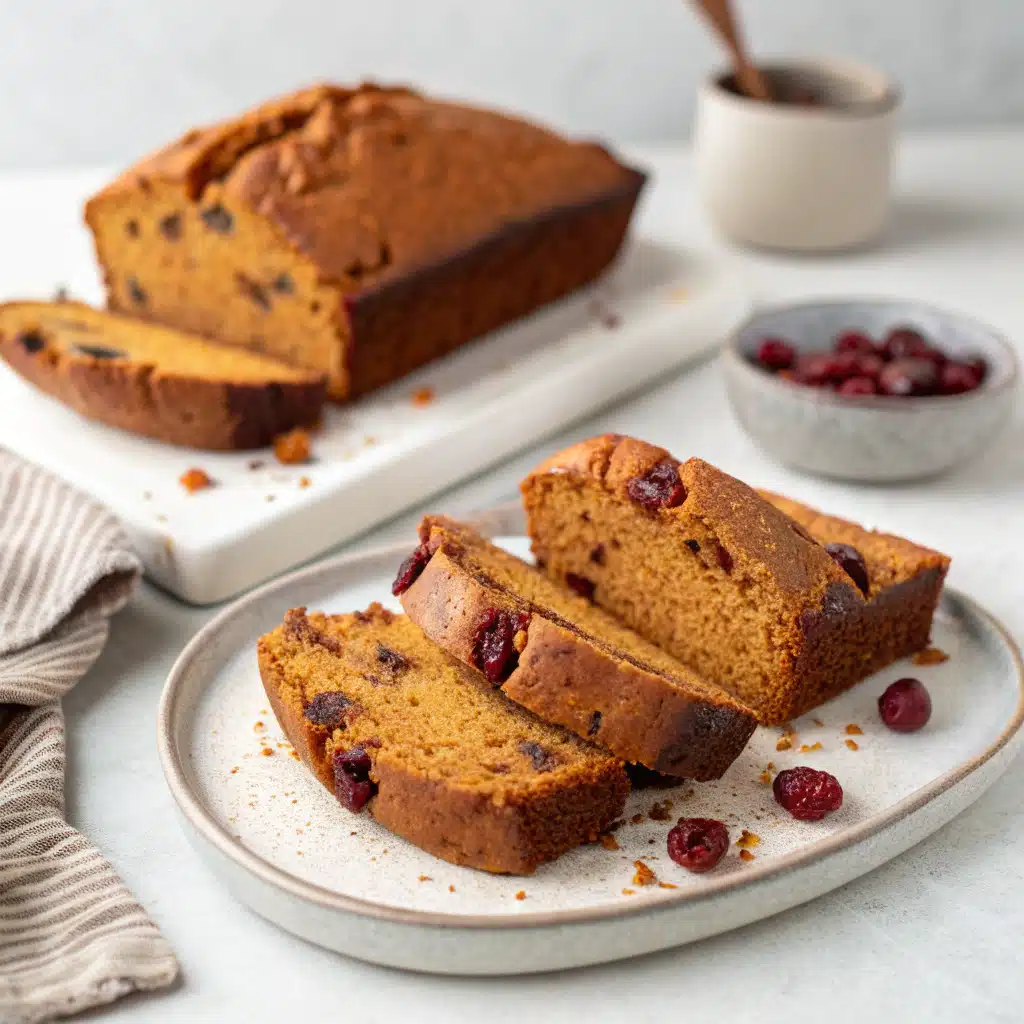
  • Cherry-Spiced Pumpkin Bread – 7 Cozy Secrets

    Cherry-Spiced Pumpkin Bread – 7 Cozy Secrets

     Cherry-Spiced Pumpkin Bread isn’t just a recipe—it’s the scent that drifted through my kitchen the first cold Saturday after school pickup ran late and everyone came home starving. Cherry-Spiced Pumpkin Bread has the cozy spice of classic pumpkin bread and the cheerful pop of tart cherries, which means nobody waits for dessert. I serve slices warm with a little butter while backpacks thud to the floor and stories unwind. Cherry-Spiced Pumpkin Bread is our easy win—less fuss than cake, more festive than muffins, and always gone before the evening news.

    Cherry-Spiced Pumpkin Bread – 7 Cozy Secrets

    Recipe

    The Best Cherry-Spiced Pumpkin Bread Recipe

    Ingredients that make Cherry-Spiced Pumpkin Bread ultra-moist

    For Cherry-Spiced Pumpkin Bread with a tender, bakery-style crumb, balance moisture and structure. Pumpkin puree brings body and natural sweetness, while neutral oil (or melted butter) keeps the crumb plush for days—classic quick bread magic. A touch of Greek yogurt or sour cream adds tang and protein for stability, so this spiced pumpkin loaf slices cleanly. Warm baking spices—cinnamon, nutmeg, ginger, cloves, and allspice—wake up the pumpkin, and dried tart cherries add bright, ruby bursts in every bite. Citrus zest is optional but offers a bakery-level finish that highlights the cherry. If you love a cozy fall baking moment, Cherry-Spiced Pumpkin Bread is the easy, impressive loaf you’ll make on repeat.

    Quick bread isn’t fussy, but precision helps. Use fresh spices, gently fold the batter, and avoid overmixing. Chopped dried cherries distribute better than whole and won’t sink when tossed lightly in flour. A 9×5 loaf pan gives the classic dome; parchment ensures a clean release. This Cherry-Spiced Pumpkin Bread base also supports add-ins like toasted pecans, chocolate chips, or a cinnamon-sugar sprinkle.

    Right now, the Pinterest trend is all about glossy, pour-over glazes. A simple cherry-cinnamon glaze turns Cherry-Spiced Pumpkin Bread into a brunch showstopper without complicating the bake. Powdered sugar, milk, and a splash of cherry juice whisk into a pink sheen that sets with a gentle crackle. It’s photogenic and adds a sweet-spiced finish to your spiced pumpkin loaf. Pair a slice with a hearty fall main like my Harvest Grain Bowl with Cranberries & Pecans for a cozy weekend table. For more pumpkin-forward comfort, try my creamy Pumpkin Alfredo Pasta Bake after dessert. Cherry-Spiced Pumpkin Bread meets the moment—simple, beautiful, and absolutely seasonal.

    How to Make Cherry-Spiced Pumpkin Bread (Step-by-Step)

    Baker-tested method for a tender, moist crumb

    Cherry-Spiced Pumpkin Bread rewards a light hand. Start by preheating the oven and preparing your loaf pan with grease plus a parchment sling. Whisk the dry ingredients thoroughly; even dispersion of baking soda, baking powder, and salt prevents tunneling and guarantees a high, even rise. In a separate bowl, whisk pumpkin puree, sugars, eggs, oil, vanilla, and yogurt until glossy—properly emulsified wet ingredients build structure without toughness.

    Add dry to wet and fold with a spatula just until streaks disappear. Fold in dried cherries and optional nuts last. This spiced pumpkin loaf bakes best at 350°F; begin checking at 55 minutes. A toothpick should emerge with a few moist crumbs, and an instant-read thermometer reads about 205°F in the center.

    Cool the Cherry-Spiced Pumpkin Bread 15 minutes in the pan to set the crumb, then move to a rack. Resist slicing too early—steam is still redistributing. If glazing, wait until fully cool. This approach yields a moist, velvety slice every time, highlighting cinnamon, nutmeg, and tart cherries.

    Pro tips to nail this pumpkin-cherry bread every time

    • Room-temperature eggs mix more evenly, keeping Cherry-Spiced Pumpkin Bread tender.
    • Weigh flour (220 g) to avoid dryness. If measuring by cups, fluff, spoon, and level.
    • Toss chopped cherries with a teaspoon of flour so they stay suspended in the batter.
    • Use a light-colored metal pan to prevent over-browning on this quick bread.
    • For a crackly top, sprinkle a teaspoon of coarse sugar before baking.
    • Let the loaf rest fully before glazing—your cherry-cinnamon glaze will set beautifully.

    Hungry for more cozy flavors? My Slow Cooker Pumpkin Mac and Cheese brings the same fall spice cabinet comfort to dinner, making Cherry-Spiced Pumpkin Bread the perfect dessert companion.

    Cherry-Spiced Pumpkin Loaf Variations & Swaps

    Diet-friendly tweaks (gluten-free, dairy-free, lower sugar)

    Cherry-Spiced Pumpkin Bread adapts easily. For gluten-free, use a 1:1 baking blend with xanthan gum; give the batter an extra 5 minutes to hydrate before baking. For dairy-free, swap the yogurt for a dairy-free yogurt and use oil instead of butter; this keeps the spiced pumpkin loaf plush. To reduce sugar, cut granulated sugar to 1/2 cup and add 2 tablespoons maple syrup for moisture; cherries still pop against the warmly spiced crumb. If nuts are off the table, skip them and add pumpkin seeds for crunch. Every version preserves the hallmark qualities of Cherry-Spiced Pumpkin Bread—moist crumb, cozy spice, and cherry brightness.

    For wholesome boosts, add 2 tablespoons ground flax or swap 1/4 cup flour for fine almond flour. If you prefer a deeper profile, brown the butter first or use dark brown sugar for molasses notes. A splash of orange or lemon zest keeps this quick bread tasting fresh, even on day two.

    • Brown Butter Streusel: Top Cherry-Spiced Pumpkin Bread with a cinnamon streusel (flour, brown sugar, butter) for a coffee cake vibe.
    • Chocolate-Cherry Swirl: Marble in 1/3 cup melted dark chocolate for a bakery-worthy pattern that complements pumpkin spice.
    • Mini Loaves or Muffins: Divide into mini pans or a 12-cup muffin tin. Bake 18–22 minutes for muffins; 28–35 for minis.
    • Orange Glaze: Swap cherry juice for fresh orange juice in the glaze to brighten the dried cherries in the spiced pumpkin loaf.
    • Cream Cheese Ribbon: Layer half the batter, add a thin cream-cheese layer (softened cream cheese + sugar + egg yolk), then top with remaining batter.

    These variations carry the same soul of Cherry-Spiced Pumpkin Bread while giving your feed-worthy loaf a personalized flourish.

    Storing, Serving & Troubleshooting Cherry-Spiced Pumpkin Bread

    Make-ahead, freezing, reheating

    Cherry-Spiced Pumpkin Bread stays moist for days, thanks to oil, pumpkin puree, and cherries. Store airtight at room temperature for 2–3 days or refrigerate up to 1 week. For make-ahead, bake, cool, and skip the glaze. Wrap the whole loaf tightly in plastic plus foil and freeze up to 3 months. Thaw overnight in the fridge, bring to room temp, then glaze before serving. To rewarm slices, microwave 10–15 seconds or heat in a 300°F oven for 8–10 minutes. The spices bloom as it warms, making each slice of this spiced pumpkin loaf taste freshly baked.

    Troubleshooting guide (quick fixes)

    • Loaf sank: Underbaked or batter overmixed. Bake to 205°F internal; fold gently.
    • Dry texture: Too much flour. Weigh flour or use spoon-and-level; don’t overbake.
    • Cherries sank: Chop and lightly flour cherries; don’t over-wet batter.
    • Gummy center: Slice after fully cooling; verify oven temp with an oven thermometer.
    • Too sweet: Reduce sugar by 1/4 cup and add a pinch more salt; the cherry-cinnamon glaze is optional.

    Serve Cherry-Spiced Pumpkin Bread plain, buttered, or glazed. It pairs beautifully with coffee, chai, or a light fall salad. For more weeknight-friendly comfort, explore my collection at RecipesDarleen.com.

    FAQs

    Can I use fresh or frozen cherries instead of dried?

    Yes. Fresh or frozen cherries work if you chop and pat them dry. Toss with a teaspoon of flour to minimize sinking. Expect slightly more moisture; bake a few extra minutes if needed.

    Can I make Cherry-Spiced Pumpkin Bread into muffins?

    Absolutely. Divide batter into a greased or lined 12-cup tin. Bake at 350°F for 18–22 minutes, or until a toothpick tests with moist crumbs. Glaze or dust with cinnamon sugar.

    Do I need to soak the dried cherries?

    Soaking isn’t required for most brands, but for extra-plump cherries you can soak them in warm water or orange juice for 10 minutes, then pat dry thoroughly before folding in.

    How long does Cherry-Spiced Pumpkin Bread stay fresh?

    It’s best within 3 days at room temp, stored airtight. Refrigerate up to 1 week or freeze (well wrapped) for up to 3 months. Glaze after thawing for the best texture.

    Conclusion

    Cherry-Spiced Pumpkin Bread brings together the warmth of cinnamon, nutmeg, and cloves with the bright pop of tart cherries for a bakery-worthy quick bread that fits breakfast, snack, or dessert. With simple steps, pantry spices, and a glossy cherry-cinnamon glaze, this spiced pumpkin loaf looks as good as it tastes. Keep the batter tender, bake just to done, and let the flavors bloom as it cools. Whether you share it at a holiday brunch or slice it for after-school snacks, Cherry-Spiced Pumpkin Bread makes cozy moments effortless. If you bake it, tag me and try a second loaf with one of the variations above—you’ll be the hero of fall baking. Ready to preheat the oven?

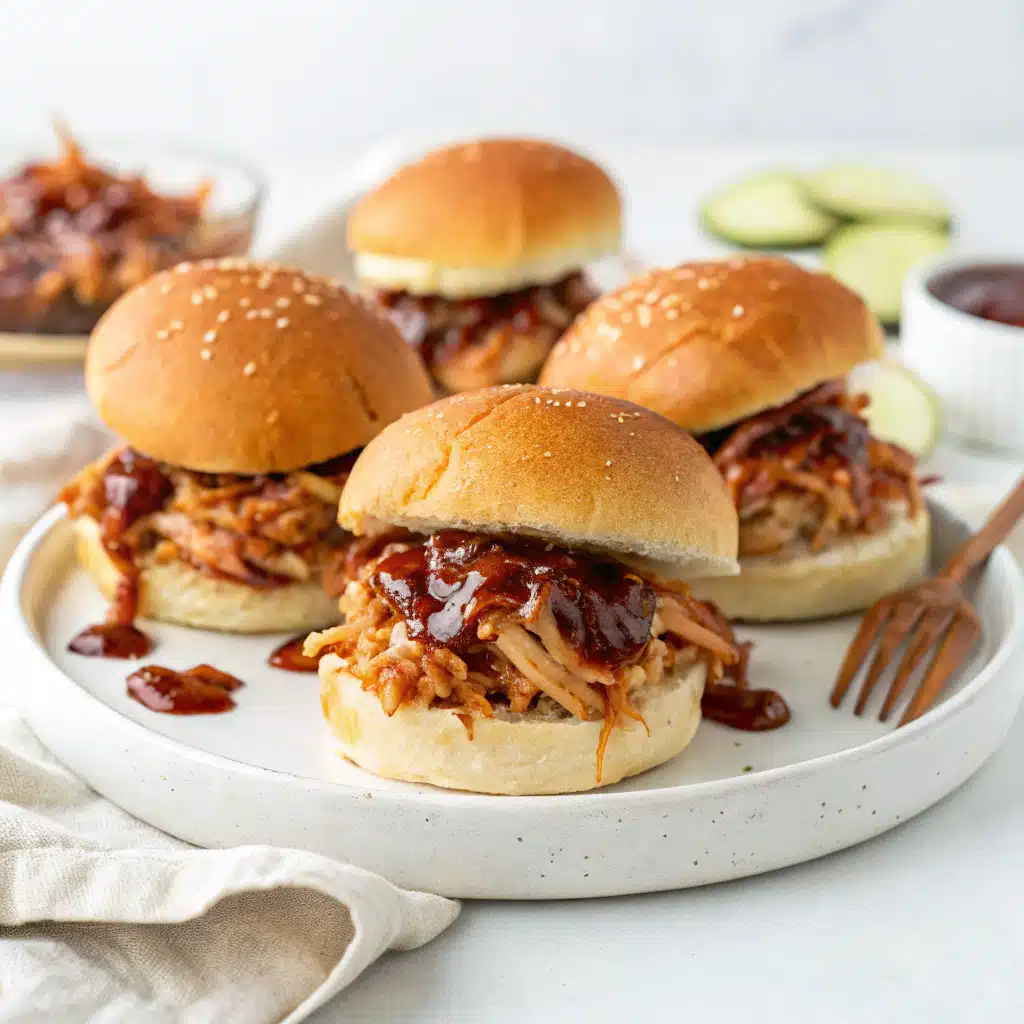
  • Slow Cooker BBQ Chicken Sliders – 7 Flavor Secrets

    Slow Cooker BBQ Chicken Sliders – 7 Flavor Secrets

    Slow Cooker BBQ Chicken Sliders were my unexpected weeknight hero the first fall I coached little league. I’d toss everything in at lunchtime, and by six, Slow Cooker BBQ Chicken Sliders greeted us like a warm hug—juicy, tangy, and ready to pile on soft buns. The kids would race to top theirs with pickles while I scooped crunchy slaw. Slow Cooker BBQ Chicken Sliders became our cozy routine: minimal prep, big flavor, and zero complaints. That’s a rare trifecta in my house—and yours, too, I bet.

    Slow Cooker BBQ Chicken Sliders – 7 Flavor Secrets
    Table of Contents

    Recipe

    Why These Slow Cooker BBQ Chicken Sliders Work

    Low-effort, maximum flavor for busy nights

    When you crave a hands-off, crowd-pleasing meal, Slow Cooker BBQ Chicken Sliders deliver every time. The slow cooker turns boneless chicken into tender, shreddable pulled chicken that’s infused with smoky-sweet sauce. You get real BBQ flavor without babysitting a grill or oven. The result is shredded chicken that’s saucy, juicy, and perfect for slider buns. For an easy weeknight dinner, game day spread, or casual weekend picnic, Slow Cooker BBQ Chicken Sliders are your secret weapon.

    Here’s the magic: a balanced sauce of BBQ sauce, apple cider vinegar, brown sugar, smoked paprika, and broth. It’s tangy, sweet, and gently smoky—classic crockpot BBQ chicken vibes that make the whole kitchen smell incredible. The slow cooker keeps everything moist, so the meat doesn’t dry out. That means consistently tender Slow Cooker BBQ Chicken Sliders with minimal effort. Add a quick homemade coleslaw for crunch, and you’ve got the perfect texture contrast so each bite pops.

    Sliders are having a moment on party boards and Sunday spreads. Slow Cooker BBQ Chicken Sliders fit right in: easy to portion, easy to hold, and endlessly customizable. Prep the chicken ahead and reheat gently—this shredded chicken only gets better as the flavors mingle. Set out buns, pickles, red onion, and slaw so guests can build their own. For more slow-cooker inspiration, peek at my 5-Ingredient Slow Cooker Chicken Fajitas or the tangy-sweet Slow Cooker Pineapple Teriyaki Chicken. But for pure comfort, Slow Cooker BBQ Chicken Sliders are hard to beat.

    How to Make Slow Cooker BBQ Chicken Sliders

    Simple ingredients, big BBQ payoff

    Start with boneless skinless chicken breasts or thighs—both shred beautifully for Slow Cooker BBQ Chicken Sliders. Whisk BBQ sauce with chicken broth, apple cider vinegar, brown sugar, smoked paprika, garlic powder, onion powder, chili powder, salt, and pepper right in the crock. Nestle in the chicken, coat well, and cook on Low for 4–5 hours or on High for 2–3. When it’s fork-tender, shred the chicken while the sauce reduces slightly, then toss together for juicy, sticky-sweet pulled chicken that clings to slider buns.

    For that deli-style finish, make a quick slaw: coleslaw mix, mayo, a touch of honey, cider vinegar, and a pinch of salt and pepper. The creamy, tangy crunch is exactly what Slow Cooker BBQ Chicken Sliders need. Toast the slider buns for a sturdy base and a little buttery crunch. Pile high with crockpot BBQ chicken, add slaw, and slip in dill pickle chips for that briny snap.

    Pro tips for perfect crockpot sliders

    • Use thighs if you want extra-juicy Slow Cooker BBQ Chicken Sliders; breasts are leaner but still tender.
    • Reduce the sauce uncovered for 10–15 minutes for clingy, glossy shredded chicken.
    • Toss the chicken into the sauce gradually to control juiciness—it should be moist, not soupy.
    • Warm buns just before serving to keep Slow Cooker BBQ Chicken Sliders from getting soggy.
    • Scale up easily—double the recipe for parties and keep on Warm for self-serve sliders.

    Flavor Twists for Slow Cooker BBQ Chicken Sliders

    Regional BBQ vibes: pick your adventure

    Make Slow Cooker BBQ Chicken Sliders uniquely yours with sauce twists. For a Kansas City-style finish, use a thick, sweet, molasses-forward sauce and add extra brown sugar. Prefer Texas swagger? Add a dash of Worcestershire and a pinch of cayenne for heat. Lean Carolina? Stir in more apple cider vinegar and a touch of mustard for tangier, vinegar-based crockpot BBQ chicken. All these moves keep the heart of Slow Cooker BBQ Chicken Sliders—tender shredded chicken and a bold sauce—front and center.

    Want smoke without the smoker? Add a few drops of liquid smoke or up the smoked paprika. Love heat? Sriracha, chipotle in adobo, or crushed red pepper give Slow Cooker BBQ Chicken Sliders a spicy lift. For a fruity spin, stir in a spoonful of strawberry or peach preserves to your BBQ sauce for that glossy, sticky glaze trending on Pinterest boards.

    Viral swaps and crowd-loved variations

    • Hawaiian Sliders: Use sweet Hawaiian rolls and pineapple rings for tiki-tinged Slow Cooker BBQ Chicken Sliders.
    • Cheesy Bake: Layer buns in a pan, add BBQ chicken, shredded cheddar, top buns with garlic butter, and bake for 10 minutes.
    • Apple Slaw: Swap honey for maple and add julienned apples to the slaw for extra crunch in your Slow Cooker BBQ Chicken Sliders.
    • Pickle Lovers: Pile on dill pickle chips and a drizzle of pickle juice—try with my viral Tangy Dill Pickle Dip for a pickleboard party.
    • Buffalo-BBQ Mashup: Stir in buffalo sauce and top sliders with blue cheese crumbles.

    Serving, Storage, and FAQs for Sliders

    What to serve with your sliders

    Round out Slow Cooker BBQ Chicken Sliders with kettle chips, cornbread, roasted sweet potatoes, or a crisp salad. For a cozy slow-cooker lineup, pair with Slow Cooker Three-Bean Chili Mac or my hearty Slow Cooker Italian Wedding Soup. A simple fruit platter or crunchy veggie sticks with ranch make a fresh counterpoint to the rich, smoky-sweet crockpot BBQ chicken in your Slow Cooker BBQ Chicken Sliders.

    Storage, reheating, and troubleshooting

    • Storage: Keep shredded BBQ chicken and slaw in separate airtight containers. Chicken lasts 4 days in the fridge; freeze up to 3 months.
    • Reheating: Gently warm chicken on the stove with a splash of broth or BBQ sauce to keep Slow Cooker BBQ Chicken Sliders juicy.
    • Too watery? Reduce the sauce uncovered for 10–15 minutes or stir in a cornstarch slurry (1 tsp cornstarch + 1 tbsp water) and simmer.
    • Too sweet? Balance with extra apple cider vinegar or a squeeze of lemon.
    • Too tangy? Add a bit more brown sugar or a spoon of ketchup.
    • Dry chicken? Fold in a few tablespoons of warm broth or additional sauce; thighs help prevent dryness.

    FAQs

    Can I use frozen chicken in the slow cooker?

    For food safety, thaw chicken before cooking. Thawed chicken ensures even cooking and the best texture for Slow Cooker BBQ Chicken Sliders.

    Breasts or thighs—what’s better for sliders?

    Both work. Thighs are naturally juicier; breasts are lean. Either becomes tender, saucy shredded chicken for Slow Cooker BBQ Chicken Sliders.

    How do I make this spicier?

    Add cayenne, chipotle in adobo, or buffalo sauce to your BBQ base for extra heat in your Slow Cooker BBQ Chicken Sliders.

    Can I prepare these sliders ahead?

    Yes. Cook and shred the BBQ chicken up to 3 days ahead. Reheat gently and assemble Slow Cooker BBQ Chicken Sliders just before serving.

    Conclusion

    Slow Cooker BBQ Chicken Sliders are the kind of low-stress, high-reward dinner that earns a permanent spot in your meal rotation. The crockpot transforms simple ingredients into tender, shredded chicken soaked with smoky-sweet sauce, ready to tuck into soft buns with crisp slaw. Whether it’s game day grazing, a busy weeknight, or make-ahead meal prep, Slow Cooker BBQ Chicken Sliders deliver comfort, flexibility, and big flavor. If this recipe becomes your new favorite (I suspect it will), explore more slow-cooker favorites across the site, and don’t forget to share your sliders with someone who needs a warm, tasty win tonight. I’ll be cheering you on from my kitchen, sauce-stained spoon in hand.

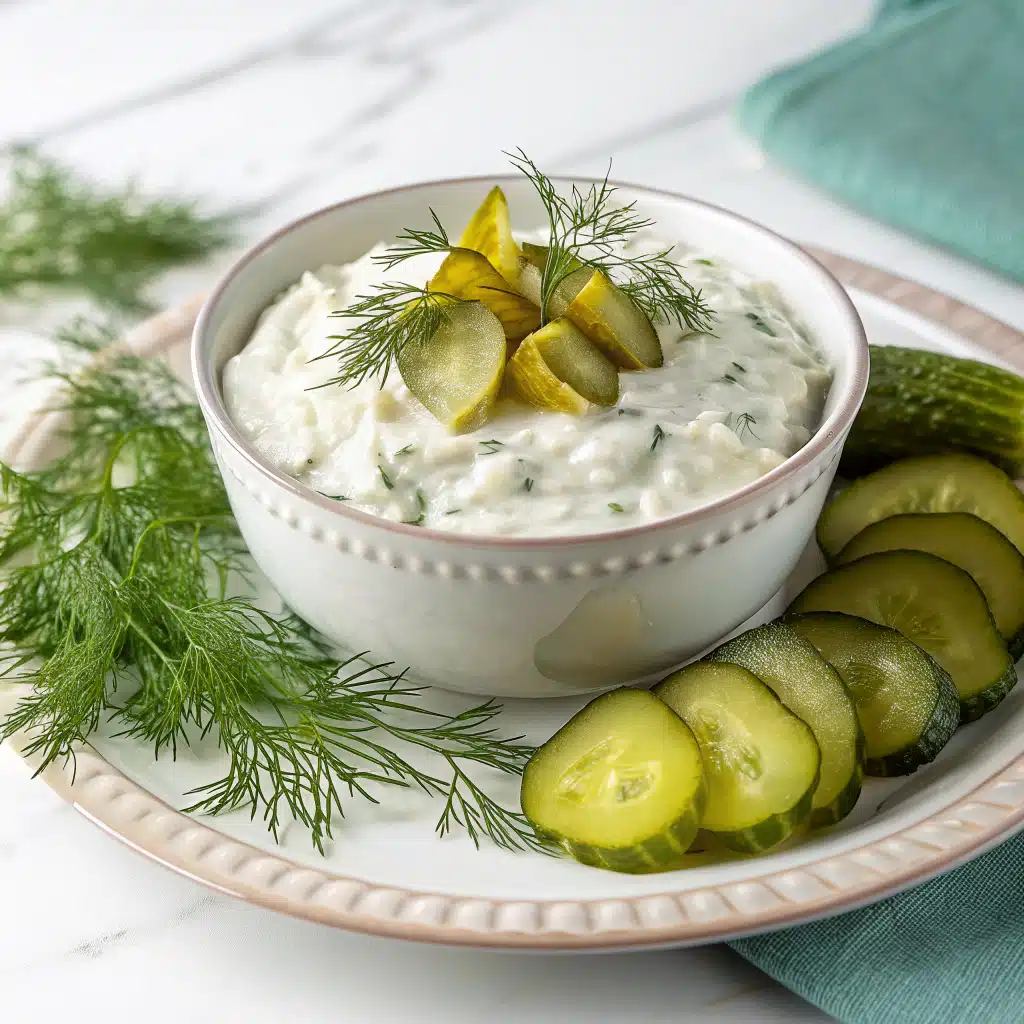
  • Tangy Dill Pickle Dip (Viral Snack) — 7 Pro Tricks

    Tangy Dill Pickle Dip (Viral Snack) — 7 Pro Tricks

    Tangy Dill Pickle Dip (Viral Snack) was born at my sister’s last-minute game night when the veggie tray looked lonely and chips were calling. I grabbed what we had—cream cheese, dill pickles, a splash of brine—and five minutes later Tangy Dill Pickle Dip (Viral Snack) was the loudest hit on the table. We scraped the bowl clean, and the kids asked for more. Now, I keep the ingredients on hand because Tangy Dill Pickle Dip (Viral Snack) is my effortless party trick: creamy, crunchy, and perfectly tangy every time.

    Tangy Dill Pickle Dip (Viral Snack) — 7 Pro Tricks

    Recipe

    What Makes Tangy Dill Pickle Dip So Addictive?

    The Pickle Factor: Not Just Any Jar Will Do

    The key to this dip’s viral charm lies in the pickles. Not all pickles are created equal. For this dip to truly shine, you need crunchy, tangy, full-dill pickles—not the sweet bread-and-butter kind or the limp slices found in generic jars. Go for refrigerated deli-style spears or whole kosher dills for the best flavor punch.

    Pickles are the backbone of this recipe, delivering that signature zip and a satisfying crunch in every bite. But here’s a game-changing tip: pulse them in a food processor rather than chopping by hand. It keeps the brine sealed inside the chunks and prevents soggy dip.

    Pro Trick #1: Pulse your pickles instead of chopping to keep the texture sharp and the flavor bold.

    Creamy Base That Actually Holds Up

    A lot of viral dips taste great right out of the fridge but fall flat after 10 minutes on the counter. This dip avoids that fate by using a three-part base: cream cheese, sour cream, and Greek yogurt. The blend is smooth, rich, and stable enough to stay creamy during your entire event.

    The cream cheese provides structure, the sour cream adds a slight tang, and the Greek yogurt offers protein and a subtle lift. It’s a combo that makes the dip spoonable yet thick enough to cling to everything from chips to carrot sticks.

    Pro Trick #2: Use full-fat ingredients. The reduced-fat versions can make the dip watery and less flavorful over time.

    Coming up next, you’ll learn how to tweak the flavor base using pantry staples—and how one surprise ingredient can turn this simple recipe into a conversation starter.

    Boost the Flavor with Pantry Staples

    Bold Seasonings That Bring It All Together

    What separates an average pickle dip from a craveable one is seasoning. The pickles bring plenty of zing, but to round out the flavor, you’ll need a few strategic pantry staples. Garlic powder and onion powder add warmth and depth, balancing out the brightness of the pickles.

    A dash of pickle juice intensifies the briny flavor without overpowering the creamy base. It also helps the texture loosen just enough to become perfectly scoopable.

    Pro Trick #3: Stir in one tablespoon of pickle juice for enhanced flavor and a smoother dip consistency.

    If you’re feeling adventurous, try a pinch of smoked paprika or cayenne. It won’t turn it into a spicy dip, but it will add subtle complexity that keeps people reaching for more.

    Fresh Herbs: Why Dill Deserves the Spotlight

    It’s called dill pickle dip for a reason—fresh dill is essential. Dried dill works in a pinch, but fresh dill brings a vibrant, almost citrus-like aroma that plays beautifully against the creaminess.

    You don’t need much. Just one tablespoon of finely chopped fresh dill is enough to take this dip from good to exceptional. Sprinkle a little extra on top before serving for both color and aroma.

    Pro Trick #4: Always add fresh herbs at the end. Mixing them in too early can dull their flavor, especially if the dip sits overnight.

    For extra flair, consider a quick garnish: thin pickle slices, a sprinkle of shredded cheese, or even a dash of everything bagel seasoning for texture.

    Next up, you’ll learn how to make it ahead, store it properly, and turn this simple dip into a party trick you’ll pull out again and again.

    Make-Ahead Tips and Storage That Keep It Fresh

    How to Prep Tangy Dill Pickle Dip in Advance

    One of the best things about this dip—besides how quickly it disappears—is how well it holds up in the fridge. In fact, it tastes better after a few hours. The flavors have time to meld, the texture firms up slightly, and the pickle brine integrates perfectly with the base.

    If you’re prepping for a party, make the dip at least four hours ahead, or even the night before. Store it in an airtight container and give it a quick stir before serving. It’s a perfect make-ahead appetizer that keeps your event stress-free.

    Pro Trick #5: Chill your dip overnight and stir just before serving for peak texture and balanced flavor.

    How to Store Leftovers (If You Have Any)

    This dip doesn’t just survive the fridge—it thrives in it. Store leftovers in a sealed glass container for up to three days. The texture remains creamy, and the dill stays fresh without wilting or turning bitter.

    Avoid freezing. Because of the dairy base, freezing alters the texture and makes it grainy. It’s best enjoyed fresh—or eaten cold right out of the fridge with a spoon (we won’t judge).

    Pro Trick #6: Transfer the dip to a shallow container to help it chill evenly and keep the herbs fresh.

    Want to use the leftovers creatively? Spread it on a sandwich, mix into potato salad, or spoon onto grilled meats. It’s surprisingly versatile.

    Coming next: Serving ideas that will turn this dip into the star of any spread, plus the final trick that made this recipe go viral in the first place.

    Serve It Like a Pro and Go Viral

    Smart Serving Ideas for Maximum Crunch

    A great dip deserves great dippers. Skip the basic saltines—this tangy dill pickle dip shines with bold textures and hearty bases. Thick-cut kettle chips, pretzel thins, pita crackers, and fresh-cut cucumbers are perfect matches. Even celery sticks give it a fresh snap that works beautifully with the creamy base.

    If you’re serving for a crowd, divide the dip into two bowls: one for the main table, and one as backup in the fridge. That way, the second bowl stays cool, and your dip never turns soft or warm.

    Pro Trick #7: Serve with a mix of soft and crunchy dippers to balance every bite and keep guests coming back.

    Hosting a party? Pair this with my Slow Cooker Buffalo Chicken Sliders for a game day spread that checks every box: spicy, cool, crunchy, and creamy.

    The Secret Garnish That Made It Go Viral

    Want your version to go viral on social media too? Here’s the twist: top the dip with a thin layer of chopped dill pickles and crushed kettle chips just before serving. This adds crunch, color, and that “wow” factor that looks amazing in photos.

    This trick, combined with a rustic bowl and bold dippers, makes your spread instantly shareable—and yes, it’s already been featured in reels and TikToks across foodie accounts. If you want more social-worthy snacks, don’t miss this Slow Cooker Beer Cheese Dip that melts perfectly every time.

    Final tip: serve it chilled, not cold. Take it out 10 minutes before guests arrive to let it soften just slightly. That’s when the flavors pop, and the texture turns irresistibly dippable.

    FAQs

    Can I make Tangy Dill Pickle Dip (Viral Snack) ahead?
    Yes, chill up to 24 hours; stir in a splash of pickle juice to refresh before serving.

    What pickles work best for this creamy pickle dip?
    Crisp refrigerated dill pickles deliver the brightest snap, but shelf-stable dills work too.

    How do I make a dairy-free dill pickle ranch dip?
    Use plant-based cream cheese and thick dairy-free yogurt; season with dill and brine.

    Is Tangy Dill Pickle Dip (Viral Snack) good for low-carb snacks?
    Yes—serve with cucumber chips, celery, and pork rinds for a low-carb spread.

    Conclusion

    Tangy Dill Pickle Dip (Viral Snack) proves that simple ingredients can deliver big-time flavor. With a creamy base, crunchy dill pickles, and that addictive briny pop, this creamy pickle dip becomes everyone’s favorite party appetizer. Keep it classic, turn up the heat, or riff with dill pickle ranch dip vibes—the bowl always empties. I’m betting your crowd will love it as much as mine does. If you make Tangy Dill Pickle Dip (Viral Snack), leave a comment, tag me in your photos, and rate the recipe so others can find this viral snack recipe too. Ready to build your spread? Browse more comfort dishes at Recipes Darleen and snag another easy star for your table.

  • 7 Cozy Secrets for Slow Cooker Butternut Squash Lentil Curry

    7 Cozy Secrets for Slow Cooker Butternut Squash Lentil Curry

    Slow Cooker Butternut Squash Lentil Curry is my rainy-Tuesday lifesaver. I tossed everything in the crockpot before school drop-off, and by dinner the house smelled like a cozy curry shop. When the kids wandered in—muddy shoes, big appetites—I ladled out Slow Cooker Butternut Squash Lentil Curry with warm naan and they went silent (the best compliment). This Slow Cooker Butternut Squash Lentil Curry tastes luxuriously creamy, but it’s dairy-free, budget-friendly, and practically cooks itself. That’s the kind of weeknight magic I live for.

    7 Cozy Secrets for Slow Cooker Butternut Squash Lentil Curry

    Recipe

    Structured JSON-LD Schema

    The Best Slow Cooker Butternut Squash Lentil Curry (Basics)

    Why this red lentil curry thrives in a crockpot

    When you want cozy, set-and-forget comfort, Slow Cooker Butternut Squash Lentil Curry delivers like a hug in a bowl. Red lentils melt into a silky base while butternut squash turns buttery-tender, creating a creamy coconut curry without any dairy. The slow cooker coaxes out sweetness from the squash and caramelizes onion and garlic just enough to round out spice, so every spoonful tastes like hours of hands-on cooking—minus the work. If you’re craving a vegan slow cooker curry that is inexpensive, nourishing, and deeply flavorful, this is your weeknight hero.

    Because red lentils break down quickly, they thicken the curry into a rich, restaurant-style texture. A splash of coconut milk adds body for that irresistible spoon-coating finish. Turmeric, cumin, coriander, and garam masala infuse the pot with Indian-inspired aromas that play beautifully with squash. Serve your Slow Cooker Butternut Squash Lentil Curry with rice, quinoa, or warm naan for a complete gluten-free dinner packed with plant-based protein and fiber.

    This Slow Cooker Butternut Squash Lentil Curry is more than comfort food—it’s a nutrient-dense, anti-inflammatory powerhouse. Butternut squash brings beta-carotene and vitamin C, while lentils bring iron and satiating protein. Turmeric and ginger are the buzzy super-spices of the moment, prized for supporting recovery and everyday wellness. If you love simple, wholesome slow cooker meals, bookmark this recipe next to my Slow Cooker Three-Bean Chili Mac or cozy up with creamy Slow Cooker Pumpkin Mac and Cheese. Together, they make a budget-friendly meal plan that tastes like a hug, night after night.

    Crockpot Butternut Squash Lentil Curry Ingredients & Smart Swaps

    The essentials for Slow Cooker Butternut Squash Lentil Curry

    For the creamiest Slow Cooker Butternut Squash Lentil Curry, start with cubed butternut squash, dry red lentils, coconut milk, crushed tomatoes, vegetable broth, and onion, garlic, and ginger. Curry powder forms the base, supported by cumin, coriander, turmeric, and garam masala for depth. Baby spinach stirred in at the end adds fresh, vibrant color and nutrients, while lime juice brightens the entire vegan curry. This crockpot butternut squash curry is naturally gluten-free and dairy-free, with hearty plant-based protein that keeps you full and energized.

    Smart swaps to match your pantry

    No squash? Sub sweet potatoes or pumpkin for an equally silky slow cooker curry. Only have green or brown lentils? They’ll work, but the texture will be chunkier; add 30–45 minutes to the cook time. Want extra protein? Stir in a can of drained chickpeas during the last hour. Prefer lighter coconut flavor? Use light coconut milk and reduce the broth slightly for a thicker finish. For extra greens, fold in kale (stems removed) and let it soften an additional 10–15 minutes.

    You can also turn this Slow Cooker Butternut Squash Lentil Curry into a Thai-inspired spin with Thai curry paste and a splash of soy or tamari for umami complexity. However you swap, the crockpot still delivers that creamy coconut curry comfort we crave.

    How to Make Slow Cooker Butternut Squash Lentil Curry (Step-by-Step)

    Hands-off method, big flavor

    Rinse the red lentils until the water runs mostly clear, then add them to your slow cooker with cubed butternut squash, chopped onion, minced garlic, grated ginger, crushed tomatoes, coconut milk, and broth. Season with curry powder, cumin, coriander, turmeric, garam masala, salt, and black pepper. Stir well. Cook your Slow Cooker Butternut Squash Lentil Curry on LOW for 6–7 hours (or HIGH for 3–4 hours), until the lentils are creamy and the squash is tender. Stir in baby spinach to wilt, add lime juice, and adjust salt to taste. That’s it—crockpot magic.

    • Sweet Heat: Add a diced jalapeño or 1/2 teaspoon cayenne for a spicy kick in your Slow Cooker Butternut Squash Lentil Curry.
    • Autumn Harvest: Swap in pumpkin or delicata squash for a seasonal rotation.
    • Protein Boost: Stir in chickpeas or cubed tofu during the last hour for extra plant-based protein.
    • Golden Glow: Finish with extra turmeric and cracked pepper for that golden latte glow in curry form.
    • Herby Finish: Top with cilantro, mint, and toasted coconut flakes to mimic restaurant-style coconut curry. For more set-and-forget inspiration, check out my soothing Slow Cooker Bone Broth health secrets—perfect for sipping between hearty curry nights.

    Slow Cooker Butternut Squash Lentil Curry Meal Prep, Storage & Troubleshooting

    Make-ahead and storage tips

    Slow Cooker Butternut Squash Lentil Curry is a meal-prep champion. Portion into airtight containers and refrigerate up to 5 days; the flavors deepen as it rests. To freeze, cool completely and store flat in freezer bags or in lidded containers for up to 3 months. Thaw overnight in the fridge or gently reheat from frozen with a splash of broth. Reheat on the stovetop over medium-low, stirring in extra coconut milk if you want creamier, dairy-free comfort. Serve leftovers over rice, quinoa, or spoon it with warm naan for a gluten-free, vegan dinner any night.

    Troubleshooting your crockpot curry

    • Too thin? Simmer uncovered for 10–15 minutes or mash a few squash cubes and lentils to thicken.
    • Too thick? Stir in warm broth or coconut milk until it’s your ideal creamy coconut curry texture.
    • Lentils undercooked? Cook 30–45 minutes longer; older lentils can take extra time.
    • Needs brightness? A squeeze of lime and a pinch more salt transform flavors fast.
    • Too spicy? Add more coconut milk or a spoon of plain yogurt (if not strictly dairy-free).

    Make it your own

    Your Slow Cooker Butternut Squash Lentil Curry can swing from mild and cozy to vibrant and spicy. Garnish with cilantro, mint, scallions, toasted cashews, or coconut flakes. Add frozen peas for a pop of sweetness or stir in kale for extra greens. Pair with basmati rice, brown rice, quinoa, or low-carb cauliflower rice. However you build your bowl, this creamy, vegan red lentil curry proves that simple pantry staples and a crockpot can taste extraordinary.

    Can I cook Slow Cooker Butternut Squash Lentil Curry on HIGH? Yes. Cook on HIGH for 3–4 hours, or on LOW for 6–7 hours, until lentils are creamy and squash is tender.

    Do I need to soak red lentils first? No soaking needed. Rinse red lentils well to remove excess starch—then add directly to the slow cooker.

    Can I use light coconut milk? Yes. Light coconut milk works; reduce vegetable broth slightly for a thicker curry or simmer uncovered to concentrate.

    How do I keep leftovers from drying out? When reheating, stir in a splash of broth or coconut milk to revive the creamy, dairy-free curry texture.

    div id=”conclusion”>

    At the end of a busy day, Slow Cooker Butternut Squash Lentil Curry proves that nourishing, budget-friendly comfort can be as easy as loading a crockpot. With red lentils, butternut squash, and gentle spices, this vegan, dairy-free curry tastes like you fussed for hours—yet it’s a true set-and-forget dinner. Serve your Slow Cooker Butternut Squash Lentil Curry over fluffy basmati rice, shower it with cilantro and lime, and let the cozy aroma do the rest. If you try this Slow Cooker Butternut Squash Lentil Curry, leave a comment, share a photo, and tell me your favorite swaps. Craving more slow-cooked comfort? Explore my site for weeknight heroes and seasonal favorites that make home cooking feel easy and joyful.