Category: Dinner

Easy, tasty dinner ideas for busy nights. Simple recipes, quick prep, and family-friendly meals you’ll make again and again.

  • Fluffy Garlic Butter Bread Rolls That Melt Hearts Instantly

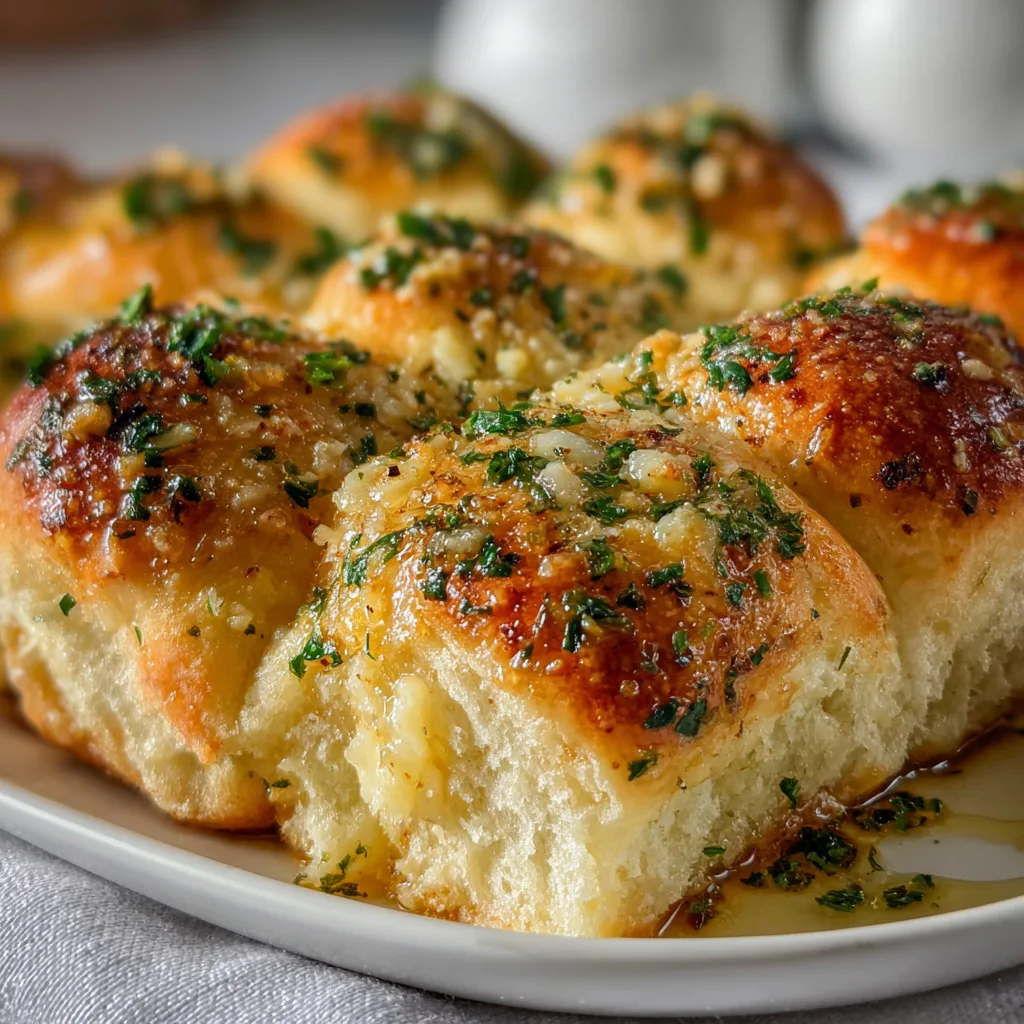
    Fluffy Garlic Butter Bread Rolls That Melt Hearts Instantly

    Fluffy Garlic Butter Bread Rolls That Melt Hearts Instantly

    Fluffy Garlic Butter Bread Rolls have completely transformed my weekend dinner gatherings. There’s something almost magical about pulling apart a warm, pillowy roll and watching that melted garlic butter stretch between the pieces. The heavenly aroma fills my kitchen, making everyone gravitate toward the dining table before I’ve even called them! These rolls strike that perfect balance between soft interior and slightly crisp exterior, with a rich buttery flavor that pairs beautifully with practically any meal. Trust me, once you’ve mastered these homemade rolls, store-bought versions will never satisfy again.

    Recipe

    Why You’ll Love These Fluffy Garlic Butter Bread Rolls

    Perfect Texture Every Time

    The secret to these rolls lies in their cloud-like texture that somehow manages to be both substantial and light as air. I spent months perfecting this recipe, testing different flour-to-liquid ratios until I found the sweet spot. The dough develops just enough gluten to create structure but remains tender through careful handling. When you tear into one, you’ll notice those beautiful stretchy layers inside – that’s the sign of perfectly developed dough. The exterior browns to a gorgeous golden shade while the interior stays pillowy and moist. It’s this textural contrast that makes them utterly irresistible.

    Flavor That Elevates Any Meal

    These aren’t just any dinner rolls – they’re a flavor experience. The garlic butter doesn’t just sit on top but infuses throughout each roll, creating pockets of savory goodness. I use a combination of fresh garlic for punch and roasted garlic for depth, creating a complex flavor profile that’s never overwhelming. A touch of herbs (I love rosemary and thyme) adds an aromatic quality that makes these rolls distinctive. The slight sweetness in the dough balances the savory elements perfectly. These rolls don’t just accompany your meal – they elevate everything on the plate.

    Essential Tips & Tricks

    Mastering the Dough

    Achieving that perfect pillowy texture starts with proper technique. I always bring my ingredients to room temperature – cold eggs or milk can inhibit yeast activity. When kneading, look for the “window pane test” – stretch a small piece of dough until it’s thin enough to see light through without tearing. This indicates well-developed gluten. Don’t rush the rise times! Those bubbles create the airy texture we’re after. I place my dough in a warm (not hot) spot, around 75°F. If your kitchen is cool, try placing the bowl near (not on) a preheating oven or use the proofing setting if your oven has one.

    The Perfect Garlic Butter Finish

    The garlic butter topping is what transforms good rolls into unforgettable ones. I melt unsalted butter (always unsalted – it gives you control over the final flavor) and add minced garlic while it’s still warm but not hot enough to burn the garlic. Let this mixture infuse for 5-10 minutes before brushing on the rolls. Apply butter twice – once before baking and once immediately after they come out of the oven. That second application is crucial as it soaks into the warm rolls, creating that signature moist, flavorful finish. A final sprinkle of flaky salt adds the perfect textural contrast and flavor pop.

    Serving Ideas & Creative Variations

    Perfect Pairings

    These rolls are versatile enough to complement almost any meal. They’re particularly magical alongside hearty soups where they can soak up all those delicious flavors – I especially love them with my Thick and Creamy Tomato Soup. For holiday dinners, they’re substantial enough to stand up to gravies and sauces without falling apart. They also make incredible sandwich buns for leftover roasted meats – slice them horizontally and toast lightly. For a simple but impressive appetizer, serve warm with a dish of seasoned olive oil for dipping. The slight sweetness in the dough makes them equally at home with savory and sweet accompaniments.

    Exciting Flavor Twists

    While the classic garlic butter version is my go-to, these rolls welcome creative variations. For a cheesy version, fold grated parmesan or asiago into the dough and sprinkle more on top before baking. Herb lovers can add chopped fresh herbs like rosemary, thyme, or chives directly into the dough. For a sweeter take, brush with honey butter instead of garlic butter – perfect for breakfast. My family goes wild for the everything bagel version where I brush with butter and sprinkle with everything bagel seasoning. You can even stuff them with cheese cubes before the second rise for an indulgent surprise center.

    Storage & Troubleshooting Guide

    Keeping Rolls Fresh

    To maintain that just-baked quality, store completely cooled rolls in an airtight container at room temperature for up to 3 days. For longer storage, freeze them! I place cooled rolls in a ziplock bag, remove as much air as possible, and freeze for up to 3 months. To reheat, wrap frozen rolls in foil and warm in a 300°F oven for about 10-15 minutes until heated through. For the freshest taste, I sometimes freeze the shaped dough before the second rise, then thaw overnight in the refrigerator and let rise at room temperature before baking. This gives you that magical fresh-baked experience without starting from scratch.

    Solving Common Problems

    If your rolls aren’t as fluffy as expected, there are several potential fixes. Dense rolls usually mean insufficient rising time or inactive yeast – always test your yeast in warm water with a pinch of sugar before starting. If the rolls are spreading too much rather than rising upward, your dough might be too wet; add a tablespoon of flour at a time until it feels tacky but not sticky. For rolls that brown too quickly before cooking through, tent them with foil halfway through baking. If your garlic butter burns, reduce the oven temperature slightly and place the rolls on a higher rack away from the heating element.

    Frequently Asked Questions

    Can I make these Fluffy Garlic Butter Bread Rolls ahead of time?

    Absolutely! Prepare the dough through shaping, then refrigerate overnight for the second rise. The next day, bring to room temperature for 30 minutes before baking for fresh rolls without the wait.

    Can I use instant yeast instead of active dry?

    Yes! Use the same amount but skip the proofing step. Add instant yeast directly to your dry ingredients and proceed with the recipe as written.

    Why didn’t my rolls rise properly?

    Your yeast might be old, or your liquid was too hot and killed it. Also check your rising environment—yeast loves a warm (not hot) spot around 75-80°F.

    How can I make these rolls dairy-free?

    Replace butter with olive oil or plant-based butter, and substitute the milk with almond or oat milk. The texture will be slightly different but still delicious.

    Can I freeze the dough instead of baked rolls?

    Yes! Freeze after shaping but before the second rise. Thaw overnight in the refrigerator, then let rise at room temperature before baking.

    Final Thoughts

    These Fluffy Garlic Butter Bread Rolls have become my signature contribution to family gatherings, with relatives requesting them by name. There’s something deeply satisfying about watching people close their eyes with that first warm, buttery bite. The recipe strikes that perfect balance between impressive and achievable – fancy enough for special occasions yet simple enough for weekend dinners. I hope these rolls bring the same joy to your table as they have to mine. Don’t forget to share your creations on Pinterest – I’d love to see your beautiful golden rolls!
  • Baked BBQ Sausages in Oven – Juicy, Easy & Irresistible!

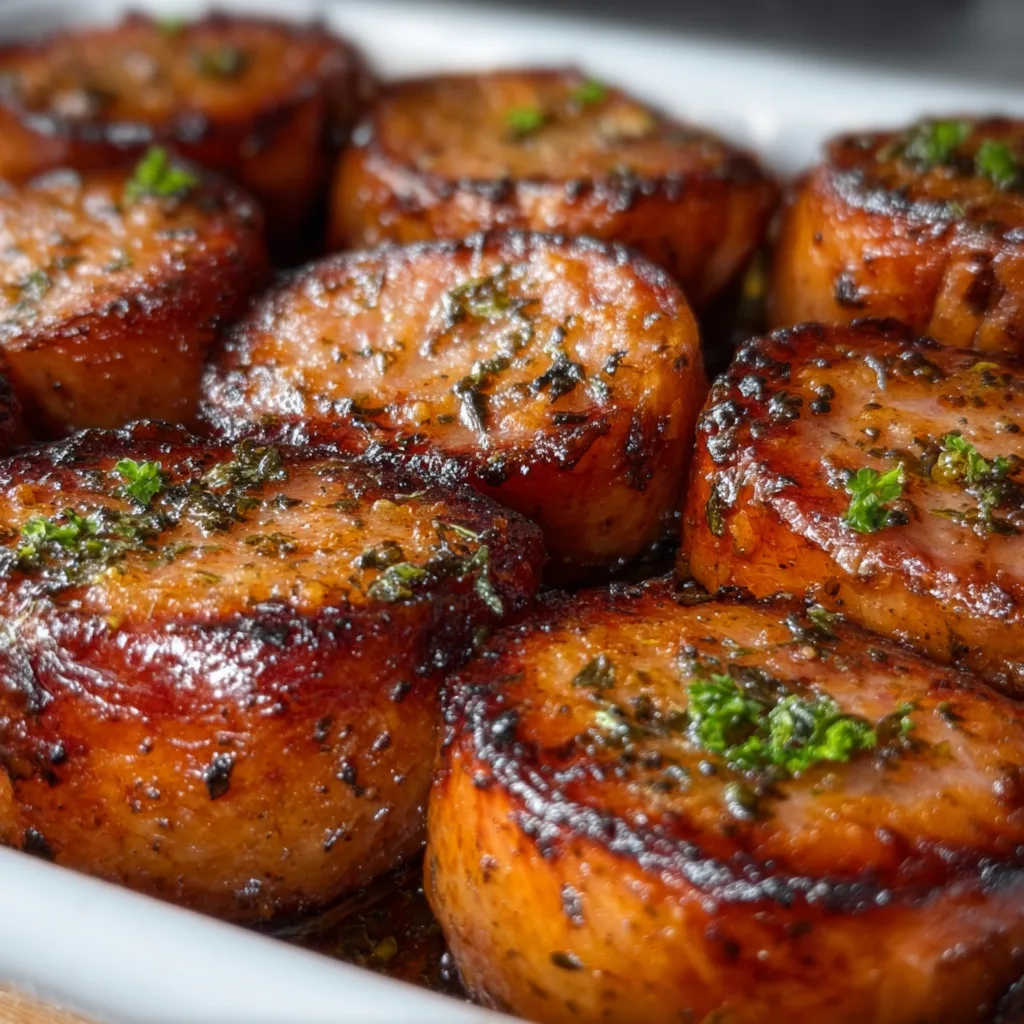
    Baked BBQ Sausages in Oven – Juicy, Easy & Irresistible!

    Baked BBQ Sausages in Oven – Juicy, Easy & Irresistible!

    Baked BBQ Sausages in the oven have become my go-to dinner solution on those evenings when I’m craving something hearty but don’t have the energy for anything complicated. There’s something magical about the way the oven transforms those humble links into caramelized, juicy morsels of deliciousness. I first discovered this method during a rainy Sunday when grilling outside wasn’t an option, and honestly? The oven-baked version might be even better! The edges get perfectly crisp while the inside stays tender and bursting with flavor. If you’ve been looking for a foolproof way to cook sausages, this method from my kitchen collection is about to become your new favorite.

    Recipe

    Why You’ll Love These Baked BBQ Sausages in Oven

    Perfect Texture Every Time

    The magic of oven-baking sausages lies in the consistent heat that surrounds them, creating that ideal balance of crispy exterior and juicy interior. Unlike pan-frying, where I always struggled with uneven cooking or burned spots, the oven method delivers perfection every time. I still remember serving these at a family gathering and watching my brother-in-law’s eyes widen with that first bite. The gentle heat allows the fat to render slowly, basting the sausages from within while the BBQ sauce caramelizes into a sticky, flavorful glaze. Trust me, once you try this method, you’ll never go back to standing over a splattering stovetop.

    Minimal Effort, Maximum Flavor

    What truly won me over about these BBQ sausages is how ridiculously easy they are to prepare. On busy weeknights when I’m juggling work emails and helping with homework, I can simply line a baking sheet, arrange the sausages, brush with sauce, and let the oven work its magic. No constant flipping or monitoring required! The hands-off cooking time gives me precious minutes to throw together a quick side dish or simply catch my breath. And the flavor payoff? Absolutely worth the minimal effort. The BBQ sauce concentrates and caramelizes, creating deep, complex flavors that taste like you’ve been cooking all day.

    Essential Tips & Tricks

    Choosing the Right Sausages

    The foundation of amazing baked sausages starts with selecting the right variety. I’ve experimented with everything from spicy Italian to sweet apple varieties, and they all work beautifully with this method. For the richest flavor, look for sausages with at least 15-20% fat content – this keeps them juicy during the baking process. My personal favorite? A good quality pork and fennel sausage that pairs perfectly with sweet BBQ sauce. Fresh sausages will always give you the best texture, but even pre-cooked varieties benefit from this baking method. Just remember to reduce the cooking time slightly if using pre-cooked options to prevent them from drying out.

    Perfecting Your BBQ Glaze

    The secret to truly exceptional oven-baked sausages lies in the BBQ glaze. While store-bought sauce works perfectly, I love to doctor mine up with a tablespoon of honey and a splash of apple cider vinegar for that perfect sweet-tangy balance. Apply your sauce in layers – start with a light coating before baking, then add a second layer halfway through cooking for maximum flavor impact. For an extra special touch that I learned from my Baked Chicken Kabobs recipe, try mixing in a teaspoon of smoked paprika or a dash of bourbon to your BBQ sauce. These little tweaks elevate the humble sausage into something truly crave-worthy.

    Serving Ideas & Creative Variations

    Family-Friendly Meal Pairings

    These BBQ sausages are incredibly versatile when it comes to creating complete meals. My family’s favorite pairing is with creamy mashed potatoes that soak up all that delicious sauce – I’ve literally seen my kids use their potatoes as a vehicle to scoop up every last bit from their plates! For a lighter option, try serving alongside a crisp coleslaw with a tangy dressing to cut through the richness. Roasted vegetables like bell peppers and zucchini complement the smoky flavors beautifully, or go classic with some Parmesan Garlic Rice for a crowd-pleasing combination. Don’t forget some crusty bread to mop up those irresistible pan juices!

    Exciting Flavor Twists

    While classic BBQ sauce is always a winner, these oven-baked sausages are the perfect canvas for flavor experimentation. For an Asian-inspired version, try glazing with a mixture of hoisin sauce, ginger, and a drizzle of honey. Mediterranean flavors work beautifully too – a combination of oregano, lemon zest, and olive oil creates a bright, herbaceous profile. My personal favorite twist came from a happy accident when I was out of BBQ sauce – I used a blend of maple syrup, Dijon mustard, and a pinch of cayenne pepper. The sweet-heat combination was so good it’s now in regular rotation! Don’t be afraid to customize based on what your family loves.

    Storage & Troubleshooting Guide

    Proper Storage Solutions

    Storing leftover baked sausages properly ensures they remain just as delicious the next day. Allow them to cool completely before transferring to an airtight container – this prevents condensation that can make them soggy. They’ll keep beautifully in the refrigerator for up to 3 days. For longer storage, these sausages freeze surprisingly well! I often make a double batch specifically for freezing. Wrap individual sausages in parchment paper before placing in a freezer bag to prevent them from sticking together. When reheating, avoid the microwave if possible – a few minutes in a 350°F oven will restore their delicious texture without drying them out.

    Fixing Common Issues

    Even the simplest recipes can sometimes go awry, but most BBQ sausage mishaps are easily fixed. If your sausages are browning too quickly but aren’t cooked through, simply lower the oven temperature by 25 degrees and cover loosely with foil to prevent further browning. For sausages that burst during cooking (releasing all those precious juices), try pricking them lightly with a fork before baking next time. If your BBQ glaze is burning rather than caramelizing, it likely contains too much sugar – try mixing your sweet sauce with a bit of broth or water to dilute it slightly. Remember that different ovens vary in temperature, so your first batch may require some timing adjustments.

    Frequently Asked Questions

    What temperature should I bake sausages in the oven?

    For perfect baked BBQ sausages in the oven, preheat to 400°F (200°C). This temperature creates the ideal balance of caramelized exterior while ensuring the inside cooks through properly without drying out.

    How long do sausages take to cook in the oven?

    Fresh sausages typically need 25-30 minutes at 400°F, turning halfway through. Thicker sausages may require up to 35 minutes. Always check for an internal temperature of 160°F to ensure they’re fully cooked.

    Can I use frozen sausages for this recipe?

    Yes! Add 5-10 minutes to the cooking time and skip the initial sauce application. Apply BBQ sauce only after the first 15 minutes when they’ve thawed in the oven.

    What’s the best way to prevent sausages from drying out?

    Avoid pricking the sausages before baking to keep juices inside. Place them on a rack over a baking sheet so they cook in their own fat, and don’t overcook beyond 160°F internal temperature.

    Can I make these sausages ahead for a party?

    Absolutely! Bake them 80% of the way through, then refrigerate. Before serving, finish in a 375°F oven for 10-15 minutes with a fresh application of BBQ sauce for a perfect glaze.

    Final Thoughts

    These baked BBQ sausages in the oven have truly become a staple in my cooking repertoire – the perfect balance of effortless preparation and impressive results. There’s something deeply satisfying about pulling a tray of gorgeously caramelized sausages from the oven, knowing that such minimal effort produced something so delicious. Whether you’re feeding a hungry family on a weeknight or entertaining friends on the weekend, this method delivers consistent, crave-worthy results. I hope you’ll give these oven-baked sausages a try and discover just how simple and rewarding they can be! For more delicious inspiration, check out my Pinterest collection.

  • Street Corn Chicken Rice Bowl – Irresistible Flavor Explosion!

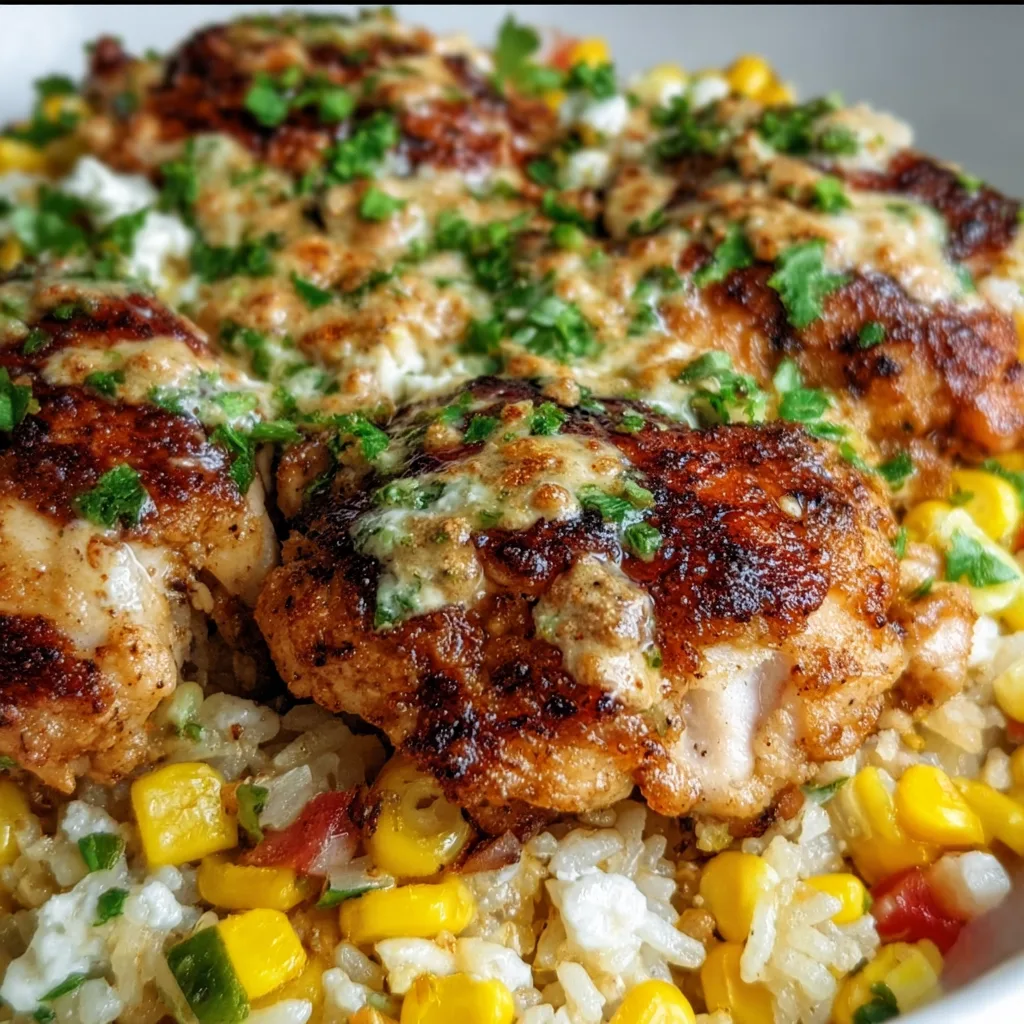
    Street Corn Chicken Rice Bowl – Irresistible Flavor Explosion!

    Street Corn Chicken Rice Bowl – Irresistible Flavor Explosion!

    Street Corn Chicken Rice Bowl is my absolute summer-to-fall transition comfort meal that brings all the vibrant flavors of Mexican street corn to a hearty, protein-packed bowl. The first time I made this, my kitchen filled with the aroma of charred corn and lime, instantly transporting me to those perfect summer evenings at food festivals. There’s something magical about the combination of sweet corn kernels, creamy sauce, and perfectly seasoned chicken that makes this bowl irresistible. If you’re looking for a meal that balances fresh and comforting, this recipe is your new weeknight hero.

    Recipe

    Why You’ll Love This Street Corn Chicken Rice Bowl

    A Perfect Balance of Flavors and Textures

    Every bite of this Street Corn Chicken Rice Bowl delivers a symphony of flavors that dance across your palate. The charred corn brings a subtle smokiness that pairs beautifully with the tangy lime-infused crema. I love how the juicy chicken, seasoned with chili powder and cumin, adds a savory depth that complements the sweetness of the corn. The fluffy rice soaks up all those incredible flavors while providing a neutral base. What makes this bowl truly special is the textural contrast – creamy sauce against tender chicken, with pops of corn and the occasional crunch from fresh garnishes. It’s comfort food with personality!

    Quick and Nutritionally Balanced

    On those hectic weeknights when cooking feels like a chore, this Street Corn Chicken Rice Bowl comes to the rescue in just 30 minutes. I’ve lost count of how many times this has saved me from ordering takeout! The protein-packed chicken keeps you satisfied, while the vegetables add essential nutrients without feeling like “health food.” Each component comes together effortlessly, making this a realistic option even when you’re exhausted. What I appreciate most is how it satisfies those comfort food cravings while still feeling light and energizing – no food coma afterward! Perfect for meal prep too, as the flavors actually improve overnight.

    Essential Tips & Tricks

    Perfecting Your Corn

    The soul of this dish lies in how you prepare the corn. For that authentic street corn flavor, don’t skip the char! If using fresh corn, remove kernels from 3-4 cobs and sauté in a cast iron skillet until you see those beautiful dark spots appearing. This caramelization creates that distinctive sweet-smoky flavor that makes street corn so addictive. In winter months, frozen corn works beautifully – just make sure to pat it dry before hitting the hot pan. A tiny sprinkle of sugar helps achieve caramelization if your corn isn’t naturally sweet. For an extra flavor dimension, try grilling your corn on the cob first, then slicing off the kernels to capture that irresistible smoky flavor.

    Mastering the Creamy Sauce

    The tangy crema brings everything together in this Street Corn Chicken Rice Bowl, so don’t rush this component! Start with a base of mayonnaise and sour cream (or Mexican crema if you can find it), then brighten with fresh lime juice and zest. The secret ingredient? A touch of honey balances the acidity perfectly. For authentic flavor, incorporate crumbled cotija cheese – though feta makes a great substitute in a pinch. My personal touch is adding a roasted garlic clove to the sauce for subtle depth. Adjust the consistency with a splash of milk if needed – you want it pourable but not watery. Let it sit for 10 minutes before serving to allow flavors to meld.

    Serving Ideas & Creative Variations

    Customizable Toppings Bar

    Transform dinner into an interactive experience by setting up a toppings station with colorful bowls of garnishes. I love offering diced avocado, thinly sliced radishes, pickled red onions, and fresh cilantro for everyone to customize their own bowl. A small dish of extra lime wedges and another with crumbled cotija encourage personalization. Toasted pepitas add wonderful crunch, while sliced jalapeños satisfy heat-seekers. This approach is perfect for family dinners where everyone has different preferences – my picky nephew even tried avocado for the first time this way! For a fun twist, include some crispy tortilla strips or crushed tortilla chips for added texture.

    Creative Protein and Base Swaps

    While chicken is the classic protein choice, this versatile bowl welcomes delicious substitutions. Grilled shrimp cooks even faster and brings a lovely sweetness that complements the corn. For vegetarians, black beans and roasted sweet potatoes create a satisfying alternative with similar flavor profiles. The rice base can easily transform too – try cilantro lime rice for extra zing, or cauliflower rice for a lower-carb option. Quinoa adds protein and a pleasant nuttiness that works beautifully with the other components. My personal favorite variation uses half rice, half greens as the base, which lightens the dish while maintaining its satisfying nature. For meal prep, these swaps keep things interesting all week!

    Storage & Troubleshooting Guide

    Proper Storage for Maximum Freshness

    To maintain the vibrant flavors of your Street Corn Chicken Rice Bowl, proper storage is essential. The assembled bowls will keep in airtight containers in the refrigerator for up to 3 days, though I recommend storing components separately for the best texture. Keep the crema sauce in its own container and the corn mixture separate from the rice to prevent sogginess. When reheating, sprinkle a few drops of water over the rice before microwaving to restore moisture. For meal prep, portion everything except the cold toppings into microwave-safe containers. Fresh elements like avocado and cilantro should always be added just before eating to prevent browning and wilting.

    Fixing Common Issues

    Even experienced cooks encounter challenges, but these simple fixes will rescue your Street Corn Chicken Rice Bowl. If your corn lacks that caramelized flavor, try increasing your pan heat and ensuring you’re not overcrowding the skillet – corn needs space to char properly. Dealing with dry chicken? Slice it thinly against the grain and toss with a splash of chicken broth before serving to restore moisture. If your sauce breaks or seems too thin, whisk in a teaspoon of mayo to re-emulsify. Too spicy? Add more crema or a dollop of plain Greek yogurt to balance the heat. Rice clumping together? Fluff with a fork and drizzle with a little olive oil to separate the grains beautifully.

    Frequently Asked Questions

    Can I make Street Corn Chicken Rice Bowl ahead of time?

    Absolutely! Prepare components separately up to 3 days ahead. Store the sauce, chicken, corn mixture, and rice in separate containers. Reheat the chicken and rice together, then add corn mixture and fresh toppings just before serving.

    What’s the best cheese for authentic street corn flavor?

    Cotija cheese is traditional and offers the perfect salty, crumbly texture. If unavailable, substitute with feta cheese or even grated parmesan in a pinch. The key is finding a cheese that’s dry and slightly salty.

    How can I make this Street Corn Chicken Rice Bowl vegetarian?

    Replace chicken with black beans, roasted chickpeas, or grilled portobello mushrooms. The corn mixture and sauce remain the same. Add extra avocado for additional creaminess and satisfying healthy fats.

    Can I use brown rice instead of white rice?

    Definitely! Brown rice adds nutty flavor and extra fiber. Adjust cooking time according to package directions (typically 35-45 minutes instead of 15-20). The heartier texture pairs beautifully with the other components.

    What’s the best way to char corn if I don’t have a grill?

    Use a cast-iron skillet on high heat for 3-4 minutes without stirring to develop char marks. Alternatively, spread corn on a baking sheet and broil for 3-5 minutes, watching carefully to prevent burning.

    Final Thoughts

    This Street Corn Chicken Rice Bowl has become my go-to recipe when I want to impress without spending hours in the kitchen. There’s something deeply satisfying about creating a meal that balances complex flavors so effortlessly. The way the sweet corn plays against the tangy sauce, complemented by perfectly seasoned chicken and fluffy rice – it’s a combination that never fails to bring smiles around my table. I hope this bowl brings the same joy to your kitchen! For more delicious recipe inspiration, check out my Pinterest board where I’m always adding new flavor combinations and cooking techniques.

  • Beef Bulgogi Bowls: Irresistible Flavor Explosion You Must Try!

    Beef Bulgogi Bowls: Irresistible Flavor Explosion You Must Try!

    Beef Bulgogi Bowls: Irresistible Flavor Explosion You Must Try!

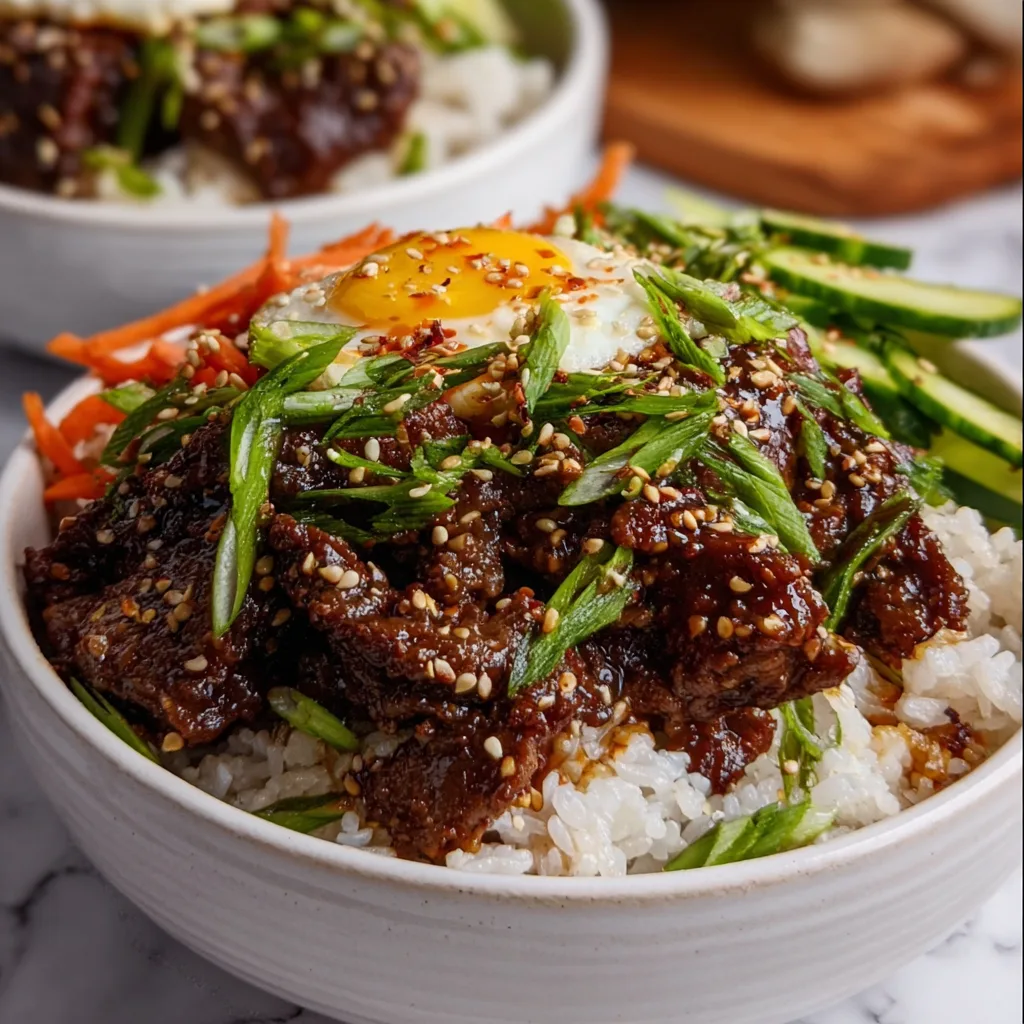
    Beef Bulgogi Bowls have completely transformed my weeknight dinner routine, and I’m thrilled to share this game-changer with you! The first time I made these colorful bowls, the sweet-savory aroma of marinated beef sizzling in the pan transported me straight to my favorite Korean restaurant. There’s something magical about the combination of tender beef strips caramelized to perfection, served over fluffy rice with vibrant veggies. This 30-minute meal balances complex flavors while being surprisingly simple to prepare. If you’re looking for a restaurant-quality dinner that will have everyone at the table asking for seconds, you’ve found it!

    Recipe

    Why You’ll Love This Beef Bulgogi Bowls

    Perfect Balance of Flavors and Textures

    The true magic of these Beef Bulgogi Bowls lies in their incredible flavor harmony. The marinade combines soy sauce, brown sugar, sesame oil, and ginger into a sweet-savory symphony that transforms ordinary beef into something extraordinary. I still remember my daughter’s face lighting up at her first bite—that perfect balance of tender meat against the slight crunch of vegetables. The beef develops those irresistible caramelized edges while staying juicy inside, creating a textural contrast that makes each bite more exciting than the last. It’s comfort food with a sophisticated edge that feels special without being fussy.

    Quick and Adaptable for Busy Weeknights

    What initially made me fall in love with Beef Bulgogi Bowls was discovering I could have such incredible flavor on the table in under 30 minutes. The meal prep flexibility is a game-changer—marinate the beef in the morning, and dinner practically makes itself when you get home. I’ve made these on chaotic Wednesdays when everyone has different activities and on lazy Sundays when we want something special without the effort. You can easily customize the veggie selection based on what’s in your fridge, making this recipe perfect for those “what can I make with what I have?” moments. It’s become my reliable solution for satisfying meals without stress.

    Essential Tips & Tricks

    Mastering the Marinade

    The heart and soul of authentic Beef Bulgogi lies in its marinade magic. For the most tender results, slice your beef against the grain as thinly as possible—partially freezing it for 30 minutes makes this much easier! I learned the hard way that rushing the marinating time cuts the flavor impact dramatically; aim for at least 1 hour, though overnight creates the most flavorful results. The marinade’s sweetness helps create those caramelized edges, but watch it carefully when cooking as the sugar can burn quickly. For an extra layer of flavor, add a tablespoon of grated Asian pear or kiwi to the marinade—the enzymes naturally tenderize the meat beautifully.

    Perfecting the Cooking Technique

    The secret to restaurant-quality Beef Bulgogi is achieving that perfect caramelization without overcooking the meat. I’ve found that cooking in small batches is absolutely essential—overcrowding the pan steams rather than sears the beef, robbing you of those flavorful browned edges. Use a heavy-bottomed pan or cast iron skillet on medium-high heat, and resist the urge to constantly stir! Allow each piece to develop a beautiful crust before flipping. For a traditional approach similar to my Korean BBQ Steak Rice Bowls, cook the beef just until it’s no longer pink—about 2-3 minutes per batch—to maintain its juicy tenderness.

    Serving Ideas & Creative Variations

    Building the Perfect Bowl

    Creating a visually stunning Beef Bulgogi Bowl is all about thoughtful assembly and color contrast. Start with a base of fluffy white rice (though brown rice works beautifully for a nuttier flavor). Arrange your beef slightly off-center, then add small piles of quick-pickled vegetables in contrasting colors—I love cucumber, carrots, and radishes for their crunch and vibrant hues. A sprinkle of sesame seeds adds visual interest and texture, while a perfectly soft-boiled egg creates a luxurious sauce when the yolk breaks. For a finishing touch that ties everything together, drizzle with extra bulgogi sauce and a zigzag of sriracha mayo for both beauty and flavor balance.

    Exciting Twist Options

    While traditional Beef Bulgogi Bowls are incredible, I love experimenting with creative variations that keep this recipe exciting in our weekly rotation. For a low-carb option, swap the rice base for cauliflower rice or spiralized zucchini noodles—it’s lighter but still satisfying. Taking inspiration from my Spicy Keto Korean Beef with Cucumber Salad, you can add gochujang for a spicy kick that transforms the flavor profile. For a fusion approach, try serving the beef in lettuce wraps with kimchi and avocado slices, or use it as a filling for Korean-inspired tacos topped with quick-pickled red onions and cilantro.

    Storage & Troubleshooting Guide

    Meal Prep and Storage Solutions

    These Beef Bulgogi Bowls are meal prep champions that actually taste better the next day as the flavors continue to develop. Store the components separately for best results—beef in one container, rice in another, and fresh vegetables separately to maintain their crunch. The cooked beef will keep beautifully in the refrigerator for up to 4 days, making it perfect for planned leftovers. I often double the recipe specifically for lunches throughout the week! For longer storage, the cooked beef freezes surprisingly well for up to 3 months. Just thaw overnight in the refrigerator and quickly reheat in a hot skillet to restore some of that caramelized texture.

    Solving Common Challenges

    Even experienced cooks occasionally encounter challenges with Beef Bulgogi. If your beef turns out tough, it’s likely either sliced with (instead of against) the grain or overcooked—next time, slice thinner and cook for less time. For flavor balance issues, remember the marinade should taste slightly stronger than you think necessary, as it will mellow when cooked. If your sauce is too salty, balance it with a touch more brown sugar or mirin. Not getting enough caramelization? Make sure your pan is hot enough before adding the beef, and don’t overcrowd it. For meal prep, keep sauce separate until serving to prevent sogginess, and add fresh elements like green onions just before eating.

    Frequently Asked Questions

    What cut of beef works best for Beef Bulgogi Bowls?

    Ribeye and sirloin are ideal choices due to their marbling and tenderness. Flank steak is a more economical option that works well when sliced thinly against the grain and not overcooked. The key is thin slicing regardless of cut.

    Can I make Beef Bulgogi Bowls ahead of time?

    Absolutely! Marinate the beef up to 24 hours ahead, and prepare the rice and vegetables separately. Store components in the refrigerator and assemble just before serving for the freshest experience.

    How can I make these Beef Bulgogi Bowls spicier?

    Add gochujang (Korean chili paste) or sriracha to the marinade for heat that permeates the meat. Alternatively, serve with kimchi or a side of sliced fresh jalapeños for customizable spice levels.

    What are good vegetable options for Beef Bulgogi Bowls?

    Traditional options include spinach, bean sprouts, carrots, and cucumber. I also love adding quick-pickled radishes, sautéed mushrooms, or blanched broccoli for extra nutrition and texture variety.

    Can I substitute ground beef for sliced beef in Bulgogi Bowls?

    Yes! Ground beef makes a quick alternative that absorbs the marinade beautifully. Cook it with the same sauce ingredients until caramelized, breaking it into small pieces for the perfect bowl topping.

    Final Thoughts

    These Beef Bulgogi Bowls have become more than just a dinner option in my home—they’re our go-to celebration meal that somehow works for both special occasions and busy weeknights. The beauty of this dish lies in its perfect balance: complex flavors achieved through simple techniques, a meal that feels indulgent while actually being nutritious. I find myself craving these colorful, flavor-packed bowls at least once a week, and judging by how quickly they disappear from the table, I’m not alone! Be sure to check out more Asian-inspired recipes on my Pinterest board for your next culinary adventure.

  • Garlic Butter Chicken Broccoli That Will Blow Your Taste Buds Away!

    Garlic Butter Chicken Broccoli That Will Blow Your Taste Buds Away!

    Garlic Butter Chicken Broccoli That Will Blow Your Taste Buds Away!

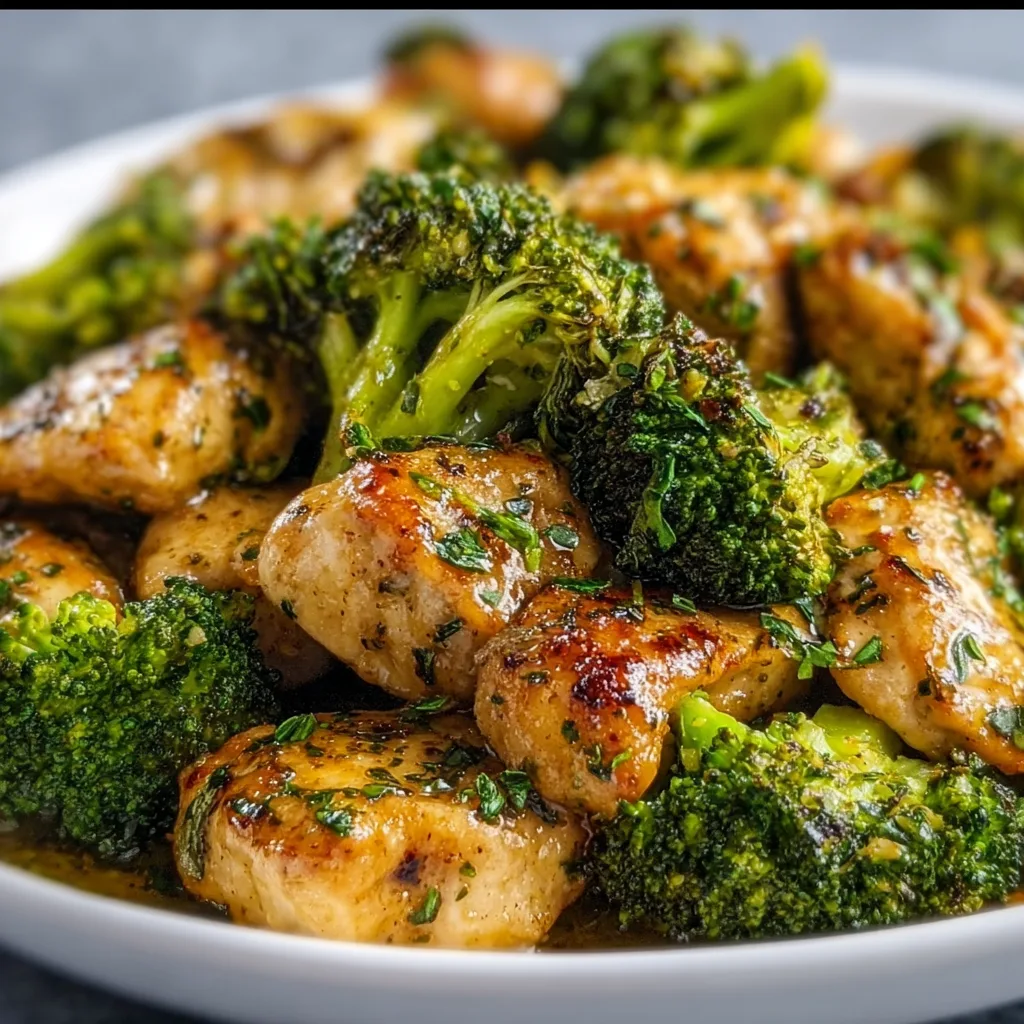
    Garlic Butter Chicken Broccoli is the ultimate weeknight dinner savior that’s transformed my busy evenings into something I actually look forward to. There’s something magical about the way the rich garlic butter coats every bite, making both the tender chicken and crisp broccoli absolutely irresistible. I discovered this recipe during a particularly hectic week when I needed something quick but refused to compromise on flavor. The combination of juicy chicken and nutritious broccoli in that velvety sauce has become my go-to when I want comfort food without the guilt. Trust me, this one-pan wonder might just become your new family favorite too!

    Recipe

    Why You’ll Love This Garlic Butter Chicken Broccoli

    Perfect Balance of Flavor and Nutrition

    This dish strikes that elusive sweet spot between utterly delicious and actually good for you. The garlic butter sauce creates this luxurious coating that transforms ordinary chicken and broccoli into something crave-worthy. I love how the broccoli florets soak up all that buttery goodness while still maintaining their nutritional value. My picky nephew who normally pushes vegetables around his plate actually asked for seconds! It’s become my secret weapon for getting more greens into family meals without complaints. Plus, the protein from the chicken keeps everyone satisfied long after dinner’s over.

    Quick and Versatile One-Pan Wonder

    On nights when I’m racing against the clock, this dish saves me every time. It comes together in just 30 minutes from start to finish, and the cleanup is minimal since everything cooks in one pan. I’ve made this on busy weeknights, for impromptu dinner guests, and even meal prepped it for lunches. The ingredients are pantry staples I almost always have on hand, which means no special shopping trips. I’ve swapped chicken thighs for breasts, added different vegetables based on what’s in my fridge, and played with the seasonings countless times. It’s practically impossible to mess up!

    Essential Tips & Tricks

    Perfecting the Chicken

    The secret to juicy, tender chicken starts with even-sized pieces. I cut mine into 1-inch cubes so they cook quickly and uniformly. Don’t rush the initial searing – those golden brown edges are flavor bombs! I season the chicken generously with salt and pepper before it hits the pan, then let it develop a nice crust before moving it around. Another game-changer? Letting the chicken rest for a minute after cooking before combining it with the broccoli. This helps the juices redistribute, keeping everything moist and flavorful. For an extra flavor boost, try marinating the chicken in a bit of garlic and olive oil for 15 minutes before cooking, just like in these white cheddar spinach chicken burgers.

    Mastering the Garlic Butter Sauce

    The velvety sauce is what elevates this dish from basic to brilliant. I always use fresh garlic – at least 4 cloves, minced or pressed – for the most vibrant flavor. Let the butter brown slightly before adding the garlic to develop nutty undertones. Keep the heat medium-low when adding garlic to prevent burning (burnt garlic turns bitter instantly). For extra richness, I finish the sauce with a splash of heavy cream or a tablespoon of cream cheese. A squeeze of lemon brightens everything up beautifully. Don’t forget to scrape up those delicious browned bits from the pan – they’re packed with flavor that will infuse your sauce!

    Serving Ideas & Creative Variations

    Perfect Pairings

    This garlic butter chicken broccoli shines brightest when served over a bed of fluffy rice that soaks up all that incredible sauce. Cauliflower rice makes a fantastic low-carb alternative that still captures all the flavors. For something heartier, try serving it over buttered egg noodles or alongside crusty bread for sauce-mopping purposes. I’ve served this with a simple side salad dressed with lemon vinaigrette for a complete meal that feels special enough for company. For an extra special touch, try pairing it with parmesan garlic rice for a double dose of garlic goodness that will have everyone asking for your secret recipe.

    Exciting Flavor Twists

    When I’m in the mood to switch things up, I love adding sun-dried tomatoes and a sprinkle of feta cheese for Mediterranean flair. For a spicy kick, red pepper flakes or a drizzle of hot honey transforms the dish entirely. Mushrooms make a wonderful addition – they soak up the garlic butter magnificently. Sometimes I’ll toss in spinach during the last minute of cooking for extra greens that wilt perfectly into the sauce. My favorite weekend variation includes a splash of white wine in the sauce and a handful of toasted pine nuts sprinkled on top. The possibilities are endless, and each variation feels like a brand new dish!

    Storage & Troubleshooting Guide

    Proper Storage and Reheating

    This dish maintains its deliciousness as leftovers for up to 4 days when stored in an airtight container in the refrigerator. The flavors actually deepen overnight, making next-day lunch something to look forward to! When reheating, add a splash of chicken broth or a small pat of butter to revitalize the sauce that may have thickened in the fridge. Microwave in 30-second intervals, stirring between each, to prevent the chicken from becoming rubbery. For best results, I prefer reheating in a skillet over medium-low heat. If you’re meal prepping, slightly undercook the broccoli initially so it doesn’t become mushy when reheated.

    Solving Common Challenges

    If your sauce breaks or looks curdled, don’t panic! Lower the heat immediately and whisk in a teaspoon of cold butter to re-emulsify everything. For sauce that’s too thin, simmer it a bit longer or add a cornstarch slurry (½ teaspoon cornstarch mixed with 1 tablespoon cold water). If it’s too thick, thin it with a splash of chicken broth. Broccoli turning out mushy? You’re likely overcooking it – it needs just 3-4 minutes to become tender-crisp. Chicken turning out dry? It’s probably overcooked – use a meat thermometer to pull it at exactly 165°F. Remember that residual heat continues cooking food even after removing it from heat.

    Frequently Asked Questions

    Can I use frozen broccoli for garlic butter chicken broccoli?

    Yes! Thaw it first and pat dry with paper towels to remove excess moisture. Add it later in the cooking process since it’s already partially cooked. It won’t be quite as crisp as fresh, but still delicious.

    How can I make this dish dairy-free?

    Substitute the butter with olive oil or a plant-based butter alternative. The flavor profile will change slightly, but you’ll still get a delicious garlic-infused sauce that coats the chicken and broccoli beautifully.

    What’s the best cut of chicken to use?

    Boneless, skinless chicken thighs provide the juiciest results, but chicken breasts work wonderfully too. Just be careful not to overcook breast meat as it can dry out more quickly.

    Can I make this dish spicy?

    Absolutely! Add red pepper flakes, cayenne pepper, or a drizzle of hot sauce to the garlic butter sauce. For a more complex heat, try adding a diced jalapeño when sautéing the garlic.

    How do I prevent the garlic from burning?

    Add garlic after the pan has cooled slightly from searing the chicken, or cook it for just 30-60 seconds before adding other liquids. Burnt garlic becomes bitter and can ruin the entire dish.

    Final Thoughts

    This Garlic Butter Chicken Broccoli has become more than just a recipe in my household—it’s a reliable friend that shows up on nights when cooking feels impossible but takeout isn’t an option. There’s something deeply satisfying about creating such bold flavors with simple ingredients. I love watching people’s faces light up with that first buttery, garlicky bite, knowing I’ve spent minimal effort for maximum impact. Whether you’re cooking for picky eaters, health-conscious family members, or just yourself after a long day, this dish delivers comfort and nourishment in equal measure. Don’t forget to check out more delicious recipes on Pinterest!

  • Garlic Butter Steak & Cheddar Potato Bake That Will Wow Your Taste Buds!

    Garlic Butter Steak & Cheddar Potato Bake That Will Wow Your Taste Buds!

    Garlic Butter Steak & Cheddar Potato Bake That Will Wow Your Taste Buds!

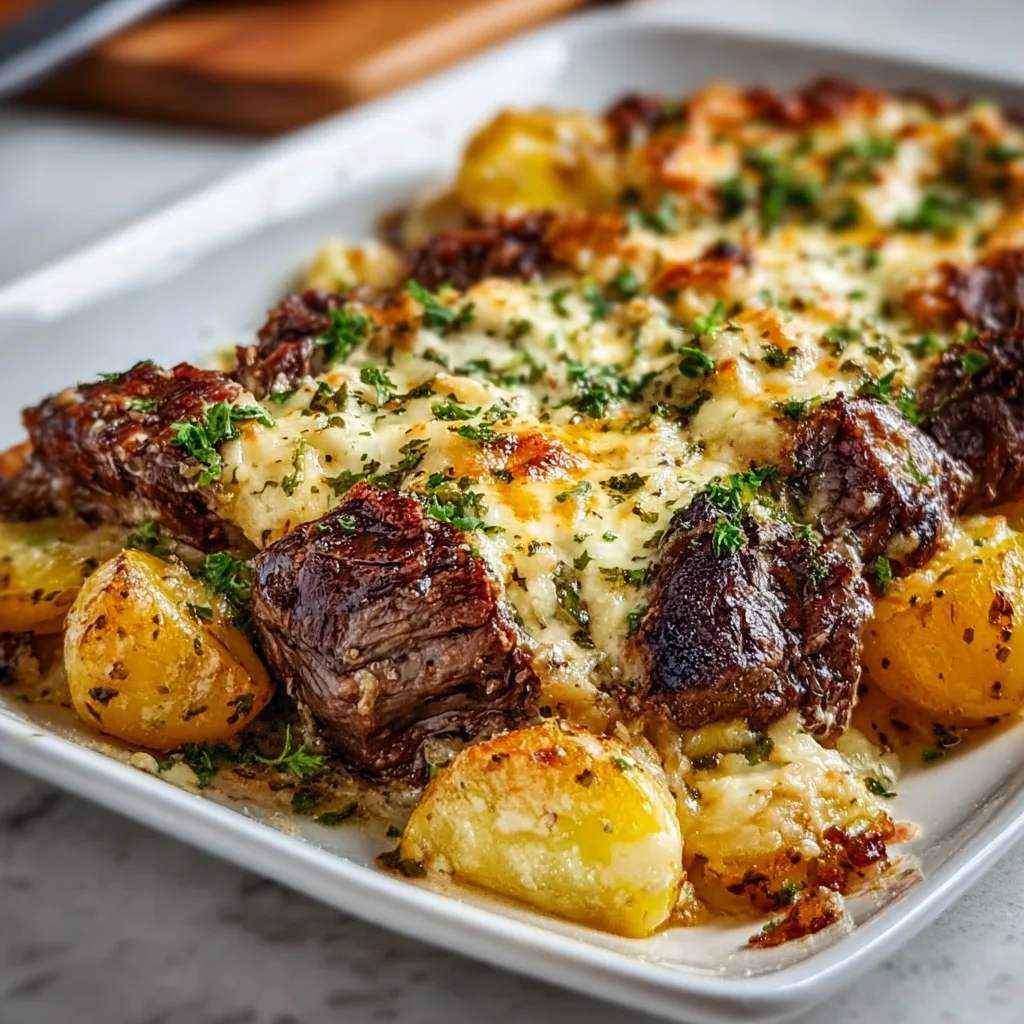
    There’s something undeniably magical about the combination of garlic butter steak & cheddar potato bake that just speaks to my soul. The first time I made this dish, my kitchen filled with an aroma so intoxicating that my neighbor actually texted to ask what I was cooking! This one-pan wonder combines juicy steak bites, golden potatoes, and melty cheddar cheese – all enveloped in a garlicky butter sauce that will have you scraping the pan for every last drop. It’s comfort food elevated to an art form, perfect for those evenings when you crave something hearty yet impressively delicious.

    Recipe

    Why You’ll Love This Garlic Butter Steak & Cheddar Potato Bake

    Perfect One-Pan Convenience

    Let’s be honest – after a long day, the last thing any of us wants is a sink full of dishes. That’s why I’m obsessed with this one-pan masterpiece. Everything cooks together, allowing the potatoes to soak up all those incredible steak juices and garlic butter flavors. The potatoes develop this incredible crispy exterior while staying creamy inside, and the steak gets a beautiful sear while remaining tender. I love how the cheese creates these irresistible crispy edges around the pan that my family literally fights over. Weeknight dinners just got a serious upgrade!

    Balanced Flavor Profile

    The magic of this dish lies in its perfect balance of flavors and textures. The rich garlic butter creates this velvety coating that clings to both the steak and potatoes, infusing everything with aromatic goodness. Meanwhile, the sharp cheddar adds that tangy, savory depth that complements the beef beautifully. I’ve found that adding a touch of fresh herbs right at the end – rosemary or thyme work wonders – brings a brightness that cuts through the richness. When you get that perfect bite with crispy potato, juicy steak, and melted cheese… pure heaven!

    Essential Tips & Tricks

    Selecting & Preparing Ingredients

    The quality of your ingredients makes all the difference in this garlic butter steak & cheddar potato bake. Choose a well-marbled cut like ribeye or sirloin for the juiciest results – I’ve found that pre-cutting into bite-sized pieces before cooking ensures maximum flavor absorption. For potatoes, Yukon Golds are my go-to because they hold their shape while getting beautifully creamy inside. Don’t skimp on the cheese either! A good aged cheddar creates those gorgeous crispy edges that make this dish extraordinary. For an even more flavorful experience, try combining cheddar with a bit of parmesan garlic rice on the side.

    Mastering the Cooking Process

    Temperature control is absolutely critical for this dish. Start with a screaming hot pan to get that beautiful sear on your steak pieces, but then reduce the heat when adding the potatoes to ensure they cook through without burning. I learned this the hard way after one smoky kitchen disaster! Par-boiling your potatoes for about 5 minutes before adding them to the pan gives them a head start and ensures they’ll cook evenly. And here’s my secret weapon: let everything rest for 5 minutes after coming out of the oven. This allows the juices to redistribute and the cheese to set slightly for the perfect texture.

    Serving Ideas & Creative Variations

    Complementary Side Dishes

    While this garlic butter steak & cheddar potato bake is certainly hearty enough on its own, I love serving it with something fresh to balance the richness. A simple arugula salad with lemon vinaigrette cuts through the buttery goodness perfectly. For something warm, roasted asparagus or Brussels sprouts add a wonderful earthy element that complements the savory flavors. If you’re really looking to impress, try serving alongside my crispy baked chicken wings for an epic feast! Just a drizzle of balsamic glaze over the entire dish before serving adds a touch of acidity that makes all the flavors pop.

    Exciting Flavor Twists

    The beauty of this dish is how adaptable it is to different flavor profiles. For a spicy southwestern version, add diced jalapeños, swap the cheddar for pepper jack, and finish with fresh cilantro. Craving something Mediterranean? Try adding sun-dried tomatoes, olives, and feta instead of cheddar, with a sprinkle of oregano. My personal favorite variation includes adding mushrooms to the pan – they soak up all that garlic butter and add an amazing umami depth. For a luxurious upgrade, try finishing with a drizzle of truffle oil or a sprinkle of blue cheese for an unexpected flavor bomb.

    Storage & Troubleshooting Guide

    Proper Storage Methods

    This garlic butter steak & cheddar potato bake stores surprisingly well, though I rarely have leftovers! For best results, cool completely before transferring to an airtight container – this prevents condensation that can make things soggy. It’ll keep in the refrigerator for up to 3 days. When reheating, avoid the microwave if possible as it can make the steak tough. Instead, place in a covered oven-safe dish at 325°F for about 15 minutes. The cheese won’t be quite as gooey as fresh, but the flavors actually develop beautifully overnight. For meal prep, you can pre-cut all ingredients and store separately until ready to cook.

    Common Issues & Solutions

    The most frequent issue I’ve encountered is potatoes that aren’t quite done while the steak is perfectly cooked. The solution? Par-boil those potatoes first! Just 5-7 minutes in salted water gives them the head start they need. If your dish is coming out too greasy, try using half the butter in the cooking process and then adding a small pat of compound butter on top after baking – you’ll get all the flavor with less oil. Cheese burning? Cover loosely with foil for part of the baking time, removing for the last few minutes to get that perfect golden top. Remember that different ovens vary, so keep an eye on your dish the first time you make it.

    Frequently Asked Questions

    What’s the best cut of steak for Garlic Butter Steak & Cheddar Potato Bake?

    Ribeye or sirloin work beautifully for their marbling and flavor. Strip steak is also excellent, while budget-conscious cooks can use flank steak cut against the grain for tenderness. Just ensure pieces are uniform for even cooking.

    Can I make this dish ahead of time?

    You can prep all components separately up to a day ahead. Par-boil potatoes, cut steak, and prepare garlic butter, then store separately. Assemble and bake just before serving for the best texture and flavor.

    How can I ensure my potatoes cook through without overcooking the steak?

    Par-boil potatoes for 5-7 minutes before adding to the pan. Alternatively, give potatoes a 10-minute head start in the oven before adding seasoned steak pieces for the remaining cooking time.

    What cheese alternatives work well?

    Gruyère offers nutty richness, while fontina melts beautifully. Gouda adds smokiness, and a blue cheese crumble creates tangy pockets. For milder flavor, try Monterey Jack or a young Havarti.

    Can I make this dish without an oven?

    Absolutely! Use a large skillet with a lid. Cook potatoes first until almost tender, add steak, then cover and reduce heat. Add cheese last, cover until melted. The texture differs slightly but remains delicious.

    Final Thoughts

    This garlic butter steak & cheddar potato bake has become my go-to dish whenever I want to impress without spending hours in the kitchen. There’s something profoundly satisfying about creating such bold flavors with simple ingredients. The way the garlic butter infuses everything with richness, how the cheese creates those irresistible crispy edges, and the perfect harmony between tender steak and golden potatoes – it’s comfort food at its finest. I hope this dish brings as much joy to your table as it has to mine! Don’t forget to check out more comfort food inspiration on Pinterest.

  • Nashville Hot Chicken Sandwiches That Ignite Your Taste Buds!

    Nashville Hot Chicken Sandwiches That Ignite Your Taste Buds!

    Nashville Hot Chicken Sandwiches That Ignite Your Taste Buds!

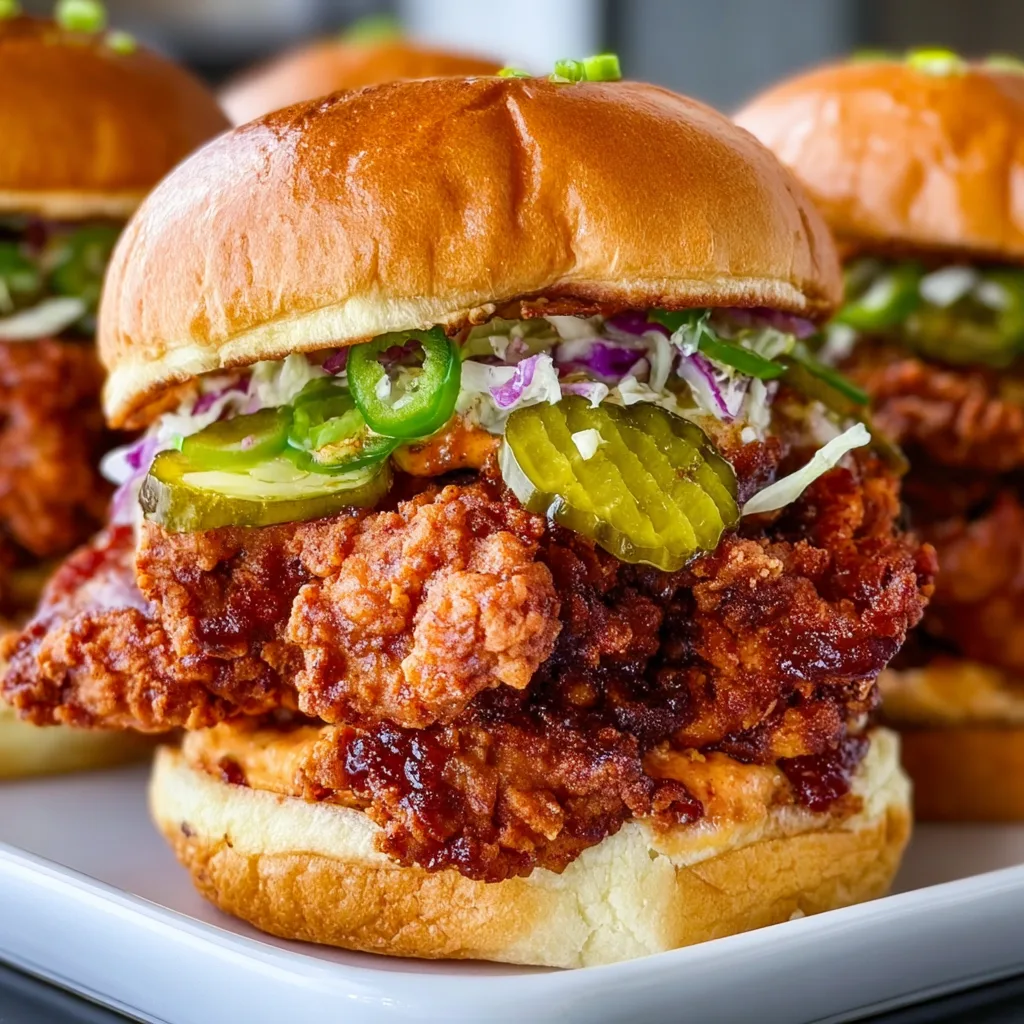
    Nashville Hot Chicken Sandwiches have completely transformed my weeknight dinner game. There’s something magical about that perfect balance of crispy, spicy chicken nestled between soft buns with cool, creamy slaw that makes my taste buds dance with joy. I’ll never forget the first time I made these for my family—my husband’s eyes widened with that first bite, and he declared them “better than any restaurant version.” Today, I’m sharing my foolproof recipe that delivers that authentic Nashville heat with a touch of sweetness that’ll have everyone asking for seconds. Ready to bring some Southern comfort to your dinner table? Let’s get cooking!

    Recipe

    Why You’ll Love This Nashville Hot Chicken Sandwiches

    The Perfect Balance of Heat and Flavor

    These Nashville Hot Chicken Sandwiches deliver that signature fiery kick without overwhelming your palate. I’ve perfected the spice blend with the ideal ratio of cayenne, paprika, and a touch of brown sugar that creates that authentic Nashville flavor profile. What makes these sandwiches truly special is how the heat builds gradually rather than hitting you all at once. The buttermilk marinade ensures your chicken stays incredibly juicy inside while developing that gorgeous crispy exterior. Trust me, even heat-sensitive family members will find themselves reaching for seconds!

    Quick and Customizable for Any Occasion

    What I adore about these Nashville Hot Chicken Sandwiches is their incredible versatility. You can adjust the spice level to suit everyone at your table—from mild for the kiddos to five-alarm fire for heat enthusiasts. The basic recipe comes together in under 45 minutes, making it perfect for busy weeknights, but it’s impressive enough for weekend gatherings too. I’ve served these at everything from casual family dinners to backyard parties, and they’re always the first thing to disappear. Plus, the components can be prepped ahead, allowing you to assemble fresh sandwiches in minutes when guests arrive.

    Essential Tips & Tricks

    Perfecting the Crispy Coating

    The secret to that irresistible crunch lies in double-dredging your chicken. First, pat your chicken breasts completely dry before starting the breading process. Then dip in buttermilk, coat in seasoned flour, back into buttermilk, and into the flour again. This creates those craggy edges that crisp up beautifully and hold onto the spicy oil. For extra crispiness, add a tablespoon of cornstarch to your flour mixture. Let the coated chicken rest on a wire rack for 10 minutes before frying—this helps the coating adhere properly and prevents it from sliding off during cooking.

    Mastering the Signature Hot Oil

    The defining feature of authentic Nashville Hot Chicken Sandwiches is that spiced oil brushed over the fried chicken. Heat your oil to exactly 350°F before adding your spices—too hot and they’ll burn, too cool and they won’t infuse properly. I like to bloom my spices in the hot oil for 30 seconds to release their full flavor potential. Use a heatproof pastry brush to generously coat each piece of chicken immediately after frying. For the most authentic experience, save some of the frying oil and use it as the base for your spice mixture—it carries the essence of the chicken and adds incredible depth.

    Serving Ideas & Creative Variations

    Perfect Pairings and Sides

    Nashville Hot Chicken Sandwiches shine brightest with the right accompaniments. A cooling cucumber slaw provides the perfect temperature contrast to the spicy chicken—I make mine with thinly sliced cucumbers, cabbage, a touch of mayo, and apple cider vinegar. For sides, classic Parmesan Garlic Rice makes an unexpected but delicious pairing that soaks up any extra spicy drippings. Sweet potato fries, macaroni salad, or pickled vegetables all complement these sandwiches beautifully. Don’t forget to serve with plenty of napkins and maybe some cooling ranch or blue cheese dip on the side!

    Global Fusion Twists

    Take your Nashville Hot Chicken Sandwiches on a world tour with these creative variations! For an Asian-inspired version, add gochujang to your hot oil and top with kimchi slaw. My family goes crazy for the “Mediterranean Hot Chicken” where I incorporate za’atar into the flour coating and serve it on pita with tzatziki instead of traditional slaw. For a Mexican fusion approach, spike your hot oil with chipotle powder and top with avocado crema and pickled jalapeños. These variations maintain the spirit of Nashville heat while introducing exciting new flavor dimensions that keep this recipe in regular rotation at our house.

    Storage & Troubleshooting Guide

    Make-Ahead and Leftover Strategies

    To maintain that perfect crispiness, store leftover fried chicken separate from buns and toppings in an airtight container in the refrigerator for up to 3 days. Reheat in a 350°F oven for 10-15 minutes until heated through—never microwave, as it’ll turn your crispy coating soggy! For make-ahead prep, you can marinate the chicken up to 24 hours in advance and mix the dry spices ahead of time. The spicy oil can be made up to a week ahead and gently reheated before using. For ultimate convenience, prepare extra chicken and freeze it after cooling completely—it reheats beautifully for quick weeknight sandwiches.

    Solving Common Challenges

    If your coating is falling off during frying, your oil temperature is likely too high or too low. Maintain a steady 350°F throughout cooking using a reliable thermometer. For chicken that’s burning on the outside but raw inside, your pieces are probably too thick—pound them to an even ¼-inch thickness before breading. If your spice level is overwhelming, serve with honey on the side—it’s traditional in Nashville and wonderfully tames the heat while adding delicious complexity. For soggy bottomed sandwiches, try toasting your buns and adding a thin layer of mayo to create a moisture barrier before assembling.

    Frequently Asked Questions

    How spicy are authentic Nashville Hot Chicken Sandwiches?

    Traditional Nashville Hot Chicken Sandwiches pack serious heat! The authentic version uses generous amounts of cayenne pepper. Start with half the cayenne if you’re heat-sensitive, then gradually increase in future batches to find your perfect spice level.

    Can I bake these instead of frying?

    Yes! Spray breaded chicken with cooking oil and bake at 425°F for 20-25 minutes until crispy and cooked through. The texture won’t be identical to fried, but you can still brush with the signature spicy oil for authentic flavor.

    What’s the best bread for Nashville Hot Chicken Sandwiches?

    Traditional Nashville Hot Chicken Sandwiches are served on plain white bread or potato buns. The soft, slightly sweet bread provides the perfect contrast to the spicy chicken. Brioche buns are my personal favorite upgrade!

    How do I make these gluten-free?

    Substitute the all-purpose flour with a cup-for-cup gluten-free flour blend. Add 1 tablespoon cornstarch to improve crispiness. Ensure your spices are certified gluten-free and serve on gluten-free buns or lettuce wraps.

    Can I prepare the Nashville Hot Chicken Sandwiches in an air fryer?

    Absolutely! Spray the breaded chicken with oil and air fry at 390°F for 12-15 minutes, flipping halfway through. Brush with the hot oil mixture immediately after cooking for that authentic Nashville flavor.

    Final Thoughts

    These Nashville Hot Chicken Sandwiches have become a beloved staple in my household for good reason—they deliver restaurant-quality flavor with home-cooked love in every bite. The beauty of this recipe lies in its adaptability; whether you’re a spice enthusiast or prefer a milder approach, you can craft the perfect sandwich to suit your taste. I hope these tips and tricks help you create a memorable meal that brings a touch of Nashville’s famous culinary tradition to your table. Don’t forget to share your creations on Pinterest and tag me—I’d love to see your spicy masterpieces!

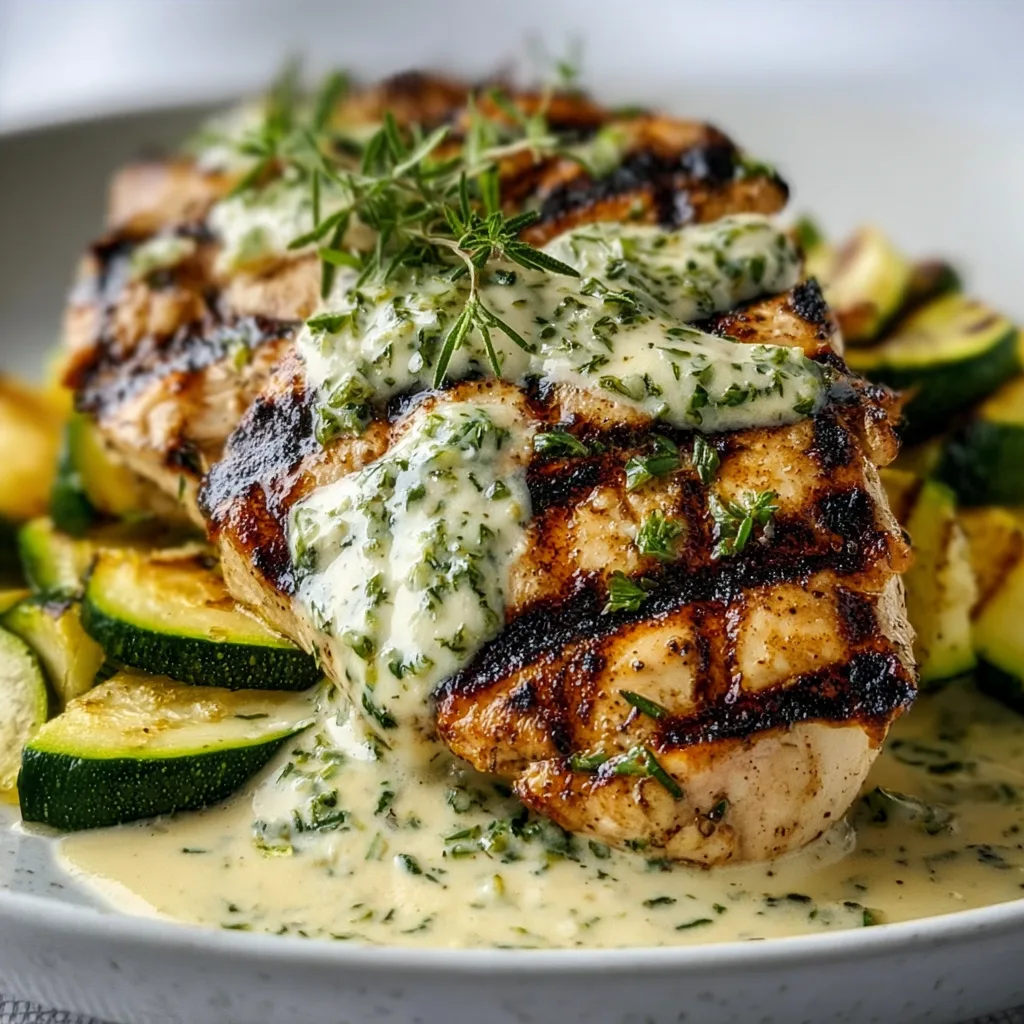
  • Grilled Chicken with Zucchini & Creamy Herb Sauce—Irresistibly Delicious!

    Grilled Chicken with Zucchini & Creamy Herb Sauce—Irresistibly Delicious!

    Grilled Chicken with Zucchini & Creamy Herb Sauce—Irresistibly Delicious!

    Grilled Chicken with Zucchini & Creamy Herb Sauce is my summer salvation on those evenings when the kitchen feels too hot but my craving for something satisfying won’t quit. The first time I made this dish, the aroma of herbs and garlic wafting through my backyard had my neighbor peeking over the fence asking what I was cooking. There’s something magical about the way the char marks on both the chicken and zucchini create the perfect canvas for that silky herb sauce to cling to. It’s simple enough for weeknights but impressive enough for company – my kind of cooking balance! If you love easy but flavor-packed meals, this recipe is about to become your new favorite.

    Recipe

    Why You’ll Love This Grilled Chicken with Zucchini & Creamy Herb Sauce

    Perfect Balance of Flavors and Textures

    The beauty of this Grilled Chicken with Zucchini & Creamy Herb Sauce lies in its harmonious contrasts. The smoky char from the grill creates a delicious crust on both the juicy chicken and tender zucchini, while the creamy herb sauce adds a cooling, aromatic element that ties everything together. I love how the zucchini caramelizes slightly on the edges but stays tender-crisp in the center. The sauce – oh, that sauce! – combines fresh herbs, tangy yogurt, and a hint of lemon that brightens every bite. It’s that perfect balance that makes this dish impossible to resist.

    Quick and Healthy Weeknight Solution

    When life gets hectic (which seems like always lately), this dish is my saving grace. From start to finish, you can have Grilled Chicken with Zucchini & Creamy Herb Sauce on the table in under 30 minutes. The lean protein from the chicken paired with nutrient-rich zucchini makes this a balanced meal without feeling like “diet food.” I’ve made this on busy weeknights when I’m tempted to order takeout, and it always reminds me that homemade can be just as quick and infinitely more satisfying. Plus, the active cooking time is minimal – the grill does most of the work while you mix up that dreamy sauce.

    Essential Tips & Tricks

    Mastering the Marinade

    The secret to truly exceptional Grilled Chicken with Zucchini & Creamy Herb Sauce starts with a proper marinade. Even 15 minutes makes a difference, but if you can plan ahead, let that chicken bathe in those flavors for 2-4 hours. I use a simple blend of olive oil, lemon juice, garlic, and herbs, but the acid-to-oil ratio is crucial – too much lemon and the chicken texture changes. For the zucchini, I keep it separate with just olive oil, salt, and pepper so its delicate flavor doesn’t get overwhelmed. When I’m really pressed for time, I’ve even used this quick marinade technique where you score the chicken slightly to help the flavors penetrate faster.

    Grilling Temperature Control

    Nothing ruins this dish faster than chicken that’s charred on the outside but raw inside, or zucchini that’s turned to mush. The key is temperature zones on your grill – medium-high heat (around 375-400°F) for the chicken and medium for the more delicate zucchini. I learned this the hard way after serving blackened-yet-undercooked chicken to my in-laws (mortifying!). Use a meat thermometer to ensure chicken reaches 165°F internally, and watch those zucchini planks carefully – they need just 2-3 minutes per side until they develop grill marks while maintaining their structure. Remember, they’ll continue cooking slightly after removal.

    Serving Ideas & Creative Variations

    Complementary Side Dishes

    While Grilled Chicken with Zucchini & Creamy Herb Sauce is practically a complete meal on its own, I love adding a starch to round things out. A simple herb-flecked rice soaks up that extra sauce beautifully, while a crusty baguette is perfect for more casual dining. For a lower-carb option, try cauliflower rice or a butter lettuce salad with a light vinaigrette. When I’m entertaining, I’ll often add these garlic butter parmesan knots on the side – they’re always a hit and complement the Mediterranean flavors perfectly. For a complete color palette, consider adding something red like roasted cherry tomatoes or a quick bell pepper sauté.

    Flavor Twists and Adaptations

    Don’t be afraid to play with the flavor profile of this versatile dish! My Mediterranean version uses fresh dill, parsley, and oregano in the sauce, but you could easily pivot to a Mexican-inspired meal with cilantro, lime, and a touch of cumin. For an Italian twist, use basil and oregano, then top with a sprinkle of Parmesan. The protein is flexible too – swap chicken for salmon, shrimp, or even firm tofu for vegetarians. I’ve made this with different summer vegetables like bell peppers, eggplant, or asparagus depending on what looks fresh at the market. The creamy sauce works with virtually any grilled protein and vegetable combination.

    Storage & Troubleshooting Guide

    Proper Storage and Reheating

    Grilled Chicken with Zucchini & Creamy Herb Sauce makes fantastic leftovers when stored properly. Keep the components separate if possible – store cooled chicken and zucchini in an airtight container in the refrigerator for up to 3 days, with the sauce in a separate container. When reheating, the microwave works in a pinch, but for best results, I warm the chicken in a 300°F oven covered with foil to prevent drying out. The zucchini is best at room temperature or just slightly warmed. Never boil the sauce when reheating – gentle heat is key, or it might separate. I often make extra sauce specifically for leftovers!

    Common Problems and Solutions

    If your Grilled Chicken with Zucchini & Creamy Herb Sauce isn’t turning out perfectly, a few troubleshooting tips can help. Dry chicken is usually from overcooking – invest in an instant-read thermometer and remove the chicken at 160°F as it will continue cooking to 165°F while resting. If your zucchini is getting soggy, it’s likely cut too thin or cooked too long – aim for ½-inch planks and watch them carefully. For a broken or thin sauce, whisk in a teaspoon of mayo or an extra spoonful of Greek yogurt to re-emulsify. And if your grill is flaring up, causing burning, create a temporary cool zone by turning off one burner.

    Frequently Asked Questions

    Can I make Grilled Chicken with Zucchini & Creamy Herb Sauce without a grill?

    Absolutely! Use a grill pan or cast iron skillet over medium-high heat. You’ll still get nice sear marks, though you might miss some of that smoky flavor. A quick broil at the end can help mimic the charred finish.

    What herbs work best in the creamy sauce?

    Fresh herbs make all the difference – dill, parsley, chives, and basil are my favorites. Use at least two different herbs for complexity, and add them at the very end to preserve their bright flavor and color.

    How can I make this recipe dairy-free?

    Replace the Greek yogurt in the Grilled Chicken with Zucchini & Creamy Herb Sauce with dairy-free yogurt or a blend of dairy-free mayo and a splash of lemon juice. Coconut cream also works beautifully for a slightly sweeter profile.

    Can I prep any components ahead of time?

    Yes! Marinate the chicken up to 24 hours ahead, and the sauce can be made up to 2 days in advance. Just slice the zucchini shortly before grilling to prevent it from releasing too much moisture.

    What’s the best thickness to cut the zucchini?

    Aim for ½-inch planks cut lengthwise. This thickness stands up to grilling without falling apart but cooks through quickly. If your zucchini are large, halve them lengthwise first, then cut into planks.

    Final Thoughts

    This Grilled Chicken with Zucchini & Creamy Herb Sauce has become my summer signature dish for good reason. It transforms simple ingredients into something that feels special without hours of effort. I love how it showcases seasonal produce while delivering big on flavor. There’s something deeply satisfying about serving a meal that’s nutritious, delicious, and brings people together around the table. Whether you’re cooking for family on a weeknight or friends on the weekend, this recipe adapts to your needs while always delivering on taste. Find more seasonal inspiration on my Pinterest boards where I’m constantly adding new ideas!