Category: Dinner

Easy, tasty dinner ideas for busy nights. Simple recipes, quick prep, and family-friendly meals you’ll make again and again.

  • Hot and Tangy Devilled Chicken Recipe That’ll Ignite Your Taste Buds!

    Hot and Tangy Devilled Chicken Recipe That’ll Ignite Your Taste Buds!

    Hot and Tangy Devilled Chicken Recipe That’ll Ignite Your Taste Buds!

    Hot and tangy devilled chicken has been my secret weapon for dinner parties that leave guests begging for the recipe. There’s something magical about that perfect balance of heat and tanginess that transforms ordinary chicken into something extraordinary. The first time I made this dish, my kitchen filled with the most intoxicating aroma of spices and caramelizing chicken skin. I watched my husband’s eyes widen as he took his first bite – that moment of pure culinary bliss is why I keep coming back to this recipe. Let me show you how to create this flavor explosion that’s become a staple in my home kitchen.

    Recipe

    Why You’ll Love This Hot and Tangy Devilled Chicken

    A Perfect Balance of Flavors

    The magic of this dish lies in its harmonious blend of heat and tanginess. The marinade features a delicious combination of Dijon mustard, hot sauce, and a touch of honey that creates layers of flavor that dance on your tongue. I love how the spices form a gorgeous crust on the chicken as it cooks, sealing in all those juicy flavors. The first time I served this at a dinner party, my friend Sarah literally closed her eyes while eating – that’s the kind of reaction you can expect! The marinade penetrates deep into the meat, ensuring every bite delivers that perfect flavor balance.

    Quick Prep, Maximum Impact

    What I adore about this hot and tangy devilled chicken is how it delivers restaurant-quality results with minimal effort. The prep takes just 15 minutes of hands-on time, then the marinade does all the heavy lifting. On busy weeknights when I’m juggling work deadlines and helping with homework, I can still get this impressive dish on the table. The chicken develops its complex flavors while marinating, meaning you don’t need to babysit it. Plus, the ingredients are pantry staples I always have on hand, making this my go-to recipe when I need something reliably delicious without a special shopping trip.

    Essential Tips & Tricks

    Mastering the Marinade

    The key to truly exceptional hot and tangy devilled chicken lies in the marinade timing. While you can cook it after just 30 minutes, I find the sweet spot is 4-6 hours for the flavors to fully develop. For an even deeper flavor infusion, I sometimes prepare it the night before – the difference is remarkable! Make sure to really massage the marinade into every crevice of the chicken pieces. I also recommend scoring the chicken slightly with a knife to help the flavors penetrate. Don’t skimp on the acid component (vinegar or lemon juice) – it’s what tenderizes the meat and creates that melt-in-your-mouth texture.

    Perfect Cooking Techniques

    The cooking method you choose dramatically affects the final result. For the most delicious caramelization, I prefer roasting at 425°F, which creates that incredible sticky exterior while keeping the inside juicy. If you’re grilling, use indirect heat first, then finish over direct flames for those beautiful char marks. Always let the chicken come to room temperature before cooking – cold chicken straight from the fridge won’t cook evenly. And the most important tip? Use a meat thermometer! Chicken thighs should reach 175°F for that perfect tenderness, while breasts need 165°F to avoid drying out.

    Serving Ideas & Creative Variations

    Complementary Side Dishes

    This hot and tangy devilled chicken pairs beautifully with sides that can balance the heat. My family’s favorite combination includes a cooling cucumber raita and fluffy basmati rice that soaks up all those delicious juices. For a complete meal, I often add roasted vegetables tossed with a touch of the same spice mix – the consistency ties everything together perfectly. When I’m feeling fancy, I’ll serve it with a bright citrus salad; the acidity cuts through the richness of the chicken. For a more substantial meal, try it alongside crispy roasted potatoes – the contrast in textures is absolutely divine!

    Flavor Variations to Try

    While the classic recipe is perfection, I love experimenting with different flavor profiles. For a Mediterranean twist, add oregano, lemon zest, and olives to the marinade. When I’m craving something tropical, I incorporate coconut milk and lime for a completely different but equally delicious version. You can adjust the heat level to suit your preference – my kids prefer it milder, so I often make a batch with less chili for them. For an Asian-inspired variation, try adding ginger, five-spice powder, and a touch of sesame oil. Each variation maintains the essential tangy-spicy character while offering a fresh experience.

    Storage & Troubleshooting Guide

    Proper Storage Solutions

    To maintain the peak flavor of your hot and tangy devilled chicken, proper storage is essential. Leftovers can be refrigerated in an airtight container for up to 3 days, though the flavors actually intensify overnight, making for an even more delicious lunch the next day. If you’re meal prepping, you can freeze the cooked chicken for up to 2 months – just be sure to cool it completely before freezing. I recommend portioning it into individual servings for easier defrosting. For the best texture when reheating, let it thaw overnight in the refrigerator, then warm it in a 325°F oven until just heated through.

    Fixing Common Issues

    Even experienced cooks occasionally encounter challenges with this dish. If your chicken skin isn’t crisping properly, try patting the pieces completely dry before applying the marinade, and make sure your oven is fully preheated. For chicken that’s coming out too dry, you’re likely overcooking it – invest in a good meat thermometer for perfect results every time. If the flavor isn’t as punchy as you’d like, try adding a splash of acid (vinegar or lemon juice) just before serving to brighten everything up. And if the sauce is too thin, you can reduce it in a small saucepan until it reaches that perfect sticky consistency.

    Frequently Asked Questions

    Can I use boneless chicken for hot and tangy devilled chicken?

    Absolutely! Boneless thighs work beautifully and cook faster (about 20-25 minutes). Just watch them carefully as they can dry out more quickly than bone-in pieces.

    How spicy is this recipe?

    The heat level is moderate but customizable. Start with half the hot sauce if you’re sensitive to spice, or double it if you love that fiery kick!

    Can I make this in an air fryer?

    Yes! Cook at 380°F for about 12-15 minutes for boneless pieces, flipping halfway through. You’ll get amazingly crispy results.

    Is this recipe gluten-free?

    It can be! Just ensure your mustard, hot sauce, and other condiments are certified gluten-free, as some brands contain hidden gluten.

    Can I prepare the marinade ahead of time?

    Definitely. The marinade keeps well in the refrigerator for up to 3 days, making meal prep even easier.

    Final Thoughts

    This hot and tangy devilled chicken has become more than just a recipe in my household – it’s a celebration of bold flavors that brings everyone to the table with excitement. The beauty lies in its versatility and reliability; whether for a casual family dinner or entertaining guests, it never disappoints. I hope you’ll make this dish your own, experimenting with the spice levels and sides until you find your perfect combination. Don’t forget to check out more delicious recipes on my Pinterest board for more inspiration!
  • Crispy Beef with Spicy Saucy Noodles: Irresistibly Delicious!

    Crispy Beef with Spicy Saucy Noodles: Irresistibly Delicious!

    Crispy Beef with Spicy Saucy Noodles: Irresistibly Delicious!

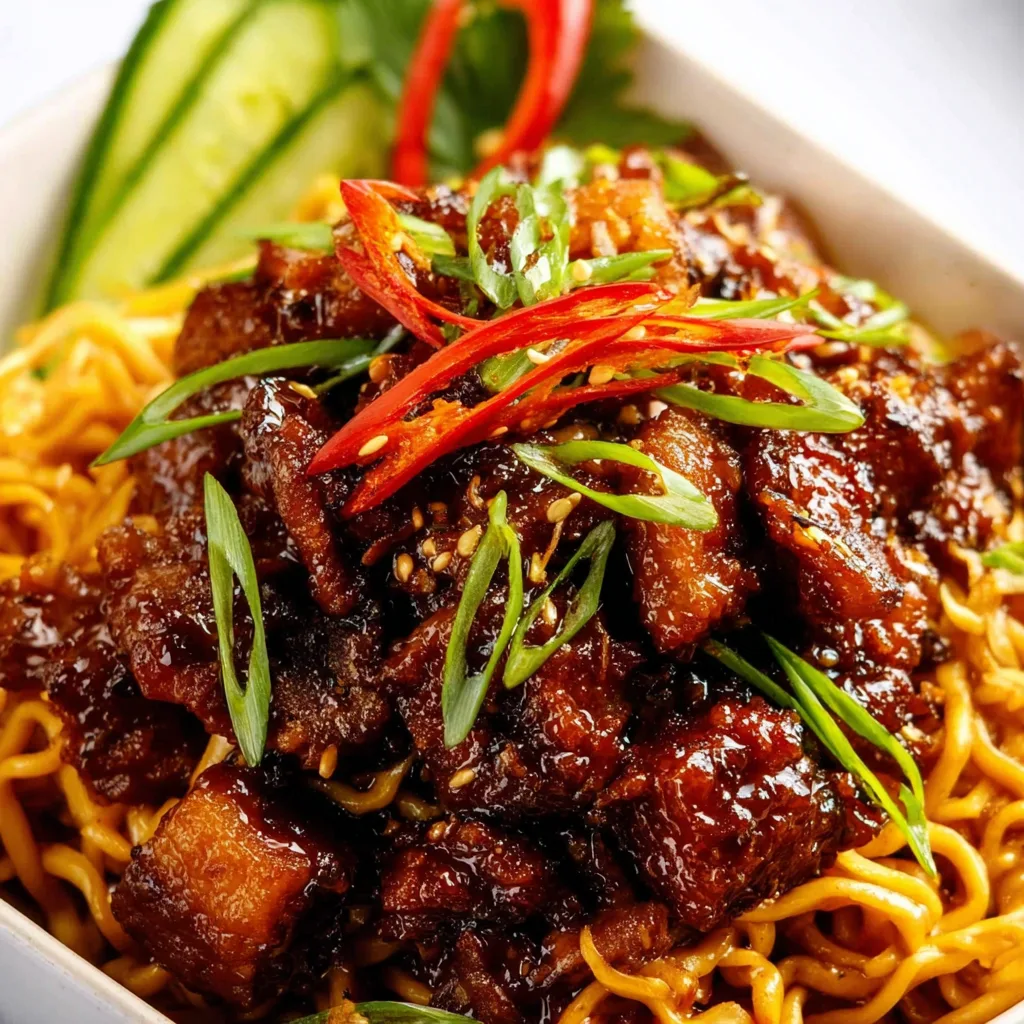
    Crispy beef with Spicy Saucy Noodles is my absolute obsession lately—that perfect combination of crunchy texture and bold flavors that dance on your tongue! I first made this dish after a particularly exhausting Monday, craving something with a bit of kick to wake up my taste buds. The way the beef caramelizes and crisps up while the noodles soak up that spicy, savory sauce is pure magic. Trust me, this isn’t just dinner; it’s a mood-lifting experience that’ll have you twirling noodles with a smile. Let me show you how to create this irresistible comfort food.

    Recipe

    Why You’ll Love This Crispy Beef with Spicy Saucy Noodles

    Perfect Texture Contrast

    There’s something almost therapeutic about the textural symphony in this dish. The beef gets this incredible crispy exterior while staying tender inside—a technique I perfected after many (delicious) trial runs. The key is getting your pan screaming hot and not overcrowding the meat. When you take that first bite with the silky noodles and crunchy beef together, it’s like hitting the satisfaction jackpot! My husband actually does a little food dance whenever I make this, which is both adorable and validating. The contrast keeps every bite interesting and crave-worthy.

    Bold, Balanced Flavors

    The flavor profile here is what I call “confidently spicy”—it’s got heat that makes itself known without overwhelming everything else. I balance the spice with subtle sweetness and umami depths that make your taste buds do a happy dance. The sauce clings to both the caramelized beef and the noodles perfectly, creating this harmonious bite every time. I remember serving this to my spice-cautious friend Emma who surprised herself by going back for seconds! It’s that perfect middle ground where the flavors are bold enough to be exciting but balanced enough to keep you coming back for more.

    Essential Tips & Tricks

    Perfecting the Crispy Beef

    Getting that restaurant-quality crispiness at home isn’t magic—it’s technique! Start by slicing your beef super thin against the grain (pro tip: freeze it for 20 minutes first for easier cutting). Then the game-changer: cornstarch. Coating the beef in cornstarch creates that golden crust we’re after. Make sure your oil is properly hot before adding the beef, and work in batches—overcrowding is the enemy of crispiness! I learned this the hard way when I rushed once and ended up with beef that steamed rather than crisped. Patience here pays off in texture dividends that make the dish extraordinary.

    Sauce Consistency Secrets

    The perfect sauce should be thick enough to coat the back of a spoon but not so thick it becomes gloopy. My secret? A touch of dark brown sugar which not only adds depth but helps with caramelization. Balance your spicy elements (like chili paste) with something acidic (rice vinegar works beautifully) to create complexity. For thickening, a cornstarch slurry is your best friend—but add it gradually! I once dumped it all in at once during a dinner party and ended up with something closer to beef jelly than sauce. Timing matters too—just like with these Crispy Chicken Spring Rolls, add your sauce at the right moment for perfect results.

    Serving Ideas & Creative Variations

    Complementary Side Dishes

    This dish shines as the star but pairs beautifully with simple sides that complement without competing. Try cucumber salad with rice vinegar for a cooling contrast to the spicy beef—the refreshing crunch is perfection alongside the rich main dish. Steamed bok choy or broccoli makes for a nutritious addition that soaks up extra sauce deliciously. For a complete experience, nothing beats a small bowl of miso soup as a starter. I served this combination at my last dinner gathering, and my friend Lisa texted the next day specifically asking for the “entire spicy beef experience” recipe—sides included!

    Regional Flavor Adaptations

    While my base recipe has Chinese-inspired flavors, you can easily pivot to create different regional variations. For a Korean twist, add gochujang instead of sriracha and a sprinkle of toasted sesame seeds. Thai-inspired? Incorporate some fish sauce, lime, and Thai basil. Japanese variation? A dash of mirin and a side of pickled ginger changes everything. The versatility of the crispy beef technique means you can travel the world with your flavors! This pairs wonderfully with a simple Italian Chopped Salad for an east-meets-west fusion dinner that’ll impress anyone at your table.

    Storage & Troubleshooting Guide

    Keeping It Fresh

    Let’s be honest—this dish is at its absolute best fresh from the wok, when the beef is at peak crispiness. However, life happens! If you need to store leftovers, keep the beef separate from the noodles and sauce when possible. Store in airtight containers in the refrigerator for up to 2 days. When reheating, use a skillet rather than microwave to help revive some crispness in the beef. A light spray of oil and high heat can work wonders. I’ve found that adding a fresh garnish like sliced green onions after reheating gives leftovers new life and makes them feel special again.

    Fixing Common Issues

    If your beef isn’t crisping properly, your pan probably isn’t hot enough or you’re overcrowding it. Work in smaller batches next time. For sauce that’s too thin, whisk in additional cornstarch slurry (1 teaspoon cornstarch mixed with 2 teaspoons cold water). Too thick? A splash of chicken broth loosens it perfectly. If your dish lacks flavor depth, try adding a teaspoon of oyster sauce or a dash of fish sauce—these umami bombs transform bland to brilliant instantly. For too much heat, a drizzle of honey and extra lime juice can tame the fire while adding complexity rather than just diluting flavors.

    Frequently Asked Questions

    What cut of beef works best for Crispy Beef with Spicy Saucy Noodles?

    Flank steak or sirloin are ideal choices. They have enough fat for flavor but remain tender when sliced thin against the grain and briefly cooked at high heat.

    Can I make this dish less spicy?

    Absolutely! Reduce or omit the chili paste/sriracha and use mild paprika instead of cayenne. The dish will still have wonderful flavor without the heat.

    How do I prevent my noodles from sticking together?

    Rinse cooked noodles under cold water immediately after cooking, then toss with a small amount of sesame oil until ready to add to your sauce.

    Can I make this dish ahead for a party?

    Prepare components separately—crisp the beef and make the sauce up to a day ahead, then reheat the sauce, quickly refry the beef, and combine with fresh noodles just before serving.

    What’s the secret to restaurant-quality Crispy Beef with Spicy Saucy Noodles?

    The key is high heat, cornstarch-coated beef cooked in batches, and a well-balanced sauce with layers of flavor—sweet, salty, spicy, and umami all in perfect harmony.

    Final Thoughts

    This Crispy Beef with Spicy Saucy Noodles has become my go-to when I want to impress without stressing in the kitchen. There’s something deeply satisfying about creating those perfect textures—crispy beef against silky noodles—that makes dinner feel special. I love seeing people’s eyes light up with that first bite! The beauty of this dish lies in its adaptability; make it your own with your preferred spice level or protein. For more inspiration, check out my Pinterest board where I’m always adding new Asian-inspired recipes. Now go get your wok hot and ready—crispy beef bliss awaits!

  • Garlic Butter Steak Bites & Shrimp That Melt Hearts Fast!

    Garlic Butter Steak Bites & Shrimp That Melt Hearts Fast!

    Garlic Butter Steak Bites & Shrimp That Melt Hearts Fast!

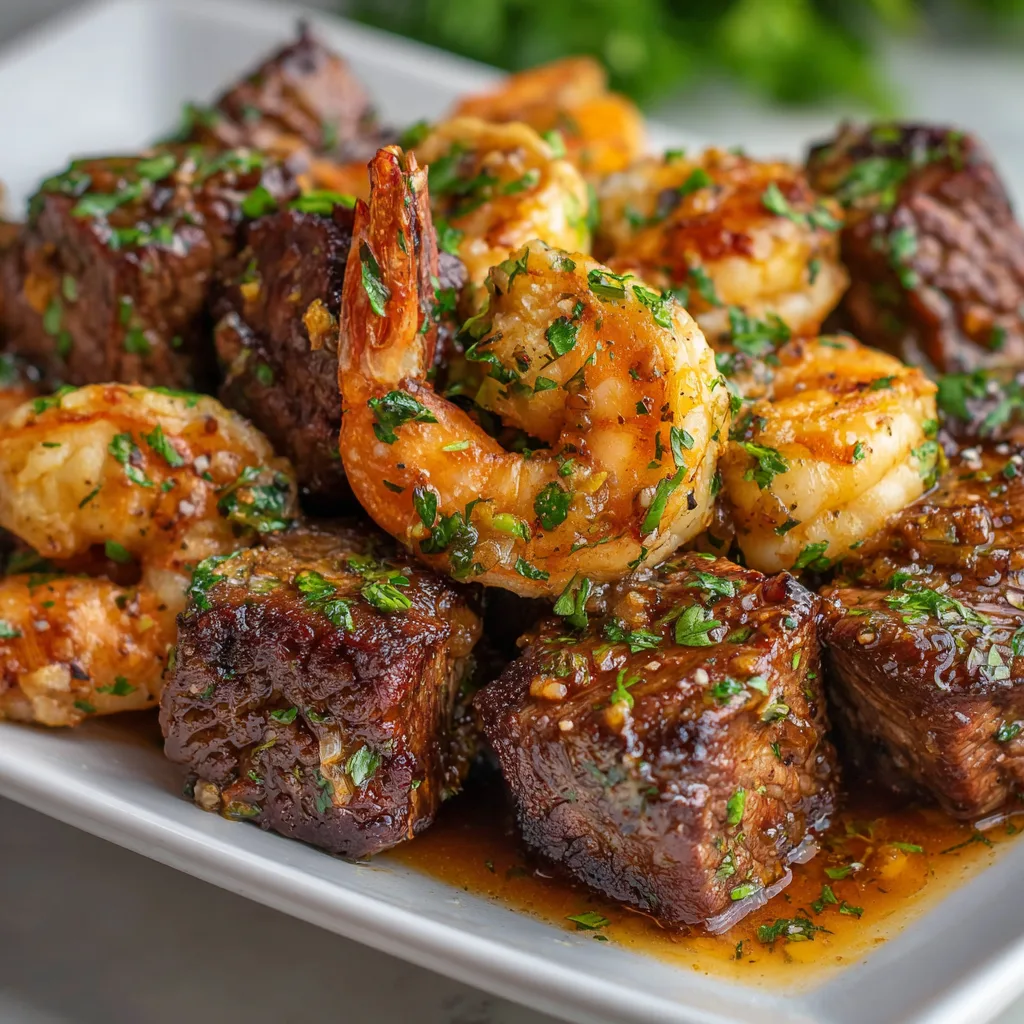
    Garlic Butter Steak Bites and Shrimp is the ultimate surf and turf dinner that combines tender, juicy steak chunks with succulent shrimp, all bathed in a rich, aromatic garlic butter sauce. I discovered this recipe during a spontaneous dinner party when I was scrambling to impress my in-laws with something special. The sizzle of the steak hitting the hot pan, the fragrant cloud of garlic butter rising into the air – it was pure magic! This one-pan wonder transforms ordinary weeknights into something extraordinary, all in under 30 minutes. Let me show you how to create this restaurant-worthy meal right in your own kitchen.

    Recipe

    Why You’ll Love This Garlic Butter Steak Bites and Shrimp

    Perfect Combination of Flavors and Textures

    There’s something truly magical about the marriage of tender steak and plump shrimp in one dish. The beef brings a rich, savory depth while the shrimp offers a sweet delicacy that perfectly complements it. When both are enveloped in that garlicky, buttery sauce with hints of herbs, every bite becomes a celebration. The textural contrast between the meaty steak and the slightly springy shrimp creates a sensory experience that keeps you coming back for more. It’s like having the best of both worlds on one plate!

    Quick and Impressive Meal Solution

    When life gets hectic but you still want something that feels special, these garlic butter steak bites and shrimp come to the rescue. Ready in just 25 minutes, this dish delivers maximum flavor with minimal effort. I’ve served this on busy weeknights and for last-minute dinner guests with equal success. The elegant presentation belies how simple it is to prepare, making it my secret weapon for those “I need something impressive but have no time” moments. Even kitchen novices can nail this recipe on the first try!

    Essential Tips & Tricks

    Mastering the Perfect Sear

    The key to restaurant-quality steak bites lies in achieving that gorgeous caramelized crust. Start with a smoking hot pan – I mean really hot – before adding your meat. Work in batches to avoid overcrowding, which steams rather than sears your steak. Pat your meat dry with paper towels before seasoning, as moisture is the enemy of a good sear. For the shrimp, cook just until they turn pink and opaque; about 2 minutes per side is usually perfect. Overcooking will transform them from succulent to rubbery faster than you can say “dinner’s ready!”

    Selecting and Preparing Your Ingredients

    Choose high-quality steak cuts like sirloin, ribeye, or New York strip for the most tender results. Cut against the grain into uniform 1-inch cubes for even cooking. For shrimp, I prefer large (16/20 count) ones with shells and tails removed for easier eating. Fresh is wonderful, but frozen shrimp work beautifully too – just thaw completely and pat dry. The garlic butter sauce really makes this dish shine, so use fresh garlic rather than pre-minced for the most vibrant flavor profile.

    Serving Ideas & Creative Variations

    Perfect Pairings for a Complete Meal

    These garlic butter steak bites and shrimp deserve worthy companions on your plate. A bed of creamy mashed potatoes makes the perfect landing pad for soaking up that luscious sauce. For a lighter option, try cauliflower mash or buttered rice. Add a bright, acidic side like a simple arugula salad with lemon vinaigrette to cut through the richness. Roasted asparagus or Brussels sprouts with hot bacon bring a welcome veggie component that complements rather than competes with your star protein duo.

    Exciting Flavor Twists to Try

    While the classic garlic butter version is divine, don’t be afraid to experiment! Add a Cajun twist with blackening spices and a squeeze of lemon. For an Asian-inspired variation, incorporate soy sauce, ginger, and a drizzle of honey into your butter sauce. Mediterranean flavors work beautifully too – try adding sun-dried tomatoes, capers, and a splash of white wine to the sauce. For heat lovers, red pepper flakes or a diced jalapeño will give your dish a pleasant kick that complements the rich butter and tender proteins.

    Storage & Troubleshooting Guide

    Proper Storage and Reheating Methods

    Store any leftover garlic butter steak bites and shrimp in an airtight container in the refrigerator for up to 2 days. The delicate nature of seafood means this isn’t a dish that keeps well for extended periods. When reheating, gentle methods work best to prevent toughening the proteins. I recommend warming in a skillet over medium-low heat with a splash of water or broth to create steam. Microwave reheating works in a pinch, but use 50% power and short intervals, checking frequently to avoid overheating the shrimp.

    Solving Common Cooking Challenges

    Tough steak bites usually indicate overcooking or poor-quality meat. For tender results, aim for medium-rare to medium doneness and rest your meat before cutting. If your shrimp turn rubbery, they’ve likely spent too long in the pan – they need just minutes to cook through. Sauce separation happens when butter breaks due to high heat; prevent this by removing the pan from heat before stirring in cold butter. If your sauce lacks flavor depth, try adding a splash of white wine or beef broth and reducing it before adding the butter.

    Frequently Asked Questions

    Can I make garlic butter steak bites and shrimp ahead of time?

    This dish is best enjoyed fresh, but you can prep ingredients 24 hours ahead. Cut and season the steak, clean the shrimp, and mince the garlic. Store separately in the refrigerator until cooking time for the freshest results.

    What’s the best cut of beef for steak bites?

    Sirloin offers the perfect balance of tenderness and flavor without breaking the bank. Ribeye and New York strip are excellent premium options. Avoid lean cuts like tenderloin which can dry out quickly when cut into small pieces.

    How do I know when the shrimp are perfectly cooked?

    Perfectly cooked shrimp form a “C” shape, turn opaque, and show a pearly pink color. If they curl into a tight “O” shape, they’re overcooked. Cook for approximately 2 minutes per side depending on size.

    Can I substitute the butter in garlic butter steak bites and shrimp?

    Yes, though it changes the flavor profile. Olive oil works for dairy-free needs, while ghee offers the butter flavor without lactose. For a lighter option, use half butter and half olive oil.

    What wine pairs best with this dish?

    A medium-bodied red like Merlot or Pinot Noir complements the steak, while an unoaked Chardonnay or Sauvignon Blanc pairs beautifully with the shrimp. For versatility, choose a sparkling wine that works with both proteins.

    Final Thoughts

    Garlic Butter Steak Bites and Shrimp has become my go-to recipe when I want to create something truly special without spending hours in the kitchen. There’s something magical about the way the rich, aromatic butter sauce brings together the tender steak and succulent shrimp. I love watching people’s eyes light up at first bite – that moment of pure food joy is why I cook. Whether for a date night, family dinner, or solo indulgence, this dish delivers restaurant-quality results with minimal effort. Don’t forget to check out more delicious recipes on Pinterest!

  • Vegetarian Black Bean Enchiladas: Irresistibly Delicious & Easy!

    Vegetarian Black Bean Enchiladas: Irresistibly Delicious & Easy!

    Vegetarian Black Bean Enchiladas: Irresistibly Delicious & Easy!

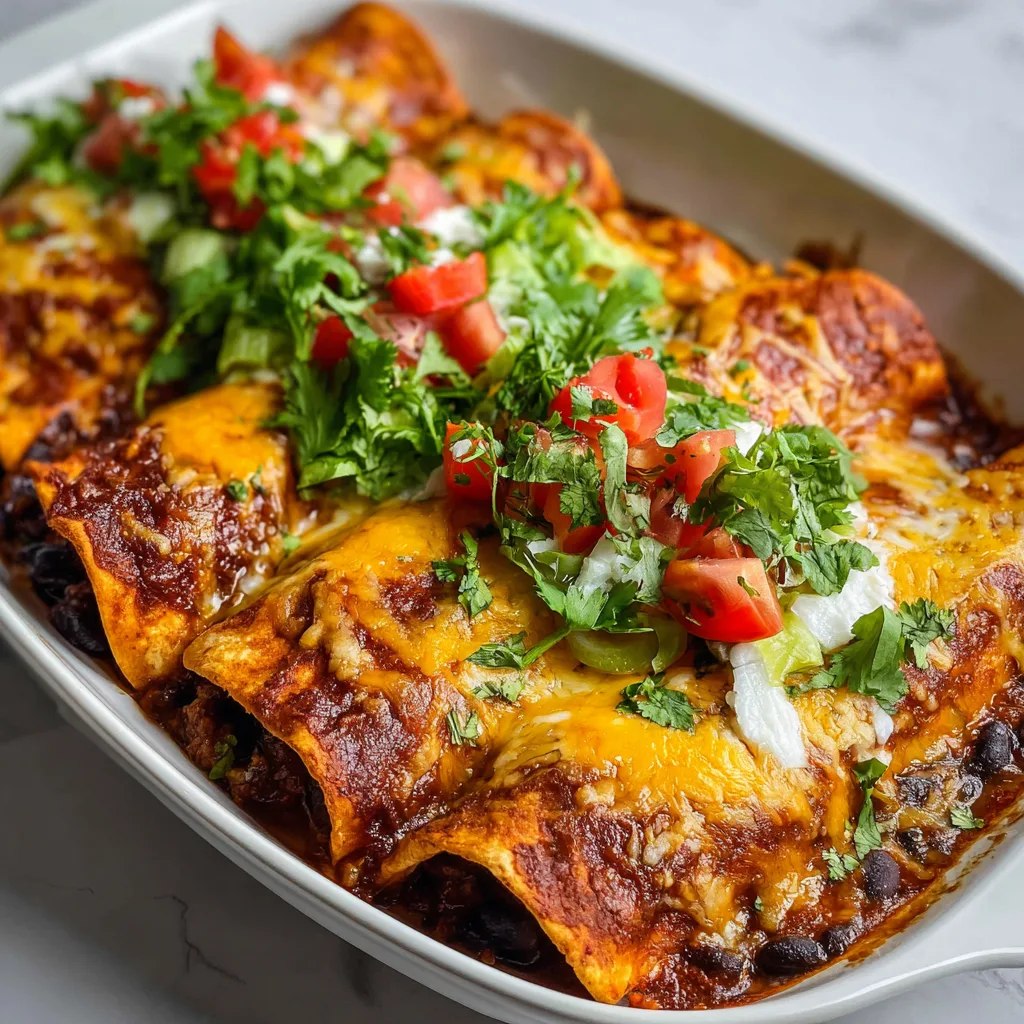
    Vegetarian Black Bean Enchiladas have become my absolute comfort food obsession lately! There’s something magical about that first bite—warm tortillas wrapped around creamy, spiced black beans, all smothered in a vibrant enchilada sauce and melty cheese. Every time I make these, my kitchen fills with the most incredible aromas that take me back to my favorite little Mexican restaurant in Santa Fe. These enchiladas are not just deliciously satisfying but also incredibly versatile. You can customize them with whatever veggies you have on hand, making them perfect for busy weeknights or weekend gatherings at RecipesDarleen.

    Recipe

    Why You’ll Love These Vegetarian Black Bean Enchiladas

    Perfect Balance of Flavors and Textures

    These vegetarian black bean enchiladas deliver the perfect harmony of flavors and textures in every bite. The earthy black beans provide a hearty base that absorbs all those aromatic Mexican spices. I love how the beans maintain just enough texture while becoming creamy when mixed with sautéed onions, garlic, and bell peppers. The slight char on the tortillas adds a subtle smokiness that complements the tangy enchilada sauce. When you cut through that cheese-crusted top into the tender filling, you’ll understand why these have become a staple in my dinner rotation!

    Quick and Nutritious Weeknight Solution

    What I adore most about these enchiladas is how they transform pantry staples into a nutrient-packed meal without hours of prep. Black beans offer incredible plant-based protein and fiber, while the colorful bell peppers and tomatoes add essential vitamins. I can have these ready in about 40 minutes total, making them perfect for those evenings when I’m craving something substantial but don’t have endless time. My neighbor actually texted me last week asking for the recipe after smelling these cooking through our shared wall!

    Essential Tips & Tricks

    Mastering the Enchilada Sauce

    The secret to exceptional vegetarian black bean enchiladas lies in the sauce! While store-bought works in a pinch, homemade enchilada sauce elevates these to restaurant quality. I toast dried chilies briefly before simmering them with tomatoes, garlic, and spices. This creates deeper, more complex flavors than any jarred version. Be sure to adjust the heat level by varying your chili types—ancho for mild sweetness or chipotle for smoky heat. Always blend the sauce until silky smooth and strain out any tough bits for that perfect consistency.

    Preventing Soggy Enchiladas

    Nobody wants soggy enchiladas! The key is giving your tortillas a quick flash-fry in hot oil—just 5-10 seconds per side until pliable but not crispy. This creates a protective barrier that prevents them from absorbing too much sauce and turning mushy. Another game-changer is layering some sauce on the bottom of your baking dish before adding enchiladas. For extra insurance against sogginess, try my Italian Chopped Salad technique of patting ingredients dry before filling—it works wonders for enchiladas too!

    Serving Ideas & Creative Variations

    Complementary Side Dishes

    Elevate your vegetarian black bean enchiladas with thoughtfully paired sides that balance the rich, saucy main dish. I love serving these with a bright, citrusy cilantro-lime rice that soaks up extra sauce beautifully. A simple avocado and jicama slaw with lime dressing adds refreshing crunch that cuts through the cheesy goodness. For a complete fiesta, add a side of charred corn with cotija cheese and chili powder. These sides not only complement the flavors but also add visual appeal to your plate with their vibrant colors.

    Exciting Flavor Twists

    Don’t be afraid to experiment with your enchiladas! My favorite variation adds roasted sweet potatoes to the black bean filling for a sweet-savory combination that’s absolutely divine. For a fusion twist, try incorporating Bang Bang Salmon flavors by adding a spicy-sweet sauce drizzle over the top before serving. You can also create a breakfast version by adding scrambled eggs to the filling and topping with fresh avocado slices. The possibilities are endless—just keep the basic structure and have fun with different flavor profiles!

    Storage & Troubleshooting Guide

    Proper Storage and Reheating

    These black bean enchiladas maintain their delicious flavor for days when stored properly. Allow leftovers to cool completely before transferring to an airtight container—this prevents condensation that could make them soggy. They’ll keep in the refrigerator for up to 4 days. For freezing, I recommend assembling but not baking them, then wrapping tightly in foil and freezing for up to 3 months. When reheating, cover with foil for the first 15 minutes of baking to retain moisture, then uncover to re-crisp the cheese topping.

    Troubleshooting Common Issues

    If your enchiladas are coming out too dry, try increasing the sauce by 25% or covering them with foil for most of the baking time. For enchiladas that are too wet, ensure you’re properly draining your black beans and sautéed vegetables before assembly. If your tortillas are cracking during rolling, try warming them slightly in the microwave between damp paper towels before filling. And for filling that keeps falling out during rolling, slightly mash a portion of the beans to create a more cohesive mixture that stays put.

    Frequently Asked Questions

    Can I make vegetarian black bean enchiladas ahead of time?

    Absolutely! Assemble them up to 24 hours in advance, cover tightly with plastic wrap, and refrigerate. Add an extra 10 minutes to the baking time when cooking from cold.

    What’s the best cheese for enchiladas?

    A combination works best—I recommend equal parts monterey jack for meltability and sharp cheddar for flavor. For authentic taste, try queso fresco or cotija as a finishing cheese.

    Are black bean enchiladas gluten-free?

    They can be! Simply use certified gluten-free corn tortillas and check that your enchilada sauce doesn’t contain any wheat-based thickeners.

    How can I make these enchiladas vegan?

    Replace the cheese with your favorite plant-based alternative that melts well. Also verify your tortillas don’t contain lard, which is traditional in some varieties.

    What’s the best way to warm tortillas for rolling?

    Warm them in a dry skillet for 10-15 seconds per side or wrap a stack in damp paper towels and microwave for 30 seconds until pliable but not dried out.

    Final Thoughts

    These vegetarian black bean enchiladas have become my go-to recipe whenever I need something comforting yet impressive. There’s something truly special about watching friends’ faces light up as they take that first bite—the way the flavors unfold from tangy to savory to slightly spicy. I find myself craving these on rainy evenings or when celebrating little victories. They remind me that plant-based cooking can be deeply satisfying and crave-worthy! Don’t forget to check out more of my favorite comfort food recipes on Pinterest for endless inspiration.

  • French Onion Chicken Orzo Casserole: Ultimate Comfort Food Winner!

    French Onion Chicken Orzo Casserole: Ultimate Comfort Food Winner!

    French Onion Chicken Orzo Casserole: Ultimate Comfort Food Winner!

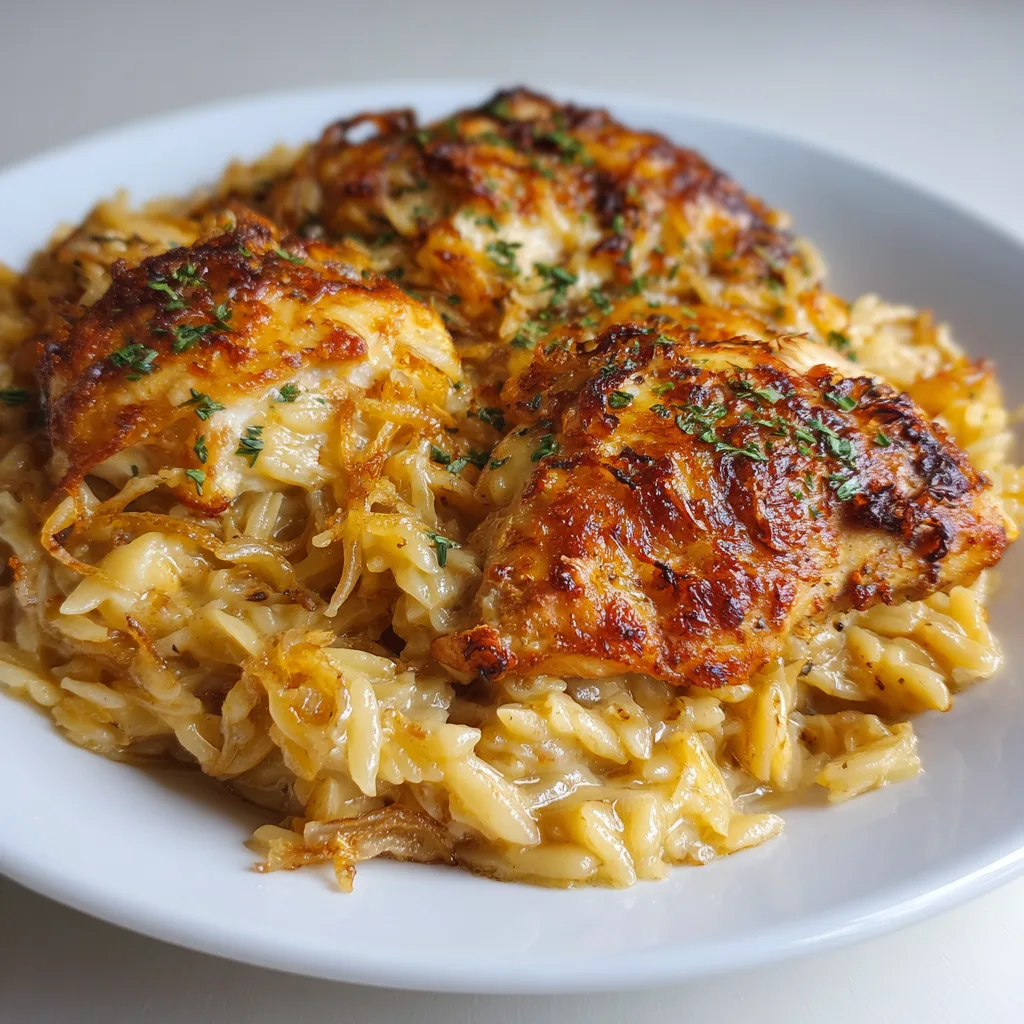
    French Onion Chicken Orzo Casserole combines two comfort food classics into one irresistible dish that’s perfect for those cozy nights when you’re craving something hearty yet sophisticated. The first time I made this for my family, the kitchen filled with that unmistakable aroma of caramelized onions and herbs that instantly draws everyone to the table. There’s something magical about how the sweet, deeply golden onions meld with tender chicken and creamy orzo, all topped with bubbling Gruyère cheese. This casserole has quickly become my go-to when I need a dinner that impresses without hours of fussing in the kitchen.

    Recipe

    Why You’ll Love This French Onion Chicken Orzo Casserole

    Perfect Balance of Flavors and Textures

    This casserole hits all the right notes with its complex flavor profile that marries sweet caramelized onions with savory chicken and herbs. The orzo pasta absorbs all those wonderful juices while cooking, becoming plump and tender with each bite delivering pure comfort. What makes this dish truly special is the contrast between the creamy interior and that gloriously golden, slightly crispy cheese topping that forms during the final minutes under the broiler. I love watching my guests’ faces light up when they break through that cheesy crust and discover the rich, aromatic goodness underneath.

    One-Pot Wonder That’s Weeknight Friendly

    Despite its impressive appearance, this French Onion Chicken Orzo Casserole is surprisingly straightforward to prepare. The beauty lies in its one-pot approach—everything builds flavor in layers in the same dish, meaning fewer dishes to wash afterward (always a win in my book!). You can even prepare components ahead of time, like caramelizing the onions on Sunday for a quick assembly on busy Tuesday night. For busy households, this recipe strikes that perfect balance between “special occasion worthy” and “doable on a weeknight” when you need something comforting but don’t have hours to spend in the kitchen.

    Essential Tips & Tricks

    Mastering the Caramelized Onions

    The soul of this dish lies in properly caramelized onions, which require patience and gentle heat. I’ve learned the hard way that rushing this step leads to bitter, burnt onions instead of that sweet, jammy goodness we’re after. Allow at least 25-30 minutes for this process, stirring occasionally while the onions transform from sharp and pungent to meltingly sweet and golden brown. A splash of balsamic vinegar toward the end adds depth, while a pinch of sugar can help speed up caramelization if you’re short on time. Remember: those little browned bits on the bottom of the pan? That’s pure flavor—deglaze with broth and incorporate every bit.

    Choosing the Right Cheese Blend

    While traditional French onion soup uses Gruyère, this casserole welcomes creativity in your cheese selection. I recommend a combination of Gruyère for its nutty depth and mozzarella for that perfect cheese-pull moment. For an extra flavor dimension, add a sprinkle of Parmesan to the top layer. The cheese functions as more than just a pretty topping—it forms a protective layer that helps keep the orzo moist during baking. For best results, grate your cheese fresh rather than using pre-shredded varieties, which contain anti-caking agents that can prevent that beautifully smooth melt. Try this approach with my Italian Sausage Pasta Bake too!

    Serving Ideas & Creative Variations

    Complementary Side Dishes

    This hearty casserole pairs beautifully with lighter sides that provide fresh contrast to its richness. My favorite combination includes a simple arugula salad with lemon vinaigrette—the peppery greens and bright acidity cut through the creamy, cheesy goodness perfectly. For a more substantial meal, add roasted asparagus or Brussels sprouts tossed with a touch of balsamic glaze. Crusty bread is non-negotiable in my household; we use it to scoop up every last bit of that savory sauce. For special occasions, I’ve served this alongside my Crispy Crab Cake Bites with Lemon Dill Sauce for an elevated dinner that always impresses guests.

    Exciting Flavor Twists

    Don’t be afraid to make this French Onion Chicken Orzo Casserole your own with creative adaptations. For a Mediterranean twist, add sun-dried tomatoes, artichoke hearts, and replace some of the broth with white wine. Mushroom lovers can add sautéed cremini or shiitake mushrooms for an earthy dimension that complements the sweet onions beautifully. Looking for a bit more indulgence? Stir in a few tablespoons of cream cheese before baking for an even creamier result. For a lightened-up version that doesn’t sacrifice flavor, use pearl barley instead of orzo and incorporate more vegetables like diced zucchini or bell peppers.

    Storage & Troubleshooting Guide

    Proper Storage and Reheating

    This casserole actually improves with time as flavors meld, making it perfect for meal prep and leftovers. Store cooled portions in airtight containers in the refrigerator for up to 4 days. When reheating, add a splash of chicken broth to restore moisture, as the orzo continues to absorb liquid during storage. For best results, reheat covered in a 325°F oven until warmed through, then uncover for the last few minutes to re-crisp the top. This dish also freezes beautifully—portion into freezer-safe containers, leaving room for expansion, and freeze for up to 3 months. Thaw overnight in the refrigerator before reheating.

    Fixing Common Issues

    If your casserole turns out too dry, the most likely culprit is orzo absorption rates, which can vary by brand. Next time, increase your liquid by ¼ cup or reduce cooking time slightly. For a soupy casserole, simply leave it uncovered in the oven for 5-10 extra minutes to allow excess moisture to evaporate. If your cheese topping isn’t browning properly, switch to the broiler for the final 2-3 minutes, watching carefully to prevent burning. And if onions are burning rather than caramelizing, your heat is too high—lower the temperature and add a tablespoon of water to slow the process.

    Frequently Asked Questions

    Can I make French Onion Chicken Orzo Casserole ahead of time?

    Yes! Prepare everything up to the baking step, cover, and refrigerate for up to 24 hours. When ready to bake, add an extra 10-15 minutes to the cooking time since you’re starting with a cold dish.

    What can I substitute for orzo pasta?

    Pearl couscous, small shell pasta, or even arborio rice work well. Adjust cooking times accordingly as these alternatives may require different liquid ratios and cooking durations.

    Is there a way to make this recipe gluten-free?

    Absolutely! Use gluten-free orzo (or rice) and ensure your broth and other packaged ingredients are certified gluten-free. The flavor profile remains delicious with these substitutions.

    How do I know when my French Onion Chicken Orzo Casserole is done?

    The casserole is ready when the liquid is absorbed, orzo is tender, internal temperature of chicken reaches 165°F, and the cheese topping is golden and bubbly.

    Can I use rotisserie chicken to save time?

    Definitely! Shredded rotisserie chicken is a great time-saver. Add it later in the cooking process since it’s already cooked—just enough time to warm through and absorb the flavors.

    Final Thoughts

    This French Onion Chicken Orzo Casserole has become a cornerstone recipe in my household—one that bridges the gap between everyday cooking and special occasions with its remarkable depth of flavor. There’s something truly magical about transforming simple ingredients into something so deeply satisfying. I hope this dish brings the same warmth and comfort to your table that it has to mine. Don’t forget to check out more comfort food inspiration on Pinterest and tag me when you make your own version of this beloved casserole!

  • Ruth’s Chris Creamed Corn Au Gratin: Irresistibly Cheesy & Viral!

    Ruth’s Chris Creamed Corn Au Gratin: Irresistibly Cheesy & Viral!

    Ruth’s Chris Creamed Corn Au Gratin: Irresistibly Cheesy & Viral!

    Ruth’s Chris Creamed Corn Au Gratin has become my absolute obsession since I first tasted it at the famous steakhouse last winter. The way the sweet corn kernels swim in that velvety cheese sauce, topped with a golden, buttery crust that crackles under your fork… pure heaven! I’ve spent months perfecting this copycat recipe, and friends, I’m thrilled to finally share it with you. This indulgent side dish brings steakhouse luxury right to your dinner table, and trust me, it’ll steal the spotlight from whatever main dish you pair it with. Ready to dive into creamy, cheesy bliss? Let’s get cooking!

    Recipe

    Why You’ll Love This Ruth’s Chris Creamed Corn Au Gratin

    Restaurant-Quality Flavors at Home

    There’s something magical about that first bite of Ruth’s Chris Creamed Corn Au Gratin that makes your eyes close involuntarily as you savor the moment. The combination of sweet corn kernels, three different cheeses, and that hint of garlic creates layers of flavor that dance on your palate. What makes this recipe truly special is how it captures that perfect balance between sweet and savory. I’ve tested countless variations to nail down exactly what makes the restaurant version so addictive, and this recipe delivers that same luxurious experience without the steakhouse price tag.

    Simple Ingredients, Extraordinary Results

    Don’t let the fancy name fool you—this dish uses everyday ingredients that transform into something extraordinary. Fresh corn kernels (or good quality frozen in a pinch) form the foundation, while heavy cream and butter create that silky-smooth texture we’re after. The trio of cheeses—sharp cheddar, Gruyère, and Parmesan—each plays a crucial role in developing depth and that signature golden crust. What surprised me most when developing this recipe was how a touch of nutmeg and a hint of cayenne elevate the entire dish, adding that je ne sais quoi that keeps everyone guessing.

    Essential Tips & Tricks

    Perfecting the Cheese Sauce

    The heart of any great au gratin lies in its cheese sauce, and this one deserves your full attention. Start by creating a proper roux as your base—equal parts butter and flour cooked until it smells slightly nutty but hasn’t browned. This crucial step ensures your sauce will be silky-smooth without any graininess. When adding cheeses, always remove the pan from heat first and incorporate them gradually, stirring constantly. This prevents the proteins from seizing up and creating that dreaded stringy texture. For an extra-silky finish like they achieve at Ruth’s Chris, grate your own cheese rather than using pre-shredded, which contains anti-caking agents.

    Achieving the Perfect Golden Crust

    That crackling, golden crust is what elevates this dish from mere creamed corn to spectacular au gratin territory. The secret lies in a two-phase baking approach. First, bake covered at a moderate temperature to allow the flavors to meld and the corn to become tender. Then, uncover and increase the heat for the final 10-15 minutes, watching carefully as the top transforms into a beautiful golden brown. For that extra-special touch, I sometimes run it under the broiler for the final minute—just don’t walk away during this step! A sprinkle of fresh thyme right before serving adds a pop of color and aromatic freshness that complements the richness perfectly.

    Serving Ideas & Creative Variations

    Perfect Pairings for Any Occasion

    This Ruth’s Chris Creamed Corn Au Gratin shines as a showstopping side dish alongside almost any protein. Pair it with a perfectly seared steak to recreate the classic steakhouse experience, or serve it with roasted chicken for a more casual Sunday dinner. It’s particularly magnificent with Baked Lemon Garlic Tilapia, where the bright citrus notes of the fish balance the richness of the corn. For holiday gatherings, prepare it in individual ramekins for an elegant presentation that makes everyone feel special. The dish holds well in a warm oven, making it perfect for entertaining when timing multiple dishes can be tricky.

    Seasonal Twists and Dietary Adaptations

    One of the joys of this recipe is how beautifully it adapts to seasonal ingredients and dietary needs. In summer, use fresh sweet corn cut straight from the cob for unbeatable flavor and texture. During fall, try adding diced roasted poblano peppers for a subtle smoky heat. For a lighter version, substitute half-and-half for the heavy cream and reduce the butter slightly—it’s still delicious! To make it gluten-free, simply swap the all-purpose flour for a 1:1 gluten-free blend. Vegetarians already love this dish, but for a vegan adaptation, use plant-based butter, non-dairy milk thickened with a bit more roux, and your favorite melty vegan cheese alternatives.

    Storage & Troubleshooting Guide

    Make-Ahead and Storage Solutions

    This Ruth’s Chris Creamed Corn Au Gratin is wonderfully versatile when it comes to make-ahead options. You can prepare the entire dish up to the baking point, cover it tightly, and refrigerate for up to 48 hours before baking. Just add about 10-15 minutes to the covered baking time if cooking straight from the refrigerator. Leftovers (if you’re lucky enough to have any!) will keep in an airtight container for 3-4 days. While the texture is best fresh from the oven, you can rejuvenate day-old portions by adding a small splash of cream before reheating covered in a 325°F oven until warmed through, then uncovering for a few minutes to re-crisp the top.

    Troubleshooting Common Challenges

    Even experienced cooks occasionally encounter issues, but most problems with this dish are easily fixed. If your sauce looks curdled or broken, whisk in a tablespoon of cold heavy cream off the heat until it comes back together. For a sauce that’s too thick, gradually add warm milk until you reach your desired consistency. Too thin? Create a small amount of additional roux in a separate pan, then whisk it into your sauce. If your topping isn’t browning properly, move the dish to a higher oven rack and watch it carefully. And remember, the perfect au gratin should be bubbling around the edges when done—if it’s not, it likely needs more time to heat through completely.

    Frequently Asked Questions

    Can I use frozen corn for Ruth’s Chris Creamed Corn Au Gratin?

    Absolutely! While fresh corn offers the sweetest flavor, good-quality frozen corn works beautifully. Thaw completely and pat dry with paper towels to remove excess moisture before adding to your recipe.

    How can I make this dish ahead for a dinner party?

    Prepare everything up to the baking step, cover and refrigerate for up to 2 days. Before guests arrive, bake as directed, adding 10-15 extra minutes to the covered baking time.

    What’s the best cheese substitute if I can’t find Gruyère?

    Swiss cheese makes an excellent substitute with its similar nutty flavor. Fontina or Emmental also work well, offering that creamy melt that makes the dish special.

    Can I freeze leftovers of this corn au gratin?

    Yes, though the texture may change slightly. Freeze in an airtight container for up to 1 month. Thaw overnight in the refrigerator and reheat covered at 325°F until hot throughout.

    Is there a lighter version of this rich dish?

    For a lighter Ruth’s Chris Creamed Corn Au Gratin, substitute half-and-half for heavy cream, reduce butter by half, and use part-skim mozzarella in place of some of the cheese. It’s still delicious!

    Final Thoughts

    This Ruth’s Chris Creamed Corn Au Gratin recipe brings the essence of fine dining into your home kitchen with surprisingly little effort. There’s something deeply satisfying about watching your guests’ faces light up with that first creamy, cheesy bite—the same reaction I had at the restaurant. Whether it’s for a special occasion or simply to elevate a weeknight meal, this dish delivers restaurant-quality luxury that creates memorable dining experiences. I hope you’ll share your creations with me on Pinterest and make this indulgent side a tradition at your own table. Happy cooking!

  • Italian Sausage Pasta Bake: Irresistibly Cheesy & Comforting Feast!

    Italian Sausage Pasta Bake: Irresistibly Cheesy & Comforting Feast!

    Italian Sausage Pasta Bake: Irresistibly Cheesy & Comforting Feast!

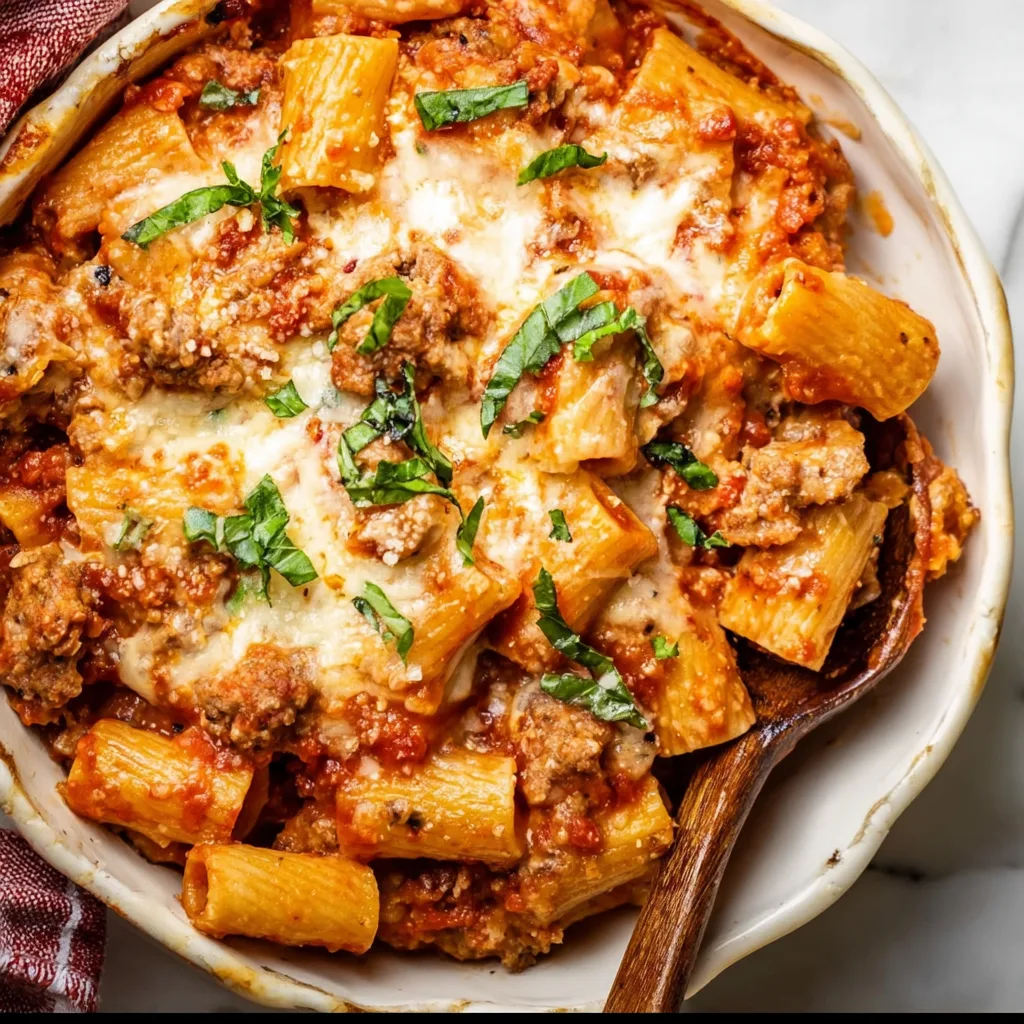
    This Italian Sausage Pasta Bake transforms ordinary pasta night into something extraordinary. The first time I made this bubbling masterpiece, my kitchen filled with an aroma that literally pulled my husband from his home office—nose first! There’s something magical about the way the spicy Italian sausage mingles with sweet tomatoes and melty cheese, creating comfort in casserole form. If you’re looking for a crowd-pleasing dish that delivers big flavor with minimal fuss, this recipe deserves a permanent spot in your dinner rotation. It’s become my go-to when hosting friends who appreciate hearty, homemade meals.

    Recipe

    Why You’ll Love This Italian Sausage Pasta Bake

    Perfect Make-Ahead Miracle

    This pasta bake is my secret weapon for busy weeks. I often assemble it on Sunday, refrigerate, and then bake it fresh on Monday evening when cooking feels like climbing Mount Everest. The flavors actually intensify overnight as the sauce permeates the pasta and the herbs bloom. Plus, there’s something deeply satisfying about coming home to a ready-to-bake dish after a long day. Just pop it in the oven, kick off your shoes, and pour a glass of wine while the cheese bubbles to golden perfection. The anticipation is almost as delicious as the meal itself!

    One-Dish Wonder for Every Occasion

    Whether it’s Tuesday dinner or Saturday with friends, this pasta bake rises to the occasion. The versatile nature of this dish means it works for casual family meals and impressive entertaining alike. I’ve served it at potlucks where it disappeared faster than anything else on the table, and for dinner parties where guests requested the recipe before dessert was served. The combination of zesty sausage, al dente pasta, and that irresistible cheese pull creates a comfort food experience that resonates with everyone. It’s hearty enough to stand alone yet plays well with simple sides.

    Essential Tips & Tricks

    Perfecting Your Pasta

    The foundation of an exceptional pasta bake lies in properly cooking your pasta. Always boil it for 2 minutes less than the package directions suggest—this slight undercooking ensures it won’t turn mushy during baking. Last Christmas, I overcooked the pasta and ended up with something resembling baby food rather than the textural delight it should have been! Salt your pasta water generously (it should taste like seawater) to season the pasta from within. And please, don’t rinse after draining—those starches help the sauce cling beautifully to each piece of pasta, creating that perfect creamy texture we’re aiming for.

    Layering Flavors Strategically

    Building depth in your Italian Sausage Pasta Bake happens in stages, not all at once. Start by properly browning the sausage until it develops those caramelized edges that contain concentrated flavor bombs. Don’t rush this step! Remove the sausage before sautéing your aromatics in the flavorful fat left behind. This layering technique ensures every bite delivers maximum impact. I learned this the hard way after once throwing everything in at once and ending up with a one-dimensional dish. The magic happens when each ingredient gets its moment to shine before joining the ensemble.

    Serving Ideas & Creative Variations

    Complementary Side Dishes

    The right sides elevate this pasta bake from delicious to memorable. My go-to pairing is a crisp green salad with a bright lemon vinaigrette that cuts through the richness of the bake. For something heartier, try garlic bread for sopping up extra sauce—my husband has been known to make “pasta bake sandwiches” with leftovers! Roasted vegetables like Brussels sprouts with balsamic pecans offer beautiful contrast in both flavor and texture. Remember that simple sides often work best, allowing the pasta bake to remain the undisputed star of your dinner table.

    Exciting Flavor Twists

    While the classic version is divine, don’t be afraid to make this recipe your own. Swap sweet Italian sausage for spicy chorizo for a Spanish-inspired variation with extra heat. Add a layer of sautéed mushrooms for earthy depth, or stir in a handful of fresh spinach just before baking for color and nutrition. My personal favorite twist involves adding a dollop of ricotta between layers for pockets of creamy goodness. During summer, I fold in fresh cherry tomatoes and basil from my garden. Each variation creates a slightly different experience while maintaining the comforting essence of the original.

    Storage & Troubleshooting Guide

    Proper Storage for Maximum Enjoyment

    Leftover pasta bake—if you’re lucky enough to have any—needs proper storage to maintain its deliciousness. Allow it to cool completely before refrigerating in an airtight container for up to 4 days. For freezing, portion into individual servings, wrap tightly in plastic, then foil, and freeze for up to 3 months. The individual portions are my weekday lunch salvation! When reheating, add a tablespoon of water before microwaving to revive the sauce, or cover with foil and reheat in a 350°F oven until the center reaches 165°F. The texture won’t be identical to fresh, but the flavors often deepen beautifully.

    Fixing Common Pitfalls

    Even experienced cooks encounter issues with pasta bakes. If your dish seems dry, you likely need more sauce—pasta continues absorbing liquid as it bakes. A good rule is making the mixture look slightly too wet before baking. For soggy results, your pasta was probably overcooked initially or you used too much sauce. Balance is key! If your cheese burns before the center heats through, cover with foil for most of the baking time, removing for the final 10 minutes to achieve that golden top. And remember, resting for 10-15 minutes after baking isn’t just for flavor development—it helps the bake set properly.

    Frequently Asked Questions

    Can I make Italian Sausage Pasta Bake vegetarian?

    Absolutely! Substitute the Italian sausage with plant-based sausage alternatives or use a combination of mushrooms and walnuts sautéed with Italian seasonings for a meaty texture without the meat.

    How can I make this recipe gluten-free?

    Simply swap regular pasta for your favorite gluten-free variety, checking that your Italian sausage is also gluten-free (some contain fillers with gluten). The rest of the ingredients are naturally gluten-free.

    Can I assemble this pasta bake ahead of time?

    Yes! Prepare everything up to 24 hours in advance, cover with plastic wrap, and refrigerate. Add an extra 10-15 minutes to the baking time when cooking directly from the refrigerator.

    What’s the best pasta shape for this bake?

    Medium shapes that trap sauce work best—penne, rigatoni, and fusilli are my favorites for Italian Sausage Pasta Bake. Avoid tiny pasta like orzo or long pasta like spaghetti.

    Can I use turkey sausage instead?

    Definitely! Turkey Italian sausage creates a lighter version with less fat. You might want to add a splash more olive oil when browning to compensate for the reduced fat content.

    Final Thoughts

    This Italian Sausage Pasta Bake represents everything I love about home cooking—it’s adaptable, forgiving, and brings people together around the table. The combination of zesty sausage, tender pasta, and molten cheese creates something greater than the sum of its parts. I’ve watched this dish bridge generations at family gatherings and spark conversation among new friends. It’s comfort food that doesn’t sacrifice flavor for convenience. Whether you follow my recipe exactly or add your personal touch, I hope this pasta bake brings as much joy to your table as it has to mine. Find more inspiration for your next meal on Pinterest.

  • 20 Minute Ground Turkey Bang Bang Rice | Easy, Flavor-Packed Feast!

    20 Minute Ground Turkey Bang Bang Rice | Easy, Flavor-Packed Feast!

    20 Minute Ground Turkey Bang Bang Rice | Easy, Flavor-Packed Feast!

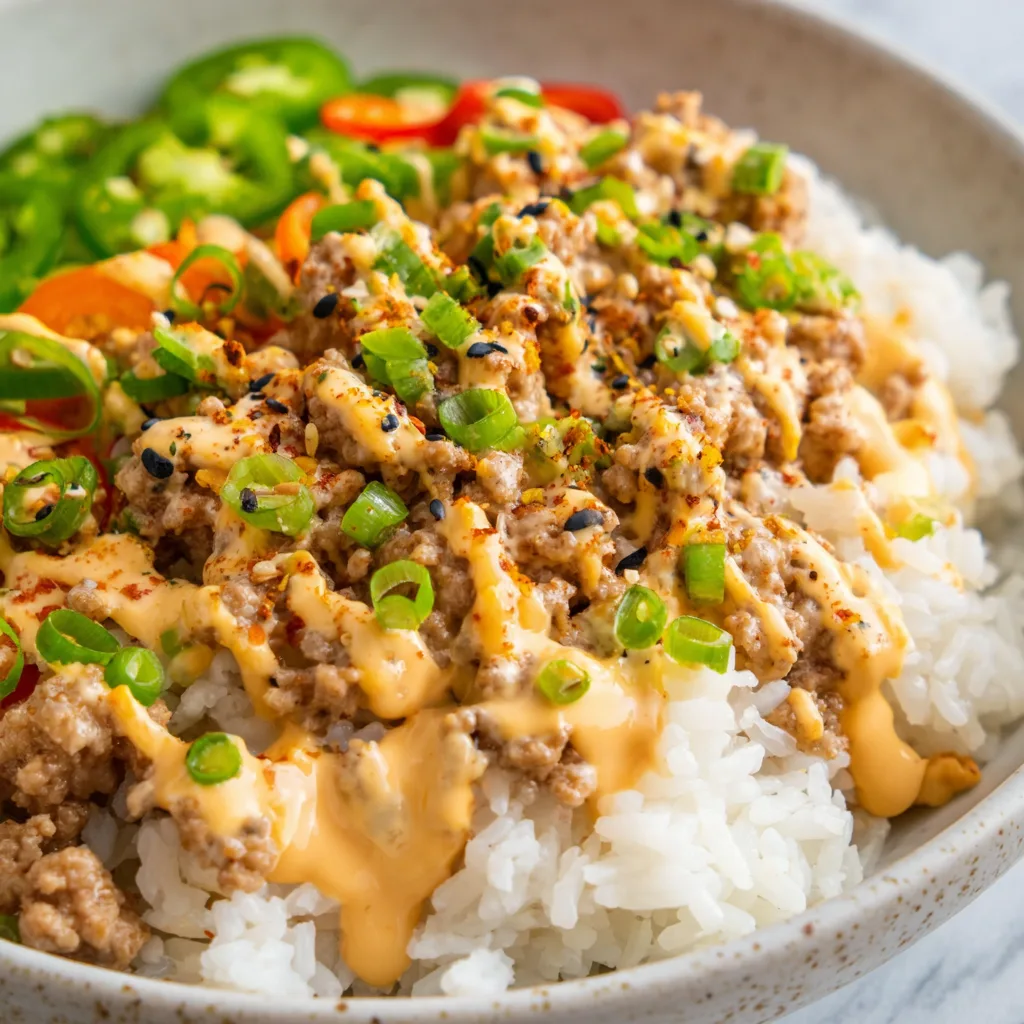
    20 Minute Ground Turkey Bang Bang Rice is about to become your new weeknight hero! This dish has saved me countless times when I’m staring into my fridge at 6 PM wondering what magic I can conjure up. The first time I made this, my kitchen filled with the most intoxicating aroma of sweet-spicy sauce meeting freshly cooked rice. My partner literally wandered in from the other room asking, “What smells so amazing?” The best part? It delivers big flavor with minimal effort. If you love quick meals with a flavor punch like my Bang Bang Salmon, you’ll adore this turkey version.

    Recipe

    Why You’ll Love This 20 Minute Ground Turkey Bang Bang Rice

    Perfect Weeknight Solution

    This 20 Minute Ground Turkey Bang Bang Rice truly lives up to its name—start to finish in 20 minutes! On busy weeknights when I’m exhausted but still craving something satisfying, this dish is my go-to. The ground turkey cooks quickly, absorbing all those delicious bang bang sauce flavors. I love that it’s protein-packed but doesn’t feel heavy. The sauce brings that perfect balance of creamy, sweet, and spicy notes that make your taste buds dance. Plus, everything comes together in a single pan, which means minimal cleanup—music to my ears after a long day!

    Crowd-Pleasing Flavor Profile

    The magic of this dish lies in that irresistible bang bang sauce—creamy, sweet, and just the right amount of heat. I’ve served this to picky eaters and food enthusiasts alike, and it’s always met with empty plates and requests for seconds. The sauce coats each grain of rice and bit of turkey with its velvety goodness. What I particularly love is how the sauce’s slight heat builds gradually rather than overwhelming your palate. It’s comfort food with personality! Even my spice-cautious friends find themselves reaching for more, which is always the ultimate compliment.

    Essential Tips & Tricks

    Perfecting Your Rice

    Getting the rice-to-sauce ratio just right makes all the difference in this 20 Minute Ground Turkey Bang Bang Rice. I recommend using jasmine rice for its fragrant quality and ability to stay fluffy. For maximum flavor absorption, cook your rice in broth instead of water—this simple swap creates an amazing foundation. Let your rice rest covered for 5 minutes after cooking; this allows the grains to finish steaming and separate beautifully. If you’re really pressed for time, quality microwave rice works wonderfully too! I’ve made this countless times with both methods, and while freshly cooked is my preference, both deliver delicious results.

    Sauce Secrets Revealed

    The bang bang sauce is the heart and soul of this dish! For the creamiest texture, use full-fat mayo and make sure your sweet chili sauce is the thick, sticky kind rather than the watery variety. I always add the sauce to the turkey off the heat to prevent separation. My personal touch? A splash of rice vinegar for brightness and balance. If you love spice like I do, add a drizzle of hot honey for complexity. Remember to reserve a little sauce for drizzling on top just before serving—this final touch makes the flavors pop and gives that restaurant-quality presentation.

    Serving Ideas & Creative Variations

    Perfect Pairings

    This 20 Minute Ground Turkey Bang Bang Rice pairs beautifully with fresh, crisp vegetables that balance the rich sauce. I love serving it with a simple cucumber salad dressed with rice vinegar and sesame oil—the cool crunch against the warm rice is divine! For a complete meal, steamed broccoli or roasted bok choy makes an excellent side. When I’m feeling fancy, I’ll add some quick-pickled vegetables for a tangy contrast. If you’re entertaining, serve this alongside my Asian Garlic Shrimp for an impressive spread that comes together in under 30 minutes. The complementary flavors will have everyone thinking you spent hours in the kitchen!

    Mix It Up

    Don’t be afraid to customize this versatile dish! My favorite variation swaps ground turkey for ground chicken or even crumbled tofu for a vegetarian option. The sauce works beautifully with any protein. Sometimes I stir in shredded carrots and peas during the last few minutes of cooking for added nutrition and color. For a lower-carb version, try cauliflower rice—it soaks up the sauce just as well. When I’m craving extra texture, I’ll sprinkle toasted sesame seeds or crushed peanuts on top. The beauty of this recipe is its flexibility—it welcomes your creativity while maintaining that irresistible bang bang flavor profile.

    Storage & Troubleshooting Guide

    Make-Ahead & Storage Tips

    This 20 Minute Ground Turkey Bang Bang Rice makes excellent leftovers that often taste even better the next day! Store in airtight containers in the refrigerator for up to 3 days. When reheating, add a splash of water or broth to revive the sauce’s creaminess and prevent the rice from drying out. For meal prep, I sometimes portion it into individual containers with steamed veggies for grab-and-go lunches. You can even freeze portions for up to 2 months—just thaw overnight in the fridge before reheating. The sauce might look slightly separated after freezing, but a good stir while warming will bring it back together.

    Common Issues Solved

    If your sauce seems too thick or thin, there’s an easy fix! For sauce that’s too thick, add a tablespoon of water or chicken broth until you reach your desired consistency. If it’s too thin, a teaspoon of mayo or even a sprinkle of cornstarch mixed with water can thicken it right up. Sometimes the rice might absorb too much sauce—simply make a half batch more of the bang bang sauce to refresh the dish. If you accidentally overcooked your turkey and it seems dry, folding in the sauce while the meat is still hot and letting it rest covered for 5 minutes works wonders to restore moisture.

    Frequently Asked Questions

    Can I make 20 Minute Ground Turkey Bang Bang Rice ahead of time?

    Absolutely! It stores beautifully for 3 days in the refrigerator. The flavors actually deepen overnight, making it perfect for meal prep. Just reheat with a splash of water to refresh the sauce.

    Is this dish spicy?

    The heat level is customizable. As written, it has a mild-to-medium kick. Adjust the sriracha up or down to suit your preference, or substitute with gochujang for a different spice profile.

    Can I use brown rice instead of white?

    Yes, though it will increase your cooking time. I recommend cooking the brown rice separately first, then combining with the turkey and sauce at the end.

    What vegetables work best with this dish?

    Broccoli, bell peppers, snap peas, and bok choy all complement the flavors beautifully. Add them during the last few minutes of cooking for perfect texture.

    How can I make this dish healthier?

    Try using cauliflower rice, light mayo in the sauce, and adding extra vegetables. You can also use ground turkey breast for a leaner protein option.

    Final Thoughts

    This 20 Minute Ground Turkey Bang Bang Rice has become a staple in my kitchen for good reason—it delivers maximum flavor with minimum effort. There’s something magical about how a few simple ingredients transform into such a satisfying meal. I find myself craving that perfect balance of creamy, sweet and spicy bang bang sauce at least once a week! Whether you’re cooking for yourself, your family, or friends, this dish is guaranteed to impress while keeping your sanity intact. Don’t forget to share your creations on Pinterest!