Category: Breakfast

Easy breakfast recipes for busy mornings. Simple, delicious meals that bring warmth, flavor, and energy to your day.

  • Garlic Butter Parmesan Knots That Will Melt Your Heart Instantly!

    Garlic Butter Parmesan Knots That Will Melt Your Heart Instantly!

    Garlic Butter Parmesan Knots That Will Melt Your Heart Instantly!

    These Garlic Butter Parmesan Knots are what I call pure comfort magic—pillowy soft dough twisted into perfect little knots, then bathed in a fragrant garlic butter and showered with nutty parmesan cheese. I first made these for a Sunday family dinner, and the way everyone reached for seconds (and thirds!) told me everything I needed to know. The aroma alone will draw everyone to your kitchen, I promise. These knots strike that perfect balance between impressive and approachable that makes them ideal for everything from pasta night to holiday gatherings.

    Recipe

    Why You’ll Love These Garlic Butter Parmesan Knots

    Perfect Texture & Flavor Combination

    There’s something utterly irresistible about the combination of soft, pillowy bread with rich garlic butter and savory parmesan. Each bite delivers a perfect harmony of flavors that simply melts in your mouth. The outside develops a slight crispness while the interior stays tender and fluffy. I’ve watched guests’ eyes light up at that first bite—it’s the subtle tang from the parmesan playing against the aromatic garlic butter that creates such a memorable experience. These knots manage to be both rustic and elegant at the same time.

    Versatile for Any Occasion

    These garlic butter parmesan knots are incredibly adaptable for virtually any meal or gathering. They elevate a simple weeknight pasta dinner to something special, yet they’re impressive enough for holiday tables or dinner parties. I’ve brought them to potlucks, served them alongside soups, and even packed them for picnics. The best part? They can be partially prepared ahead of time, making them perfect for busy hosts. Their hand-held nature makes them ideal for buffets or casual gatherings where guests are mingling rather than sitting for a formal meal.

    Essential Tips & Tricks

    Perfecting Your Dough

    Getting the dough consistency right is your foundation for perfect knots. Look for a smooth, slightly tacky texture that pulls away from the bowl but doesn’t stick to your fingers. If it’s too sticky, add flour one tablespoon at a time; if too dry, add water by the teaspoon. Room temperature ingredients make a huge difference here—I learned this the hard way after a failed batch with cold butter. Allow enough time for proper rising; the dough should nearly double in size. This patience pays off in the exceptional texture of your finished garlic knots.

    Mastering the Garlic Butter

    The garlic-to-butter ratio is crucial—too little and you’ll miss that signature flavor, too much and it becomes overwhelming. I prefer 4 cloves of fresh minced garlic to 6 tablespoons of butter for the perfect balance. Melt your butter slowly over low heat, then add garlic and let it gently infuse for 1-2 minutes without browning. A touch of Italian herbs and a pinch of red pepper flakes adds wonderful dimension. For maximum flavor absorption, brush half the mixture on before baking and reserve the rest for immediately after they come out of the oven.

    Serving Ideas & Creative Variations

    Perfect Pairings

    These garlic butter parmesan knots are the ideal companion to so many dishes. They shine alongside pasta classics like spaghetti or creamy shrimp scampi pasta bake. They’re also magnificent with hearty soups—I still remember how they complemented my butternut squash soup on a chilly autumn evening. For a simple appetizer, serve them with marinara or pesto dipping sauce. They also elevate salads from side dish to complete meal. The slight crunch of the exterior contrasts beautifully with the soft interior, making them perfect for sopping up delicious sauces.

    Flavorful Twists

    While the classic version is divine, these knots welcome creative adaptations. Try adding finely chopped fresh herbs like rosemary or thyme to the dough for an aromatic variation. For a spicier version, increase the red pepper flakes or add a dash of cayenne to the garlic butter. Cheese lovers can experiment beyond parmesan—try pecorino romano, asiago, or even a smoked gouda. For a sweeter take, skip the garlic and parmesan and brush with honey butter and cinnamon sugar instead. My family went wild for a version with caramelized onions and gruyere folded into the dough.

    Storage & Troubleshooting Guide

    Keeping Them Fresh

    These garlic butter parmesan knots stay at their peak freshness for about 2 days at room temperature in an airtight container. For longer storage, refrigerate for up to 5 days, though the texture may change slightly. They freeze beautifully for up to 3 months—just wrap individually in plastic, then store in a freezer bag. To reheat, wrap in foil and warm in a 300°F oven for about 10 minutes (or 15 minutes from frozen). A quick 10-second microwave zap works in a pinch, but the oven method better preserves that wonderful texture contrast.

    Common Issues & Solutions

    If your knots didn’t rise properly, the yeast activation might be the culprit. Always check that your yeast is fresh and that your liquid isn’t too hot (which kills yeast) or too cold (which won’t activate it). The ideal temperature is around 110°F—warm to the touch but not hot. If your knots are browning too quickly in the oven, tent them with foil for the remaining bake time. Tough knots usually mean the dough was overworked or contained too much flour. Remember that a slightly sticky dough yields tender results, and gentle handling prevents developing too much gluten.

    Frequently Asked Questions

    Can I make garlic butter parmesan knots ahead of time?

    Yes! Prepare the dough and shape the knots, then refrigerate overnight. Bring to room temperature for 30 minutes before baking. Alternatively, par-bake for 5 minutes, cool completely, then finish baking when ready to serve.

    How do I know when my dough has risen enough?

    The dough should nearly double in size and feel light and puffy. Press it gently with your finger—if the indentation remains, it’s ready. If it springs back completely, it needs more time.

    Can I use pre-made dough for garlic butter parmesan knots?

    Absolutely! Store-bought pizza dough or even refrigerated biscuit dough works in a pinch. The flavor won’t be identical to homemade, but they’ll still be delicious with the garlic butter parmesan topping.

    What’s the best cheese substitute if I don’t have parmesan?

    Romano, asiago, or pecorino make excellent substitutes with similar texture and flavor profiles. For a milder option, try grated gruyere or even a sharp white cheddar.

    Why did my garlic burn in the oven?

    Fresh garlic can burn easily at high temperatures. Mix it with butter before applying, and if baking above 375°F, consider adding part of the garlic mixture after baking instead of before.

    Final Thoughts

    These garlic butter parmesan knots have become my go-to recipe when I want to make an impression without spending hours in the kitchen. There’s something about homemade bread that speaks directly to the heart, and these knots deliver that emotional punch with minimal effort. The way they fill your home with their intoxicating aroma is worth the price of admission alone. I hope you’ll give these a try and discover why they’ve earned a permanent spot in my recipe collection. Don’t forget to share your creations on Pinterest!

  • Cinnamon Roll Muffins: Irresistibly Soft & Gooey Bites You’ll Crave!

    Cinnamon Roll Muffins: Irresistibly Soft & Gooey Bites You’ll Crave!

    Cinnamon Roll Muffins: Irresistibly Soft & Gooey Bites You’ll Crave!

    Cinnamon Roll Muffins combine the irresistible swirl of cinnamon rolls with the convenience of grab-and-go muffins, creating a breakfast treat that’s perfect for busy mornings. The first time I made these for my family, the kitchen filled with that warm, spicy aroma that instantly makes a house feel like home. There’s something magical about the ribbon of cinnamon sugar dancing through each tender muffin, topped with a drizzle of cream cheese glaze that slowly melts into every crevice. If you love classic cinnamon flavors but need something quicker, these muffins are your new best friend.

    Recipe

    Why You’ll Love These Cinnamon Roll Muffins

    Perfect Balance of Flavors and Textures

    These Cinnamon Roll Muffins deliver everything you crave about traditional cinnamon rolls but in a fraction of the time. The tender muffin base has just the right amount of vanilla flavor, creating the perfect canvas for that bold cinnamon swirl. I love how each bite offers a different experience – sometimes you get more of the soft, cakey exterior, and other times you hit a pocket of melty cinnamon sugar that makes your taste buds dance. The cream cheese glaze adds that final touch of indulgence, transforming these from simple muffins into something truly special.

    Quick and Easy Morning Solution

    Unlike traditional cinnamon rolls that require multiple rises and hours of preparation, these muffins come together in about 30 minutes. I’m definitely not a morning person, but even I can handle mixing a simple batter and creating a quick cinnamon swirl before my first cup of coffee kicks in. The best part? Your kitchen will smell absolutely heavenly, and everyone will think you’ve been slaving away since dawn. These have become my secret weapon for holiday mornings when I want something special but need to conserve my energy for the day ahead.

    Essential Tips & Tricks

    Mastering the Perfect Swirl

    The signature cinnamon swirl is what makes these muffins truly special, and getting it right is easier than you might think. Start by making sure your cinnamon-sugar mixture has enough butter to create that gooey, caramelized texture we all love. When adding the swirl, resist the urge to overmix – you want distinct ribbons, not a uniform batter. My favorite technique is to fill each muffin cup halfway, add a generous spoonful of cinnamon mixture, then top with remaining batter and another sprinkle of cinnamon sugar before using a toothpick to create figure-eight swirls.

    Achieving the Ideal Texture

    For perfectly tender muffins, the mixing method matters tremendously. Combine your dry ingredients thoroughly, then mix your wet ingredients separately before bringing them together. The key is to stir just until combined – overmixing develops gluten and creates tough, dense muffins. I learned this the hard way after serving what felt like cinnamon-flavored hockey pucks to my in-laws! For extra insurance against dryness, add a tablespoon of sour cream or Greek yogurt to your batter – it creates incredible moisture without affecting the flavor.

    Serving Ideas & Creative Variations

    Elevating Your Breakfast Spread

    These Cinnamon Roll Muffins shine as the centerpiece of a thoughtful breakfast or brunch spread. Serve them slightly warm to maximize that fresh-baked experience – about 10 seconds in the microwave works perfectly if they’ve cooled. I love pairing them with fresh fruit for a pop of color and freshness that balances the richness. For special occasions, create a muffin board with various spreads like whipped butter, honey, or additional cream cheese frosting. My family goes crazy when I include these alongside a savory egg casserole for weekend brunches.

    Seasonal Twists and Additions

    The basic Cinnamon Roll Muffin recipe welcomes creative adaptations throughout the year. During apple season, fold in diced apples tossed with extra cinnamon for an autumn-inspired treat. For a holiday version, add orange zest to the batter and a splash of bourbon to the glaze. When I’m feeling indulgent, I’ll add a chocolate drizzle over the cream cheese glaze for an extra layer of decadence. You can even incorporate chopped nuts like pecans or walnuts into the cinnamon swirl mixture for added texture and a nutty flavor dimension.

    Storage & Troubleshooting Guide

    Keeping Muffins Fresh

    To maintain the perfect texture of your Cinnamon Roll Muffins, proper storage is essential. For short-term storage (1-2 days), keep them in an airtight container at room temperature. The cream cheese glaze means they shouldn’t be left out longer than that. For longer storage, refrigerate them for up to 5 days. I’ve found that placing a paper towel beneath and on top of the muffins absorbs excess moisture and prevents sogginess. These muffins also freeze beautifully – wrap each one individually in plastic wrap, then store in a freezer bag for up to 3 months.

    Fixing Common Baking Issues

    Even experienced bakers encounter occasional challenges with muffins. If your muffins don’t rise properly, check if your baking powder is fresh – it loses potency after about 6 months. For muffins that stick to the liners, try spraying the liners lightly with cooking spray before filling. If your cinnamon swirl sinks to the bottom, try tossing the cinnamon-sugar mixture with a teaspoon of flour before adding it to the batter. And if your muffins dome too much or overflow, remember to fill your muffin cups only about 2/3 full to allow room for expansion.

    Frequently Asked Questions

    Can I make Cinnamon Roll Muffins ahead of time?

    Absolutely! Prepare the batter and refrigerate overnight. In the morning, give it a gentle stir, fill your muffin cups, add the cinnamon swirl, and bake. You can also bake them completely and freeze for up to 3 months.

    How do I know when my Cinnamon Roll Muffins are done baking?

    Insert a toothpick into the center – it should come out clean or with a few moist crumbs, but no wet batter. The tops should be golden brown and spring back when lightly touched.

    Can I make these muffins without the cream cheese glaze?

    Yes! They’re delicious even without glaze. Alternatively, try a simple powdered sugar glaze, a drizzle of maple syrup, or just a light dusting of powdered sugar.

    What’s the best way to reheat frozen Cinnamon Roll Muffins?

    Thaw overnight in the refrigerator, then microwave for 10-15 seconds or warm in a 300°F oven for 5-7 minutes. This restores that fresh-baked texture and aroma.

    Can I use alternative flours in my Cinnamon Roll Muffins recipe?

    You can substitute up to half the all-purpose flour with whole wheat flour for a nuttier flavor. For gluten-free versions, use a 1:1 gluten-free baking blend that contains xanthan gum.

    Final Thoughts

    These Cinnamon Roll Muffins have become a staple in my baking repertoire, striking that perfect balance between special treat and everyday feasible. There’s something deeply satisfying about creating something that looks and tastes impressive without requiring professional baking skills. The way they fill your home with that unmistakable cinnamon aroma is worth the minimal effort alone. I hope these muffins bring as much joy to your kitchen as they have to mine! For more delicious breakfast inspiration, visit our Pinterest board where we share new recipes weekly.

  • Slow Cooker Cottage Cheese Breakfast Lasagna Recipe That Wows!

    Slow Cooker Cottage Cheese Breakfast Lasagna Recipe That Wows!

    Slow Cooker Cottage Cheese Breakfast Lasagna Recipe That Wows!

    Slow Cooker Cottage Cheese Breakfast Lasagna transforms your morning routine with layers of creamy protein-packed goodness that practically makes itself while you sleep. I discovered this breakfast game-changer last winter when I needed something warm and satisfying for my early-rising family. The magic happens overnight as the slow cooker gently melds together the rich cottage cheese, tender noodles, and your favorite breakfast ingredients into a morning masterpiece. Unlike traditional breakfast casseroles, this creamy delight offers both comfort and nutrition in each forkful.

    Recipe

    Why You’ll Love This Slow Cooker Cottage Cheese Breakfast Lasagna

    Perfect Make-Ahead Solution

    There’s something deeply satisfying about waking up to breakfast already made—especially one that’s both nutritious and delicious. This overnight wonder requires just 15 minutes of evening prep, then your slow cooker handles the rest while you sleep. I love assembling this on Sunday evenings when I’m already in the kitchen; by Monday morning, we have a protein-rich start to the week. The layers of cottage cheese provide sustained energy without the mid-morning crash that comes from sugary breakfast options. Plus, the hands-off cooking method means you can focus on other morning priorities.

    Customizable for Every Taste

    What makes this Slow Cooker Cottage Cheese Breakfast Lasagna truly special is how easily it adapts to your preferences. The basic framework remains the same—lasagna noodles, cottage cheese mixture, and your protein of choice—but the flavor possibilities are endless. For a Mediterranean twist, add spinach, feta, and sun-dried tomatoes. Craving something sweeter? Layer in cinnamon-spiced apples and a drizzle of maple syrup. My family’s favorite version includes crispy turkey bacon, sautéed mushrooms, and sharp cheddar, but I’ve made at least a dozen variations that all disappear by mid-morning.

    Essential Tips & Tricks

    Perfecting the Cottage Cheese Mixture

    The heart of this breakfast lasagna is the cottage cheese mixture, which needs the right balance of moisture and binding ingredients. I recommend using full-fat cottage cheese for the creamiest texture, whisked together with eggs, a splash of milk, and your seasonings of choice. This creates a custard-like layer that sets beautifully overnight. To prevent graininess, blend half the cottage cheese until smooth, then fold in the remaining portion for texture. For extra protein and fluffiness, I sometimes add a scoop of unflavored protein powder or Greek yogurt to the mixture, similar to my approach with gluten-free high-protein blueberry bagels.

    Slow Cooker Settings Matter

    Not all slow cookers perform identically, making timing crucial for breakfast success. For overnight cooking, the LOW setting is non-negotiable—HIGH will overcook and dry out your lasagna. Line your slow cooker with parchment paper or use a cooking spray to prevent sticking, especially around the edges where burning can occur. If your model runs hot, consider using a timer to switch to the WARM setting for the final hour. I learned this lesson the hard way when I awoke to slightly crispy edges (though my husband claimed those were the best parts). Add a small water bath by placing a heat-safe dish with water beside your lasagna for gentle, steam-assisted cooking.

    Serving Ideas & Creative Variations

    Morning Meal Pairings

    This Slow Cooker Cottage Cheese Breakfast Lasagna shines as a standalone meal, but thoughtful pairings can elevate the experience. Serve with a bright fruit salad dressed with mint and lime to contrast the rich, savory layers. For weekend brunches, I add a simple arugula salad with lemon vinaigrette to cut through the creaminess. Coffee enthusiasts in my household insist that a dark roast brings out the subtle flavors in the herb-infused cottage cheese mixture. For a complete protein-packed breakfast, consider adding a side of quick Mediterranean chicken tenders that can be prepared while the lasagna rests after cooking.

    Sweet vs. Savory Variations

    The versatility of this breakfast lasagna extends to completely transforming its flavor profile. For a dessert-inspired breakfast, replace traditional lasagna noodles with cinnamon-dusted crepes or thinly sliced apple layers. Mix cottage cheese with honey, vanilla, and cinnamon, then layer with berries and chopped nuts for natural sweetness. Savory enthusiasts can create a southwestern version with green chilies, pepper jack cheese, and chorizo between the layers. My personal revelation was a fall-themed variation with pumpkin puree mixed into the cottage cheese, warming spices, and maple-glazed pecans on top—it tastes indulgent while remaining protein-focused.

    Storage & Troubleshooting Guide

    Proper Storage Solutions

    Leftover Slow Cooker Cottage Cheese Breakfast Lasagna maintains its quality remarkably well when stored properly. Allow it to cool completely before refrigerating to prevent condensation that could make the noodles soggy. Individual portions work best for storage—slice the lasagna and place in airtight containers for up to four days in the refrigerator. For longer storage, wrap portions in parchment paper, then aluminum foil before freezing for up to two months. When reheating from frozen, thaw overnight in the refrigerator, then warm in a 325°F oven until heated through. Microwaving works for quick reheating, but cover with a damp paper towel to maintain moisture.

    Common Issues & Solutions

    Even experienced cooks encounter challenges with slow cooker recipes. If your lasagna turns out too watery, the likely culprit is excess moisture from vegetables or watery cottage cheese. Pre-cook vegetables to release their moisture before adding them to your layers, and consider straining cottage cheese through cheesecloth if it seems particularly wet. Conversely, if your lasagna seems dry, your slow cooker may run hot. Next time, reduce the cooking time by 30-60 minutes or add an extra egg to the cottage cheese mixture for moisture retention. For uneven cooking, rotate your slow cooker insert halfway through cooking time if possible, or ensure your cooker is on a level surface.

    Frequently Asked Questions

    Can I make Slow Cooker Cottage Cheese Breakfast Lasagna without eggs?

    Yes! Replace eggs with a mixture of 2 tablespoons cornstarch or arrowroot powder mixed with ¼ cup milk per egg. This creates a similar binding effect without compromising texture.

    How long does this breakfast lasagna take to cook?

    The ideal cooking time is 7-8 hours on LOW. This allows the flavors to meld and the texture to set perfectly without overcooking or drying out.

    Can I use regular lasagna noodles or do they need to be no-boil?

    Either works! Regular noodles need more liquid, so add an extra ½ cup of milk to your cottage cheese mixture. No-boil noodles work perfectly with the standard recipe.

    What’s the best cottage cheese to use for breakfast lasagna?

    Full-fat (4%) cottage cheese provides the creamiest texture and best flavor. Small or medium curd both work well, depending on your texture preference.

    Is this Slow Cooker Cottage Cheese Breakfast Lasagna gluten-free?

    Not with regular lasagna noodles, but you can easily substitute gluten-free lasagna noodles. Just ensure they’re sturdy enough for slow cooking without becoming mushy.

    Final Thoughts

    This Slow Cooker Cottage Cheese Breakfast Lasagna has revolutionized my morning routine, bringing protein-packed comfort to busy weekdays and lazy weekends alike. The overnight cooking process feels like kitchen magic—minimal effort yielding maximum satisfaction. I’ve shared this recipe with countless friends who now swear by it for family breakfasts and brunch gatherings. Whether you lean toward sweet or savory, this adaptable dish welcomes your creativity while delivering consistent results. For more breakfast inspiration, visit our Pinterest board dedicated to protein-rich morning meals.

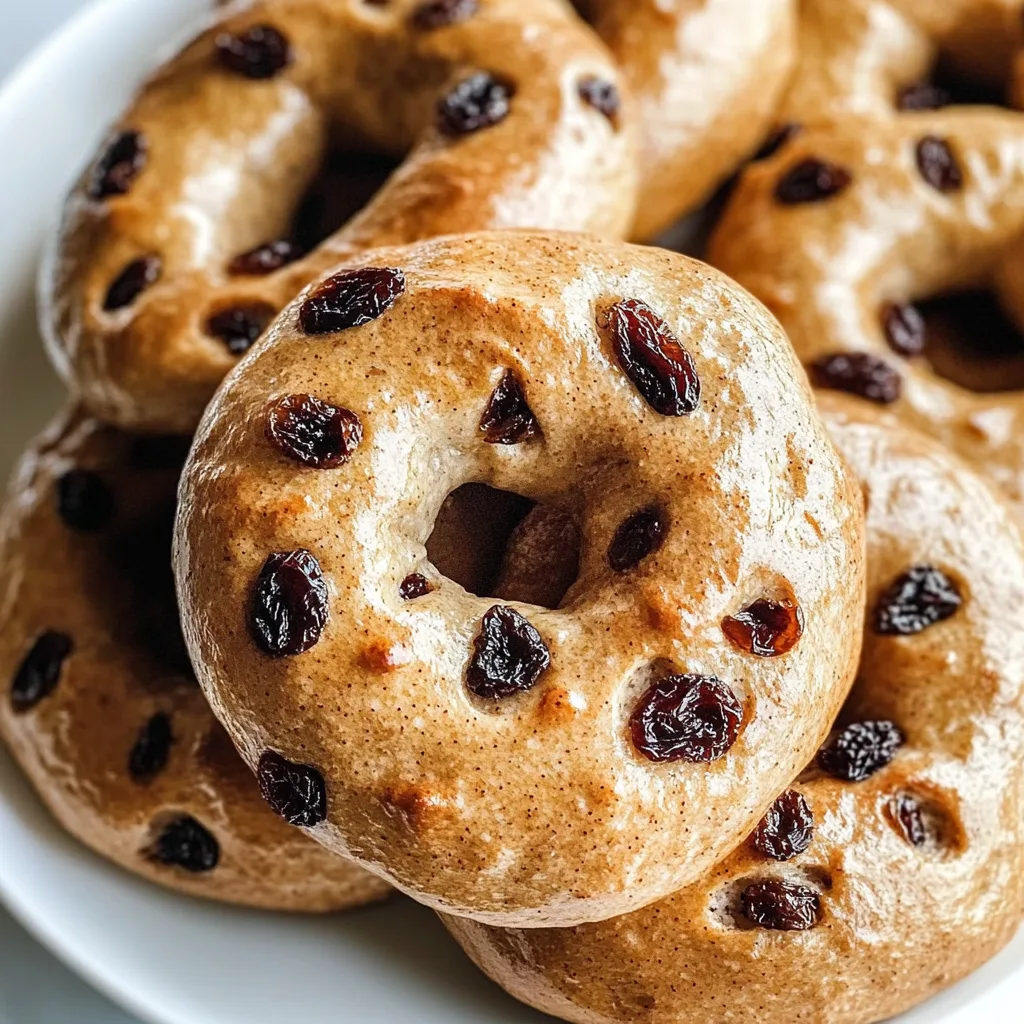
  • Gluten-Free Cinnamon Raisin Greek Yogurt Bagels: Irresistibly Soft & Delicious

    Gluten-Free Cinnamon Raisin Greek Yogurt Bagels: Irresistibly Soft & Delicious

    Gluten-Free Cinnamon Raisin Greek Yogurt Bagels: Irresistibly Soft & Delicious

    Gluten-free Cinnamon Raisin Greek Yogurt Bagels have completely transformed my weekend breakfast routine! There’s something magical about the aroma of cinnamon and plump raisins wafting through the kitchen as these beauties bake. Made with protein-packed Greek yogurt and without a speck of gluten, these bagels give you that perfect chewy texture you crave without the digestive discomfort. I discovered this recipe during a rainy Sunday morning when I was craving something special but didn’t want to leave the house. Now they’ve become my go-to weekend treat that feels indulgent while still being nourishing.

    Recipe

    Why You’ll Love These Gluten-free Cinnamon Raisin Greek Yogurt Bagels

    Perfect Texture Without the Gluten

    The biggest challenge with gluten-free baking is achieving that authentic bagel chew, but these cinnamon raisin bagels nail it perfectly! The Greek yogurt creates a tender interior while the outside develops that characteristic golden crust. I was genuinely shocked the first time I made these—they have that satisfying resistance when you bite in, just like traditional bagels. The plump raisins add bursts of natural sweetness while the warm cinnamon weaves throughout each bite. For anyone missing “real” bagels since going gluten-free, this recipe will bring that simple joy back into your breakfast routine.

    Quick and Easy Preparation

    Unlike traditional bagels that require proofing, boiling, and extensive kneading, these Gluten-free Cinnamon Raisin Greek Yogurt Bagels come together in a fraction of the time! You’ll have fresh-baked bagels in under an hour from start to finish. The dough is surprisingly forgiving—I’ve made these while still half-asleep on Saturday mornings and they’ve turned out beautifully every time. There’s no complicated shaping technique either; just roll the dough into ropes and connect the ends. Perfect for busy mornings or when you want homemade bagels without dedicating your entire day to the kitchen.

    Essential Tips & Tricks

    Getting the Perfect Dough Consistency

    The secret to perfect Gluten-free Cinnamon Raisin Greek Yogurt Bagels lies in the dough consistency. You want it slightly tacky but not sticky enough to cling to your fingers. If your dough seems too wet, add gluten-free flour one tablespoon at a time until it reaches that perfect balance. The brand of Greek yogurt matters too—I’ve found that thicker, strained varieties like Fage or Chobani work best. Make sure your raisins are plump and moist; if they’re a bit dried out, soak them in warm water for 10 minutes before adding them to the dough. This prevents them from pulling moisture from your bagels during baking.

    Baking for the Perfect Chew

    To achieve that authentic bagel chew, temperature and timing are everything. Preheat your oven thoroughly to 425°F and don’t be tempted to open the door during the first 15 minutes of baking. The high heat creates that beautiful crust while keeping the inside tender. Brush the tops with an egg wash for that characteristic glossy finish that makes them look like they came from a fancy bakery. For extra flavor, sprinkle a cinnamon-sugar mixture on top before baking. These bagels pair beautifully with a thick and creamy tomato soup for a cozy lunch combo.

    Serving Ideas & Creative Variations

    Beyond Cream Cheese

    While cream cheese is the classic bagel companion, these Gluten-free Cinnamon Raisin Greek Yogurt Bagels deserve creative toppings that highlight their flavor! Try apple butter spread generously over a warm toasted bagel—the combination of cinnamon and apple is absolutely heavenly. For a protein boost, almond butter with a drizzle of honey creates a satisfying breakfast that keeps you full for hours. My personal favorite is whipped mascarpone with a touch of vanilla and orange zest—it transforms these bagels into a sophisticated brunch offering. For something unexpected, try them with deviled egg dip for a sweet-savory combination.

    Seasonal Adaptations

    One of the joys of these bagels is how easily they adapt to seasonal flavors! In fall, add pumpkin puree and pumpkin spice to the dough for a festive twist. During summer, fold in dried blueberries instead of raisins and add lemon zest for brightness. Winter holidays call for cranberries and orange zest with a hint of nutmeg. You can even make a chocolate version by adding cocoa powder and chocolate chips instead of cinnamon and raisins. The base recipe is so versatile that once you master it, you’ll find yourself creating new variations for every season and occasion.

    Storage & Troubleshooting Guide

    Keeping Bagels Fresh

    These Gluten-free Cinnamon Raisin Greek Yogurt Bagels maintain their quality remarkably well if stored properly. For maximum freshness, allow them to cool completely before storing in an airtight container at room temperature for up to 2 days. For longer storage, slice the bagels before freezing them in a single layer on a baking sheet, then transfer to a freezer bag once frozen solid. This method prevents them from sticking together and allows you to toast them directly from frozen. I’ve found that a light spritz of water before reheating in a toaster oven helps restore that fresh-baked texture and brings back the aromatic cinnamon scent.

    Fixing Common Problems

    Even experienced bakers encounter issues sometimes, but most problems with these bagels have simple solutions. If your bagels are spreading too much during baking, your dough might be too wet—add a bit more flour next time. If they’re cracking on top, the dough was likely too dry or the oven too hot. For bagels that don’t brown properly, brush with egg wash before baking and consider placing them on a higher oven rack. If your raisins are burning on the outside, try kneading them deeper into the dough rather than having them at the surface. Remember that gluten-free flour blends vary, so adjustments may be needed.

    Frequently Asked Questions

    Can I make these bagels dairy-free?

    Yes! Substitute the Greek yogurt with a thick coconut yogurt or a dairy-free Greek-style yogurt alternative. You may need to adjust the flour slightly as plant-based yogurts can be wetter than traditional Greek yogurt.

    Why did my Gluten-free Cinnamon Raisin Greek Yogurt Bagels turn out dense?

    Overmixing the dough can develop too much structure, resulting in density. Mix just until ingredients are combined, and make sure your baking powder is fresh for proper rise.

    Can I make these without a stand mixer?

    Absolutely! While a stand mixer makes the process easier, you can mix the dough by hand with a wooden spoon and then knead gently on a floured surface until smooth.

    How do I know when the bagels are fully baked?

    The bagels should be golden brown on top and sound hollow when tapped on the bottom. An internal temperature of 190°F indicates they’re perfectly baked.

    Can I add different mix-ins besides raisins?

    Definitely! Dried cranberries, chopped dried apples, or chocolate chips work beautifully. Just keep the total amount of mix-ins around ½ cup to maintain the proper dough structure.

    Final Thoughts

    These Gluten-free Cinnamon Raisin Greek Yogurt Bagels have become my weekend ritual—one that fills my kitchen with warmth and my breakfast plate with joy. There’s something deeply satisfying about creating something so delicious that most people wouldn’t even guess is gluten-free. The protein from the Greek yogurt makes these more nutritious than store-bought versions, while the cinnamon and raisins bring comfort to each bite. Whether you’re gluten-intolerant or simply looking for a healthier bagel option, this recipe deserves a permanent spot in your breakfast rotation. Find more inspiring recipes on Pinterest.

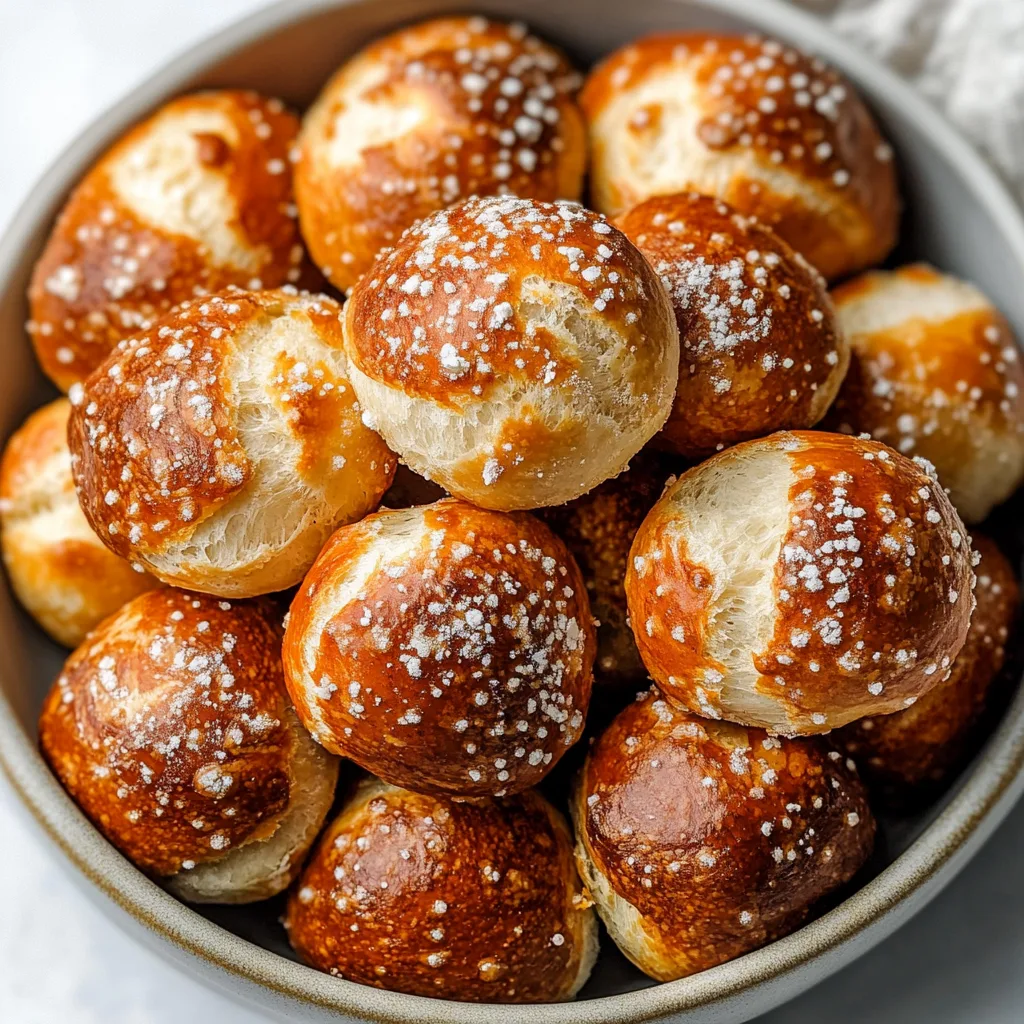
  • Gluten-Free Sourdough Discard Pretzel Bites: Irresistibly Soft & Crispy!

    Gluten-Free Sourdough Discard Pretzel Bites: Irresistibly Soft & Crispy!

    Gluten-Free Sourdough Discard Pretzel Bites: Irresistibly Soft & Crispy!

    Gluten-free sourdough discard pretzel bites bring the perfect combination of chewy texture and tangy flavor to your snack game without the gluten. As someone who hates wasting my precious sourdough starter, these little bites of heaven have become my go-to recipe when that discard jar starts filling up. The first time I pulled these golden nuggets from the oven, their irresistible aroma filling my kitchen, I knew I’d found something special. They’re surprisingly simple to make and deliver that authentic pretzel taste that’s so hard to find in gluten-free options. Trust me, these will disappear faster than you can say “pass the mustard!”

    Recipe

    Why You’ll Love These Gluten-free Sourdough Discard Pretzel Bites

    Perfect Texture & Flavor Balance

    The tangy sourdough flavor pairs beautifully with that classic pretzel taste we all crave. What makes these truly special is how the discard adds complexity without overwhelming. The outside develops that characteristic pretzel chew while staying tender inside – something that’s notoriously difficult to achieve with gluten-free baking. I’ve found the baking soda bath is absolutely essential for developing that authentic pretzel flavor and gorgeous amber color. When I serve these at gatherings, even my gluten-eating friends can’t tell the difference and always ask for my secret!

    Quick & Economical Solution

    Using sourdough discard transforms what would be kitchen waste into something magnificent. I love that satisfying feeling of being resourceful while creating something delicious! These bites come together in under an hour, making them perfect for last-minute snack cravings or unexpected guests. The ingredients are pantry staples for most gluten-free bakers, so no special shopping trip required. I keep a jar of discard in my fridge specifically for these pretzel bites – they’ve become such a regular treat in my home that I plan my sourdough feeding schedule around them!

    Essential Tips & Tricks

    Mastering the Dough Consistency

    Finding the perfect dough texture is crucial for successful gluten-free pretzel bites. It should be pliable but not sticky – think play-dough consistency. If your dough feels too wet, add a tablespoon of gluten-free flour at a time until it reaches that sweet spot. Too dry? A splash of warm water works wonders. I learned this the hard way after my first batch spread into sad puddles during baking! Temperature matters too – I’ve found that letting the dough rest at room temperature for 15 minutes makes it much easier to handle and shape into those perfect little nuggets that we’re aiming for.

    The Perfect Baking Soda Bath

    Don’t skip the alkaline bath – it’s what gives these bites their authentic pretzel flavor and beautiful brown exterior! I like to keep the water at a gentle simmer rather than a rolling boil, which can make delicate gluten-free dough fall apart. Aim for 20-30 seconds in the bath – any longer and they might become too soggy. After the bath, be sure to let them drain well on a wire rack before baking. For extra flavor, check out my Kickin’ Collard Greens recipe that uses a similar technique of balancing flavors through careful preparation.

    Serving Ideas & Creative Variations

    Dips & Pairings

    These pretzel bites shine brightest when paired with the right complementary flavors. My personal favorite is a honey-mustard blend with a touch of heat, but they’re equally delicious with cheese sauce, ranch, or even a sweet cream cheese dip. For game day, I arrange them in a basket lined with parchment paper alongside a variety of dips in small bowls – the presentation always impresses! The slight tanginess from the sourdough discard makes these pretzel bites particularly good with creamy dips, creating a perfect balance of flavors that will keep everyone reaching for more.

    Flavor Customizations

    The beauty of these pretzel bites is their versatility as a base for different flavor profiles. Before baking, try sprinkling them with everything bagel seasoning, cinnamon sugar, or rosemary and sea salt. For a cheesy version, mix shredded cheddar right into the dough. My family goes crazy for the garlic parmesan variation – just brush with garlic butter after baking and sprinkle with fresh parmesan. For a sweet treat similar to my popular Lemon Crinkle Cookies, try a lemon-sugar coating that adds bright flavor to the tangy base.

    Storage & Troubleshooting Guide

    Keeping Them Fresh

    These pretzel bites are best enjoyed fresh from the oven, but they can be stored for 2-3 days in an airtight container at room temperature. To refresh them, spritz lightly with water and warm in a 350°F oven for 3-5 minutes – they’ll taste almost like new! For longer storage, freeze the completely cooled bites in a single layer, then transfer to a freezer bag. They’ll keep for up to a month. I often make a double batch specifically for freezing, which gives me a quick snack option when unexpected cravings strike or when I need something impressive for last-minute guests.

    Common Issues & Solutions

    The most common problem is dough consistency. If your pretzel bites flatten during baking, your dough was likely too wet. Next time, add more flour or reduce the liquid. Are they too dense? You might have added too much flour – try using a kitchen scale for precise measurements. If they’re not browning properly, check that your baking soda bath is concentrated enough (¼ cup to 4 cups water is my sweet spot). For pale pretzels despite the bath, brush with egg wash before baking. Remember that different gluten-free flour blends behave differently, so you might need to adjust ratios slightly.

    Frequently Asked Questions

    Can I use fresh sourdough starter instead of discard?

    Yes, but fresh starter is more active and has higher water content. Reduce the liquid in your recipe by about 2 tablespoons and expect a slightly different flavor profile.

    What’s the best gluten-free flour blend for these pretzel bites?

    I recommend a blend with rice flour, tapioca starch, and potato starch. Commercial blends like Bob’s Red Mill 1-to-1 or Cup4Cup work beautifully for gluten-free sourdough discard pretzel bites.

    Can I make these dairy-free as well?

    Absolutely! Replace butter with olive oil or vegan butter. The texture might be slightly different, but they’ll still have that wonderful pretzel flavor.

    How long should I let the dough rest?

    Let it rest for at least 30 minutes. This allows the flours to hydrate properly and makes the dough easier to handle and shape.

    Can I make these without sourdough discard?

    While possible, you’d miss the distinctive tangy flavor. If needed, substitute with ¾ cup gluten-free flour mixed with 2 tablespoons of apple cider vinegar for tanginess.

    Final Thoughts

    These gluten-free sourdough discard pretzel bites have become a staple in my kitchen – the perfect way to transform discard into something truly special. They strike that rare balance of being both simple to make and impressive to serve. The tanginess from the sourdough paired with that classic pretzel flavor creates something uniquely satisfying that both gluten-free and conventional eaters will love. I hope these little bites bring as much joy to your kitchen as they have to mine! For more gluten-free inspiration, check out my creations at Pinterest.

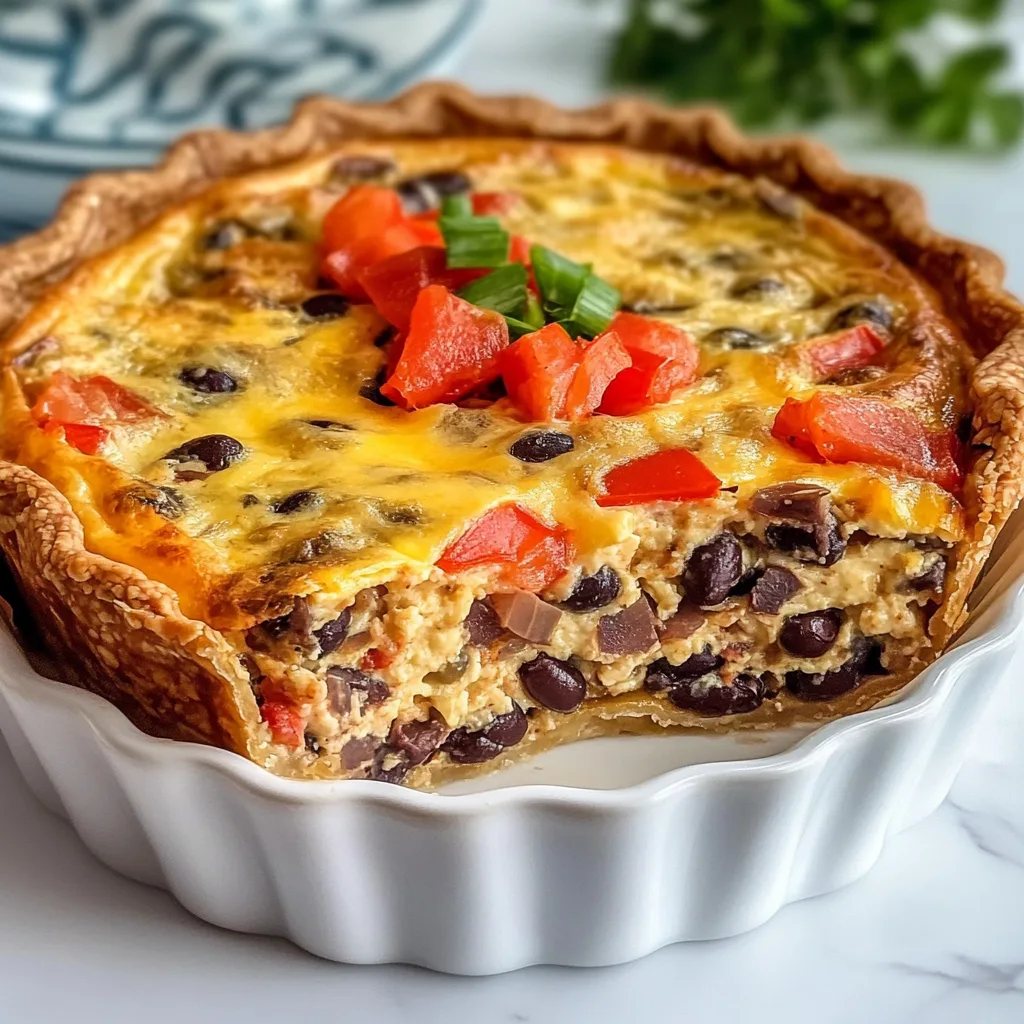
  • Black Bean & Pepper Jack Quiche: Irresistibly Bold & Flavor-Packed!

    Black Bean & Pepper Jack Quiche: Irresistibly Bold & Flavor-Packed!

    Black Bean & Pepper Jack Quiche: Irresistibly Bold & Flavor-Packed!

    Black Bean & Pepper Jack Quiche has become my weekend salvation—that perfect blend of creamy eggs, spicy pepper jack cheese, and hearty black beans that somehow makes my kitchen feel like the coziest spot in the universe. I first created this recipe during a rainy Sunday when I was craving something that would fill my home with warmth and incredible aromas. The combination of southwestern flavors with classic quiche technique creates a dish that’s both familiar and exciting. Whether you’re hosting brunch or planning a simple family meal, this quiche recipe delivers comfort in every single bite.

    Recipe

    Why You’ll Love This Black Bean & Pepper Jack Quiche

    Perfect Balance of Flavors and Textures

    The magic of this Black Bean & Pepper Jack Quiche lies in its perfect harmony of textures and flavors. The creamy egg custard creates a silky backdrop for the slight pop of black beans and the gentle heat from the pepper jack cheese. I love how the beans add substance without heaviness, making each bite satisfying but not overwhelming. The cheese melts into little pockets of spicy goodness throughout, while a touch of cumin and cilantro brings everything together with southwestern warmth. It’s that rare dish where every ingredient plays its part perfectly.

    Versatile for Any Mealtime

    I’ve served this Black Bean & Pepper Jack Quiche for practically every occasion imaginable. It shines as a show-stopping brunch centerpiece but works equally well for dinner paired with a simple salad. One Tuesday night when I was too exhausted to cook anything complex, I pulled a leftover slice from the fridge and was reminded how satisfying it is even cold. The protein from the beans and eggs makes it substantial enough for a main dish, while its elegant presentation means it never feels like a compromise. It’s the definition of practical luxury.

    Essential Tips & Tricks

    Perfecting Your Crust

    The foundation of an exceptional Black Bean & Pepper Jack Quiche starts with the crust. I recommend blind baking your crust for 10-12 minutes before adding the filling—this prevents the dreaded soggy bottom that can ruin even the most flavorful quiche. Line your chilled crust with parchment paper, fill with pie weights or dried beans, and bake until just beginning to color. For a time-saving alternative that doesn’t sacrifice quality, try a high-quality store-bought crust. Just like my Easy Ground Beef Enchiladas, sometimes smart shortcuts make all the difference.

    Getting the Perfect Custard

    The heart of any Black Bean & Pepper Jack Quiche is its custard, and achieving that perfect silky texture requires attention to detail. I always use a 4:1 ratio of eggs to liquid (typically half-and-half or whole milk) for the ideal consistency. Whisk thoroughly but gently—you want to incorporate air without creating foam. Room temperature ingredients blend more smoothly, so set your eggs and dairy out about 30 minutes before mixing. The custard should coat the back of a spoon but still flow easily when poured. This ensures your quiche will set properly while maintaining that luxurious mouthfeel.

    Serving Ideas & Creative Variations

    Complementary Side Dishes

    My Black Bean & Pepper Jack Quiche pairs beautifully with sides that enhance its southwestern flair. A simple arugula salad dressed with lime vinaigrette provides a peppery, acidic counterpoint that cuts through the richness perfectly. For brunch, I love serving it alongside fresh fruit with a drizzle of honey and a sprinkle of tajin for a sweet-spicy contrast. When serving for dinner, roasted sweet potatoes with a touch of cinnamon complement the savory notes in the quiche. These combinations create a balanced meal that feels thoughtfully curated without requiring hours in the kitchen, similar to my approach with Creamy Tomato Garlic Pasta.

    Exciting Flavor Twists

    While the classic Black Bean & Pepper Jack Quiche is divine, I love experimenting with variations that keep it fresh and exciting. Try adding roasted poblano peppers for smoky depth or swap the pepper jack for smoked gouda to create an entirely new flavor profile. For a breakfast-forward version, add crumbled chorizo and a sprinkle of cotija cheese on top. Vegetable lovers can fold in sautéed zucchini and corn kernels during summer months. My personal favorite twist involves adding a layer of green chile salsa at the bottom of the crust before pouring in the custard—it creates an unexpected burst of flavor with each bite.

    Storage & Troubleshooting Guide

    Proper Storage Methods

    Your Black Bean & Pepper Jack Quiche will maintain its delicious quality when stored properly. For short-term storage, cool the quiche completely before covering with plastic wrap and refrigerating for up to 4 days. Individual slices can be wrapped separately for grab-and-go convenience. For longer storage, freeze the entire quiche or individual portions by wrapping in plastic followed by foil to prevent freezer burn. Frozen quiche keeps well for up to 2 months. When reheating, thaw overnight in the refrigerator, then warm in a 325°F oven until heated through—this preserves the texture better than microwave reheating.

    Common Issues and Solutions

    Even experienced bakers encounter challenges with quiche. If your Black Bean & Pepper Jack Quiche develops a cracked surface, you likely baked it at too high a temperature—next time, try 325°F for a gentler bake. Soggy bottom crust usually indicates the filling was too wet or the crust wasn’t properly blind baked. If your quiche seems watery after cutting, it may have been underbaked; the center should be just set with a slight jiggle when done. For crust that shrinks during blind baking, make sure to thoroughly chill it first and use proper weights. Remember that quiche continues cooking slightly after removal from the oven.

    Frequently Asked Questions

    Can I make Black Bean & Pepper Jack Quiche ahead of time?

    Absolutely! Prepare it up to 2 days ahead and refrigerate. Reheat covered with foil at 325°F for 15-20 minutes before serving, or enjoy cold for a different but equally delicious experience.

    Is there a crustless option for this recipe?

    Yes! Simply grease your pie dish well and pour the filling directly in. The eggs will set beautifully, creating a naturally gluten-free version with all the same wonderful flavors.

    How do I prevent my black beans from sinking to the bottom?

    Rinse and thoroughly dry your beans before adding them to the egg mixture. Folding them in just before pouring into the crust helps them distribute more evenly throughout the quiche.

    Can I substitute the pepper jack cheese?

    Certainly! Monterey Jack provides milder flavor, while cheddar offers sharpness. For adventurous palates, try smoked gouda or even blue cheese for distinctive character.

    How do I know when my quiche is perfectly done?

    The quiche is ready when the edges are set but the center still has a slight wobble—like gelatin. A knife inserted 1 inch from the edge should come out clean, while the center remains slightly moist.

    Final Thoughts

    This Black Bean & Pepper Jack Quiche has become more than just a recipe in my kitchen—it’s a reliable friend that never disappoints. The way the spicy cheese melts into the creamy custard, punctuated by those perfect little beans, creates something truly special. I find myself returning to it whenever I need a dish that feels both nurturing and exciting. Whether you’re making it for a quiet breakfast at home or sharing it with friends at your next gathering, I hope it brings the same comfort and joy to your table that it has to mine. Find more inspiration for your next cooking adventure on Pinterest.

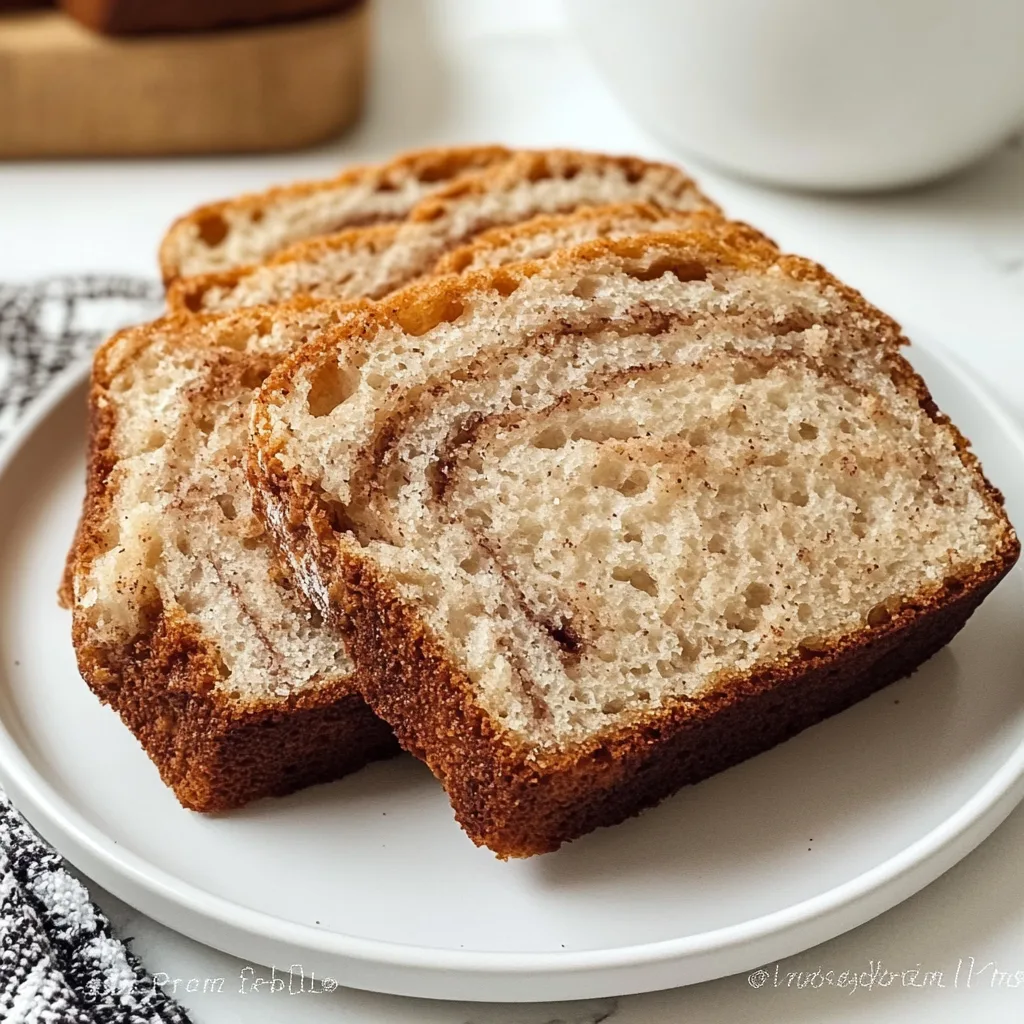
  • Sourdough Discard Cinnamon Quick Bread: Irresistibly Soft & Cozy!

    Sourdough Discard Cinnamon Quick Bread: Irresistibly Soft & Cozy!

    Sourdough Discard Cinnamon Quick Bread: Irresistibly Soft & Cozy!

    Sourdough discard cinnamon quick bread has become my absolute salvation on those chilly mornings when I’m craving something warm and spiced but don’t have the patience for a full-on yeast bread. There’s something magical about the tangy depth that sourdough discard brings to this tender loaf, creating layers of flavor you simply can’t achieve with regular quick bread recipes. I discovered this recipe during my pandemic baking adventures when my counter was perpetually cluttered with a bubbling starter and I couldn’t bear to waste another gram of discard. The aroma that fills your kitchen as this bread bakes is nothing short of heavenly – cinnamon, vanilla, and that distinctive sourdough tang creating a symphony of cozy scents.

    Recipe

    Why You’ll Love This Sourdough Discard Cinnamon Quick Bread

    Perfect Balance of Flavors

    The beauty of this sourdough discard cinnamon quick bread lies in its perfect balance of sweet and tangy notes. The discard adds a subtle complexity that elevates this beyond your standard cinnamon bread. I love how the fermented notes play with the warm cinnamon and brown sugar, creating something that feels both familiar and excitingly different. My neighbor actually knocked on my door the first time I made this, drawn by the irresistible aroma wafting through our shared hallway! The texture strikes that ideal balance too – tender and moist with a slightly tight crumb that makes each slice perfect for toasting.

    No-Waste Baking Solution

    If you maintain a sourdough starter, you know the guilt of tossing discard. This sourdough discard cinnamon quick bread transforms that potential waste into something spectacular! I used to feel a pang of regret each time I discarded excess starter, but now I actively look forward to it. Each cup of discard becomes an opportunity rather than a burden. The acidity in the discard also helps activate the baking soda, contributing to a beautiful rise without needing buttermilk or yogurt. Plus, there’s something deeply satisfying about creating a delicious treat from something that would otherwise go straight to the compost.

    Essential Tips & Tricks

    Getting the Perfect Texture

    The key to achieving that ideal texture in your sourdough discard cinnamon quick bread is not overmixing the batter. I learned this the hard way after creating a few dense, tunnel-filled loaves! Mix just until the ingredients are combined – those few streaks of flour you see? They’ll disappear during baking. Another game-changer is using room temperature ingredients. Cold discard straight from the fridge can cause the melted butter to solidify, creating an uneven texture. I like to pull my discard out about 30 minutes before baking, similar to how I prepare for making those delicious snickerdoodle cobbler treats everyone loves.

    Enhancing the Cinnamon Flavor

    To create a truly memorable sourdough discard cinnamon quick bread, don’t skimp on quality cinnamon. I recommend using Ceylon cinnamon for its complex, warm flavor rather than the sharper cassia variety commonly found in supermarkets. For an even more pronounced cinnamon presence, try creating a swirl: mix 2 tablespoons of cinnamon with 1/4 cup of sugar, then layer it between portions of batter in your loaf pan. This creates beautiful ribbons of intense cinnamon flavor throughout the bread. For extra decadence, sprinkle turbinado sugar on top before baking for a sweet, crunchy crust that contrasts beautifully with the tender interior.

    Serving Ideas & Creative Variations

    Perfect Pairings

    Sourdough discard cinnamon quick bread shines as both a breakfast treat and afternoon snack. My favorite way to serve it is lightly toasted with a generous smear of salted butter that melts into all the nooks and crannies. For a more decadent option, try it with cream cheese or a drizzle of local honey. It pairs beautifully with coffee or tea, making it perfect for slow weekend mornings. For a special brunch, serve alongside fresh fruit and yogurt, similar to how I present my creme brulee French toast for guests – it’s always a hit and disappears quickly!

    Seasonal Adaptations

    One thing I love about this sourdough discard cinnamon quick bread is how easily it adapts to seasonal flavors. In fall, add 1/2 cup of diced apples and a handful of chopped walnuts for a harvest-inspired variation. Winter calls for orange zest and cranberries, while spring feels right with lemon zest and blueberries folded into the batter. Summer? Try adding fresh peaches and a touch of ginger. The tangy sourdough base complements all these fruits beautifully, and the cinnamon provides a warm backbone regardless of the season. Each variation feels like a completely new recipe while using the same trusted base.

    Storage & Troubleshooting Guide

    Keeping Your Bread Fresh

    To maintain that just-baked quality, store your sourdough discard cinnamon quick bread properly. Once completely cooled, wrap it tightly in plastic wrap or place in an airtight container. At room temperature, it stays fresh for 2-3 days. For longer storage, refrigeration extends freshness to about a week. The bread also freezes beautifully – I slice the entire loaf before freezing, allowing me to thaw individual portions as needed. Just wrap slices in plastic wrap, then aluminum foil, and freeze for up to 3 months. When ready to enjoy, thaw at room temperature or pop frozen slices directly in the toaster.

    Fixing Common Issues

    If your sourdough discard cinnamon quick bread isn’t turning out perfectly, a few simple adjustments can help. For a loaf that’s too dense, check your leavening agents – baking powder loses potency over time, so replace it every six months. If your bread is sinking in the middle, your oven temperature might be off (consider an oven thermometer), or you might be opening the oven door too early in the baking process. For bread that’s too dry, try reducing the baking time by 5 minutes or adding an extra tablespoon of oil to your next batch.

    Frequently Asked Questions

    Can I use fresh sourdough starter instead of discard?

    Yes, but fresh starter is more active and less acidic. Reduce the baking soda slightly (by about 1/4 teaspoon) and expect a slightly different flavor profile with less tang.

    How long will my sourdough discard cinnamon quick bread stay fresh?

    When properly stored in an airtight container, it remains fresh for 2-3 days at room temperature, up to a week refrigerated, and up to 3 months frozen.

    Can I make this recipe gluten-free?

    Absolutely! Use gluten-free sourdough discard and replace the all-purpose flour with a 1:1 gluten-free baking blend that contains xanthan gum for structure.

    What if my sourdough discard is very liquid?

    If your discard has high hydration (very runny), reduce other liquid ingredients in the recipe by 2-3 tablespoons to maintain the proper batter consistency.

    Is sourdough discard cinnamon quick bread healthier than regular quick bread?

    The fermentation process in sourdough can make nutrients more bioavailable and easier to digest, potentially making this bread somewhat easier on your digestive system than traditional quick breads.

    Final Thoughts

    This sourdough discard cinnamon quick bread has become a staple in my baking rotation, transforming what was once waste into something truly spectacular. There’s something deeply satisfying about the process – watching humble ingredients and discard combine to create something so aromatic and delicious. I hope you’ll experience the same joy as the sweet-spicy scent of cinnamon fills your kitchen and that first warm slice melts in your mouth. Be sure to share your creations on Pinterest to inspire other bakers to give their discard new life!

  • Vanilla French Beignets: Irresistible, Fluffy Delight You’ll Crave!

    Vanilla French Beignets: Irresistible, Fluffy Delight You’ll Crave!

    Vanilla French Beignets: Irresistible, Fluffy Delight You’ll Crave!

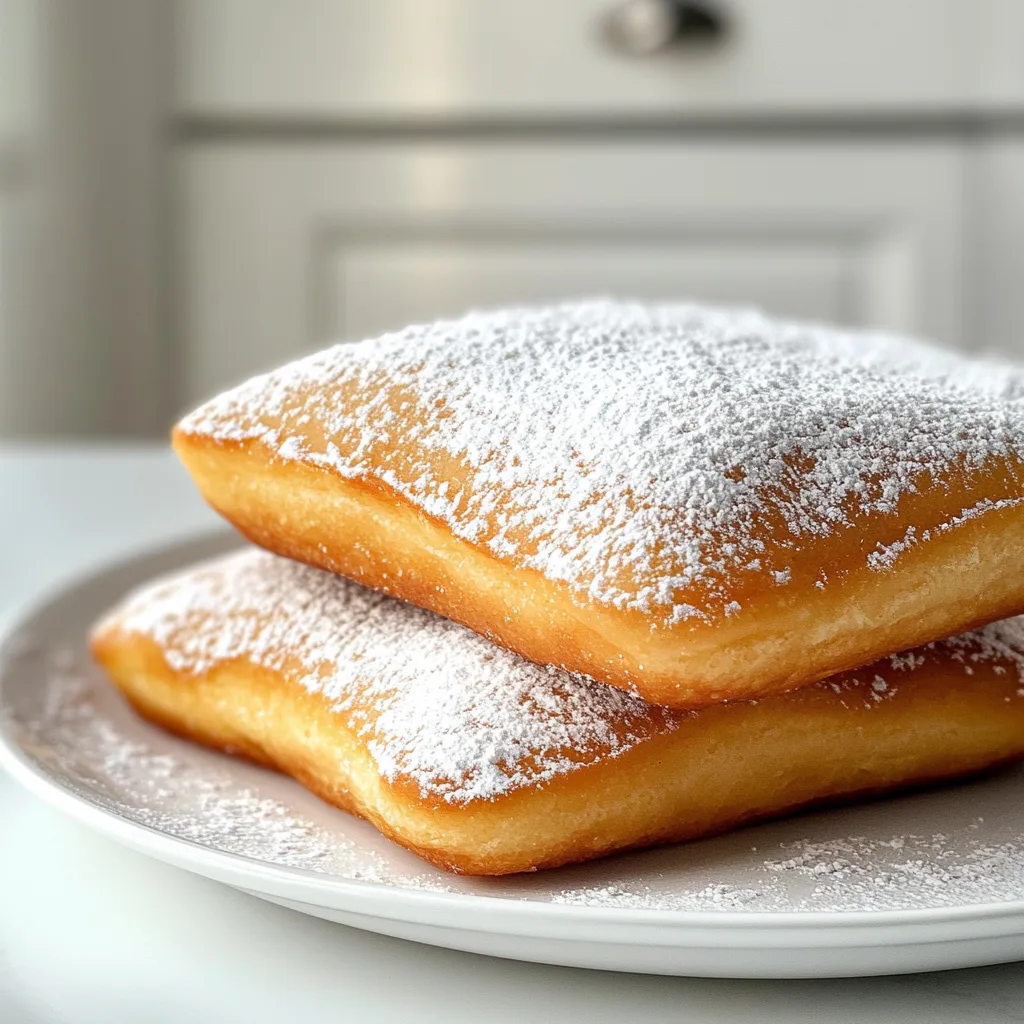
    Vanilla French Beignets have become my kitchen obsession lately, bringing a touch of New Orleans magic into my home with every batch. These pillowy, powdered sugar-dusted treats strike the perfect balance between a donut and a cloud, with that unmistakable hint of vanilla dancing through each bite. The first time I made these, my kitchen filled with the intoxicating aroma of sweet dough and warm vanilla that had everyone wandering in, wondering what heavenly creation was in progress. If you’re looking for a weekend baking project that feels special without being overly complicated, these beignets are exactly what you need.

    Recipe

    Why You’ll Love These Vanilla French Beignets

    A Taste of New Orleans at Home

    There’s something magical about biting into a fresh, warm beignet that transports you straight to Café du Monde without the plane ticket. The vanilla-infused dough creates a depth of flavor that elevates these beyond ordinary fried dough. I still remember making these on a rainy Sunday morning, the windows fogging up as the dough fried to golden perfection. The contrast between the crisp exterior and pillowy interior creates that authentic texture you’re looking for, while the vanilla adds a warmth that makes these beignets distinctively yours.

    Surprisingly Simple to Master

    Don’t let their fancy French name intimidate you—beignets are surprisingly forgiving for home bakers. The dough comes together with basic pantry ingredients, and unlike many yeasted recipes, it’s quite resilient to slight variations in timing. What I love most is that you don’t need special equipment—just a pot, thermometer, and your hands. The most challenging part might be waiting for the dough to rise, but trust me, that patience pays off in the most delicious way when you bite into that first warm, sugar-dusted square of heaven.

    Essential Tips & Tricks

    Perfecting Your Dough

    The foundation of exceptional Vanilla French Beignets starts with properly handled dough. Temperature matters enormously here—lukewarm milk (around 110°F) activates the yeast without killing it, while room temperature eggs help everything incorporate smoothly. I’ve found that adding the vanilla directly to the wet ingredients ensures it distributes evenly throughout. Don’t rush the kneading process; those 5-7 minutes of work develop the gluten structure that gives beignets their signature chew. And remember: a slightly sticky dough is actually what you want—resist the urge to add too much flour!

    Mastering the Fry

    The difference between good and great beignets often comes down to the frying technique. Maintain your oil between 350-360°F consistently—I check with a thermometer between batches because temperature drops can lead to greasy results. Work in small batches (3-4 beignets at a time) to prevent overcrowding, which causes temperature drops and uneven cooking. My secret trick? After frying, let them drain on paper towels for just 15 seconds before immediately tossing in powdered sugar while they’re still hot. The residual heat creates a light caramelization effect with the sugar that’s absolutely divine.

    Serving Ideas & Creative Variations

    Beyond Basic Powdered Sugar

    While traditional powdered sugar is a classic finish for Vanilla French Beignets, there’s a world of possibilities to explore. Try creating a lavender-infused sugar by blending dried culinary lavender with powdered sugar for a sophisticated twist. Or serve them alongside a rich chocolate ganache dipping sauce that transforms them into an elegant dessert. My personal favorite weekend indulgence? Drizzling warm beignets with local honey and a sprinkle of flaky sea salt for that irresistible sweet-salty combination that elevates the vanilla notes and makes these truly unforgettable.

    Seasonal Inspirations

    Adapt your beignets to celebrate the changing seasons with thoughtful variations. In fall, add a teaspoon of pumpkin spice to the dough and serve with maple butter for a cozy autumn treat. For summer gatherings, fold lemon or orange zest into the dough and serve with fresh berries and whipped cream. During the holidays, a hint of nutmeg in the dough and a side of eggnog crème anglaise creates a festive moment. These seasonal adaptations maintain the essence of vanilla French beignets while creating memorable experiences that reflect the time of year.

    Storage & Troubleshooting Guide

    Keeping Beignets Fresh

    Let’s be honest—Vanilla French Beignets are at their absolute peak when eaten fresh, still warm from the fryer. However, if you find yourself with leftovers, store them in an airtight container at room temperature for up to 24 hours. To revive day-old beignets, pop them in a 300°F oven for 5 minutes to restore some of that fresh-made magic. For longer storage, freeze the plain fried beignets (before adding sugar) in a single layer, then transfer to a freezer bag for up to 1 month. Reheat from frozen in a 350°F oven and dust with fresh powdered sugar.

    Solving Common Problems

    If your beignets aren’t puffing properly, your oil temperature is likely the culprit—too hot and they brown before puffing, too cool and they absorb oil and become heavy. If your dough isn’t rising, check that your yeast is fresh and that your liquid wasn’t too hot. Dense beignets usually indicate underkneading or insufficient rising time. For beignets that deflate quickly after frying, you may have overproofed the dough. Remember that humidity affects flour absorption, so you might need slightly more or less flour depending on your kitchen environment that day.

    Frequently Asked Questions

    Can I make Vanilla French Beignets ahead of time?

    Yes! Prepare the dough the night before and let it rise slowly in the refrigerator. Bring to room temperature for 30 minutes before rolling, cutting, and frying for fresh beignets without the morning wait.

    Why are my beignets dense instead of fluffy?

    Insufficient rising time is usually the culprit. Make sure your dough doubles in size during both rises, and verify your yeast is fresh and active before starting.

    Can I bake these instead of frying?

    While traditional Vanilla French Beignets are fried, you can bake them at 375°F for 12-15 minutes. They’ll have a different texture—more like soft rolls—but still delicious with the vanilla flavor.

    What’s the best oil for frying beignets?

    Neutral oils with high smoke points work best—vegetable, canola, or peanut oil. Avoid olive oil, which imparts a strong flavor that competes with the delicate vanilla.

    How thick should I roll the dough?

    Aim for about 1/4-inch thickness. Too thin and they’ll become crisp chips; too thick and they may remain doughy inside when the outside is perfectly golden.

    Final Thoughts

    There’s something incredibly satisfying about mastering Vanilla French Beignets in your own kitchen—watching the dough transform from a simple mixture into pillowy squares of joy. The process connects us to culinary traditions while creating new memories around our own tables. Whether you’re serving these as a special breakfast, afternoon treat, or dessert, they bring an element of celebration to ordinary moments. I hope you’ll share your beignet adventures with me over on Pinterest and discover why these vanilla-scented treasures have become a beloved tradition in so many homes, including mine.