Category: Breakfast

Easy breakfast recipes for busy mornings. Simple, delicious meals that bring warmth, flavor, and energy to your day.

  • Breakfast Tostadas with Eggs & Avocado – Irresistibly Delicious!

    Breakfast Tostadas with Eggs & Avocado – Irresistibly Delicious!

    Breakfast Tostadas with Eggs & Avocado – Irresistibly Delicious!

    Breakfast Tostadas with Eggs Avocado are my weekend morning salvation—crispy tortillas topped with creamy avocado, perfectly runny eggs, and all the zesty toppings your heart desires. I discovered this recipe during a particularly chaotic Sunday when my sister dropped by unexpectedly with her hungry toddlers. The way their little faces lit up as they customized their toppings made this an instant family tradition. These tostadas strike that perfect balance between nutritious and indulgent, giving you a restaurant-worthy breakfast that comes together in minutes. If you love Mexican-inspired breakfasts as much as I do, you’ll want to add this to your regular rotation alongside my Crispy Southwest Egg Rolls.

    Recipe

    Why You’ll Love This Breakfast Tostadas with Eggs Avocado

    A Flavor Explosion in Every Bite

    There’s something magical about the textural contrast in these tostadas—the satisfying crunch of the toasted tortilla against the buttery softness of ripe avocado. The runny egg yolk creates a natural sauce that brings everything together in the most delicious way. I love adding a sprinkle of cotija cheese that melts slightly from the warmth of the eggs, while fresh cilantro and a squeeze of lime brighten each bite. The beauty is in the simplicity—quality ingredients allowed to shine without fuss or complicated techniques.

    Customizable for Everyone at Your Table

    One of the greatest joys of making these breakfast tostadas is watching everyone create their perfect plate. My husband loads up on spicy jalapeños and hot sauce, while I prefer extra avocado and a dollop of Greek yogurt. You can set up a little toppings bar with diced tomatoes, sliced radishes, pickled red onions, or even leftover roasted veggies from dinner. This adaptability makes it perfect for feeding a crowd with different preferences or dietary needs—simply adjust the components to suit everyone’s taste.

    Essential Tips & Tricks

    Perfecting Your Tostada Base

    The foundation of an exceptional breakfast tostada is a perfectly crisp tortilla. While store-bought tostada shells work in a pinch, I prefer making my own by lightly brushing corn tortillas with olive oil and baking at 400°F for 5-7 minutes until golden and crisp. Watch them carefully—they go from perfectly toasted to burnt in seconds! For extra flavor, sprinkle with a pinch of salt or chili powder before baking. The homemade version tastes fresher and holds up better under toppings without shattering into a million pieces with the first bite.

    Mastering the Perfect Egg

    The crowning glory of these breakfast tostadas is undoubtedly the egg, and getting it just right makes all the difference. I prefer sunny-side up with set whites and runny yolks, but feel free to prepare them however you like. For sunny-side up eggs, use medium heat and cover the pan briefly to help the whites set without overcooking the yolks. If you’re making tostadas for a crowd, try baking eggs in a muffin tin for an easy hands-off approach that allows you to prepare multiple servings simultaneously.

    Serving Ideas & Creative Variations

    Elevating with Seasonal Ingredients

    Transform your breakfast tostadas throughout the year by incorporating seasonal produce. In summer, I love adding grilled corn kernels, diced heirloom tomatoes, and fresh basil instead of cilantro. Fall brings opportunities for roasted sweet potato cubes and crispy bacon bits. Winter calls for hearty additions like sautéed mushrooms with thyme. The versatility of this dish means you’ll never get bored, and you can make the most of whatever looks fresh at the farmers’ market. Try incorporating roasted vegetables for an extra dimension of flavor.

    Global Fusion Inspirations

    Take your breakfast tostadas on a world tour by playing with different cultural influences. Mediterranean-style with feta, olives, and za’atar. Asian-inspired with sliced avocado, sriracha, sesame seeds, and a drizzle of soy sauce. Indian-spiced with cumin-scented black beans, yogurt, and cilantro chutney. The corn tortilla base is surprisingly versatile and pairs beautifully with flavors from around the globe. I recently made a Greek version with tzatziki, cucumber, and dill that was absolutely divine—proving that this breakfast format knows no boundaries.

    Storage & Troubleshooting Guide

    Prepping Components Ahead of Time

    While assembled tostadas are best enjoyed immediately, you can prep most components in advance for lightning-fast assembly. Pre-crisp your tortillas and store in an airtight container for up to 3 days. Prepare toppings like diced tomatoes, sliced radishes, and crumbled cheese and keep them in separate containers in the fridge. Even avocado can be prepped ahead—mash with a bit of lime juice to prevent browning, then cover with plastic wrap pressed directly onto the surface and refrigerate overnight.

    Rescuing Common Tostada Troubles

    Even experienced cooks encounter challenges! If your tortillas emerge from the oven too chewy rather than crisp, they likely need a few more minutes of baking time. For soggy tostadas, try creating a barrier between wet toppings and the tortilla—a thin layer of refried beans or melted cheese works wonders. If your avocados aren’t quite ripe, mash them with a bit of Greek yogurt or sour cream to improve the texture. And remember that a generous squeeze of lime or hot sauce can often rescue and brighten up flavors that seem a bit flat.

    Frequently Asked Questions

    Can I make Breakfast Tostadas with Eggs Avocado ahead of time?

    It’s best to prepare components separately and assemble just before eating. Crisp tortillas in advance, store properly, and have toppings ready to go for quick morning assembly.

    What’s the best way to keep avocados from browning?

    Mash avocados with a generous squeeze of lime juice, then place plastic wrap directly on the surface before refrigerating. This creates an air barrier that significantly slows oxidation.

    Can I use flour tortillas instead of corn?

    Absolutely! Flour tortillas crisp differently but work well. They create a lighter, flakier base that some people prefer, especially if you’re not strictly following traditional tostada methods.

    Are breakfast tostadas gluten-free?

    Yes, if you use corn tortillas and verify all other ingredients are gluten-free. Always check labels on pre-packaged items like seasonings or hot sauces for hidden gluten.

    What protein options work besides eggs?

    Try black beans, chorizo, leftover grilled chicken, or crumbled tempeh for egg-free alternatives. Each brings different flavors while maintaining the hearty satisfaction of the original.

    Final Thoughts

    These Breakfast Tostadas with Eggs Avocado have become my go-to for everything from lazy weekend mornings to impressive brunch gatherings. There’s something deeply satisfying about the combination of textures and flavors—crispy, creamy, savory, and fresh—that makes this simple dish extraordinary. The beauty lies in its adaptability and the way it welcomes both tradition and innovation. I’d love to see your creative versions on Pinterest! Whatever toppings you choose, these tostadas promise to transform your morning routine with minimal effort and maximum delight.


  • Sausage Hashbrown Breakfast: Easy, Crispy & Irresistibly Delicious!

    Sausage Hashbrown Breakfast: Easy, Crispy & Irresistibly Delicious!

    Sausage Hashbrown Breakfast: Easy, Crispy & Irresistibly Delicious!

    Sausage hashbrown breakfast casserole has been my weekend salvation for years. There’s something magical about that first bite—where crispy hashbrowns meet savory sausage and melted cheese—that makes even the earliest morning feel like a warm hug. I discovered this recipe during a chaotic family reunion when I needed to feed twelve hungry relatives before our day trip. The smell of it baking pulled everyone to the kitchen before I could even call them! This hearty, make-ahead breakfast is perfect for busy mornings when you need something substantial and delicious.

    Recipe

    Why You’ll Love This Sausage Hashbrown Breakfast

    A Time-Saving Morning Marvel

    This sausage hashbrown breakfast is the ultimate time-saver for busy mornings. You can prep everything the night before, refrigerate it, and simply pop it in the oven when you wake up. I love assembling it while cleaning up after dinner—it takes just 15 minutes of active work! The aroma of sizzling sausage and golden hashbrowns will have everyone gravitating toward the kitchen like moths to a flame. Plus, it feeds a crowd without requiring you to stand over the stove flipping individual servings of anything.

    Customizable for Every Taste

    The beauty of this sausage hashbrown breakfast lies in its endless adaptability. My daughter prefers turkey sausage while my husband insists on spicy pork, so I often divide the casserole into two sections with different meats. You can swap in sweet peppers for a pop of color, add jalapeños for heat, or mix in sautéed mushrooms for an earthy touch. I’ve even made vegetarian versions with plant-based sausage that disappeared just as quickly as the original! The recipe welcomes your personal touch.

    Essential Tips & Tricks

    Perfecting Your Hashbrown Base

    The secret to a spectacular sausage hashbrown breakfast starts with properly prepared potatoes. Always thaw frozen hashbrowns completely and pat them dry with paper towels to remove excess moisture. This simple step prevents a soggy bottom—nobody wants that! I learned this the hard way after serving a mushy casserole that had my brother-in-law politely pushing it around his plate. For extra crispiness, try pre-browning the hashbrowns in a skillet with a little butter before adding them to your casserole dish. The textural contrast is absolutely worth those few extra minutes.

    Mastering the Egg Mixture

    Your egg mixture is the glue that holds this glorious sausage hashbrown breakfast together. For the creamiest texture, whisk eggs until frothy before folding in room-temperature half-and-half or milk. Cold dairy straight from the fridge can create uneven cooking. I always add a pinch of dry mustard powder—my grandmother’s secret ingredient that adds depth without anyone being able to identify it. For an extra layer of flavor, try mixing in sour cream like I do in my potato dishes. The slight tanginess balances the richness perfectly.

    Serving Ideas & Creative Variations

    Perfect Pairings for Brunch Entertaining

    Elevate your sausage hashbrown breakfast into a show-stopping brunch spread with thoughtful accompaniments. I serve mine with a bright citrus salad that cuts through the richness—simply segment oranges and grapefruits, then drizzle with honey and fresh mint. A pitcher of spicy Bloody Marys or mimosas turns breakfast into a celebration. For a sweet counterpoint, offer a basket of mini cinnamon rolls or muffins alongside. When hosting my book club’s annual breakfast, I create a toppings bar with avocado, salsa, sour cream, and chopped herbs so everyone can customize their portion.

    International Flavor Inspirations

    Transform your basic sausage hashbrown breakfast with global flavor profiles that will transport your taste buds. For a Mediterranean twist, fold in crumbled feta, spinach, and sun-dried tomatoes, then sprinkle with oregano. My Mexican-inspired version features chorizo instead of breakfast sausage, with green chiles, pepper jack cheese, and a finish of cilantro and lime. After visiting friends in Montreal, I created a Canadian variation with maple-flavored breakfast sausage, crispy bacon bits, and a drizzle of pure maple syrup right before serving—the sweet-savory combination is absolutely divine.

    Storage & Troubleshooting Guide

    Make-Ahead and Freezer Strategies

    This sausage hashbrown breakfast shines as a meal prep champion. You can refrigerate the assembled but unbaked casserole for up to 48 hours—perfect for holiday mornings or when guests are staying over. For longer storage, freeze the unbaked casserole for up to three months. I portion leftovers into individual containers for quick weekday breakfasts; just 90 seconds in the microwave revives them beautifully. Pro tip: if freezing, slightly undercook your sausage as it will finish cooking during reheating. I label mine with masking tape noting the date and reheating instructions.

    Fixing Common Casserole Issues

    Even experienced cooks encounter challenges with breakfast casseroles. If your sausage hashbrown breakfast turns out too watery, it’s likely from undrained sausage or wet hashbrowns. Always cook sausage thoroughly and drain on paper towels before adding. For a casserole that’s browning too quickly on top but remains undercooked in the center, cover loosely with foil halfway through baking. If you’re short on time, increase the oven temperature by 25 degrees but watch carefully to prevent burning. For veggie additions that release moisture (like spinach or mushrooms), pre-cook and drain them well.

    Frequently Asked Questions

    Can I use fresh potatoes instead of frozen hashbrowns?

    Yes! Grate fresh potatoes, rinse under cold water, then squeeze out all moisture using a clean kitchen towel. Pre-cook them in a skillet for 5-7 minutes to remove excess moisture before using in your sausage hashbrown breakfast.

    How do I know when my breakfast casserole is fully cooked?

    Insert a knife into the center—it should come out clean without runny eggs. The internal temperature should reach 160°F, and the top should be golden brown with slightly crispy edges.

    Can I make this dairy-free?

    Absolutely! Use dairy-free cheese alternatives and unsweetened almond or oat milk instead of regular milk. The texture will be slightly different but still delicious.

    What’s the best cheese to use?

    Sharp cheddar provides the best flavor punch, but a mixture of cheddar and Monterey Jack creates wonderful meltability. Gruyère adds sophistication if you’re serving for a special occasion.

    How long can I keep leftovers?

    Store refrigerated leftovers in an airtight container for up to 4 days. Reheat individual portions in the microwave for 1-2 minutes or larger amounts in a 350°F oven until heated through.

    Final Thoughts

    This sausage hashbrown breakfast has become more than just a recipe in my household—it’s a tradition that signals relaxation and togetherness. The beauty lies in its reliability; it never disappoints whether served at a holiday gathering or a lazy Sunday morning. I’ve shared this recipe countless times on my Pinterest, and the comments always flood in with grateful messages and creative adaptations. There’s something deeply satisfying about a dish that’s both comforting and customizable, feeding both body and soul at the start of a new day.

  • Baked Sausage & Cream Cheese Crescents: Irresistibly Delicious!

    Baked Sausage & Cream Cheese Crescents: Irresistibly Delicious!

    Baked Sausage & Cream Cheese Crescents: Irresistibly Delicious!

    Baked Sausage & Cream Cheese Crescents are the appetizer that consistently disappears first at every gathering I host. There’s something magical about that golden, flaky crescent dough wrapped around savory sausage and creamy cheese that makes people hover near the serving platter. I discovered this recipe years ago when I needed something quick for an impromptu game night, and it’s become my go-to ever since. The combination of warm, melty cream cheese and perfectly seasoned sausage creates a flavor explosion that’s simply irresistible. Plus, they’re incredibly easy to make when you’re short on time but want to impress!

    Recipe

    Why You’ll Love This Baked Sausage & Cream Cheese Crescents

    Perfect Party Food That Disappears Fast

    These little bundles of joy are the ultimate crowd-pleaser that vanish within minutes of hitting the table. The flaky exterior gives way to a creamy, savory filling that keeps everyone coming back for more. I love watching guests’ eyes light up when they take their first bite! They’re substantial enough to satisfy hunger but small enough that people don’t feel guilty grabbing seconds (or thirds). Plus, they’re versatile enough for casual game days or more upscale gatherings. I’ve even served them at holiday cocktail parties where they outshined much fancier appetizers!

    Quick Prep With Maximum Impact

    When I’m racing against the clock but need something homemade, these crescents are my secret weapon. With just 15 minutes of active prep time, they deliver an impressive result that looks like you spent hours in the kitchen. The beauty lies in their simplicity—brown some sausage, mix in cream cheese, roll in crescents, and bake! I’ve made these while simultaneously helping my daughter with homework and taking phone calls. They’re that manageable! The aroma that fills your kitchen while they bake is an added bonus, creating an inviting atmosphere before your guests even arrive.

    Essential Tips & Tricks

    Getting The Filling Just Right

    The key to exceptional Baked Sausage & Cream Cheese Crescents lies in the filling-to-dough ratio. I’ve learned through many batches that about 1½ tablespoons of filling per crescent triangle hits the sweet spot. Too much and they’ll burst during baking; too little and you’ll miss that luscious creaminess. Let your cream cheese come to room temperature before mixing with the cooked sausage—this creates a smoother blend that’s easier to work with. For an extra flavor dimension, I add a dash of garlic powder and a sprinkle of green onions. The subtle heat from these additions elevates the entire experience.

    Perfecting The Crescent Technique

    After years of making these, I’ve perfected the wrapping technique that prevents filling leakage. Start by placing the filling at the wider end of the triangle, then roll toward the pointed tip, gently tucking in the sides as you go. For a professional-looking finish, slightly curve the ends inward to create that classic crescent shape, similar to the beautiful Garlic Butter Parmesan Knots you might also enjoy. Don’t skip brushing the tops with beaten egg—this creates that gorgeous golden shine that makes them irresistible. For extra insurance against leaks, pinch the seams firmly and arrange them seam-side down on your baking sheet.

    Serving Ideas & Creative Variations

    Perfect Pairings For Any Occasion

    These versatile crescents complement nearly any meal or stand proudly on their own. For brunch gatherings, I serve them alongside a fresh Italian Chopped Salad for a delightful contrast of warm, rich flavors against cool, crisp vegetables. For game day spreads, pair them with tangy dipping sauces like ranch, honey mustard, or even a spicy sriracha mayo. The temperature contrast between the hot crescents and cool dips creates a memorable taste experience. When serving as an appetizer before dinner, I arrange them on a wooden board with clusters of grapes and sliced apples for a visually appealing presentation.

    Exciting Flavor Variations To Try

    While the classic recipe is divine, experimenting with different flavor profiles keeps things interesting! My family goes wild for the Mexican-inspired version with chorizo, cream cheese, and a sprinkle of taco seasoning. For an Italian twist, try Italian sausage with basil, sun-dried tomatoes, and a bit of mozzarella mixed into the cream cheese. Breakfast crescents with maple breakfast sausage and a touch of maple syrup in the cream cheese mixture are perfect for morning gatherings. Vegetarian guests appreciate a version with sautéed mushrooms, spinach, and caramelized onions replacing the sausage—the umami flavor is absolutely incredible!

    Storage & Troubleshooting Guide

    Make-Ahead And Storage Solutions

    These crescents are perfect for busy hosts who need time-saving strategies. You can prepare the filling up to two days ahead and store it in an airtight container in the refrigerator. For partially made crescents, assemble them completely, place on a baking sheet, cover with plastic wrap, and refrigerate for up to 12 hours before baking. If you have leftovers (which rarely happens in my house!), store them in an airtight container in the refrigerator for up to three days. To reheat, place in a 350°F oven for 5-7 minutes—the microwave works in a pinch but sacrifices that wonderful flaky texture.

    Solving Common Baking Challenges

    If you find your crescents leaking filling during baking, you’re likely overfilling or not sealing properly. Try reducing the filling to 1 tablespoon per triangle and really focus on pinching those seams closed. Pale crescents usually indicate your oven temperature is too low—invest in an oven thermometer for accuracy. If the bottoms are burning while the tops remain undercooked, try placing the baking sheet on a higher rack and using a quality, light-colored baking sheet. For crescents that unravel during baking, try chilling them for 10 minutes before baking to help the dough set its shape.

    Frequently Asked Questions

    Can I make Baked Sausage & Cream Cheese Crescents ahead of time?

    Yes! Prepare the filling up to 2 days ahead and refrigerate. You can also assemble the crescents and refrigerate them (unbaked) for up to 12 hours before baking. Just add 2-3 minutes to the baking time if cooking from cold.

    What’s the best type of sausage to use?

    Regular breakfast sausage works beautifully, but Italian sausage (mild or hot) adds wonderful flavor. Turkey or chicken sausage creates a lighter version, while vegetarian sausage alternatives work well for meat-free options.

    Can I freeze these crescents?

    Absolutely! Freeze unbaked crescents on a baking sheet until solid, then transfer to a freezer bag for up to 3 months. Bake directly from frozen, adding about 5-7 minutes to the baking time.

    How do I prevent the filling from leaking out?

    Use about 1-1½ tablespoons of filling per crescent, place it on the wide end, and be sure to pinch all seams tightly. Arranging them seam-side down on the baking sheet also helps prevent leakage.

    What can I add to the Baked Sausage & Cream Cheese Crescents for extra flavor?

    Try adding diced jalapeños, green onions, fresh herbs, different cheese varieties, or a dash of hot sauce to the filling. A sprinkle of everything bagel seasoning on top before baking adds amazing texture and flavor!

    Final Thoughts

    Baked Sausage & Cream Cheese Crescents have earned their place as a staple in my entertaining repertoire for good reason. They strike that perfect balance between impressive and achievable that we all search for in recipes. Every time I make them, I’m reminded of the simple joy that comes from creating something delicious that brings people together. The way conversations flow more easily when hands reach for these warm, flaky bites makes all the difference at gatherings. I hope these crescents become a beloved tradition in your home too! For more delicious inspiration, check out my Pinterest collection.

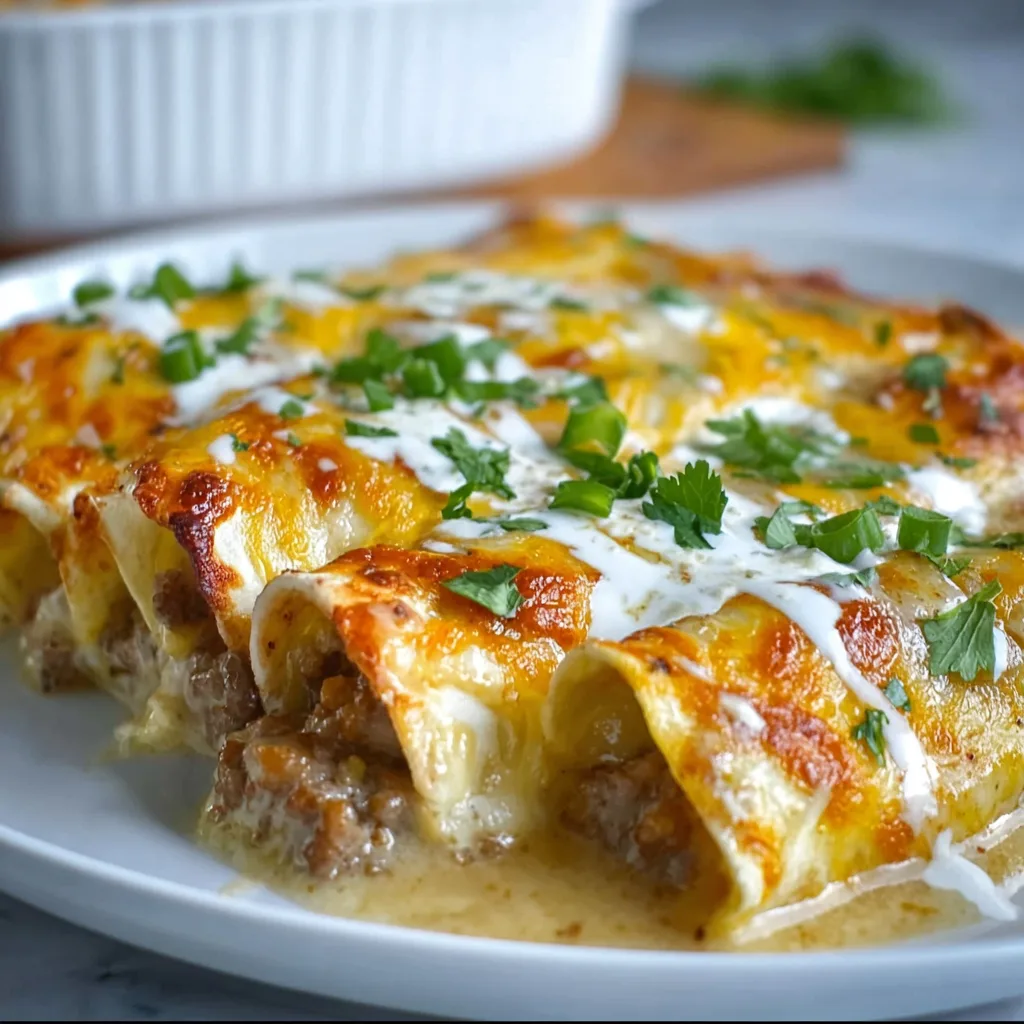
  • Breakfast Sausage Gravy Enchiladas: Irresistible Comfort in Every Bite!

    Breakfast Sausage Gravy Enchiladas: Irresistible Comfort in Every Bite!

    Breakfast Sausage Gravy Enchiladas: Irresistible Comfort in Every Bite!

    Breakfast Sausage Gravy Enchiladas combine two comfort food favorites into one irresistible dish that’ll have your family running to the table. The first time I made these for my Sunday brunch gathering, my brother-in-law asked for the recipe before he’d even finished his first bite! There’s something magical about the way the creamy, peppery sausage gravy wraps around tender tortillas, creating layers of flavor that feel like a warm hug on a plate. If you love hearty breakfast options that work just as beautifully for dinner, this recipe from RecipesDarleen deserves a spot in your regular rotation.

    Recipe

    Recipe

    Why You’ll Love This Breakfast Sausage Gravy Enchiladas

    A Perfect Fusion of Comfort Foods

    These enchiladas hit all the right notes by combining two beloved comfort classics. The savory sausage gravy – thick, creamy, and studded with bits of perfectly seasoned pork – transforms ordinary enchiladas into something extraordinary. I’ve always believed that breakfast foods shouldn’t be limited to mornings, and these enchiladas prove my point beautifully. The contrast between the soft tortillas and the rich gravy creates a textural experience that’s deeply satisfying. Plus, they’re surprisingly versatile – make them spicier with hot sausage or milder for sensitive palates.

    Make-Ahead Friendly for Busy Days

    One thing I absolutely adore about this recipe is how perfectly it fits into a busy lifestyle. You can prep these enchiladas entirely the night before, cover the baking dish, and refrigerate until morning. The make-ahead convenience means you can enjoy a spectacular breakfast without the early morning hustle. I’ve made these for holiday mornings when family is visiting, and being able to simply slide the dish into the oven while I enjoy coffee with my guests feels like a small miracle. The flavors actually develop beautifully overnight, making the dish even more delicious.

    Essential Tips & Tricks

    Getting the Perfect Gravy Consistency

    The heart of this recipe is undoubtedly the sausage gravy, and getting its consistency right makes all the difference. Start with quality breakfast sausage – I prefer something with sage and a hint of maple. When making the gravy, cook the flour with the sausage drippings for at least 2 minutes to eliminate any raw flour taste. Add milk gradually while whisking constantly to prevent lumps. For the perfect thickness, remember that the gravy will thicken slightly as it cools, so aim for a consistency just a touch thinner than you want in the final dish.

    Tortilla Selection and Preparation

    Don’t underestimate the importance of your tortilla choice and preparation method! I’ve learned through many (delicious) experiments that flour tortillas work best for this recipe, as corn tortillas can break down too much in the creamy sauce. For the best texture, lightly toast your tortillas in a dry skillet before assembling – this creates a barrier that helps them maintain integrity while baking. If you’re looking for a twist on this recipe, try my Italian Sausage Pasta Bake for another comforting meal option.

    Serving Ideas & Creative Variations

    Complementary Side Dishes

    These enchiladas shine brightest when paired with fresh, bright accompaniments that balance their richness. I love serving them with a simple avocado salad – just diced avocado, cherry tomatoes, a squeeze of lime, and cilantro. A side of fresh fruit also provides a welcome contrast to the savory enchiladas. For a more substantial brunch spread, add crispy breakfast potatoes or a light green salad. The enchiladas themselves are quite filling, so sides can be simple. For another hearty breakfast option that pairs well, check out these Spinach Feta Egg Muffins.

    Exciting Flavor Variations

    While the classic recipe is divine, don’t be afraid to put your personal spin on these enchiladas. Try adding caramelized onions to your gravy for sweetness, or mix in roasted green chiles for a Southwestern twist. For a meat-lover’s version, add crumbled bacon or diced ham alongside the sausage. Vegetarian guests? Substitute the pork sausage with a plant-based alternative and mushrooms for a similar umami experience. I’ve even made a fusion version with a sprinkle of curry powder in the gravy that received rave reviews at my last brunch gathering.

    Storage & Troubleshooting Guide

    Proper Storage and Reheating

    These enchiladas store beautifully, making them perfect for meal prep or leftovers. After cooling completely, cover tightly with foil or transfer portions to airtight containers and refrigerate for up to 3 days. For reheating, the microwave works in a pinch, but for best results, place in a 325°F oven, covered with foil, for about 15-20 minutes until heated through. If the gravy seems too thick after refrigeration, drizzle a little milk over the enchiladas before reheating to restore that creamy consistency.

    Fixing Common Issues

    Even experienced cooks encounter challenges, but most issues with this recipe have simple fixes. If your gravy turns out too thick, gradually whisk in additional warm milk until you reach the desired consistency. Too thin? Make a slurry with equal parts flour and cold water, then whisk into the simmering gravy. Dealing with soggy enchiladas? Next time, toast your tortillas more thoroughly before assembly and ensure your gravy has cooled slightly before pouring. For gravy that lacks flavor, don’t be shy with black pepper and consider adding a dash of garlic powder.

    Frequently Asked Questions

    Can I make Breakfast Sausage Gravy Enchiladas vegetarian?

    Absolutely! Substitute the pork sausage with a plant-based alternative and use mushrooms for umami. The gravy works beautifully with vegetable broth instead of milk for a dairy-free version.

    How spicy are these enchiladas?

    They’re mild by default, getting most flavor from the breakfast sausage. Adjust the heat by choosing spicy sausage or adding red pepper flakes to the gravy.

    Can I freeze these enchiladas?

    Yes! Assemble but don’t bake, then freeze for up to 3 months. Thaw overnight in the refrigerator before baking, adding 10-15 minutes to the cooking time.

    What cheese works best for this recipe?

    Sharp cheddar provides the best flavor contrast with the creamy gravy, but Monterey Jack or a Mexican blend also works beautifully.

    Can I use corn tortillas instead of flour?

    While flour tortillas hold up better in the creamy sauce, corn tortillas can work if you fry them briefly in oil before filling to create a moisture barrier.

    Final Thoughts

    Breakfast Sausage Gravy Enchiladas represent comfort food at its finest – familiar yet exciting, simple yet impressive. There’s something deeply satisfying about creating a dish that bridges culinary traditions and works for any meal of the day. The way the spiced sausage gravy envelops each bite makes this more than just a recipe – it’s an experience worth sharing. For more delicious inspiration, follow me on Pinterest where I’m always posting new comfort food creations!

  • Mustard Croissant Breakfast Sandwiches: Irresistibly Delicious & Easy!

    Mustard Croissant Breakfast Sandwiches: Irresistibly Delicious & Easy!

    Mustard Croissant Breakfast Sandwiches: Irresistibly Delicious & Easy!

    Mustard Croissant Breakfast Sandwiches are my absolute weekend obsession. There’s something magical about the way tangy Dijon mustard cuts through buttery croissants and melty cheese that makes me weak in the knees. I discovered this combination one foggy Sunday morning when I was craving something more exciting than my usual avocado toast. The first bite was a revelation – crispy, flaky layers giving way to savory fillings with that distinctive mustard kick. If you’re looking to elevate your breakfast game, these sandwiches strike the perfect balance between fancy and fuss-free. They’ve become my go-to when hosting brunch at home or when I need a special breakfast treat.

    Recipe

    Why You’ll Love These Mustard Croissant Breakfast Sandwiches

    Perfect Balance of Flavors and Textures

    The magic of these mustard croissant breakfast sandwiches lies in their perfect contrasts. The buttery, flaky croissant provides a delicate vessel for the sharp tang of quality Dijon mustard. When you add the richness of melted cheese and the savory goodness of eggs or breakfast meats, every bite becomes a symphony of textures. The exterior gets slightly crisp when toasted, while the interior remains soft and pillowy. I love how the mustard cuts through the richness, preventing the sandwich from feeling heavy while adding that sophisticated flavor that makes these feel special compared to ordinary breakfast sandwiches.

    Quick Assembly for Busy Mornings

    Despite looking like something from a fancy café, these mustard croissant breakfast sandwiches come together in minutes. I can assemble four sandwiches in under 15 minutes on busy weekday mornings. The versatile base allows for endless customization based on what’s in your fridge. Pre-sliced croissants and pre-cooked proteins make assembly lightning-fast. You can even prepare components the night before – cook your eggs or bacon, slice your cheese, and store everything separately. Then in the morning, just spread the mustard, assemble, and give them a quick warm-through. They’re perfect for those mornings when you want something special without the extra effort.

    Essential Tips & Tricks

    Choosing the Right Mustard Blend

    Not all mustards are created equal when making mustard croissant breakfast sandwiches. I recommend using a high-quality Dijon as your base – it has the perfect balance of tang, spice and creaminess. For extra dimension, try mixing your Dijon with a spoonful of whole grain mustard for delightful texture and visual appeal. If you prefer less heat, honey mustard creates a beautiful sweet-savory profile that pairs wonderfully with ham. For adventurous palates, horseradish mustard adds fantastic zip with egg and cheddar combinations. The key is finding your personal preference – I keep a mustard bar when hosting brunch so guests can customize their own.

    Perfecting the Croissant Preparation

    The foundation of extraordinary mustard croissant breakfast sandwiches is, naturally, the croissant itself. Look for all-butter croissants with visible layers – they’ll provide the best flavor and texture. Day-old croissants actually work beautifully as they hold up better to fillings without getting soggy. Always slice horizontally with a serrated knife using a gentle sawing motion to preserve those delicate layers. For next-level results, lightly toast the cut sides in a dry skillet or under the broiler for 1-2 minutes until golden. This creates a barrier against moisture while adding wonderful texture contrast. Just be vigilant during toasting – the high butter content means croissants can go from perfectly golden to burnt in seconds.

    Serving Ideas & Creative Variations

    Seasonal Adaptations

    The beauty of mustard croissant breakfast sandwiches lies in their ability to transform with the seasons. In summer, I love adding garden-fresh tomatoes and peppery arugula alongside a lighter spread of lemon-herb mustard. Fall calls for apple slices with maple mustard and turkey. Winter sandwiches feel cozy with caramelized onions and a robust whole grain mustard paired with gruyère. Spring brings asparagus spears and soft herbs like chives mixed into the mustard spread. The seasonal approach keeps these sandwiches feeling fresh year-round while making the most of what’s available. I’ve found that matching mustard intensity to seasonal ingredients creates the most harmonious flavor profiles – lighter in warm months, bolder in cool ones.

    International Flavor Inspirations

    Take your mustard croissant breakfast sandwiches on a global flavor journey by incorporating international ingredients. Create a French-inspired version with ham, Emmental cheese, and cornichons alongside classic Dijon. Go Italian with prosciutto, fresh mozzarella, basil, and a sun-dried tomato mustard. For Scandinavian vibes, try smoked salmon, dill, cucumber, and a mustard-yogurt spread. A Mexican-inspired variation featuring chorizo, pepper jack, avocado and chipotle-spiked mustard brings wonderful heat. The croissant’s buttery neutrality provides the perfect canvas for these global flavor explorations. I’ve served international breakfast sandwich boards at gatherings, and guests love creating their own culinary adventures.

    Storage & Troubleshooting Guide

    Make-Ahead and Reheating Strategies

    While mustard croissant breakfast sandwiches are best enjoyed fresh, strategic preparation can save morning time. Assemble sandwiches without mustard the night before, wrap individually in parchment paper, then store in an airtight container. In the morning, add the mustard (prevents sogginess) and reheat. For optimal reheating, use a toaster oven at 325°F for 5-7 minutes or an air fryer at 300°F for 3-4 minutes. Avoid microwaving which makes croissants chewy. If you need to freeze components, croissants freeze surprisingly well – thaw at room temperature in their packaging, then refresh in a 300°F oven for 5 minutes before assembling. Eggs can be scrambled and frozen in portions, though fried eggs are best made fresh.

    Fixing Common Sandwich Issues

    Even seasoned cooks encounter challenges with mustard croissant breakfast sandwiches. If your sandwich feels too dry, add a thin layer of softened butter or mayo beneath the mustard for extra moisture. For overly soggy sandwiches, toast the croissant interior more thoroughly next time and place moisture-heavy ingredients (like tomatoes) in the center, surrounded by cheese or meat to create a barrier. If fillings keep sliding out, try creating a shallow well in the bottom croissant half before adding ingredients. Too-strong mustard flavor can be balanced with additional cheese or a drizzle of honey. For croissants that crumble excessively when slicing, try chilling them for 10 minutes first – the butter firms up, making them easier to cut cleanly.

    Frequently Asked Questions

    What’s the best cheese to use in mustard croissant breakfast sandwiches?

    Gruyère offers the perfect melt and nutty flavor that complements mustard beautifully. Other excellent options include sharp cheddar, Havarti, or Swiss. Choose something with good melting properties and enough flavor to stand up to the mustard.

    Can I make these sandwiches vegetarian?

    Absolutely! Replace meat with sliced avocado, roasted portobello mushrooms, or plant-based sausage alternatives. Eggs work wonderfully, or try scrambled tofu with turmeric and black salt for a vegan option.

    How do I prevent my mustard croissant breakfast sandwiches from becoming soggy?

    Toast the cut sides of your croissant before assembling, apply mustard just before serving, and place juicy ingredients like tomatoes between layers of cheese or meat to create moisture barriers.

    What’s a good side dish to serve with these sandwiches?

    Fresh fruit salad provides a refreshing contrast, while roasted breakfast potatoes complement the richness. For brunch gatherings, a simple green salad with light vinaigrette balances the meal perfectly.

    Can I use other breads instead of croissants?

    While the flaky texture of croissants makes these sandwiches special, brioche buns, English muffins, or ciabatta rolls make excellent alternatives. Just adjust the cooking time when toasting to suit the bread type.

    Final Thoughts

    Mustard croissant breakfast sandwiches have transformed my morning routine from mundane to magnificent. The combination of buttery pastry, tangy mustard, and customizable fillings creates endless possibilities for breakfast bliss. What I love most is how they straddle the line between everyday accessible and weekend special – impressive enough for guests but simple enough for Tuesday morning. Whether you’re a mustard aficionado or just dipping your toe into more adventurous breakfast territory, these sandwiches deserve a spot in your recipe collection. Try them once, and I promise they’ll become a staple in your breakfast rotation too. Don’t forget to share your creations on Pinterest!

  • Breakfast Cabbage Sauté Recipe That Will Brighten Your Morning!

    Breakfast Cabbage Sauté Recipe That Will Brighten Your Morning!

    Breakfast Cabbage Sauté Recipe That Will Brighten Your Morning!

    Breakfast Cabbage Sauté transforms humble cabbage into a morning revelation that’ll change how you start your day. The first time I made this dish, the aroma of butter-kissed cabbage and garlic filled my kitchen, and I knew my breakfast game would never be the same. There’s something magical about how cabbage caramelizes in the pan, developing sweet notes that pair perfectly with runny eggs. This quick, nutrient-packed morning meal has become my go-to when I need something satisfying yet light. Perfect for meal prep and versatile enough to customize with whatever’s in your fridge, this breakfast cabbage sauté deserves a permanent spot in your morning routine.

    Recipe

    Why You’ll Love This Breakfast Cabbage Sauté

    A Nutritional Powerhouse

    This breakfast cabbage sauté isn’t just delicious—it’s practically medicine in a skillet. Cabbage delivers an impressive array of vitamins C and K, plus fiber that keeps you feeling full until lunch. I’ve noticed a real difference in my energy levels since adding this to my rotation. The natural sweetness that develops when cabbage caramelizes makes it surprisingly crave-worthy, while adding protein from eggs or bacon creates perfect macronutrient balance. My favorite morning hack is prepping the cabbage the night before, which cuts morning cooking time in half and ensures I’m getting greens before most people have had their coffee!

    Quick & Budget-Friendly

    On mornings when time feels like sand slipping through my fingers, this breakfast cabbage sauté saves the day. It comes together in under 15 minutes and costs mere pennies per serving. Cabbage is one of the most economical vegetables year-round, and it keeps forever in the fridge (okay, maybe not forever, but weeks!). I’ve calculated that this breakfast costs about $1.50 per serving—even with organic ingredients. The simplicity makes it perfect for busy weekdays, and the ingredients are pantry and fridge staples. When I’m pinching pennies at month’s end, this recipe is my saving grace without feeling like I’m sacrificing quality or flavor.

    Essential Tips & Tricks

    Mastering the Caramelization

    The secret to exceptional breakfast cabbage sauté lies in proper caramelization—don’t rush this magical process! Use a heavy-bottomed pan that distributes heat evenly and resist the urge to stir constantly. Let the cabbage rest against the hot surface until edges turn golden before tossing. I learned this the hard way after years of pale, soggy cabbage. A splash of apple cider vinegar near the end brightens flavors while helping break down the cabbage’s structure. For maximum browning, avoid overcrowding your pan; work in batches if needed. This patience transforms ordinary cabbage into something so delicious you’ll wonder why you ever relegated it to coleslaw.

    Flavor Building Strategies

    Layering flavors transforms this breakfast cabbage sauté from good to absolutely crave-worthy. Start by rendering bacon or pancetta for a smoky foundation, then sauté your cabbage in that liquid gold. Aromatics matter enormously—fresh garlic added in the final minute prevents bitterness from overcooked garlic. My game-changing discovery was adding a pinch of caraway seeds, which complement cabbage perfectly with their subtle anise notes. Don’t skip seasoning—cabbage loves salt, which helps draw out moisture and accelerate browning. A final flourish of fresh herbs (dill and cabbage are soulmates) adds brightness that makes the whole dish sing.

    Serving Ideas & Creative Variations

    Perfect Pairings

    This breakfast cabbage sauté plays beautifully with so many accompaniments. My absolute favorite way to serve it is topped with jammy eggs—the rich yolks create a luscious sauce when broken over the caramelized cabbage. A dollop of tangy Greek yogurt adds creamy contrast and extra protein. For a heartier meal, serve alongside sourdough toast or quick jumbo dinner rolls repurposed for breakfast. When hosting brunch, I present the sauté in a cast iron skillet family-style with various toppings for guests to customize. The cabbage also makes an excellent bed for smoked salmon with capers for a more sophisticated weekend option.

    Seasonal Adaptations

    One thing I adore about breakfast cabbage sauté is how it evolves through the seasons while maintaining its comforting essence. In spring, I fold in tender asparagus tips and fresh peas during the last few minutes of cooking. Summer brings opportunities for cherry tomatoes that burst in the pan, creating juicy pockets. Fall calls for diced apple and sage—the sweetness plays beautifully against the cabbage. Winter versions get heartier with additions like roasted sweet potato chunks and rosemary. The base recipe remains constant while seasonal produce keeps it fresh and exciting. This adaptability means you’ll never tire of this breakfast staple, regardless of what’s available at your market.

    Storage & Troubleshooting Guide

    Make-Ahead & Reheating

    Breakfast cabbage sauté is perfect for meal prep—I often make a double batch on Sundays. Store cooled leftovers in airtight containers in the refrigerator for up to 4 days. The flavor actually improves overnight as the ingredients meld! When reheating, add a splash of water to prevent drying, and use medium heat in a skillet rather than microwaving to maintain texture. For freezing, portion into individual servings and store for up to 2 months. Thaw overnight in the refrigerator before reheating. I find adding a fresh element when serving leftovers—like a squeeze of lemon or sprinkle of herbs—revitalizes the dish and makes it taste freshly made.

    Troubleshooting Common Issues

    If your breakfast cabbage sauté turns out watery, you’re likely overcrowding the pan or using too low heat. Cabbage releases moisture as it cooks, and without proper evaporation, you’ll end up with soggy results. The solution is simple: use a larger pan or cook in batches, and keep heat at medium-high. If your cabbage isn’t developing those coveted brown edges, your pan probably isn’t hot enough. For bitter cabbage, try adding a teaspoon of honey or maple syrup to balance flavors. If your cabbage is tough even after cooking, you might be using old cabbage or not slicing it thinly enough—aim for ¼-inch ribbons for optimal texture.

    Frequently Asked Questions

    What’s the best type of cabbage for Breakfast Cabbage Sauté?

    Green cabbage is my go-to for its sweet flavor when caramelized, but Savoy cabbage offers delicate texture. Napa cabbage cooks faster with milder flavor, while red cabbage adds beautiful color but slightly stronger taste. All work well with slight cooking time adjustments.

    Can I make Breakfast Cabbage Sauté vegetarian or vegan?

    Absolutely! Skip the bacon and use olive oil or plant-based butter. Add nutritional yeast for umami flavor, and top with avocado instead of eggs for vegan protein. Smoked paprika adds that smoky note you’d otherwise get from bacon.

    How can I meal prep this for busy mornings?

    Slice cabbage and store in airtight containers up to 3 days ahead. You can even fully cook the cabbage sauté and refrigerate for 4 days. In the morning, reheat while preparing your eggs for a complete breakfast in minutes.

    What protein works best with this dish?

    Eggs are classic—fried, poached, or scrambled all pair beautifully. Bacon, sausage, or leftover chicken integrate seamlessly. For plant-based options, crispy tofu or tempeh crumbles add satisfying texture and protein.

    How finely should I slice the cabbage for Breakfast Cabbage Sauté?

    Aim for ¼-inch ribbons for optimal texture and cooking time. Too thick and they’ll remain tough; too thin and they’ll become mushy. A sharp knife makes all the difference—or use a mandoline for consistent results.

    Final Thoughts

    This breakfast cabbage sauté has revolutionized my morning routine, proving that nutritious eating can be both simple and deeply satisfying. I find myself craving its caramelized sweetness and comforting warmth, especially on busy mornings when I need sustained energy. What began as an experiment with leftover cabbage has become a recipe I share with everyone I know. The versatility means it never gets boring, while the nutritional profile keeps me feeling my best. I hope this breakfast cabbage sauté brings as much joy to your mornings as it has to mine. For more breakfast inspiration, visit our Pinterest board filled with morning meal ideas.

  • Quick Jumbo Dinner Rolls: Irresistibly Soft & Fluffy Every Time!

    Quick Jumbo Dinner Rolls: Irresistibly Soft & Fluffy Every Time!

    Quick Jumbo Dinner Rolls: Irresistibly Soft & Fluffy Every Time!

    Quick Jumbo Dinner Rolls have been my saving grace on countless busy weeknights when I need something homemade but don’t have hours to spare. There’s something magical about pulling a tray of golden, fluffy rolls from the oven just as dinner hits the table. The aroma alone transforms an ordinary meal into something special. I discovered this recipe during a particularly chaotic holiday season, and it’s become my go-to ever since. Unlike traditional dinner rolls that can take hours with multiple rises, these jumbo beauties are ready in a fraction of the time without sacrificing that pillowy texture we all crave. Let me show you how to make these irresistible rolls that will have everyone reaching for seconds.

    Recipe

    Why You’ll Love These Quick Jumbo Dinner Rolls

    Perfect for Busy Weeknights

    These quick jumbo dinner rolls truly live up to their name—ready in under an hour from start to finish! I remember the first time I made them for a Tuesday family dinner; my daughter walked in from soccer practice, caught that yeasty scent, and her eyes widened with disbelief. “You made homemade bread on a weeknight?!” The time-saving secret lies in using instant yeast and a slightly warmer rise environment. The dough comes together in minutes in a stand mixer, and with just one abbreviated rise, you’ll have impressive, bakery-worthy rolls that taste like they took all day. No one needs to know how simple they actually were!

    Crowd-Pleasing Size and Texture

    The jumbo part of these dinner rolls isn’t just for show—it’s what makes them special. Each roll is generously sized, creating that perfect tear-apart moment when you pull them open to reveal the steamy, tender interior. The texture hits that sweet spot between fluffy and substantial, with just enough chew to feel satisfying. I’ve found that the larger size also helps the rolls stay softer longer, which means any leftovers (though rare in my house!) remain delicious for breakfast the next day. The golden tops get a brush of melted butter right after baking, adding a rich finish that makes these rolls absolutely irresistible.

    Essential Tips & Tricks

    Mastering the Quick Rise

    The key to these quick jumbo dinner rolls lies in creating the perfect environment for that single, efficient rise. I learned this trick after a baking disaster: warm your oven to its lowest setting for just 2 minutes, then turn it off completely. This creates a draft-free, slightly warm space that encourages rapid yeast development. Place your covered dough inside and watch the magic happen in just 20-25 minutes! Another game-changer is using room temperature ingredients—cold milk or eggs will significantly slow down the process. I keep everything on the counter for 30 minutes before starting, which makes all the difference in achieving that quick rise without compromising texture.

    Shaping for Perfect Results

    Properly shaping your rolls creates that professional bakery look and ensures even baking. I use a kitchen scale to divide the dough into equal portions (about 3 ounces each for truly jumbo rolls). The technique that changed everything for me: roll each portion into a tight ball by cupping your hand over the dough and moving in small circles against an unfloured surface. This creates surface tension for a beautiful rise. Place them in your baking dish with about an inch between each roll—they’ll expand to touch during rising, creating those classic soft sides that tear apart so satisfyingly. A light egg wash before baking gives them that irresistible golden shine.

    Serving Ideas & Creative Variations

    Perfect Pairings

    These quick jumbo dinner rolls elevate practically any meal from ordinary to memorable. They’re substantial enough to serve alongside hearty soups like my family’s favorite chicken udon soup, where they’re perfect for soaking up every last drop of broth. I particularly love them with holiday meals—last Thanksgiving, my brother-in-law used one to create a mini turkey sandwich right at the table! The slightly sweet, buttery flavor complements both casual weeknight dinners and special occasions. Try them with roasted chicken, beef stew, or even a simple pasta dinner. The versatility is what makes them a staple in my recipe collection—they truly make any meal feel complete.

    Flavor Twists and Add-Ins

    While the classic version is perfection, these rolls become even more special with simple variations. My personal favorite is adding fresh herbs to the dough—rosemary and thyme create an aromatic roll that’s divine with roasted meats. For a sweeter version, fold in cinnamon and a touch of brown sugar for breakfast rolls. Another crowd-pleaser: fold in shredded cheese and minced garlic for a savory twist that disappears in minutes. The dough is incredibly forgiving, making it perfect for experimentation. I’ve even topped them with everything bagel seasoning before baking when serving with soup. Each variation maintains the quick preparation time while creating something uniquely delicious.

    Storage & Troubleshooting Guide

    Keeping Rolls Fresh

    These quick jumbo dinner rolls stay remarkably fresh when stored properly. For next-day enjoyment, let them cool completely before placing in an airtight container or zip-top bag at room temperature—they’ll maintain their softness for up to 2 days. For longer storage, the freezer is your friend! I wrap individual rolls tightly in plastic wrap, then place them in a freezer bag for up to 3 months. The best part: they reheat beautifully. Just wrap frozen rolls in foil and warm in a 300°F oven for about 10 minutes, or microwave for 20-30 seconds. I’ve found that refreshing them with a light brush of butter after reheating brings back that fresh-baked magic.

    Troubleshooting Common Issues

    Even experienced bakers encounter challenges, but most roll problems have simple solutions. If your dough isn’t rising quickly enough, check your yeast’s expiration date—this was my mistake once that resulted in dense rolls! Another common issue is overproofing, where the dough rises too long and then collapses in the oven. Watch for the dough to double in size, then bake immediately. For rolls that brown too quickly, place foil loosely over the top halfway through baking. And if your rolls turn out dense rather than fluffy, you likely added too much flour—the dough should feel slightly tacky but not stick to your fingers. These simple adjustments will help ensure perfect jumbo rolls every time.

    Frequently Asked Questions

    Can I make these Quick Jumbo Dinner Rolls ahead of time?

    Absolutely! Prepare the dough through shaping, then cover and refrigerate overnight. The next day, let them come to room temperature (about 30-45 minutes) before baking. They’ll be just as delicious with less day-of work.

    Why didn’t my rolls rise properly?

    Check your yeast’s freshness and ensure your liquid ingredients are warm (105-110°F)—not hot or cold. Also, make sure your rising environment is warm and draft-free for optimal yeast activation.

    Can I make these rolls smaller for a larger quantity?

    Yes! Divide the dough into 16-18 portions instead of 12 for standard-sized dinner rolls. Reduce the baking time by about 3-4 minutes and watch them closely.

    How can I make these Quick Jumbo Dinner Rolls extra soft?

    Add 1/4 cup of potato flakes to the dough for ultra-soft texture. Also, brush with melted butter immediately after baking to keep the tops tender and flavorful.

    Can I use active dry yeast instead of instant?

    Yes, but you’ll need to proof it first in warm liquid with a pinch of sugar until foamy (about 5-10 minutes) before adding to the dry ingredients, and expect a slightly longer rise time.

    Final Thoughts

    These Quick Jumbo Dinner Rolls have become my secret weapon in the kitchen—impressive enough for special occasions yet simple enough for weeknights. There’s something deeply satisfying about placing a basket of warm, homemade rolls on the table, especially when they required so little effort. The beauty of this recipe is its reliability; I’ve made these rolls countless times, and they never disappoint. Whether paired with a hearty soup or served alongside a holiday feast, these quick jumbo dinner rolls bring that special touch that makes a meal memorable. I hope they become a beloved staple in your home as they have in mine. For more delicious bread recipes, visit our Pinterest collection.

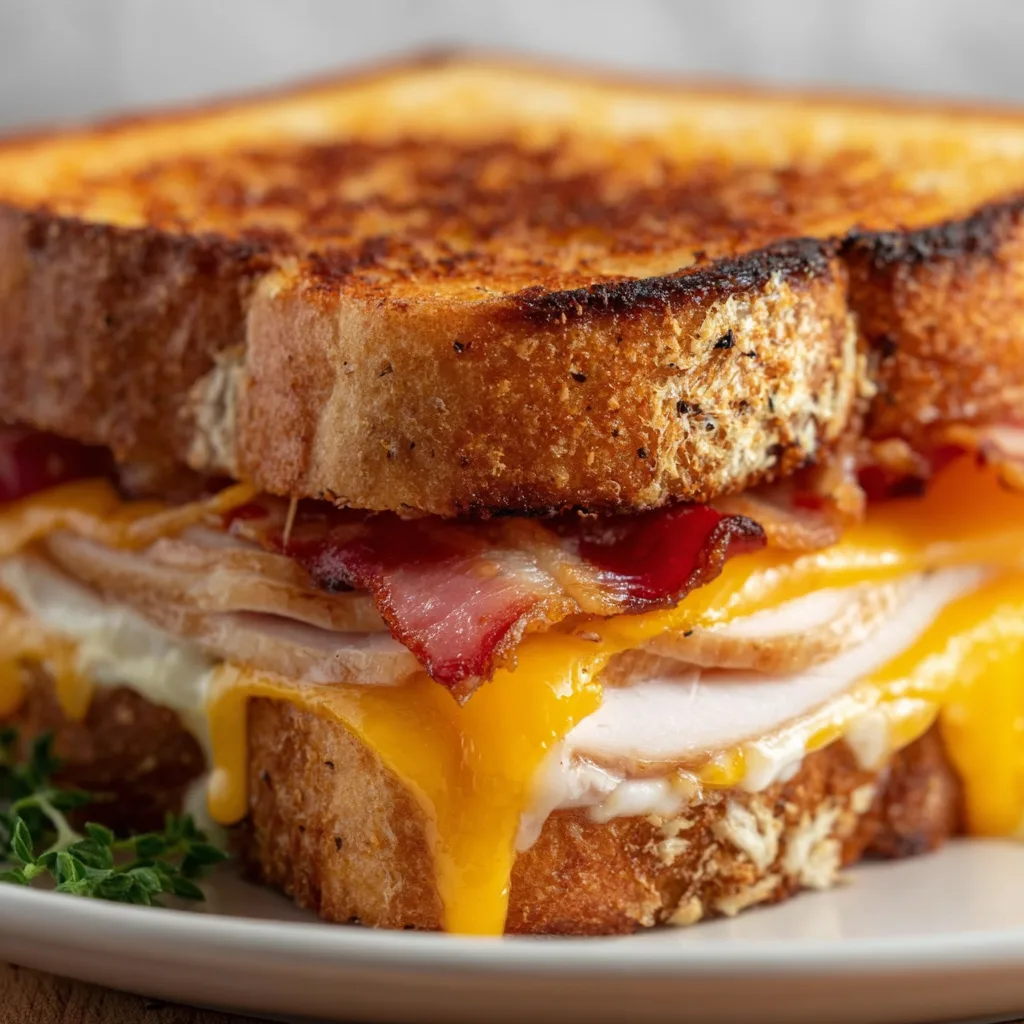
  • Cheddar Bacon Turkey Melt: Irresistible, Crispy, Melted Perfection!

    Cheddar Bacon Turkey Melt: Irresistible, Crispy, Melted Perfection!

    Cheddar Bacon Turkey Melt: Irresistible, Crispy, Melted Perfection!

    The Cheddar and Bacon Turkey Melt Sandwich is my absolute favorite comfort food creation when I’m craving something warm, gooey, and satisfying. There’s something magical about the way sharp cheddar melts into crispy bacon and tender turkey, all nestled between slices of perfectly toasted bread. I first made this sandwich on a rainy Sunday afternoon when my pantry was nearly empty, and it’s been my go-to ever since. The combination of smoky, savory, and creamy elements creates a flavor explosion that will make your taste buds dance with joy.

    Recipe

    Why You’ll Love This Cheddar and Bacon Turkey Melt Sandwich

    Perfect Balance of Flavors and Textures

    This sandwich hits all the right notes with its harmonious blend of ingredients. The sharpness of quality cheddar cheese cuts through the richness of the bacon, while the turkey provides a hearty, protein-packed foundation. I love how the outside gets crispy and golden from a light butter coating, while the inside remains moist and tender. The textural contrast between the crunchy bread exterior and the melty cheese interior creates that satisfying bite that makes you close your eyes and savor the moment. It’s comfort food perfection!

    Quick and Convenient Meal Solution

    When life gets hectic, this sandwich is my time-saving savior. I can have it ready in under 15 minutes, making it perfect for busy weeknights or quick lunches. Most of the ingredients are staples I always have on hand—bread, cheese, and some form of protein. Even better, it’s customizable based on whatever’s in your refrigerator. I’ve made this sandwich countless times when I needed something substantial but didn’t have the energy for elaborate cooking. It’s filling enough to satisfy hunger without requiring a nap afterward!

    Essential Tips & Tricks

    Cheese Selection and Melting Techniques

    The secret to the perfect turkey melt lies in your cheese strategy. While pre-sliced cheddar works fine, I prefer freshly grated for superior melting. The key is to use room temperature cheese—cold cheese straight from the refrigerator won’t melt evenly before your bread burns. For an extra-gooey result, try mixing sharp cheddar with a bit of mozzarella or monterey jack. And don’t rush the melting process! Cook over medium-low heat with a lid to create a mini oven effect that melts the cheese perfectly while keeping the bread from burning.

    Bread and Assembly Considerations

    Choosing the right bread makes all the difference in your Cheddar and Bacon Turkey Melt Sandwich. I recommend sturdy varieties like sourdough, rye, or a good quality white bread that can stand up to the fillings without getting soggy. Butter the outside of the bread rather than the pan for even browning and that irresistible crispy exterior. When layering ingredients, place cheese slices directly against the bread on both sides with the turkey and bacon in between—this creates a seal that prevents the bread from becoming soggy and ensures maximum cheese meltage.

    Serving Ideas & Creative Variations

    Complementary Side Dishes

    This sandwich pairs beautifully with lighter sides that balance its richness. My go-to accompaniments include a tangy coleslaw with apple cider vinegar dressing or a simple green salad with lemon vinaigrette. For a heartier meal, try serving alongside a cup of Tomato Soup for that classic comfort food combination. Sweet potato fries with a sprinkle of smoked paprika also make an excellent side, adding color and complementary flavors to your plate. In summer months, I love pairing this sandwich with fresh cucumber slices tossed in dill and yogurt.

    Innovative Flavor Combinations

    Don’t be afraid to experiment with exciting flavor enhancements! Try adding thinly sliced apples or pears for a sweet-savory contrast that works beautifully with the cheddar. For heat lovers, incorporate jalapeño slices or a spread of chipotle mayo. One of my favorite variations uses leftover cranberry sauce after Thanksgiving—the sweet-tart flavor cuts through the richness perfectly. You could also try different proteins like smoked turkey, rotisserie chicken, or even sliced steak for a more substantial sandwich. Fresh herbs like thyme or rosemary added to the butter for toasting elevate the flavor profile.

    Storage & Troubleshooting Guide

    Make-Ahead and Reheating Methods

    While these sandwiches are best enjoyed fresh, you can prep components in advance for quick assembly. Cook bacon ahead of time and store in the refrigerator for up to three days. For reheating a fully assembled sandwich, avoid the microwave which makes the bread soggy. Instead, wrap loosely in foil and warm in a 300°F oven for about 10 minutes. If you’re packing this for lunch, toast the bread extra crispy initially, let cool completely before assembling, and wrap in parchment paper rather than plastic wrap to prevent sogginess.

    Common Issues and Solutions

    The most frequent problem with melts is uneven cooking—burnt bread with unmelted cheese. The solution is patience and lower heat. If your cheese isn’t melting fast enough, cover the pan with a lid to trap heat. For bread that’s browning too quickly, reduce the heat immediately and consider finishing the sandwich in a 300°F oven. If your sandwich seems dry, add a spread like mayo, mustard, or avocado to one side of the bread. And if ingredients keep sliding out while eating, let the sandwich rest for 2-3 minutes after cooking to allow the cheese to set slightly.

    Frequently Asked Questions

    What’s the best cheese for a Cheddar and Bacon Turkey Melt Sandwich?

    Sharp cheddar provides the classic flavor, but mixing cheeses works wonderfully. Try combining cheddar with Gruyère, fontina, or Havarti for enhanced meltability and depth of flavor.

    Can I make this sandwich with leftover Thanksgiving turkey?

    Absolutely! Leftover turkey makes this sandwich even more delicious. The roasted flavors add depth, and you can incorporate other Thanksgiving leftovers like cranberry sauce or gravy.

    How do I keep my sandwich from getting soggy?

    Toast both bread slices lightly before assembly, place cheese directly against the bread as a moisture barrier, and avoid overloading with wet ingredients.

    What’s the best way to cook the bacon for this sandwich?

    Oven-baking bacon on a rack at 400°F for 15-20 minutes yields perfectly crisp, flat bacon strips that fit nicely in sandwiches without curling.

    Can I make this sandwich vegetarian?

    Yes! Substitute the turkey and bacon with grilled portobello mushrooms, avocado slices, or plant-based meat alternatives while keeping the delicious cheddar cheese.

    Final Thoughts

    The Cheddar and Bacon Turkey Melt Sandwich has become my reliable comfort food hero for good reason. It strikes that perfect balance between convenience and indulgence, making everyday meals feel special. Whether you’re cooking for yourself after a long day or impressing friends with an elevated lunch, this sandwich delivers satisfaction in every bite. I hope you’ll make this recipe your own by experimenting with different breads, cheeses, and add-ins. Don’t forget to check out more sandwich inspiration on Pinterest and share your creations!