Author: Darleen Vance

  • Gluten-Free Strawberry Shortcake: Irresistibly Sweet & Easy!

    Gluten-Free Strawberry Shortcake: Irresistibly Sweet & Easy!

    Gluten-Free Strawberry Shortcake: Irresistibly Sweet & Easy!

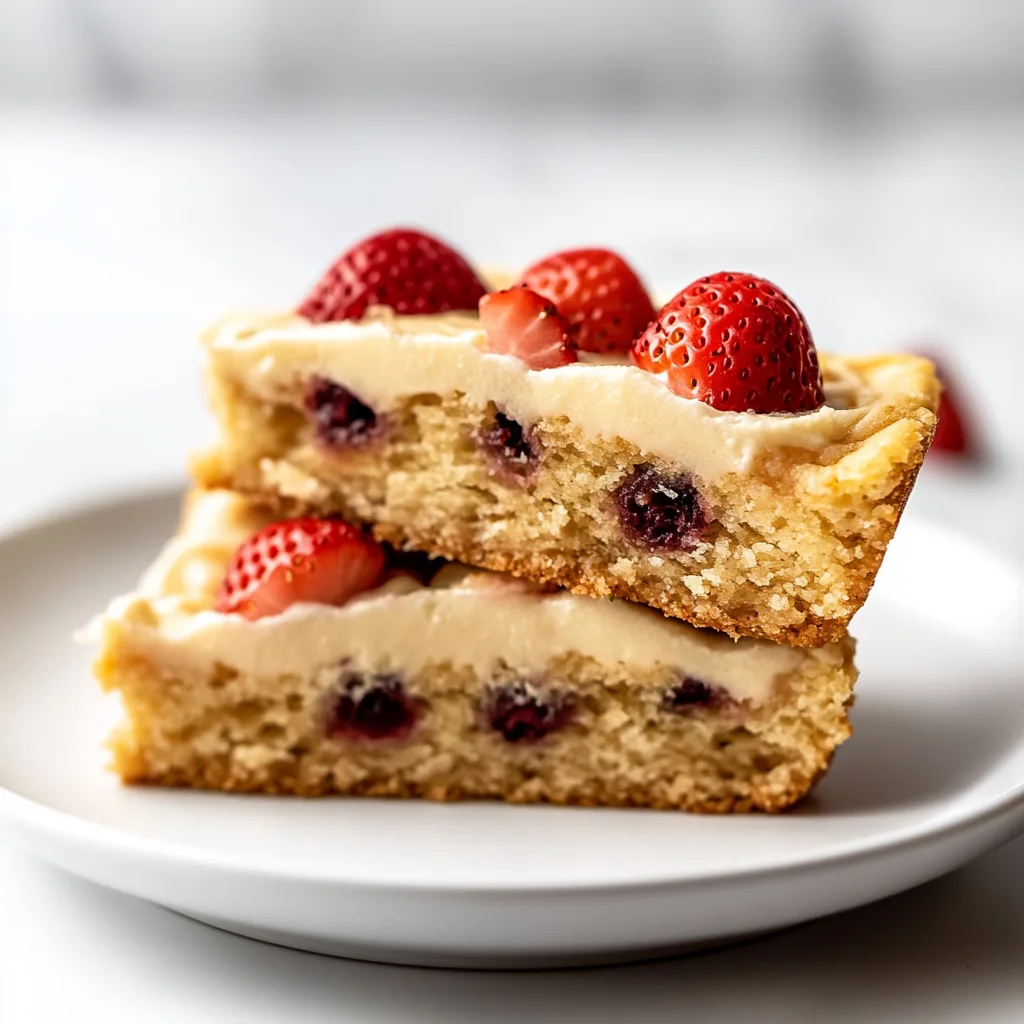
    Gluten-Free Strawberry Shortcake has completely transformed my summer dessert game! When those juicy strawberries hit the farmers’ market, I can’t resist creating this pillowy, tender shortcake that nobody would guess is gluten-free. The combination of buttery biscuits, sweet berries, and billowing clouds of whipped cream creates a dessert that’s both nostalgic and fresh. Last weekend, I served this at a backyard gathering, and the way everyone’s eyes lit up with that first bite told me everything I needed to know. If you’re craving a classic dessert that accommodates dietary needs without sacrificing an ounce of flavor, this recipe is about to become your new summer tradition, just like it’s become mine at Recipes Darleen.

    Recipe

    Why You’ll Love This Gluten-Free Strawberry Shortcake

    Perfect Texture Without the Gluten

    Creating gluten-free baked goods that don’t feel like a compromise used to feel impossible until I discovered the secrets to these shortcakes. The texture is divine – tender inside with a slight crispness on the outside that holds up beautifully to juicy strawberries. I use a blend of rice flour, tapioca starch, and a touch of xanthan gum to mimic traditional wheat flour’s structure. What makes these truly special is the cold butter technique – I grate frozen butter directly into the dry ingredients, creating those perfect little pockets that make the shortcakes rise beautifully and develop an irresistible buttery flavor.

    A Dessert for Everyone at the Table

    What I adore most about this gluten-free strawberry shortcake is how inclusive it feels when serving dessert. No more making separate options or watching someone skip the sweet finale! The beauty is that nobody can tell these are gluten-free – they’re just delicious shortcakes, period. I’ve served these at countless summer gatherings, and they’ve become my secret weapon for accommodating dietary needs without drawing attention to them. The look of surprise when I mention they’re gluten-free after everyone has cleaned their plates is always priceless. These shortcakes bring everyone together around the same delightful dessert.

    Essential Tips & Tricks

    Mastering the Berry Preparation

    The perfect maceration technique transforms ordinary strawberries into the star of this dessert. I slice most berries thinly, but leave some quartered for textural contrast, then toss with just enough sugar to draw out their natural juices without making them too sweet. My secret ingredient? A tiny splash of balsamic vinegar or a squeeze of lemon juice to brighten and intensify the strawberry flavor. Let them sit for at least 30 minutes – the transformation is magical as they develop that glossy, syrupy quality. For the most spectacular gluten-free dessert experience, prepare berries a few hours ahead and let them reach room temperature before serving.

    The Cold Ingredient Rule

    Temperature control is absolutely crucial for achieving that perfect rise and tender crumb in gluten-free shortcakes. Keep everything cold – the butter, the milk, even the mixing bowl if you can! I actually place my measured flour mixture in the freezer for 15 minutes before adding the butter. When incorporating wet ingredients, use a light touch and mix just until combined – overmixing is the enemy of tender shortcakes. Another game-changing tip: after shaping the biscuits, pop them in the freezer for 10 minutes before baking. This firms up the butter again, creating those beautiful layers when baked and preventing the dreaded spread that can happen with gluten-free doughs.

    Serving Ideas & Creative Variations

    Beyond Basic Strawberries

    While classic strawberries shine in this dessert, don’t be afraid to experiment with fruit combinations. I love creating seasonal variations throughout summer – adding blackberries and a hint of fresh mint in early summer, or peaches with a touch of honey in August. For a truly spectacular presentation, try a mixed berry medley with strawberries, blueberries, and raspberries, perhaps with a splash of Grand Marnier for adult gatherings. The gluten-free shortcake base is neutral enough to pair with virtually any fruit combination. I’ve even created a tropical version with mango and passion fruit that transported my guests straight to a beach vacation!

    Elevating Your Presentation

    Transform this humble dessert into a showstopping finale with thoughtful presentation. Instead of traditional assembly, try creating a shortcake bar where guests can build their own perfect ratio of cake, cream, and berries. For special occasions, I layer components in clear trifle glasses for a stunning visual effect. Another favorite approach is making miniature shortcakes using a small biscuit cutter – these two-bite versions are perfect for elegant dinner parties. Don’t forget the finishing touches: a light dusting of powdered sugar, a sprig of mint, or even edible flowers can elevate the entire experience from delicious to unforgettable.

    Storage & Troubleshooting Guide

    Keeping Components Fresh

    Proper storage ensures your gluten-free strawberry shortcake components maintain their optimal texture. Store baked shortcakes in an airtight container at room temperature for up to 2 days – any longer and they’ll begin to dry out. If needed, refresh them with 5-10 seconds in the microwave or a quick trip to a 300°F oven. The macerated berries will keep in the refrigerator for up to 24 hours, though they’ll continue to soften and release juice. Whipped cream is best made fresh, but if necessary, you can stabilize it with a teaspoon of powdered sugar and store it separately in the refrigerator for up to 4 hours.

    Solving Common Challenges

    Even experienced bakers encounter issues with gluten-free baking, but most problems have simple solutions. If your shortcakes spread too much during baking, your butter likely got too warm – next time, chill the shaped dough for 15 minutes before baking. For shortcakes that turned out dense rather than fluffy, you might have overworked the dough. Remember to use a light touch when mixing and folding. If they’re crumbly and falling apart, your mixture may have been too dry – gluten-free flours often absorb more liquid than wheat flour, so don’t be afraid to add an extra tablespoon of milk if the dough seems too dry.

    Frequently Asked Questions

    Can I make this gluten-free strawberry shortcake ahead of time?

    Yes! Bake the shortcakes up to 2 days ahead and store in an airtight container. Prepare berries up to 24 hours in advance. Assemble just before serving to maintain the perfect texture.

    What’s the best gluten-free flour blend for shortcakes?

    I recommend a blend with rice flour, tapioca starch, and potato starch. Commercial cup-for-cup blends containing xanthan gum also work well, providing structure that mimics gluten.

    Can I freeze the shortcakes?

    Absolutely! Cool completely, wrap individually in plastic, then foil, and freeze for up to 3 months. Thaw at room temperature and warm briefly before serving.

    How do I prevent my shortcakes from being dry?

    Use full-fat ingredients, don’t overmix the dough, and add a tablespoon of sour cream or yogurt to the wet ingredients for moisture that lasts.

    Can I use frozen strawberries instead of fresh?

    In a pinch, yes. Thaw completely, drain excess liquid, then macerate as directed. Fresh berries provide the best texture and flavor, but frozen work when strawberries aren’t in season.

    Final Thoughts

    This gluten-free strawberry shortcake has become more than just a recipe in my kitchen—it’s a celebration of inclusive baking that proves dietary restrictions never need to mean compromise. The joy of watching someone bite into these tender, buttery shortcakes topped with juicy berries and cream is pure kitchen magic. I hope you’ll make this recipe your own, experimenting with seasonal fruits and creating memories around your table. Don’t forget to share your creations on Pinterest – I’d love to see how you’ve made this gluten-free classic shine in your home!
  • Brown Butter Skillet Chocolate Chip Cookie That Melts Hearts Fast

    Brown Butter Skillet Chocolate Chip Cookie That Melts Hearts Fast

    Brown Butter Skillet Chocolate Chip Cookie That Melts Hearts Fast

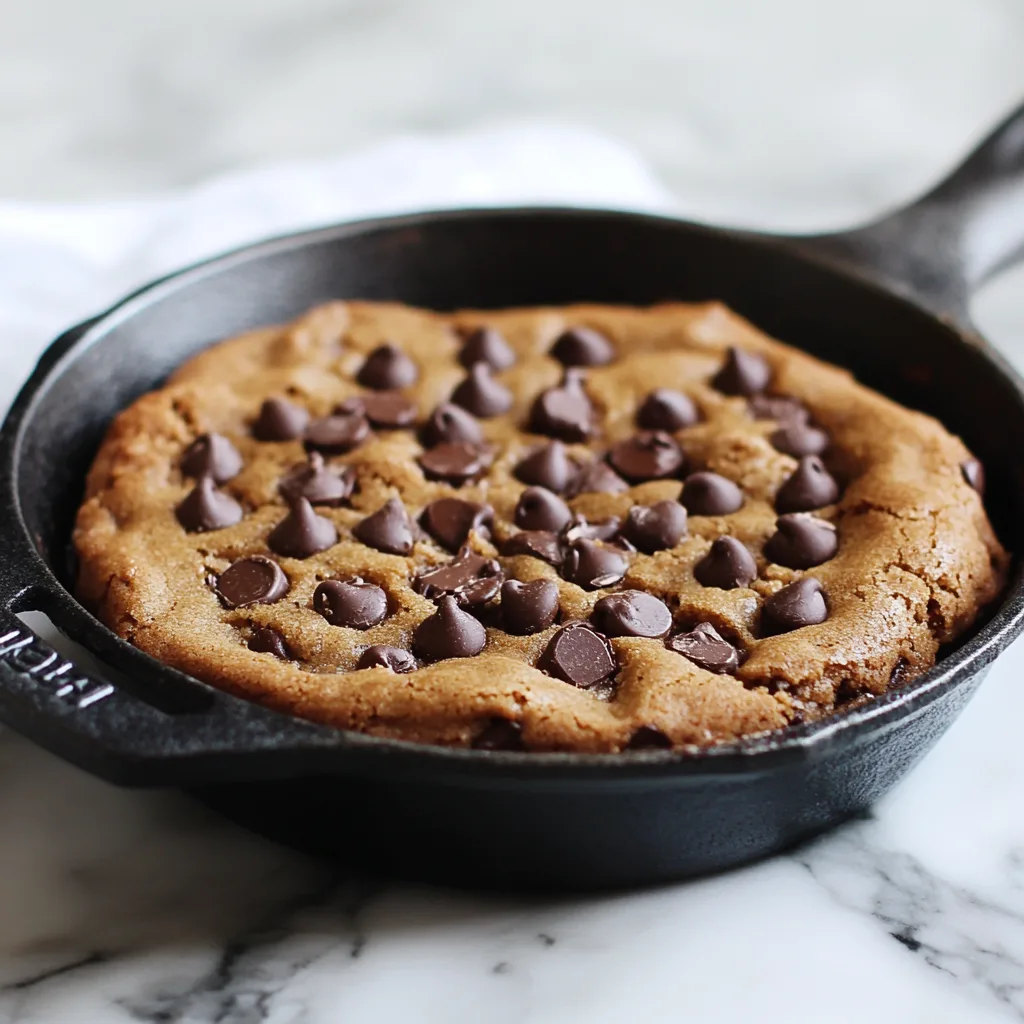
    The Brown Butter Skillet Chocolate Chip Cookie is my absolute favorite indulgence when I need something warm, gooey, and soul-satisfying. There’s something magical about that first crack through the crispy edge into the soft center that makes my heart skip a beat every time. I discovered this recipe during a rainy weekend at my grandmother’s cabin, and it’s been my go-to comfort dessert ever since. The nutty aroma of brown butter fills the kitchen with a warmth that signals something extraordinary is about to happen. If you love classic comfort desserts, this skillet cookie will become your new obsession.

    Recipe

    Perfect Texture Combination

    The beauty of a Brown Butter Skillet Chocolate Chip Cookie lies in its incredible texture contrast. The edges develop a delightful crispness while the center stays deliciously soft and gooey. I’ve found that cast iron creates the perfect heat distribution for achieving this texture nirvana. When my spoon breaks through that slightly crackly top into the molten center, it’s pure bliss! The brown butter adds complex caramel notes that regular chocolate chip cookies simply can’t match. Plus, the presentation is absolutely stunning – there’s nothing like bringing a sizzling skillet straight to the table.

    Simple Yet Impressive

    What I adore about this Brown Butter Skillet Chocolate Chip Cookie is how it transforms basic ingredients into something spectacular. Last month, I made this for unexpected dinner guests with pantry staples, and they couldn’t stop raving about it! The brown butter technique might sound fancy, but it’s actually quite straightforward – just watch the butter closely as it transforms from golden to nutty brown. This recipe requires fewer steps than individual cookies (no scooping or multiple batches), making it perfect for both weeknight treats and special occasions when you want to impress without spending hours in the kitchen.

    Essential Tips & Tricks

    Mastering the Brown Butter

    Perfecting your brown butter is the crucial first step to an exceptional skillet cookie. I’ve found that using a light-colored pan helps you monitor the color change from yellow to golden to that perfect nutty brown. Keep the heat medium-low and never walk away – butter can go from perfectly browned to burnt in seconds! You’ll know it’s ready when you smell that intoxicating nutty aroma and see tiny brown specks forming. Let it cool slightly before adding to your sugar mixture, or you might accidentally cook your eggs. This extra step adds a depth of flavor that transforms an ordinary cookie into something extraordinary.

    Choosing the Right Chocolate

    The chocolate you select makes a tremendous difference in your Brown Butter Skillet Chocolate Chip Cookie. I prefer using a combination of chocolates – chunks, chips, and even chopped bars with varying cocoa percentages. This creates pockets of different sweetness and texture throughout the cookie. For my last birthday, I splurged on high-quality chocolate with 70% cocoa content, and the difference was mind-blowing! Consider adding a touch of sea salt on top before baking to enhance the chocolate’s complexity. Remember to reserve some chocolate pieces for pressing into the top right before baking for that beautiful, bakery-worthy appearance.

    Serving Ideas & Creative Variations

    The Ultimate A La Mode Experience

    There’s nothing quite like serving a Brown Butter Skillet Chocolate Chip Cookie still warm from the oven with a scoop of vanilla bean ice cream melting into all the nooks and crannies. I love the dramatic sizzle when the cold ice cream hits the hot skillet! For extra decadence, drizzle with homemade caramel sauce or hot fudge. My family’s favorite weekend ritual involves gathering around the coffee table with spoons in hand, digging straight into the skillet while watching our favorite movie. For a dinner party upgrade, try adding individual ramekins for personal-sized cookies that never fail to impress guests.

    Seasonal Flavor Twists

    One of the joys of this Brown Butter Skillet Chocolate Chip Cookie is how adaptable it is to seasonal variations. During fall, I love adding warm spices like cinnamon and nutmeg with a handful of toasted pecans. For holiday gatherings, white chocolate chips with dried cranberries and orange zest create a festive twist. Summer brings opportunities for fresh berries pressed into the top before baking, creating jammy pockets of sweetness. My personal favorite variation happened by happy accident when I had leftover salted caramel sauce – swirling it through the batter created magical pockets of gooey goodness that had everyone fighting for the last bite.

    Storage & Troubleshooting Guide

    Keeping It Fresh

    While a Brown Butter Skillet Chocolate Chip Cookie is best enjoyed fresh from the oven, leftovers (if you’re lucky enough to have any!) can still be delicious. Cover the cooled skillet tightly with foil and store at room temperature for up to 3 days. To reheat, pop it in a 300°F oven for 5-7 minutes until warmed through. For longer storage, cut into portions and freeze in airtight containers for up to a month. My favorite midnight snack hack: microwave a frozen piece for 20-30 seconds for an almost-fresh-baked experience! Just remember that the texture is never quite the same as that first magical serving straight from the oven.

    Fixing Common Issues

    If your Brown Butter Skillet Chocolate Chip Cookie isn’t turning out perfectly, a few simple adjustments can help. For cookies that are too cakey or dry, reduce the flour by 2-3 tablespoons next time. If the center remains undercooked while the edges burn, your oven temperature may be too high – try reducing by 25°F. For cookies that spread too much, chill the dough for 30 minutes before baking. I once accidentally added too much butter and ended up with a delicious but very flat cookie! The fix was simple – I served it as a “cookie sundae base” with ice cream, and no one knew it wasn’t intentional.

    Frequently Asked Questions

    Yes! Prepare the dough up to 24 hours ahead and refrigerate in an airtight container. Let it sit at room temperature for 30 minutes before pressing into the skillet and baking for that fresh-baked experience.

    What size skillet works best?

    A 10-inch cast iron skillet is ideal for a perfect edge-to-center ratio. For thicker cookies, use a smaller 8-inch skillet. For thinner, crispier results, a 12-inch skillet works beautifully.

    Can I substitute the brown butter with regular butter?

    You can, but you’ll miss the nutty, caramel notes that make this cookie special. Brown butter adds complex flavor that transforms an ordinary chocolate chip cookie into something extraordinary.

    Is this recipe adaptable for dietary restrictions?

    Absolutely! Use gluten-free flour blend (with xanthan gum) for a gluten-free version. For dairy-free options, plant-based butter can be browned similarly, though watch it more carefully.

    Look for golden brown edges that are set, while the center remains slightly soft. A toothpick inserted 2 inches from the edge should come out mostly clean with a few moist crumbs.

    Final Thoughts

    This Brown Butter Skillet Chocolate Chip Cookie has become more than just a dessert in my home—it’s a tradition, a comfort, and sometimes even a celebration. The magic happens not just in the transformation of butter into its nutty, caramelized form, but in the moments shared around the warm skillet. Whether you’re serving it at a dinner party or enjoying it in your pajamas on a quiet evening, this skillet cookie brings a special kind of homemade happiness that’s hard to beat. I’d love to see your creations on Pinterest if you give this recipe a try!

  • BBQ Pulled Chicken Tater Tots: Crispy, Melty, Irresistible!

    BBQ Pulled Chicken Tater Tots: Crispy, Melty, Irresistible!

    BBQ Pulled Chicken Tater Tots: Crispy, Melty, Irresistible!

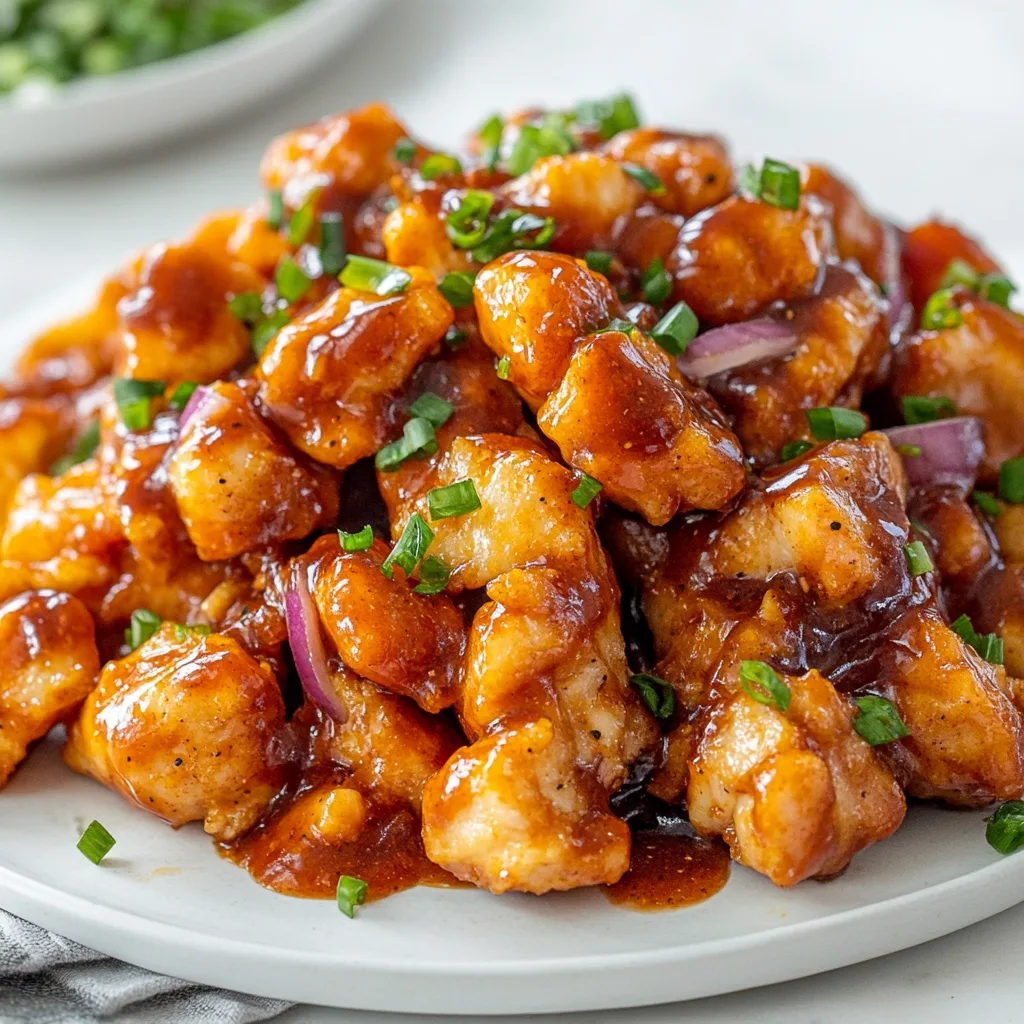
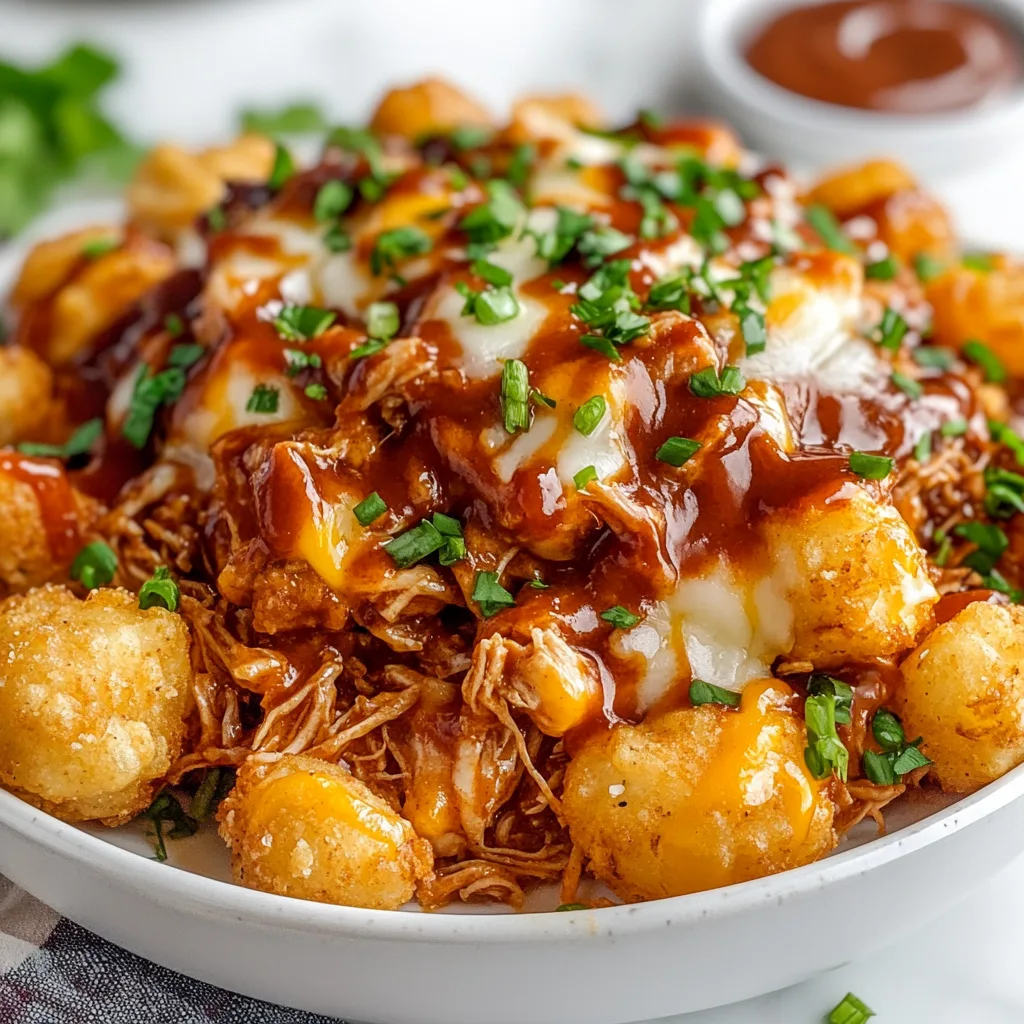
    There’s something absolutely magical about BBQ Pulled Chicken with Crispy Tater Tots and Melted Cheese that makes even the dreariest weeknight feel like a special occasion. The first time I made this for my family, my kitchen filled with the sweet-smoky aroma of barbecue sauce while the tater tots crisped to golden perfection in the oven. It’s comfort food that hits all the right notes—tender shredded chicken, crunchy potato bites, and that gooey cheese pull that makes everyone at the table smile. Trust me, this dish has rescued countless “I don’t know what to make” evenings in my home, and I’m thrilled to share it with you!

    Recipe

    Why You’ll Love This BBQ Pulled Chicken with Crispy Tater Tots and Melted Cheese

    A Perfect Blend of Textures and Flavors

    There’s something utterly satisfying about the contrasting textures in this dish—the tender pulled chicken against the crispy exterior of those golden tater tots. The sweet tanginess of the barbecue sauce creates the perfect backdrop for the savory chicken, while the melted cheese brings everything together in a gooey embrace. I love how the tots on the bottom soak up some of the sauce while the ones on top stay delightfully crunchy. It’s like having the best parts of a barbecue sandwich and loaded potato skins in one incredible bite!

    Quick and Convenient for Busy Weeknights

    This recipe has saved me on countless evenings when I’m running between my daughter’s soccer practice and helping with homework. You can use rotisserie chicken to make it even faster, or prepare the pulled chicken in a slow cooker earlier in the day. The assembly takes just minutes, and while it bakes, you’re free to help with spelling words or simply catch your breath. I often prep the chicken portion on Sunday, which means midweek dinner can be ready in about 25 minutes—just enough time to change into comfy clothes and set the table.

    Essential Tips & Tricks

    Mastering the Perfect Pulled Chicken

    The secret to irresistible pulled chicken lies in two key elements: proper seasoning and moisture control. I’ve learned that adding a tablespoon of apple cider vinegar to your cooking liquid helps break down the proteins, resulting in chicken that shreds effortlessly. For extra flavor depth, try using chicken thighs instead of breasts—they’re more forgiving and won’t dry out as quickly. If you’re short on time, a similar technique works wonders in my Chicken Pot Pie Casserole with Biscuits, creating tender, flavorful meat every time.

    Getting Those Tater Tots Perfectly Crispy

    Nothing disappoints quite like soggy tater tots! To achieve that golden crunch we all crave, arrange them in a single layer and give them a light spray of cooking oil before baking. My game-changing discovery was preheating the baking sheet in the oven before adding the tots—this gives them an immediate sear that prevents sogginess. For extra crispiness, consider baking them separately for 10 minutes before adding to the assembled dish. This technique creates that delightful textural contrast that makes this comfort food so satisfying.

    Serving Ideas & Creative Variations

    Family-Style Presentation Options

    I love serving this BBQ Pulled Chicken with Crispy Tater Tots and Melted Cheese directly from the oven in a cast-iron skillet—there’s something so inviting about that rustic presentation. For a fun twist, try individual ramekins that allow everyone to have their own perfectly portioned dish with those crispy edges all around. Top with thinly sliced green onions, a dollop of sour cream, or a sprinkle of crispy bacon bits. This presentation style works beautifully alongside a simple green salad, just like in my Cheesy Beef and Rice Casserole with Mushrooms for a complete meal.

    Exciting Flavor Combinations to Try

    While the classic BBQ version is a guaranteed crowd-pleaser, don’t be afraid to experiment with flavor variations. Try a buffalo chicken version with hot sauce and blue cheese, or go Tex-Mex with taco seasoning, corn, black beans, and pepper jack cheese. My family went wild for a Hawaiian-inspired version with pineapple tidbits and a teriyaki glaze! For a more sophisticated adult version, try adding caramelized onions and smoked gouda—the depth of flavor is absolutely incredible and pairs beautifully with a glass of your favorite red wine.

    Storage & Troubleshooting Guide

    Proper Storage and Reheating Methods

    This dish is a meal-prep champion! Store leftovers in airtight containers in the refrigerator for up to 3 days. The key to successful reheating is separating the process: microwave until just warm, then finish in a toaster oven to restore the tots’ crispiness. For freezing, I recommend storing the BBQ chicken portion separately from the tater tots—frozen tots lose their texture, so it’s better to use fresh ones when reheating. When properly stored, the chicken portion freezes beautifully for up to 2 months, making future dinners even easier.

    Solving Common Recipe Challenges

    If you find your dish turning out too soupy, try reducing the barbecue sauce on the stovetop before mixing it with the chicken. This concentrates the flavors while eliminating excess moisture. For tots that refuse to crisp, try patting them dry with paper towels before baking and ensure your oven is fully preheated. If your cheese is browning too quickly before the tots are done, cover loosely with foil for part of the baking time. Remember that different barbecue sauces vary in sweetness and consistency, so adjust seasonings accordingly.

    Frequently Asked Questions

    Can I make BBQ Pulled Chicken with Crispy Tater Tots and Melted Cheese ahead of time?

    Yes! Prepare the pulled chicken up to 2 days ahead and refrigerate. Assemble with fresh tater tots and cheese just before baking for the best texture contrast.

    What’s the best cheese to use for this recipe?

    A combination of sharp cheddar and monterey jack offers the perfect balance of flavor and meltability. For extra indulgence, add a sprinkle of smoked gouda on top.

    Can I use frozen chicken for this recipe?

    Absolutely! Cook frozen chicken on low in a slow cooker for 7-8 hours or in an Instant Pot for 12 minutes with natural release for perfectly shreddable results.

    How can I make this recipe healthier?

    Try using sweet potato tots, reduce the cheese by half, and choose a lower-sugar barbecue sauce. You can also add diced bell peppers and onions to the chicken mixture.

    What sides pair well with this dish?

    A crisp green salad, steamed broccoli, or tangy coleslaw provides the perfect fresh contrast to the rich, comforting flavors of this hearty main dish.

    Final Thoughts

    This BBQ Pulled Chicken with Crispy Tater Tots and Melted Cheese has become more than just a recipe in my household—it’s a reliable friend on busy nights and a guaranteed mood-lifter. There’s something deeply satisfying about watching my family’s eyes light up when they see it coming to the table, knowing that beneath that bubbling cheese surface lies comfort and care in every bite. I hope this dish brings the same joy to your table! For more comforting recipes, visit my Pinterest board where I’m always sharing new family favorites.

  • BBQ Chicken Totchos: Irresistible Snack You’ll Crave Instantly!

    BBQ Chicken Totchos: Irresistible Snack You’ll Crave Instantly!

    BBQ Chicken Totchos: Irresistible Snack You’ll Crave Instantly!

    BBQ Chicken Totchos have completely transformed my weeknight dinner game! There’s something magical about the way crispy tater tots combine with tender BBQ chicken, melty cheese, and all those colorful toppings. The first time I made these for my family, my kitchen filled with the sweet-smoky aroma of BBQ sauce, and everyone literally raced to the table! These loaded totchos strike that perfect balance between comfort food indulgence and crowd-pleasing fun. Think of them as the cooler, more exciting cousin of nachos that will have everyone reaching for seconds. They’re perfect for game day, casual gatherings, or just a fun Tuesday dinner when you need a little joy on your plate.

    Recipe

    Why You’ll Love This BBQ Chicken Totchos

    Perfect Balance of Flavors and Textures

    The magic of these BBQ Chicken Totchos lies in their incredible textural contrast. The tots start super crispy (I’ll show you my secret for getting them extra crunchy!), creating the perfect base for the tender, saucy BBQ chicken. Then comes the blanket of melted cheese that brings everything together. Each bite delivers that satisfying crunch followed by savory chicken and gooey cheese. I love adding a fresh finish with cool sour cream, zesty green onions, and if you’re feeling adventurous, a few jalapeños for heat. It’s like a flavor party where everyone’s invited – savory, sweet, spicy, and creamy all dancing together!

    Quick and Adaptable for Any Occasion

    What I adore about these totchos is how incredibly versatile they are. You can use rotisserie chicken to make this a 20-minute meal, or plan ahead with slow-cooked chicken that falls apart with just a fork. They’re perfect for using up leftover BBQ from your weekend cookout – I’ve even made a version with leftover turkey after Thanksgiving! The basic formula stays the same, but you can dress them up for game day with team colors (colored bell peppers work great) or make them more elegant for a dinner party with artisanal cheese and microgreens. My kids love customizing their own sections with their favorite toppings!

    Essential Tips & Tricks

    Getting Ultra-Crispy Tater Tots

    The foundation of amazing totchos is perfectly crispy tots. I learned this the hard way after serving my first batch with soggy potatoes (nobody wants that!). Now I always arrange them in a single layer on a baking sheet and bake them about 5 minutes longer than the package suggests. For extra crispiness, try tossing them halfway through cooking and consider using a preheated cast iron skillet instead of a baking sheet. The cast iron retains heat beautifully and gives those golden edges we all fight over. Remember: a crowded pan means steaming, not crisping – so give those tots some breathing room!

    Layering Strategy for Maximum Flavor

    The secret to exceptional totchos is all in how you build them. Start with that base of crispy tots, then add a thin layer of cheese before the BBQ chicken – this creates a protective barrier that helps prevent sogginess. Next comes your saucy BBQ chicken, followed by another generous layer of cheese to bind everything together. I’ve found that a mix of cheeses works best – sharp cheddar for flavor and monterey jack or mozzarella for that Instagram-worthy cheese pull. For the perfect finish like my favorite casseroles, add your cold toppings (sour cream, avocado, green onions) only after baking for the best temperature and texture contrast.

    Serving Ideas & Creative Variations

    Family-Style Presentation Options

    There’s something so joyful about serving these BBQ Chicken Totchos family-style that brings everyone together. My favorite method is using a large cast-iron skillet placed on a wooden board with small bowls of extra toppings surrounding it. This creates an interactive experience where everyone can customize their portion. For outdoor gatherings, I’ve served them on a large wooden board lined with parchment paper – it’s casual but looks impressive! Individual portions work beautifully too – try using mini cast iron skillets or oven-safe personal dishes for a restaurant-quality presentation that keeps portions hot longer. The sizzle when they hit the table always gets “oohs” and “aahs”!

    Exciting Flavor Variations to Try

    While classic BBQ chicken is amazing, don’t be afraid to experiment with different flavor profiles! My buffalo chicken version with blue cheese crumbles and celery has become a game day tradition in our house. For taco night vibes, try seasoned ground beef with taco seasoning, black beans, and a dollop of guacamole – it’s like my favorite taco-inspired recipes but with a totchos twist! A Mediterranean version with Greek-seasoned chicken, feta, olives, and tzatziki is unexpectedly delicious. For breakfast totchos (yes, that’s a thing!), try topping with scrambled eggs, crumbled bacon, and hollandaise sauce. Each variation brings its own personality while keeping that satisfying totchos experience.

    Storage & Troubleshooting Guide

    Make-Ahead and Leftover Strategies

    Let’s be honest – BBQ Chicken Totchos are at their absolute best when freshly made, but that doesn’t mean you can’t plan ahead! I often prep components separately: cook and shred the chicken with BBQ sauce, shred the cheese, and chop toppings up to two days ahead. Store everything separately in the refrigerator, then assemble and bake just before serving. For leftovers (if you’re lucky enough to have any!), store them in an airtight container for up to 2 days. The microwave works in a pinch, but for reviving that crispy texture, a few minutes in a 350°F oven works wonders.

    Solving Common Totchos Challenges

    The biggest challenge with totchos is keeping them from getting soggy – nobody wants that! If your tots are turning out soft, try baking them longer initially before adding toppings. Another game-changer is patting your BBQ chicken with paper towels to remove excess moisture before adding it to the tots. If your cheese isn’t melting properly, try grating it yourself instead of using pre-shredded (which contains anti-caking agents). For even melting, cover with foil for the first few minutes of baking, then remove to allow the top to get golden. And if your toppings are sliding off, try creating “valleys” in your tot arrangement to catch all that goodness!

    Frequently Asked Questions

    Can I make BBQ Chicken Totchos in advance for a party?

    Prepare components separately (crisp the tots, prepare BBQ chicken, shred cheese, chop toppings) and store separately. Assemble and bake just before serving for the best texture and flavor – takes just minutes when prepped ahead!

    What’s the best cheese to use for totchos?

    A combination works best! Sharp cheddar provides flavor while monterey jack or mozzarella gives that stretchy cheese-pull. Freshly grated melts more smoothly than pre-shredded varieties with anti-caking agents.

    Can I make these BBQ Chicken Totchos in an air fryer?

    Absolutely! Cook tots in the air fryer until extra crispy, then transfer to an oven-safe dish, add toppings, and broil until cheese melts. This creates ultra-crispy tots with perfectly melted toppings.

    How do I keep my totchos from getting soggy?

    Bake tots until extra crispy before adding toppings, create a cheese barrier between tots and saucy ingredients, and add cold toppings like sour cream and avocado only after baking.

    What sides pair well with BBQ Chicken Totchos?

    These are hearty enough to be a meal, but pair beautifully with a simple green salad, coleslaw, or corn on the cob. For appetizer portions, balance with fresh veggie sticks and dip.

    Final Thoughts

    BBQ Chicken Totchos have earned their place in my regular rotation because they bring together everything I love about comfort food – they’re customizable, crowd-pleasing, and somehow feel special even on an ordinary weeknight. There’s something magical about that combination of crispy, saucy, cheesy goodness that just makes people happy. Whether you’re feeding a hungry family or entertaining friends, these totchos strike that perfect balance between impressive and approachable. I’d love to see your creations if you make them – tag me on Pinterest with your BBQ Chicken Totchos masterpieces!

  • Gluten-Free Banana Bread with Chocolate Chips: Irresistibly Soft & Yummy!

    Gluten-Free Banana Bread with Chocolate Chips: Irresistibly Soft & Yummy!

    Gluten-Free Banana Bread with Chocolate Chips: Irresistibly Soft & Yummy!

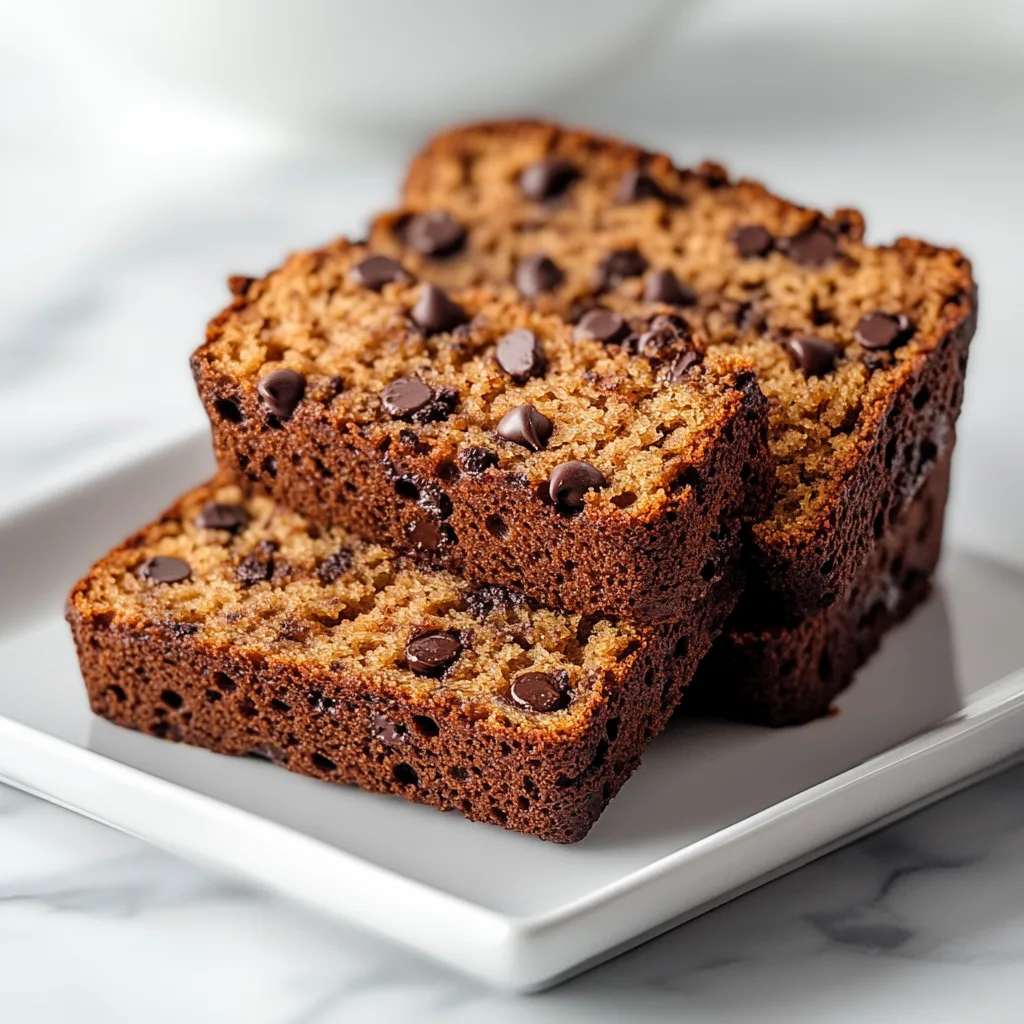
    There’s something magical about the aroma of Gluten-Free Banana Bread with Chocolate Chips baking in the oven. That sweet, comforting scent that fills every corner of your home, promising warmth and deliciousness with each bite. I still remember the first time I nailed this recipe – it was a rainy Sunday afternoon, and my kitchen became this cozy haven of banana-chocolate goodness. Whether you’re gluten-intolerant or simply looking to try something new, this recipe delivers all the moisture and flavor you’d expect from traditional banana bread, with none of the gluten. Ready to transform those spotty bananas into something extraordinary? Let’s get baking!

    Recipe

    Why You’ll Love This Gluten-Free Banana Bread with Chocolate Chips

    Perfect Texture Every Time

    The biggest challenge with gluten-free baking is achieving that perfect texture – not too dry, not too dense. This recipe solves that problem beautifully! The secret combination of gluten-free flour blend and xanthan gum creates structure, while those overripe bananas provide natural moisture that keeps everything perfectly tender. I’ve tested this recipe countless times (my family never complains about the “research”), and it consistently produces a loaf with a golden crust and pillowy interior that doesn’t crumble when sliced. The melty chocolate chips create these little pockets of gooey goodness that elevate the entire experience.

    Simple Ingredients, Extraordinary Results

    What I adore about this recipe is how it transforms everyday ingredients into something truly special. You likely have most items already – those spotty bananas on your counter, eggs, vanilla, and a bag of chocolate chips hiding in the pantry. The gluten-free flour blend is widely available now (I use a simple rice flour/tapioca/potato starch mix), making this accessible for everyone. There’s something deeply satisfying about creating something so delicious with such humble ingredients. The natural sweetness from the bananas means we can use less sugar, too, making this treat a bit more wholesome while still feeling indulgent.

    Essential Tips & Tricks

    Banana Selection & Preparation

    The perfect banana for this bread is spotty, fragrant, and almost too ripe to eat – that’s when the natural sugars and banana flavor are at their peak. Those black-speckled bananas you’d normally toss? They’re baking gold! For the best results, mash them with a fork rather than a blender; those tiny chunks add moisture and concentrated flavor pockets throughout the bread. If your bananas aren’t quite ripe enough, place them in a paper bag with an apple overnight – the ethylene gas will speed up ripening. This technique has saved my baking plans countless times when I’m impatient for those bananas to ripen naturally!

    Mixing Method Matters

    The way you combine your ingredients makes a world of difference in the final texture. Always mix dry ingredients thoroughly before adding wet ingredients to ensure even distribution of leavening agents. When combining wet and dry ingredients, use a gentle folding motion rather than vigorous stirring – overmixing develops the proteins in gluten-free flour, creating a gummy texture. I learned this the hard way after several dense loaves! Fold just until no dry streaks remain, then gently incorporate the chocolate chips. For an even distribution of chips, toss them with a teaspoon of the flour mixture before adding to prevent sinking to the bottom during baking. Check out my gluten-free molasses cookie for another treat using similar techniques.

    Serving Ideas & Creative Variations

    Beyond the Basic Slice

    While a simple slice of warm banana bread is heaven all by itself, there are so many ways to elevate this treat! Try toasting a slice and spreading with a layer of creamy peanut butter that melts into all the nooks and crannies – the salty-sweet combination is absolutely divine. For breakfast, I love serving thick slices with a dollop of Greek yogurt and a drizzle of honey. For dessert, transform it into a decadent treat by warming a slice and topping with a scoop of vanilla ice cream and a sprinkle of toasted walnuts. The contrast between warm bread and cold, creamy ice cream creates a sensory experience that’s simply irresistible.

    Flavor Variations to Try

    The beauty of this recipe is its versatility as a base for experimentation. Swap the chocolate chips for blueberries for a fruity twist, or add a teaspoon of cinnamon and a pinch of nutmeg for a warm, spiced version. My personal favorite variation includes folding in 1/2 cup of toasted coconut flakes and using dark chocolate chunks instead of chips – it’s tropical heaven in every bite! For a more indulgent treat, drizzle the cooled loaf with a simple glaze made from powdered sugar and fresh orange juice. For more gluten-free inspiration, check out my gluten-free lemon pound cake that uses similar principles for moisture retention.

    Storage & Troubleshooting Guide

    Keeping Your Bread Fresh

    Gluten-free baked goods can dry out faster than their wheat counterparts, so proper storage is essential. Once completely cooled, wrap your banana bread in parchment paper first, then in aluminum foil. This double-layer approach keeps moisture in while preventing the bread from becoming soggy. At room temperature, it will stay fresh for up to 3 days. For longer storage, slice the entire loaf, place parchment paper between slices, and freeze in an airtight container for up to 3 months. When a craving hits, simply toast a frozen slice – no need to thaw first! I keep a loaf in the freezer at all times for emergency chocolate cravings.

    Troubleshooting Common Issues

    If your bread sinks in the middle, your oven temperature might be too high or your leavening agents might be expired. Always check your baking powder and baking soda every 6 months for freshness. If the bread is too dense, you might have overmixed the batter or not used enough leavening. For bread that’s too dry, try adding an extra tablespoon of oil next time or using bananas that are even riper. If the bread sticks to the pan despite greasing, try lining with parchment paper with overhanging edges to create a sling for easy removal. Remember that gluten-free baking often requires a bit more moisture than traditional recipes.

    Frequently Asked Questions

    Can I make this banana bread dairy-free as well as gluten-free?

    Absolutely! Simply substitute the butter with coconut oil or a plant-based butter alternative. The chocolate chips can be swapped for dairy-free versions, which are widely available in most grocery stores now.

    How can I tell when my Gluten-Free Banana Bread with Chocolate Chips is done baking?

    Insert a toothpick into the center – it should come out with a few moist crumbs but no wet batter. The top should be golden brown and spring back slightly when touched.

    Can I use a pre-made gluten-free flour blend?

    Yes! Look for a 1:1 baking blend that contains xanthan gum. If your blend doesn’t include it, add 1/4 teaspoon per cup of flour to help with structure and moisture retention.

    Why did my chocolate chips sink to the bottom of the loaf?

    Toss your chocolate chips in 1 tablespoon of your flour mixture before folding them into the batter. This light coating prevents sinking during baking.

    Can I reduce the sugar in this recipe?

    You can reduce the added sugar by about 25% without significantly affecting texture. The ripe bananas provide natural sweetness, especially when paired with chocolate chips.

    Final Thoughts

    This Gluten-Free Banana Bread with Chocolate Chips has become my go-to recipe for using up ripe bananas, impressing guests, or simply treating myself to something special with my morning coffee. There’s something deeply satisfying about creating a baked good that everyone enjoys, regardless of dietary restrictions. The smell of this bread baking has become synonymous with comfort in my home – a signal that something wonderful is about to be shared. I hope this recipe brings the same joy to your kitchen! For more delicious recipes, follow me on Pinterest where I share new gluten-free inspirations regularly.

  • Turkey Chili with Beans & Sweet Potatoes: Cozy, Healthy, & Delicious!

    Turkey Chili with Beans & Sweet Potatoes: Cozy, Healthy, & Delicious!

    Turkey Chili with Beans & Sweet Potatoes: Cozy, Healthy, & Delicious!

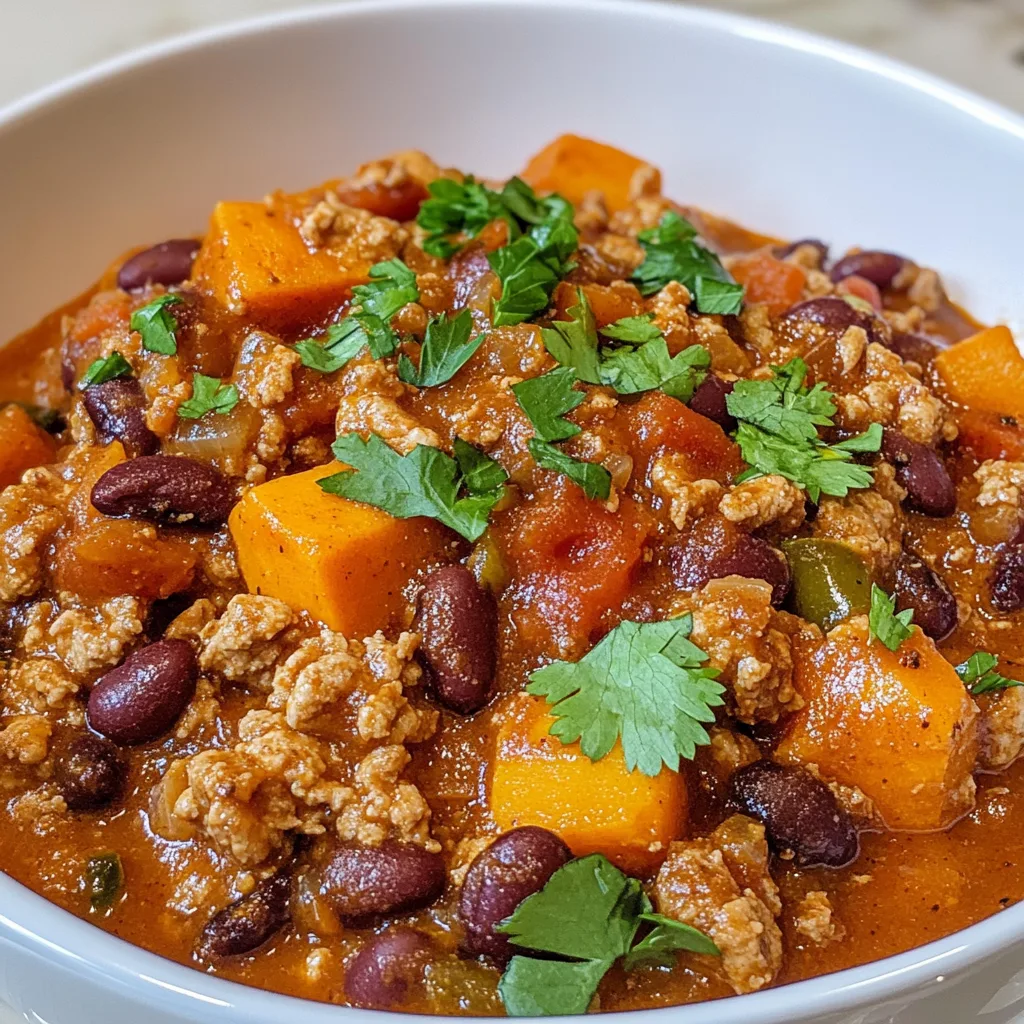
    The aroma of Turkey Chili with Beans and Sweet Potatoes simmering on my stove brings instant comfort on chilly evenings. This hearty one-pot wonder combines lean ground turkey, fiber-rich beans, and chunks of sweet potato for a nutritious meal that’s both satisfying and wholesome. I discovered this recipe during a particularly harsh winter when I craved something warming but didn’t want the heaviness of traditional beef chili. The sweet potatoes add a subtle sweetness that balances the savory spices perfectly, making this a go-to dinner that reminds me of cozy nights at home.

    Why You’ll Love This Turkey Chili with Beans and Sweet Potatoes

    Perfect Balance of Flavors and Textures

    The magic of this Turkey Chili with Beans and Sweet Potatoes lies in its perfect harmony of flavors. The natural sweetness from the sweet potatoes balances beautifully with the savory turkey and earthy beans. Each spoonful delivers a delightful textural experience – tender chunks of sweet potato, hearty beans with just the right amount of bite, and perfectly seasoned ground turkey. I love how the spices bloom in the simmering pot, creating layers of flavor that deepen as they cook. The chili powder and cumin create that classic chili profile, while a touch of smoked paprika adds complexity.

    Nutritional Powerhouse for Busy Days

    This chili isn’t just delicious—it’s a nutritional goldmine. Swapping beef for lean turkey significantly reduces the fat content while maintaining protein levels. The sweet potatoes provide beta-carotene, vitamin C, and fiber, while beans add plant protein and additional fiber that keeps you satisfied for hours. I’ve served this to friends who couldn’t believe how filling it was without feeling heavy afterward. On busy weeknights when I need something that fuels my family with goodness but doesn’t require hours in the kitchen, this chili delivers every time.

    Essential Tips & Tricks

    Layering Flavors for Maximum Depth

    The secret to exceptional Turkey Chili with Beans and Sweet Potatoes is building layers of flavor. Always start by sautéing onions until translucent before adding garlic—this prevents the garlic from burning and creates a flavorful base. Don’t rush browning the turkey; those caramelized bits add incredible depth. I learned to bloom the spices in the pot with the meat for 30-60 seconds before adding liquids—this releases their essential oils and intensifies their impact. For an extra dimension, try adding a tablespoon of tomato paste and letting it caramelize slightly before the liquid ingredients go in.

    Texture Control and Ingredient Selection

    The texture balance makes this chili special, so timing matters. Add sweet potatoes about 15 minutes before serving to prevent them from becoming mushy. For beans, I prefer a combination of black beans and kidney beans for visual appeal and textural variety, similar to my Hearty Beef and Vegetable Soup. When selecting sweet potatoes, choose firm ones with orange flesh for the best flavor and nutrition. Dice them into uniform 1/2-inch cubes for even cooking. If you prefer a thicker chili, mash some of the sweet potato pieces against the side of the pot during the final cooking stage.

    Serving Ideas & Creative Variations

    Toppings and Accompaniments

    The right toppings transform this Turkey Chili with Beans and Sweet Potatoes from delicious to extraordinary. My family’s favorite combination includes a dollop of Greek yogurt (a healthier alternative to sour cream), diced avocado for creaminess, thinly sliced green onions, and a sprinkle of sharp cheddar. For texture contrast, try crushed tortilla chips or toasted pepitas. Warm cornbread makes the perfect side—the slightly sweet flavor complements the chili beautifully. For a complete meal with minimal effort, serve with a simple side salad dressed with lime vinaigrette to echo the chili’s flavor profile.

    Creative Twists on the Classic Recipe

    Don’t be afraid to experiment with variations to keep this recipe exciting. For a southwestern twist, add corn kernels and diced bell peppers during the last 10 minutes of cooking. Spice lovers can kick up the heat with diced jalapeños or a dash of cayenne. For a smoky version reminiscent of my Slow Cooker Texas-Style Chili, add a teaspoon of liquid smoke or use fire-roasted tomatoes. Vegetarians can skip the turkey and double the beans or add plant-based crumbles. For unexpected depth, stir in a tablespoon of unsweetened cocoa powder—it adds richness without sweetness.

    Storage & Troubleshooting Guide

    Proper Storage for Maximum Flavor

    This Turkey Chili with Beans and Sweet Potatoes actually improves with time as flavors meld together. Store cooled leftovers in airtight containers in the refrigerator for up to 4 days. For freezing, I recommend portioning into individual servings for easy reheating—it keeps beautifully for up to 3 months. When freezing, slightly undercook the sweet potatoes as they’ll soften more during reheating. Always cool chili completely before refrigerating or freezing to prevent condensation. To reheat, thaw overnight in the refrigerator if frozen, then warm gently on the stovetop, adding a splash of broth if needed.

    Fixing Common Chili Challenges

    Even experienced cooks encounter chili dilemmas occasionally. If your chili is too thin, simmer uncovered for 10-15 minutes to reduce, or stir in a tablespoon of tomato paste. Too thick? Add vegetable broth or water in small increments. If the flavors seem flat, brighten with a splash of apple cider vinegar or lime juice—acid awakens all the other flavors. Oversalted chili can be rescued by adding more unsalted ingredients like beans or sweet potatoes. For chili that lacks depth, a teaspoon of Worcestershire sauce or soy sauce adds umami without overwhelming the other flavors.

    Frequently Asked Questions

    Can I make Turkey Chili with Beans and Sweet Potatoes in a slow cooker?

    Absolutely! Brown the turkey and sauté the aromatics first, then transfer everything to your slow cooker. Cook on low for 6-7 hours or high for 3-4 hours, adding sweet potatoes during the last hour to prevent mushiness.

    Can I use different beans in this recipe?

    Yes! Any combination of beans works well. Try pinto, navy, or cannellini beans for variety. The different textures and flavors make each batch unique.

    Is this chili spicy?

    The basic recipe has a mild-to-medium heat level. Adjust to your preference by increasing or decreasing the chili powder, or adding fresh jalapeños for more kick.

    How can I make this recipe vegetarian?

    Simply omit the turkey and add an extra can of beans or plant-based meat substitute. The sweet potatoes and beans provide plenty of substance and protein.

    What’s the best way to freeze this chili?

    Cool completely, then portion into freezer-safe containers leaving room for expansion. Freeze for up to 3 months and thaw overnight in the refrigerator before reheating.

    Final Thoughts

    This Turkey Chili with Beans and Sweet Potatoes has become my cold-weather lifeline—nutritious, adaptable, and deeply satisfying. What makes it special is how it welcomes personalization while maintaining its soul-warming essence. Whether you’re feeding a crowd or meal-prepping for busy weekdays, this chili delivers comfort in every spoonful. I’d love to see how you make this recipe your own—share your creations on Pinterest and tag me! The combination of lean protein, hearty beans, and nutritious sweet potatoes creates a meal that nourishes both body and spirit.

  • Gluten-Free Lemon Pound Cake That Melts Hearts Instantly!

    Gluten-Free Lemon Pound Cake That Melts Hearts Instantly!

    Gluten-Free Lemon Pound Cake That Melts Hearts Instantly!

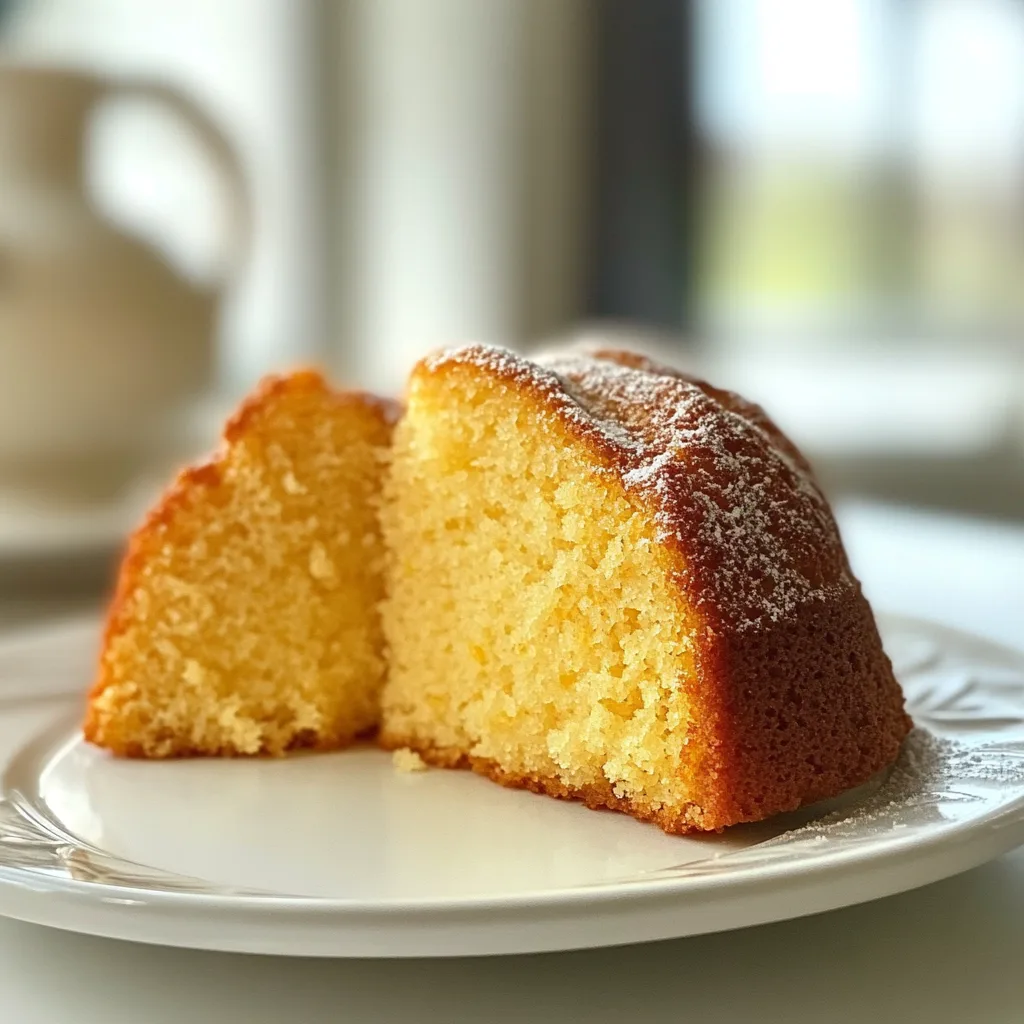
    Gluten-Free Lemon Pound Cake has been my saving grace since going gluten-free three years ago. That first bite—tangy, sweet, with a perfect crumb—reminds me why I fell in love with baking in the first place. There’s something magical about the bright citrus aroma filling my kitchen on a dreary afternoon, promising sunshine in every slice. This recipe delivers that classic pound cake texture without compromising on flavor, proving that gluten-free baking can be just as indulgent as traditional recipes. Perfect for everything from brunch to dessert, this versatile cake might just become your new favorite too.

    Recipe

    Why You’ll Love This Gluten-Free Lemon Pound Cake

    Perfect Texture Every Time

    The secret to this pound cake’s incredible texture lies in the blend of gluten-free flours. I spent weeks perfecting this recipe after a disastrous attempt at my sister’s birthday (we still laugh about that crumbly mess!). The combination of rice flour, tapioca starch, and a touch of xanthan gum creates that dense-yet-tender crumb that defines a proper pound cake. The butter and eggs provide richness, while the yogurt adds moisture that gluten-free bakes often lack. You’ll be amazed at how this cake holds together beautifully when sliced, with none of that gritty texture that gives gluten-free baking a bad name.

    Bright, Natural Lemon Flavor

    The vibrant lemon flavor comes from a triple threat approach: fresh lemon zest, juice, and a touch of extract work together for that perfect citrus punch. I learned this technique from my grandmother, who believed in extracting every bit of flavor from her ingredients. The lemon zest contains essential oils that infuse the batter with intense aroma, while the juice adds tanginess that balances the sweetness. This isn’t a subtle hint of lemon—it’s a bold, sunshine-filled experience that wakes up your taste buds. Even my lemon-skeptical husband reaches for seconds of this bright, zippy cake.

    Essential Tips & Tricks

    Mastering the Mixing Method

    The room temperature ingredients are non-negotiable for this recipe—I learned this the hard way! Cold eggs and butter won’t incorporate properly, leading to a dense, uneven cake. I set everything out an hour before baking while I sip my morning coffee. When mixing, cream the butter and sugar until truly fluffy (about 3-4 minutes), as this incorporates air that helps the cake rise. Then alternate dry ingredients with wet ones, mixing just until combined. Overmixing activates the xanthan gum too much, making your cake rubbery instead of tender. Gentle folding preserves that perfect gluten-free brownie texture we’re aiming for.

    The Importance of Proper Baking

    Your oven is the final crucial element in pound cake perfection. Preheat thoroughly—I give mine a full 20 minutes to reach temperature. Place the loaf pan in the center of the middle rack where heat distributes most evenly. The slow bake at 325°F rather than 350°F allows the inside to cook through without over-browning the exterior. Resist the urge to open the oven during the first 45 minutes! That blast of cool air can cause your cake to sink in the middle. The toothpick test is reliable, but I also gently press the top—it should spring back when fully baked, not leave an indentation.

    Serving Ideas & Creative Variations

    Seasonal Pairings

    This versatile cake shines in any season with the right accompaniments. In summer, I serve slices with fresh berries and a dollop of whipped cream—the sweet-tart raspberries complement the lemon beautifully. Fall calls for a warm caramel drizzle and toasted pecans. Winter holidays? Add a sprinkle of powdered sugar “snow” and sugared cranberries for a festive touch. Spring brunches pair perfectly with a side of lemon curd for extra citrus indulgence. For a truly special dessert, transform this into a trifle with layers of creamy rice pudding and fresh fruit—I’ve converted many gluten-eating friends with this showstopper!

    Flavor Twists

    While the classic lemon version holds a special place in my heart, this recipe adapts beautifully to different flavor profiles. For a sophisticated twist, add 1 tablespoon of fresh rosemary or lavender to the sugar before creaming with butter—the oils infuse for a subtle herbal note. Orange or lime zest can replace lemon for a different citrus experience. My husband’s favorite variation includes 1/2 cup of poppy seeds and a vanilla glaze. For a dessert-like version, fold in 1 cup of white chocolate chips or dried blueberries. The base recipe remains the same, making this your perfect canvas for culinary creativity.

    Storage & Troubleshooting Guide

    Keeping Your Cake Fresh

    This gluten-free lemon pound cake actually improves with a day of rest as the flavors meld and intensify. Store at room temperature in an airtight container for up to 3 days—any longer and it may dry out faster than traditional cakes. For extended freshness, refrigerate for up to a week, but always bring slices back to room temperature before serving to revive that soft texture. This cake also freezes beautifully! I wrap individual slices in plastic, then foil, and freeze for up to three months. Having cake ready for unexpected guests or late-night cravings has saved many an evening at my house!

    Fixing Common Problems

    Even experienced bakers encounter issues sometimes! If your cake sinks in the middle, your oven temperature might be off (I recommend an oven thermometer), or you may have undermixed the butter and sugar. Too dense? You likely overmixed after adding the flour or used cold ingredients. Crumbly texture usually means too much flour—I always measure by weight rather than volume for precision. If the cake browns too quickly but remains undercooked inside, tent with foil halfway through baking. Remember that gluten-free baking is more sensitive to variations, so measuring accurately and following the method precisely yields the best results.

    Frequently Asked Questions

    Can I substitute regular flour for gluten-free in this lemon pound cake recipe?

    No, this recipe is specifically formulated for gluten-free baking. The ratios and ingredients work together to create structure without gluten. For a traditional version, you’d need a different recipe.

    What’s the best gluten-free flour blend to use?

    I recommend a blend with rice flour, tapioca starch, and potato starch. Commercial options like King Arthur Measure for Measure or Bob’s Red Mill 1-to-1 work well, or make your own blend following the recipe.

    Can I make this dairy-free as well?

    Yes! Substitute the butter with coconut oil or a plant-based butter, and use coconut yogurt instead of regular. The texture will be slightly different but still delicious.

    How do I know when the pound cake is fully baked?

    Insert a toothpick into the center—it should come out clean or with a few moist crumbs. The top should spring back when lightly pressed, and the edges will pull away slightly from the pan.

    Can I bake this in a bundt pan instead of a loaf pan?

    Absolutely! A small bundt works beautifully—just reduce the baking time by about 5-10 minutes and watch it carefully. The decorative shape makes for a lovely presentation.

    Final Thoughts

    This Gluten-Free Lemon Pound Cake has become my signature bring-along for gatherings, earning rave reviews from both gluten-free and conventional eaters alike. The bright citrus flavor combined with that perfect buttery crumb proves that dietary restrictions don’t mean sacrificing life’s simple pleasures. Whether you’re new to gluten-free baking or a seasoned pro, this forgiving recipe delivers consistent results that’ll boost your confidence. I hope it brings as much joy to your kitchen as it has to mine! For more seasonal inspiration, check out my Pinterest collection of gluten-free favorites.

  • One-Pot American Goulash Recipe That Will Steal Your Heart!

    One-Pot American Goulash Recipe That Will Steal Your Heart!

    One-Pot American Goulash Recipe That Will Steal Your Heart!

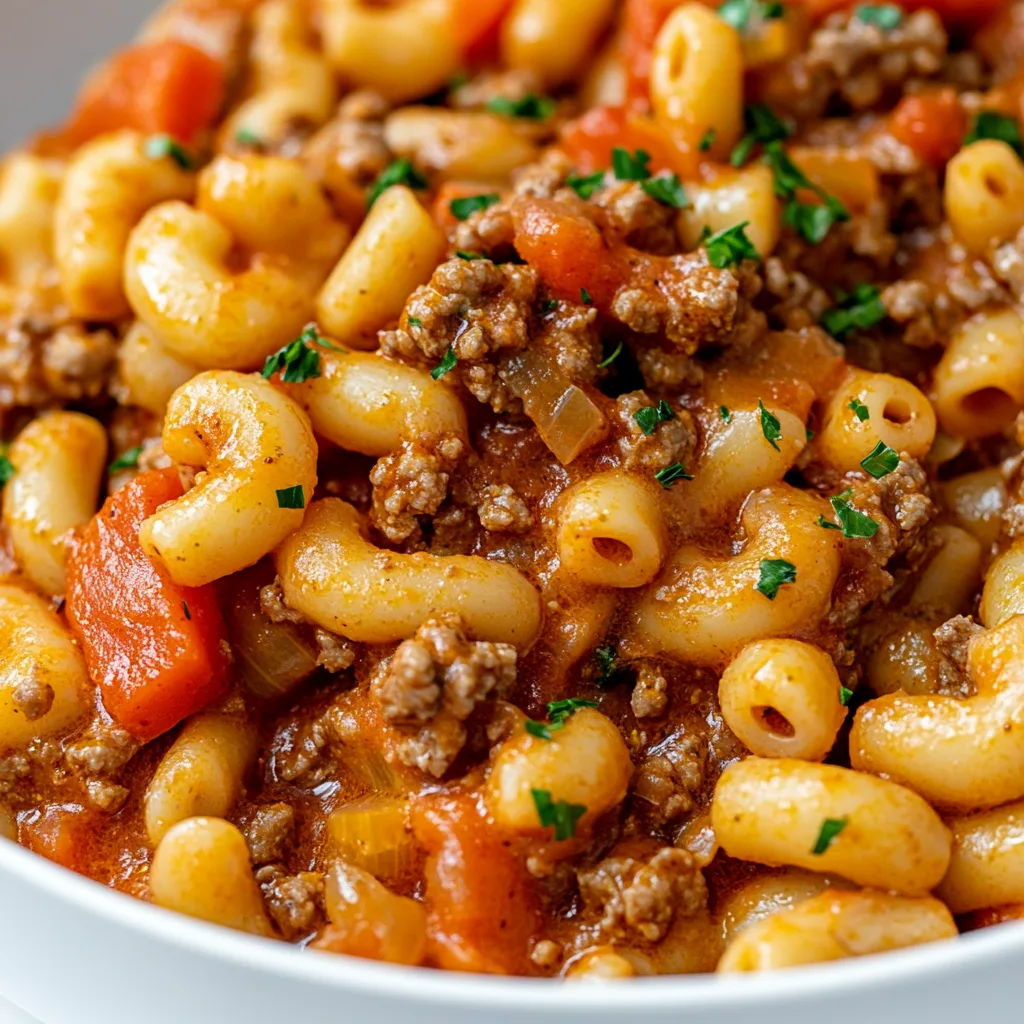
    There’s something magical about One-Pot American Goulash that instantly transports me back to my grandmother’s kitchen. That rich tomato sauce bubbling away with tender pasta and seasoned ground beef, filling the house with an aroma that whispers “come and gather.” This classic comfort dish has been gracing American dinner tables for generations, and for good reason! It’s incredibly simple to prepare, uses budget-friendly ingredients, and somehow manages to taste even better the next day. My family requests this hearty meal at least twice a month, especially when the weather turns chilly and we need something warm and satisfying to bring us together around the table.

    Recipe

    Why You’ll Love This One-Pot American Goulash

    Perfect Weeknight Solution

    When life gets hectic (and when doesn’t it?), this One-Pot American Goulash becomes my kitchen superhero. The beauty lies in its true one-pot nature – everything cooks together, developing deep flavors while saving you from a sink full of dishes. I’ve made this on busy weeknights when homework help, dog walking, and laundry were all competing for my attention, and still managed to get dinner on the table in about 30 minutes. The combination of pantry staples means you likely have everything you need already, making this the ultimate “I forgot to plan dinner” rescue meal.

    Budget-Friendly Comfort

    In times when grocery prices make me wince, this goulash recipe remains a wallet-friendly option that doesn’t sacrifice flavor. Ground beef stretches beautifully when combined with pasta and tomatoes, easily feeding a family of four with leftovers for lunch the next day. Last month when my in-laws surprised us with a visit, I quickly doubled the recipe without doubling the cost. The humble ingredients transform into something so satisfying that nobody realizes you’re serving an economical meal – they’re too busy reaching for seconds and asking for your secret recipe!

    Essential Tips & Tricks

    Perfect Pasta Every Time

    The trickiest part of One-Pot American Goulash is getting the pasta texture just right. The key is to use elbow macaroni which holds up well to the one-pot cooking method, and to slightly undercook it initially since it continues absorbing liquid as it sits. I learned this the hard way after serving mushy goulash one too many times! Add the pasta to simmering (not boiling) liquid, and test it 2 minutes before the package directions suggest. For extra flavor, try beef broth instead of water – it creates a richer base that infuses every bite with savory goodness. For more pasta perfection, check out my baked macaroni and cheese recipe too!

    Flavor-Boosting Techniques

    The difference between good goulash and amazing goulash lies in a few simple techniques. Always take time to properly brown your ground beef, creating those flavorful caramelized bits on the bottom of the pot. This is where the magic happens! Then deglaze with a splash of red wine or beef broth, scraping up all those wonderful brown bits. I also recommend blooming your spices in the beef fat for 30 seconds before adding liquids – this releases their essential oils and intensifies their flavor. A bay leaf and a teaspoon of Worcestershire sauce are my secret weapons for depth that makes people wonder what makes it taste so good.

    Serving Ideas & Creative Variations

    Family-Style Presentations

    One-Pot American Goulash shines brightest when served family-style, creating that warm, communal dining experience. I love bringing the entire pot to the table in my favorite Dutch oven, garnished with fresh parsley and a sprinkle of sharp cheddar cheese that melts into the hot goulash. Pair it with a simple green salad and some crusty bread for sopping up the sauce. For a complete comfort food experience, you might want to finish the meal with my hot chocolate poke cake with whipped marshma – the contrast of warm goulash and cool, sweet cake is absolutely divine!

    Regional Twists and Add-Ins

    While traditional American Goulash has its charms, don’t be afraid to make it your own with regional twists. In the Southwest, add a can of fire-roasted green chiles and a teaspoon of cumin for a Tex-Mex version. For a Midwestern twist, stir in a cup of corn and top with crushed potato chips. My Italian-American husband convinced me to add a splash of red wine and some fennel seeds, which was a delicious surprise! For veggie-lovers, try folding in baby spinach during the last minute of cooking – it wilts perfectly into the hot goulash and adds beautiful color and nutrition without changing the comfort-food essence.

    Storage & Troubleshooting Guide

    Making Ahead and Freezing

    One of the greatest attributes of One-Pot American Goulash is how well it stores for future meals. It actually tastes better the next day as the flavors meld together overnight in the refrigerator. Store in airtight containers for up to 4 days, adding a splash of broth when reheating to refresh the sauce. For freezing, slightly undercook the pasta, then cool completely before portioning into freezer bags. Lay flat to freeze for space efficiency! Thaw overnight in the refrigerator and reheat gently on the stovetop with a bit of added liquid to restore the perfect consistency.

    Troubleshooting Common Issues

    Even experienced cooks occasionally run into goulash challenges. If your sauce is too watery, remove the lid and simmer for 5-10 minutes to reduce the liquid. Conversely, if it’s too thick, add beef broth ¼ cup at a time until you reach your desired consistency. Pasta overcooked? Try adding a handful of fresh pasta to absorb excess liquid and provide textural contrast. For bland goulash, a splash of red wine vinegar or a squeeze of tomato paste can brighten flavors, while a pinch of sugar balances acidity. Remember that goulash is forgiving – almost any issue can be remedied with simple adjustments!

    Frequently Asked Questions

    What’s the difference between American Goulash and Hungarian Goulash?

    American Goulash contains elbow macaroni and tomato sauce, while Hungarian Goulash is a paprika-seasoned beef stew without pasta. The American version evolved from the European original but became its own distinct comfort food classic.

    Can I make One-Pot American Goulash in a slow cooker?

    Yes! Brown the meat and onions first, then transfer to the slow cooker with remaining ingredients except pasta. Cook on low for 6 hours, adding the pasta during the final 30 minutes.

    What can I substitute for ground beef?

    Ground turkey, chicken, or plant-based meat alternatives work well. For vegetarian options, try mushrooms and lentils which provide similar texture and heartiness.

    How do I adjust the spice level for kids?

    Reduce the amount of black pepper and omit any cayenne or hot sauce. You can serve hot sauce on the side for adults who prefer more heat.

    Can I use gluten-free pasta in my One-Pot American Goulash?

    Absolutely! Use gluten-free elbow macaroni but check it frequently while cooking as it may have different cooking times than traditional pasta.

    Final Thoughts

    One-Pot American Goulash represents everything I love about home cooking – it’s unpretentious, adaptable, and brings people together. There’s something deeply satisfying about creating a meal that nourishes both body and soul with minimal fuss. Whether you’re cooking for a busy family weeknight or looking for comfort food on a budget, this recipe delivers every time. I’d love to see your goulash creations – tag me on Pinterest to share your versions of this beloved classic!