Author: Darleen Vance

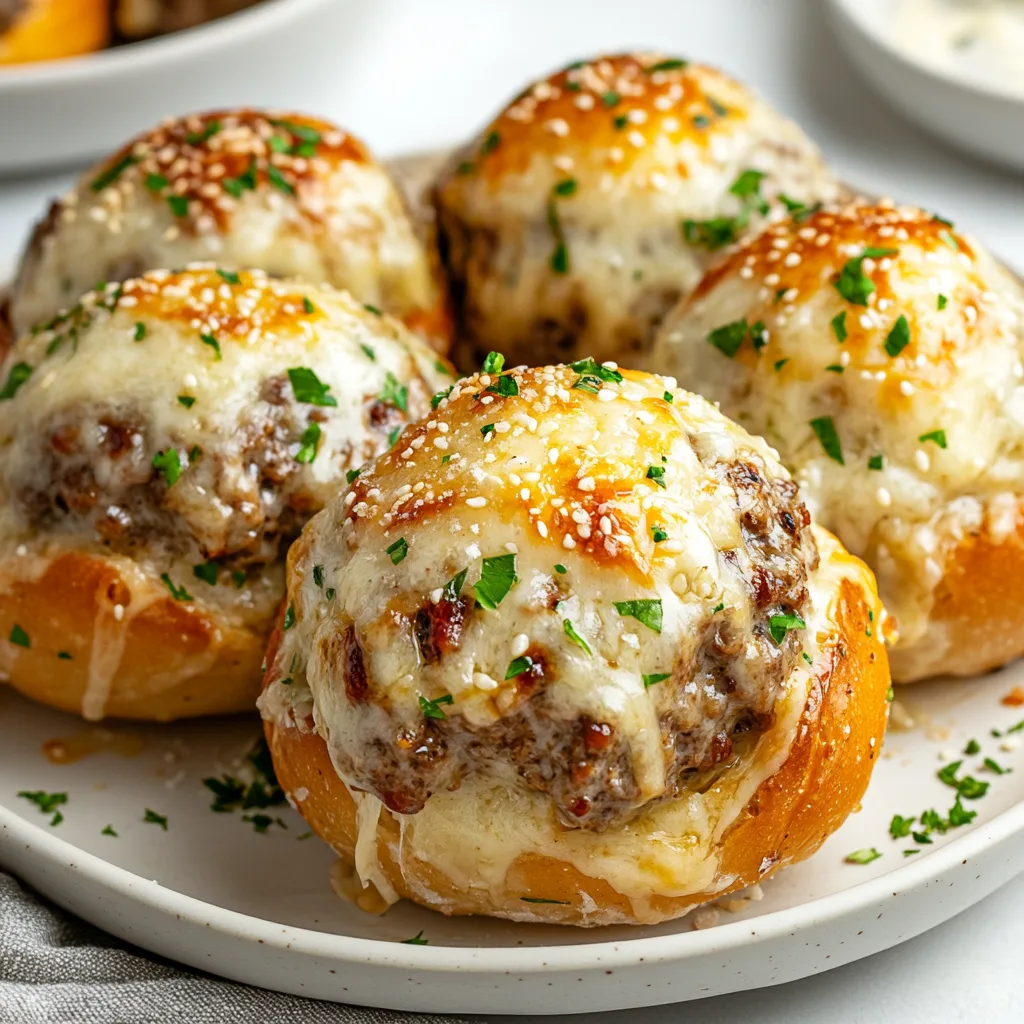
  • Garlic Parmesan Cheeseburger Bombs: Irresistible Flavor Explosion!

    Garlic Parmesan Cheeseburger Bombs: Irresistible Flavor Explosion!

    Garlic Parmesan Cheeseburger Bombs: Irresistible Flavor Explosion!

    Garlic Parmesan Cheeseburger Bombs are the ultimate comfort food mash-up that’s stolen my heart (and taste buds)! These golden-brown bundles of joy combine everything we love about cheeseburgers with the irresistible pull of fresh-baked bread and the savory punch of garlic and parmesan. I discovered these little miracles last game day when I needed something beyond the usual chips and dip, and my kitchen has never been the same. The moment you bite through that buttery, garlic-parmesan crust into the juicy, cheesy center, you’ll understand why these have become my family’s most requested treat. Trust me, these bombs are about to become your new obsession.

    Recipe

    Why You’ll Love These Garlic Parmesan Cheeseburger Bombs

    Perfect Party Food That Disappears Fast

    There’s something magical about serving food that creates an instant reaction. Every time I set down a platter of these Garlic Parmesan Cheeseburger Bombs, they’re gone in minutes! The handheld size makes them perfect for casual gatherings, and they stay remarkably warm even after sitting out. Last Super Bowl, my brother-in-law (who claims to be a food snob) ate seven of these before asking for the recipe. The combination of familiar cheeseburger flavors wrapped in that aromatic garlic-parmesan coating creates an irresistible pull that has guests circling back to the appetizer table again and again.

    Customizable For Every Taste Preference

    What I adore about these Garlic Parmesan Cheeseburger Bombs is how easily they adapt to different preferences. The basic formula stays the same, but you can switch up the filling to suit anyone’s taste. Use ground turkey for a lighter option, or plant-based meat for vegetarian friends. My daughter prefers hers with extra pickles and a touch of mustard mixed into the meat, while my husband loves adding jalapeños for heat. You can even prepare different variations in the same batch—just mark them with different garnishes on top! This flexibility makes them perfect for families with picky eaters or gatherings with diverse dietary needs.

    Essential Tips & Tricks

    Mastering The Perfect Dough Seal

    The secret to exceptional Garlic Parmesan Cheeseburger Bombs lies in creating a proper seal. After filling your dough portions, pinch the edges firmly then roll between your palms to ensure there are no openings where cheese could escape. I learned this the hard way after my first batch leaked all over the baking sheet! For extra insurance, I place each bomb seam-side down on the baking sheet. The dough should feel slightly tacky but not sticky—if it’s too dry, it won’t seal properly; too wet, and it becomes unmanageable. Let the filled bombs rest for 5-10 minutes before baking to help the dough relax and create a more secure seal.

    The Secret To That Irresistible Garlic-Parmesan Coating

    The garlicky, cheesy exterior is what transforms these from ordinary stuffed bread to crave-worthy bombs. For maximum flavor, I combine melted butter with fresh minced garlic (never the jarred stuff for this!), a touch of Italian seasoning, and finely grated parmesan—the kind that’s almost powdery works best here. Brush this mixture generously over the bombs just before they go into the oven, then again halfway through baking. This double application ensures that gorgeous golden crust with concentrated flavor in every bite. For an extra special touch, sprinkle with a bit more parmesan during the last two minutes of baking for a crispy, cheesy finish that’s simply irresistible.

    Serving Ideas & Creative Variations

    Perfect Pairings For A Complete Meal

    While Garlic Parmesan Cheeseburger Bombs are spectacular on their own, pairing them with complementary sides elevates them to a complete meal. I love serving them alongside a crisp garden salad dressed simply with vinaigrette to balance the richness. For casual gatherings, arrange them on a platter with small bowls of ketchup, mustard, and special sauce for dipping. When I’m feeling fancy, I’ll add a tomato-basil soup for dunking—the acidity cuts through the richness perfectly. For game day spreads, these bombs fit right in with sweet potato fries, coleslaw, or even a platter of roasted vegetables for a more balanced approach.

    Creative Twists On The Classic Recipe

    Don’t be afraid to experiment with different flavor profiles! My pizza bomb variation uses the same technique but swaps the burger filling for pepperoni, mozzarella, and a spoonful of marinara. The Mediterranean version with ground lamb, feta, and oregano earned rave reviews at my last book club. For breakfast bombs, try filling them with scrambled eggs, cheese, and breakfast sausage—they’re perfect for meal prep! My personal favorite twist is the Philly cheesesteak bomb with thinly sliced steak, sautéed peppers and onions, and provolone. The beauty of this recipe is its versatility—once you master the technique, you can create endless variations to suit any occasion.

    Storage & Troubleshooting Guide

    Make-Ahead And Freezer Instructions

    These Garlic Parmesan Cheeseburger Bombs are perfect for planning ahead! You can prepare them up to the point of baking, then refrigerate for 24 hours covered with plastic wrap. Just add a few extra minutes to the baking time when cooking from cold. For longer storage, freeze the unbaked bombs on a baking sheet until solid, then transfer to a freezer bag for up to 3 months. No need to thaw before baking—just place them on a baking sheet, brush with the garlic butter, and add about 5-7 minutes to the baking time. I often make a double batch specifically to freeze half, giving me a quick dinner option on hectic weeknights.

    Solving Common Cheeseburger Bomb Problems

    If your bombs are leaking cheese during baking, your seals probably need work. Make sure to pinch the dough thoroughly and roll between your palms to create a tight seal. For extra insurance, let them rest seam-side down for 10 minutes before baking. Pale, soggy bottoms usually mean your oven temperature is too low or the bombs are placed too high in the oven—try using the lower rack and checking your oven temperature with a separate thermometer. If the exterior browns too quickly while the inside stays doughy, your oven is likely too hot. Cover them loosely with foil after they reach your desired color, then continue baking until completely done.

    Frequently Asked Questions

    Can I use store-bought dough for Garlic Parmesan Cheeseburger Bombs?

    Absolutely! Refrigerated biscuit or pizza dough works perfectly. Just divide each biscuit in half or cut pizza dough into 3-inch squares. The flavor won’t be identical to homemade, but it’s a great time-saving option.

    How do I know when my cheeseburger bombs are fully cooked?

    They should be golden brown with an internal temperature of 160°F. If you don’t have a thermometer, cut one open—the dough should be cooked through with no raw spots, and the meat filling should be completely done.

    Can I make these with raw meat or should it be pre-cooked?

    Always pre-cook your meat filling. Raw meat won’t fully cook inside the dough before the exterior burns. Cook the meat with your seasonings, drain excess fat, then cool slightly before filling.

    Are Garlic Parmesan Cheeseburger Bombs spicy?

    Not unless you add spicy ingredients! The base recipe is savory but mild. Add diced jalapeños, red pepper flakes, or hot sauce to the meat mixture if you prefer heat.

    How can I make these healthier?

    Use lean ground turkey or chicken, reduced-fat cheese, and whole wheat dough. You can also brush with olive oil instead of butter and add extra vegetables to the filling.

    Final Thoughts

    Garlic Parmesan Cheeseburger Bombs have become my go-to recipe whenever I need guaranteed smiles around the table. There’s something magical about the way they combine familiar flavors into an exciting, handheld package that delights everyone from picky kids to discerning foodies. The aroma that fills your kitchen as they bake is worth making them for that alone! Whether you’re feeding a crowd or just looking for something fun to shake up your dinner routine, these bombs deliver big flavor in every bite. I hope you’ll give these Garlic Parmesan Cheeseburger Bombs a try and experience the joy they bring to any table! Find more delicious recipes on Pinterest.
  • One-Pan Balsamic Chicken Recipe That Will Melt Your Heart

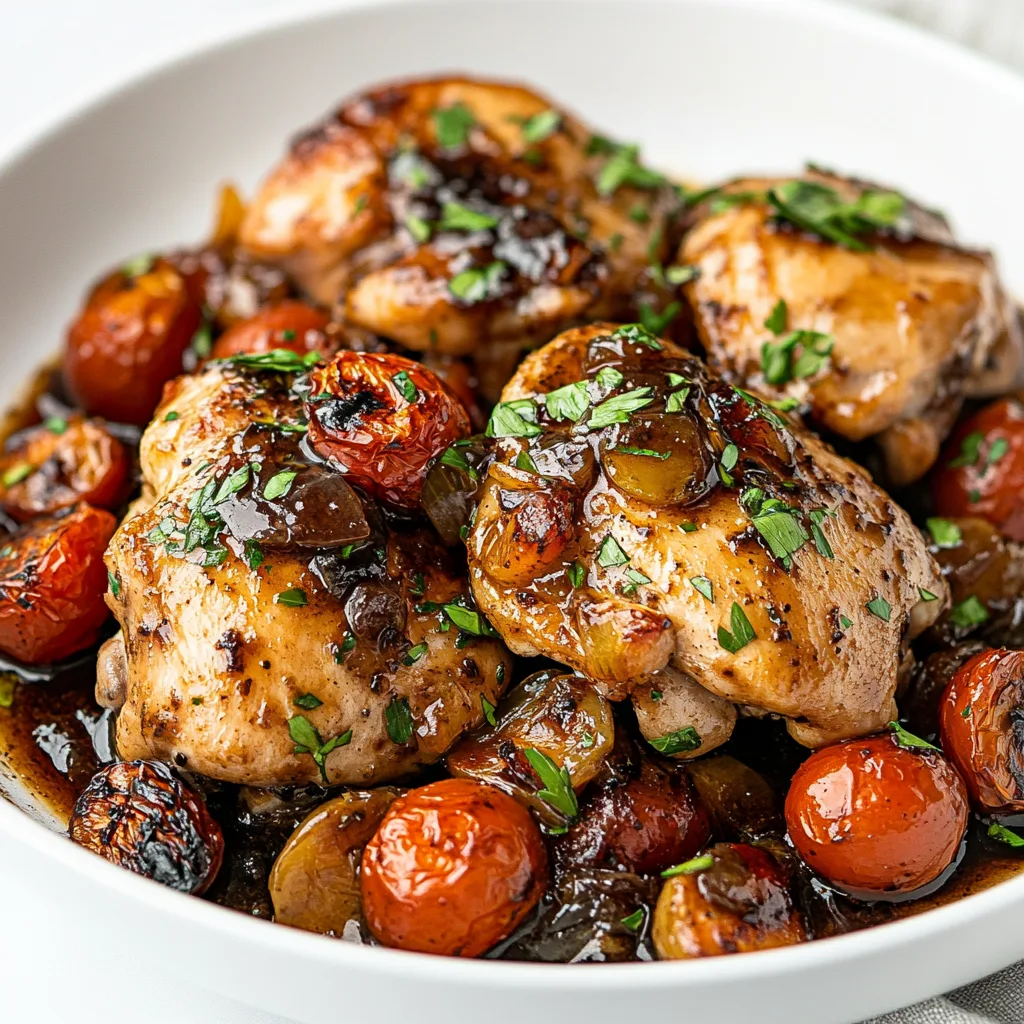
    One-Pan Balsamic Chicken Recipe That Will Melt Your Heart

    One-Pan Balsamic Chicken Recipe That Will Melt Your Heart

    One-pan balsamic chicken is a weeknight game-changer that transformed my dinner routine when I discovered it during a particularly hectic season of life. The rich, tangy sauce creates a perfect symphony with tender chicken and roasted vegetables, all while keeping cleanup blissfully minimal. I still remember the first time I made this dish—my kitchen filled with the intoxicating aroma of caramelizing balsamic vinegar, and my family appeared at the table before I even called them! This recipe balances bold flavors with incredible simplicity, making it perfect for both busy weeknights and casual entertaining.

    Recipe

    Why You’ll Love This One-Pan Balsamic Chicken

    Perfect Balance of Flavors

    The magic of this one-pan balsamic chicken lies in its perfect harmony of sweet and tangy notes. The balsamic vinegar caramelizes as it cooks, creating a rich glaze that coats every bite with complex flavor. I love how the natural sugars in the vinegar develop into this gorgeous sticky coating that makes even simple chicken breasts extraordinary. The vegetables absorb all those wonderful juices too, becoming little flavor bombs alongside the protein. It’s that rare dish where every component tastes equally delicious—no bland bits to push around your plate!

    Minimal Cleanup, Maximum Impact

    There’s something deeply satisfying about creating a complete meal in just one pan. As someone who values both good food and precious time, I appreciate how this one-pan balsamic chicken delivers restaurant-quality results without the kitchen chaos. Everything roasts together, allowing the flavors to meld beautifully while you’re free to help with homework or enjoy a glass of wine. The vegetables caramelize alongside the chicken, soaking up all those wonderful juices. When dinner’s over, there’s just one pan to wash—a gift to your future self after enjoying such a satisfying meal!

    Essential Tips & Tricks

    Perfecting Your Marinade

    The secret to exceptional one-pan balsamic chicken starts with the marinade. I recommend using a high-quality balsamic vinegar—it makes a noticeable difference in the final flavor. Let the chicken marinate for at least 30 minutes, though overnight works wonders if you can plan ahead. I like adding a touch of maple syrup or honey to enhance caramelization, plus a hint of Dijon mustard for depth. Fresh herbs like rosemary or thyme infuse aromatic notes that elevate the entire dish. Remember to reserve some marinade before adding raw chicken if you want extra sauce for drizzling later!

    Timing Is Everything

    Achieving perfectly cooked chicken and vegetables simultaneously requires strategic timing. I start by arranging everything in a single layer—crowding the pan leads to steaming instead of roasting. For even cooking, cut vegetables into similar-sized pieces, placing denser items like potatoes or carrots on the pan first. Add the marinated chicken after about 10 minutes, then return everything to the oven. This approach ensures your vegetables develop beautiful caramelization while your chicken remains juicy. For an extra flavor boost, try this crispy bang bang chicken technique of finishing with a quick broil to create a gorgeous glaze!

    Serving Ideas & Creative Variations

    Perfect Pairings

    One-pan balsamic chicken shines when paired with simple, complementary sides. I love serving it over a bed of creamy polenta or fluffy quinoa that soaks up all those incredible juices. A simple green salad with a light vinaigrette adds freshness that balances the rich, caramelized flavors. For a complete meal that feels special without extra effort, warm some crusty bread to mop up the sauce—it’s too delicious to waste! The versatility of this dish means it works equally well for casual family dinners or when entertaining guests who will never guess how effortlessly it came together.

    Seasonal Adaptations

    The beauty of this recipe lies in its flexibility across seasons. In summer, I load my pan with colorful bell peppers, zucchini, and cherry tomatoes that burst with sweetness. Fall brings opportunities for butternut squash, Brussels sprouts, and red onions that caramelize beautifully alongside the chicken. Winter calls for heartier additions like sweet potatoes and carrots. You can even create a Mediterranean version with olives, artichokes, and feta sprinkled after roasting—similar to the approach in tuscan shrimp with spinach artichokes. Don’t be afraid to experiment with different herb combinations to complement your seasonal vegetables!

    Storage & Troubleshooting Guide

    Proper Storage Solutions

    One-pan balsamic chicken makes fantastic leftovers that maintain their flavor beautifully. Store everything together in an airtight container in the refrigerator for up to 3 days. The flavors actually deepen overnight, making next-day lunch something to look forward to! For meal prep, portion into individual containers with a side of greens or grains. If freezing, separate the chicken from vegetables for best texture upon reheating. Allow frozen portions to thaw overnight in the refrigerator before gently reheating. I find a quick zap in the microwave works well, though a few minutes in a skillet revives the caramelized edges nicely.

    Troubleshooting Common Issues

    If your one-pan balsamic chicken isn’t developing that gorgeous caramelization, your oven temperature might be too low or the pan overcrowded. Ensure you’re using a large enough sheet pan to allow proper air circulation. For overly dry chicken, try brining it first or using bone-in, skin-on pieces that retain moisture better. If your vegetables cook unevenly, remember to cut denser items smaller and arrange them strategically. Too much liquid in the pan? Try patting chicken dry before marinating and roasting at a slightly higher temperature. For sauce that’s too thin, remove the chicken and vegetables, then reduce the pan juices on the stovetop until syrupy.

    Frequently Asked Questions

    Can I use chicken thighs instead of breasts for one-pan balsamic chicken?

    Absolutely! Chicken thighs work beautifully and often stay juicier. Adjust cooking time to about 25-30 minutes or until they reach 165°F internally. The rich flavor pairs wonderfully with the balsamic glaze.

    How do I prevent vegetables from becoming mushy?

    Cut vegetables into similar-sized pieces and don’t overcrowd the pan. For tender vegetables like zucchini or tomatoes, add them halfway through cooking to prevent overcooking.

    Can this recipe be made ahead of time?

    Yes! Marinate the chicken overnight and prep vegetables in advance. You can also fully cook the dish and reheat gently before serving—the flavors actually improve with time.

    What’s the best balsamic vinegar to use?

    Look for a thick, syrupy aged balsamic for best results. While you don’t need the most expensive option, avoid the thinnest, most acidic varieties for this recipe.

    Is one-pan balsamic chicken gluten-free?

    Most versions are naturally gluten-free, but always check your balsamic vinegar label as some contain additives. Make sure any other seasonings you add are certified gluten-free if needed.

    Final Thoughts

    One-pan balsamic chicken represents everything I love about modern home cooking—bold flavors, practical preparation, and endless adaptability. It’s become my reliable solution for those evenings when I want something special without spending hours in the kitchen. The way the balsamic transforms into a glossy, sweet-tangy glaze never fails to impress, while the simplicity of preparation makes it accessible to cooks of all skill levels. Find more inspiration for your next meal on Pinterest where I share my favorite variations of this versatile dish!

  • Bourbon Maple Bacon Cinnamon Rolls That Will Blow Your Mind

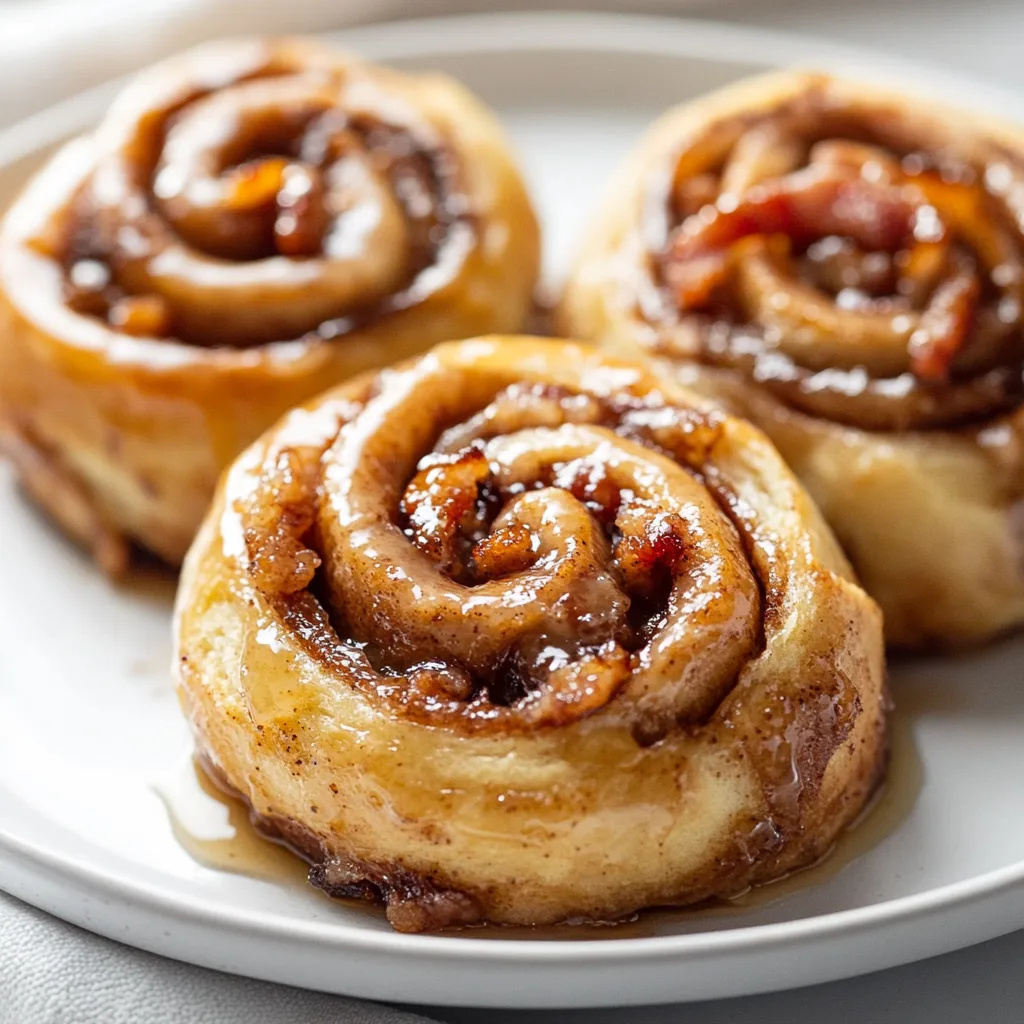
    Bourbon Maple Bacon Cinnamon Rolls That Will Blow Your Mind

    Bourbon Maple Bacon Cinnamon Rolls That Will Blow Your Mind

    Bourbon Maple Bacon Cinnamon Rolls have become my weekend ritual when I want to fill the house with an irresistible aroma that pulls everyone from their beds. The combination of sweet maple syrup, smoky bourbon, and crispy bacon folded into pillowy cinnamon rolls creates a flavor experience that’s both indulgent and comforting. I discovered this recipe after a trip to Vermont where maple-everything changed my baking forever. These rolls strike the perfect balance between sweet and savory, making them the ultimate brunch centerpiece that’ll have your family hovering in the kitchen, impatiently waiting for that timer to ding. Trust me, these are worth every minute of preparation!

    Why You’ll Love This Bourbon Maple Bacon Cinnamon Rolls

    The Perfect Sweet-Savory Balance

    There’s something magical that happens when maple syrup meets crispy bacon in these cinnamon rolls. The caramelized edges develop a rich amber color while the centers stay pillowy soft. I love how the bourbon adds depth without overpowering—it’s that mysterious “what makes these so good?” element. The first time I made these for my sister, she declared them better than any bakery version she’d tried. The bacon adds just enough salt to cut through the sweetness, creating that perfect balance that keeps you coming back for “just one more bite.” Your kitchen will smell like a gourmet bakery!

    Make-Ahead Convenience

    One of my favorite aspects of these Bourbon Maple Bacon Cinnamon Rolls is how prep-friendly they are. You can prepare the dough and filling the night before, let it rise slowly in the refrigerator, and bake them fresh in the morning. This means you can enjoy warm, freshly baked rolls without waking up at dawn! The slow overnight rise actually enhances the flavor, allowing the bourbon and maple to fully infuse the dough. I’ve found this method especially helpful when hosting brunches—I can focus on my guests rather than frantically measuring ingredients while they wait. The make-ahead option is a game-changer!

    Essential Tips & Tricks

    Mastering the Dough

    The foundation of exceptional Bourbon Maple Bacon Cinnamon Rolls is a perfectly elastic dough. I learned the hard way that room temperature ingredients make all the difference—cold butter and eggs can lead to a dense, heavy roll. Aim for a dough that’s tacky but not sticky; it should pull away from the bowl while remaining soft. When kneading, use the windowpane test: stretch a small piece until it’s thin enough to see light through without tearing. Don’t rush the rise times—these are crucial for developing flavor and texture. I like to place my dough in a warm (not hot) spot, like near a sunny window or on top of a preheating oven.

    The Bacon Secret

    Not all bacon methods are created equal when it comes to these rolls! For the crispiest texture that won’t get soggy inside your rolls, bake your bacon in the oven at 375°F on a parchment-lined baking sheet. Cook until just beyond chewy but not burnt—about 15-18 minutes. Drain thoroughly on paper towels and chop finely once cooled. The rendered bacon fat? Don’t you dare throw it away! I substitute a tablespoon of it for butter in the filling for an extra dimension of smoky flavor. Make sure your bacon is completely cool before sprinkling it over the filling to prevent it from melting your butter layer prematurely.

    Serving Ideas & Creative Variations

    Brunch Pairings

    These Bourbon Maple Bacon Cinnamon Rolls deserve to be the star of a memorable brunch spread. I like to serve them alongside a savory egg dish to balance the sweetness—my Spinach and Feta Egg Casserole is a perfect complement. Fresh fruit provides a refreshing contrast, particularly tart berries that cut through the richness. For beverages, skip the expected coffee and try a spiced chai tea or a bourbon-spiked hot apple cider if you’re feeling adventurous. I always slightly warm the maple syrup for drizzling tableside, allowing guests to add their desired level of sweetness. The rolls themselves should be served warm—reheat briefly if needed.

    Seasonal Twists

    One of the joys of this recipe is how adaptable it is to seasonal ingredients. During fall, I add diced apples and a pinch of cardamom to the filling—the apples become tender little pockets of flavor. Winter holidays call for orange zest and cranberries, which add brightness and color. Spring inspires me to incorporate a touch of lavender in the glaze, while summer begs for a bourbon-peach variation. You can even transform these into a dessert by serving them warm with a scoop of vanilla bean ice cream on top. The bourbon-maple-bacon trinity works beautifully as a foundation for countless creative variations that keep this recipe exciting year-round.

    Storage & Troubleshooting Guide

    Keeping Them Fresh

    To maintain the heavenly texture of your Bourbon Maple Bacon Cinnamon Rolls, proper storage is essential. For same-day enjoyment, simply cover them loosely with foil at room temperature. If storing longer, wait until they’re completely cool before placing in an airtight container—this prevents condensation that could make them soggy. They’ll keep at room temperature for 2 days, but for the best quality beyond that, refrigerate for up to 5 days. To reheat, wrap individual rolls in foil and warm in a 300°F oven for 7-10 minutes. Freezing works remarkably well too—wrap cooled rolls individually in plastic wrap then foil and freeze for up to 3 months.

    Troubleshooting Common Issues

    Even experienced bakers encounter challenges with cinnamon rolls! If your dough isn’t rising, check that your yeast is fresh and that your environment is warm enough—I place mine in an oven with just the light on for perfect rising conditions. For rolls that spread too much during baking, your butter was likely too soft in the filling—chill the assembled rolls for 15 minutes before baking. If the center rolls are undercooked while the outer ones are perfect, lower your oven temperature by 25°F and extend baking time. Glaze too runny? Add powdered sugar a tablespoon at a time. Too thick? A few drops of milk will thin it to your desired consistency.

    Frequently Asked Questions

    Can I make Bourbon Maple Bacon Cinnamon Rolls without alcohol?

    Absolutely! Replace the bourbon with vanilla extract (1 tablespoon) or apple juice (3 tablespoons). You’ll miss some complexity, but they’ll still be delicious with the maple-bacon flavor profile intact.

    How do I know when the cinnamon rolls are perfectly baked?

    Look for golden-brown tops and an internal temperature of 190°F. When gently pressed in the center, they should spring back slightly. Underbaked rolls will have a doughy center, while overbaked ones become dry.

    Can I use pre-cooked bacon bits instead of fresh bacon?

    I don’t recommend it. Store-bought bacon bits lack the texture and flavor of freshly cooked bacon. The extra step of cooking real bacon makes a significant difference in these Bourbon Maple Bacon Cinnamon Rolls.

    My dough is too sticky to roll out. What should I do?

    Chill the dough for 30 minutes to firm up the butter. When rolling, use just enough flour on your surface to prevent sticking. Too much flour will make the rolls tough.

    Can I prepare the rolls and bake them the next day?

    Yes! After shaping the rolls and placing them in the baking pan, cover with plastic wrap and refrigerate overnight. Let them sit at room temperature for 30-45 minutes before baking.

    Final Thoughts

    These Bourbon Maple Bacon Cinnamon Rolls represent everything I love about weekend baking—they’re indulgent, impressive, and bring people together around the table. There’s something deeply satisfying about watching someone take their first bite and seeing their eyes close in appreciation. The combination of sweet maple, smoky bourbon, and savory bacon creates a flavor experience that’s truly unforgettable. Whether you’re making them for a special occasion or simply because you deserve a treat, these rolls are guaranteed to become a requested favorite. Find more of my favorite breakfast indulgences on Pinterest and enjoy every sticky, delicious bite!

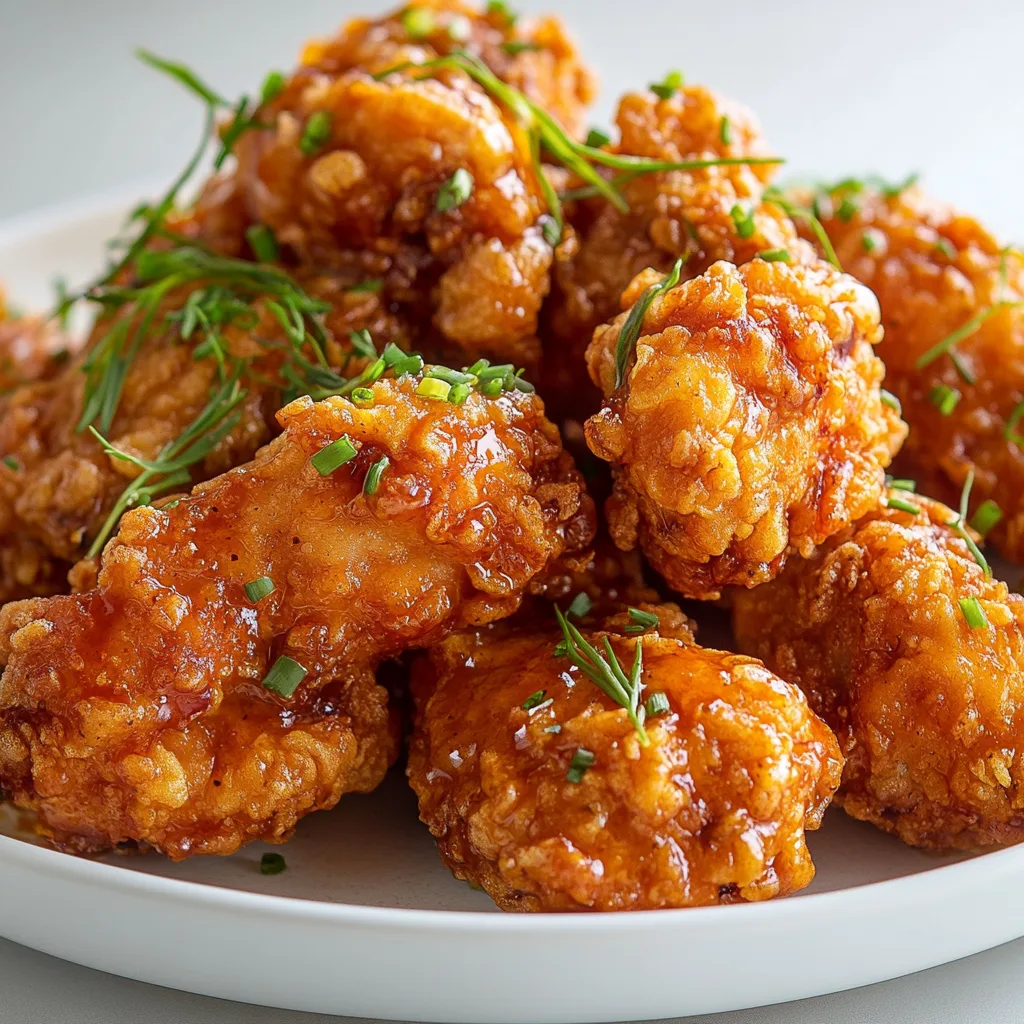
  • Crispy Bang Bang Chicken: Irresistibly Crunchy & Bursting with Flavor!

    Crispy Bang Bang Chicken: Irresistibly Crunchy & Bursting with Flavor!

    Crispy Bang Bang Chicken: Irresistibly Crunchy & Bursting with Flavor!

    Crispy Bang Bang Chicken has completely transformed my weeknight dinner game! The perfect balance of crunchy texture and spicy-sweet sauce makes this dish absolutely irresistible. I first tried making this after a particularly exhausting Monday, and the moment that first crispy bite hit my taste buds, I knew I’d found my new comfort food obsession. The combination of panko-coated chicken with that signature creamy, spicy bang bang sauce creates a restaurant-quality meal that’s surprisingly simple to make at home. Trust me, this is about to become your new favorite chicken recipe.

    Recipe

    Why You’ll Love This Crispy Bang Bang Chicken

    Perfect Texture Combination

    The magic of this dish lies in its incredible textural contrast. The chicken is coated in seasoned panko breadcrumbs that create an audibly crispy exterior while keeping the inside perfectly juicy and tender. I’ve found that a quick double-dredge in flour, egg, and panko makes all the difference. The sound of that first crunch followed by the juicy chicken underneath is what makes this recipe so satisfying. Plus, when that crispy coating soaks up just a bit of the creamy bang bang sauce? Absolute heaven on a plate that hits all the right sensory notes.

    Flavor That Packs a Punch

    The signature bang bang sauce is what elevates this dish from good to unforgettable. It’s a beautiful marriage of sweet and spicy with creamy undertones that will make your taste buds dance. The sauce combines mayonnaise, sweet chili sauce, and sriracha with a hint of honey for balance. I love how the heat builds gradually rather than overwhelming you all at once. The first time I made this for my family, my spice-averse sister couldn’t stop eating it—that’s how perfectly balanced this sauce is. It’s addictive in the best possible way!

    Essential Tips & Tricks

    Perfecting the Crispy Coating

    The key to achieving that restaurant-quality crunch is all in the preparation. First, make sure your chicken is completely dry before coating—I pat mine with paper towels thoroughly. For extra crispiness, try mixing panko with a bit of cornstarch and a pinch of baking powder. Another game-changing trick: after coating the chicken, let it rest on a wire rack for 10-15 minutes before frying. This allows the coating to adhere better and results in that perfect golden crust that stays crispy even after being sauced. Trust me, this step is worth every minute!

    Sauce Secrets for Maximum Flavor

    The bang bang sauce is incredibly versatile, and getting it just right makes all the difference. I recommend making the sauce at least 30 minutes ahead of time to let the flavors meld together. Store it in the refrigerator while you prepare the chicken. For the perfect consistency, use room-temperature mayonnaise as your base. My secret ingredient? A tiny splash of rice vinegar to brighten everything up. If you love this sauce, you’ll definitely want to try my Sticky Garlic Chicken Noodles which has a similarly addictive flavor profile.

    Serving Ideas & Creative Variations

    Perfect Pairings

    This Crispy Bang Bang Chicken shines when served with the right accompaniments. My favorite way to enjoy it is over a bed of fluffy jasmine rice that soaks up the extra sauce beautifully. For a fresher approach, serve it with a simple cucumber and carrot slaw dressed with rice vinegar and a touch of sesame oil. The cool crunch of the vegetables perfectly complements the warm, crispy chicken. For a complete meal that will impress guests, add a side of steamed edamame or Roasted Brussels Sprouts for a nutritious green element.

    Exciting Twist Options

    Don’t be afraid to put your own spin on this versatile recipe! For a lighter version, try air-frying the coated chicken instead of deep frying—you’ll still get amazing crispiness with less oil. Another delicious variation is turning this into bang bang chicken tacos by shredding the crispy chicken and serving it in warm tortillas with avocado, cilantro, and extra sauce. For an Asian-fusion approach, try adding a tablespoon of gochujang to the sauce for a deeper, more complex heat, or incorporate lemongrass and lime for a Thai-inspired twist.

    Storage & Troubleshooting Guide

    Keeping It Crispy

    To maintain that perfect crunch, store the chicken and sauce separately whenever possible. Place leftover chicken in an airtight container lined with paper towels to absorb excess moisture. When reheating, avoid the microwave which will make your chicken soggy. Instead, place it on a baking sheet in a 350°F oven for 7-10 minutes until heated through and crispy again. For meal prep, you can freeze the coated, uncooked chicken pieces on a baking sheet, then transfer to a freezer bag once solid—they’ll cook beautifully straight from frozen.

    Fixing Common Issues

    If your coating isn’t sticking properly, the likely culprit is moisture. Make sure your chicken is thoroughly dried before beginning the dredging process. For a coating that’s turning dark too quickly, your oil is probably too hot—maintain a steady 350°F for perfect results. If your sauce is too spicy, add more mayonnaise or a touch of honey to balance it. Too thick? A splash of water or lime juice will thin it to the perfect consistency. And if your sauce breaks or looks separated, simply whisk vigorously or blend it briefly to bring it back together.

    Frequently Asked Questions

    Can I make Crispy Bang Bang Chicken in an air fryer?

    Absolutely! Spray the coated chicken with cooking oil, then air fry at 390°F for 12-14 minutes, flipping halfway through. You’ll get wonderfully crispy results with significantly less oil.

    What’s the best way to check if my chicken is cooked through?

    Use an instant-read thermometer inserted into the thickest part—it should read 165°F. Alternatively, cut into a piece; the meat should be white with no pink remaining.

    Can I make the bang bang sauce less spicy?

    Yes! Reduce or omit the sriracha and add more sweet chili sauce. You can also increase the mayonnaise ratio for a milder, creamier sauce.

    How do I keep my Crispy Bang Bang Chicken from getting soggy?

    Serve the sauce on the side or drizzled over just before serving. For leftovers, store chicken and sauce separately and reheat chicken in the oven, not the microwave.

    What protein alternatives work with this recipe?

    Shrimp, firm tofu, or cauliflower florets all work beautifully with the same coating and sauce. Adjust cooking times accordingly for each alternative.

    Final Thoughts

    This Crispy Bang Bang Chicken has become my go-to recipe when I want to impress without spending hours in the kitchen. The contrast between the crunchy exterior, tender chicken, and that unforgettable sweet-spicy sauce creates a sensory experience that’s hard to beat. Whether you’re cooking for a quiet night in or hosting friends, this dish delivers restaurant-quality results every time. Don’t forget to check out more delicious recipes on Pinterest for endless inspiration!

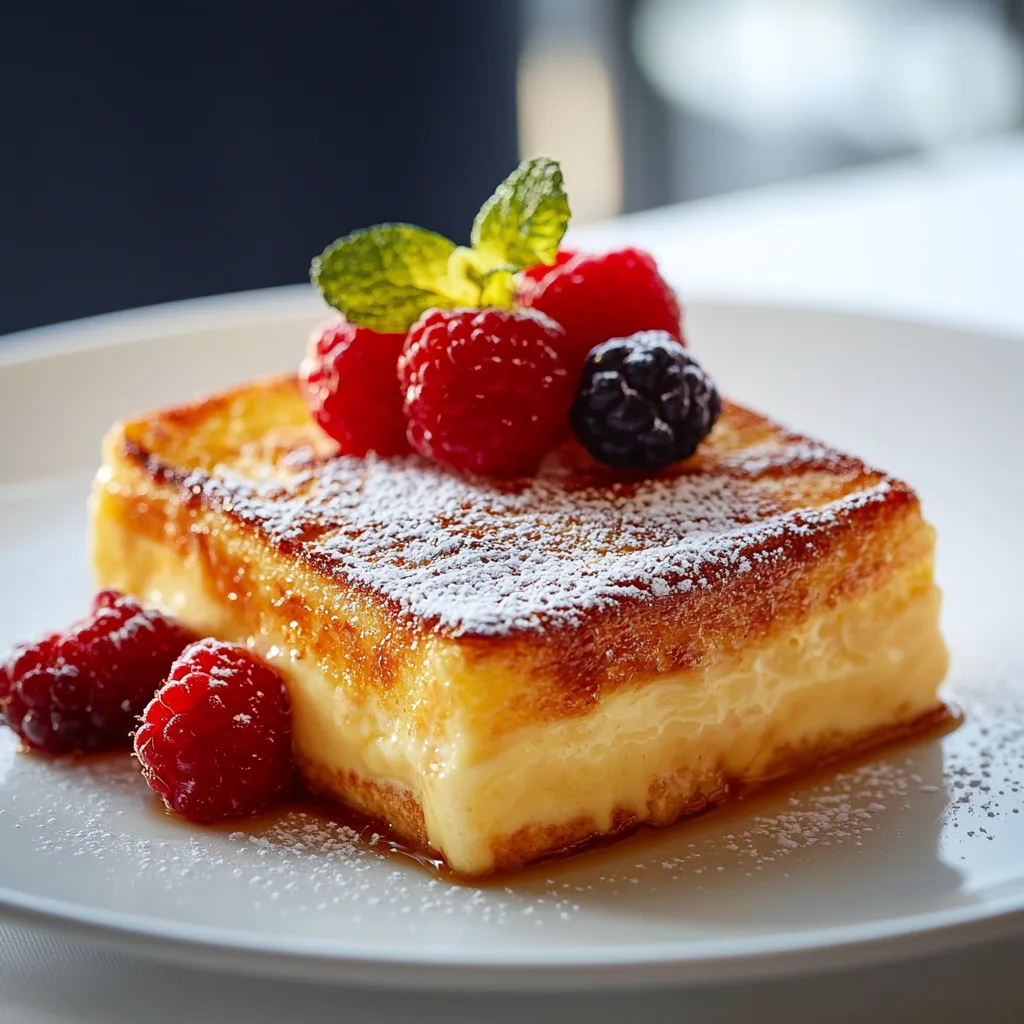
  • Crème Brûlée French Toast Recipe That Will Blow Your Mind!

    Crème Brûlée French Toast Recipe That Will Blow Your Mind!

    Crème Brûlée French Toast Recipe That Will Blow Your Mind!

    Crème Brûlée French Toast transforms ordinary breakfast into a luxurious affair that’ll make your kitchen smell like a Parisian bakery. I discovered this recipe during a rainy Sunday morning when I craved something special but didn’t want to leave home. The first bite transported me straight to my favorite French café—that perfect balance of custardy center with a caramelized sugar topping that cracks beautifully under your fork. It’s decadent enough for special occasions but simple enough for weekend family brunches. Let me show you how to create this magical breakfast treat!

    Recipe

    Why You’ll Love This Crème Brûlée French Toast

    A Perfect Make-Ahead Breakfast

    This Crème Brûlée French Toast is a time-saving miracle for busy mornings. I prepare it the night before, allowing the bread to soak up all that vanilla-scented custard goodness. The magic happens overnight in the refrigerator, where the flavors meld and intensify. By morning, all you need to do is pop it in the oven and sprinkle with sugar for that signature crackly topping. It’s particularly perfect for holiday mornings when you’d rather be opening presents than standing over a stove flipping individual slices of French toast.

    Restaurant-Quality Results at Home

    Creating that signature caramelized sugar crust at home is easier than you might think! The secret lies in using a kitchen torch (though your broiler works in a pinch) to transform ordinary sugar into a glassy, amber-colored topping that shatters with each bite. The contrast between the crisp top and the custardy, vanilla-infused bread beneath creates a textural symphony that rivals any brunch spot’s offering. My guests always ask for the recipe, amazed that something so impressive came from my kitchen rather than a fancy restaurant.

    Essential Tips & Tricks

    Choosing the Right Bread

    The foundation of exceptional Crème Brûlée French Toast begins with the perfect bread choice. I prefer using day-old brioche or challah for their buttery richness and ability to soak up the custard without falling apart. The slight dryness of day-old bread works to your advantage, allowing it to absorb more of the vanilla-scented egg mixture without becoming soggy. For a rustic variation, try a thick-cut sourdough, which adds a slight tanginess that beautifully complements the sweet caramelized topping. Whatever you choose, make sure it’s sliced at least 1-inch thick for that perfect texture.

    Perfecting the Custard Mixture

    The custard is where the magical transformation happens in this recipe. I whisk together eggs, heavy cream, vanilla extract, and just a hint of orange zest for brightness. The key is to ensure your eggs are completely incorporated—no streaks of egg white should remain. For an extra layer of flavor, try adding a splash of Grand Marnier or bourbon. Allow the bread to soak for at least 4 hours, but preferably overnight, turning once halfway through if possible. This patience rewards you with a perfectly saturated slice that’s custardy in the center while maintaining its structure, just like this creamy rice pudding.

    Serving Ideas & Creative Variations

    Seasonal Fruit Pairings

    Fresh fruits add brightness and balance to the richness of Crème Brûlée French Toast. In summer, I love topping it with macerated berries—strawberries, blueberries, and raspberries tossed with a little sugar and lemon juice. The slight tartness cuts through the sweetness perfectly. Fall brings opportunities for caramelized apples or pears with cinnamon, while winter calls for blood oranges or pomegranate arils for a festive touch. A simple fruit compote can be made ahead and warmed just before serving, making this elegant breakfast even more effortless. The colors and textures create a beautiful presentation worthy of special occasions.

    Flavor Variations to Try

    Don’t be afraid to experiment with different flavor profiles to make this Crème Brûlée French Toast your own. For a holiday twist, add a teaspoon of warm spices like cinnamon, nutmeg, and cardamom to the custard mixture. Chocolate lovers can fold mini chocolate chips between the layers for melty pockets of goodness. For a tropical variation, substitute coconut milk for some of the heavy cream and add a bit of lime zest. You can even create a savory-sweet version by adding a sprinkle of sea salt to the caramelized topping, similar to the sweet-savory balance in these BBQ Chicken Totchos that everyone raves about.

    Storage & Troubleshooting Guide

    Proper Storage Methods

    To maintain the quality of leftover Crème Brûlée French Toast, proper storage is essential. Cool completely before refrigerating to prevent condensation that could make the caramelized top soggy. Store individual portions in airtight containers for up to 3 days. The caramelized sugar top will naturally soften in the refrigerator, but don’t worry—you can restore that delightful crunch! When reheating, use a 325°F oven (not the microwave) for about 10 minutes, then re-caramelize the top with a sprinkle of sugar and a quick pass under the broiler or with your kitchen torch.

    Fixing Common Issues

    Even experienced cooks sometimes encounter challenges with this recipe. If your French toast turns out too soggy in the center, it likely needed more baking time or your bread slices were too thin. For future batches, use thicker bread cuts and test doneness by inserting a knife in the center—it should come out mostly clean with just a bit of moisture. If the top burns before the center cooks through, cover loosely with foil partway through baking. And if your sugar topping isn’t caramelizing evenly, try using superfine sugar instead of granulated and make sure your broiler is fully preheated before attempting to caramelize.

    Frequently Asked Questions

    Can I make Crème Brûlée French Toast without a kitchen torch?

    Absolutely! While a torch creates the most even caramelization, your oven’s broiler works well too. Place the sugar-topped French toast 4-5 inches from the broiler element and watch carefully—it caramelizes quickly!

    What’s the best bread for Crème Brûlée French Toast?

    Brioche and challah are ideal choices due to their buttery richness and sturdy structure. Day-old bread works best as it absorbs more custard without falling apart.

    Can I prepare this recipe dairy-free?

    Yes! Substitute the heavy cream with full-fat coconut milk and use a plant-based butter. The coconut adds a subtle tropical flavor that complements the vanilla beautifully.

    How do I know when my French toast is fully cooked?

    The center should be set but still slightly jiggly, similar to a bread pudding. A knife inserted in the center should come out mostly clean with just a bit of moisture.

    Can I freeze leftover Crème Brûlée French Toast?

    Yes, freeze individual portions without the caramelized topping. Wrap tightly in plastic wrap and foil, freeze for up to 1 month, and re-caramelize after reheating.

    Final Thoughts

    Crème Brûlée French Toast bridges the gap between everyday breakfast and special occasion indulgence. Its make-ahead convenience coupled with that irresistible crackly sugar topping makes it my go-to when I want to impress without stressing. I’ve served this at countless brunches, holiday mornings, and even dessert (topped with a scoop of vanilla ice cream!). The beauty lies in its simplicity and adaptability—once you master the basic technique, the variations are endless. Find more inspiration for your breakfast table on Pinterest and make your mornings a little more magical!

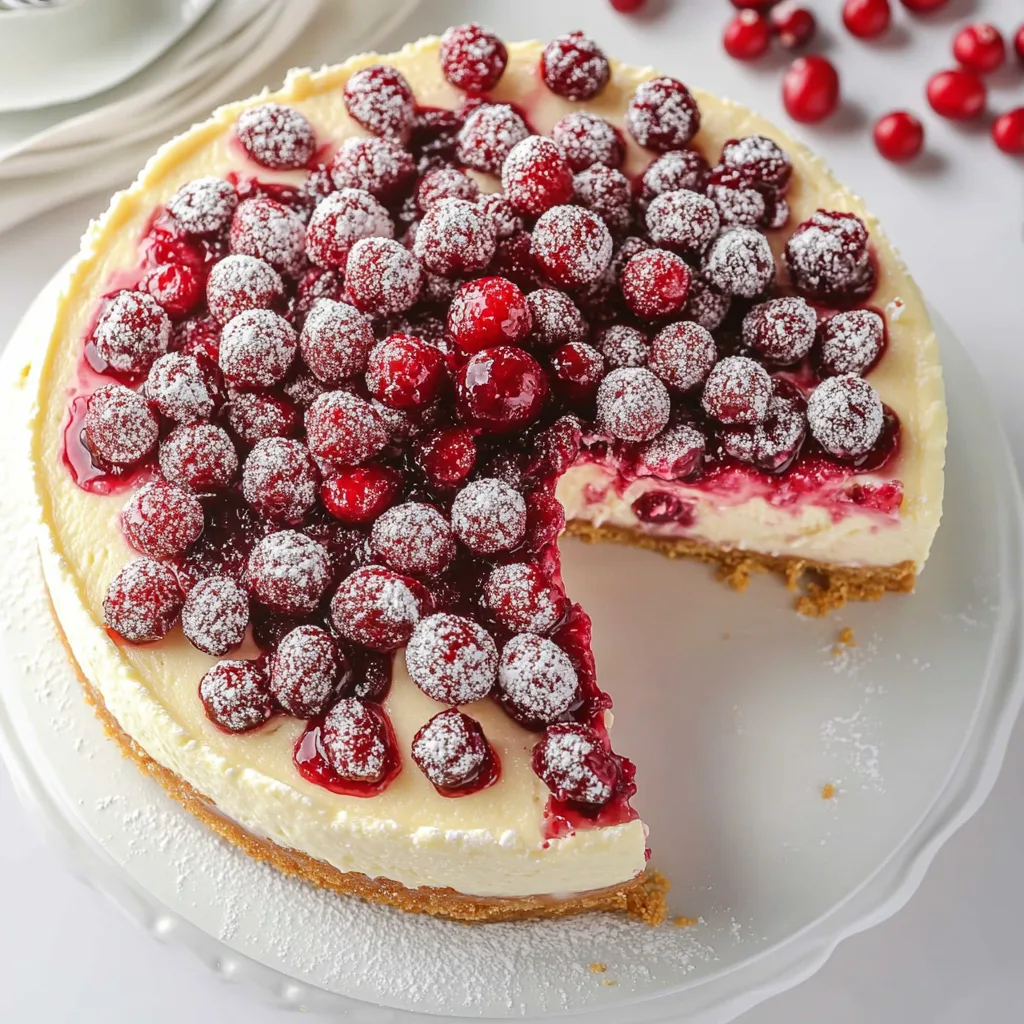
  • Christmas Cheesecake with Cranberry Jam | Irresistibly Festive!

    Christmas Cheesecake with Cranberry Jam | Irresistibly Festive!

    Christmas Cheesecake with Cranberry Jam | Irresistibly Festive!

    The magic of Christmas Cheesecake with Cranberry Jam and Sugared Cranberries has been my holiday secret weapon for years. That first time I brought it to my in-laws’ gathering, the room fell silent as everyone took their first bite – then erupted into a chorus of “Oh my goodness!” There’s something about the creamy richness paired with tart cranberry that feels like Christmas itself on a plate. The festive red berries glisten like tiny jewels atop a velvet-smooth canvas, creating a showstopper that’s actually simpler than it looks. If you’re looking to add something special to your holiday dessert table, this is it!

    Recipe

    Why You’ll Love This Christmas Cheesecake with Cranberry Jam and Sugared Cranberries

    A Perfect Balance of Flavors

    The beauty of this Christmas Cheesecake lies in its perfect harmony of flavors. The velvety cheesecake provides a rich, creamy base that melts in your mouth with each bite. That subtle vanilla bean-speckled filling creates the perfect canvas for the star of the show – that vibrant cranberry jam layer. The tartness cuts through the richness in the most satisfying way! I love watching guests’ expressions as they discover how the sweet-tart cranberry complements the buttery graham cracker crust. It’s that magical balance that makes people reach for “just one more sliver” even after declaring they couldn’t eat another bite.

    A Make-Ahead Holiday Miracle

    As someone who’s hosted enough holiday gatherings to know the stress of last-minute preparations, this cheesecake has saved me countless times. You can make it up to three days ahead, which is absolute gold during the holiday rush. The cranberry jam can be prepared a week in advance, and those sugared cranberries? Make them two days before! I still remember frantically finishing other dishes last Christmas while this beauty waited patiently in the refrigerator. When dessert time arrived, I simply garnished with the sugared cranberries and fresh mint for a stress-free finale that looked like I’d spent hours on it that day.

    Essential Tips & Tricks

    Perfect Cheesecake Texture Every Time

    The secret to avoiding cracks and achieving that dreamy, silky texture starts with room temperature ingredients – especially the cream cheese. I learned this the hard way after battling lumpy batter for years! Beat the cream cheese alone first until completely smooth before adding other ingredients. The water bath is non-negotiable – it creates gentle, even heat around your precious creation. Last Christmas, I skipped the foil wrap and water leaked in (disaster!). Now I use a double layer of heavy-duty foil wrapped tightly around the pan. Cool your cheesecake gradually by turning off the oven, leaving the door ajar, and letting it rest for an hour before refrigerating.

    Cranberry Jam & Sugared Cranberry Success

    The cranberry jam needs just the right consistency – too runny and it won’t set properly; too thick and it won’t spread beautifully. The key is watching for that magical moment when the berries burst and the mixture coats the back of a spoon. For the sugared cranberries, patience is everything! After soaking them in simple syrup, let them dry completely on a rack before rolling in sugar. This creates that gorgeous crystallized effect that makes them look like they’ve been kissed by frost. I love making extra sugared cranberries – they’re irresistible snacks while cooking and make stunning garnishes for holiday cocktails or other desserts.

    Serving Ideas & Creative Variations

    Presentation That Wows

    Transform this already stunning Christmas Cheesecake into an absolute showstopper with thoughtful presentation. I arrange the sugared cranberries in a wreath pattern around the edge, then tuck small sprigs of fresh rosemary or mint between them for a pop of green. A light dusting of powdered sugar “snow” just before serving creates a magical winter wonderland effect. Serve on a cake stand lined with eucalyptus or pine branches for extra holiday charm. I’ve found that chilling the serving knife in ice water between slices gives you those clean, photo-worthy cuts that make everyone reach for their phones before taking a bite!

    Flavor Twists and Adaptations

    While the classic version is divine, this cheesecake welcomes creative variations. Try adding orange zest to the filling for a citrus twist that brightens the whole dessert. White chocolate chips folded into the batter create delightful pockets of sweetness. For an adults-only version, add a splash of Grand Marnier to the cranberry jam – it was the secret ingredient in last year’s Christmas Eve gathering! You can also swap the graham cracker crust for gingersnaps or chocolate cookie crumbs for a different flavor foundation. For mini versions, prepare in a muffin tin with liners and reduce baking time to about 20 minutes.

    Storage & Troubleshooting Guide

    Proper Storage for Maximum Freshness

    To maintain the Christmas Cheesecake’s perfect texture and flavor, proper storage is crucial. Once completely cooled, cover with plastic wrap (without touching the surface) or place in an airtight container before refrigerating. The cheesecake will stay fresh for up to 5 days in the refrigerator – though it rarely lasts that long in my house! For longer storage, you can freeze the plain cheesecake (without sugared cranberries) for up to a month. Wrap it tightly in plastic wrap, then aluminum foil, and thaw overnight in the refrigerator before garnishing. I like to slice before freezing, separating pieces with parchment paper for easy single servings.

    Fixing Common Cheesecake Problems

    Even experienced bakers encounter challenges with cheesecakes, but most issues have simple solutions. If your cheesecake cracks, don’t panic! The cranberry jam layer will cover minor imperfections, or use sugared cranberries strategically as beautiful camouflage. For a sunken center, your cheesecake likely needed more baking time – but a generous pile of sugared cranberries in the middle creates a deliberate decorative dip. If your crust gets soggy, try a quick prebake (10 minutes at 350°F) before adding filling. And if your sugared cranberries won’t crystallize properly, ensure they’re completely dry from the syrup soak before rolling in sugar – patience here makes all the difference!

    Frequently Asked Questions

    Can I make this Christmas Cheesecake with Cranberry Jam and Sugared Cranberries gluten-free?

    Absolutely! Simply substitute the graham crackers with gluten-free graham crackers or cookies. The rest of the ingredients are naturally gluten-free, making this an easy adaptation for those with sensitivities.

    How far in advance can I make the sugared cranberries?

    The sugared cranberries can be made up to 2 days in advance. Store them in a single layer at room temperature – not in the refrigerator, as moisture will dissolve the sugar coating.

    Can I use frozen cranberries instead of fresh?

    Yes! Frozen cranberries work perfectly for both the jam and sugared cranberries. Don’t thaw them before making the jam – use them directly from frozen for the best texture.

    What’s the secret to a crack-free cheesecake?

    Room temperature ingredients, not overmixing after adding eggs, using a water bath, and cooling gradually. These steps prevent the dramatic temperature changes that cause cracks.

    Can I substitute the cranberry jam with another flavor?

    Definitely! While cranberry creates that classic Christmas look and flavor, raspberry or cherry preserves make excellent alternatives that maintain the festive red color.

    Final Thoughts

    This Christmas Cheesecake with Cranberry Jam and Sugared Cranberries has become more than just a dessert in my home – it’s a cherished tradition that signals the holiday season has truly begun. The balance of creamy, sweet, and tart creates something truly magical that friends and family request year after year. The festive appearance makes it worthy of your holiday table’s centerpiece, while the make-ahead nature keeps your celebration stress-free. I’d love to see your creations – tag me on Pinterest when you make your own version of this holiday showstopper!

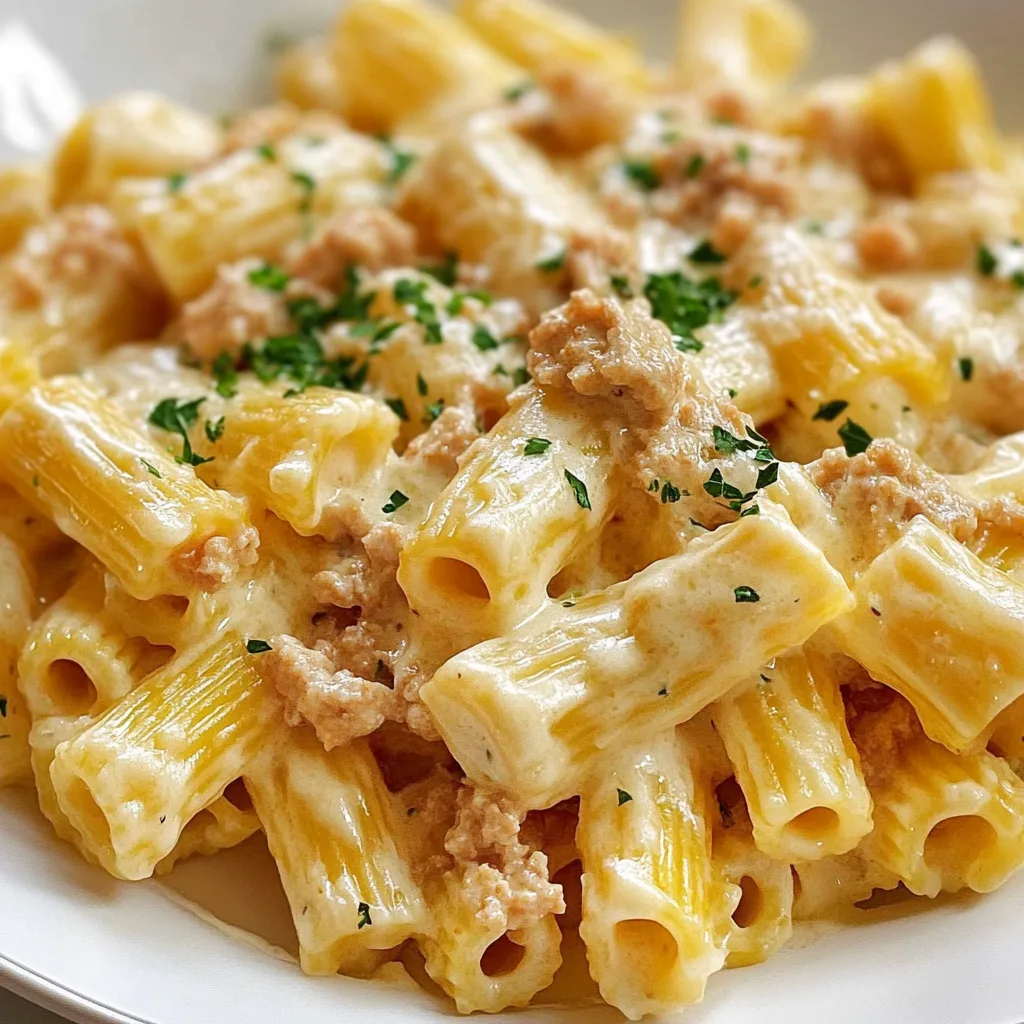
  • Creamy Rigatoni with Boursin Cheese: Irresistibly Delicious!

    Creamy Rigatoni with Boursin Cheese: Irresistibly Delicious!

    Creamy Rigatoni with Boursin Cheese: Irresistibly Delicious!

    Creamy rigatoni with Boursin cheese is my ultimate comfort food hero – a dish that transforms ordinary weeknight dinners into something truly special. The first time I made this, my kitchen filled with the most intoxicating aroma of garlic and herbs that had my teenager actually emerging from his room before being called for dinner! The velvety sauce coats each pasta tube perfectly, creating little pockets of cheesy heaven in every bite. If you love dishes that feel restaurant-worthy but are surprisingly simple, this creamy pasta recipe is about to become your new favorite.

    Recipe

    Why You’ll Love This Creamy Rigatoni with Boursin Cheese

    A Weeknight Wonder

    This dish has become my reliable weeknight savior when I need something impressive without the fuss. The Boursin cheese melts into a silky sauce that requires minimal effort but delivers maximum flavor. I still remember making this on a particularly chaotic Monday when everything seemed to go wrong – but this pasta turned the whole day around in just 25 minutes. The beauty lies in its simplicity: while the pasta boils, you can prepare the sauce, meaning dinner is ready faster than delivery would arrive. And the creamy, herb-infused result will have everyone thinking you spent hours in the kitchen.

    Ingredient Flexibility That Works

    What I adore about this creamy rigatoni is how forgiving it is with substitutions. No Boursin? Cream cheese with herbs works beautifully. Out of rigatoni? Any pasta shape that traps sauce – like penne or shells – makes a perfect stand-in. The adaptability extends to add-ins too. Sometimes I toss in leftover rotisserie chicken for protein, or sun-dried tomatoes for a tangy twist. Last week, I discovered that a handful of frozen peas added right at the end brings a lovely pop of color and sweetness. This recipe bends to your pantry’s reality while still delivering that creamy, comforting result.

    Essential Tips & Tricks

    Perfecting Your Pasta

    The key to pasta perfection lies in two simple rules I’ve learned through many (many!) pasta nights. First, salt your water generously – it should taste like the sea. This seasons the pasta from within rather than trying to add flavor later. Second, always reserve about ½ cup of that starchy pasta water before draining. This magical liquid contains starches that help the Boursin sauce cling to every ridge of your rigatoni. I once skipped this step and ended up with sauce pooling at the bottom of the dish instead of coating the pasta. That little splash of starchy water creates the silky emulsion that takes this dish from good to absolutely crave-worthy.

    Creating the Creamiest Sauce

    The secret to the dreamiest sauce lies in temperature control. Always reduce your heat to medium-low when adding the Boursin cheese – high heat can cause separation and graininess. I learned this the hard way during a dinner party when I rushed and ended up with a slightly broken sauce! Another game-changing tip is to add the cheese in small chunks rather than all at once, stirring constantly until each addition is fully melted. This gradual approach creates the smoothest texture. For extra richness, a splash of heavy cream transforms the sauce into something that could rival any restaurant’s signature pasta dish.

    Serving Ideas & Creative Variations

    Perfect Pairings

    This creamy rigatoni deserves thoughtful accompaniments to create a balanced meal. A simple arugula salad with lemon vinaigrette cuts through the richness perfectly – the peppery greens and bright acidity complement the creamy pasta. Garlic bread is another natural partner, ideal for sopping up every last bit of that luscious sauce. For wine lovers, a crisp Pinot Grigio or unoaked Chardonnay makes the herb notes in the Boursin sing. When I’m feeling extra fancy, I serve this as a side with herb-crusted chicken for Sunday dinner, and the combination never fails to impress even my pickiest guests.

    Seasonal Twists

    The versatility of this dish makes it perfect for seasonal adaptations. In summer, I fold in fresh cherry tomatoes and basil right at the end, letting them warm through without fully cooking. The burst of acidity brightens the whole dish. Come fall, roasted butternut squash cubes and crispy sage leaves transform it into a cozy autumn meal. Winter calls for caramelized mushrooms and a hint of truffle oil for something truly indulgent. My family’s springtime favorite involves tender asparagus tips and a sprinkle of lemon zest. These seasonal touches keep the basic recipe exciting year-round while honoring what’s fresh and available.

    Storage & Troubleshooting Guide

    Making Ahead & Storing

    This creamy rigatoni reheats beautifully, making it ideal for meal prep or leftovers. Store in airtight containers in the refrigerator for up to 3 days. The sauce will thicken considerably when cold – this is completely normal! When reheating, add a small splash of milk or cream and warm gently on the stovetop or microwave at 50% power, stirring frequently. I’ve found that a quick 10-second spritz of water before microwaving helps revive the pasta’s texture. For freezing, the sauce alone works best (without pasta) in freezer-safe containers for up to 2 months. Then simply thaw overnight and toss with freshly cooked pasta for a quick future meal.

    Fixing Common Issues

    Even experienced cooks encounter pasta problems! If your sauce seems too thick, don’t panic – simply add small amounts of reserved pasta water until you reach your desired consistency. Conversely, if it’s too thin, simmer gently for a few extra minutes to reduce, or add an extra tablespoon of grated parmesan to help thicken. Grainy sauce usually indicates heat was too high when adding the Boursin – fix this by removing from heat immediately and whisking in a splash of cold cream. For bland results, don’t underestimate the power of fresh-ground black pepper and an extra pinch of salt to wake up all the flavors. Remember that pasta continues absorbing sauce after cooking, so serve promptly for best results.

    Frequently Asked Questions

    Can I use a different cheese instead of Boursin?

    Yes! Cream cheese mixed with herbs works well, as does goat cheese for a tangier flavor. Add your own dried herbs like thyme, chives and dill to mimic Boursin’s flavor profile if using plain cream cheese.

    Is creamy rigatoni with Boursin cheese suitable for vegetarians?

    Absolutely! This dish is naturally vegetarian as written. Just ensure any broth you use is vegetable-based, and check that your Boursin variety doesn’t contain animal rennet (most don’t).

    Can I make this dish ahead for a dinner party?

    Yes, but I recommend making just the sauce ahead and cooking fresh pasta before serving. Reheat the sauce gently, adding a splash of cream if needed, then toss with hot pasta.

    How can I add protein to this dish?

    Grilled chicken, sautéed shrimp, or crispy bacon all work beautifully. For vegetarian options, try adding roasted chickpeas, white beans, or sautéed mushrooms for heartiness.

    What can I substitute for heavy cream to make it lighter?

    Half-and-half works well, or try evaporated milk for richness with fewer calories. For a dairy-light version, use unsweetened cashew cream or full-fat coconut milk.

    Final Thoughts

    This creamy rigatoni with Boursin cheese has become more than just a recipe in my household – it’s our comfort food cornerstone. There’s something magical about how a few simple ingredients transform into something that feels like a warm hug on a plate. The way the herbs from the Boursin perfume the kitchen, how the sauce clings to each pasta ridge, and those first creamy bites… it’s pure culinary joy. I hope this dish brings the same happiness to your table as it has to mine! For more comforting pasta inspiration, follow me on Pinterest.

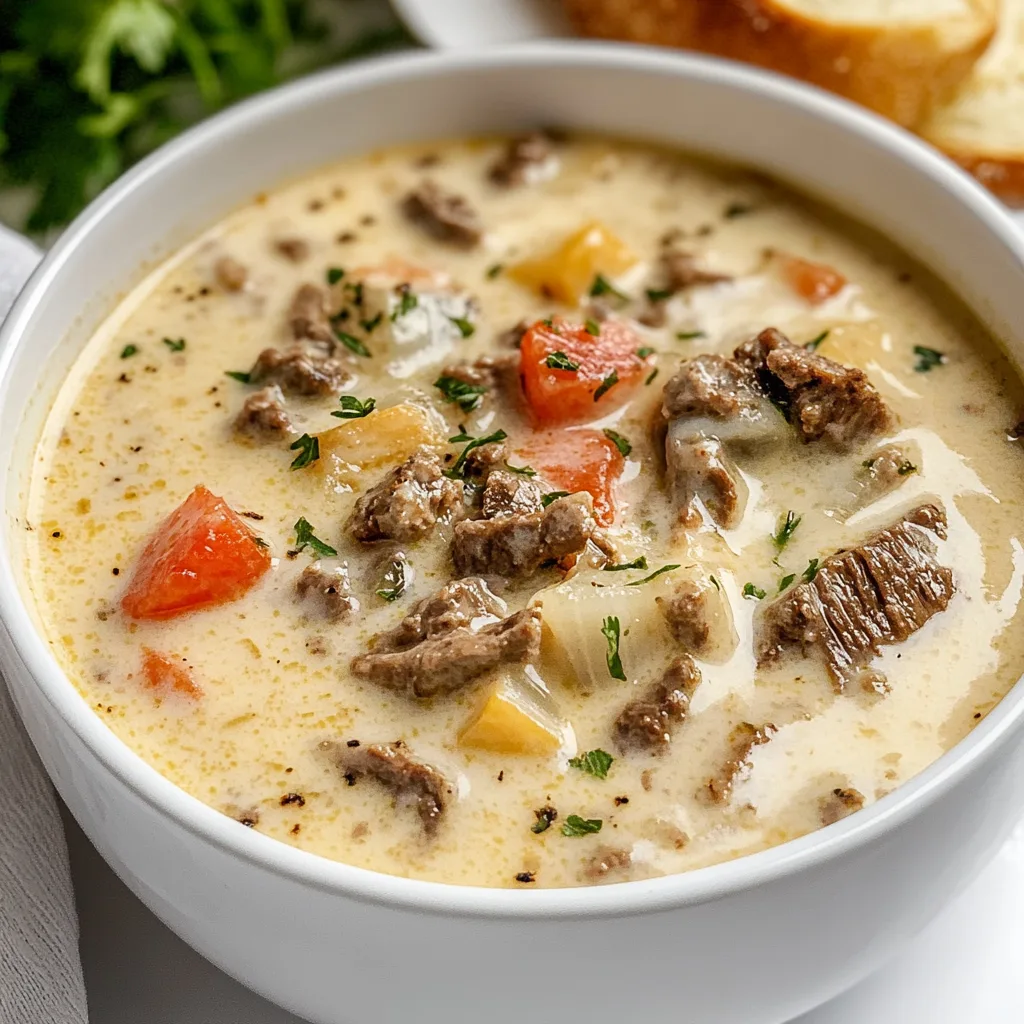
  • Creamy Philly Cheesesteak Soup That Will Blow Your Mind!

    Creamy Philly Cheesesteak Soup That Will Blow Your Mind!

    Creamy Philly Cheesesteak Soup That Will Blow Your Mind!

    Creamy Philly Cheesesteak Soup transforms everyone’s favorite sandwich into a bowl of pure comfort. On chilly evenings when nothing but warmth will do, this rich, indulgent soup delivers all the familiar flavors of a classic Philly cheesesteak in each velvety spoonful. I discovered this recipe during a particularly brutal winter in Chicago, and it’s been my go-to comfort meal ever since. The tender beef, caramelized onions, and melty provolone create a symphony of flavors that will transport you straight to the streets of Philadelphia—without leaving your kitchen. If you love hearty soups like my Creamy Chicken and Gnocchi Soup, this one’s about to become your new favorite.

    Recipe

    Why You’ll Love This Creamy Philly Cheesesteak Soup

    Perfect Comfort Food for Any Season

    There’s something magical about transforming a beloved sandwich into soup form. This Creamy Philly Cheesesteak Soup captures all those classic flavors—tender shaved beef, sweet caramelized onions, and green peppers—suspended in a velvety cheese-infused broth that warms you from the inside out. I love serving this on Sunday afternoons while watching football, and my family practically races to the table. The best part? It comes together in one pot, meaning less cleanup and more time to enjoy those incredible flavors that develop as it simmers away on your stovetop.

    Restaurant-Quality Results at Home

    You know those restaurant soups that seem impossible to recreate? This isn’t one of them. With simple ingredients and straightforward techniques, you’ll achieve restaurant-worthy results that will impress even the most devoted cheesesteak purists. The secret lies in taking your time with the onions and peppers, letting them caramelize slowly until they develop that signature sweetness. Then, when you add the perfectly seasoned beef and that creamy, cheese-laden broth, magic happens. I’ve had friends ask if I ordered takeout when serving this soup—it’s that good.

    Essential Tips & Tricks

    Choosing and Preparing the Beef

    The right cut of beef makes all the difference in this soup. Ribeye is traditional for Philly cheesesteaks, but top sirloin or flank steak work beautifully too—and won’t break the bank. For that authentic texture, freeze the meat for about 20 minutes before slicing it as thinly as possible against the grain. This technique creates those signature tender strips that melt in your mouth. When cooking, remember to sear the beef in batches rather than overcrowding the pot. This ensures proper browning instead of steaming, which locks in that rich beefy flavor that forms the foundation of this incredible soup.

    Creating the Perfect Creamy Base

    The velvety texture of this Creamy Philly Cheesesteak Soup comes from a carefully crafted base that balances richness with flavor. Start with a roux made from butter and flour, cooking it just until it smells nutty but hasn’t browned. This creates the perfect foundation for the broth. When adding cheese, always remove the pot from heat first and stir in the cheese gradually to prevent clumping or greasiness. For an extra layer of flavor, try my Creamy Tuscan Tortellini Soup technique of adding a splash of Worcestershire sauce—it adds that umami depth that takes this soup from good to unforgettable.

    Serving Ideas & Creative Variations

    Garnishes That Elevate Your Bowl

    The perfect bowl of Creamy Philly Cheesesteak Soup deserves thoughtful garnishes that complement its rich flavors. I love topping each serving with extra provolone or a sprinkle of white cheddar that melts into the hot soup. Crispy homemade croutons made from buttered hoagie rolls bring that authentic sandwich experience, while thinly sliced green onions add a fresh pop of color and flavor. For a bit of heat, offer small dishes of pickled jalapeños on the side. When hosting friends, I create a little garnish station so everyone can customize their bowl—it’s always a hit and makes the meal feel special even on ordinary weeknights.

    Making It Your Own

    This soup is wonderfully adaptable to different tastes and dietary needs. For a lighter version, substitute half-and-half for heavy cream and use reduced-fat cheese. Mushroom lovers can add sliced baby bellas or creminis when sautéing the peppers and onions—they add incredible umami depth. For a twist that’s reminiscent of my Hearty Beef and Vegetable Soup, try adding diced potatoes or sweet potatoes for extra heartiness. Vegetarians can even enjoy this by swapping the beef for portobello mushrooms and using vegetable broth—the creamy, cheesy flavor still shines through beautifully.

    Storage & Troubleshooting Guide

    Proper Storage for Leftovers

    Creamy soups require special attention when it comes to storage and reheating. Allow your Creamy Philly Cheesesteak Soup to cool completely before transferring to airtight containers. It will keep in the refrigerator for up to 3 days, though the texture is best within the first 48 hours. When freezing, be aware that dairy-based soups can sometimes separate upon thawing—the solution is to freeze the base without the cream and cheese, then add those fresh when reheating. Always reheat gently over low heat, stirring frequently to prevent scorching, and you may need to add a splash of broth to restore the original consistency.

    Fixing Common Issues

    Even experienced cooks occasionally encounter texture problems with creamy soups. If your soup breaks or looks curdled, don’t panic! Try whisking in a tablespoon of cornstarch mixed with cold water, then heating gently while stirring constantly. For soup that’s too thick, gradually add warm beef broth until you reach your desired consistency. Too thin? Simmer uncovered for a few minutes to reduce, or create a small amount of roux in a separate pan and whisk it in. If the cheese clumps rather than melting smoothly, try adding it off-heat next time and using a pre-shredded cheese that contains anti-caking agents.

    Frequently Asked Questions

    Can I make Creamy Philly Cheesesteak Soup ahead of time?

    Yes! Make it up to 2 days ahead, but stop before adding the cream and cheese. Refrigerate the base, then reheat gently and add dairy components just before serving for the best texture and flavor.

    What’s the best cheese to use for authentic Creamy Philly Cheesesteak Soup?

    Provolone is traditional and melts beautifully, but American cheese or white cheddar work well too. For extra richness, try a combination of provolone and cream cheese for that silky-smooth texture.

    Can I use leftover steak for this recipe?

    Absolutely! Slice it thinly and add it near the end of cooking just to heat through. This prevents overcooking and keeps the meat tender while still infusing it with all those wonderful flavors.

    Is there a way to make this soup in a slow cooker?

    Yes, but with modifications. Brown the meat and vegetables first, then transfer to a slow cooker with the broth. Cook on low for 4-5 hours, adding the dairy components during the final 30 minutes.

    How can I make this soup gluten-free?

    Simply substitute the all-purpose flour with a gluten-free 1:1 baking blend for the roux. Also ensure your beef broth is certified gluten-free, as some commercial brands contain wheat-based additives.

    Final Thoughts

    This Creamy Philly Cheesesteak Soup has become my ultimate crowd-pleaser—the dish friends request when they visit and the comfort food my family craves on chilly evenings. There’s something deeply satisfying about transforming a beloved sandwich into a luxurious soup that captures all those familiar flavors in each spoonful. Whether you’re serving it for game day, a cozy family dinner, or meal prepping for the week ahead, this soup delivers that perfect balance of comfort and indulgence. I’d love to see your versions—tag me on Pinterest when you make it!